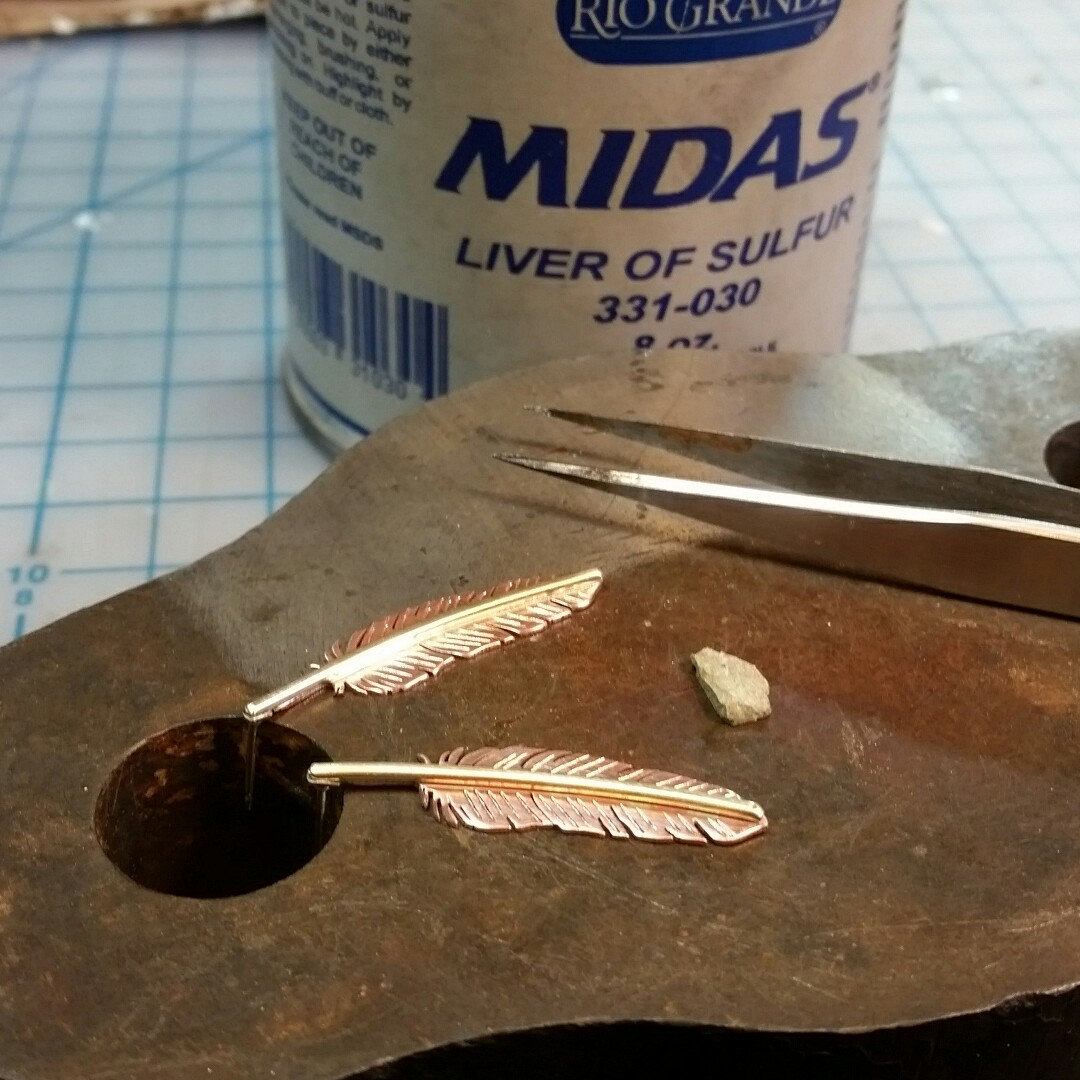
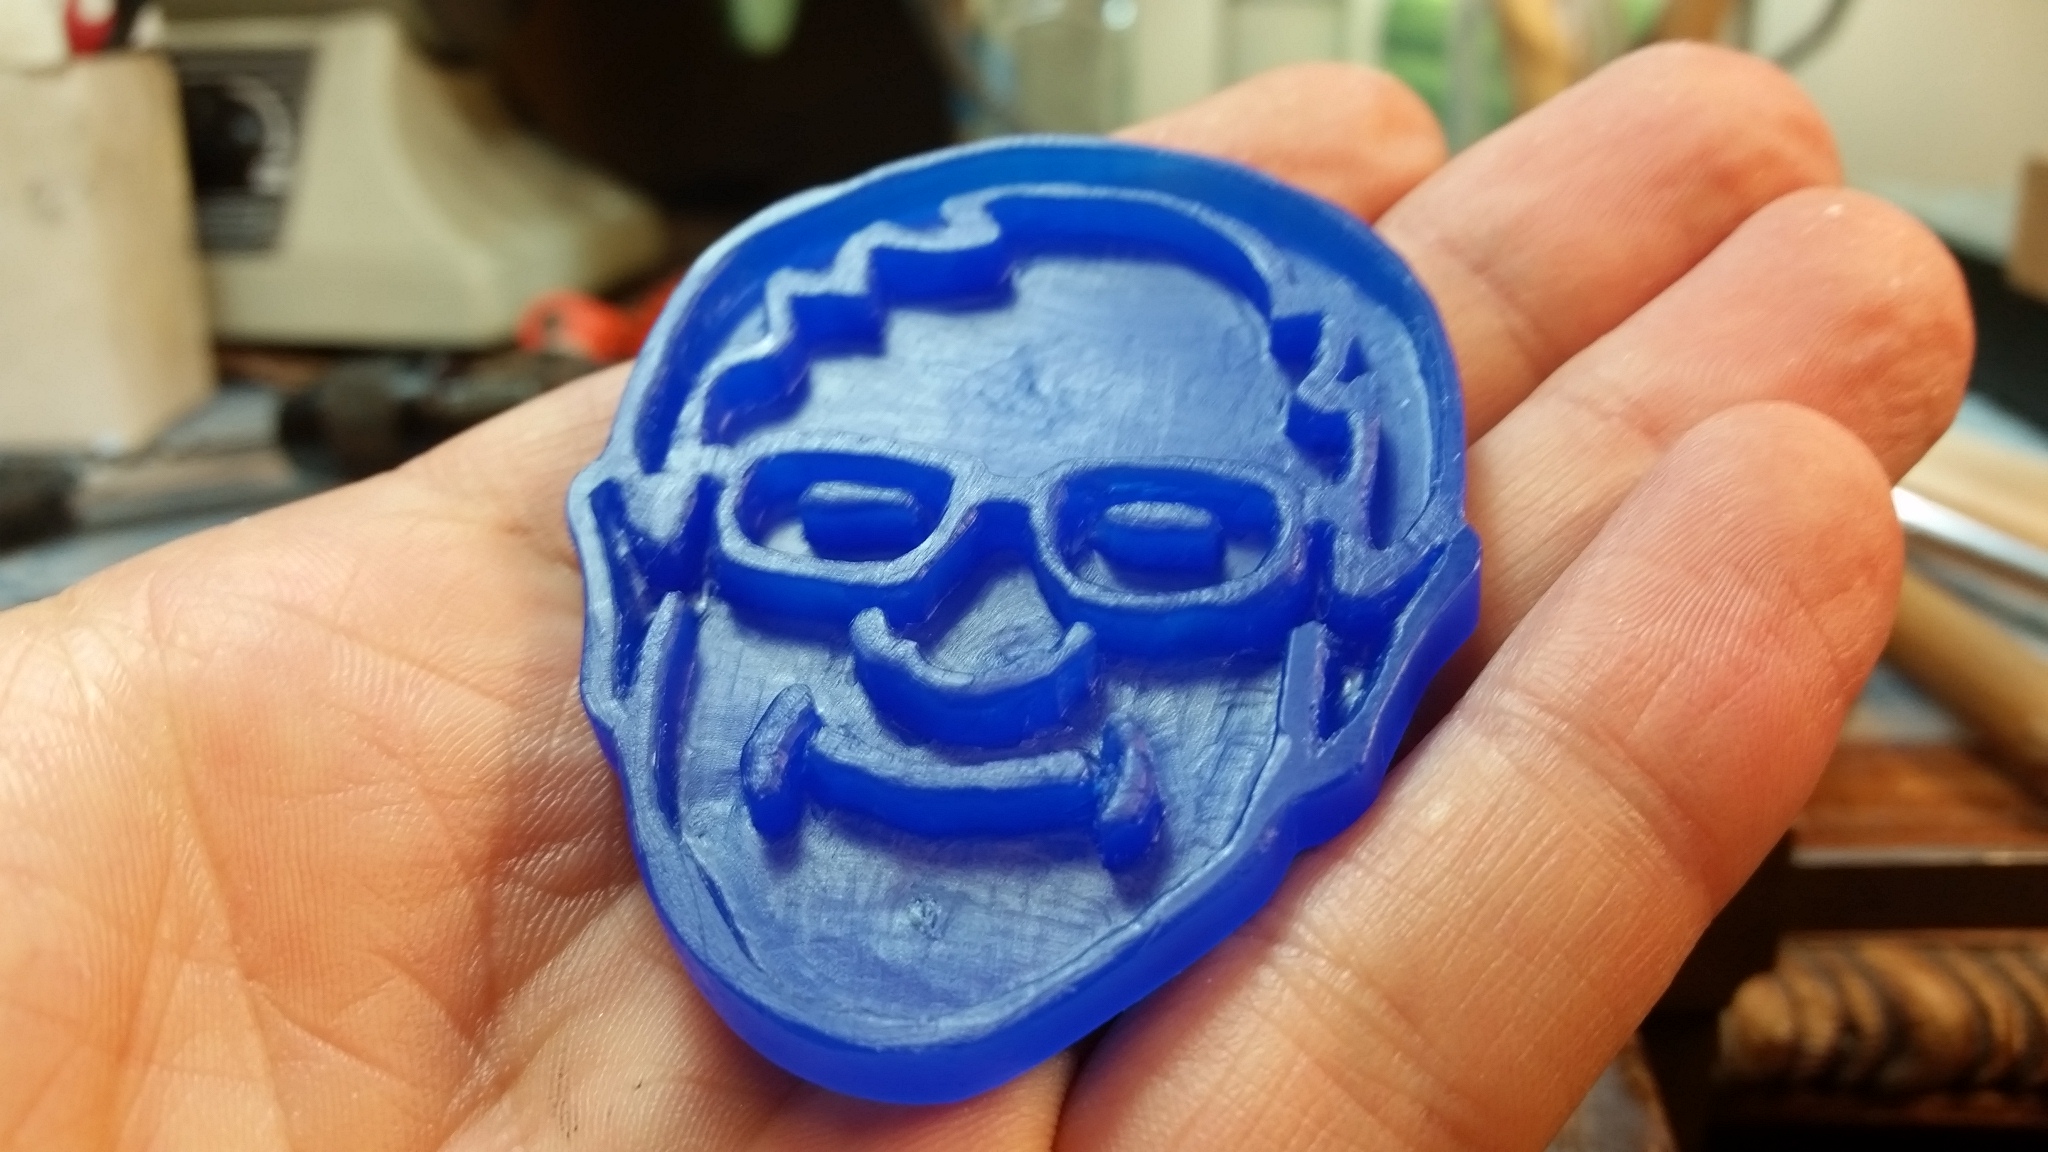
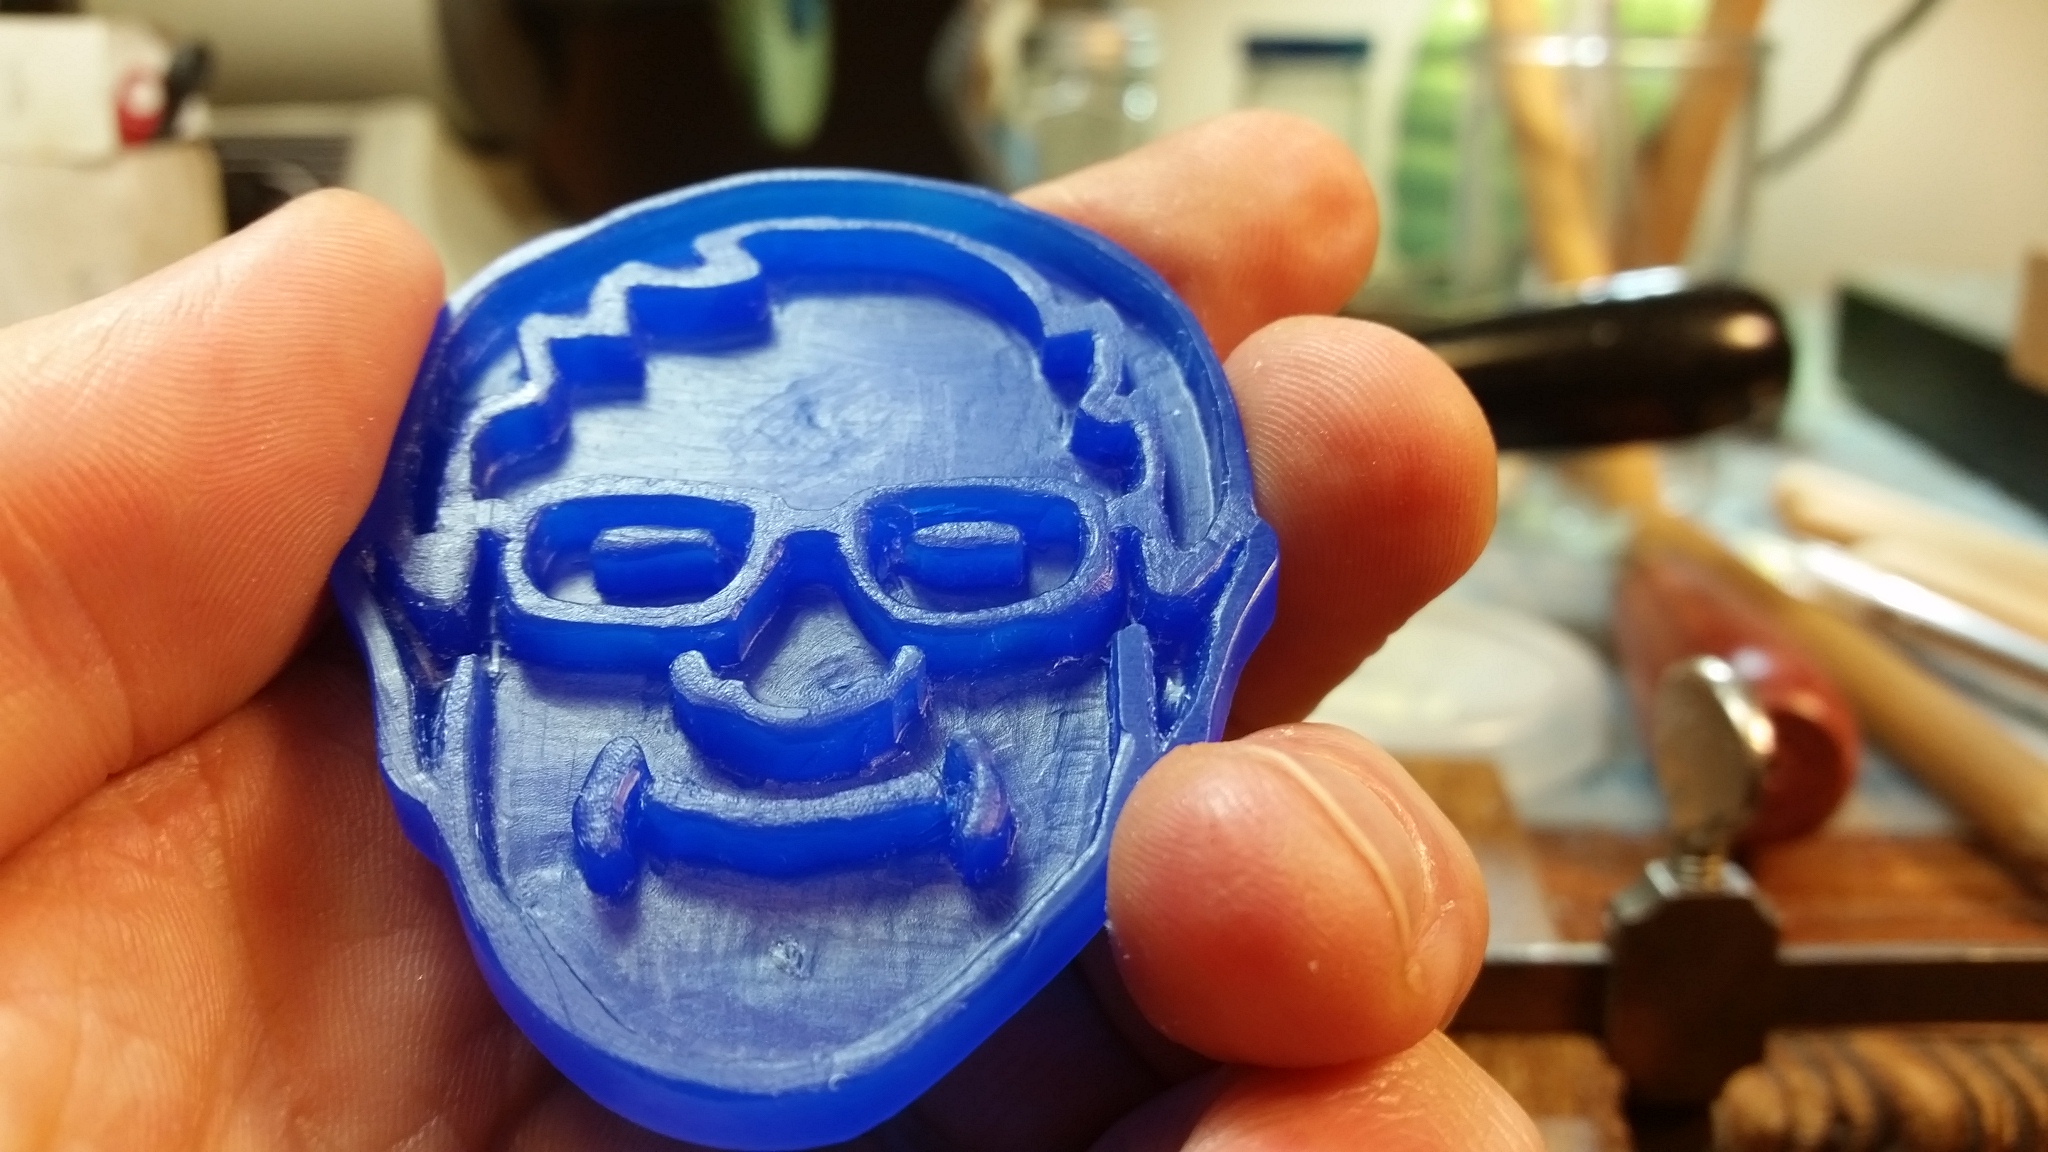
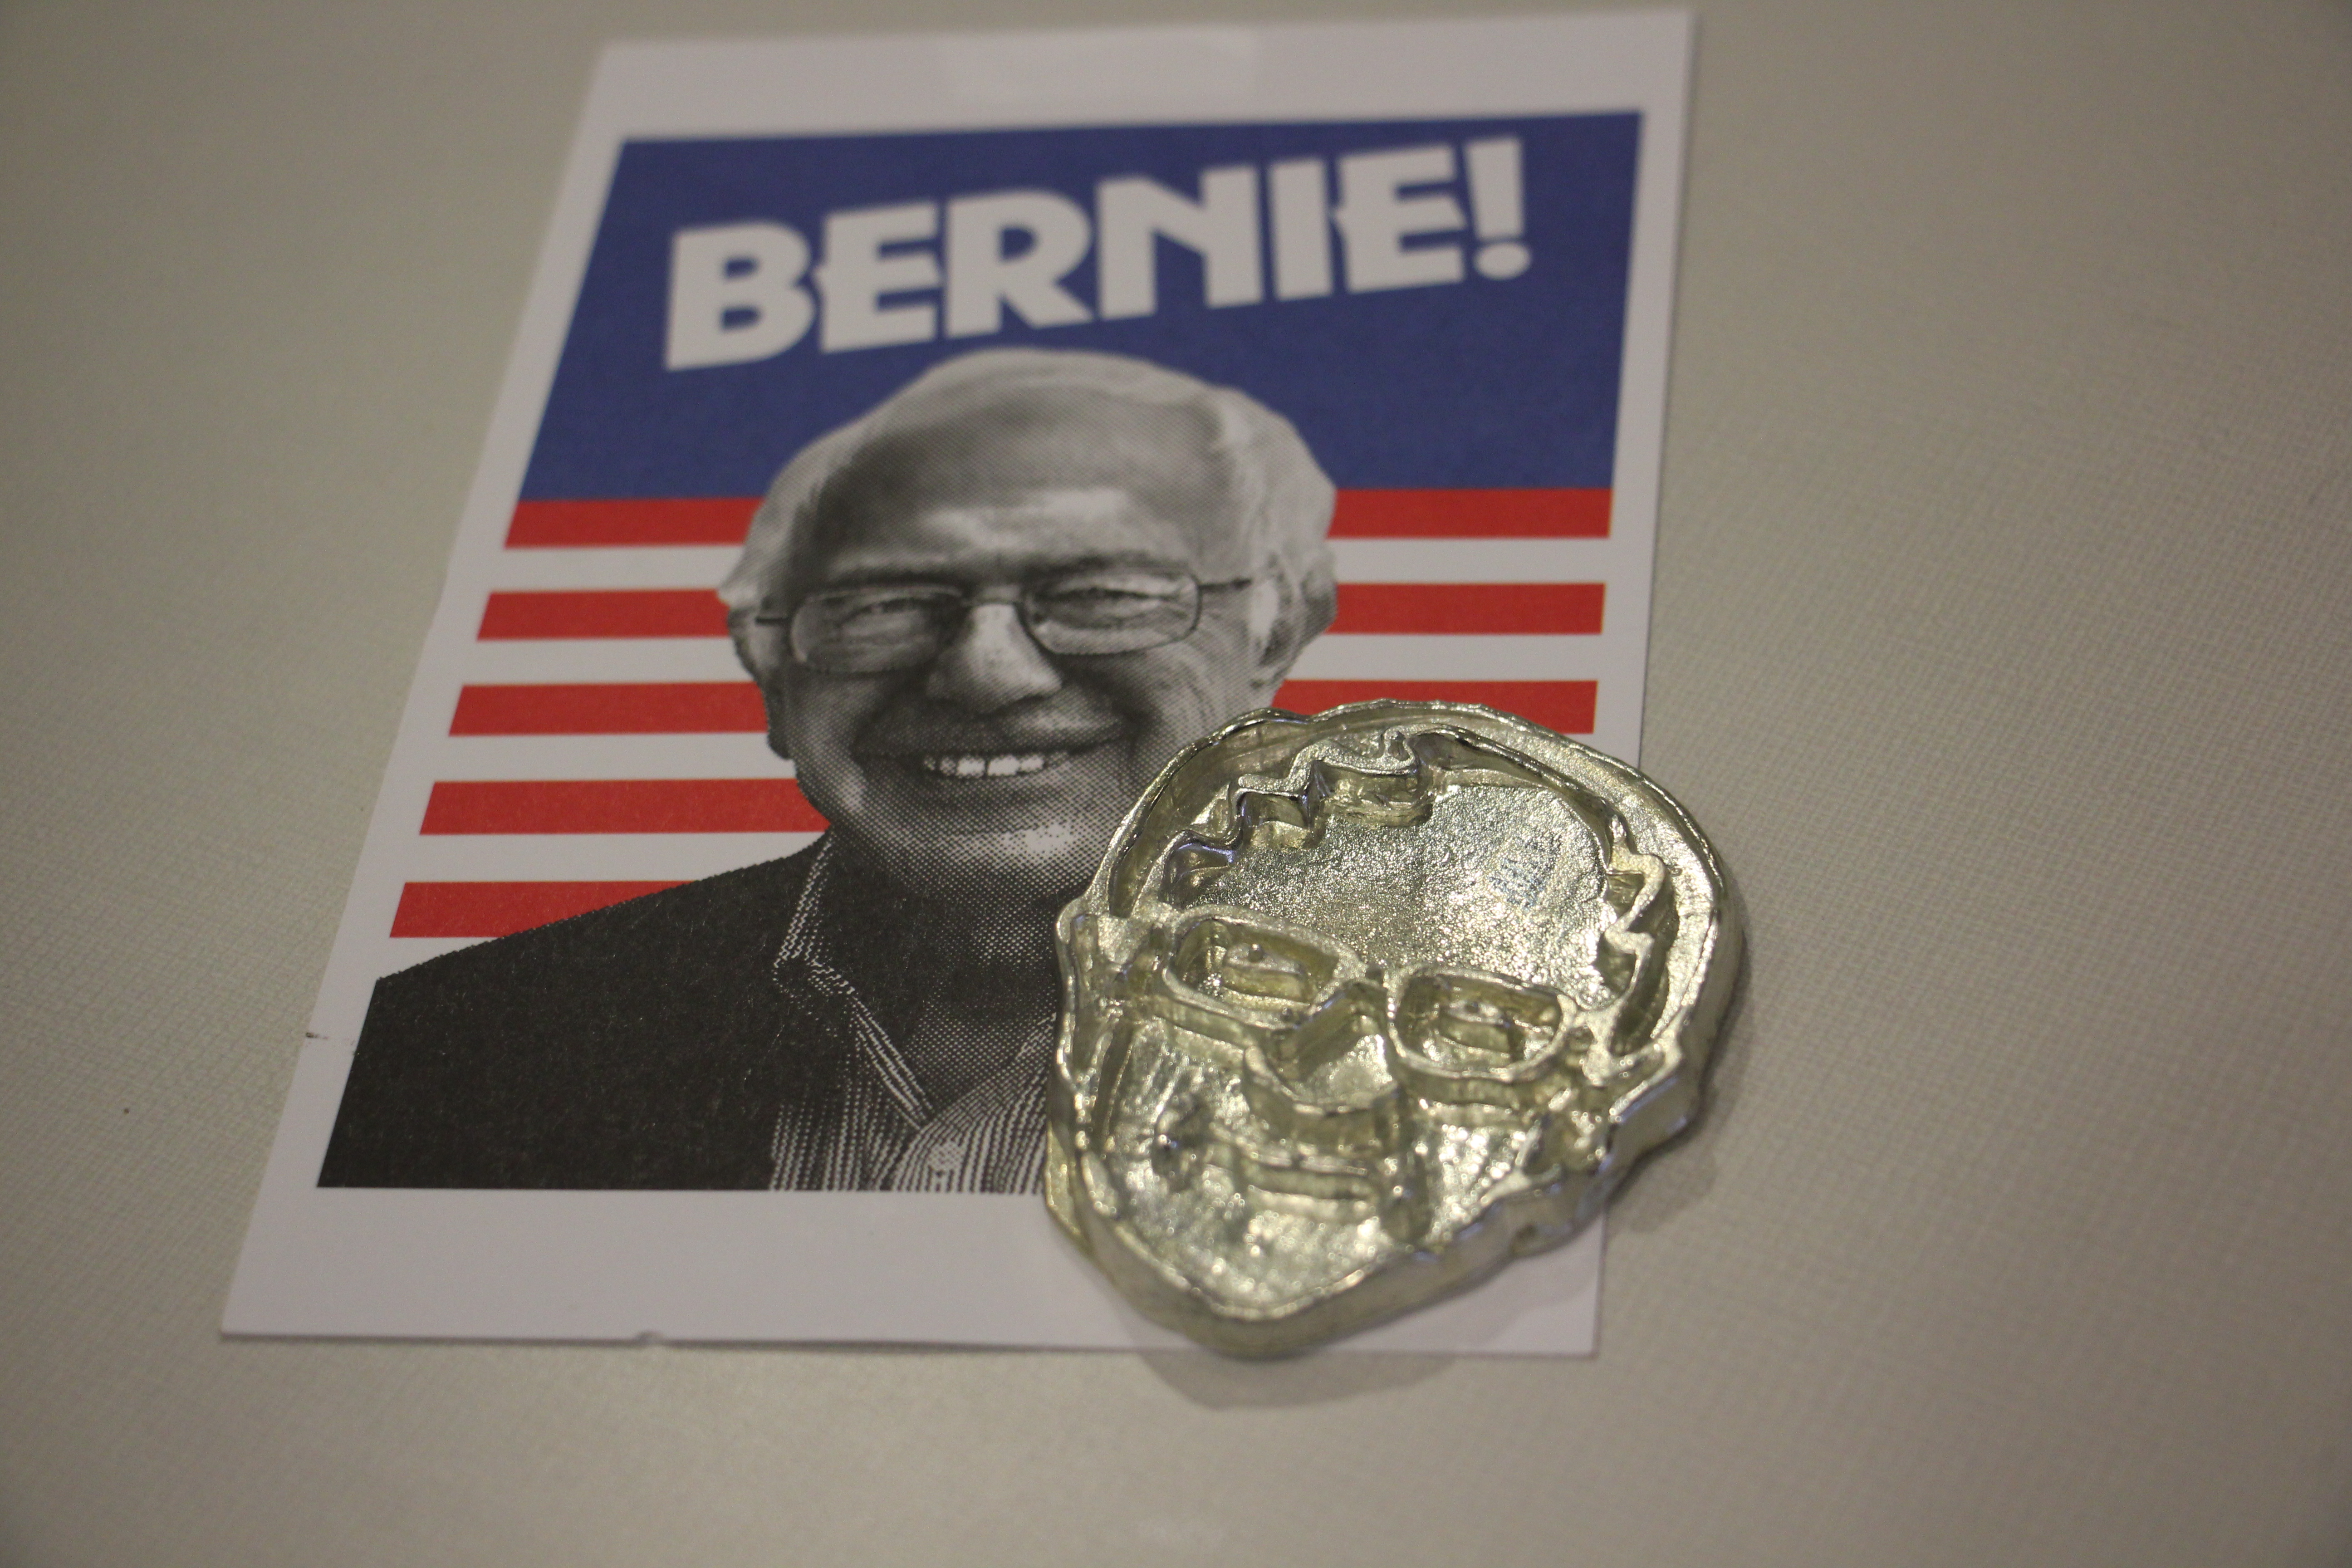
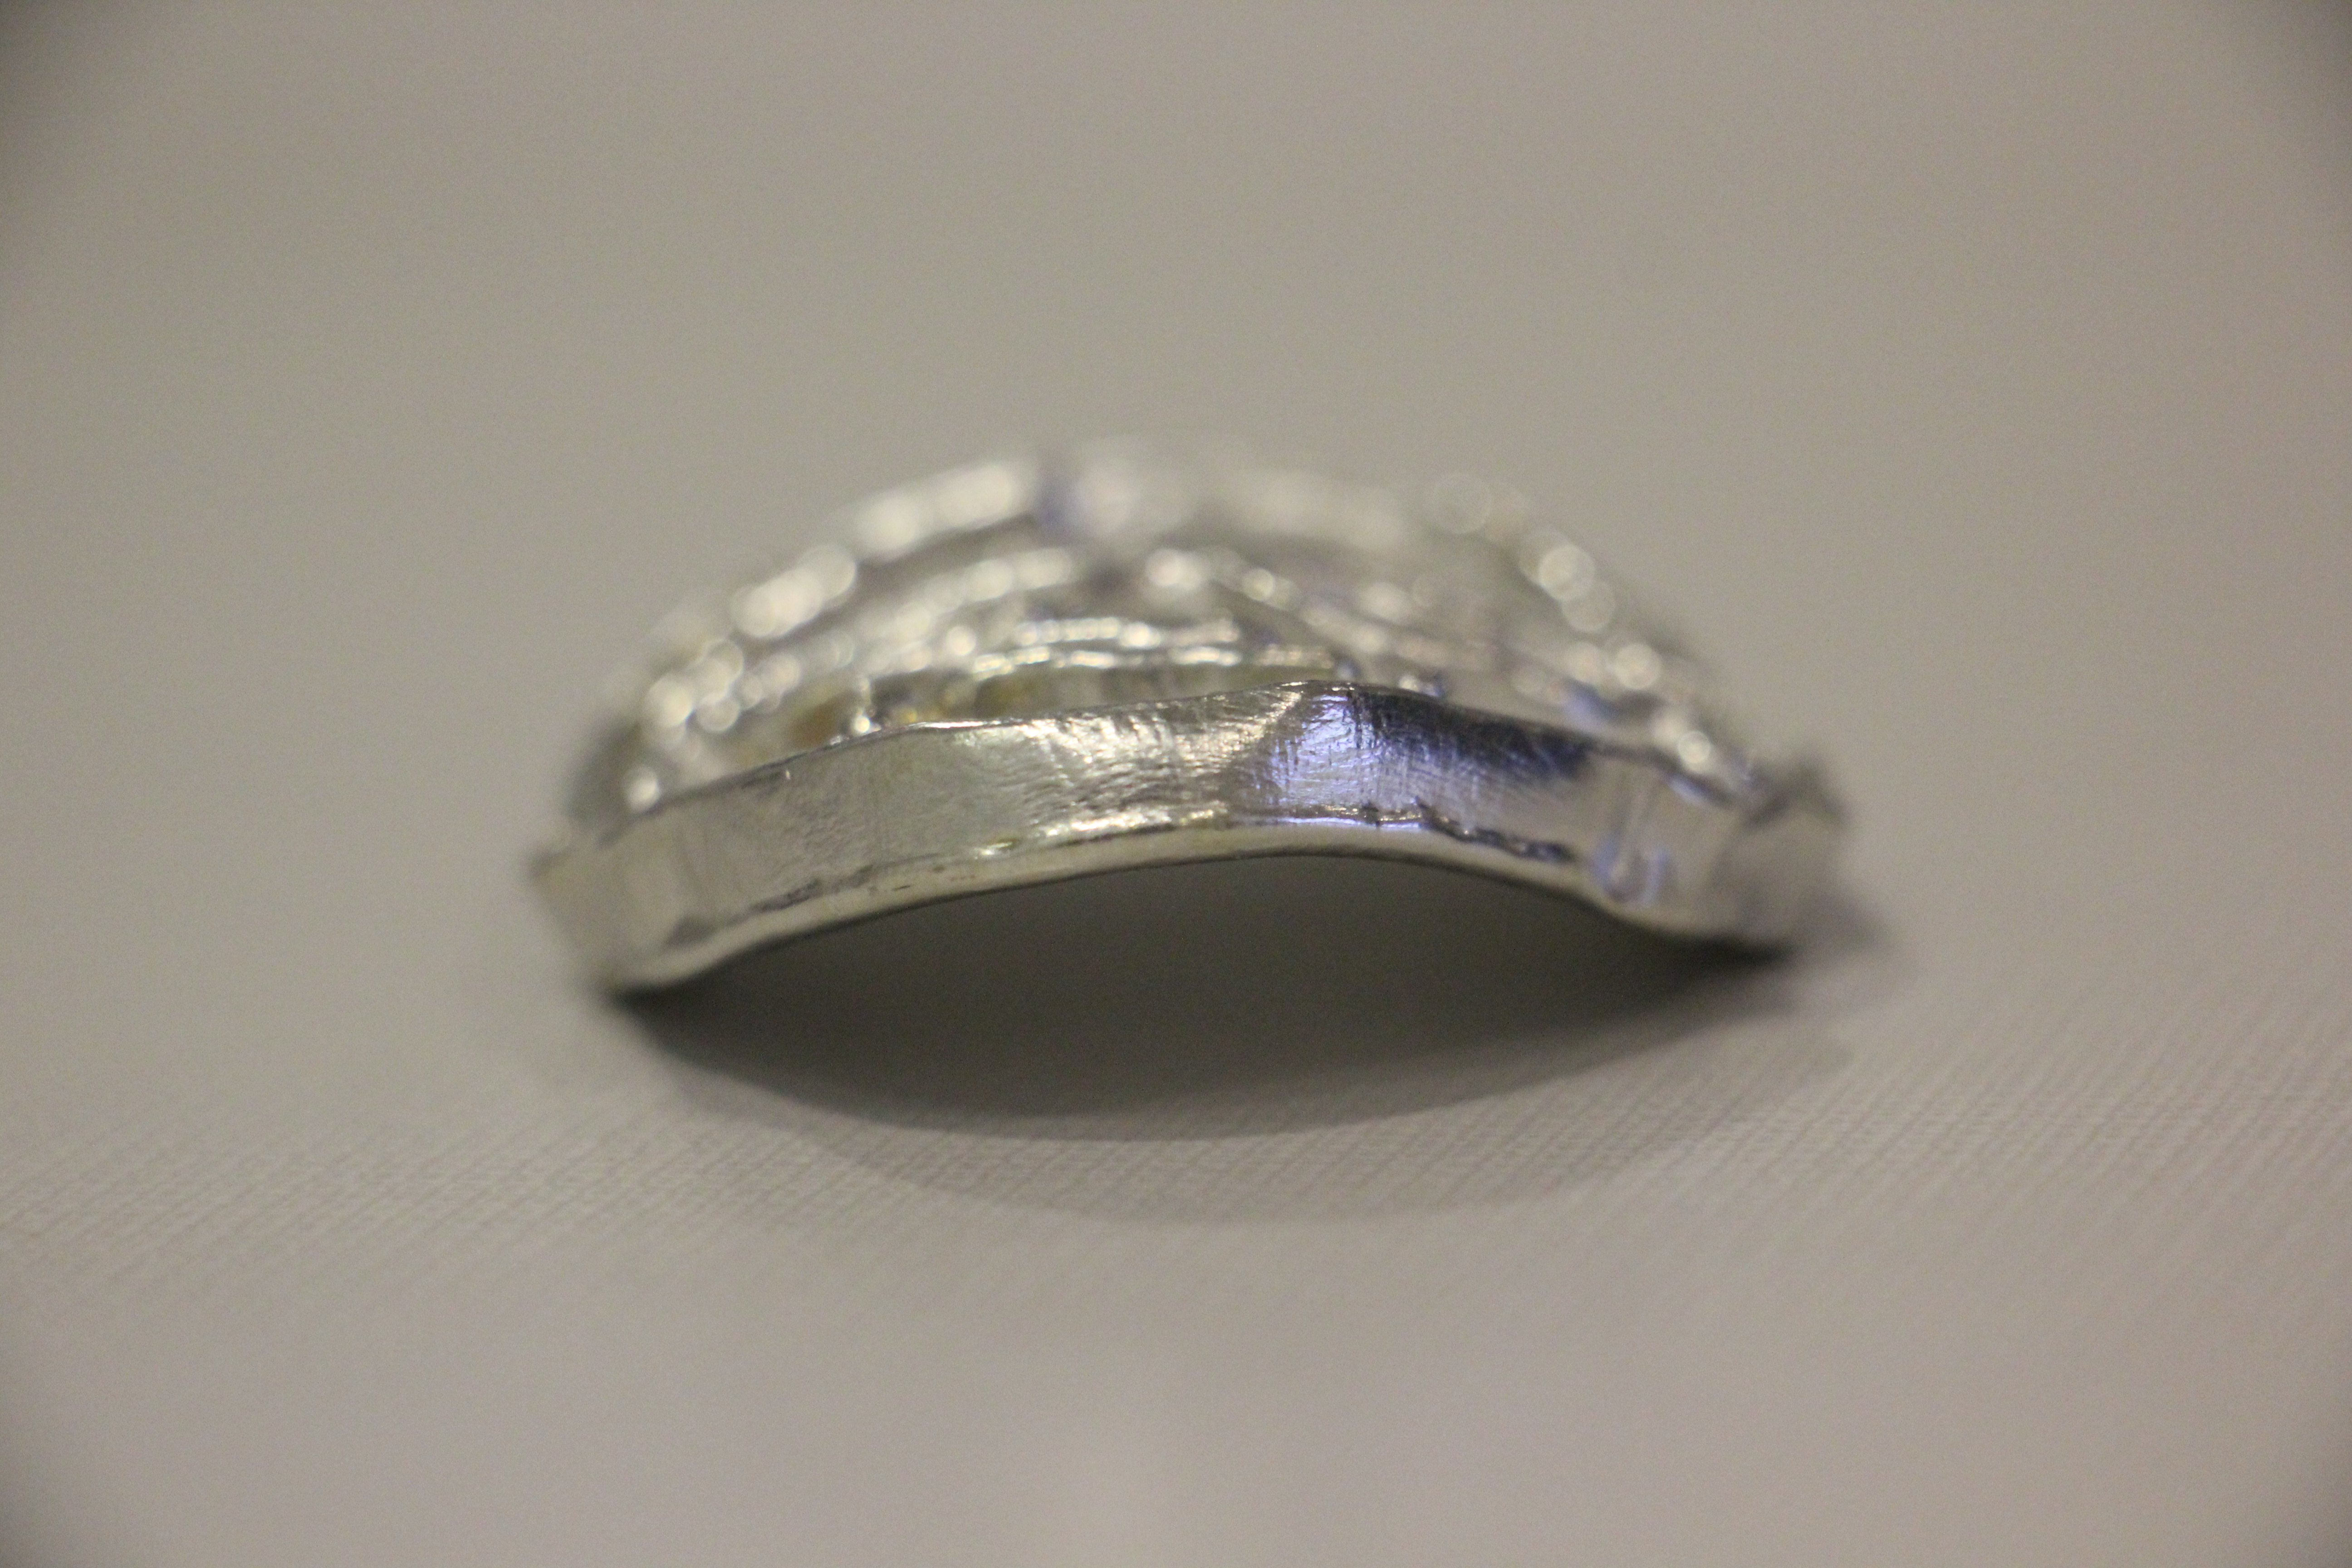
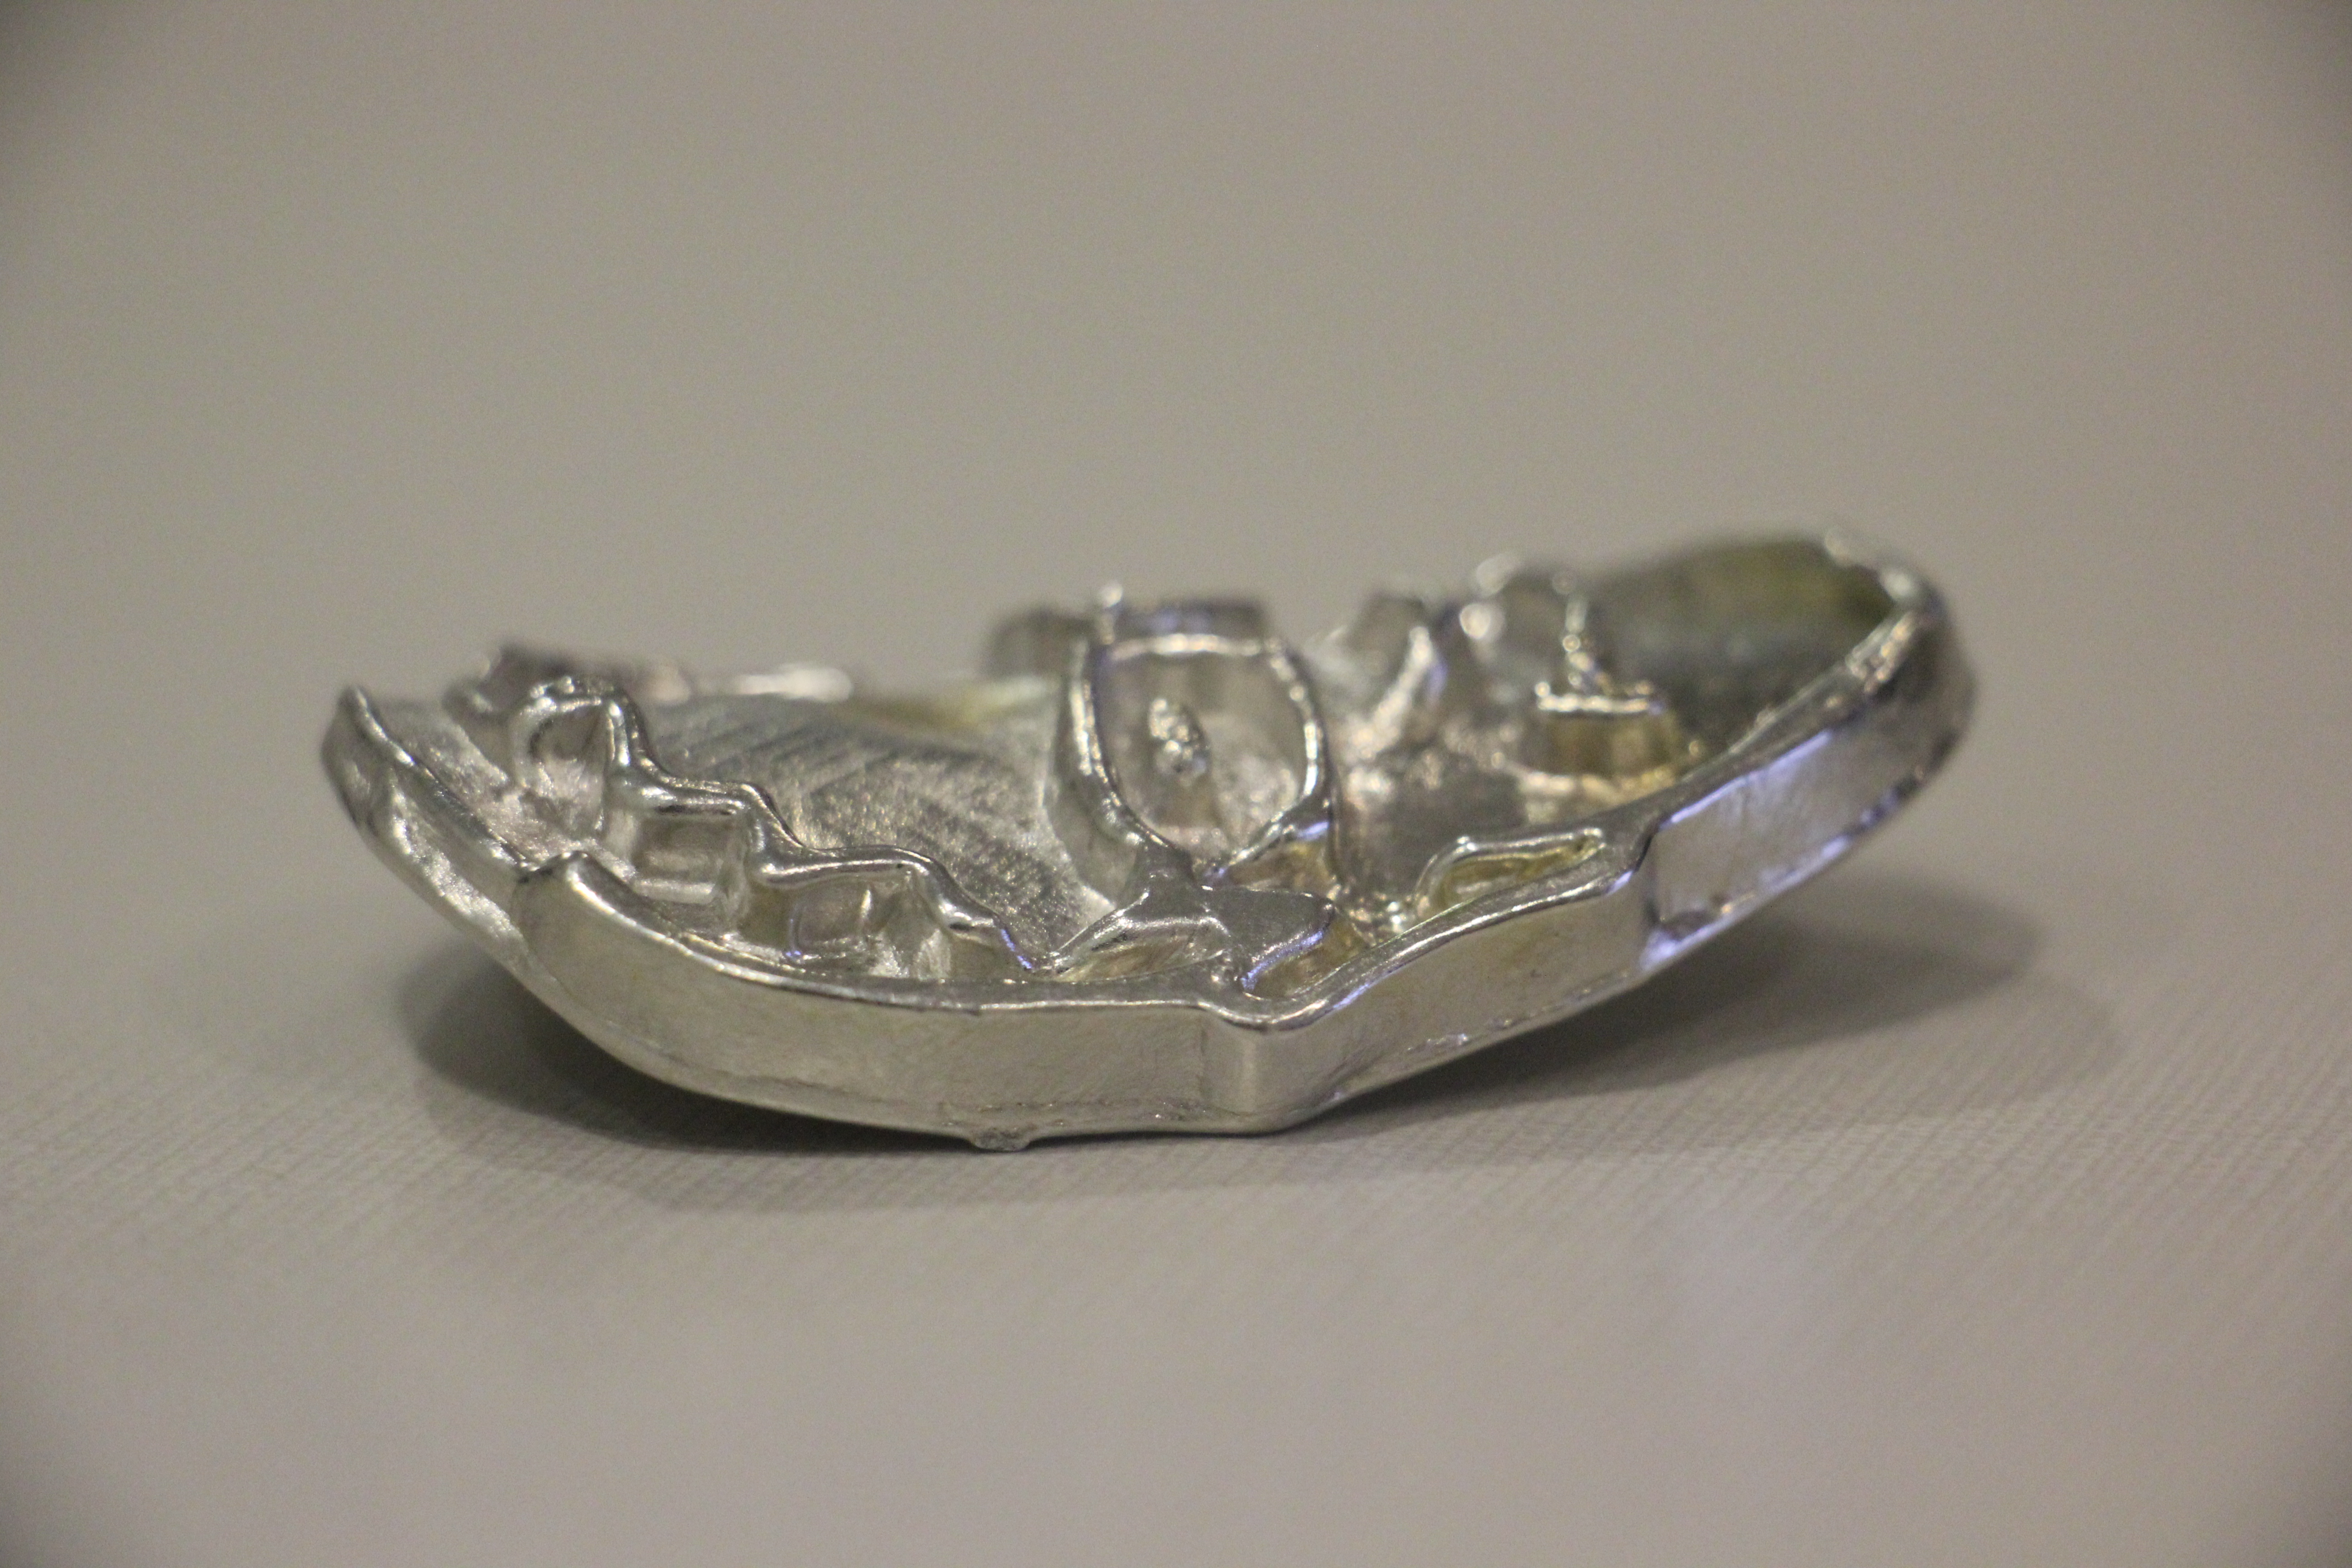
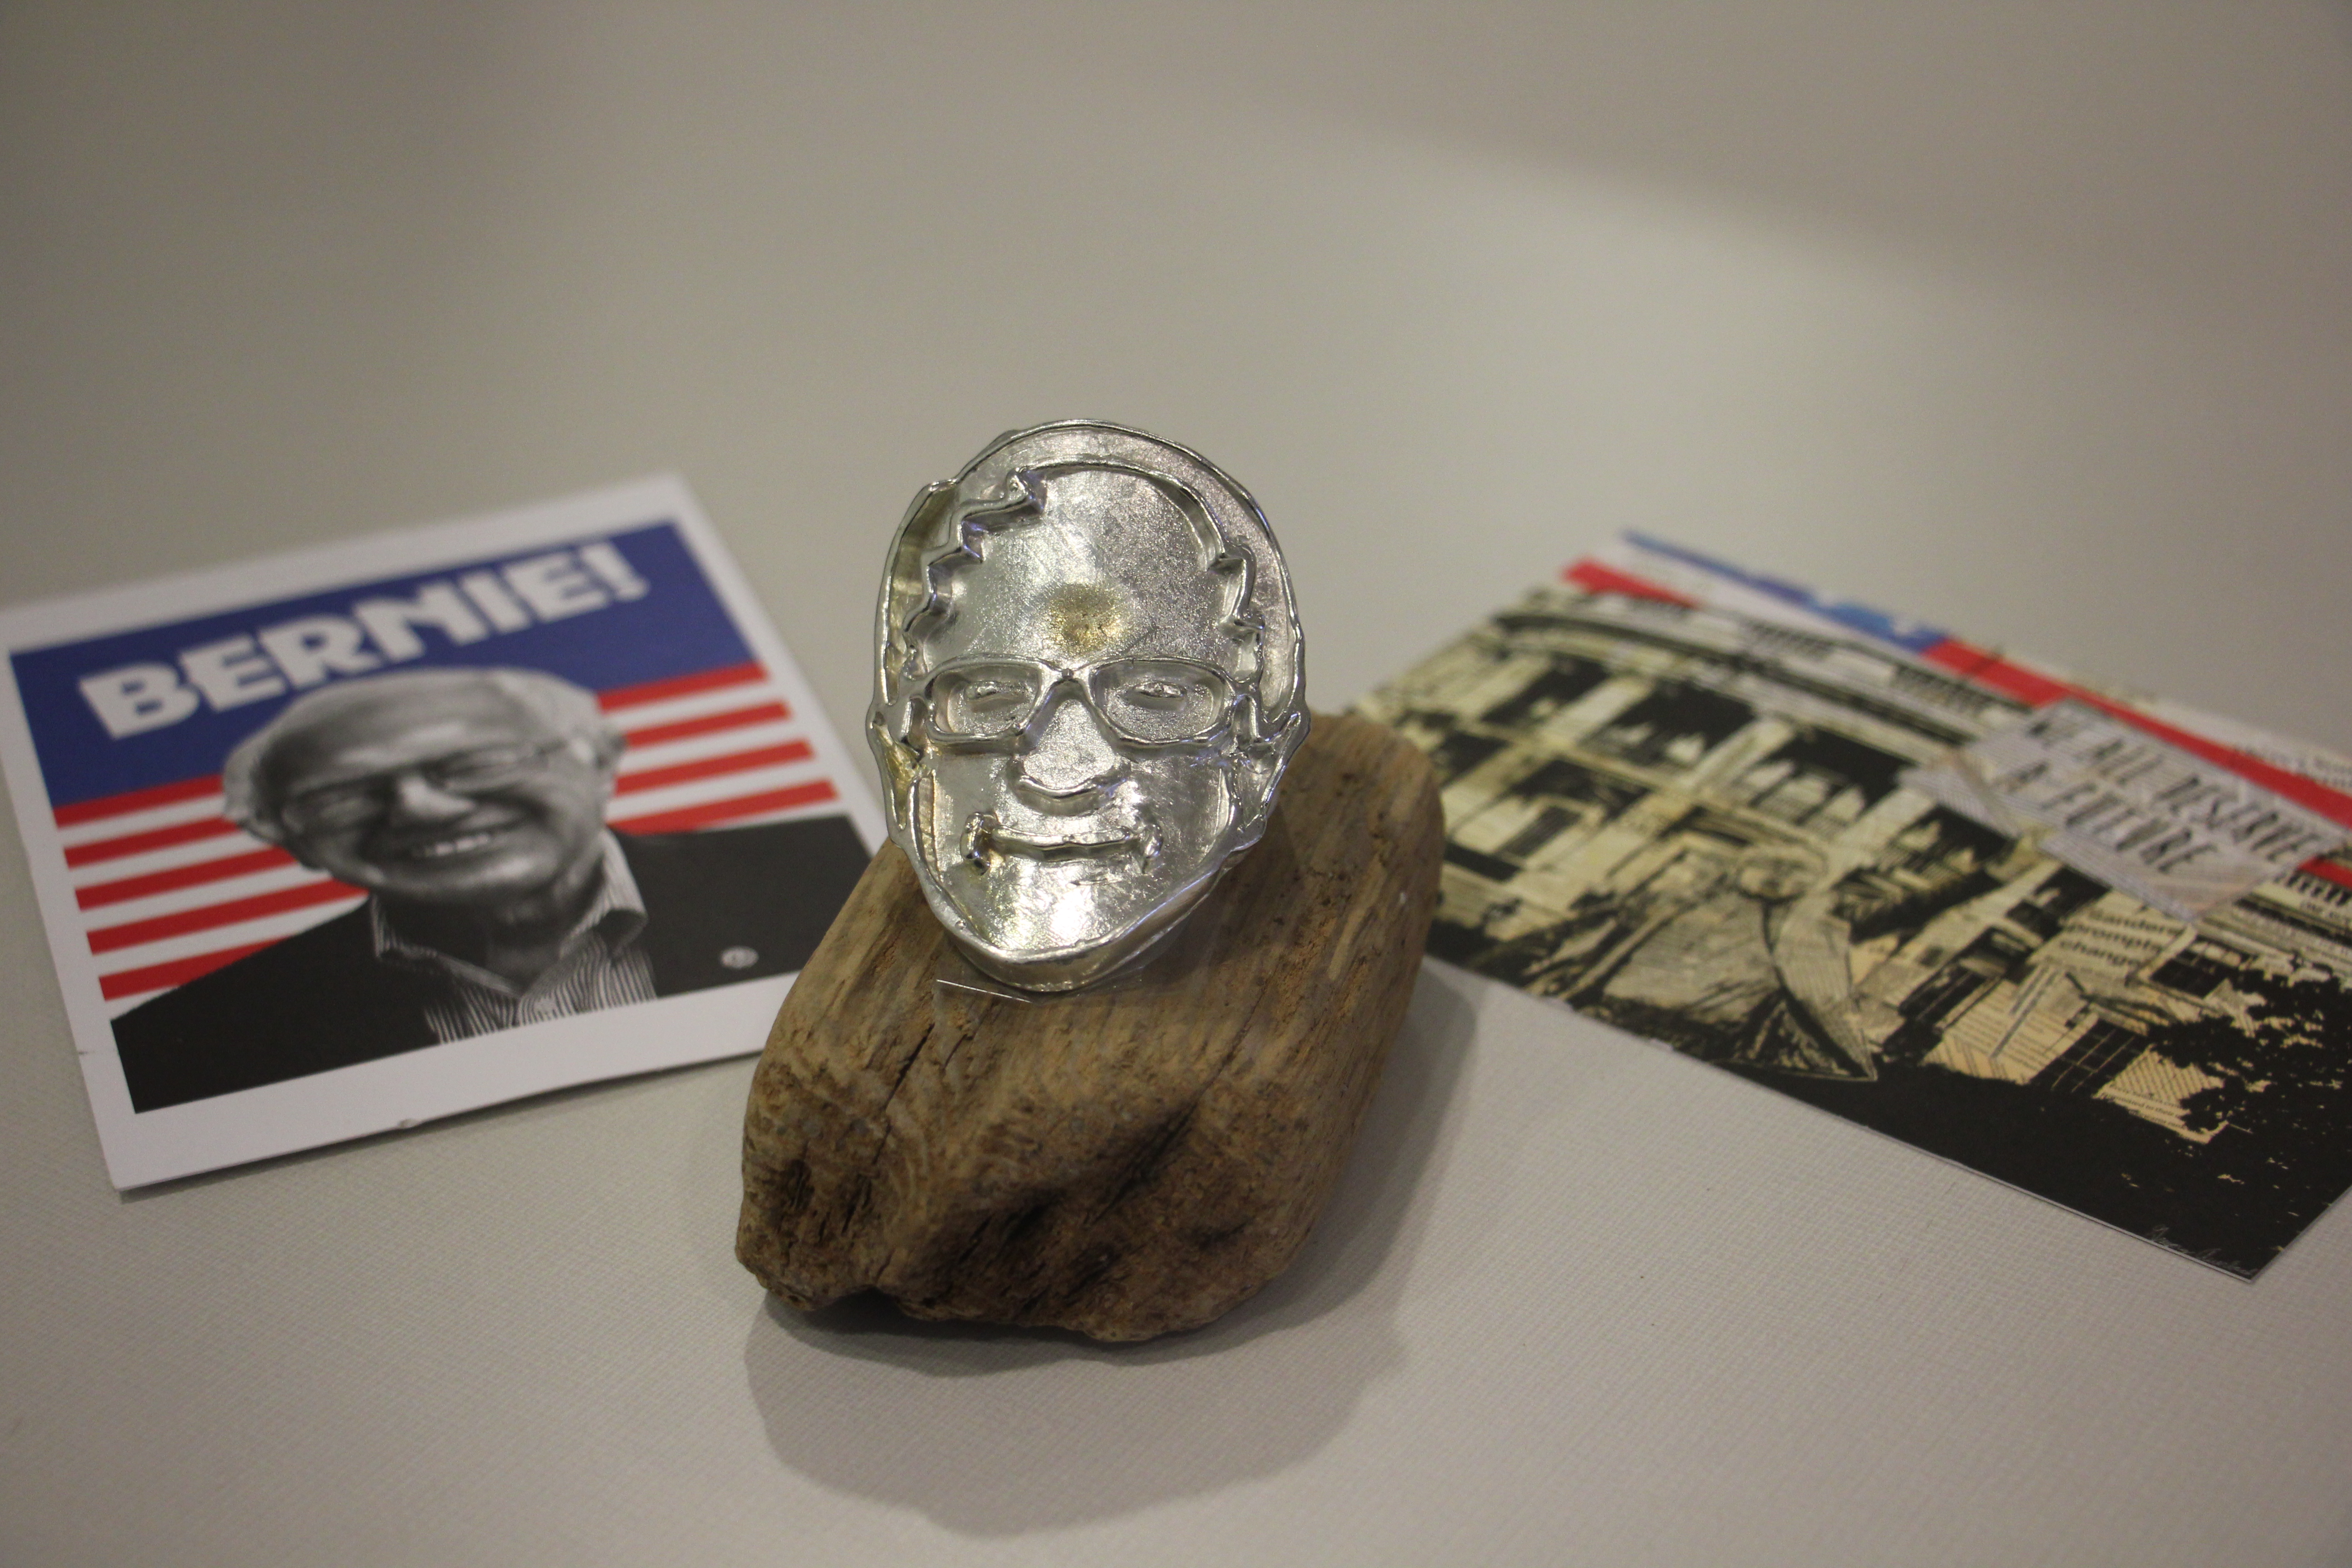
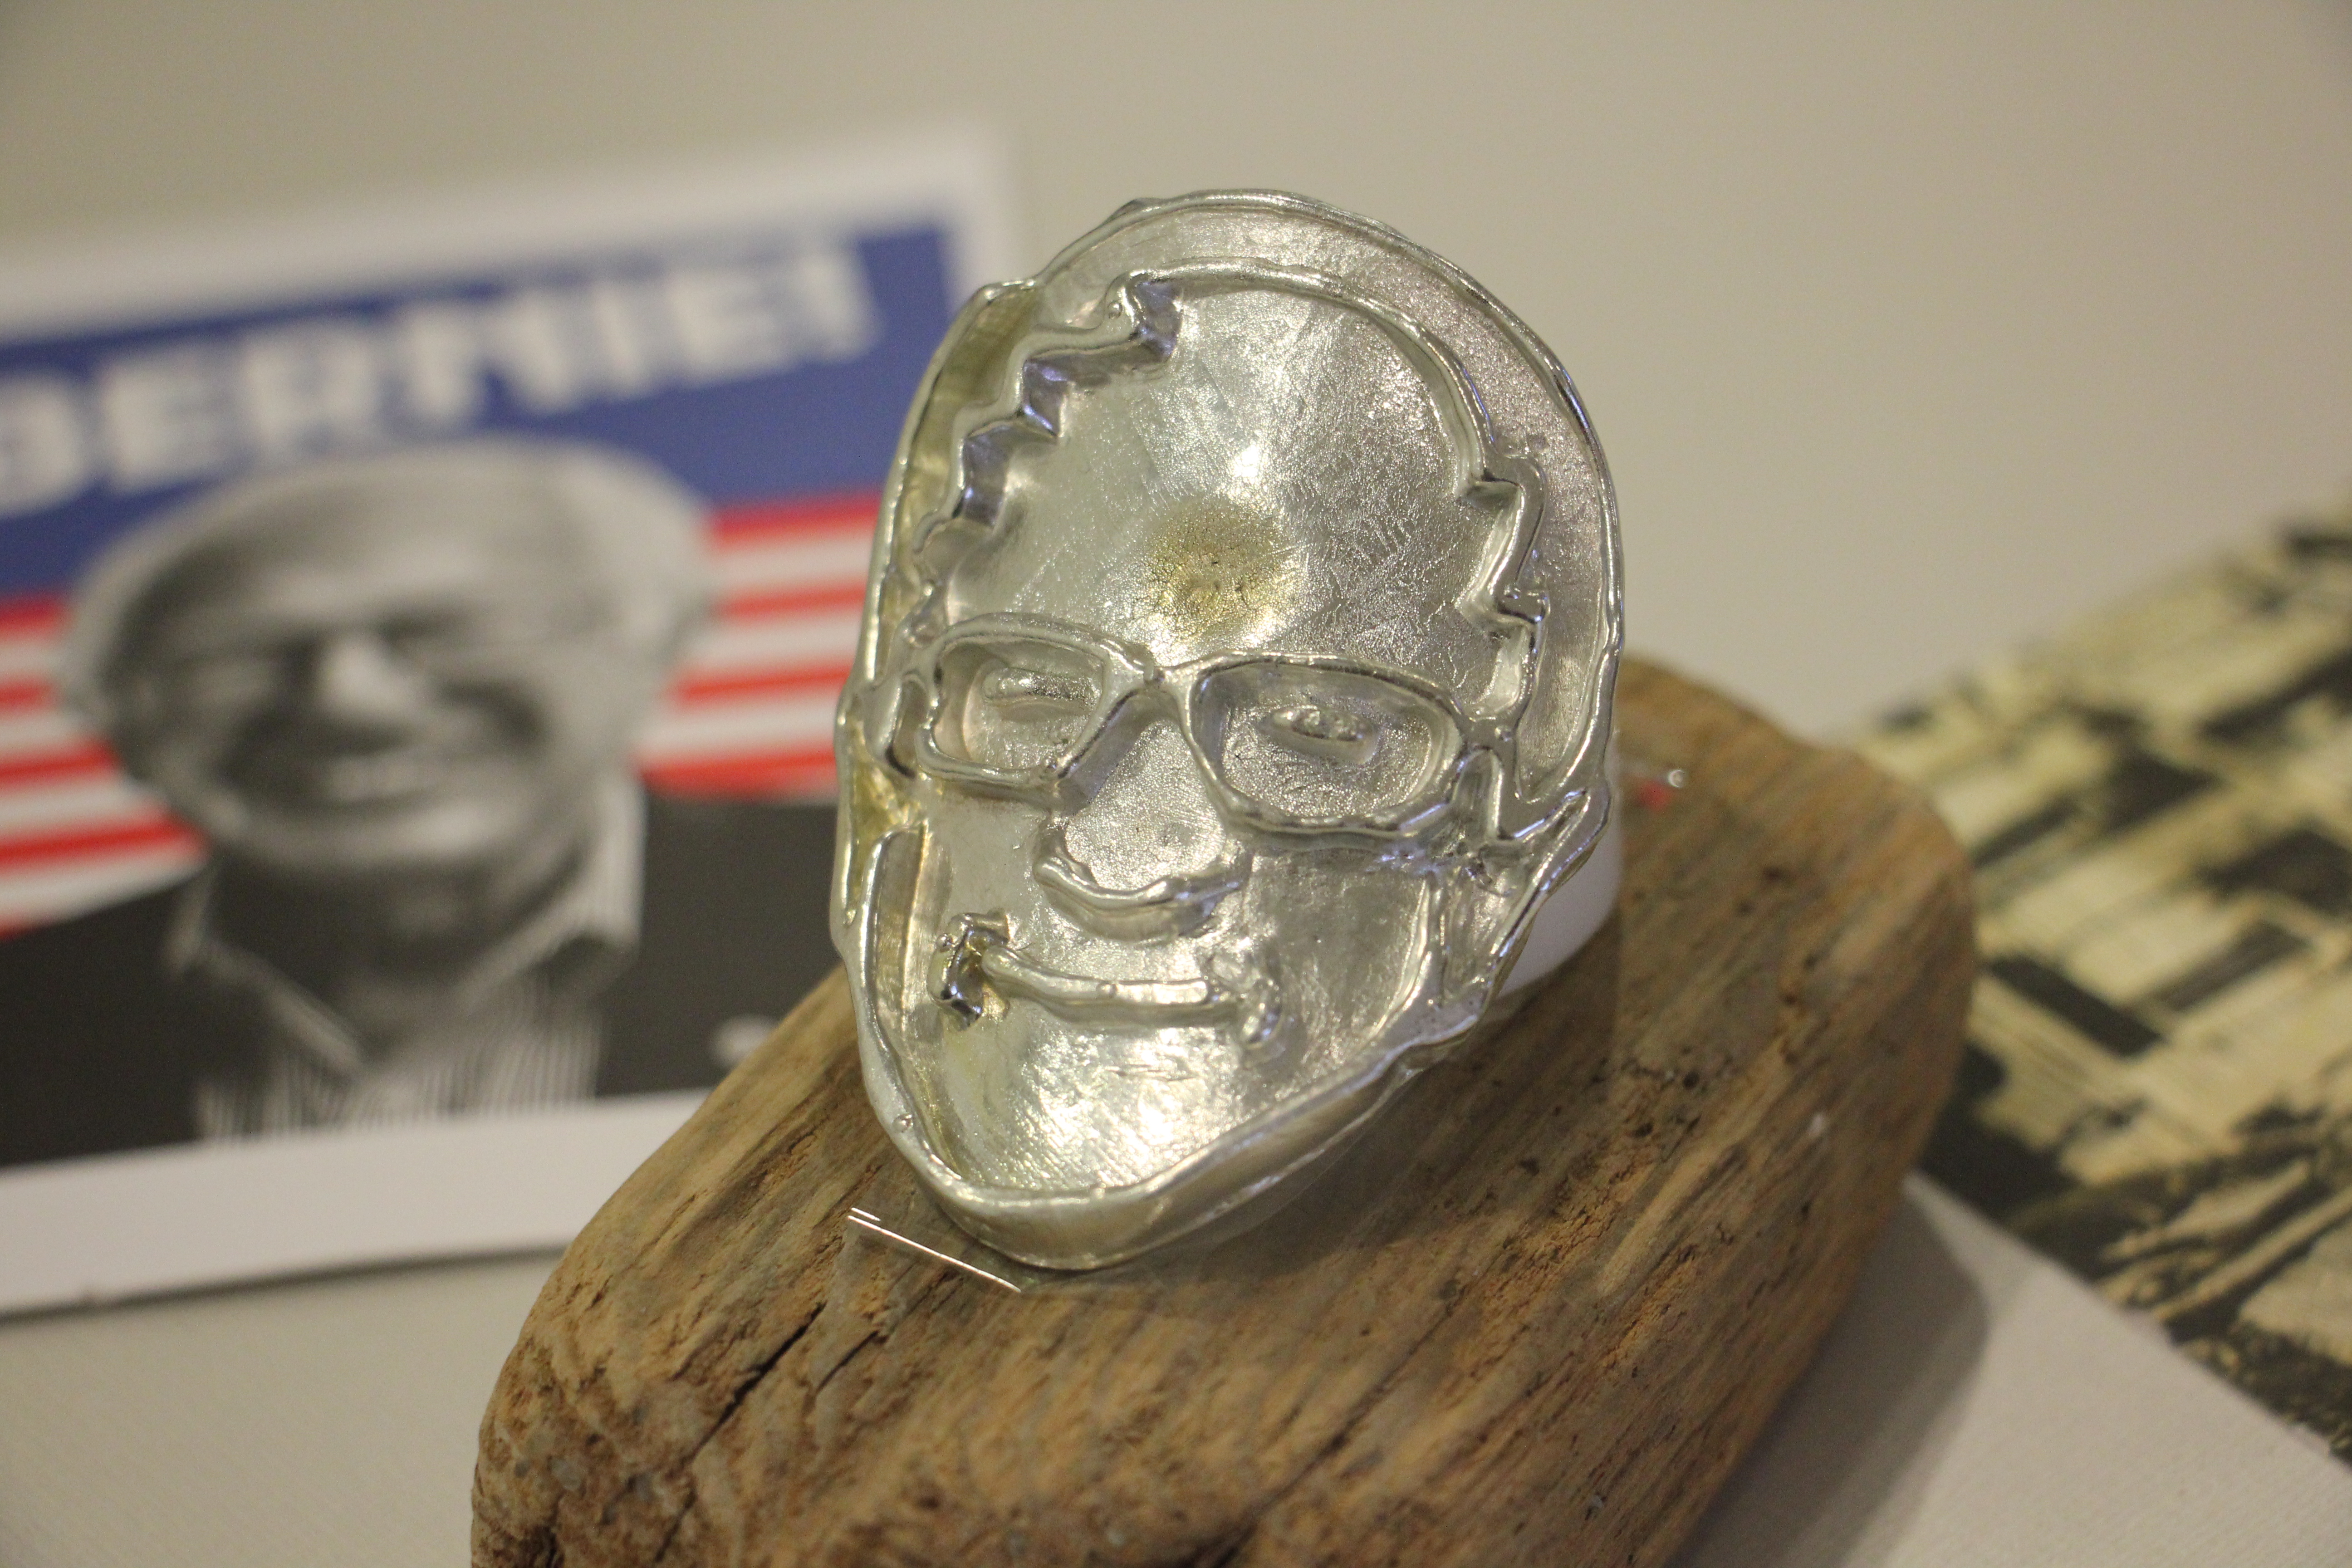
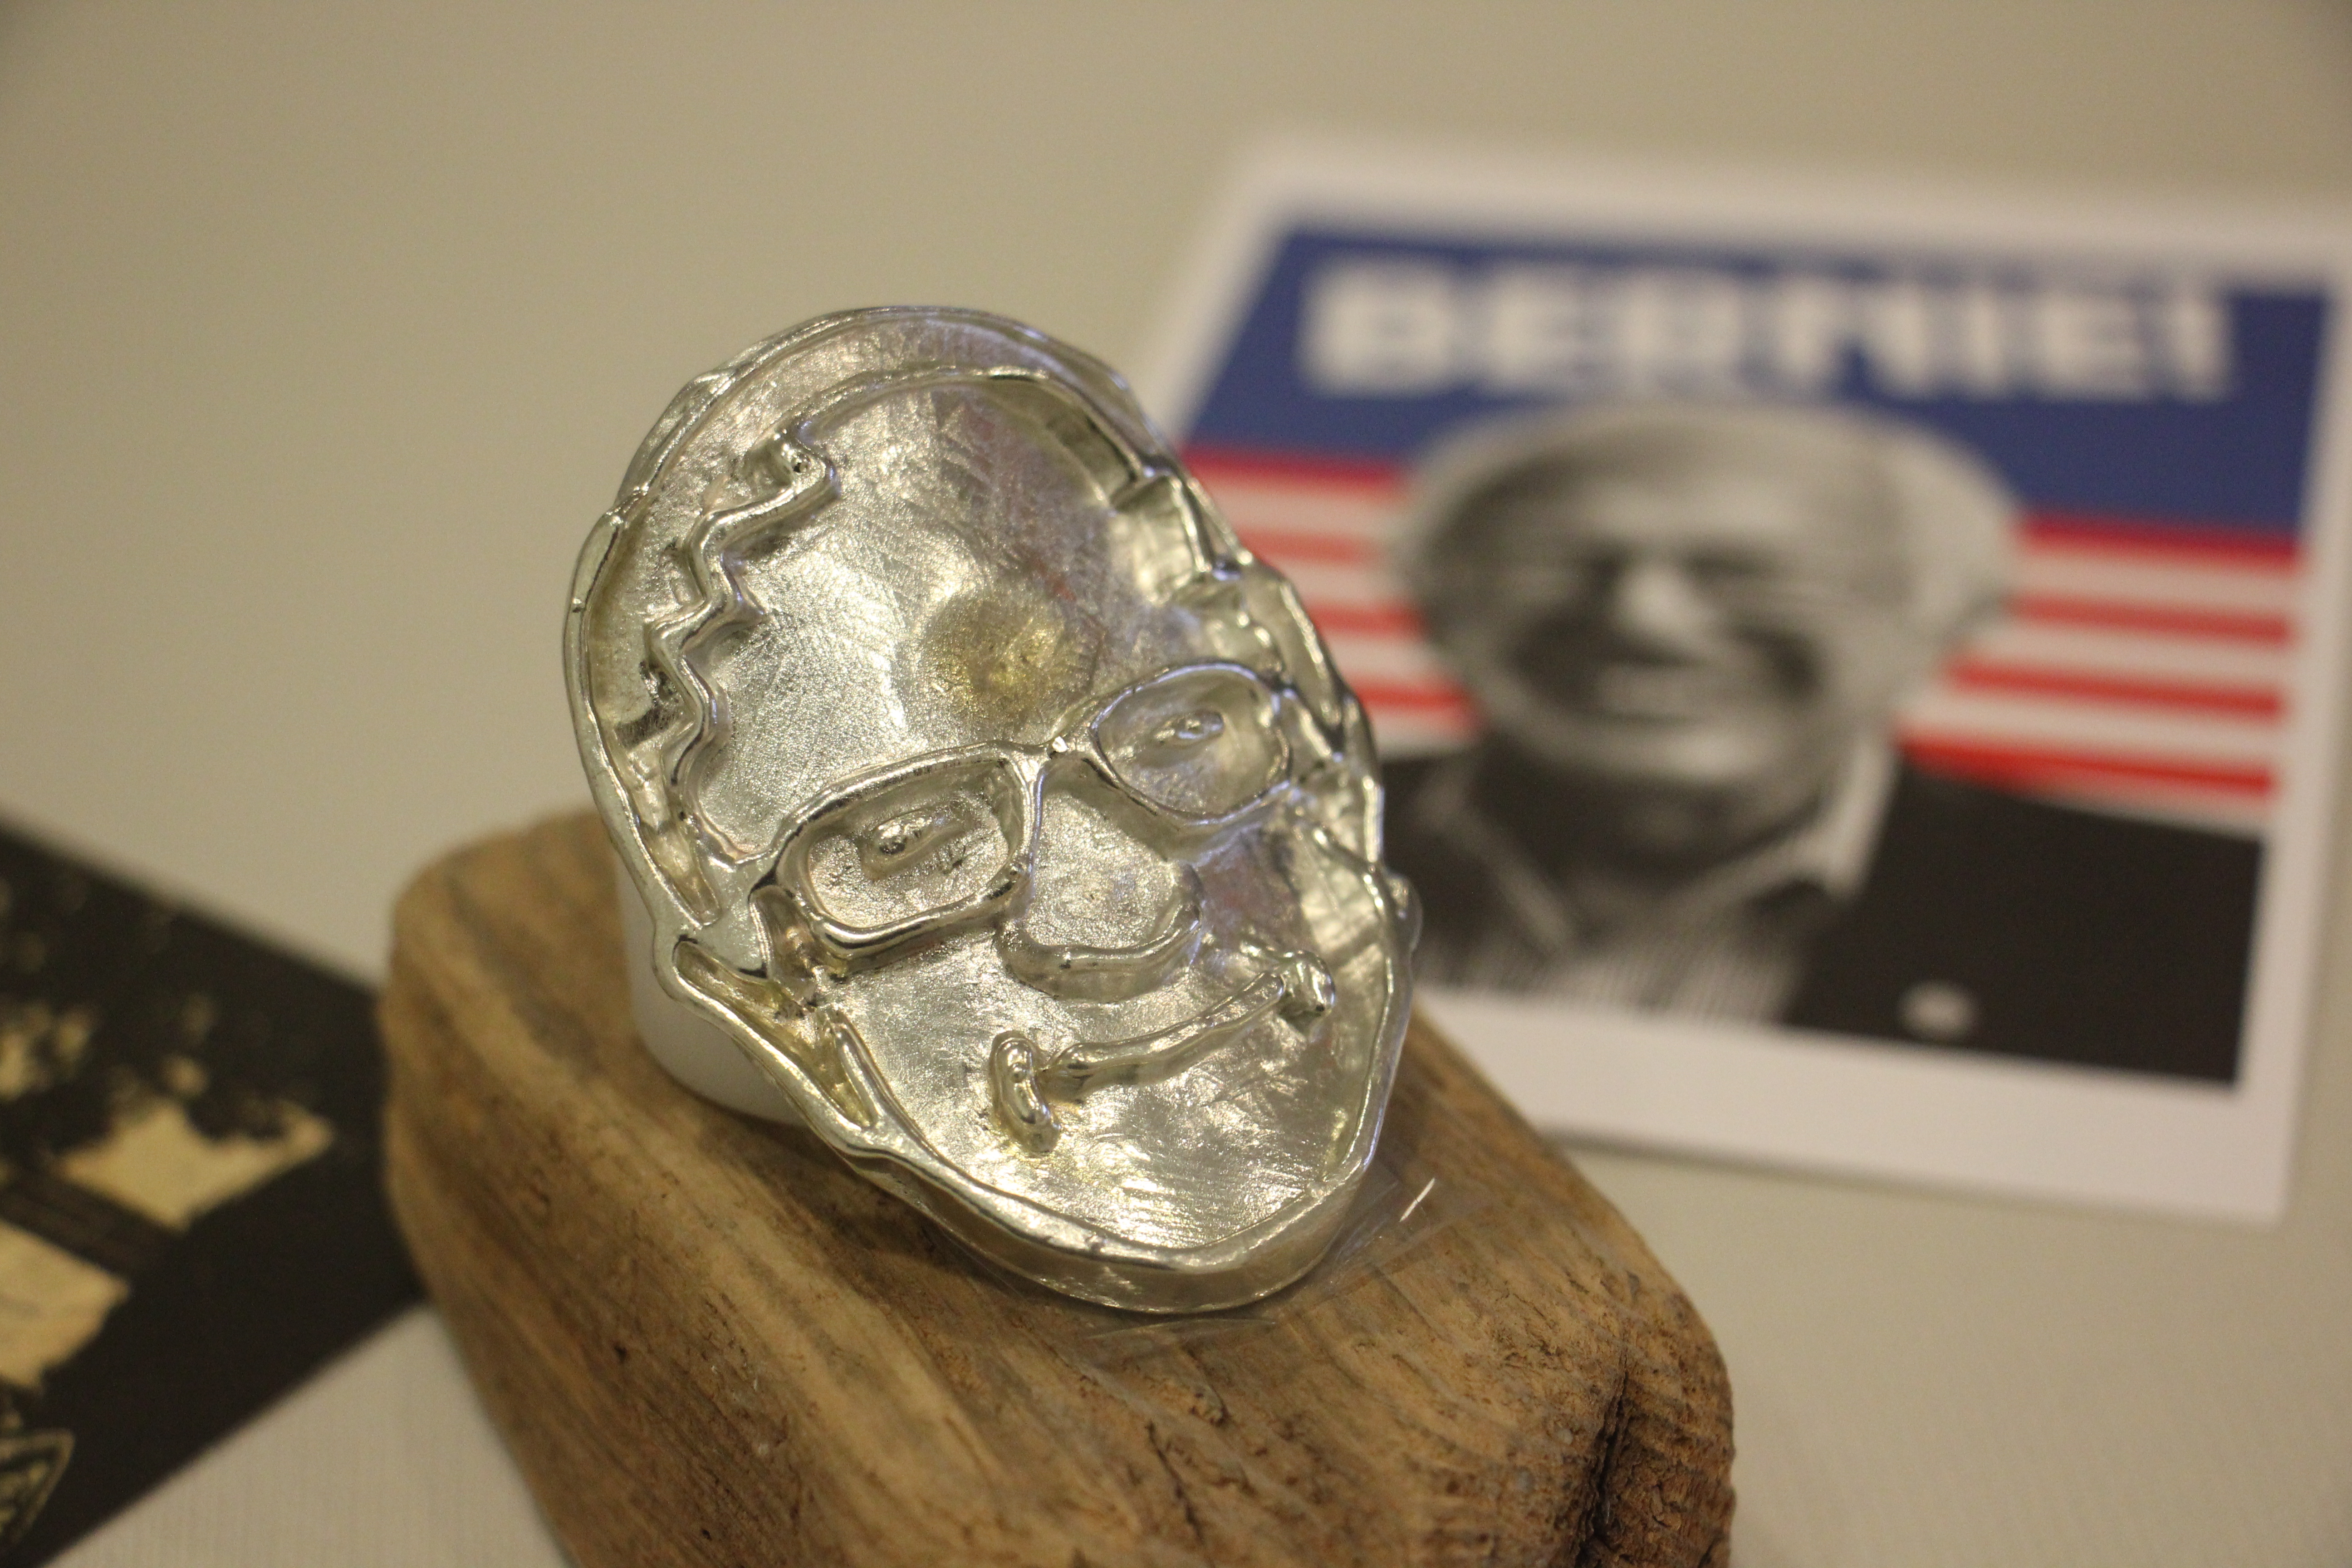
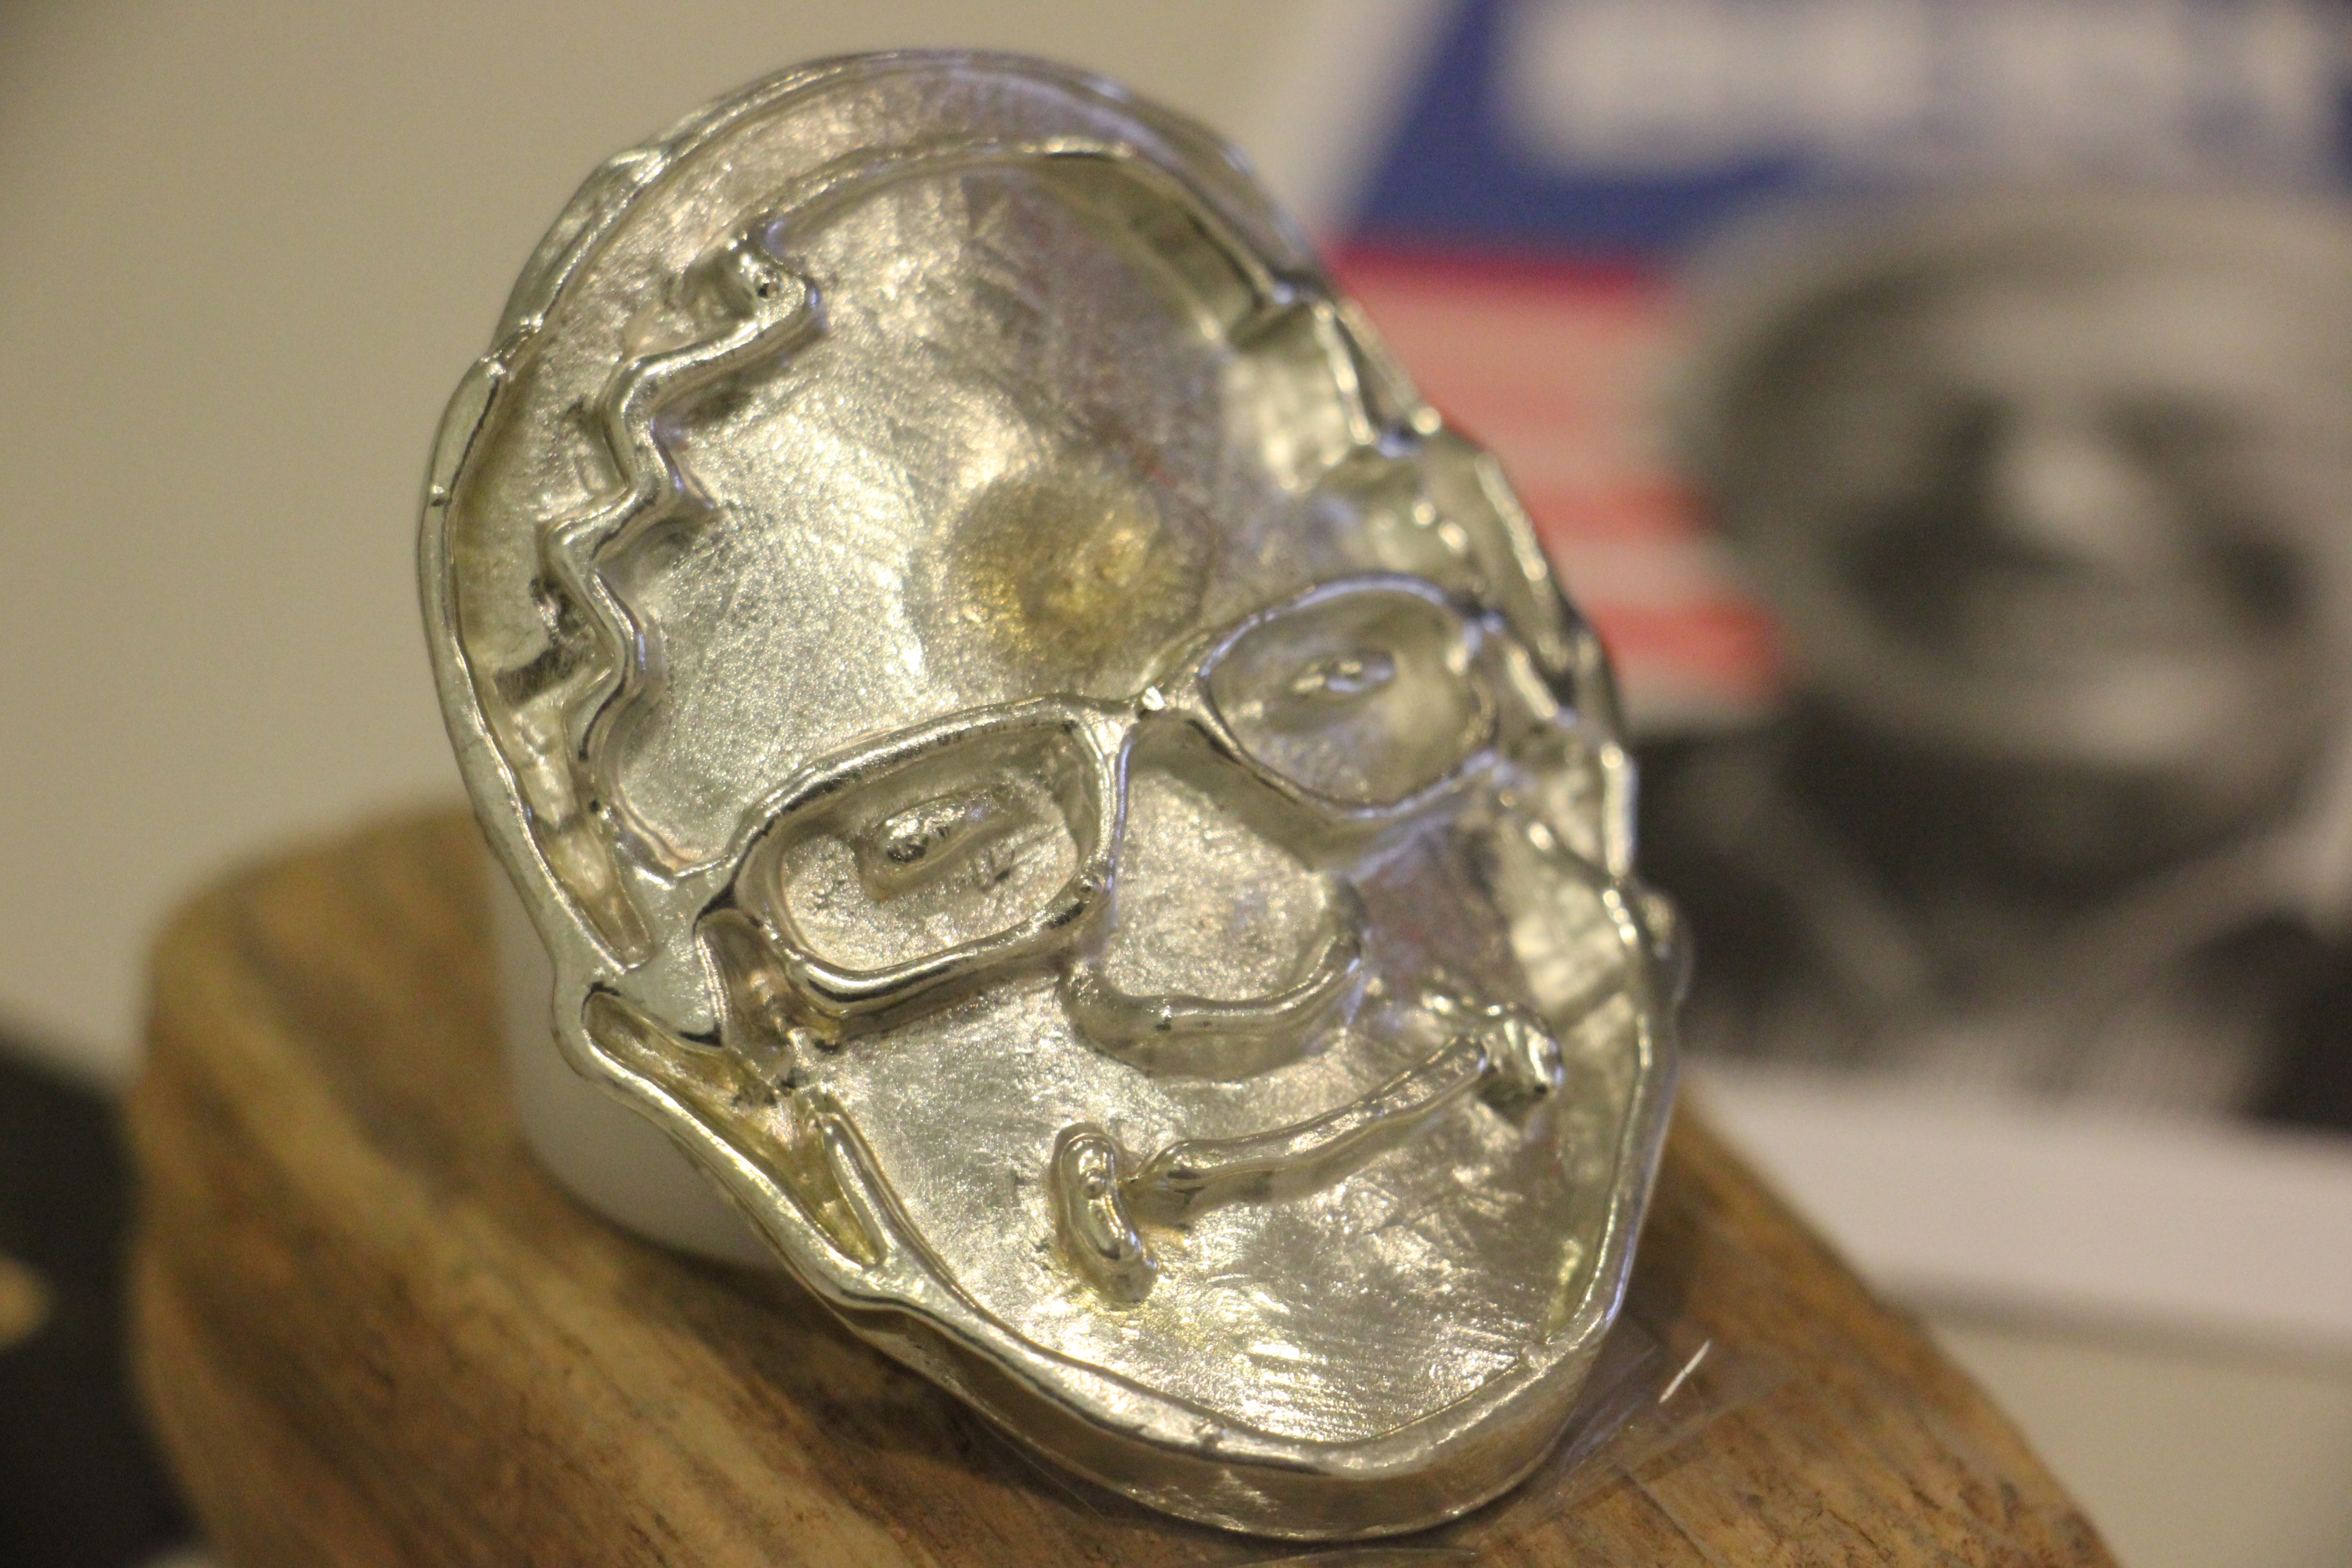
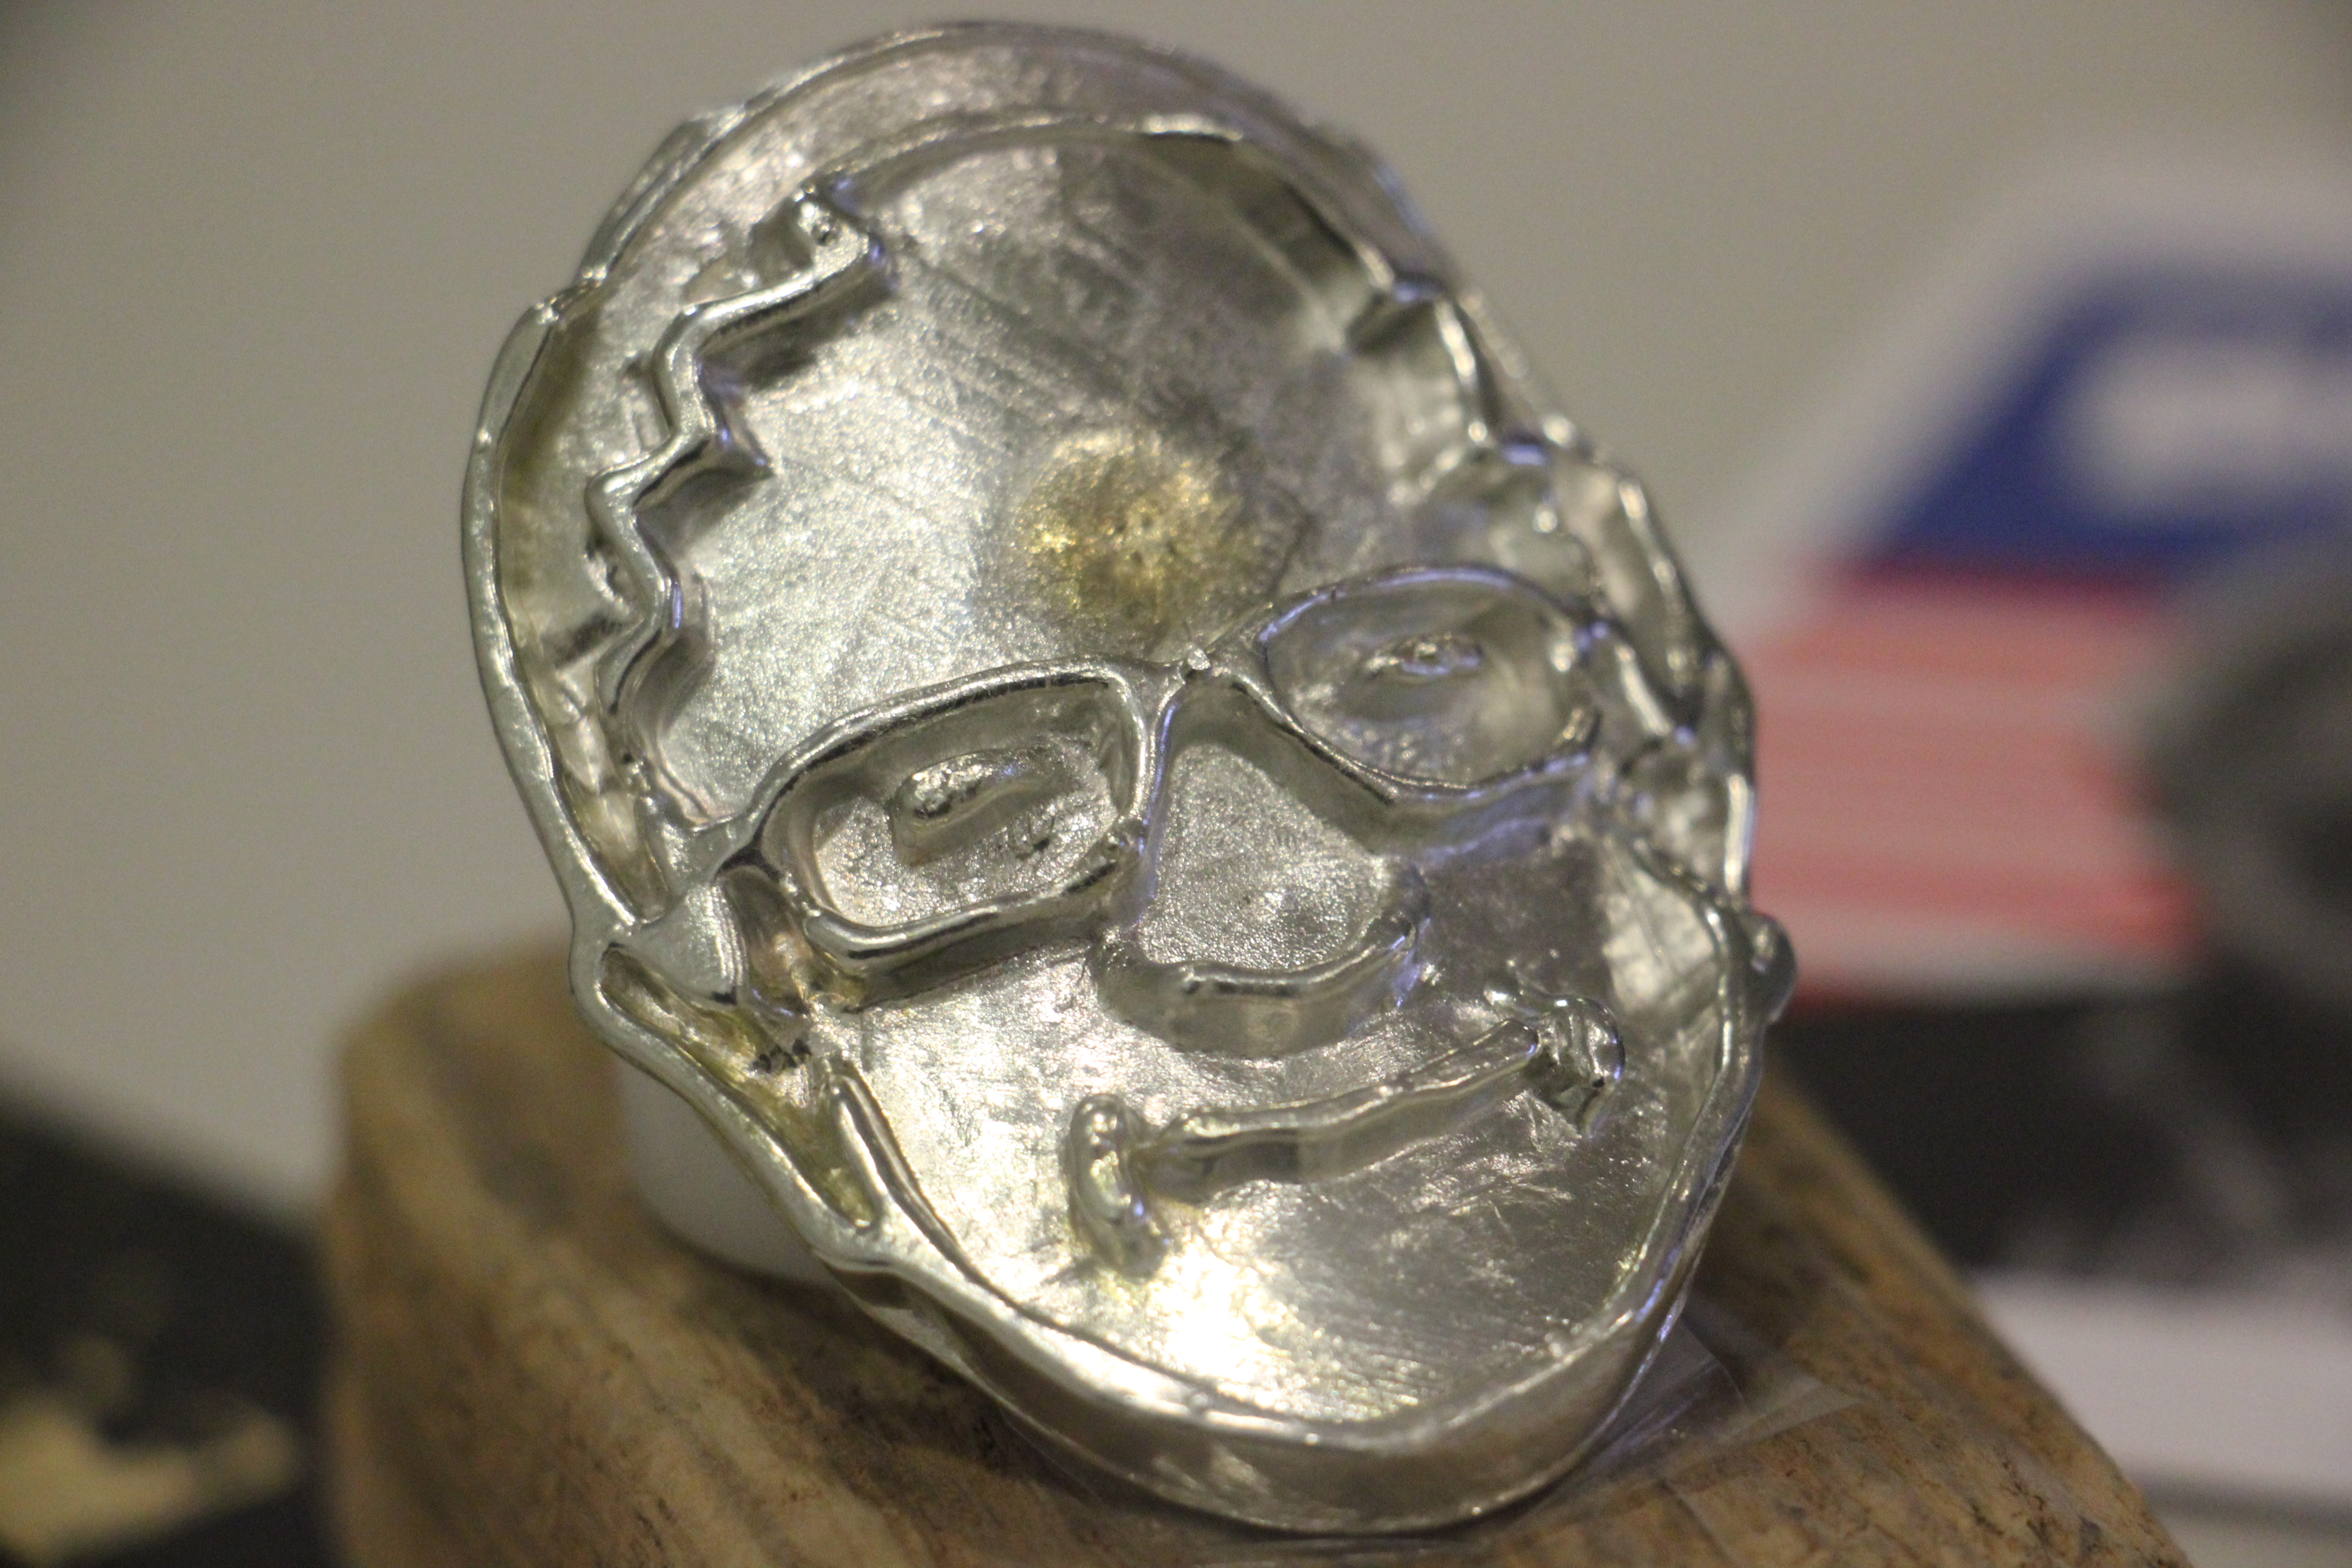
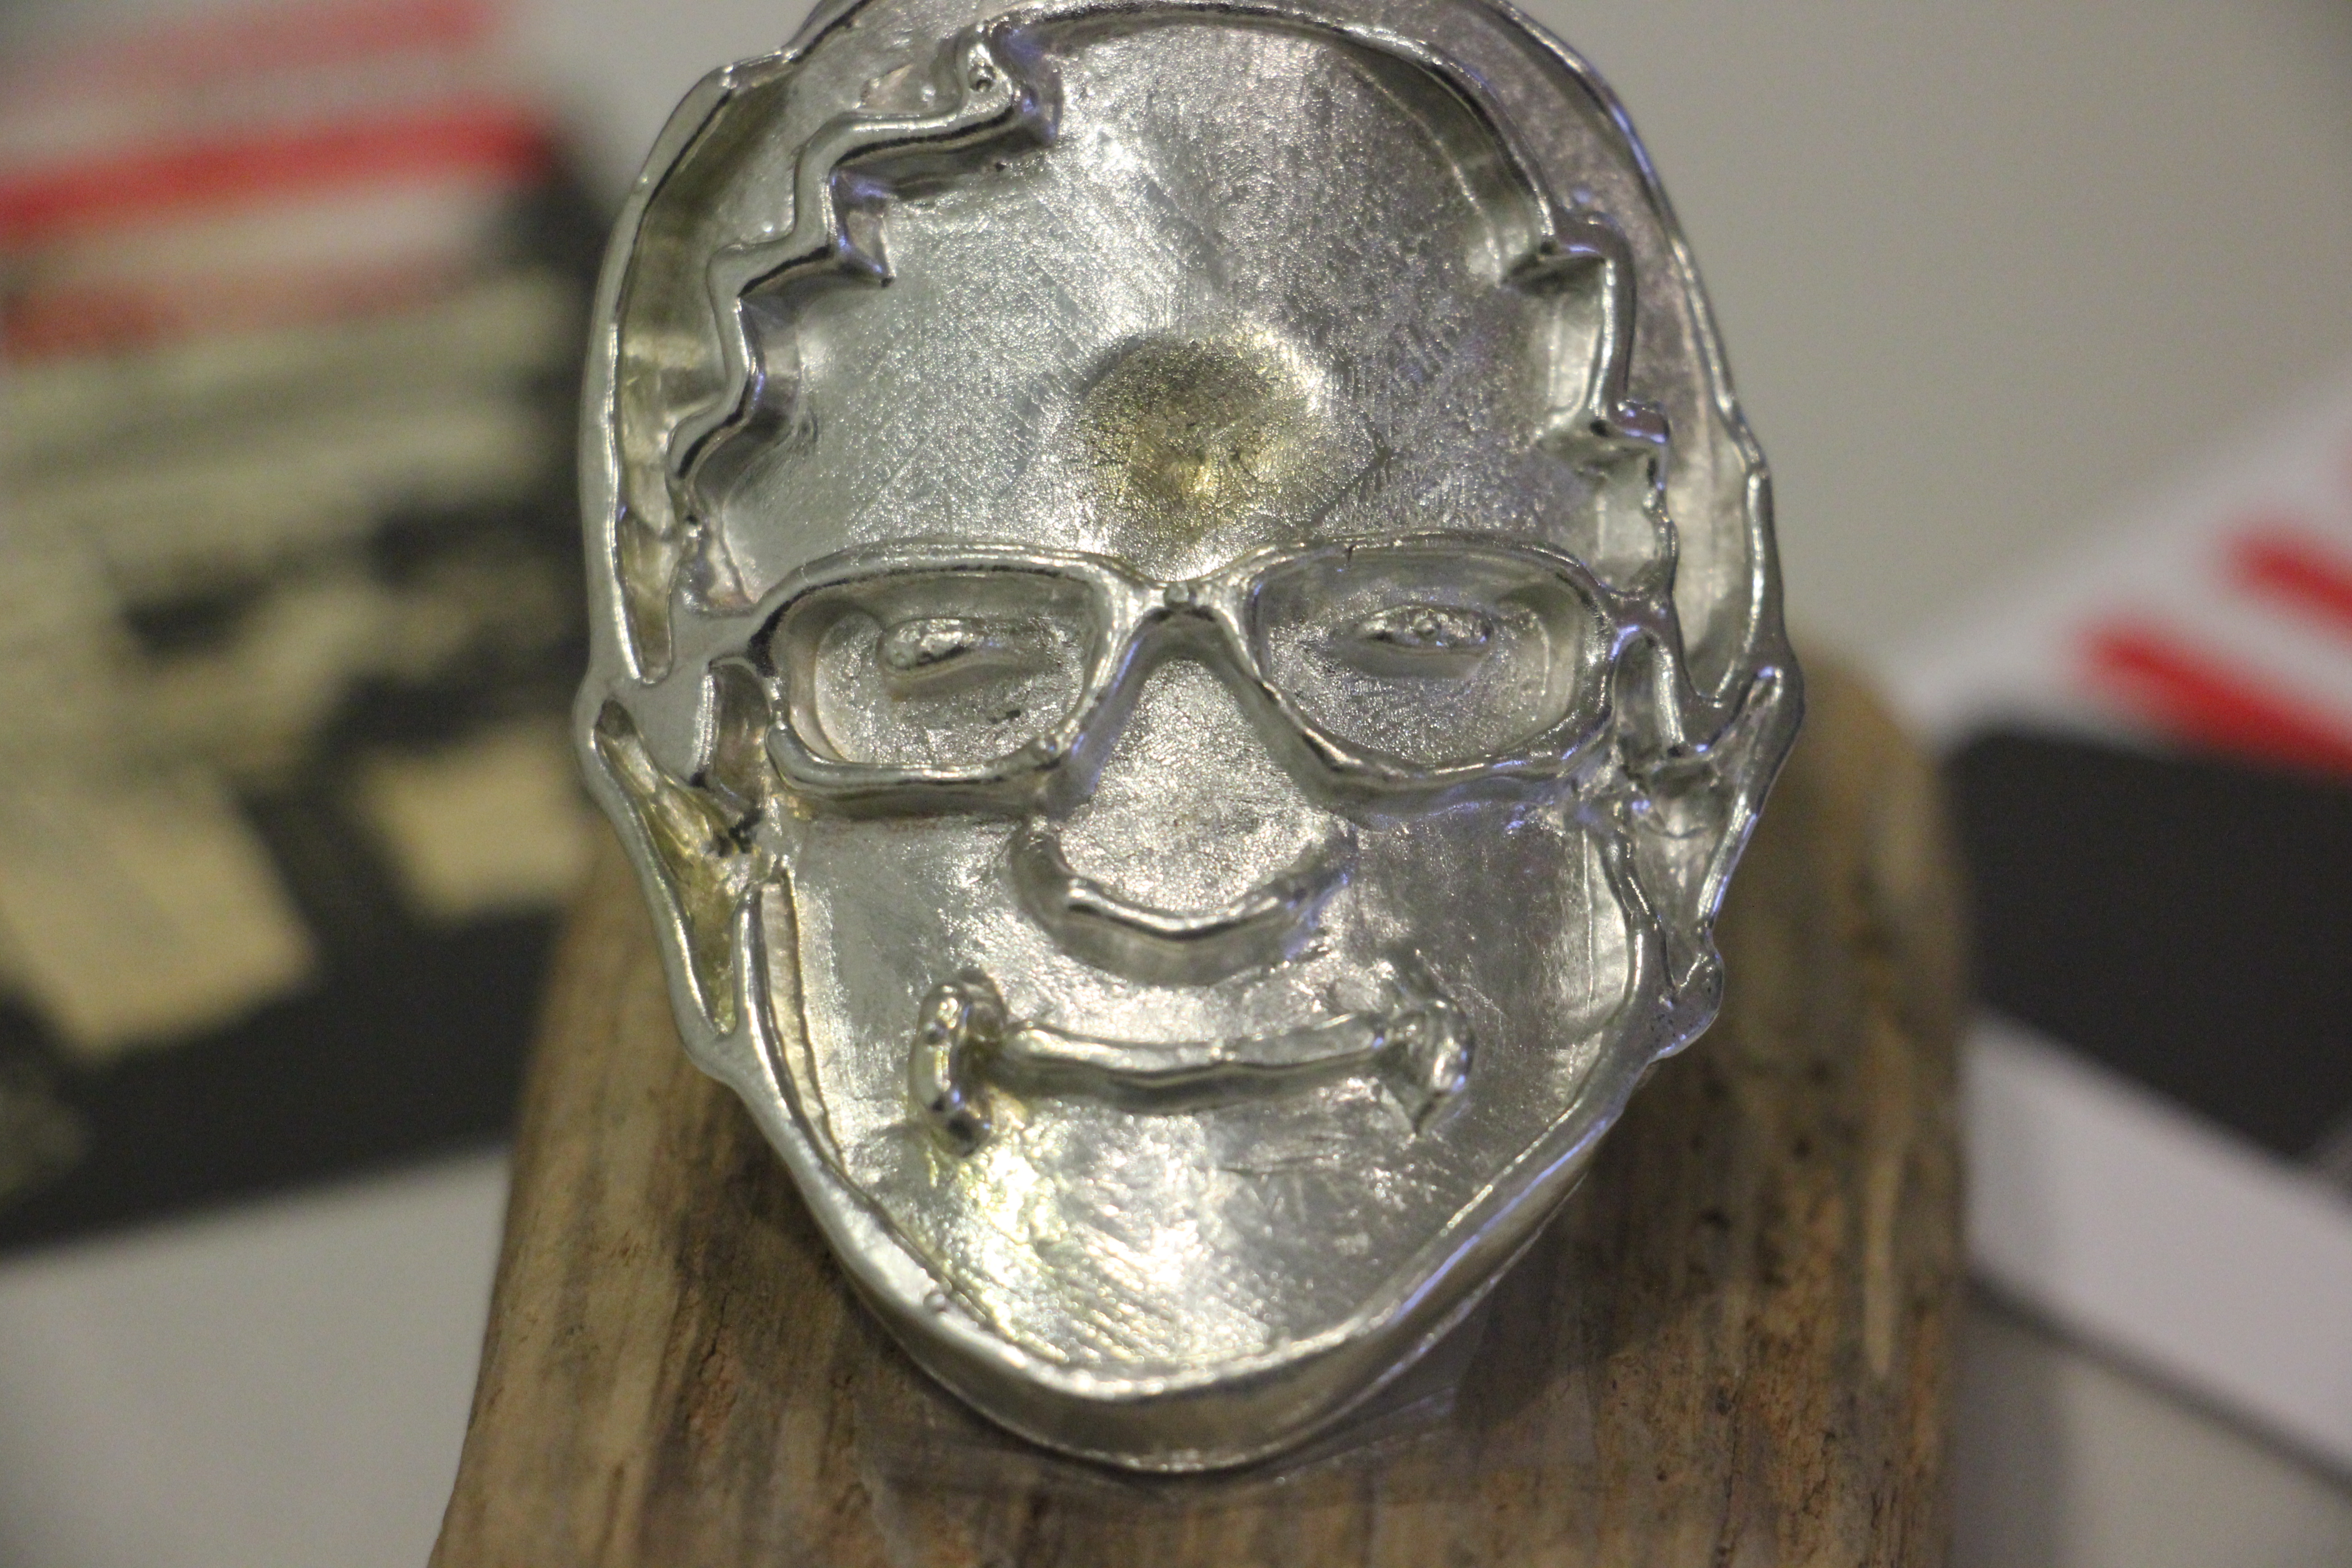
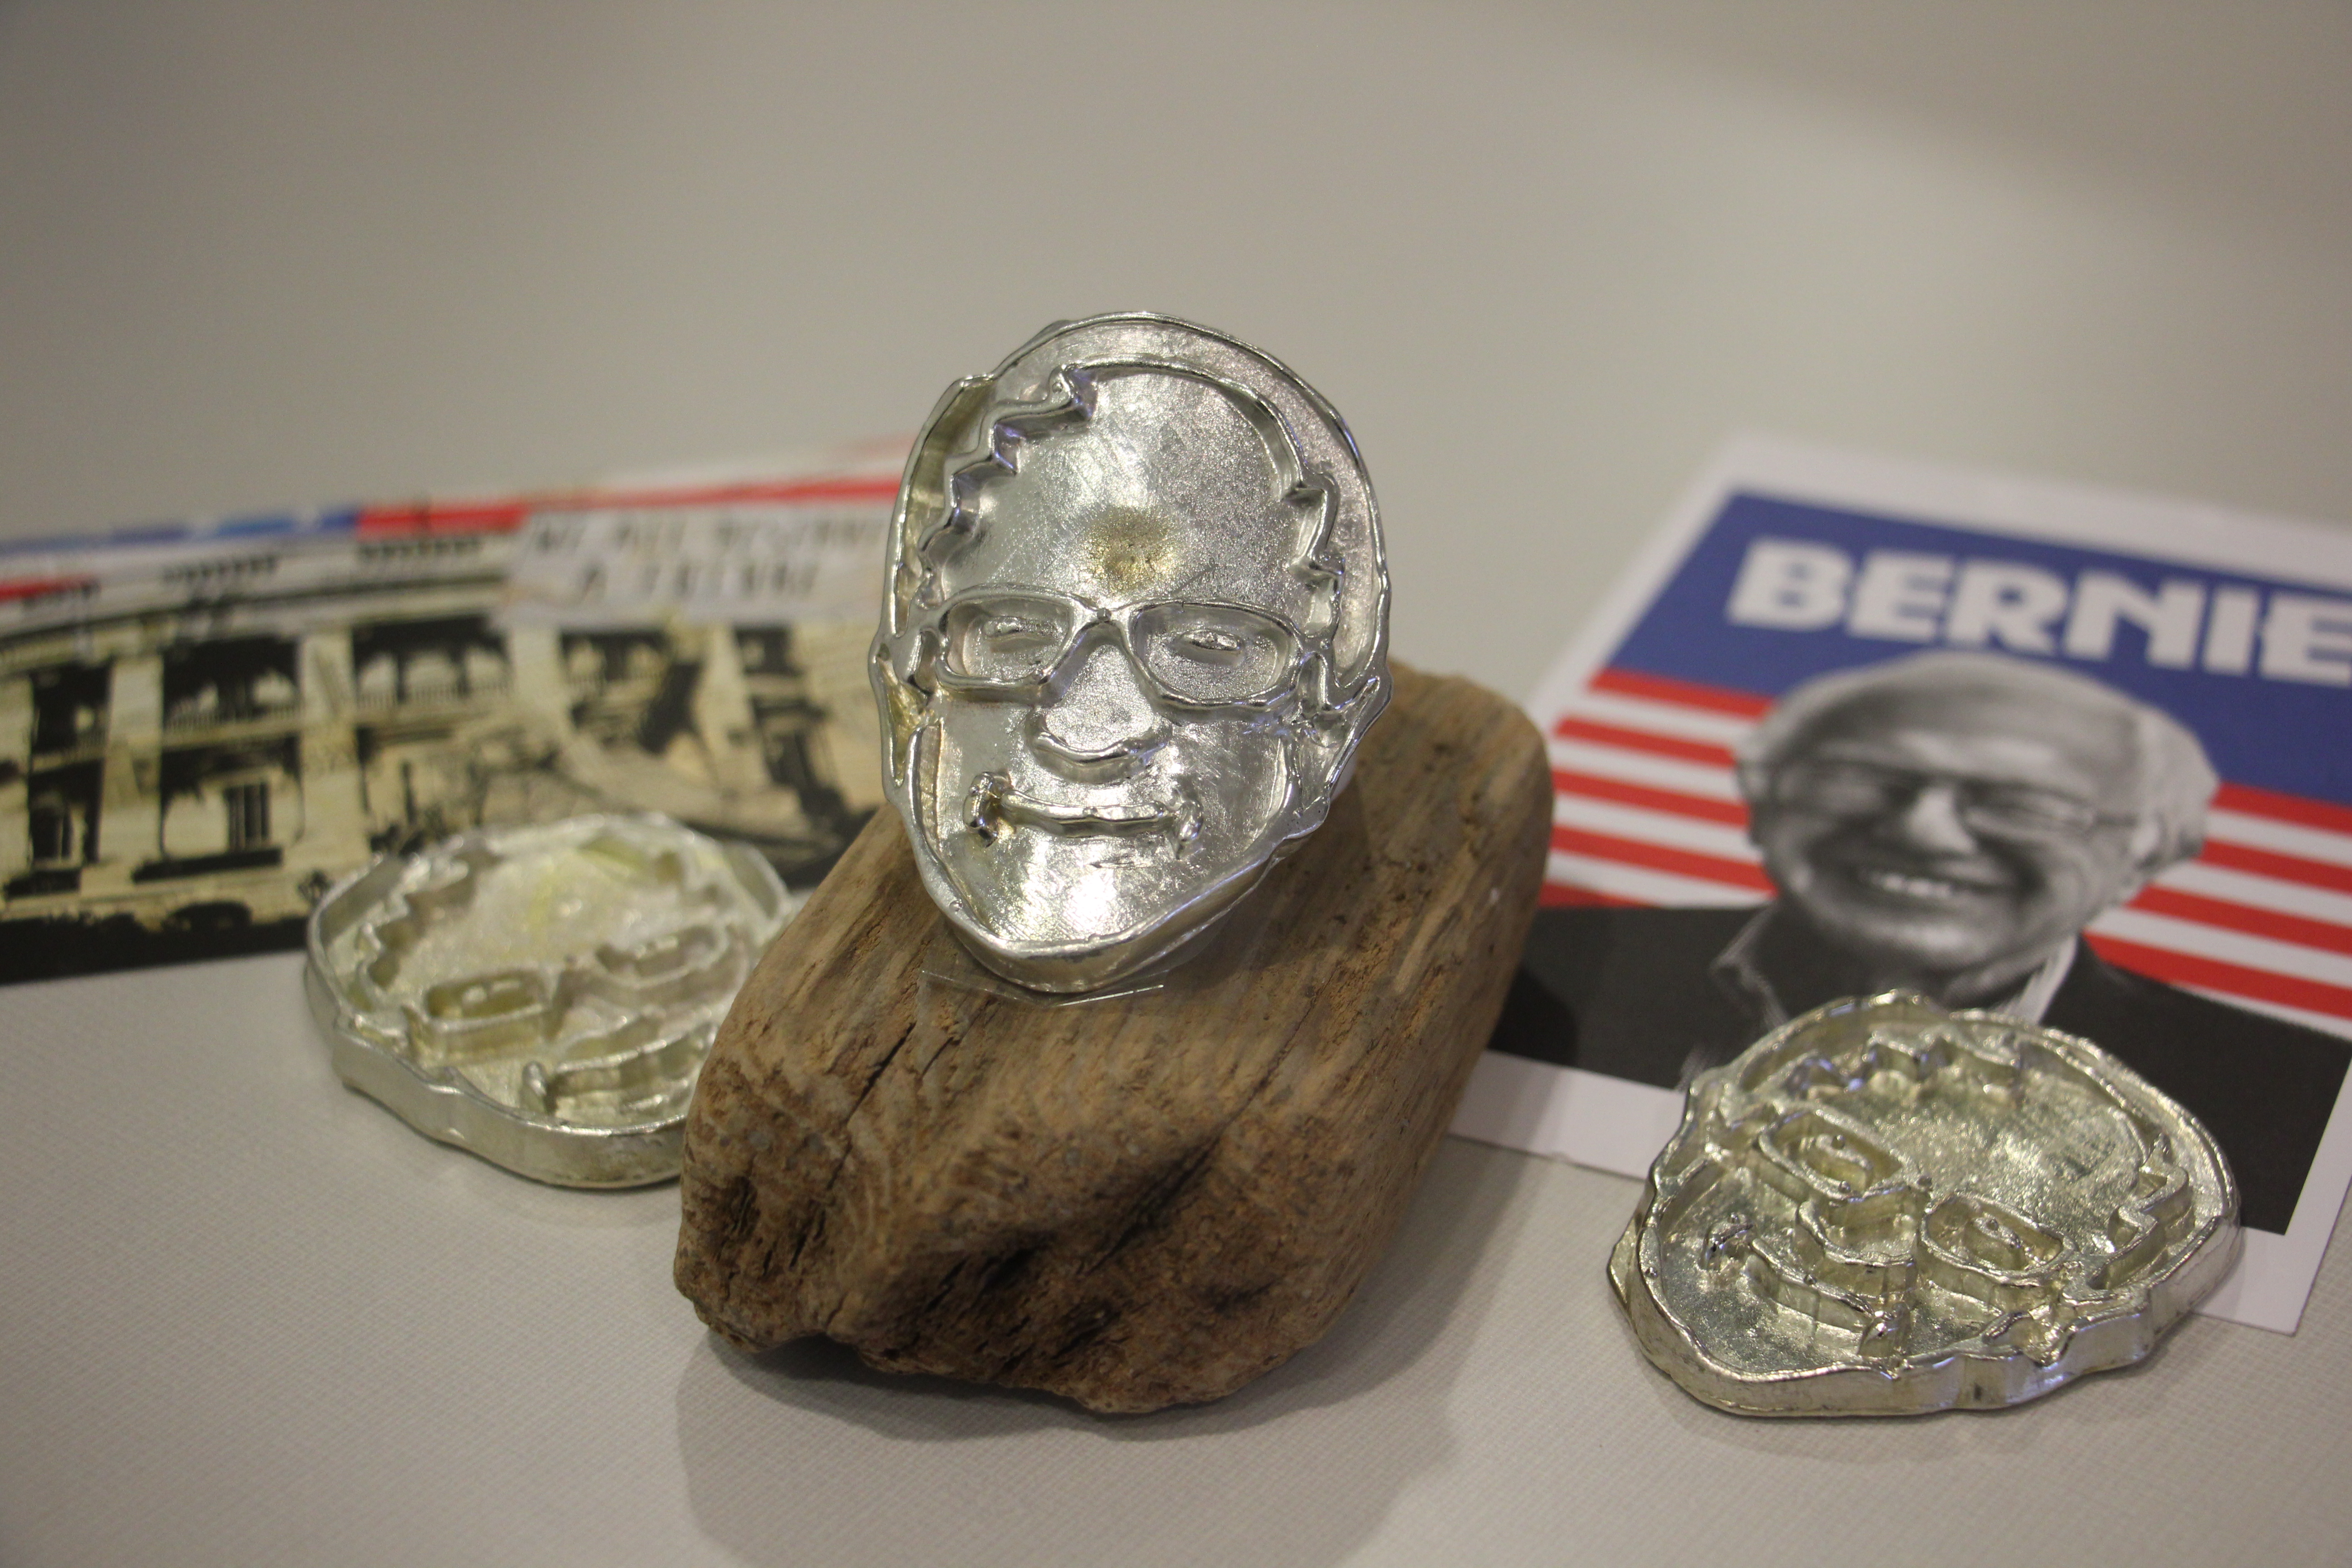
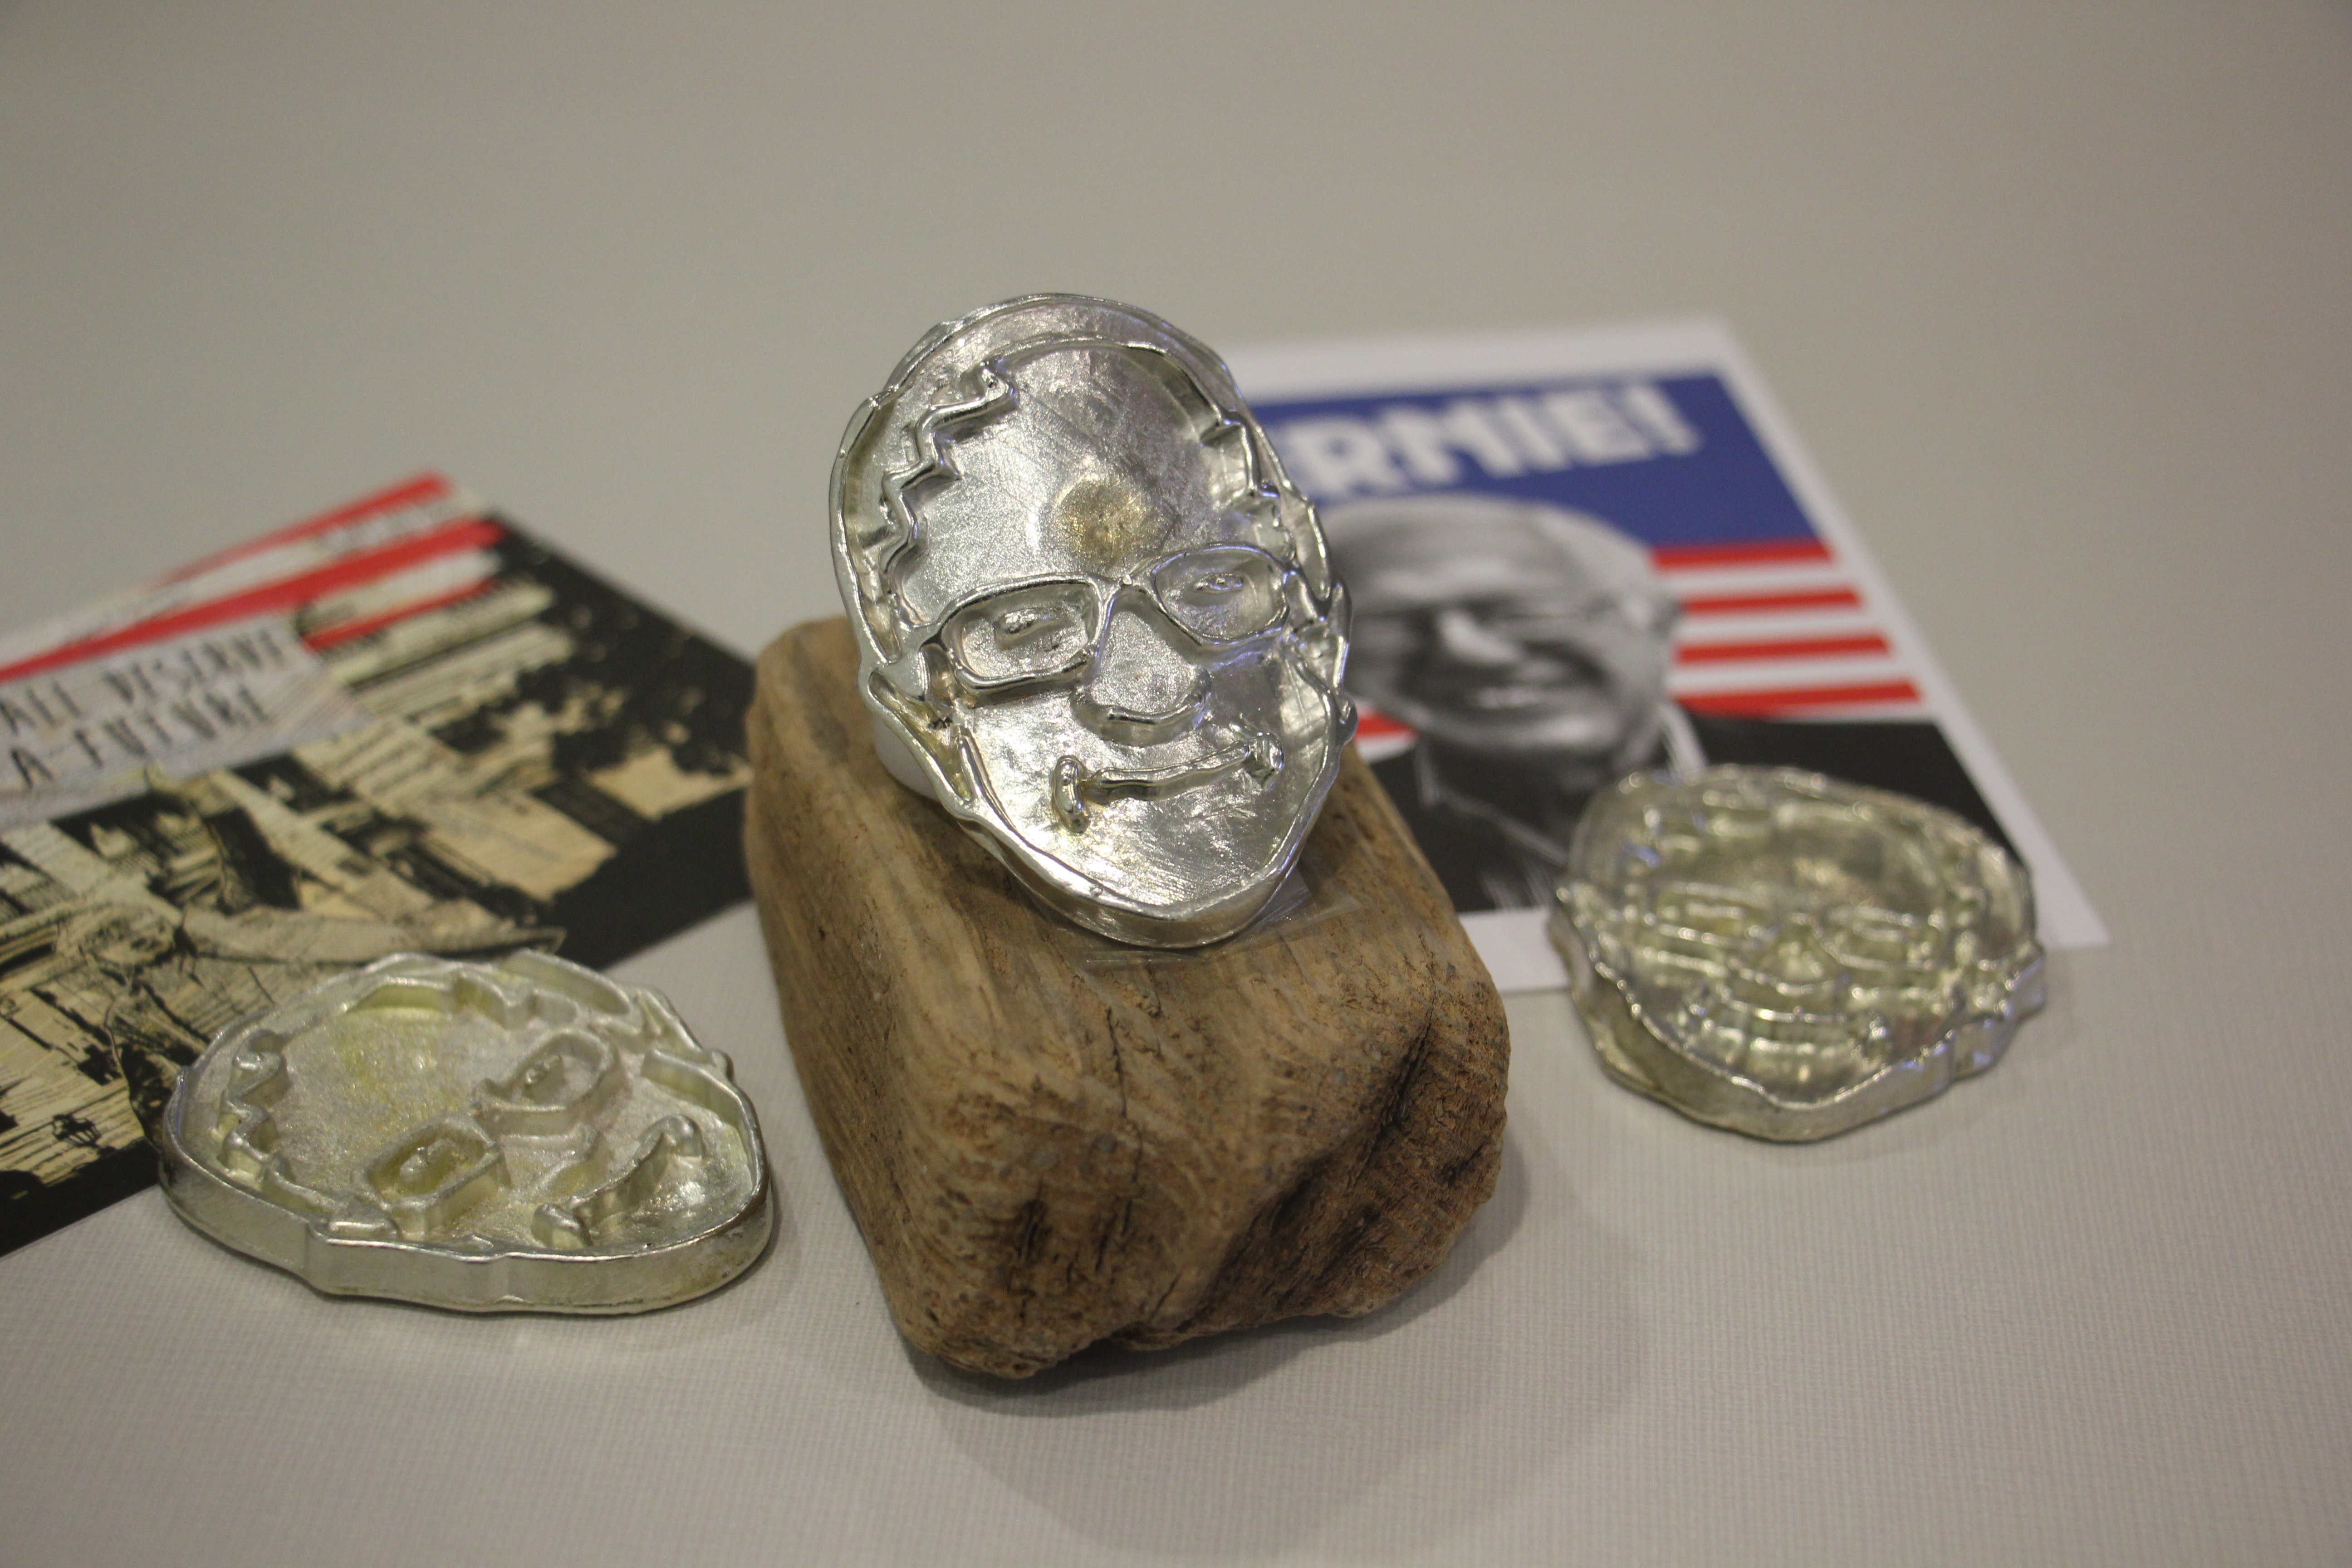
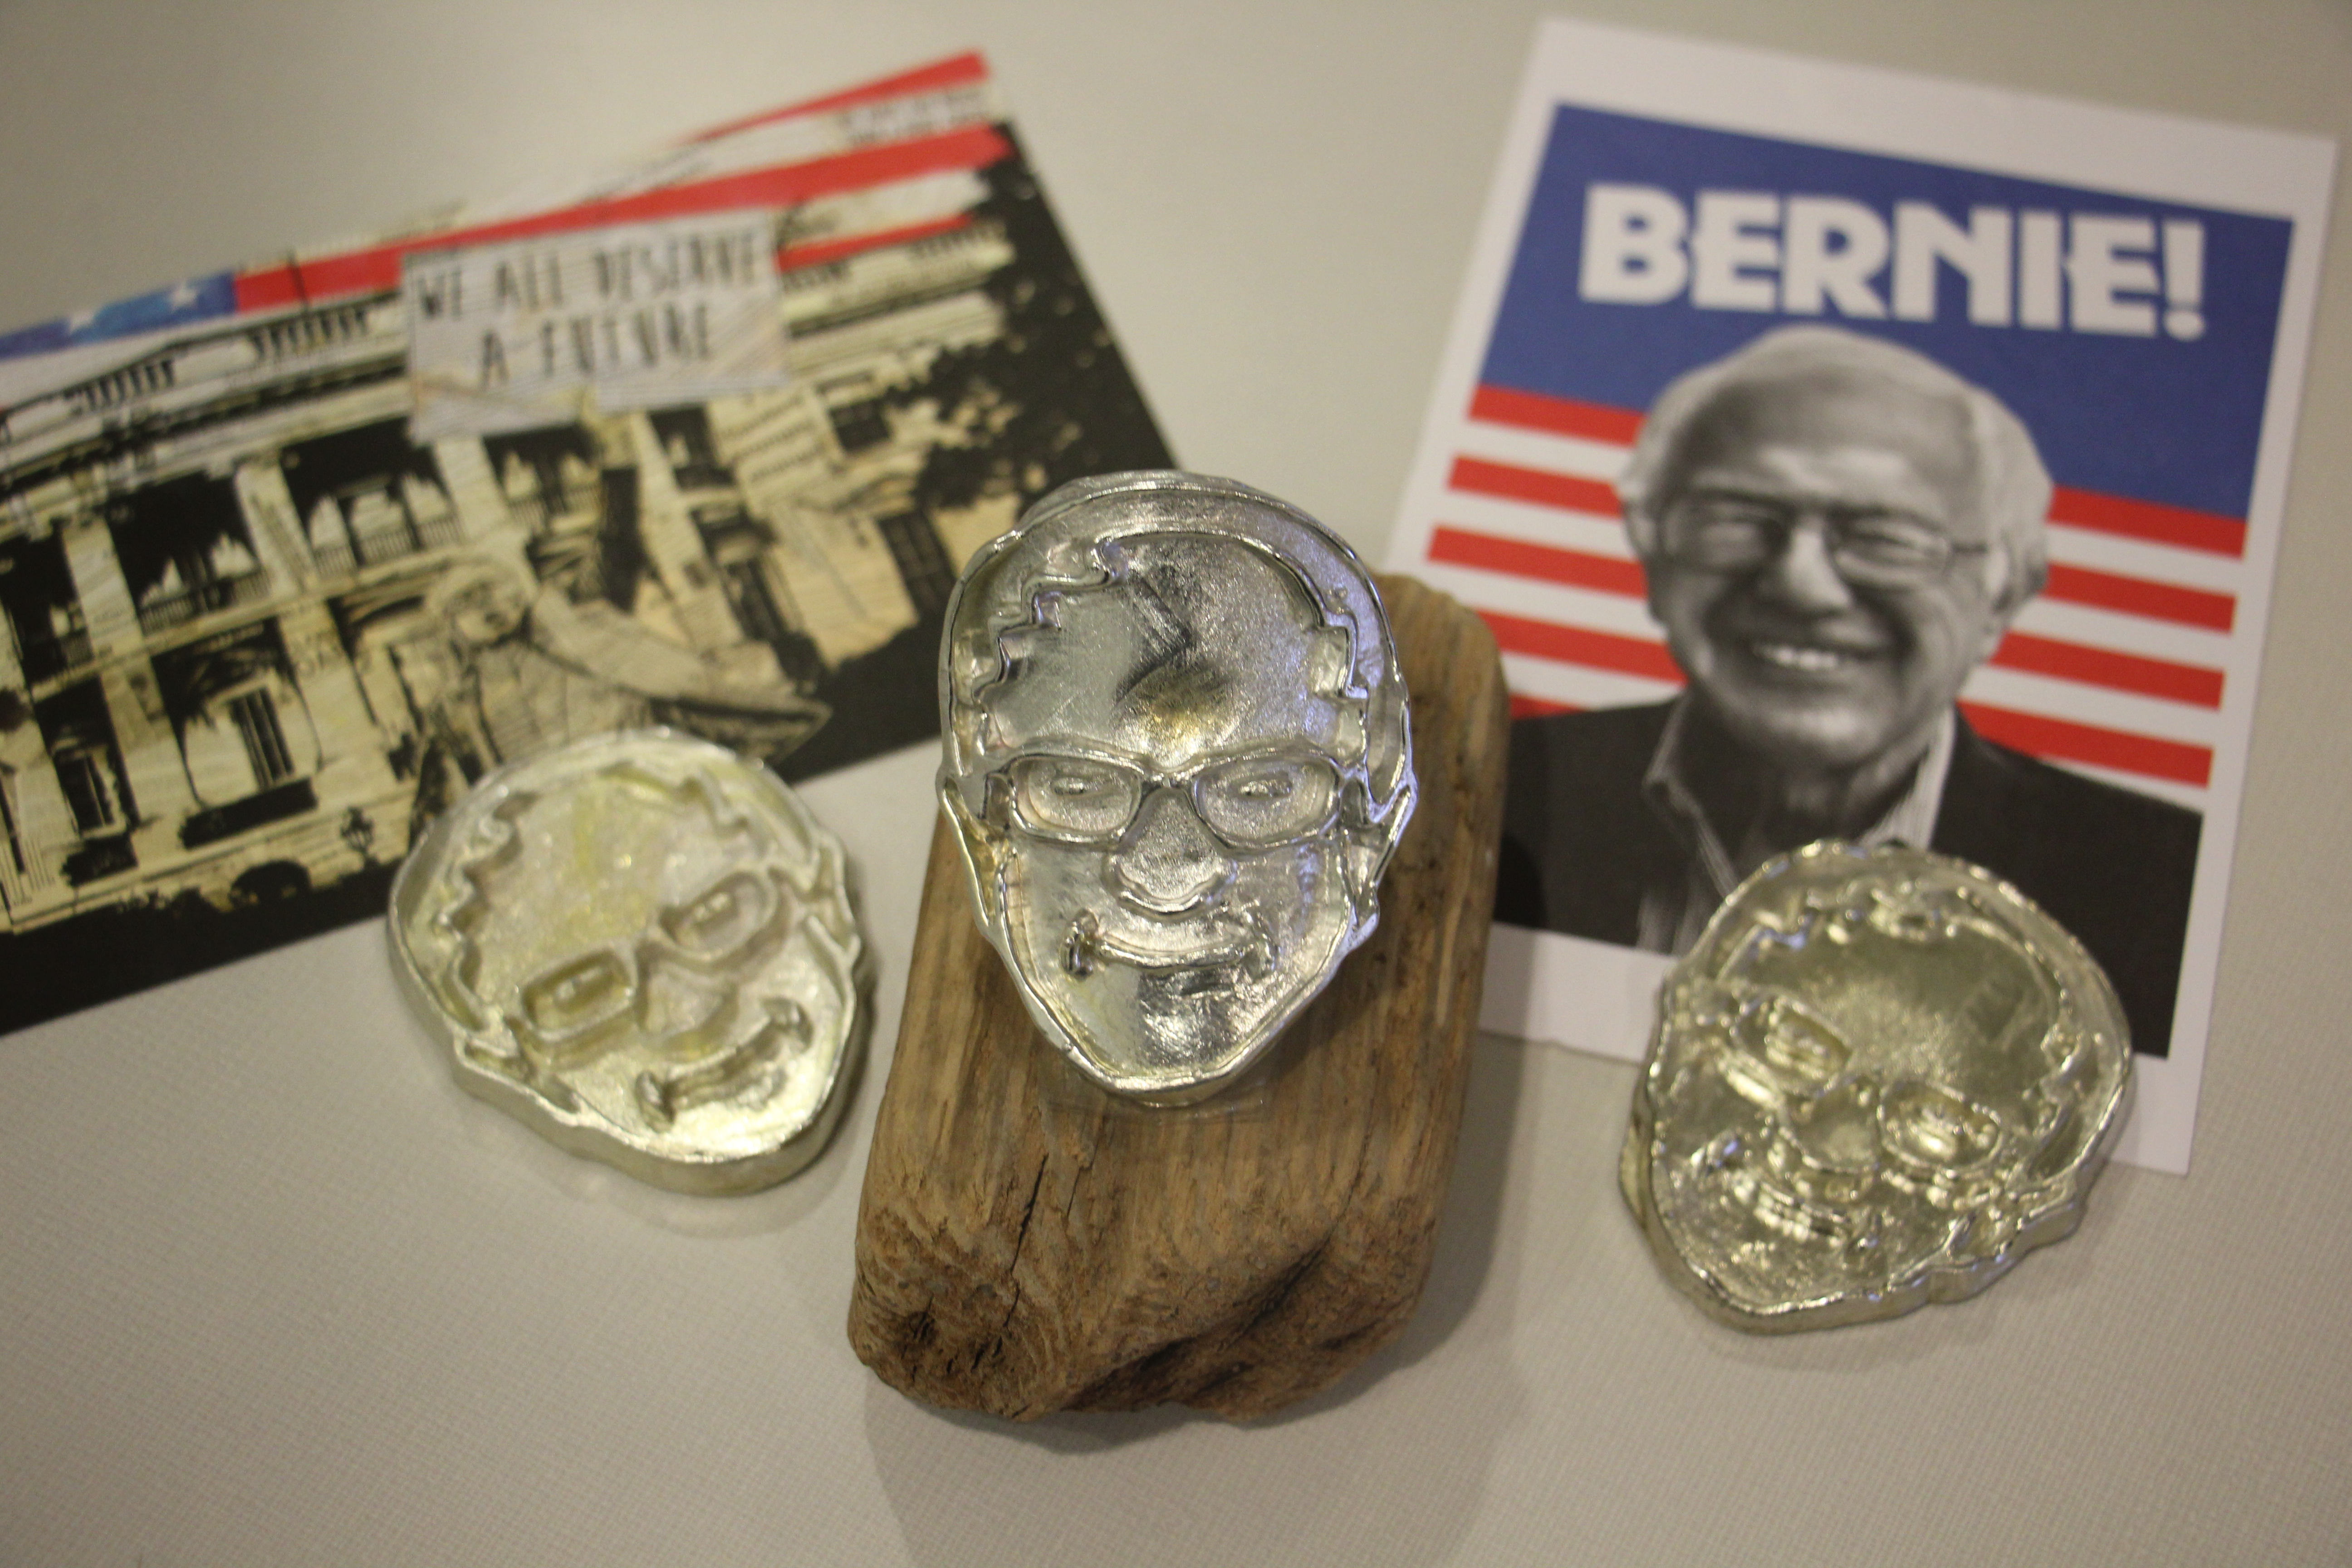
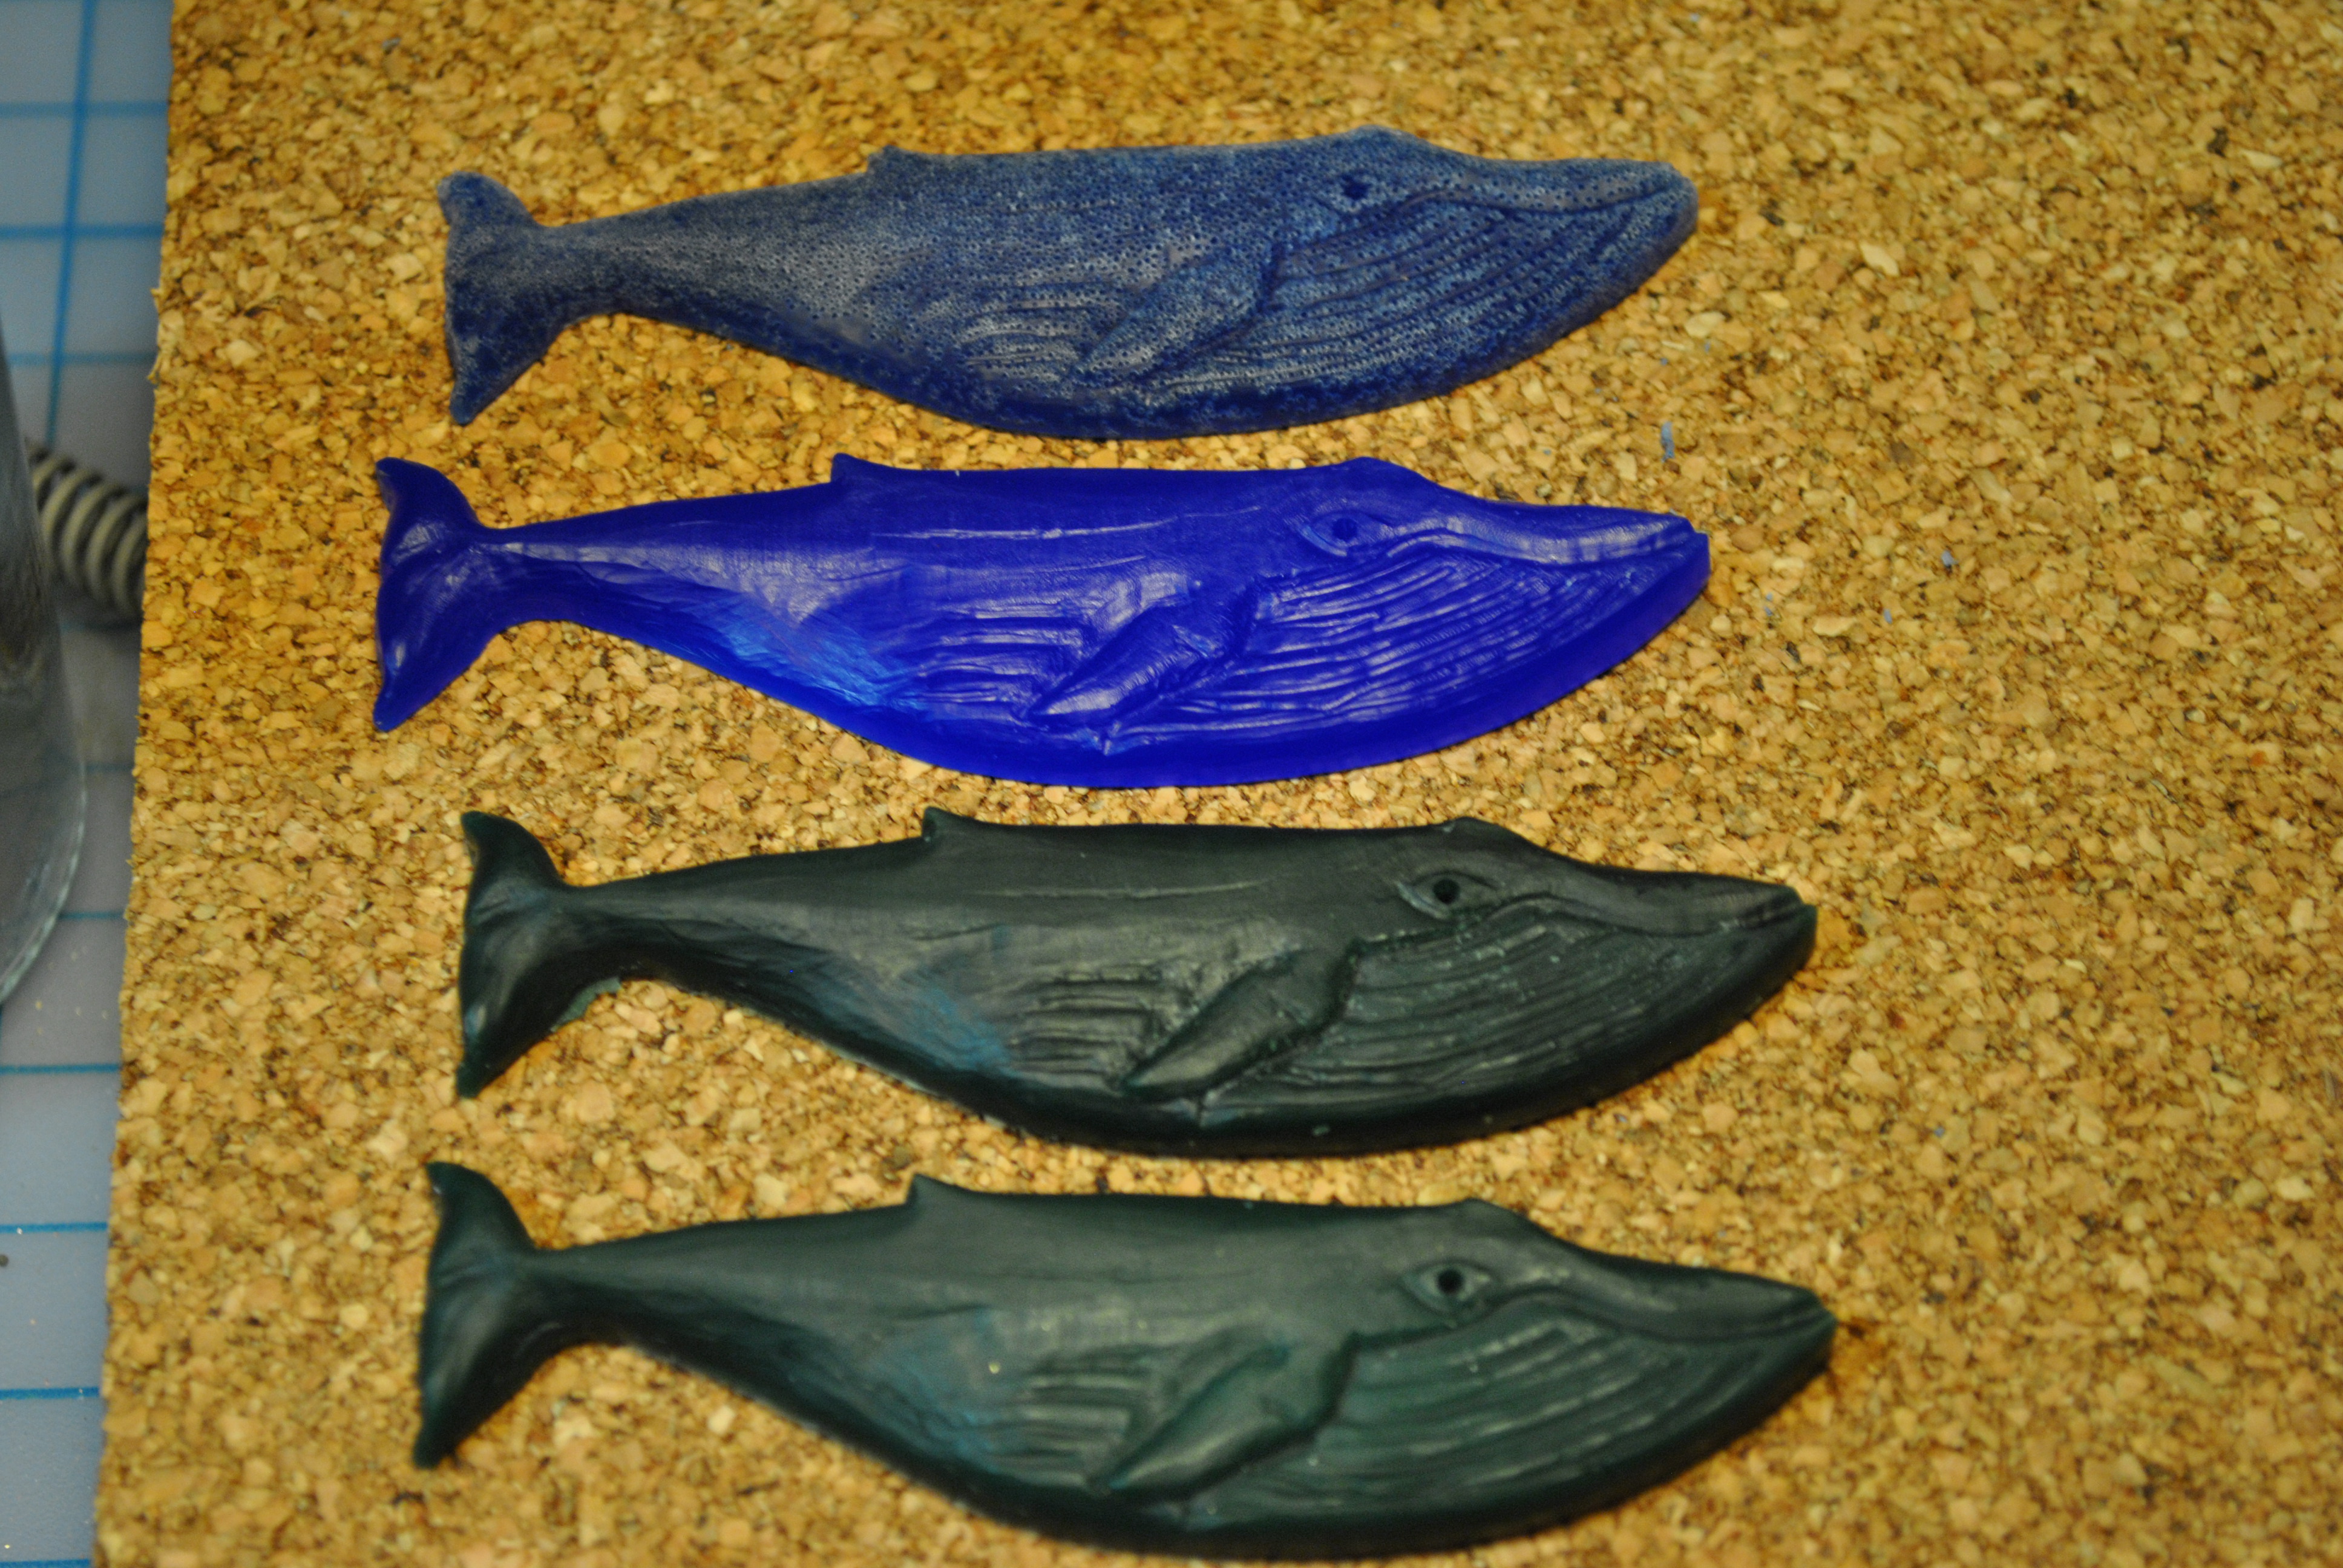
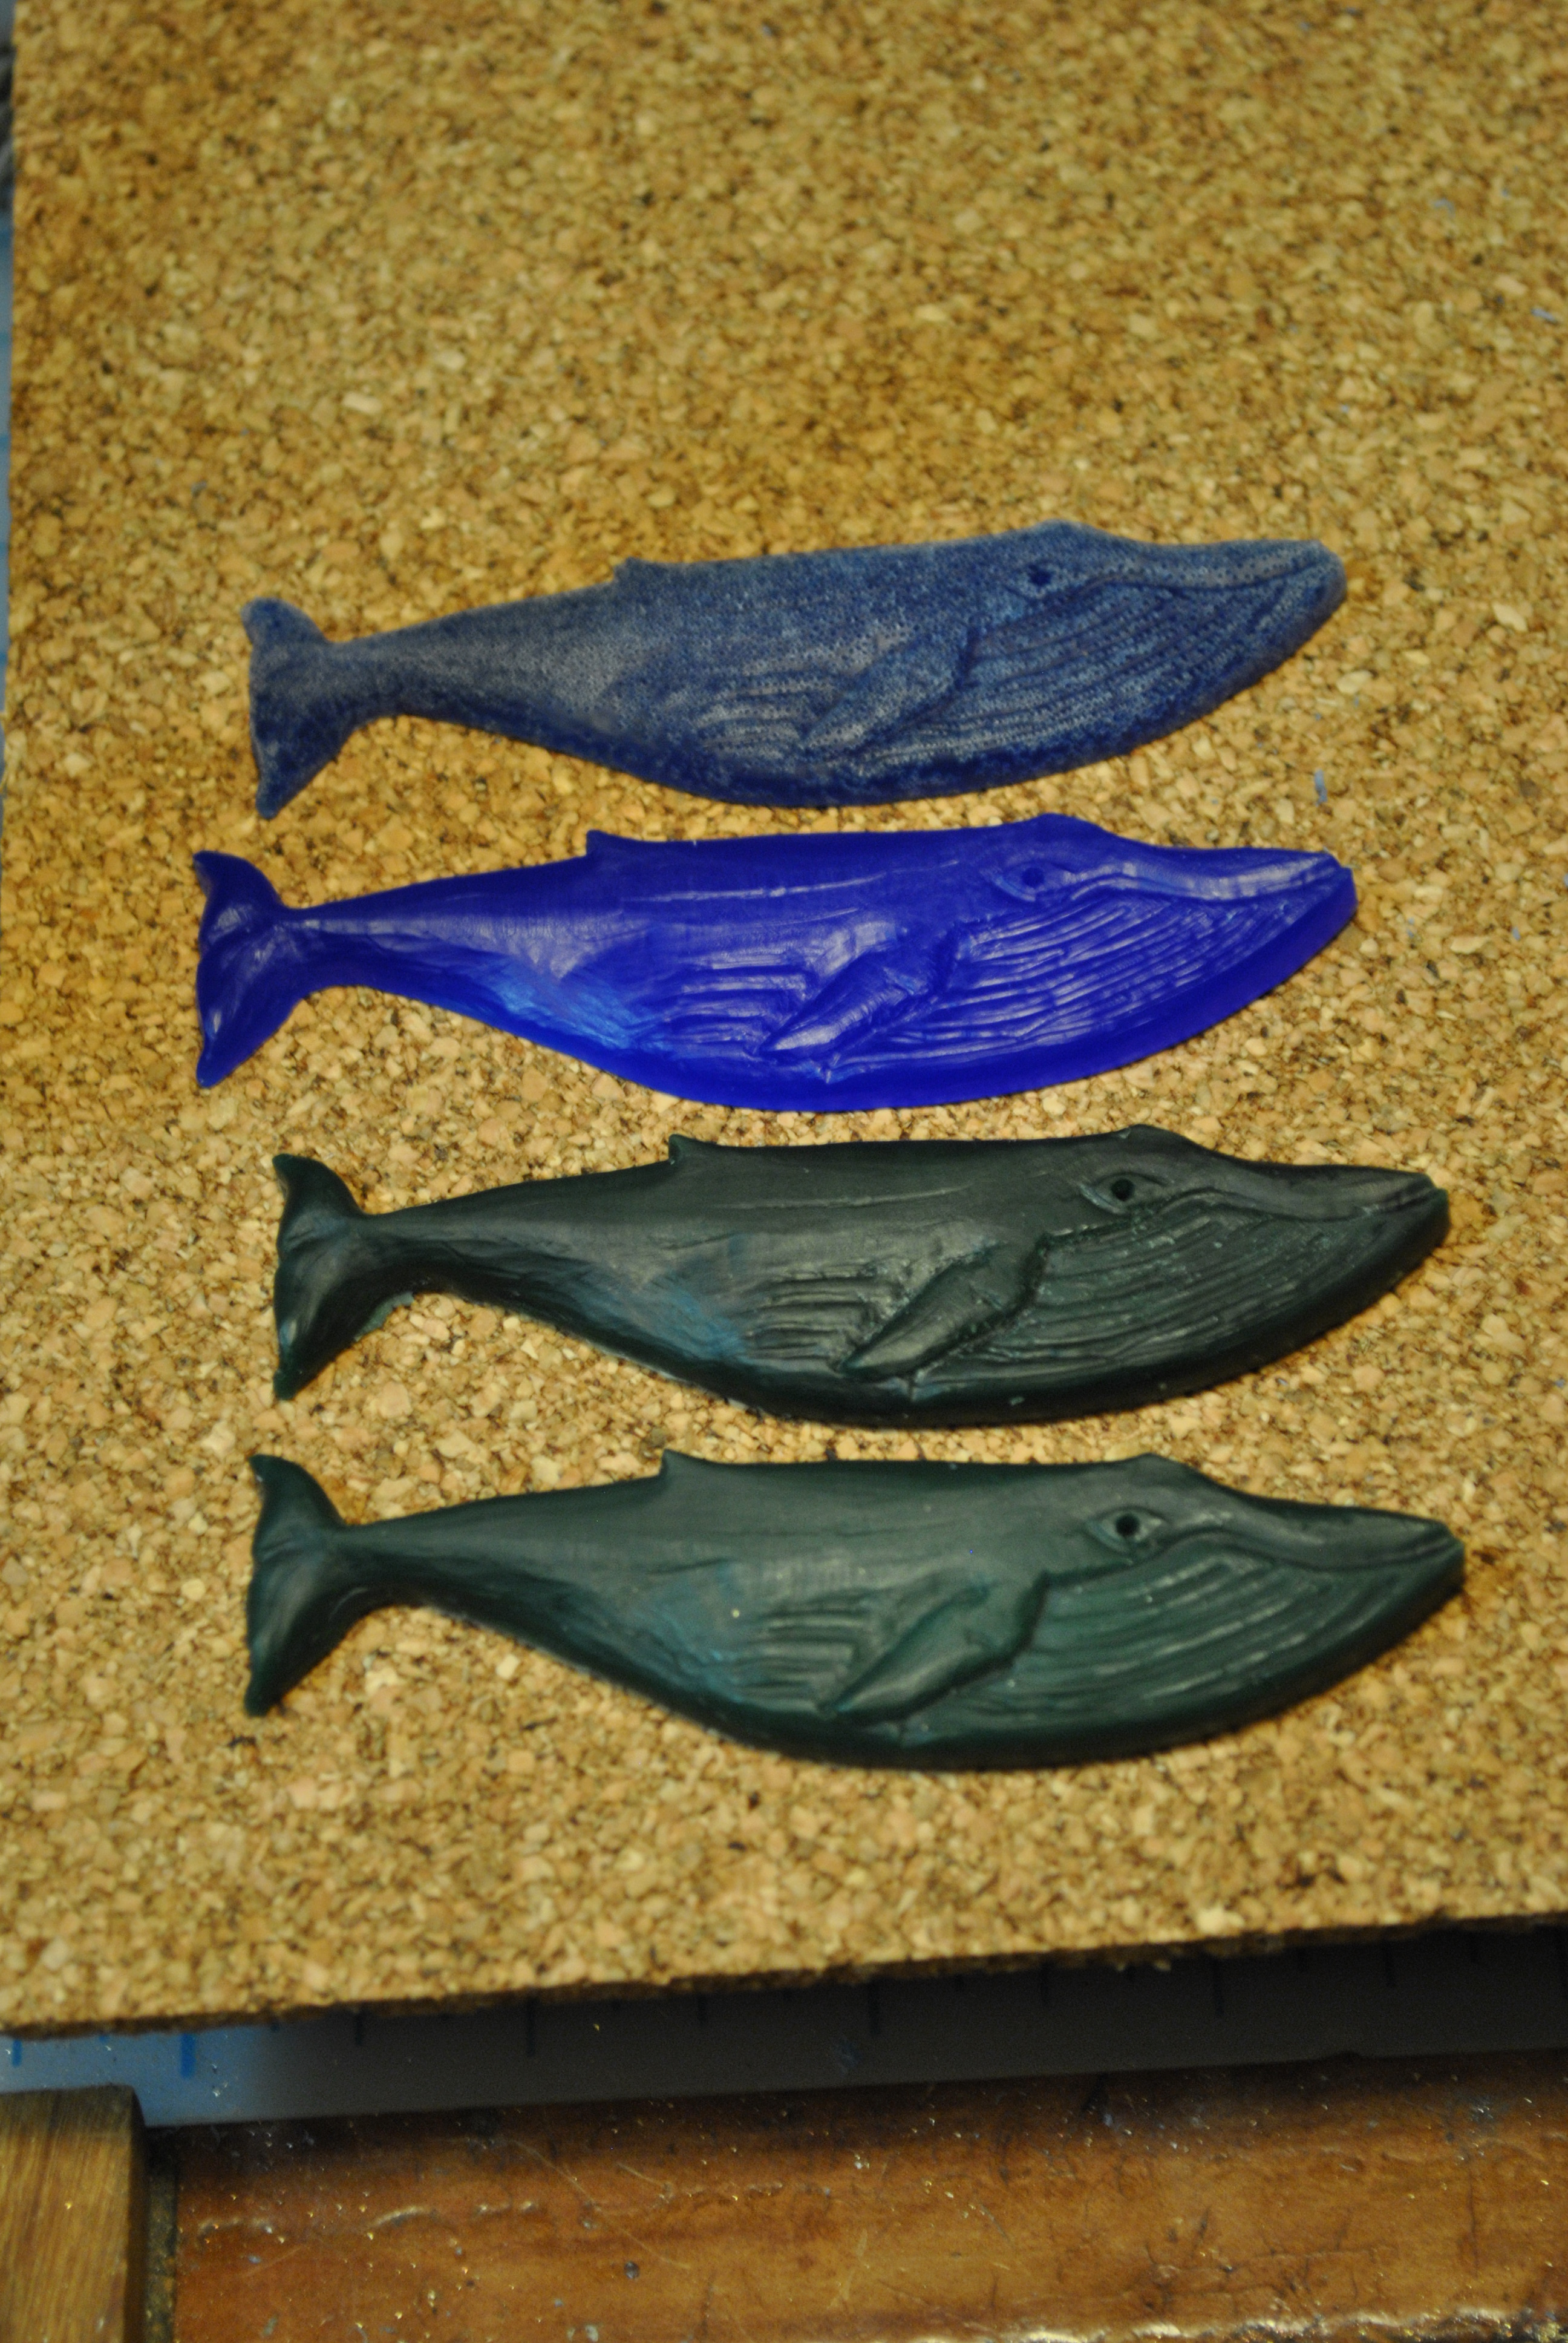
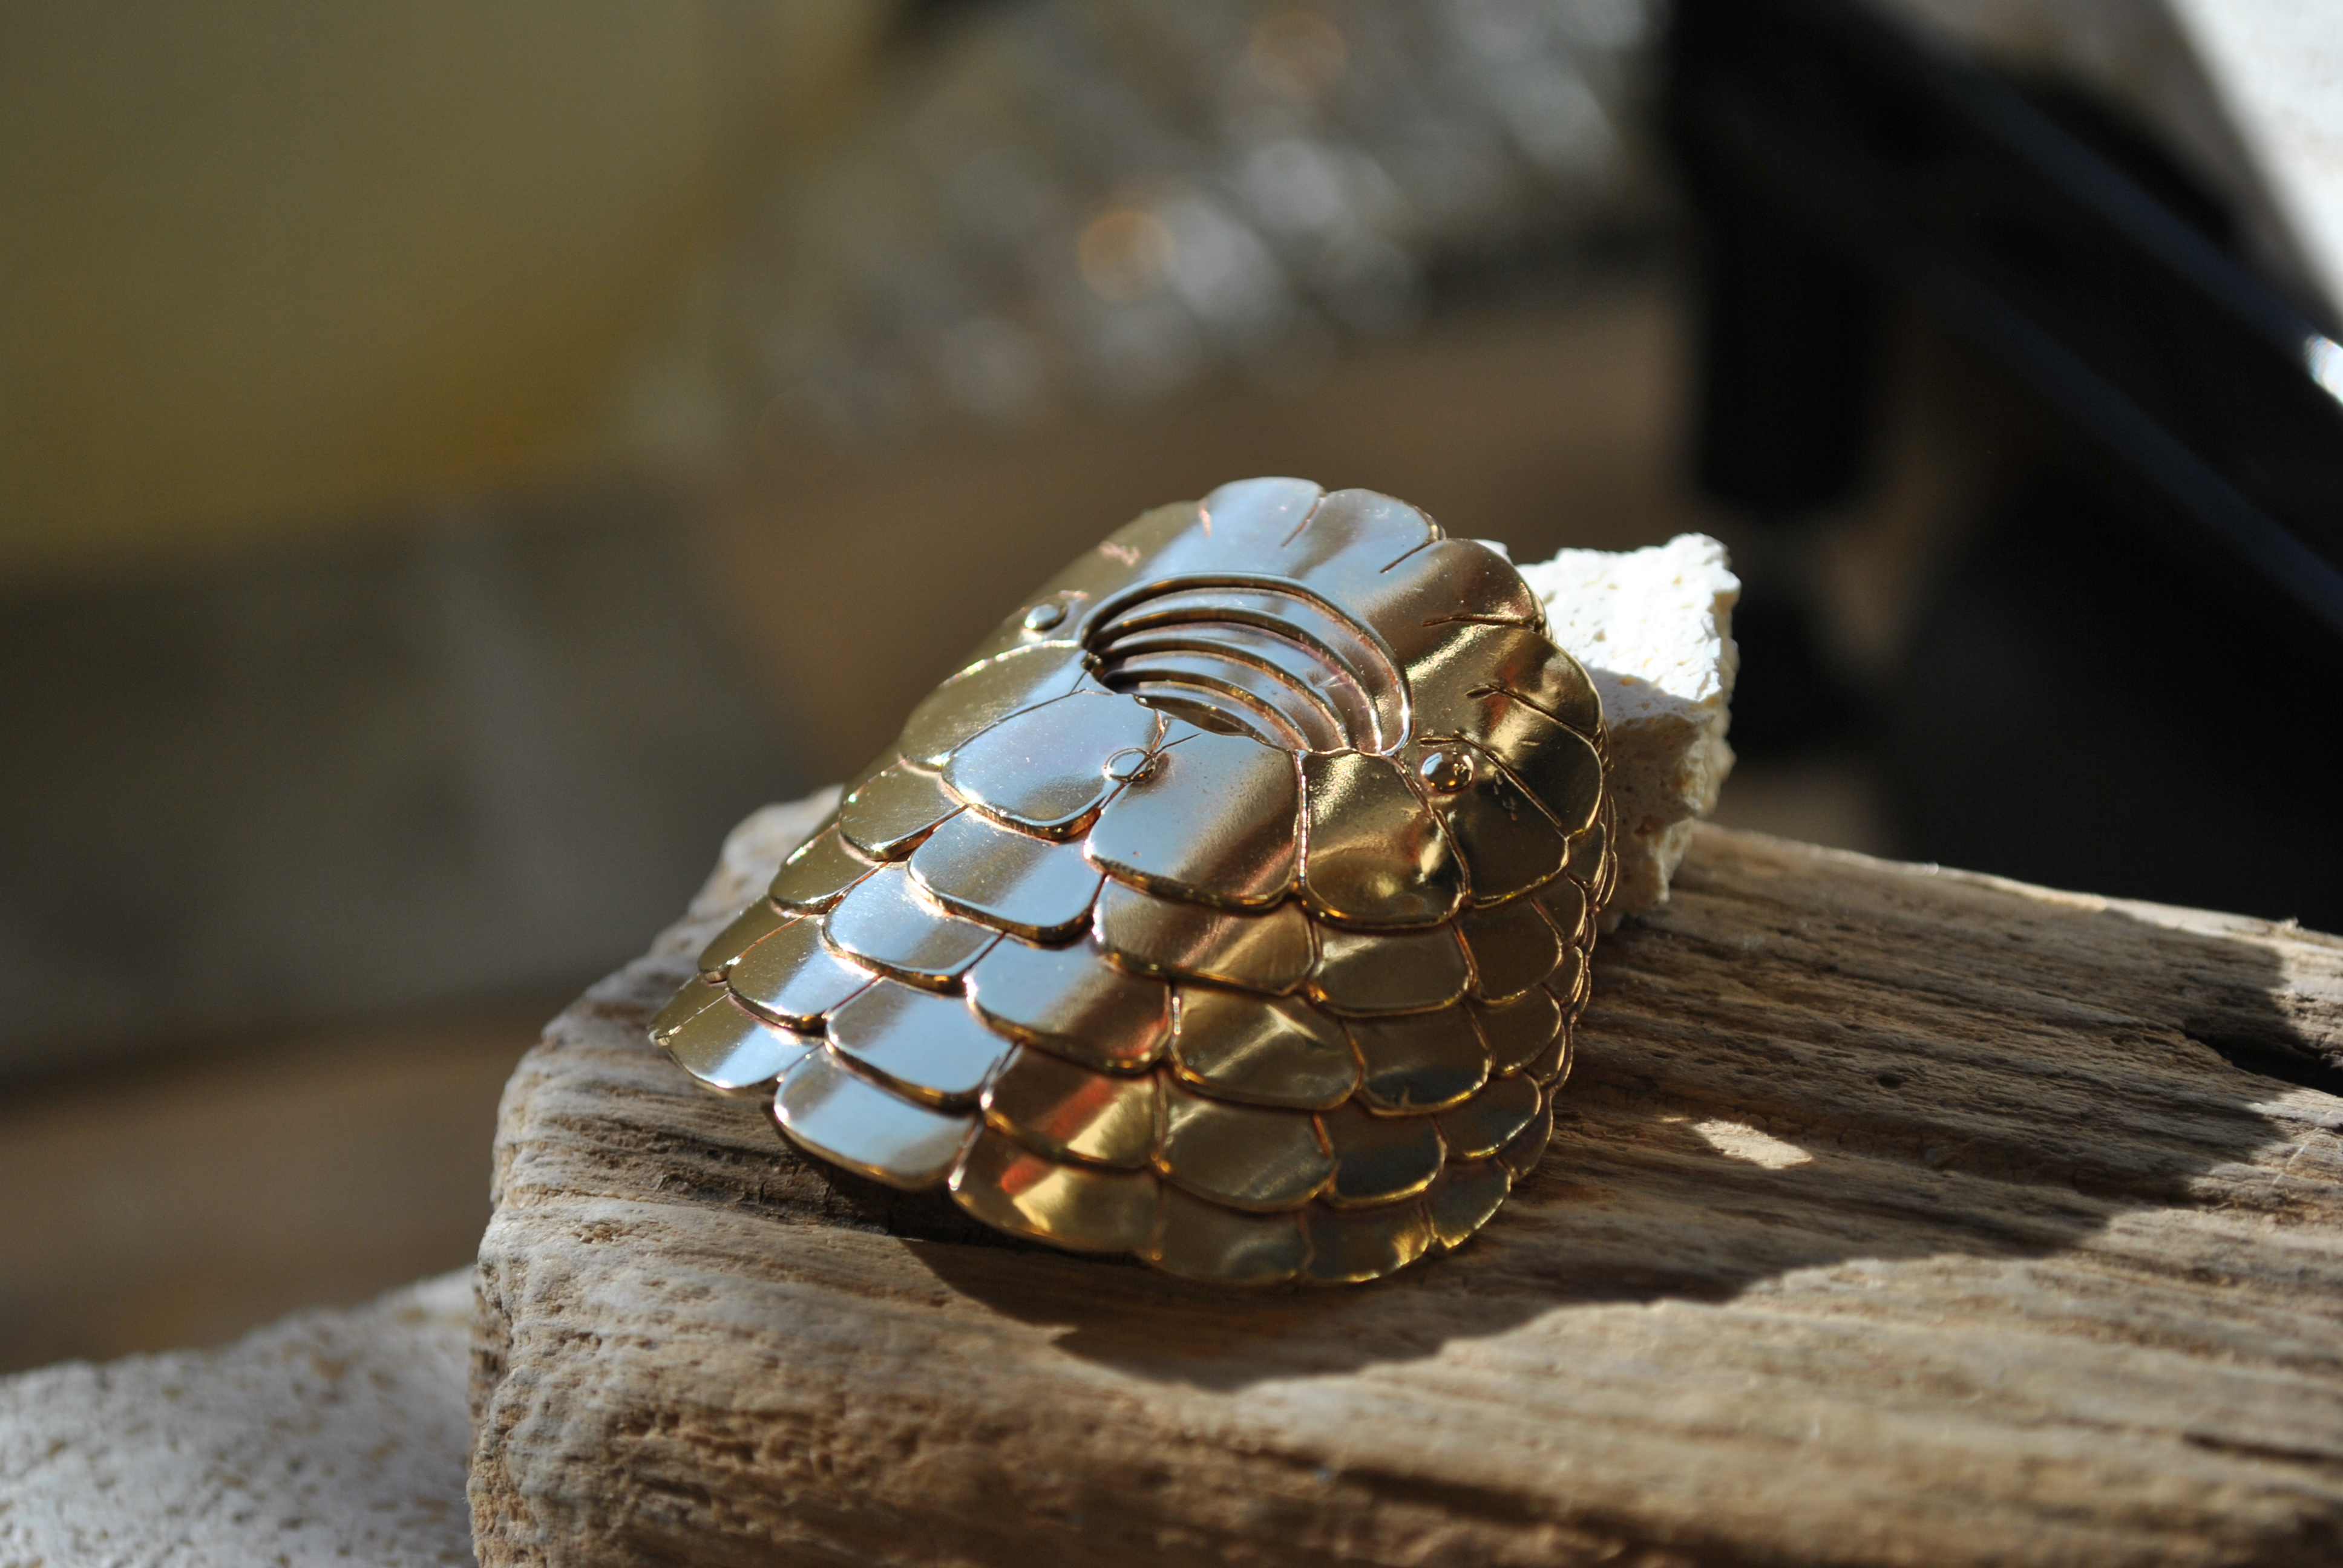
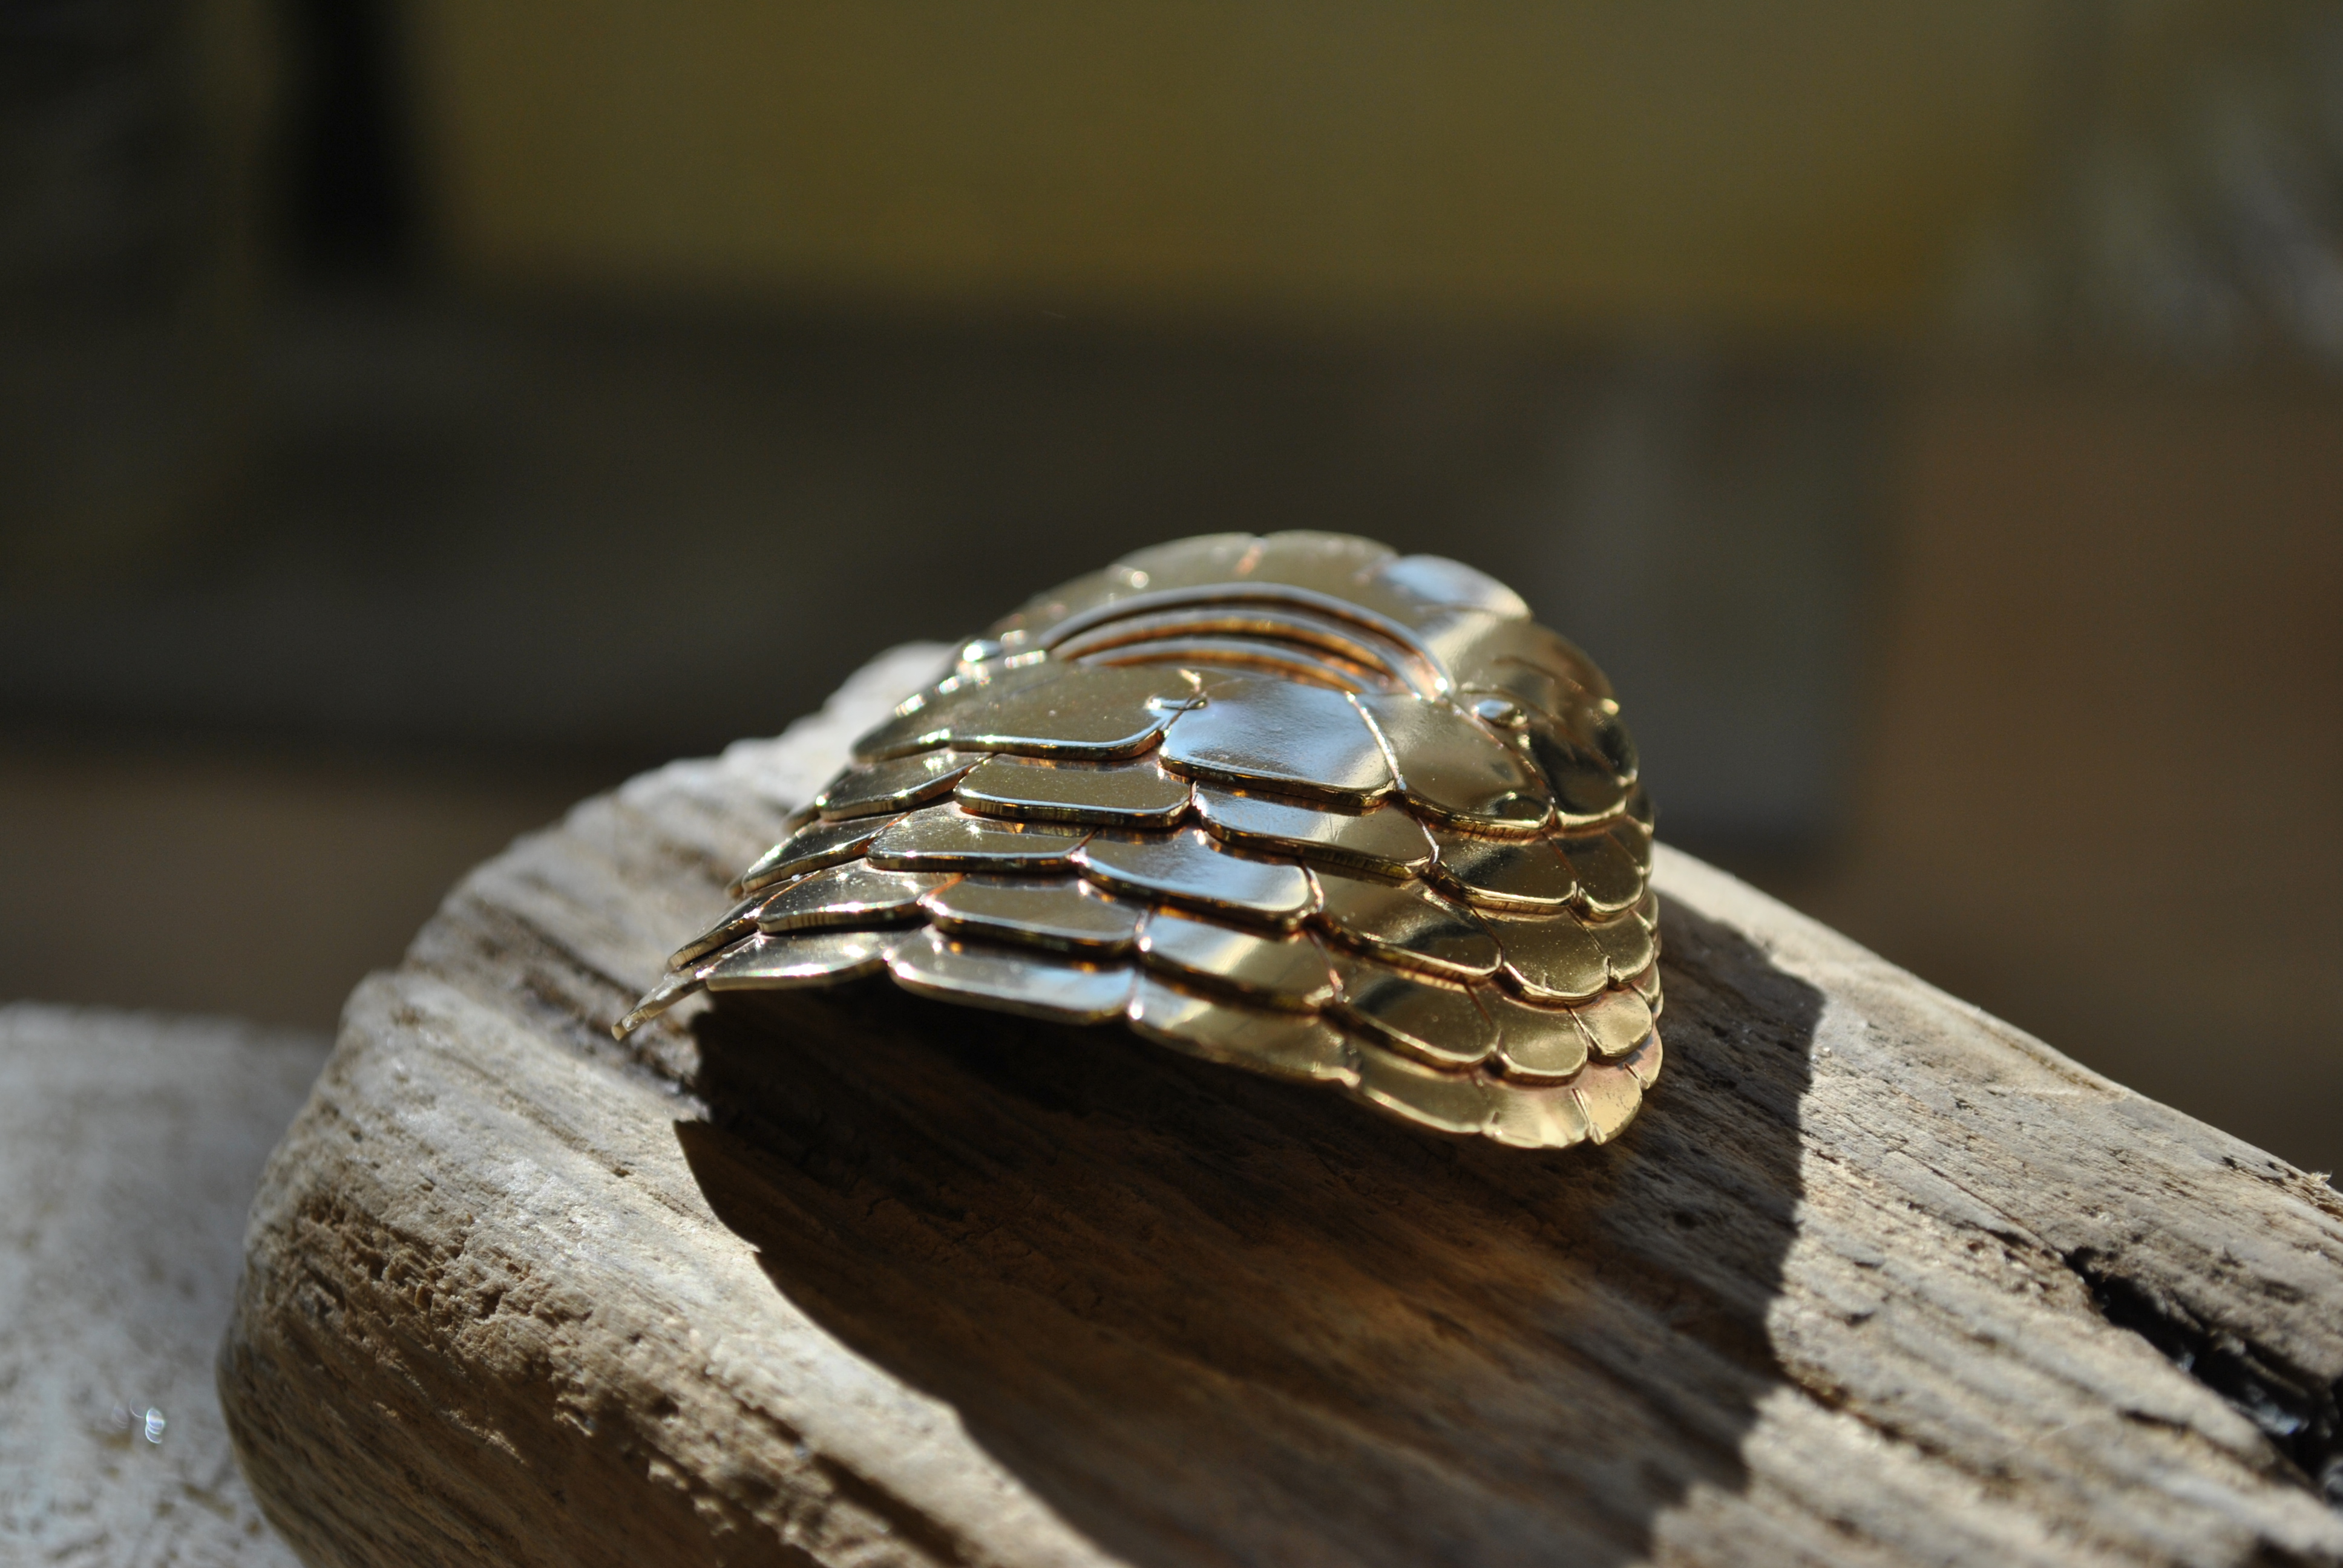
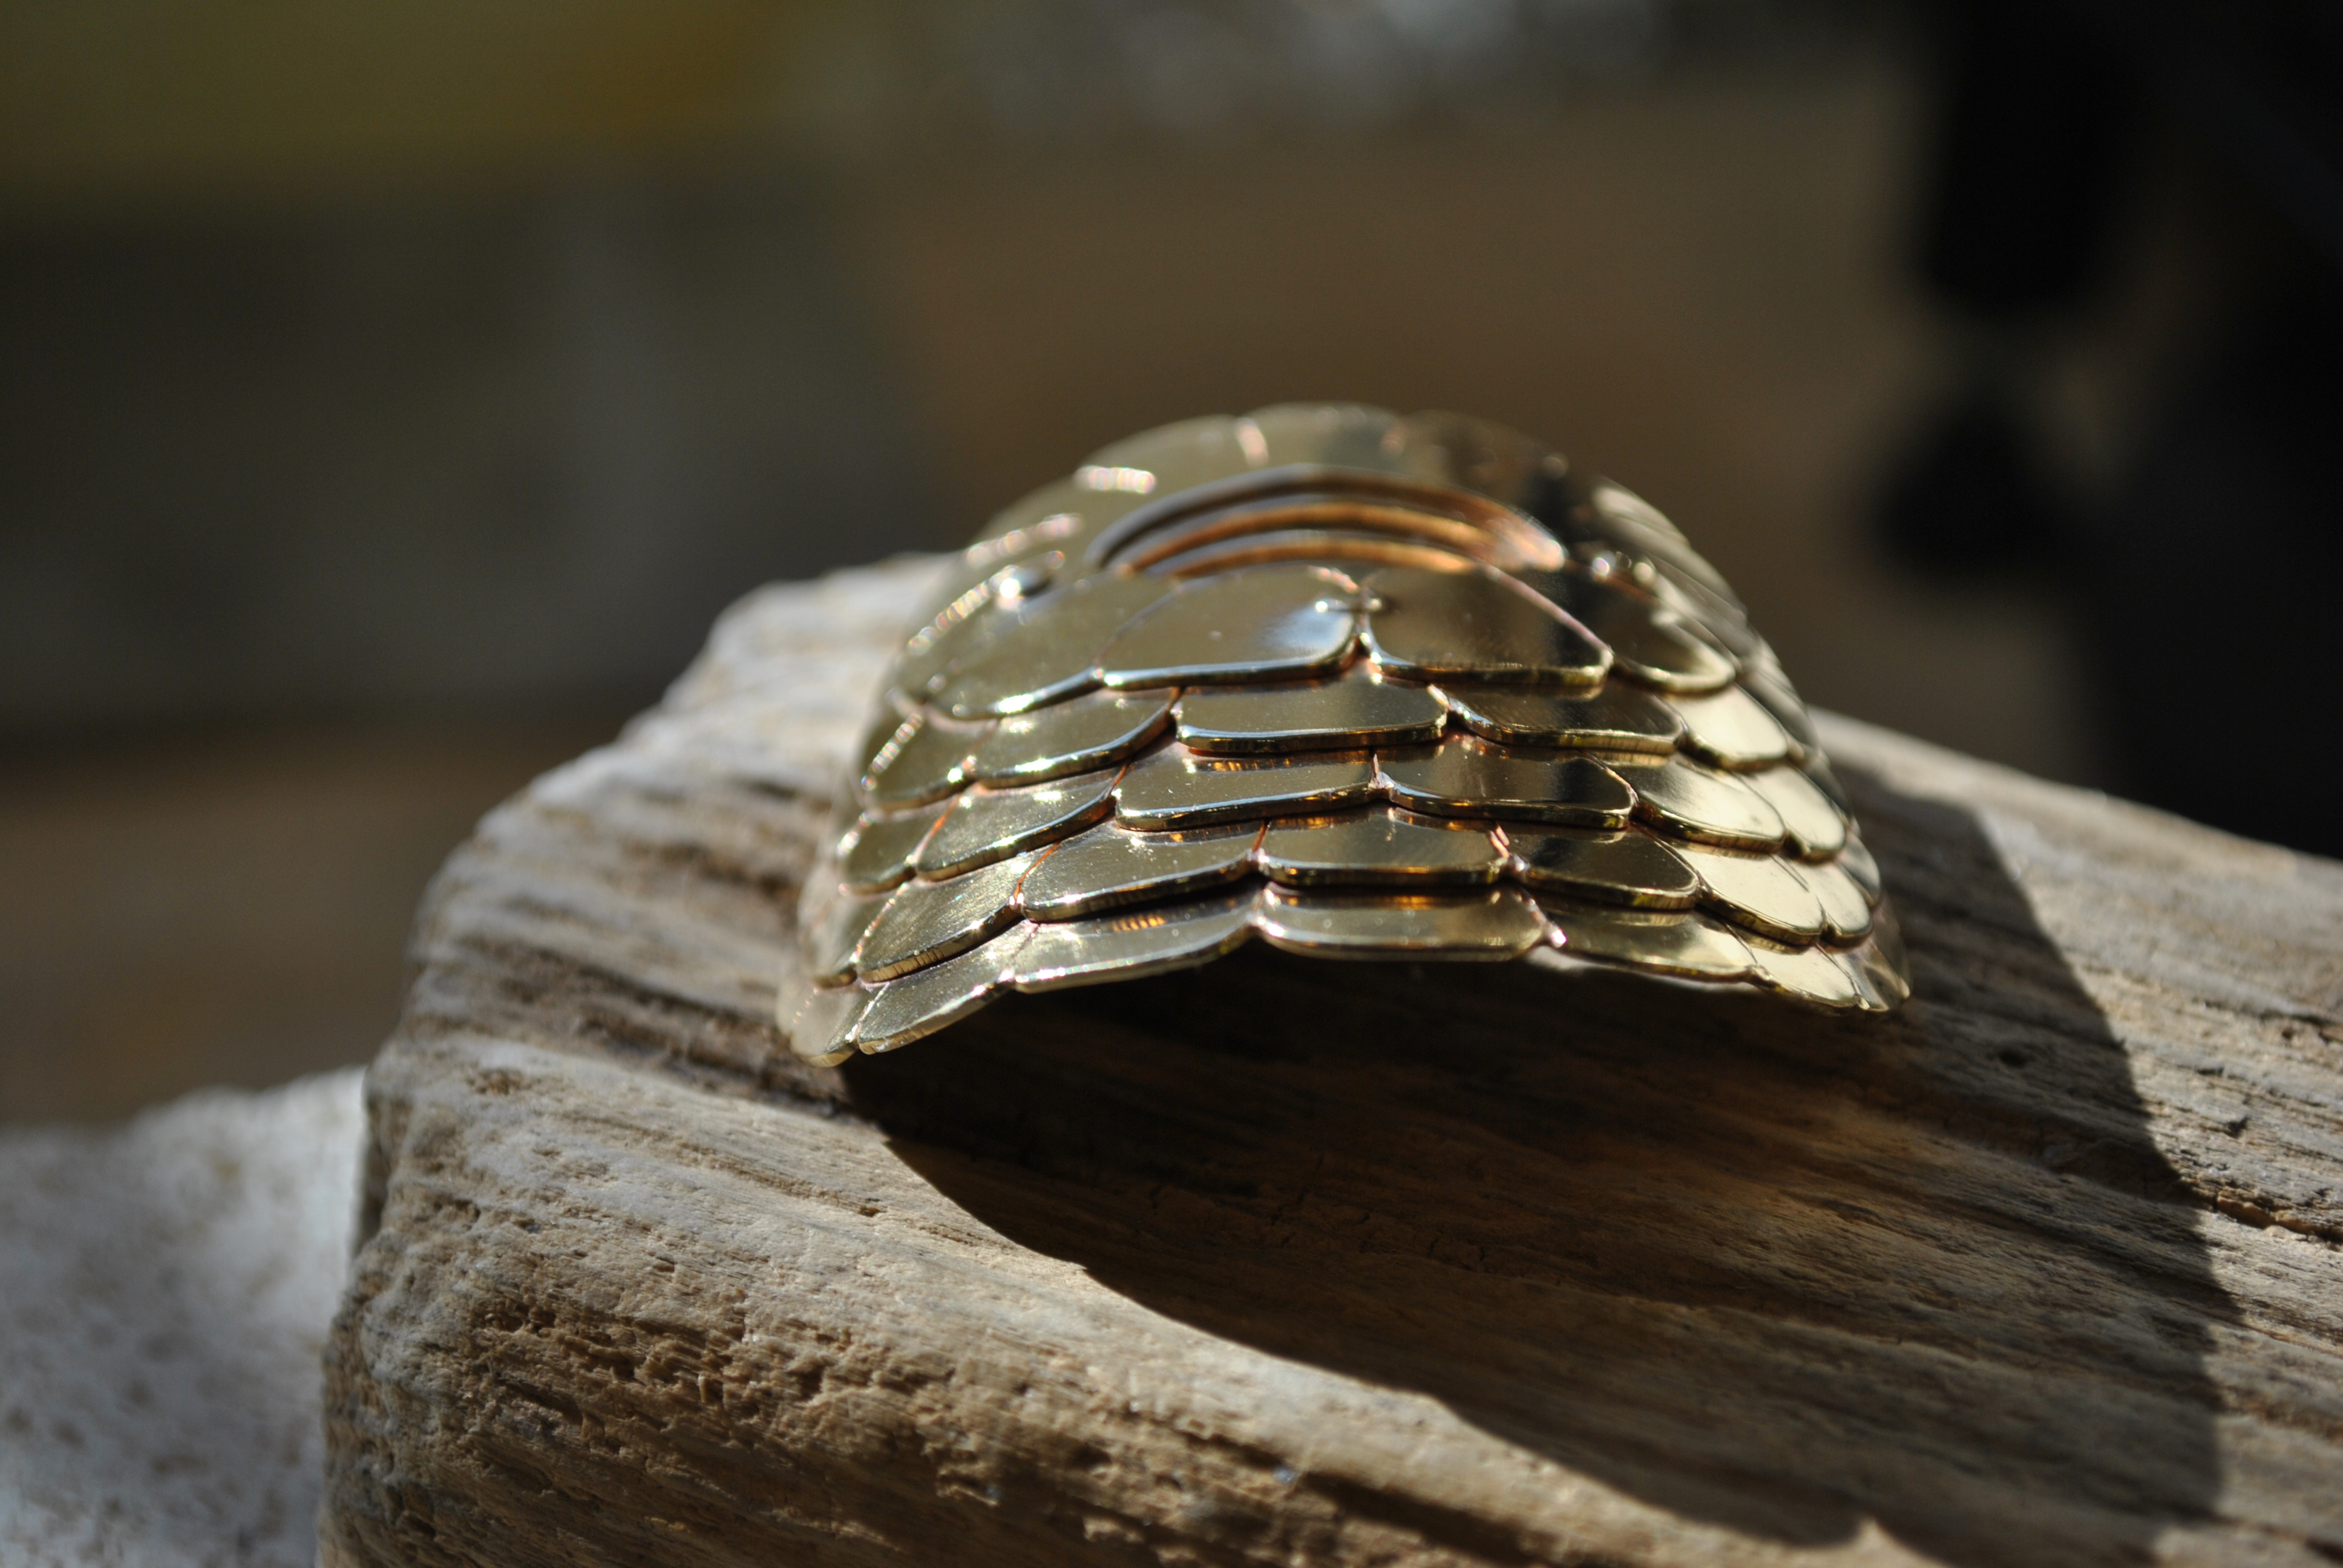
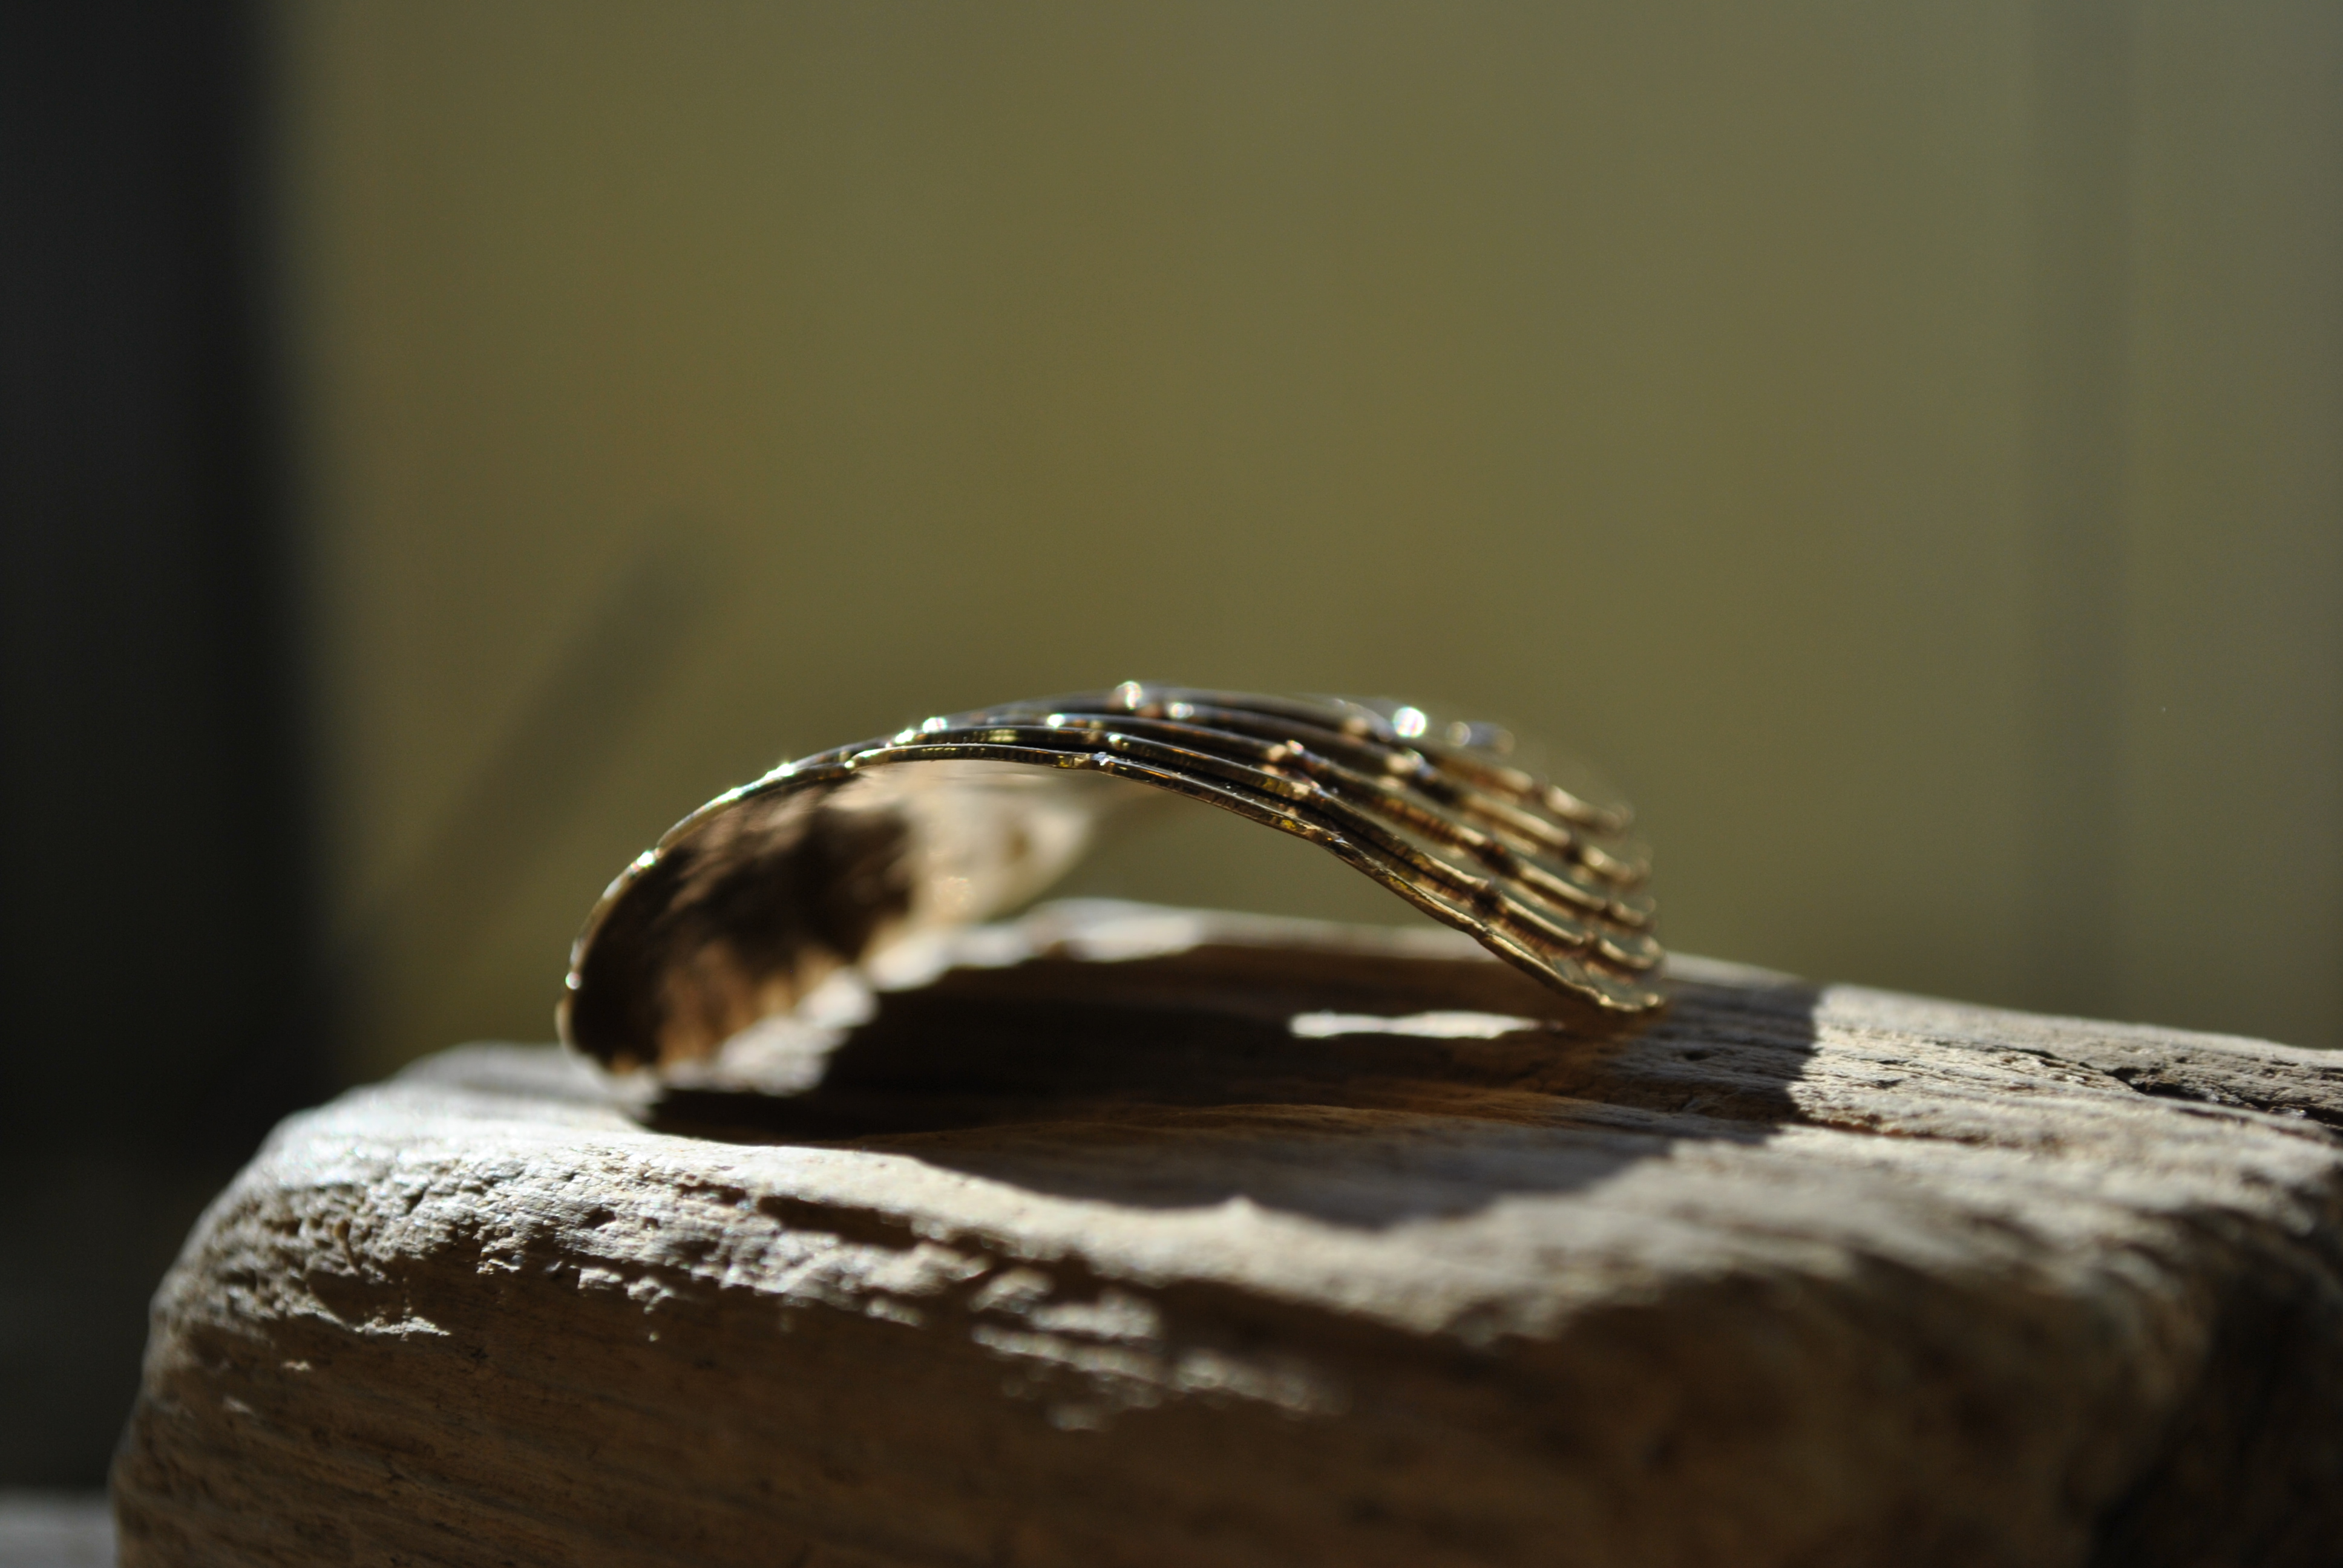
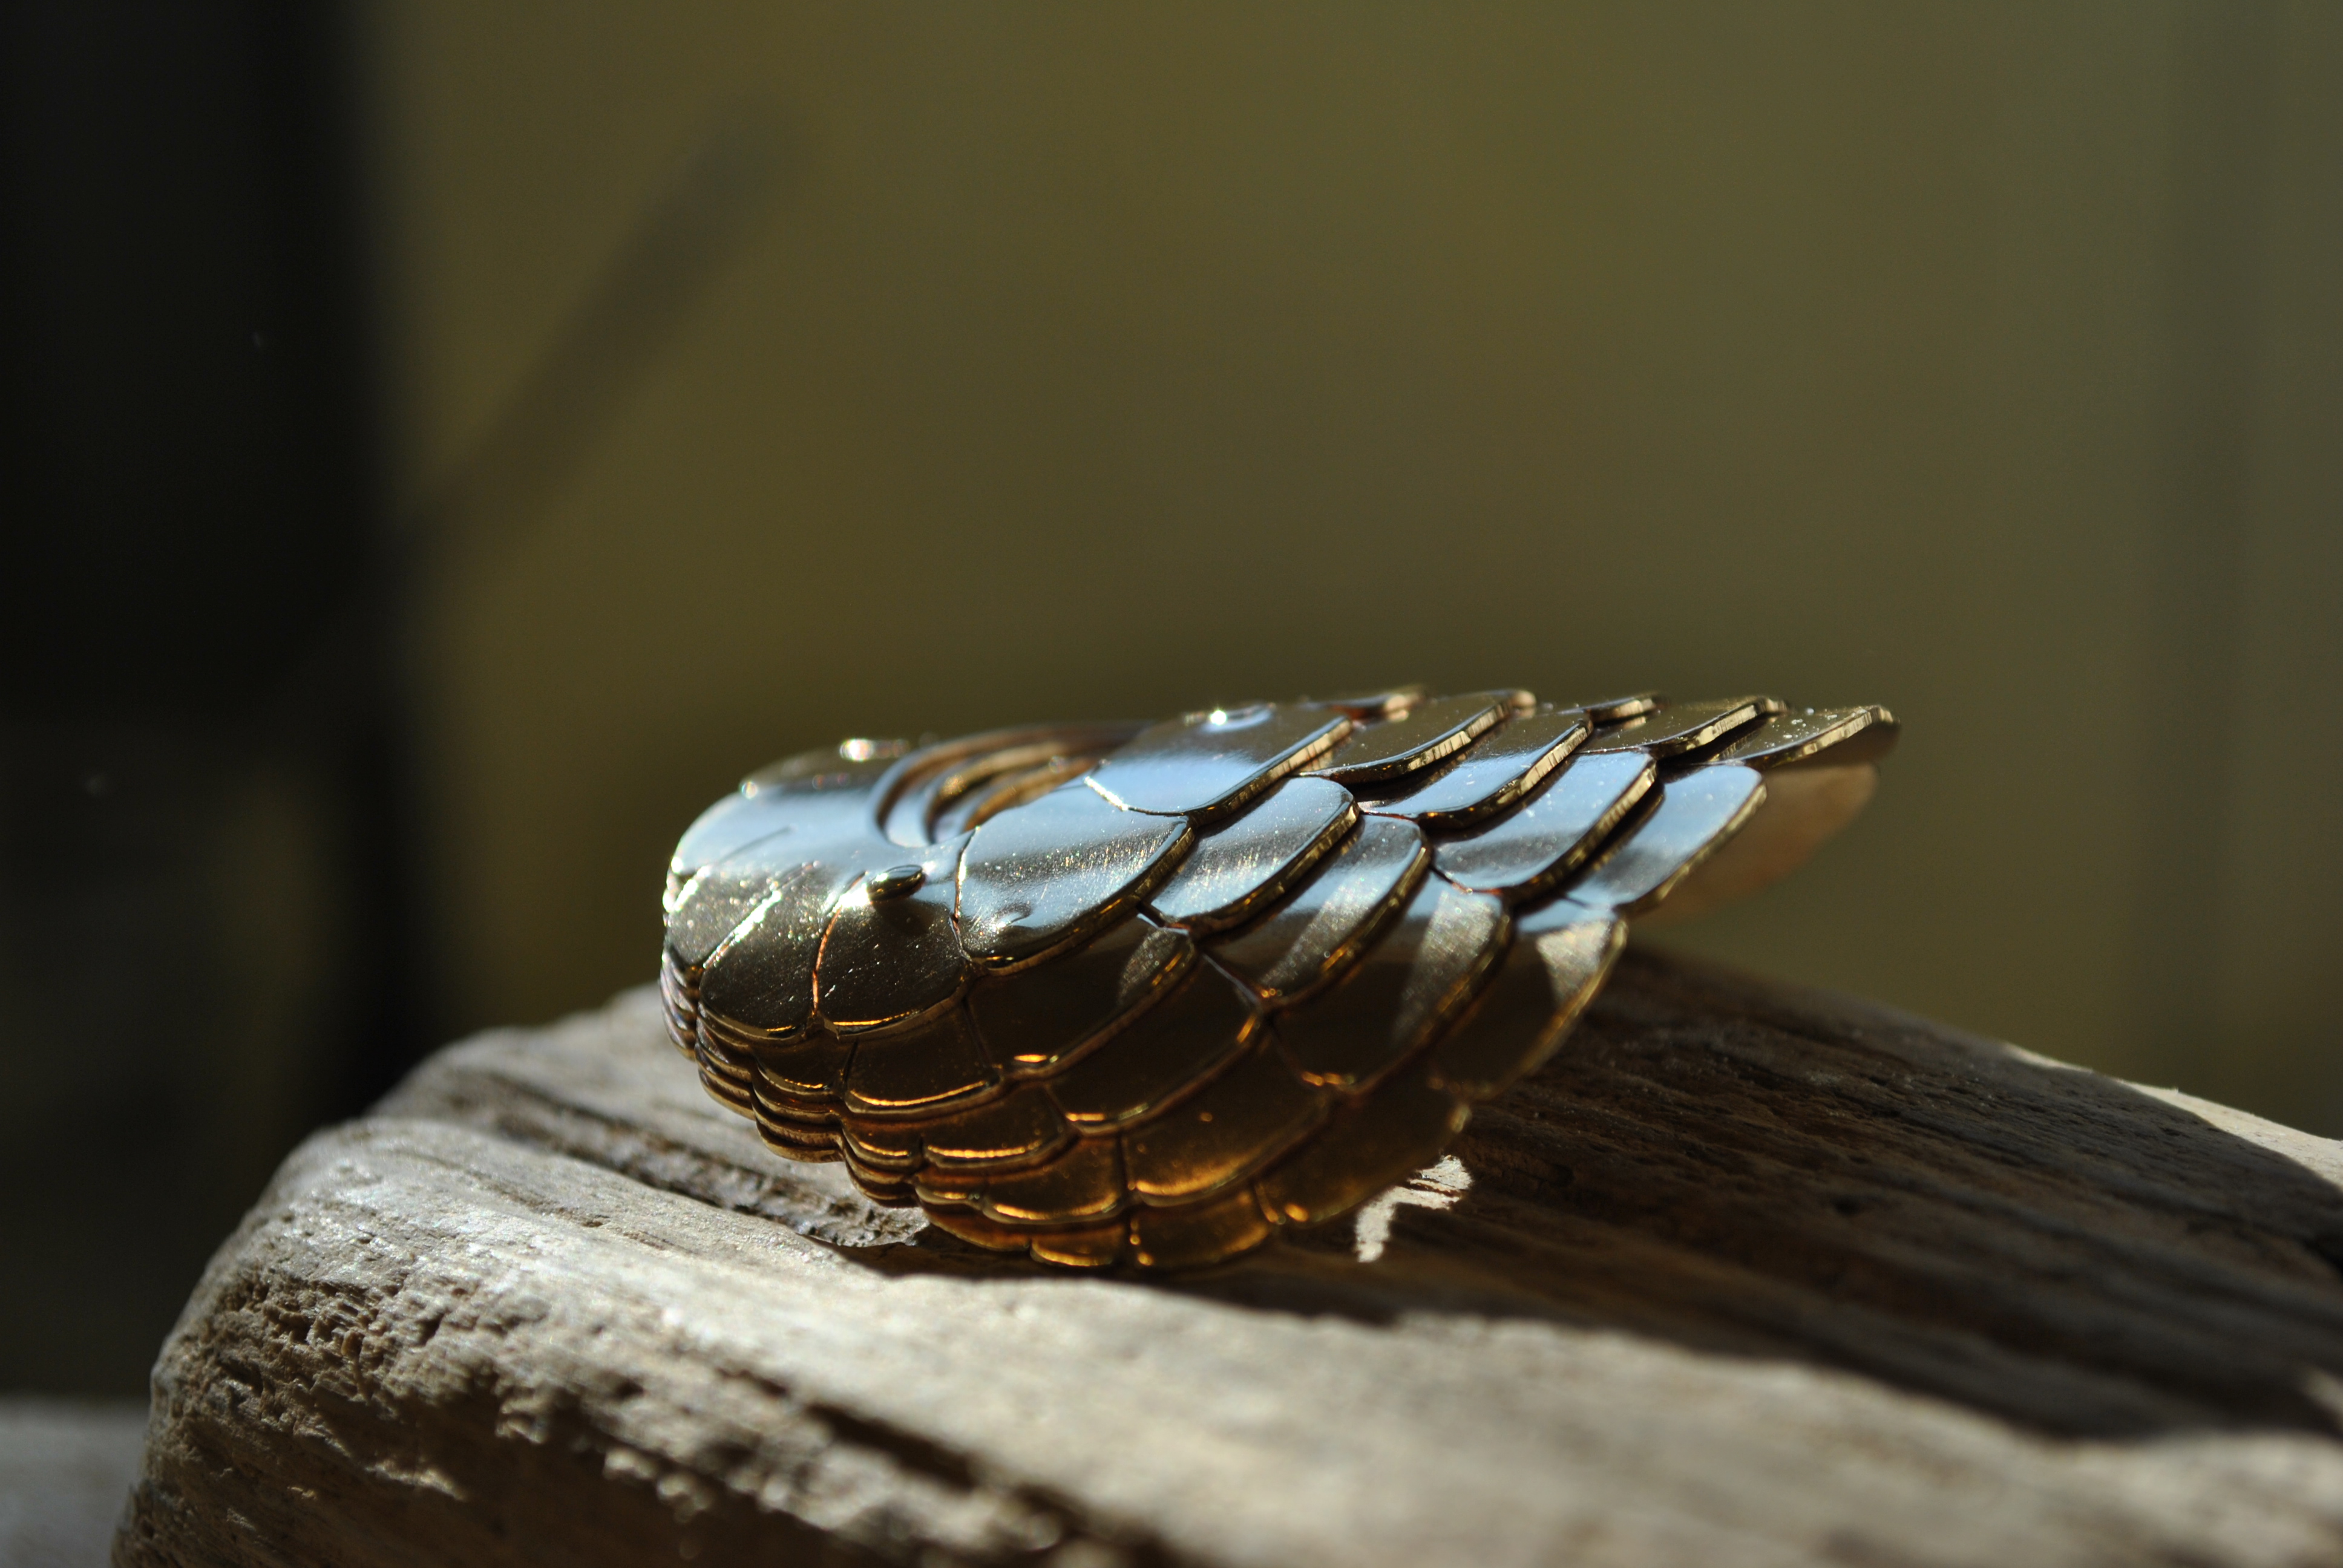
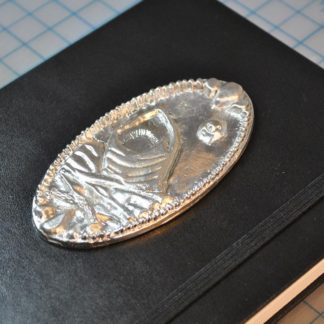
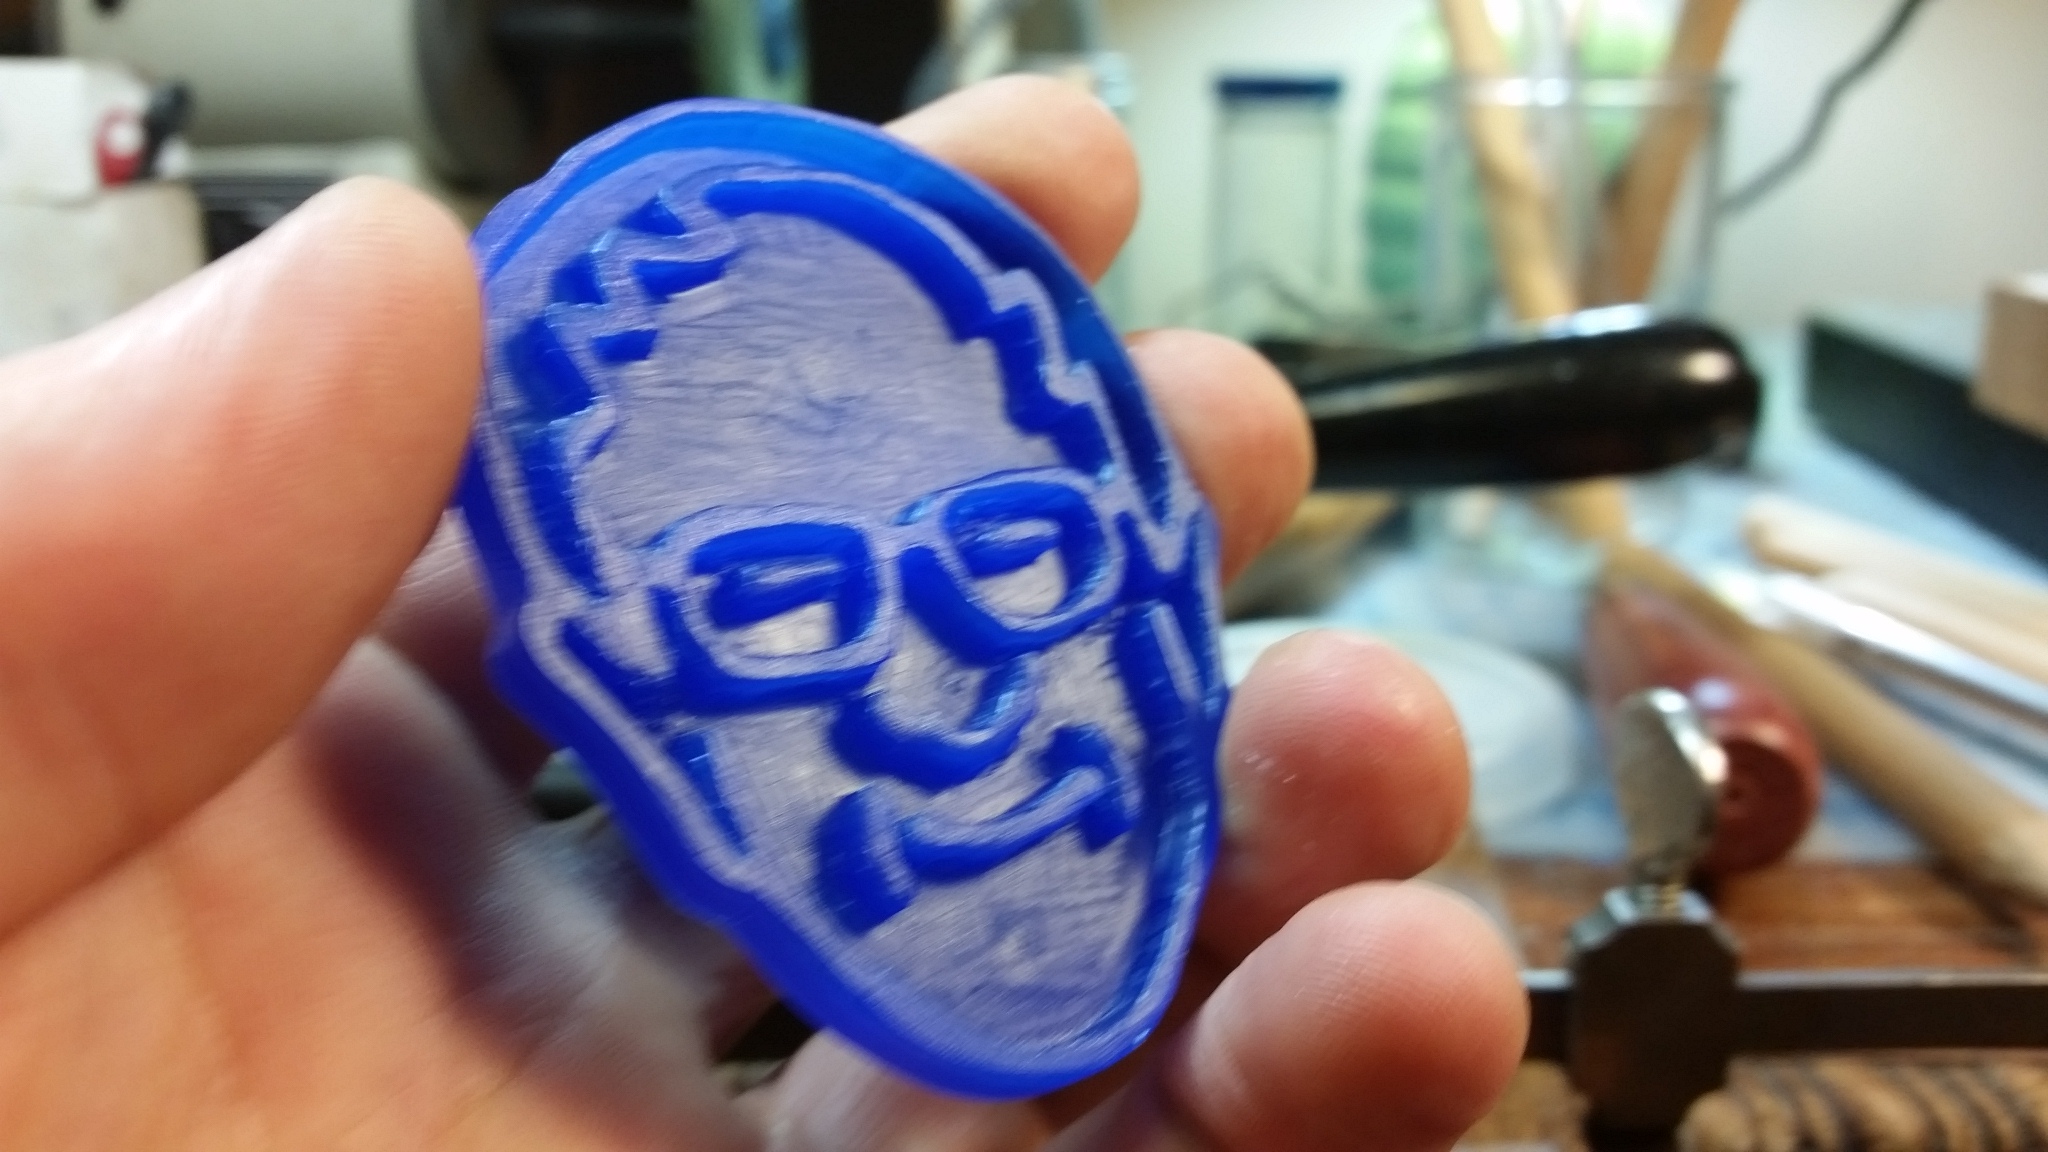
I am feeling the Bern! So much so that I thought I would make a Bernie Sanders head badge so that bicyclists for Bernie can show their love of this amazing candidate.
The first step was to carve them out of wax.
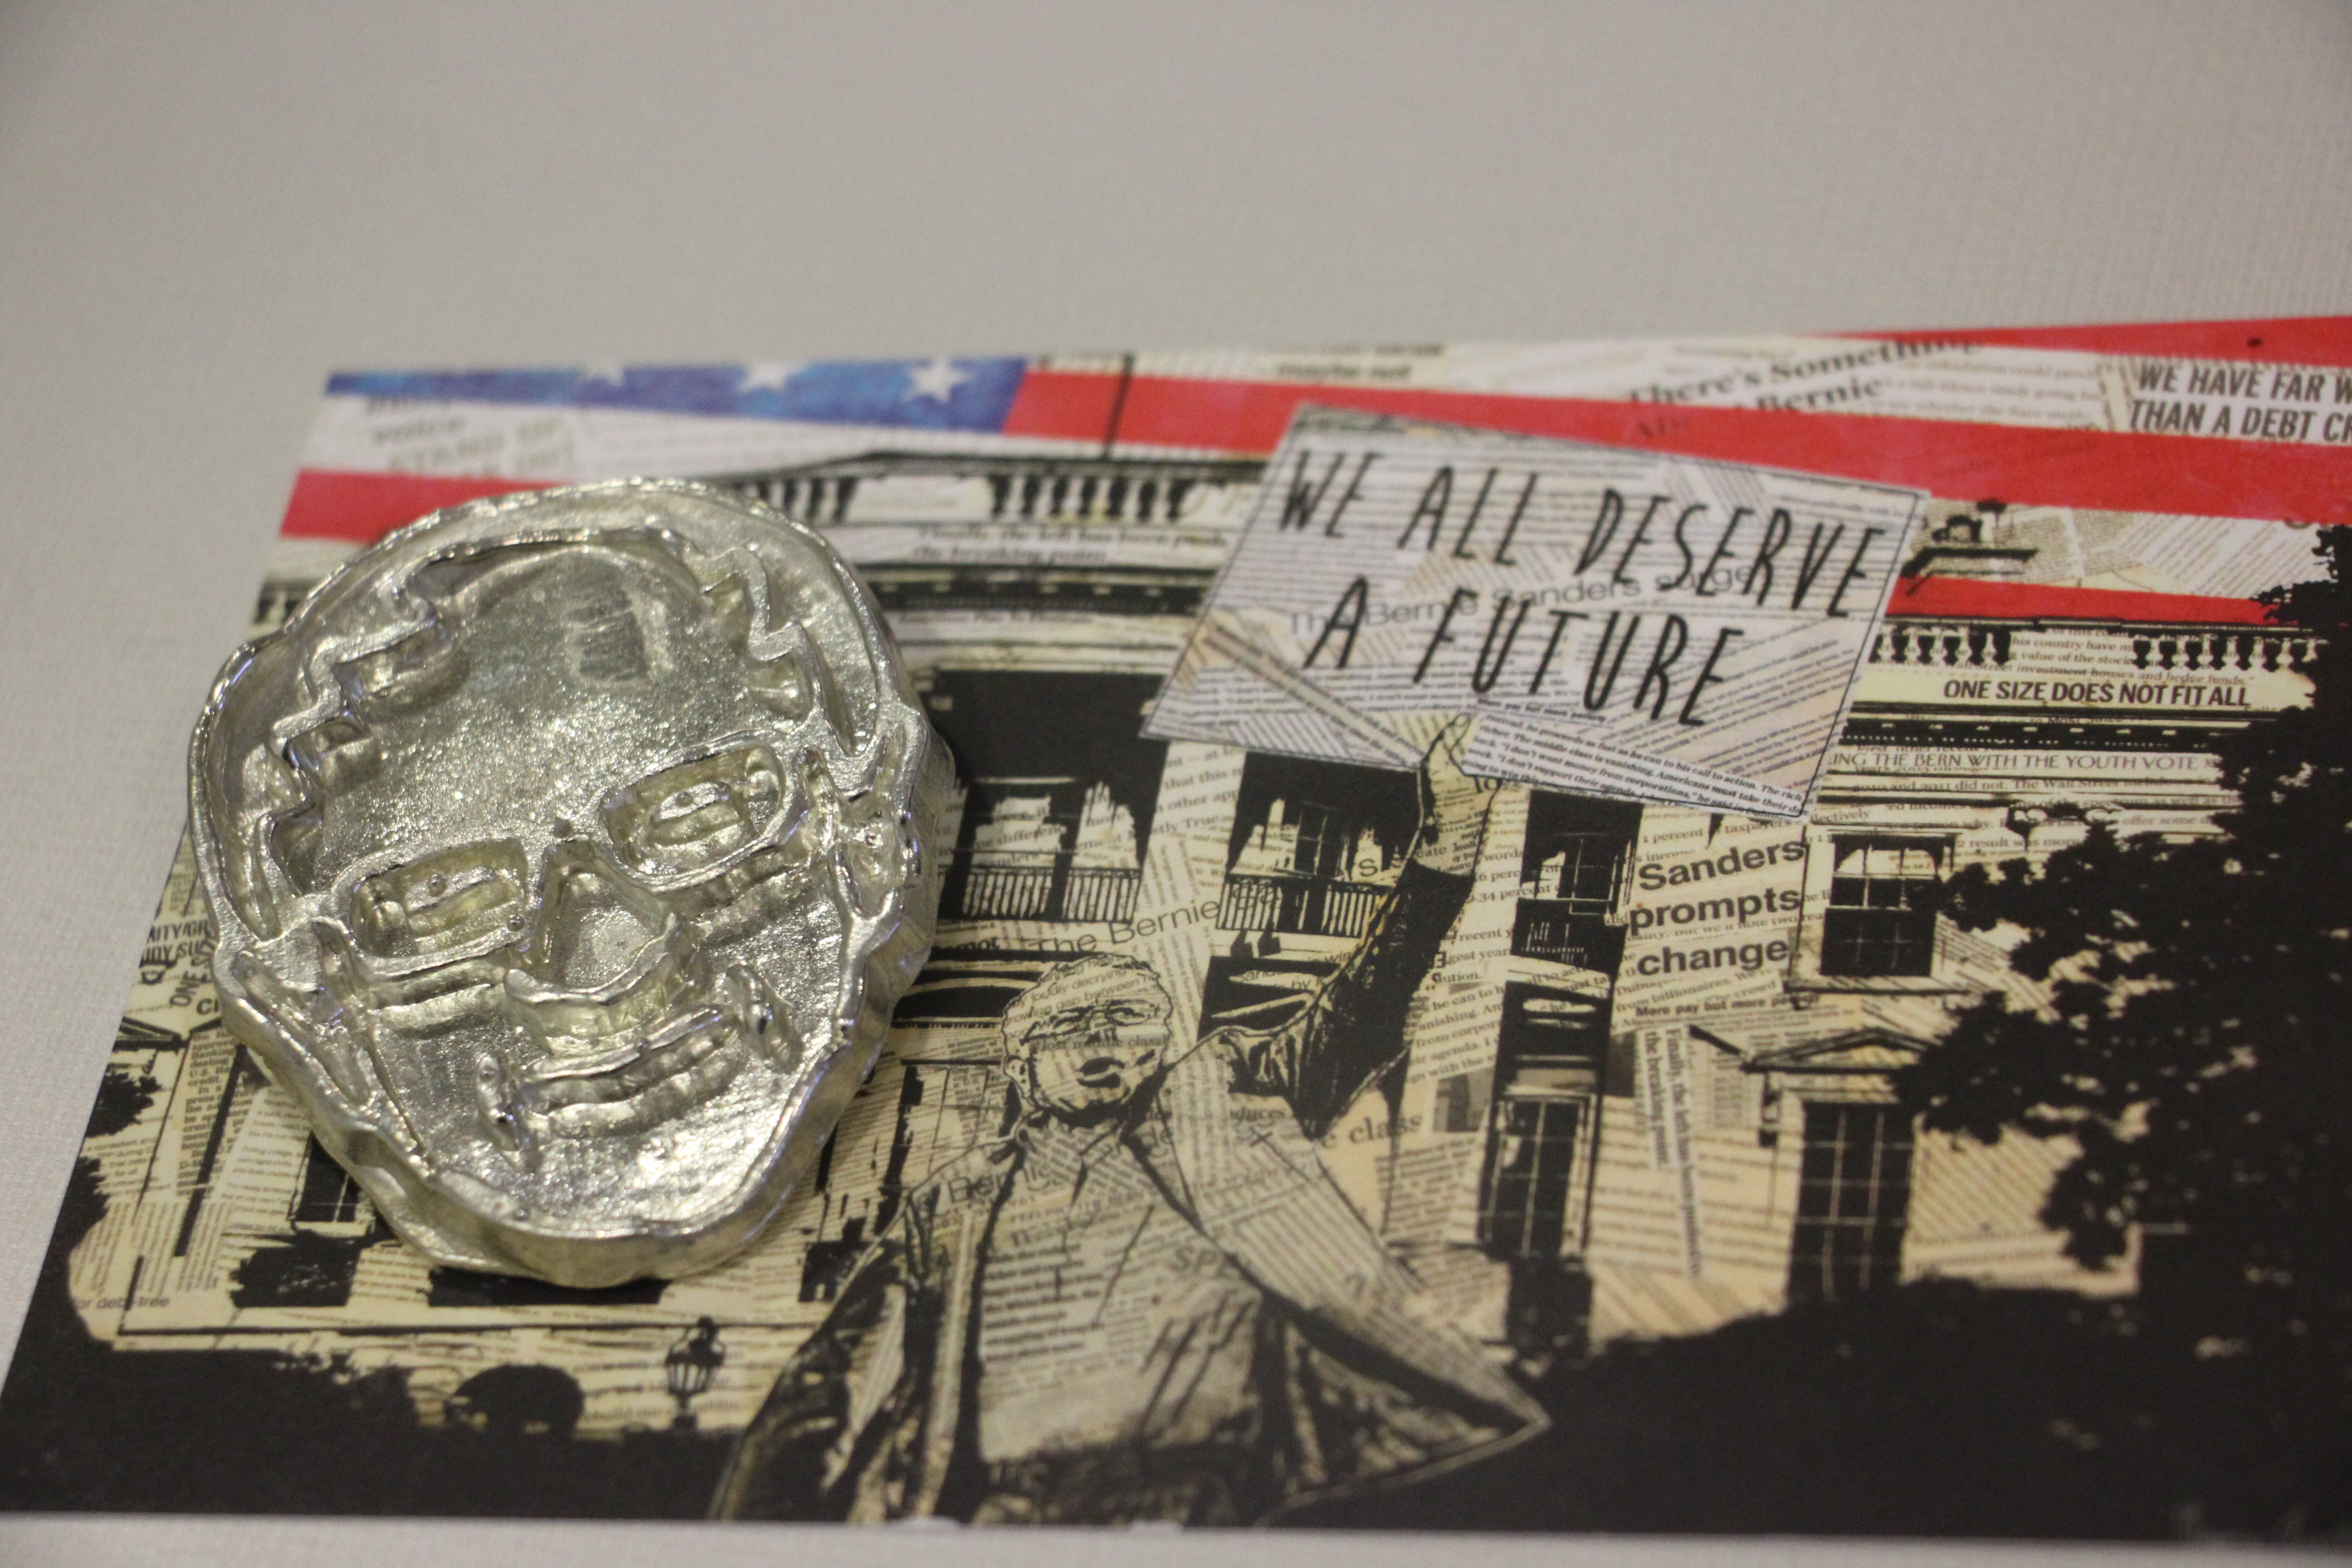
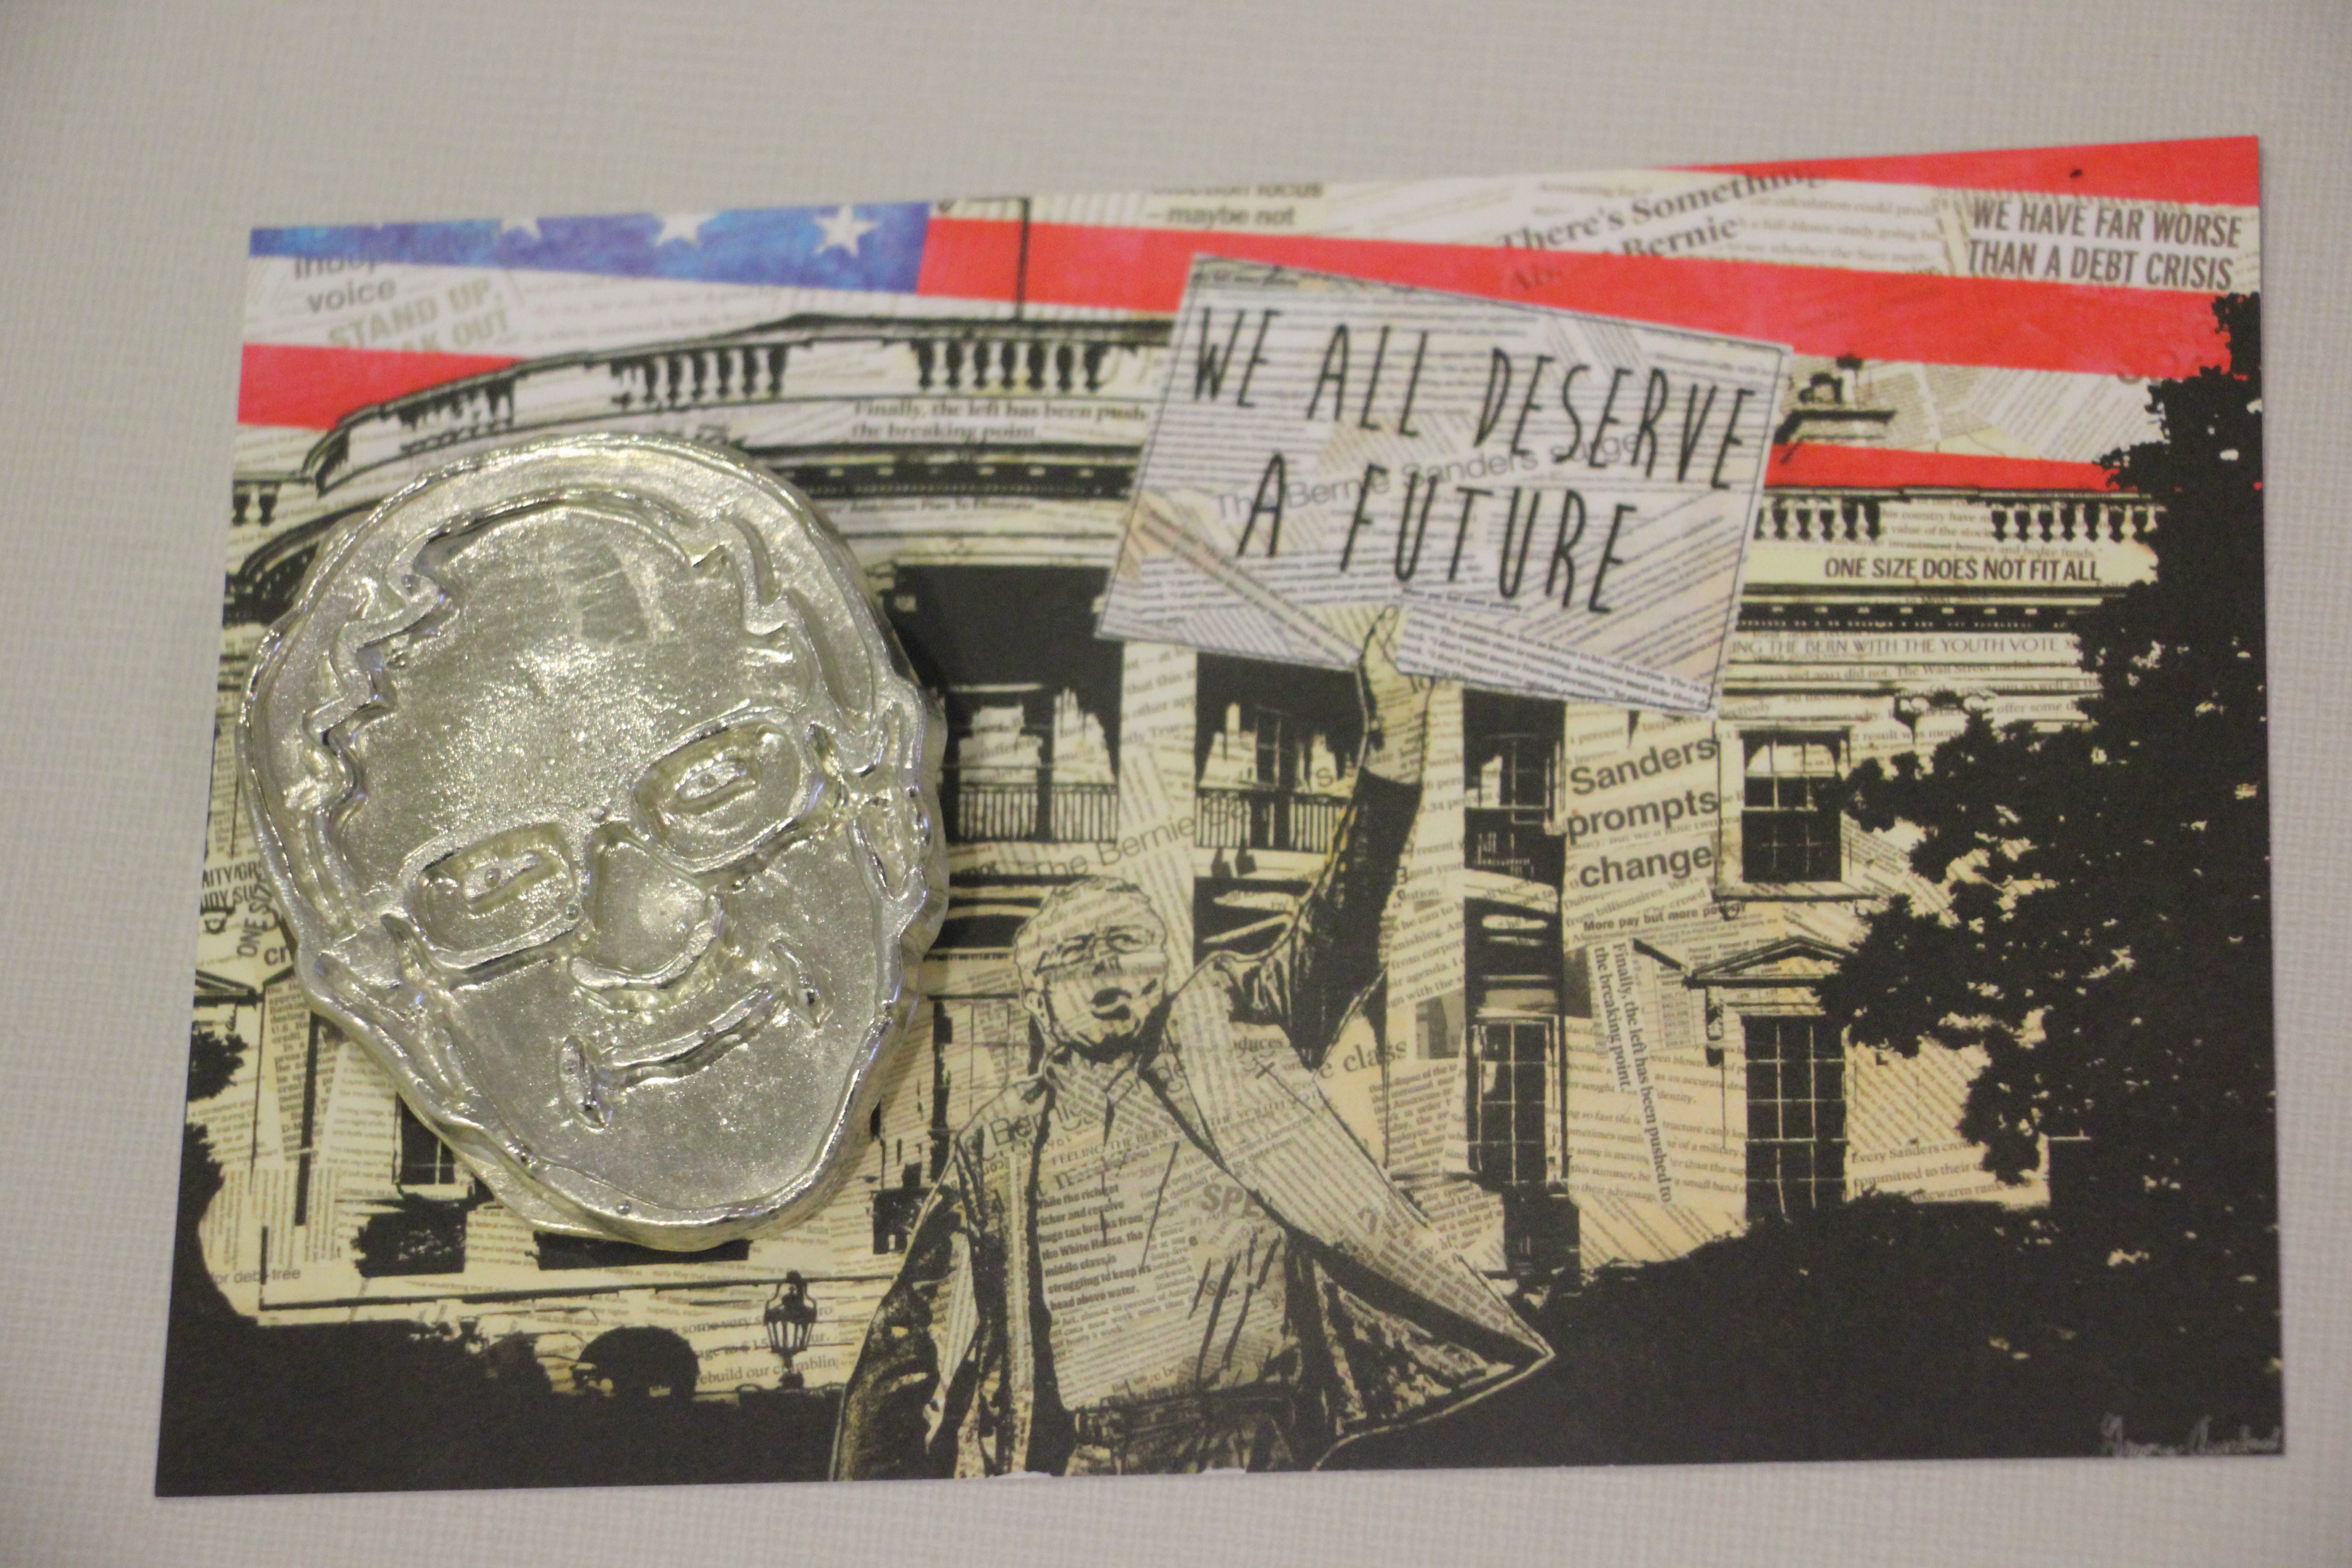
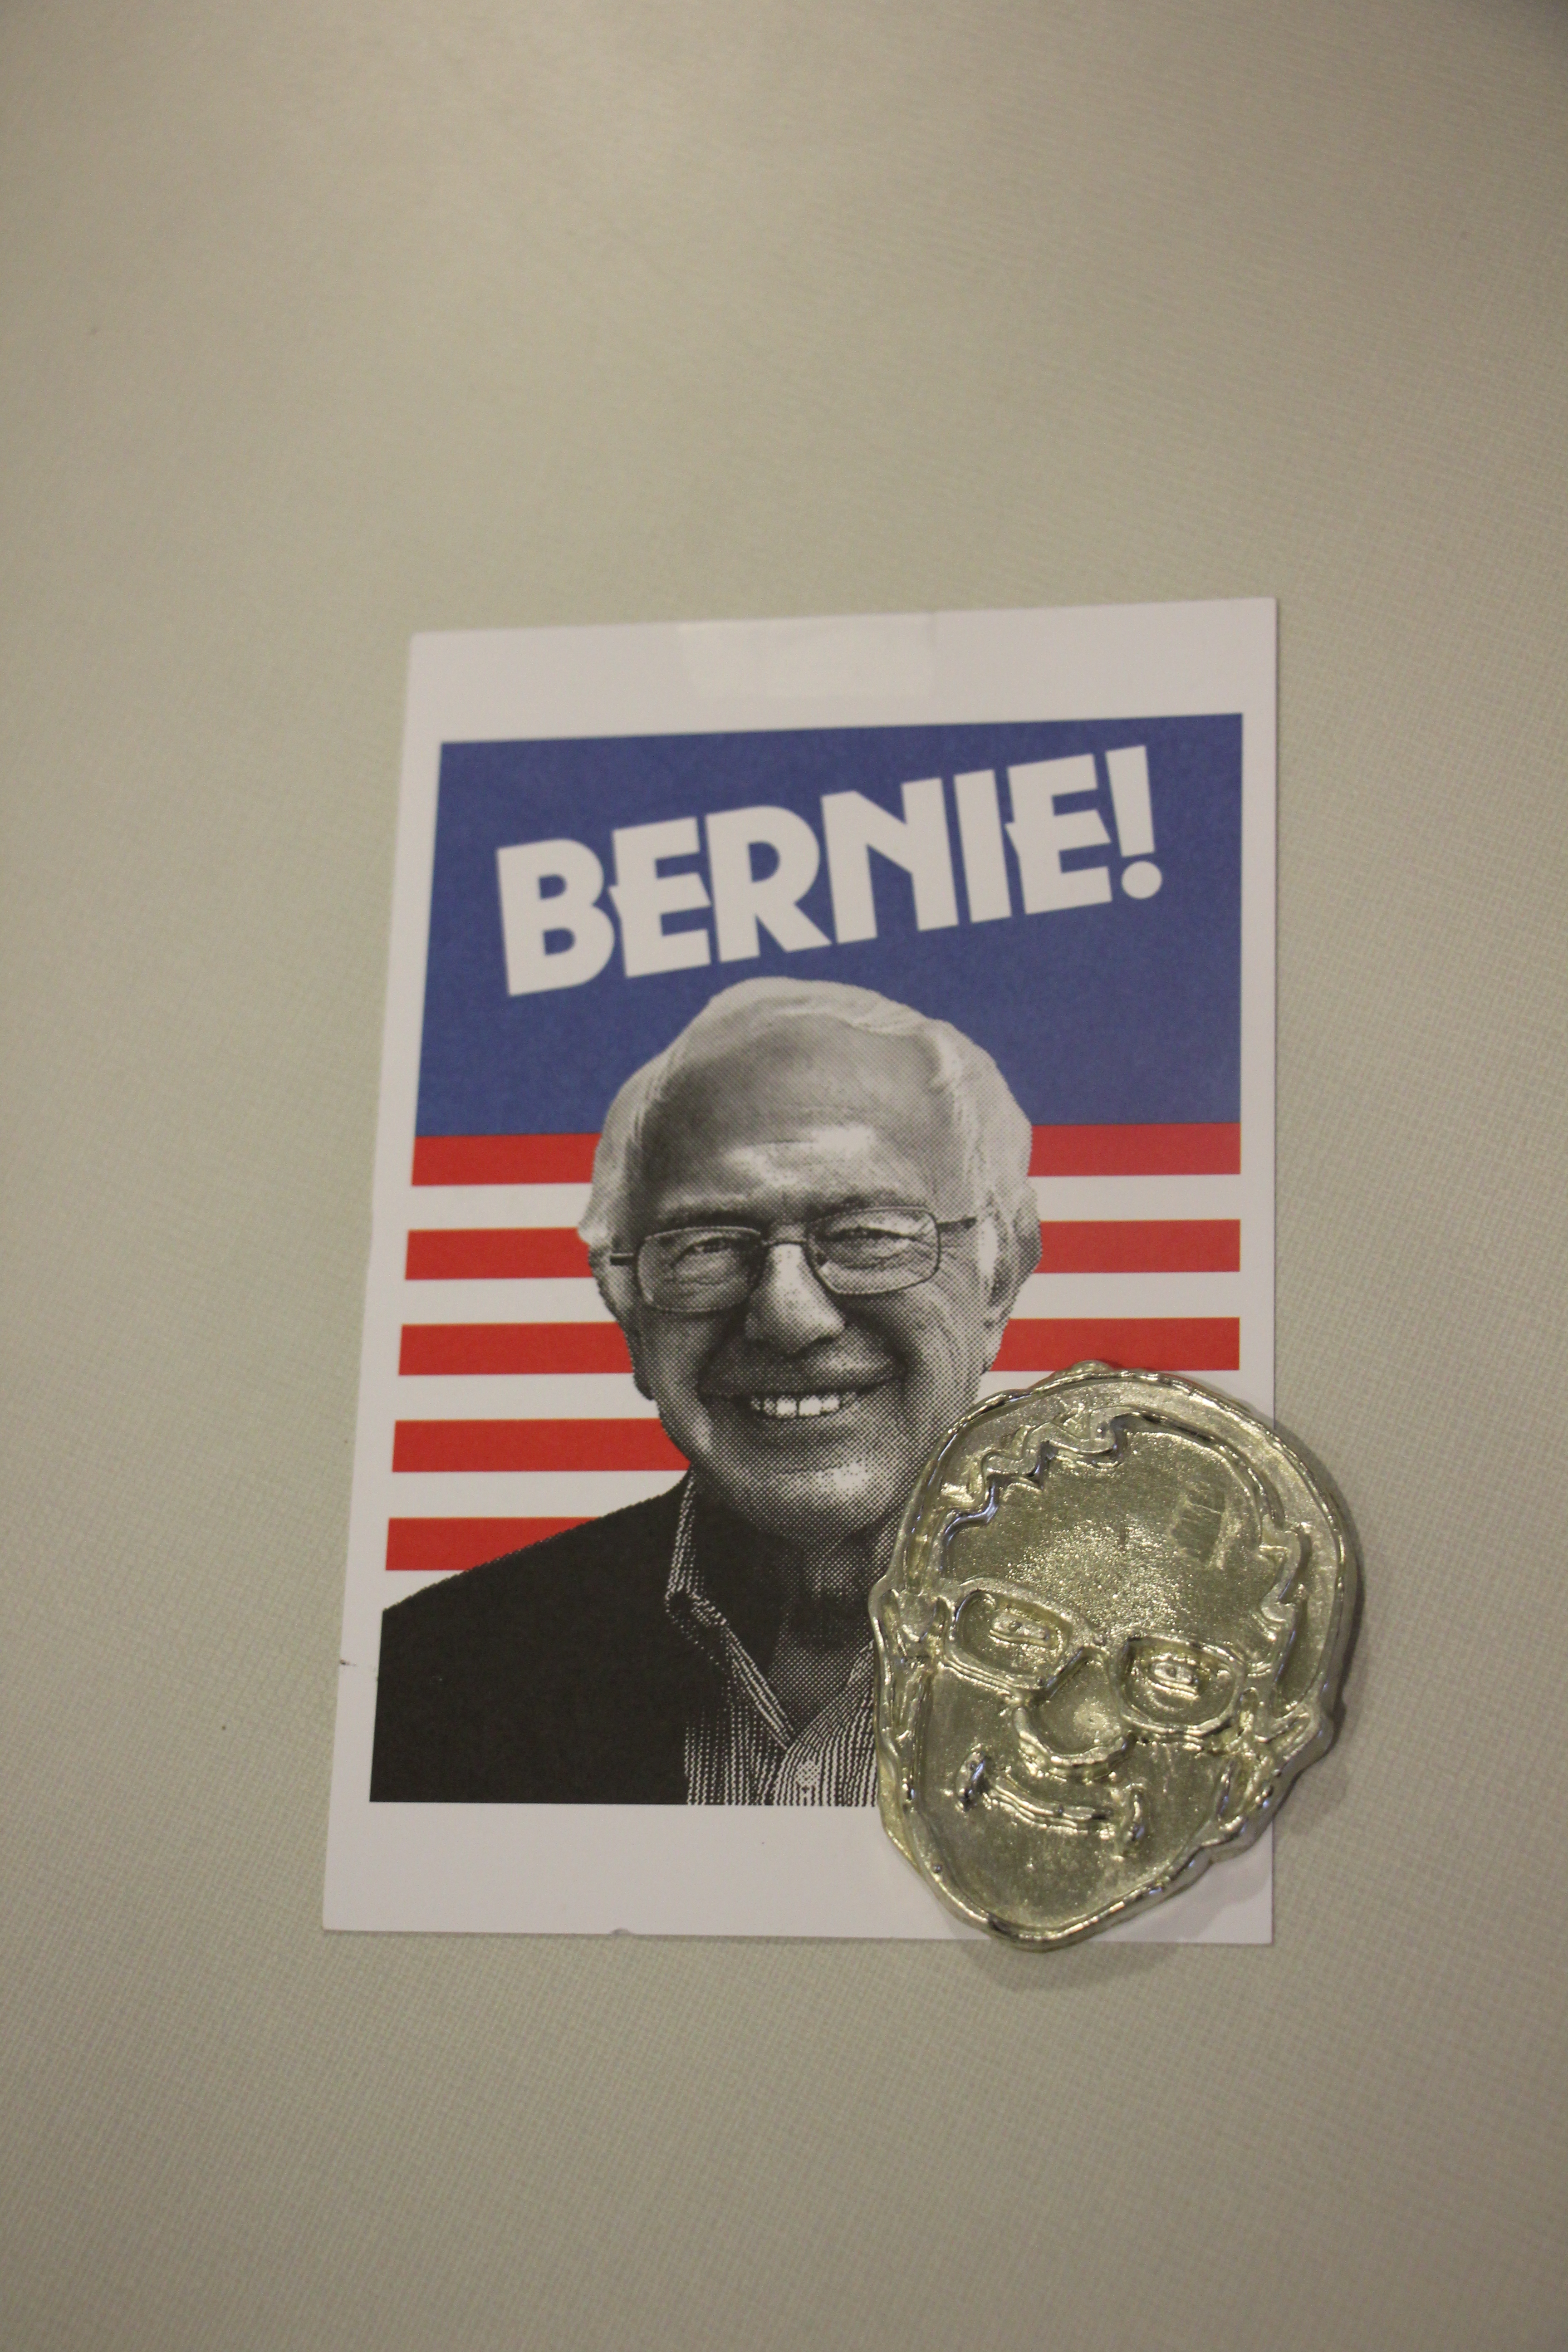
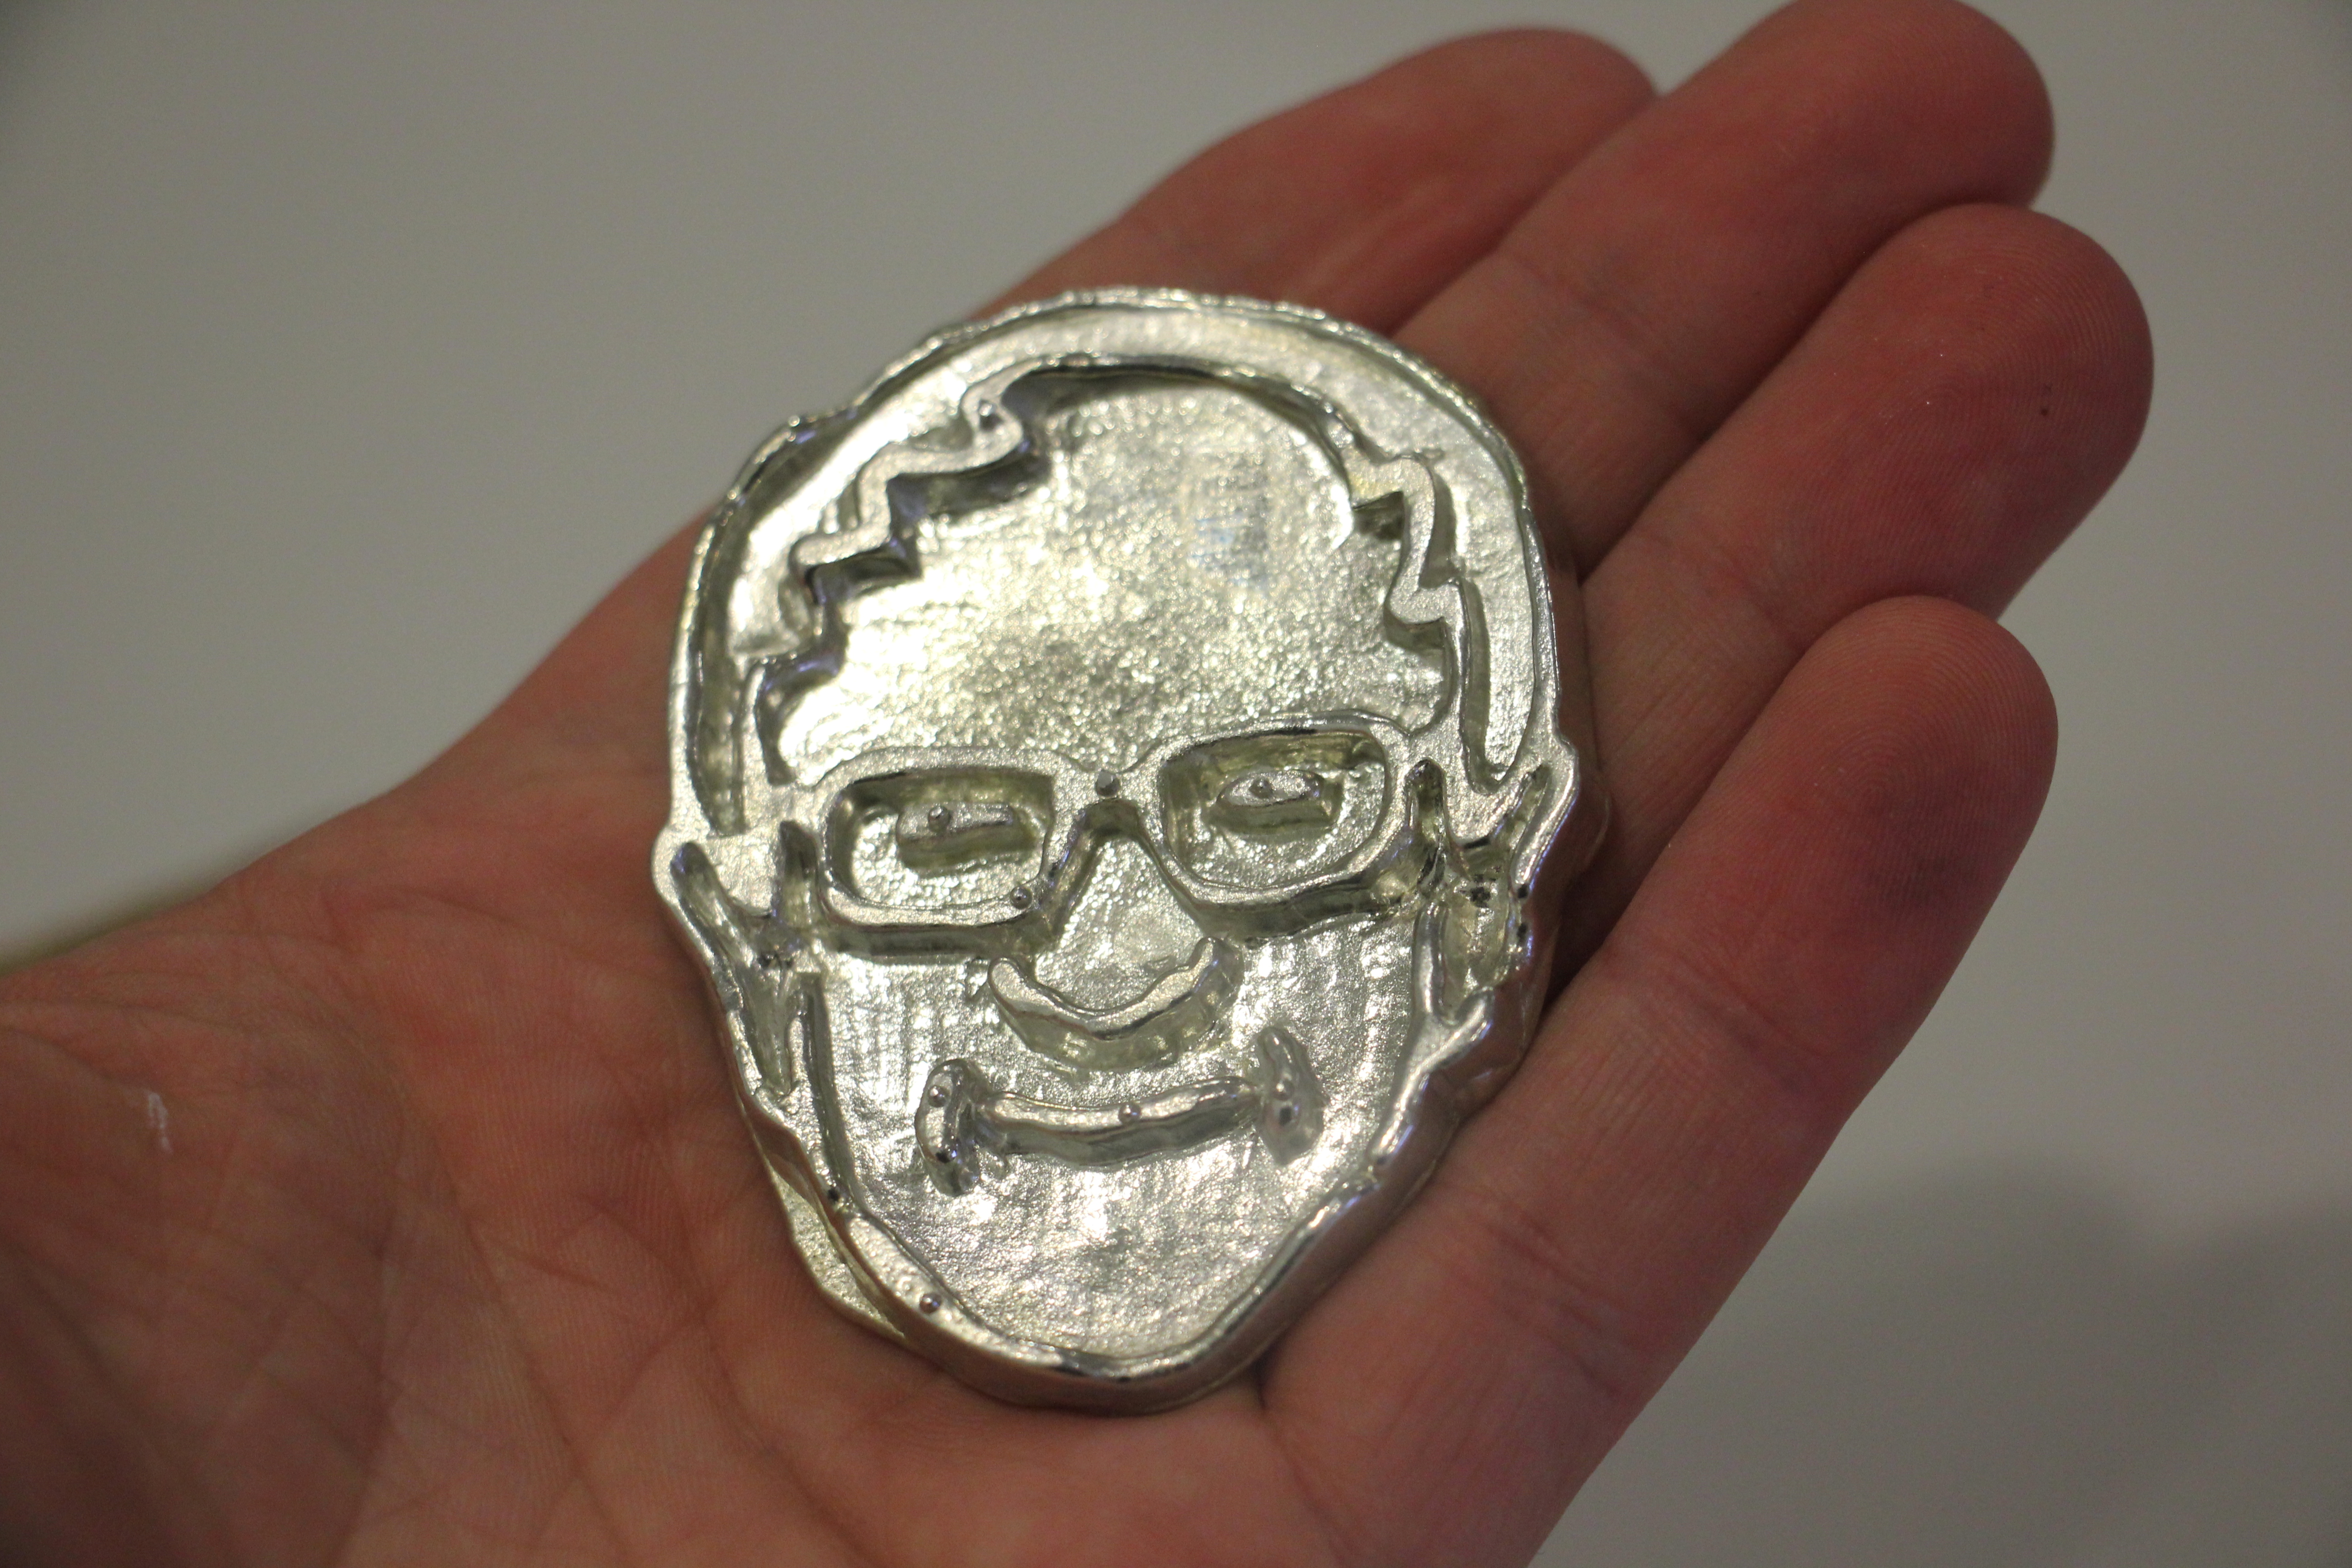
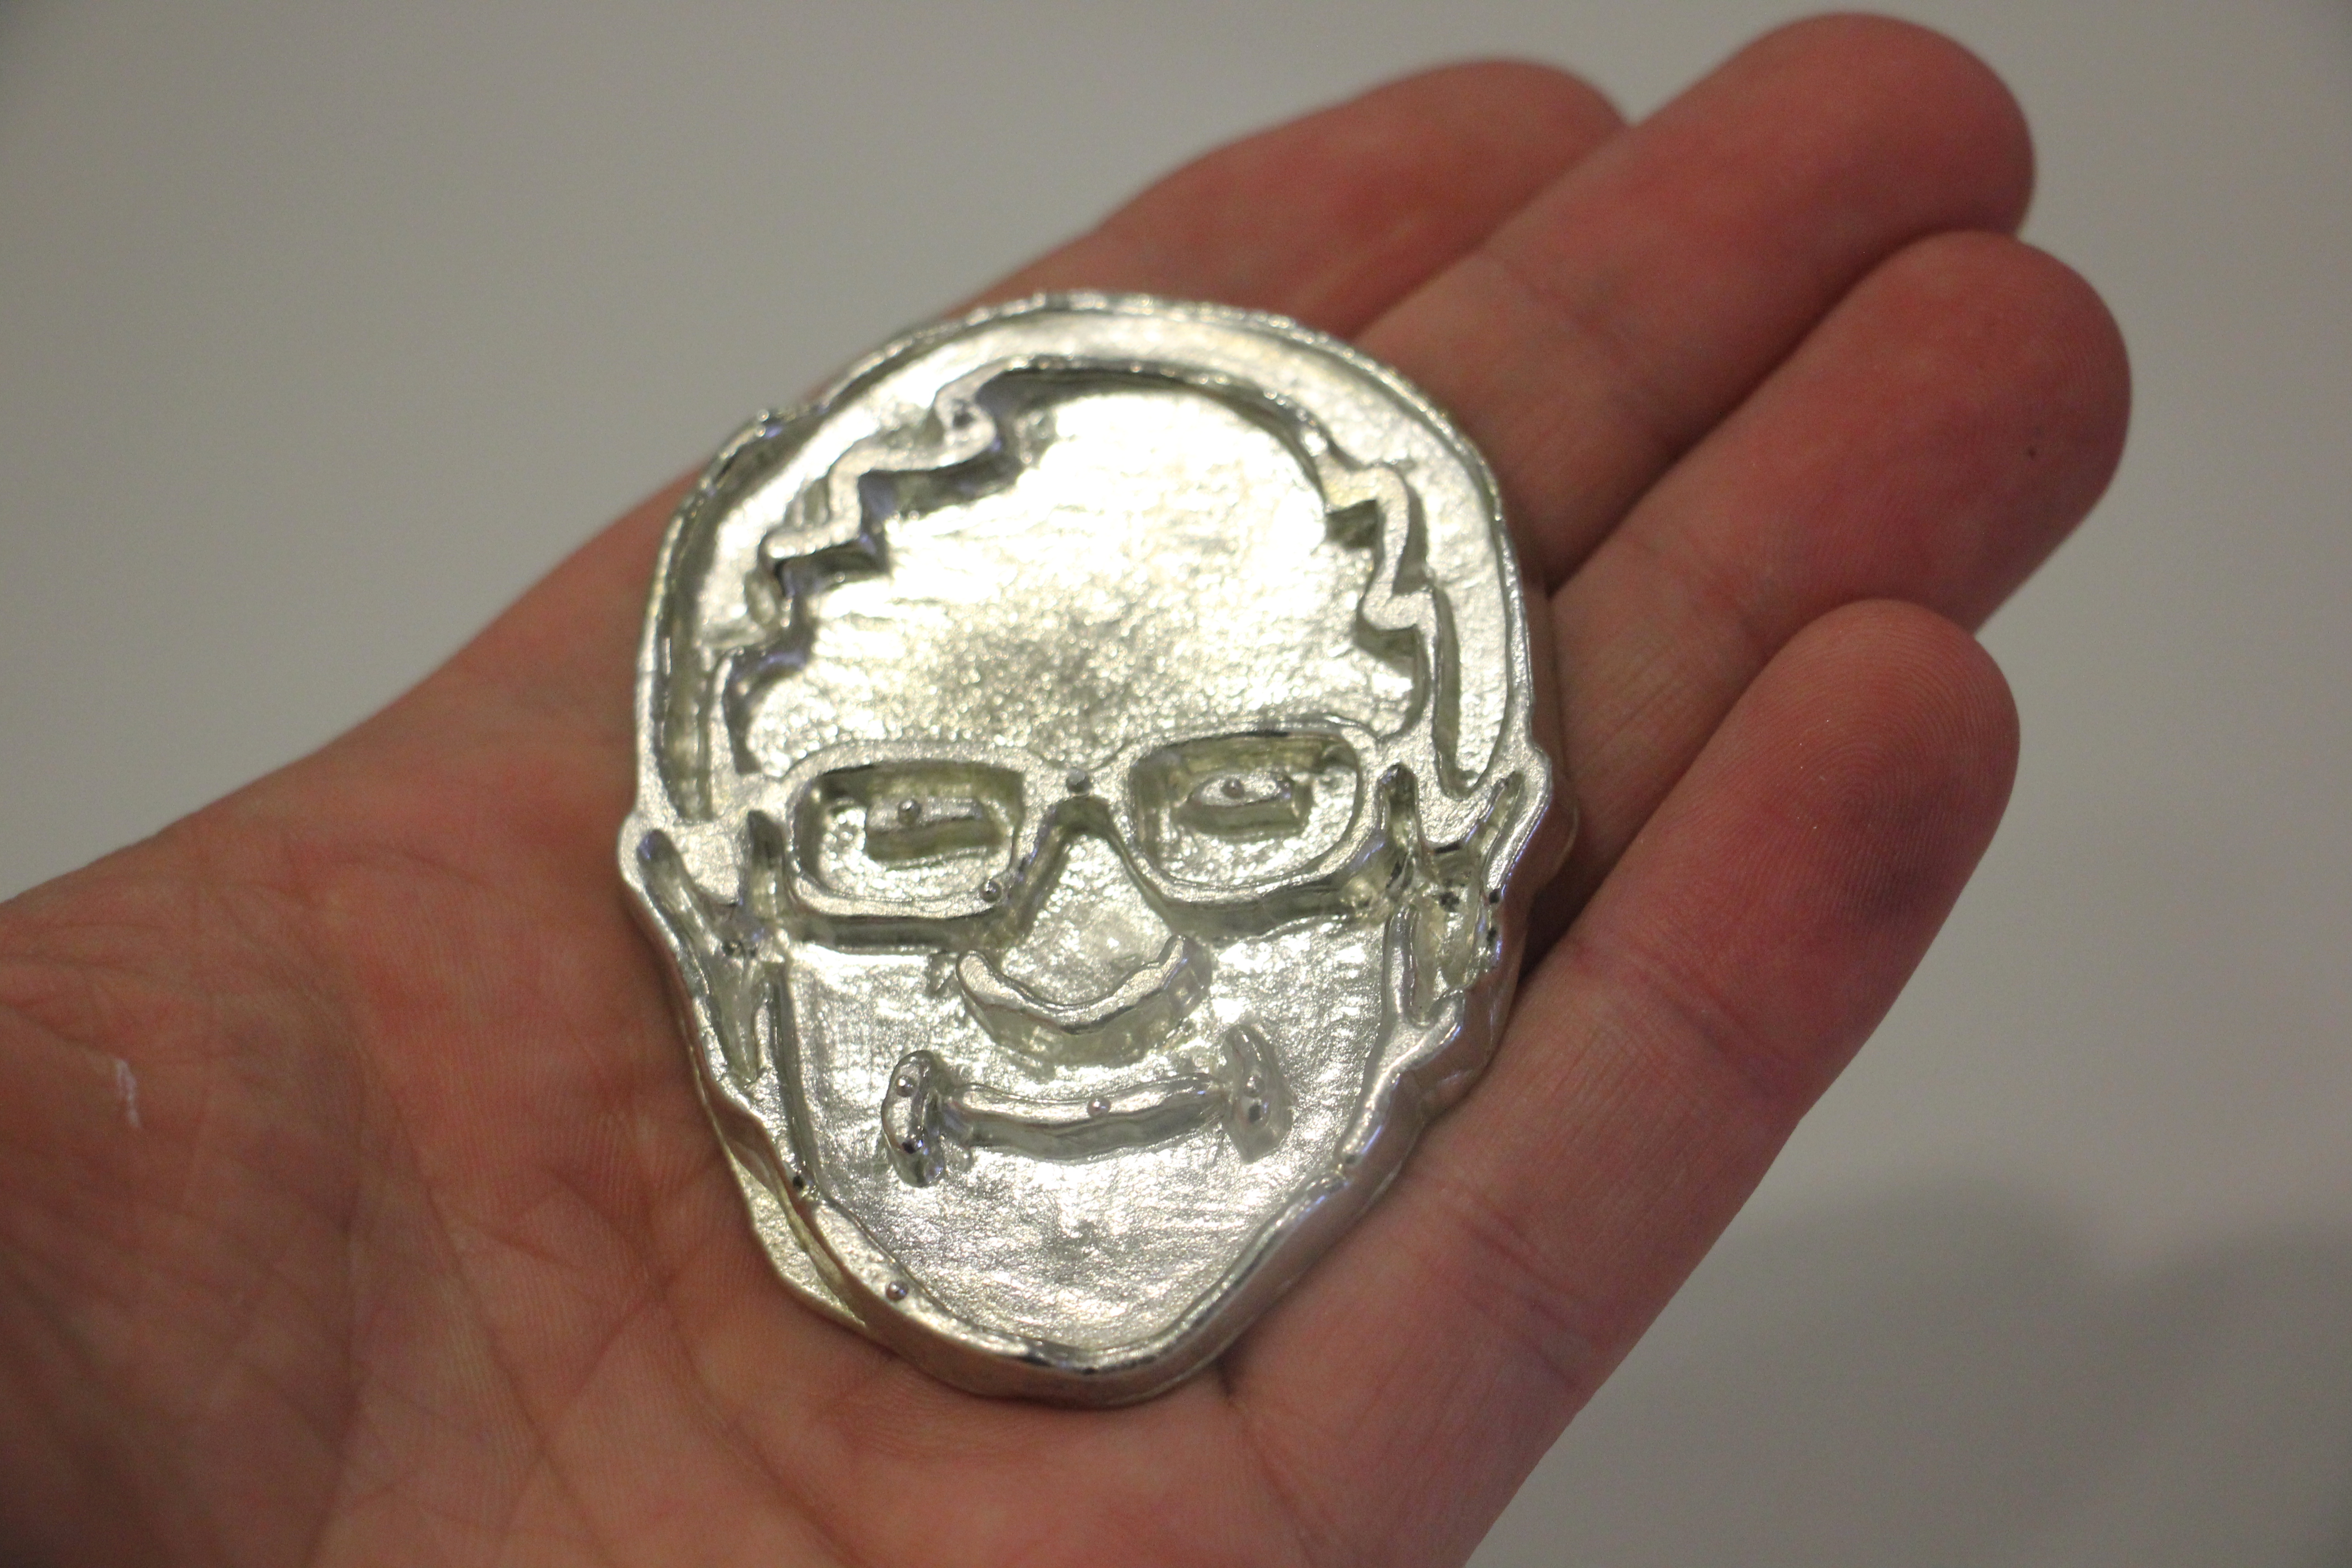
Then I molded that wax carving into some special high temp silicone. I then cast them in either tin or pewter (each and every one comes out a little different, so far the tin ones seem a bit more shiny). The results have been pretty awesome!
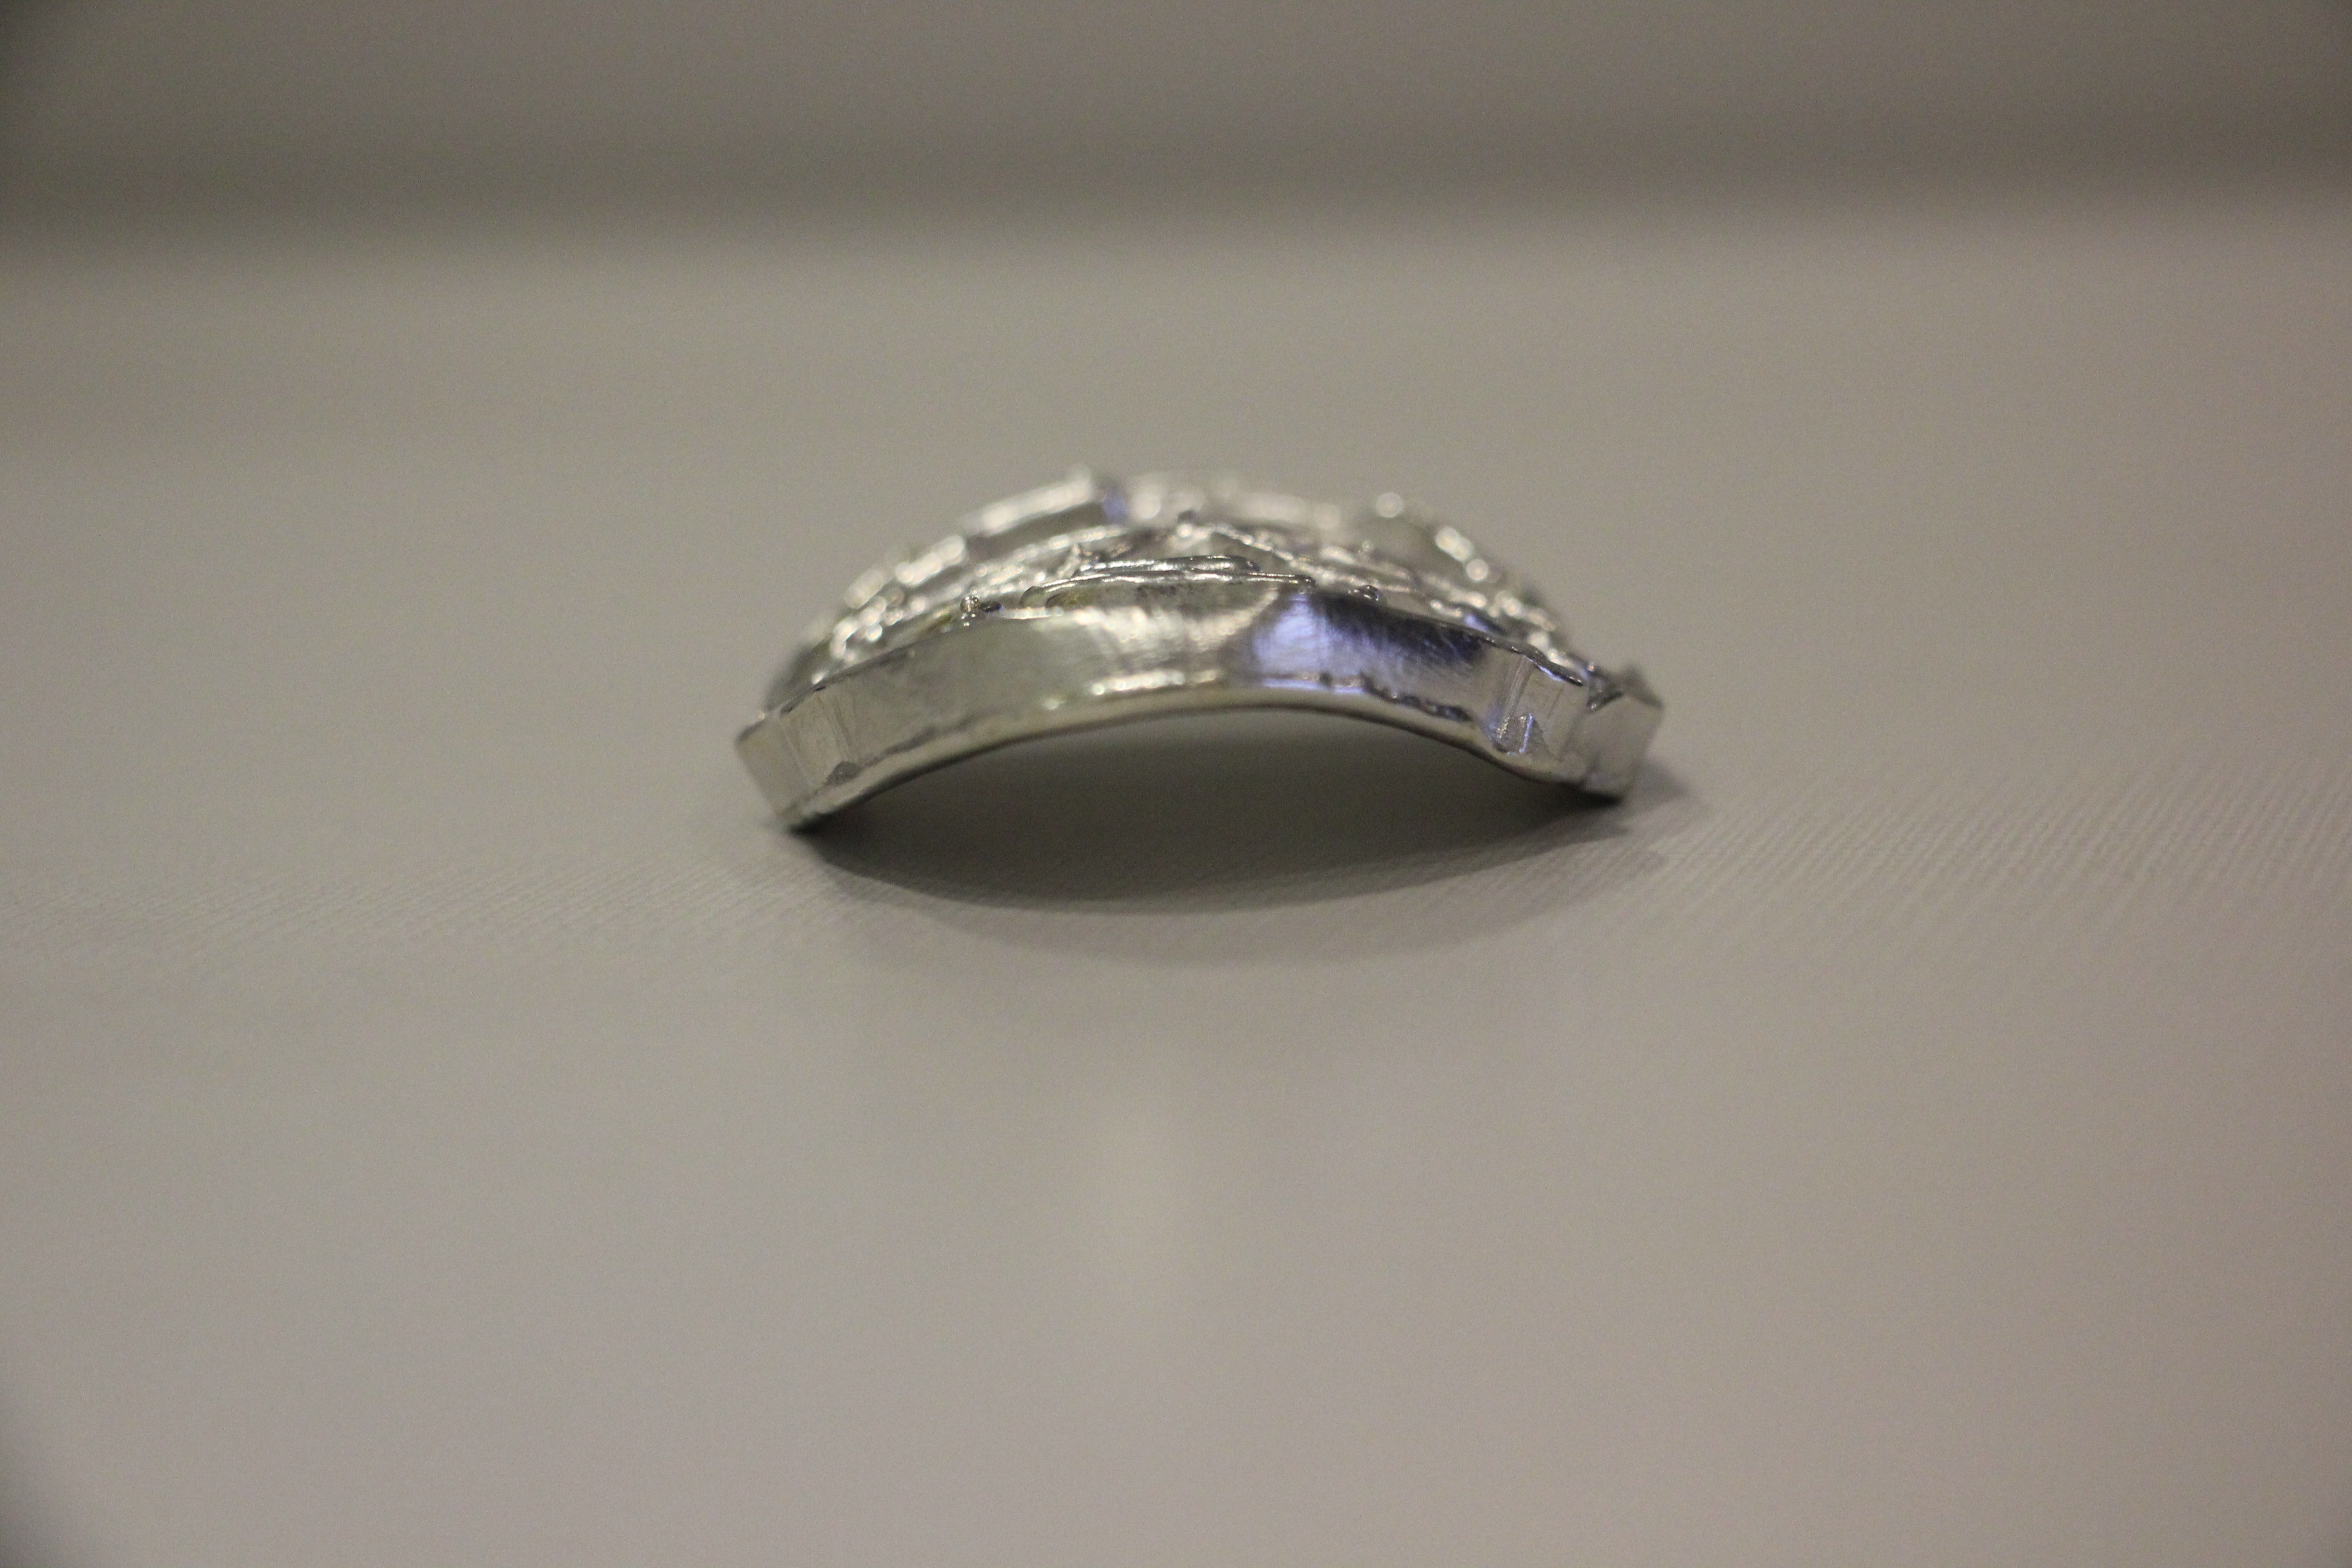
They can be bent to fit on a bike, or left flat if you just want a shiny Bernie Sanders paperweight.
Every one comes out a bit different, but I like that, I might experiment with polishing them, but pewter and tin are very soft metals, and I don’t know if I have anything that delicate.
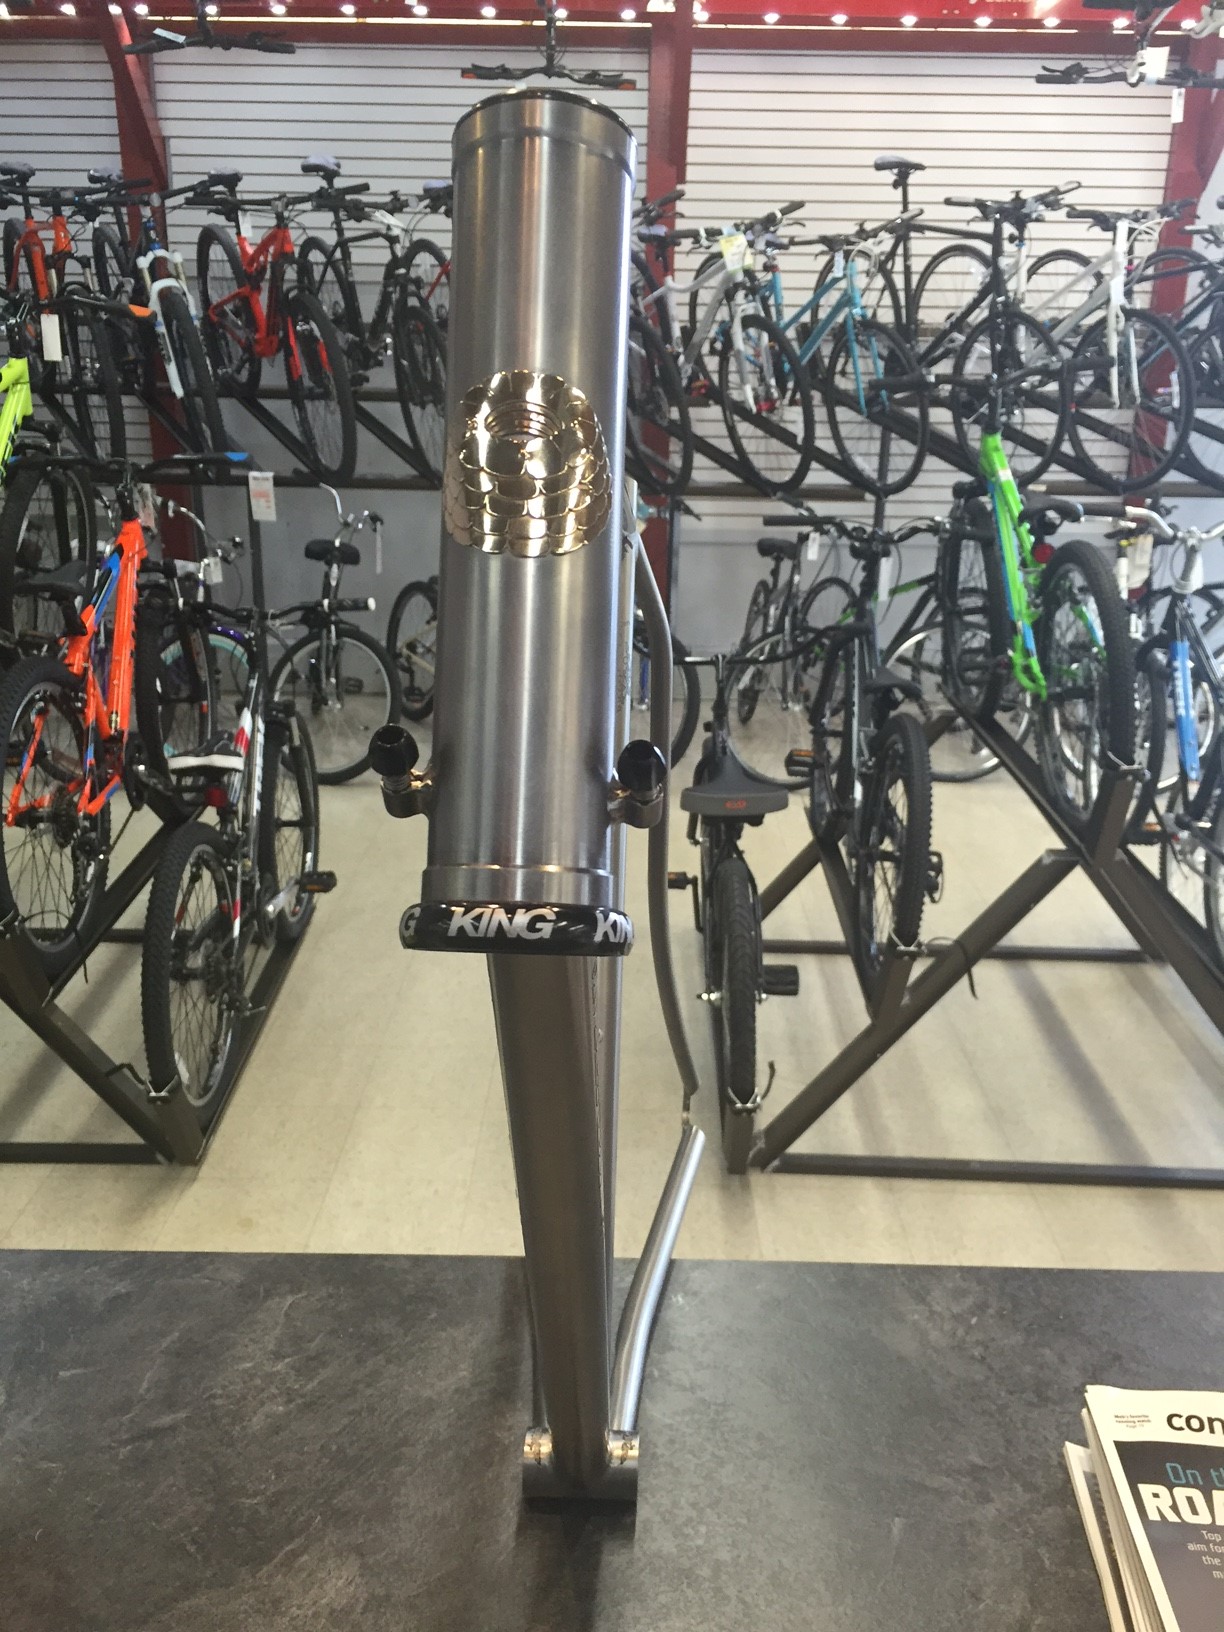
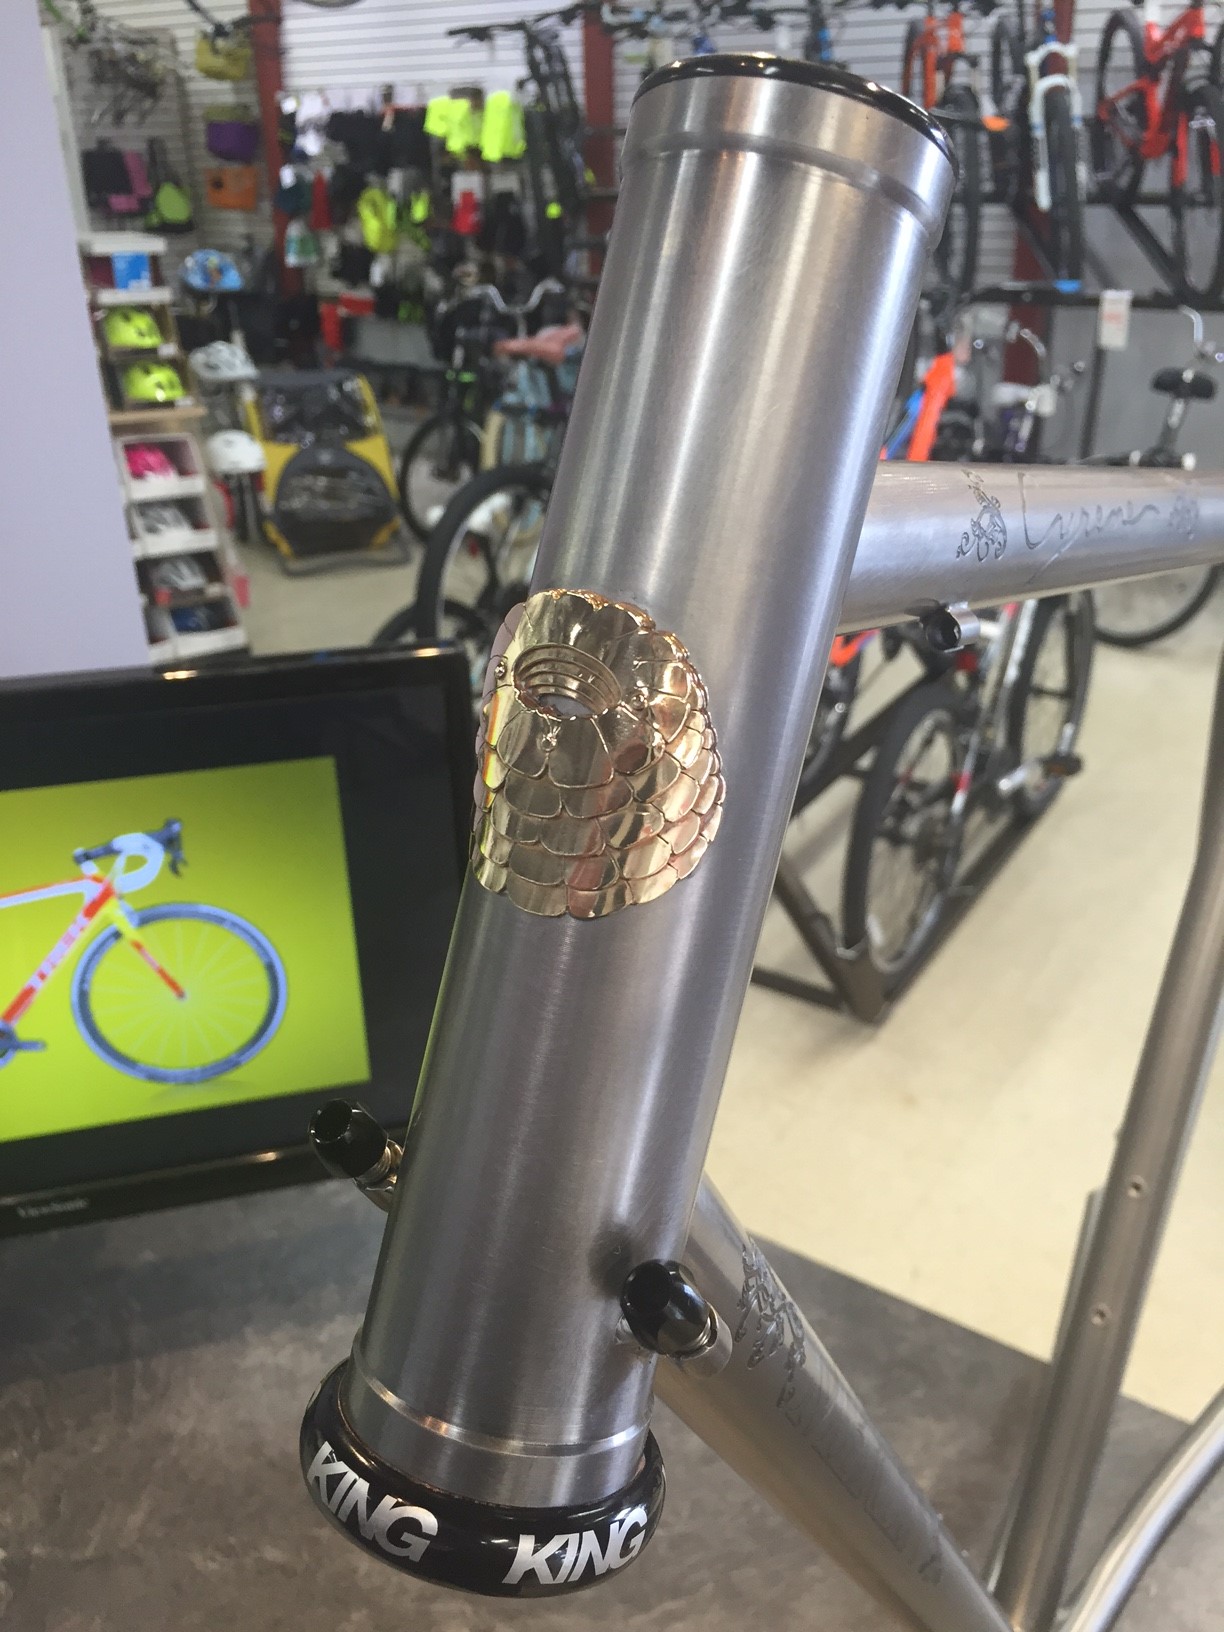
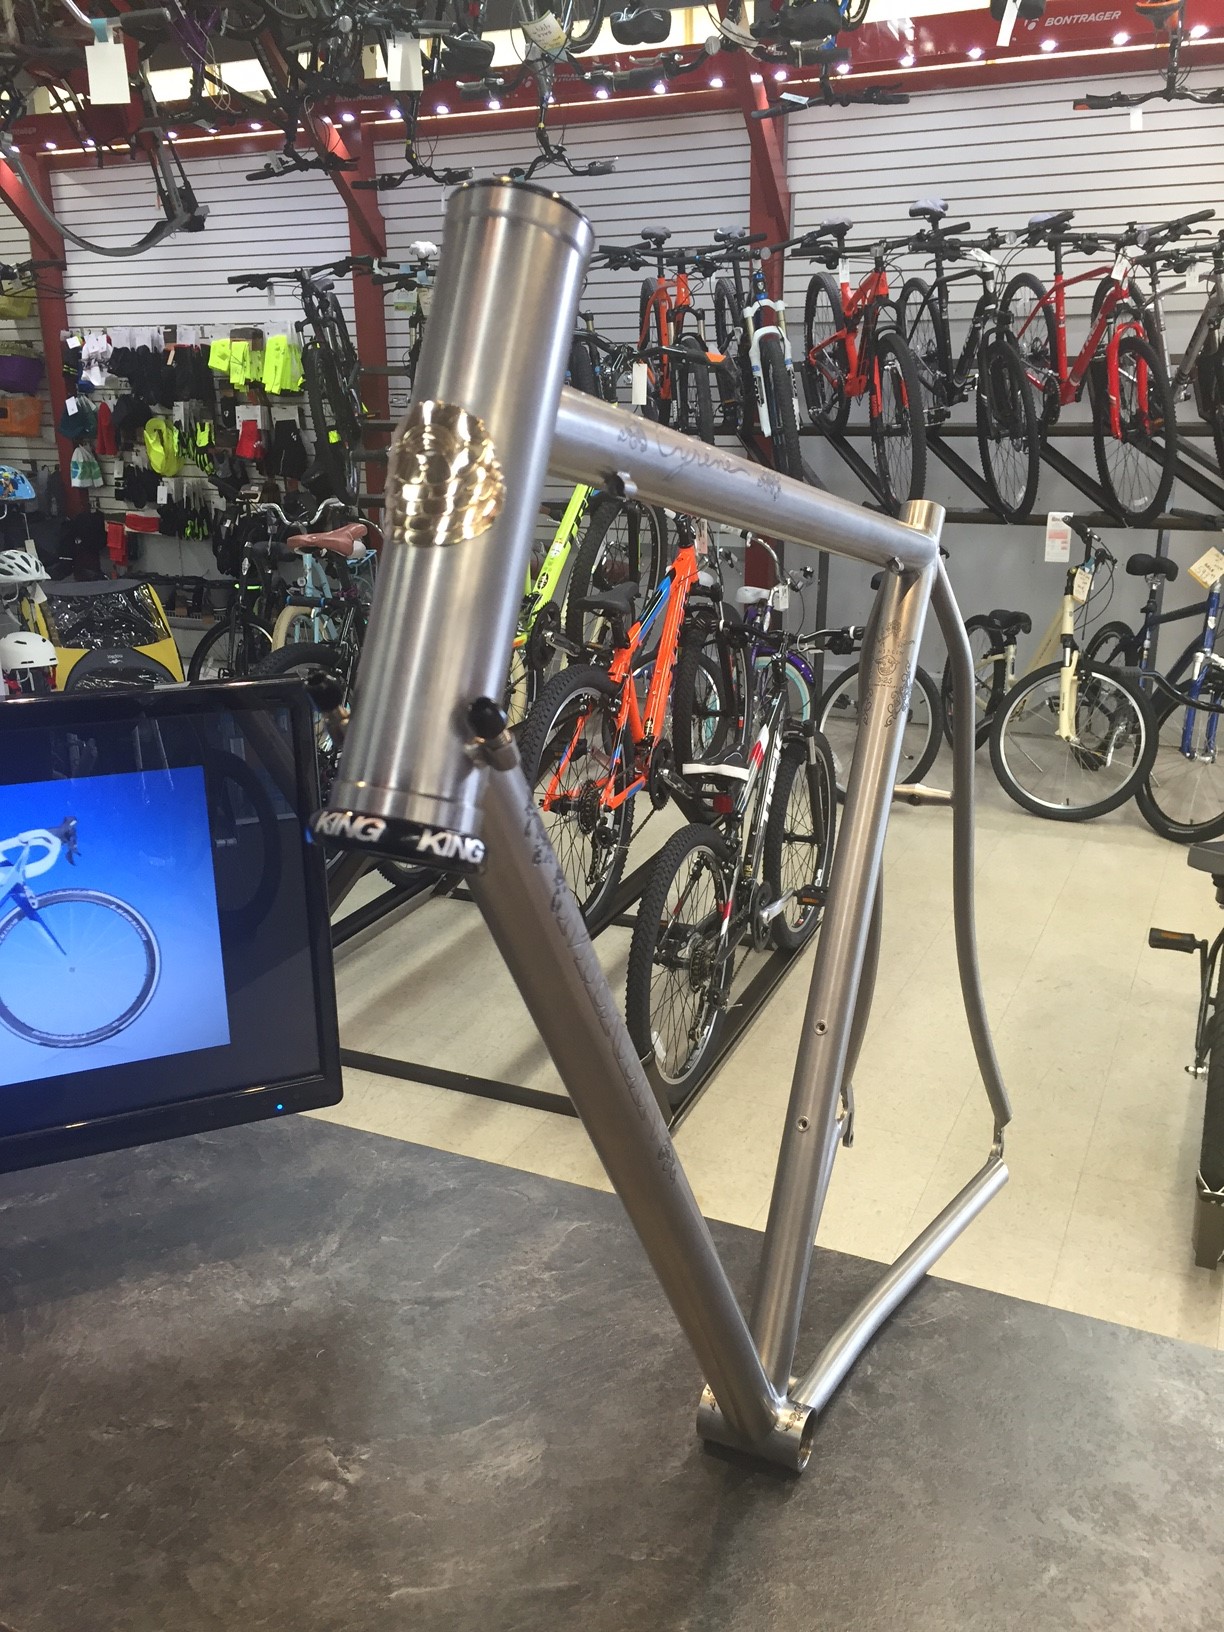
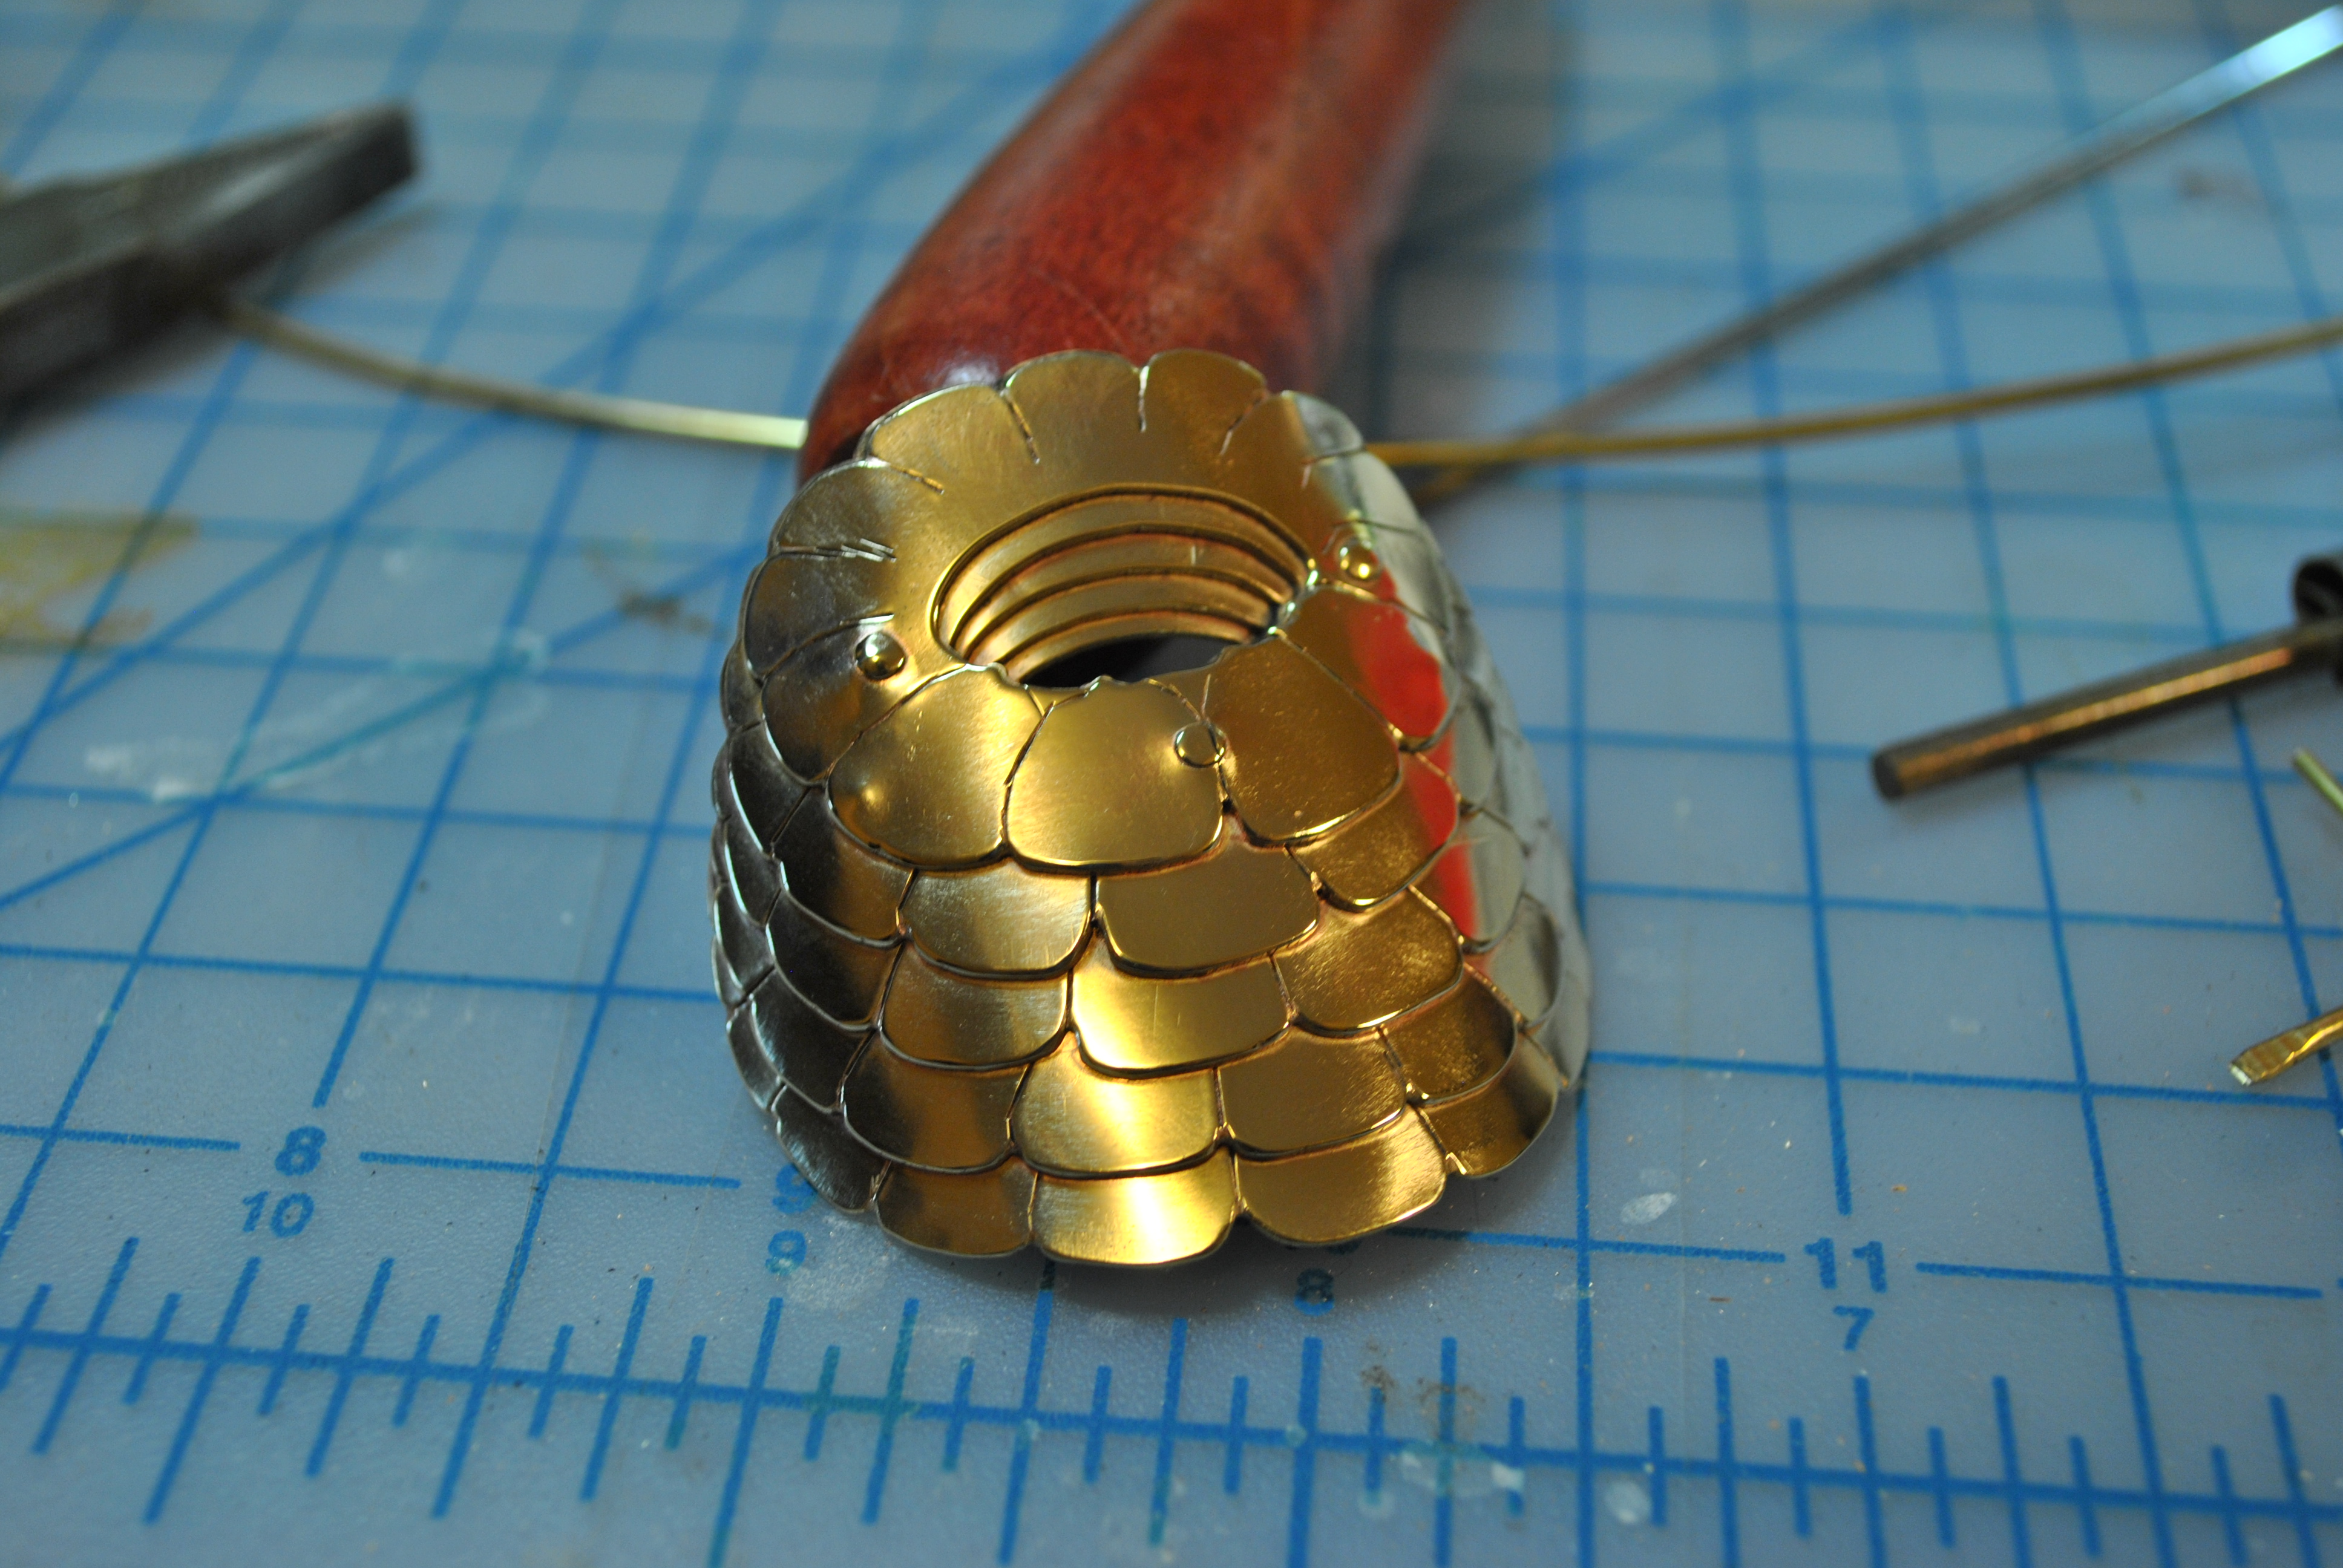
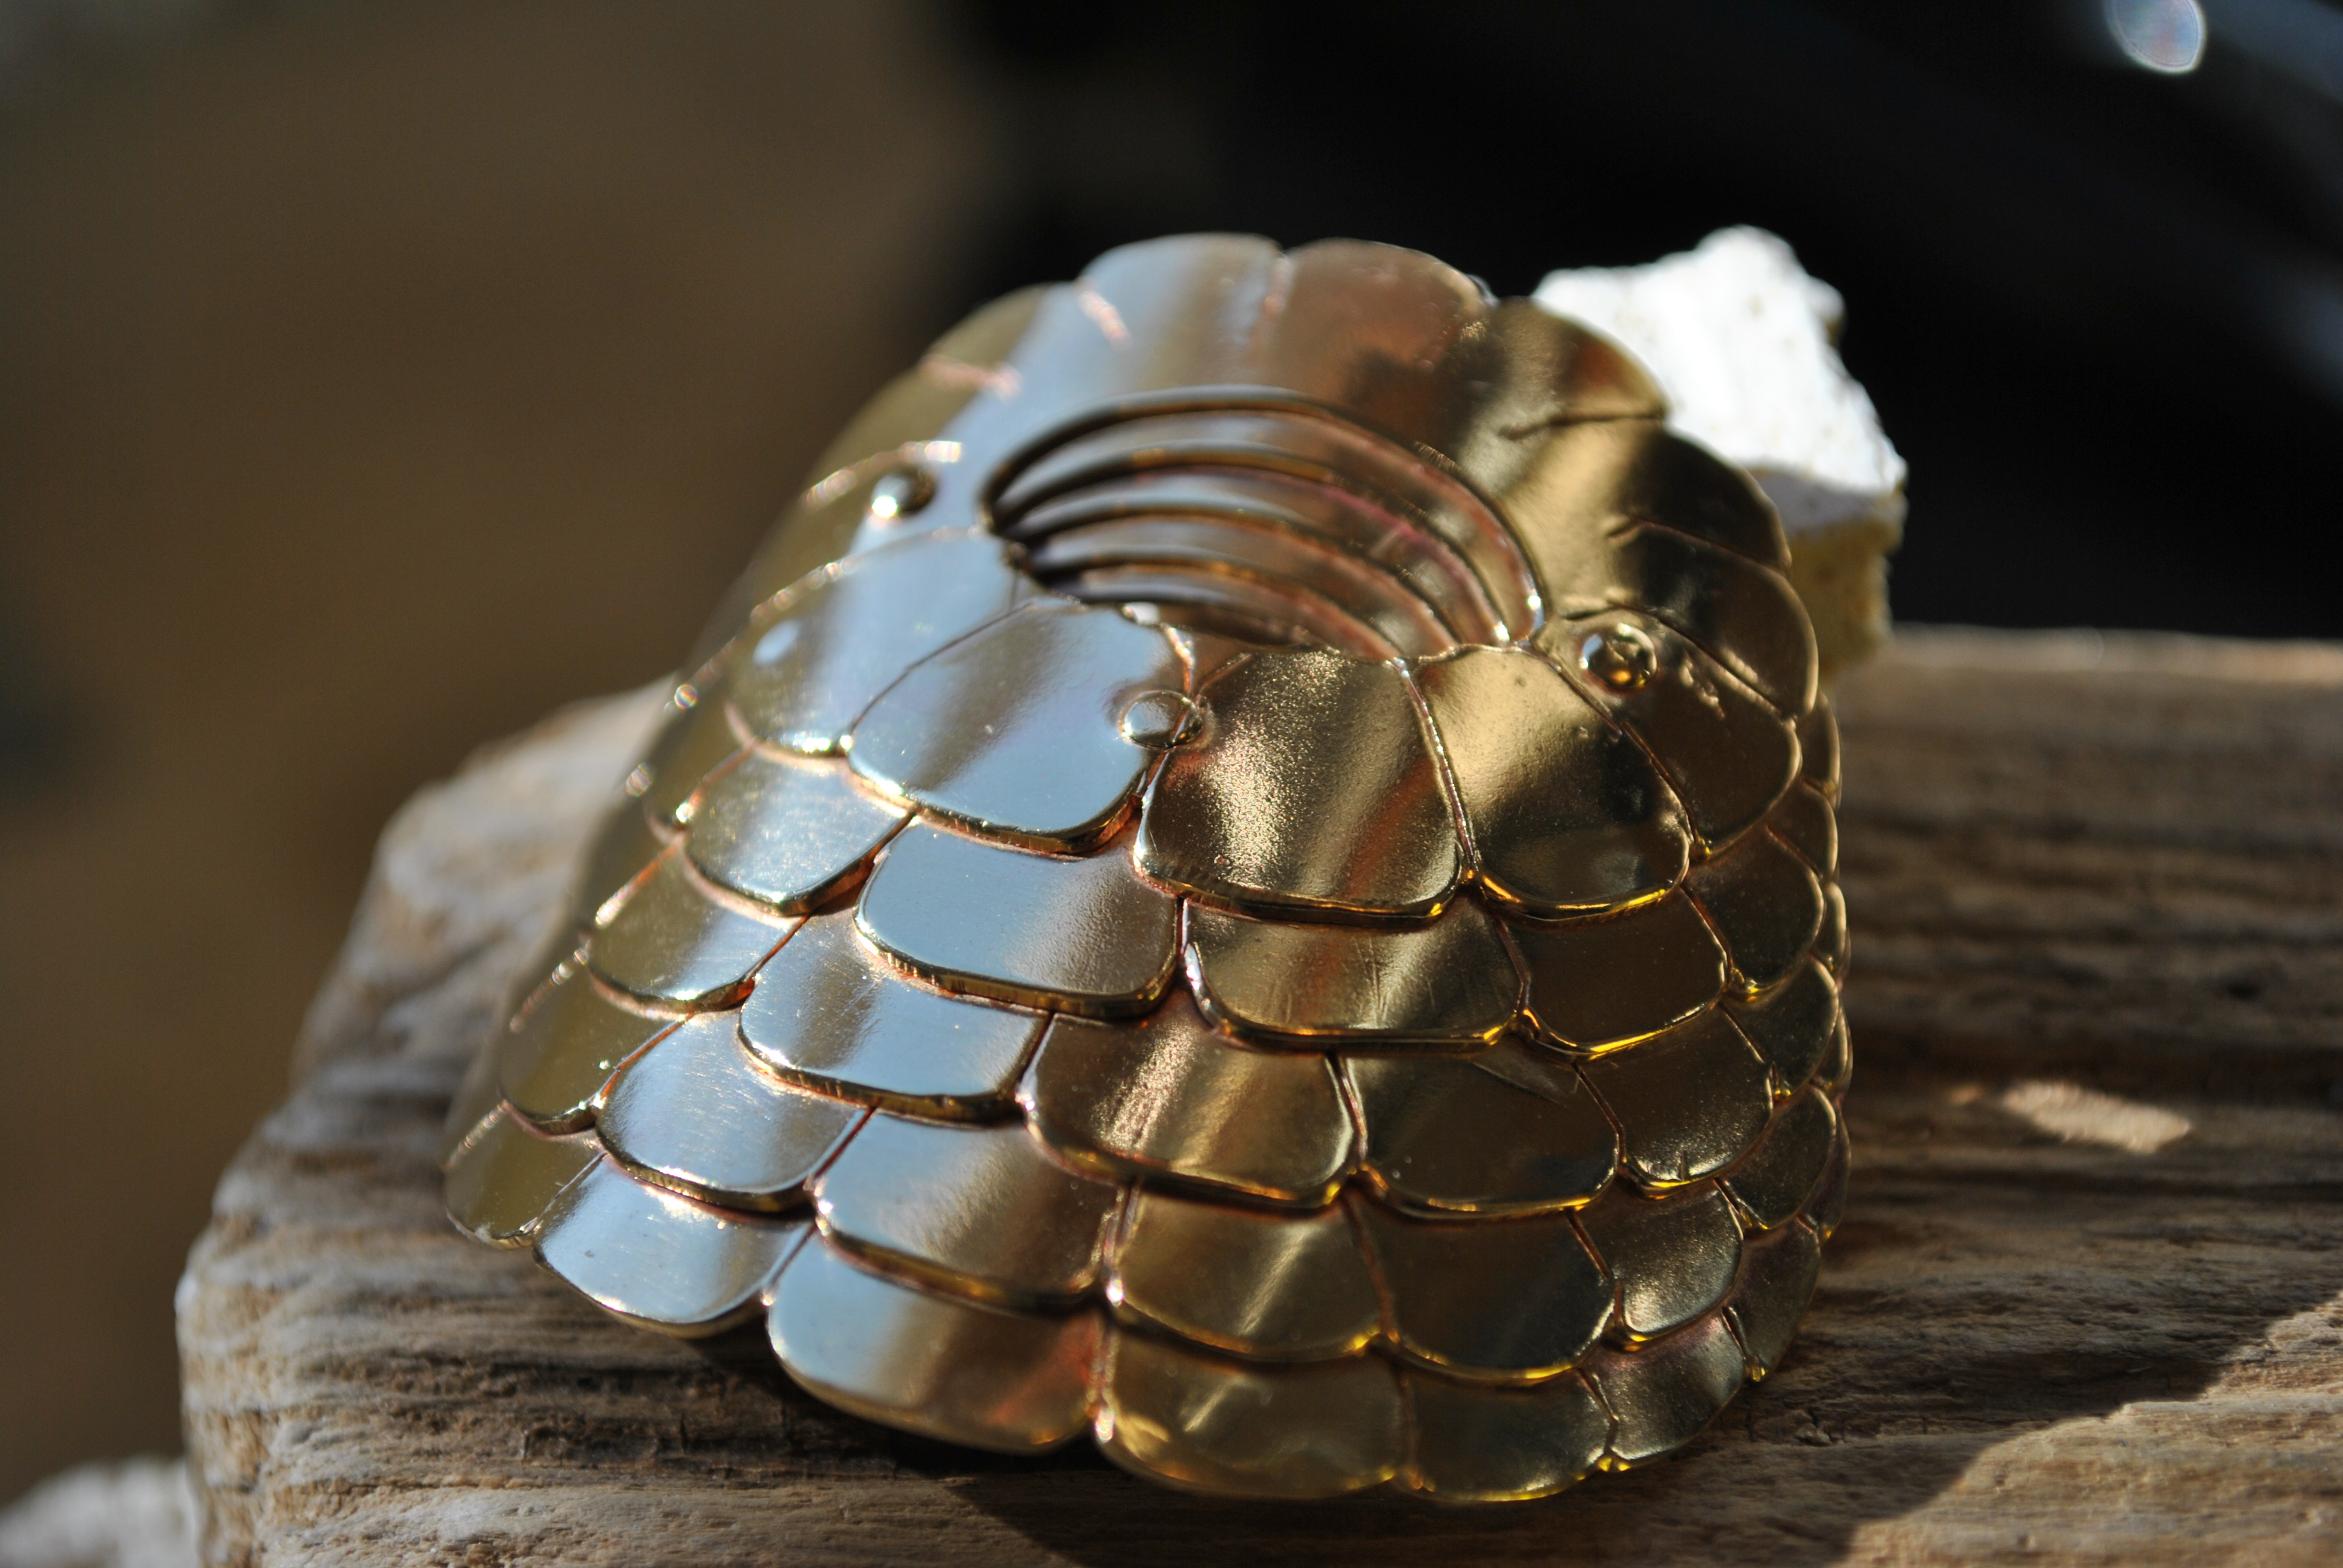
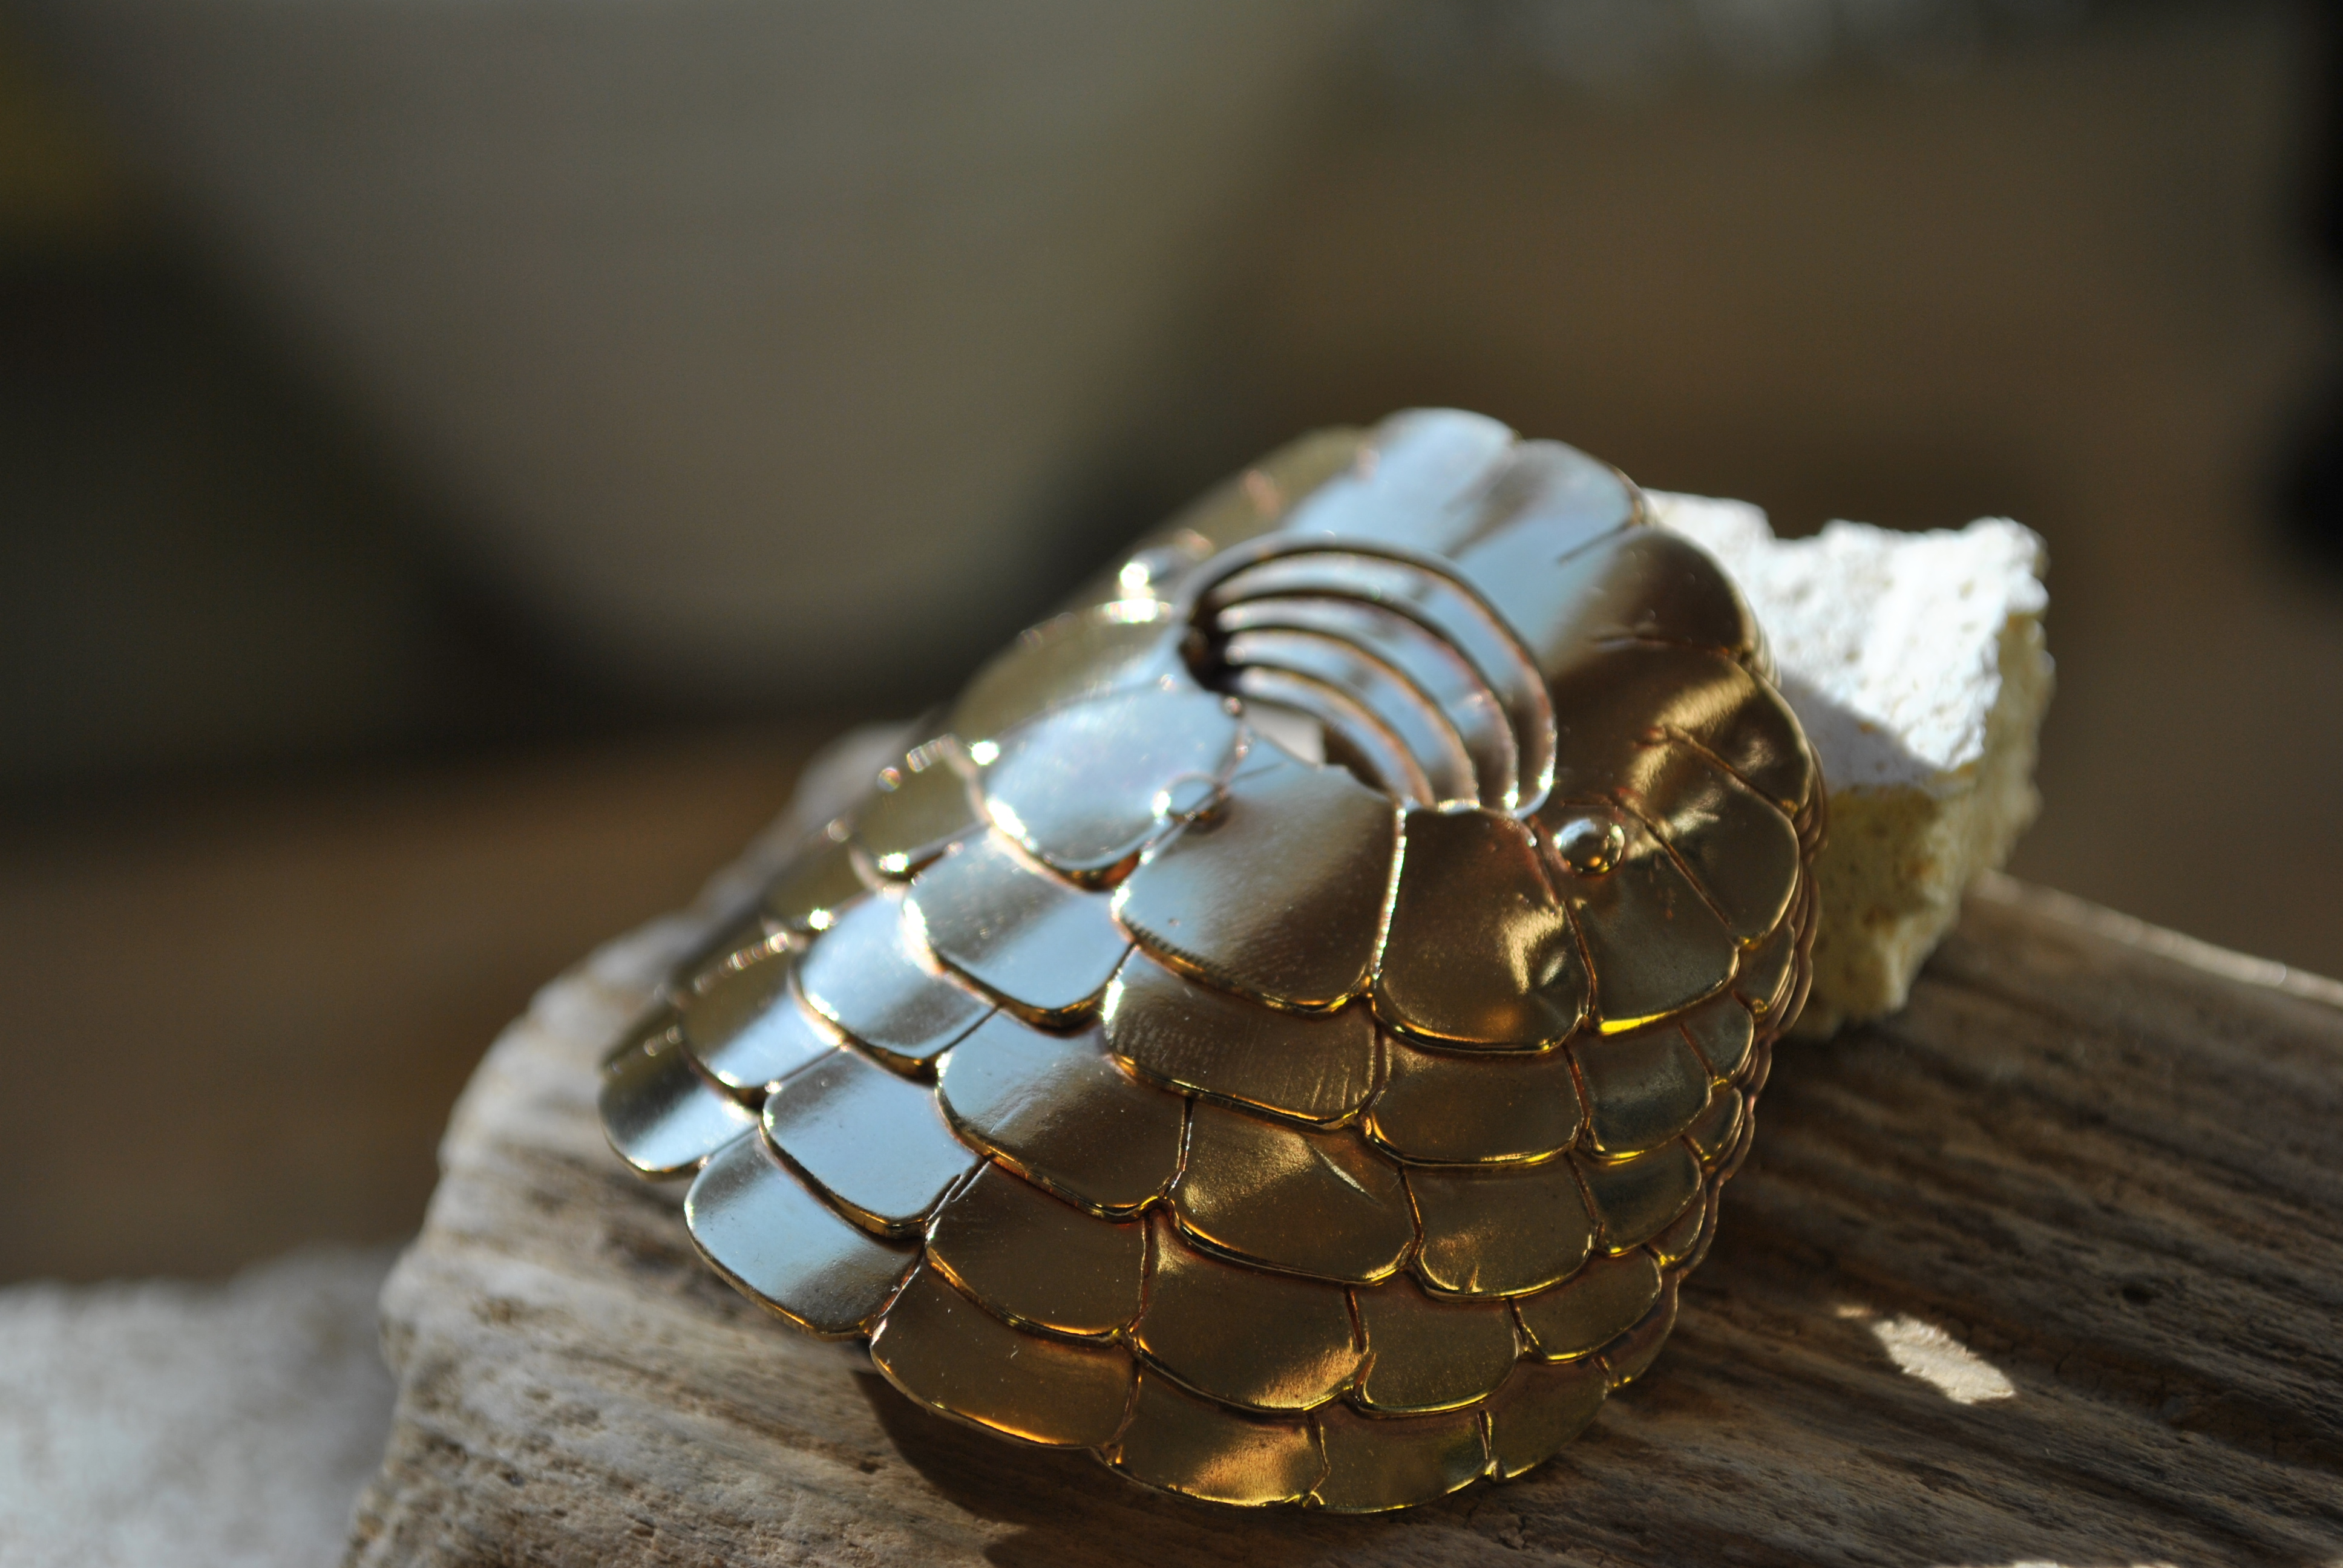
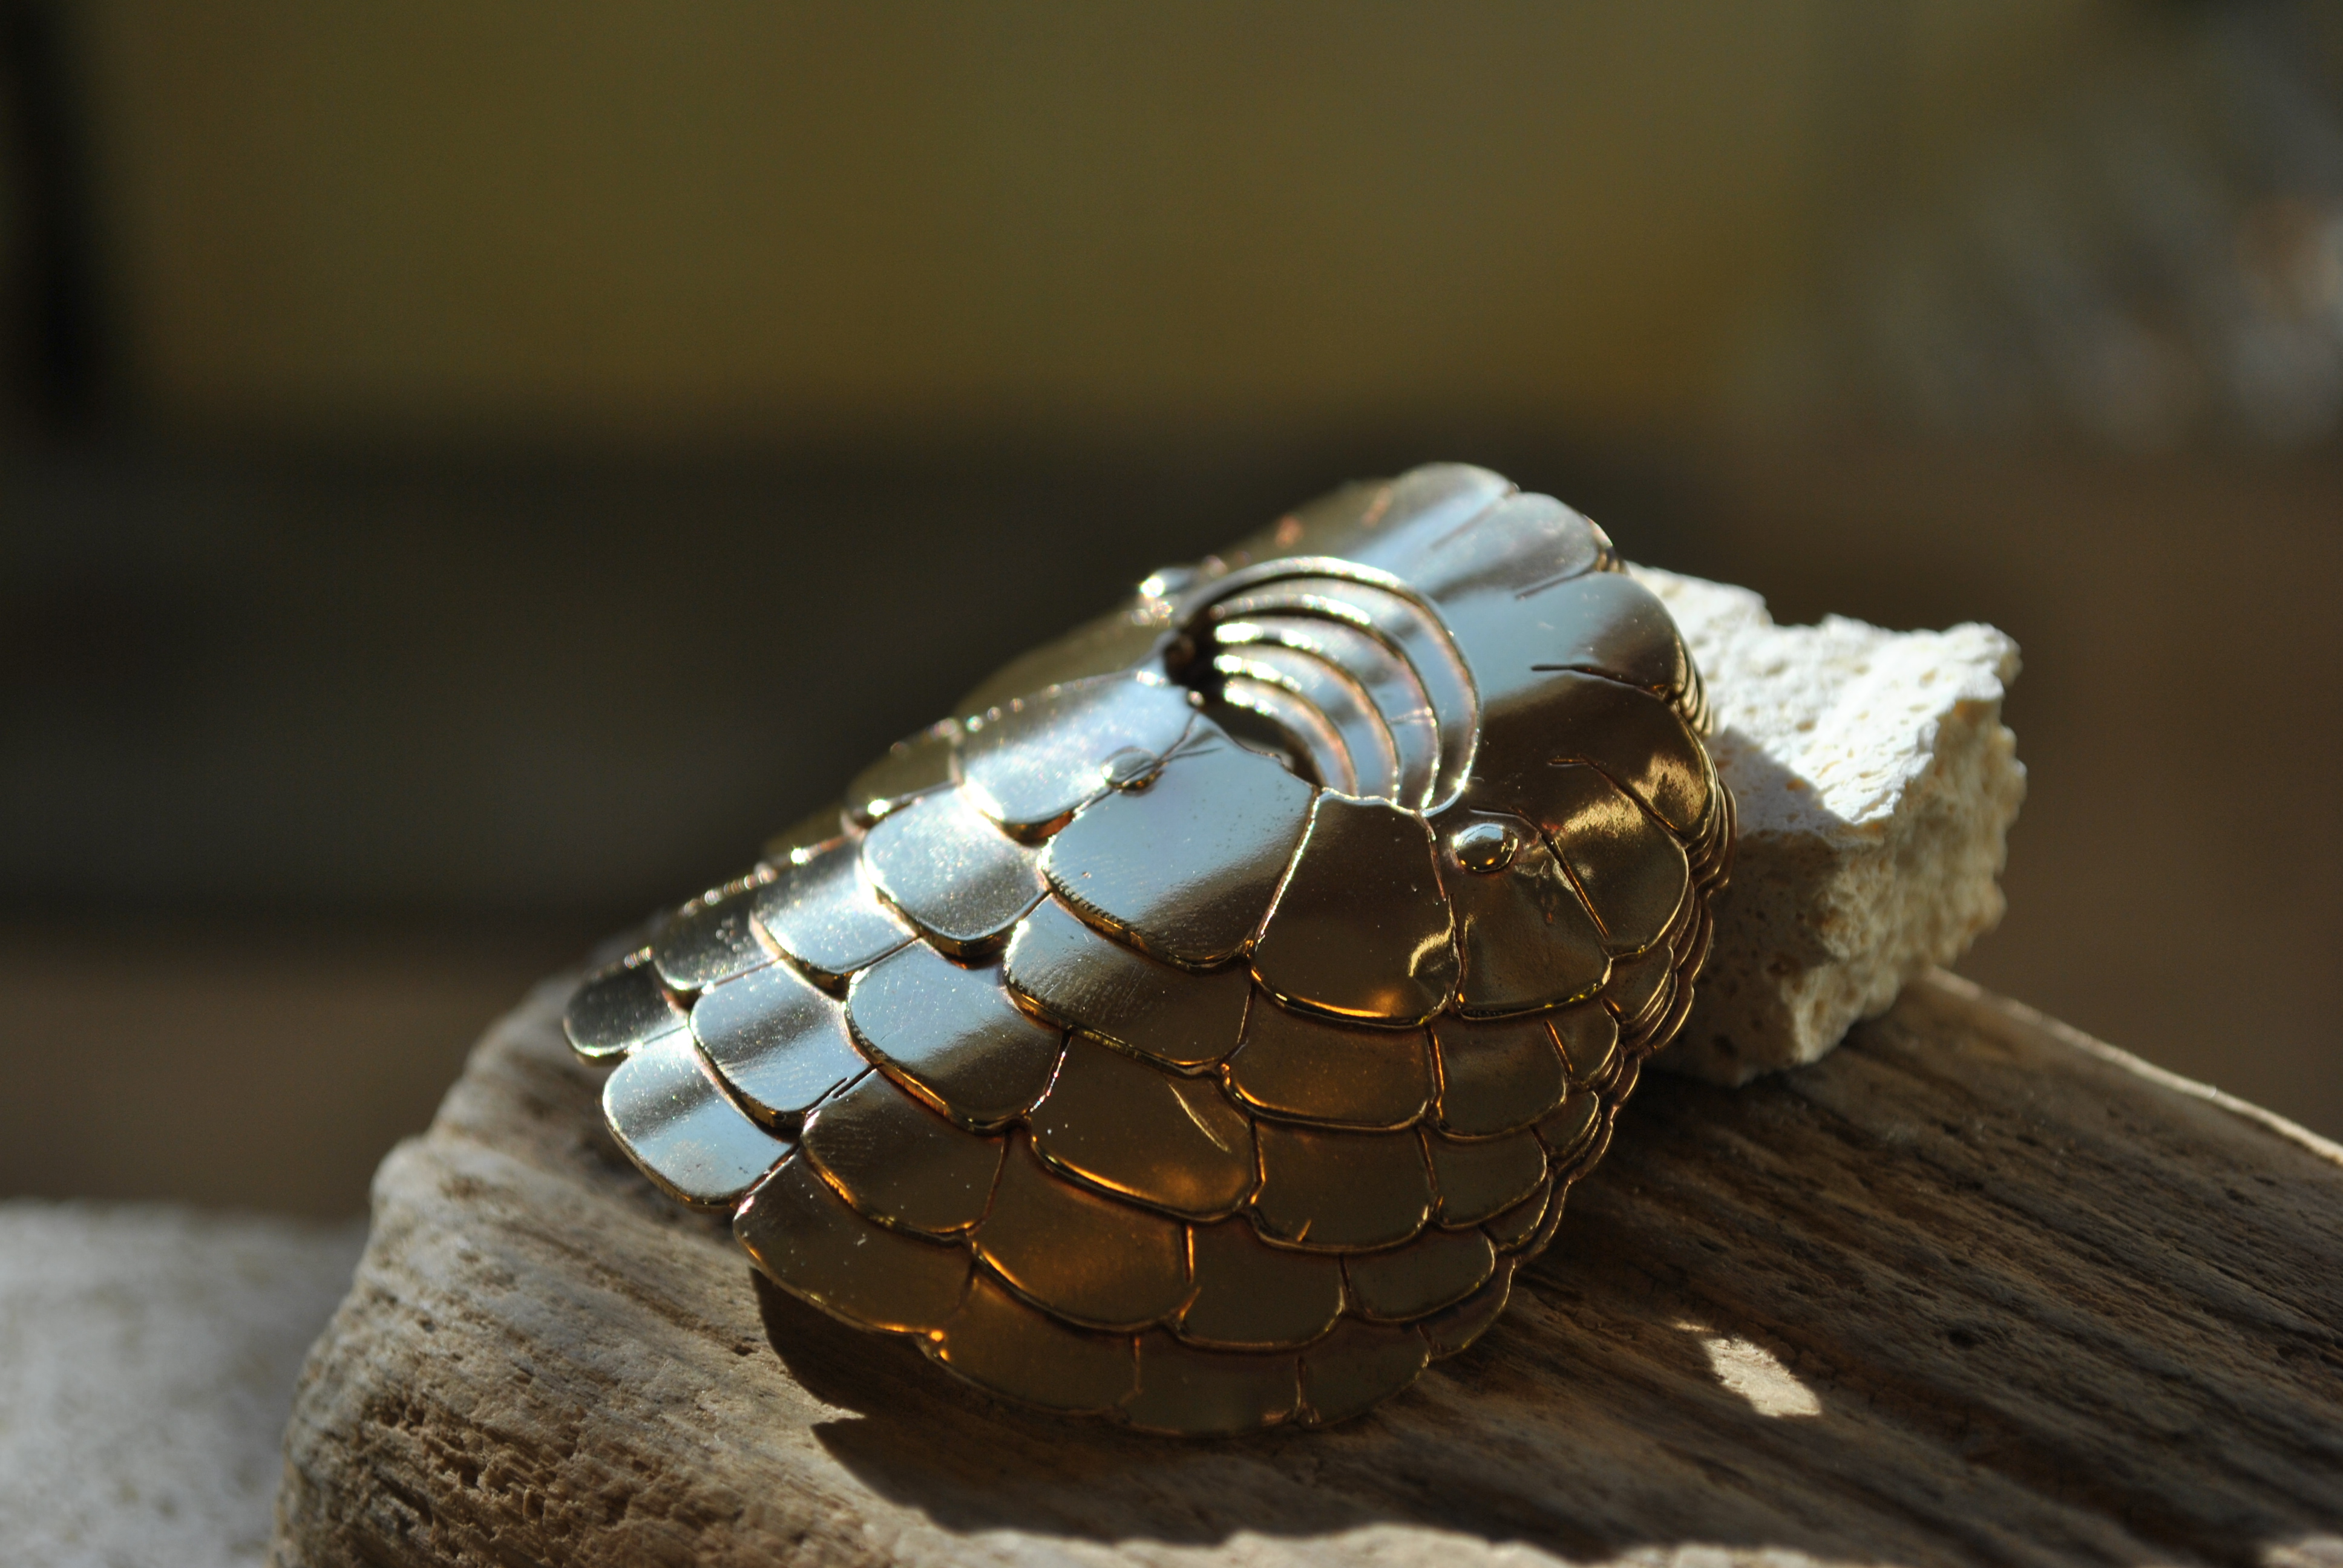
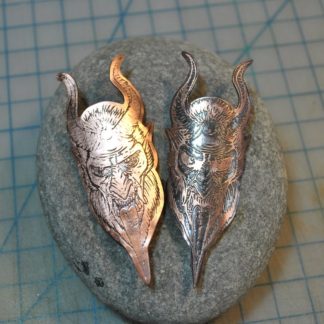
Got these lovely pictures from a client I made a “corn” cog badge for. I really like the way this looks, and am glad that it fits so well on the new bike.
Lets say you just spent a long time carving out a wax model that you plan to cast in metal, you know that your wax model will be destroyed when you cast it, but you really like and want to be able to save it. Silicon Casting to the rescue!
You will need the following:
your wax model (or anything you want to copy)
A form to hold the liquid silicon
some liquid silicon (I used Dragon skin 10 from smooth on)
A vacuum chamber and pump (this is not needed, but will greatly improve your casting)
First glue your wax model to the bottom of your form, unless you are going to suspend the item (if you want both sides cast), if you are doing that you will have to cut it in half later, look on youtube for tips on this, I did a simple one sided cast.
The mixing process for the silicon is pretty simple, follow the mixing ratio’s for your silicon. In my case it was a 1 to 1 mix. Follow the instructions as each one is a bit different.
Once you mix it together, give it some time in the vacuum chamber (how long will depend on how long your silicon takes to set up, you don’t want to wait too long and have it harden in the mixing cup!), then pour it slowly into your form, starting from a low point and letting the silicon find its own level. Go slow, and try not to introduce more bubbles.
Then back into the vacuum chamber again, to get even more bubbles out.
I also cast a simple silicon disc, just to see what would happen, it came out like a super tough, super stretchy cup coaster. I might use this technique later to cast gaskets and stuff like that.
I found that quickly running a torch over the top pops most of the surface bubbles. Very quickly run it over the top, never stop moving, and only do it once or twice. Too hot and you will harden the surface. Keep the torch far away, and move very quickly. There will be a couple bubbles left, but most will pop before the silicon hardens.
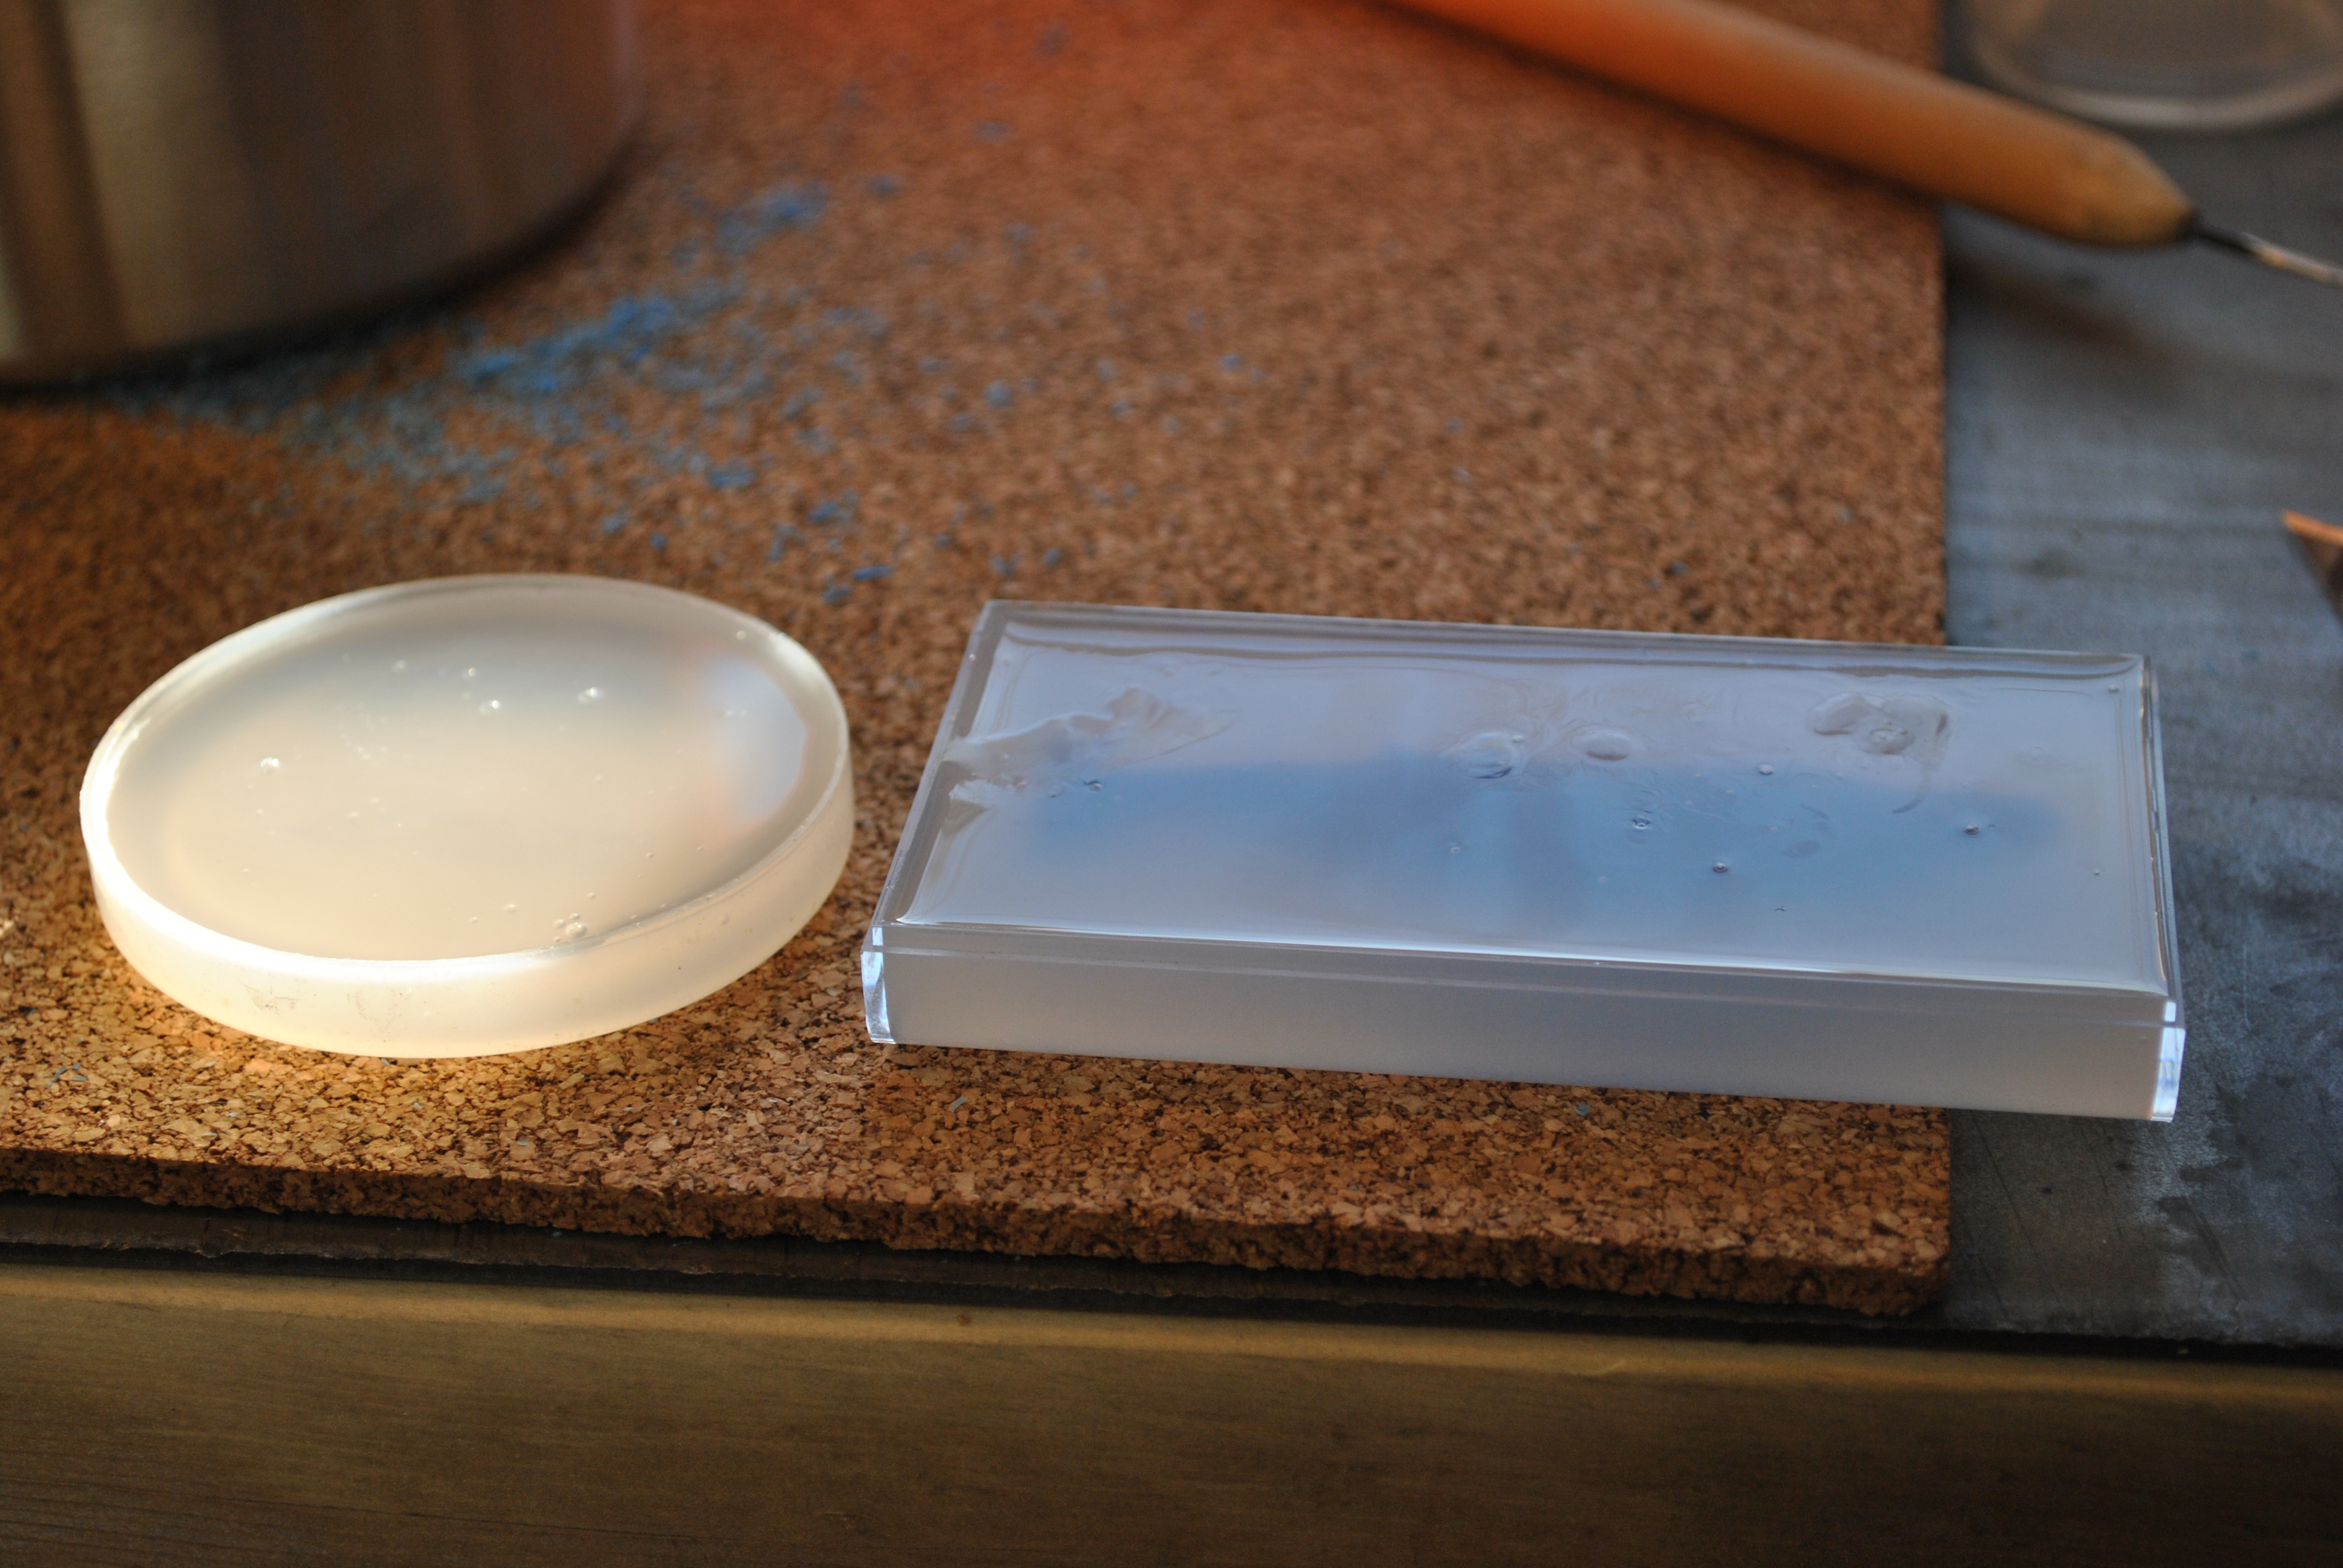
Next melt your wax and pour it in!
Don’t melt your wax in a mason jar…this jar later broke, use a pyrex jar.
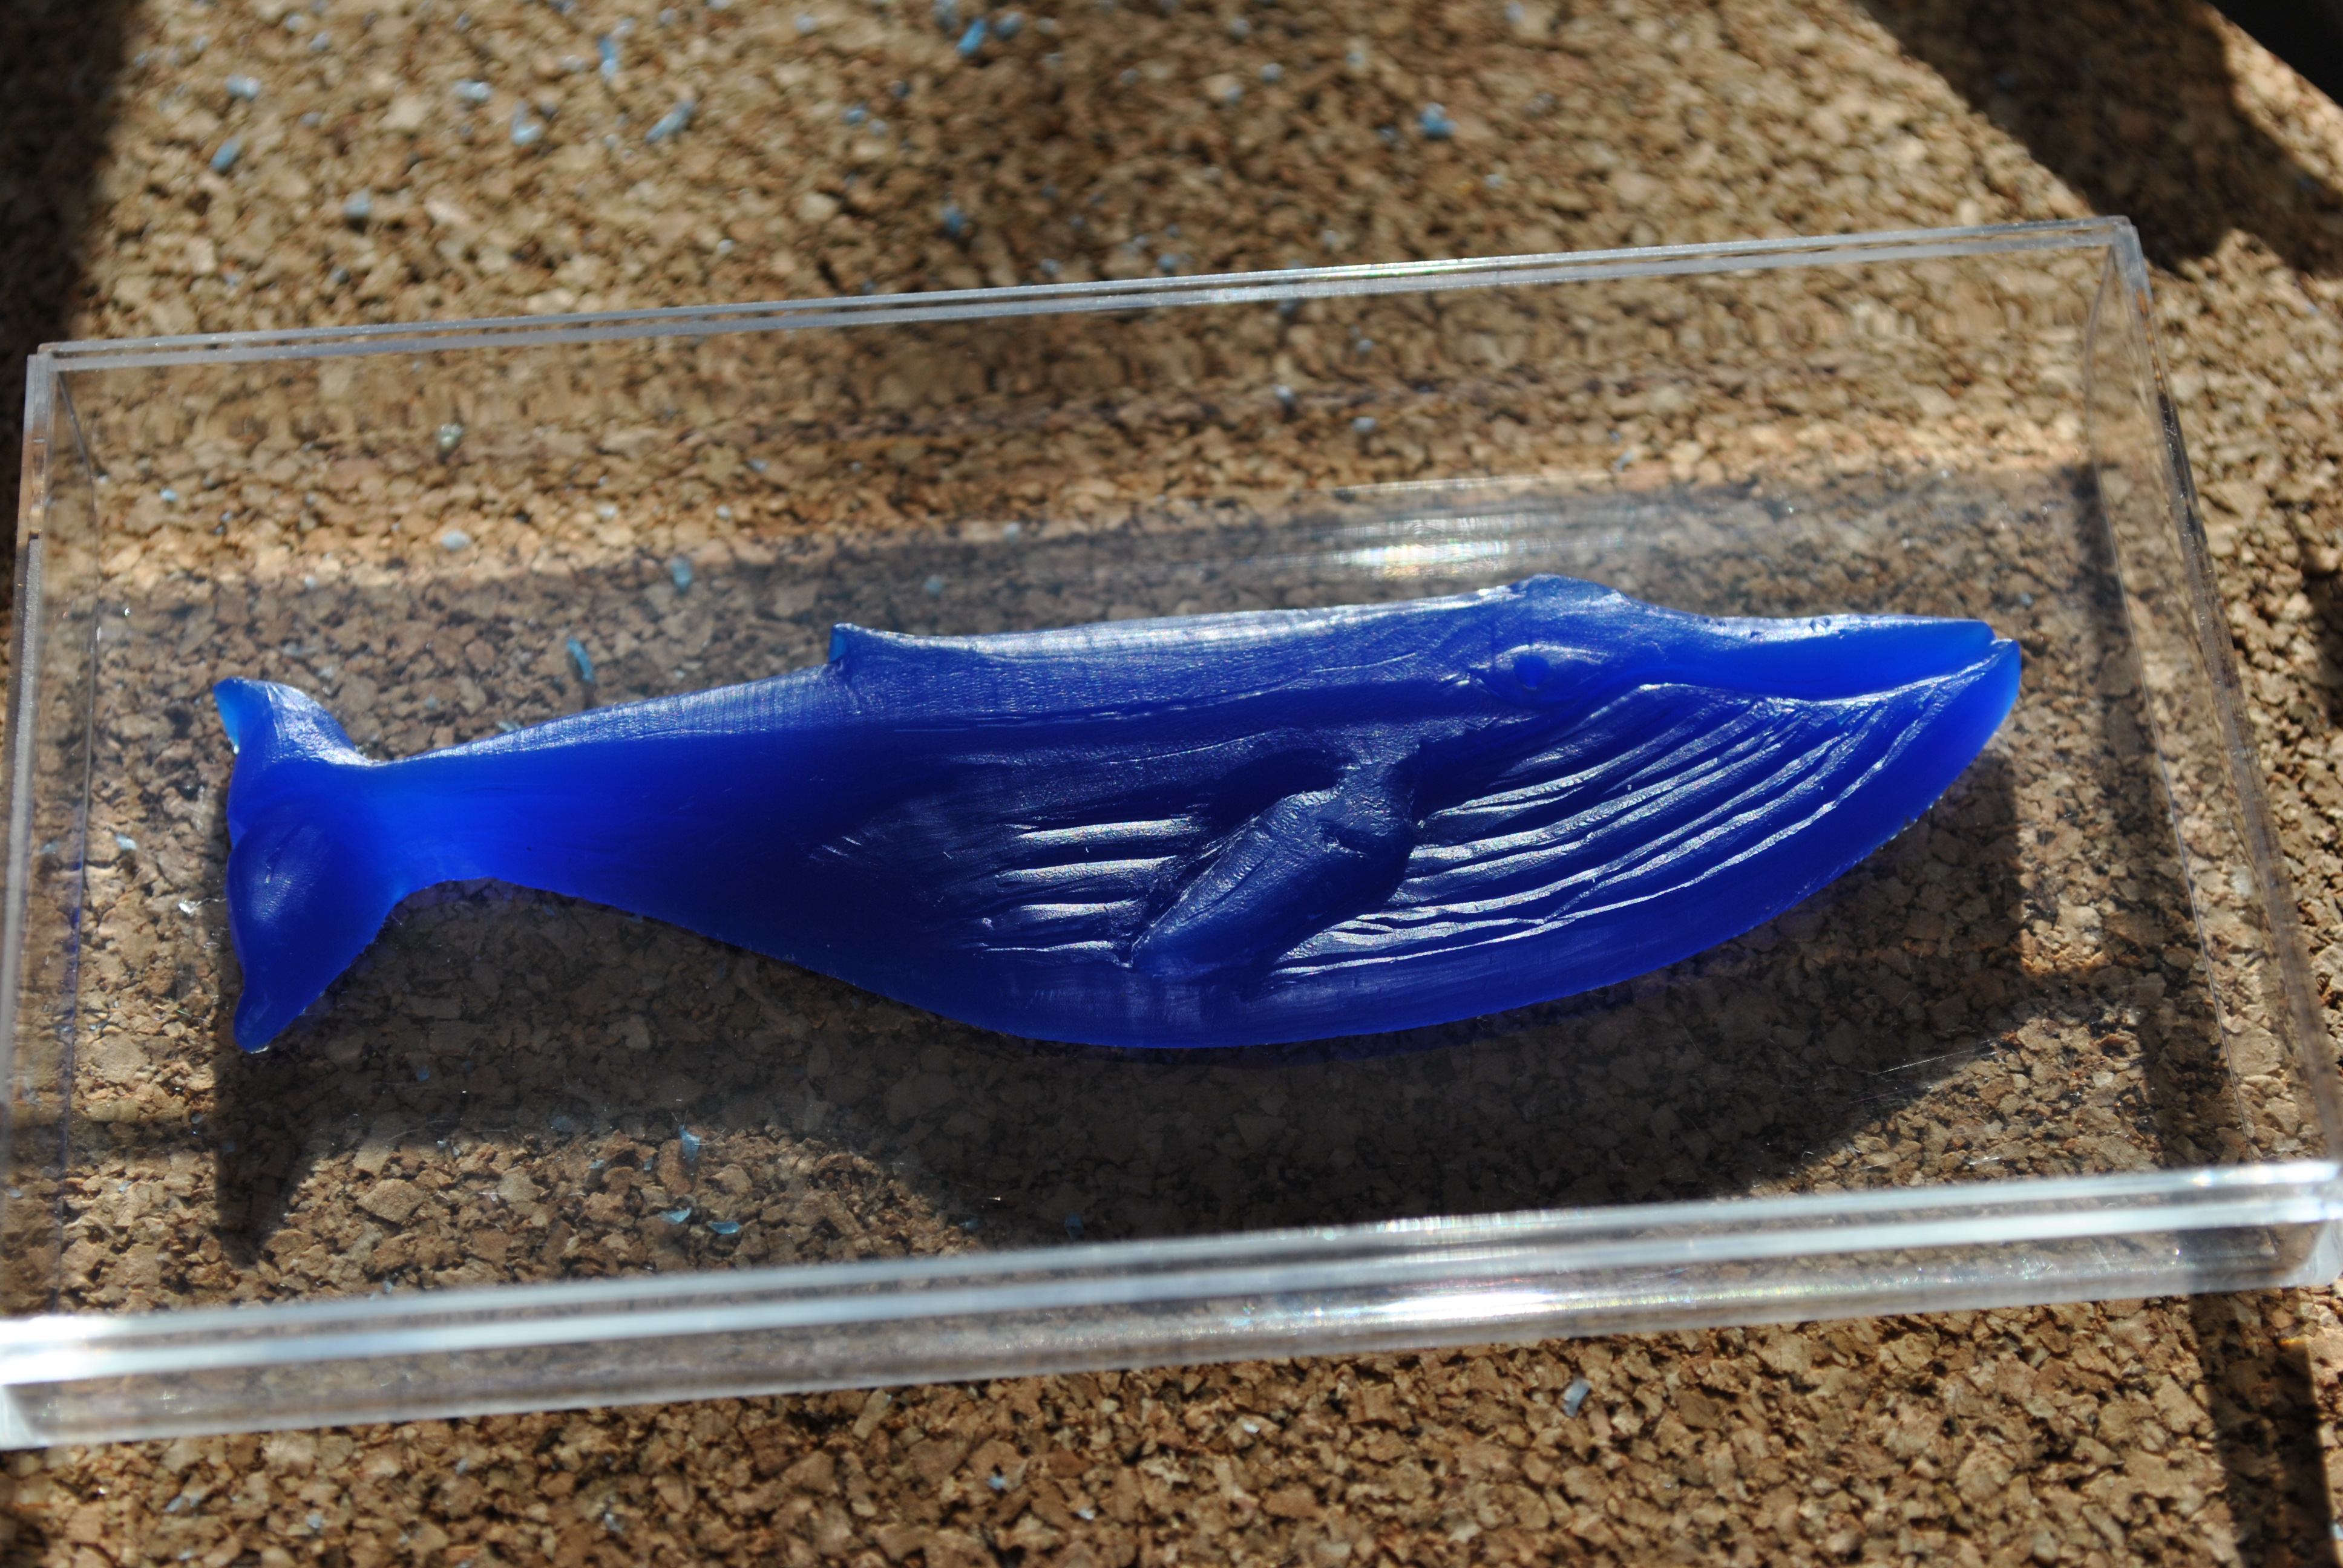
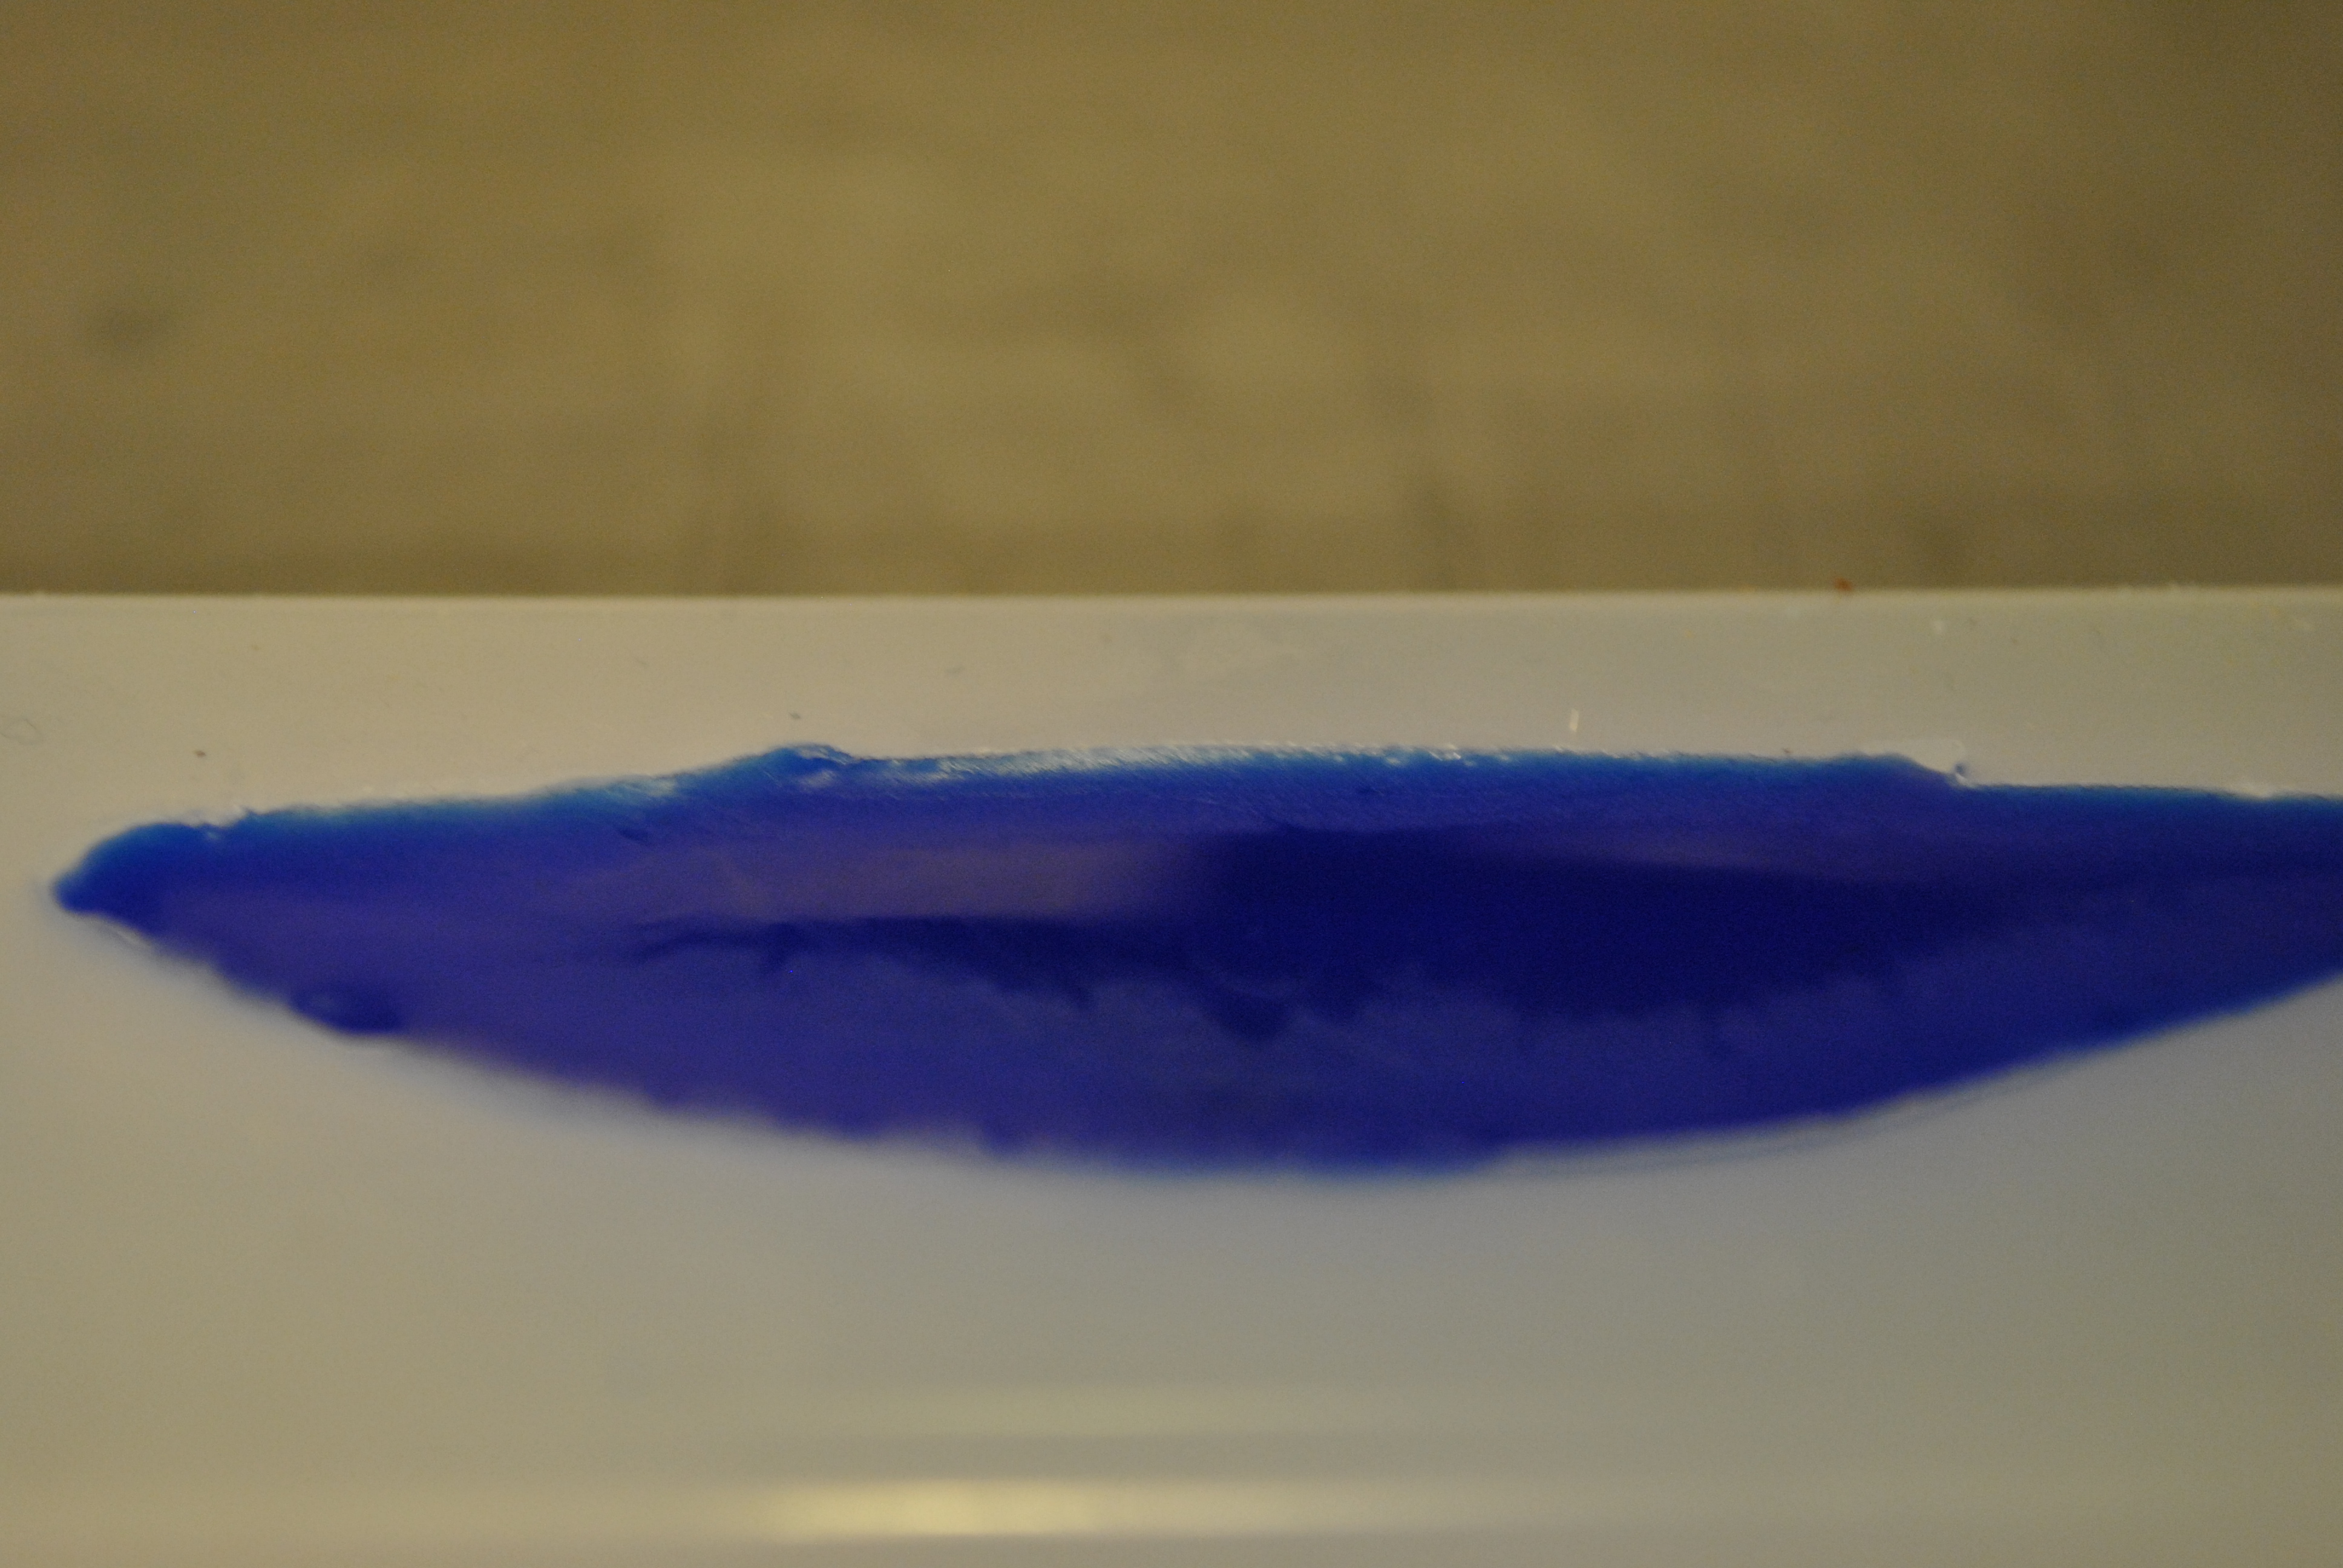
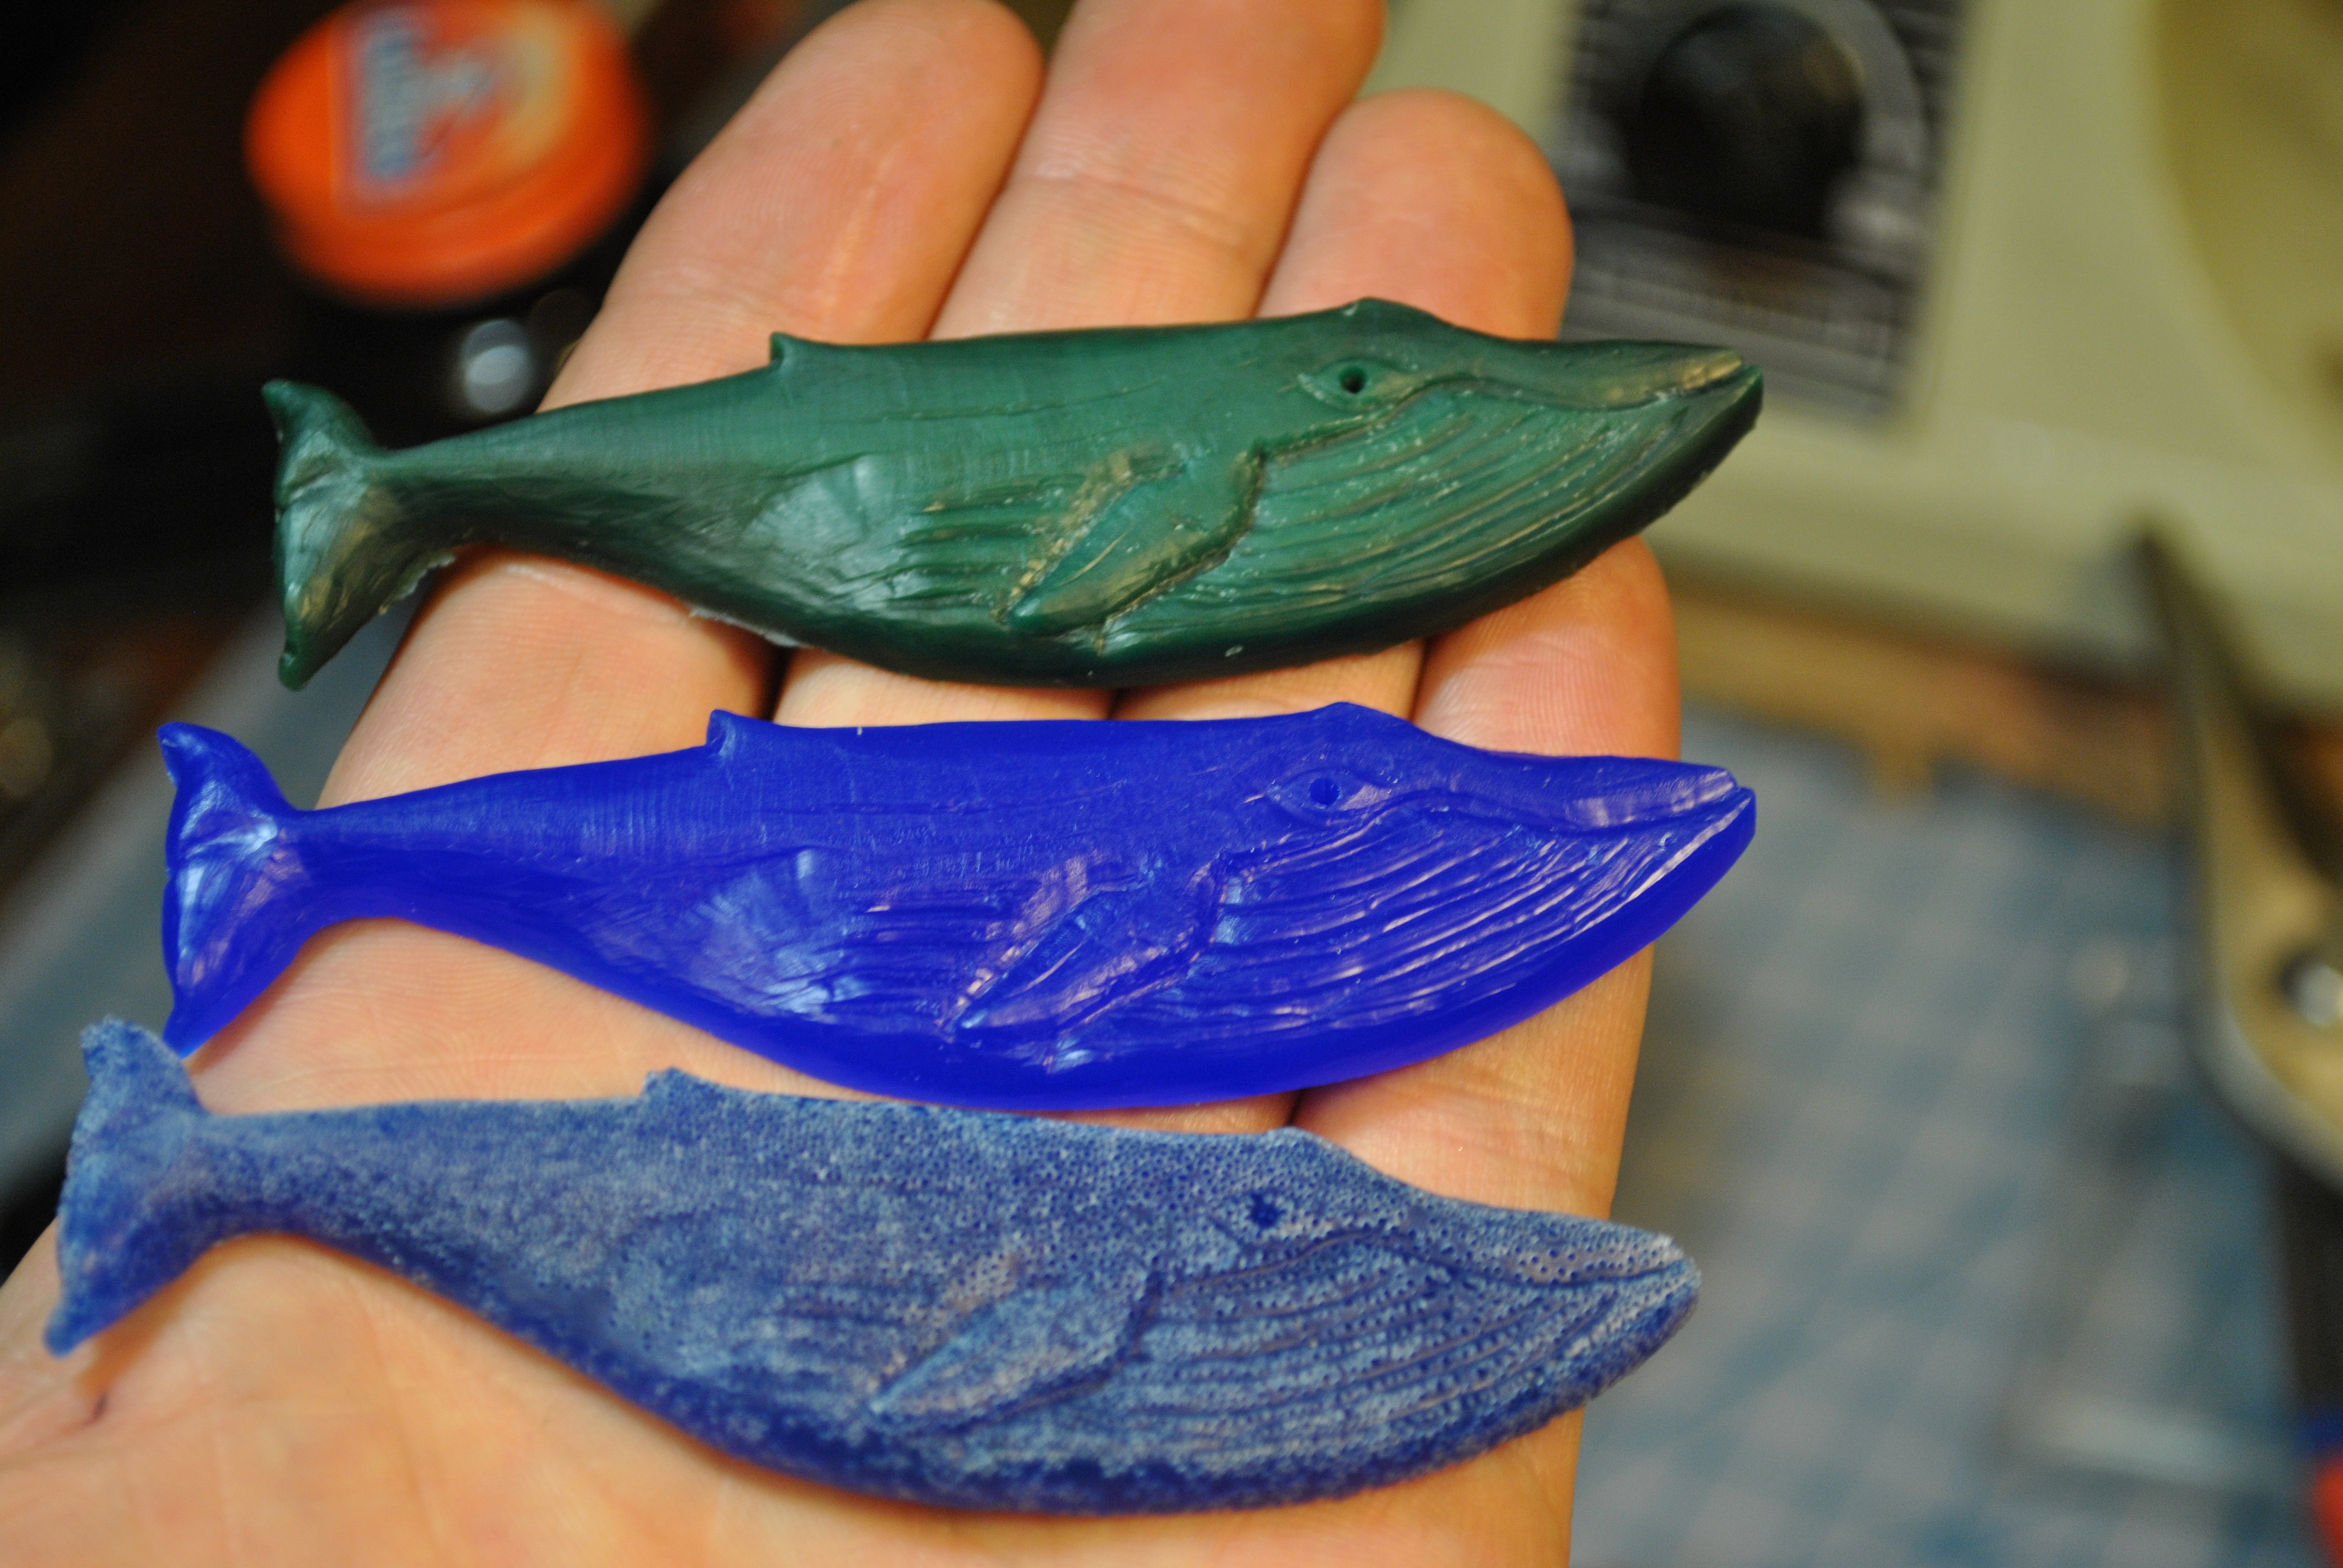
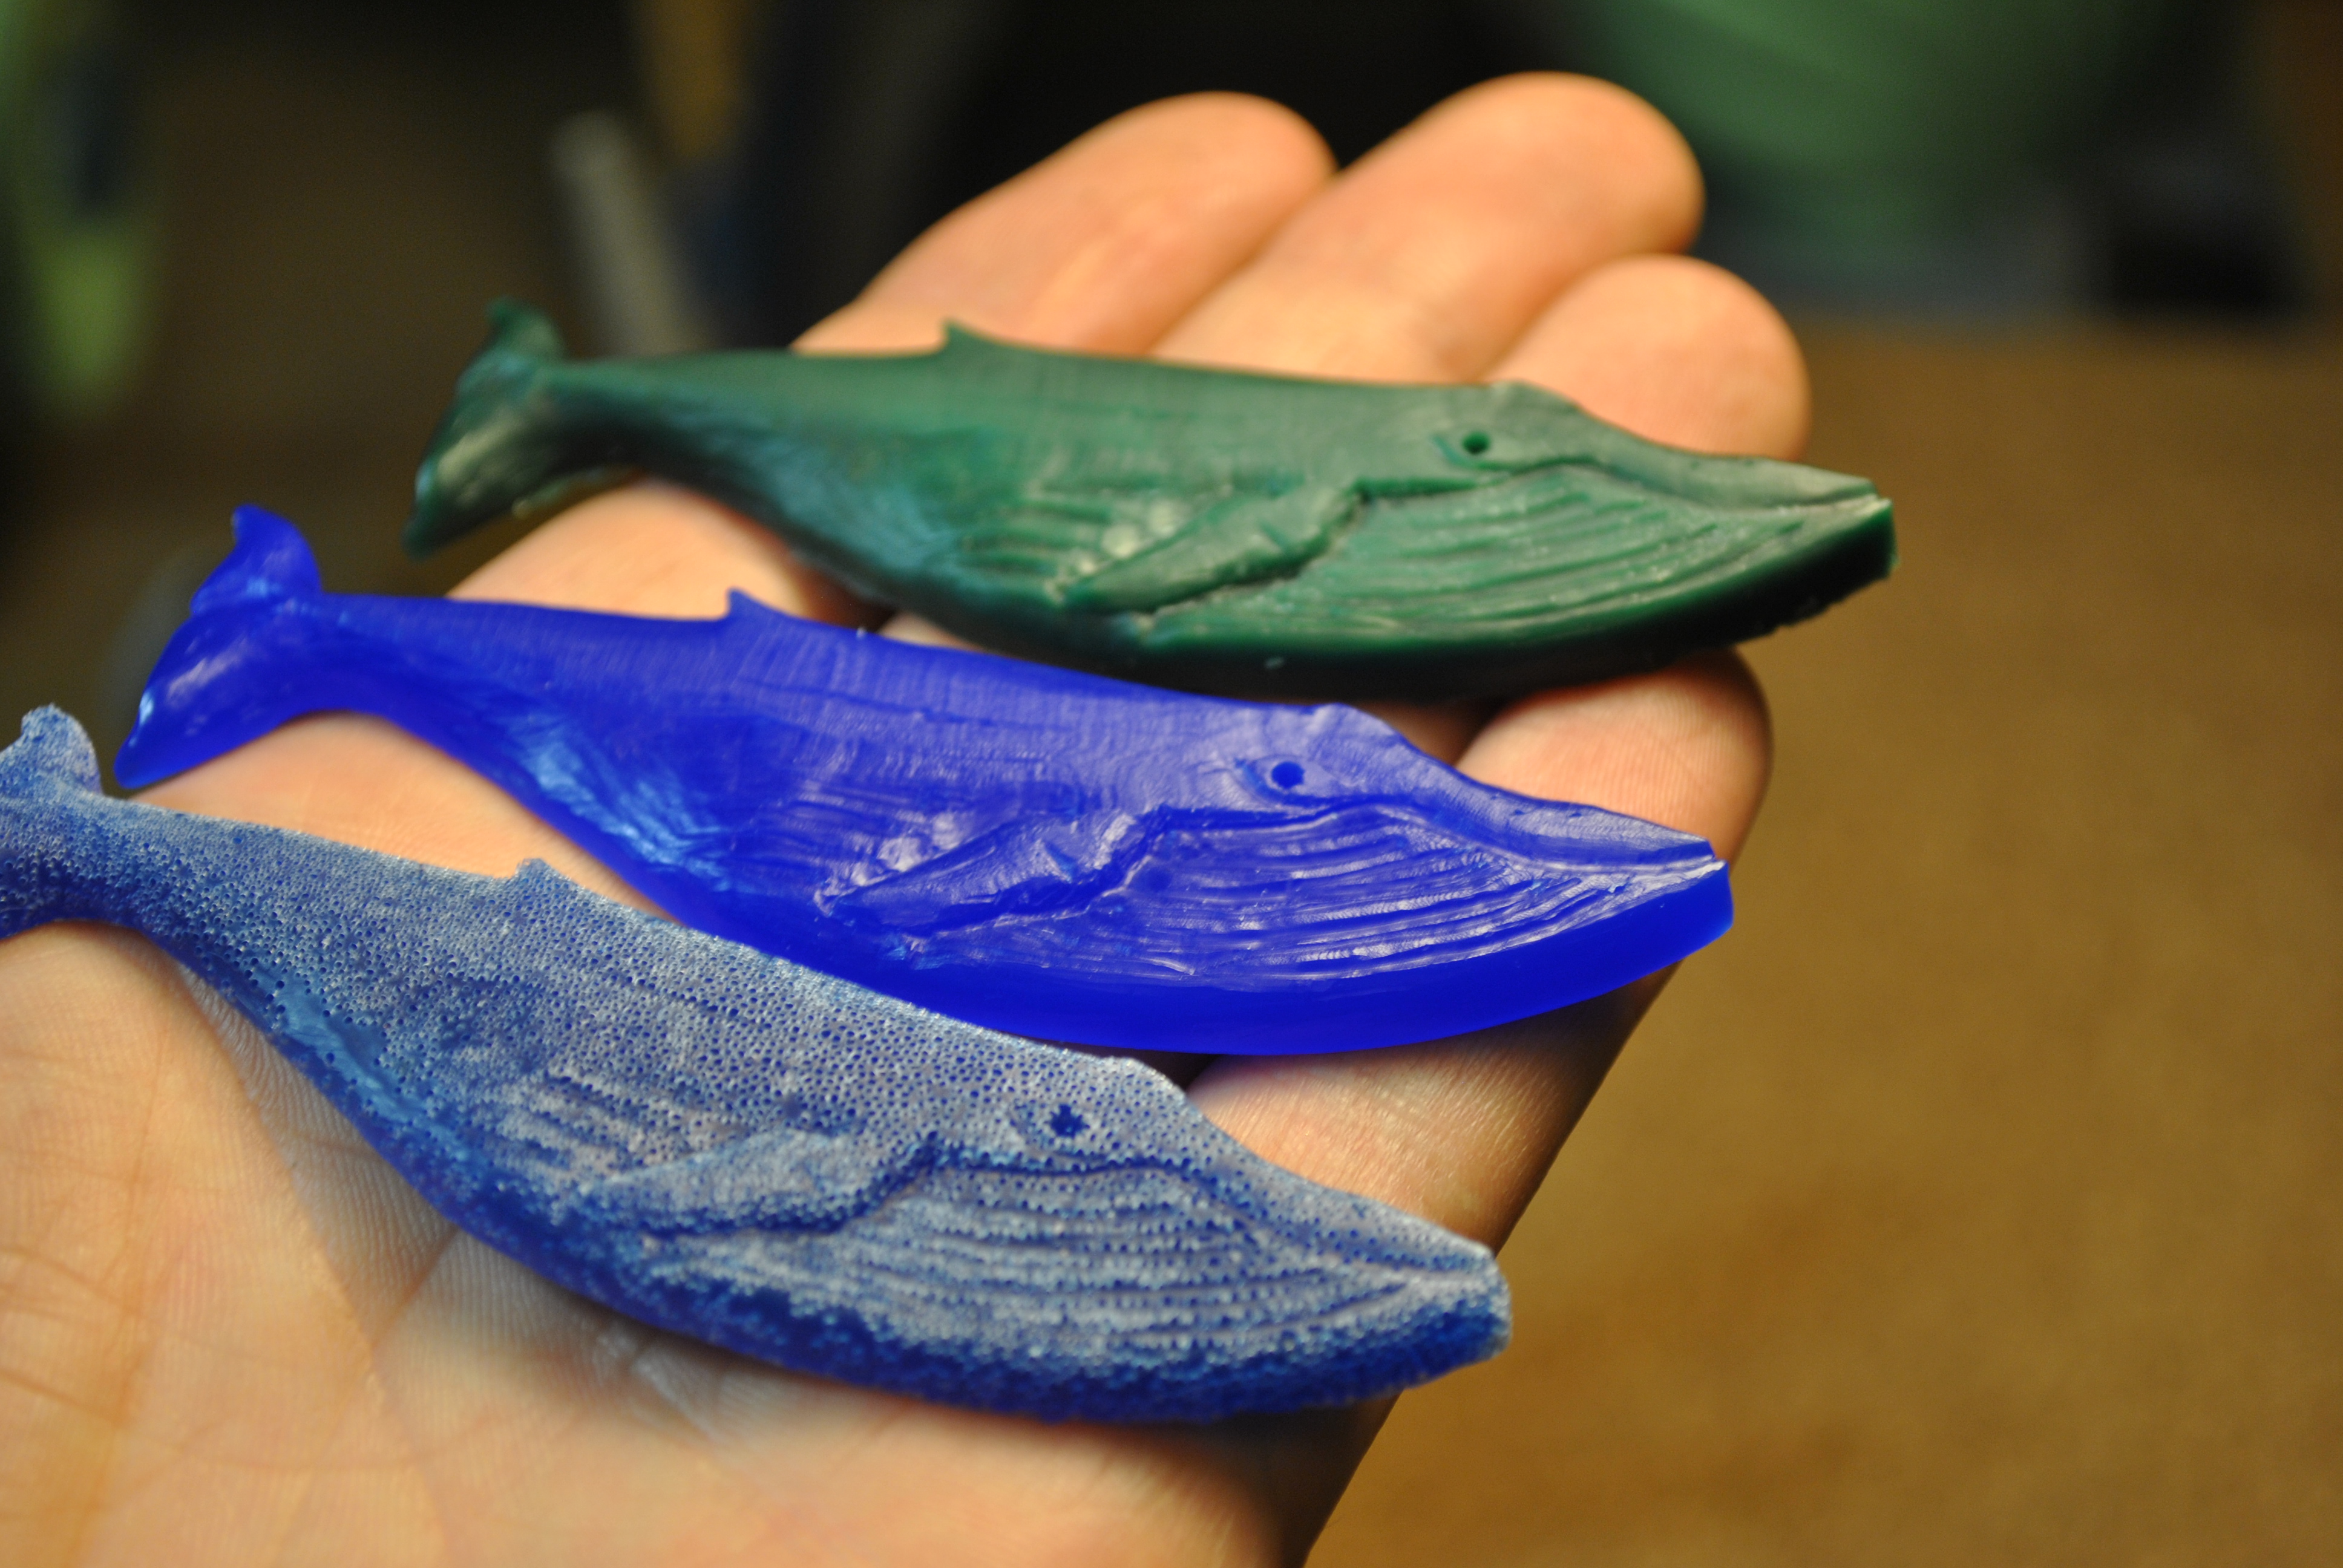
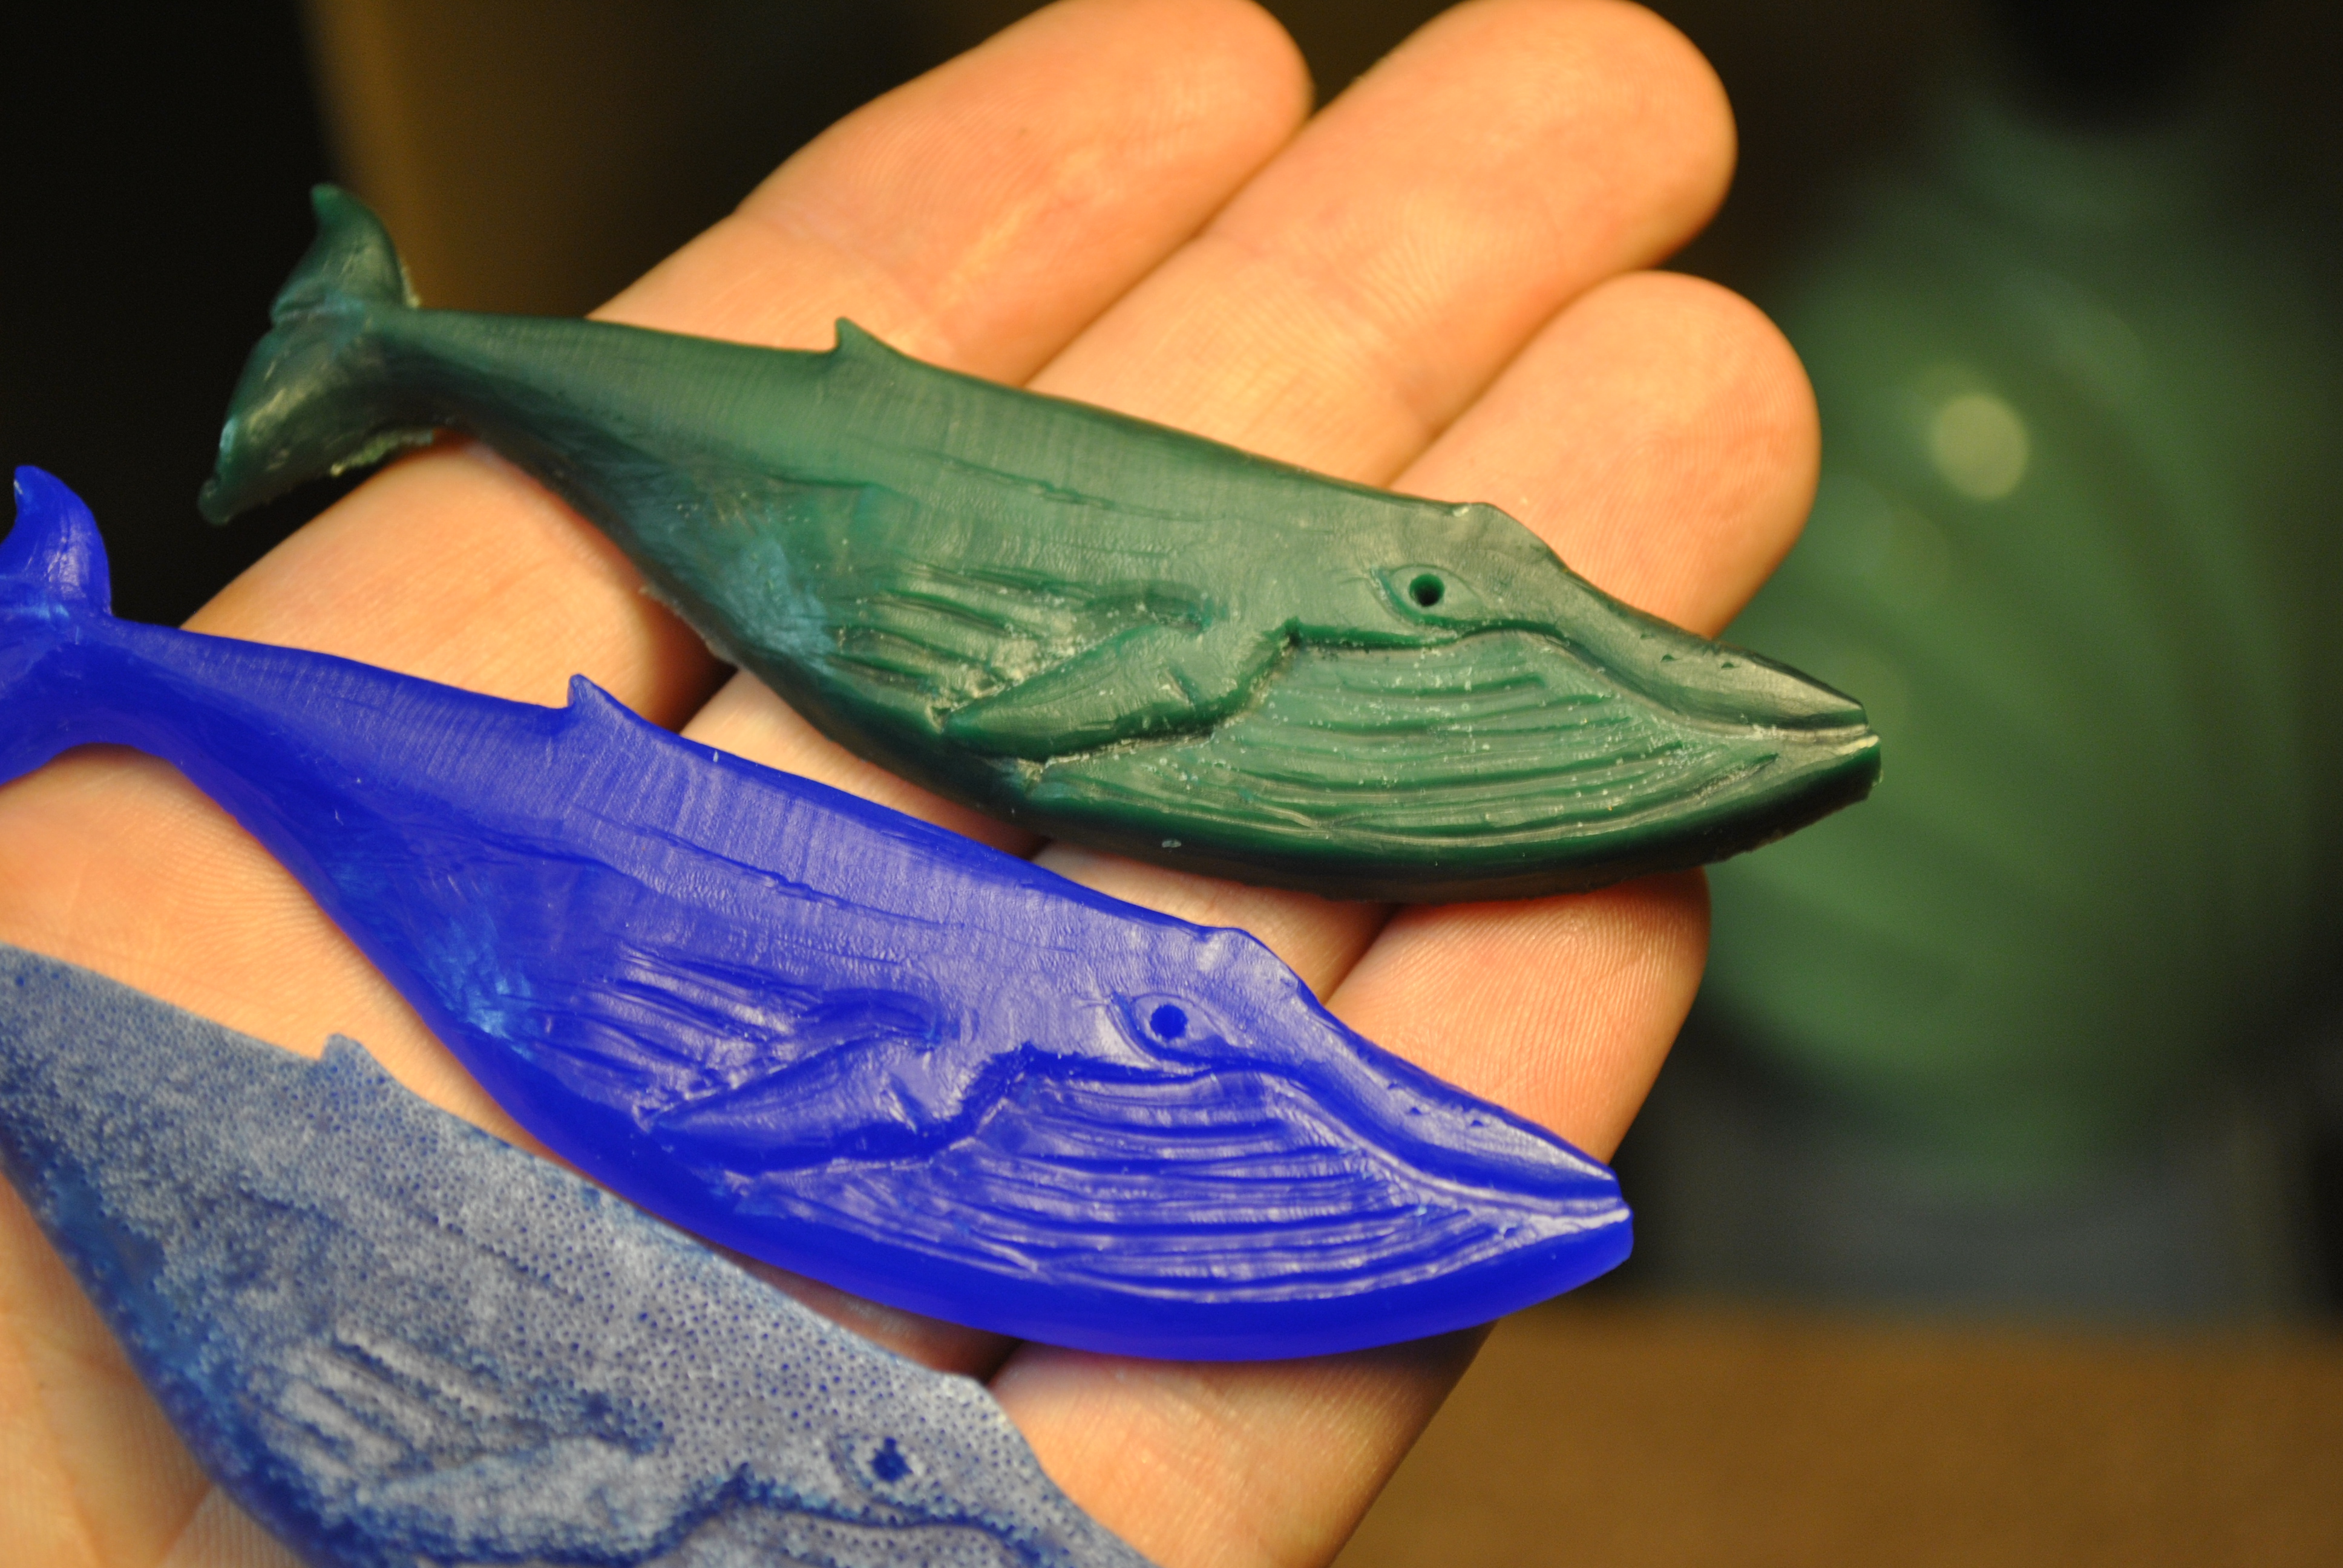
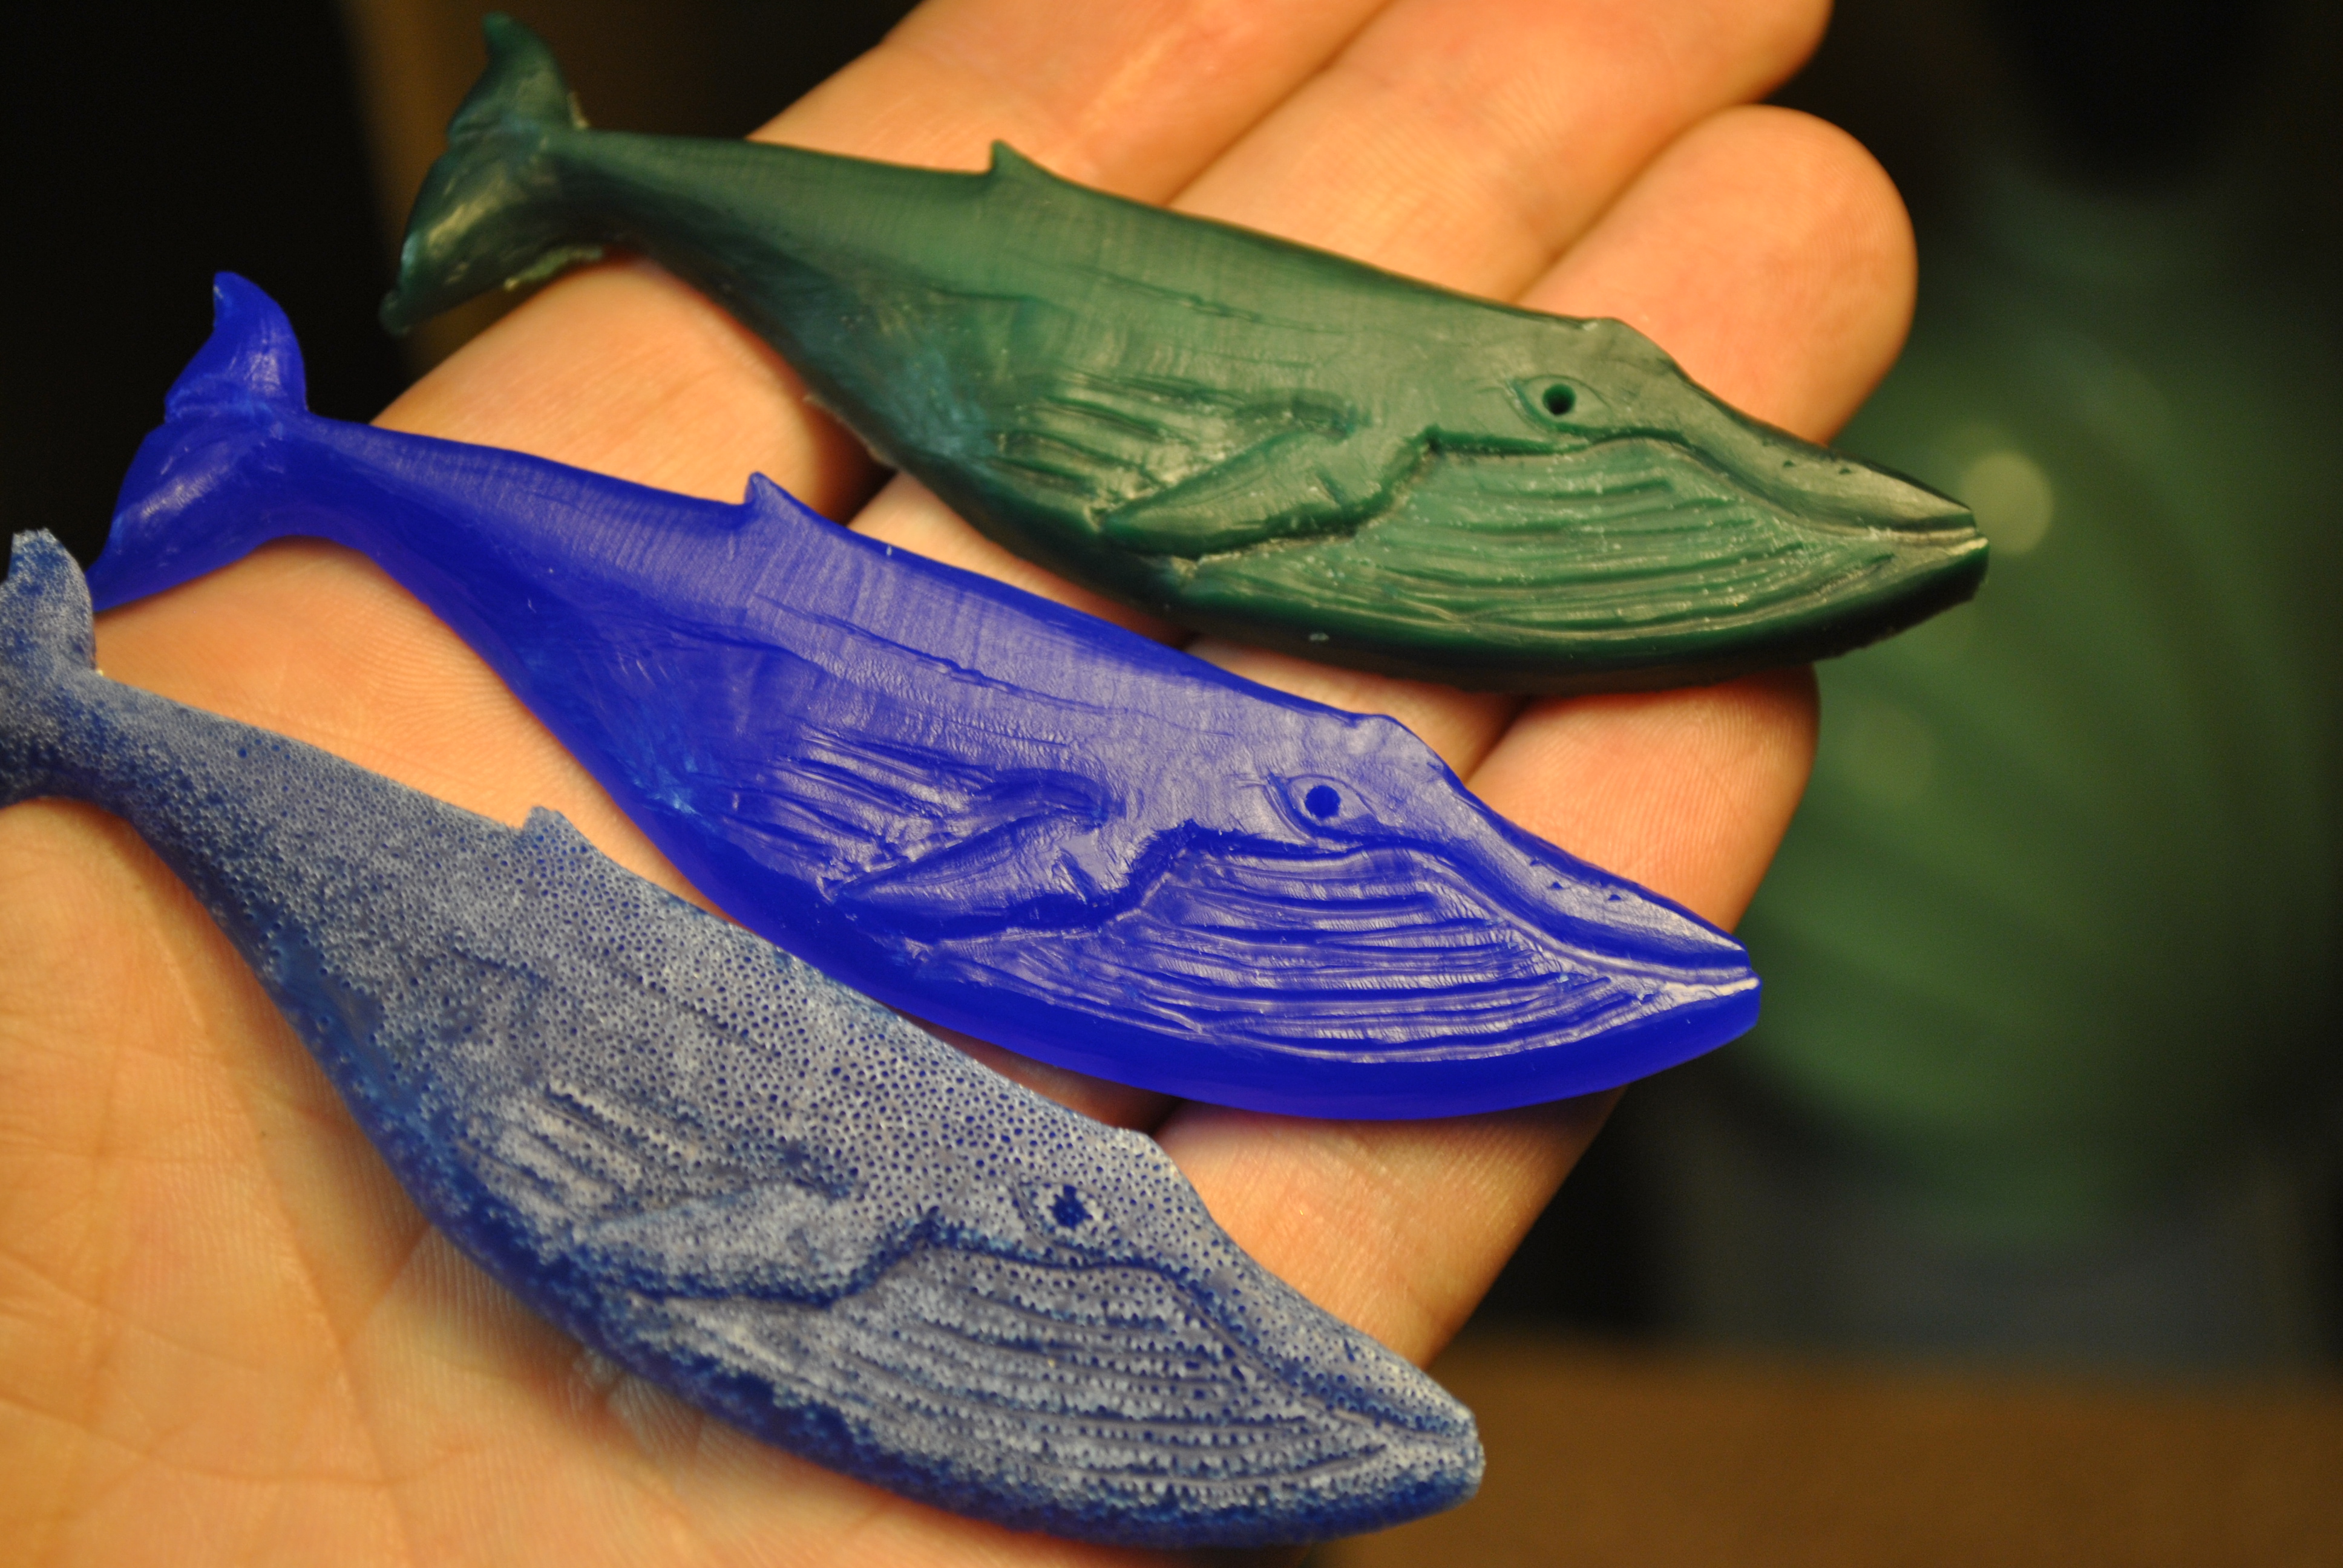
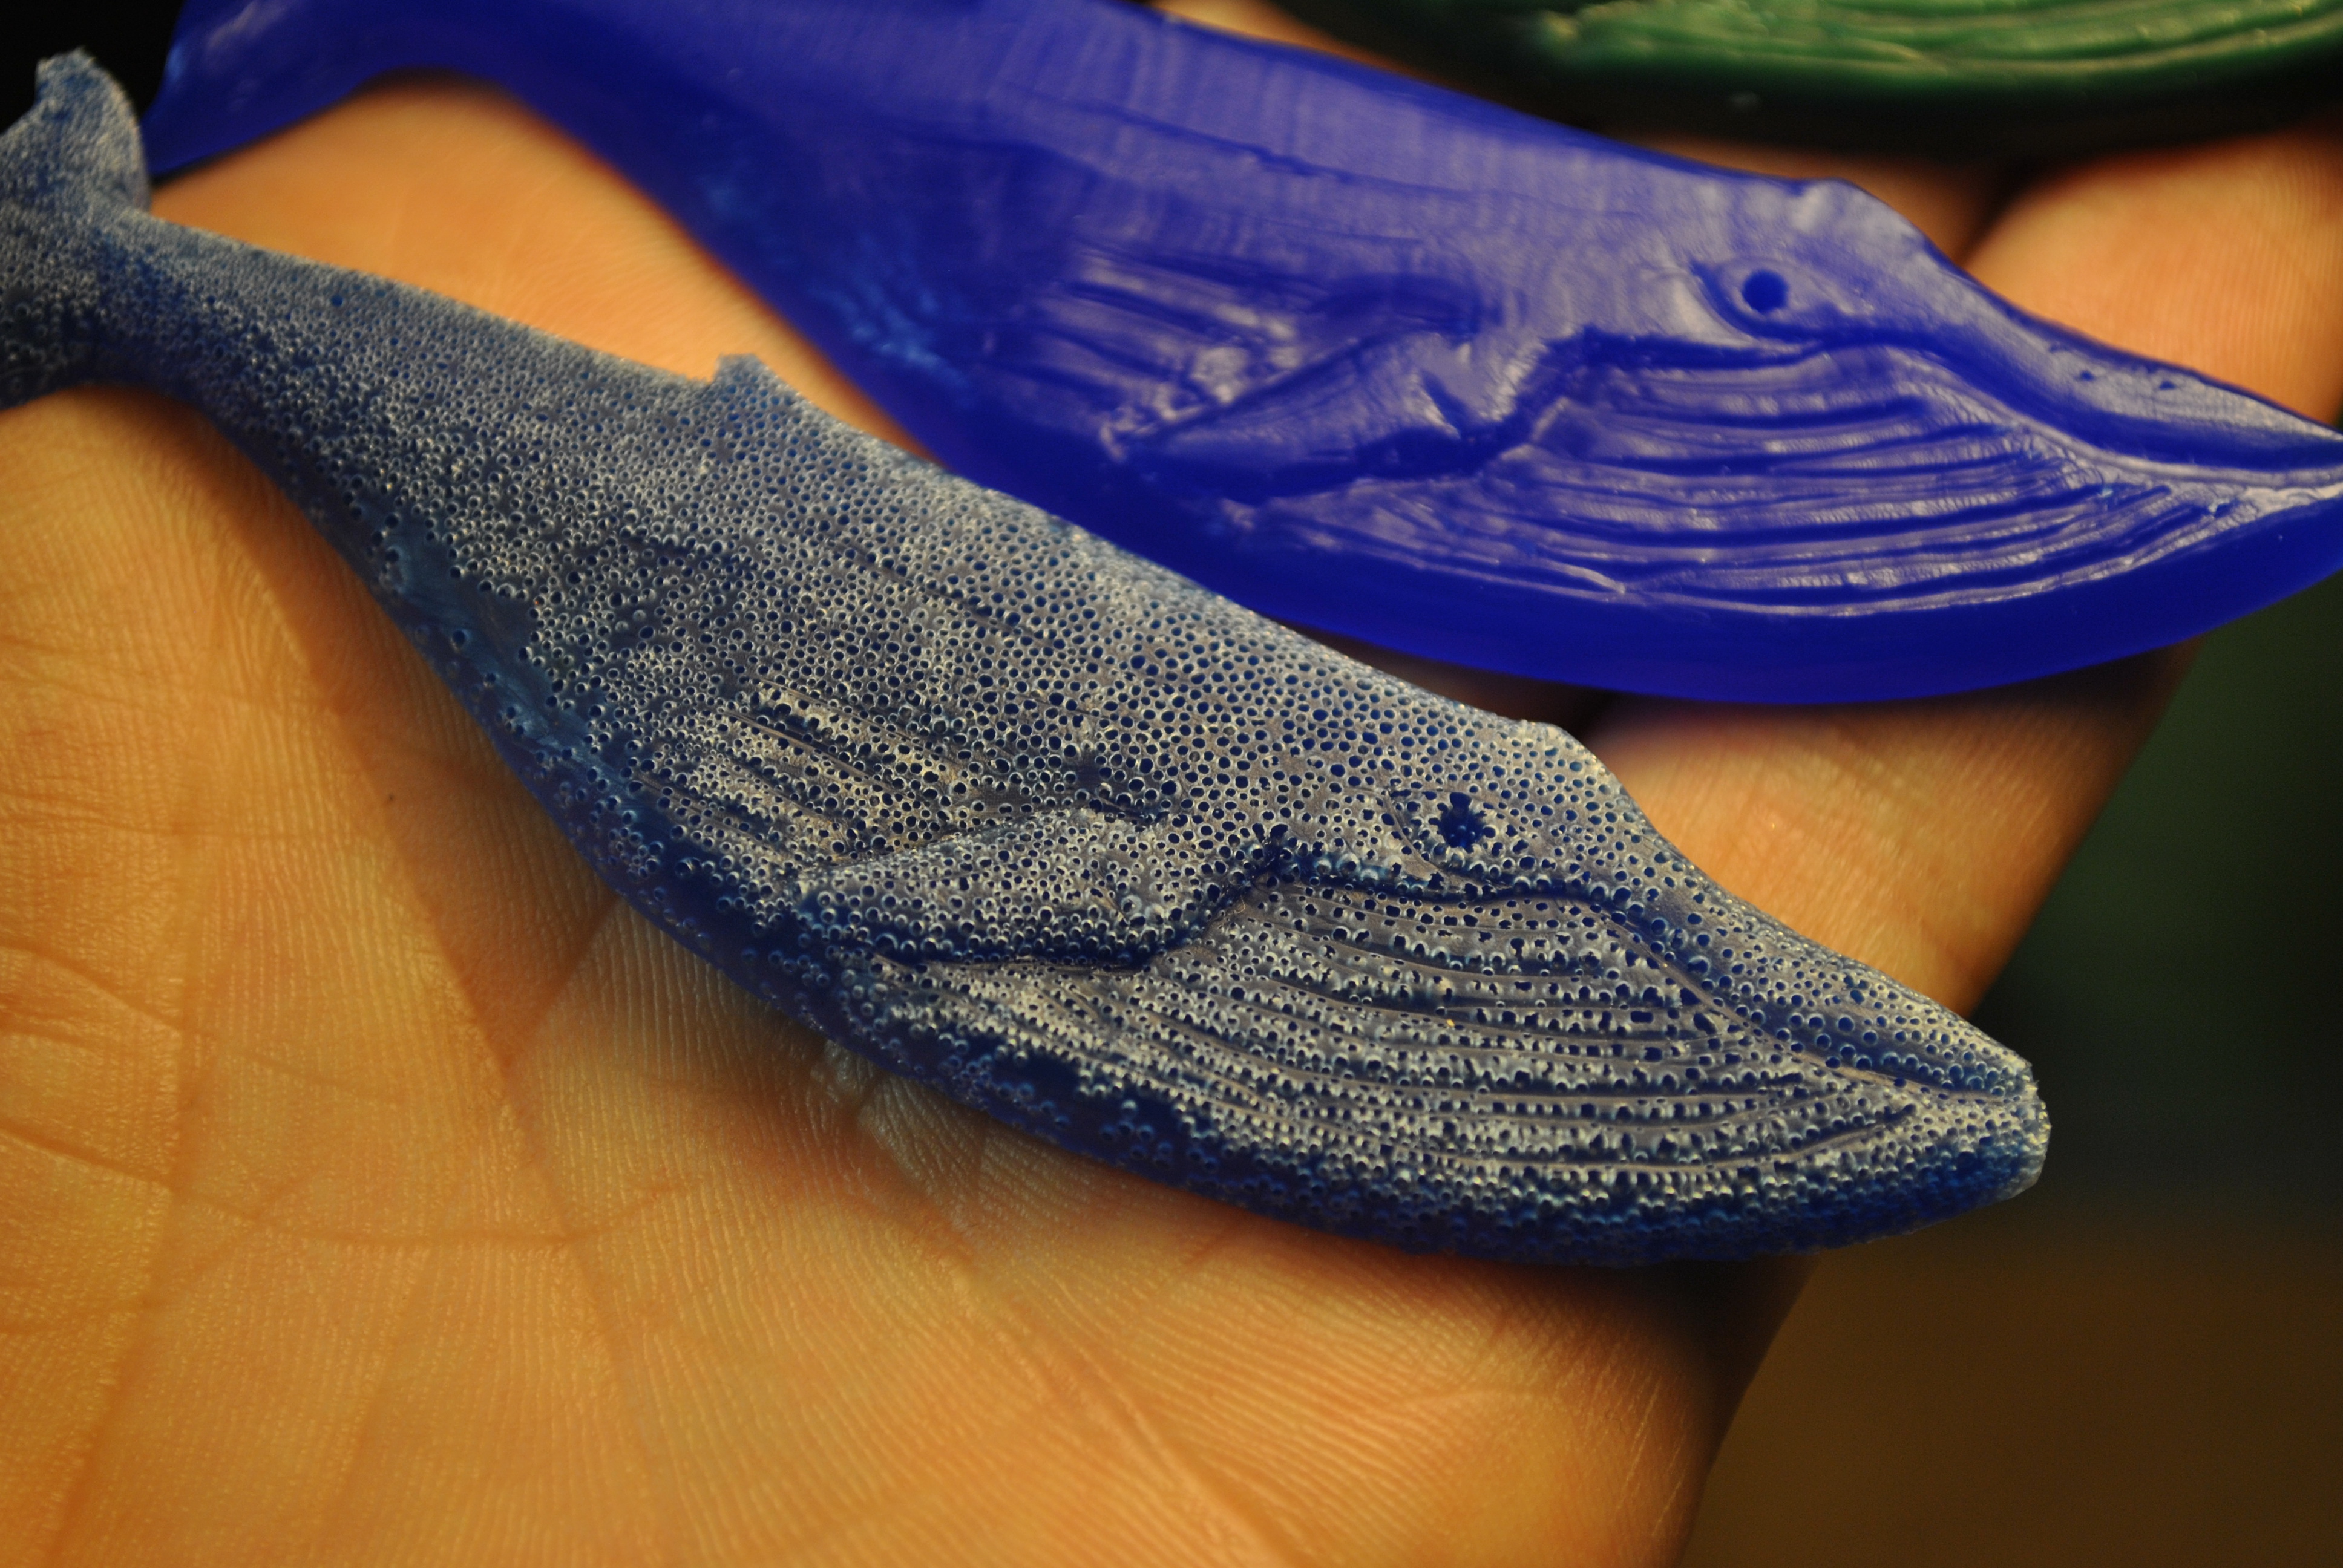
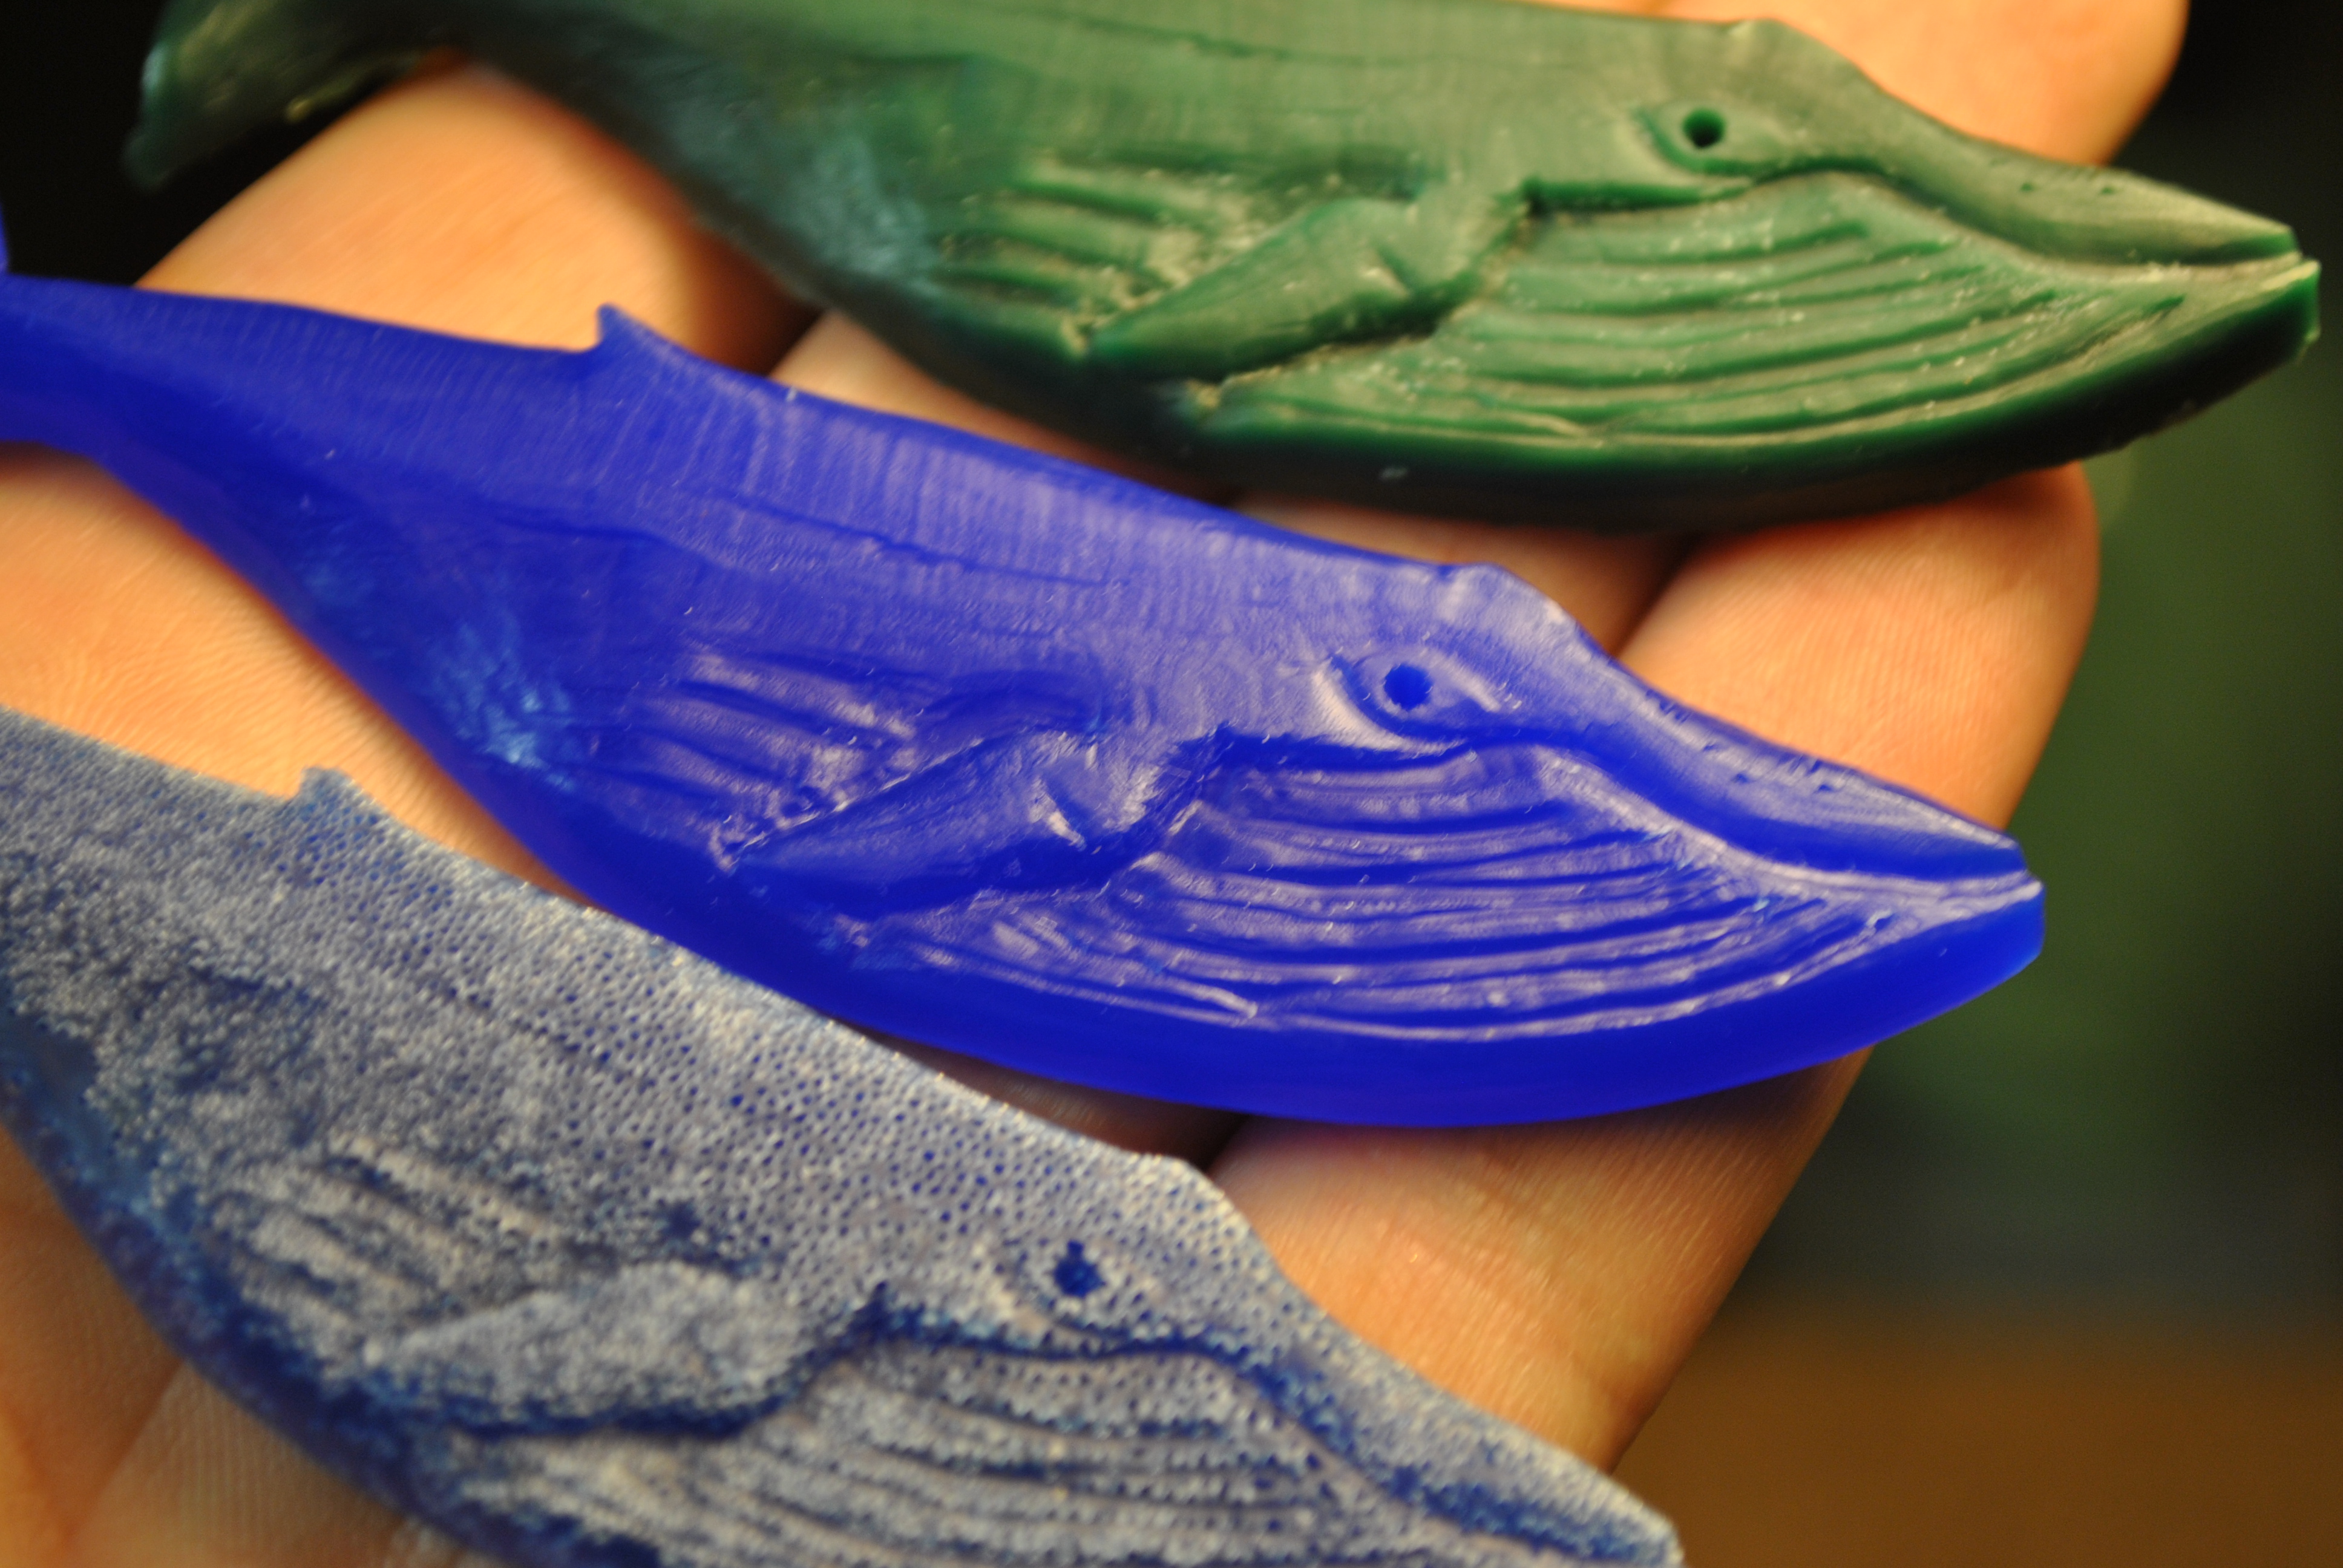
The blue wax hardening.
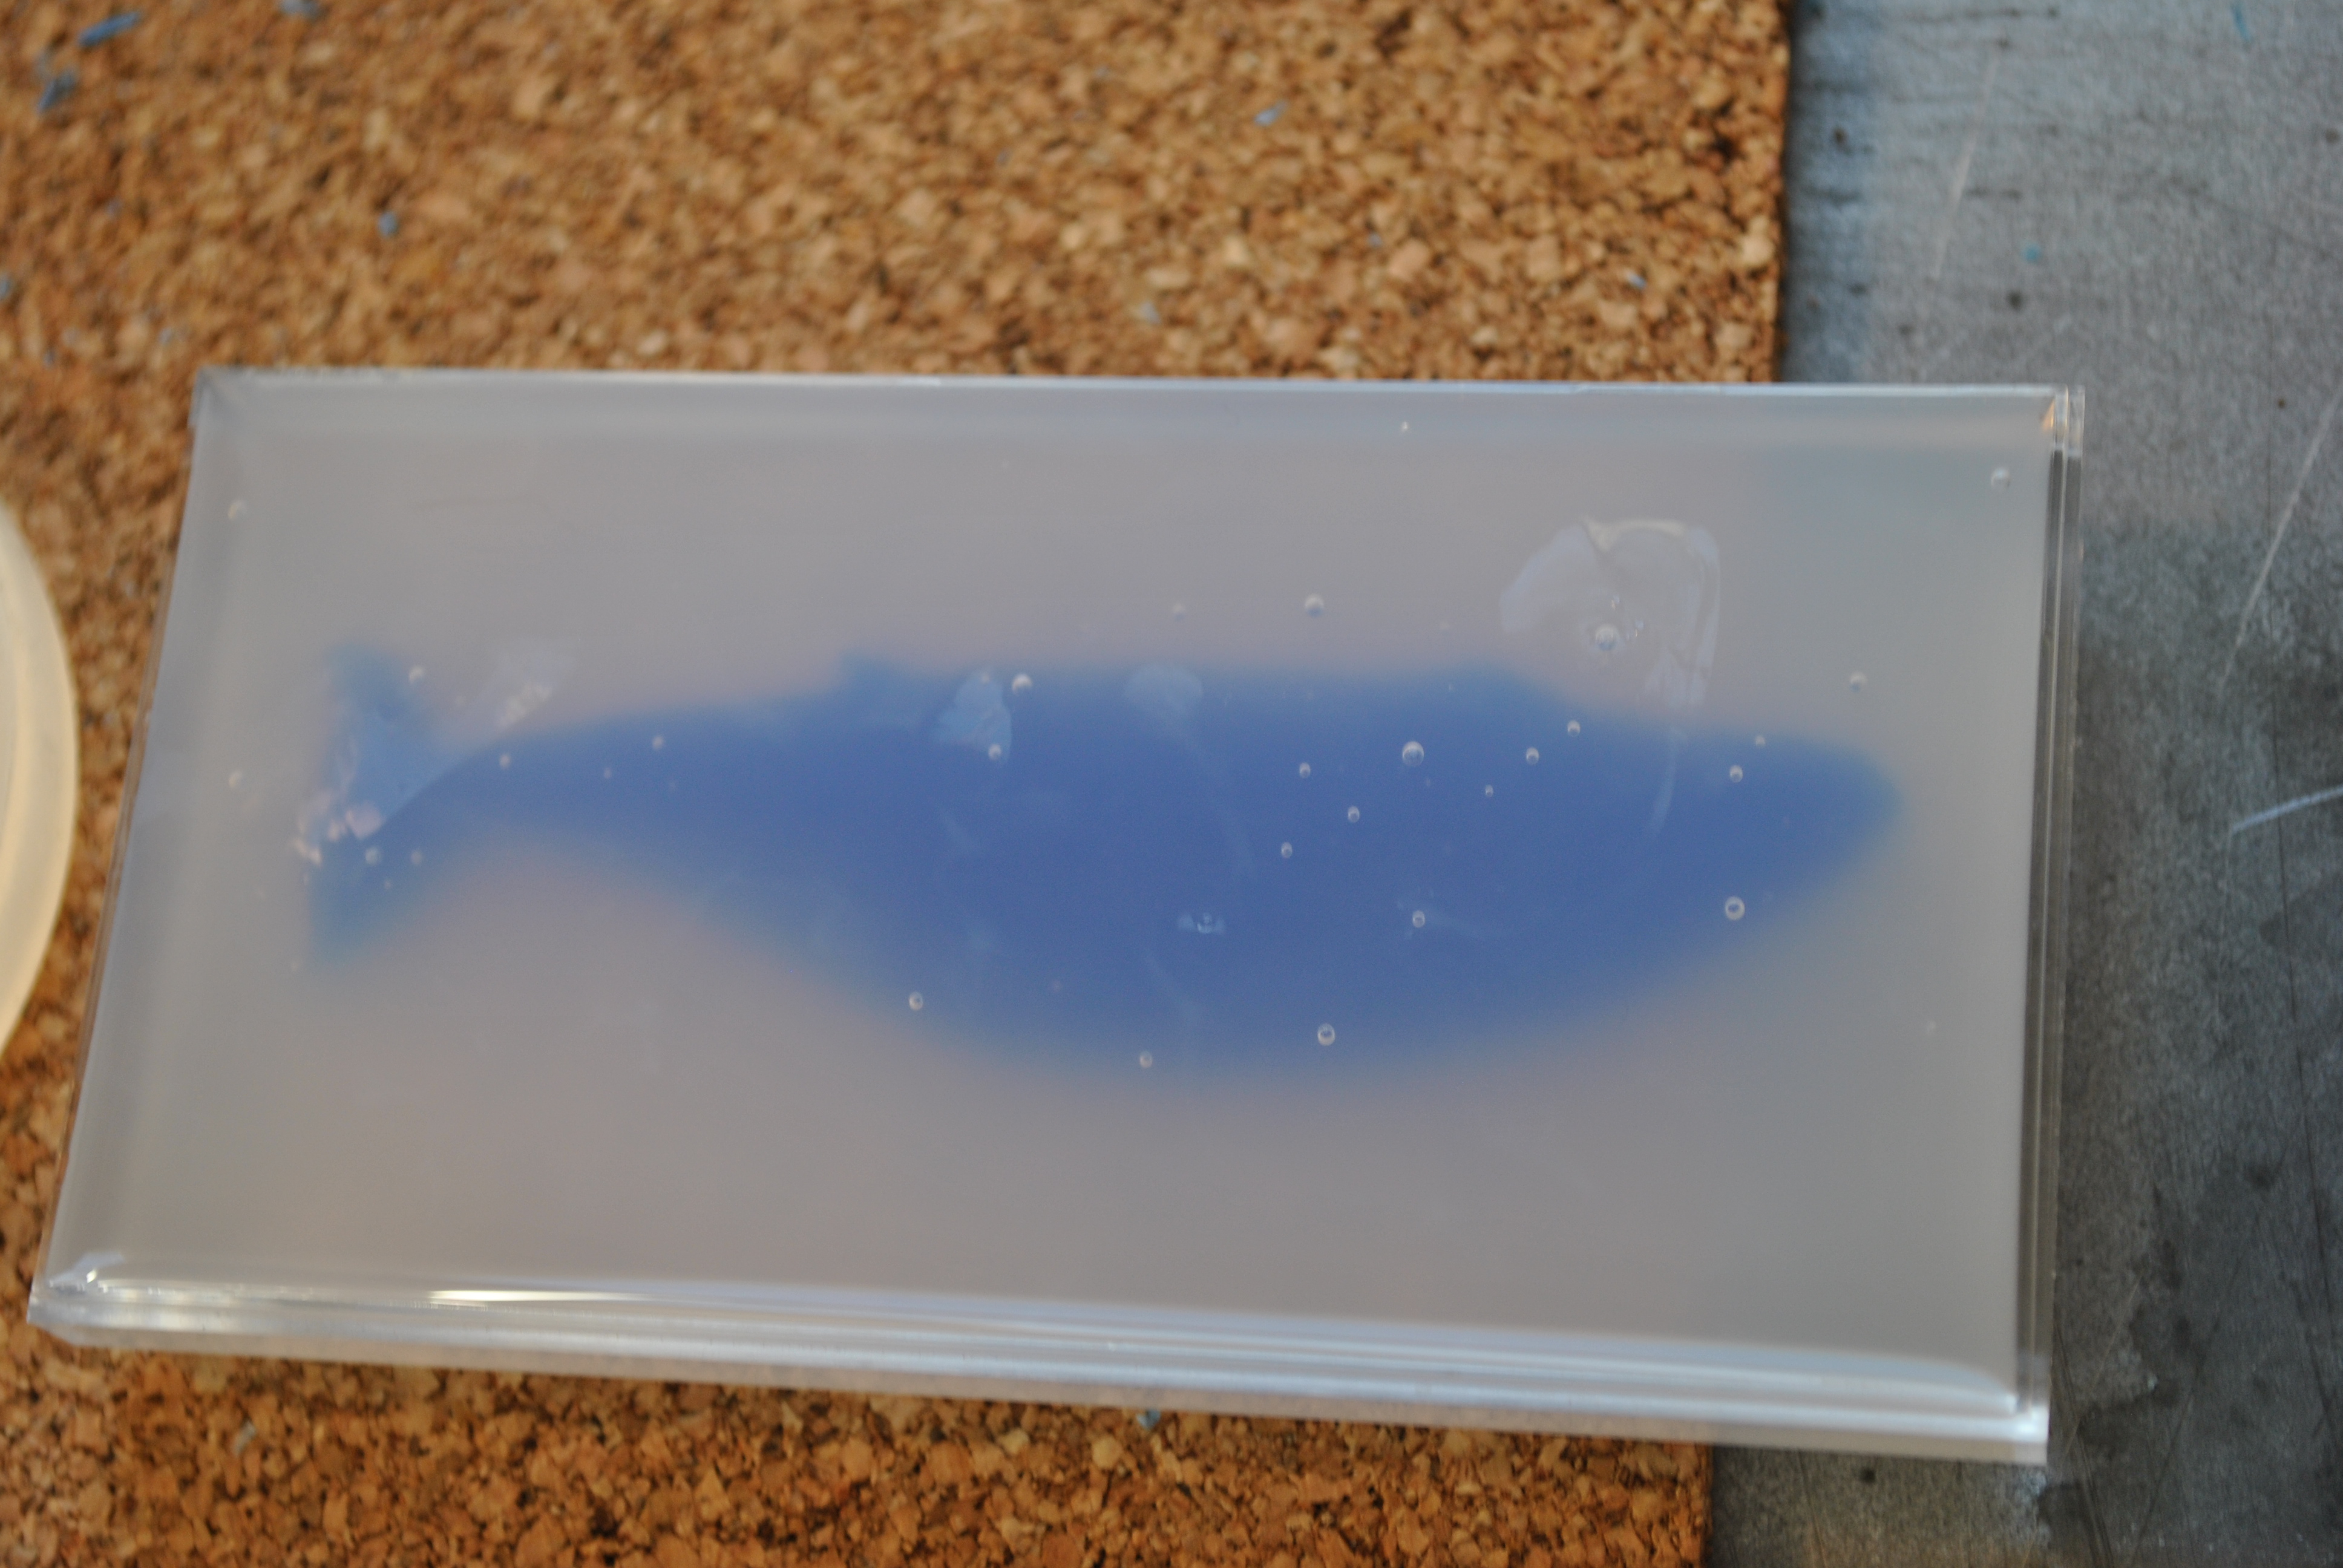
Some waxes melt better than others, the blue wax didn’t melt well, but the green wax I had was perfect!
Air bubbles from the blue wax, it just didn’t like being melted.
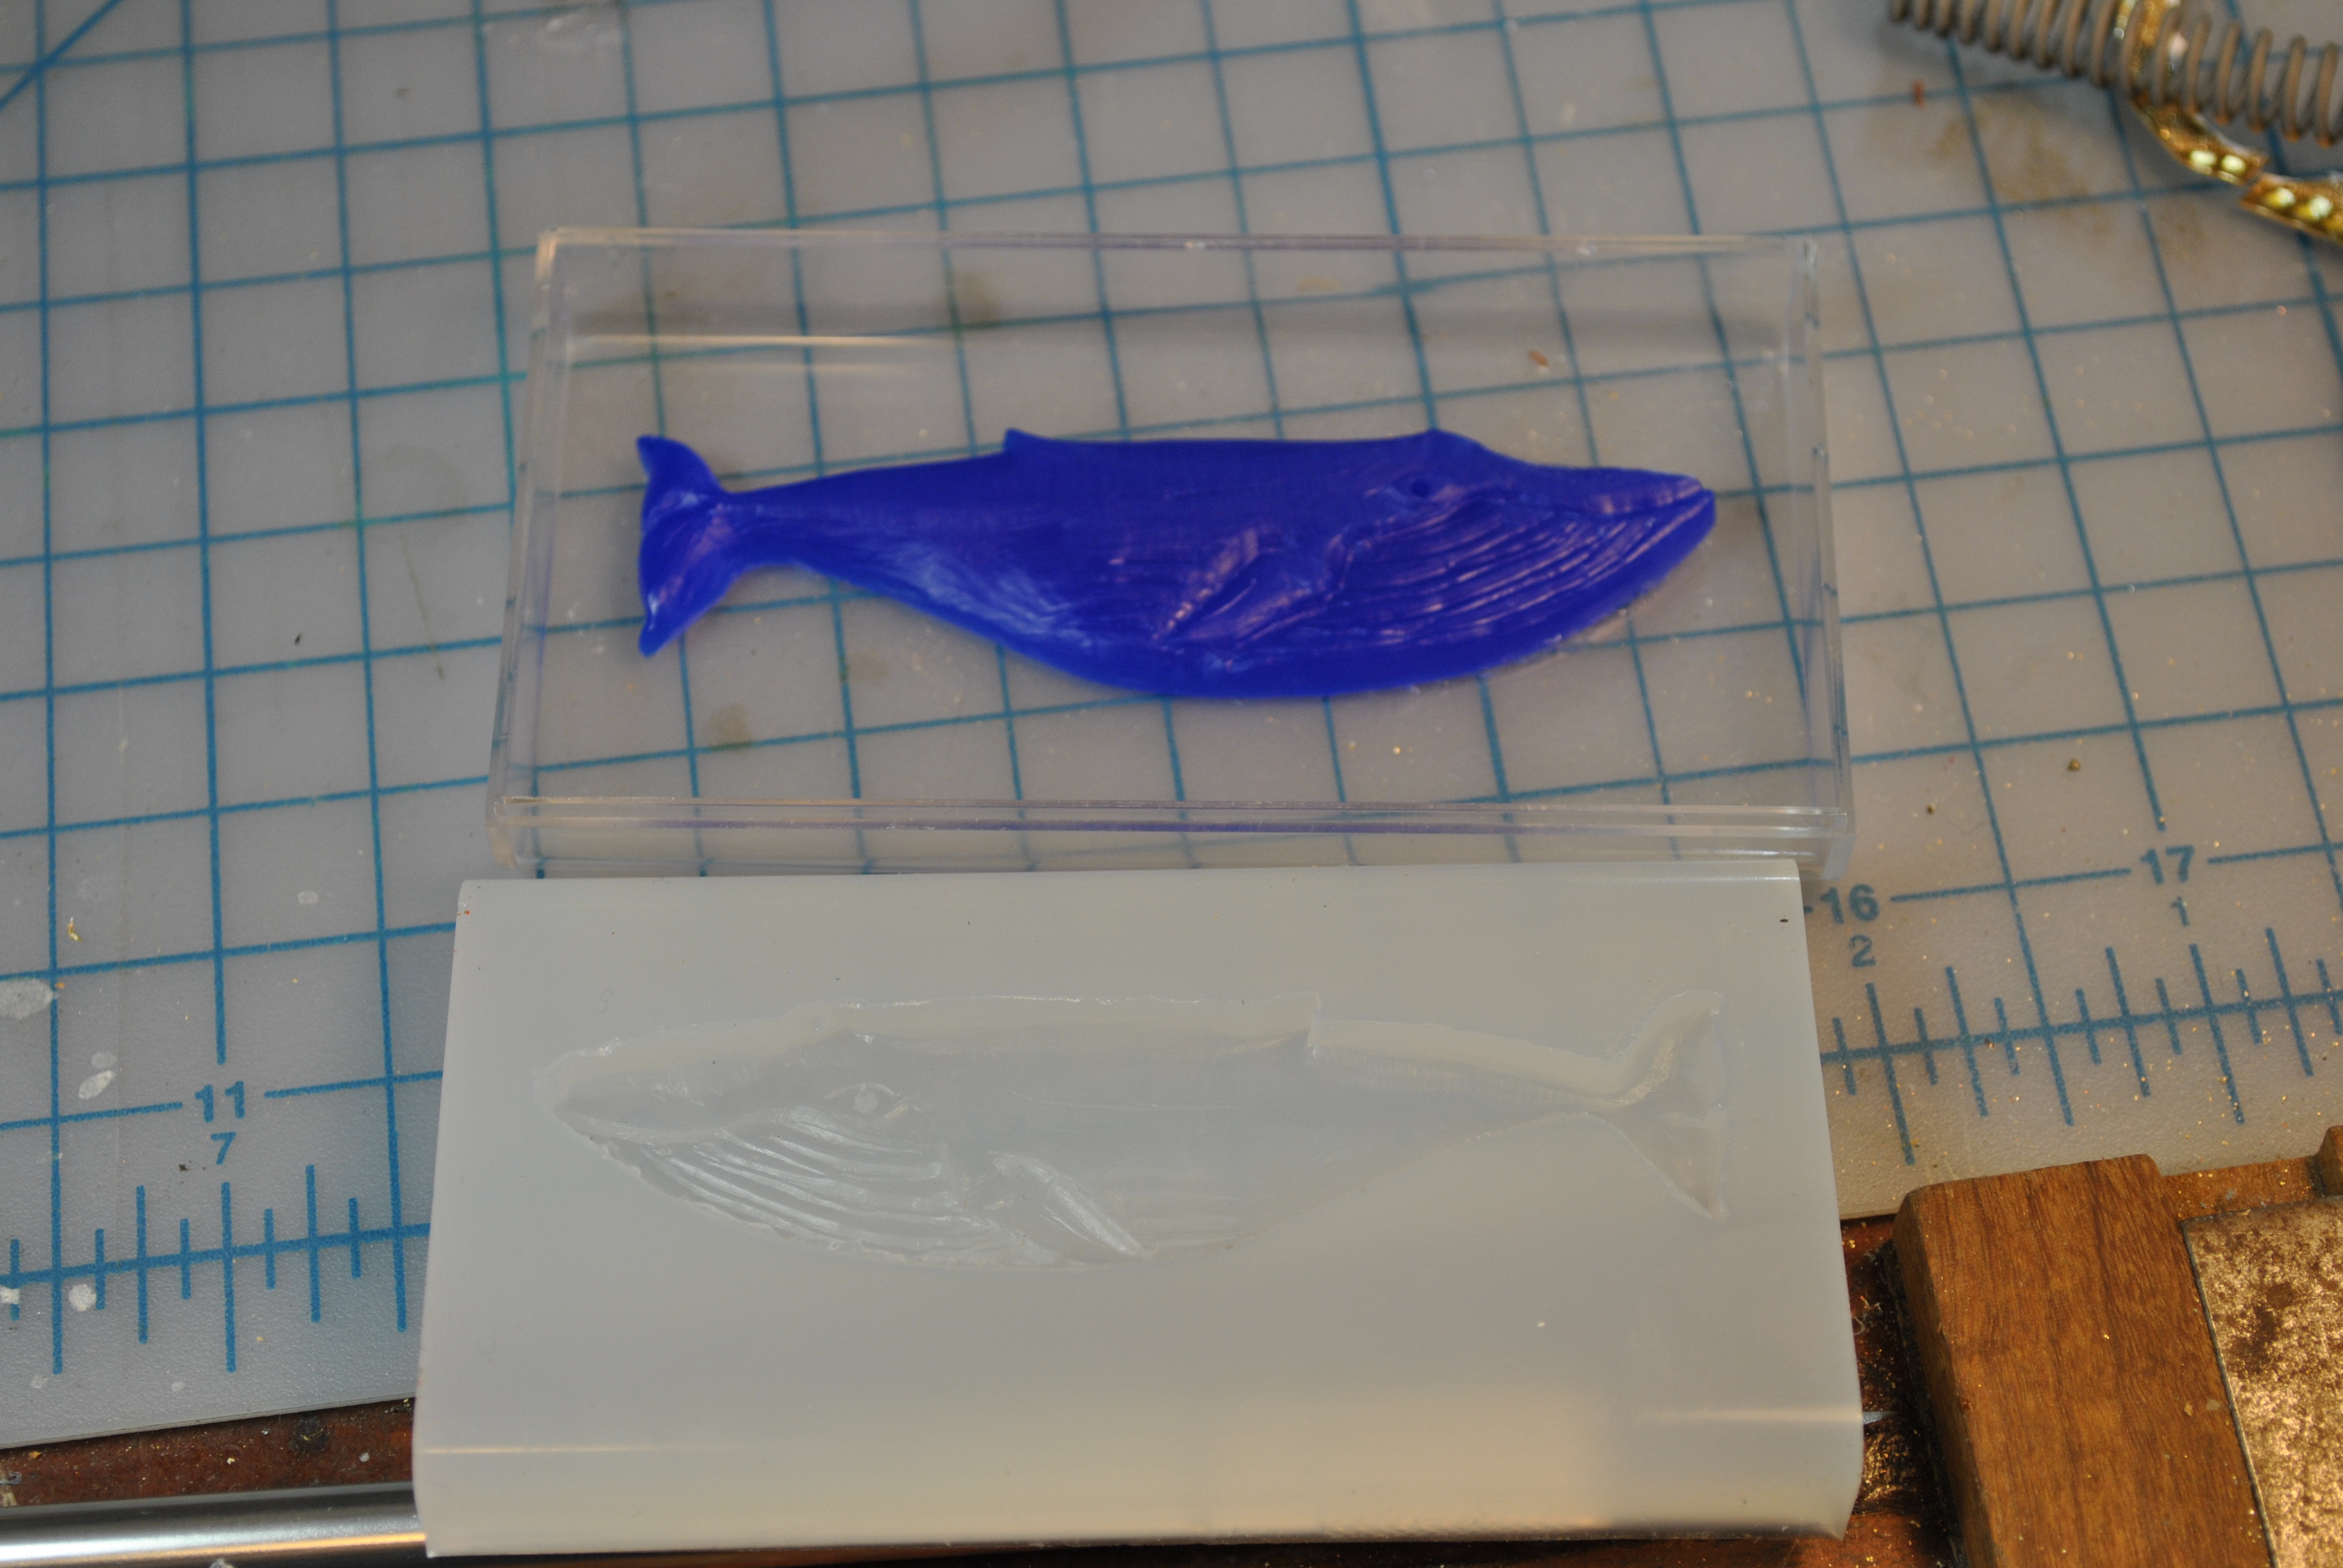
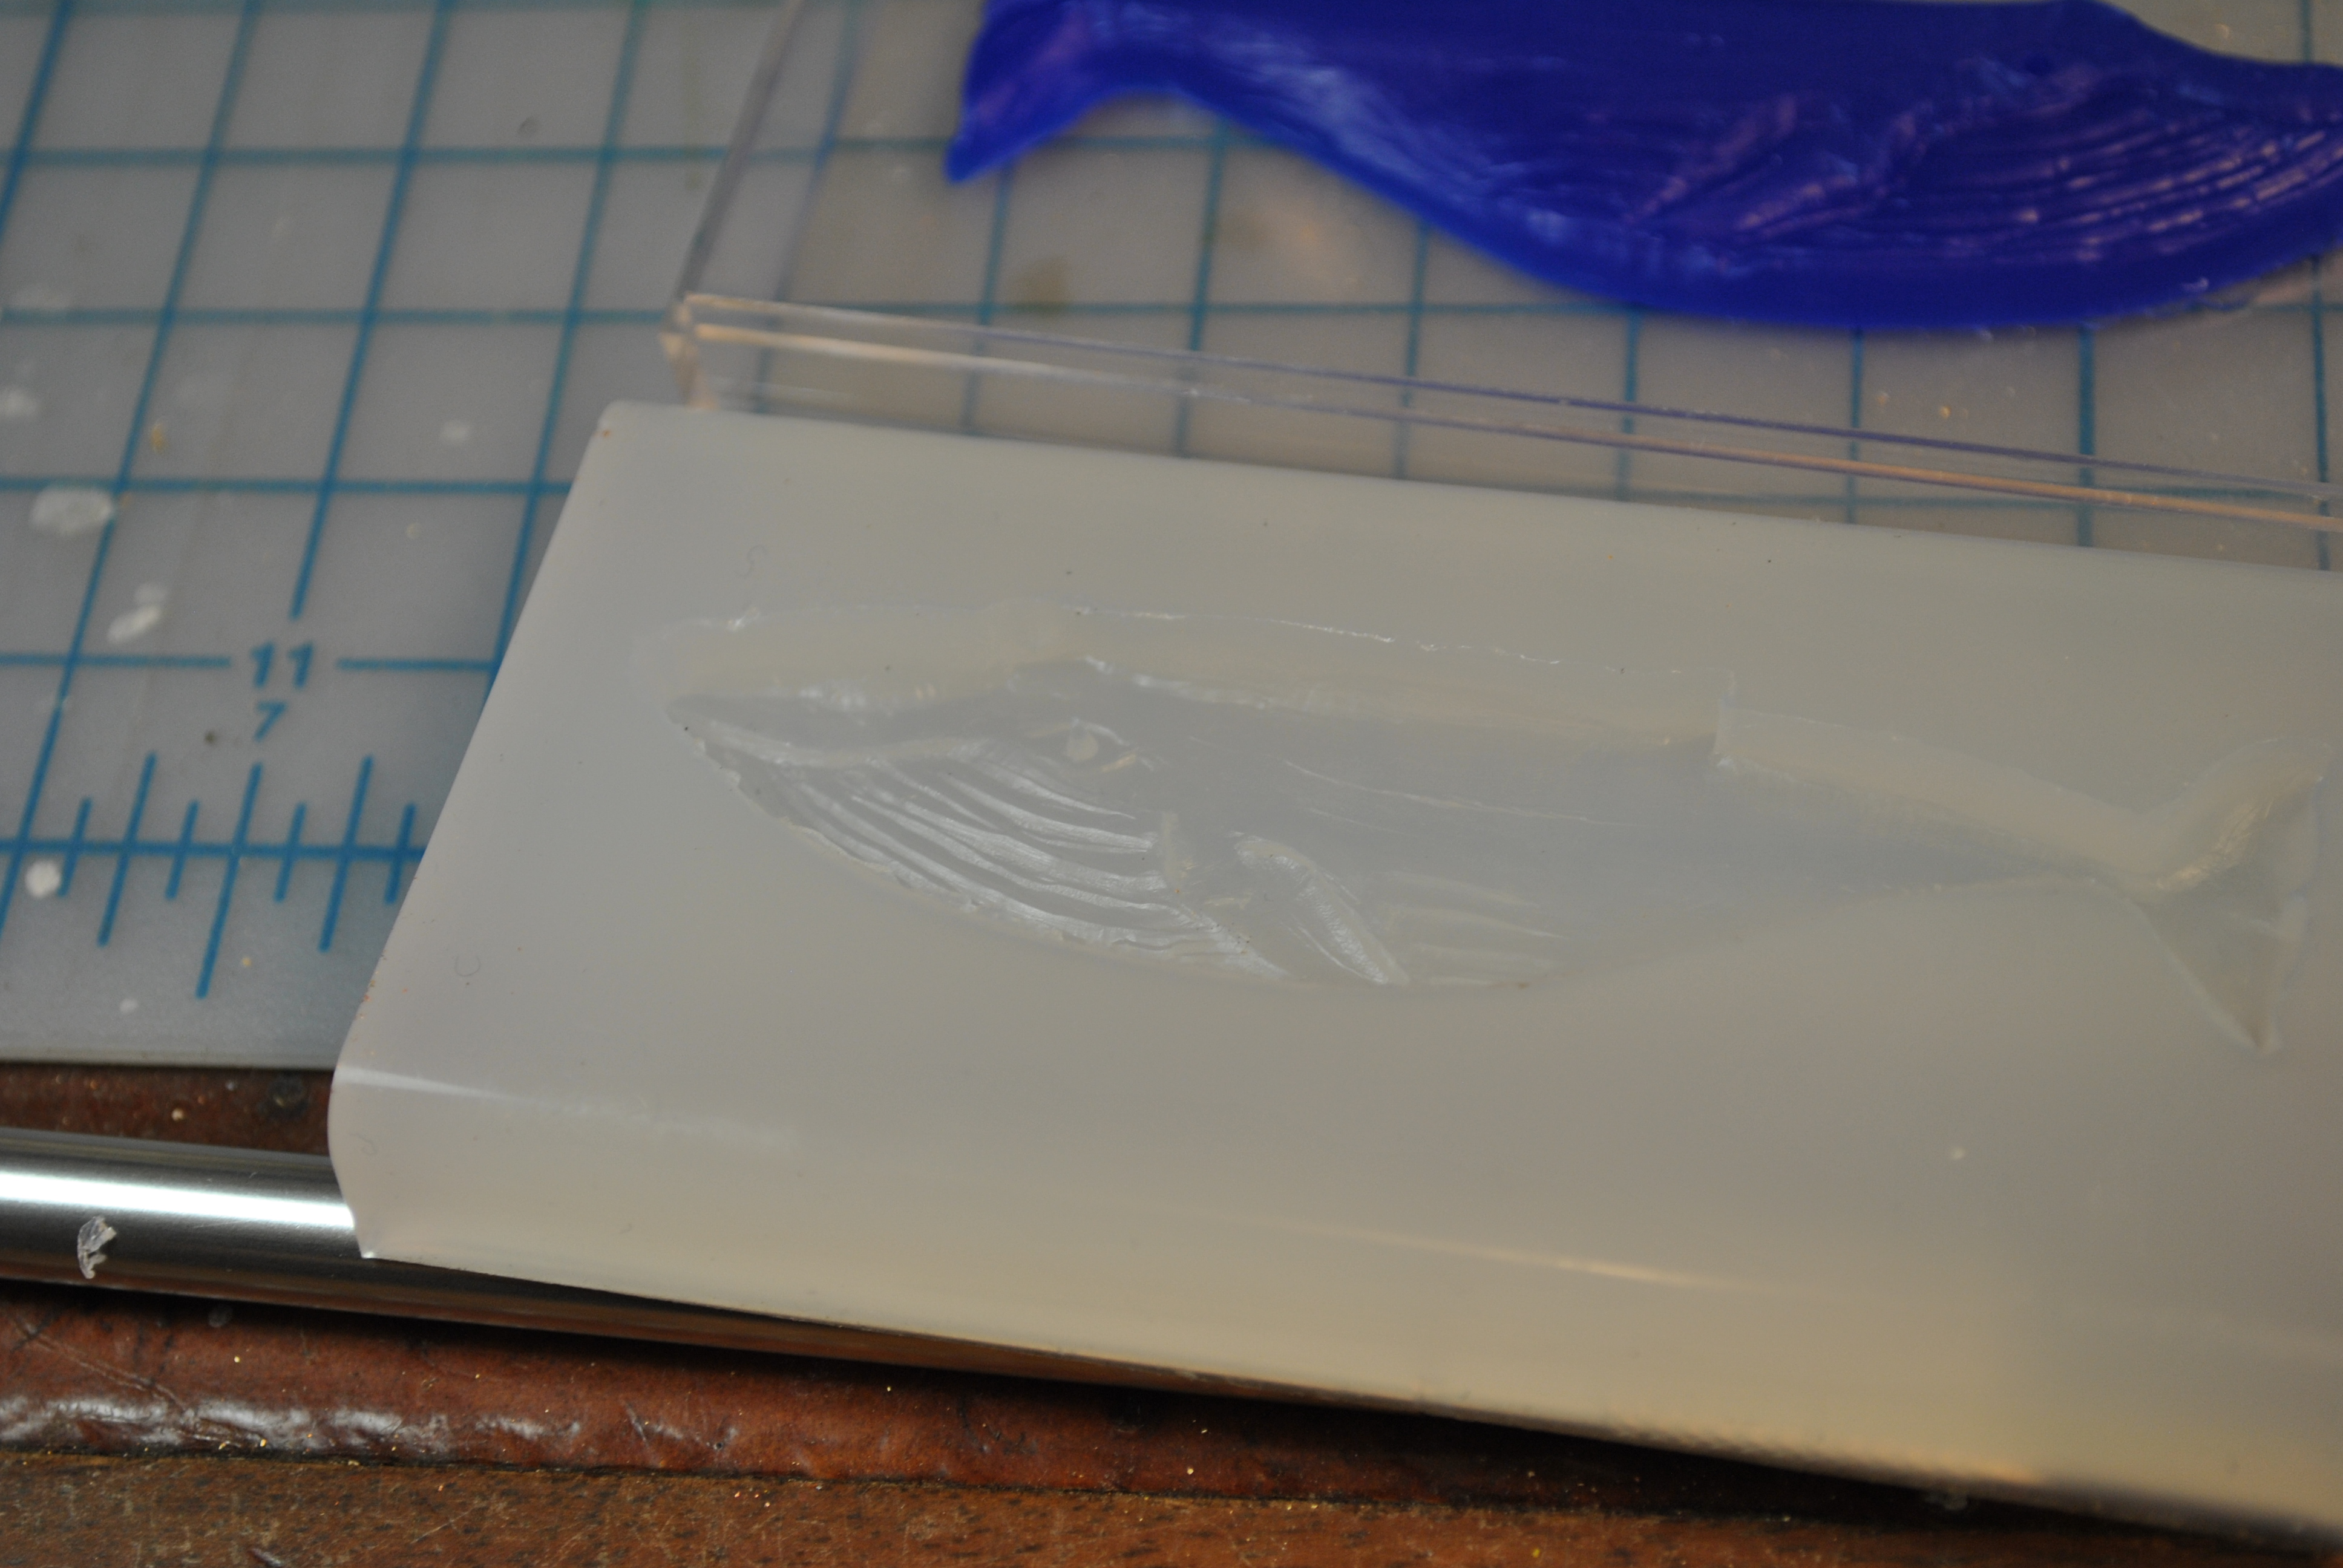
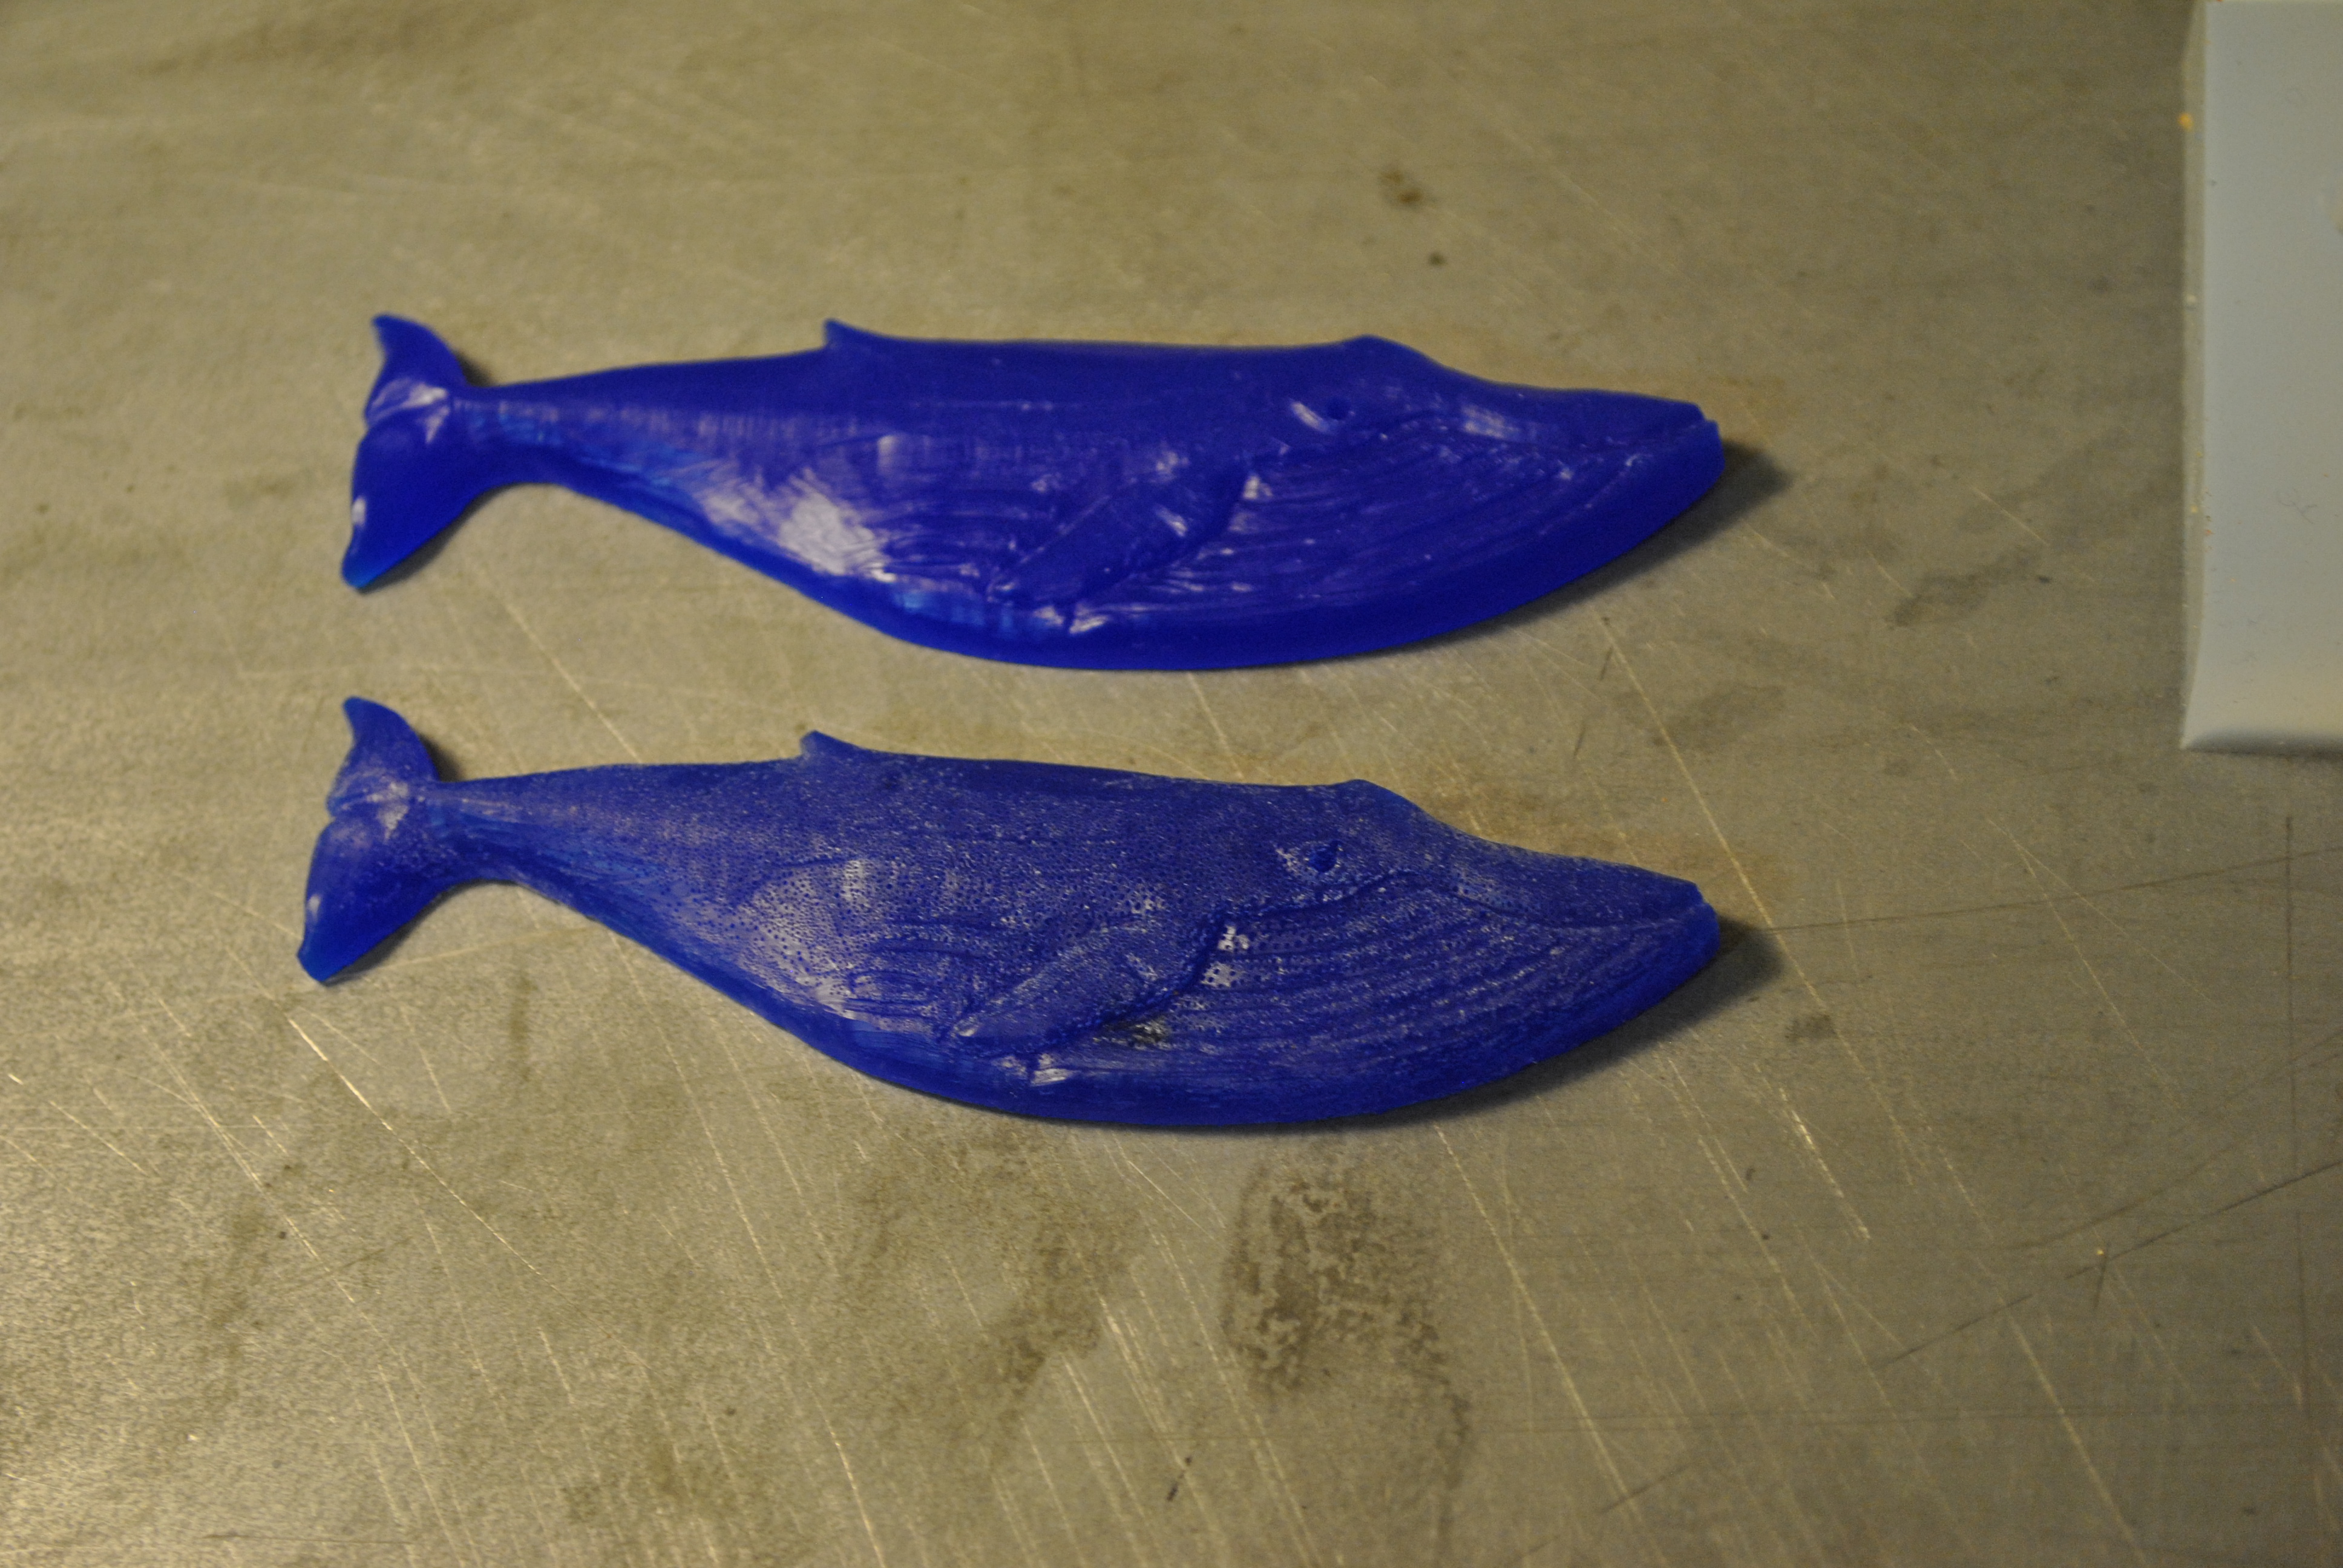
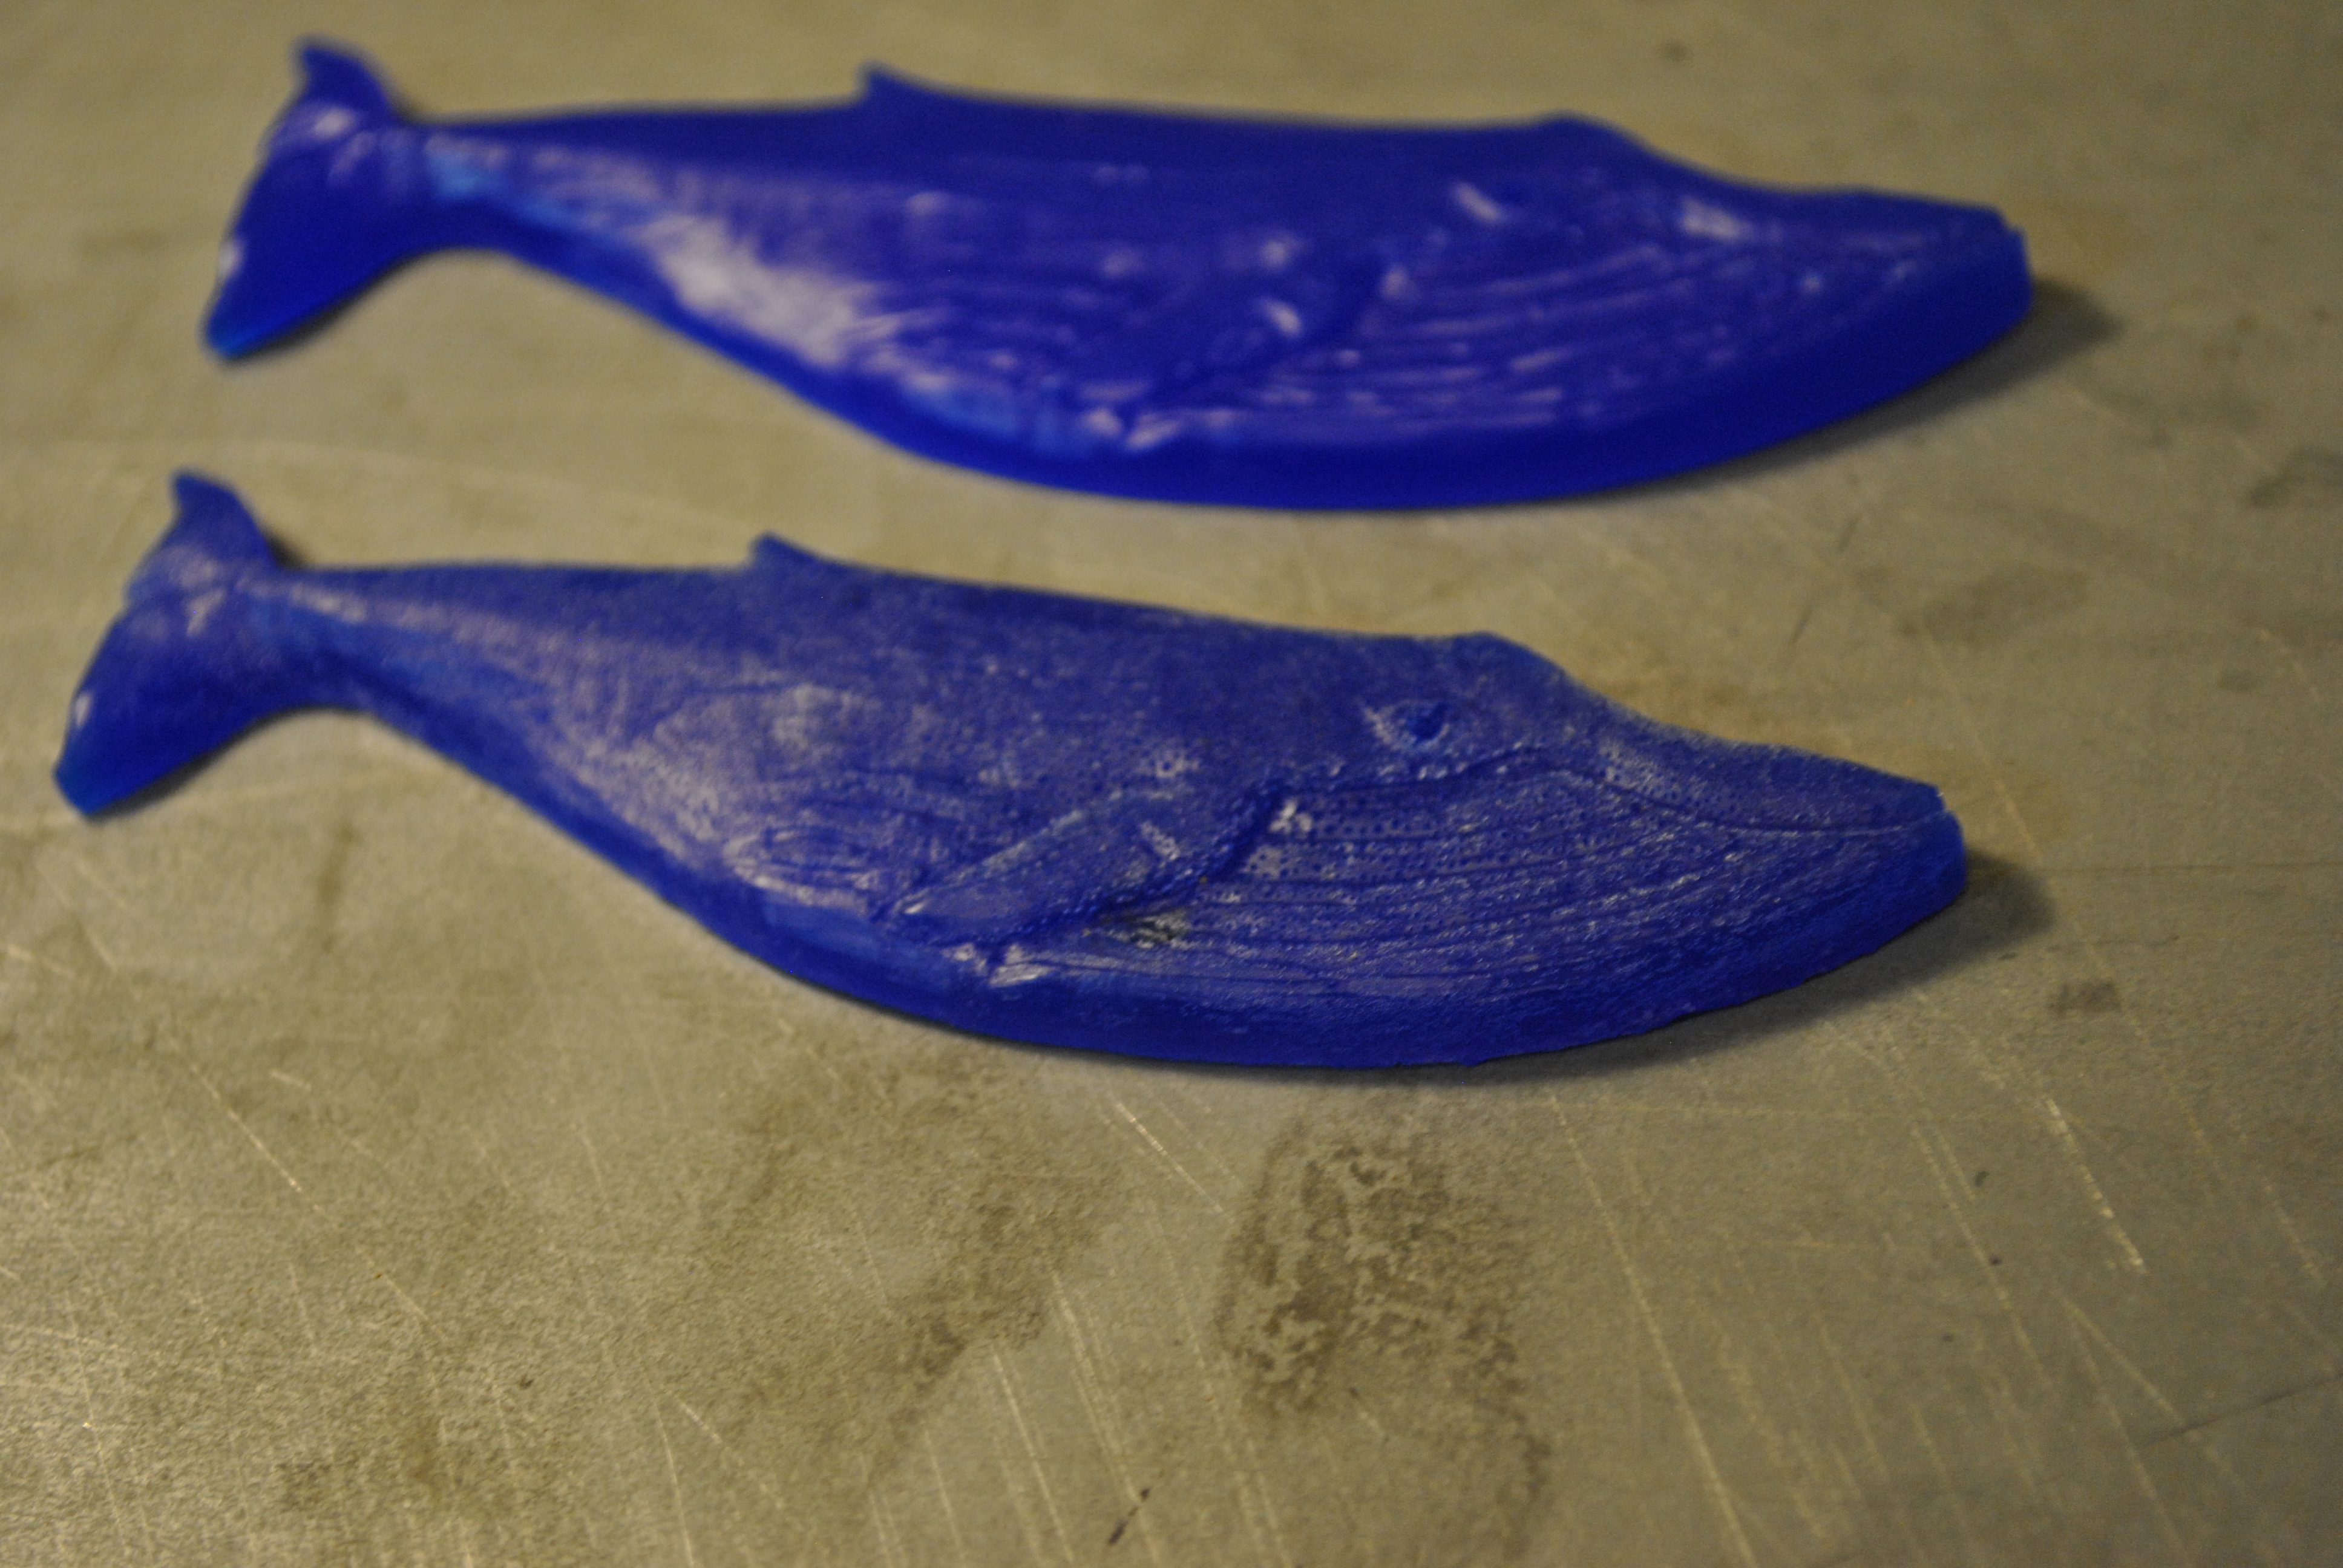
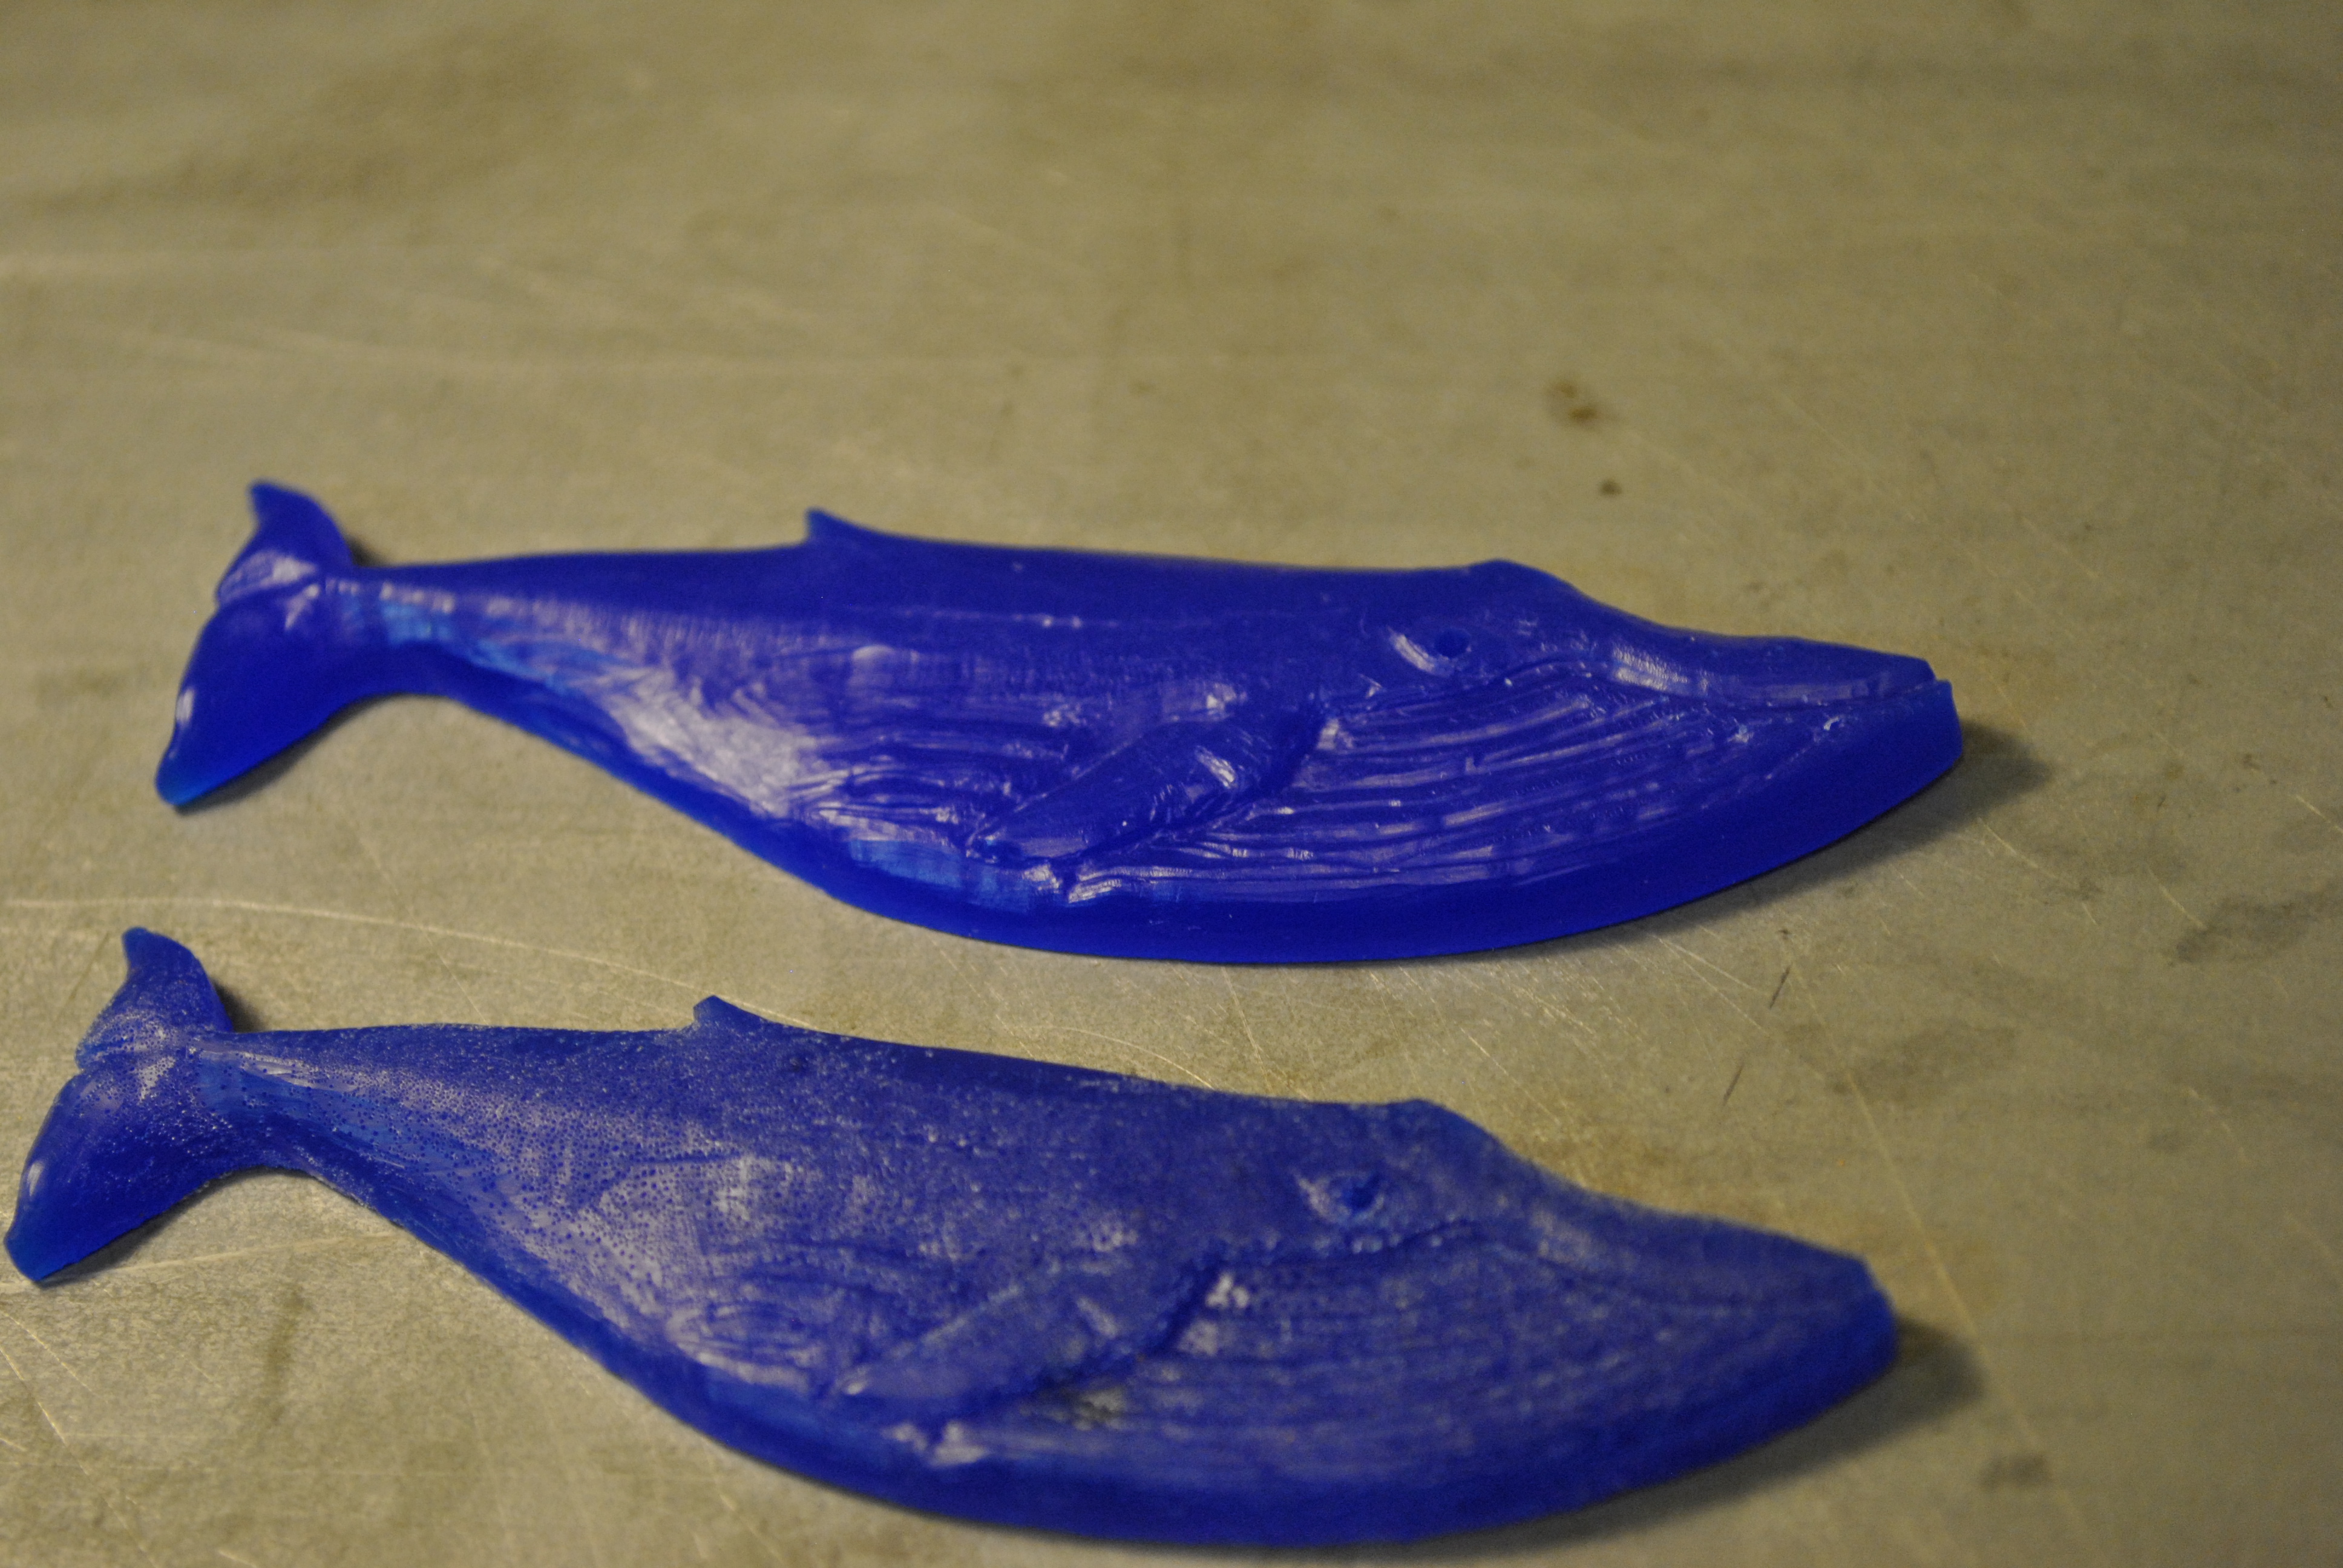
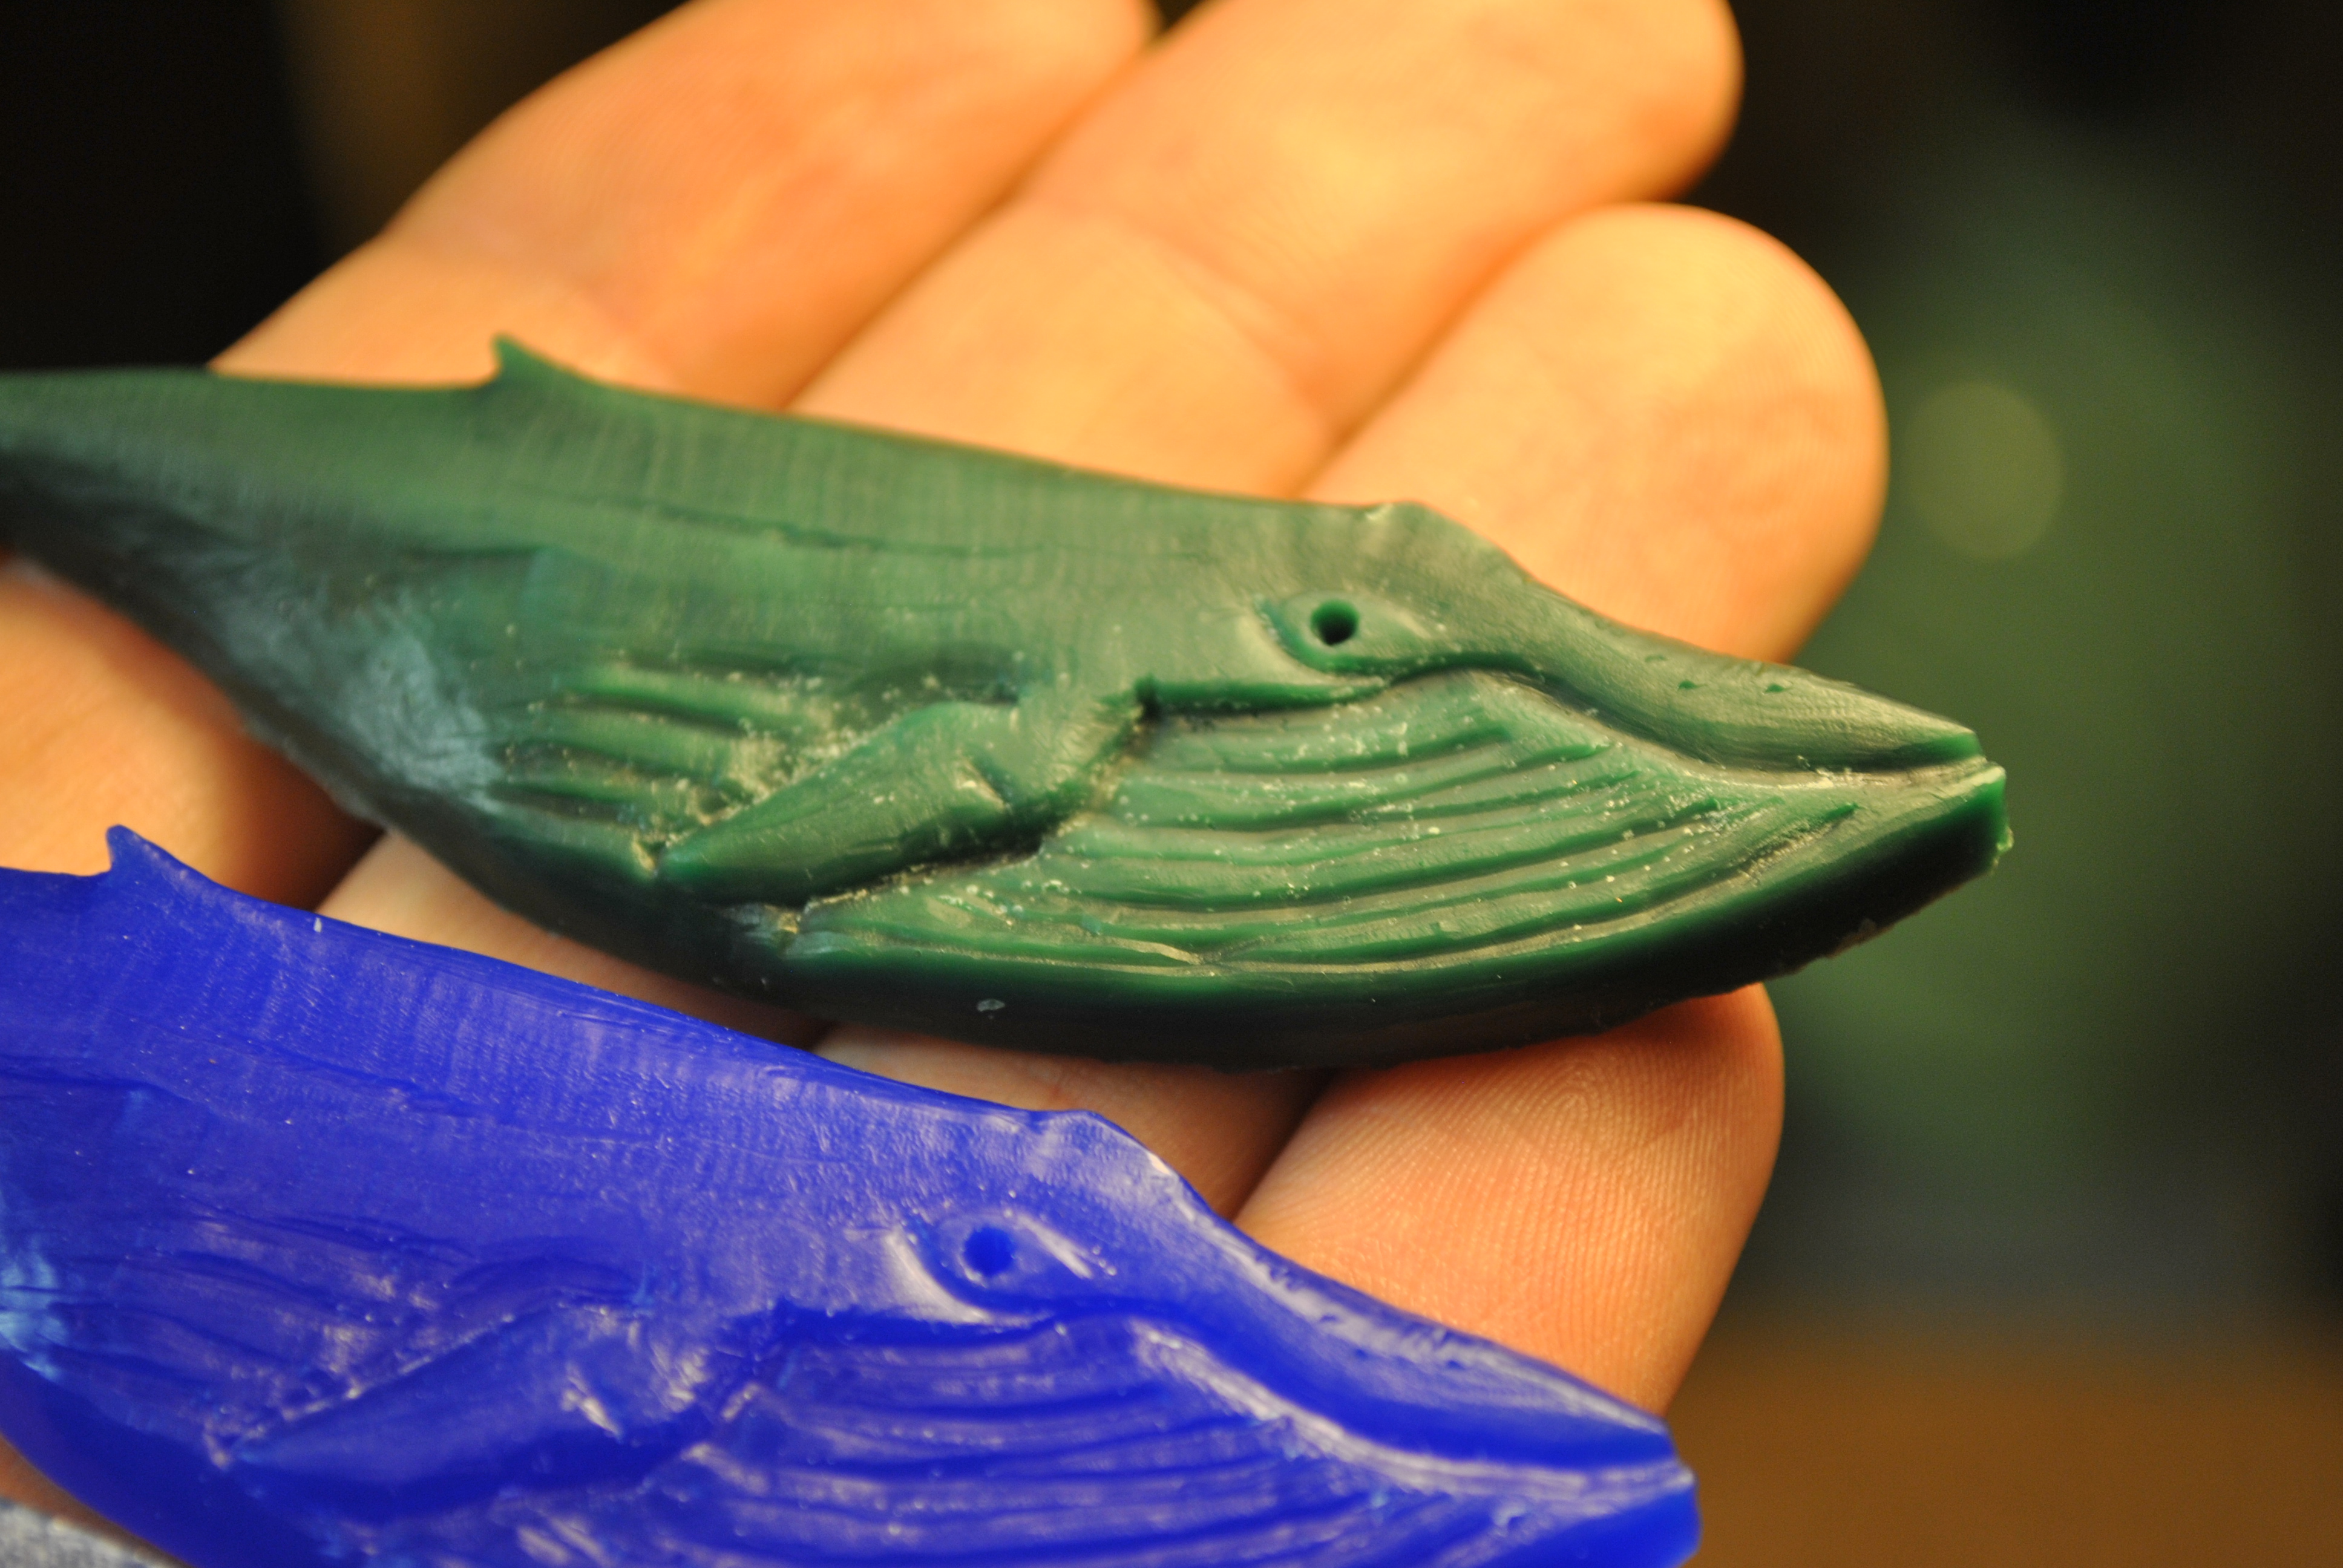
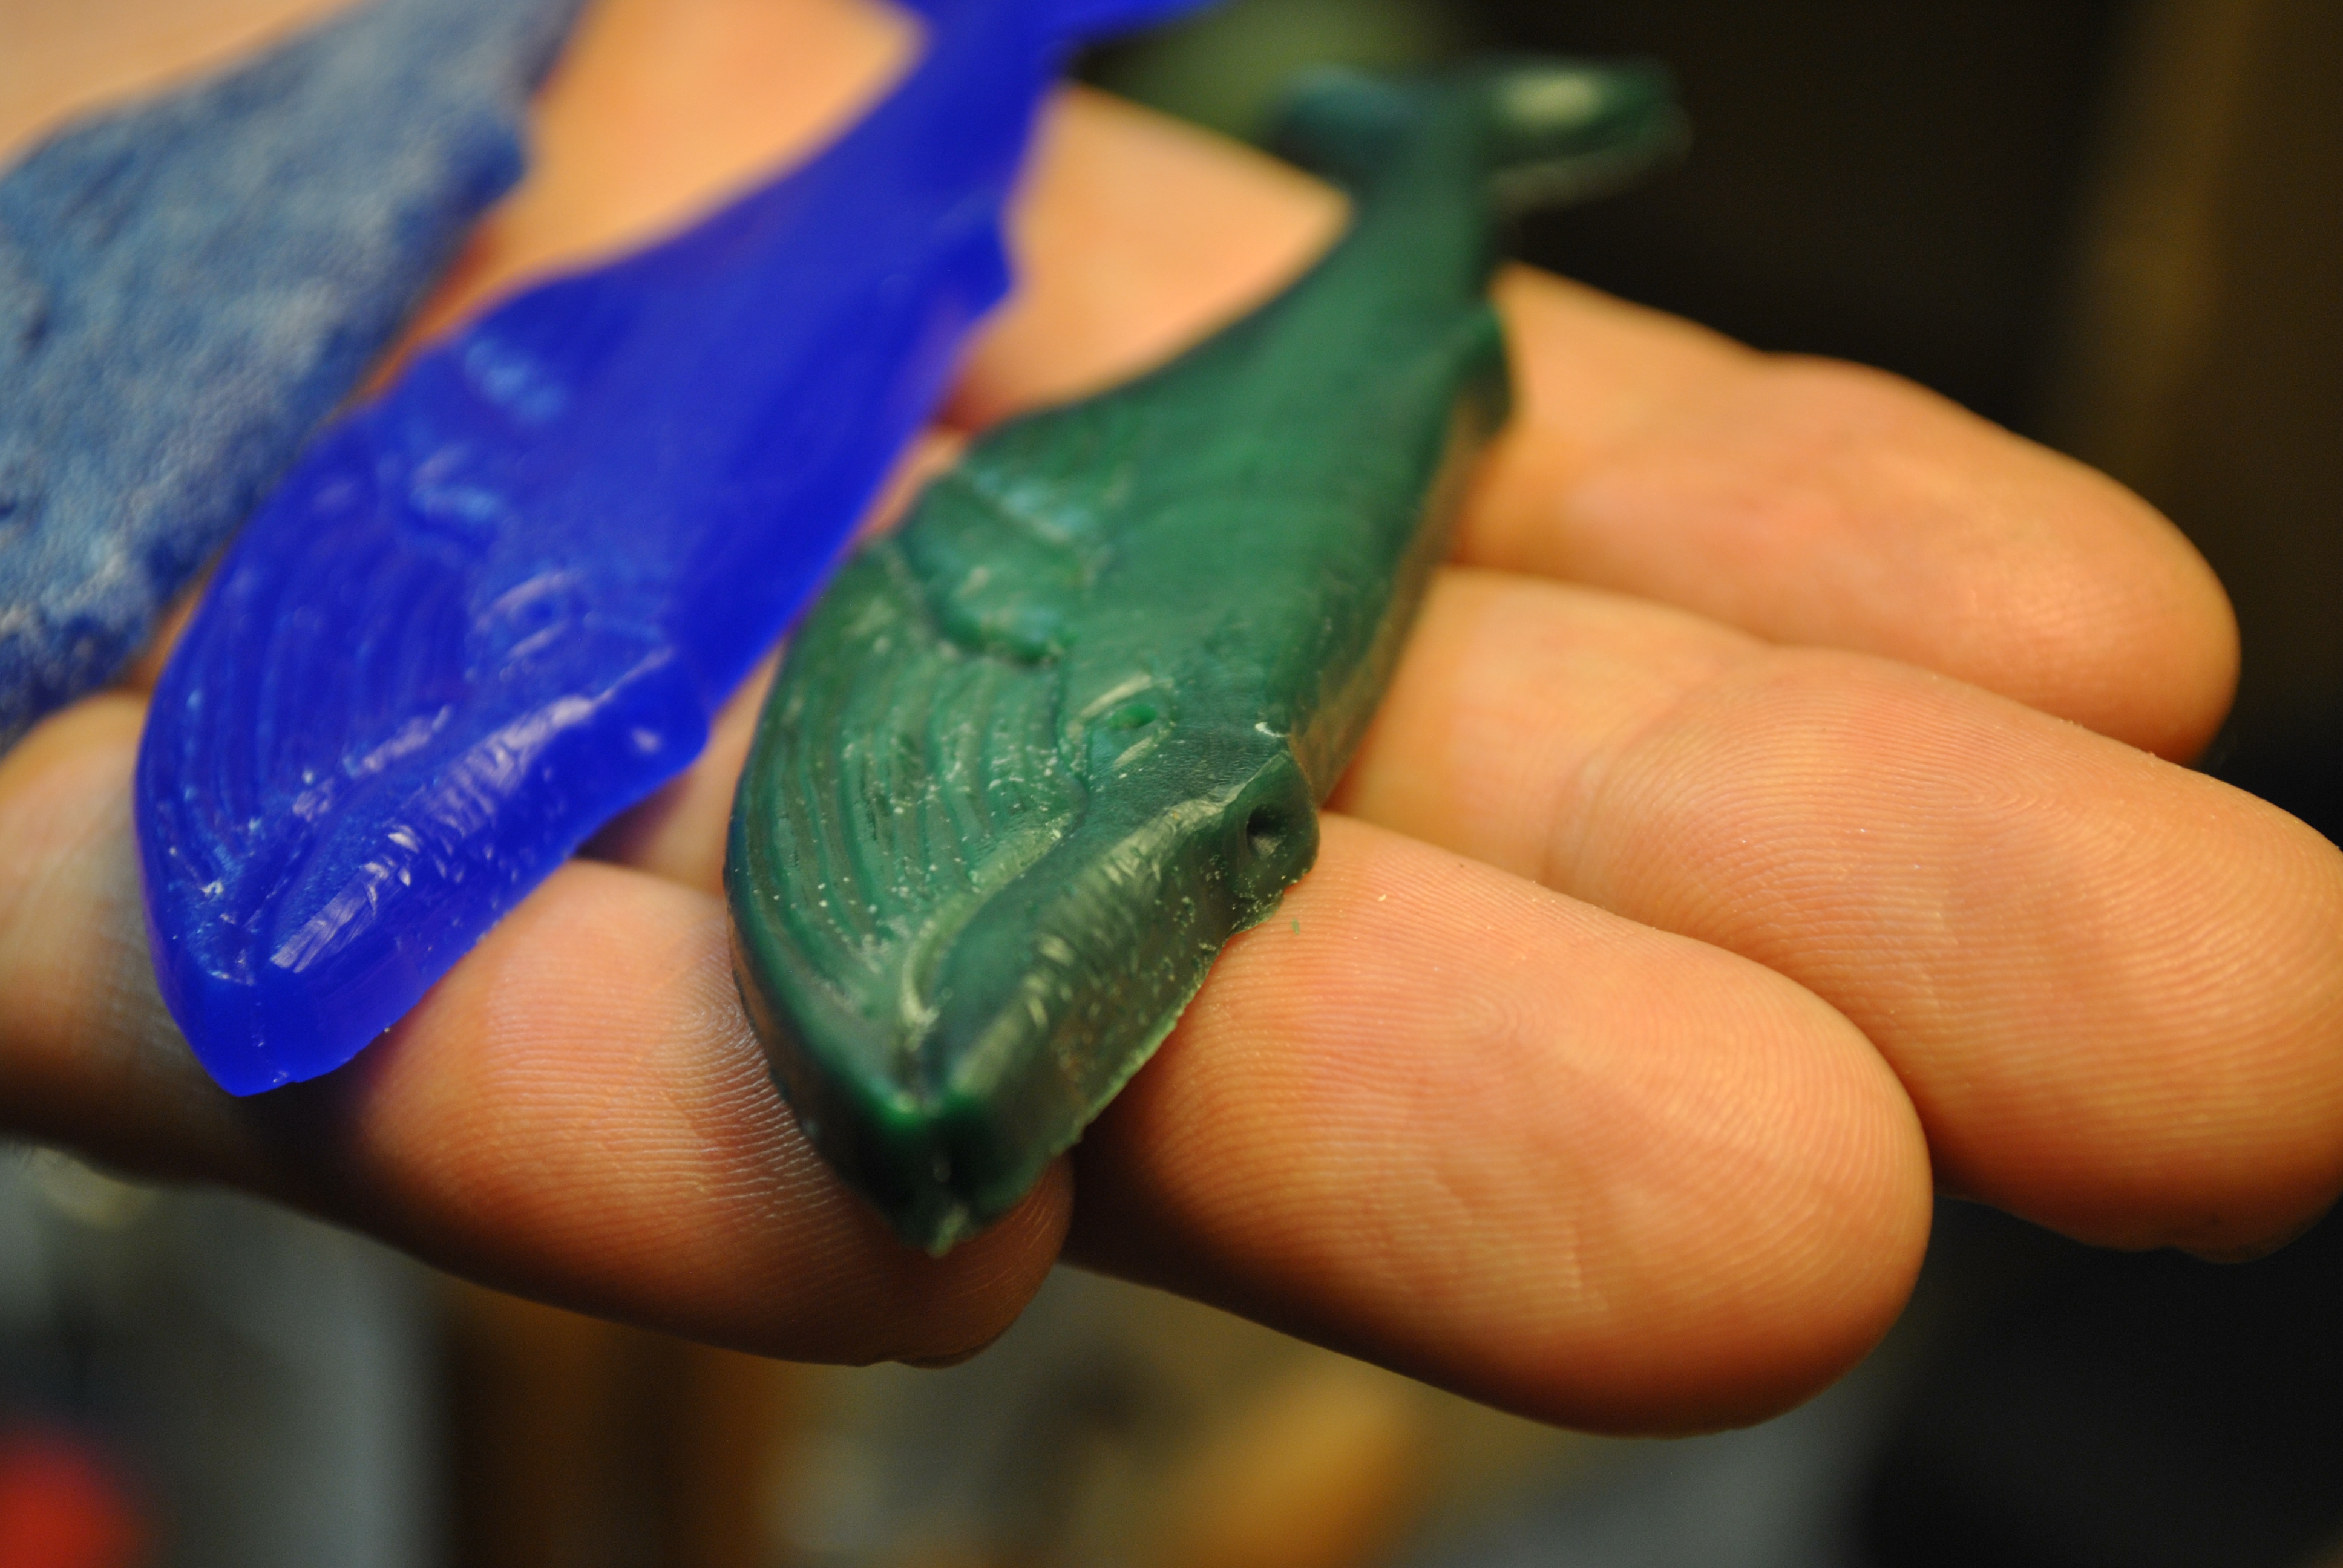
You can see that it copies every little detail!
I made another one just for fun.
That’s it! I recently purchased some food safe silicon, which I am going to use for chocolate casting! This is a really simple and easy process, I can’t wait to try it some more.
Sooner or later I had to tackle the big problem in home casting…the Kiln. I don’t know why I was so afraid of this step, perhaps it had something to do with the idea of building a box that can easily get up to 1200 C (Over 2100 f), or the electrical work, or the unfamiliarity of the whole project. But in retrospect it was super easy, and I have the internet to thank for that.
I am deeply indebted to a number of online sources for the knowledge I gleaned in how to make this kiln (I will list them all at the end), but first and foremost this instructable by Sure Hacksalot was my bible, my savior, and more importantly my safety blanket that calmed my worries. I honestly can not thank this person enough as he has made it possible for me to build myself a kiln that does everything I want for a small fraction of the cost of a commercial model.
These are not step by step instructions, for that see Sure Hacksalot’s instructable, as he has done a much better job than I ever could in laying out the steps.
If you are like me, the idea of building your own kiln is a bit daunting, I mean the damn thing is going to get really really really hot, and there are electronics, and electricity, and did I mention the really hot…yea, but in essence what you are doing is building a tiny box, and keeping all the heat inside it. It’s not very hard, no really, its pretty easy. Screw your courage to the sticking place and charge forth!
I put in links to where I purchased some of this stuff, you can get it many places though
You will need the following:
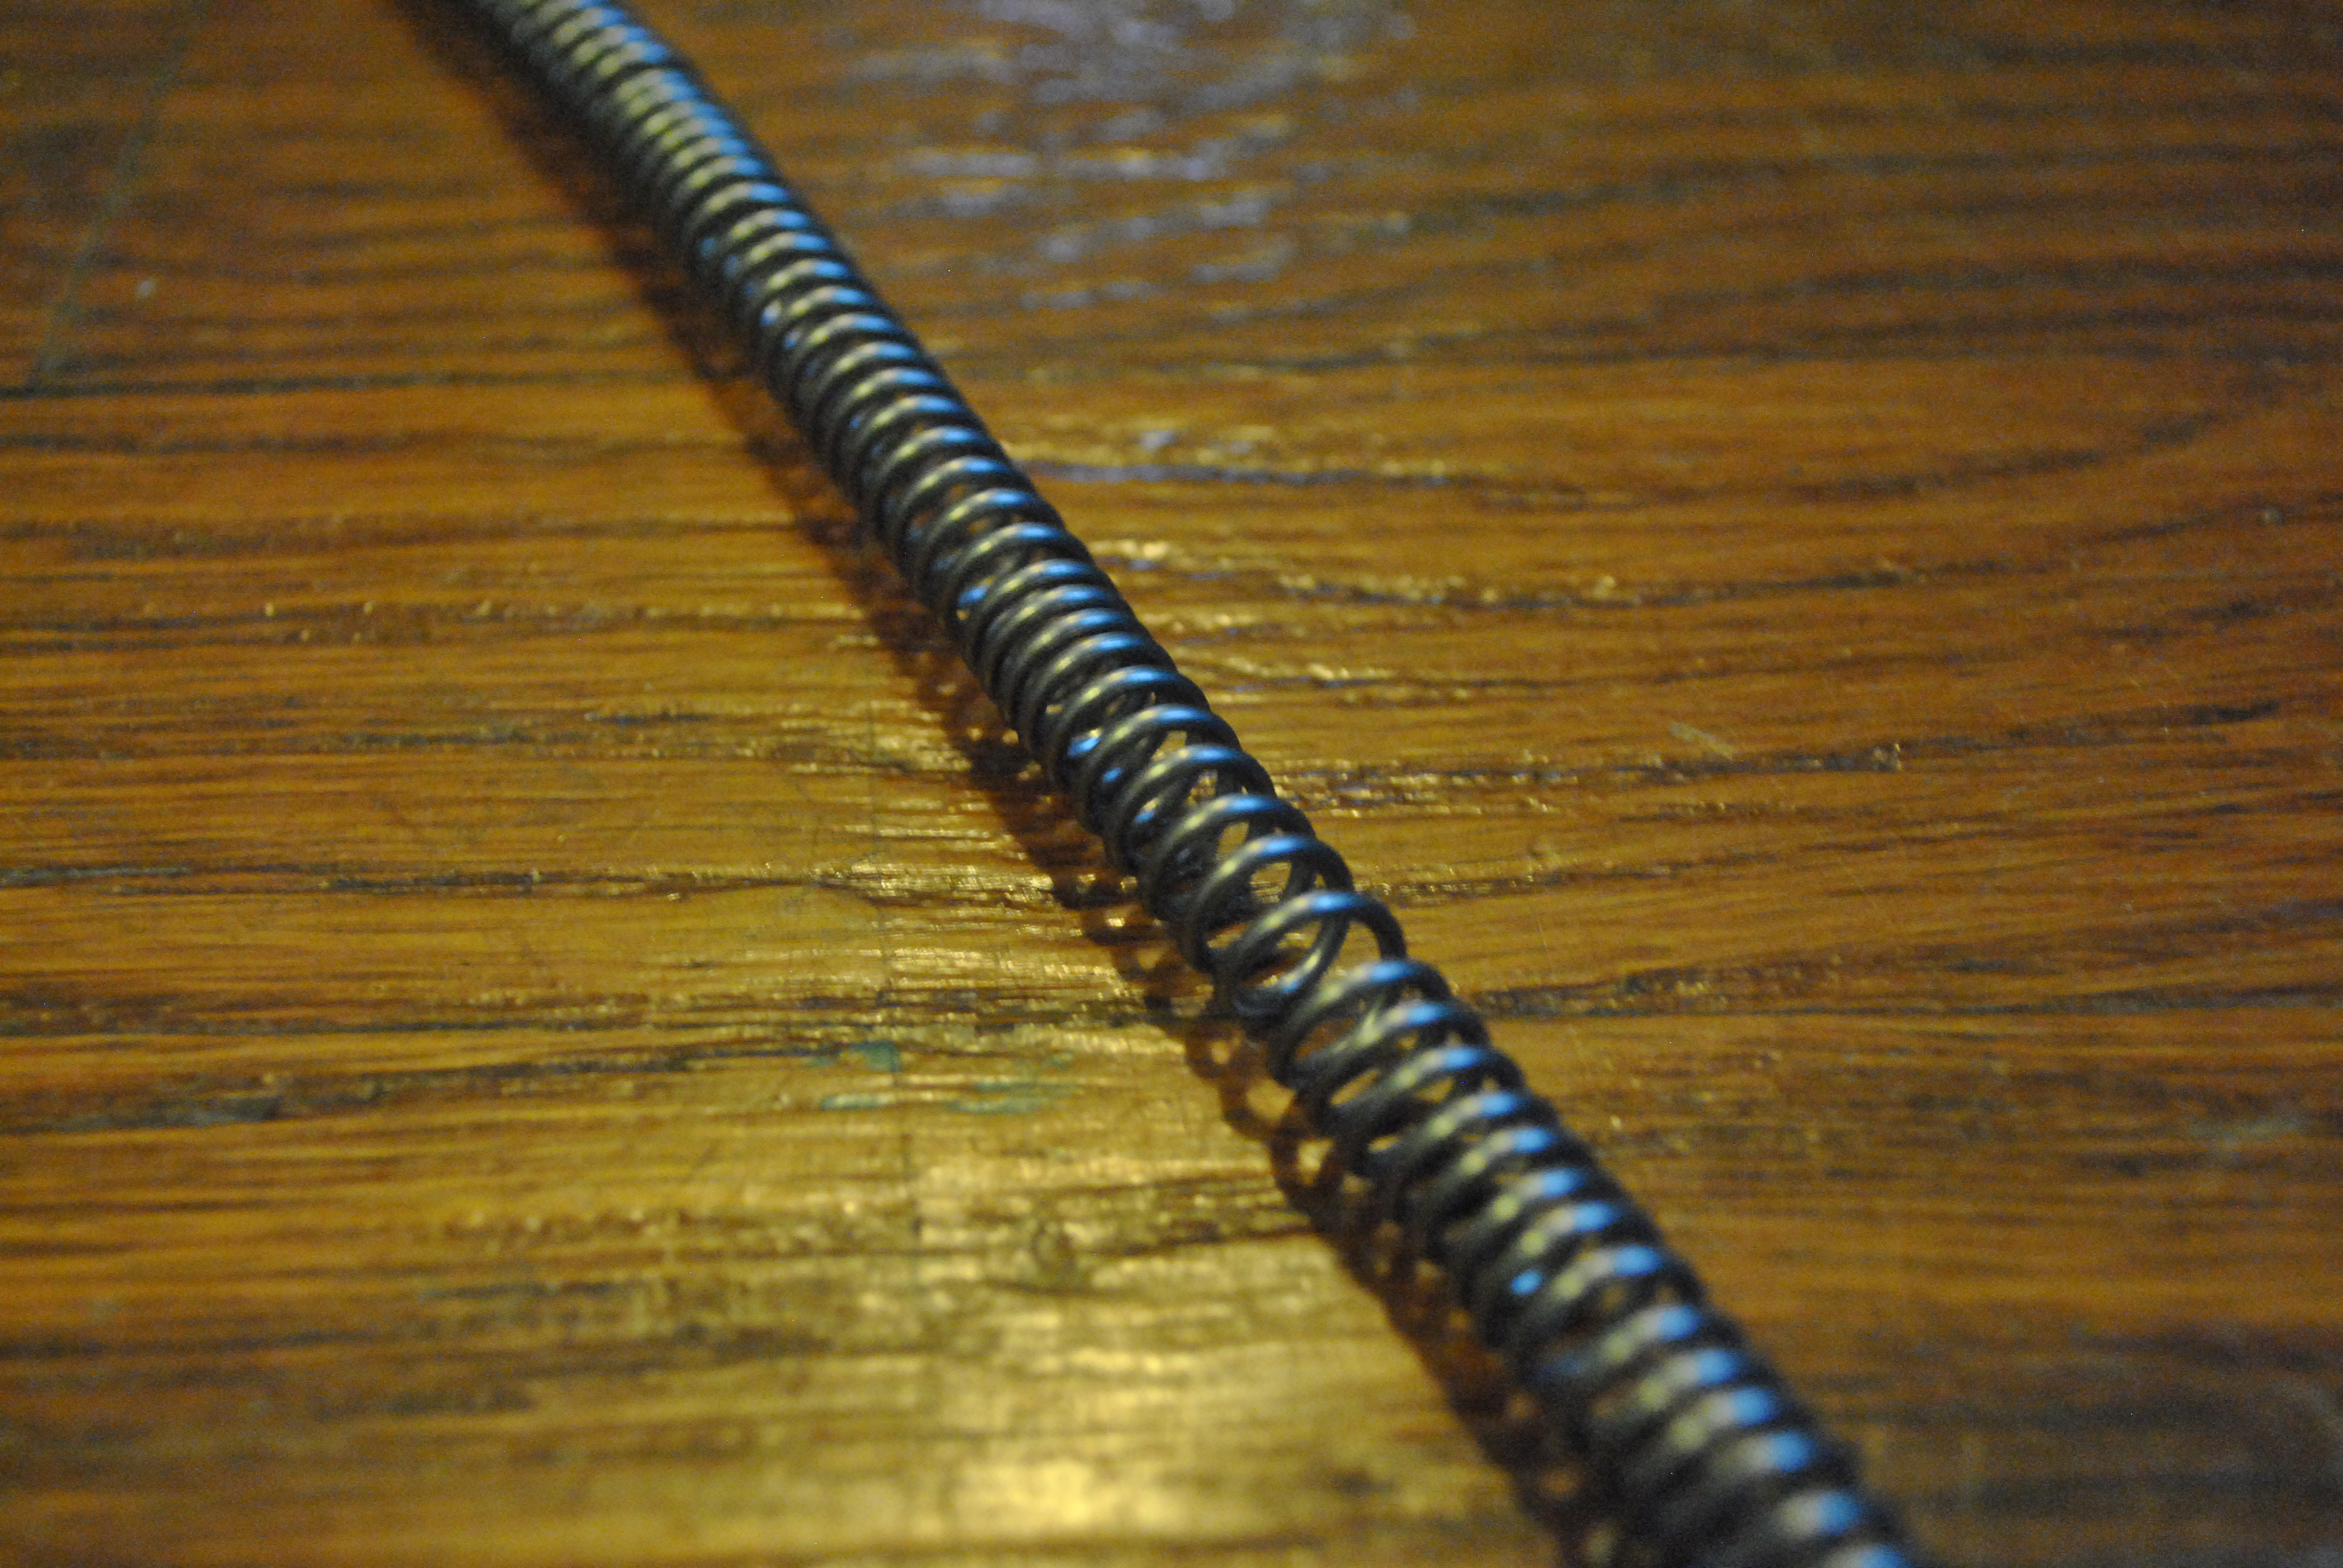
a length of Kanthal A1 resistance wire (I used 25 feet of 16g for my element, this wire is used because it can achieve the high temps needed) Buy
some K23 refractory fire bricks (I used two different shapes) Buy here and here.
Some threaded rod, and angle iron (got at home depot)
Some nuts, bolts and washers (had laying around)
A PID temp controller (I used the AGPTek Dual Digital SSR) Buy
A K Type thermocouple rated for at least 1200C (Make sure to get one with a long enough probe to fit through your fire brick) buy
A 25A rated solid state relay (be sure to get AC not DC) Buy
Some hefty gauge wire (had some laying around)
Tools needed:
a Philips head screwdriver
a hand saw (not a power saw)
a Dremel tool with the router head and bits (not technically needed but super helpful)
a drill bit the same size as your thermocouple probe
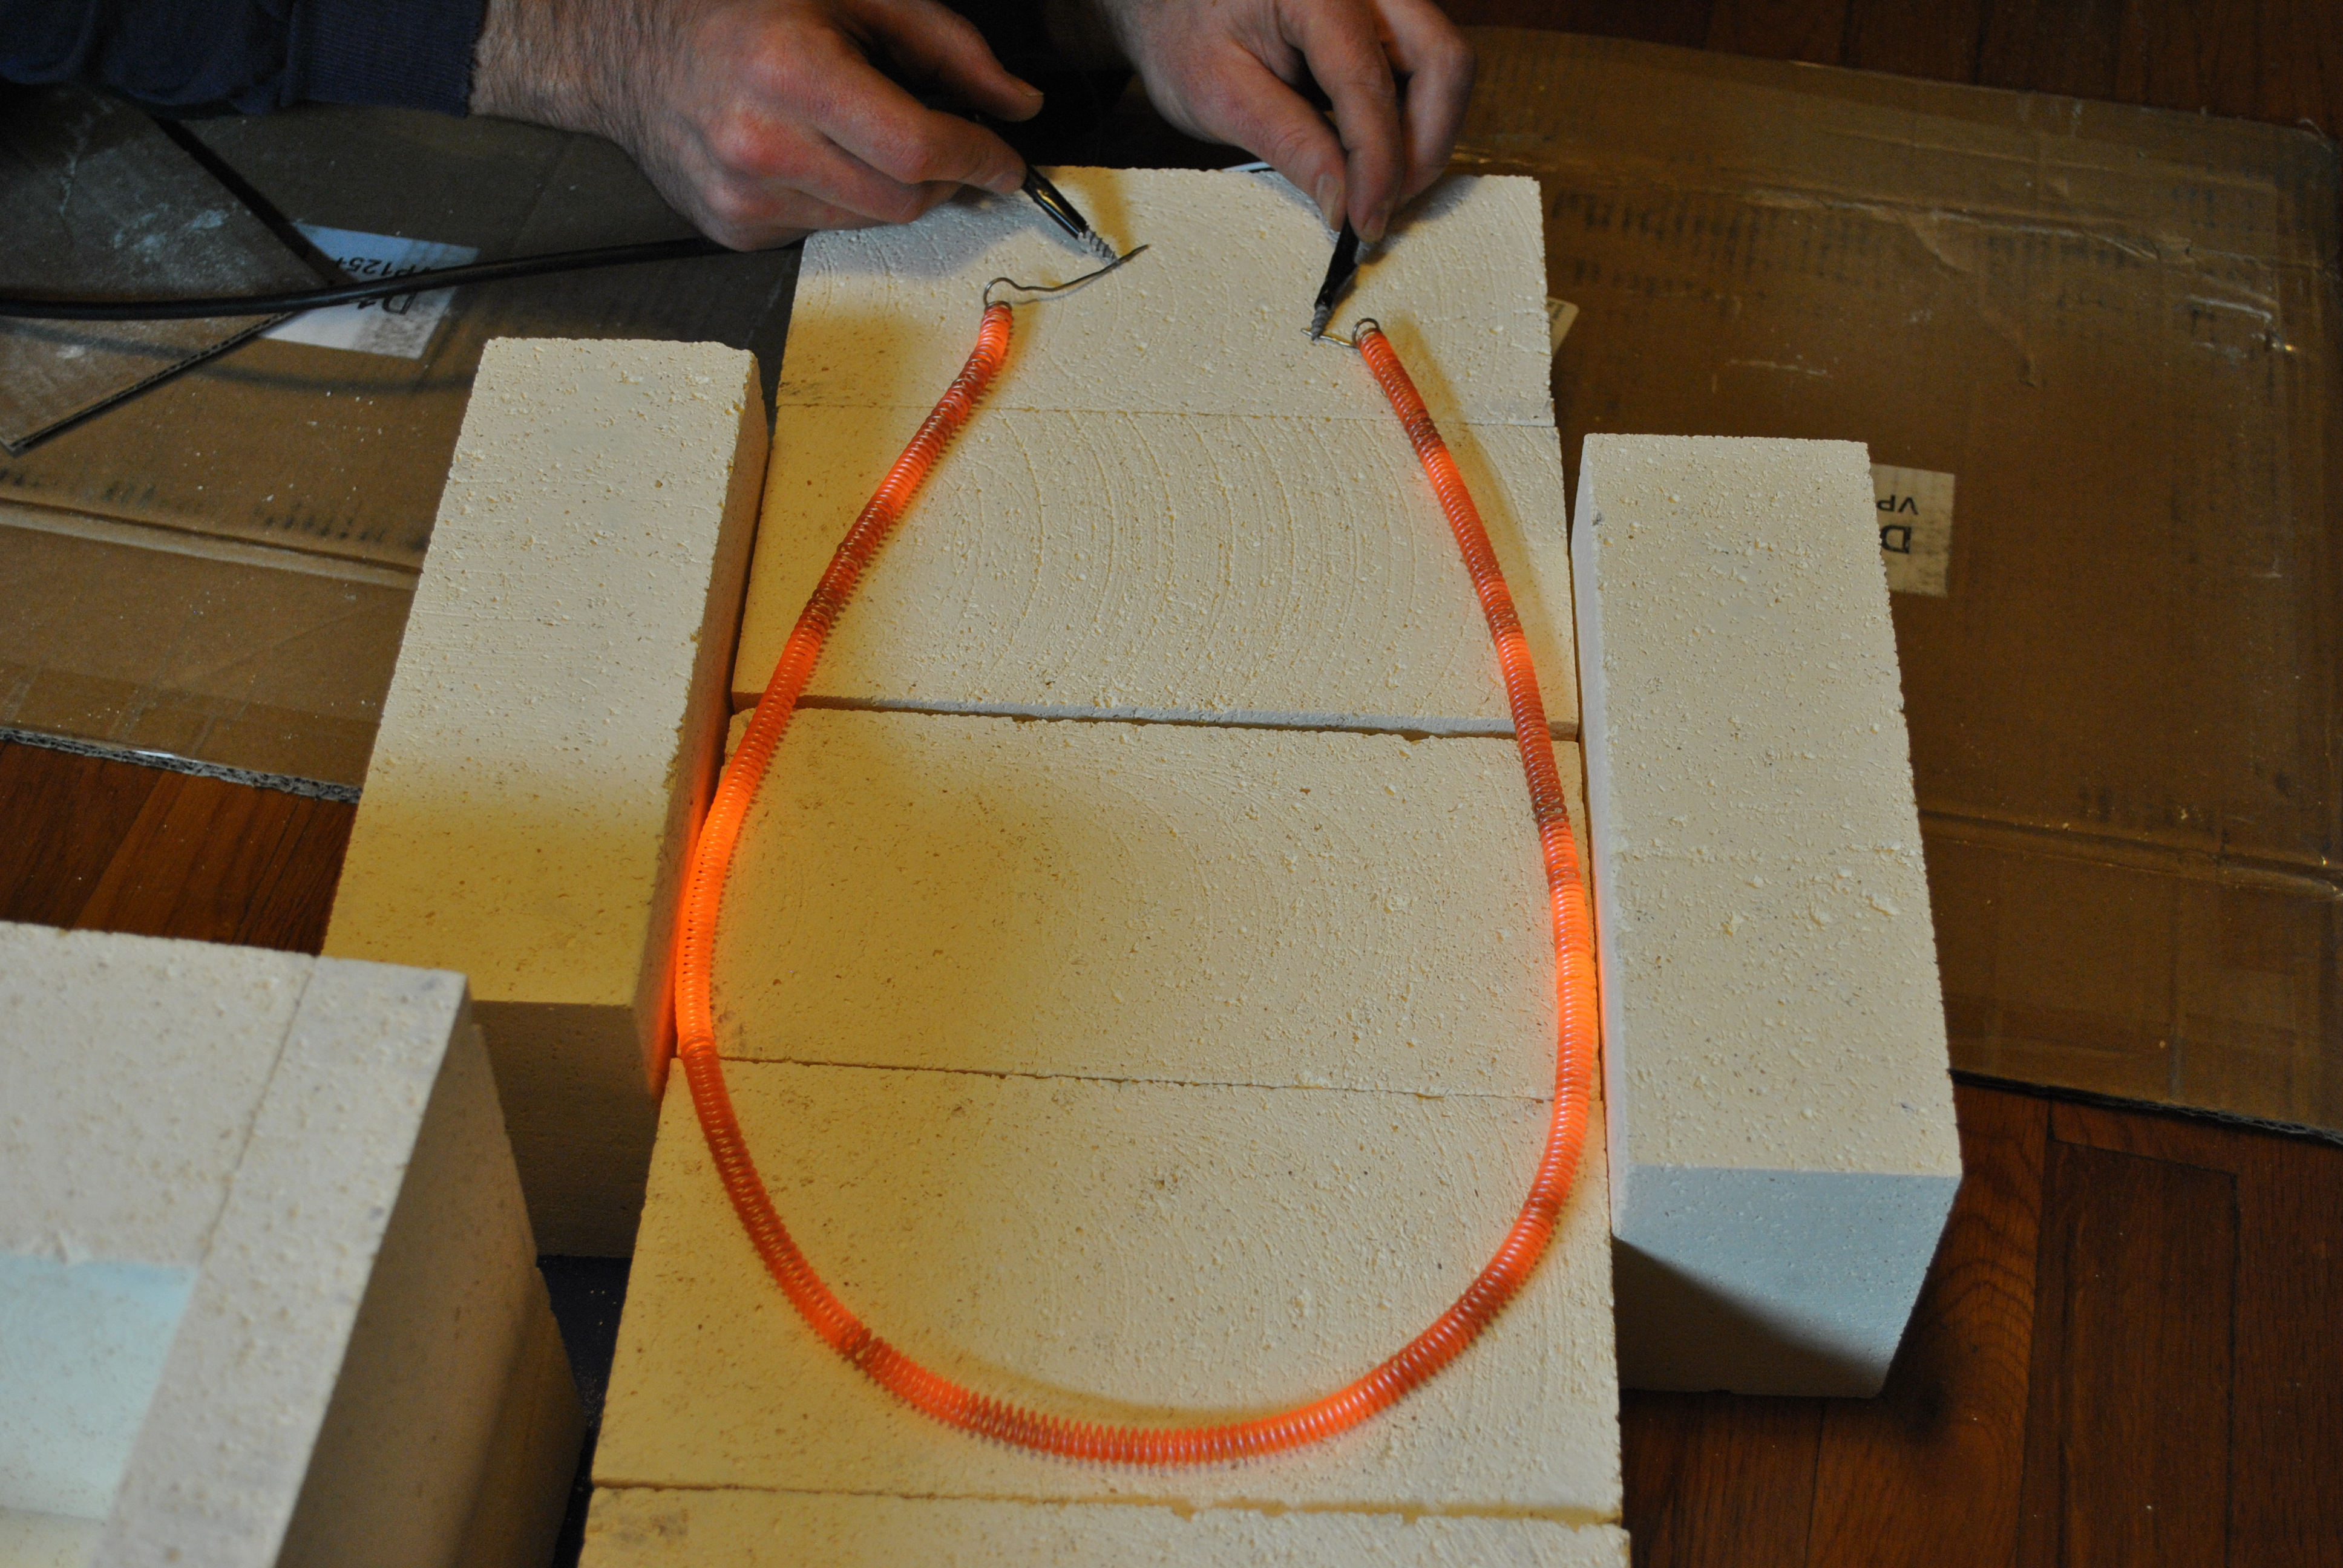
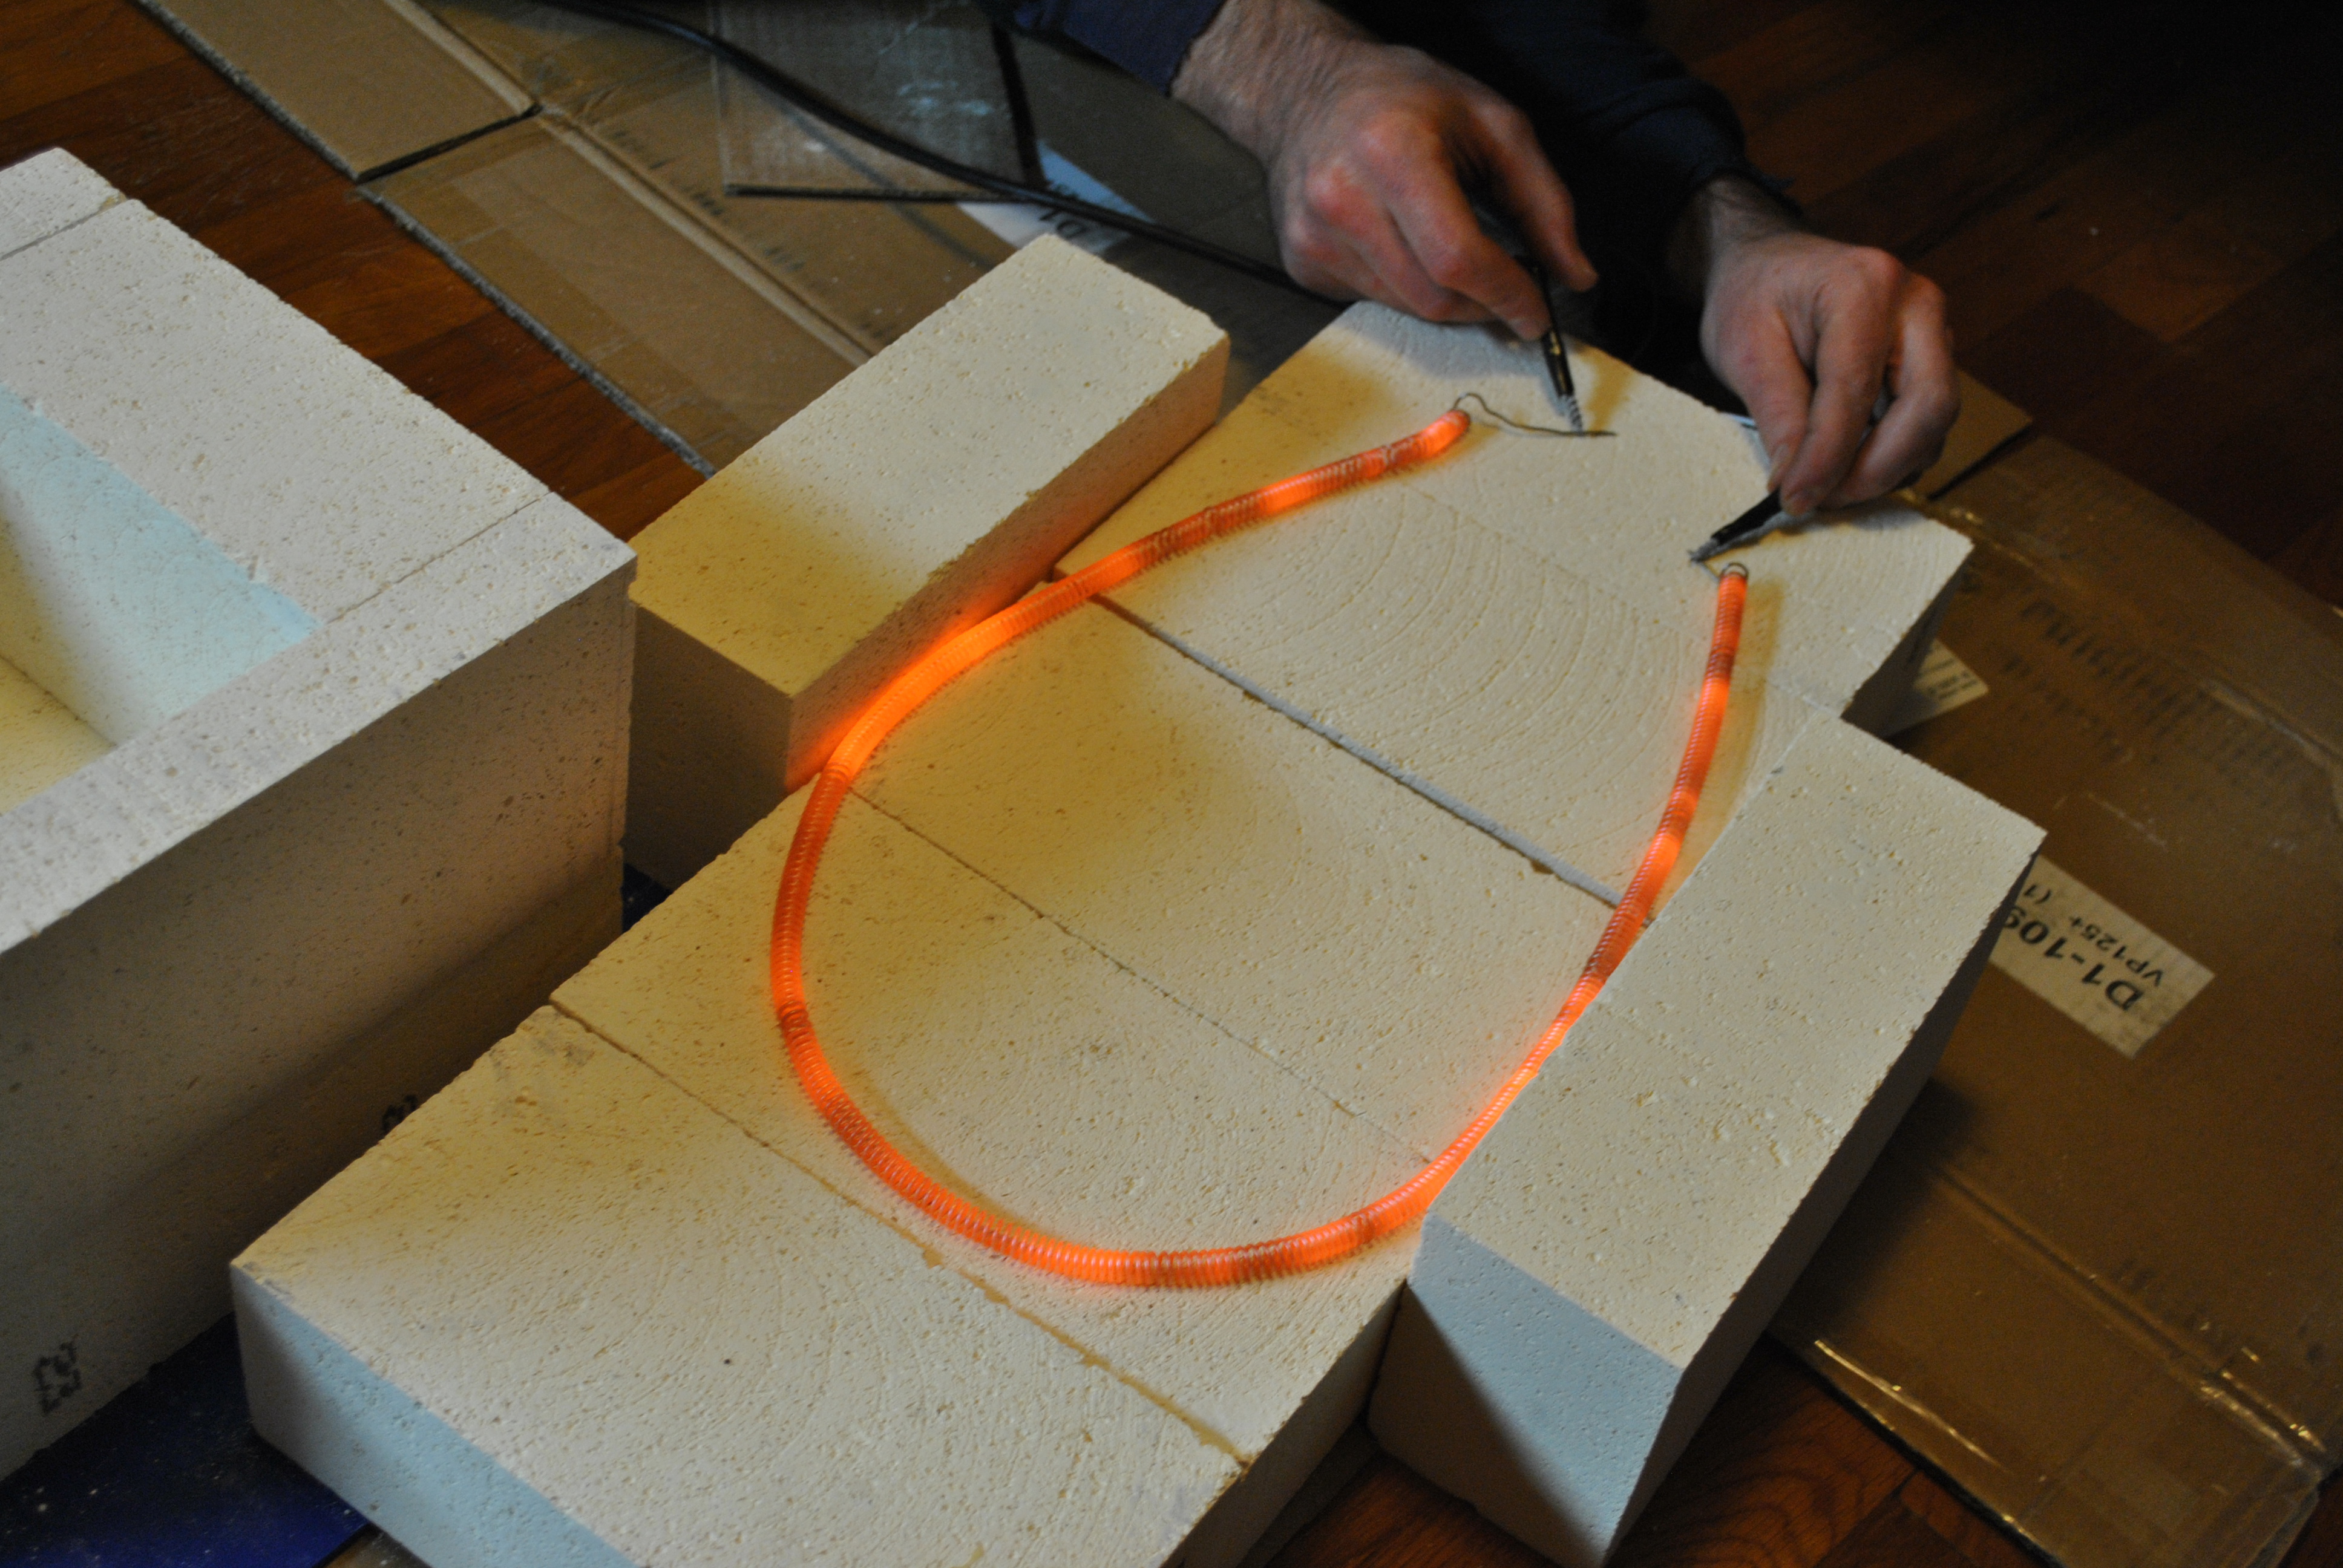
The Heating Element:
The heating element is a type of wire that gets very hot when you run electricity through it. It uses a special kind of wire called Kanthal A1 wire. You have to “size” your element so that it draws enough electricity to heat up hot enough, but not so much you blow out the breaker.
First figure out the maximum amp rating of your breaker, mine was 15.
Next determine the voltage rating for your home mine was 120.
You can not draw more Amps than your breaker can handle, and if you want to be safe and have anything else on when you are using your kiln, its a good idea to stay well below the maximum.
To figure out how many Amps your element will use, use the following math formulas:
Amps = volts / Ohms
Watts = volts X amps
Ohms = volts /Amps
Ohms is a measure of resistance, to figure that out you need to consult a chart for Kanthal A1 wire. The resistance or Ohms is per foot, so different thickness wires, and different length wires will give you different resistance.
I used 16g wire, which has a resistance of .324 ohms per foot. Using the formula above Ohms = 120 volts/15 amps = 8. However I don’t want to peg my kiln at the max, so I am going to use 7.3. Since my 16 g wire has .324 ohms per foot I take 7.3 (my max ohms) /.324 (ohms per foot of my wire) = 22.5 feet of wire.
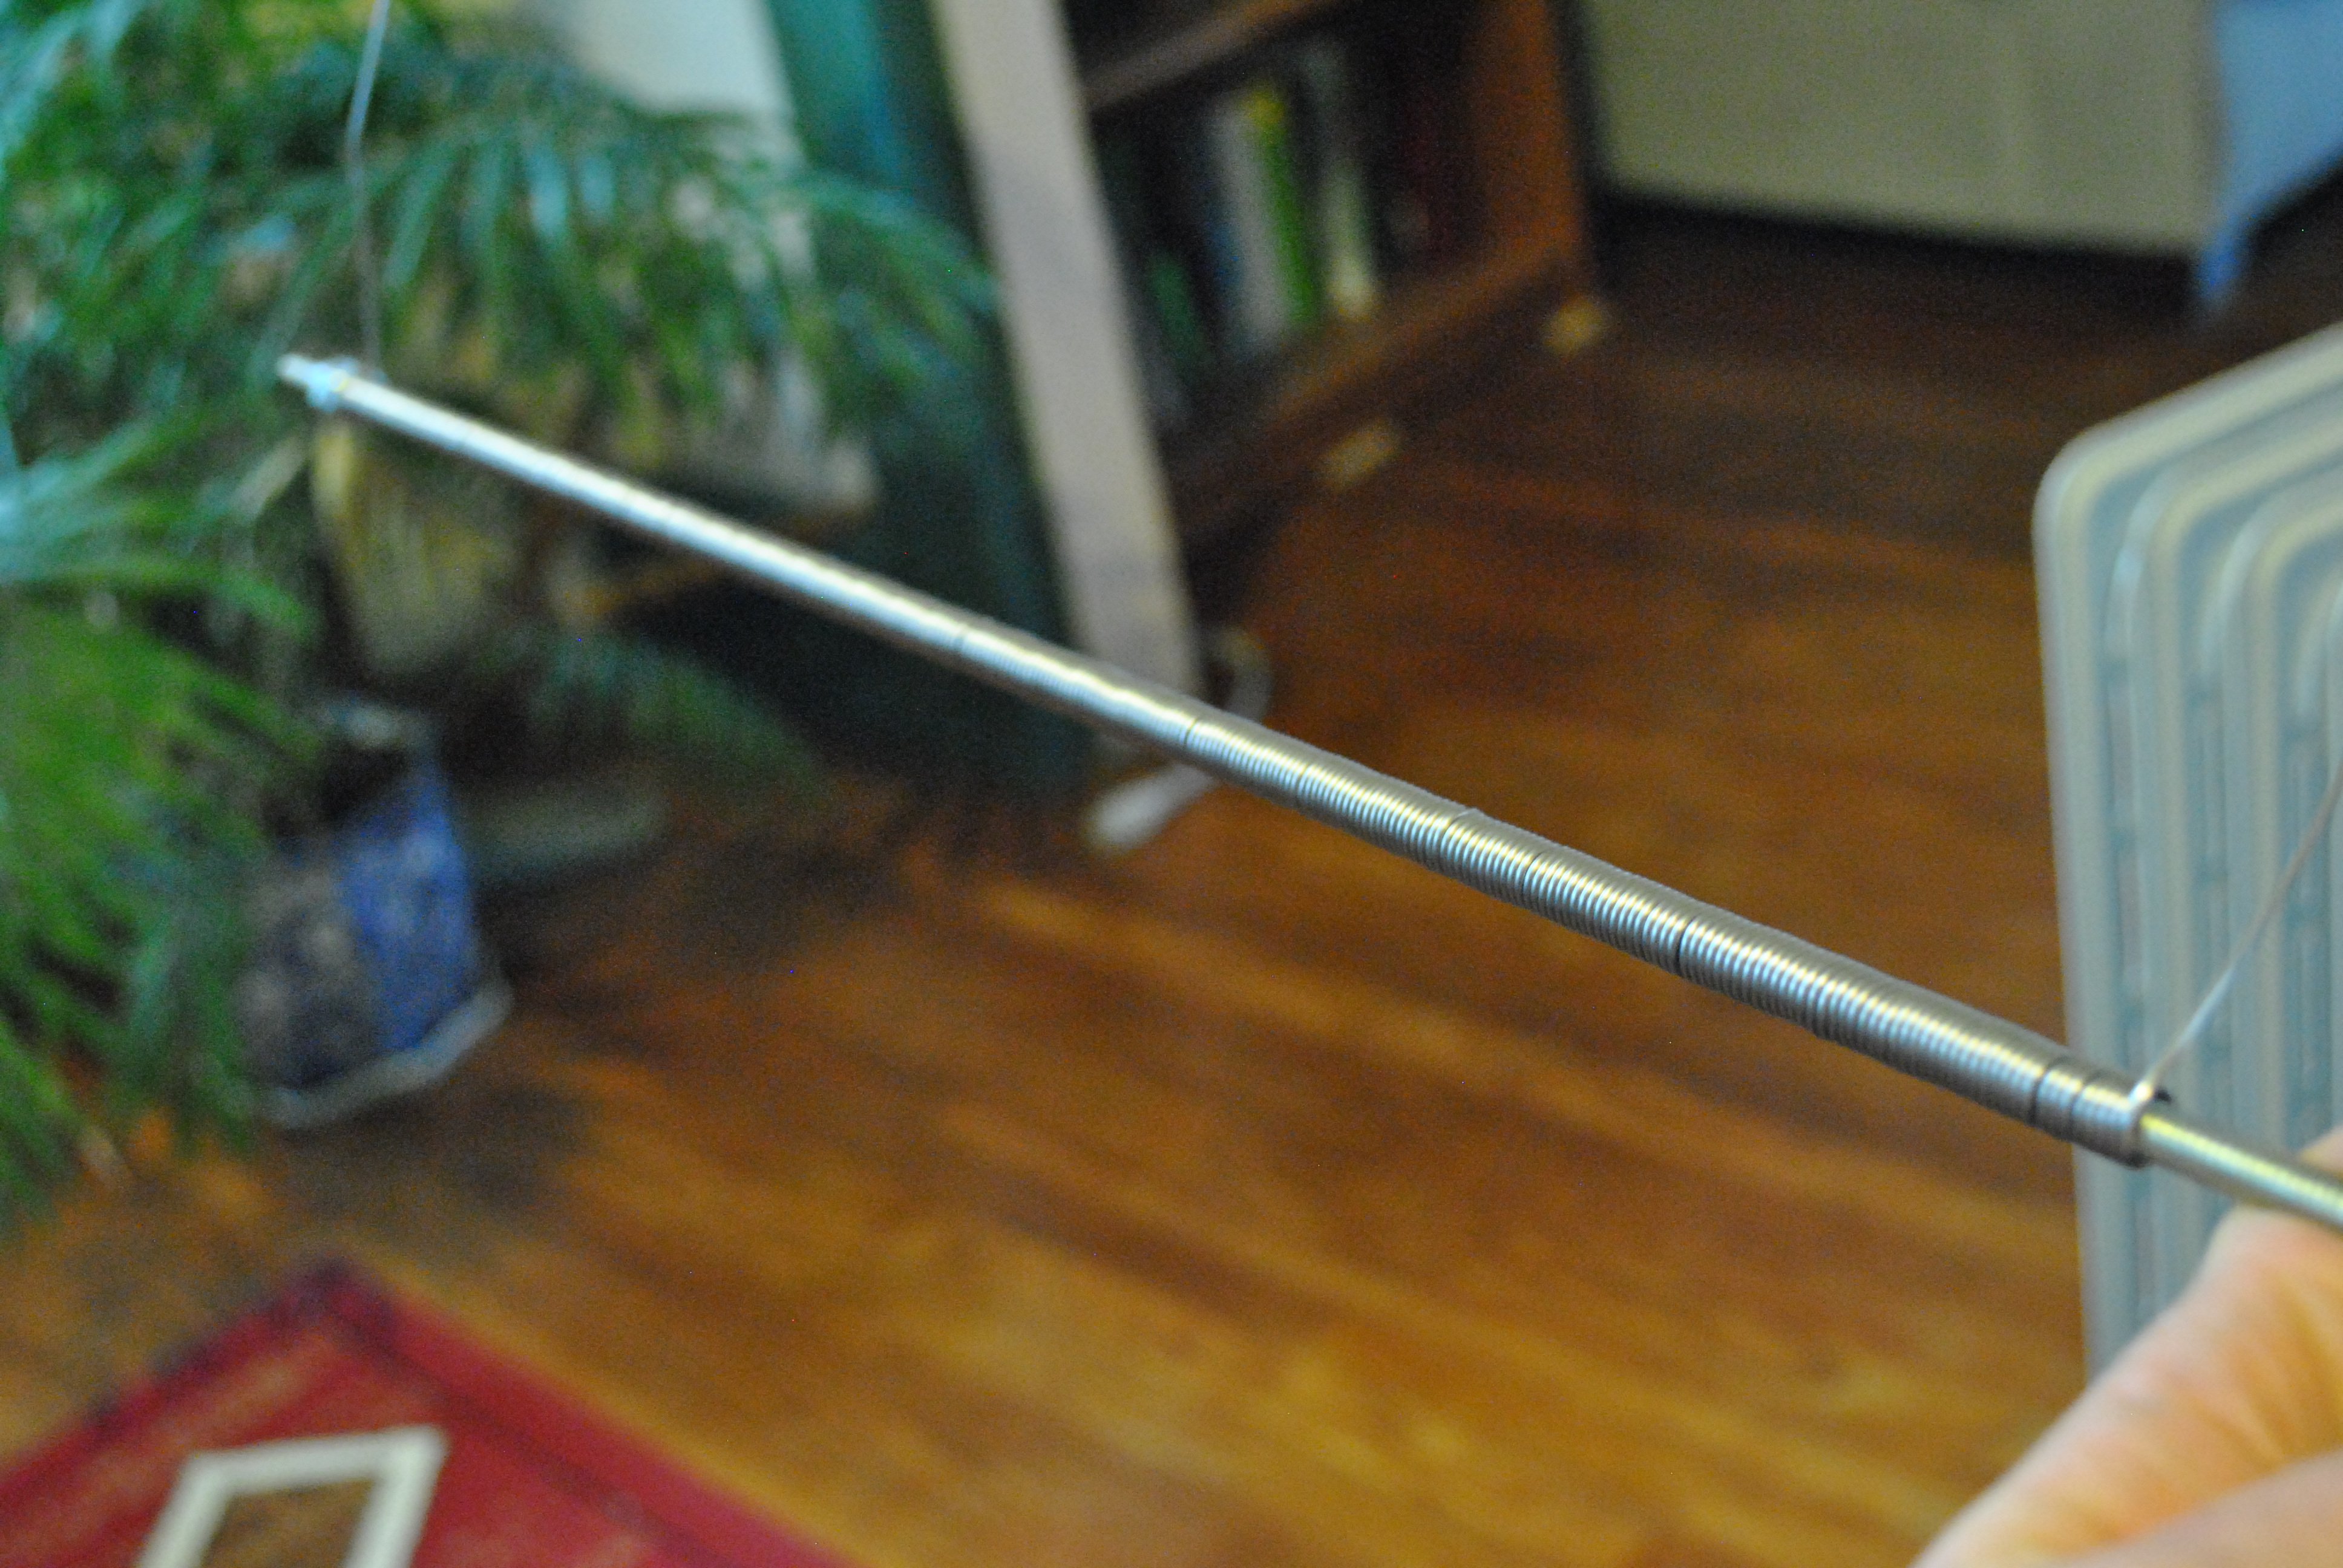
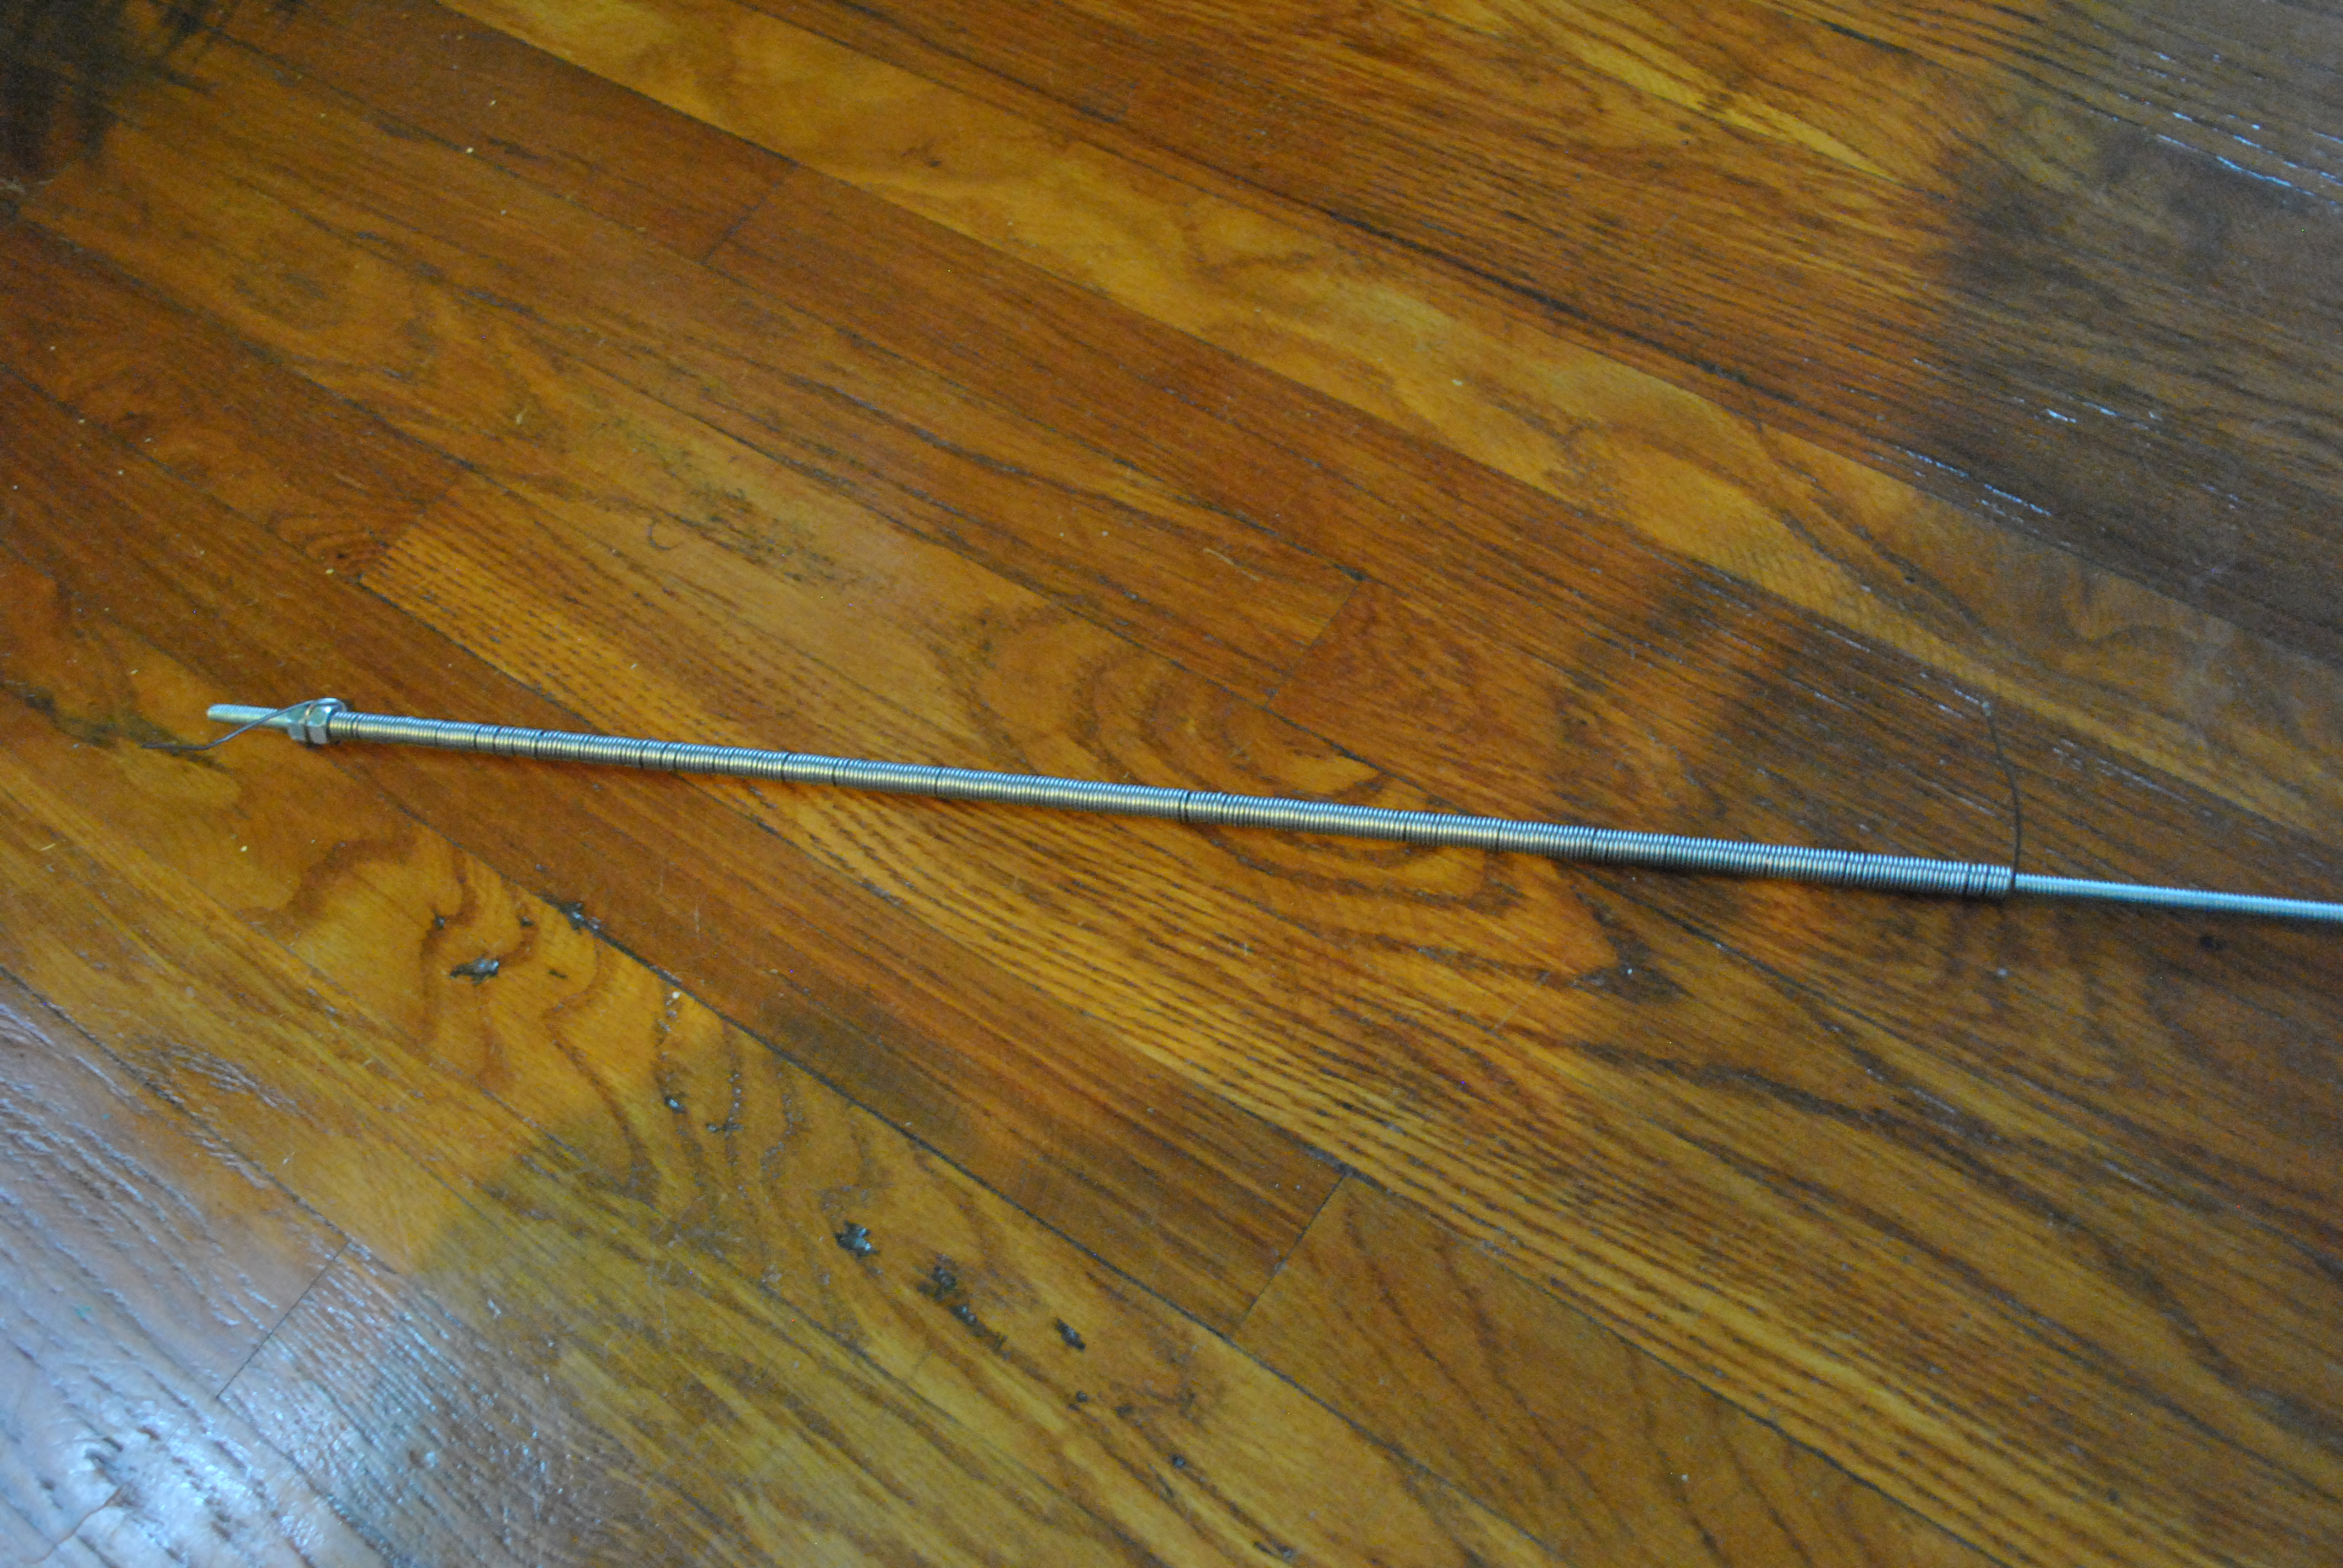
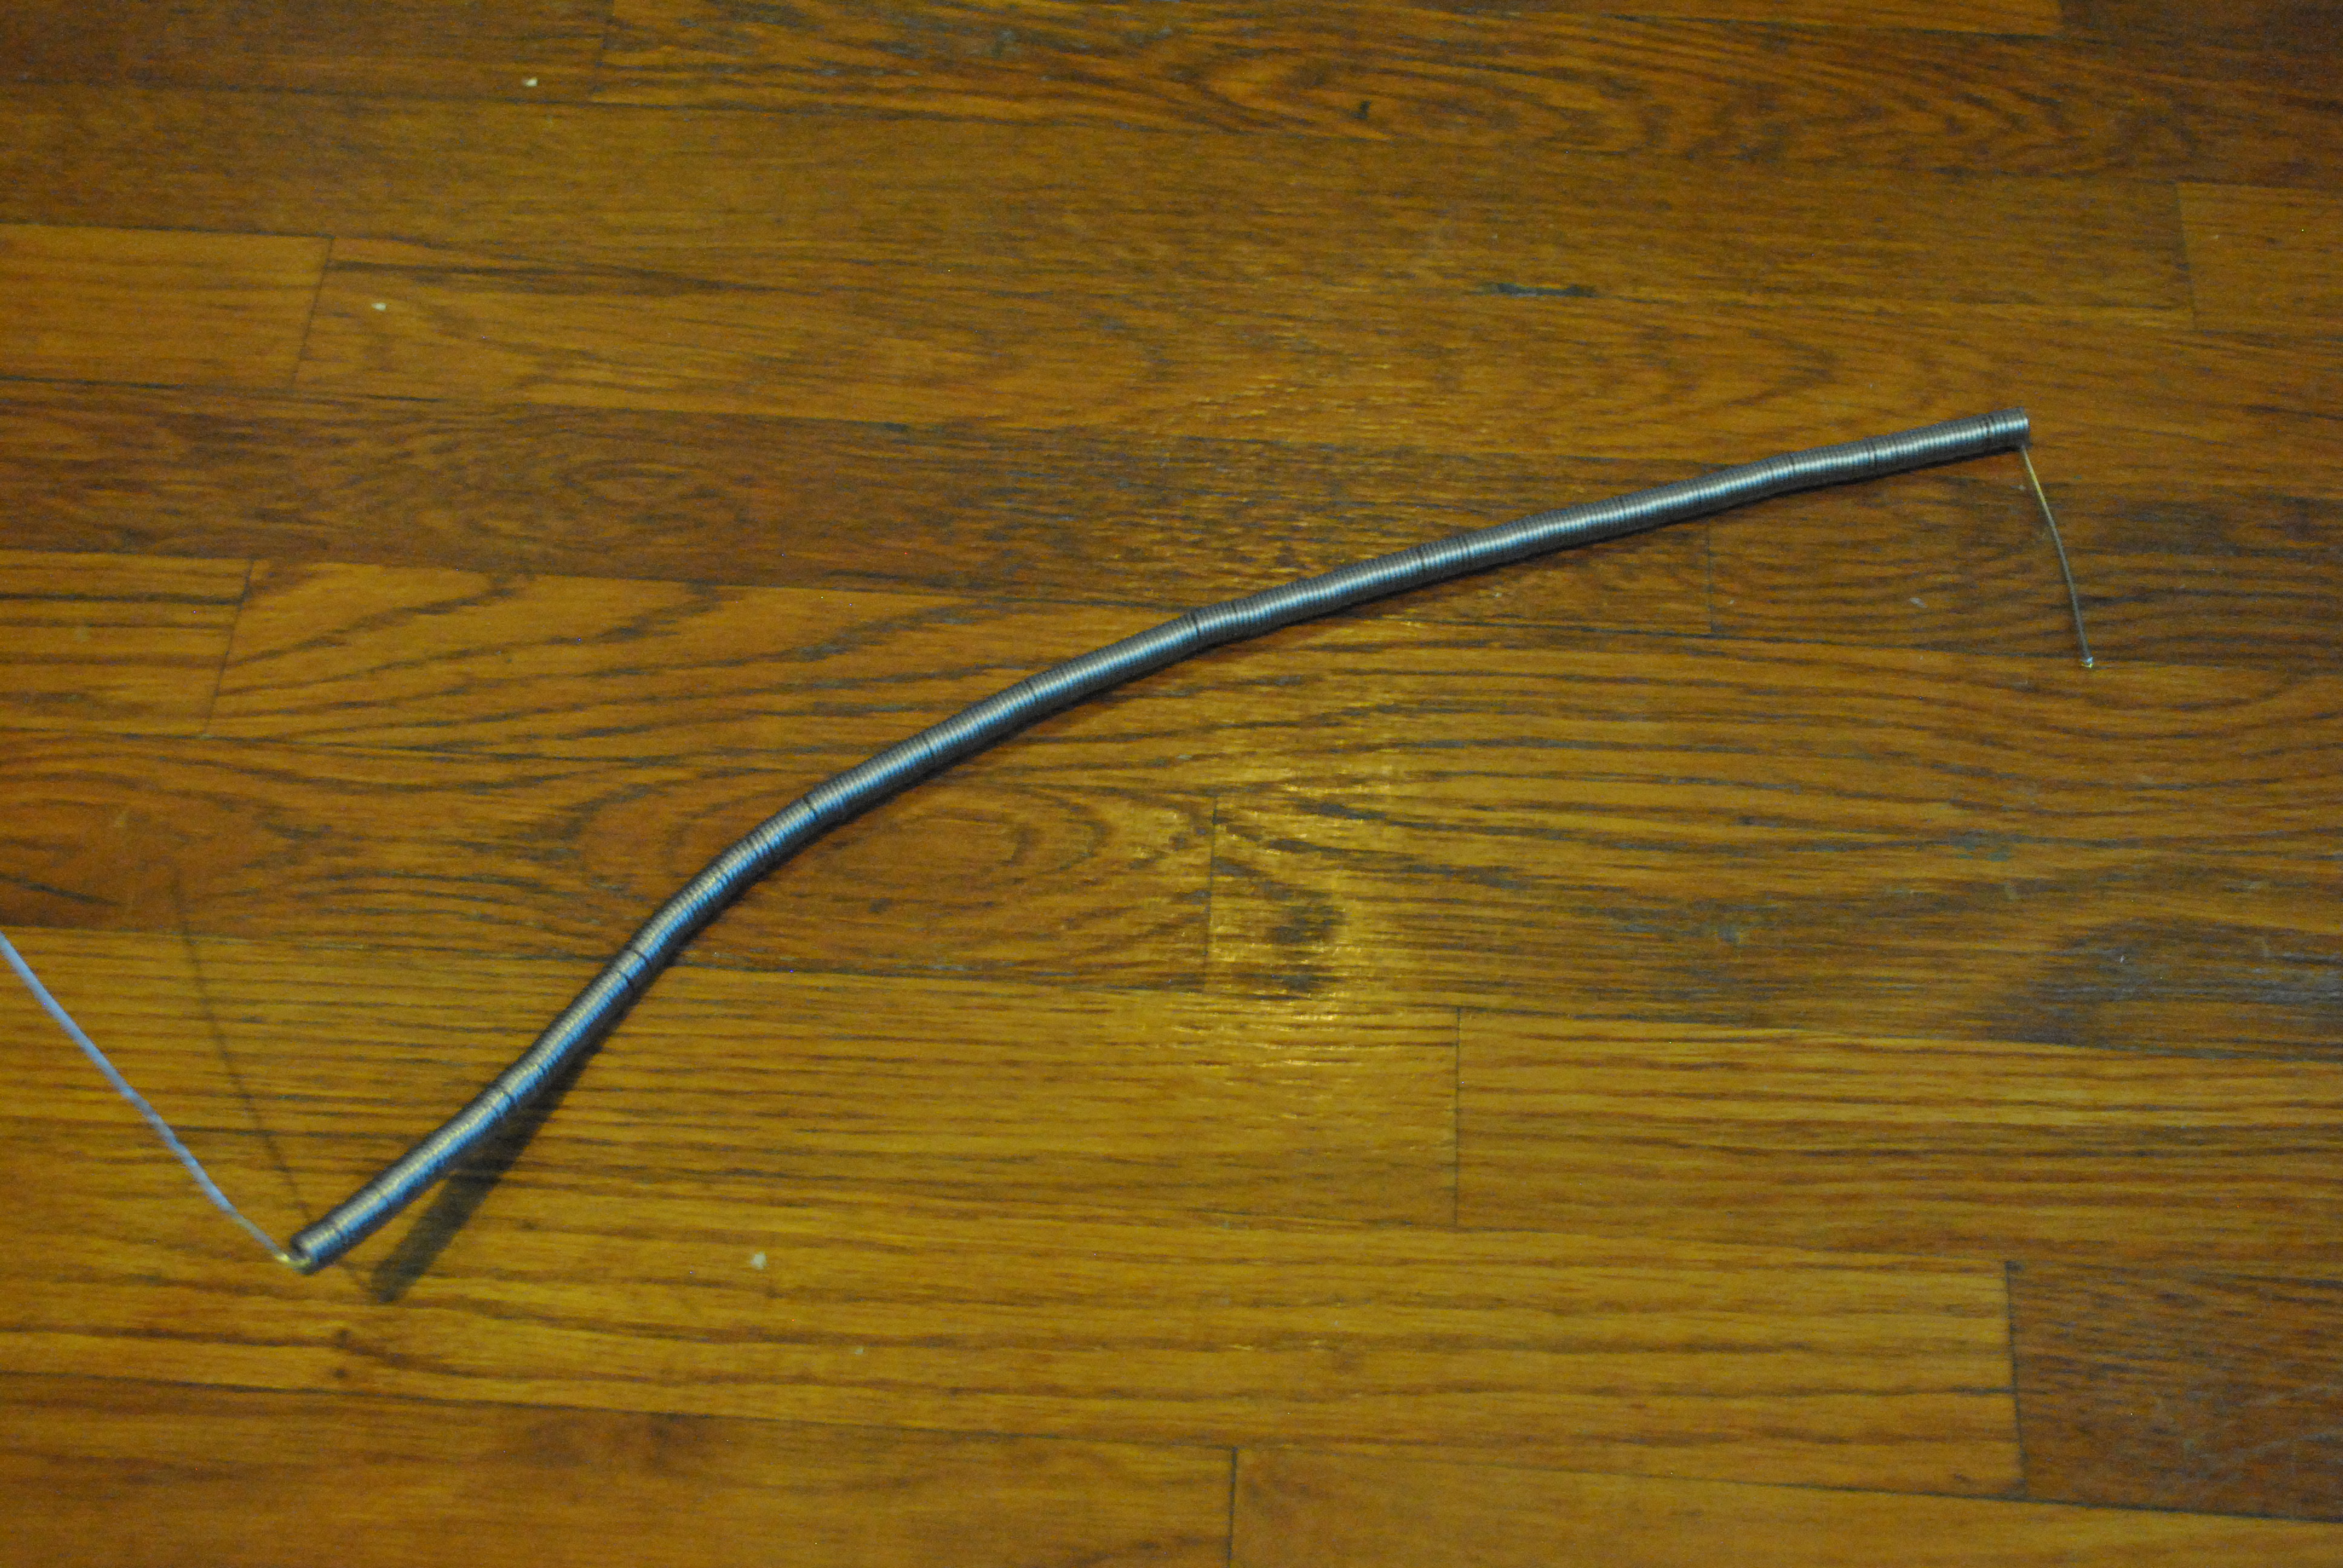
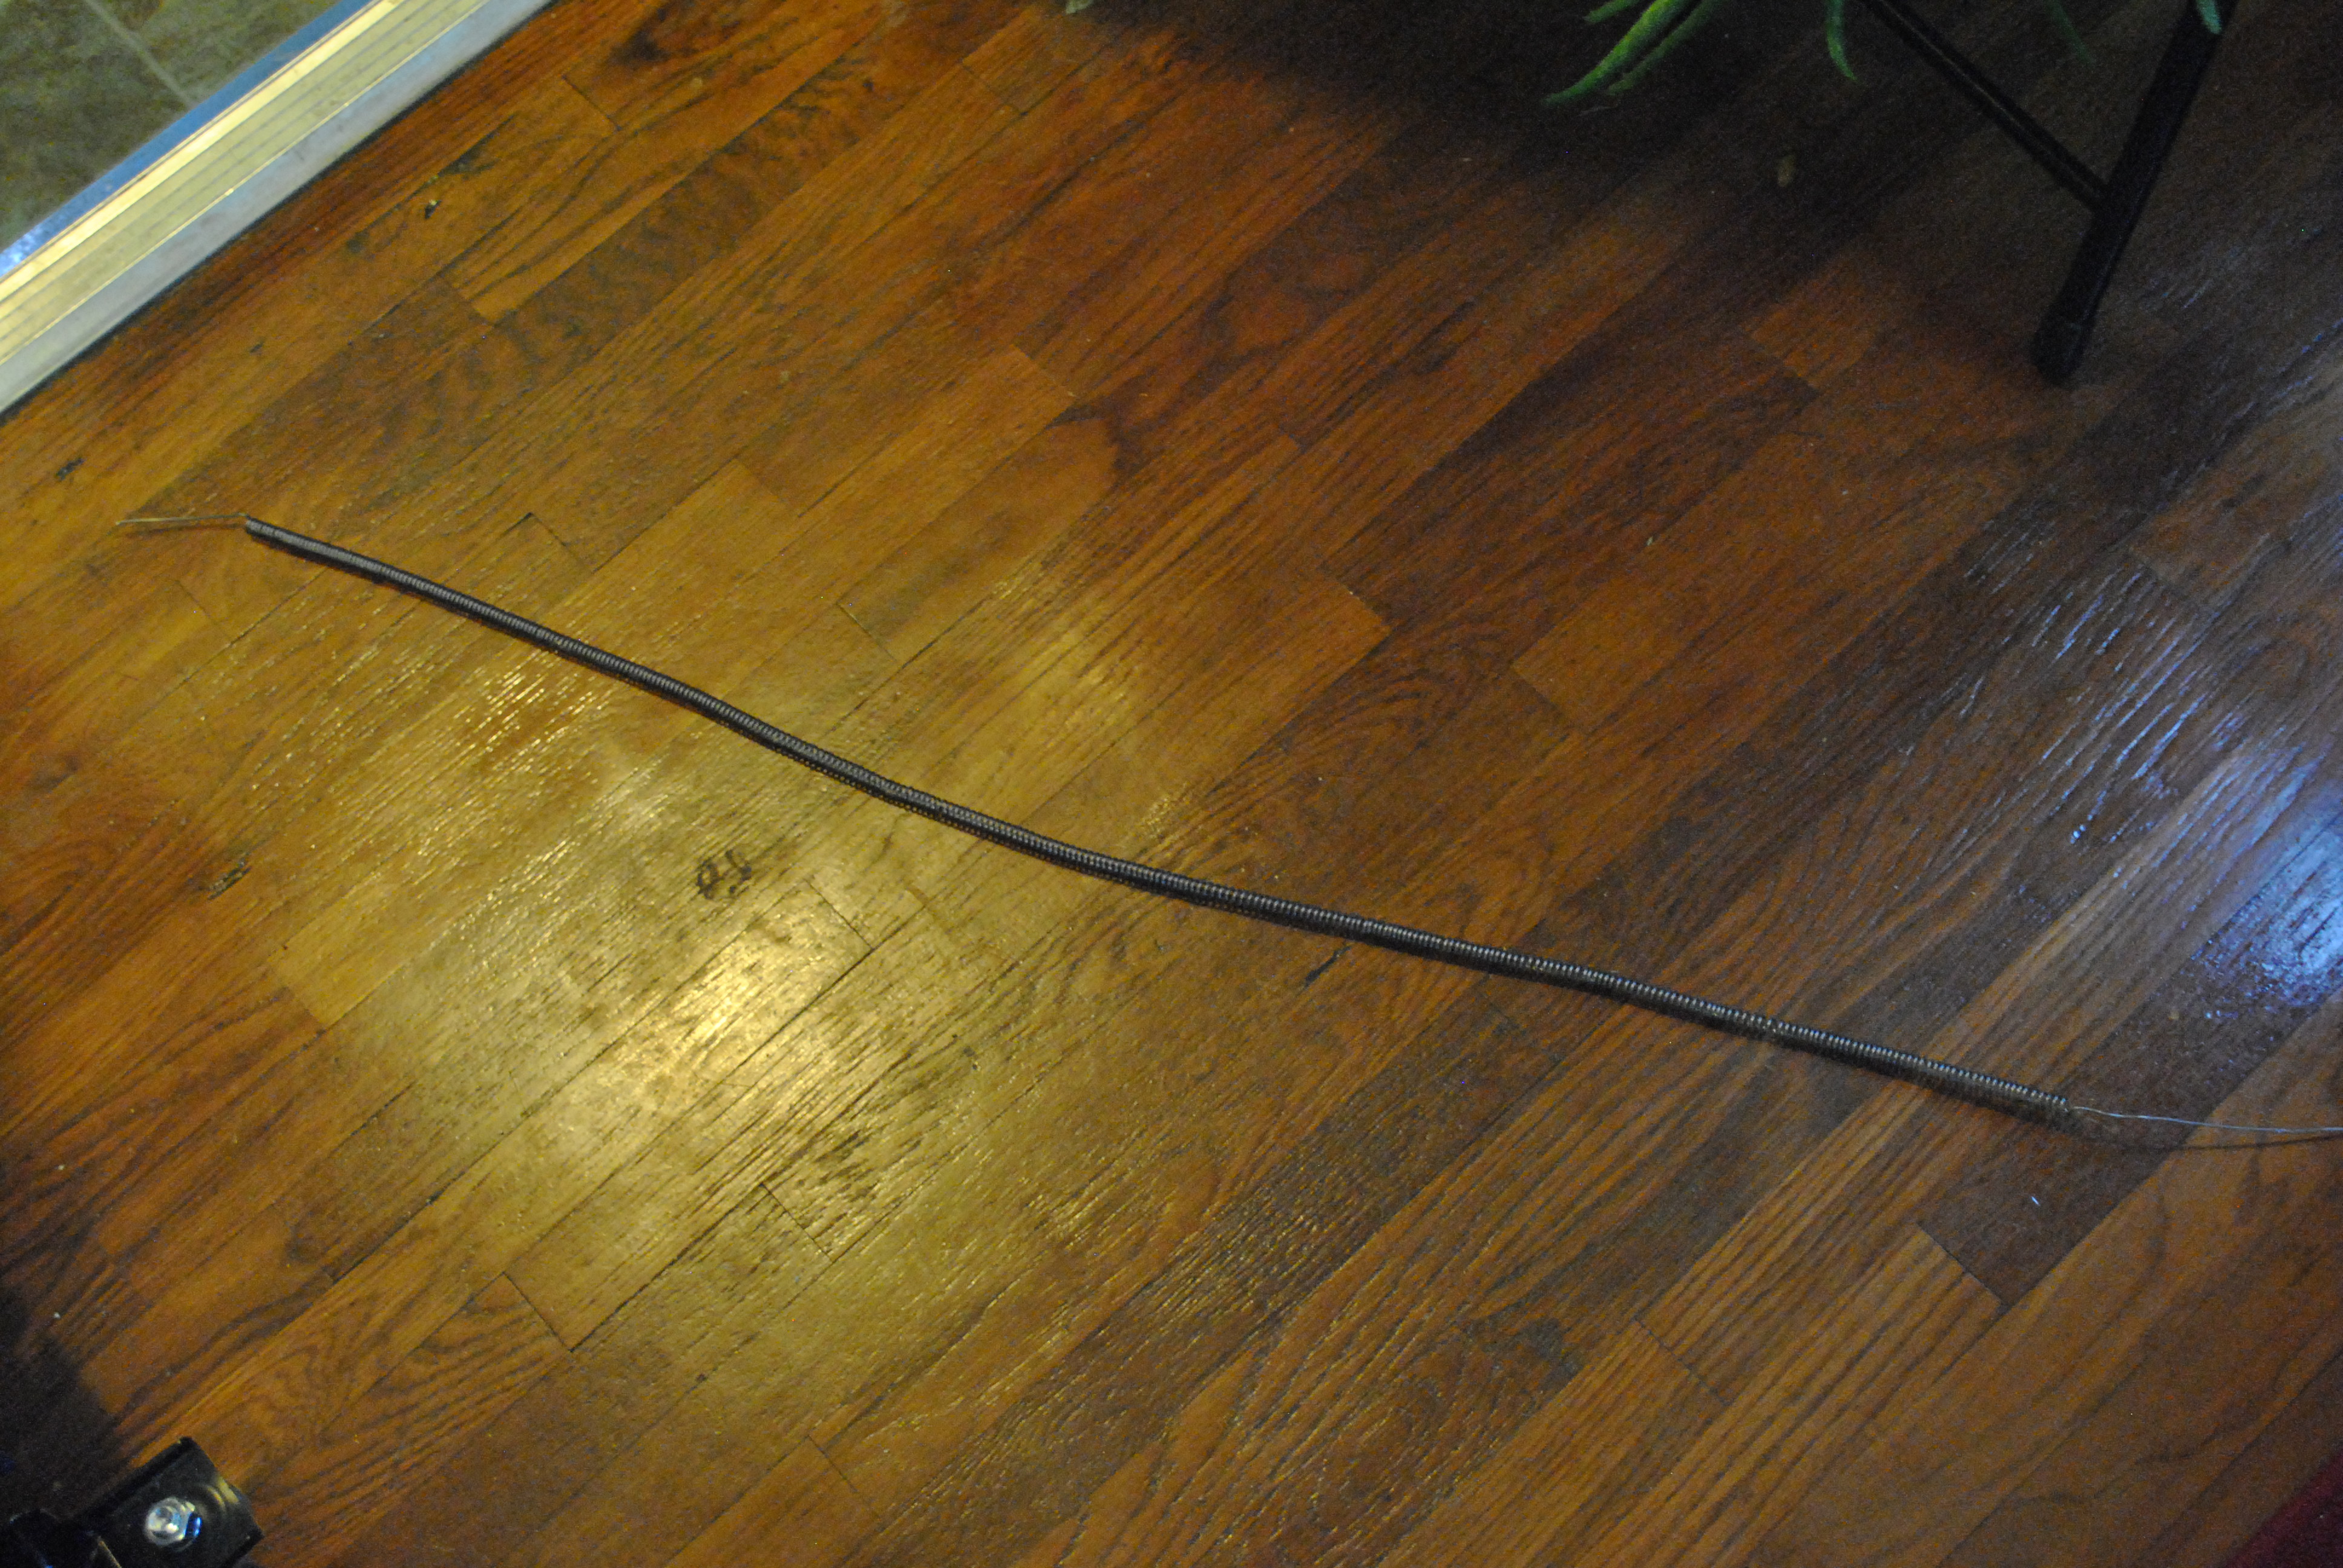
I measured out 22.5 feet of wire and then built a bootleg wire coil maker out of a piece of threaded rod, two nuts, a wrench, and a piece of wood (to save my fingers, this stuff is stiff). I basically secured one end of the wire between two nuts on one side of the rod, then used the nuts to attach the wrench to turn it. I used the chunk of wood to hold the wire close to the coil as I slowly turned it with the wrench. I used 1/4 inch rod, which works well.
Once you are done, uncoil the wire from the rod, it will spring open a bit, but you will still have to “unscrew” the rod from the coil, the whole process took about 10 minutes. Next you will need to stretch the coil, this is because the coils can not touch each other or they will short out. Stretch the coil by pulling on it until there is about 2 wire thickness’ between each coil. It will be significantly longer after you do this.
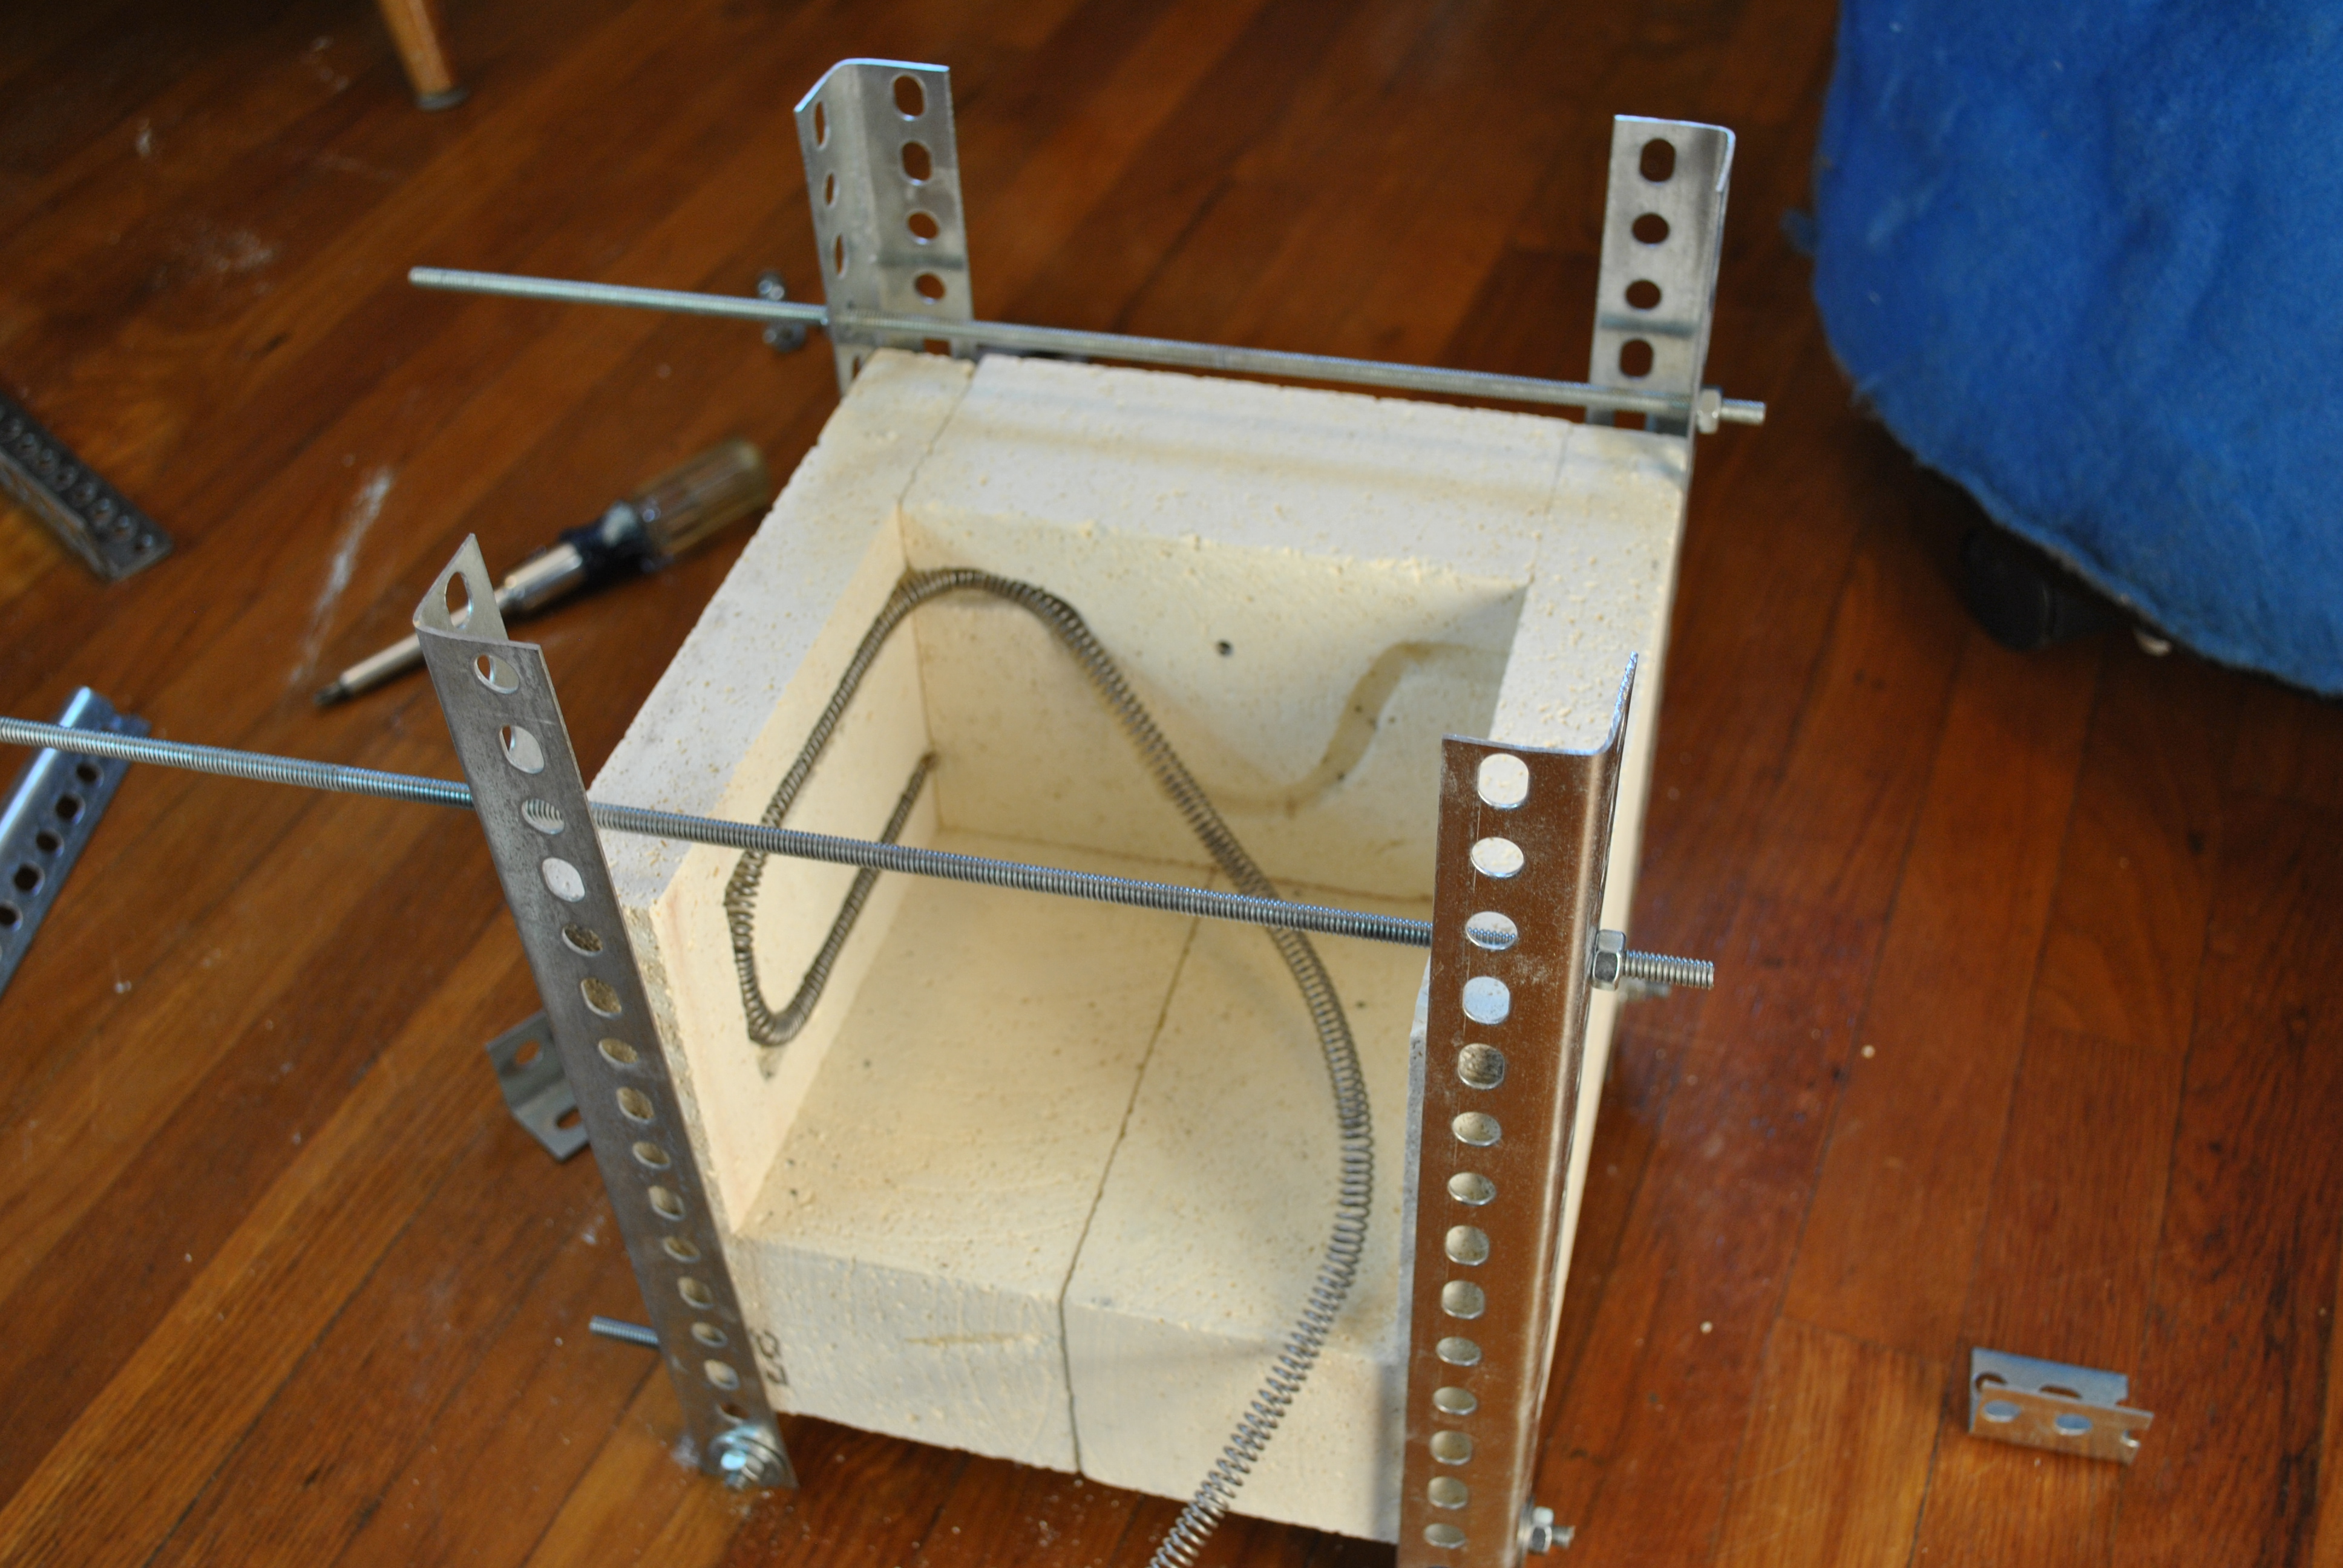
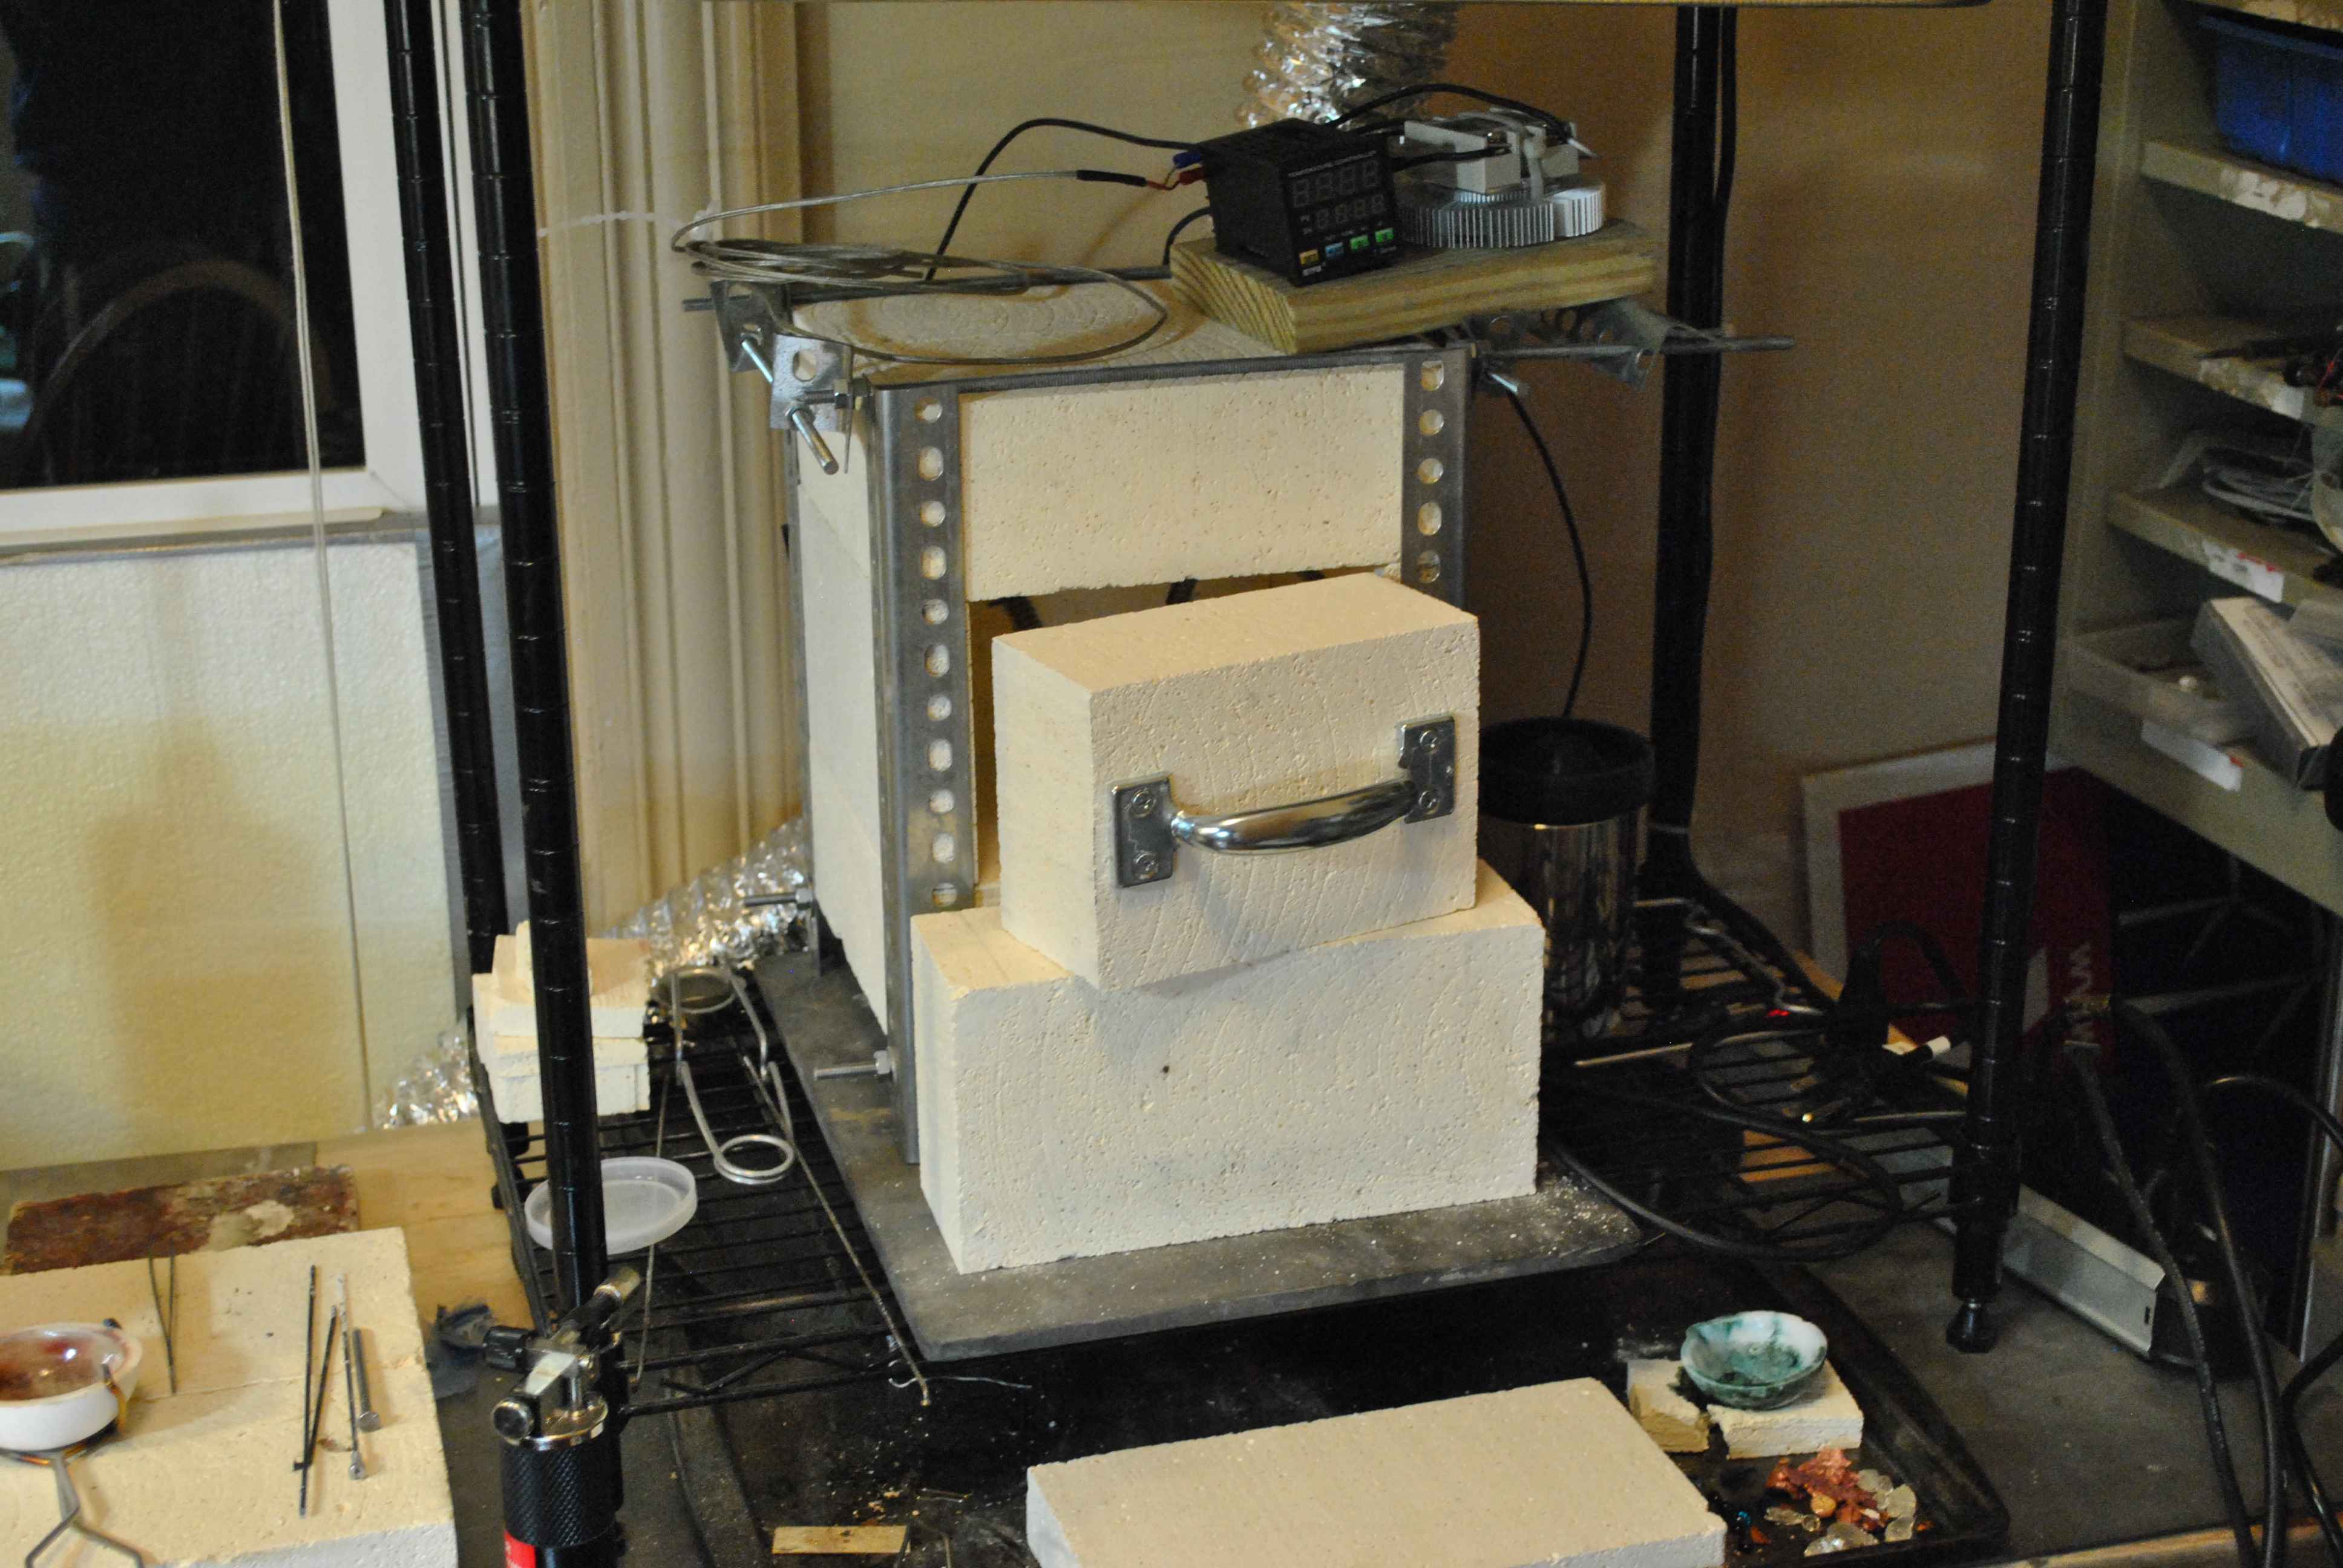
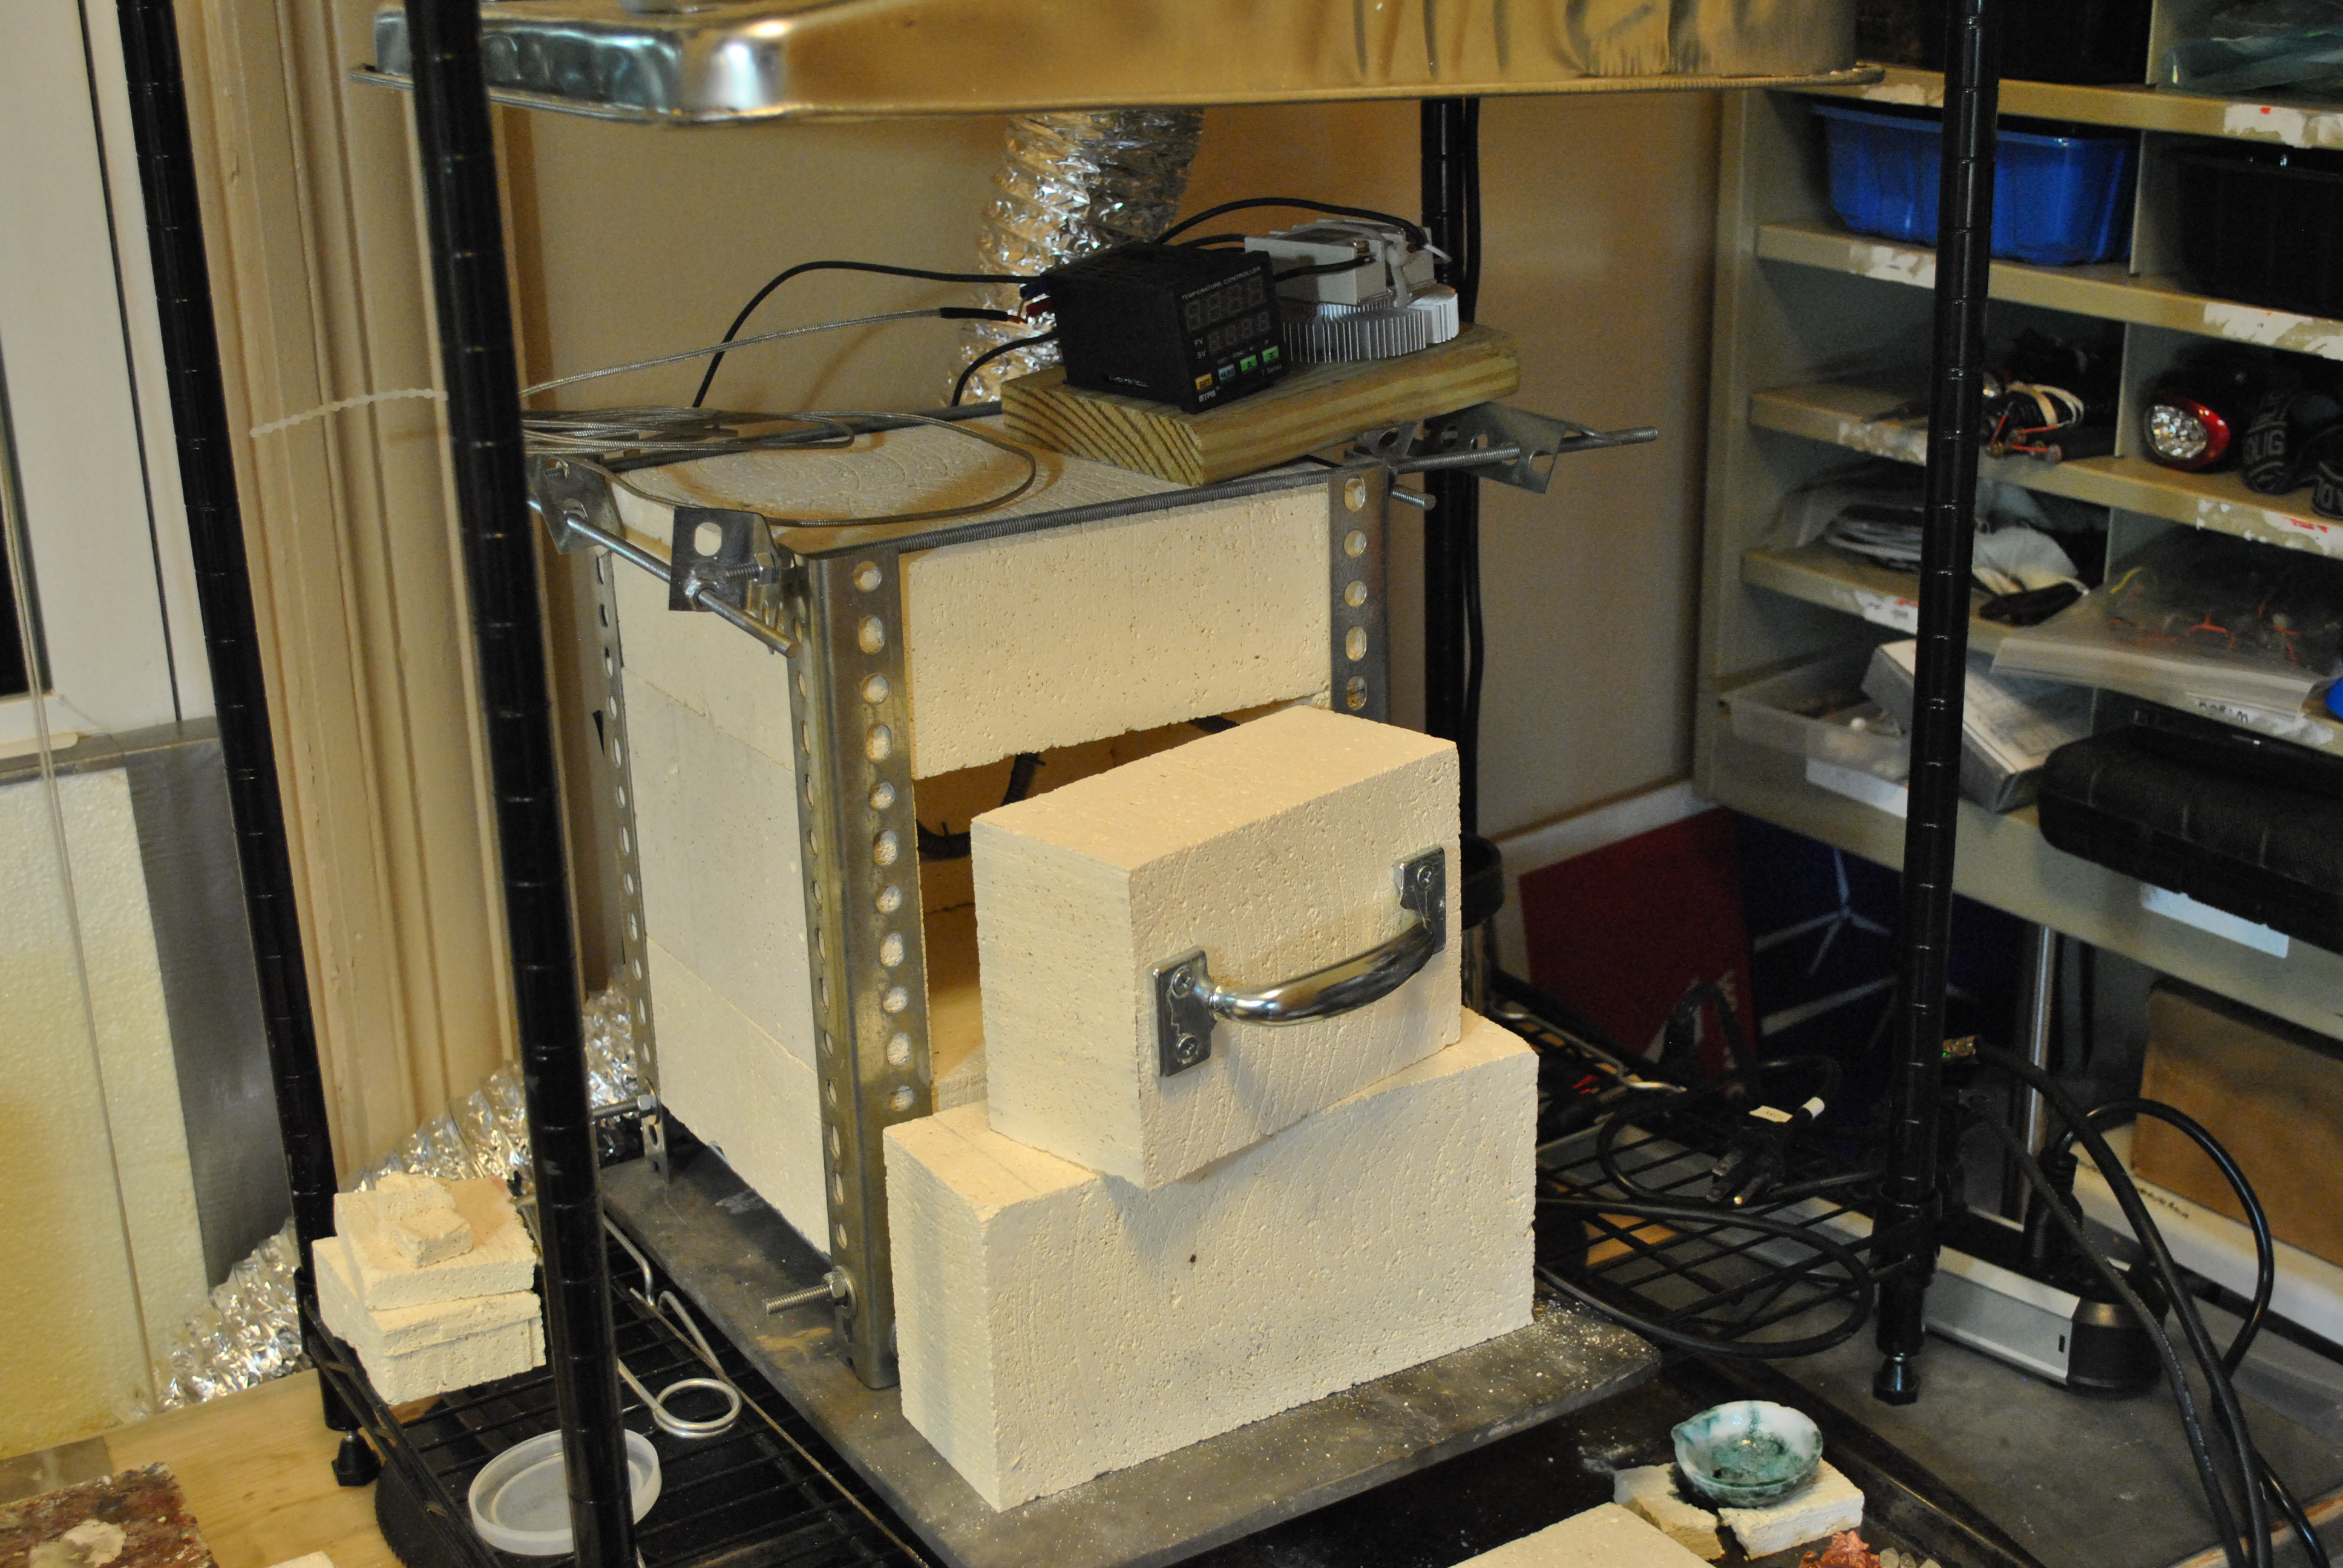
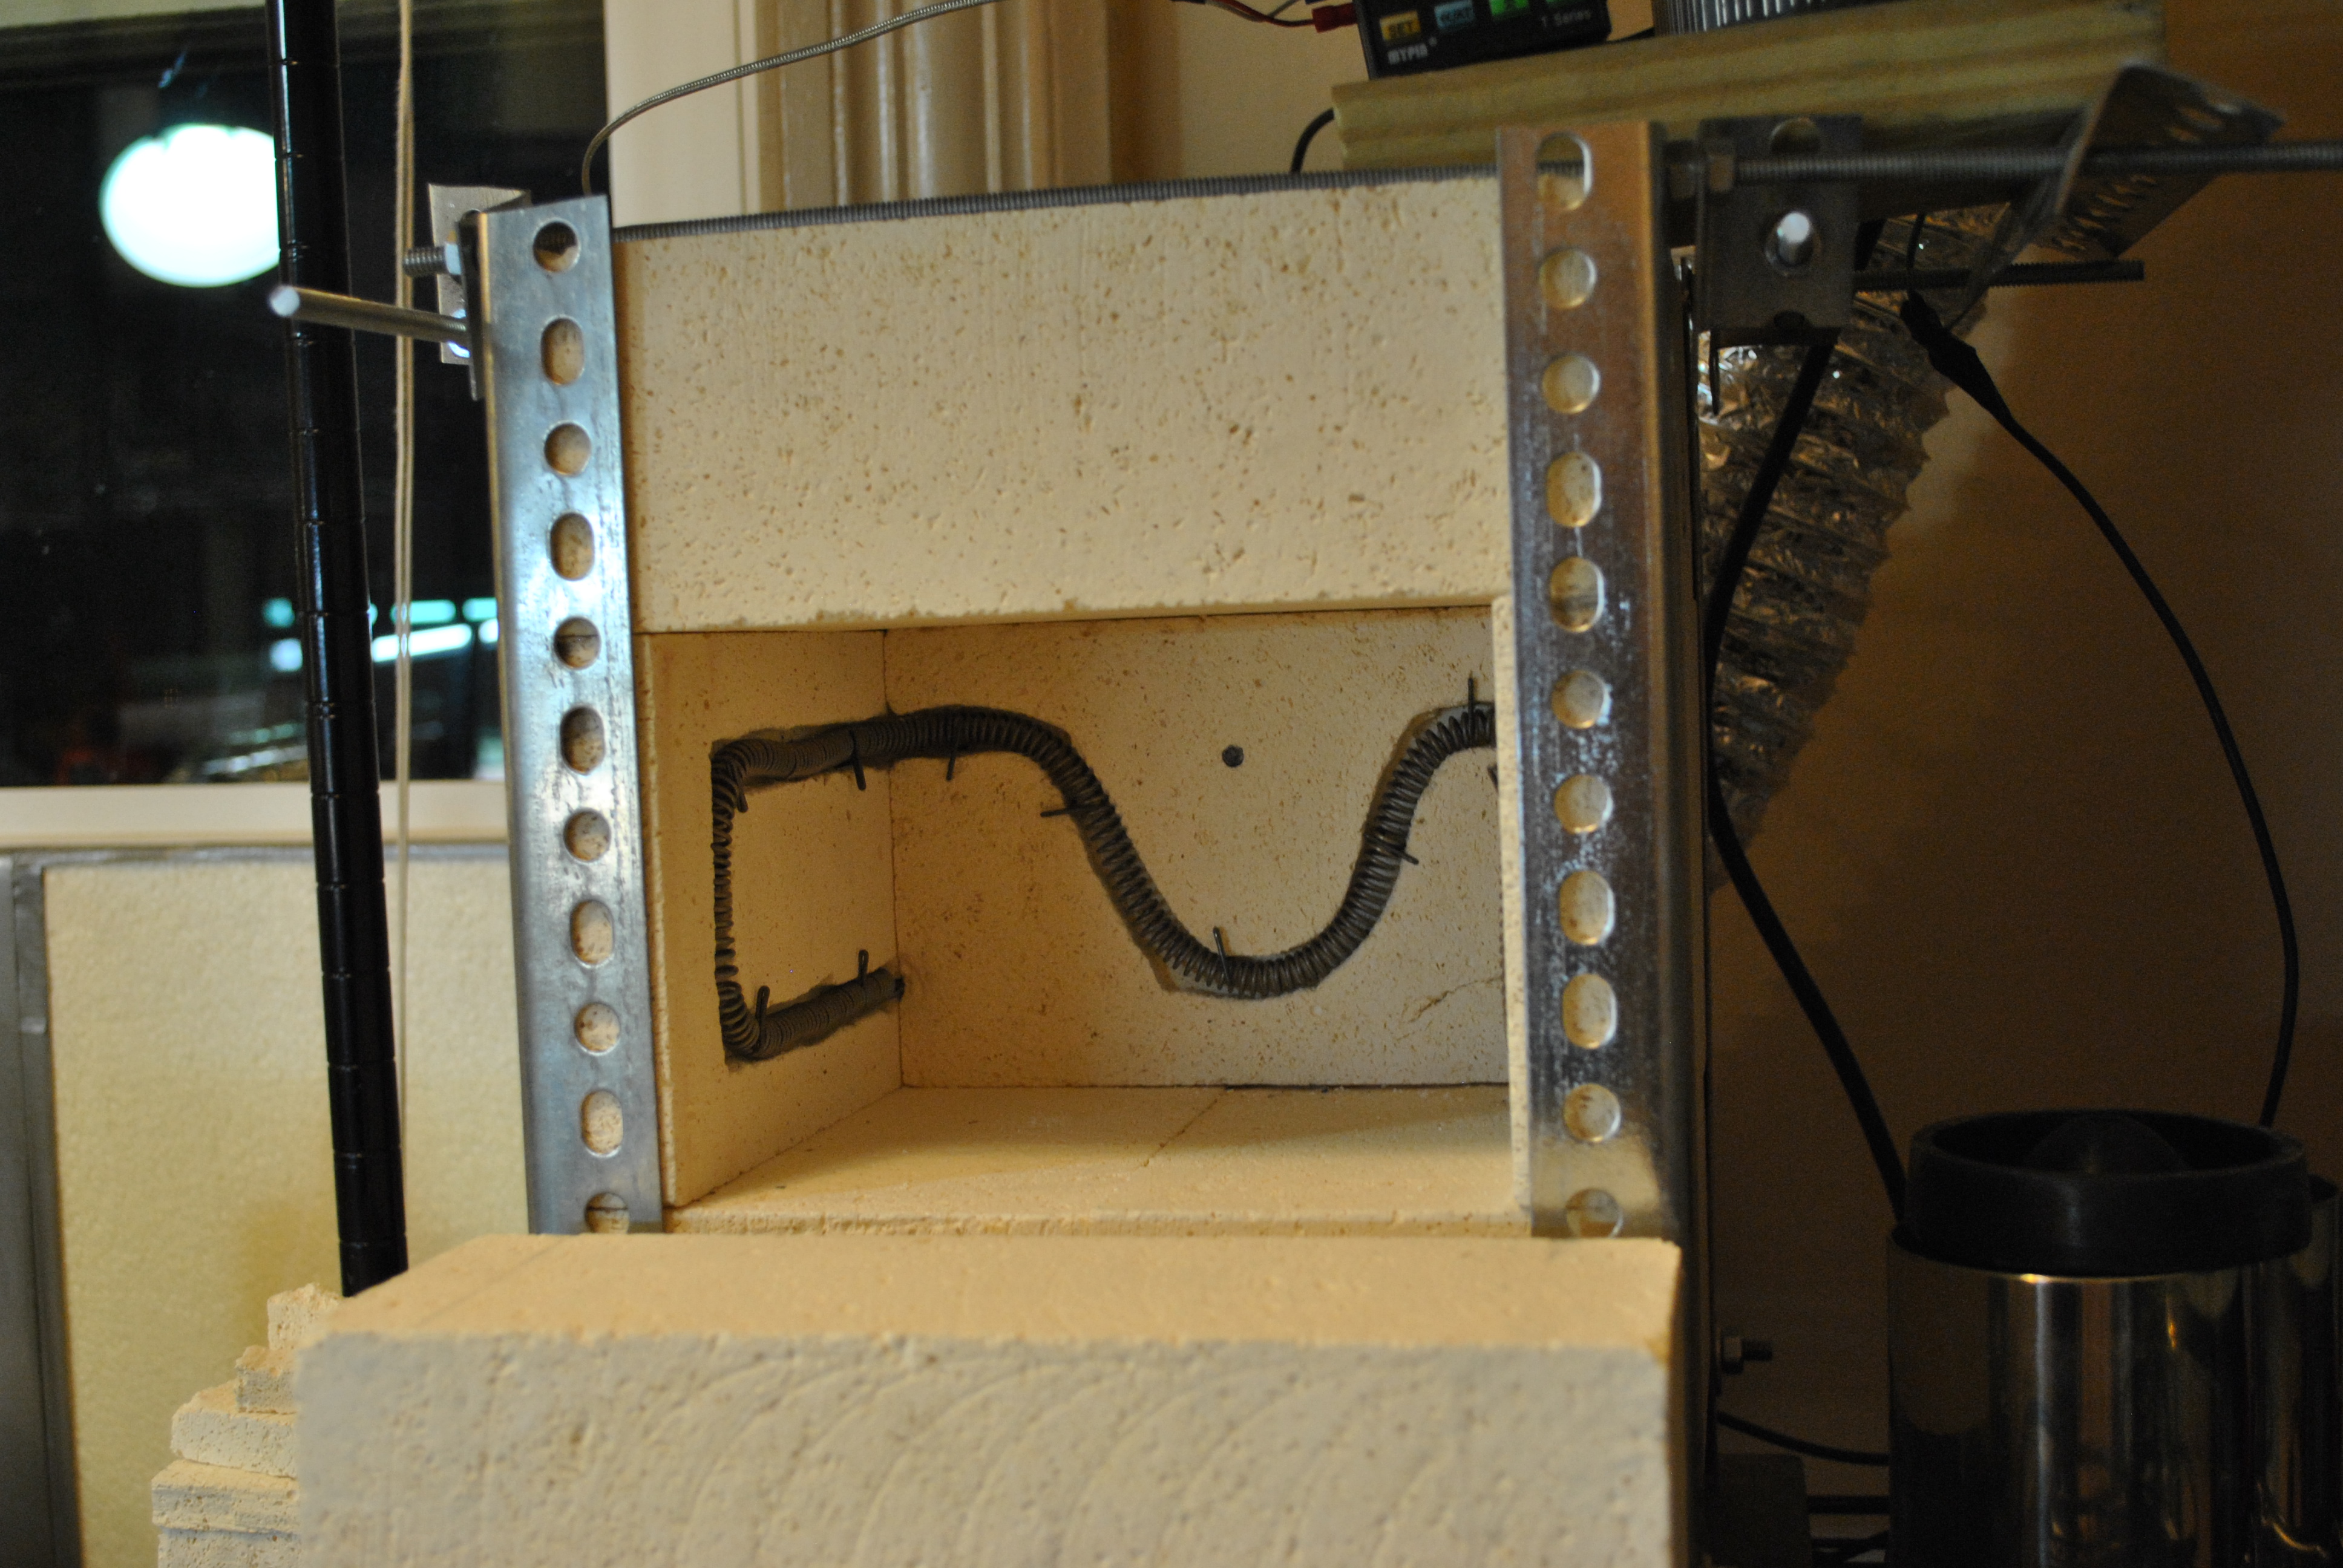
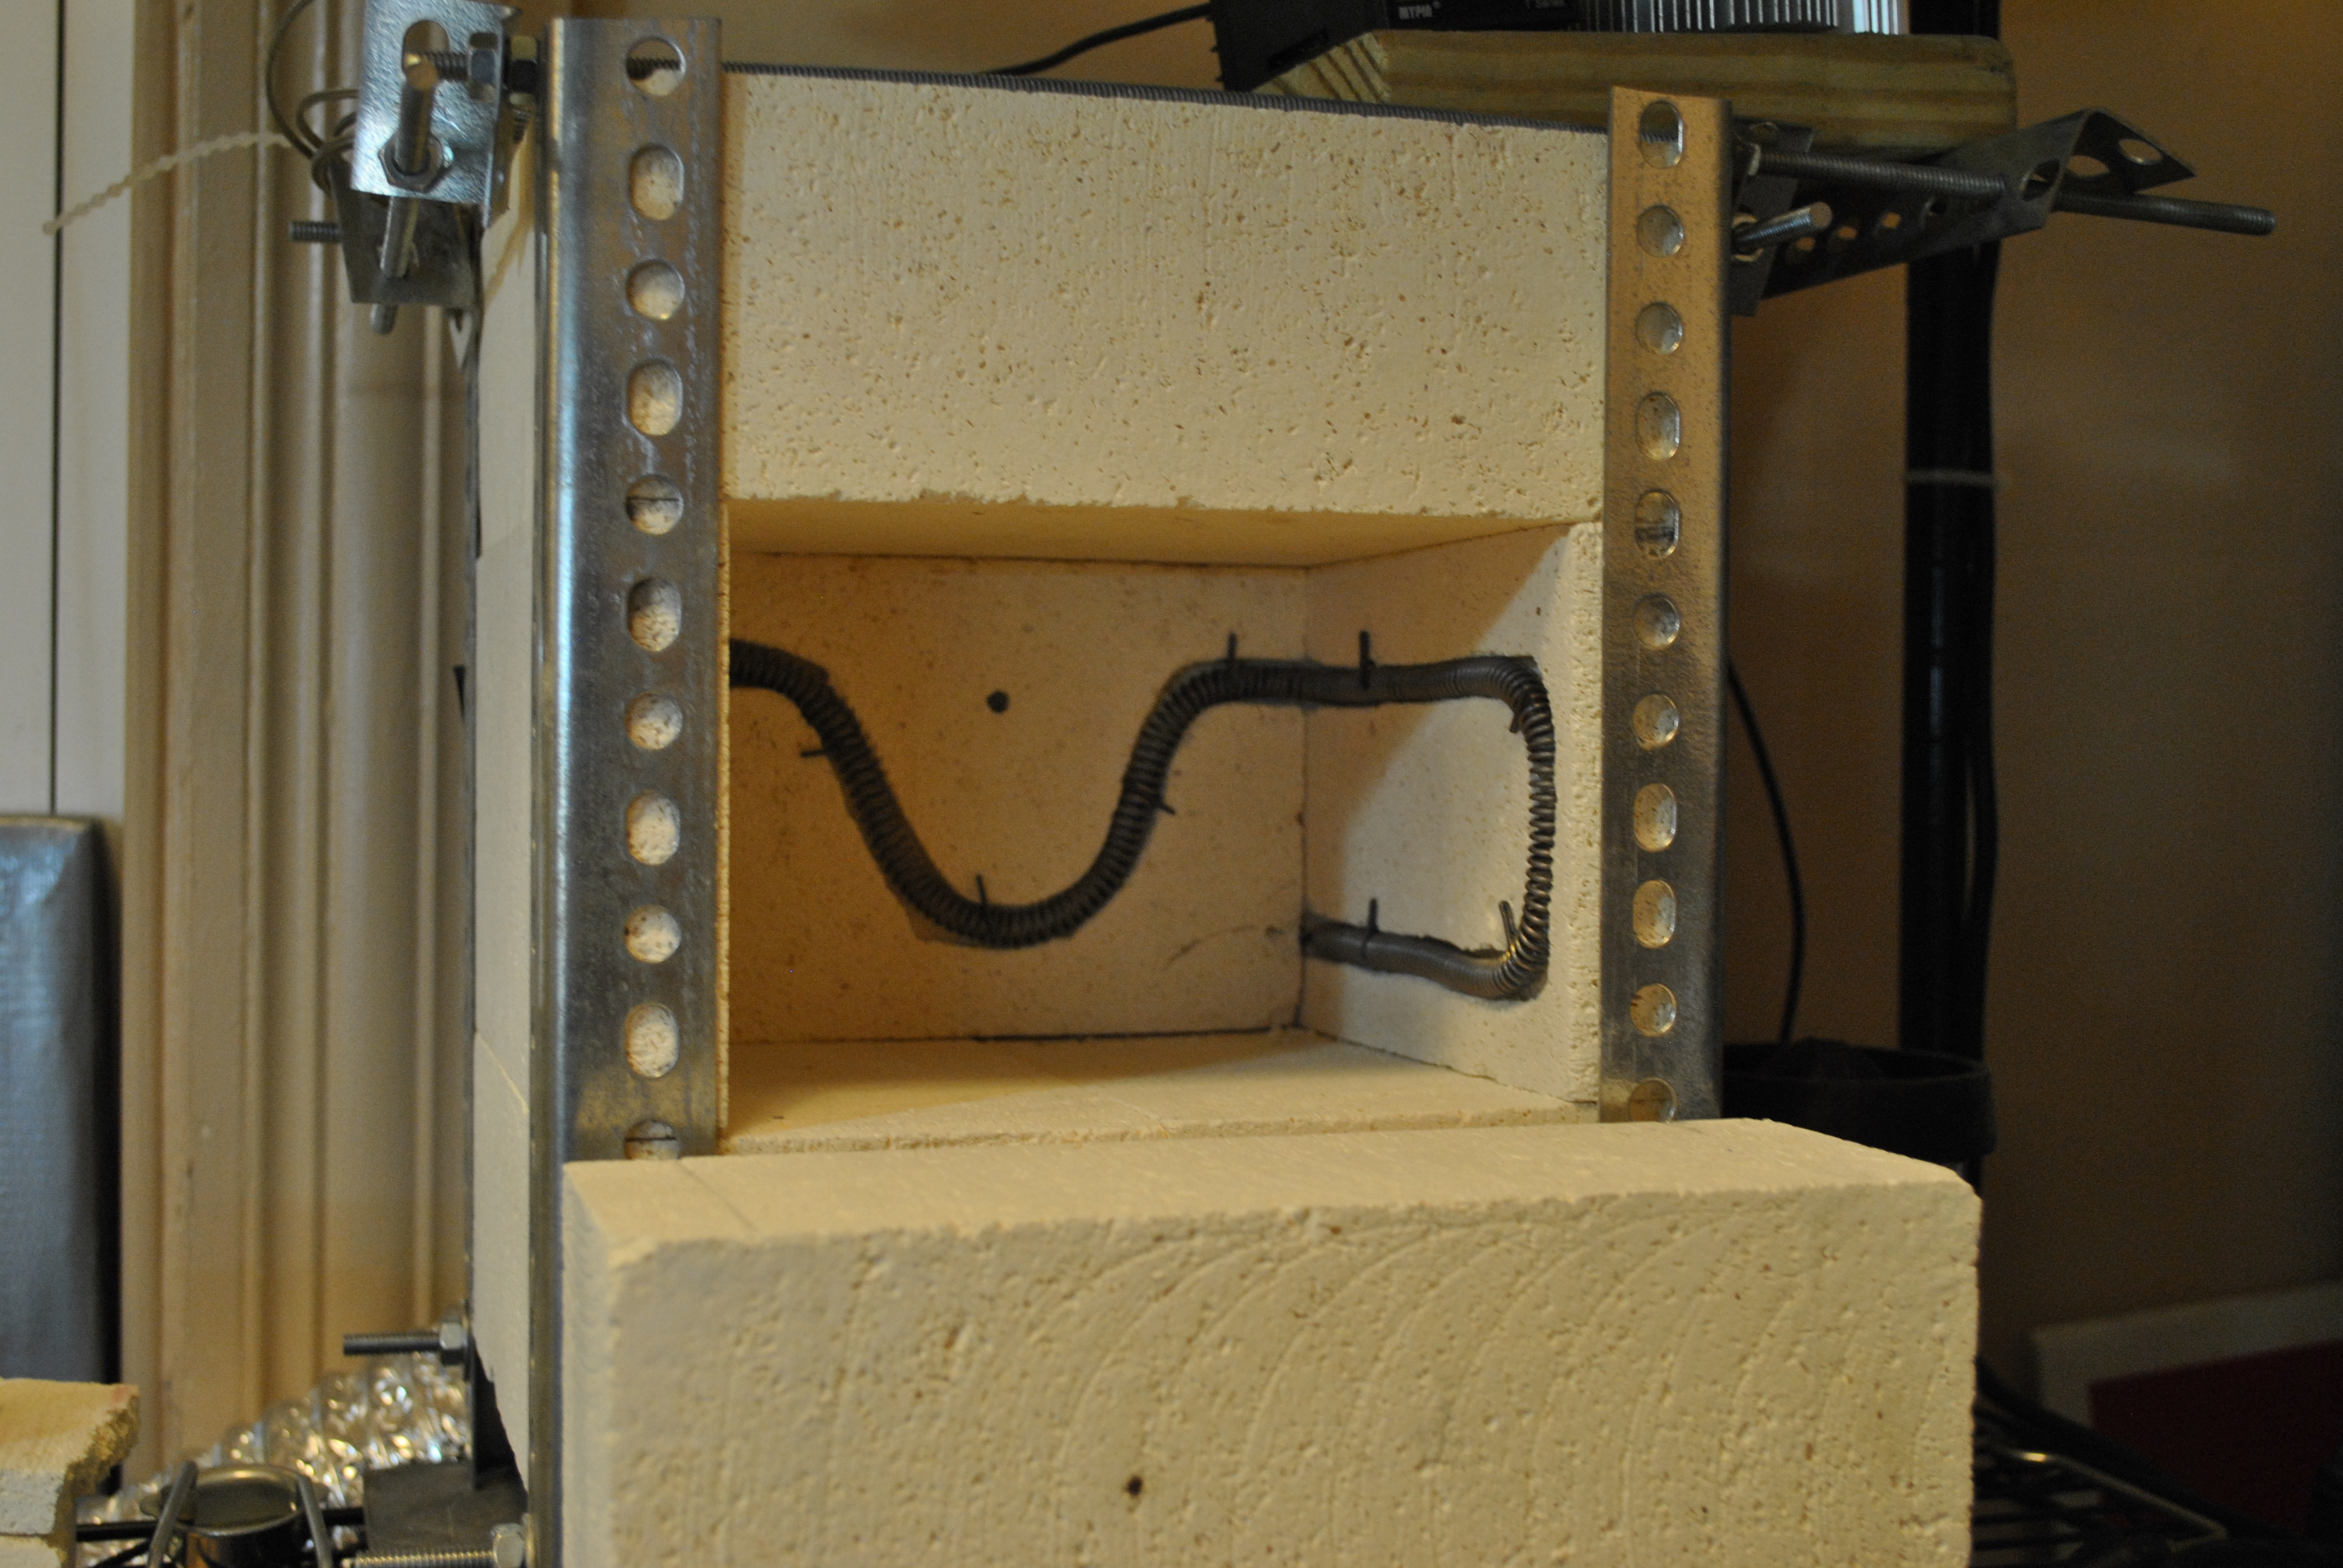
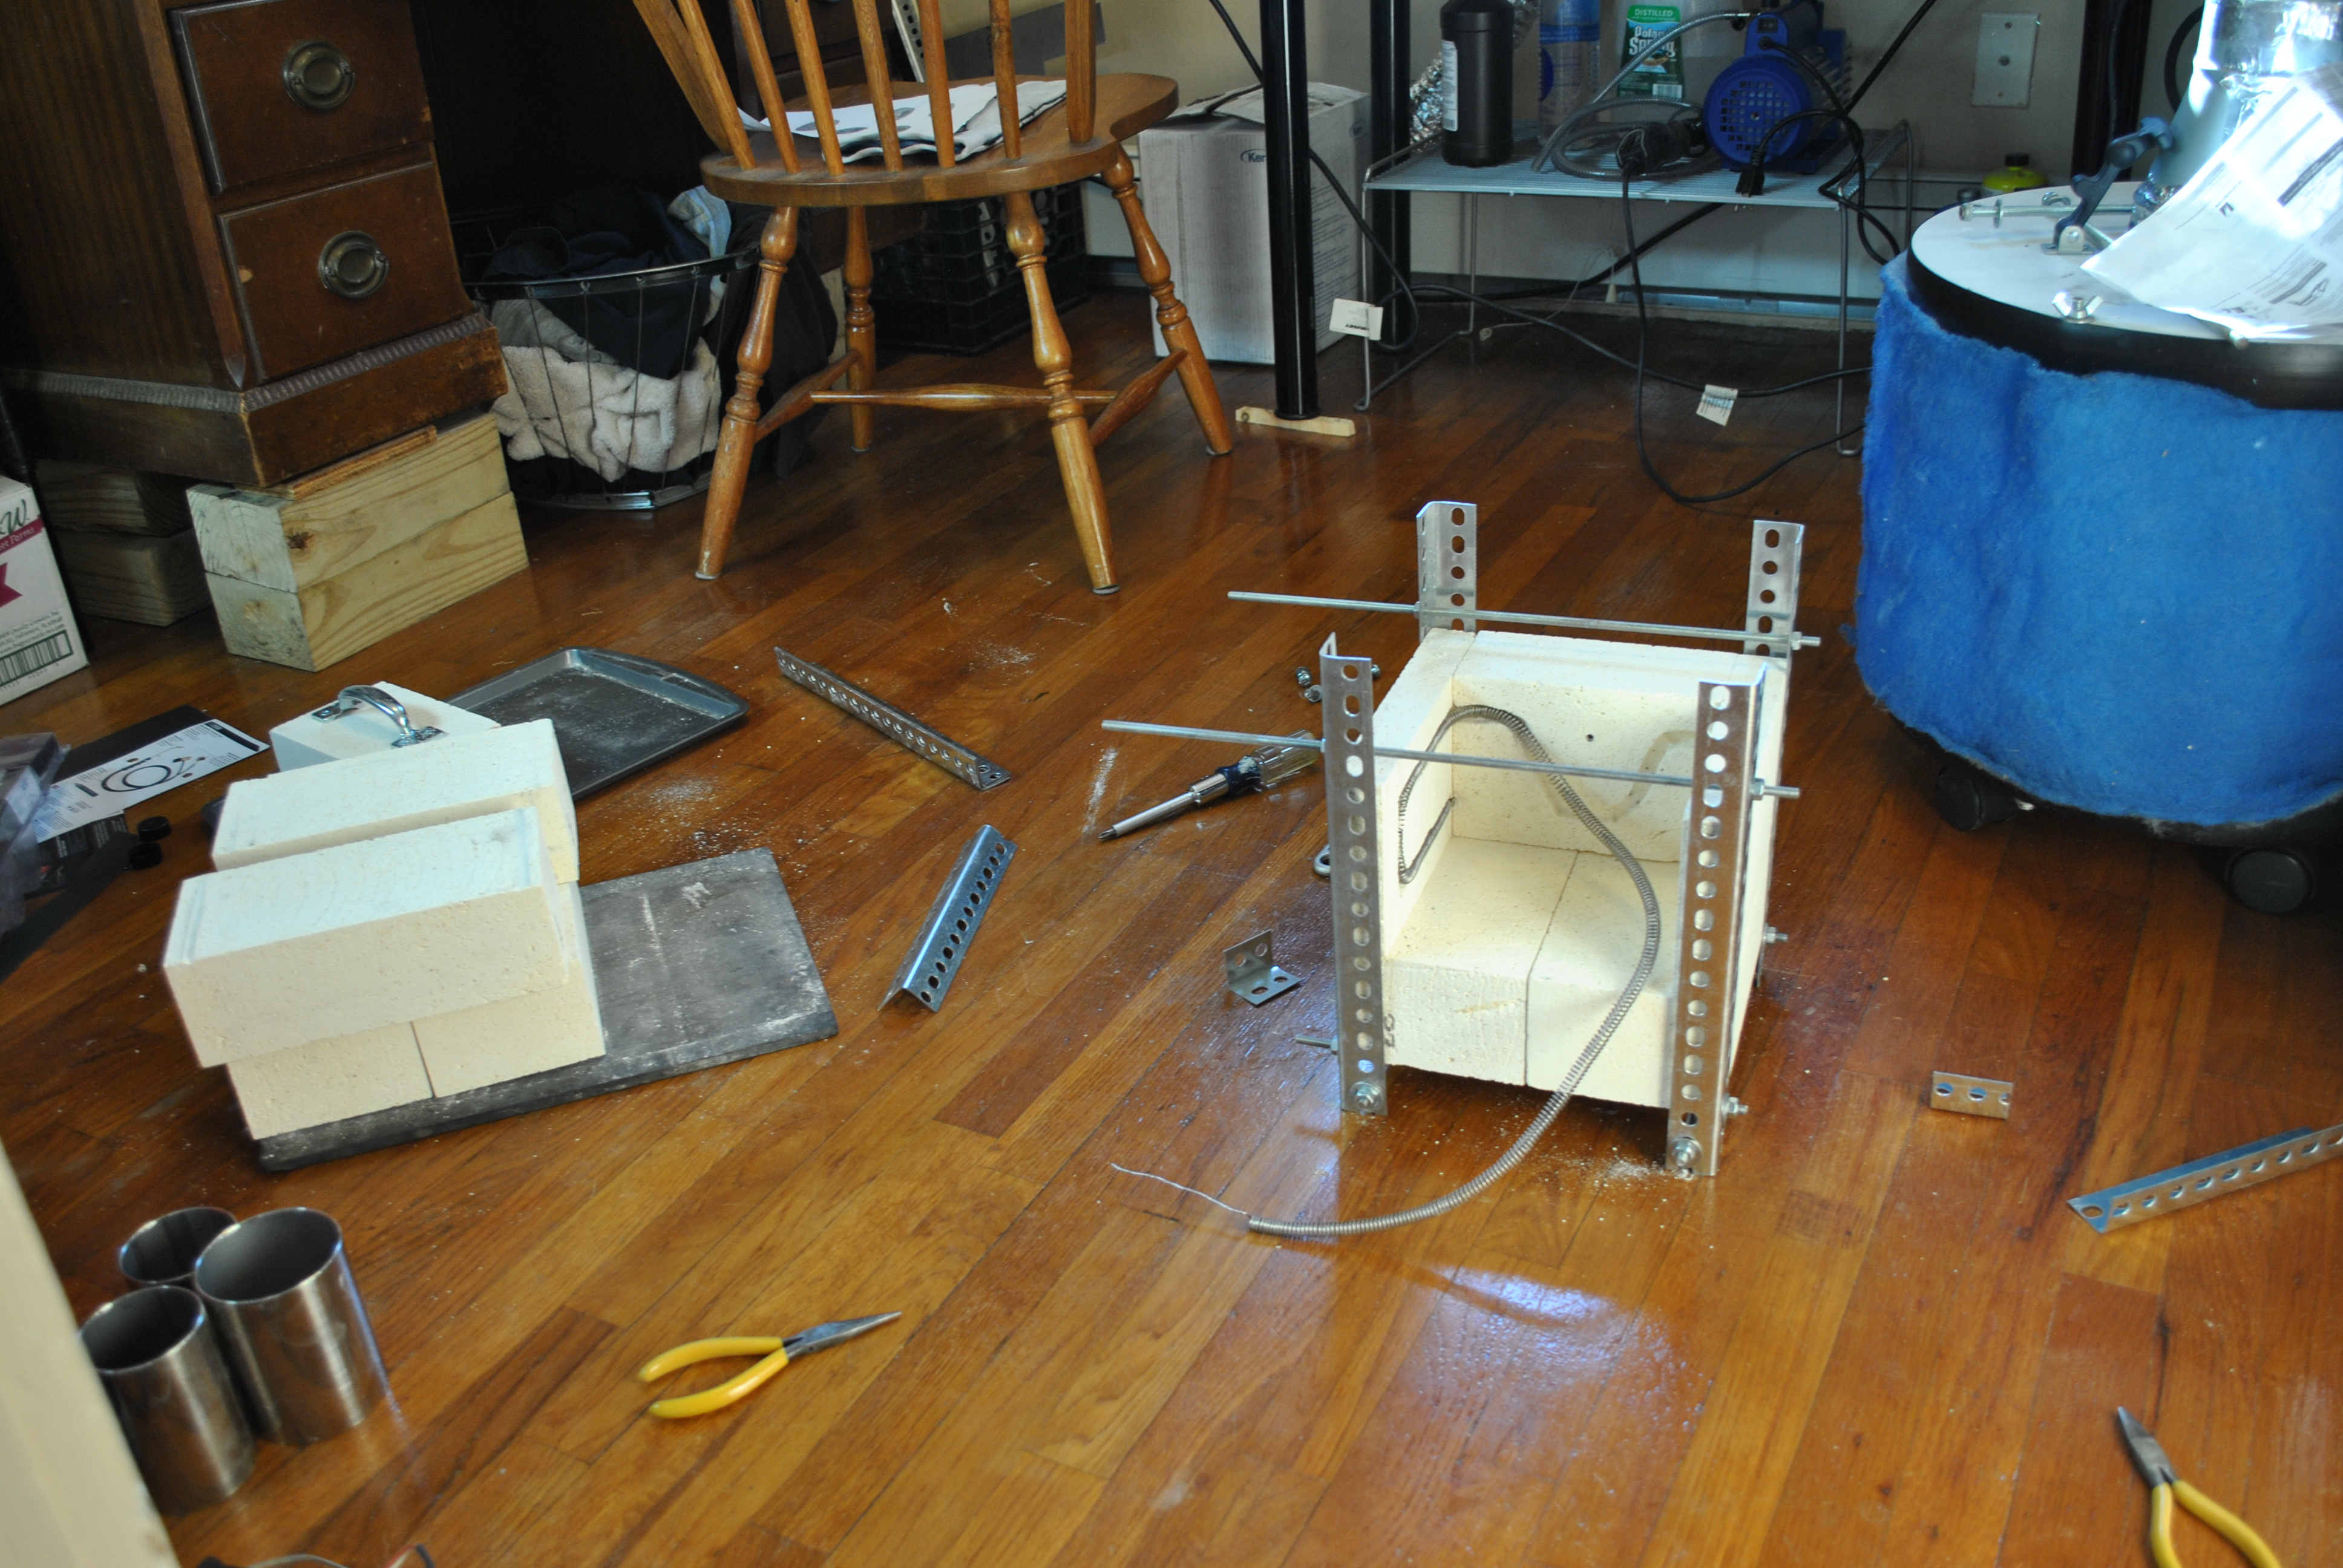
The Kiln Housing:
This is actually the easiest part of the build. You are basically playing with blocks. Some things to keep in mind. Refractory fire bricks are VERY fragile. They are very brittle and break easily. They are also very light, and easy to cut. They also produce a dust that will give you serious lung problems if you breath it, so a safety mask is a MUST for this step. Frequent clean up is good, do the cutting outside, they make a lot of dust.
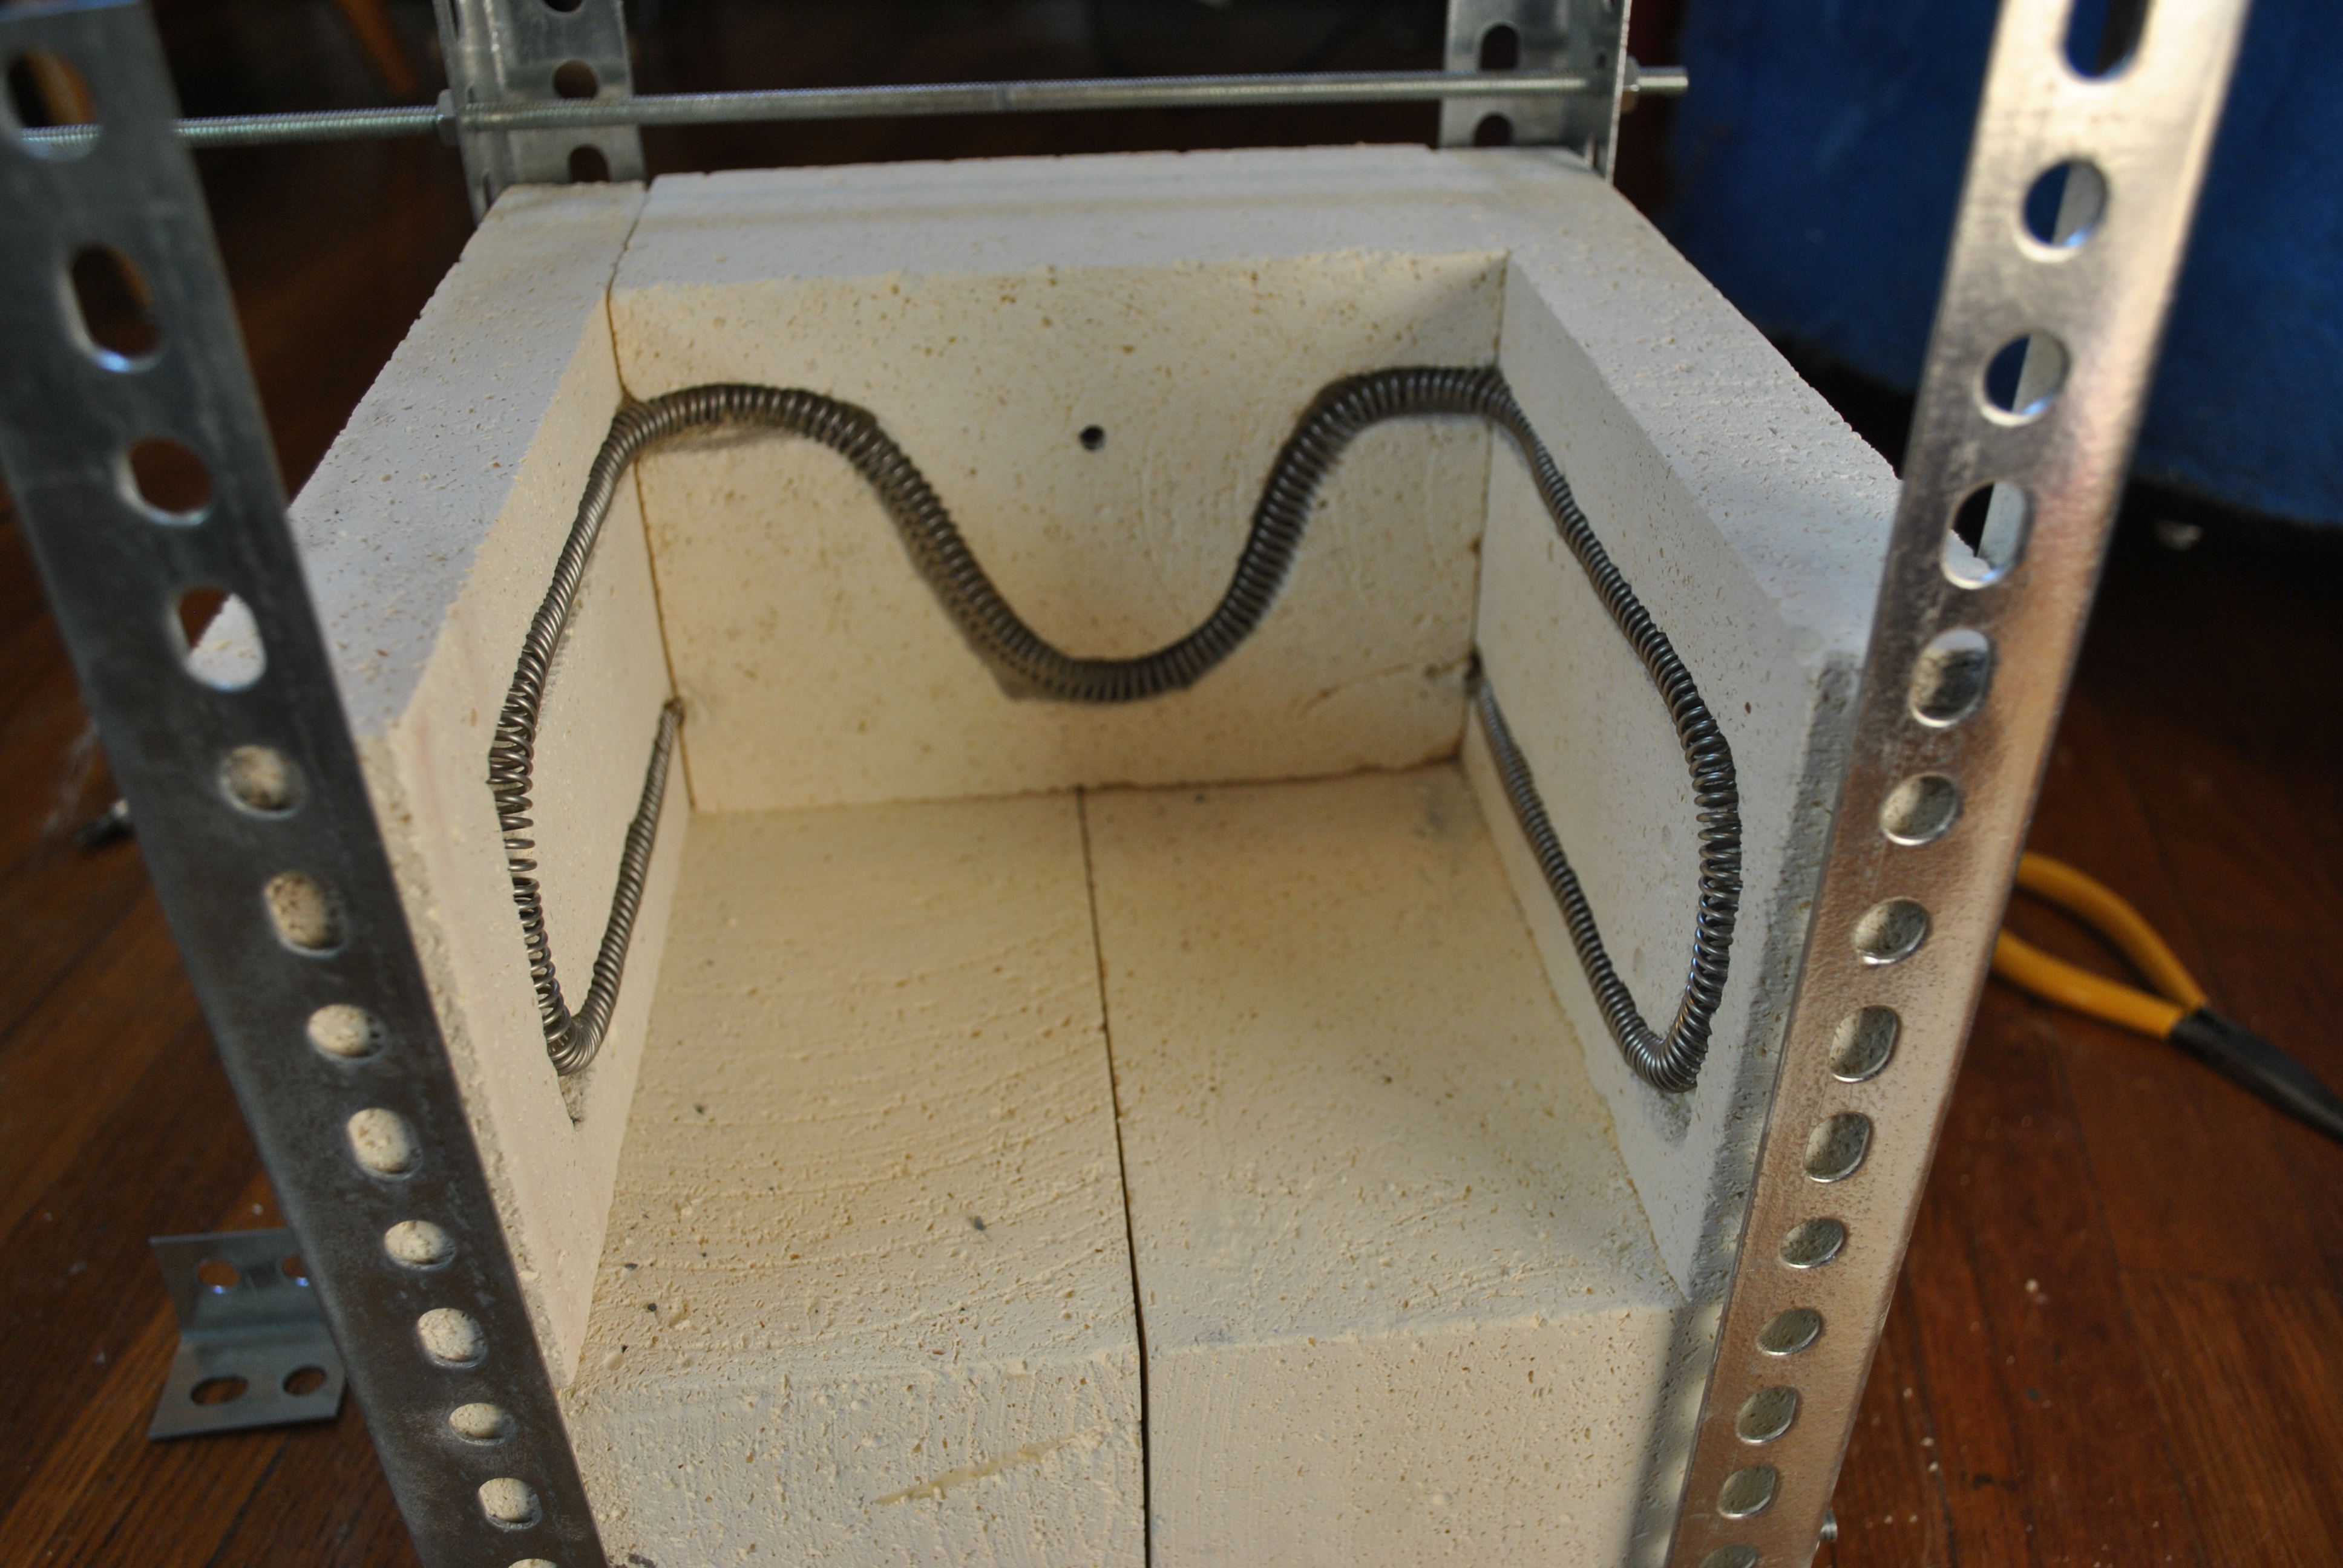
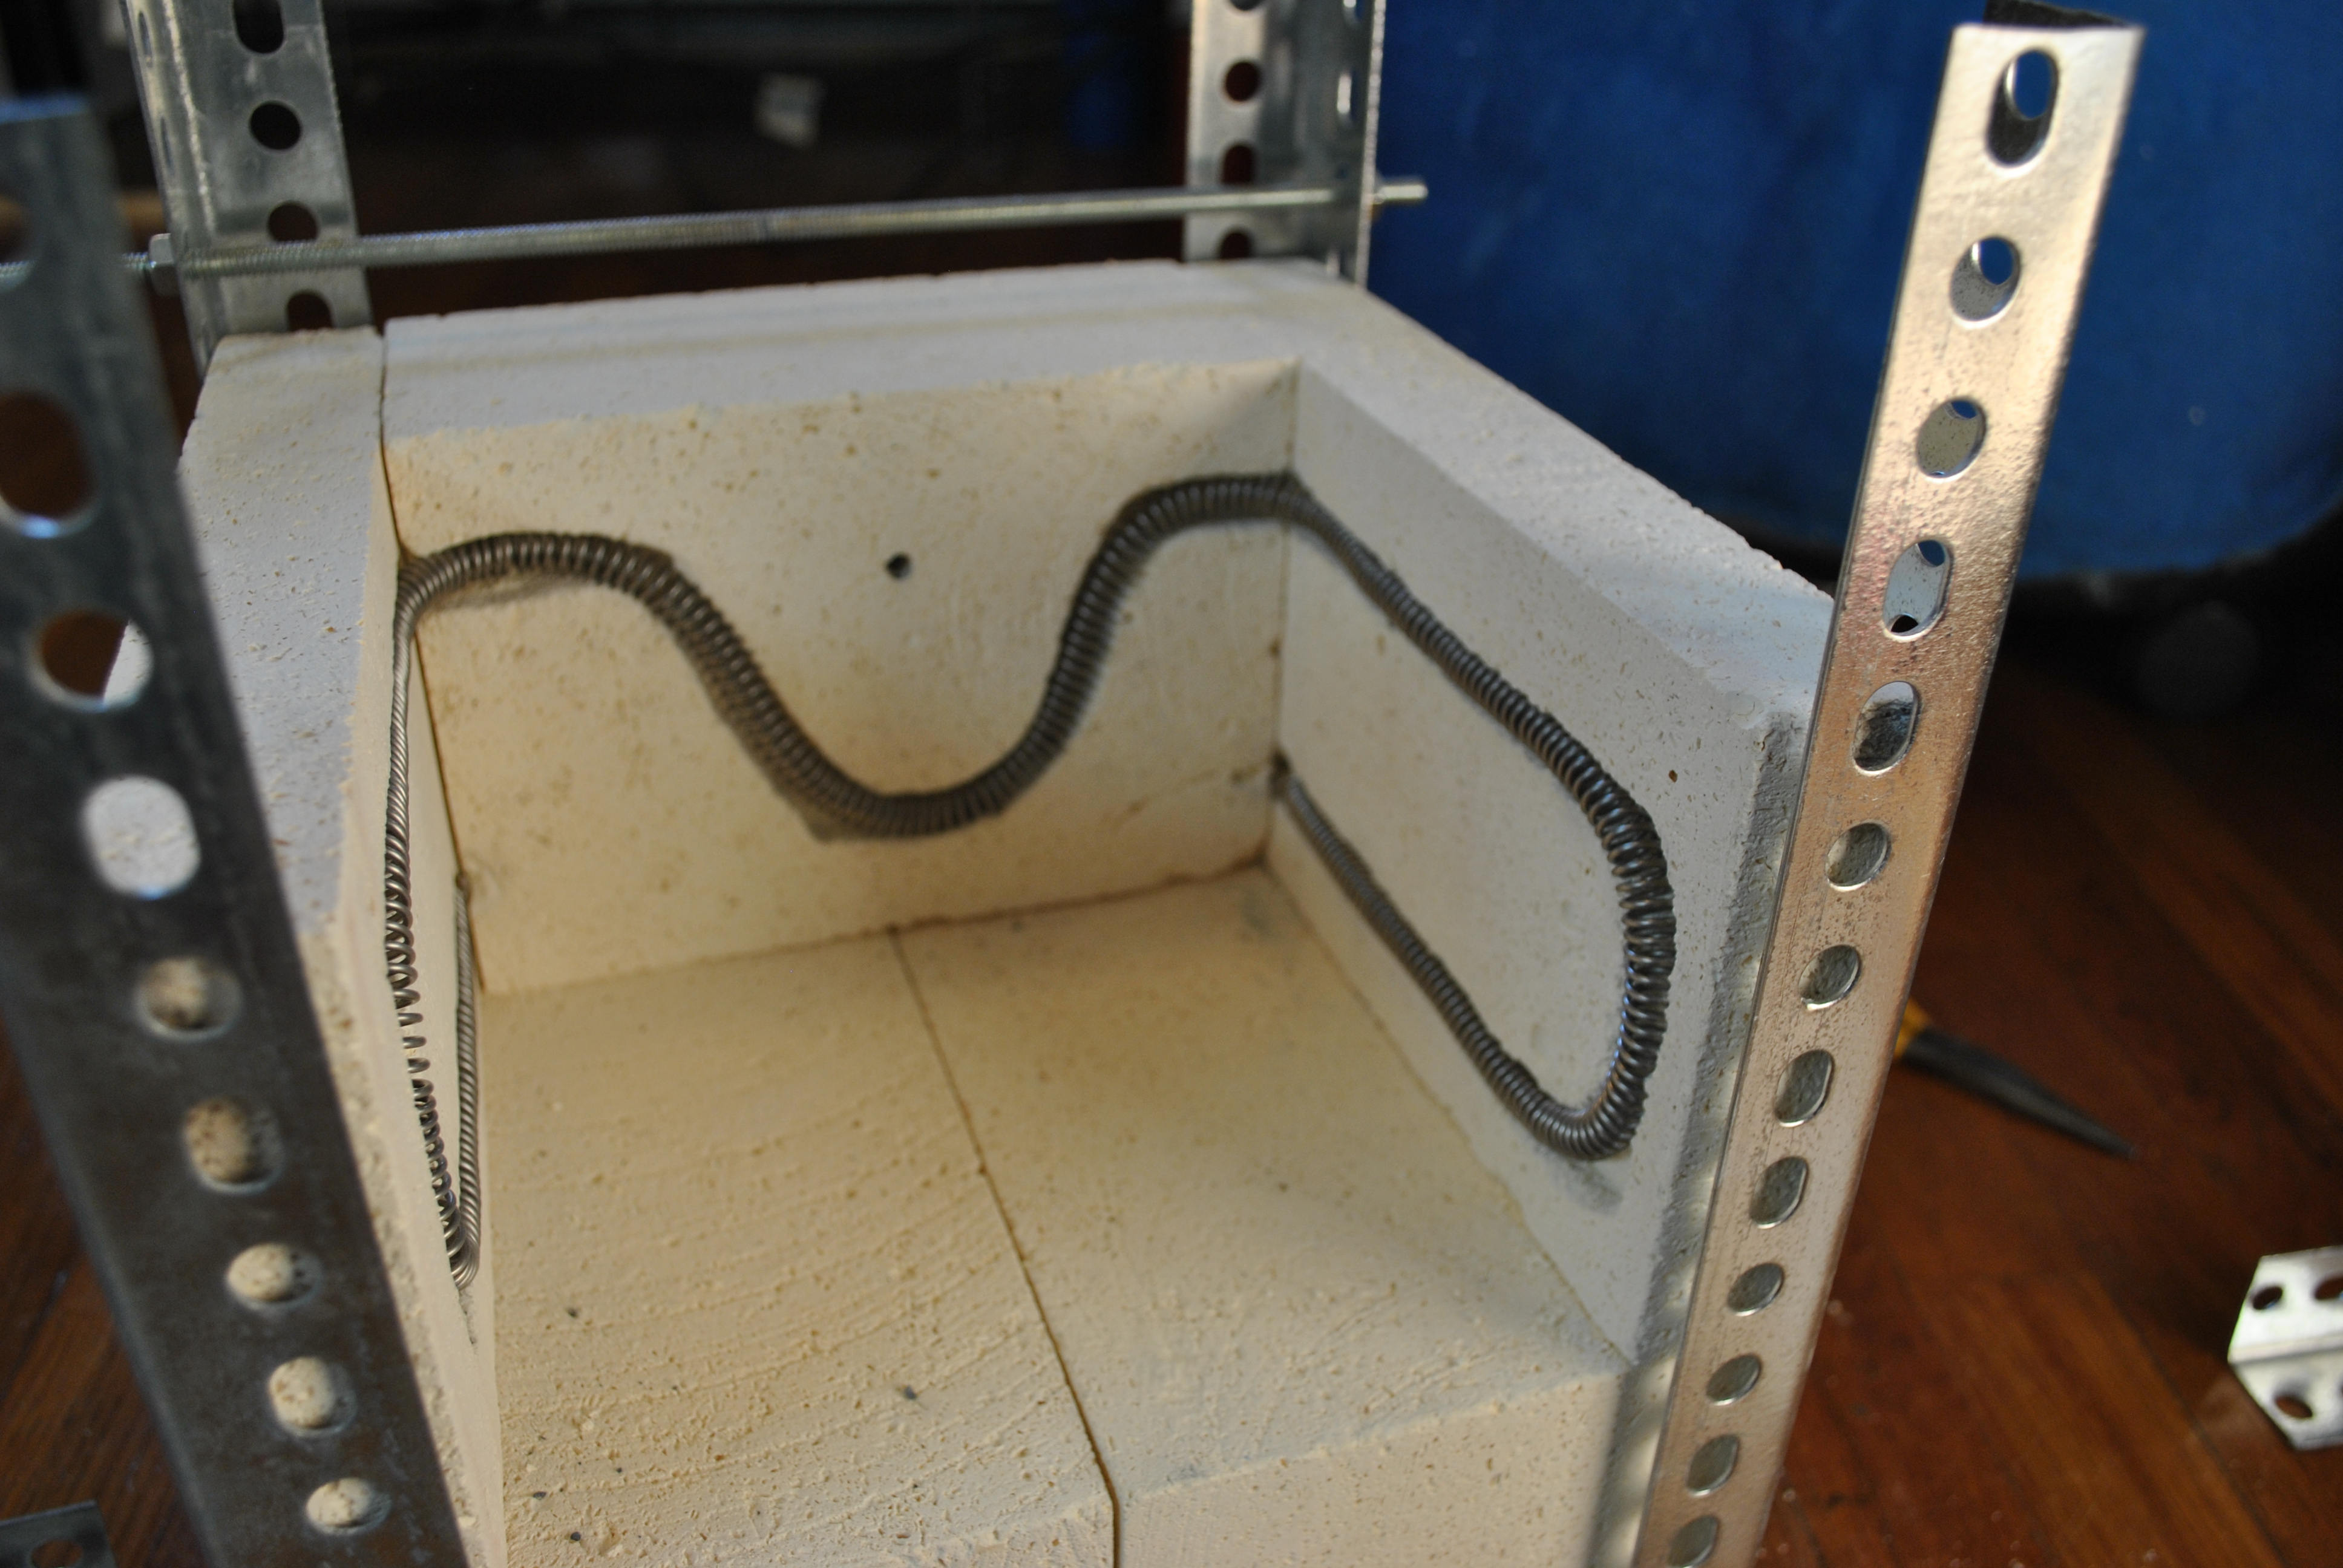
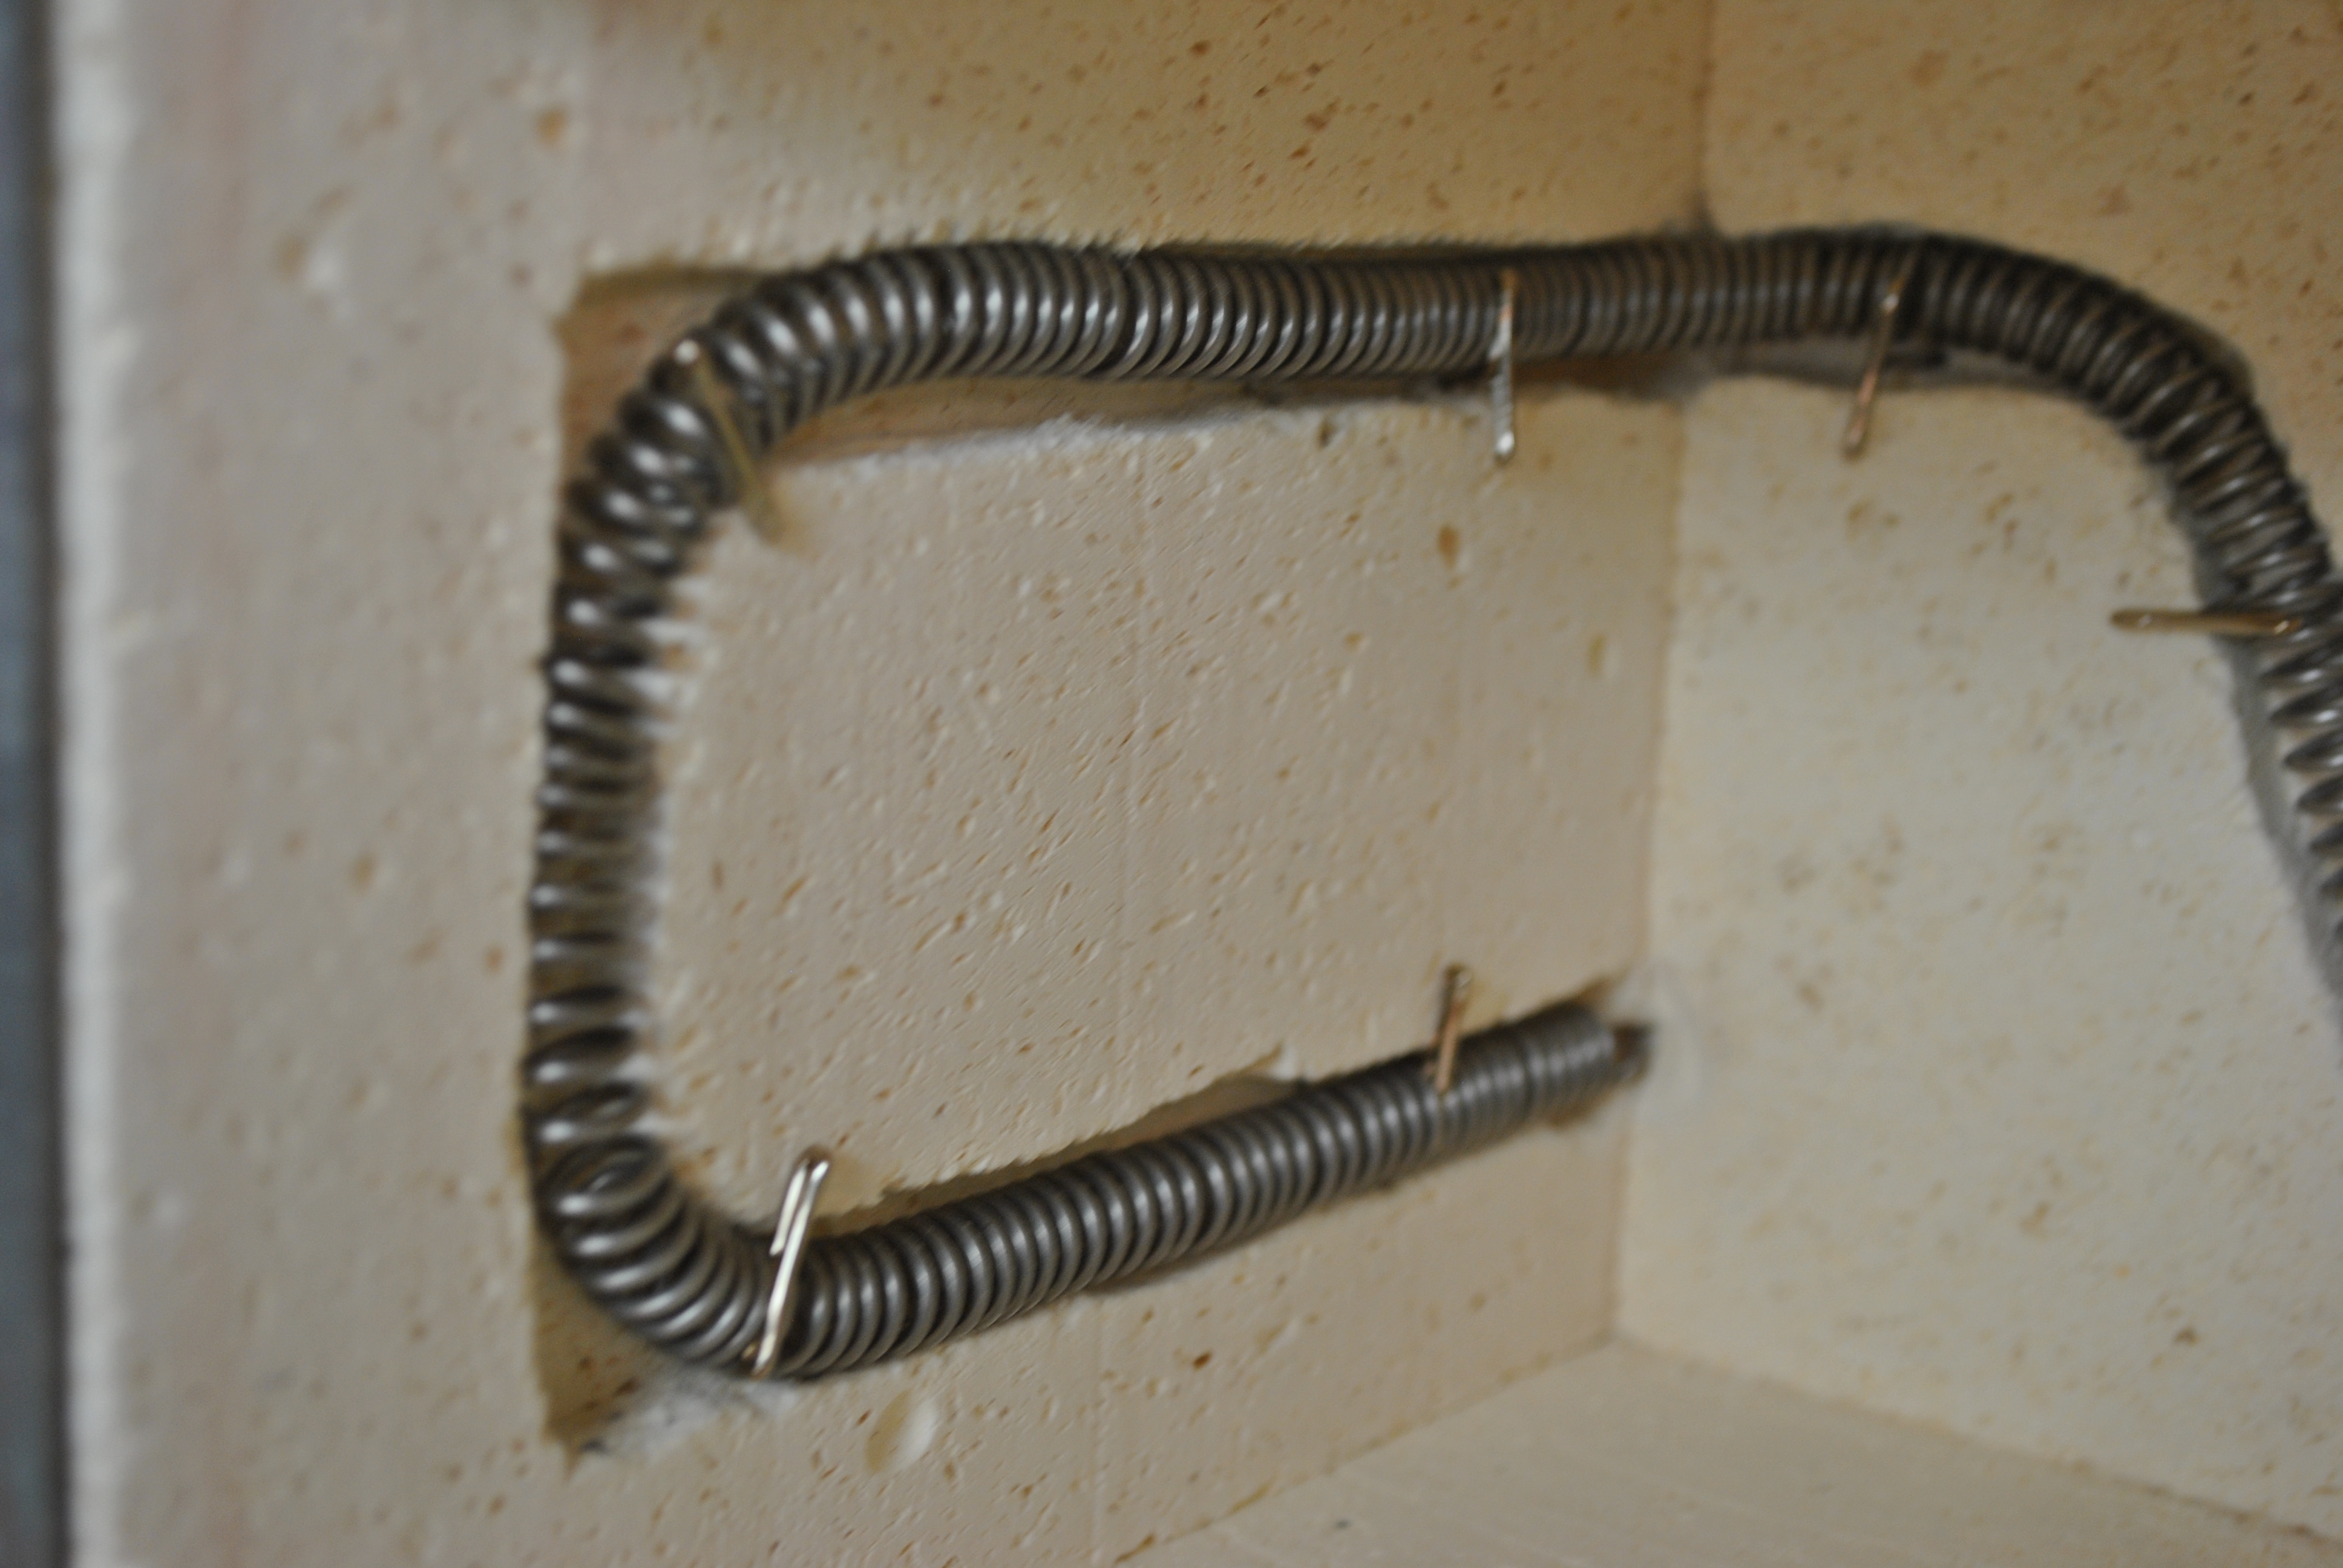
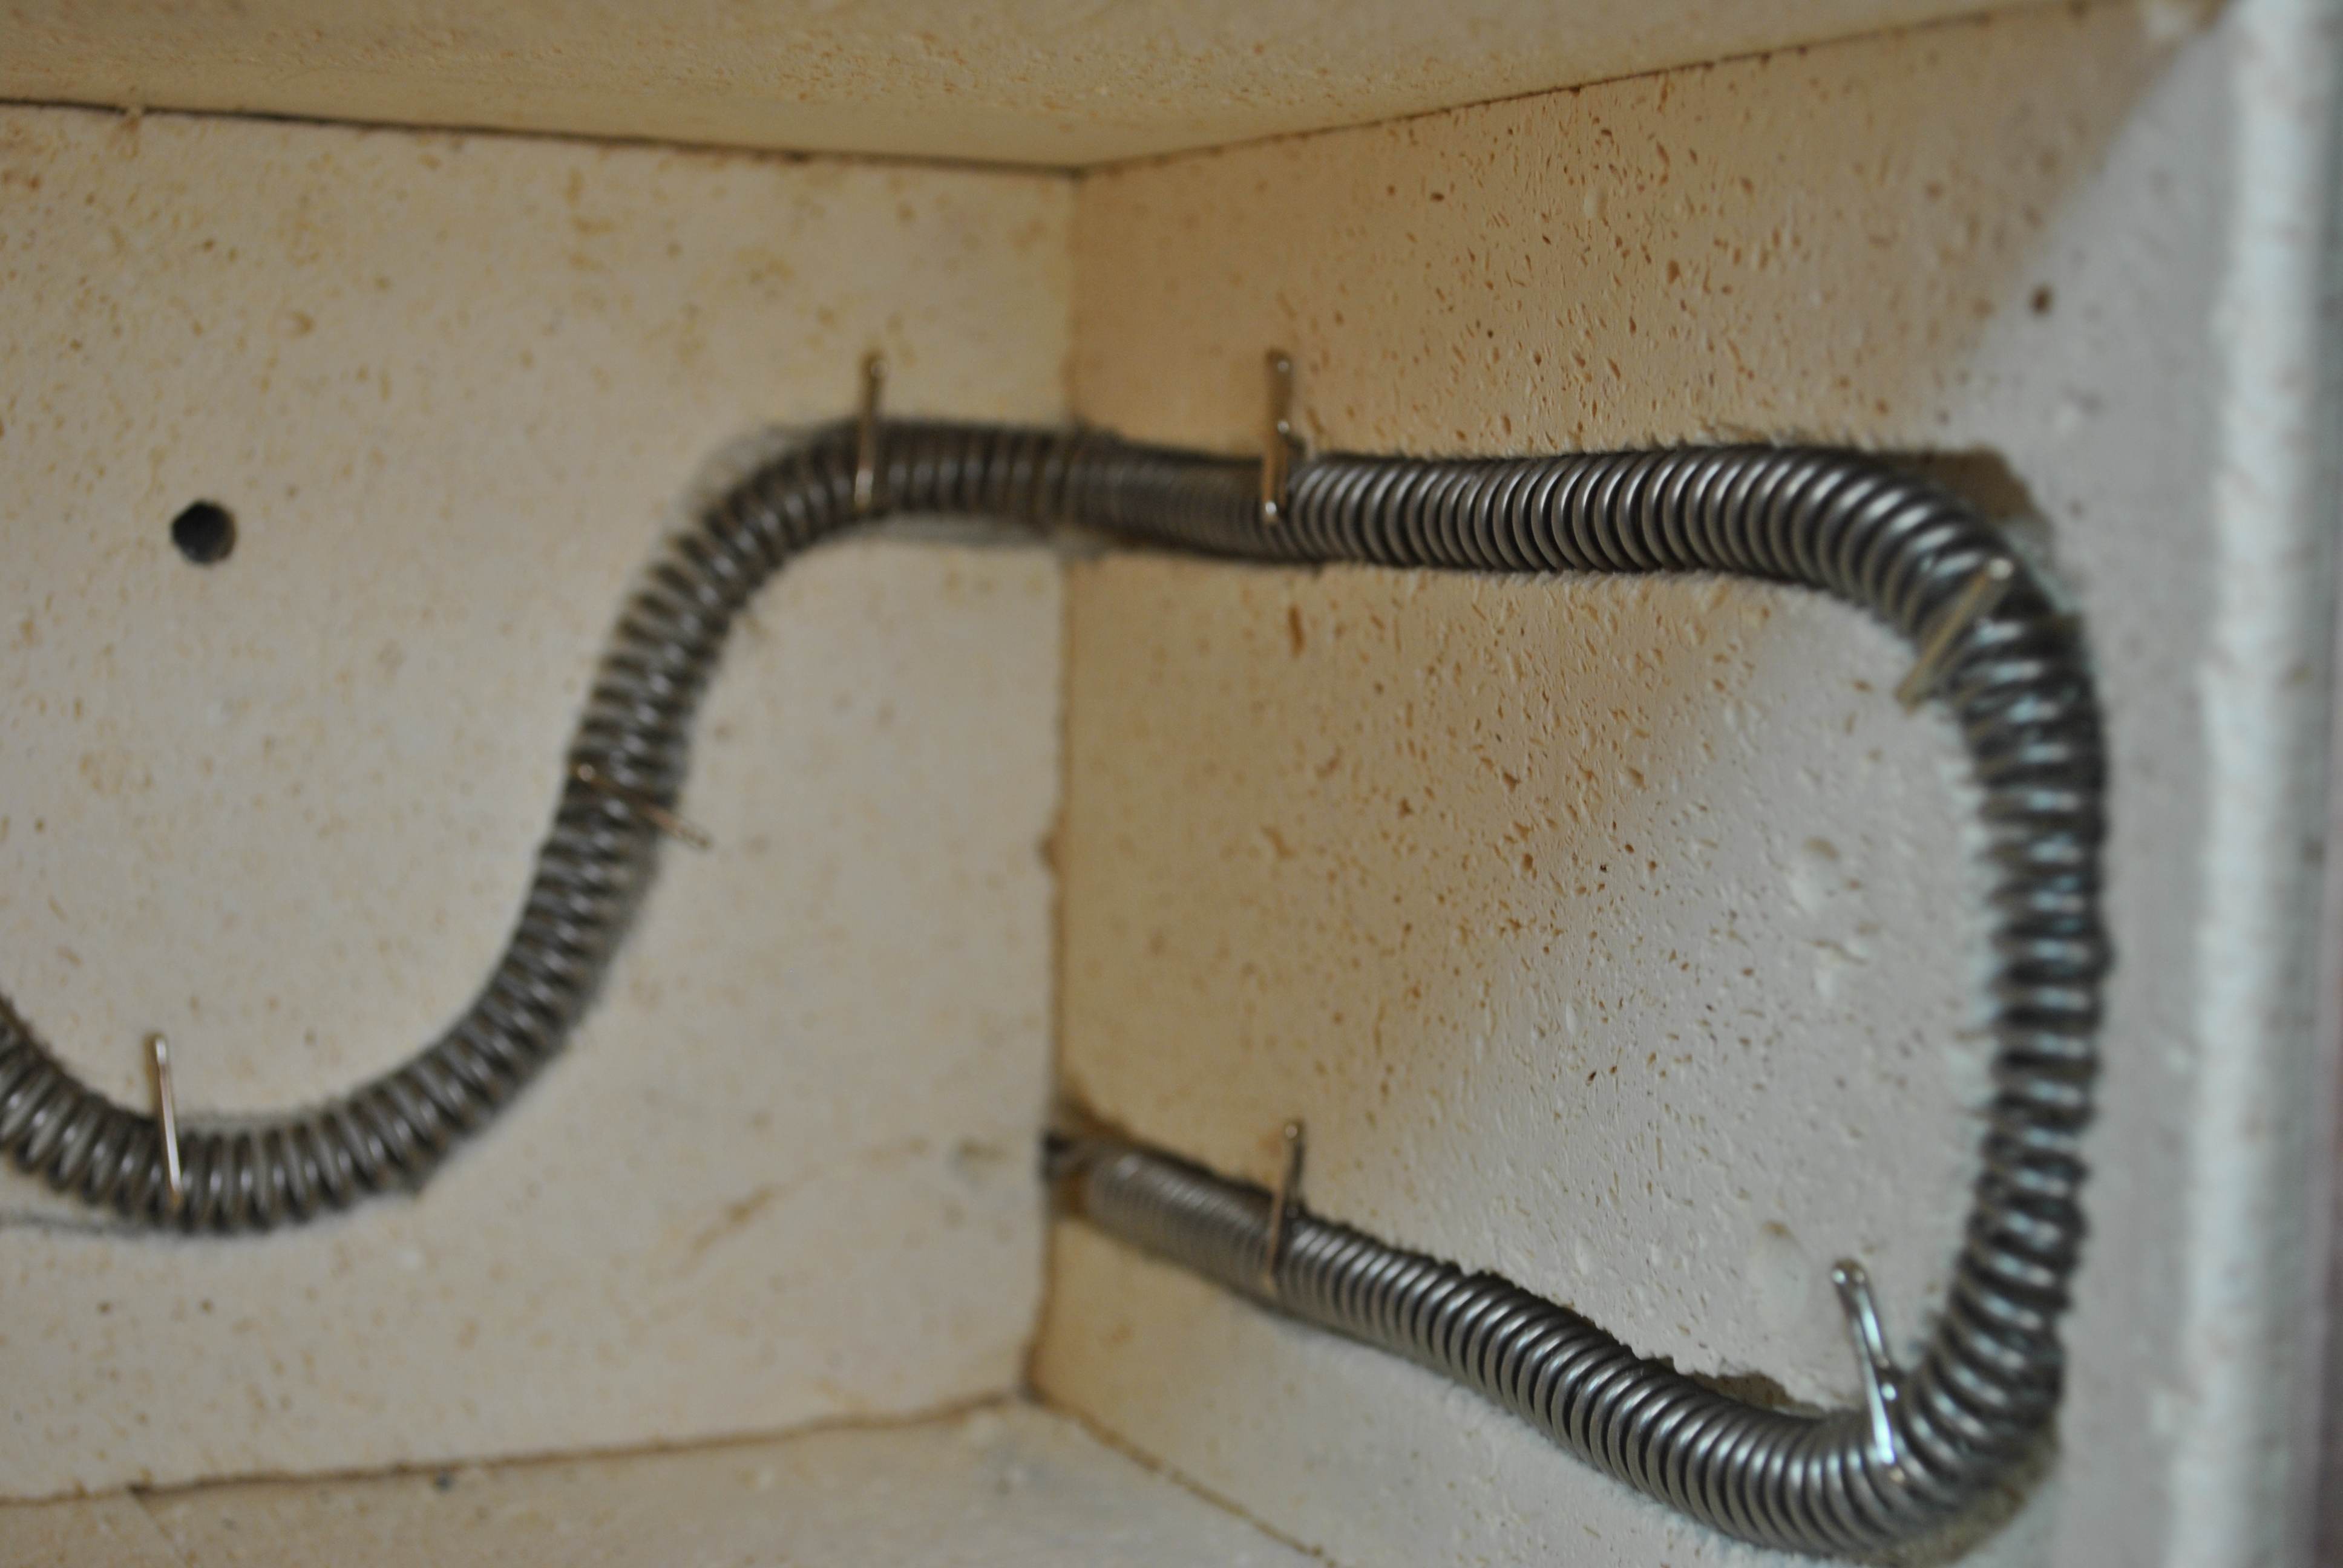
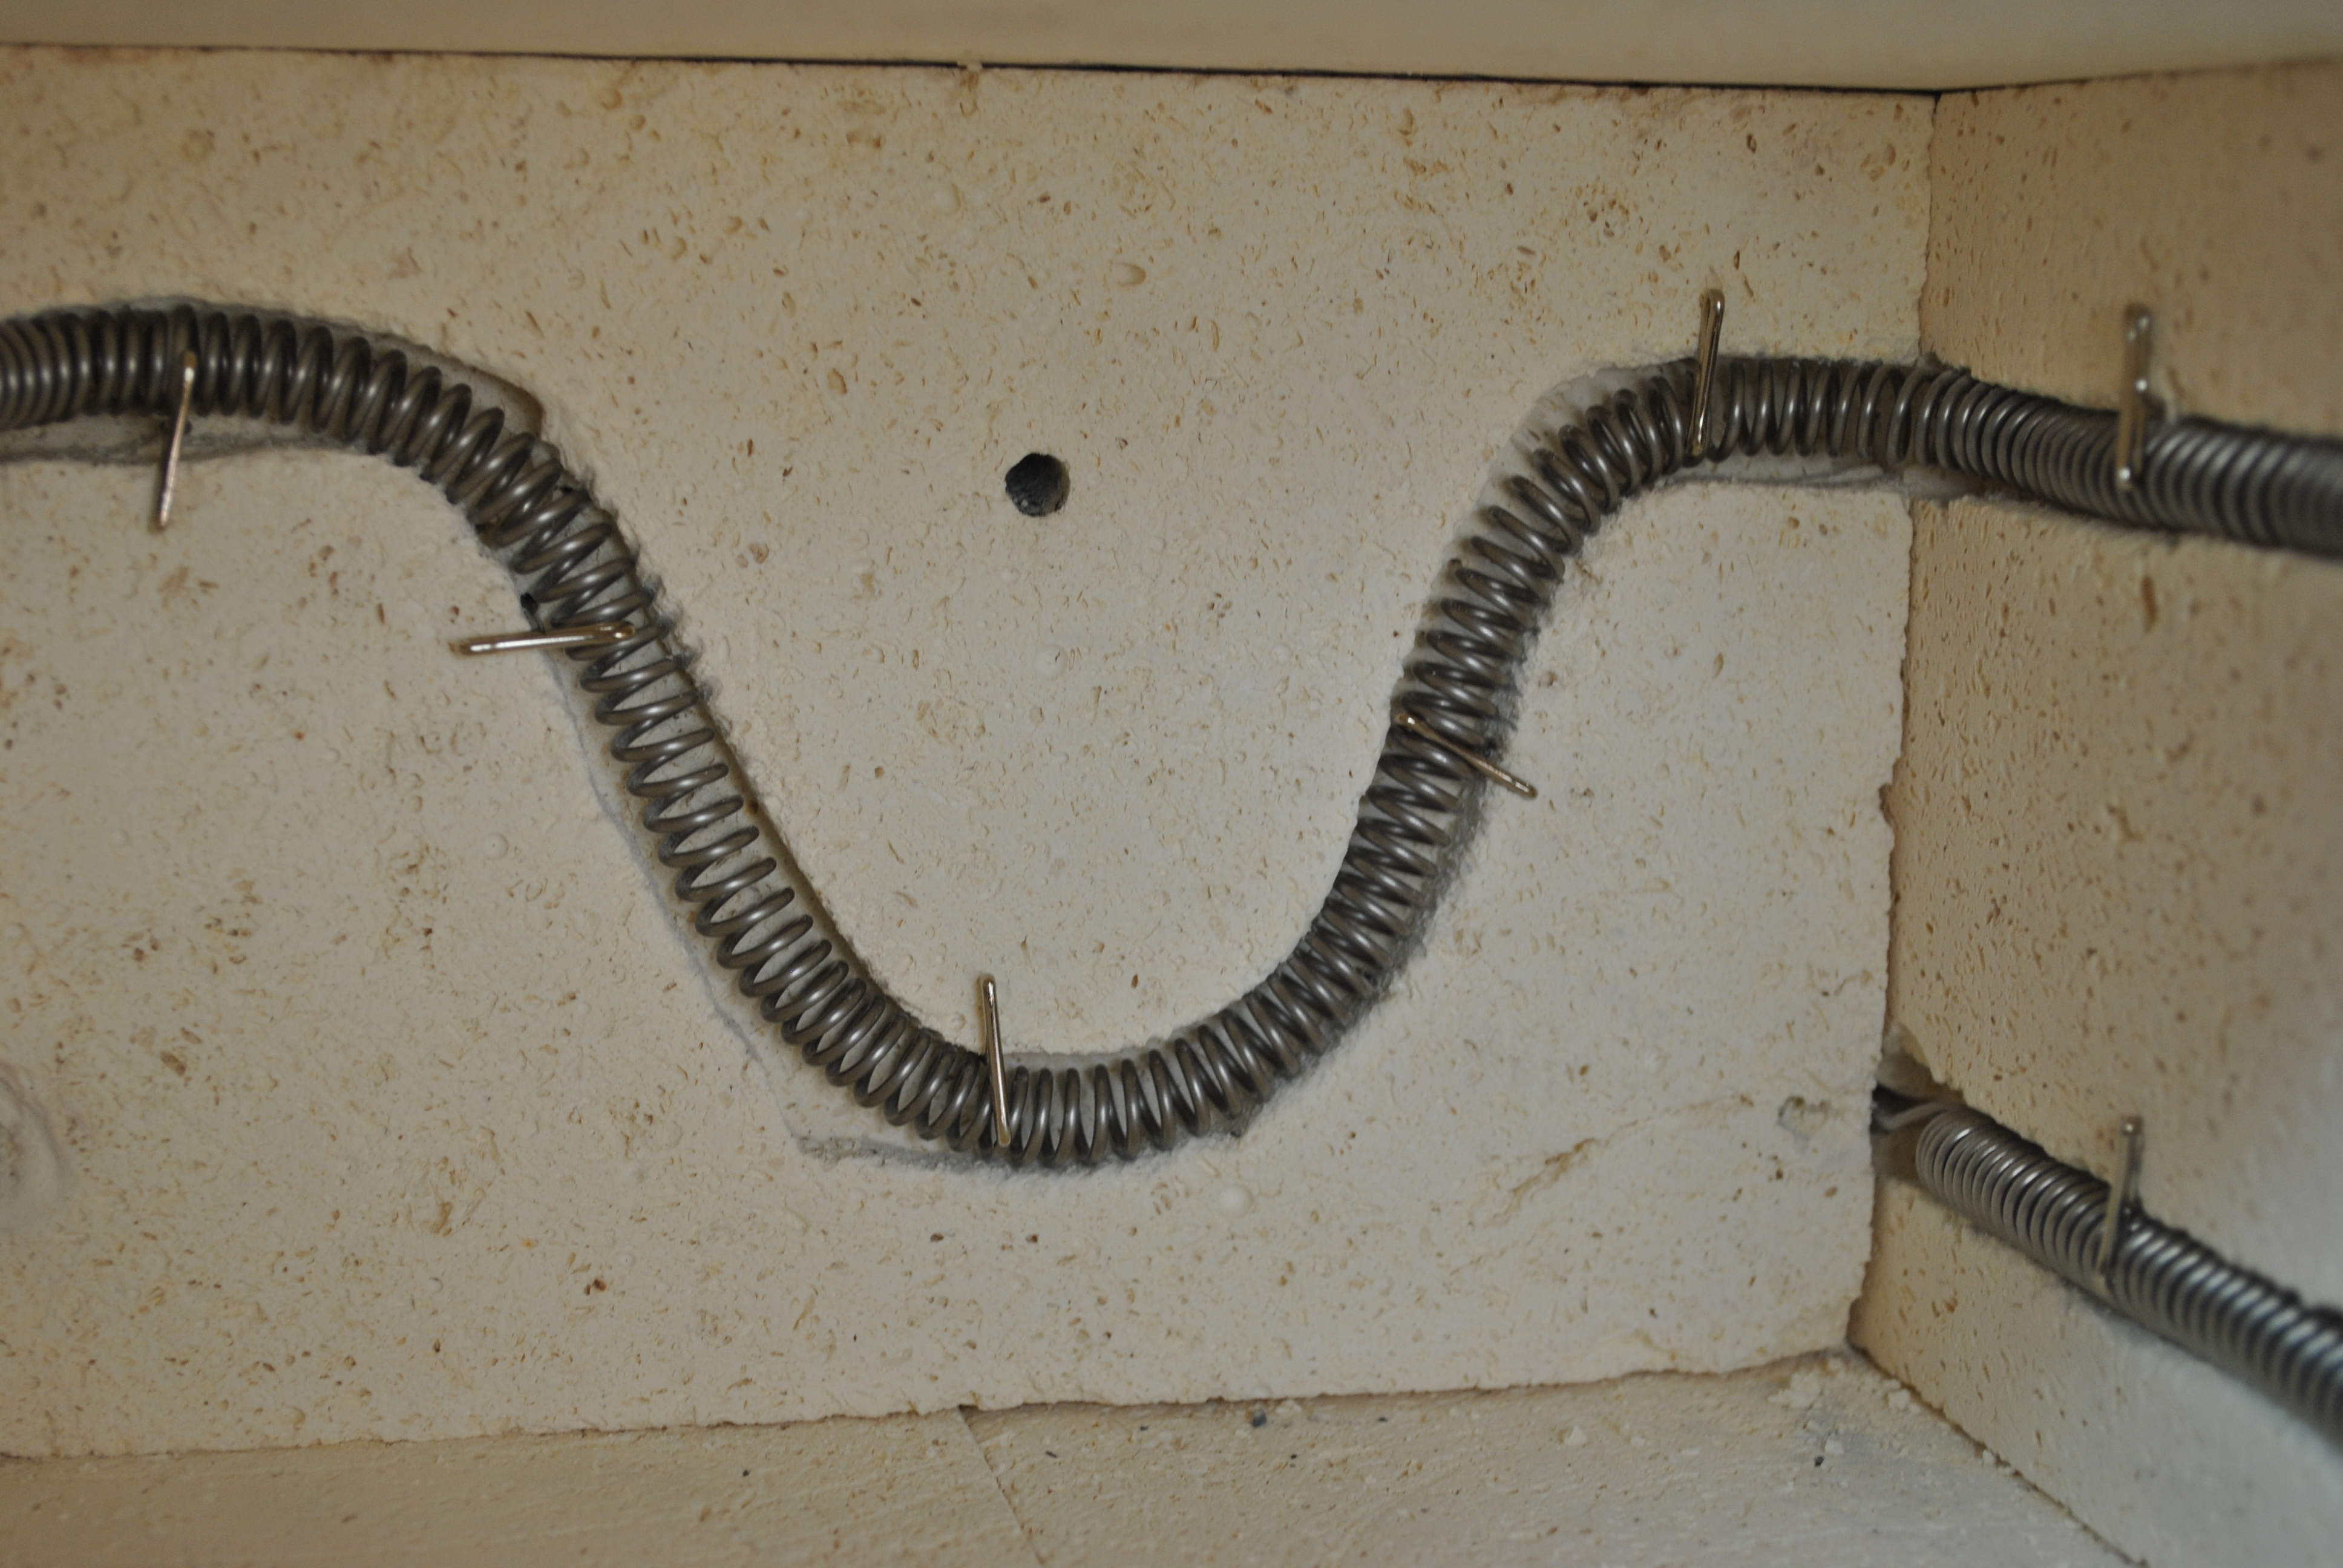
The design I came up with is a compromise between having enough space to do more than one flask at a time (see the skinny side walls), having enough space to actually fit my entire element into the kiln, and keeping the kiln small enough so that it will get hot enough.
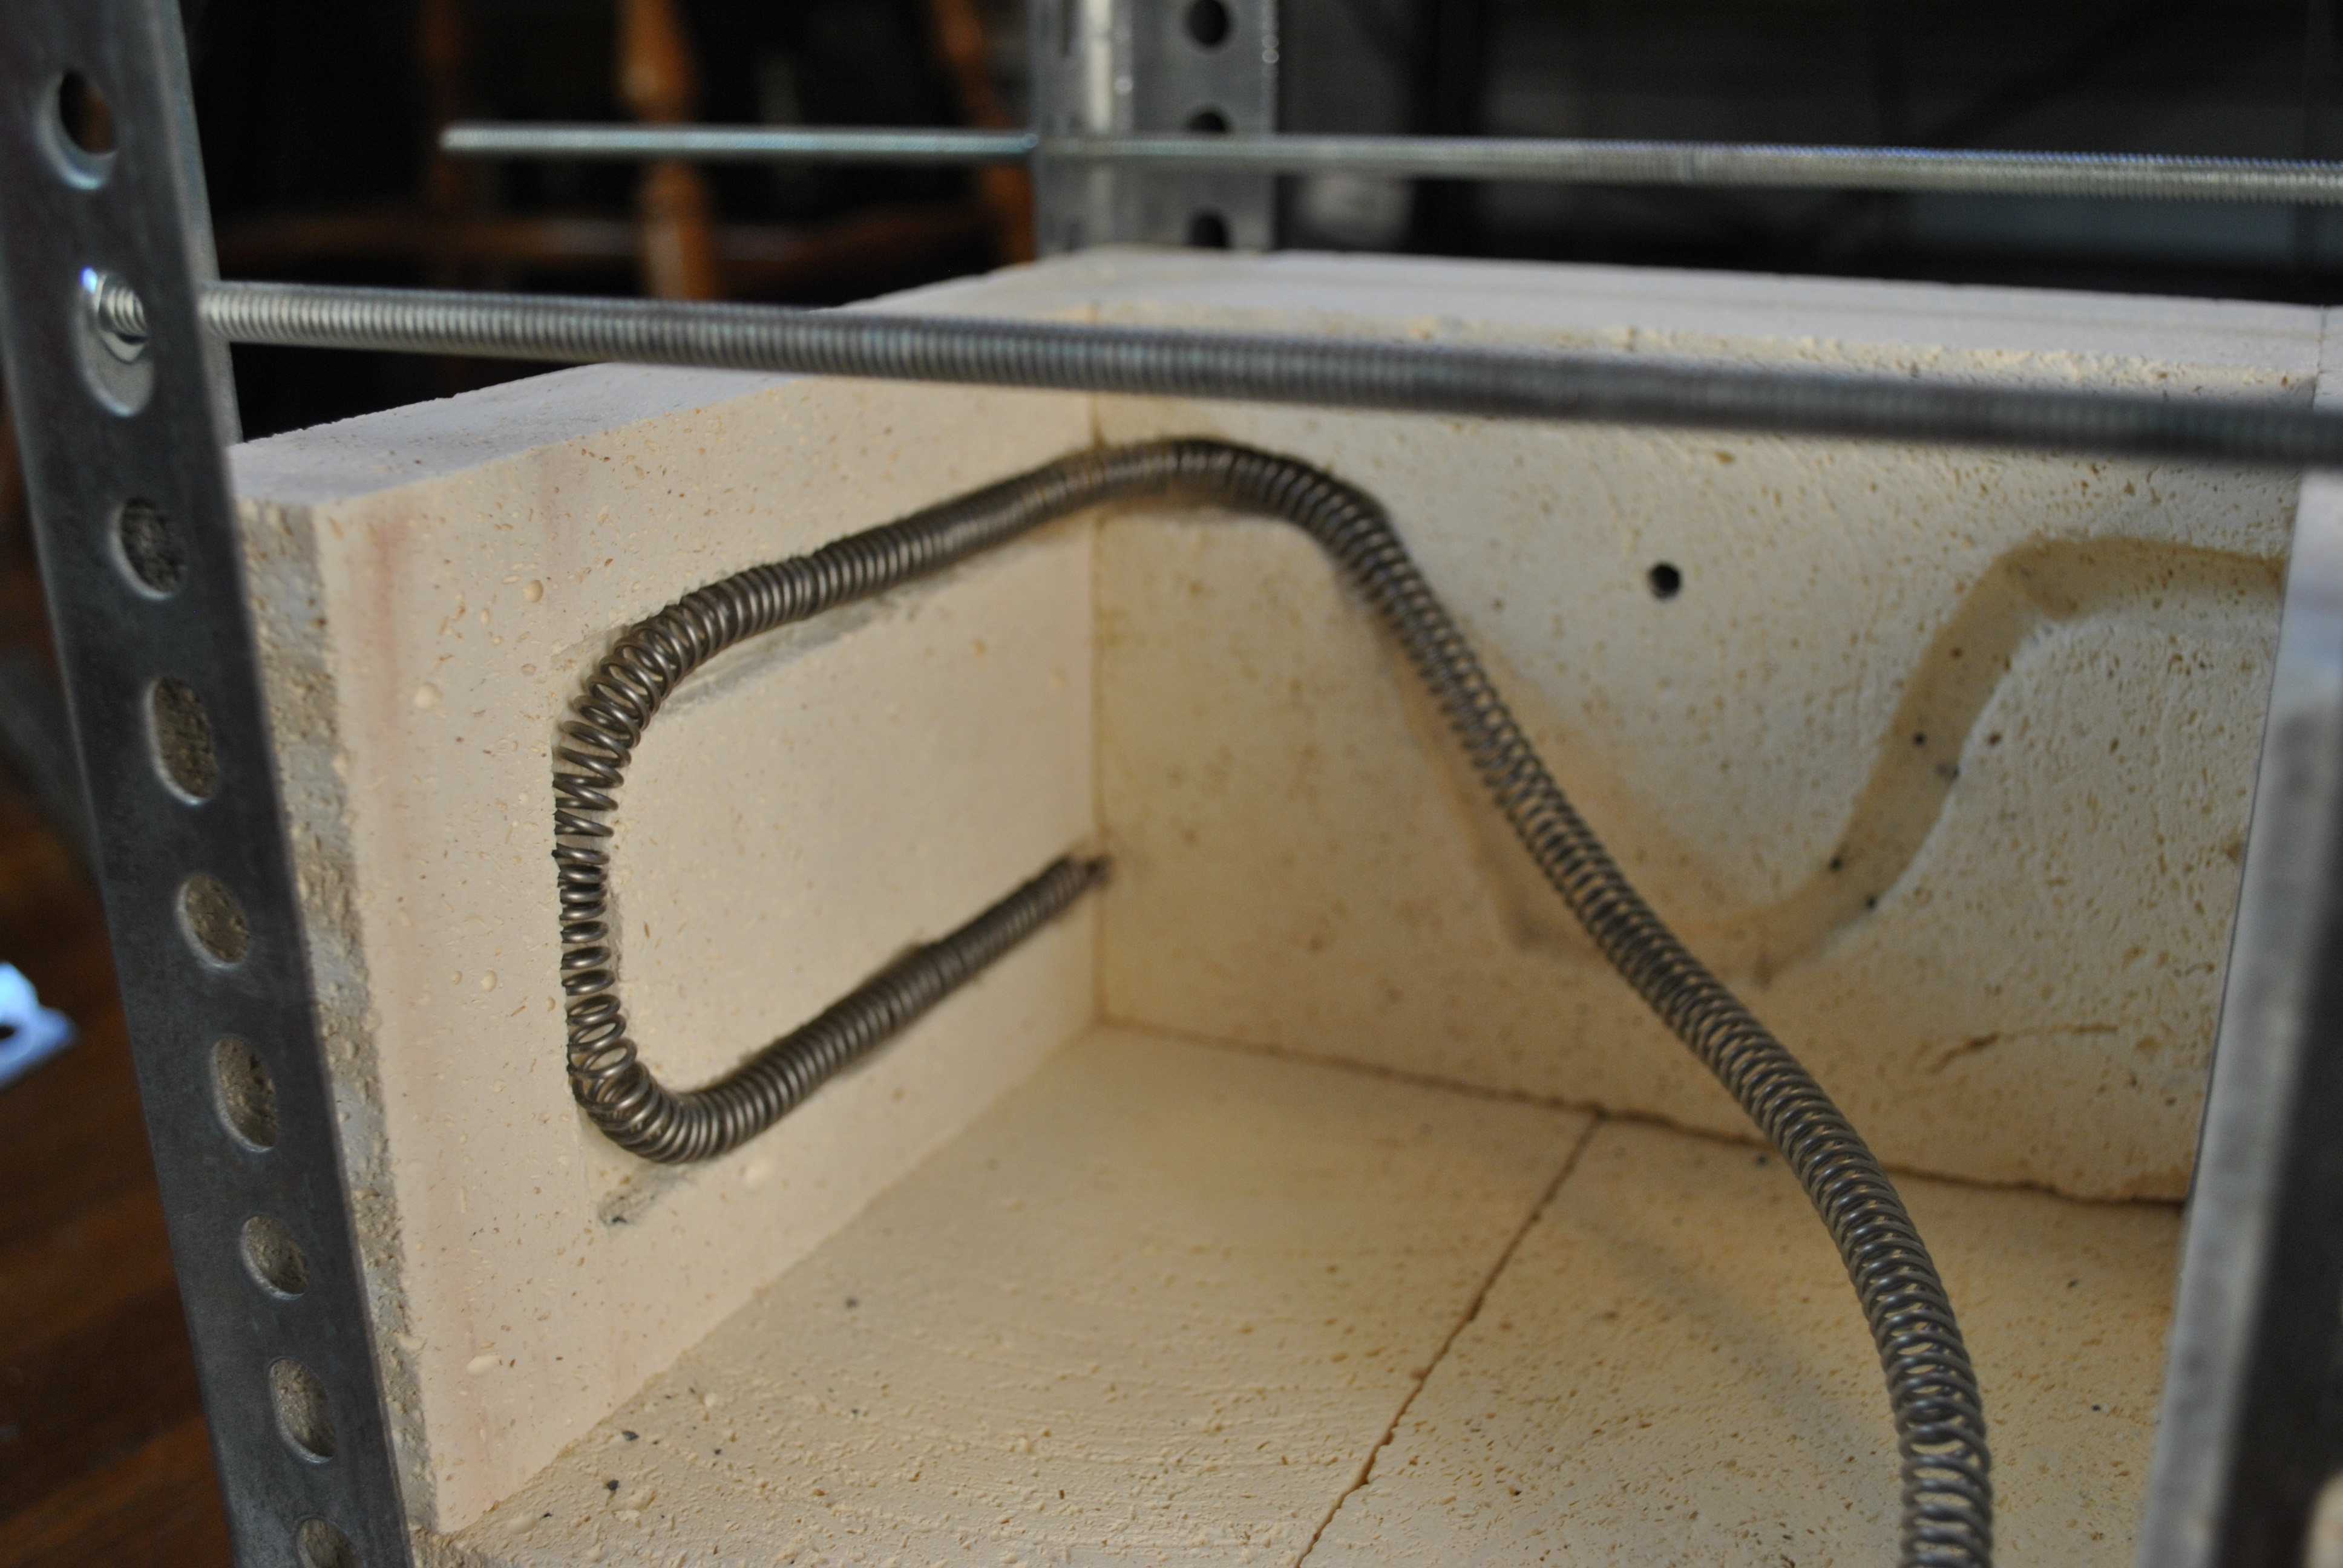
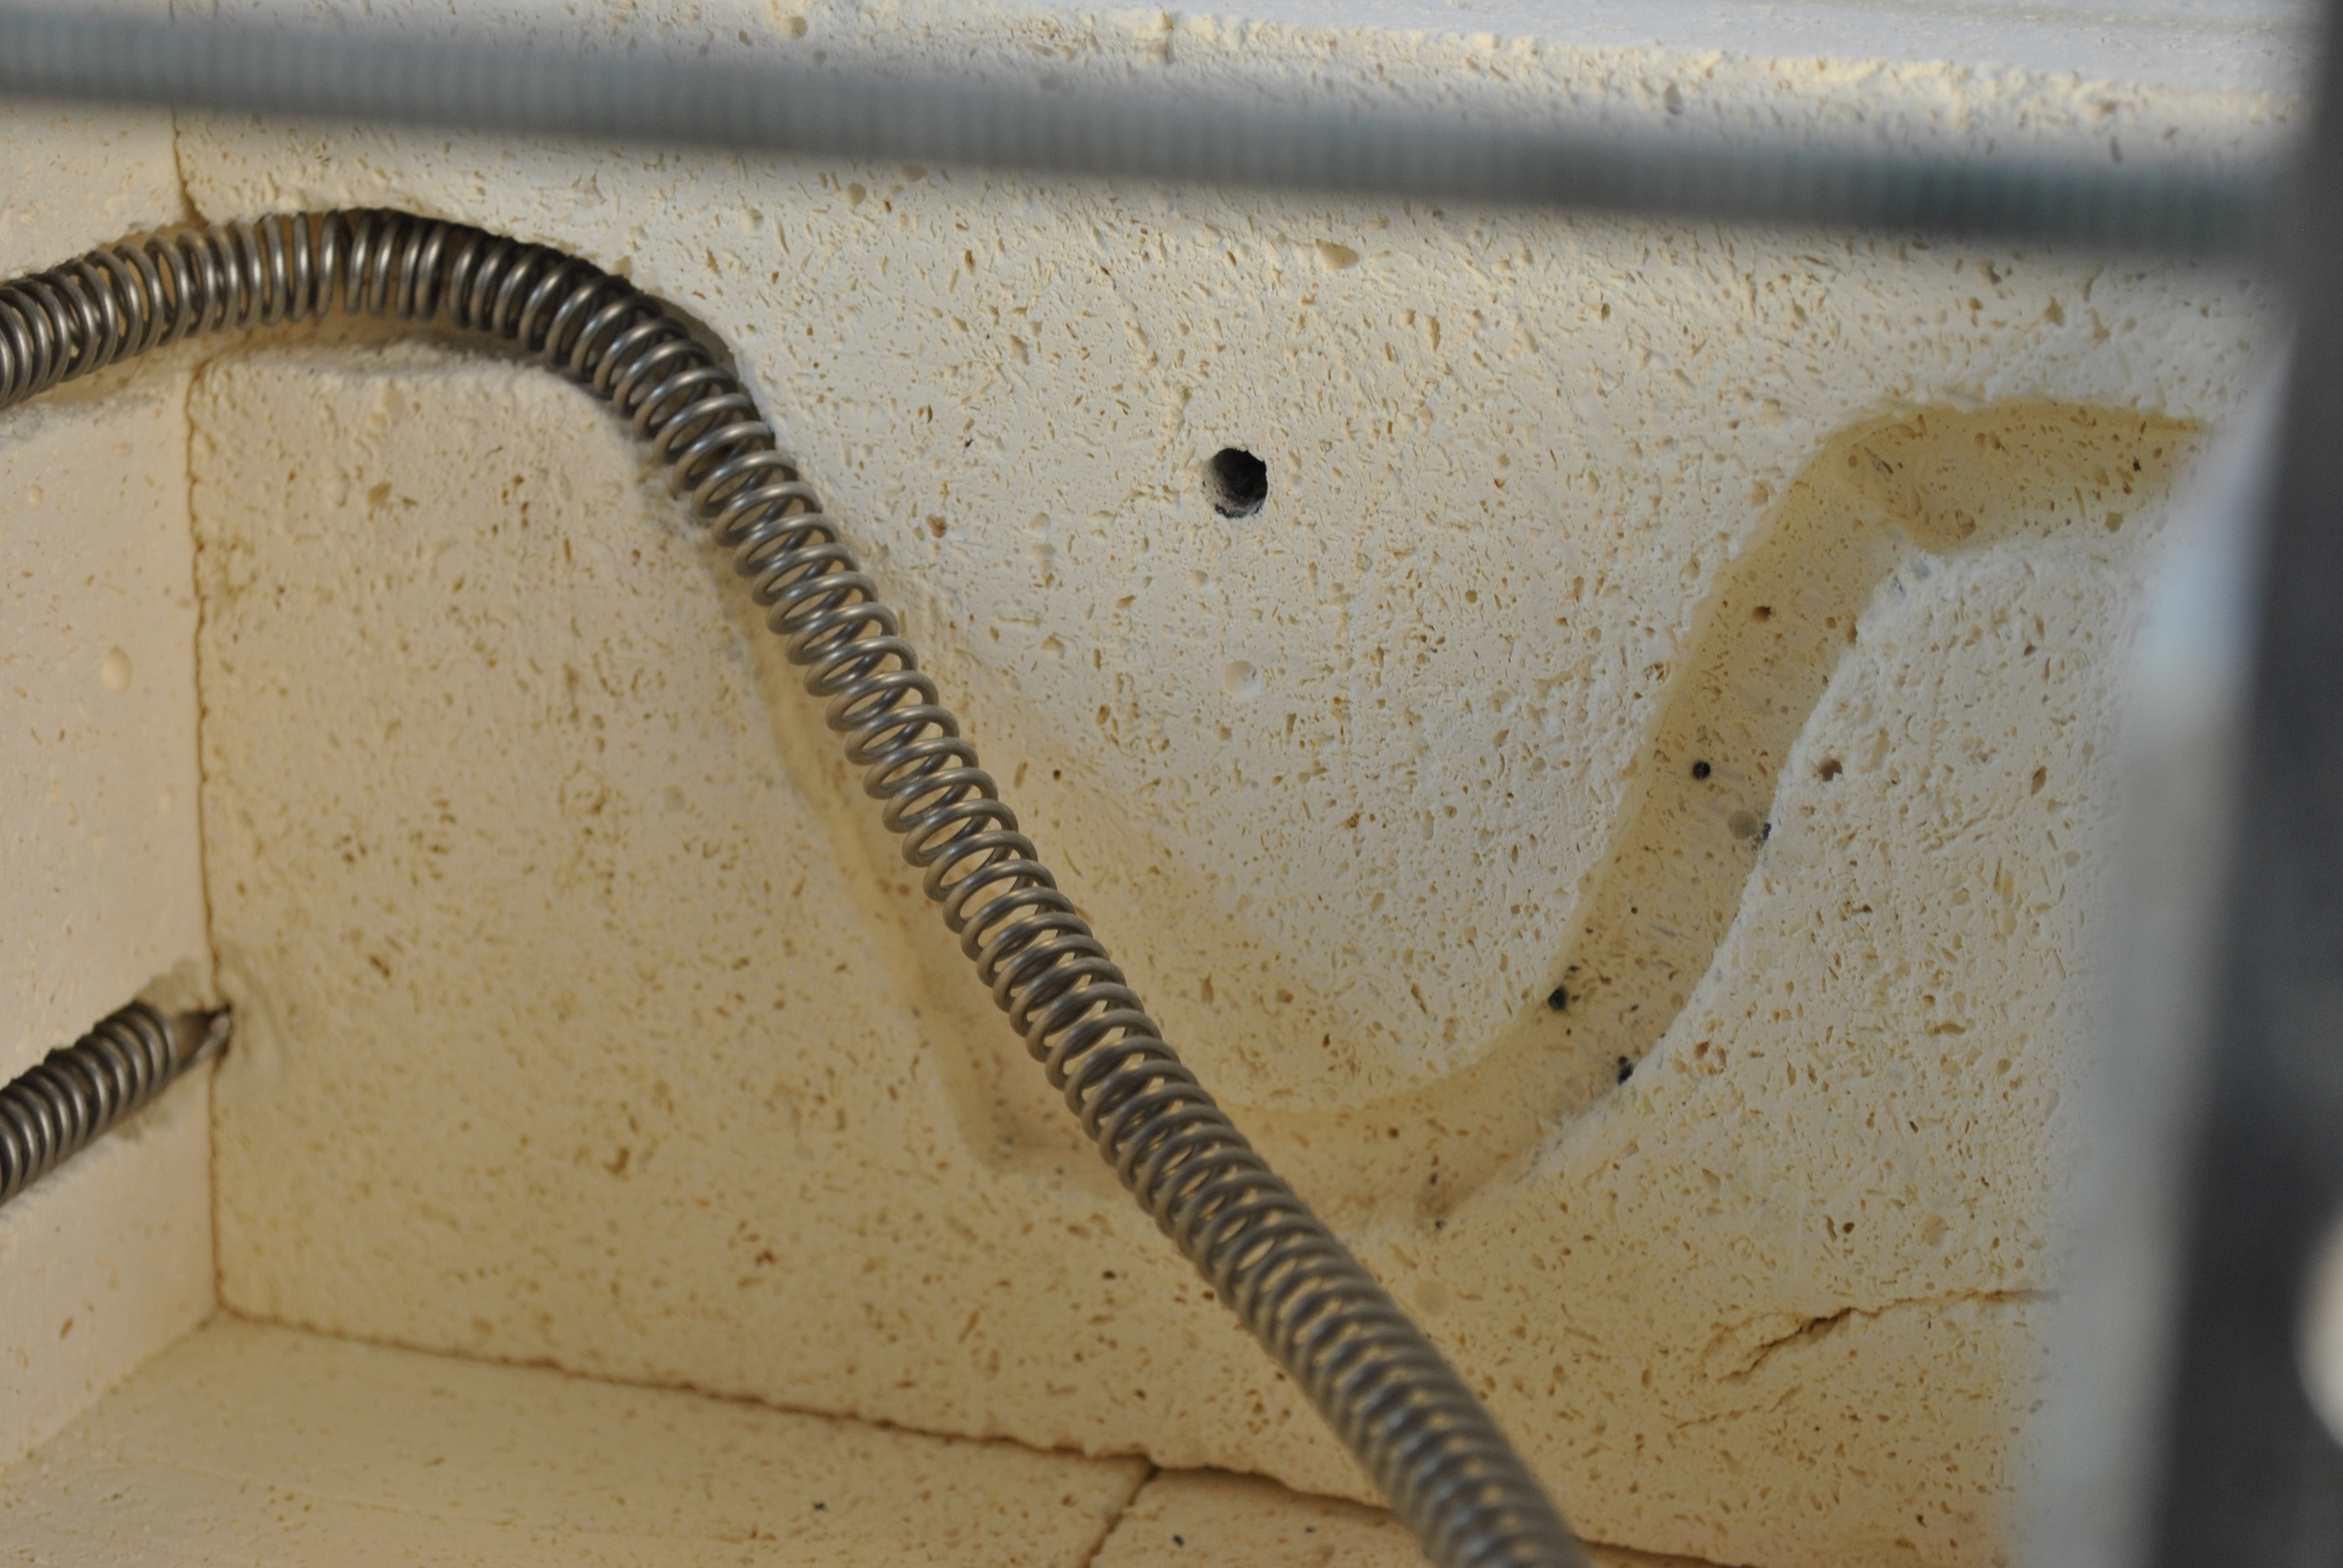
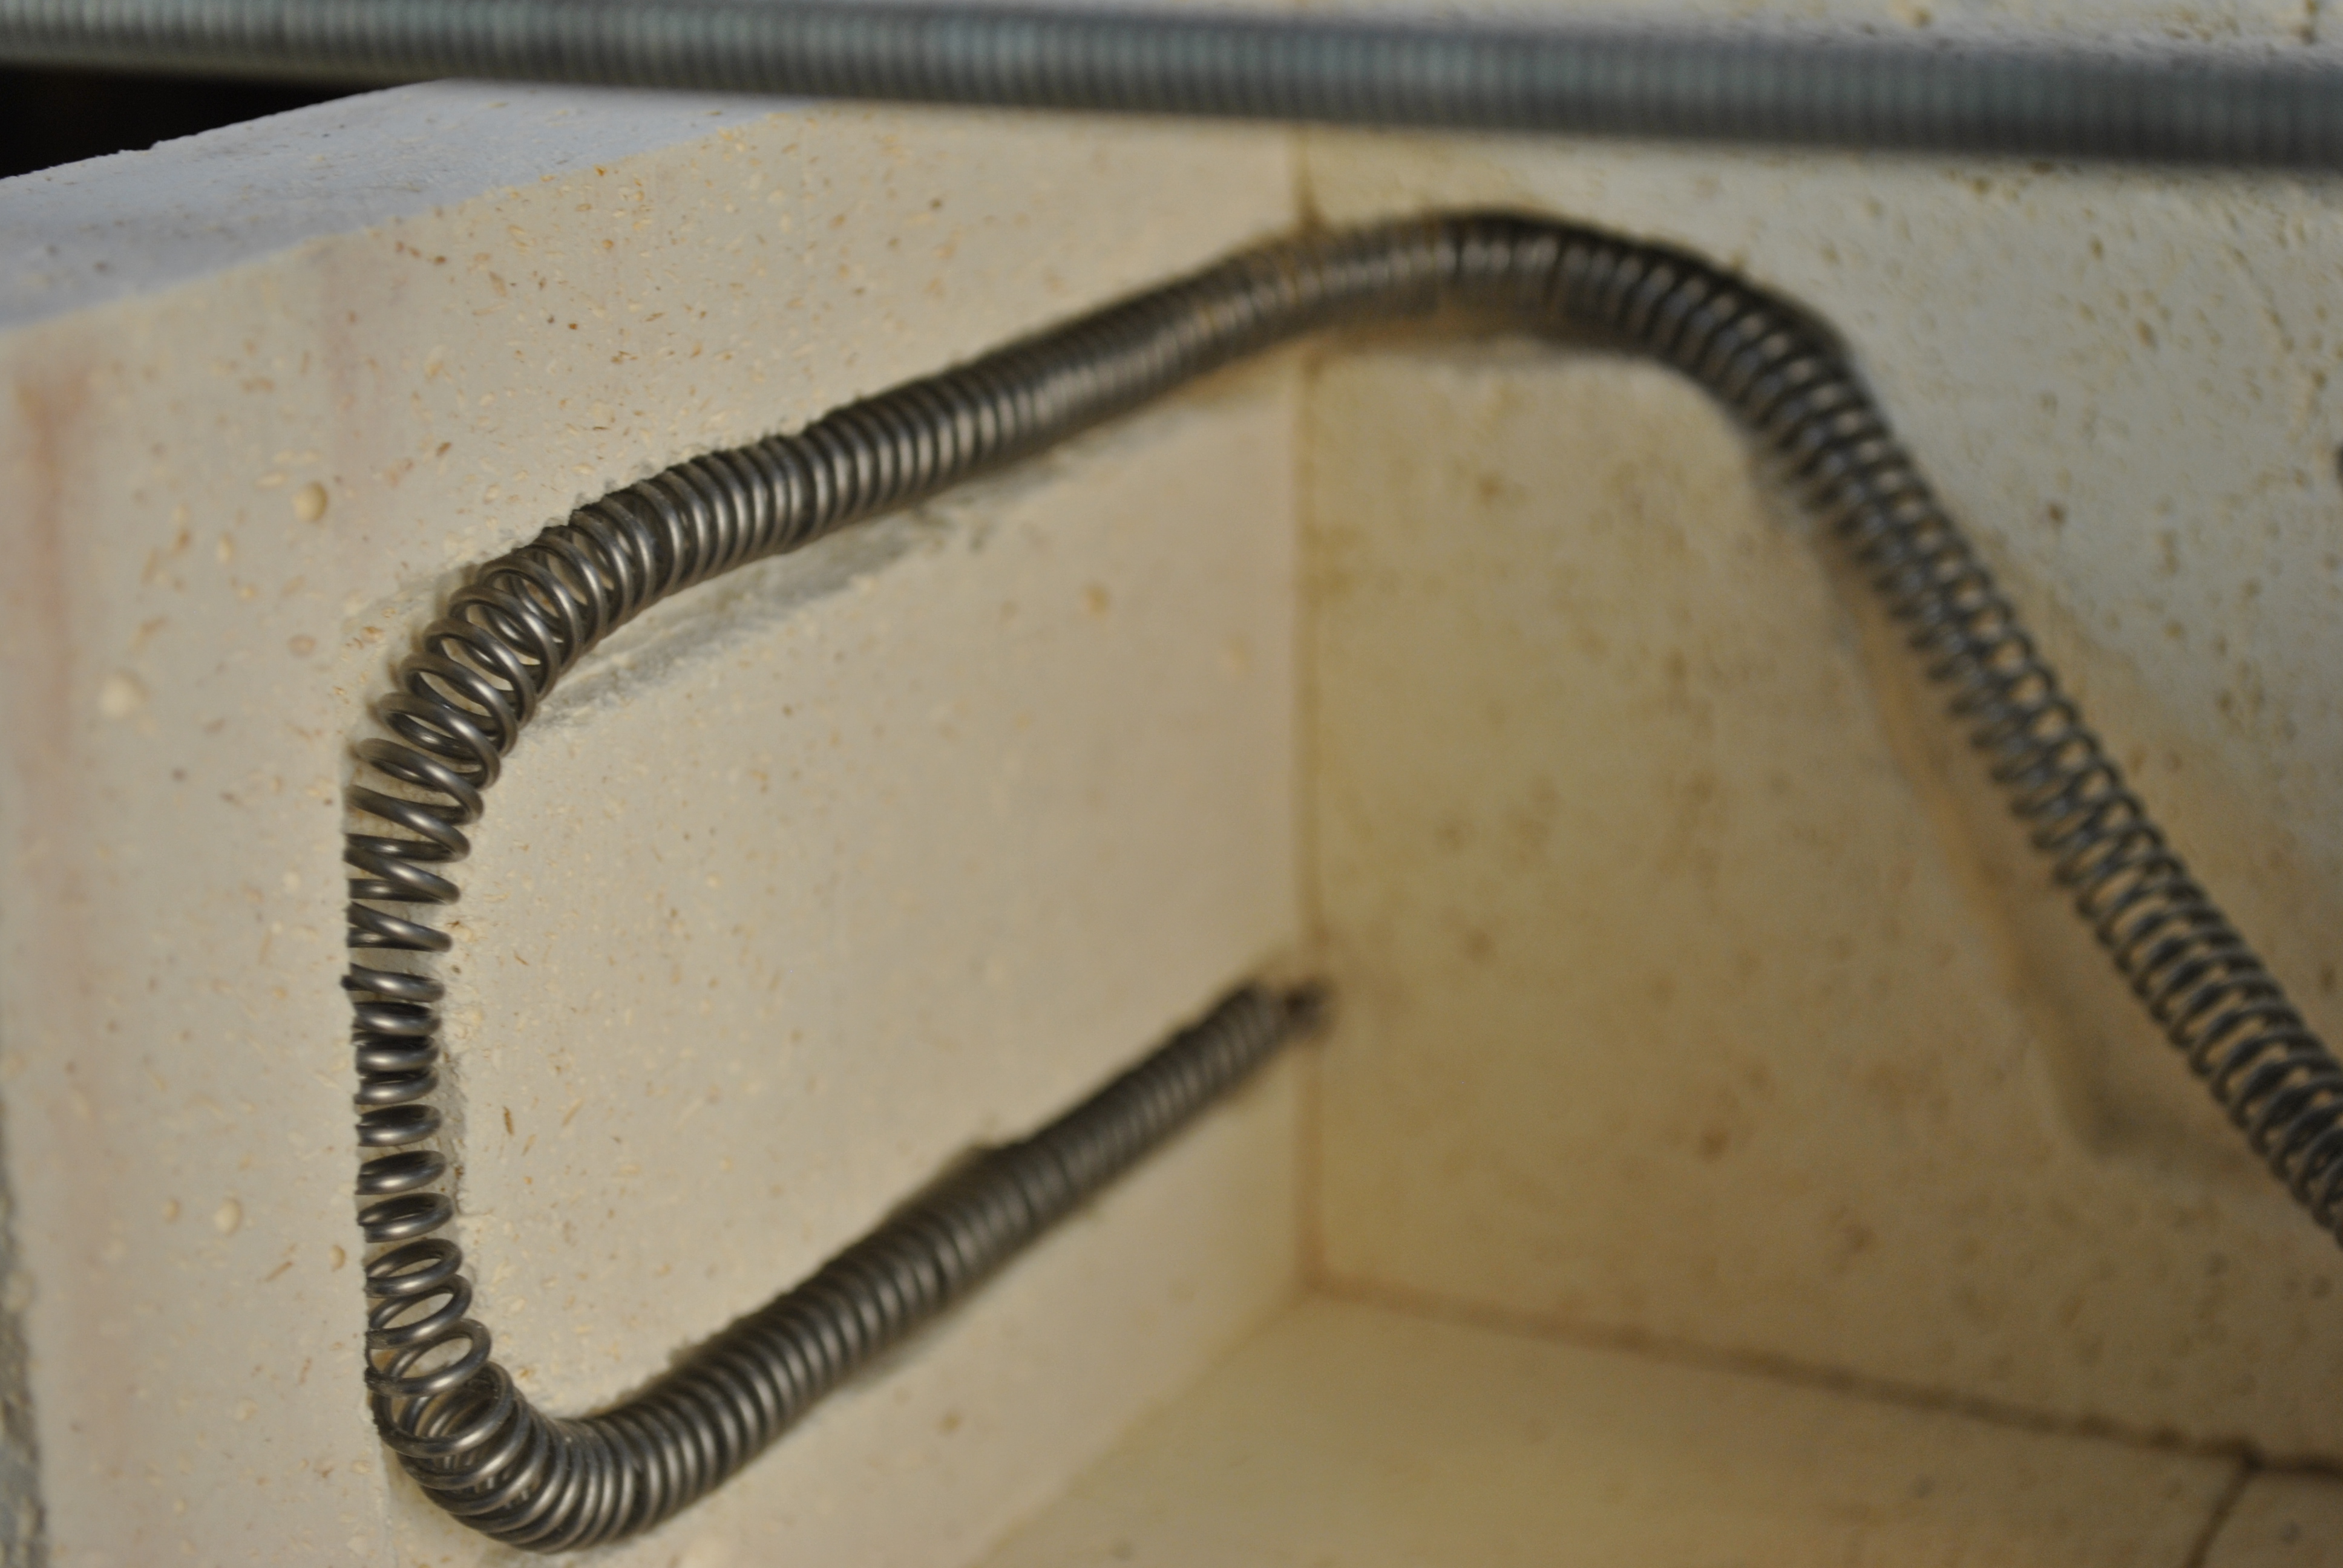
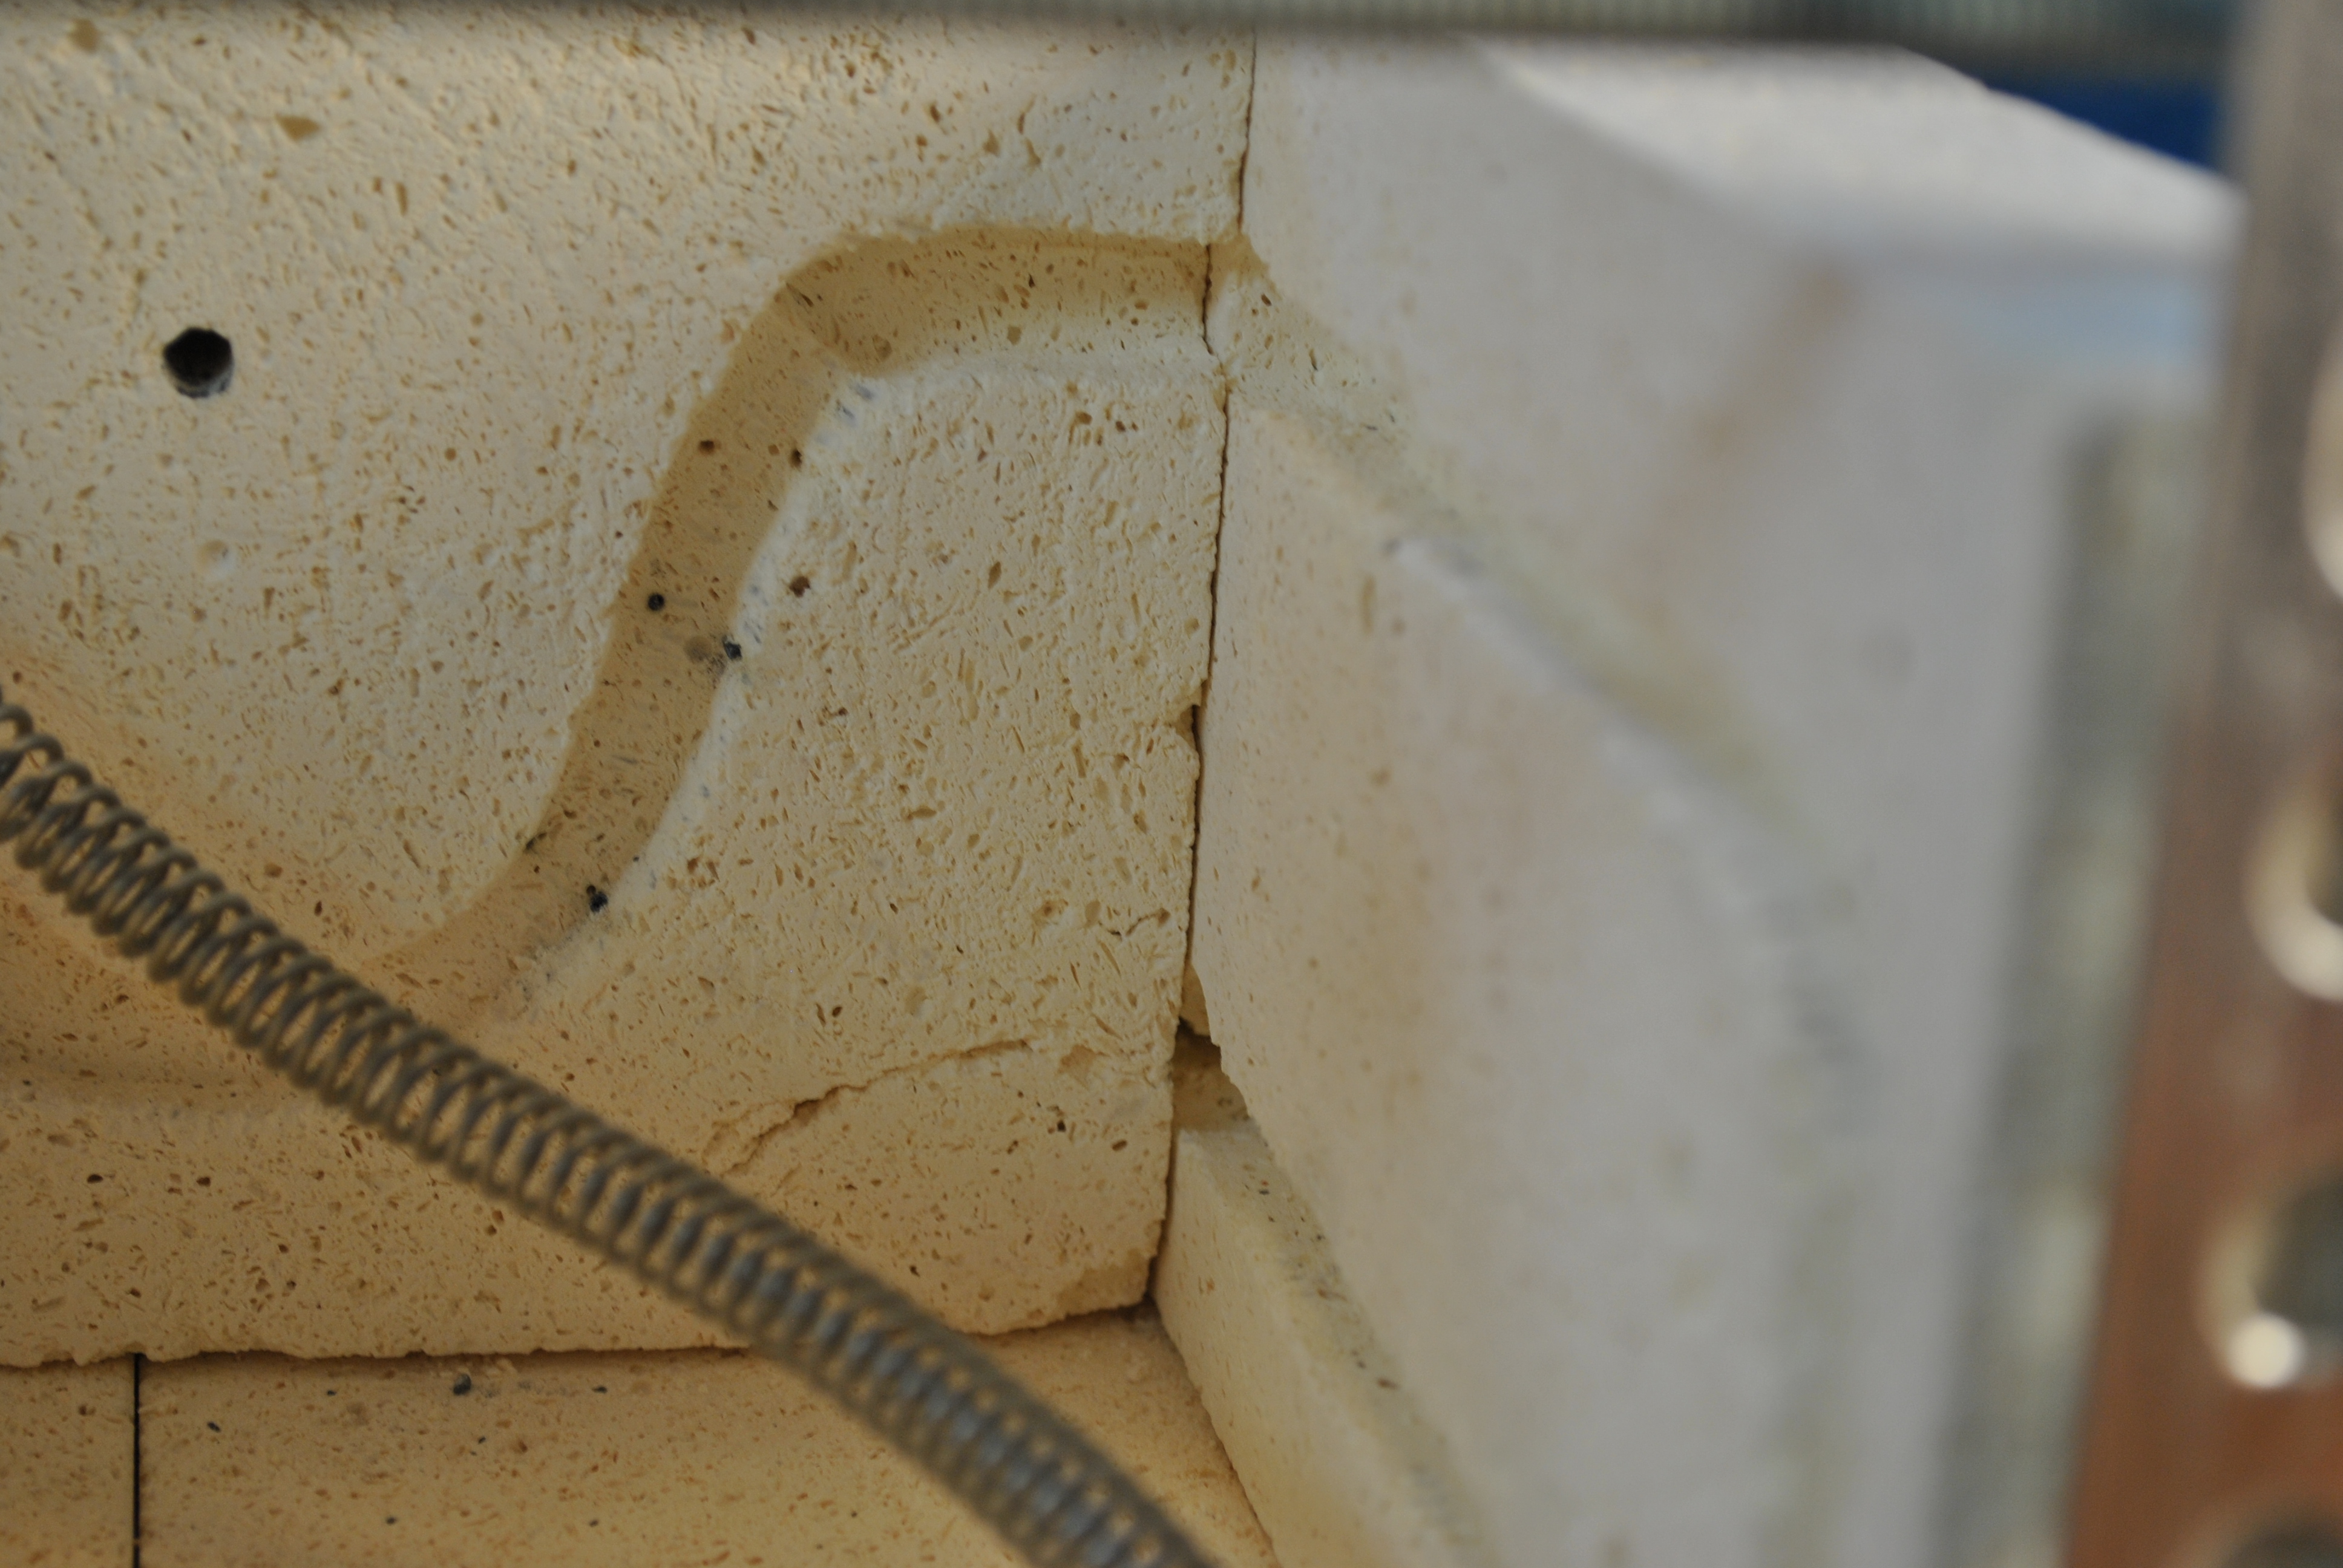
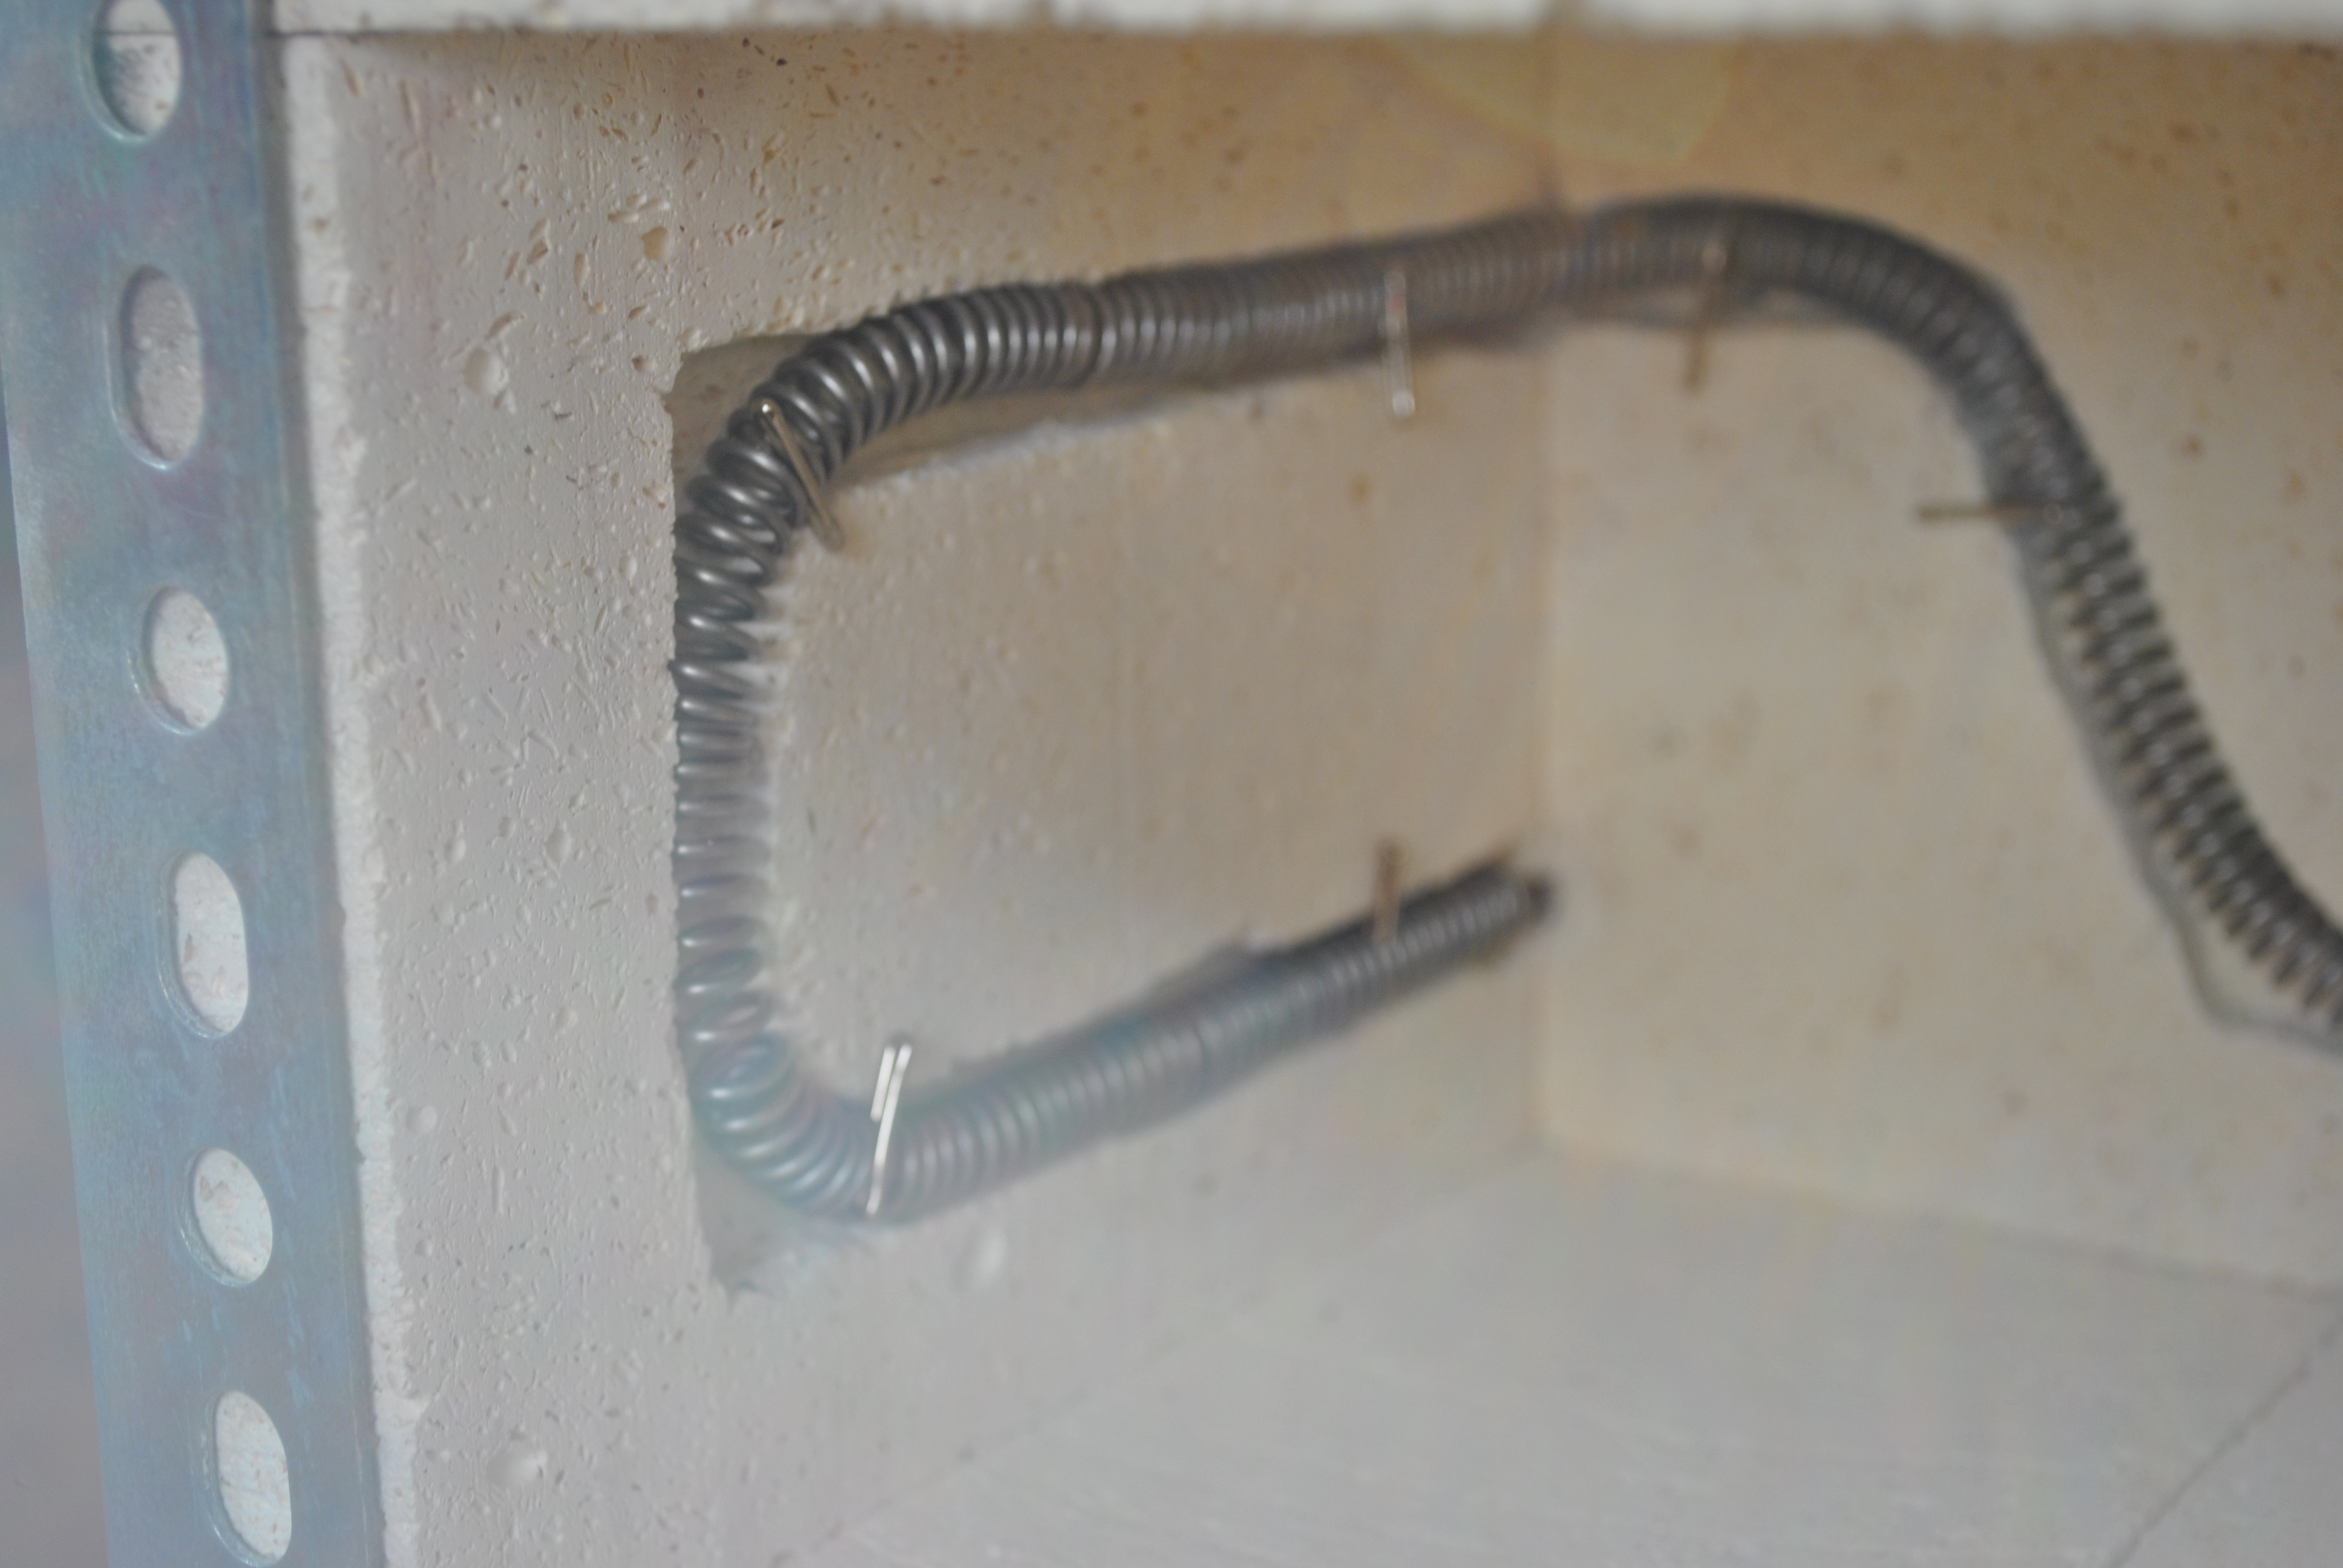
Use angle iron and threaded rods to hold the kiln together. I used a Dremel with a routing attachment to route out the channels for the element, I left two long straight sections of wire that poke out through the back (be sure they are not touching the metal frame or you will short out the system.) That small hole in the back brick is where the thermocouple will poke through. I suggest you only let a couple mm of the probe stick through to keep it from oxidizing and melting (it gets hot in the kiln!).
The threaded rod along the top here is installed temporarily, see below for the final configuration.
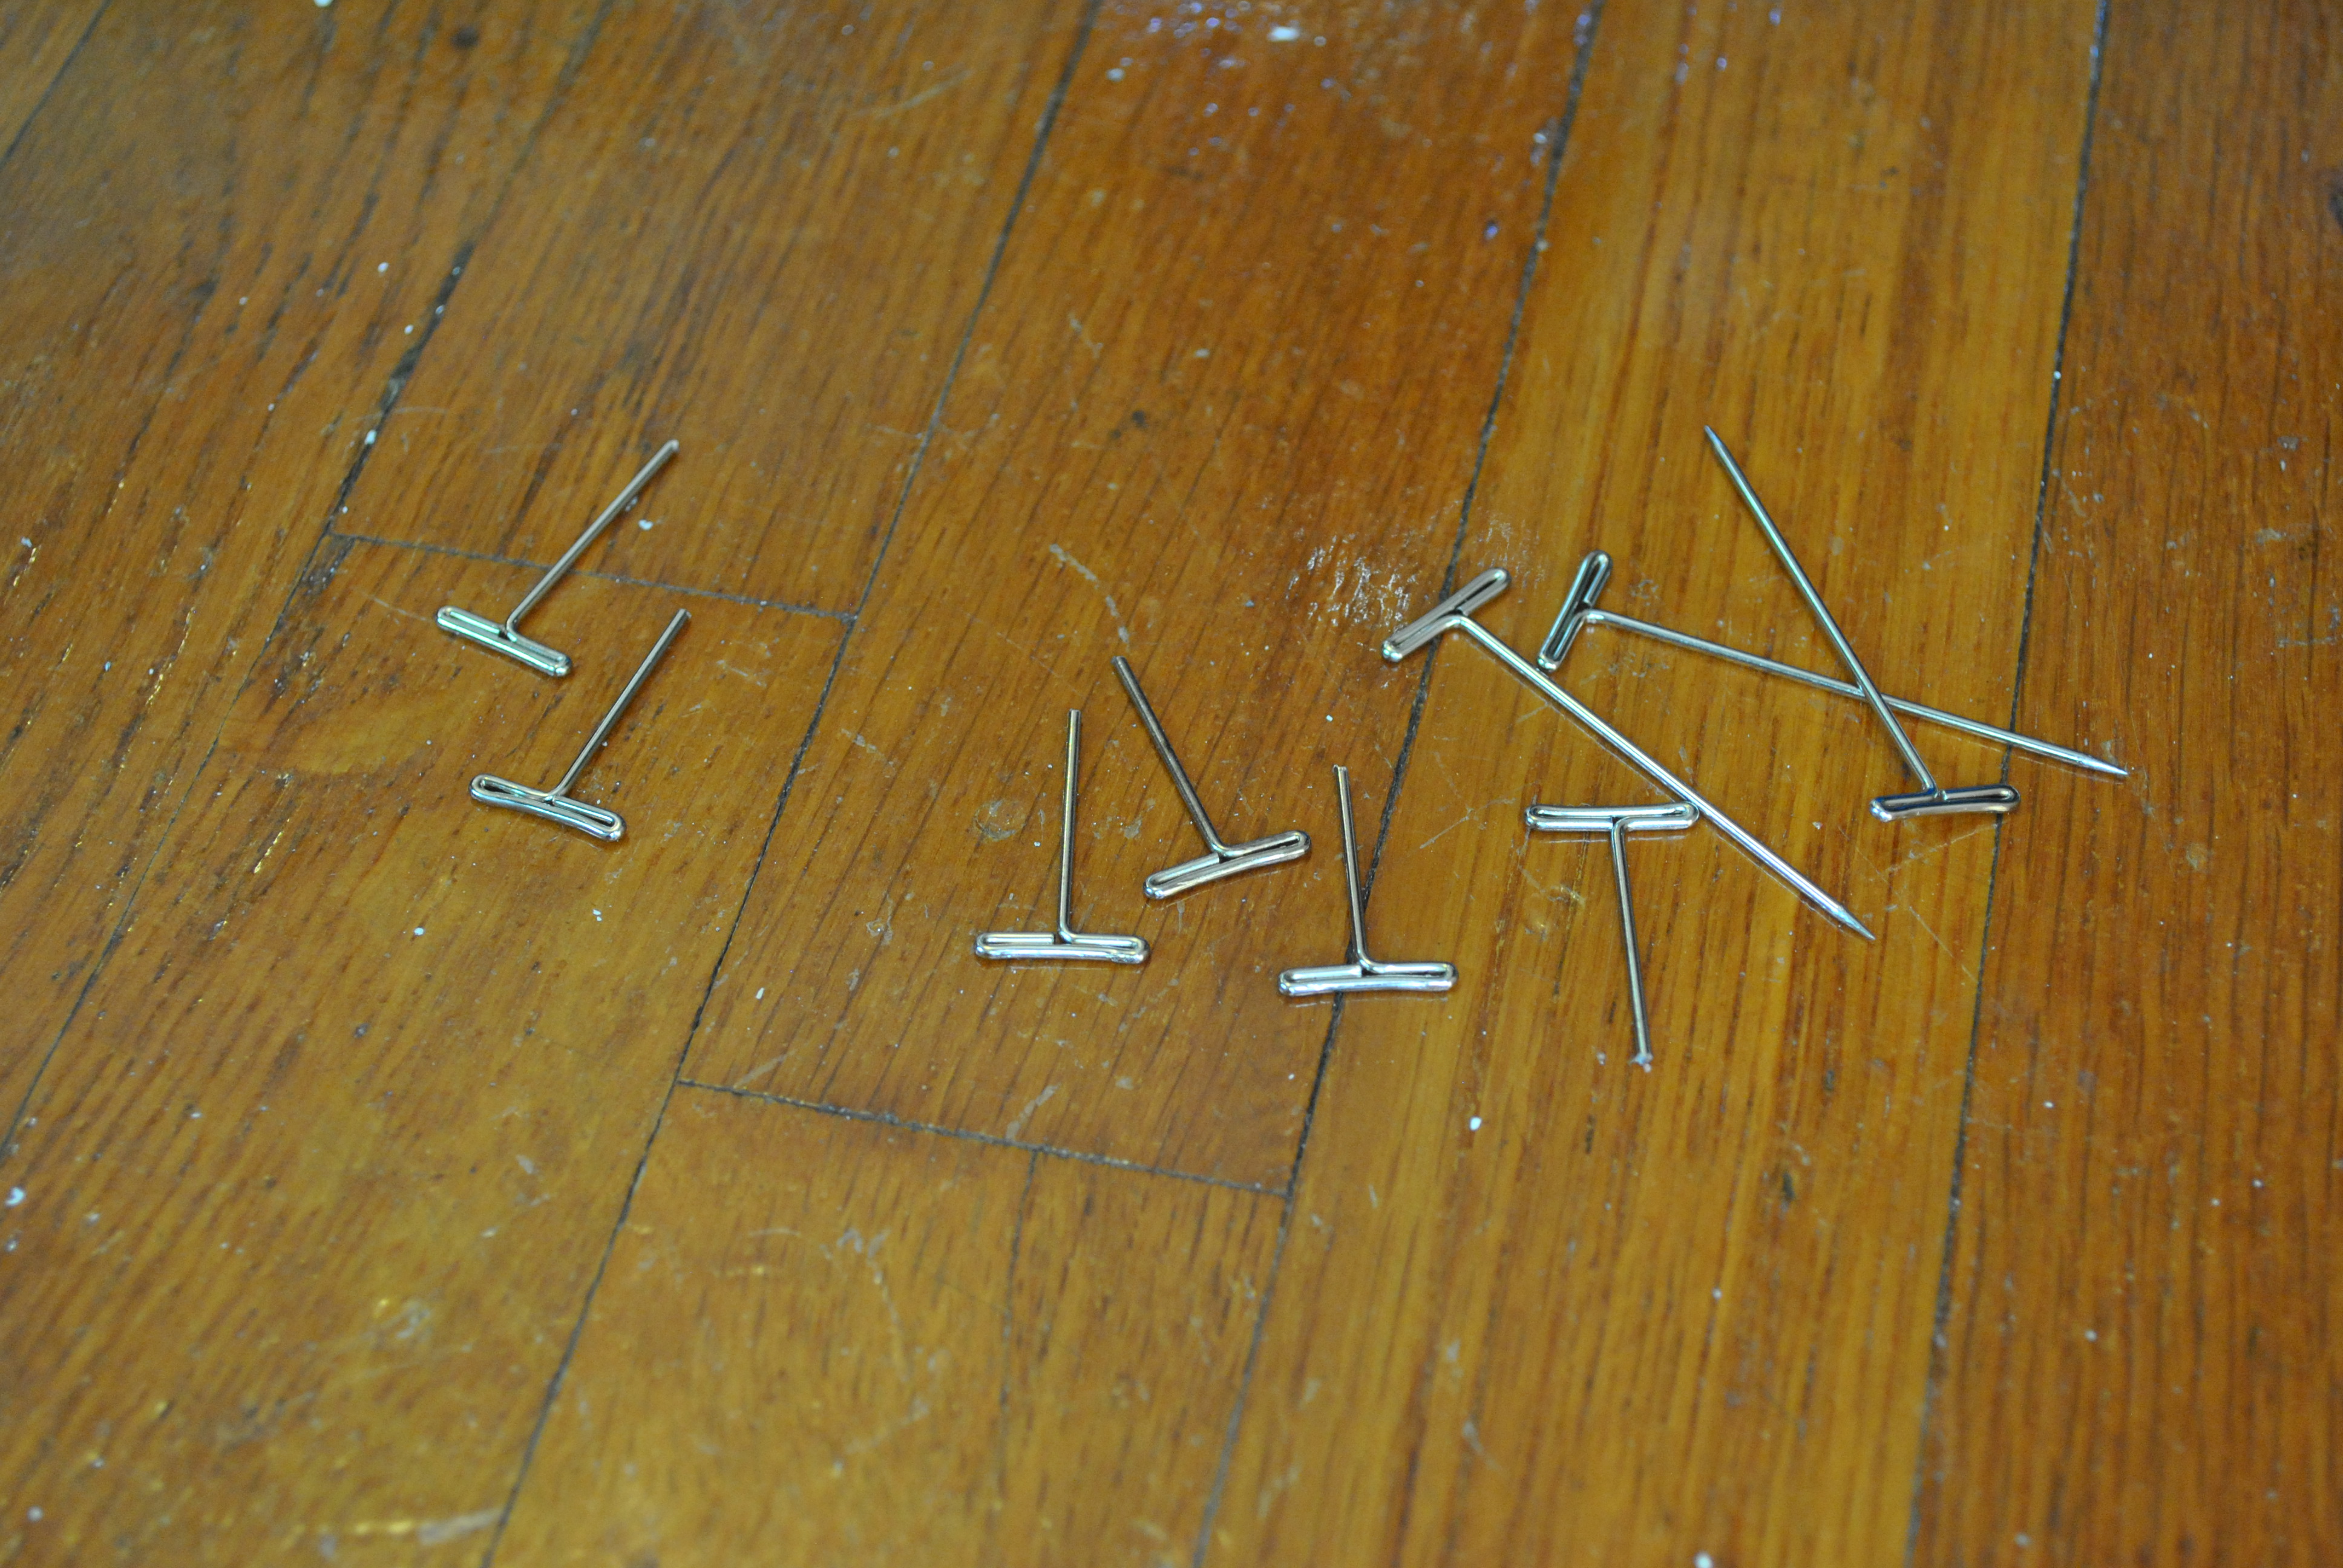
Once the element is placed in the kiln you will need to pin it down to keep it from moving when it heats up (hot things expand). I used stee “T” pins with the end cut off, they seem to work well.
Use more than you think you will need, the element will move a lot.
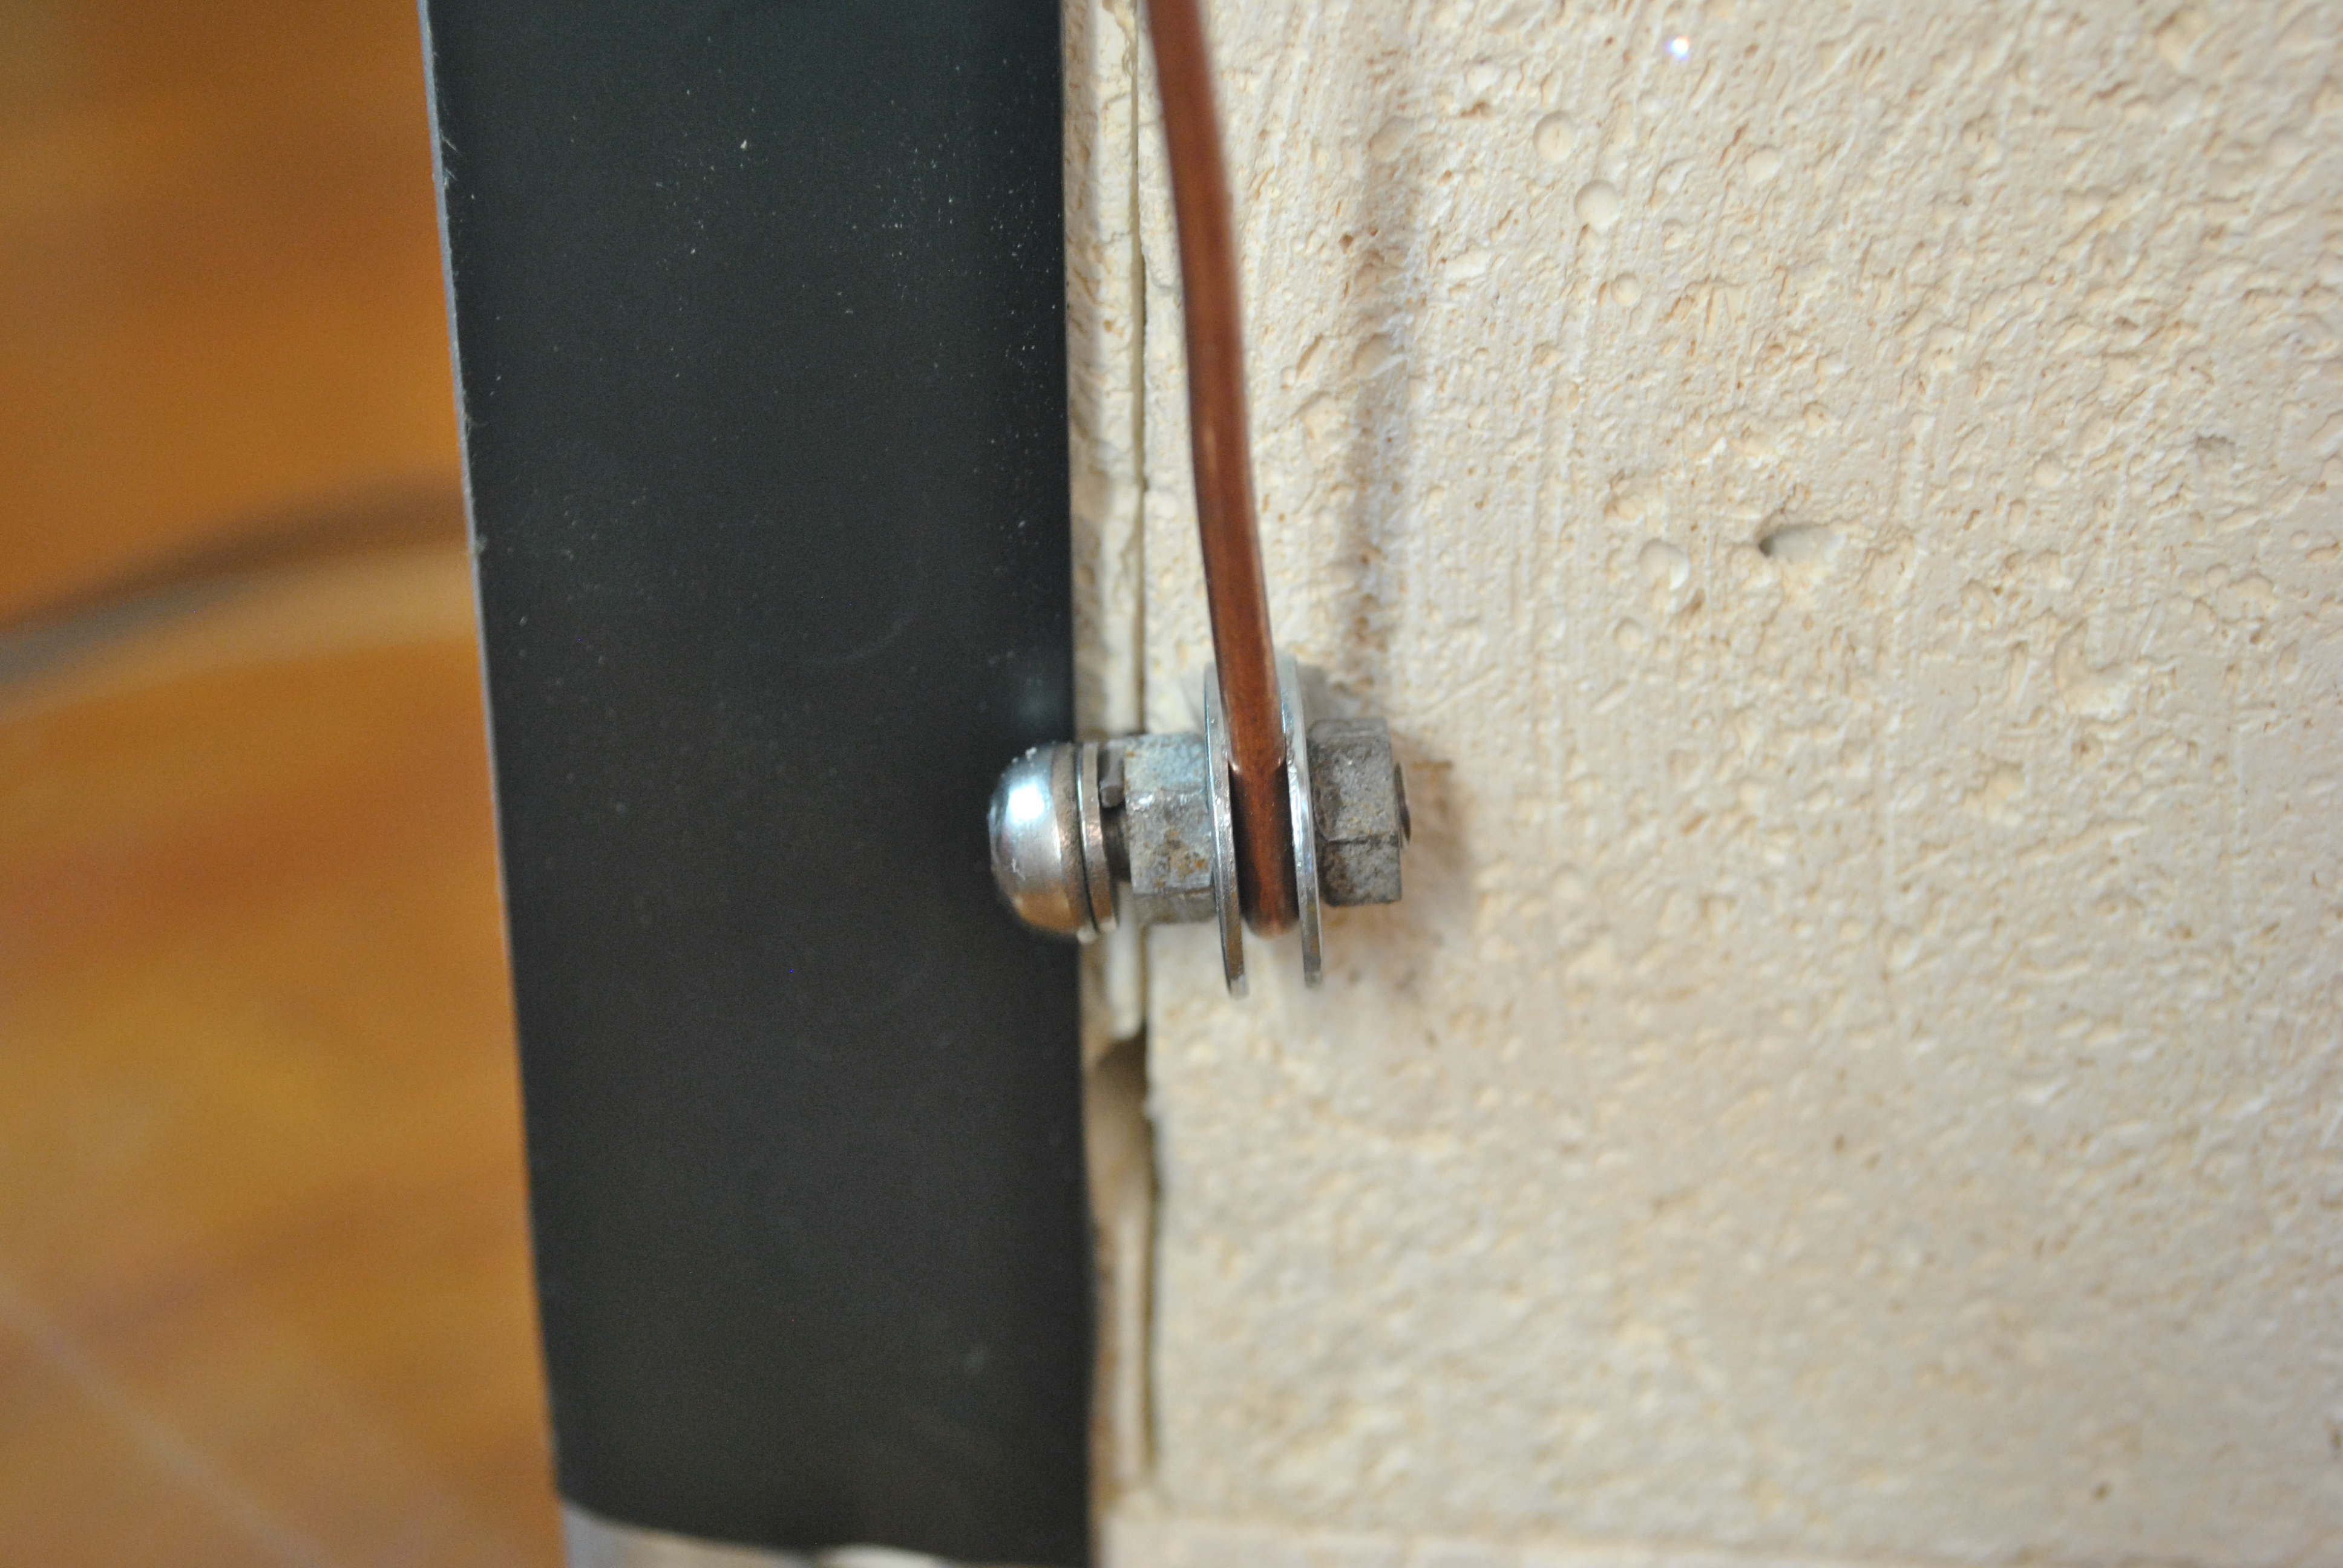
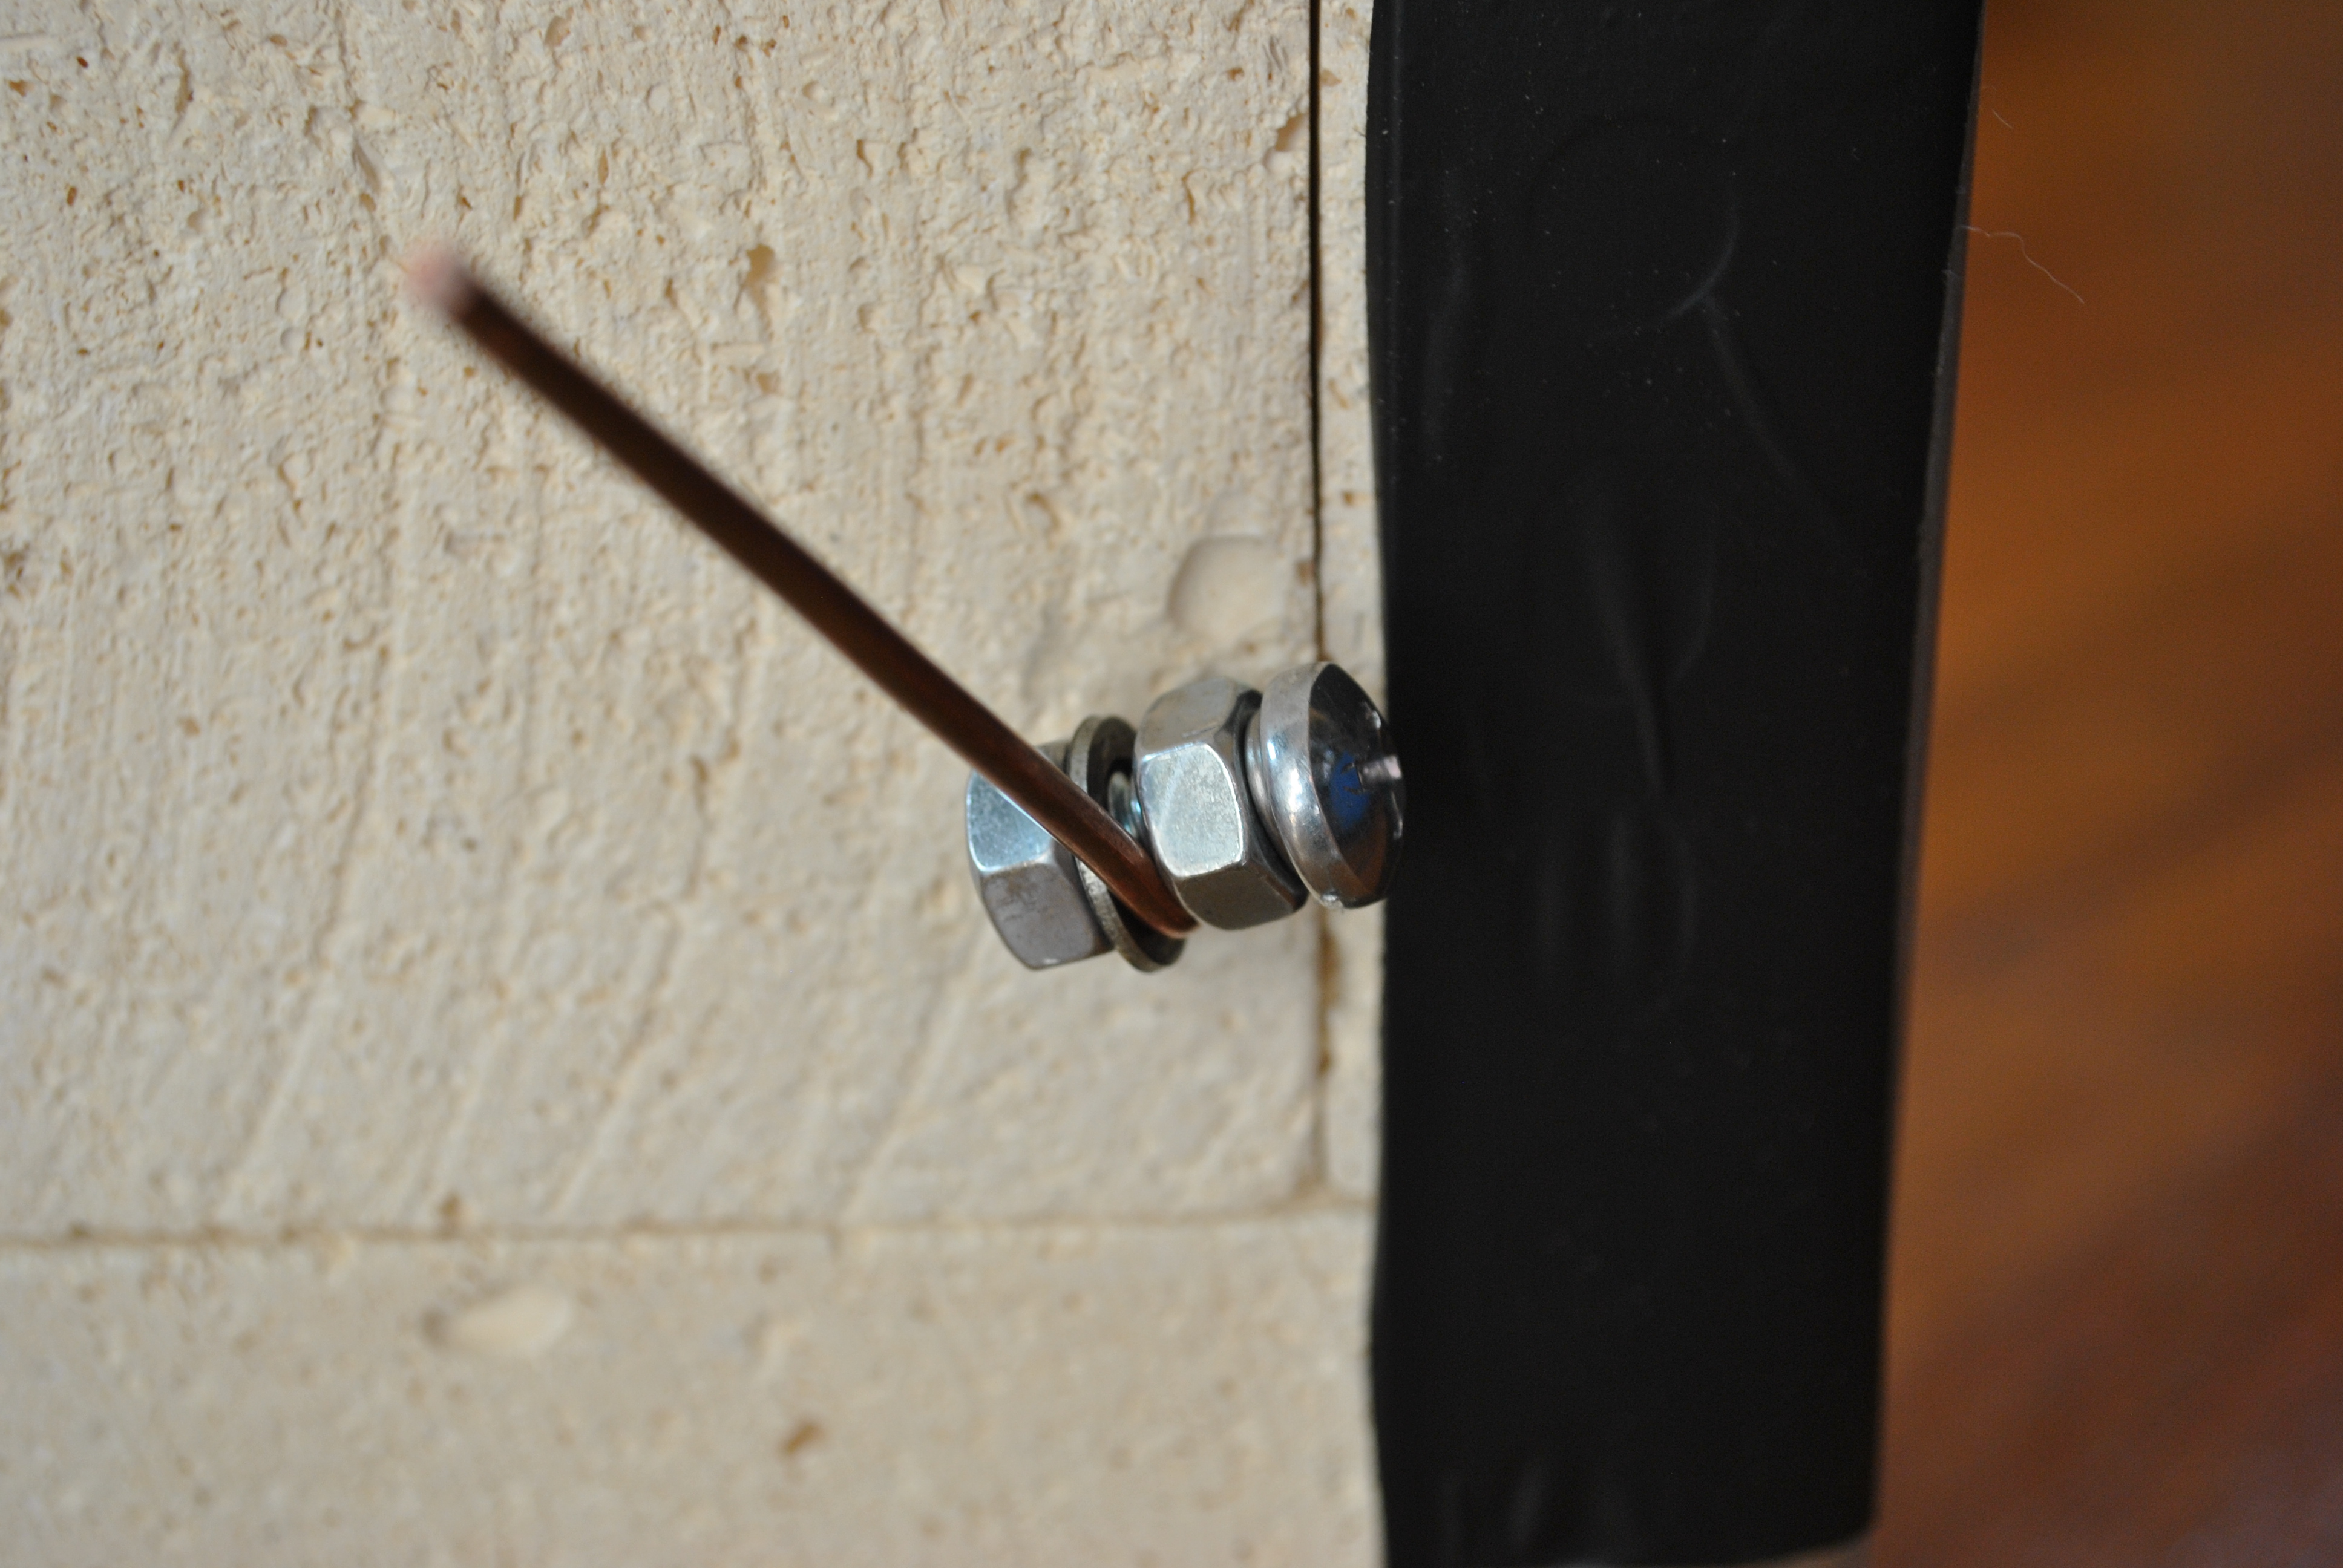
The connectors for the back, the Kanthal Wire connects to one side of the bolt, and the copper to the other, this helps to keep that connection cool. I used a big thick piece of copper wire here, because these ends of the resistance wire get very hot, so having something that can take the heat is nice. The wire leads will connect to the very end of the copper rod, which by then has cooled enough to connect the insulated wire to.
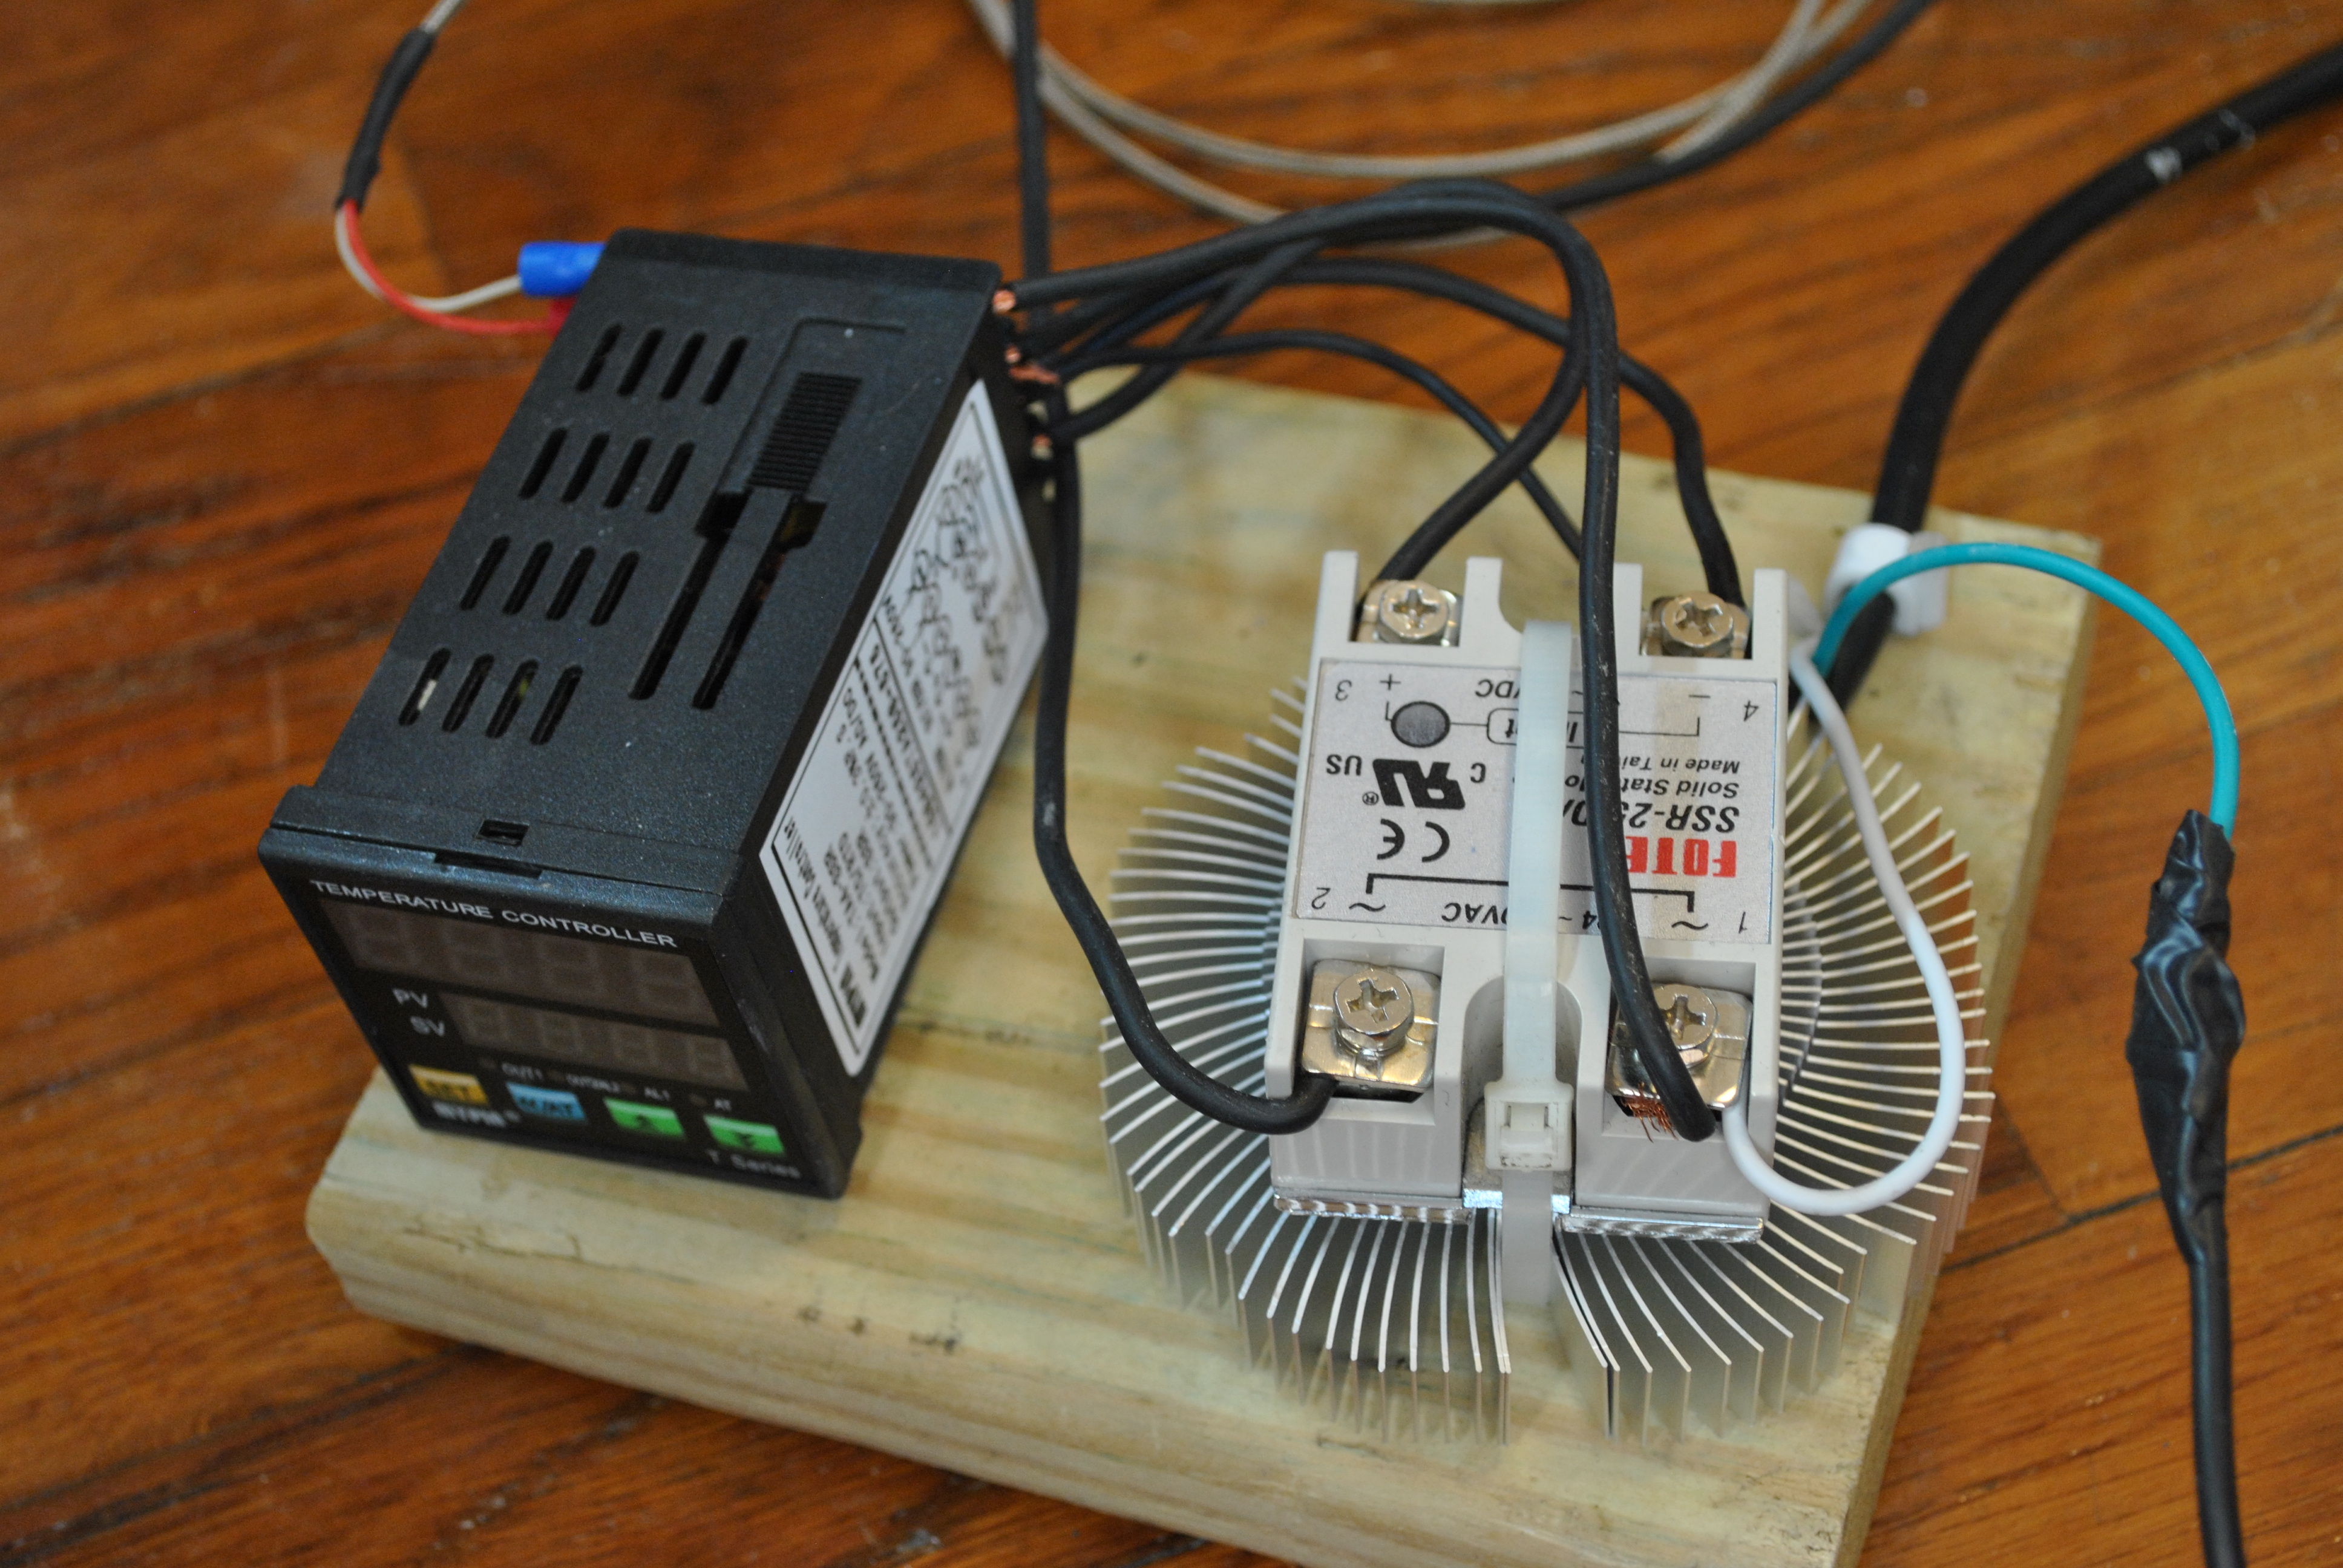
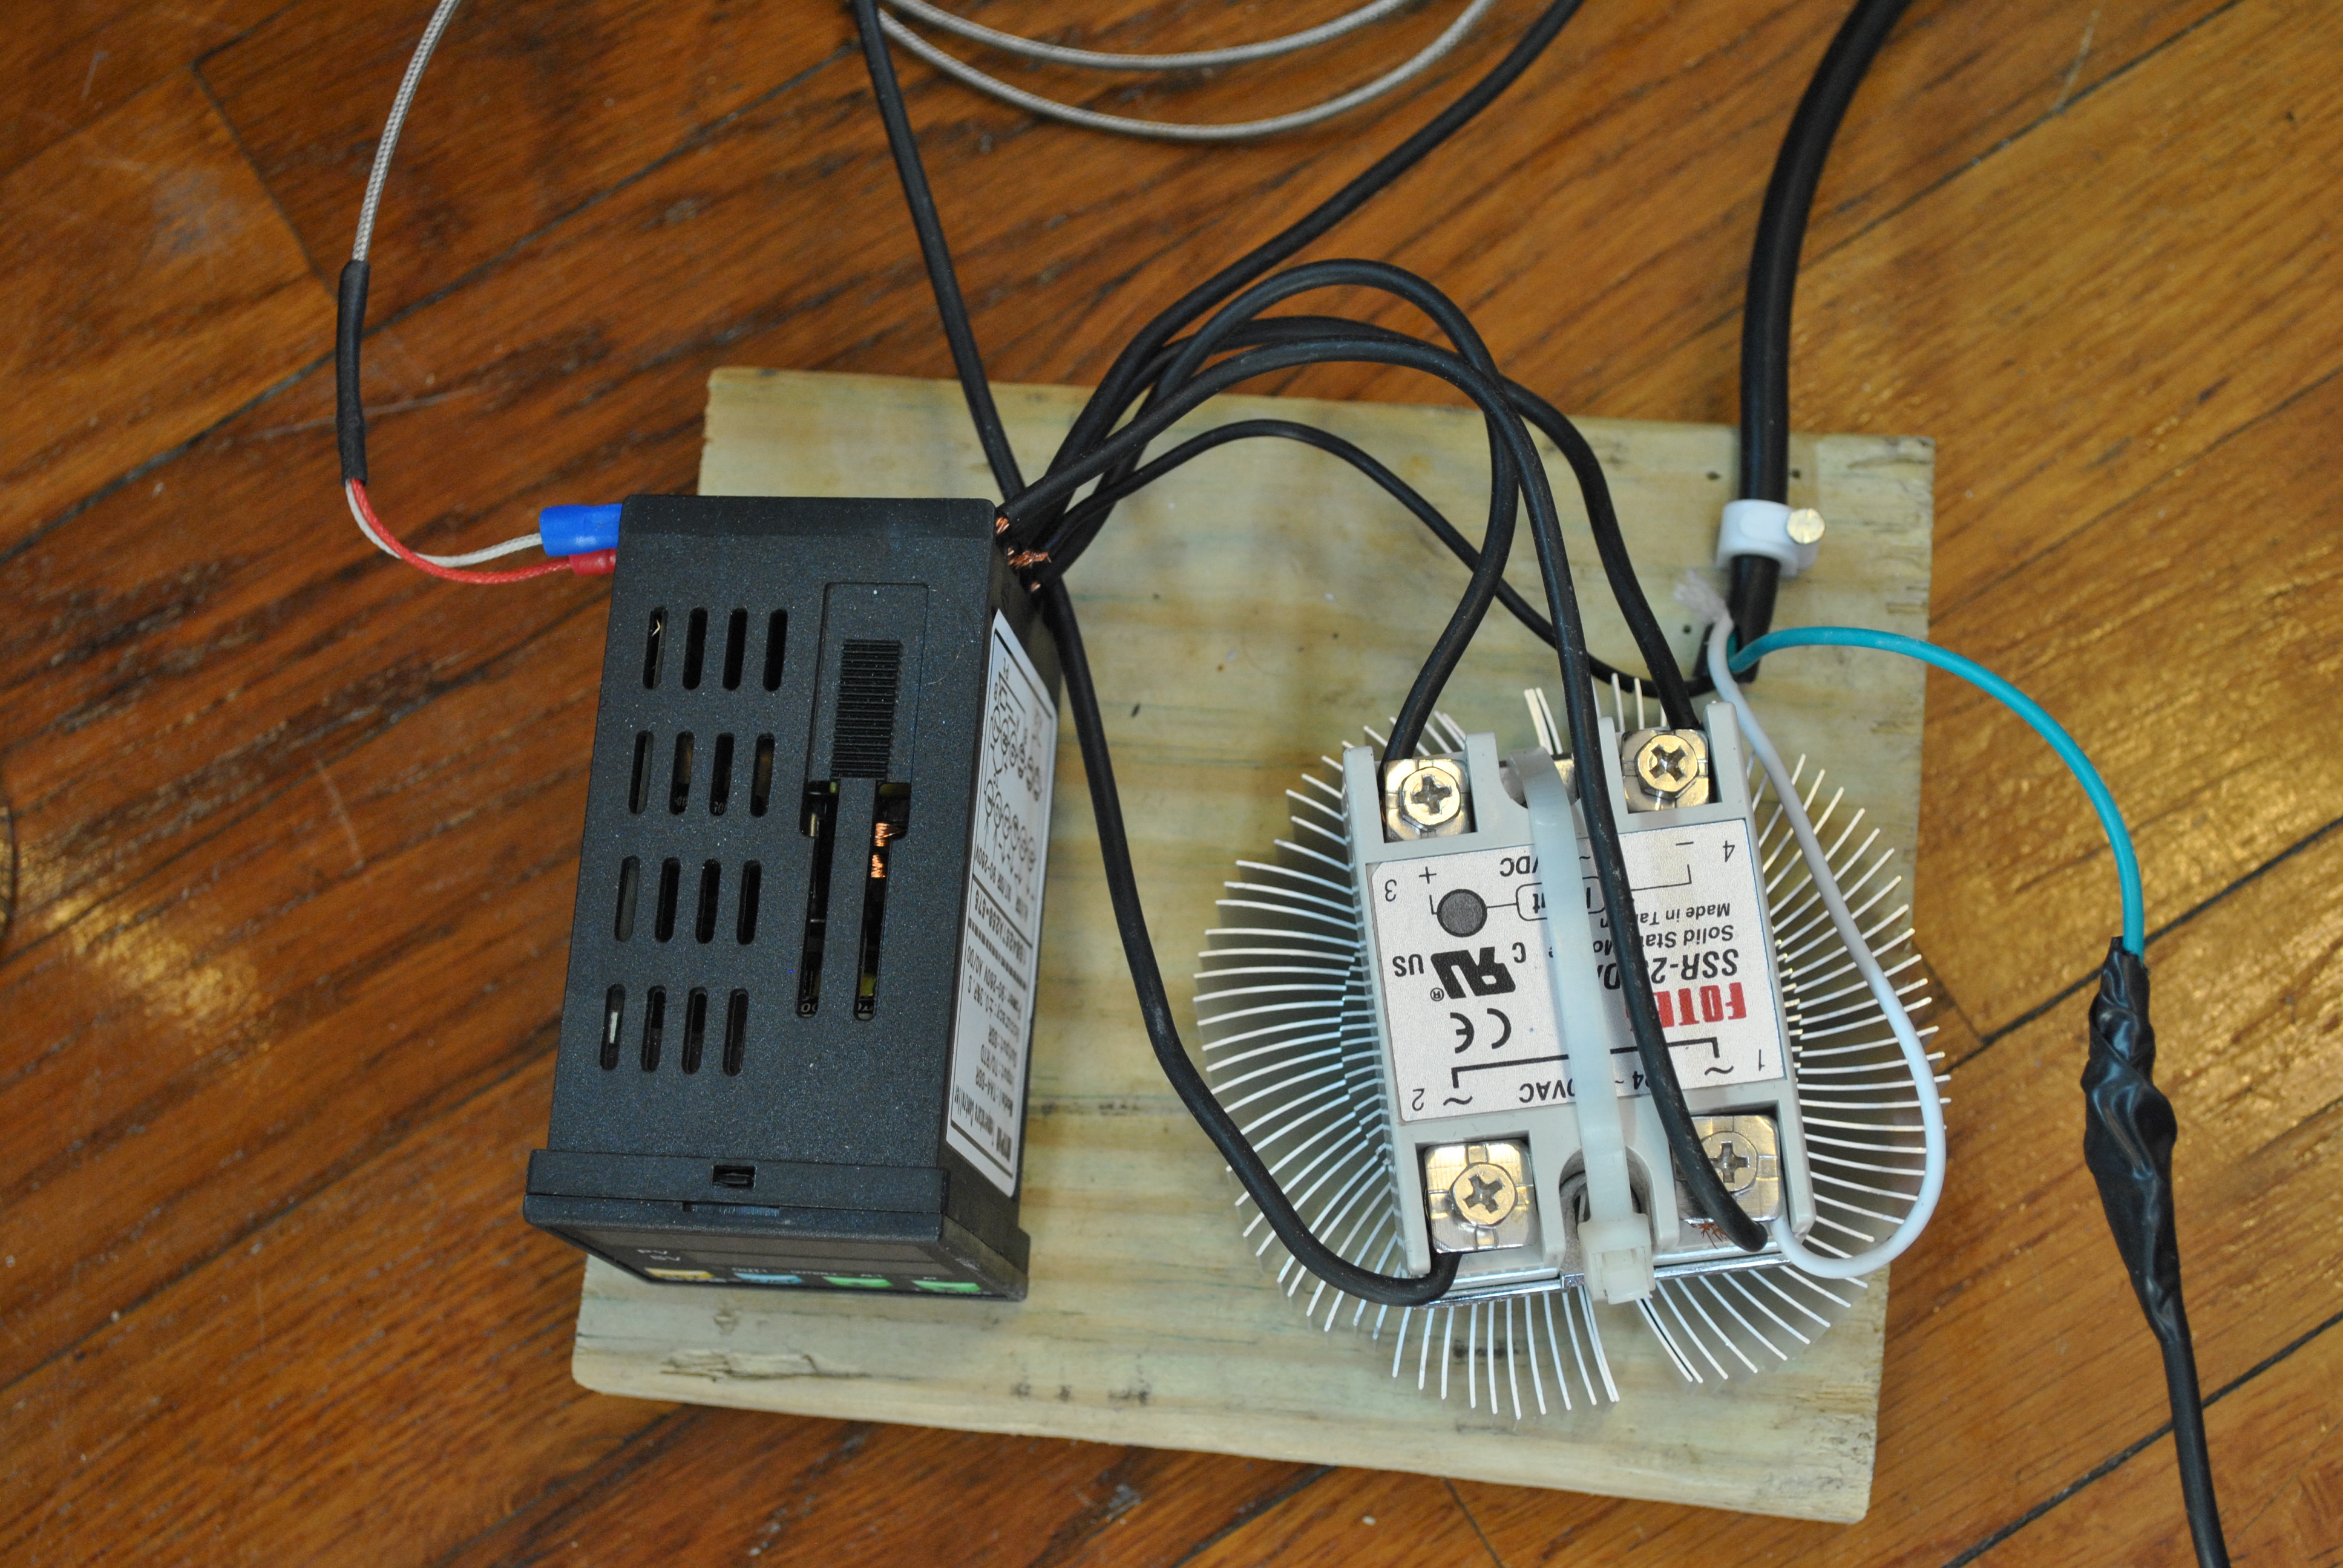
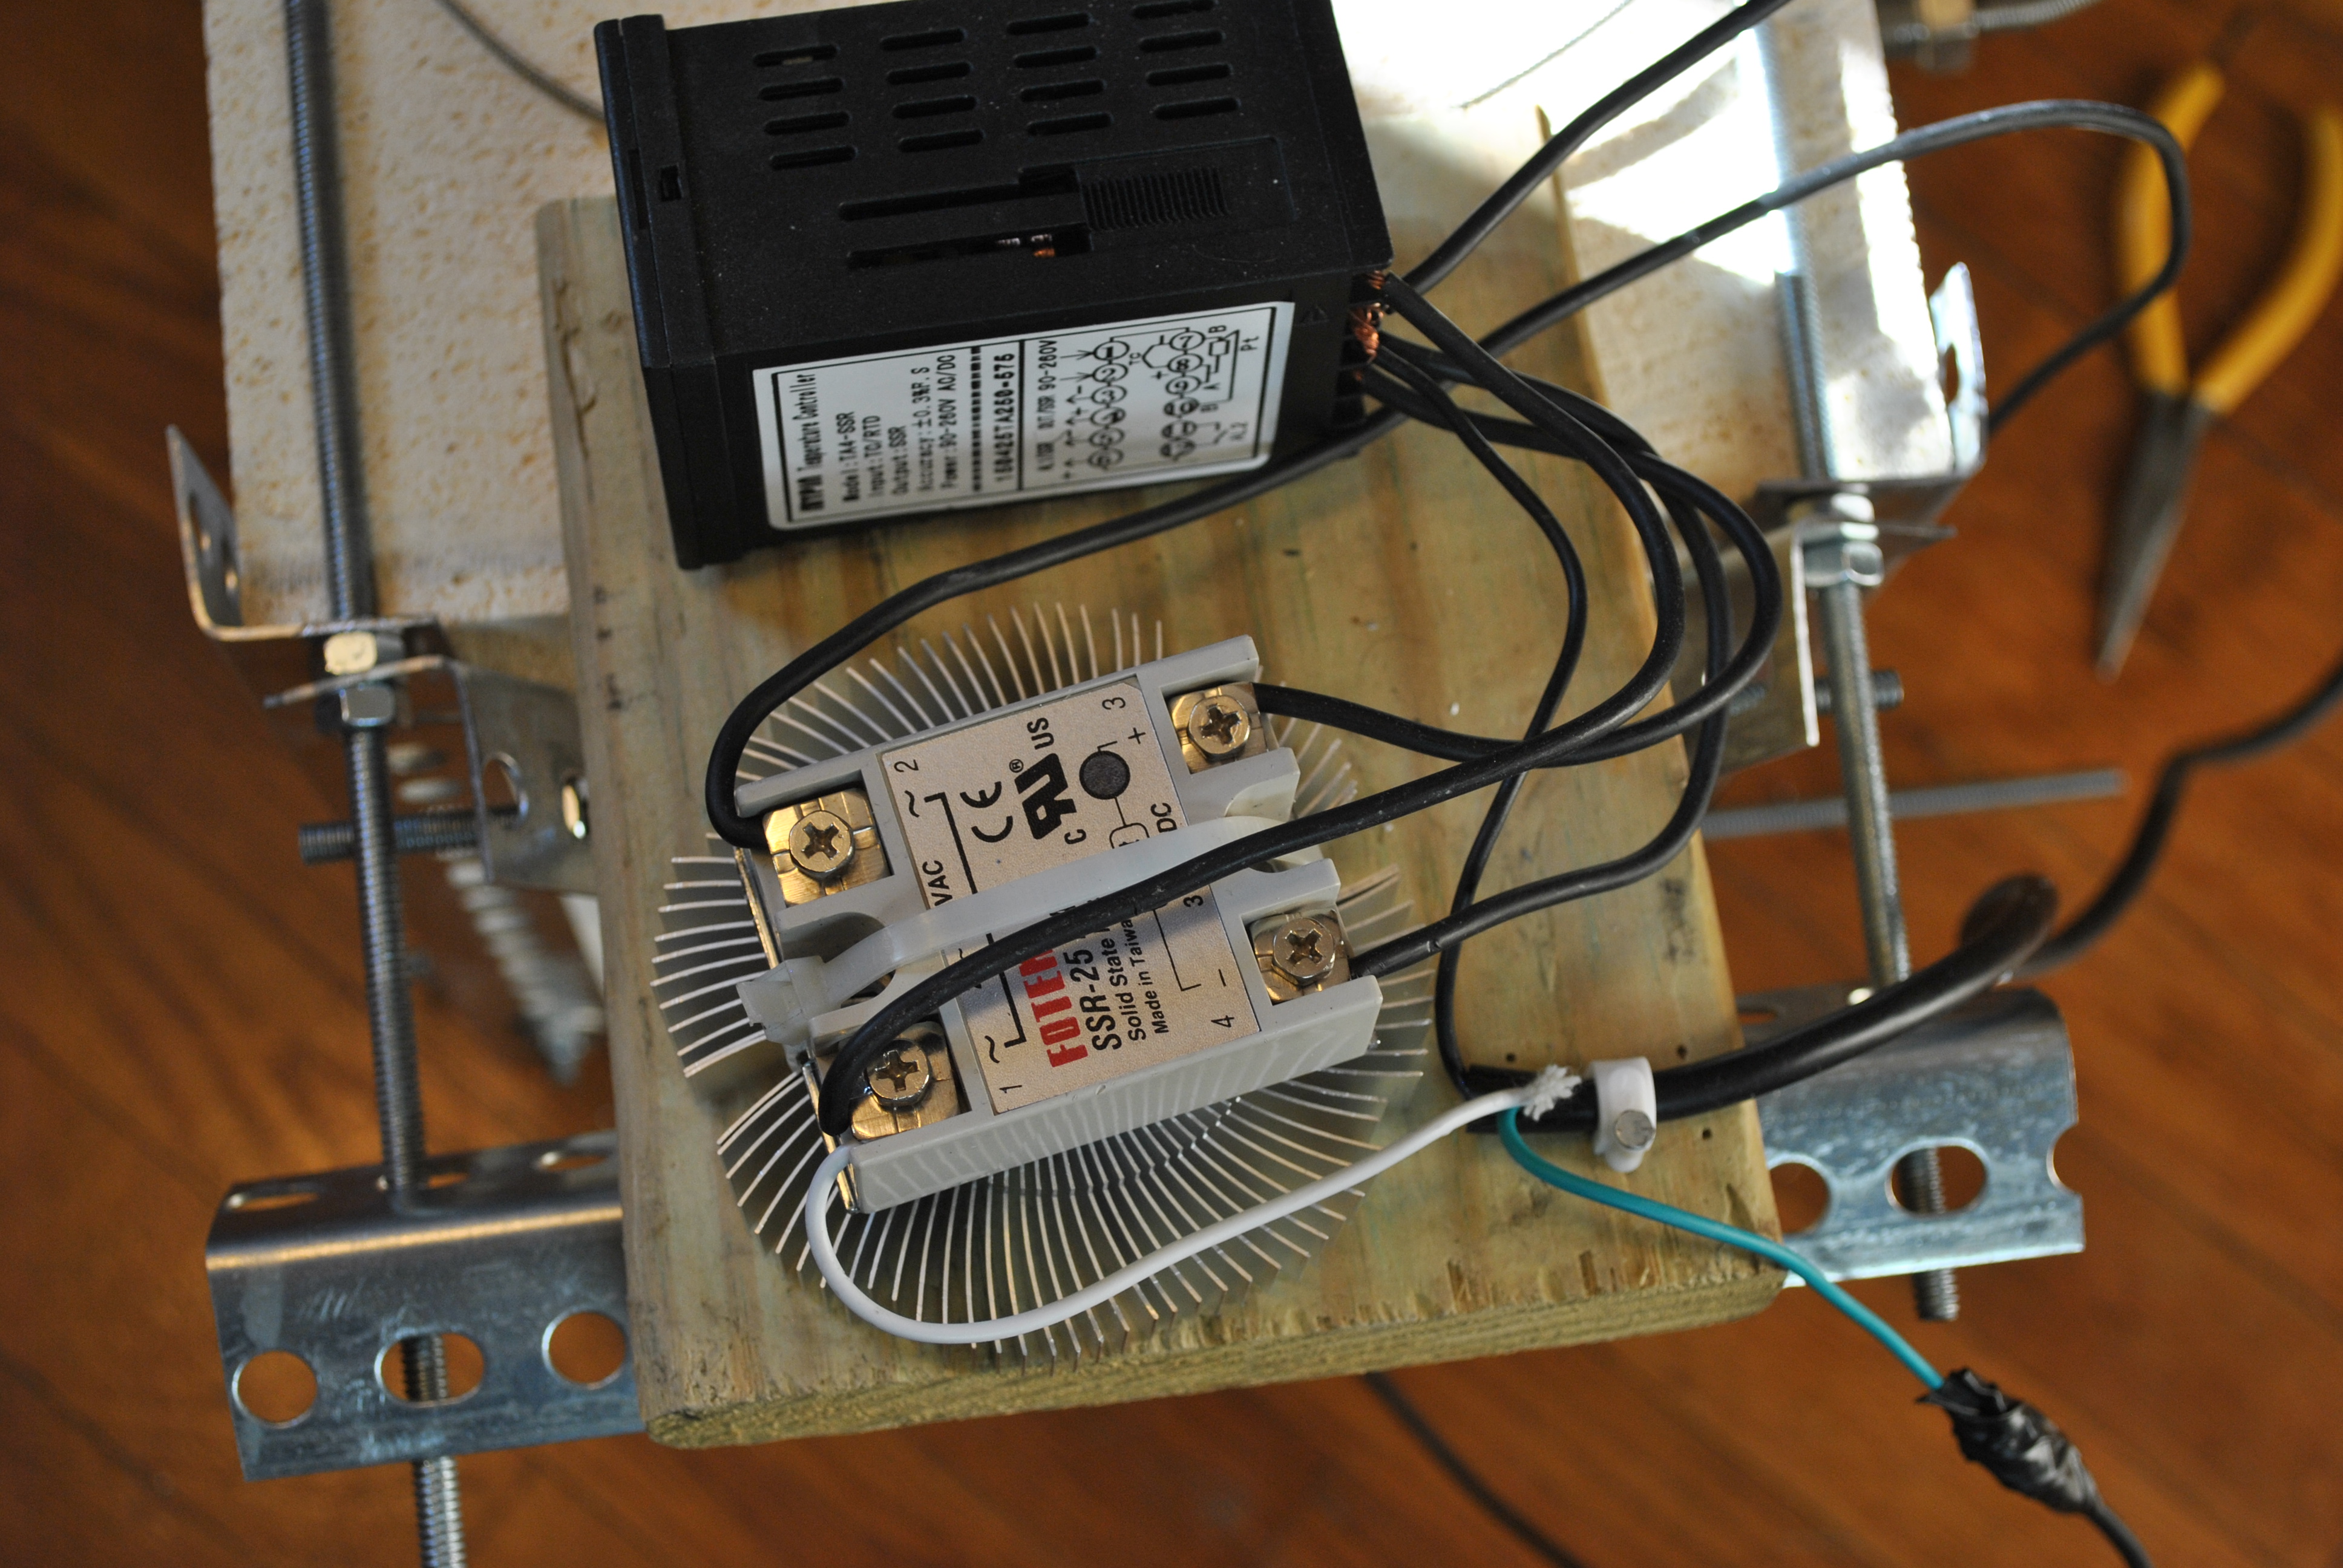
The Electronic Temperature Controller:
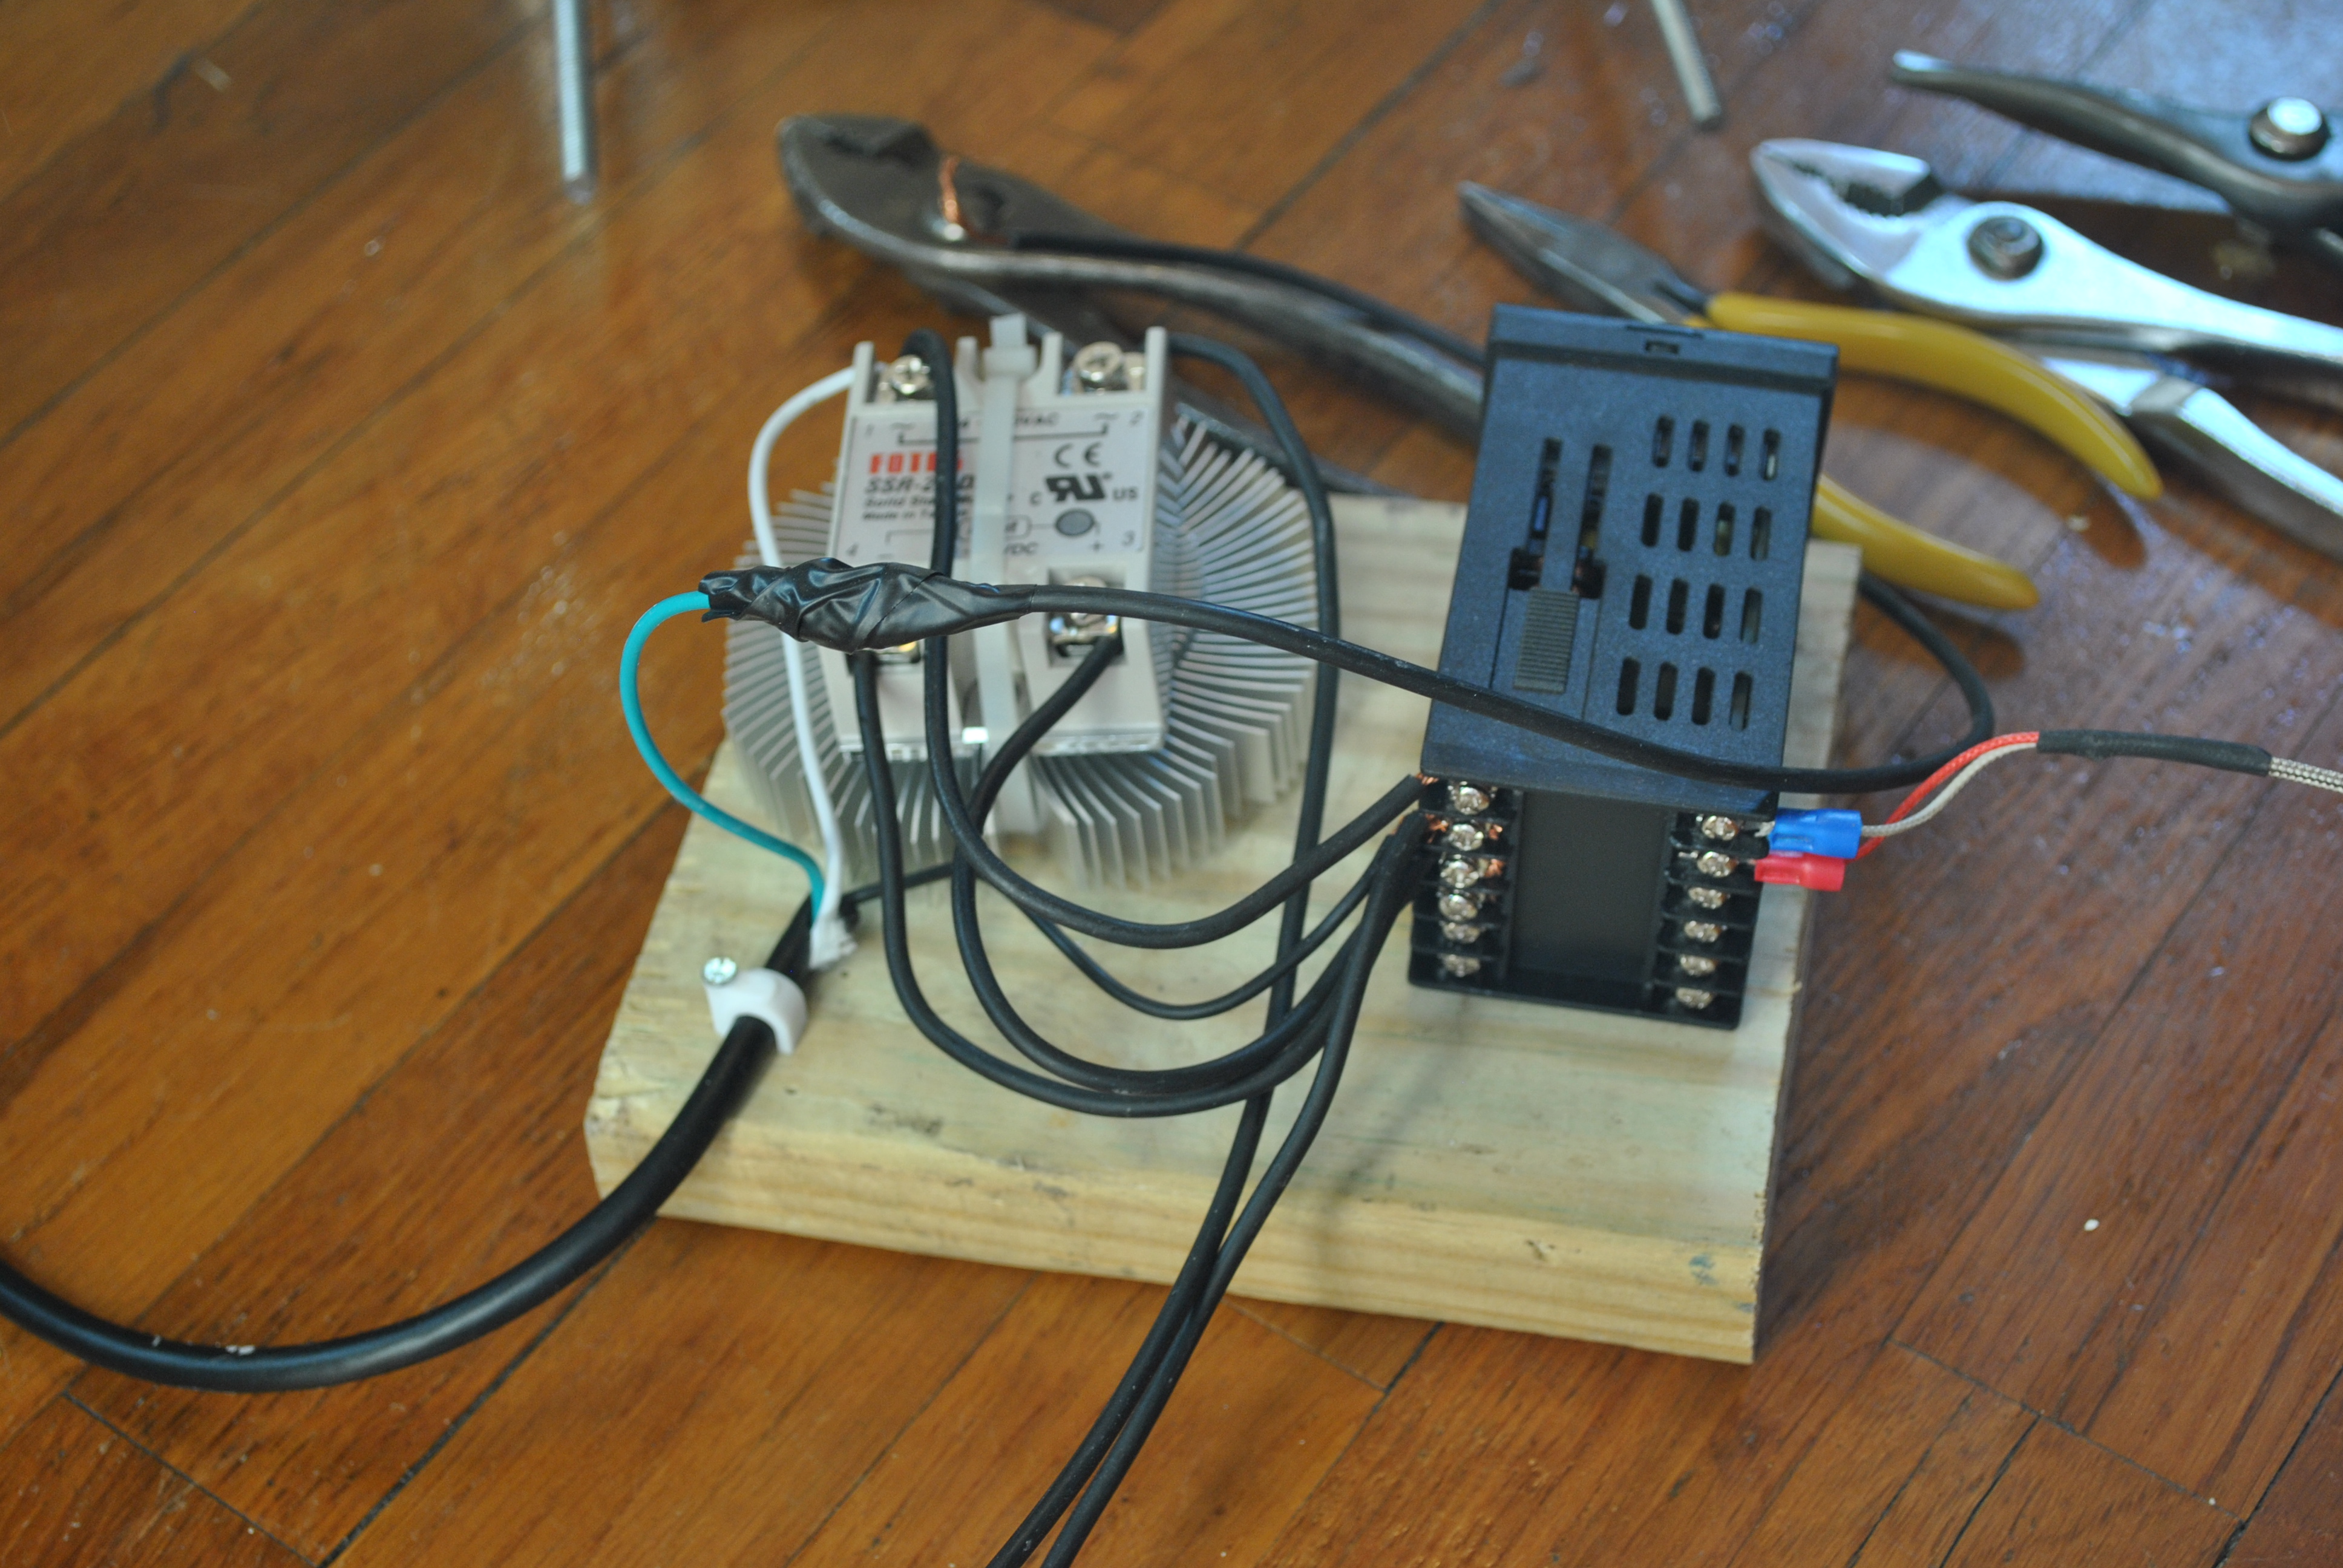
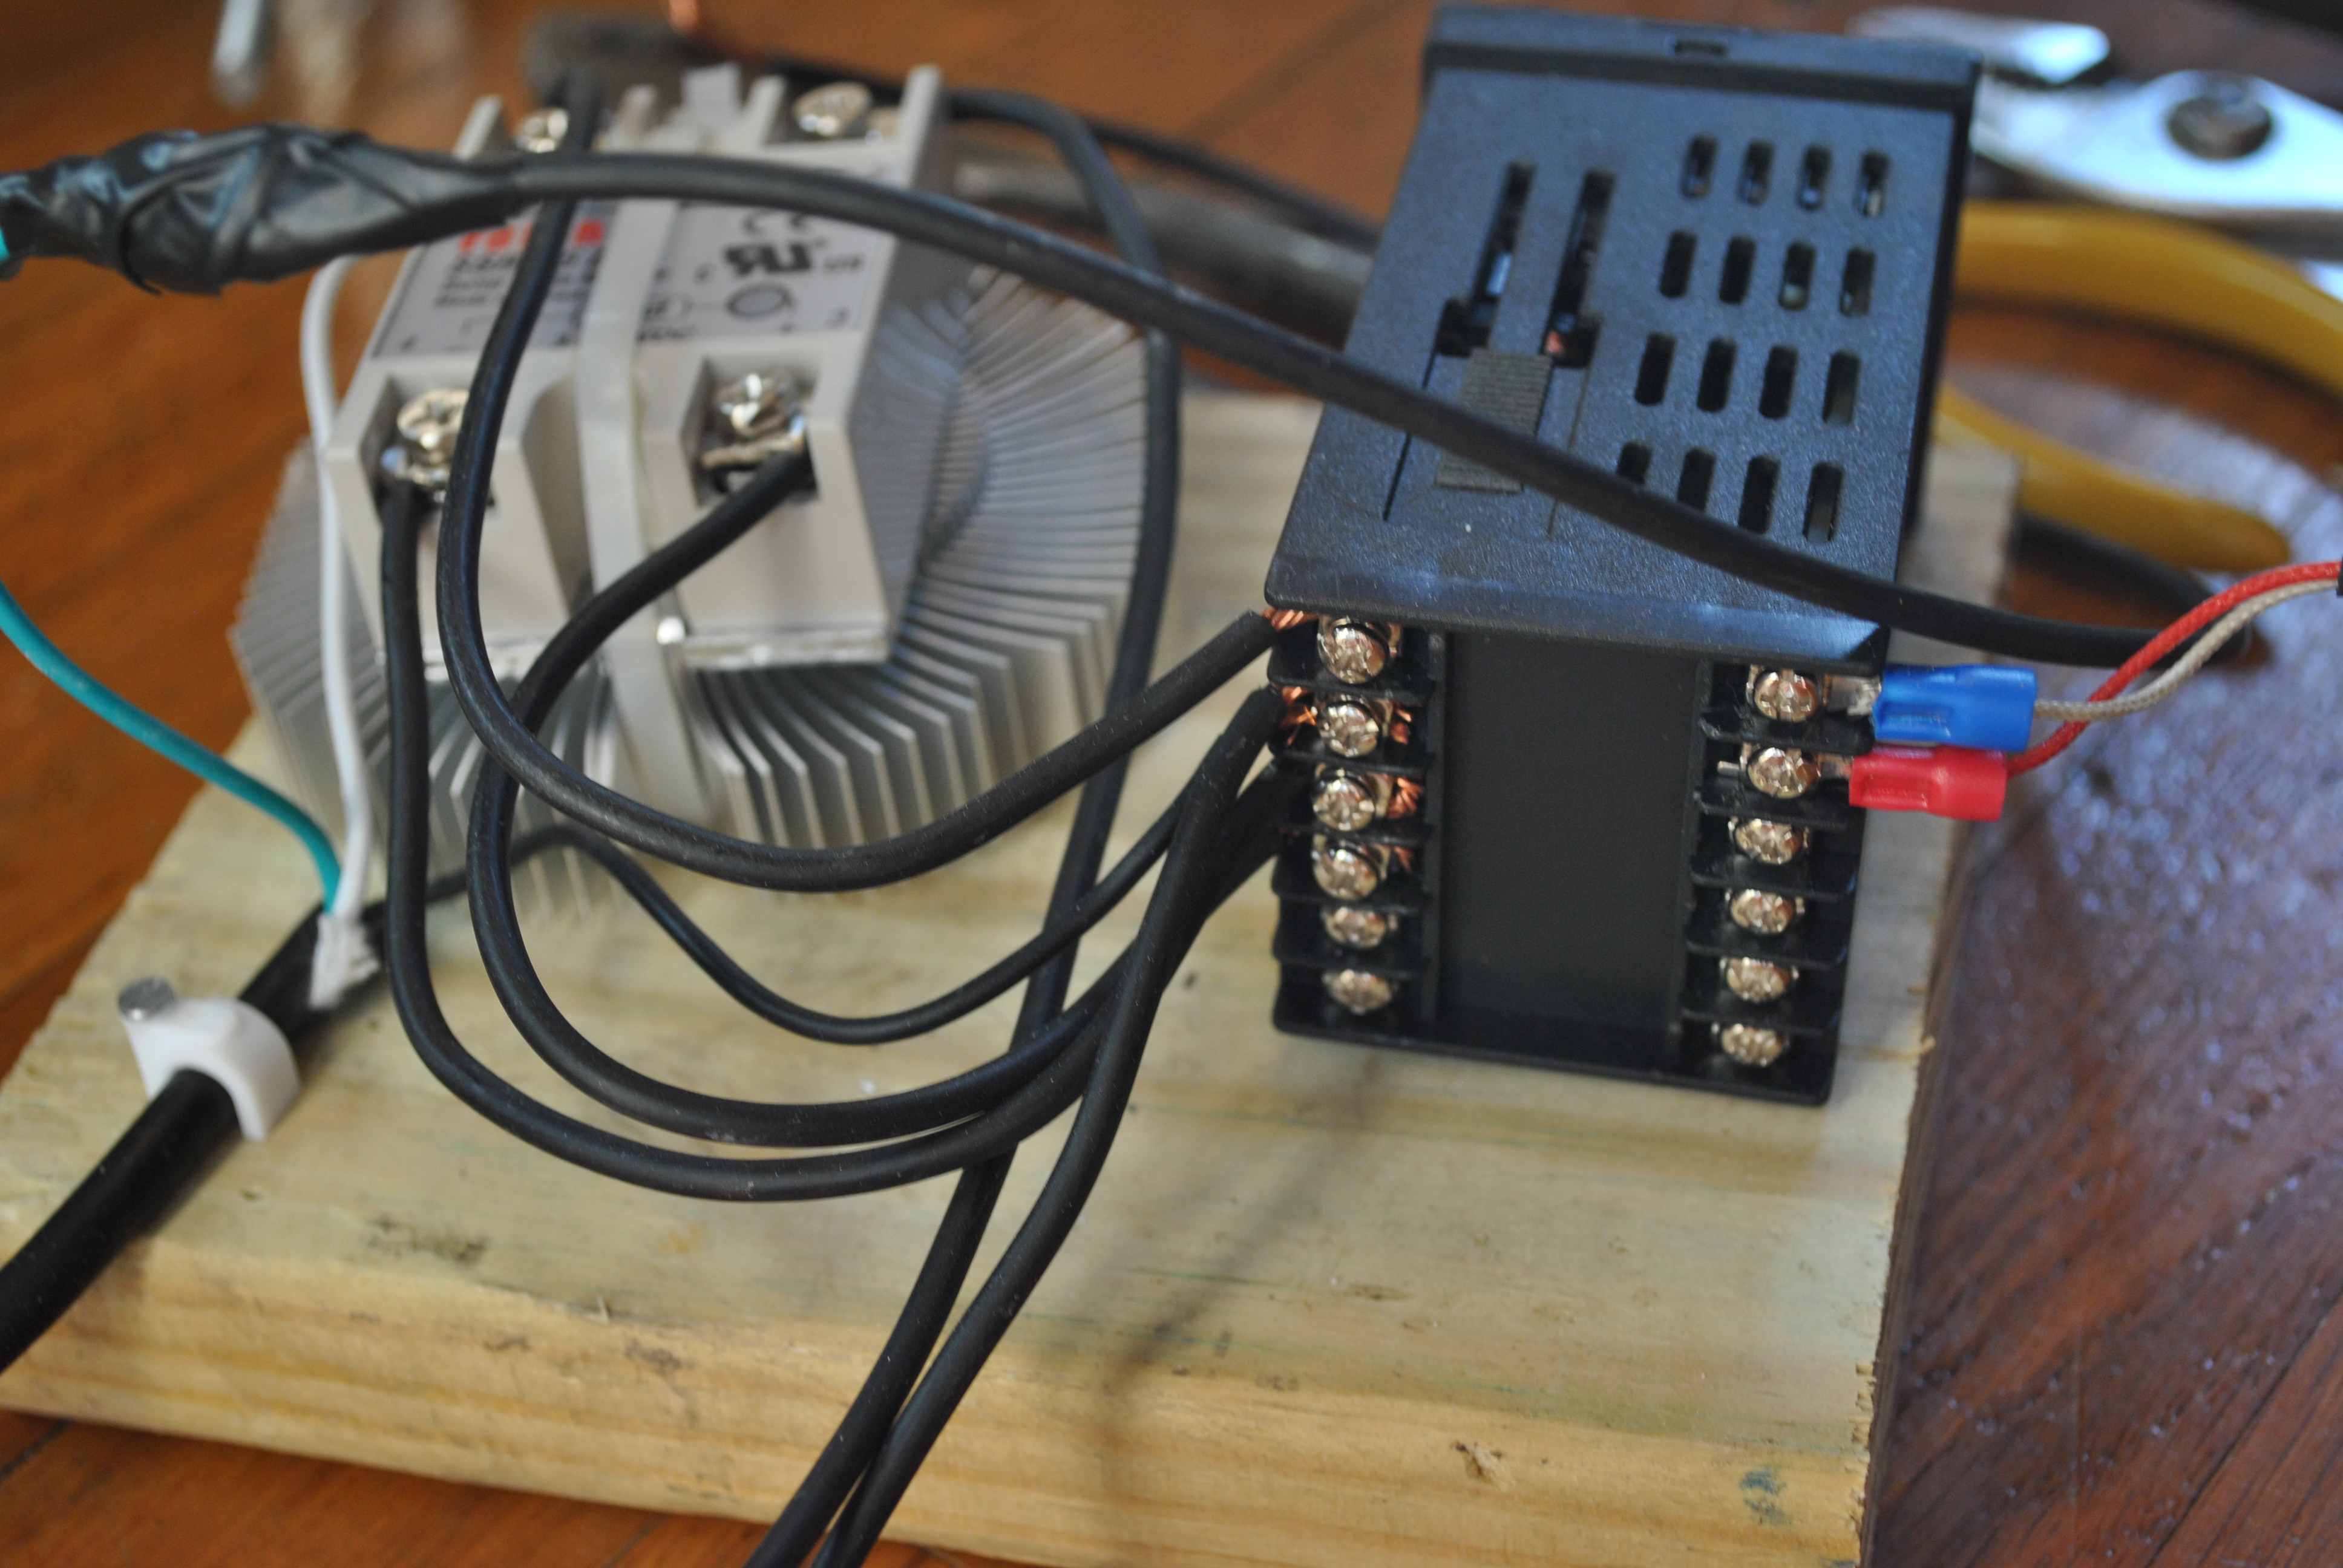
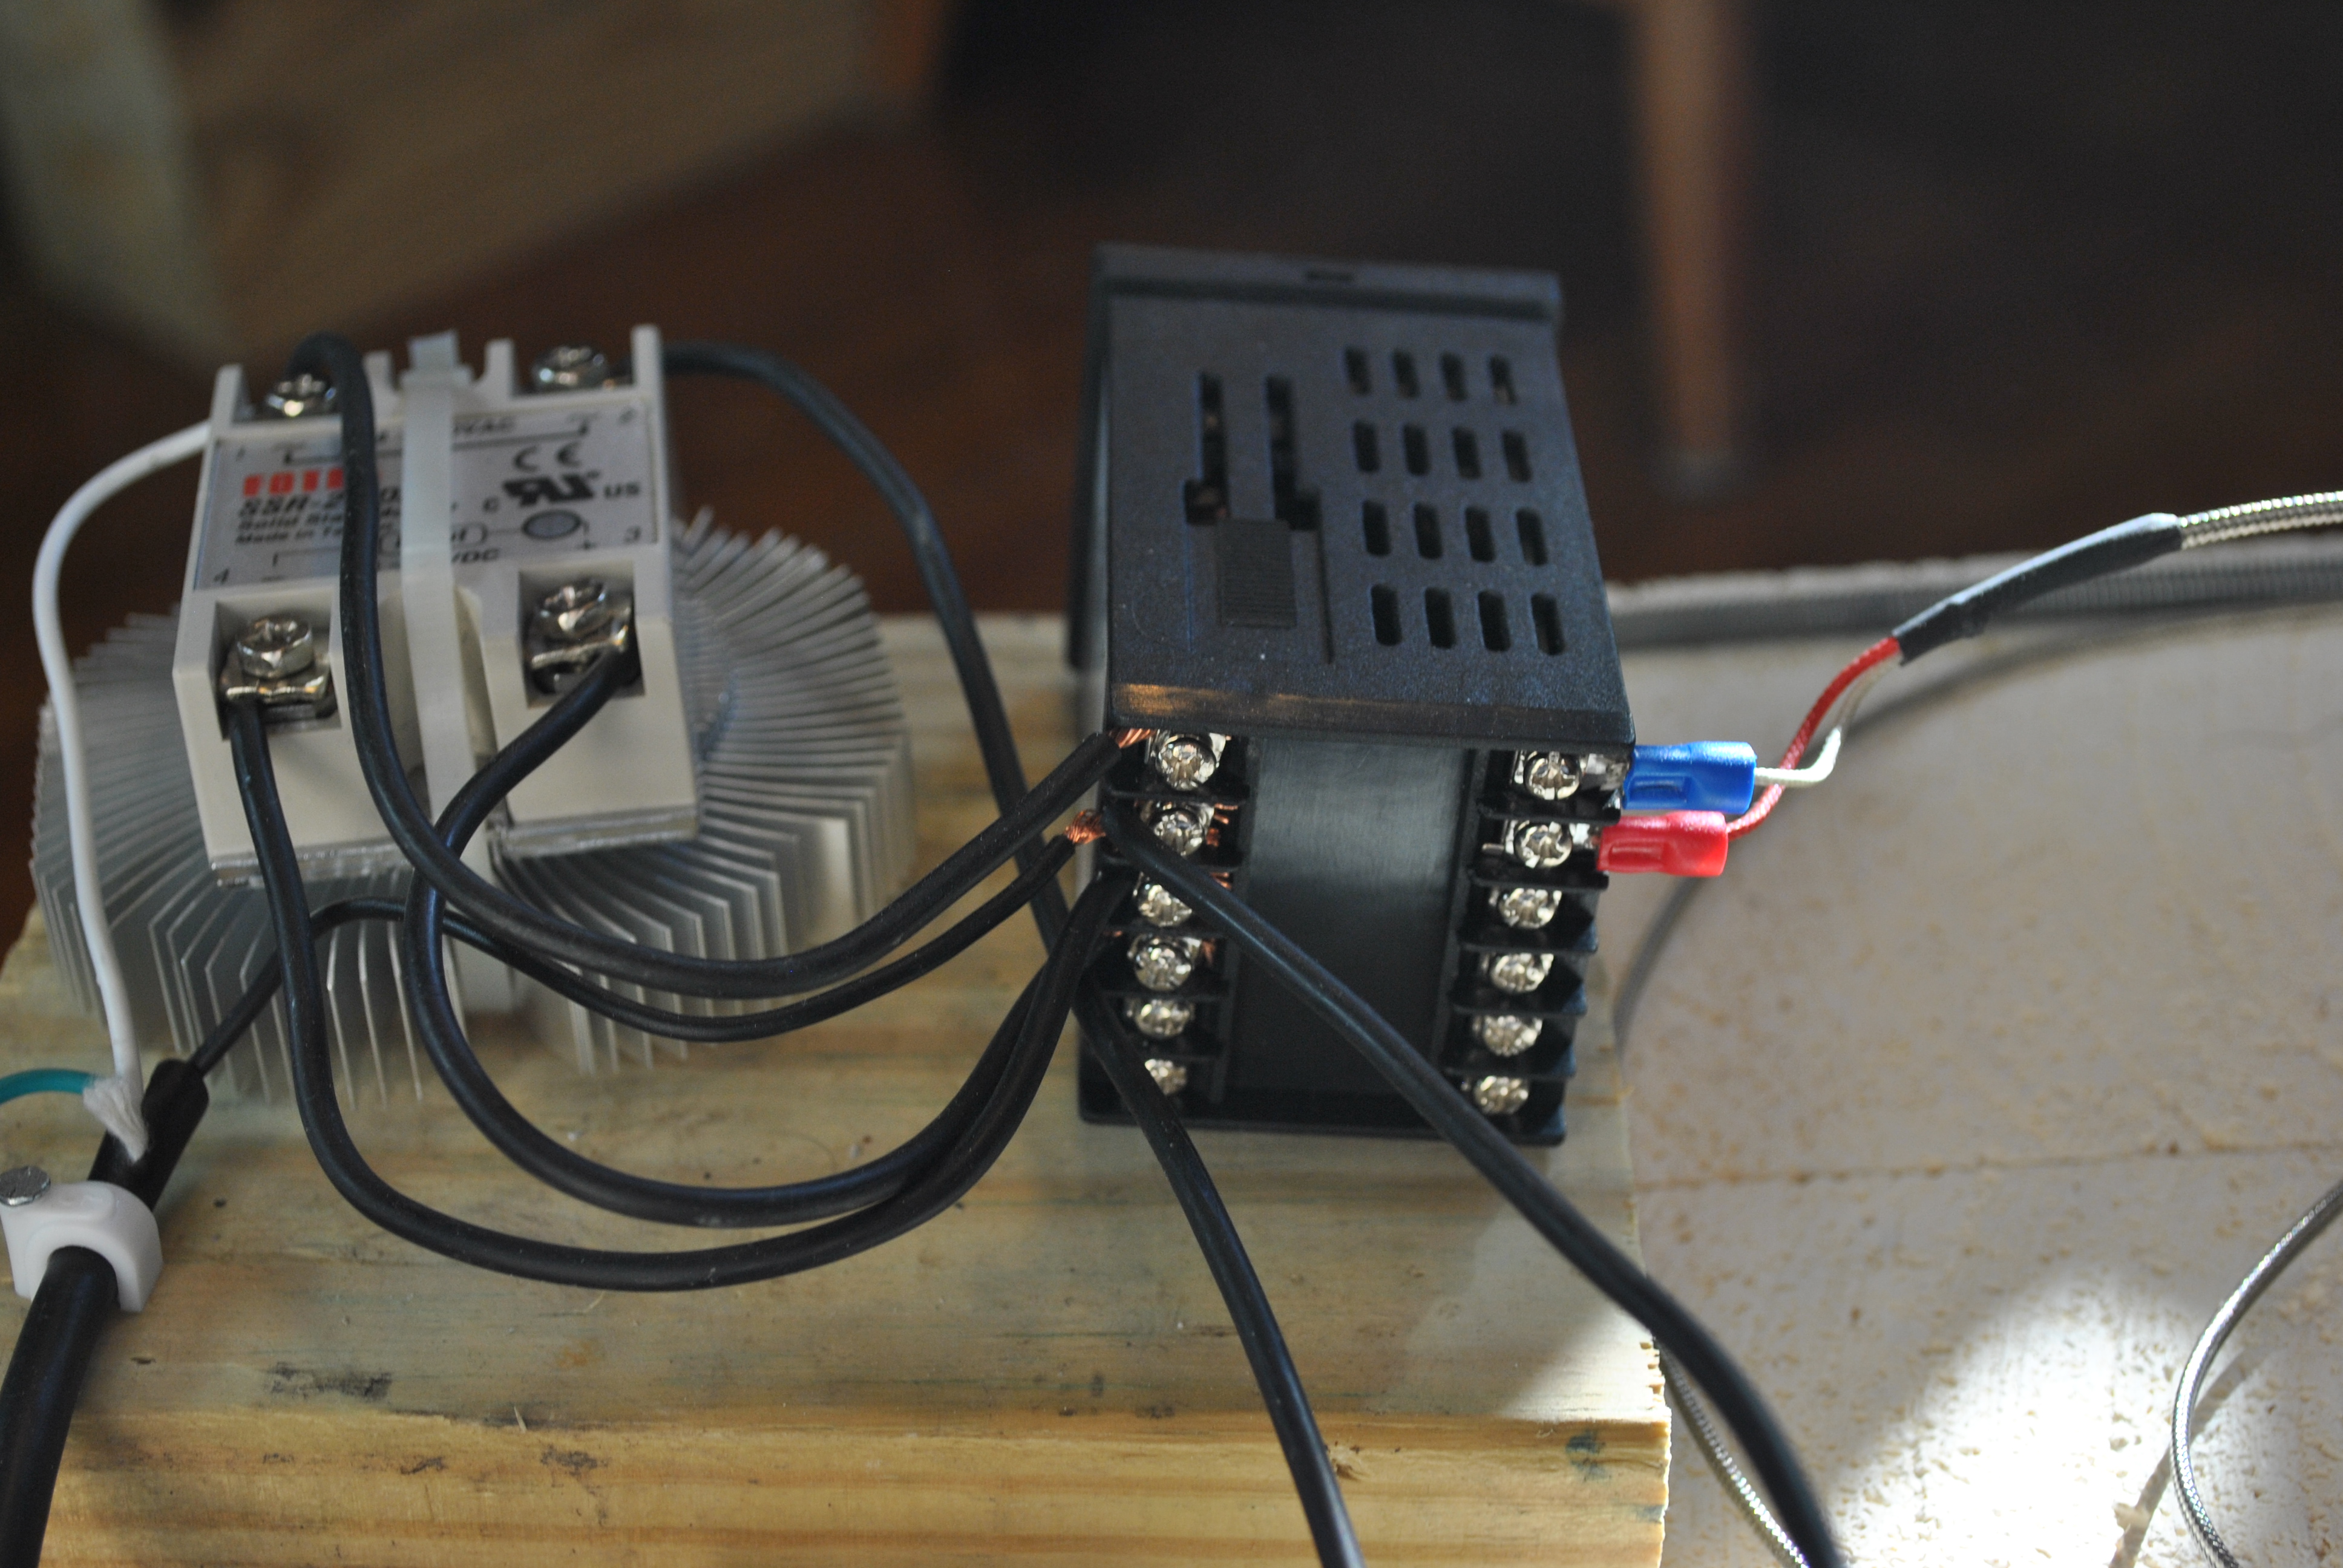
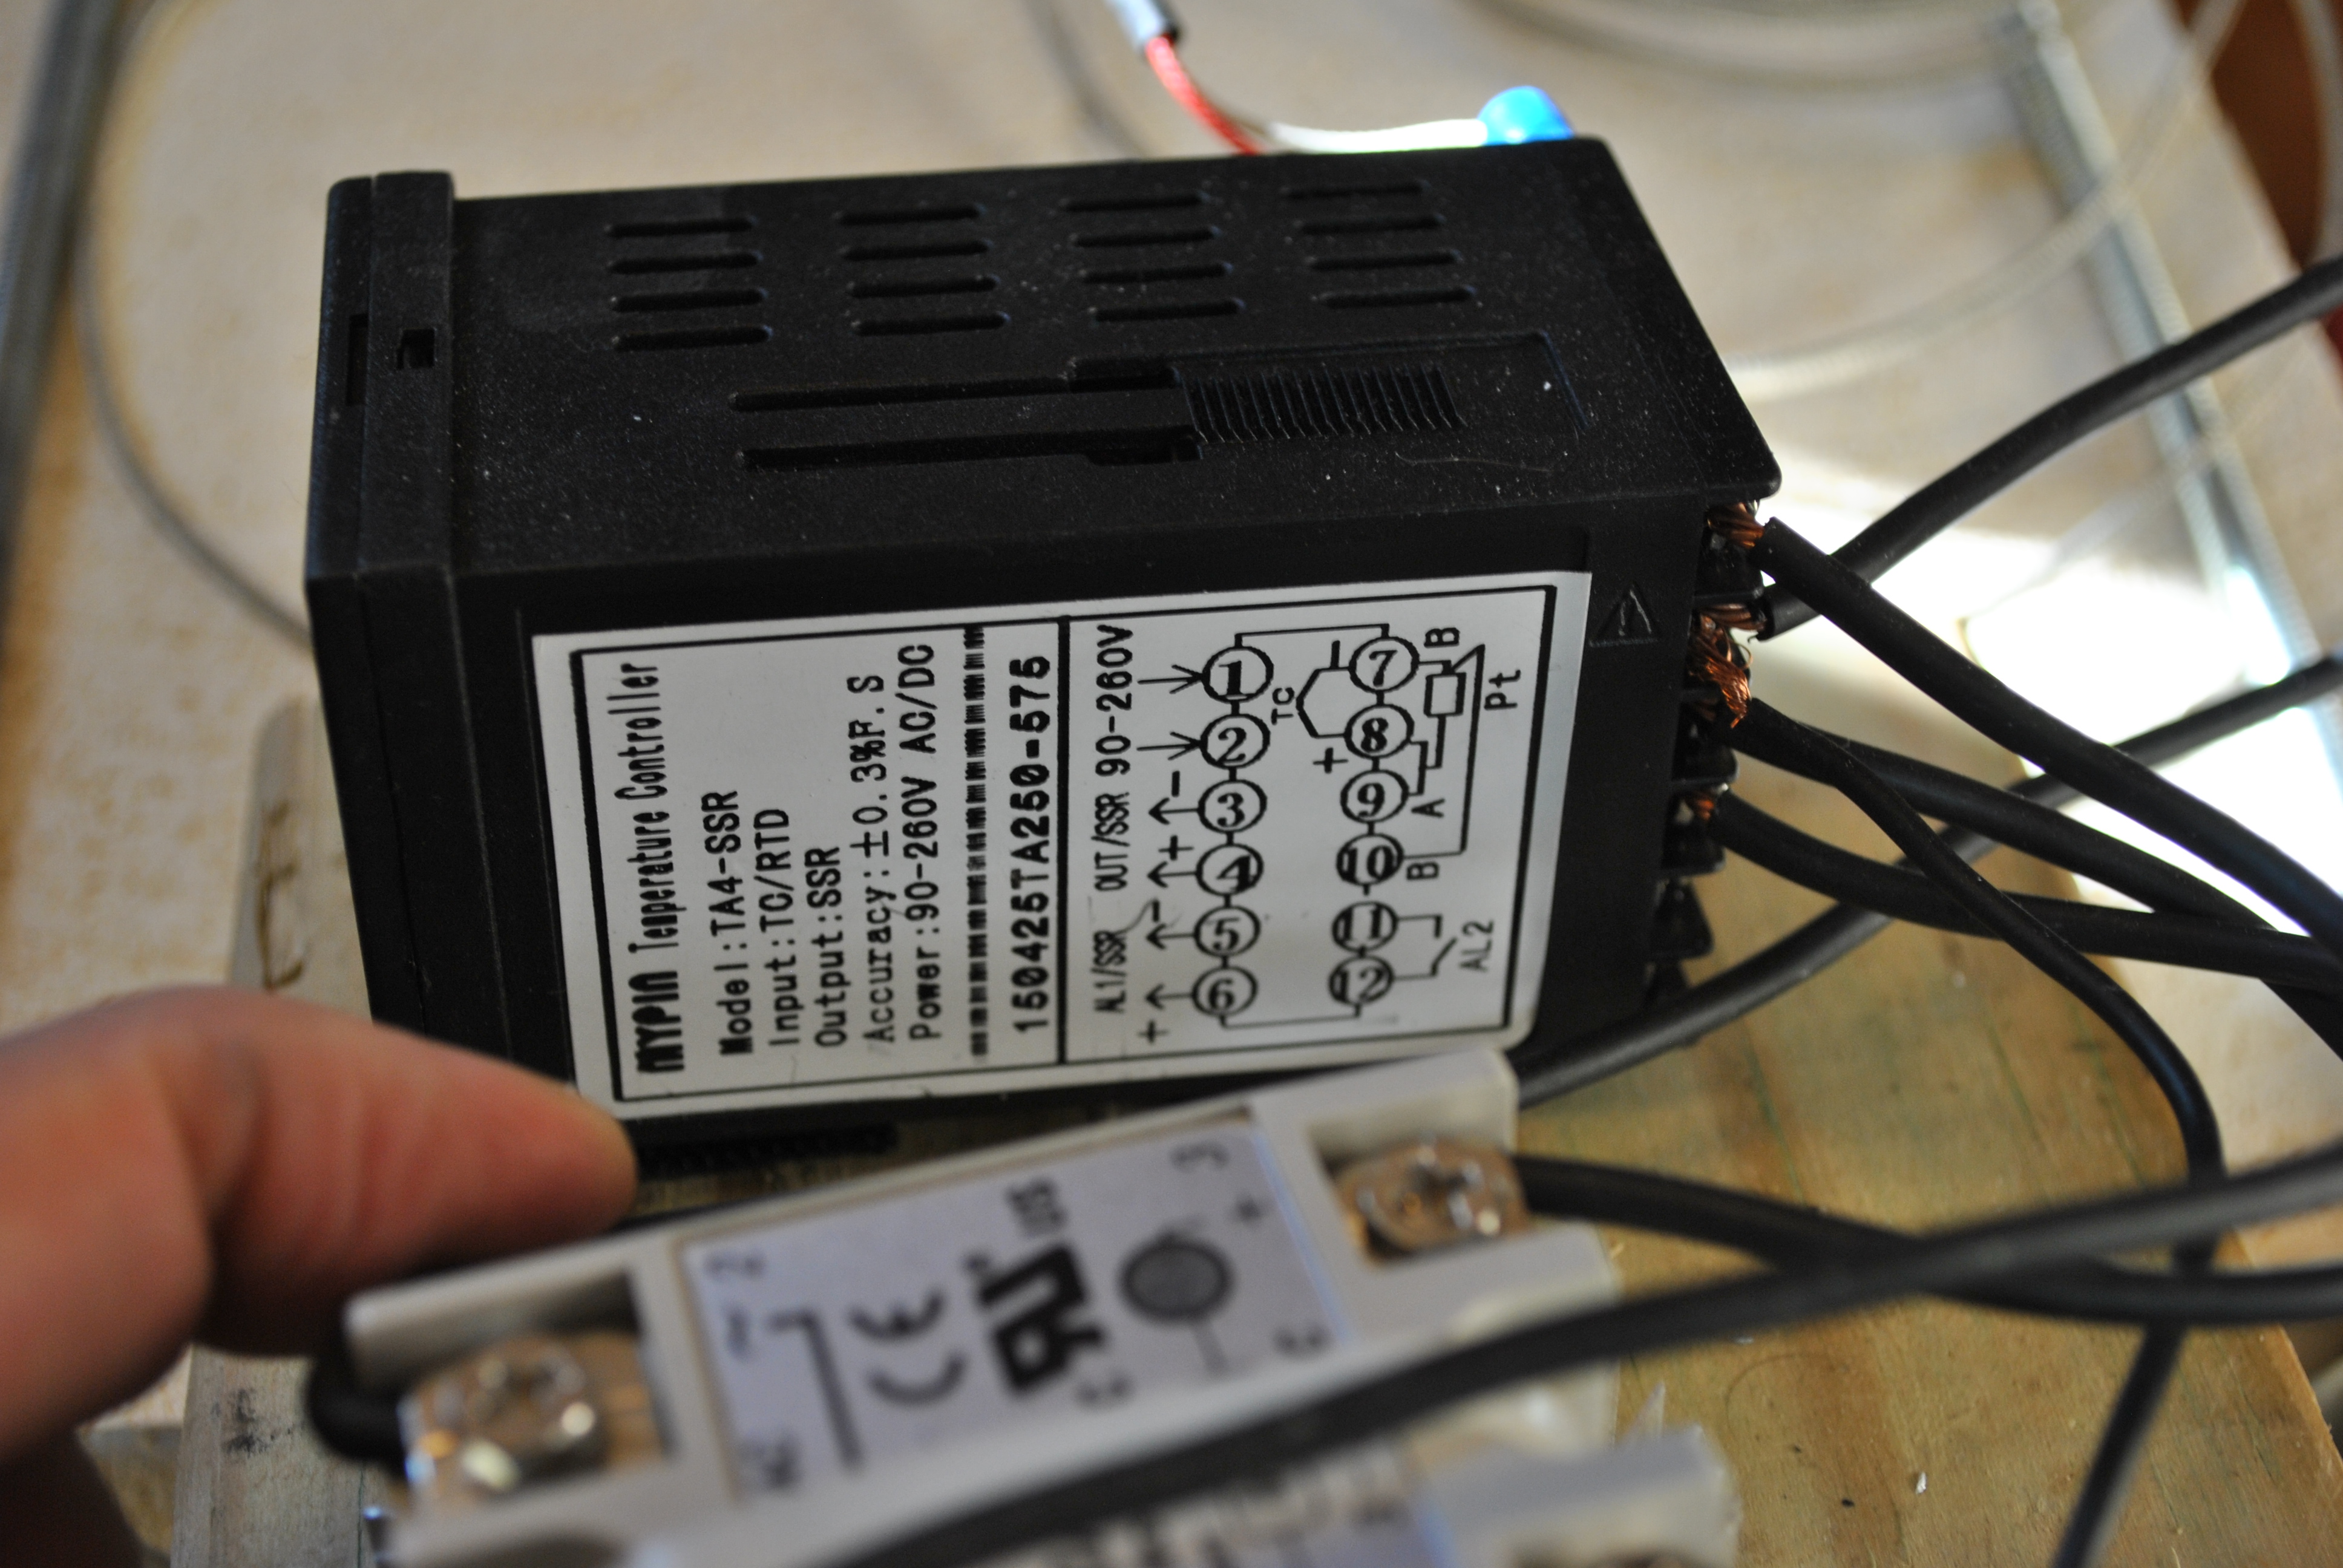
This for me was the most intimidating part. Mostly because the parts came with Chinese instruction manuals that looked like they had been written in Italian google translated into Mandarin, and then google translated into English…the internet was vital to understanding this. See the instructable linked above for a good wiring diagram, but in essence here is how it works.
A thermocouple is connected to the PID (the black box), the thermocouple tells the PID what temp it is in your kiln, the PID turns on and off the juice by using the Solid State Relay (the white thing) to keep the temp you set, the SSR is connected to a heat sink from a computer because it gets hot and the heat sink helps dissipate that heat. You will need some kind heat sink for your SSR as it gets very hot and over heating will limit its life.
The red and blue wires are from the thermocouple
This diagram is actually vital to understand, let me see if I can translate (because the instructions that come with the PID certainly do not help)
1 and 2 are the power, this PID will accept between 90 and 280 volts
3 is the negative lead to the SSR
4 is the positive lead to the SSR
5 and 6 are for a second SSR if you want to wire up more than one element (I didn’t use this feature)
7 and 8 are the + and – for the thermocouple
9-12 i have no idea, I didn’t use these.
Your PID will most likely be different, just follow its wiring diagram and you should be fine. The ground from the cord is attached to the frame. Obviously there are exposed wires in the back of this, so don’t go grabbing them when the kiln is on. Also the elements themselves, aside from being hot also are electrified so be sure when putting things in the kiln you don’t jam a metal pair of tongs into them.
For a door I used an extra brick and cut it to size, it fits snugly in the opening and rests on a another brick. This other brick is useful for placing things you recently took out/will put into the kiln on as well.
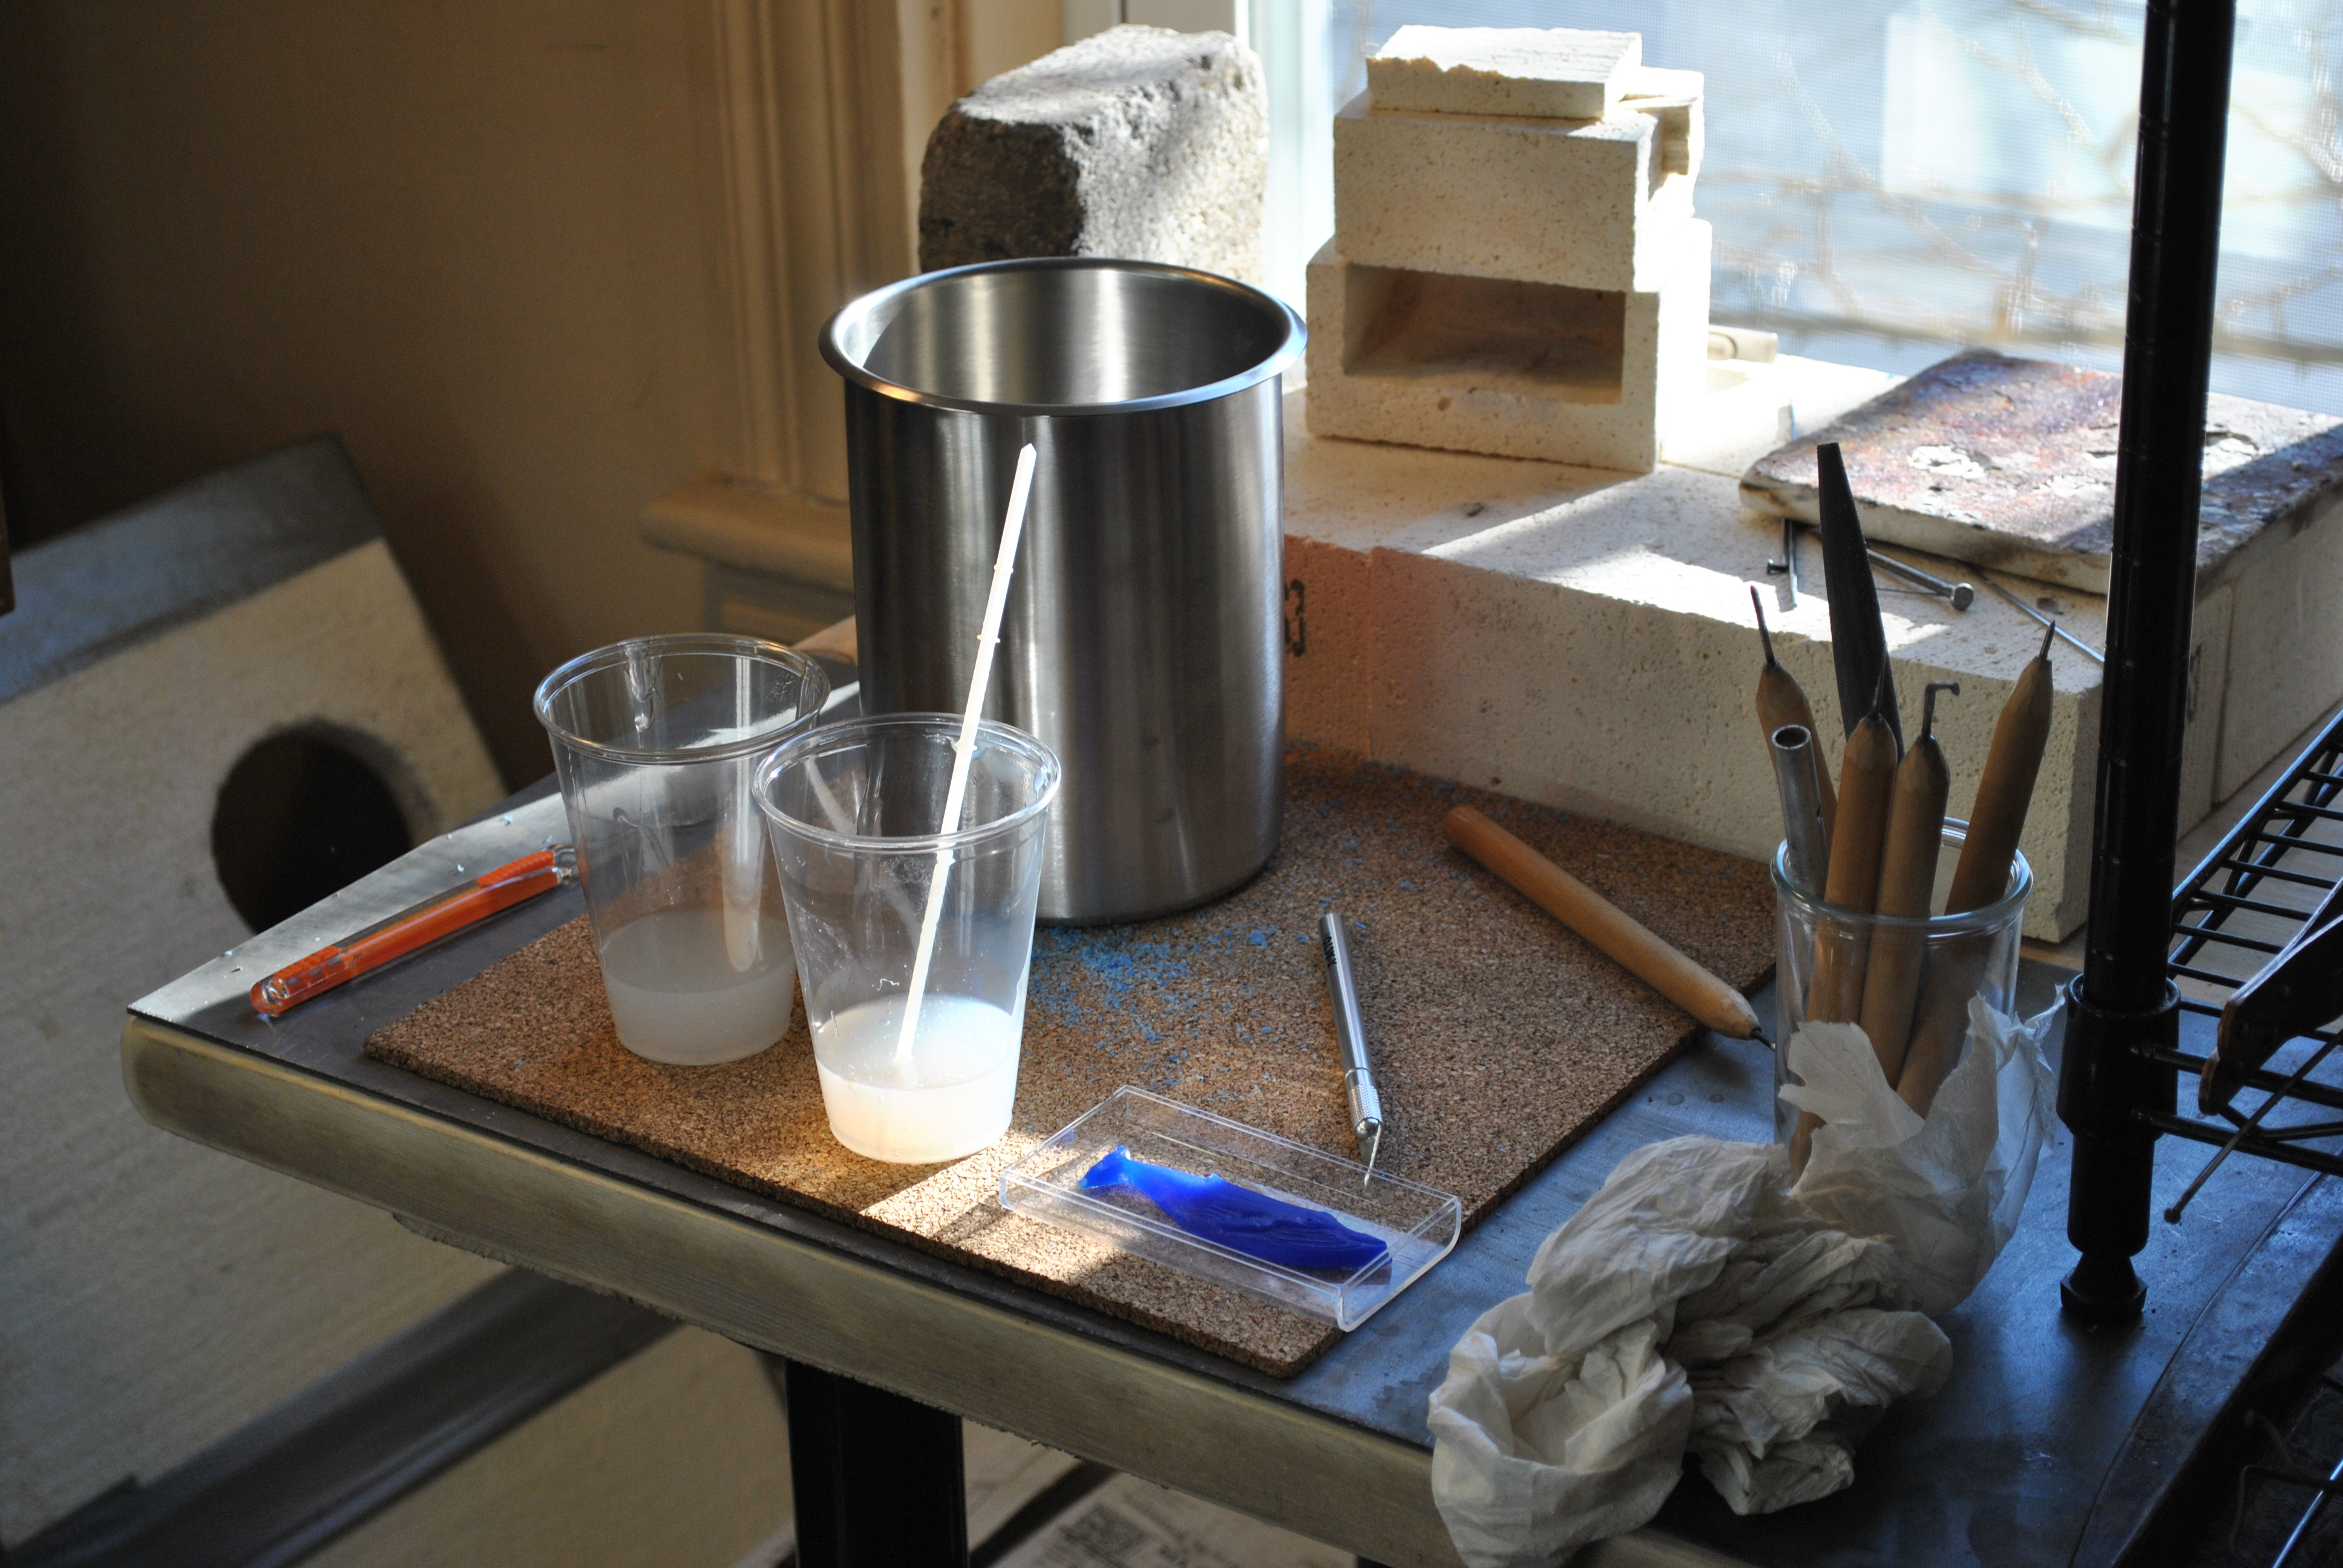
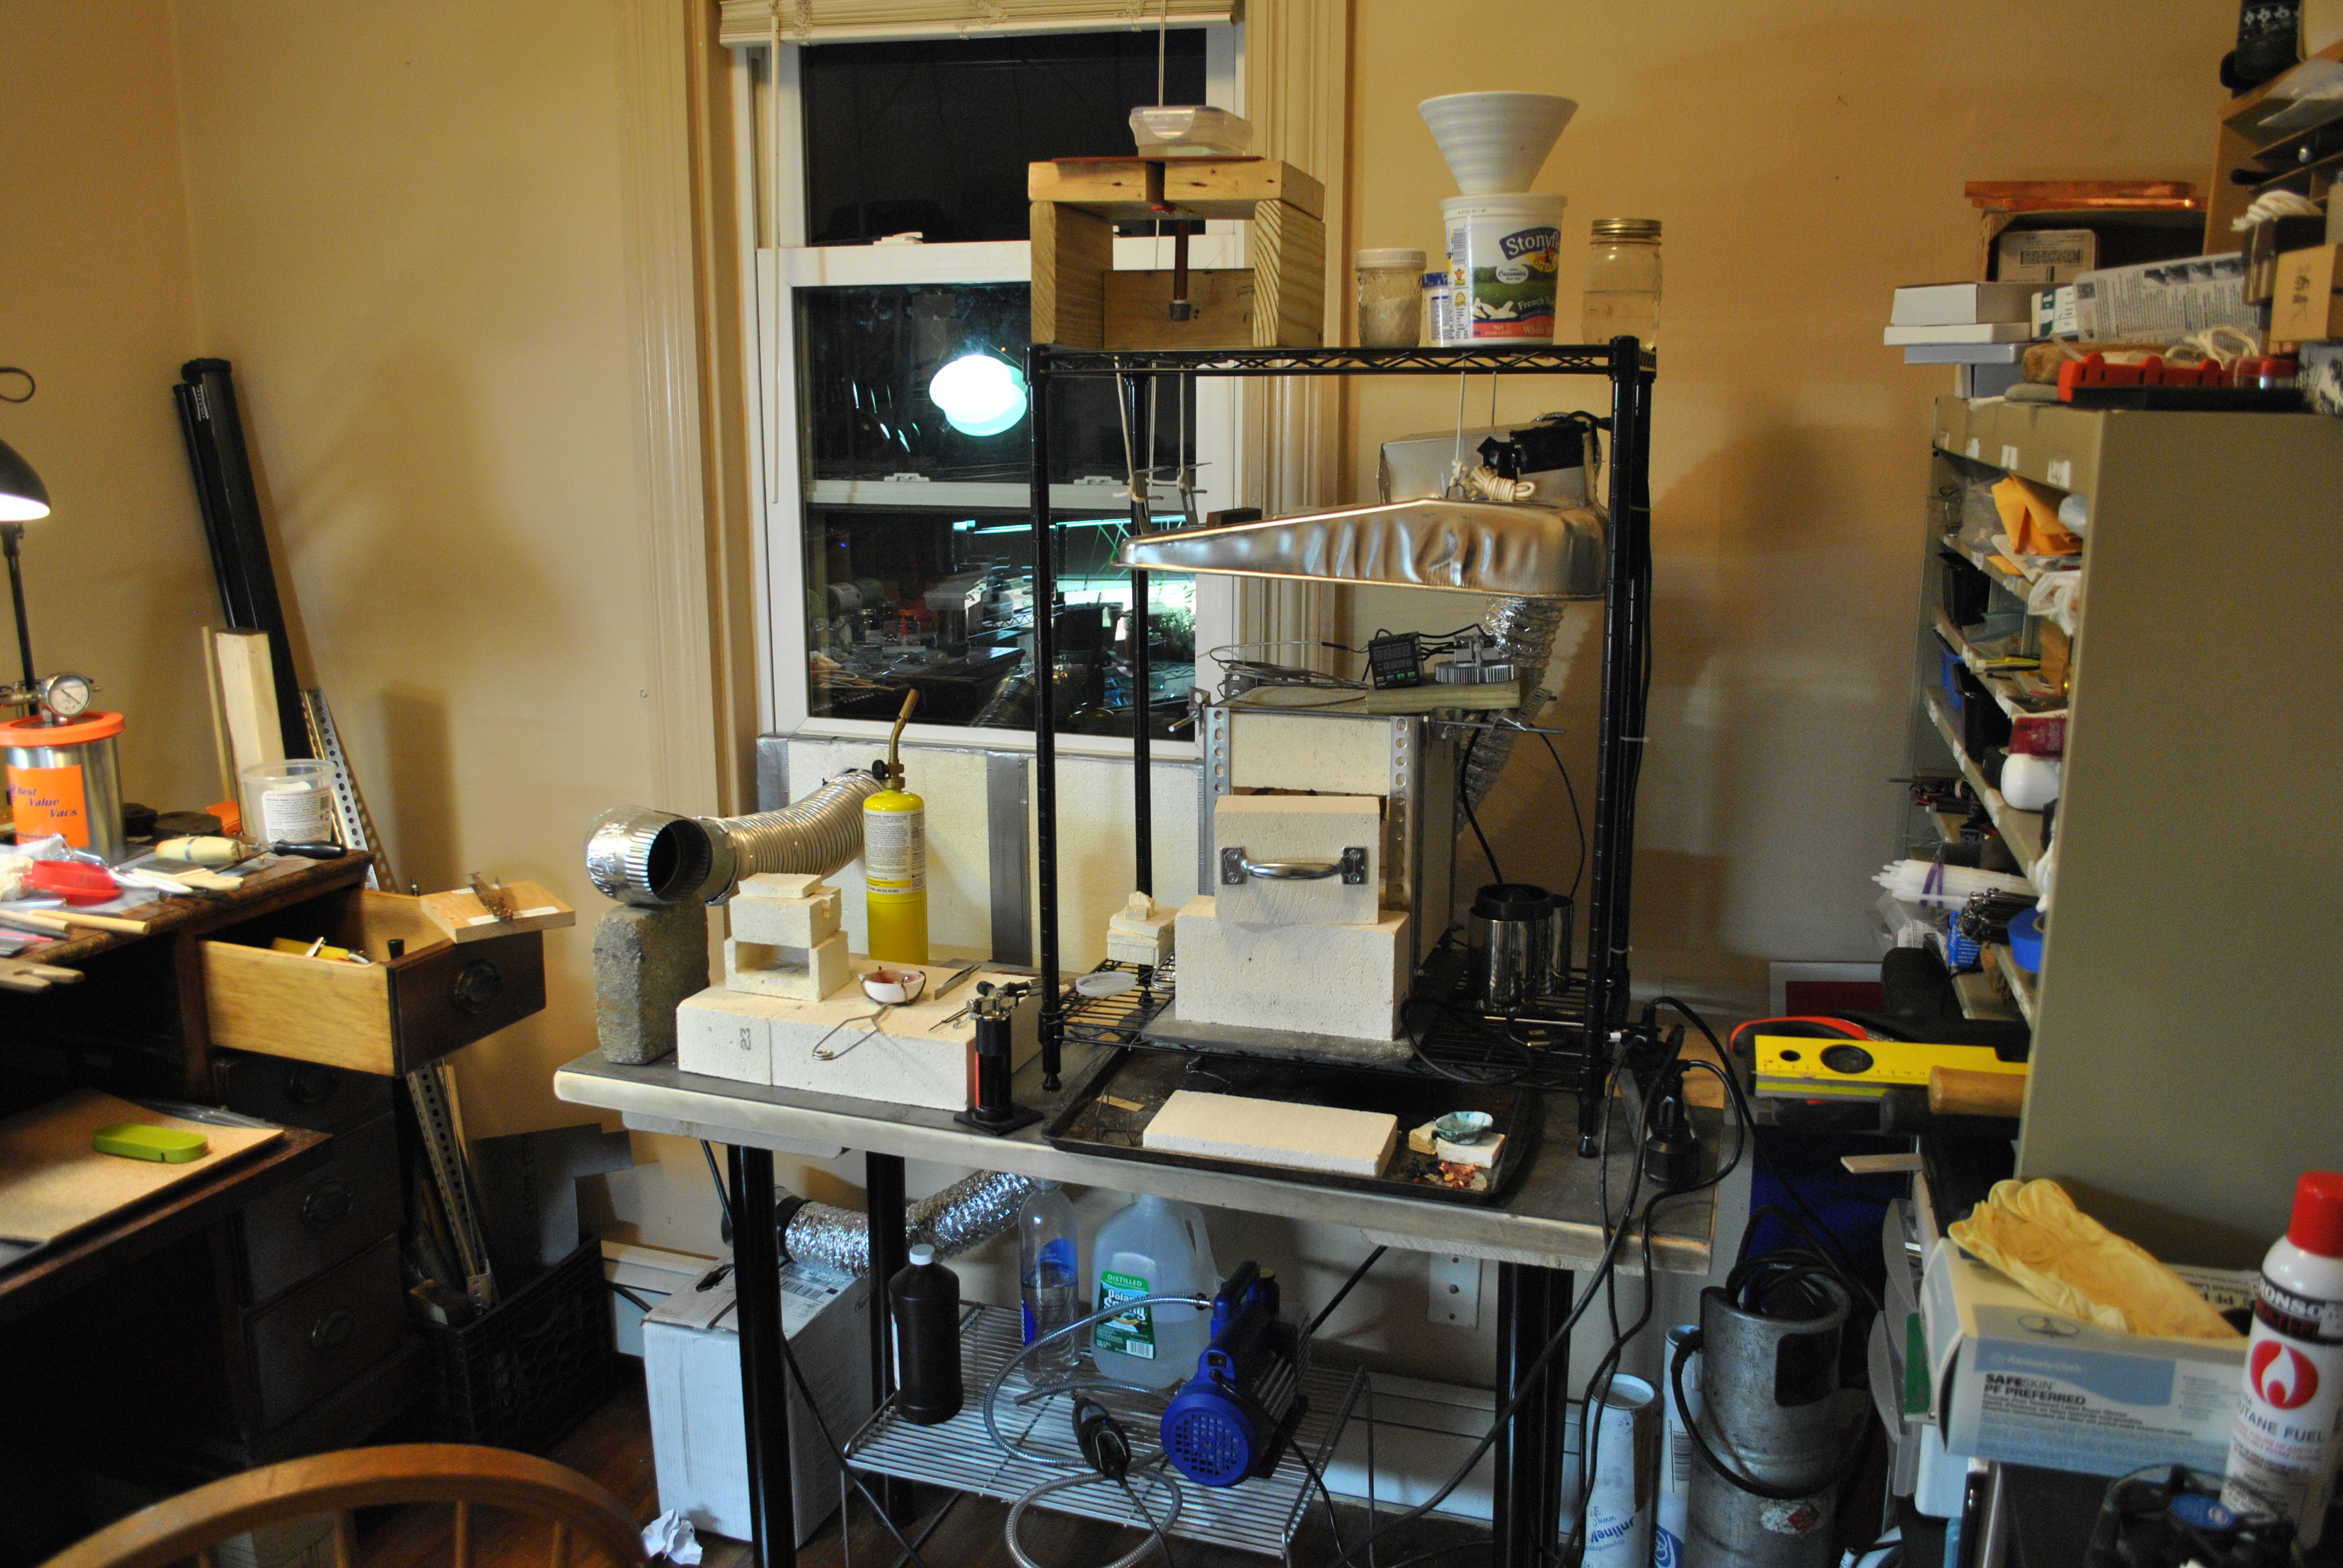
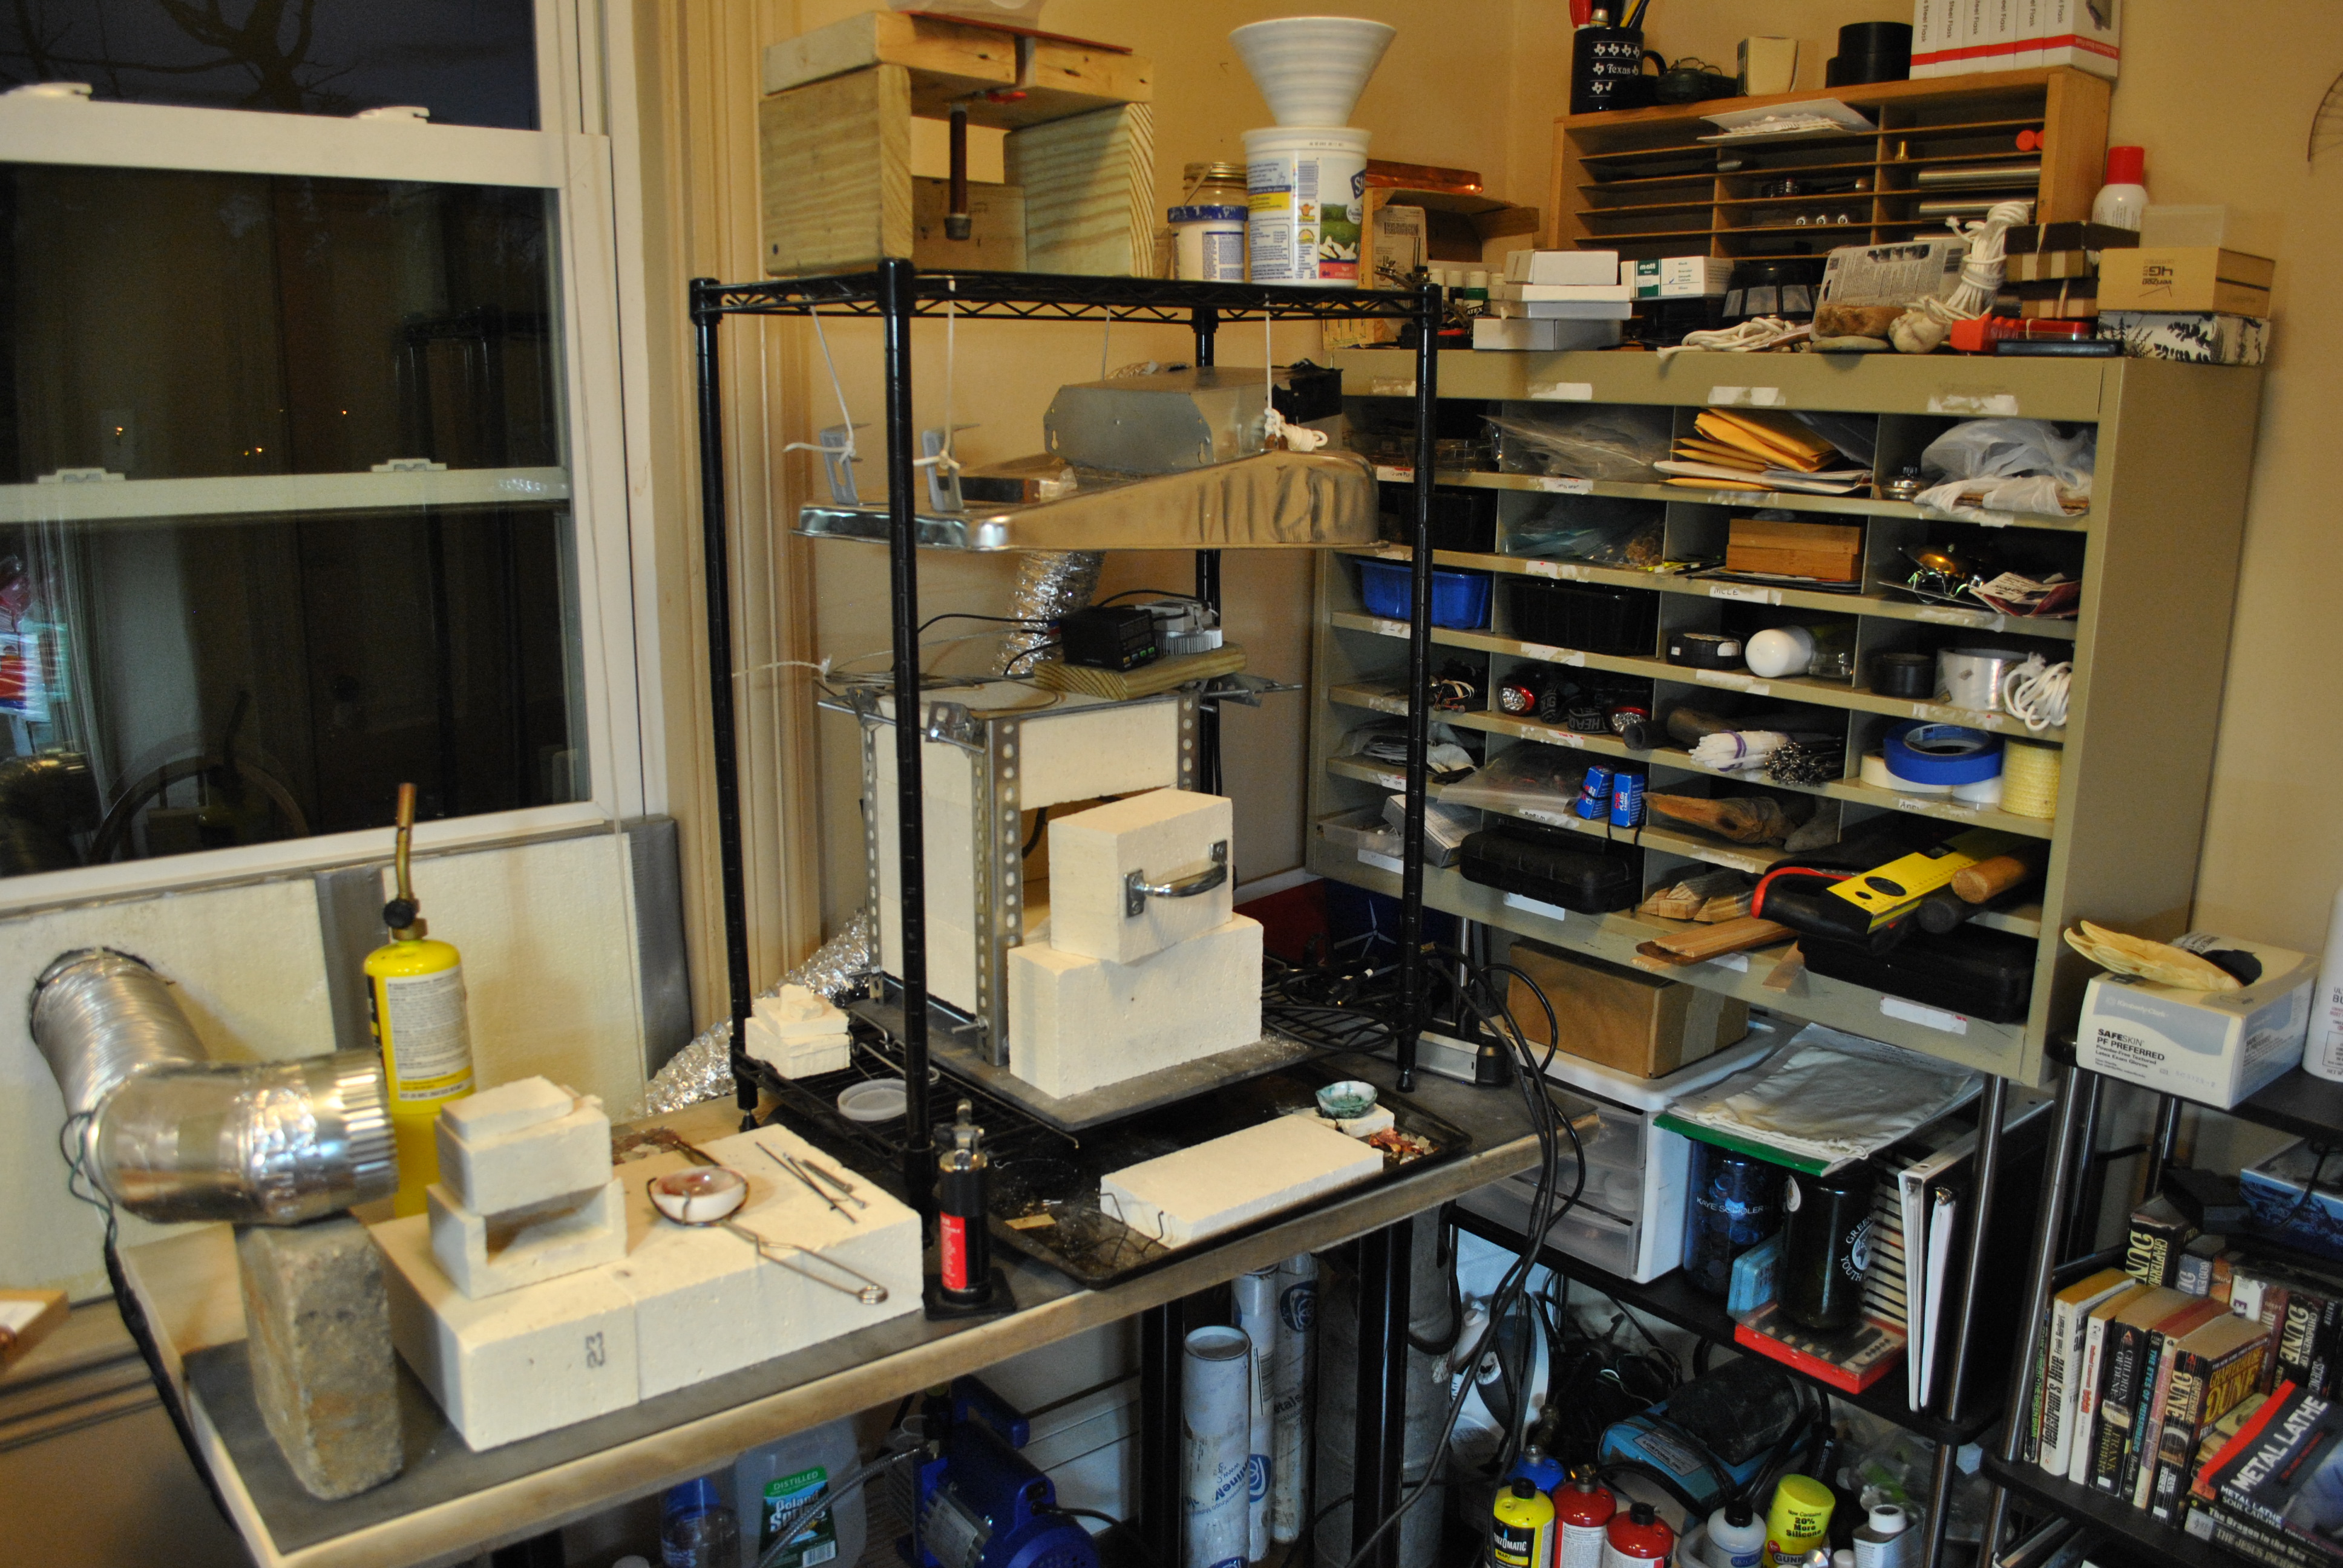
My messy studio.
One ruined crucible and some melted brass, this baby cooks! I easily got it up to 1200c.
It took me a long time to feel ok about building this. I had to read a lot on the internet to feel comfortable enough to build it, but in the end it really wasn’t that hard. If I had to do it again I think I would feel much more comfortable about the whole process.
Safety:
You will need high temp gloves, like welding gloves, the kiln gets so hot you literally can’t get your hand near it. I also suggest a full face mask, or at the least eye protection. You will also need a leather or heavy canvas apron, wear closed toe shoes, and have good ventilation.
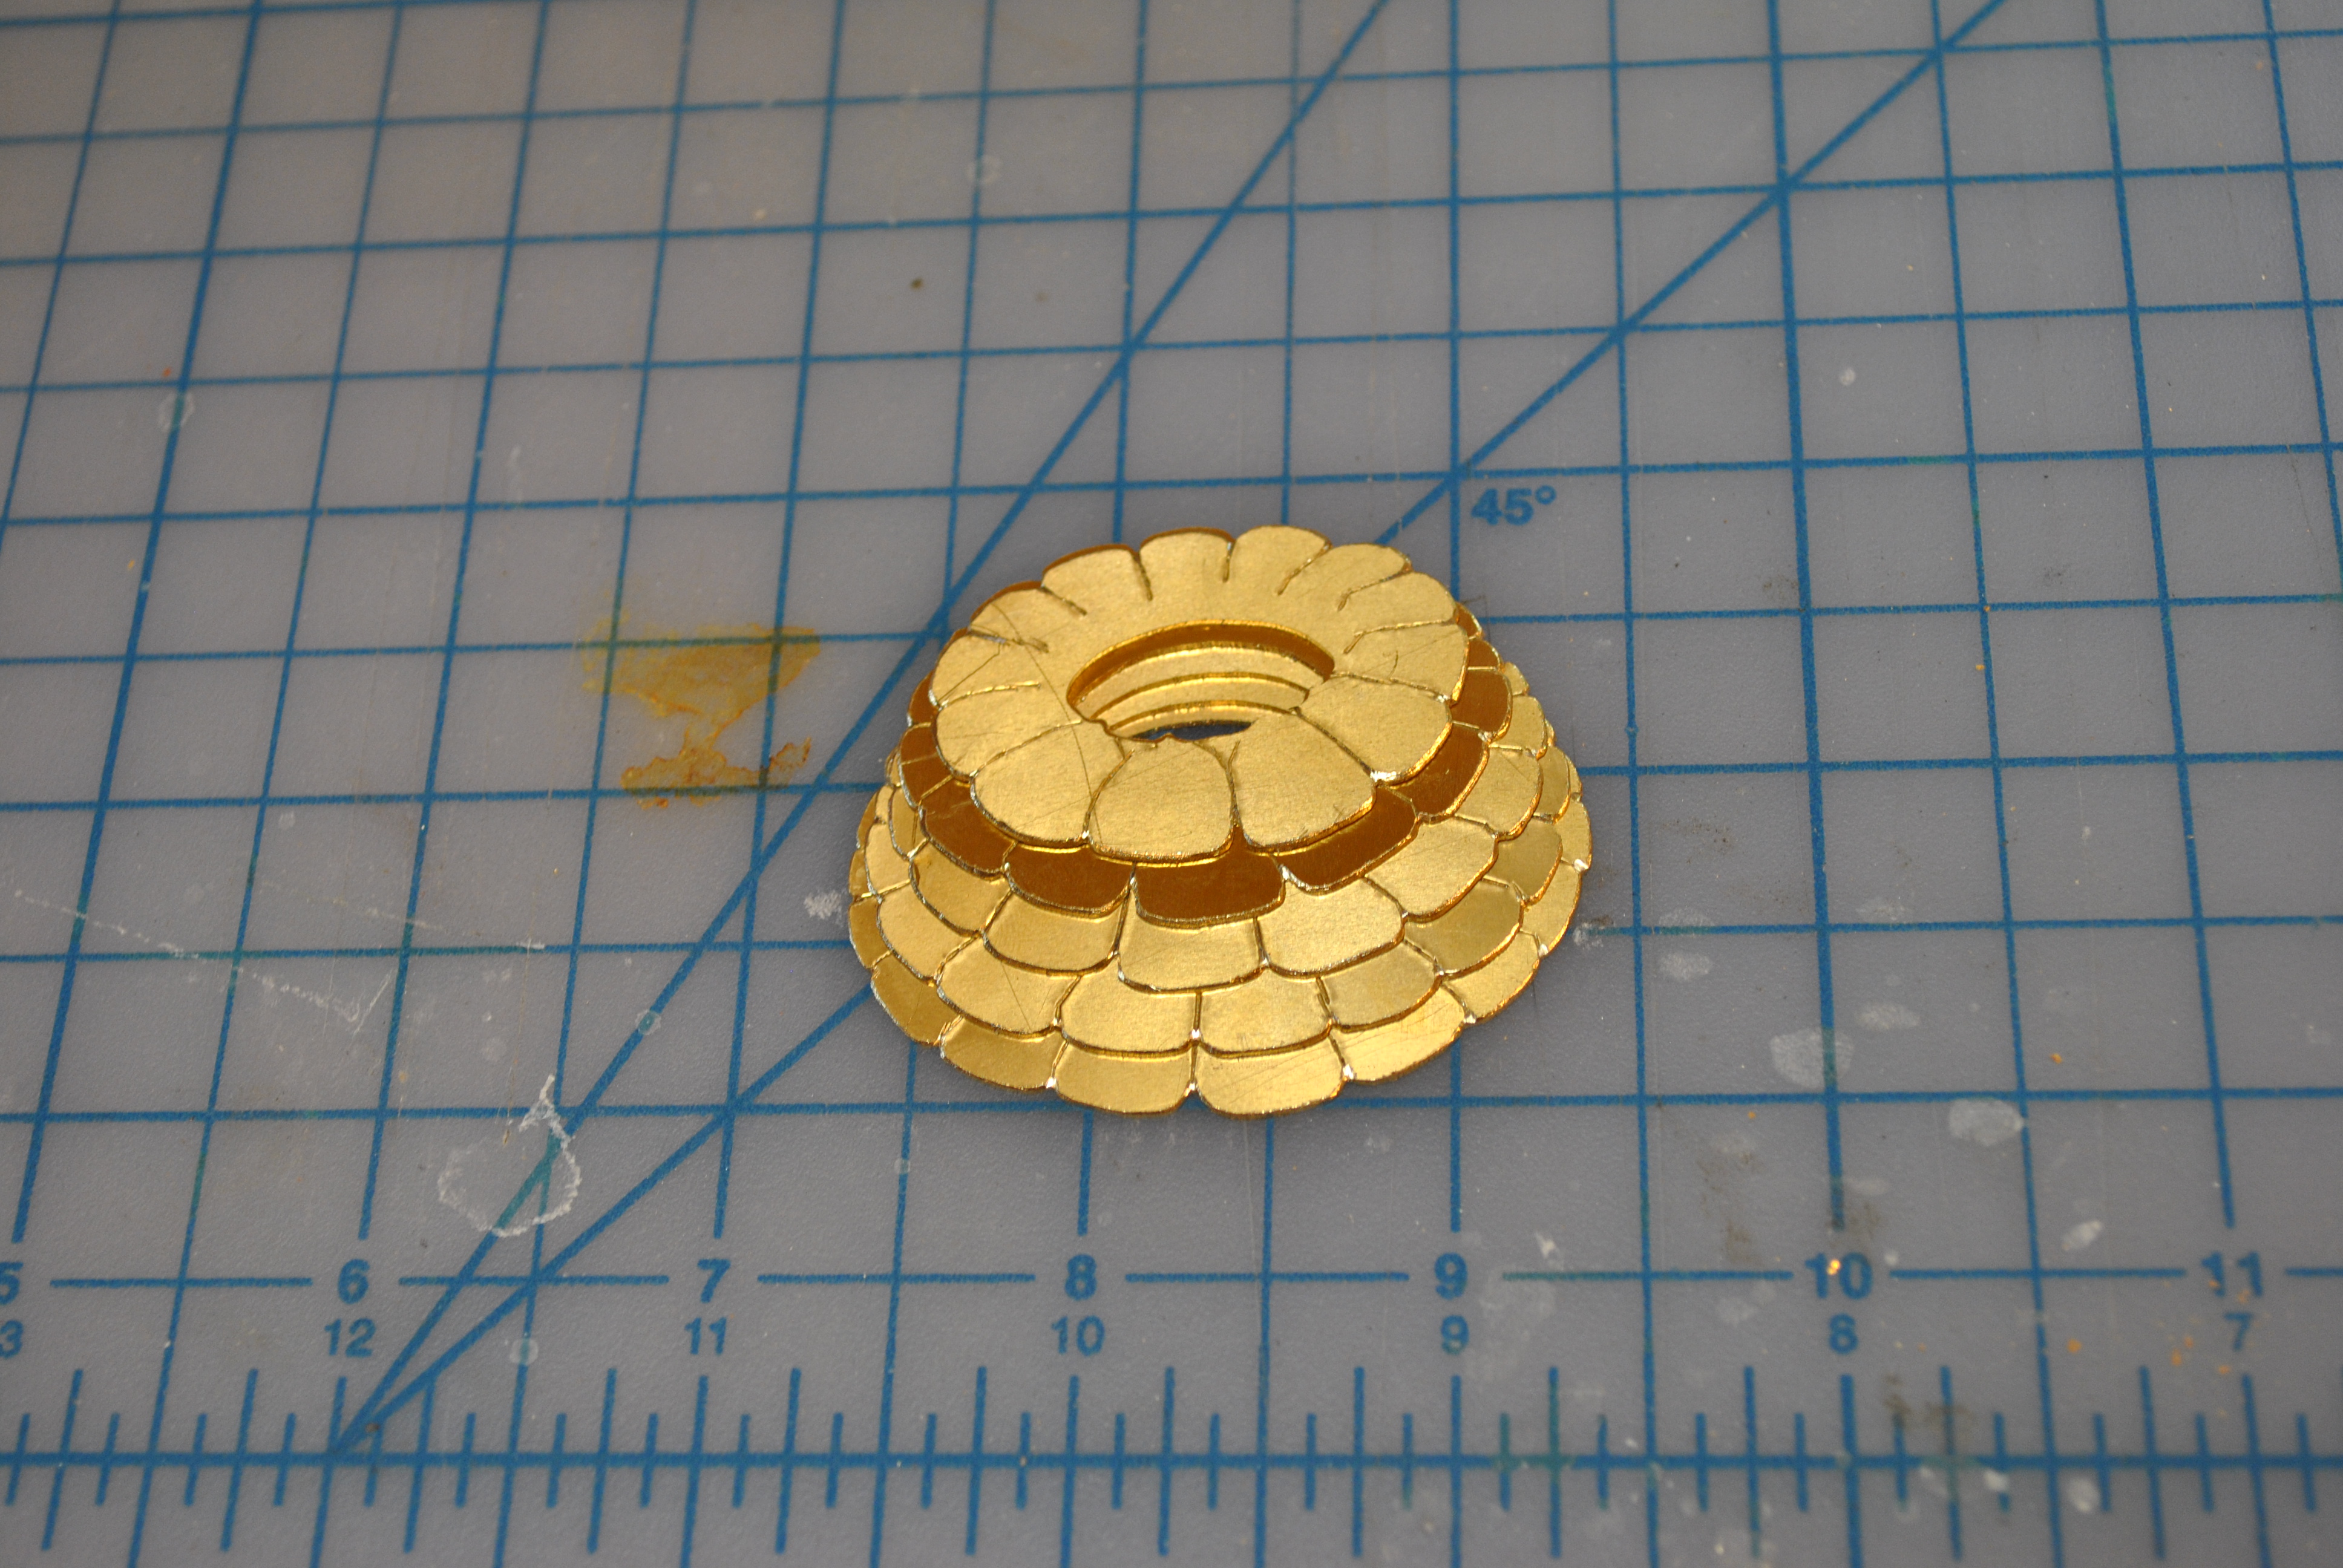
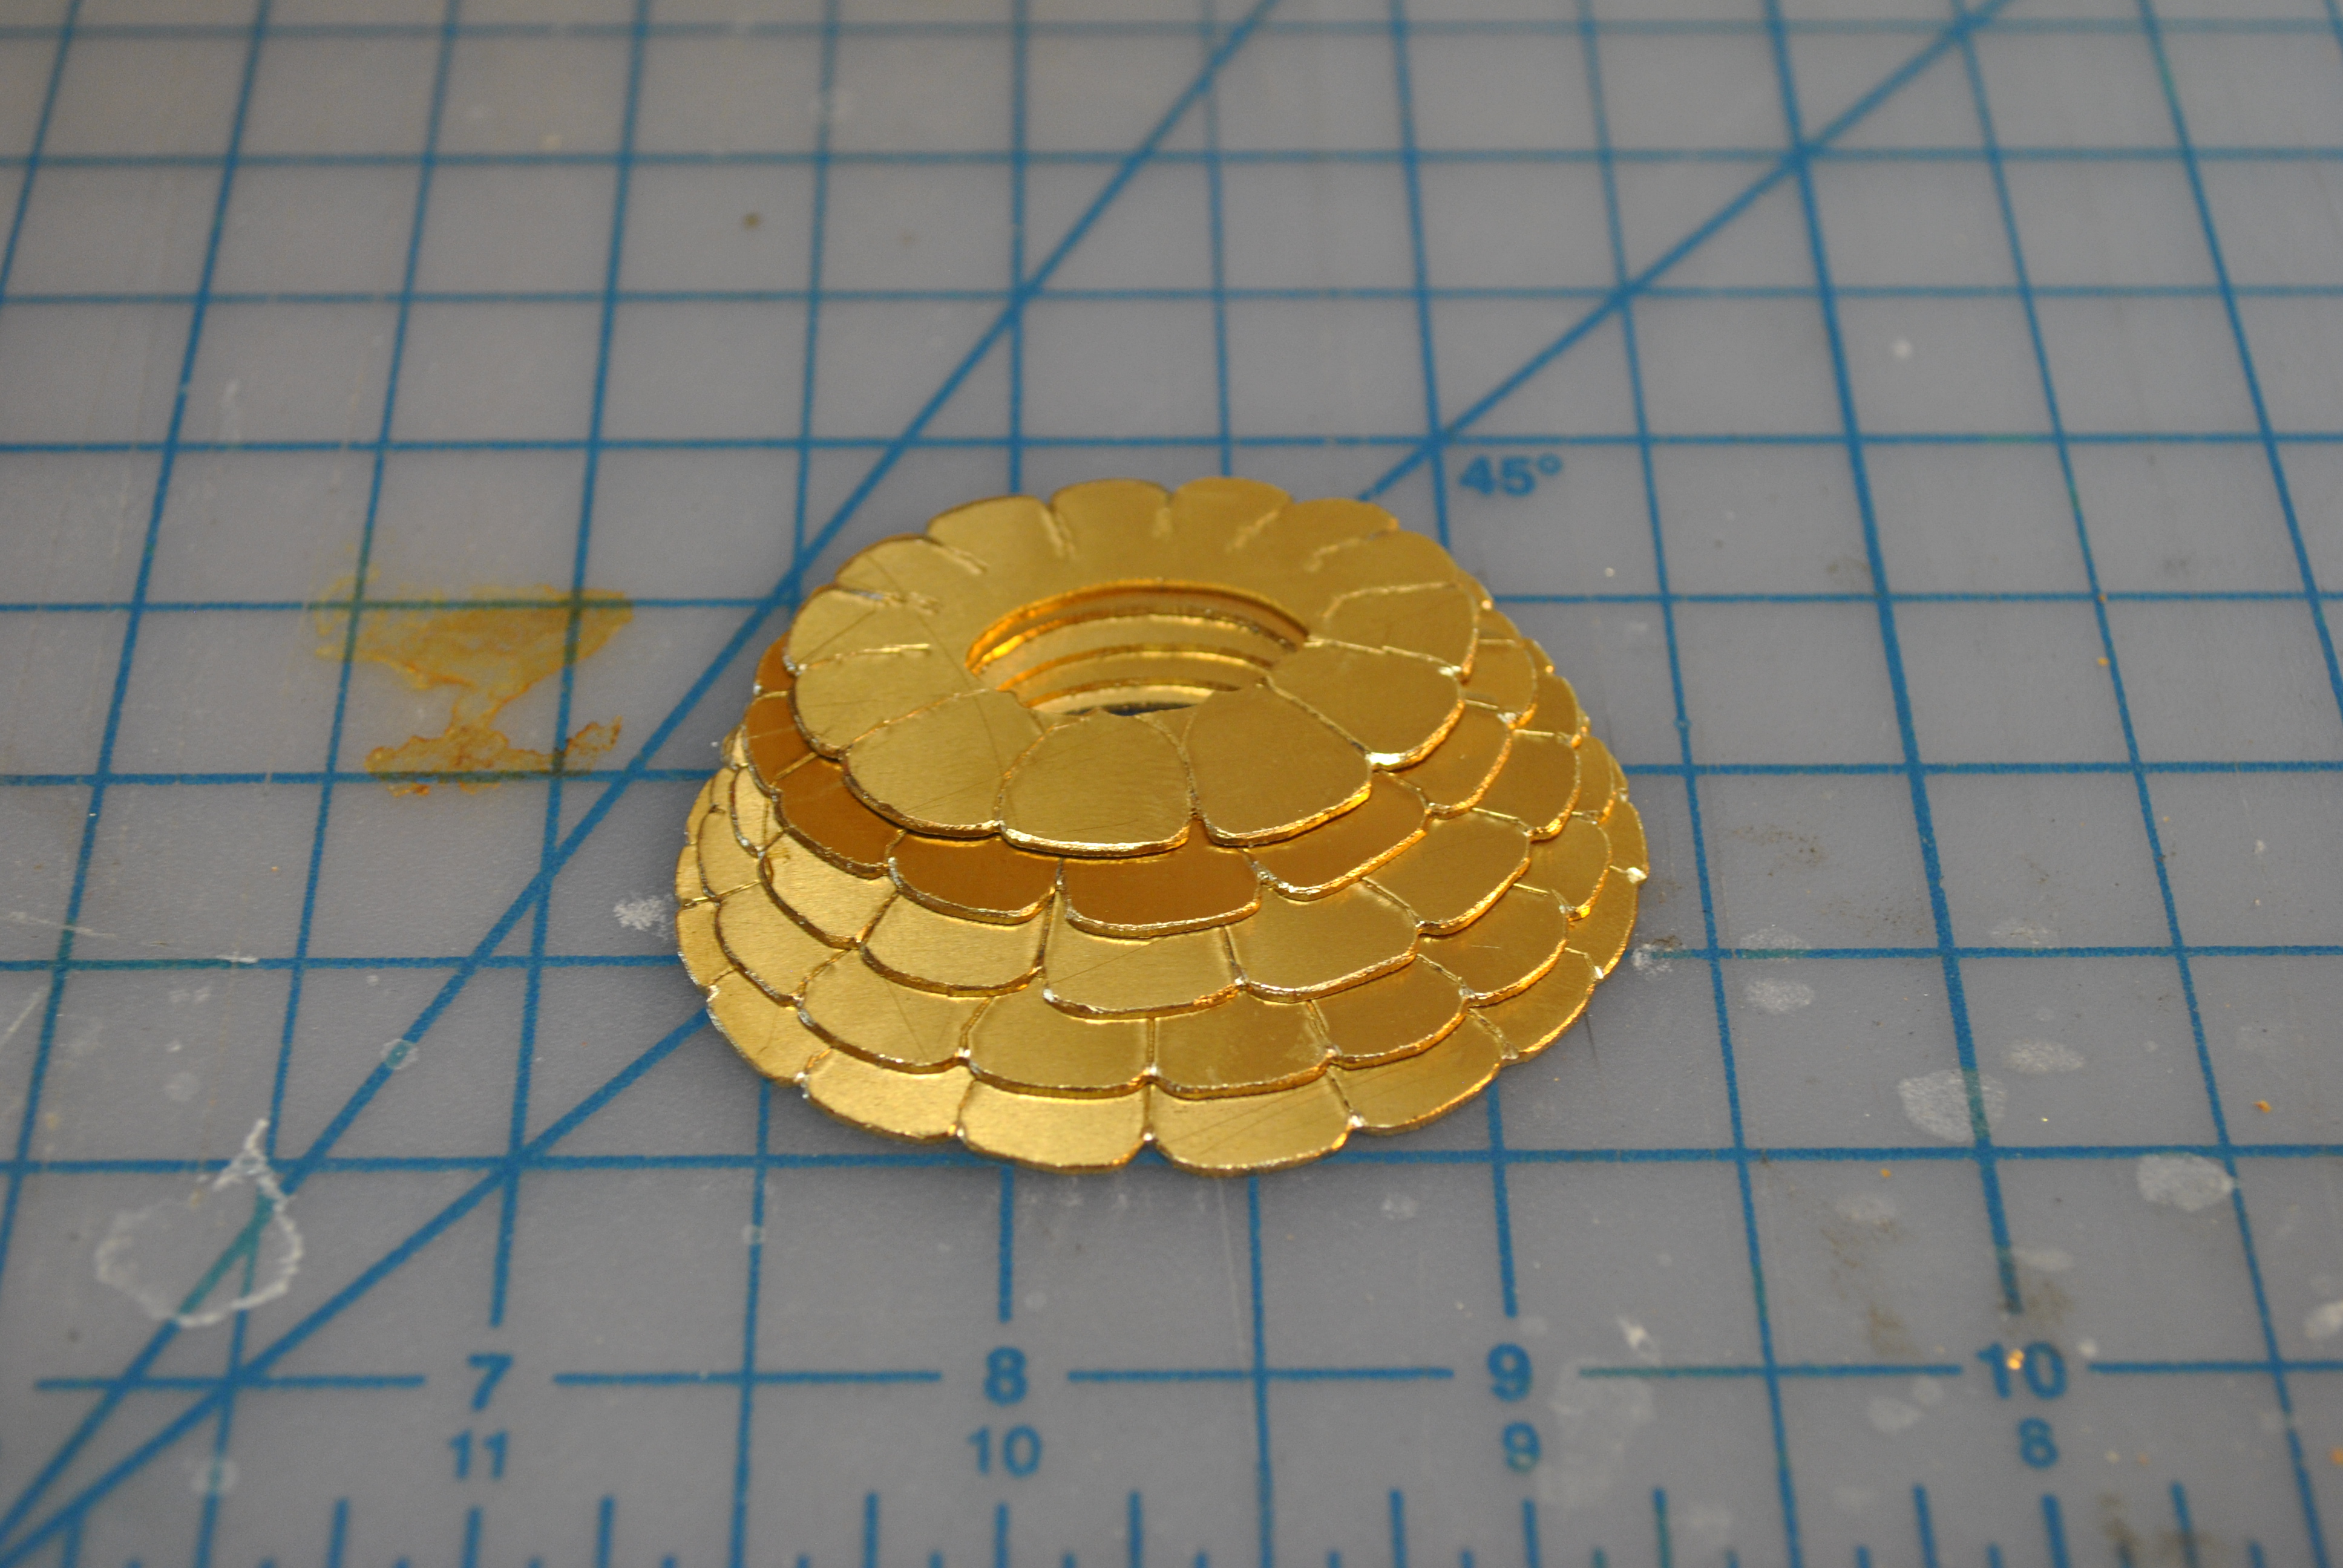
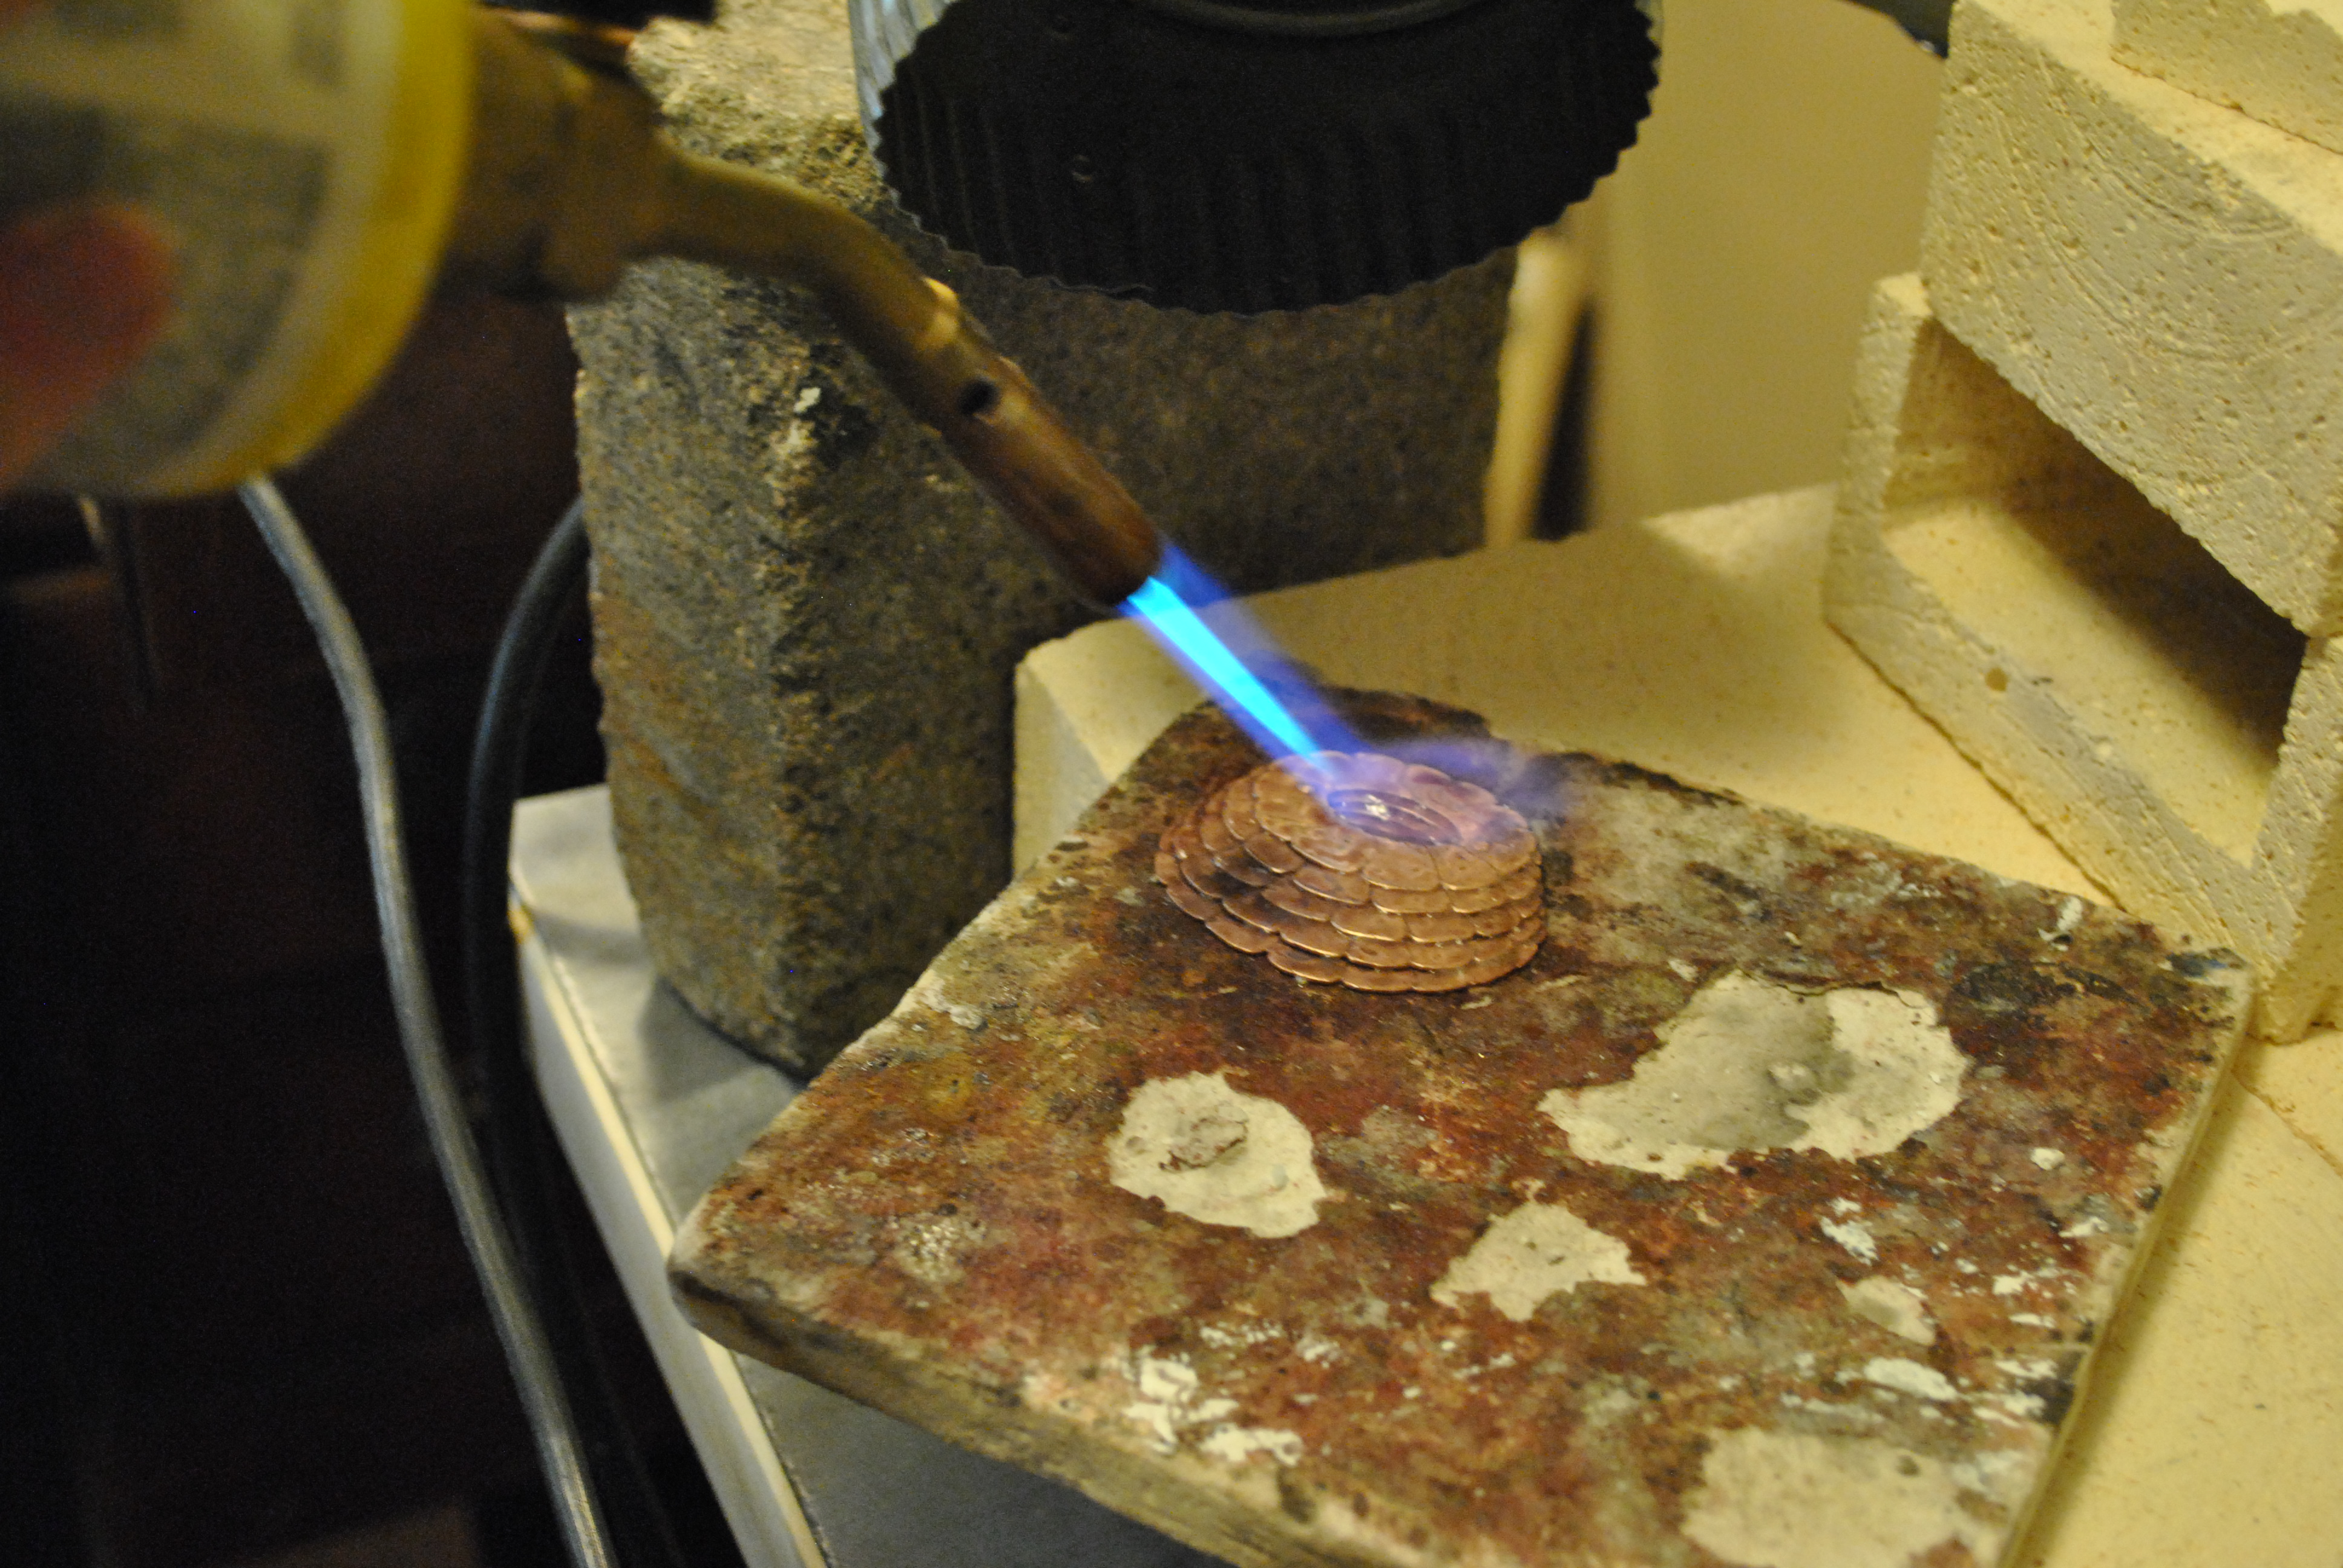
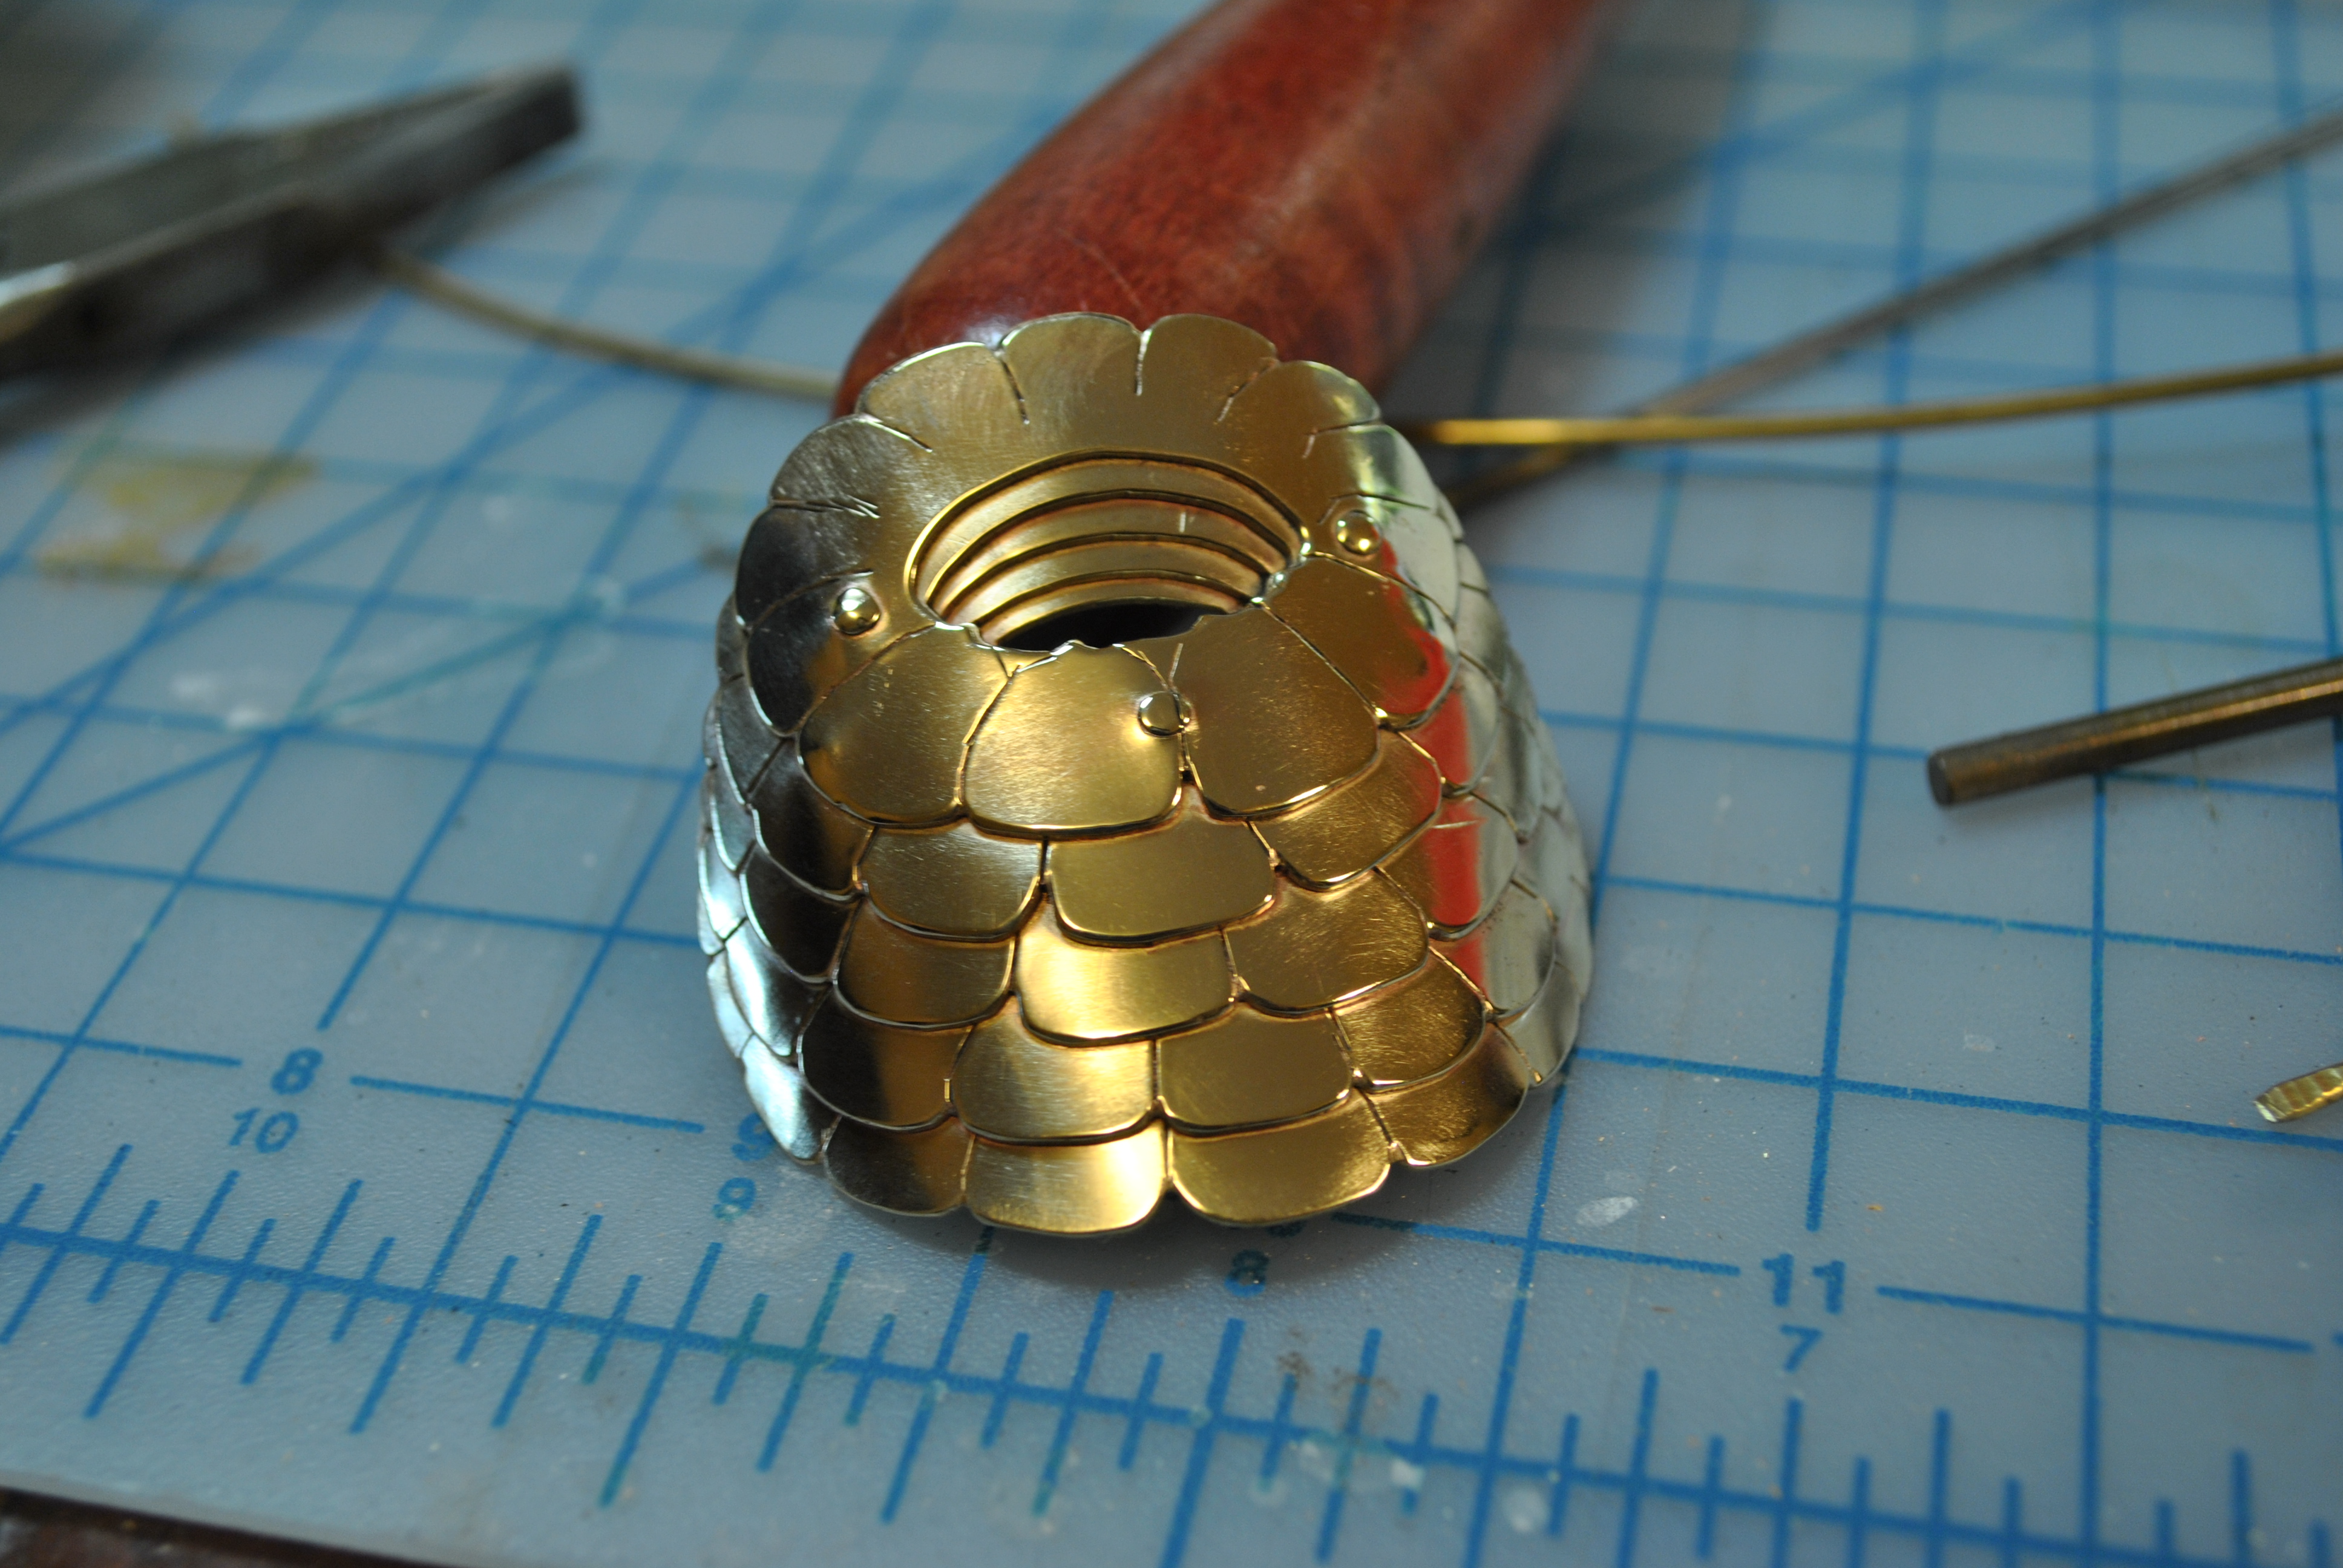
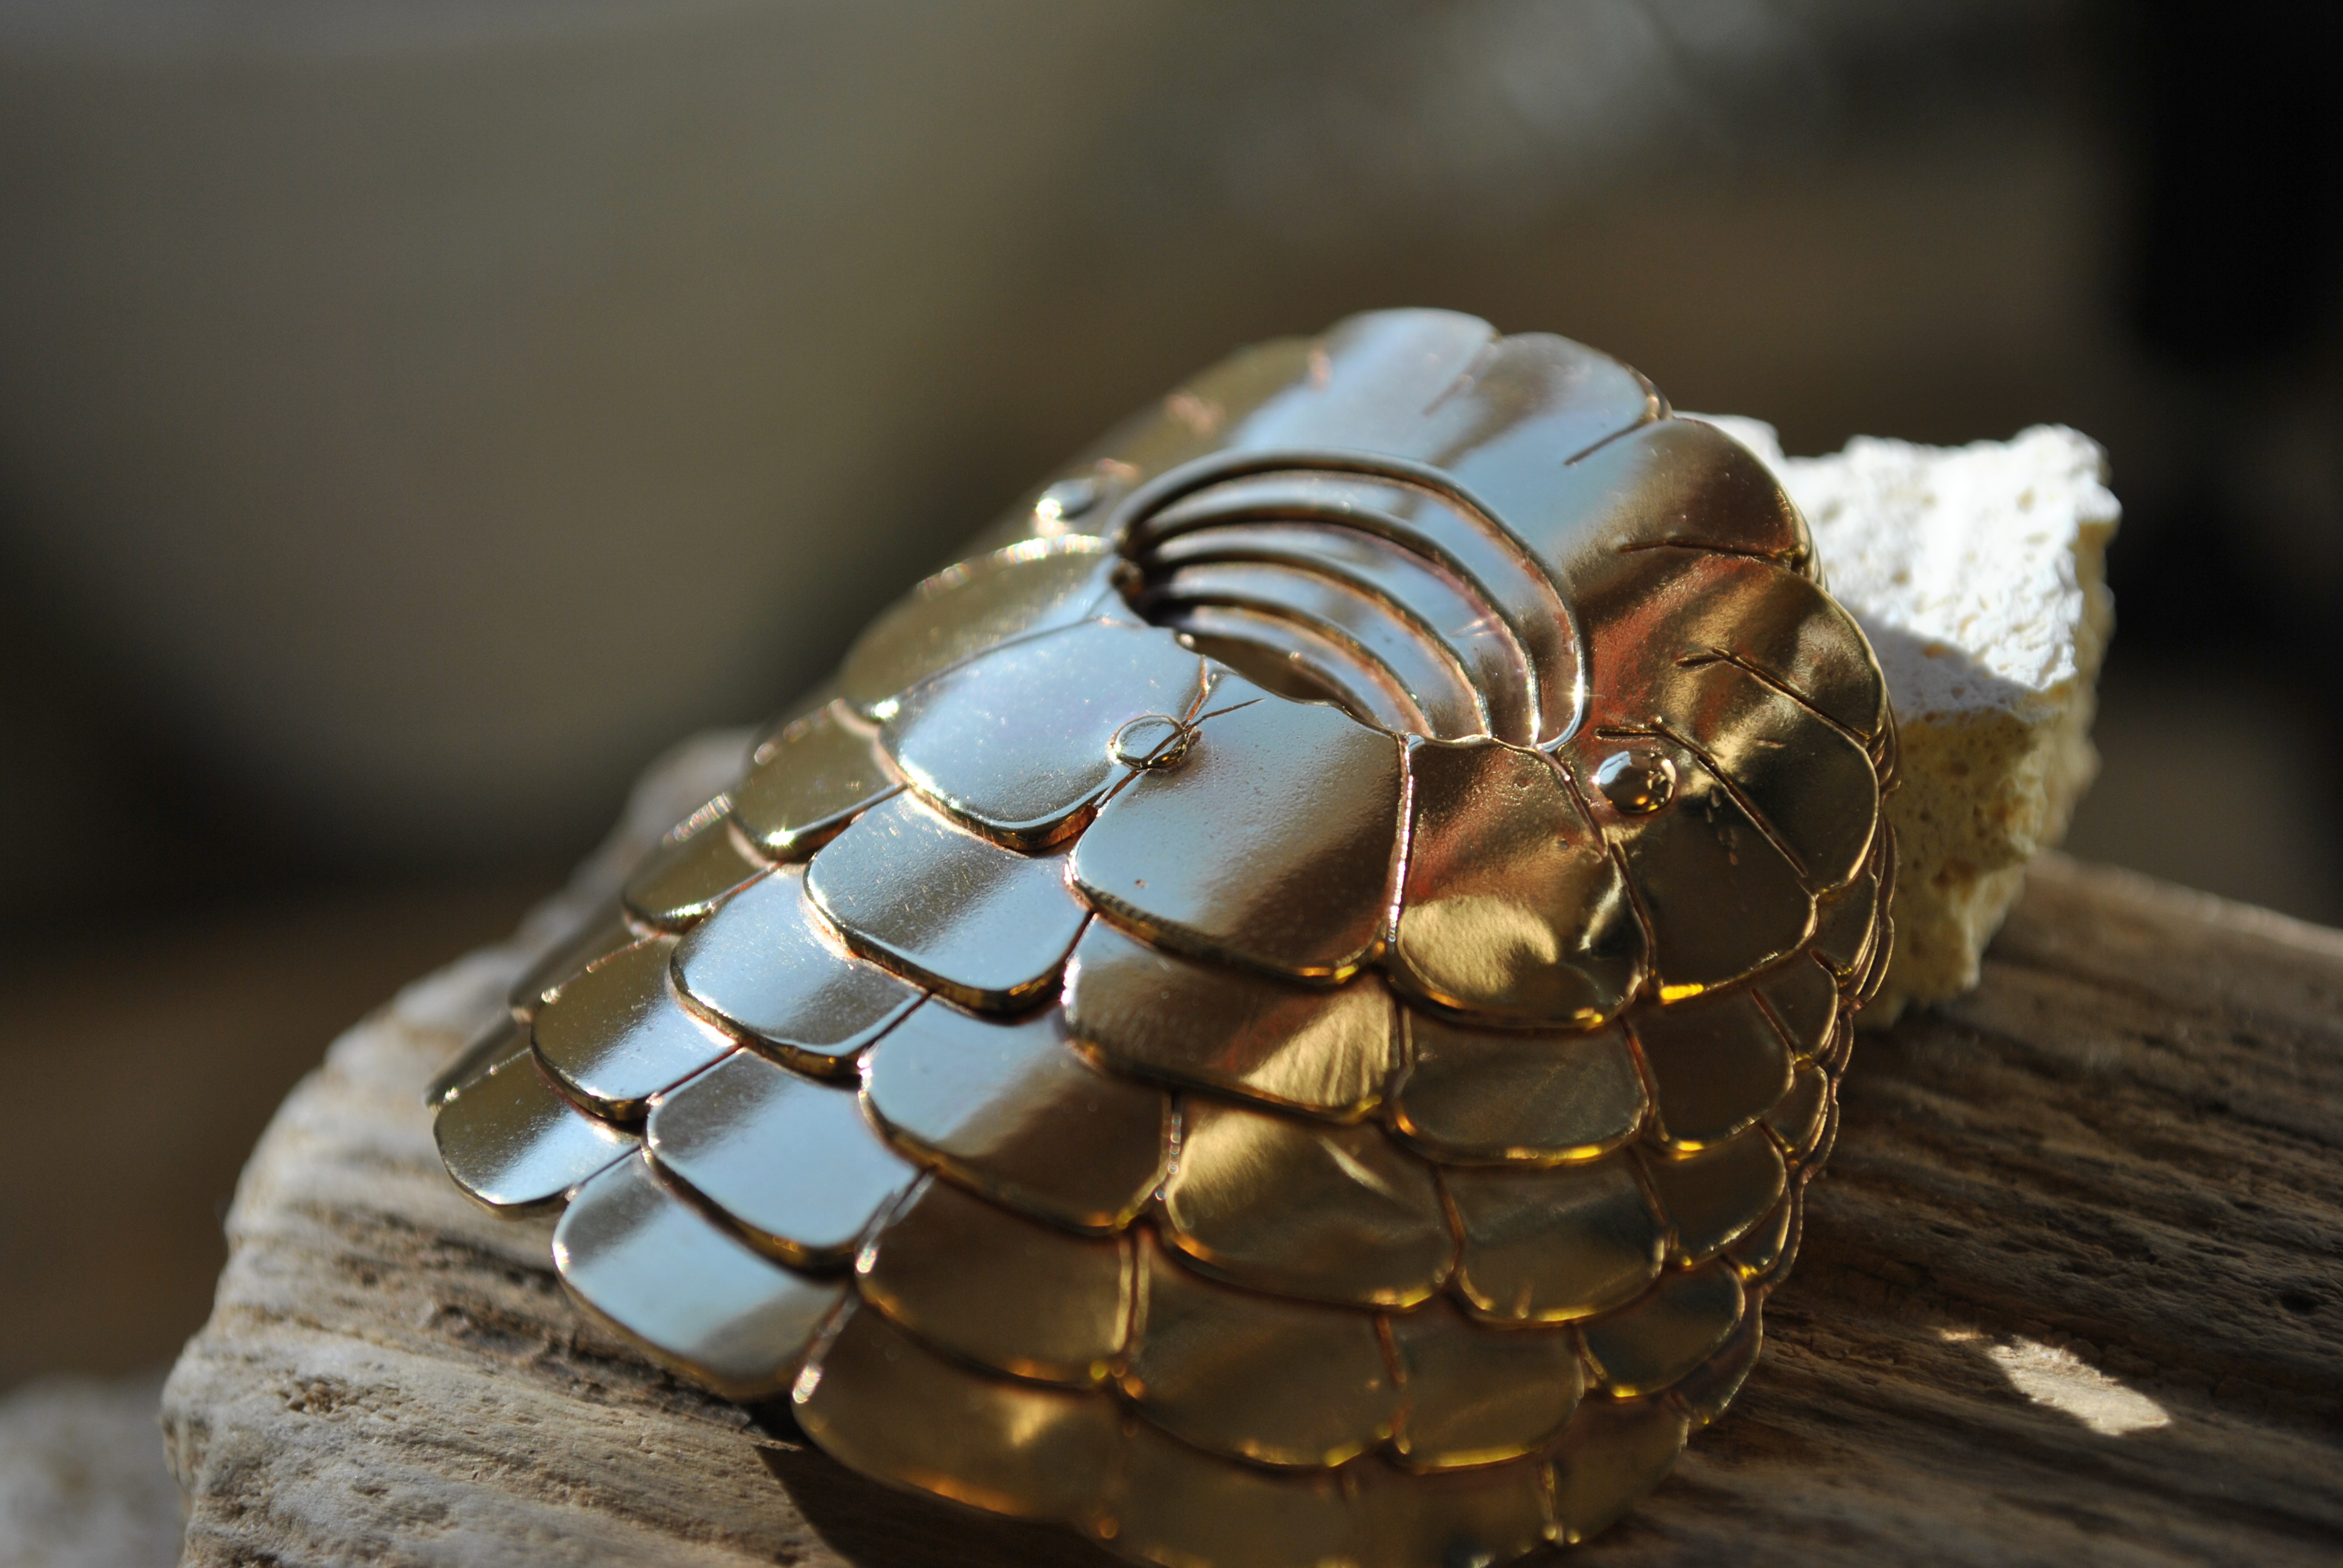
Got this awesome design from a client, I was inspired to try something a little different, a multi-layered riveted design. It turned out better than I would have thought! I also did something different than I normally do and documented the process.
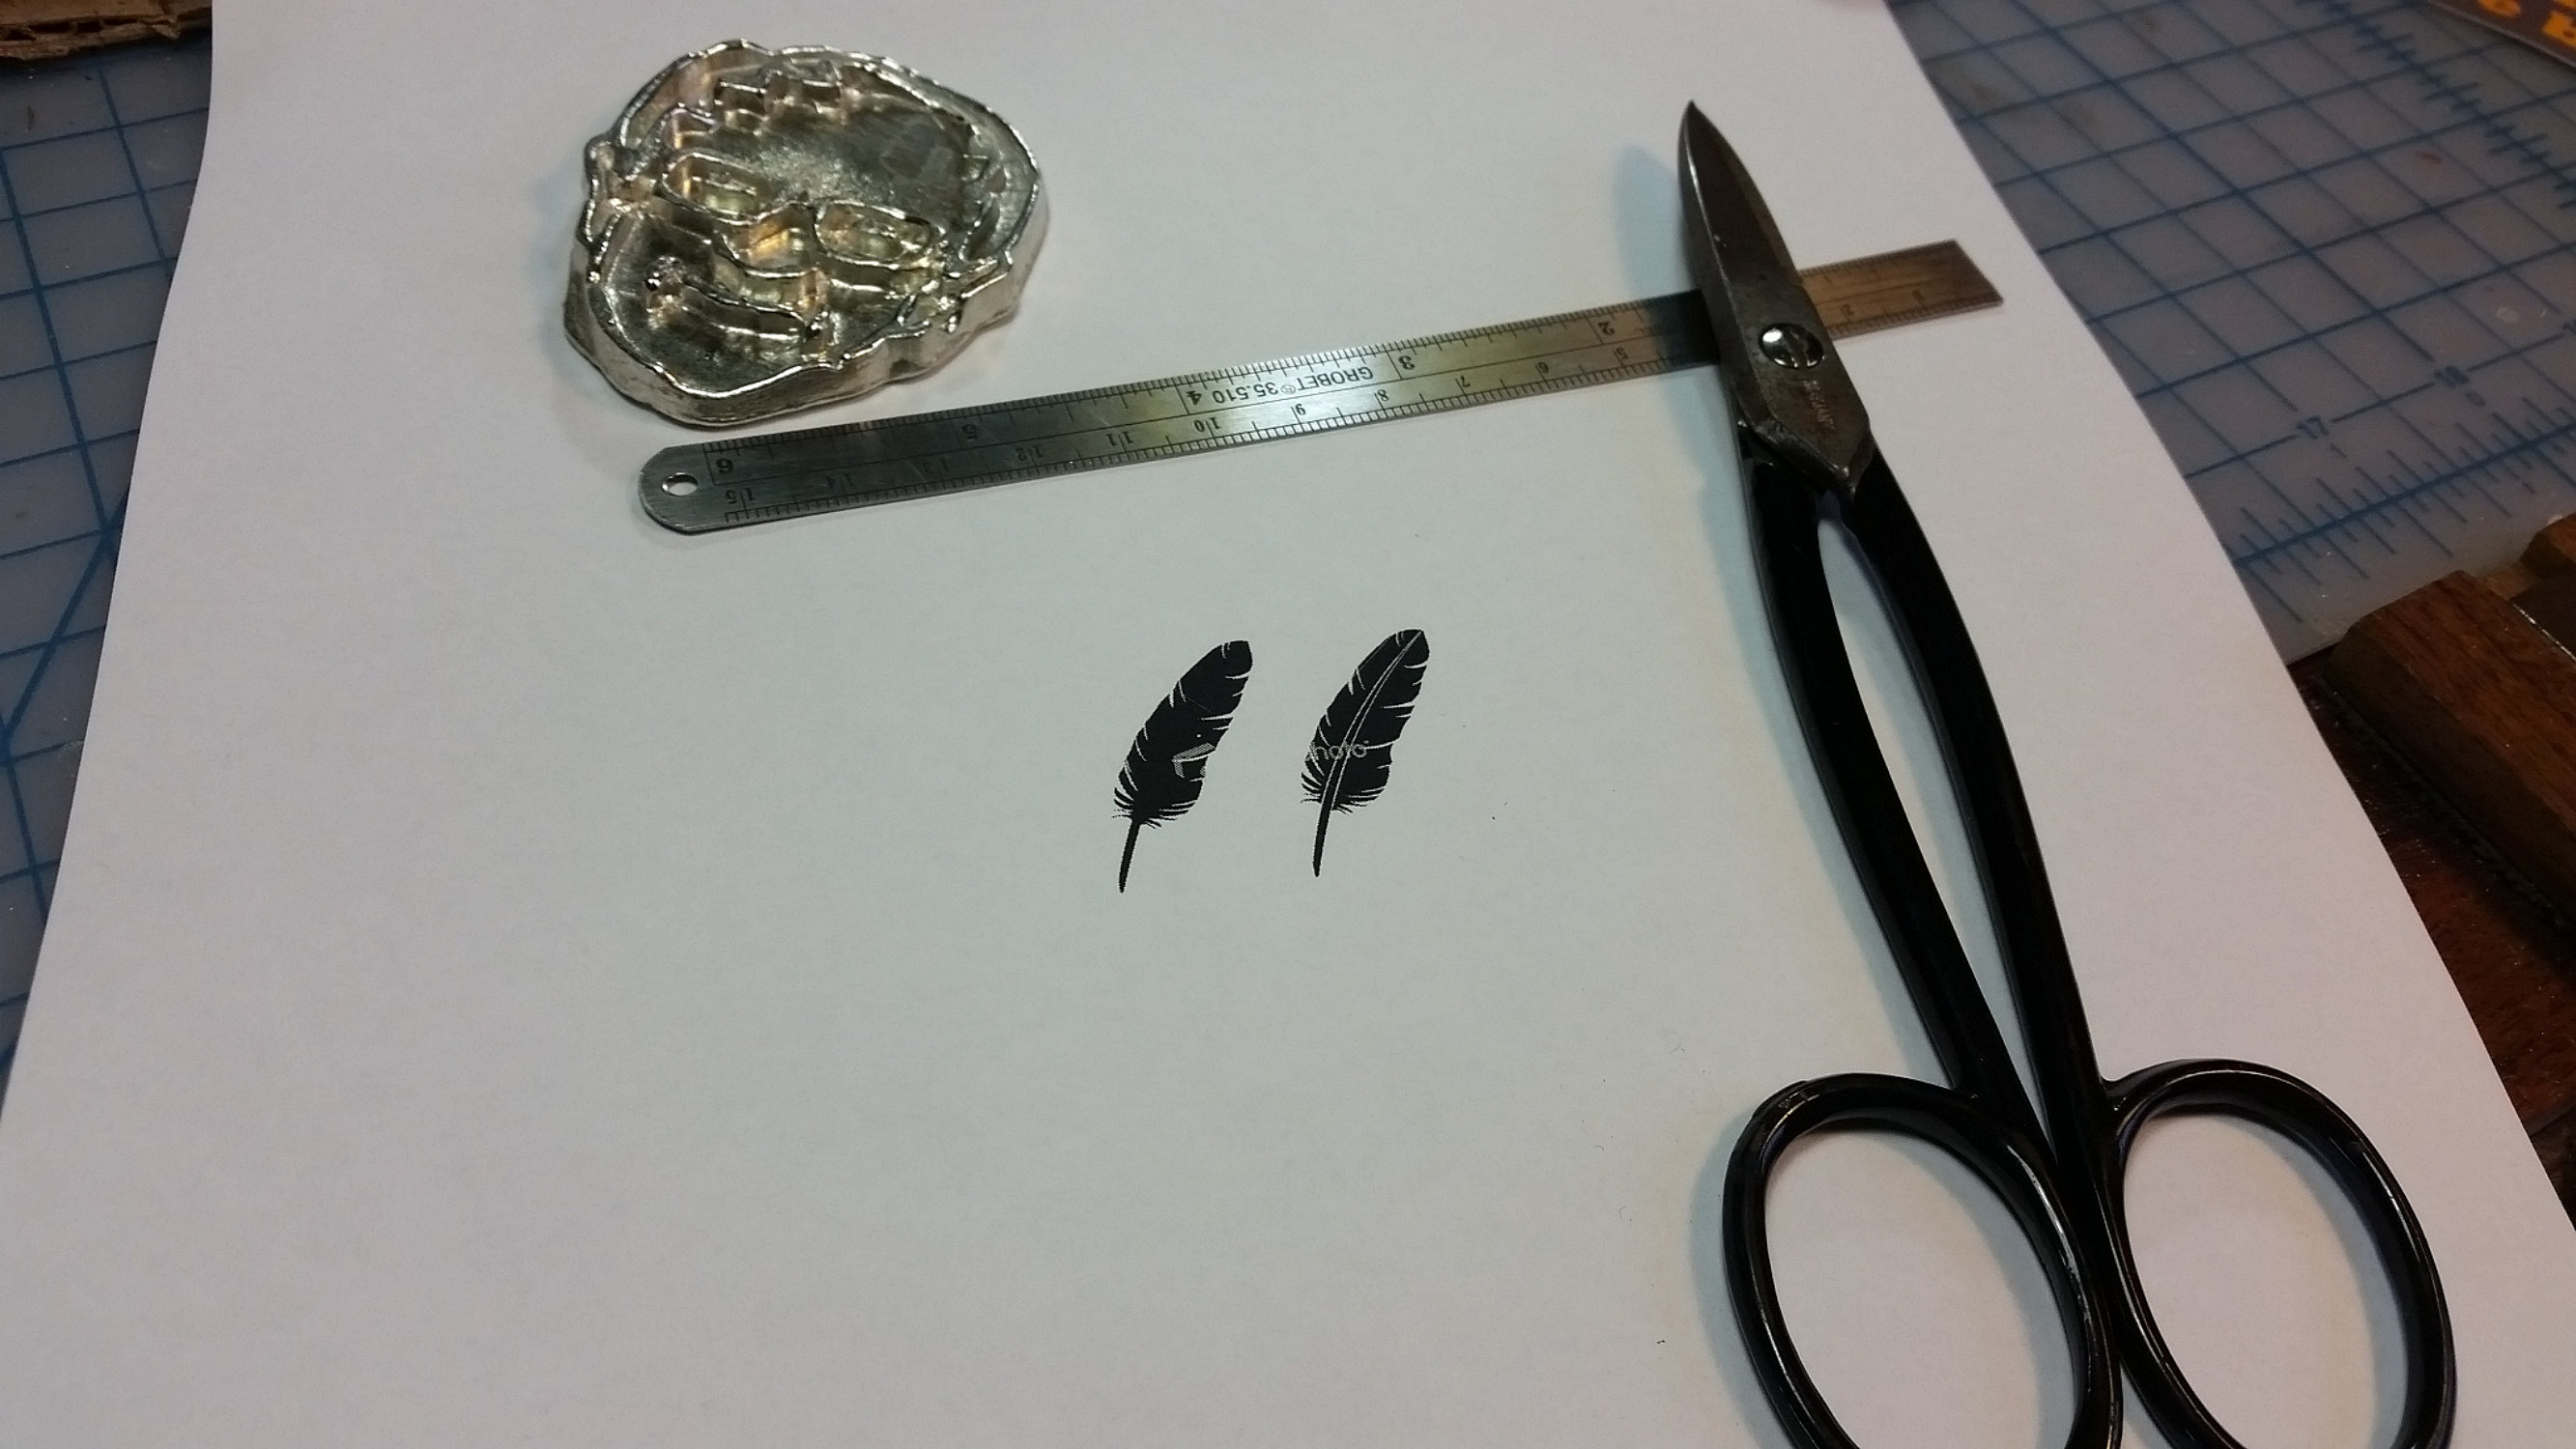
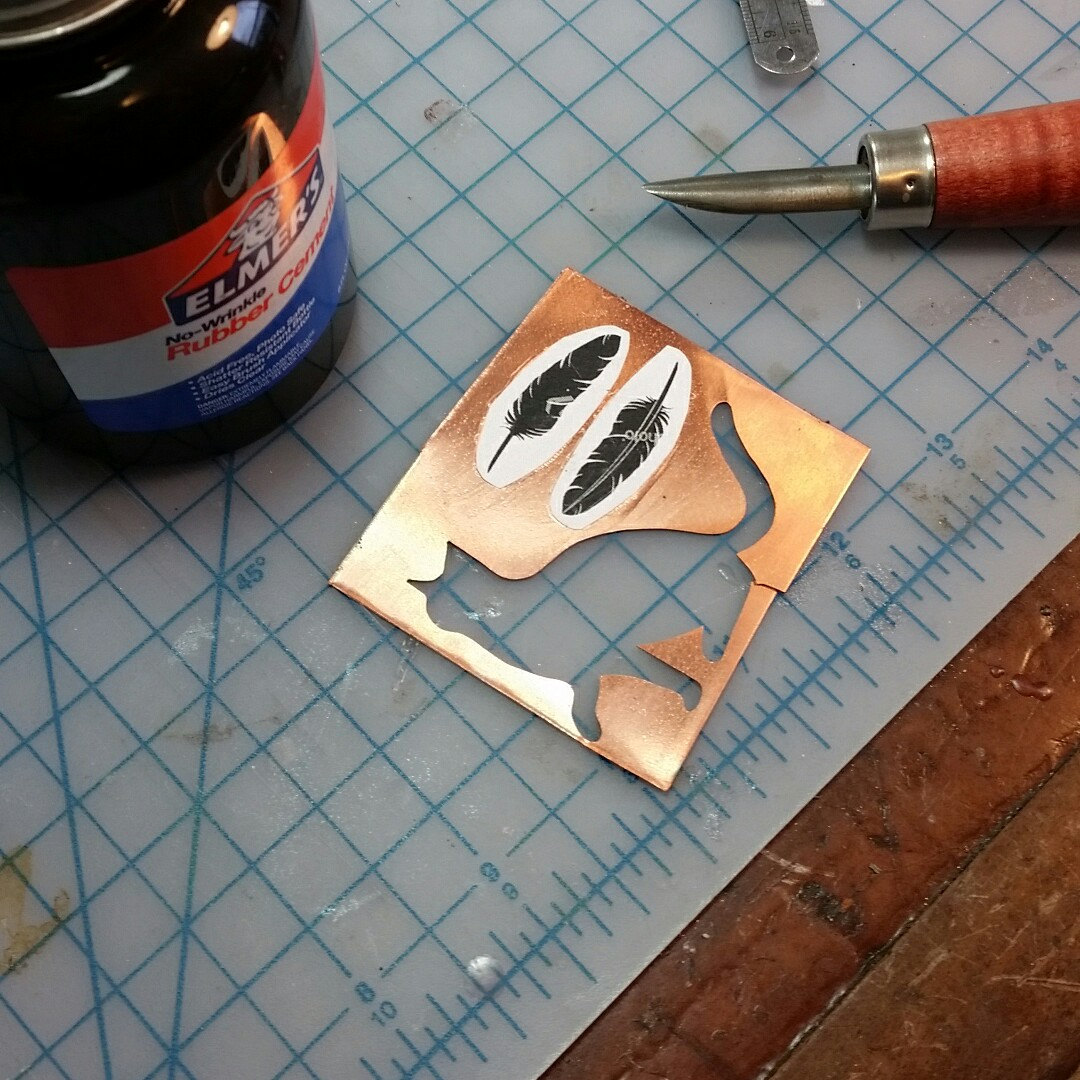
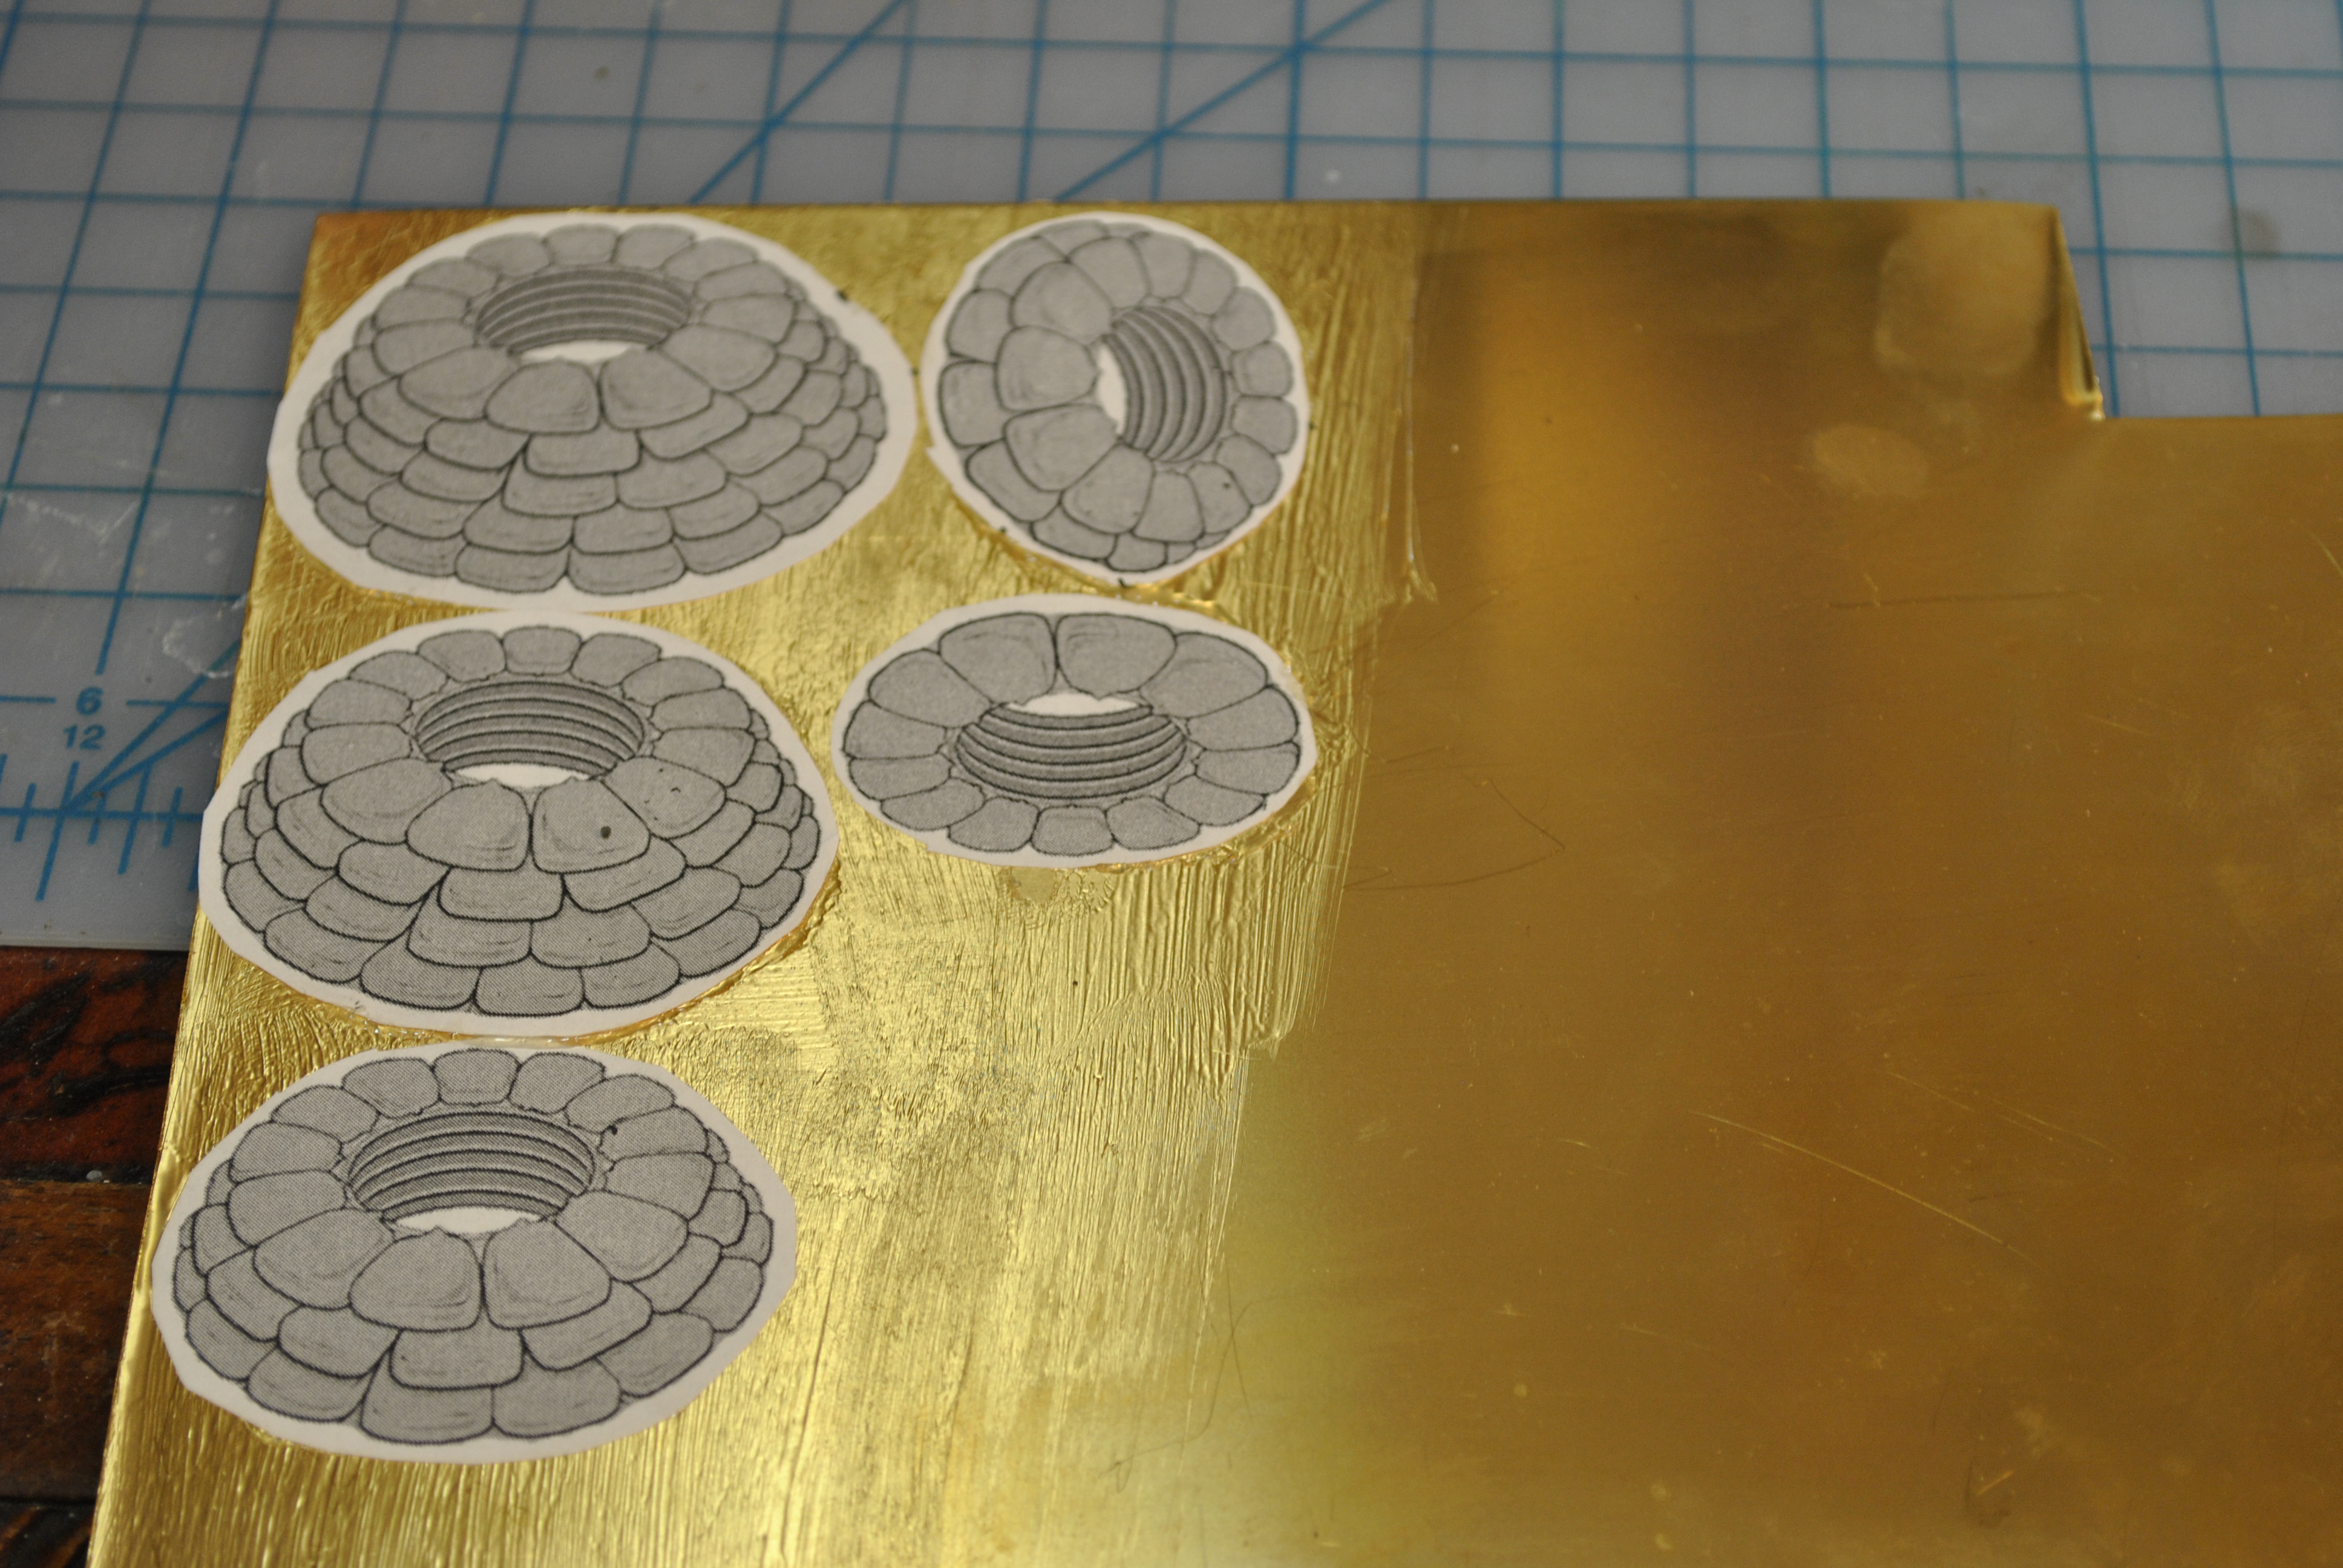
Start with a sheet of 22g brass and the design broken out into the layers.
Using rubber cement I attached the cut out designs on the brass sheet.
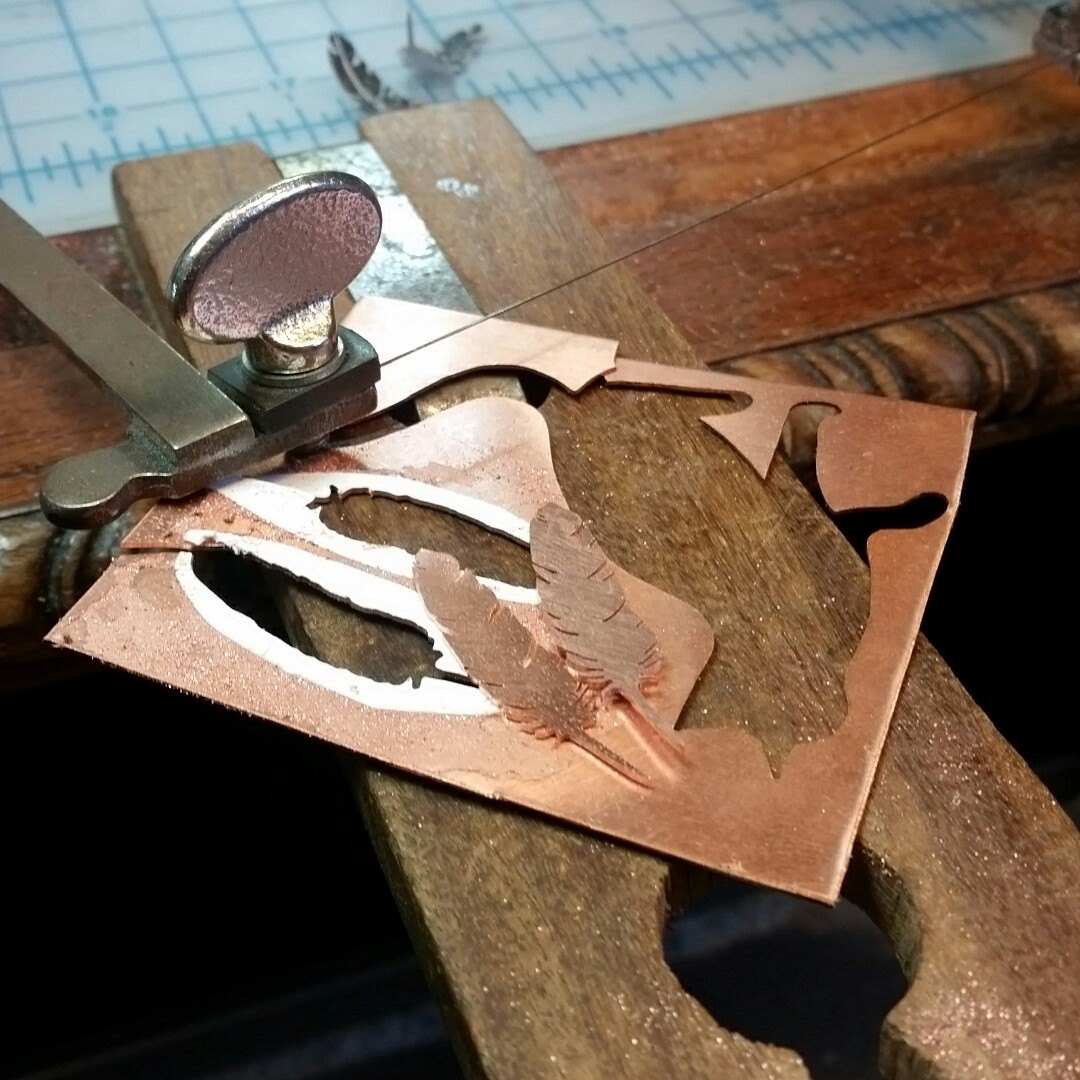
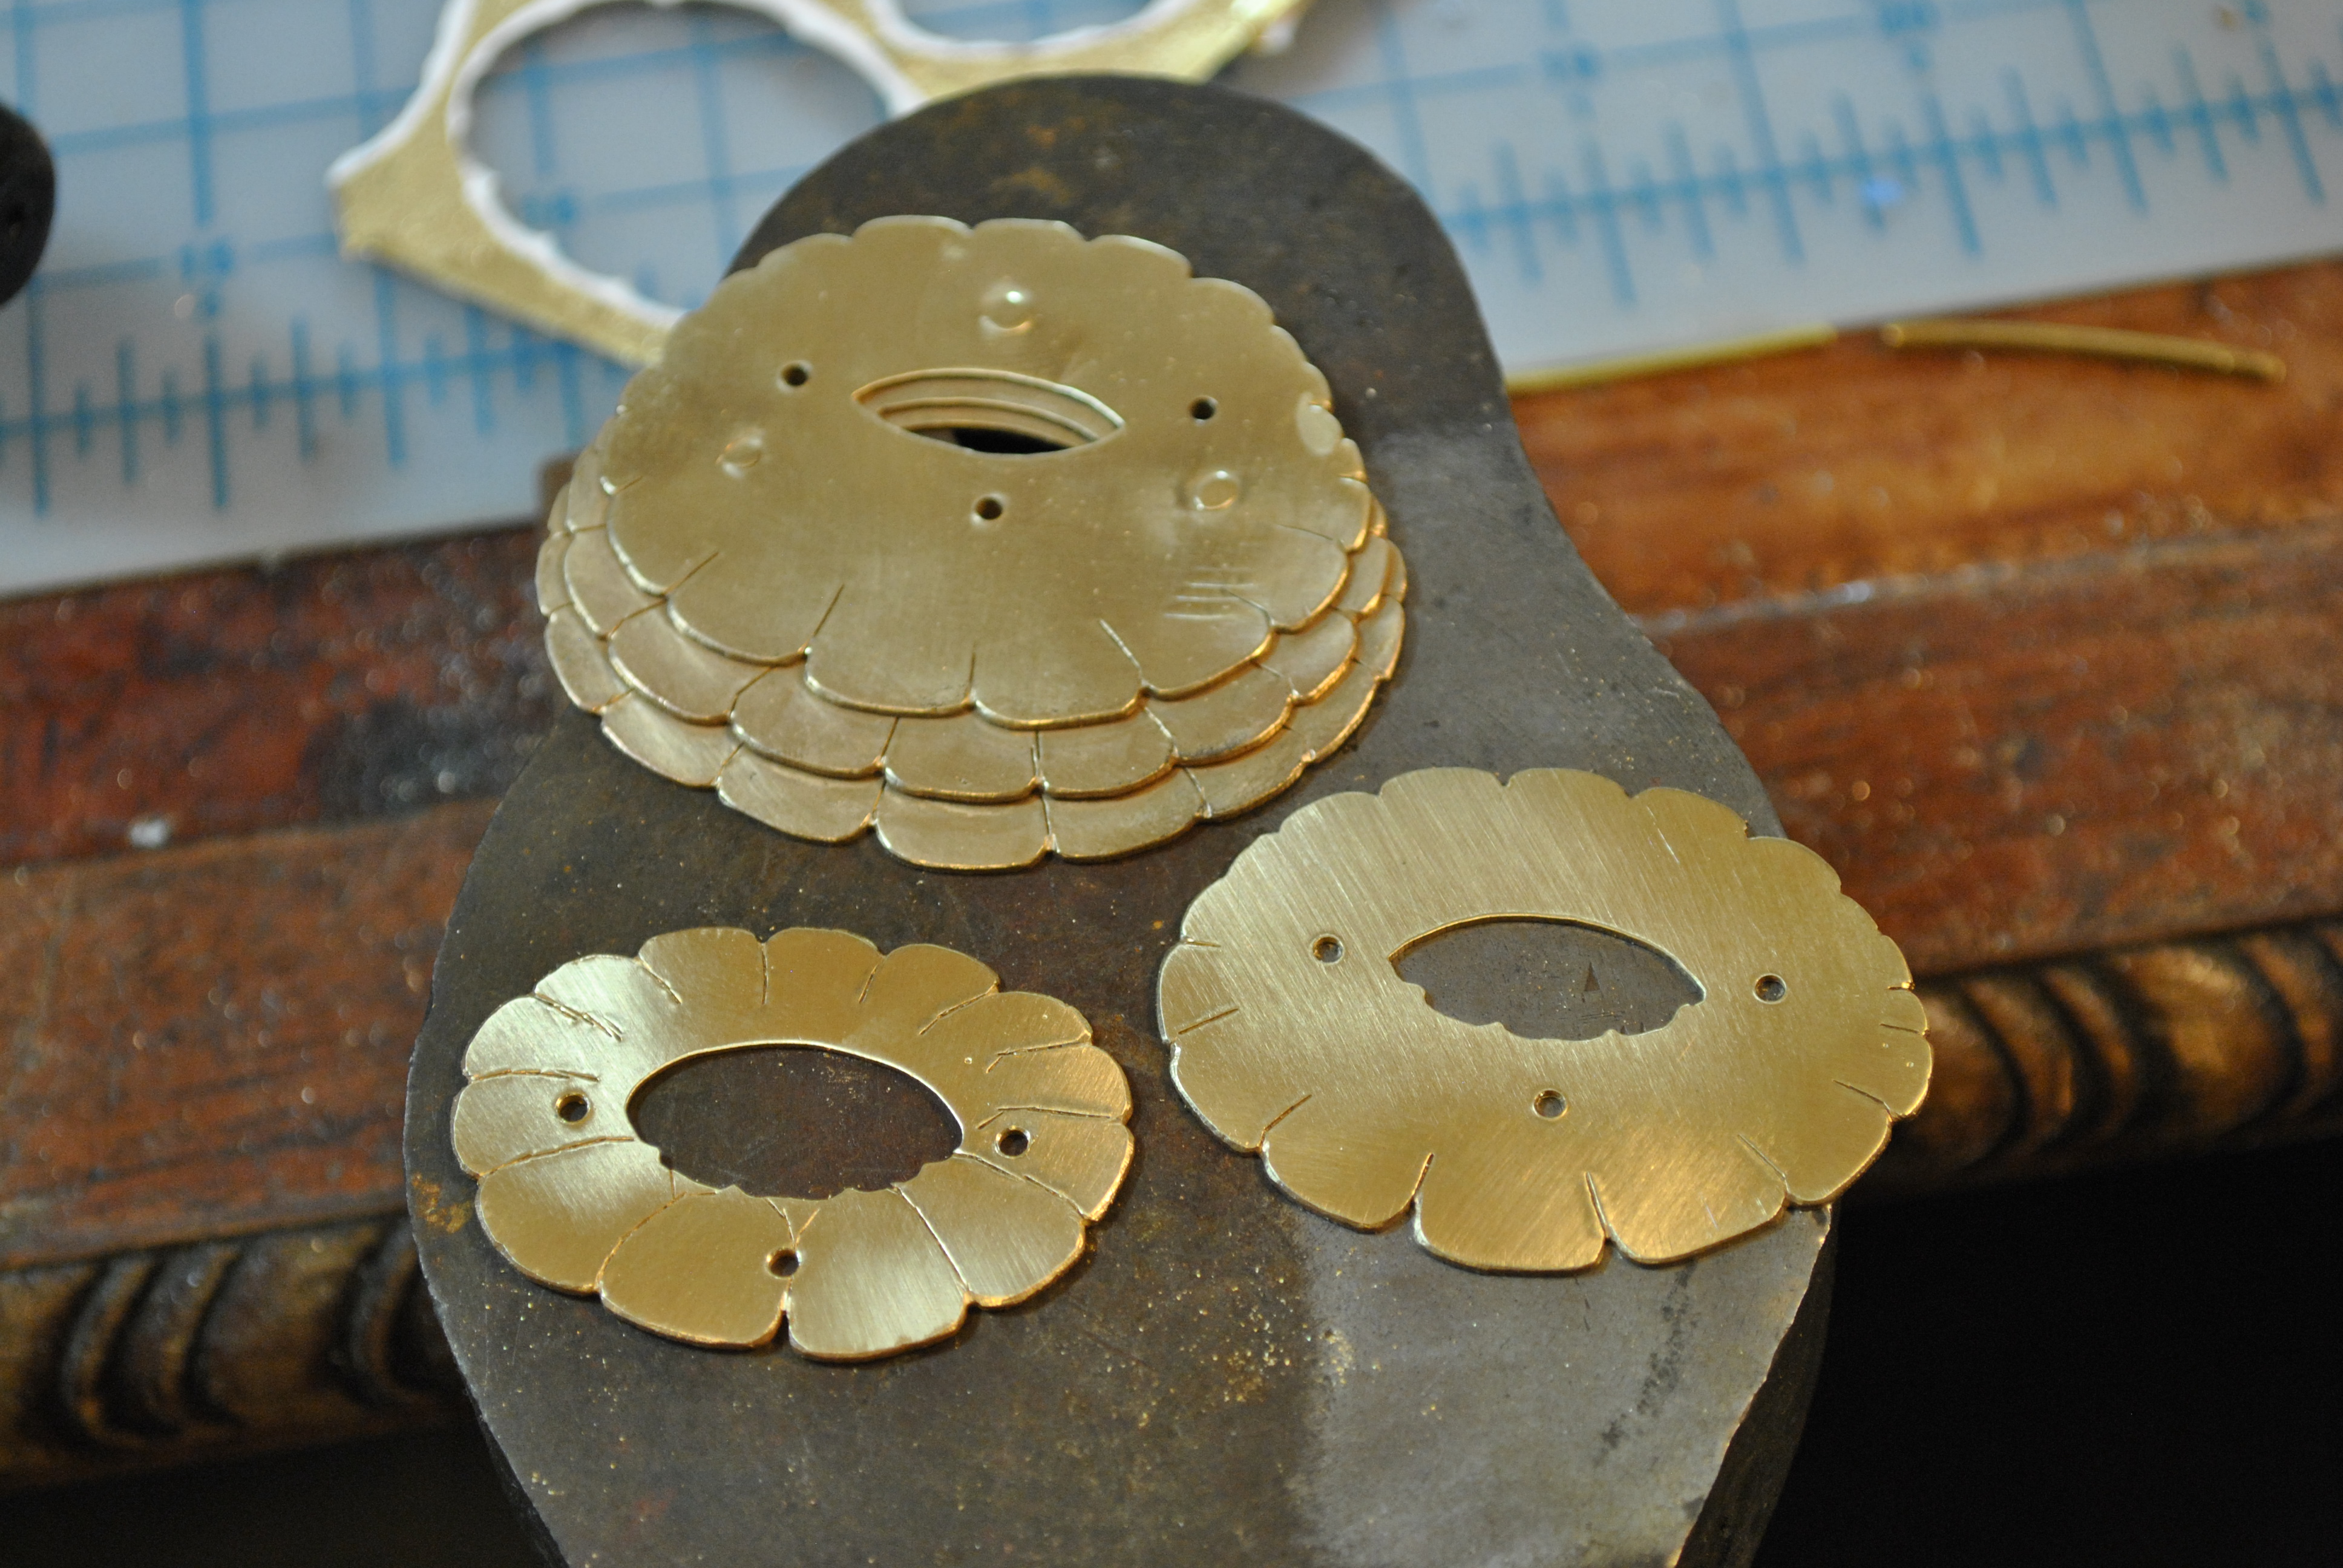
After they were cut out I filed and cut out the interior of the design, what you can’t see in this picture (but you can in the following) is where I etched the lines of the design in and filed the kernels of the corn.
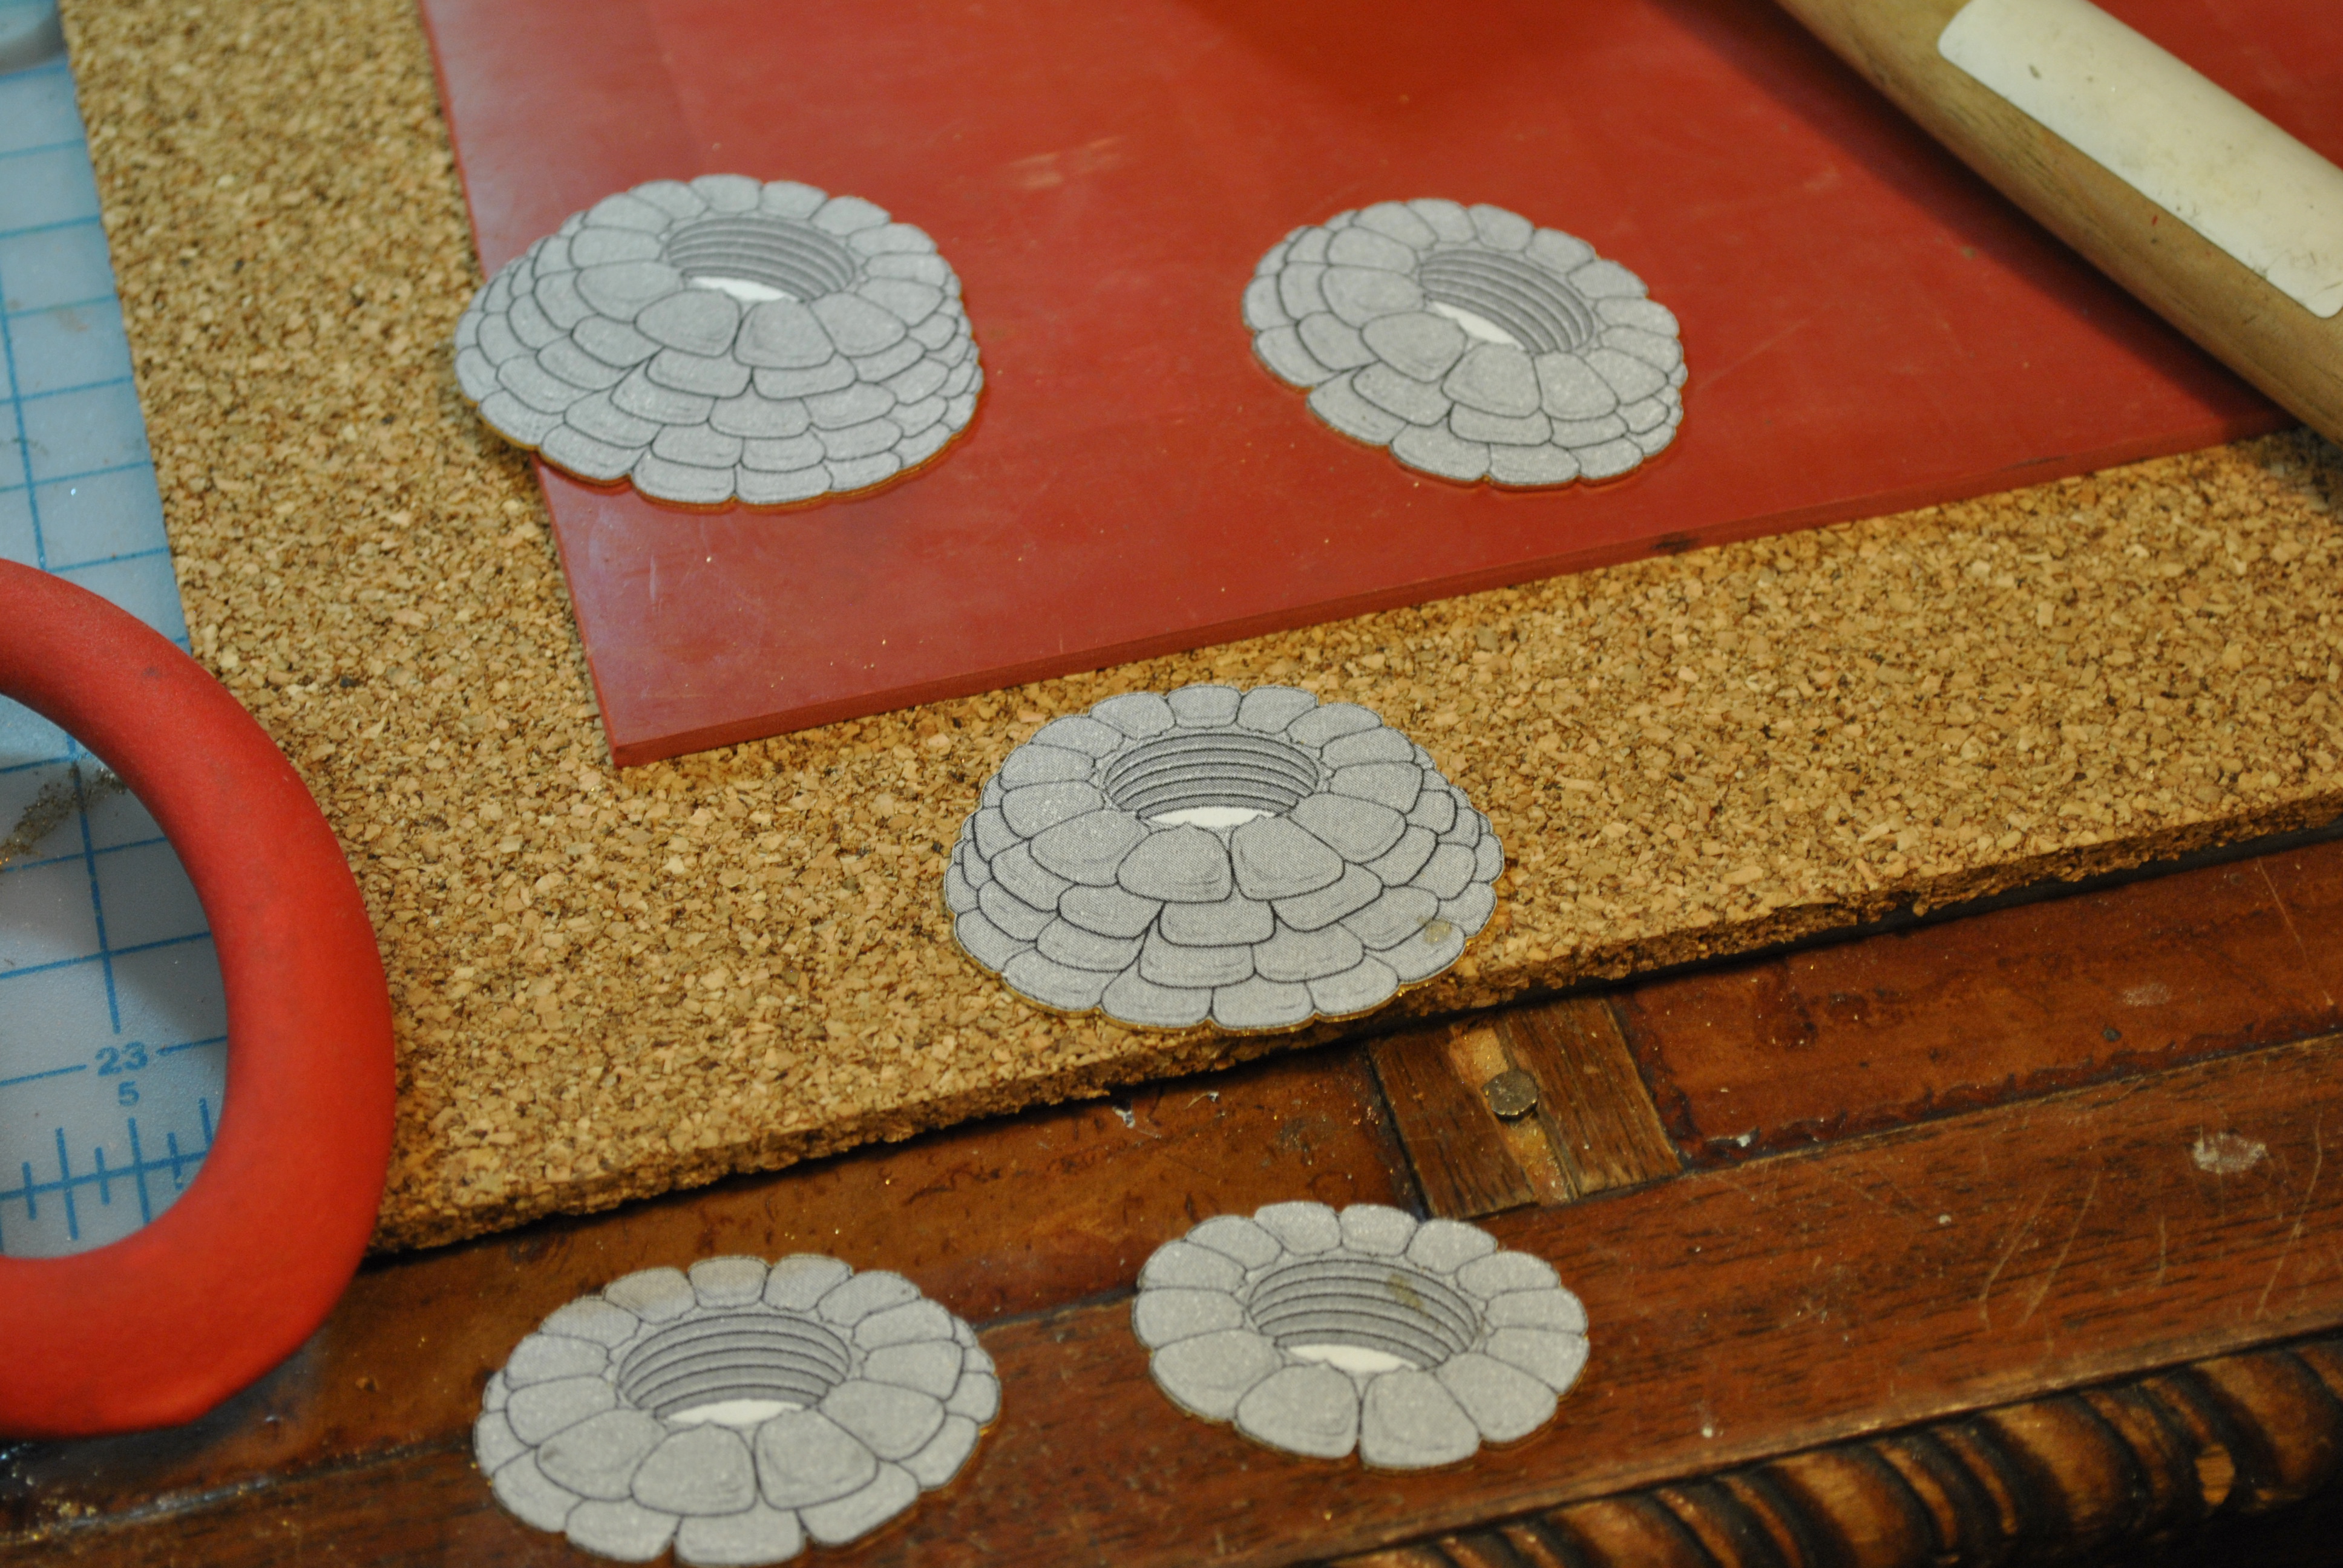
the final cut outs with etching and filing.
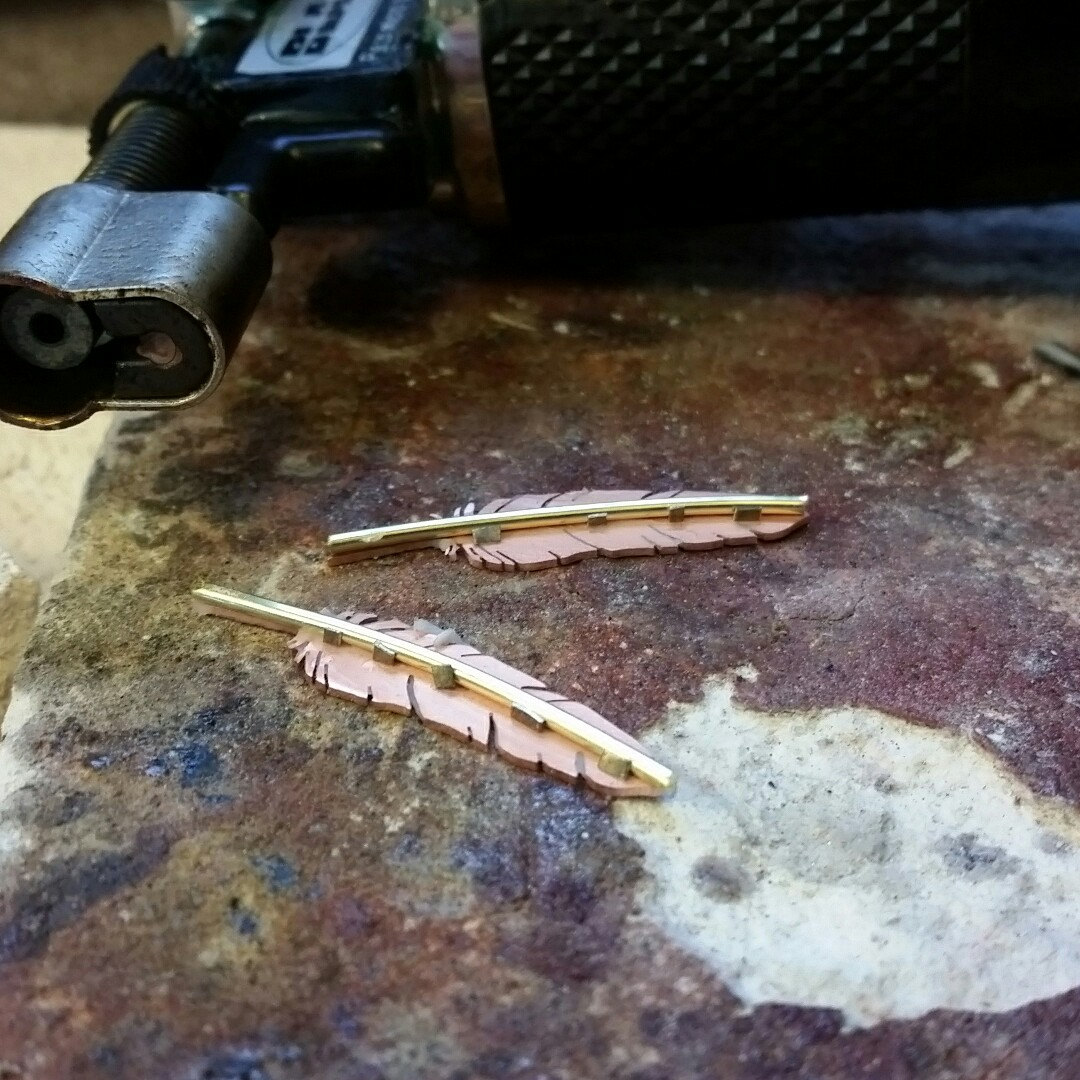
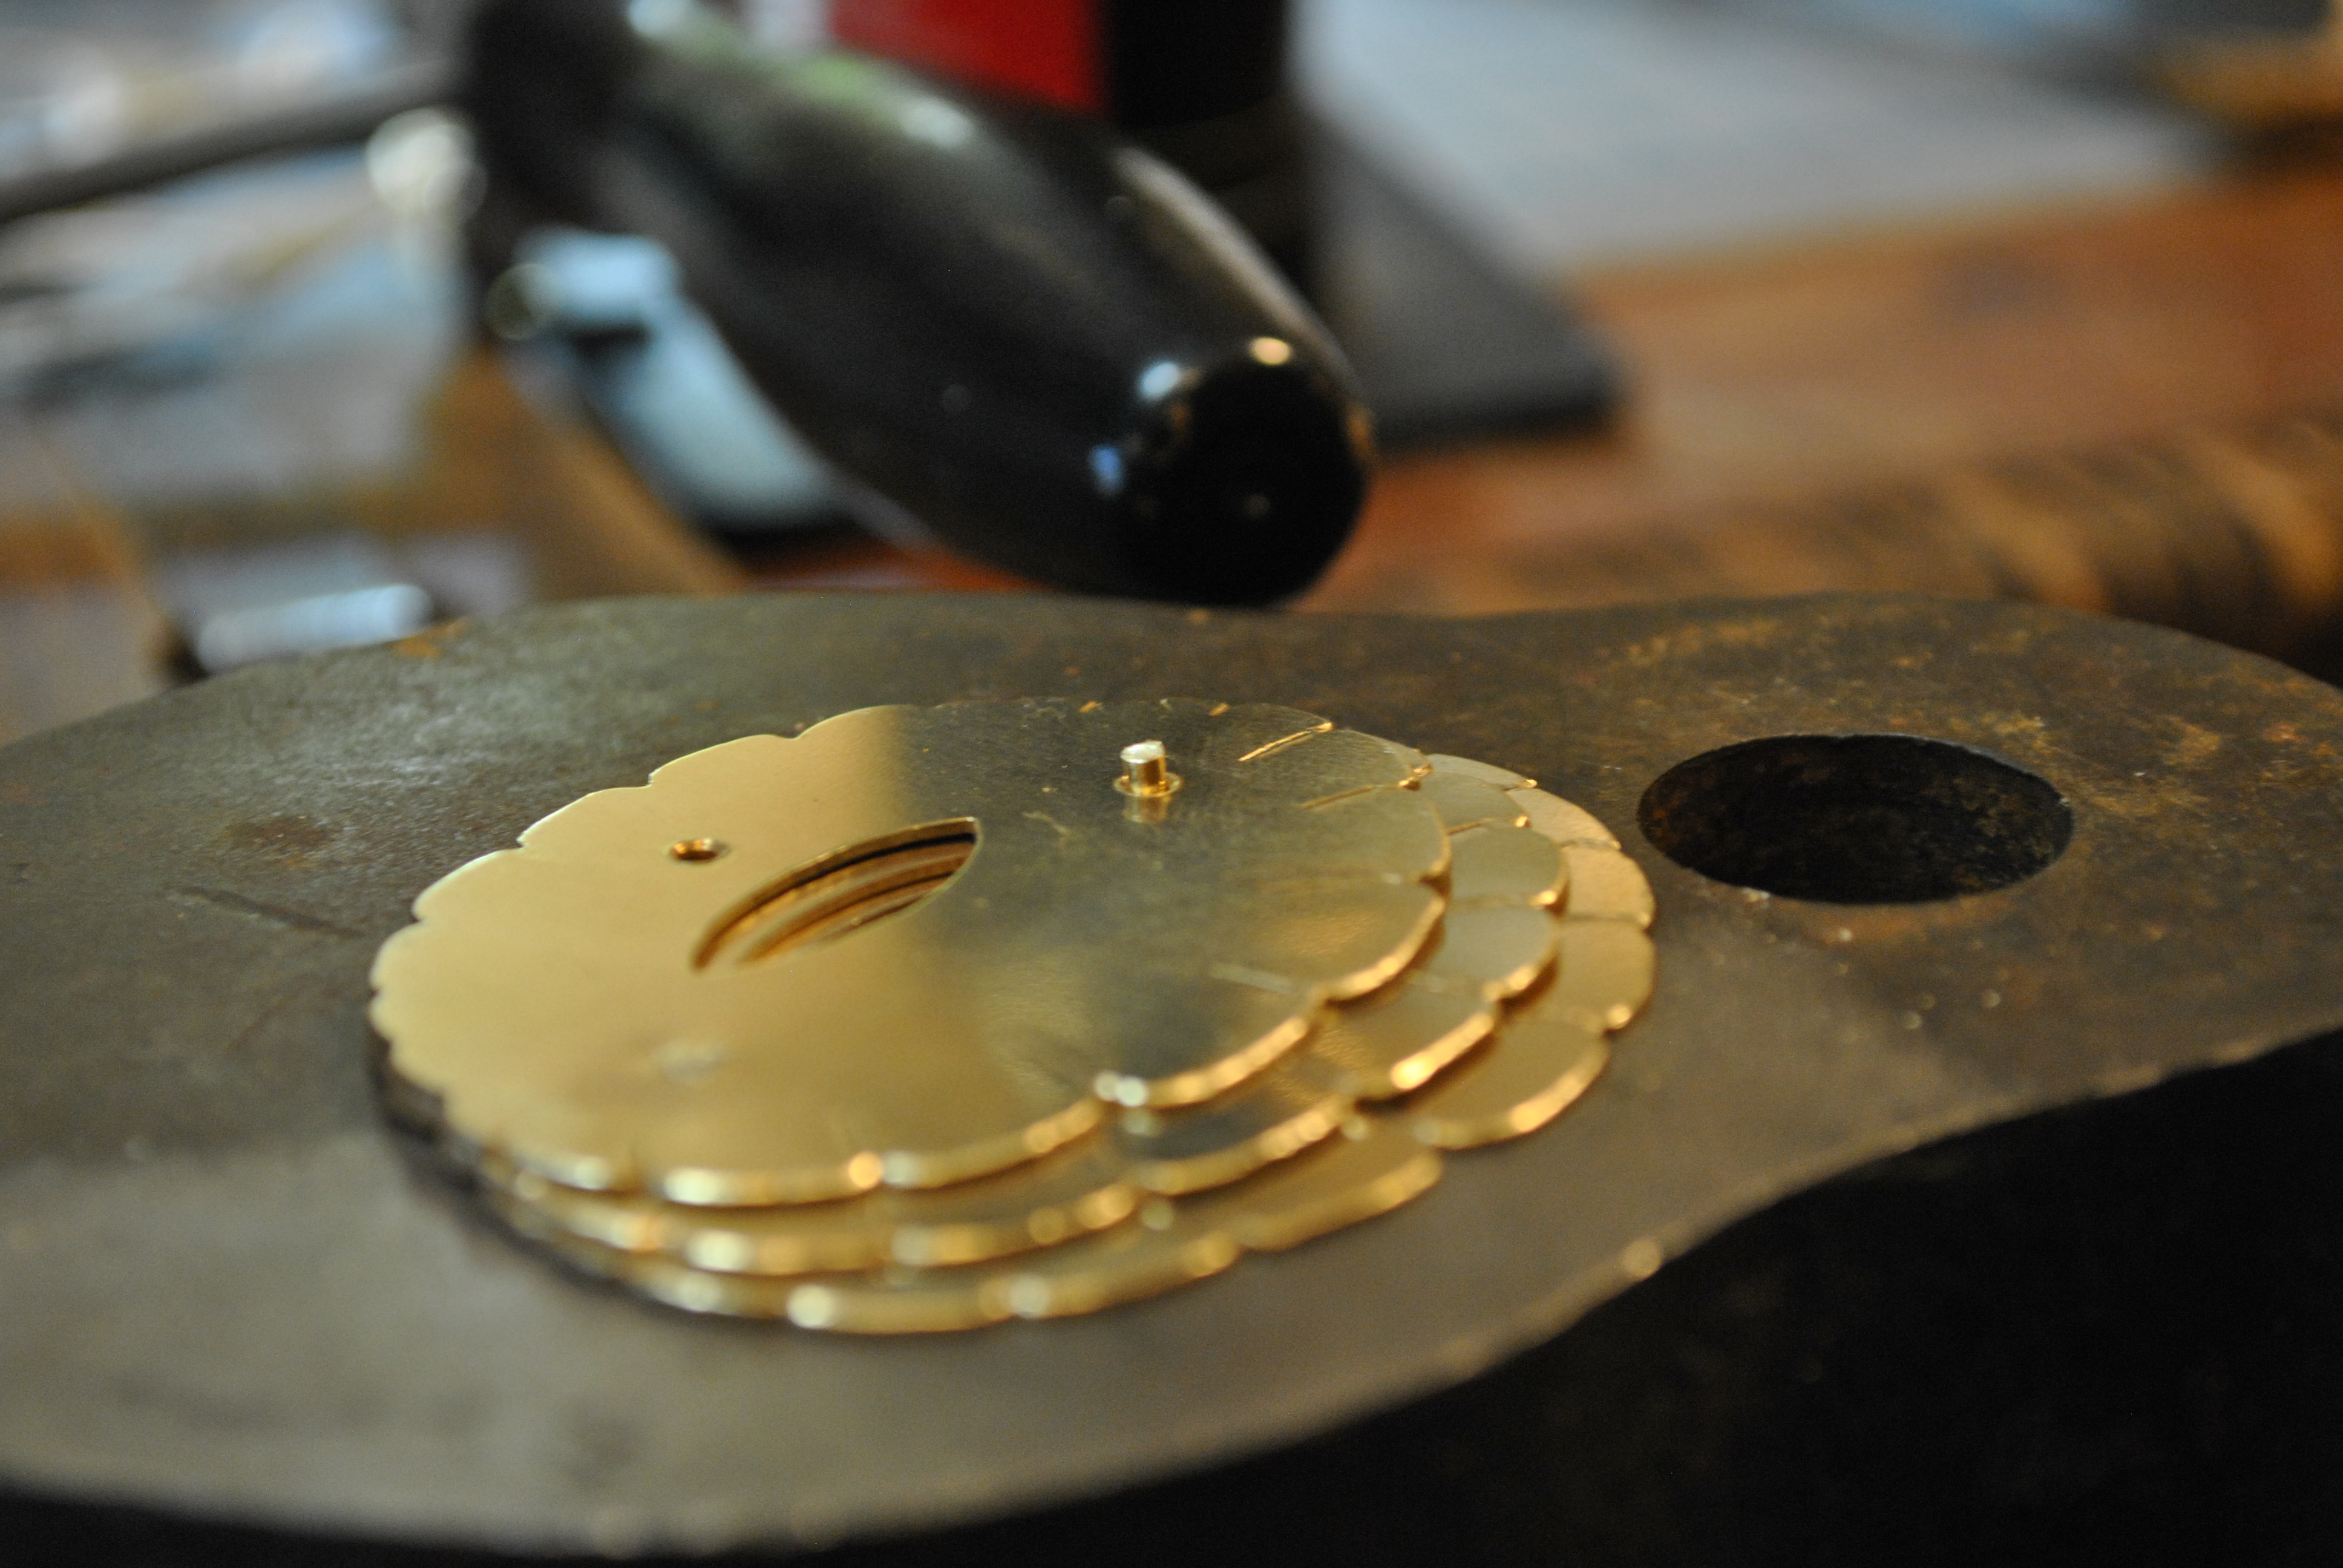
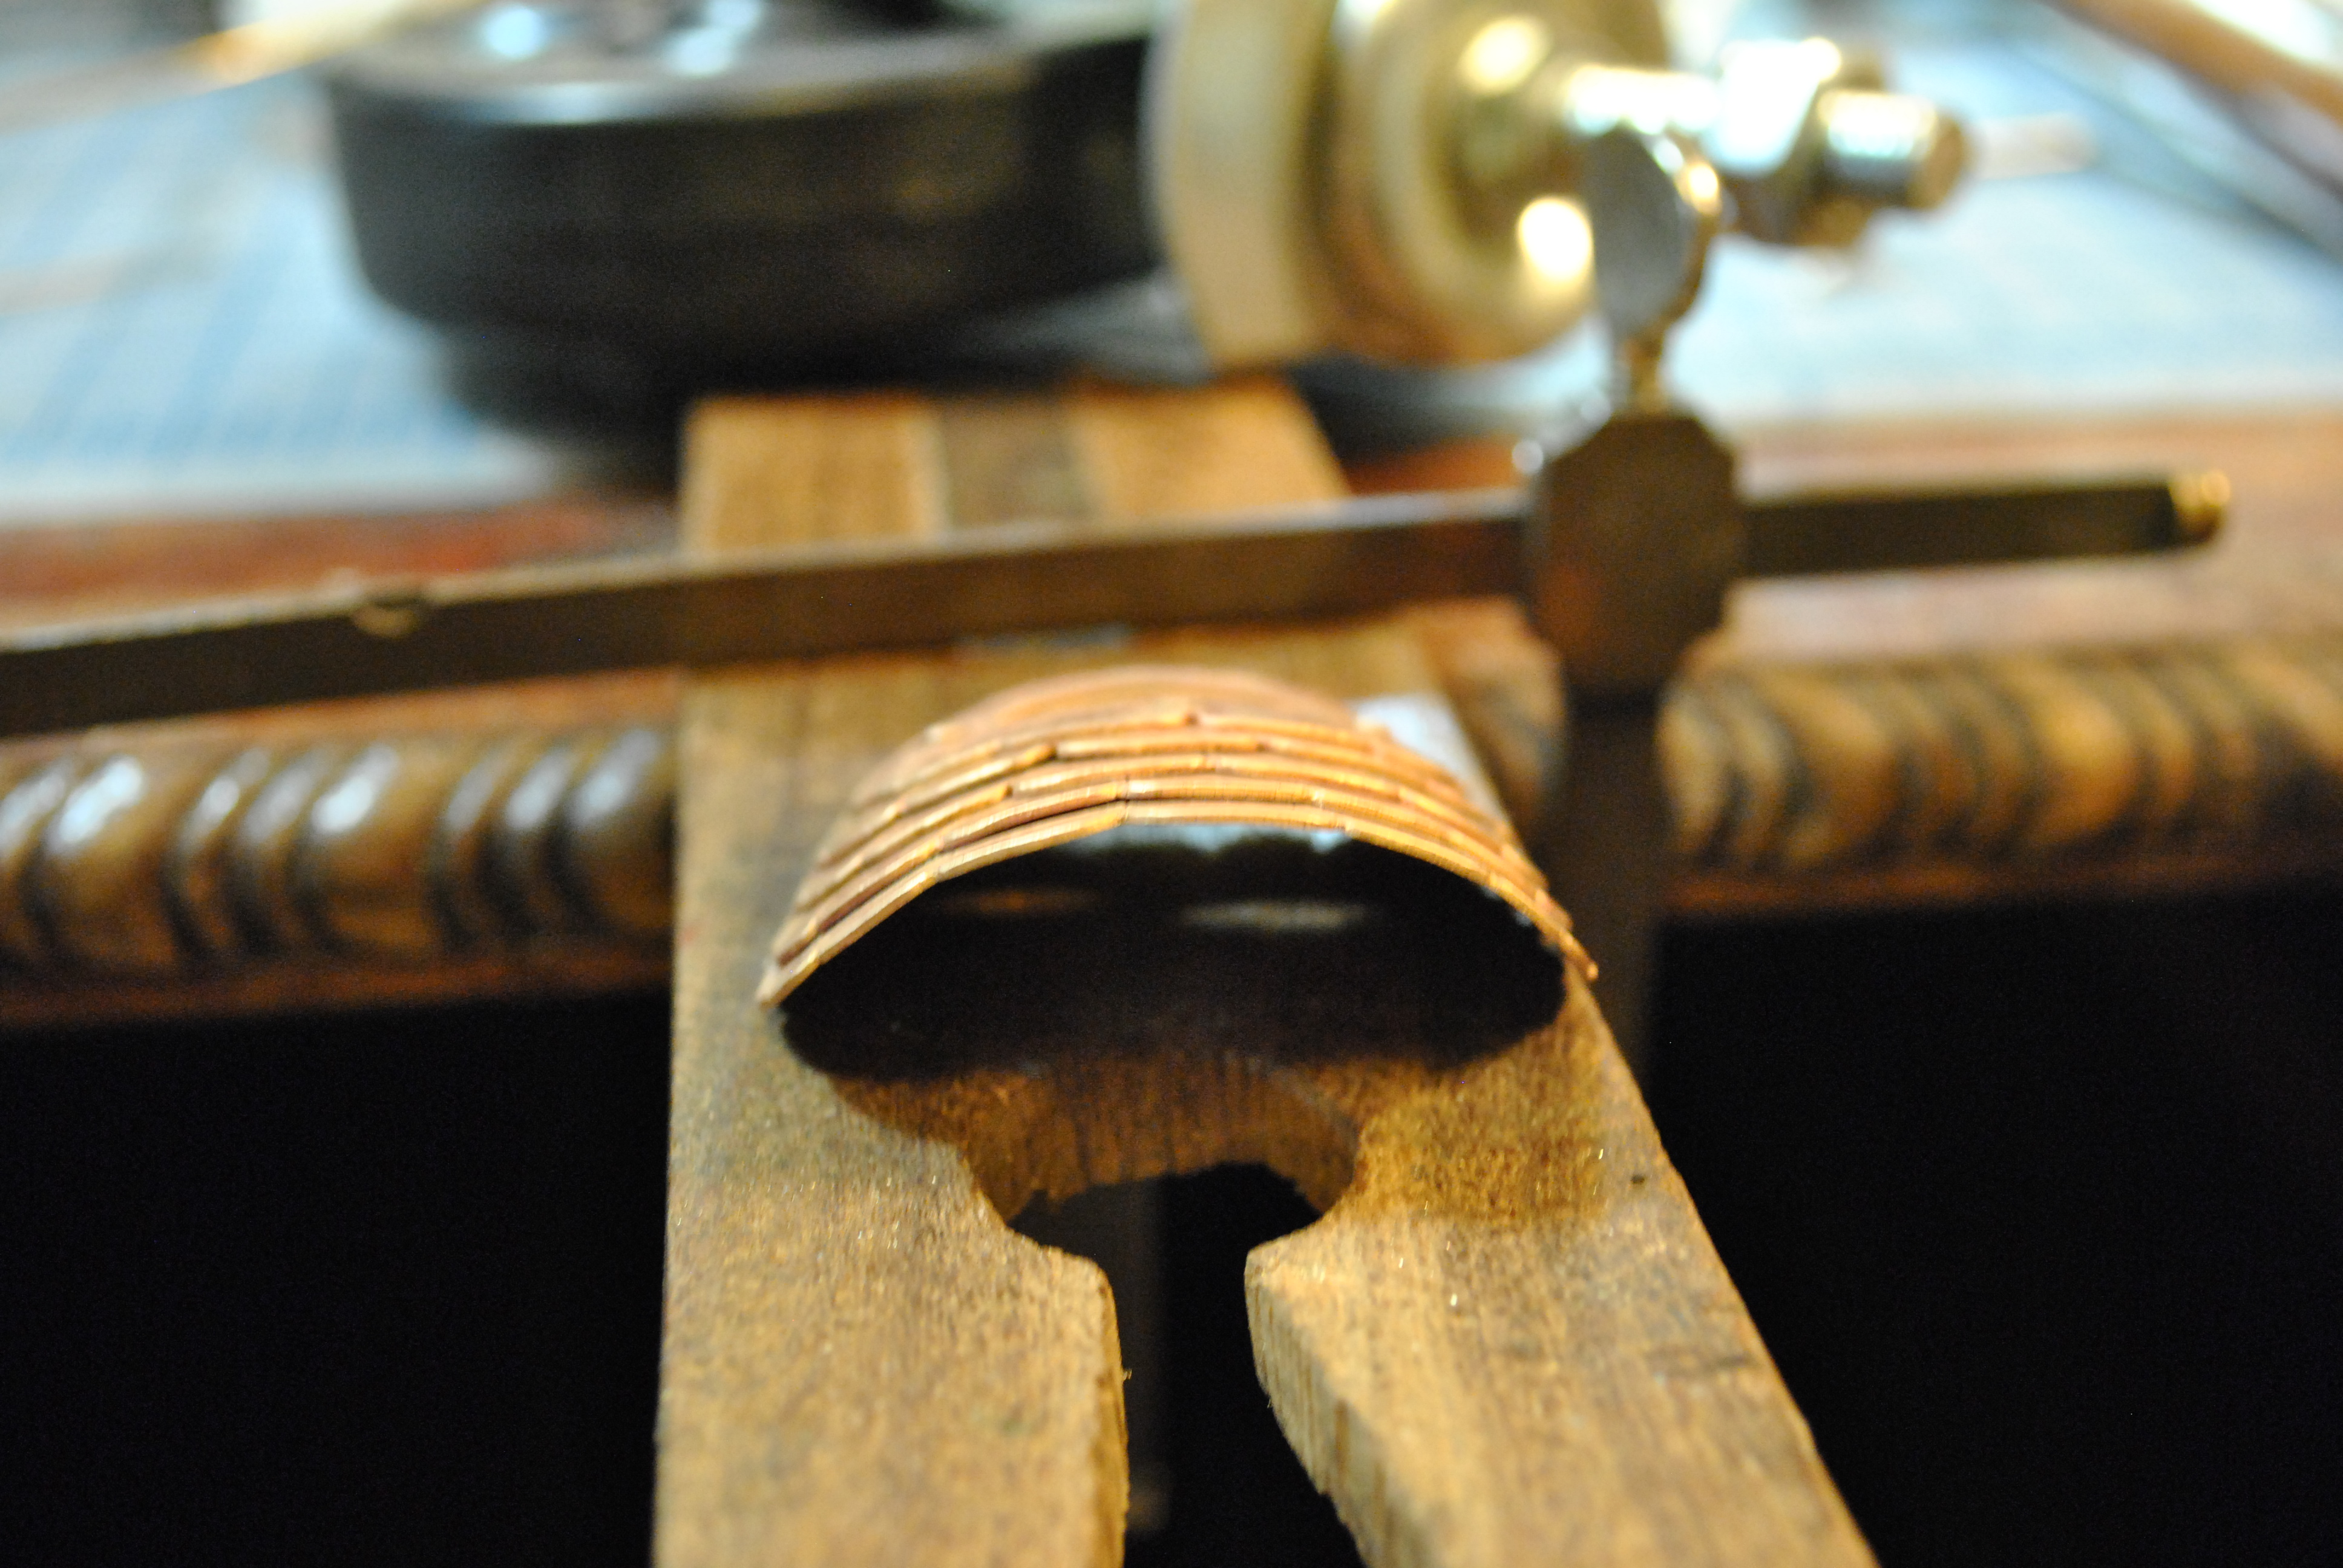
Dry fitting getting ready for the riveting.
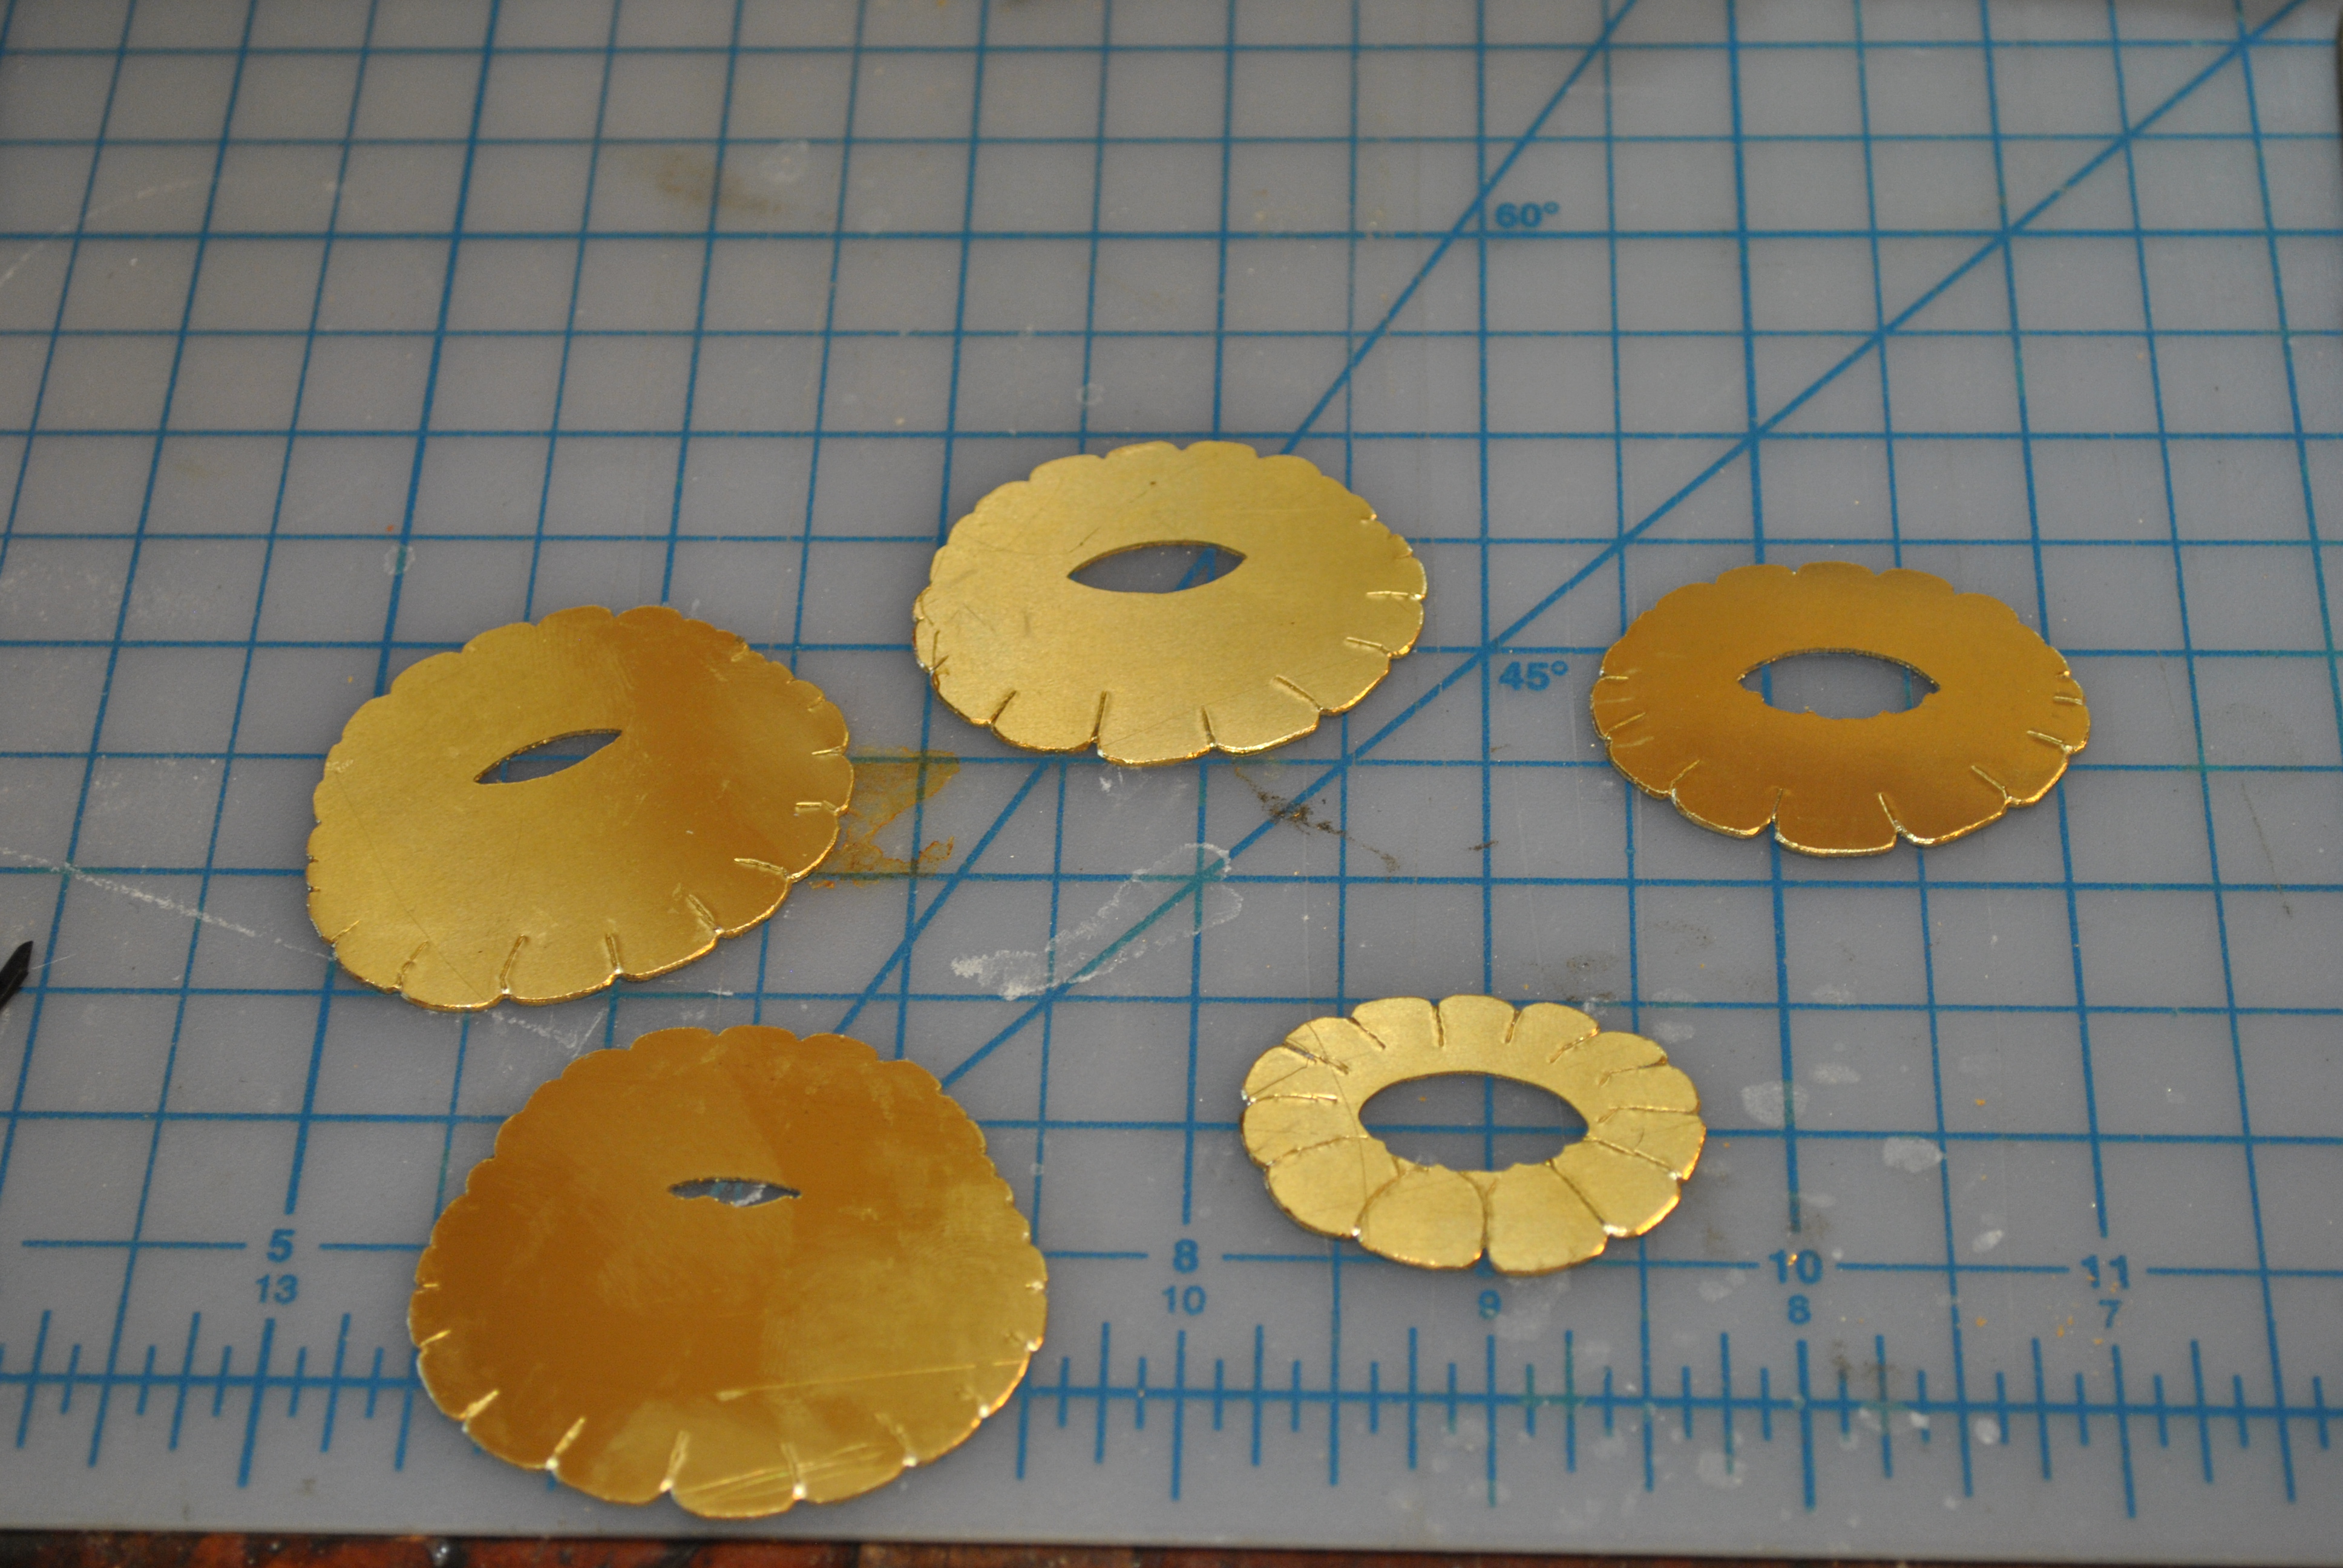
I did the rivets in two layers for strength and also so that they would fit better into the final design. I didn’t want rivets showing on every layer, but also wanted it to be strong, so there are three “hidden” rivets.
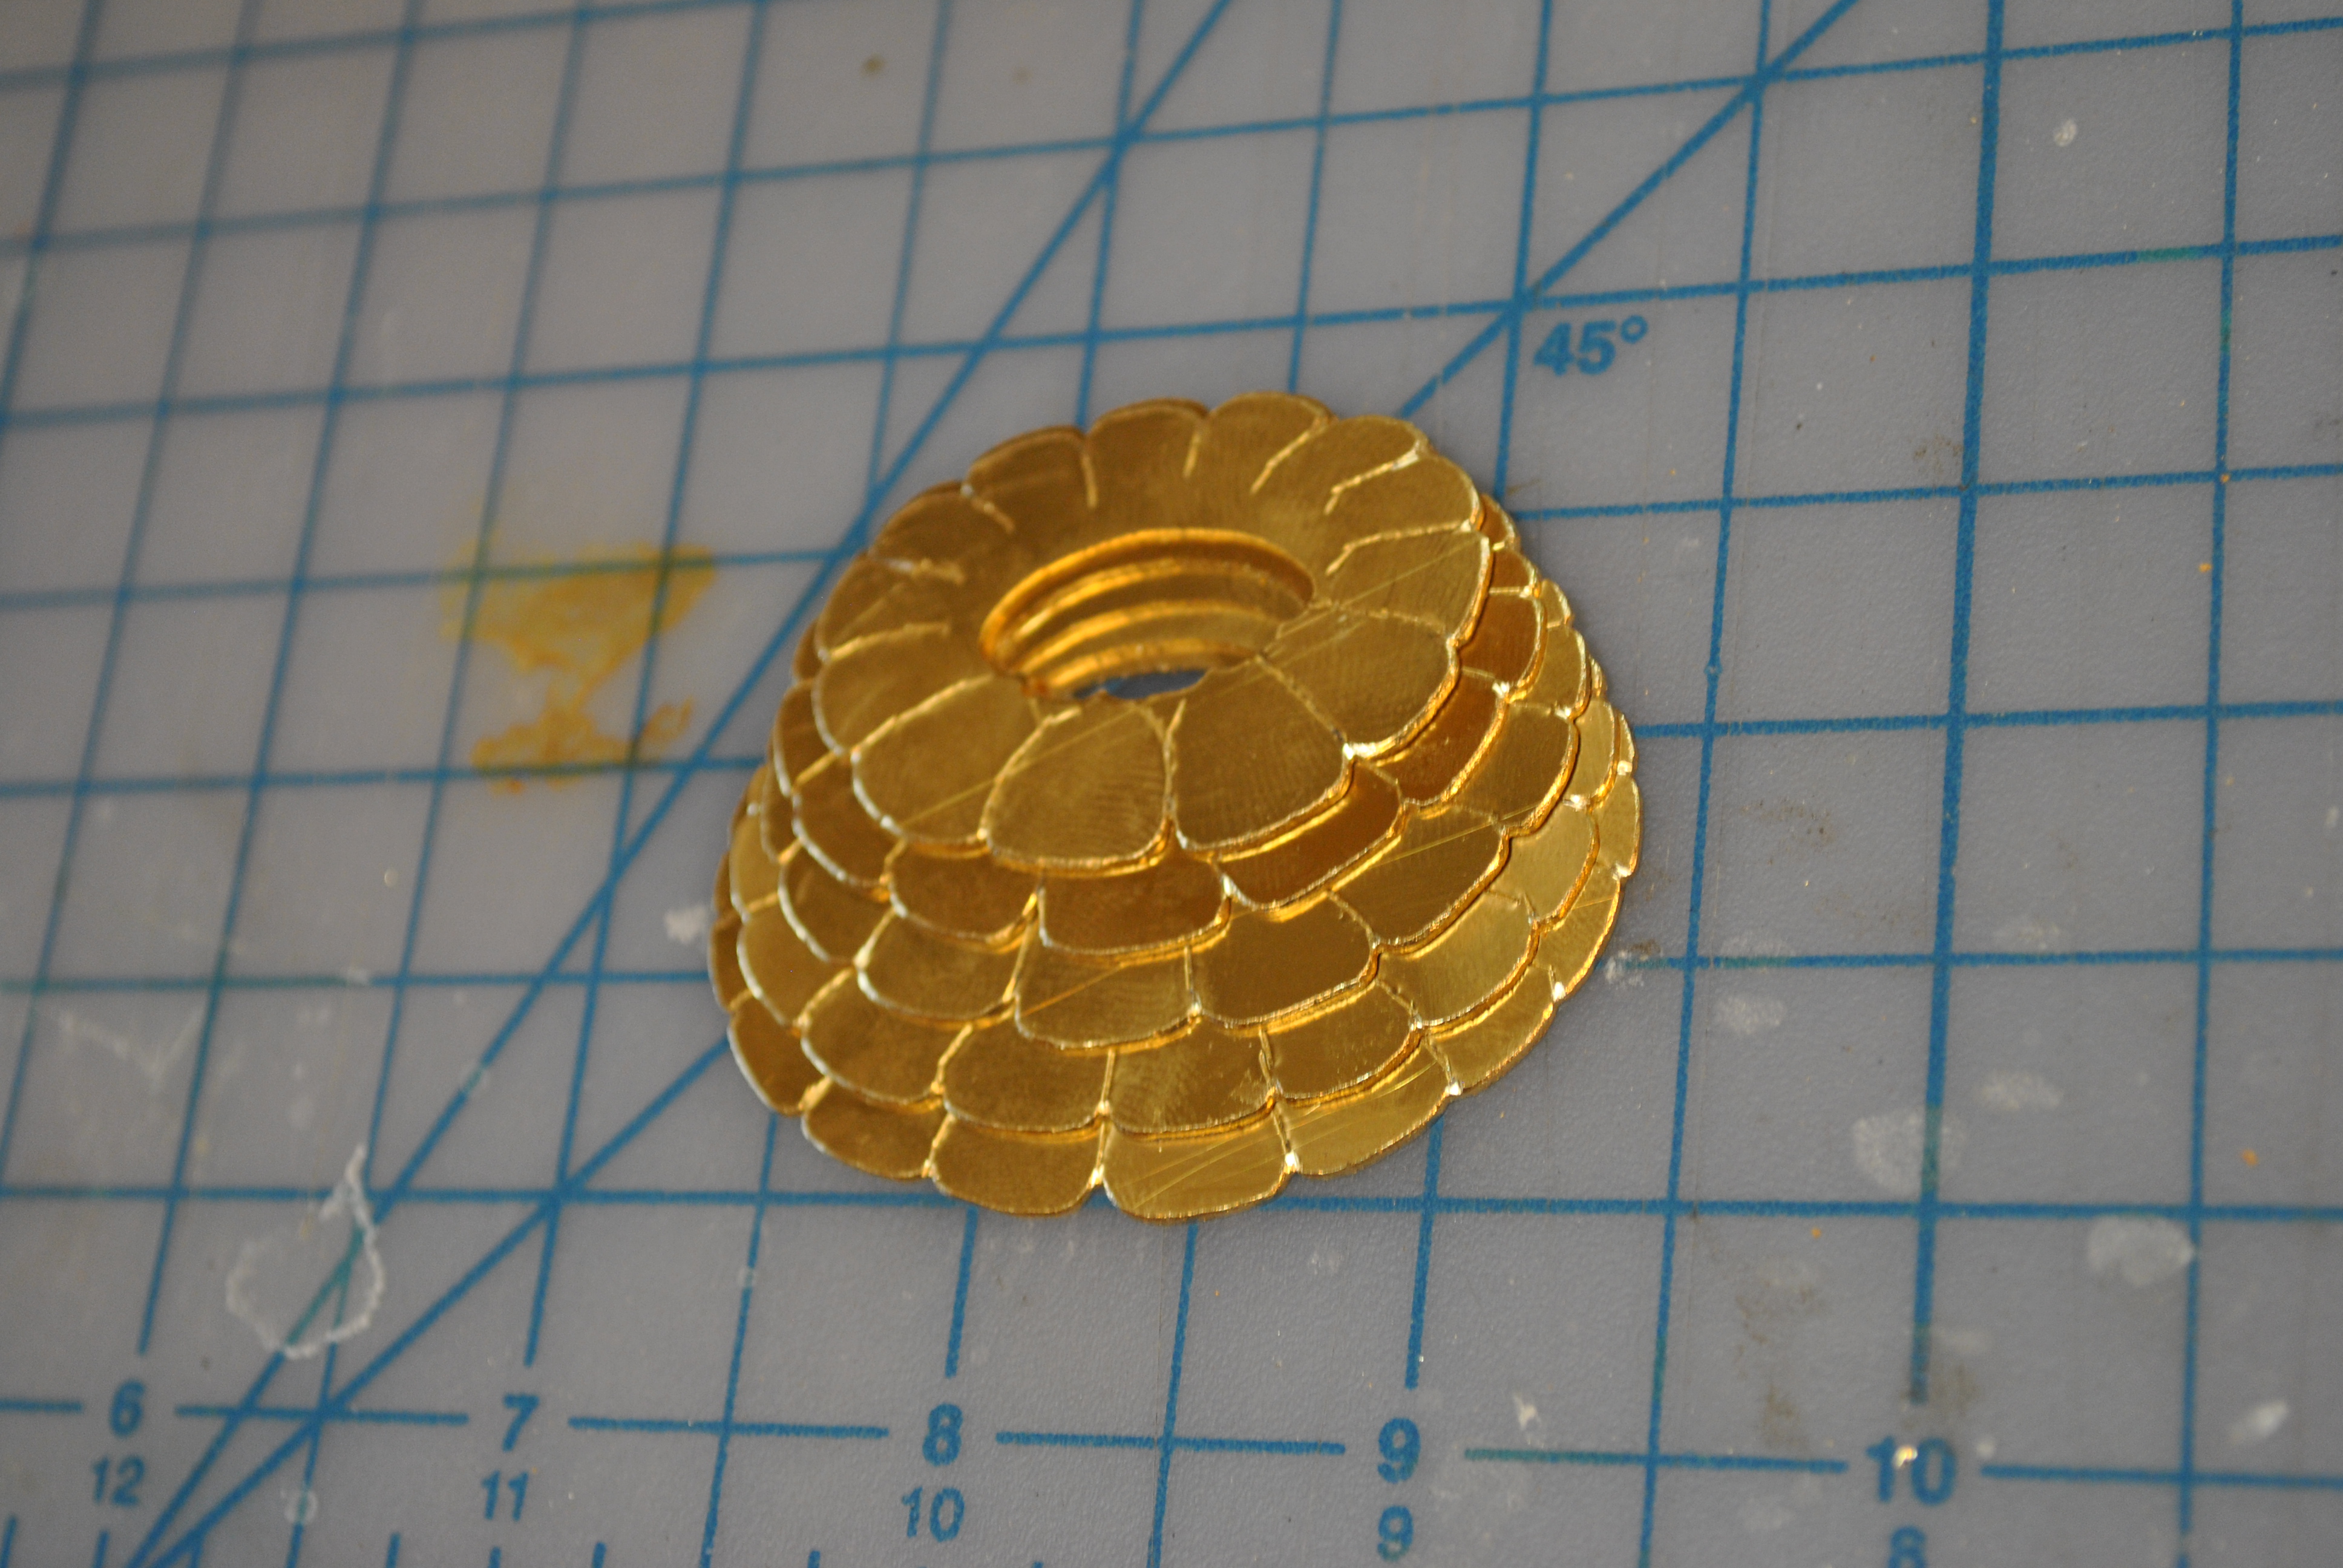
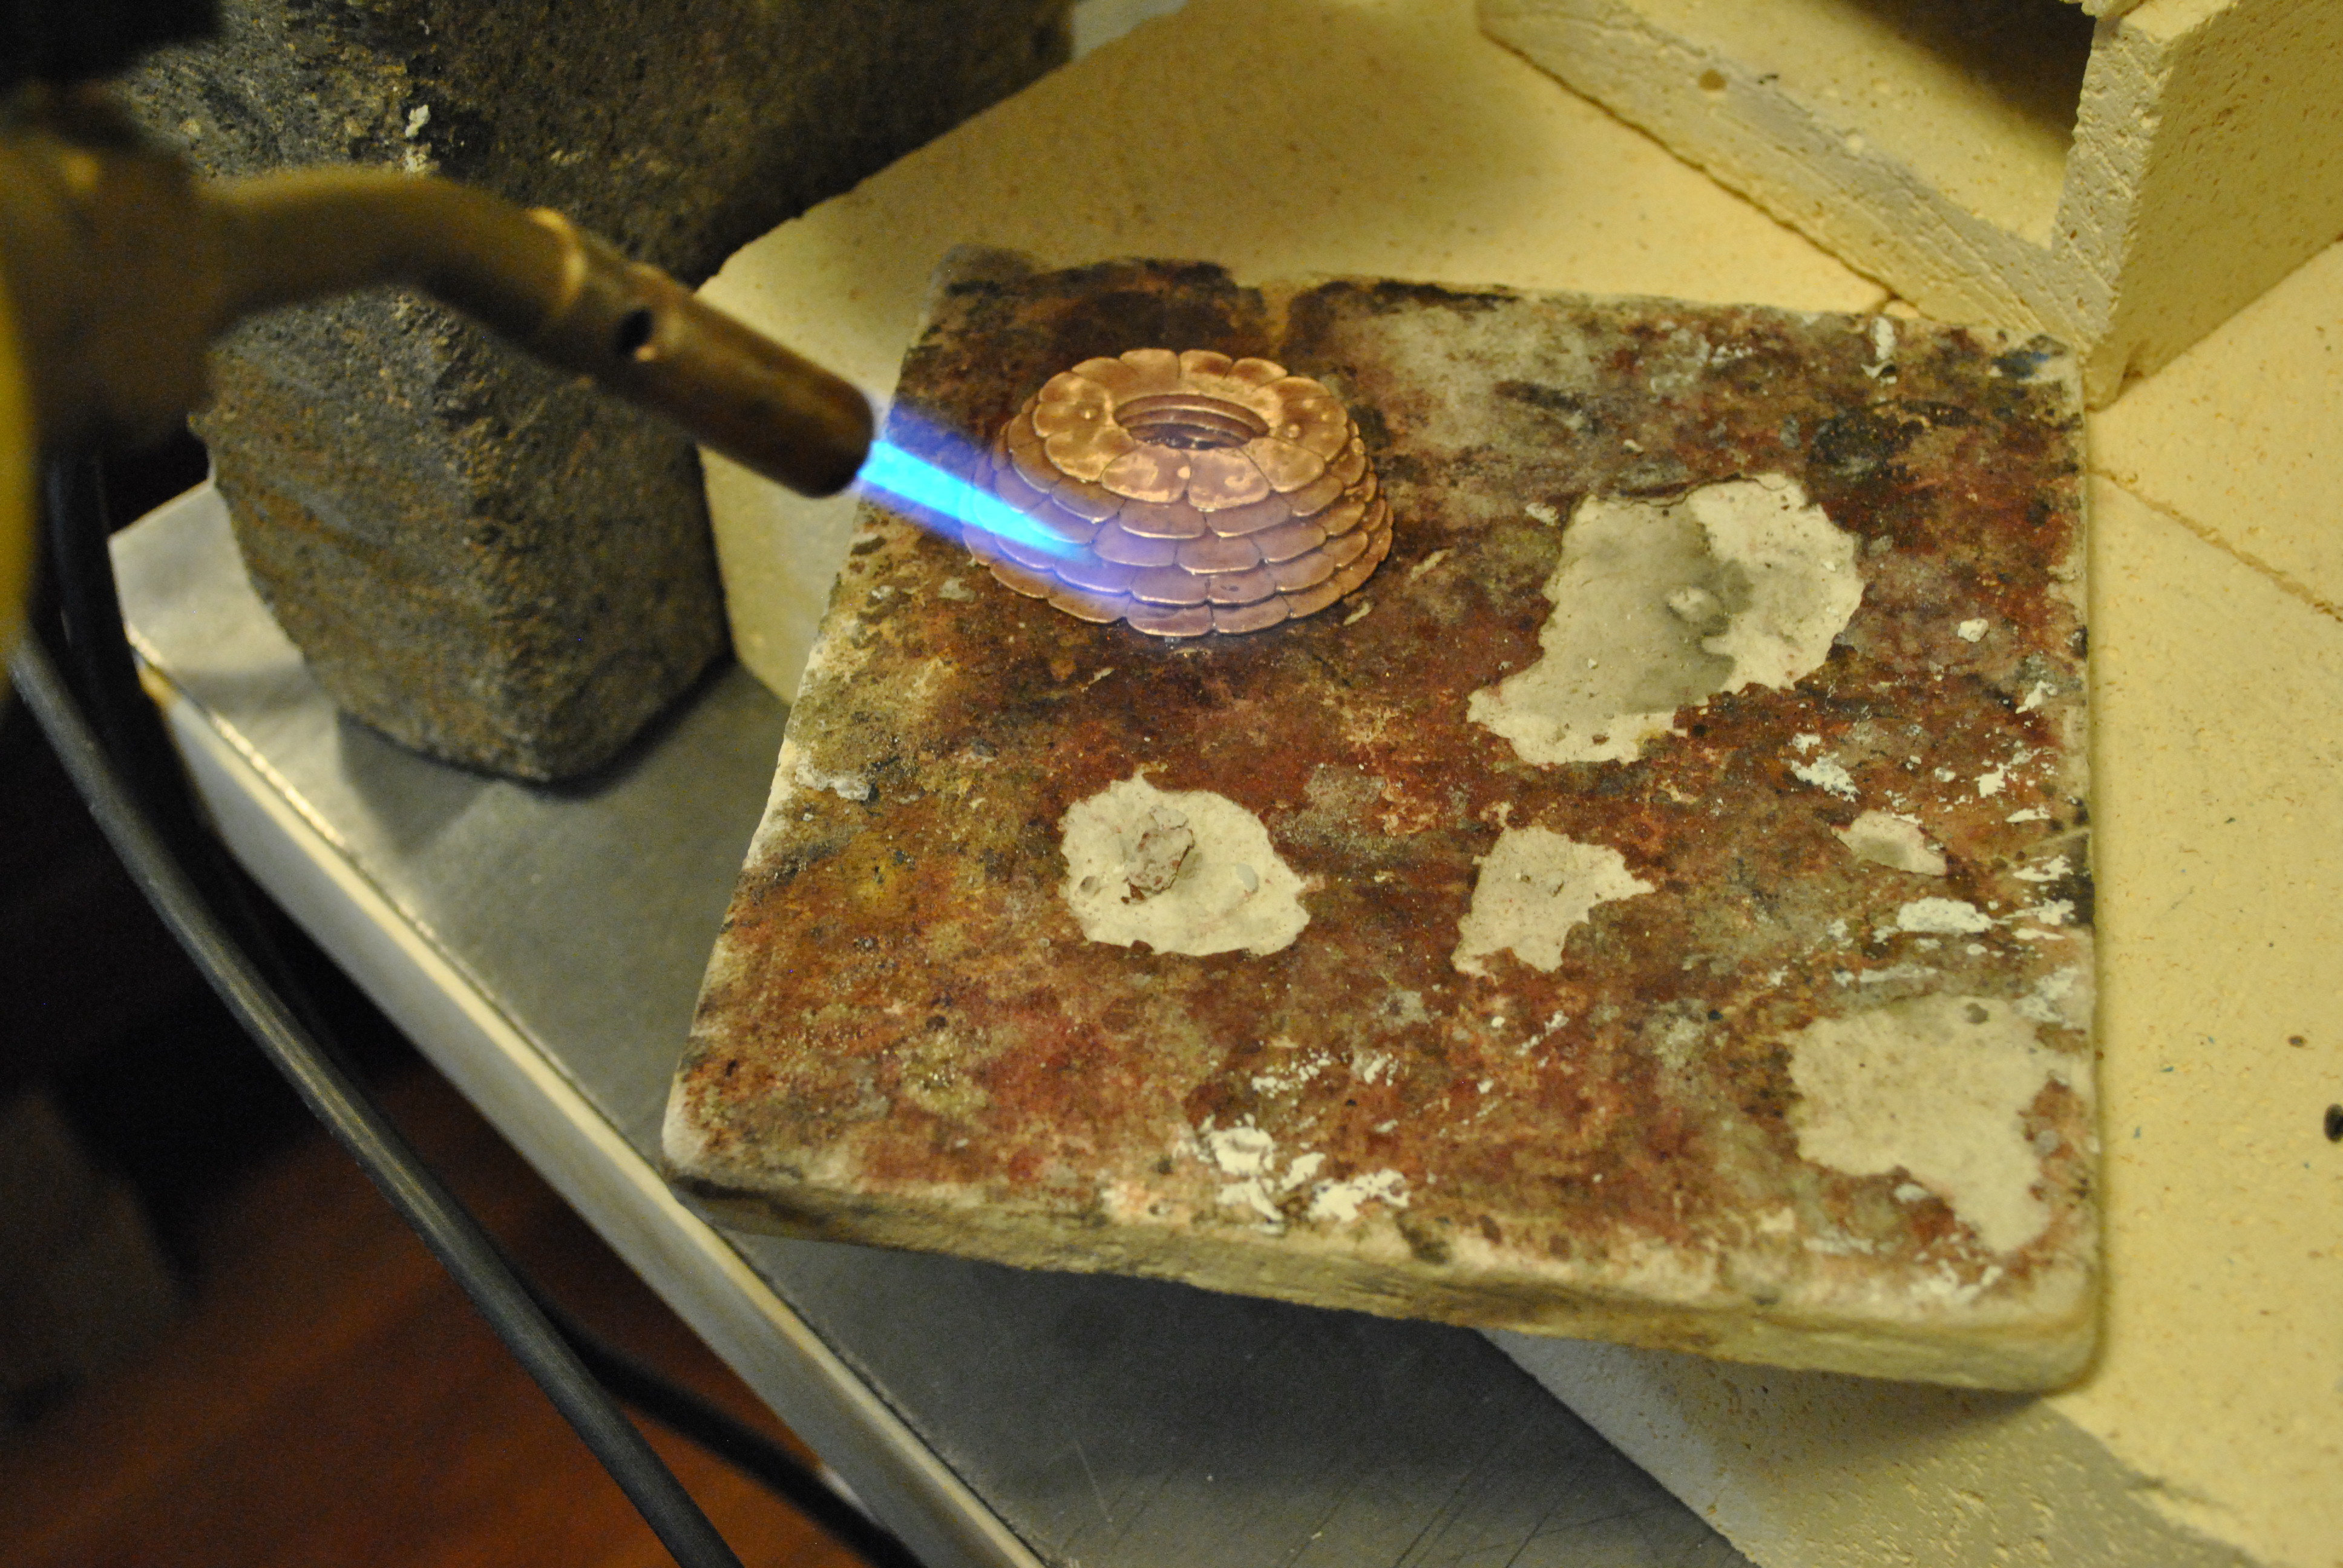
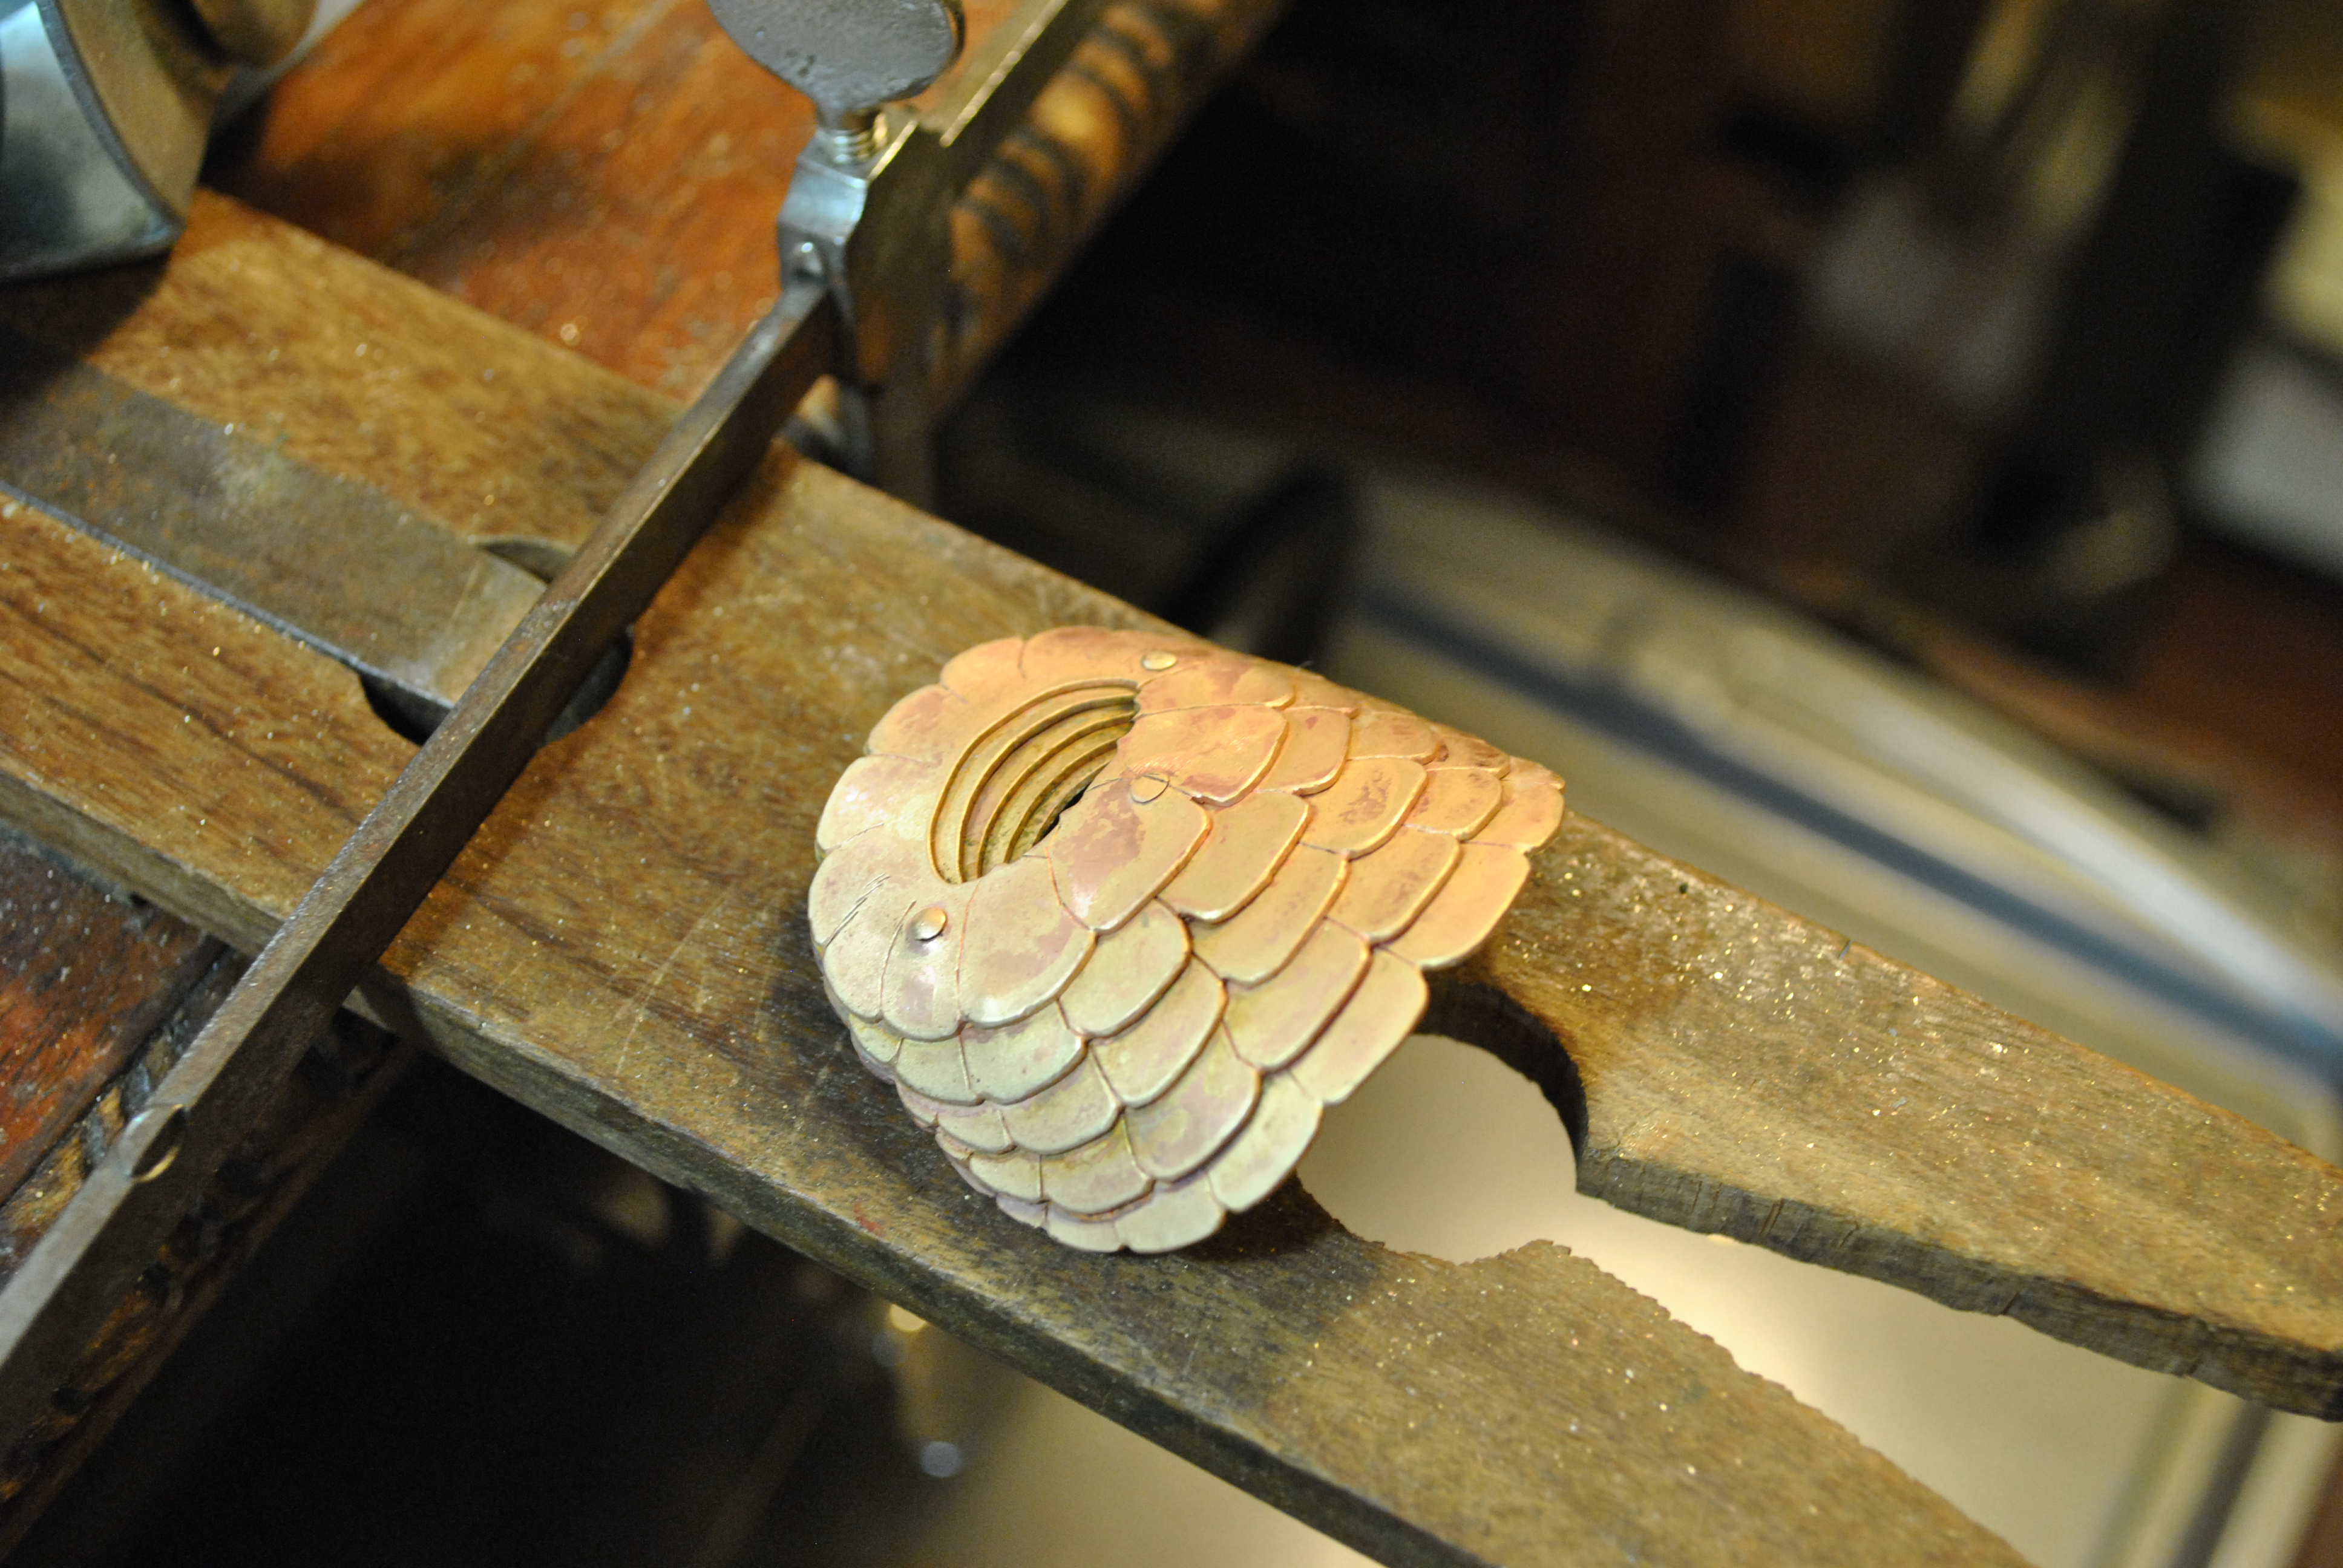
Five layers of brass is almost impossible to bend, so I annealed the metal to make it softer.
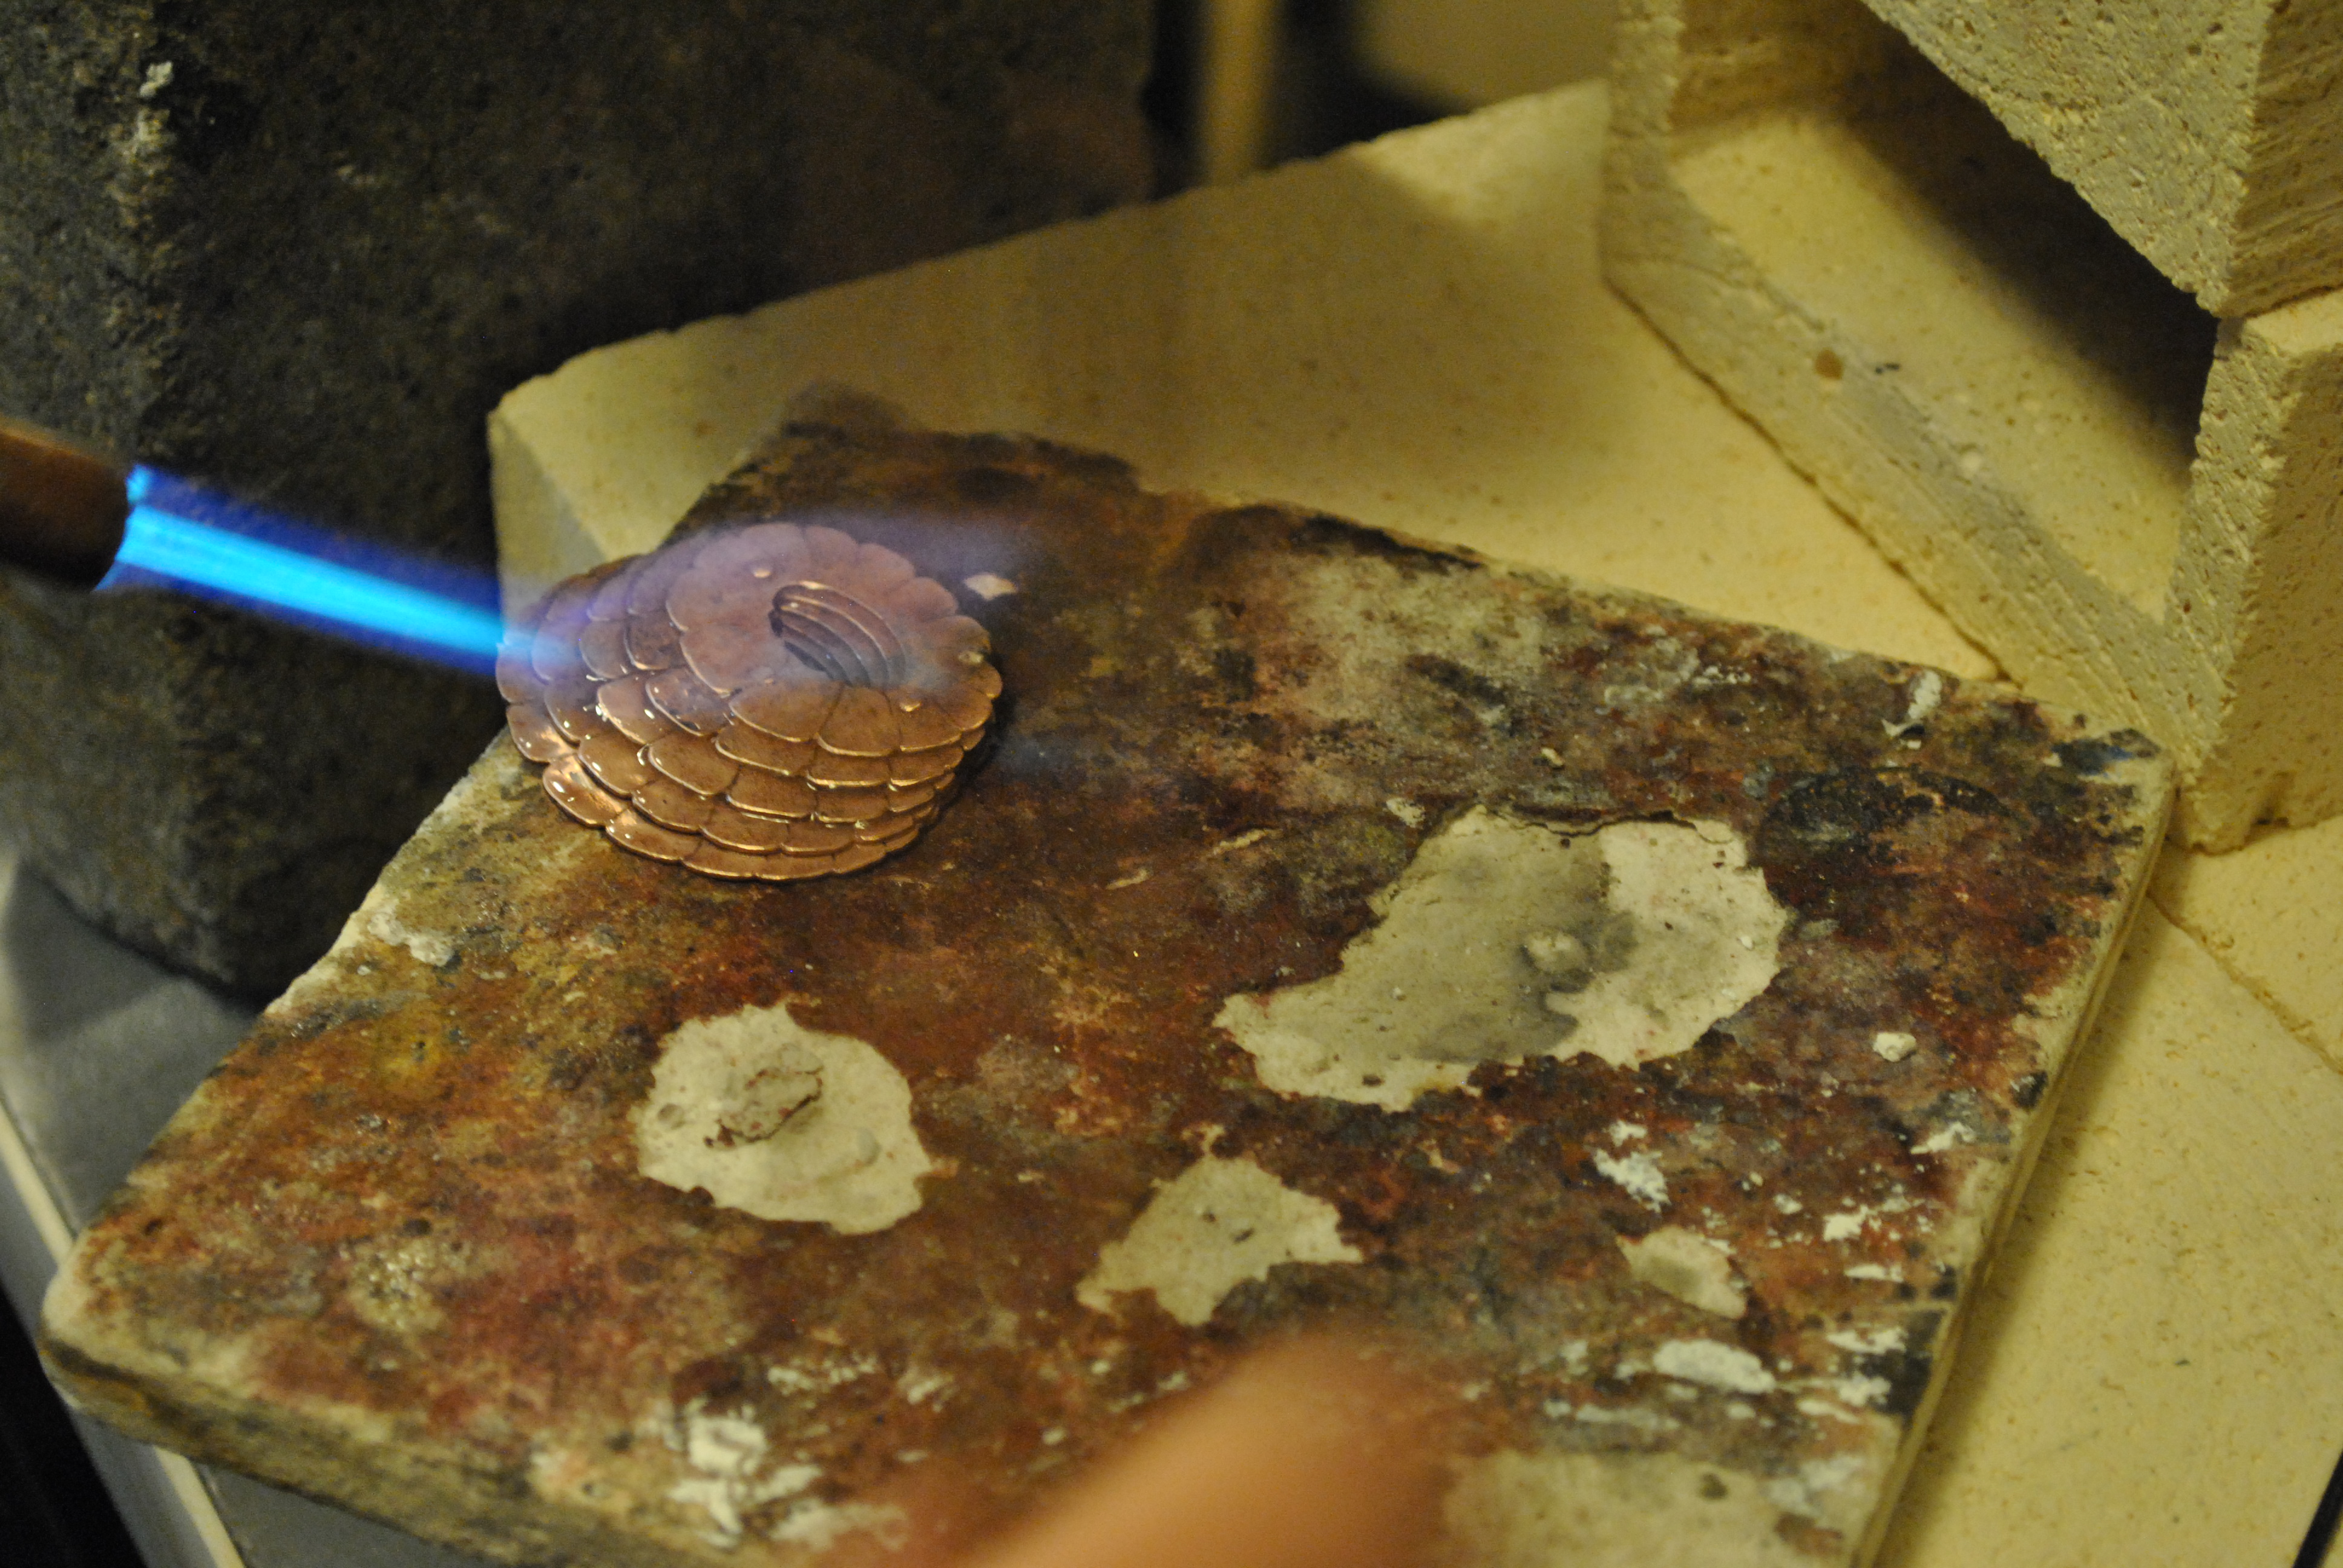
after a quick bath in the pickle it came out much softer and I was able to hammer it into shape with a plastic mallet. It also however is ugly from the fire scale.
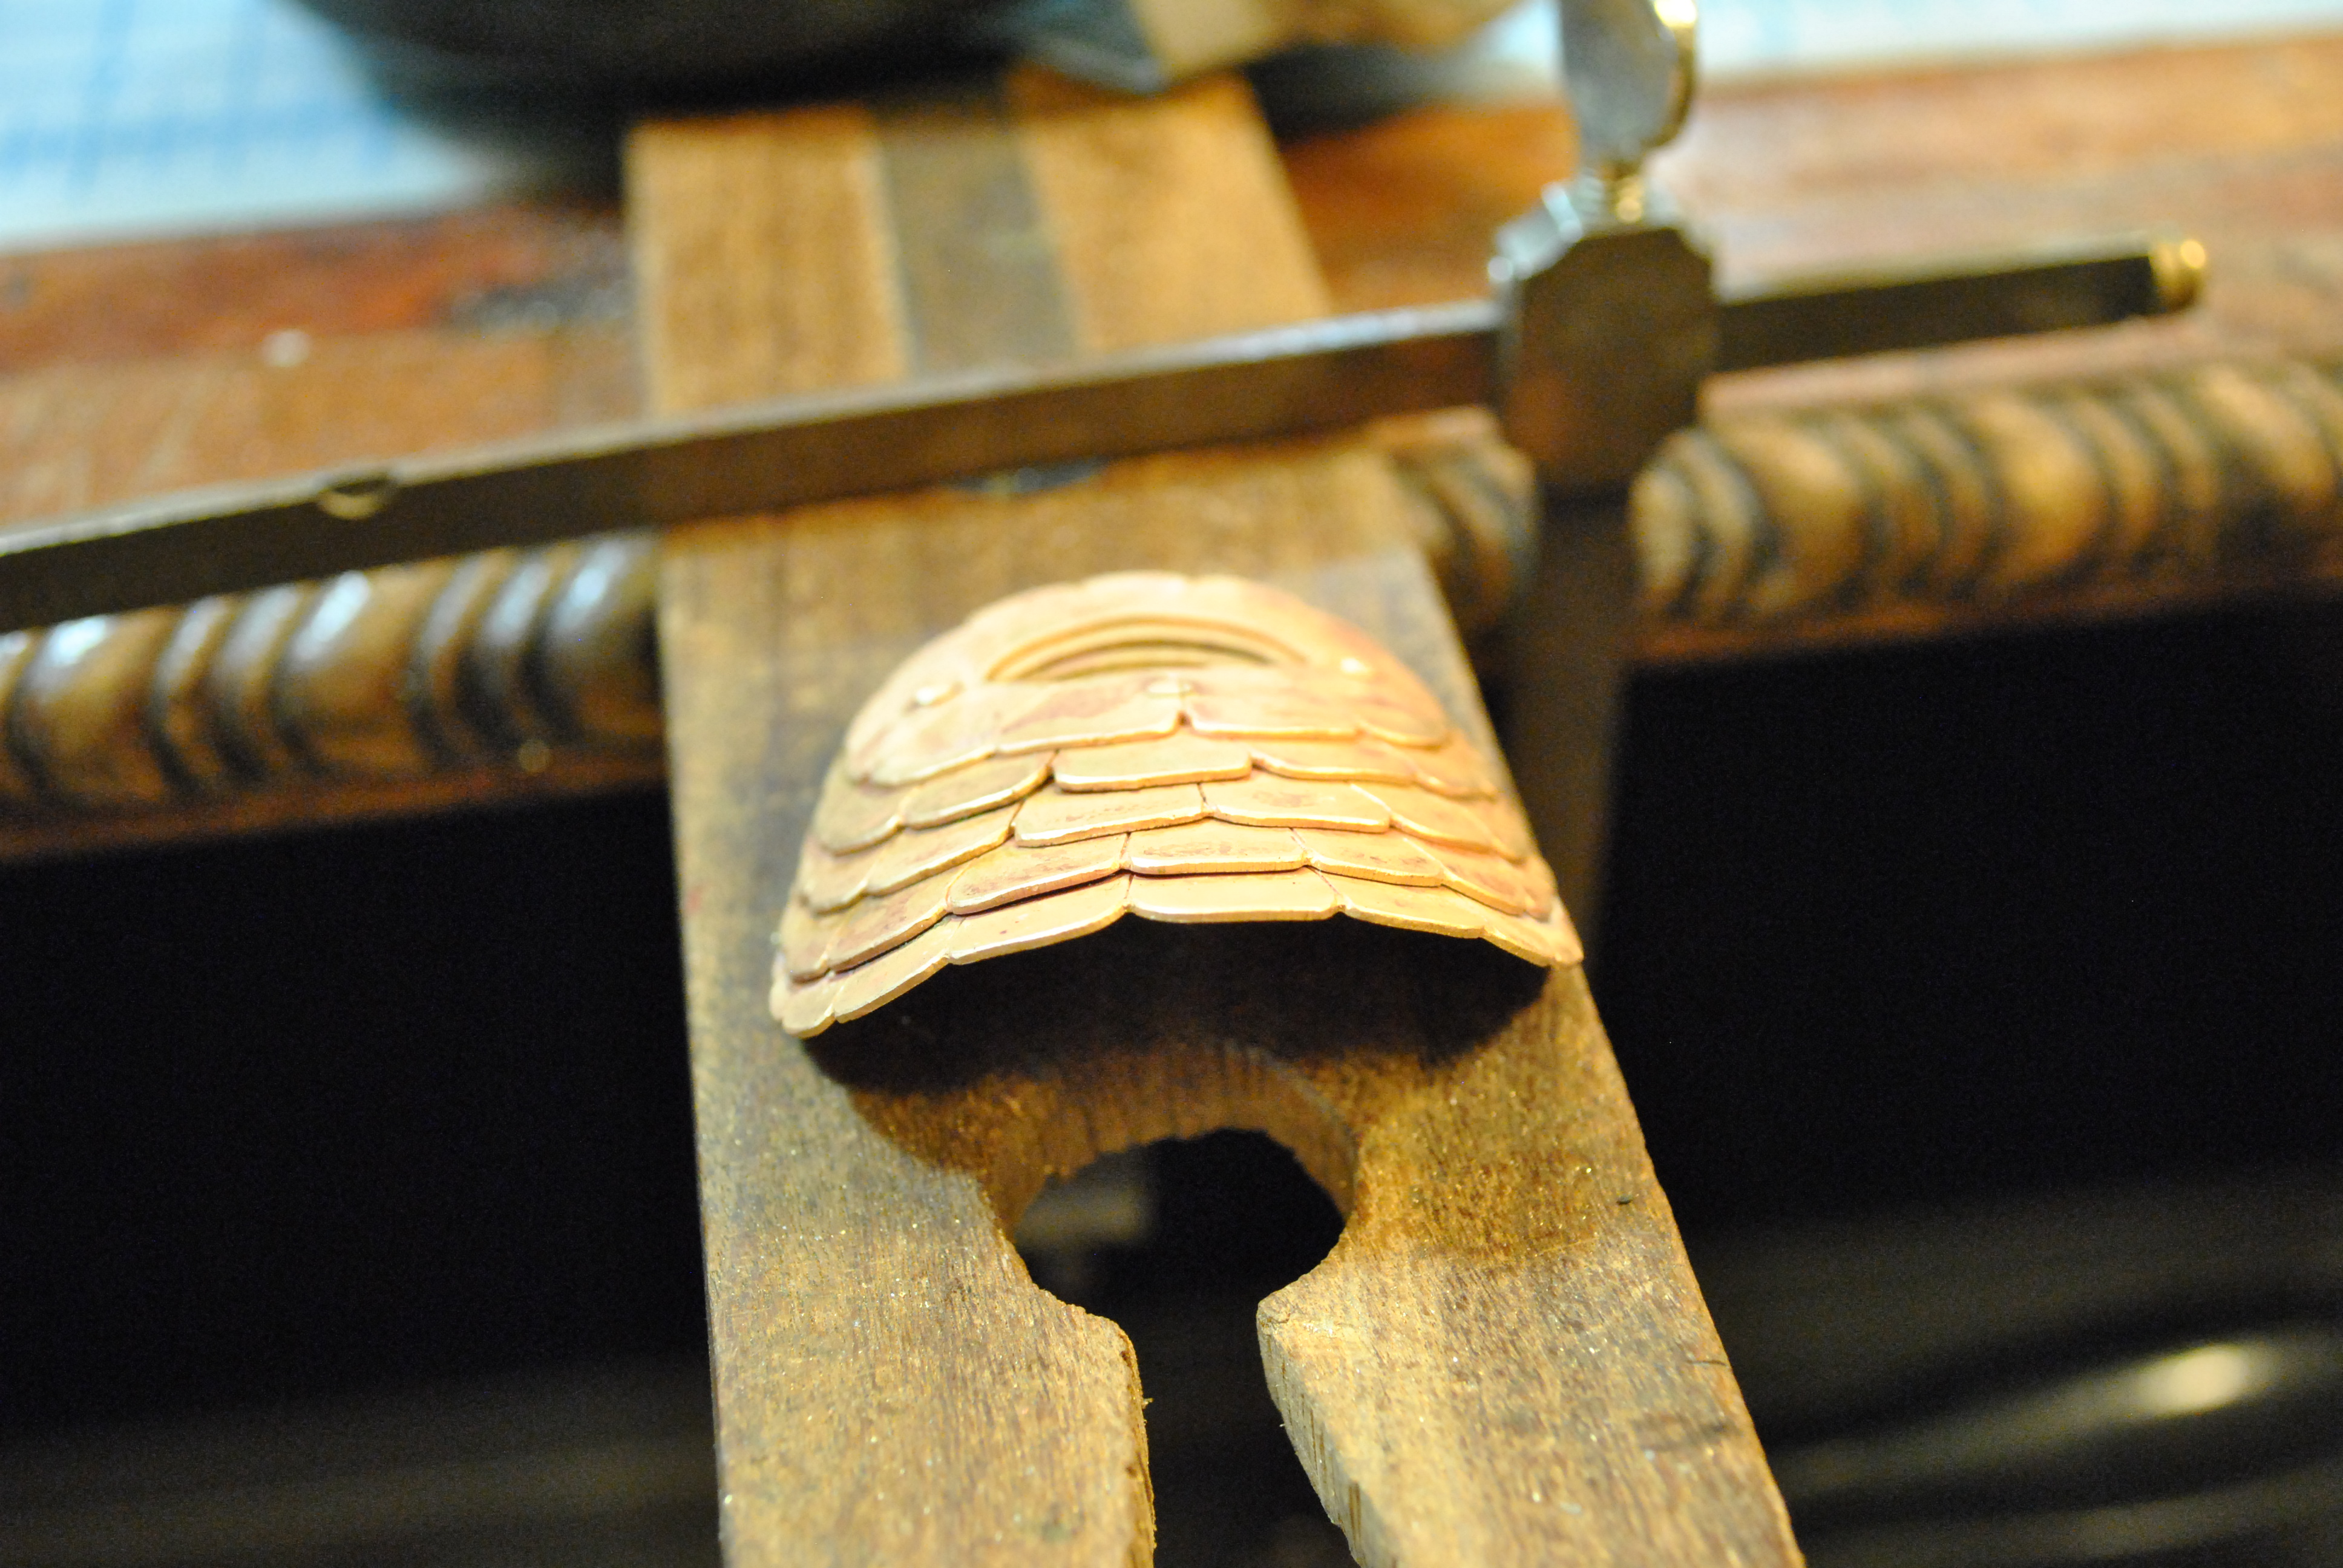
After the initial hand polishing to get all the fire scale off and start the buffing process.
After an hour in the tumbler and some more buffing on a wheel it now has a high shine and glows gloriously in the sun. I really like the way this design came out, and it was fun using rivets instead of solder for a change.
There are two kinds of casting people normally do at home in regards to lost wax. They either use a centrifuge, or a vacuum plate. In a centrifugal setup the hot metal is poured into a special crucible, and then spun madly to fling the hot metal out into the molded investment. See below.
Or vacuum plate casting, where the hot metal is poured down into the molded investment and then a vacuum is used to suck the air out of the investment making sure that the hot metal gets into all the little nooks and crannies. See below.
I am going vacuum plate, because its slightly easier to fit into my current sized (aka: small) studio.
The basic idea is you have a flat metal surface with a high temp silicon rubber gasket, you somehow get a small hole in the base of that flat area for the vacuum hose to come up under the flask/gasket combo, turn on the vacuum pump, put the flask with hot investment on top, pour in molten metal.
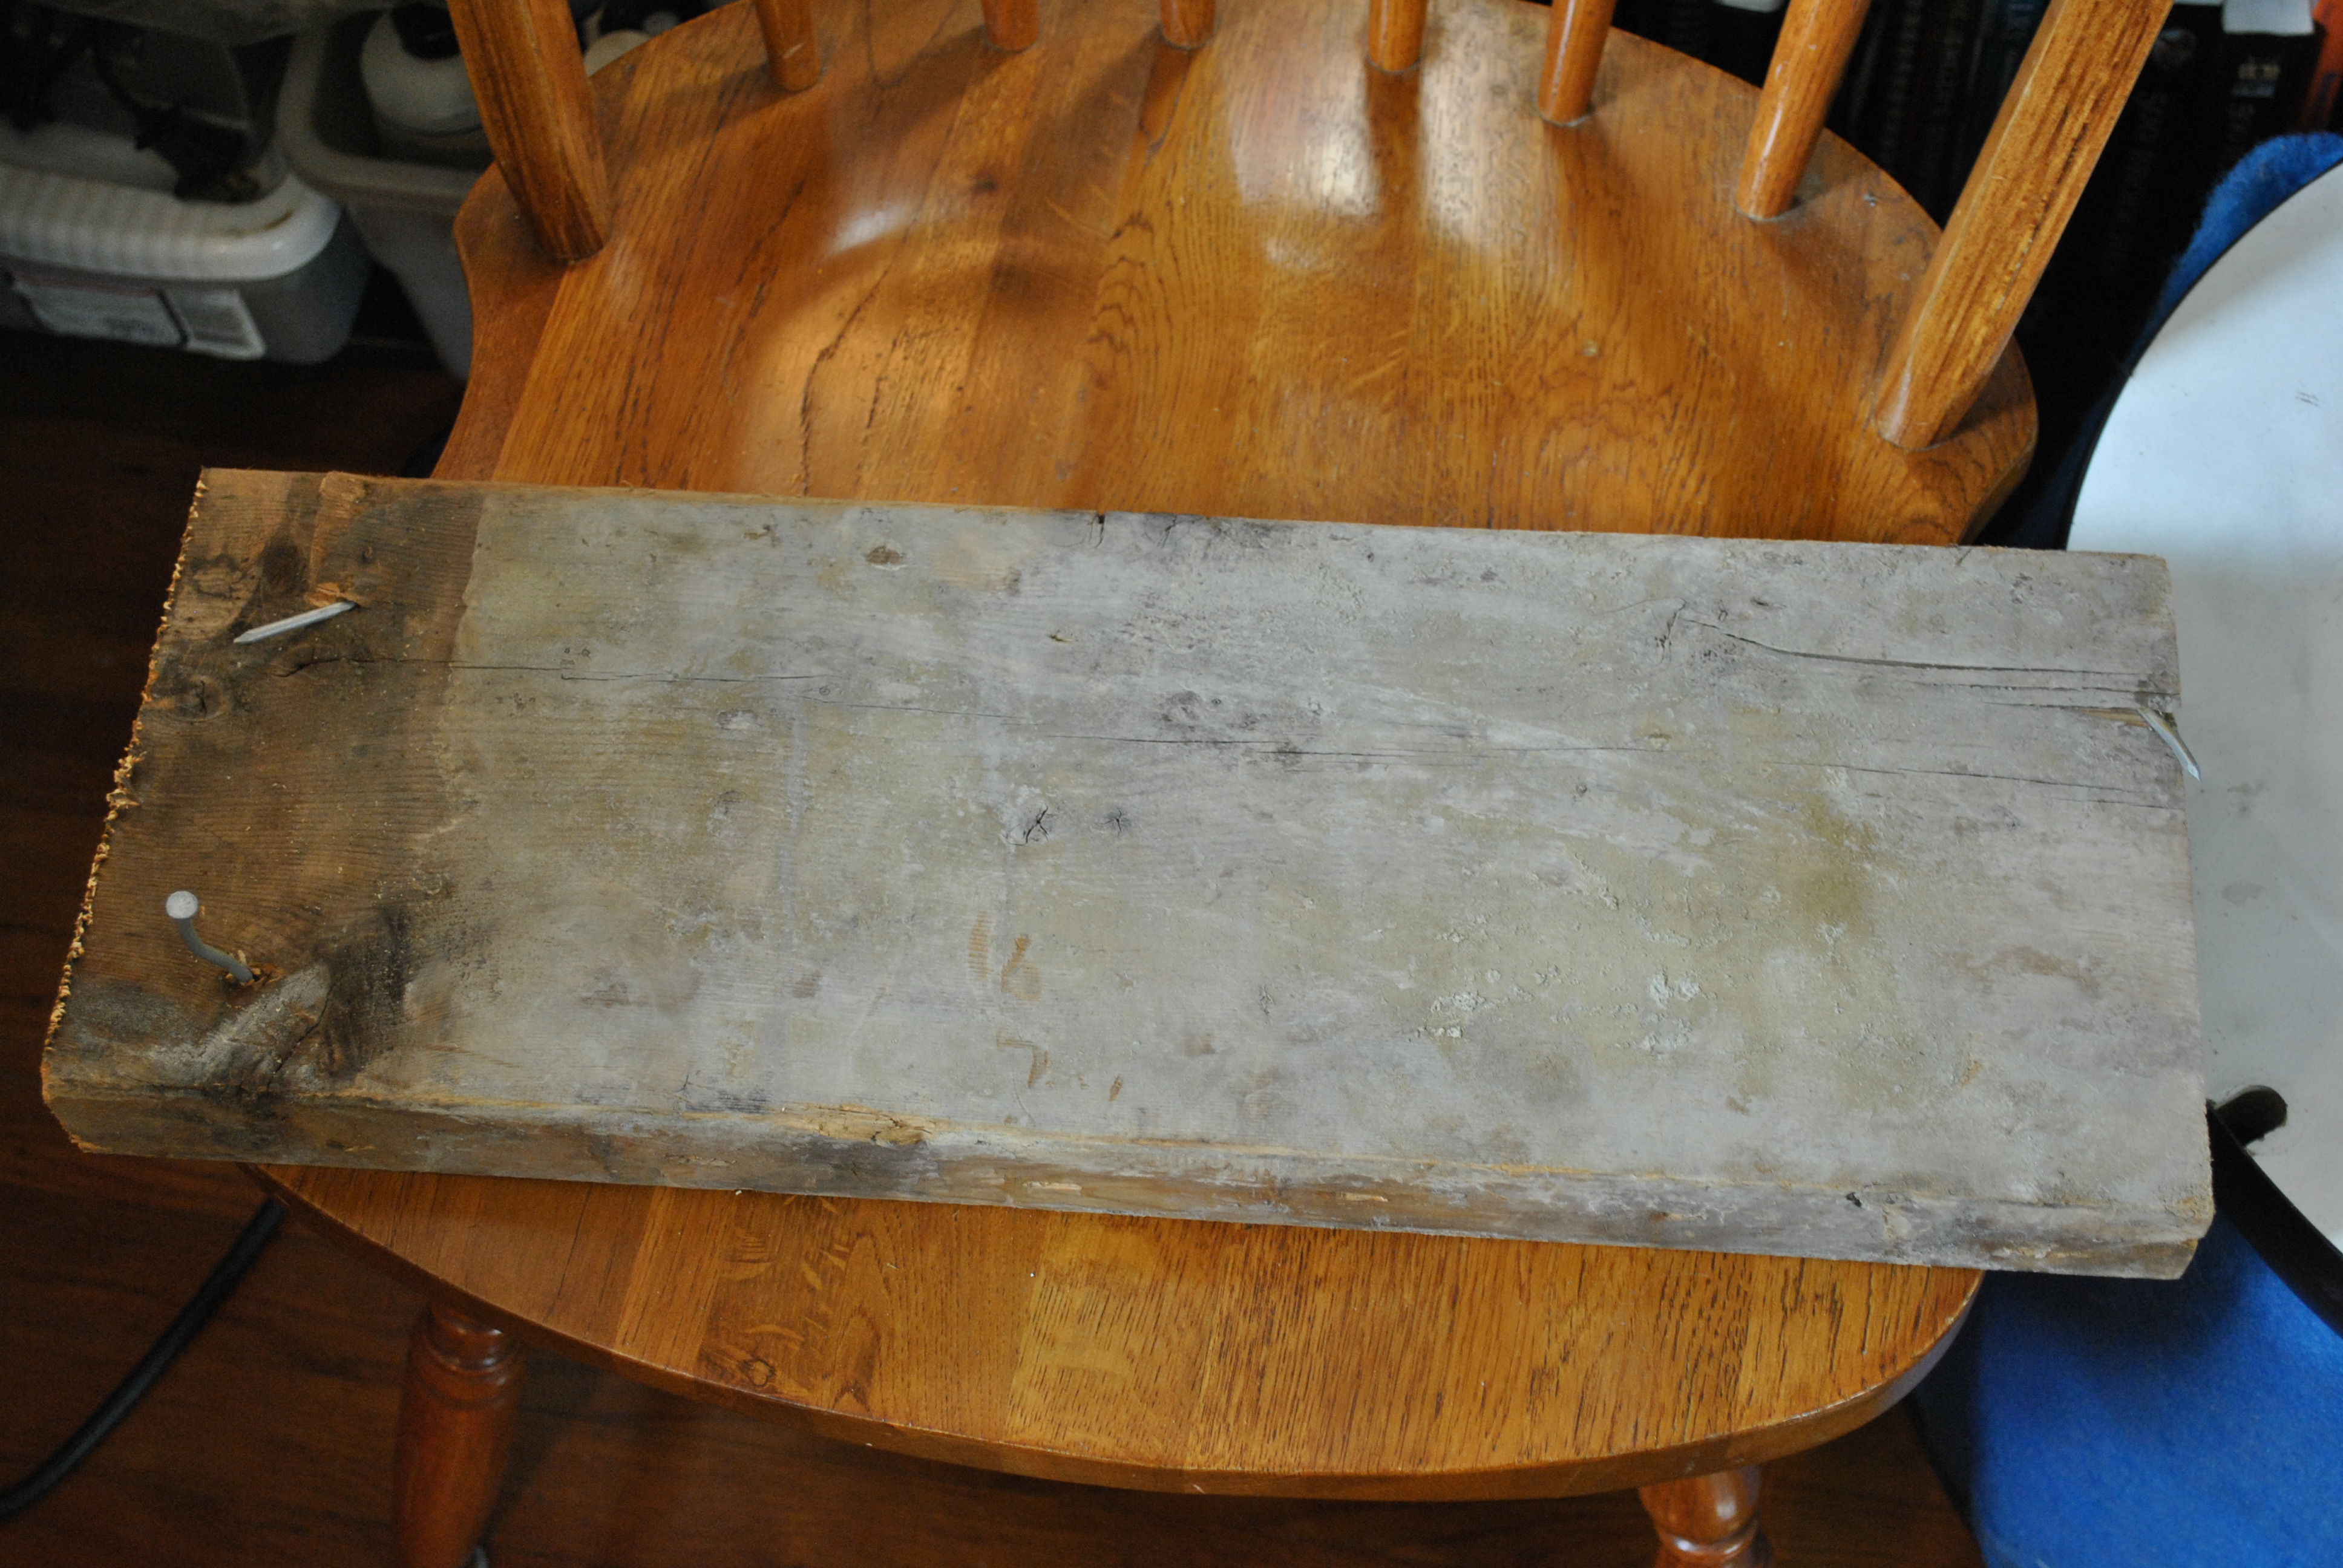
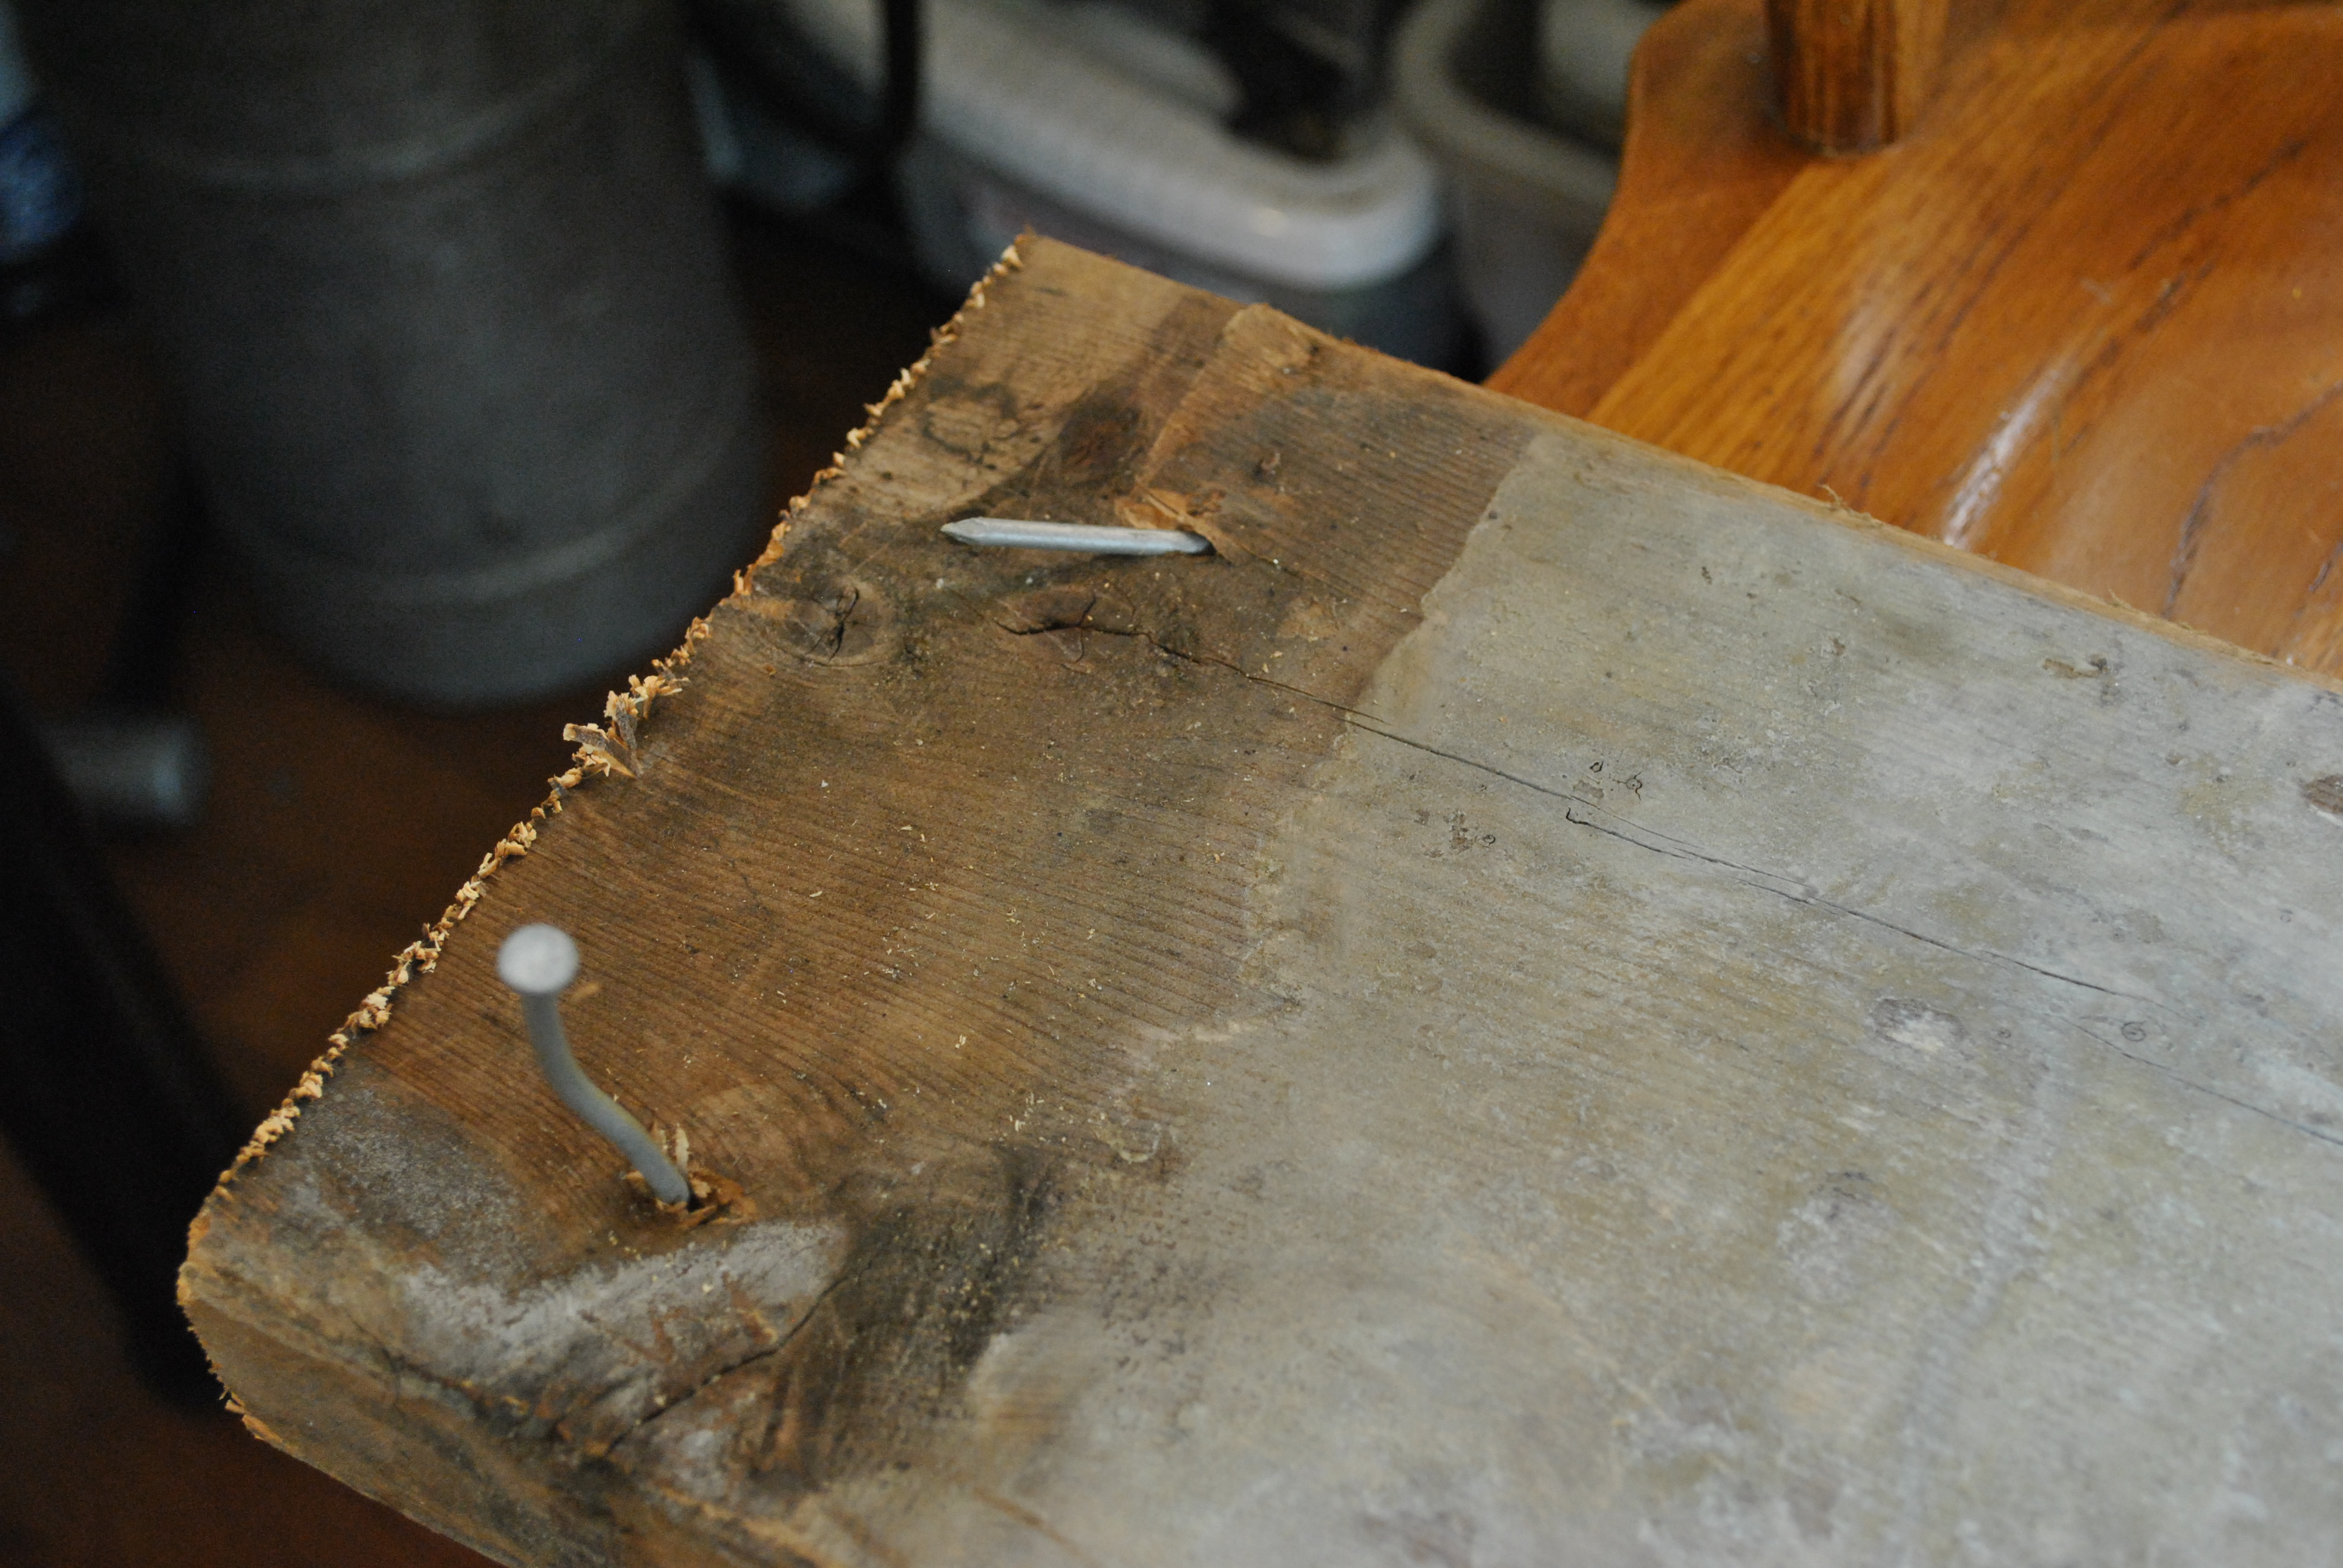
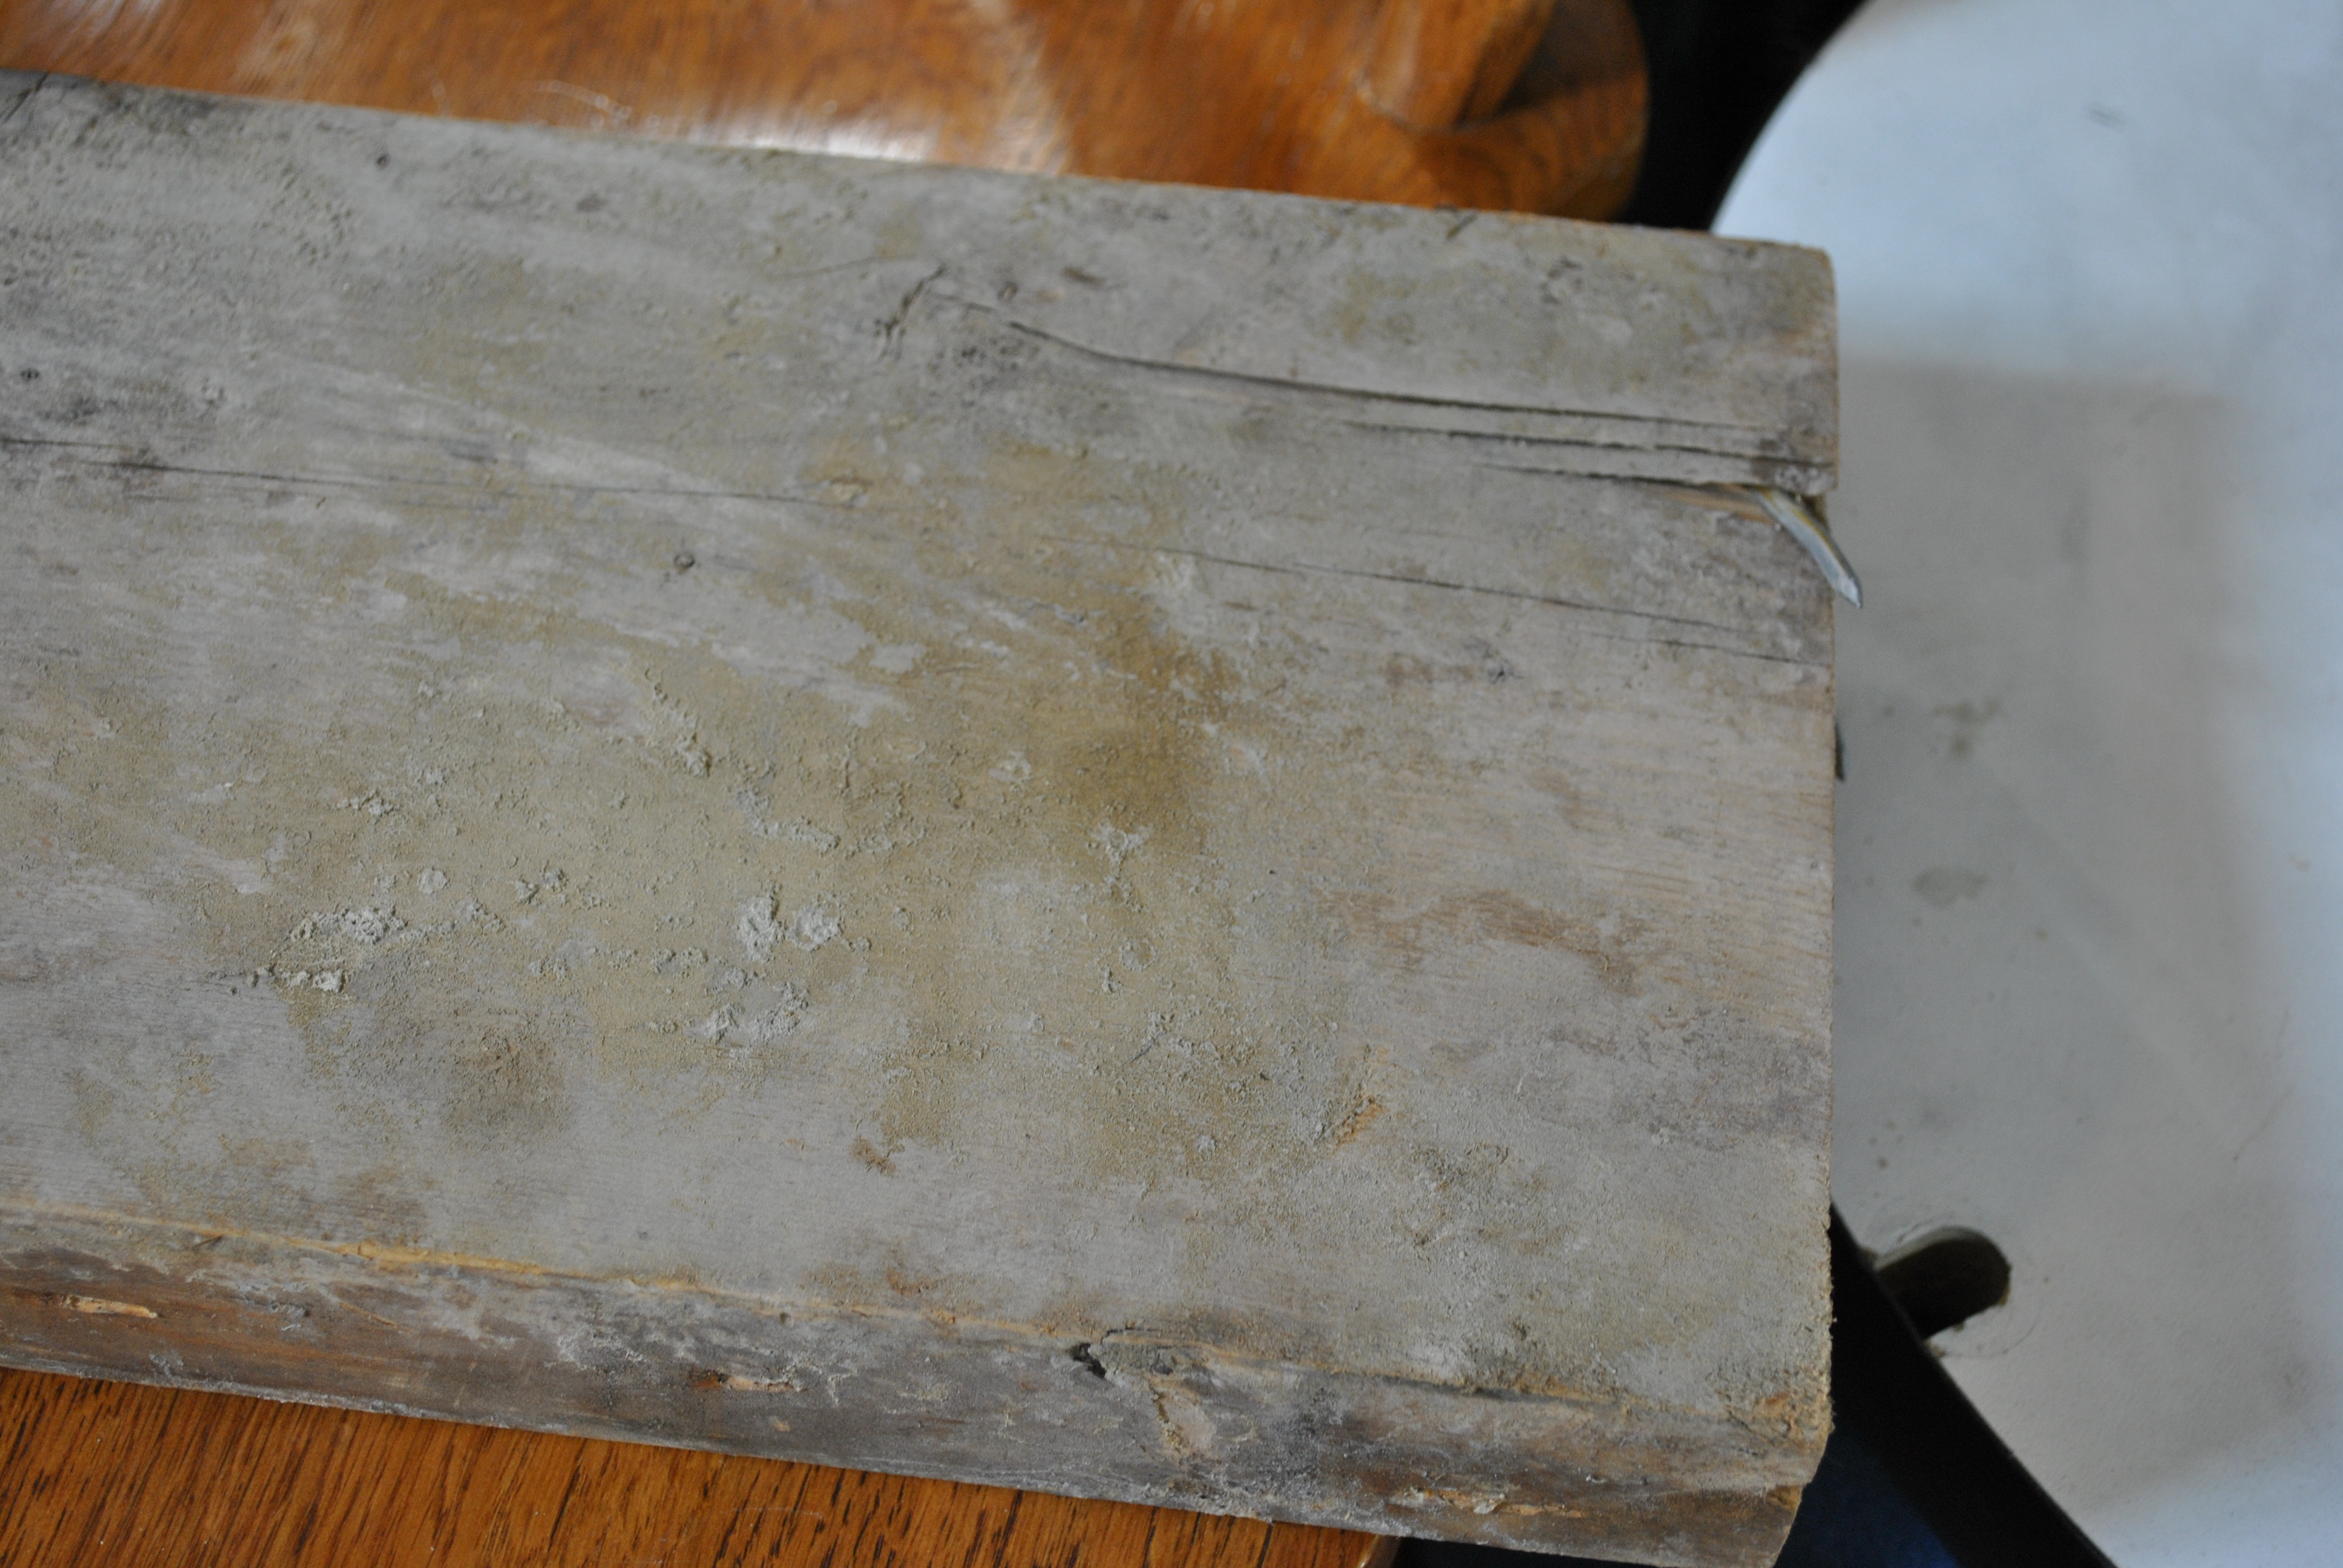
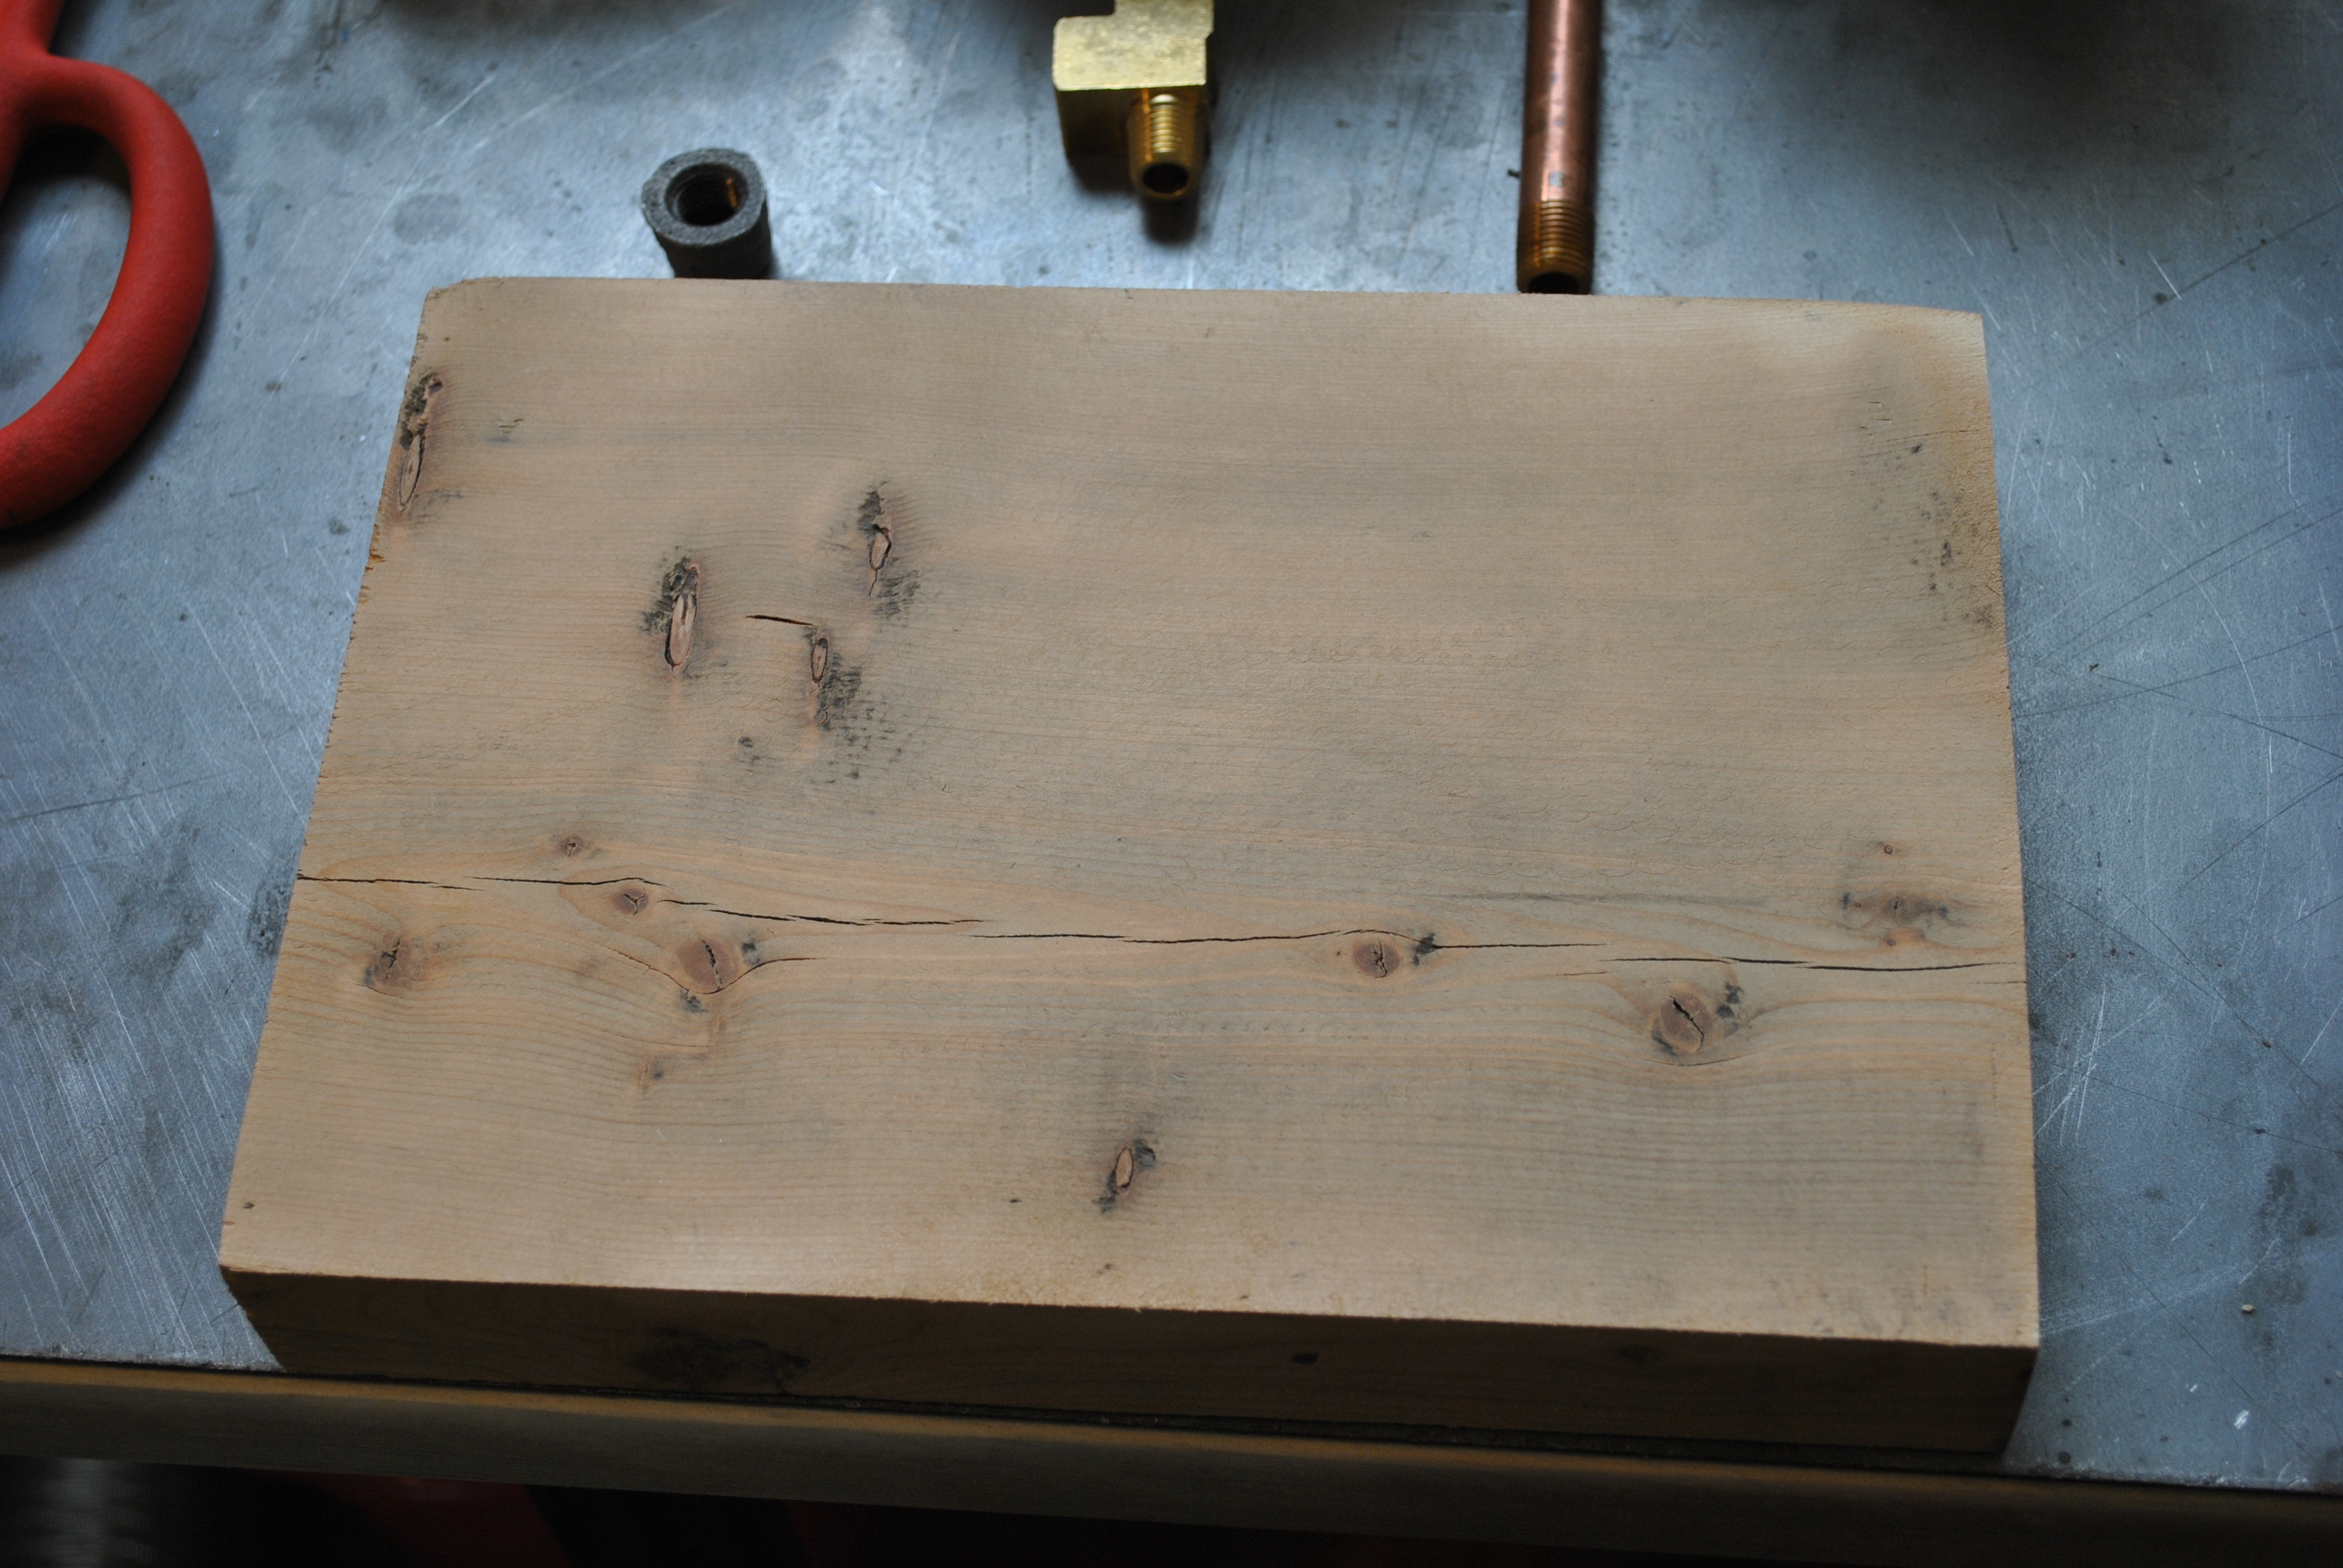
I got almost all of the stuff for this project out of dumpsters, so I started by cleaning up an old nasty board I found.
I cut it roughly 10 inches along one side, with the assumption that the “business area” is about a 4x4in square centered around the center of the block, so this is plenty big. Try to get the edges and tops as flat as possible, I used a rotary disk sander with some 120 grit on this for a couple minutes to clean it up nice and smooth.
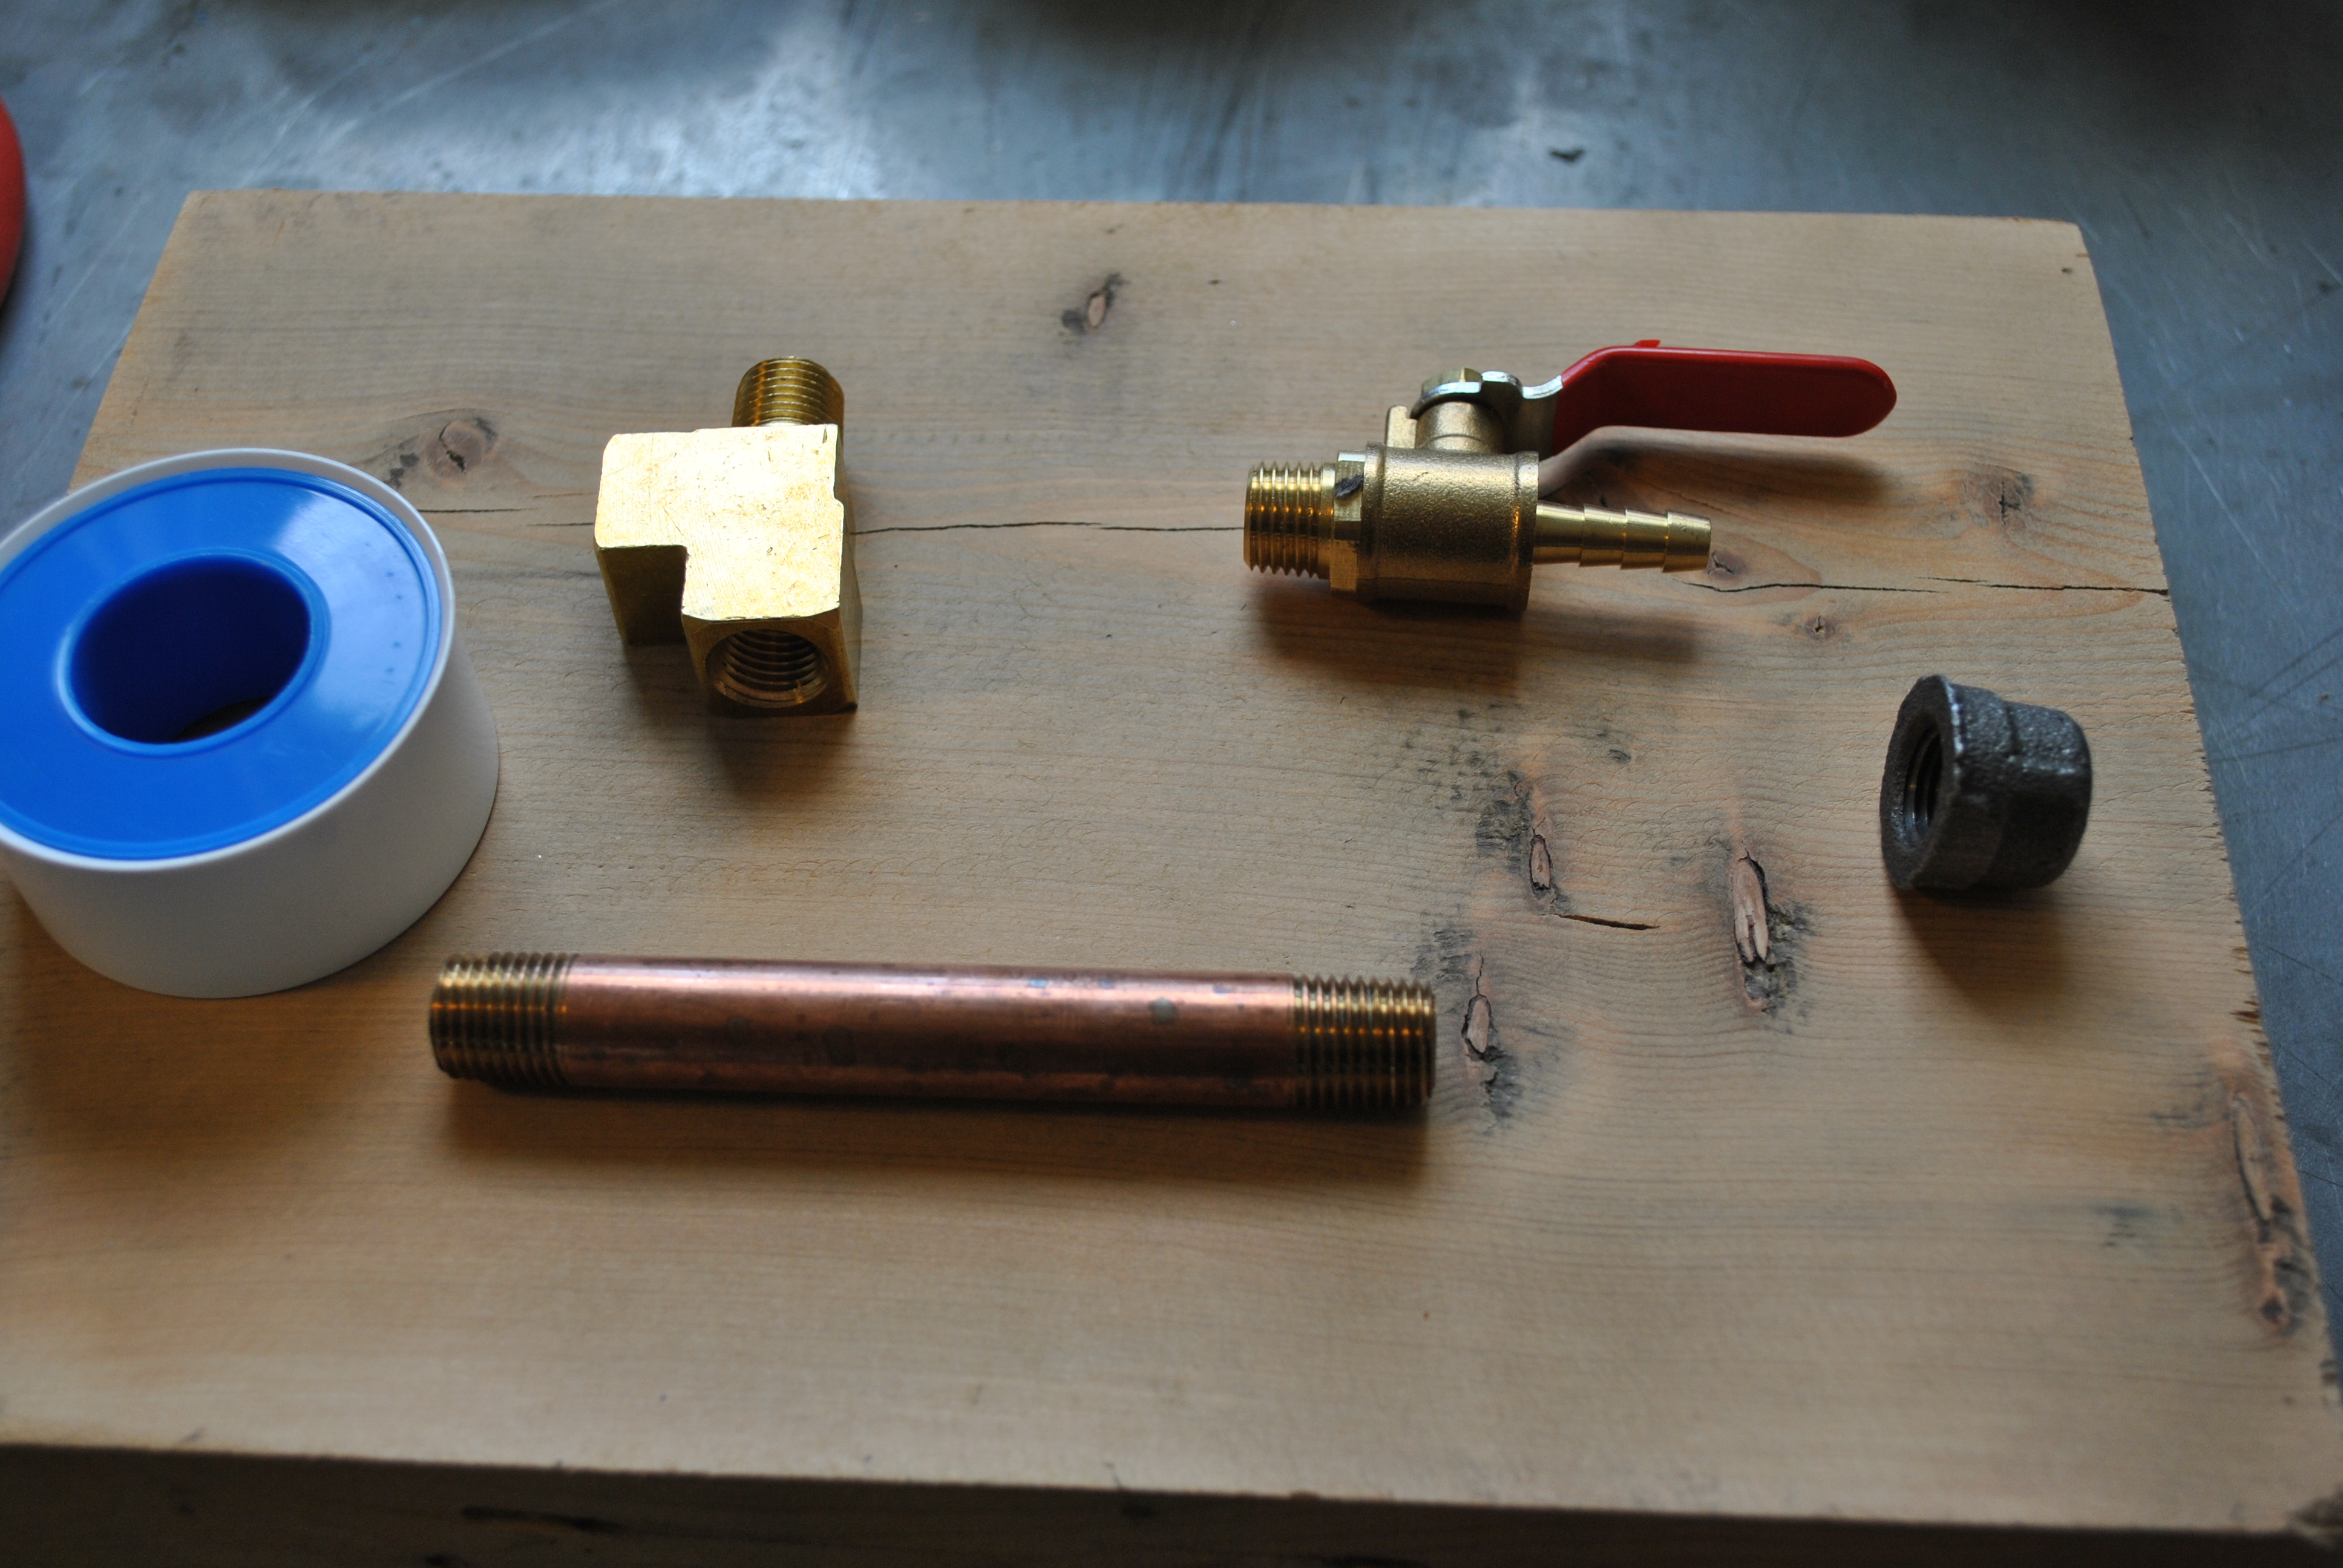
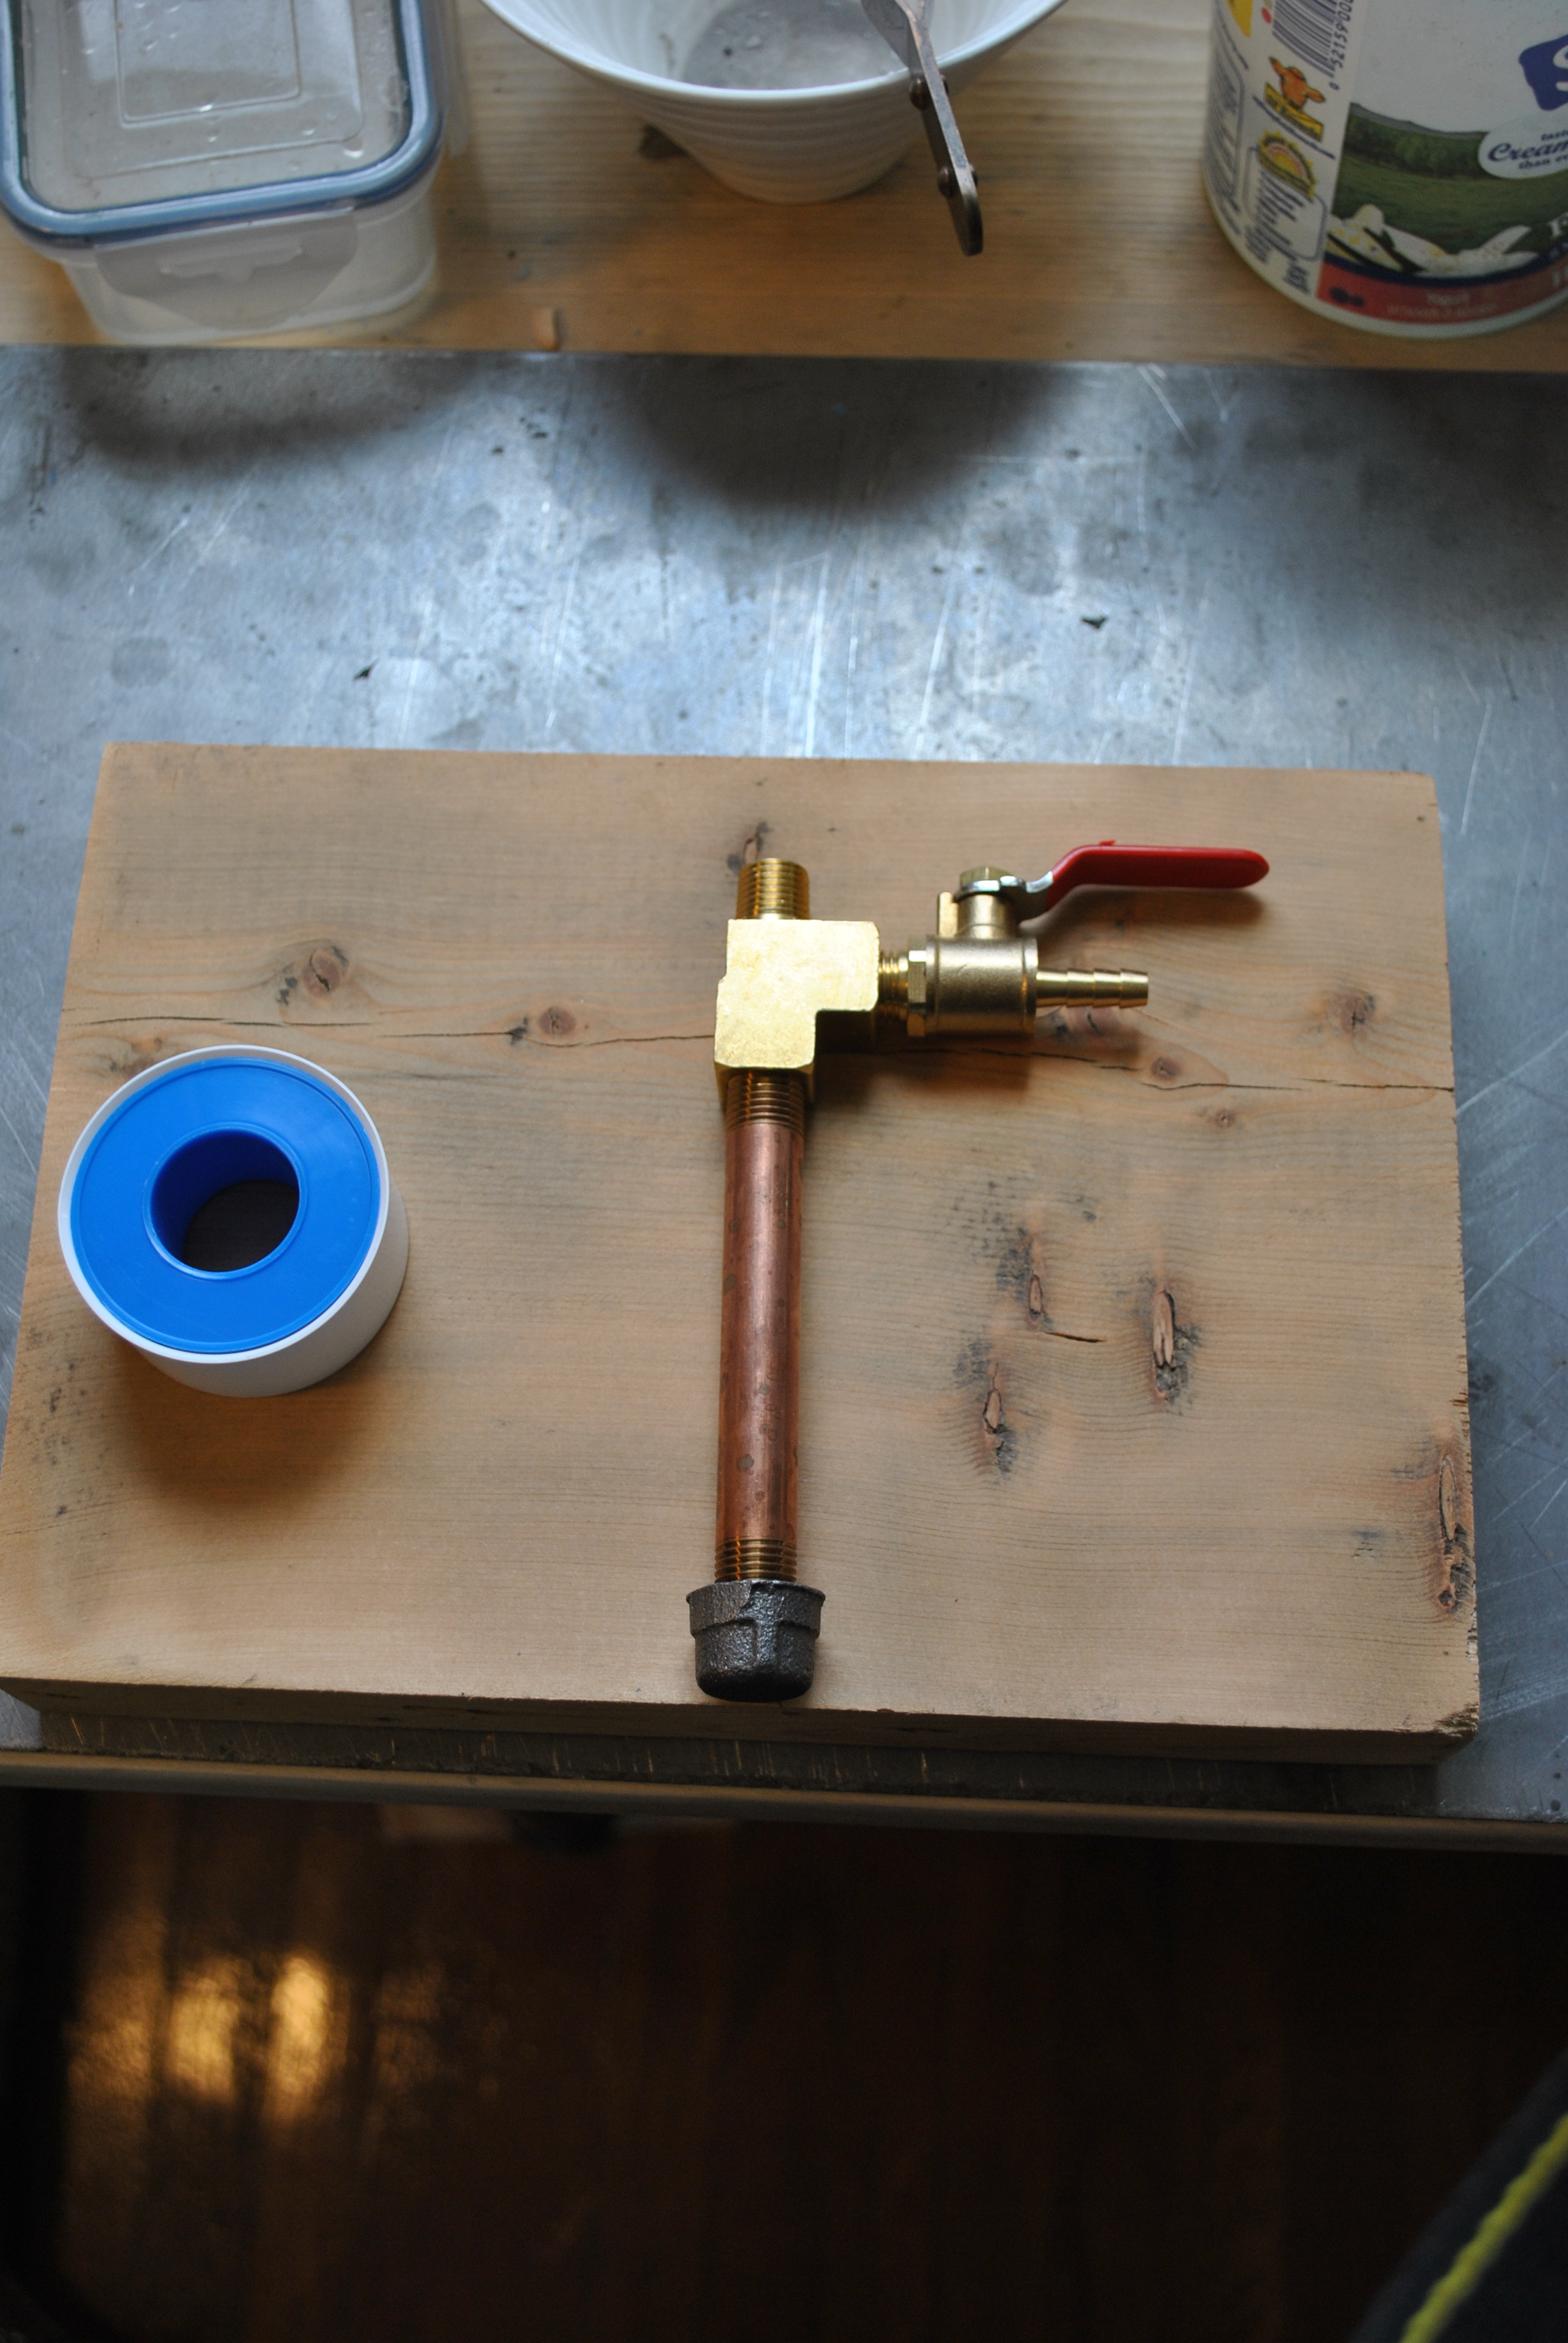
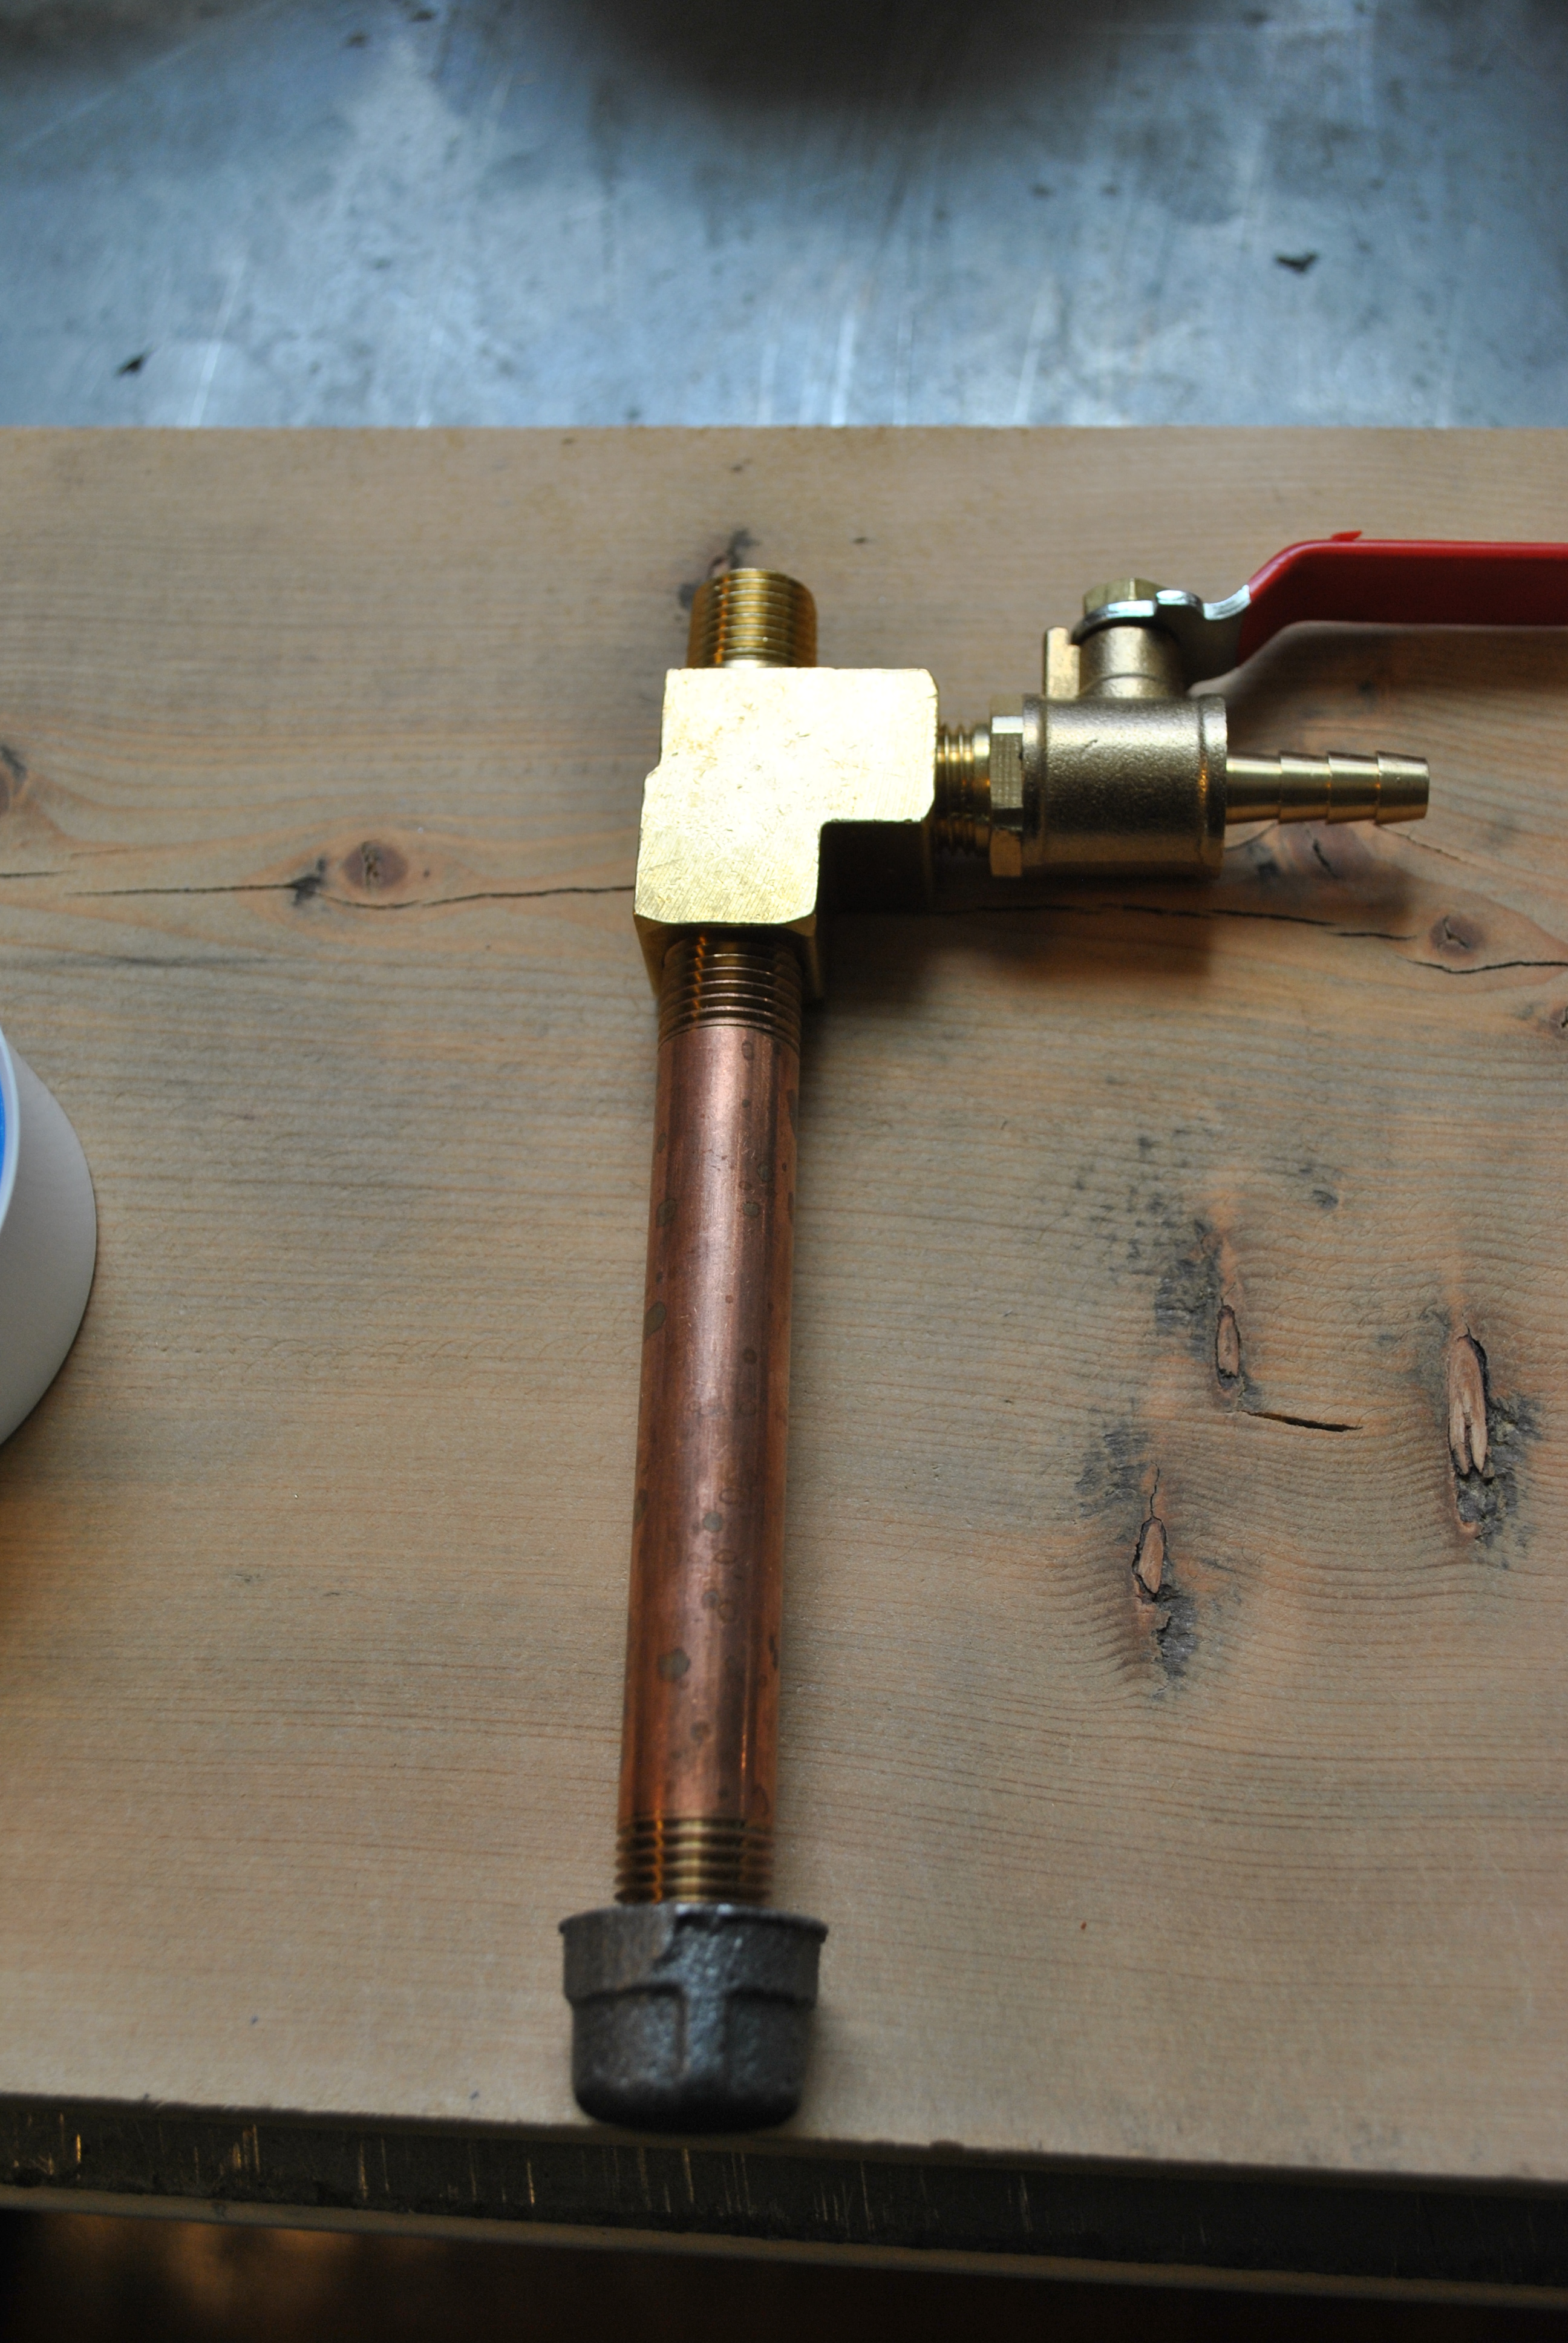
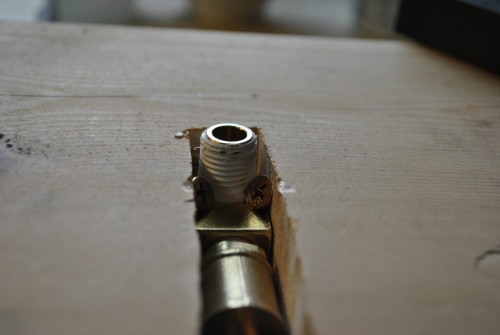
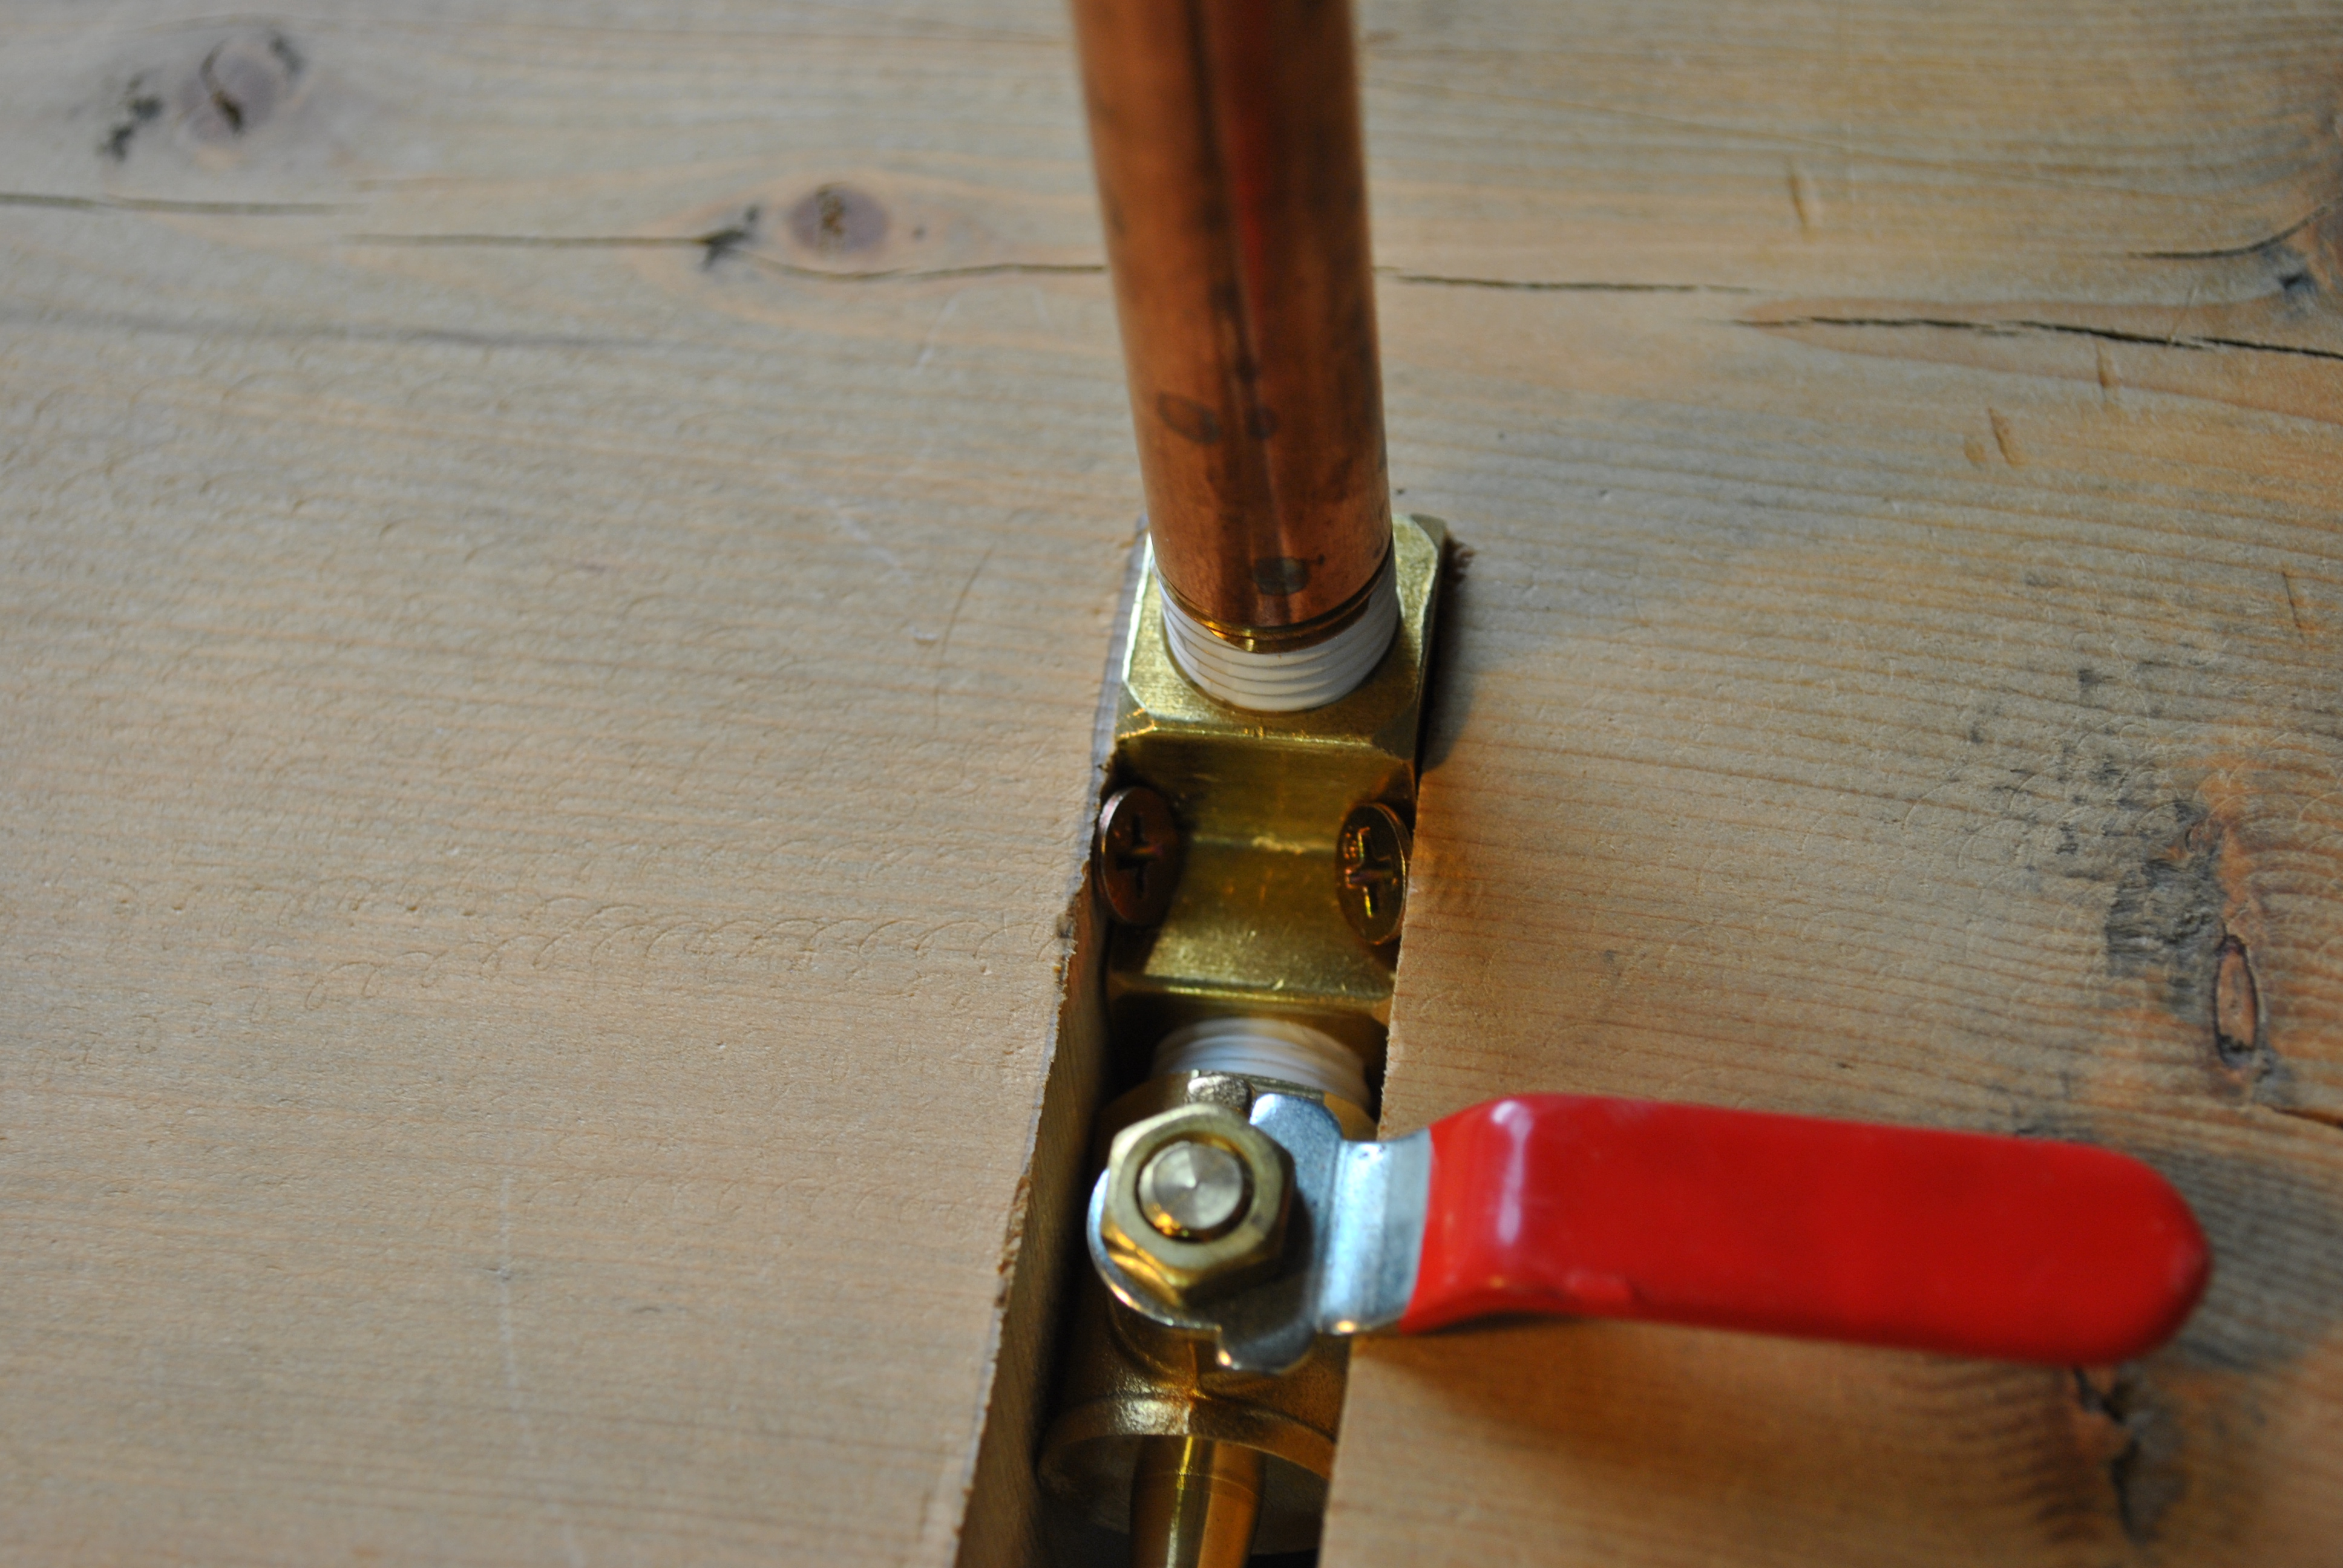
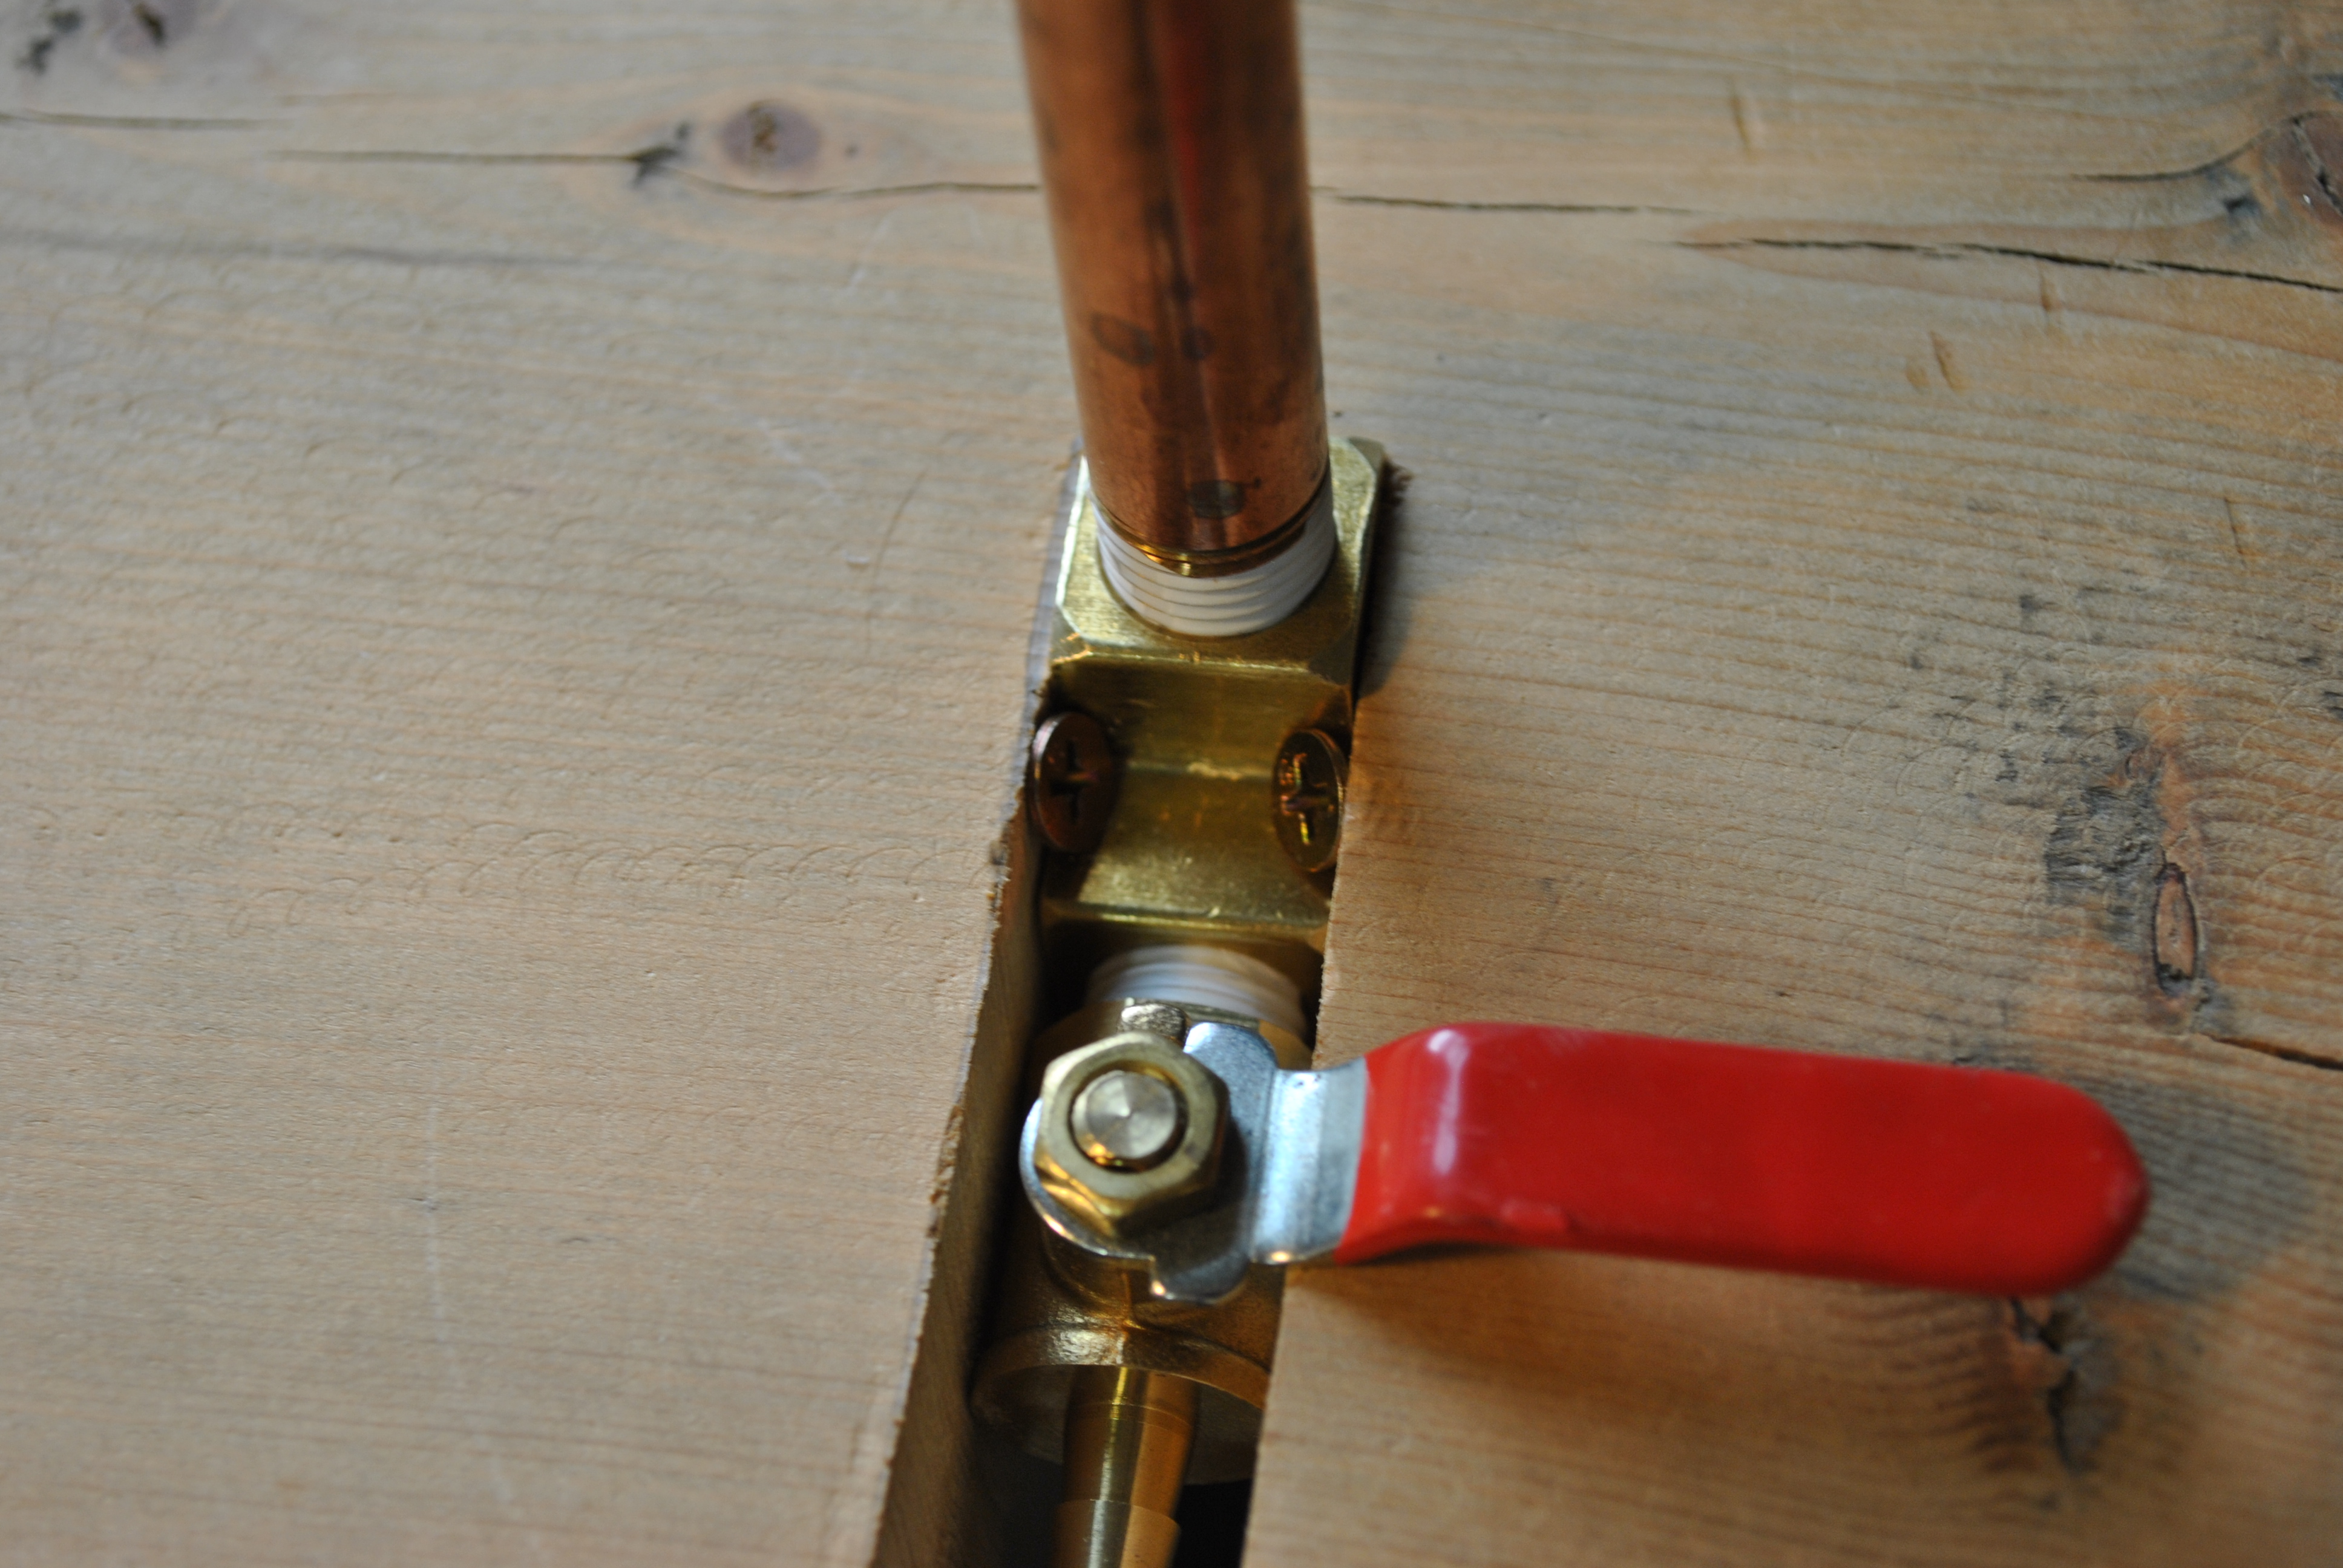
Next I dry fit the “plumbing” I used 1/4 inch brass NPT (means they have air tight pipe thread on them, which you want) fitting. These included the following parts:
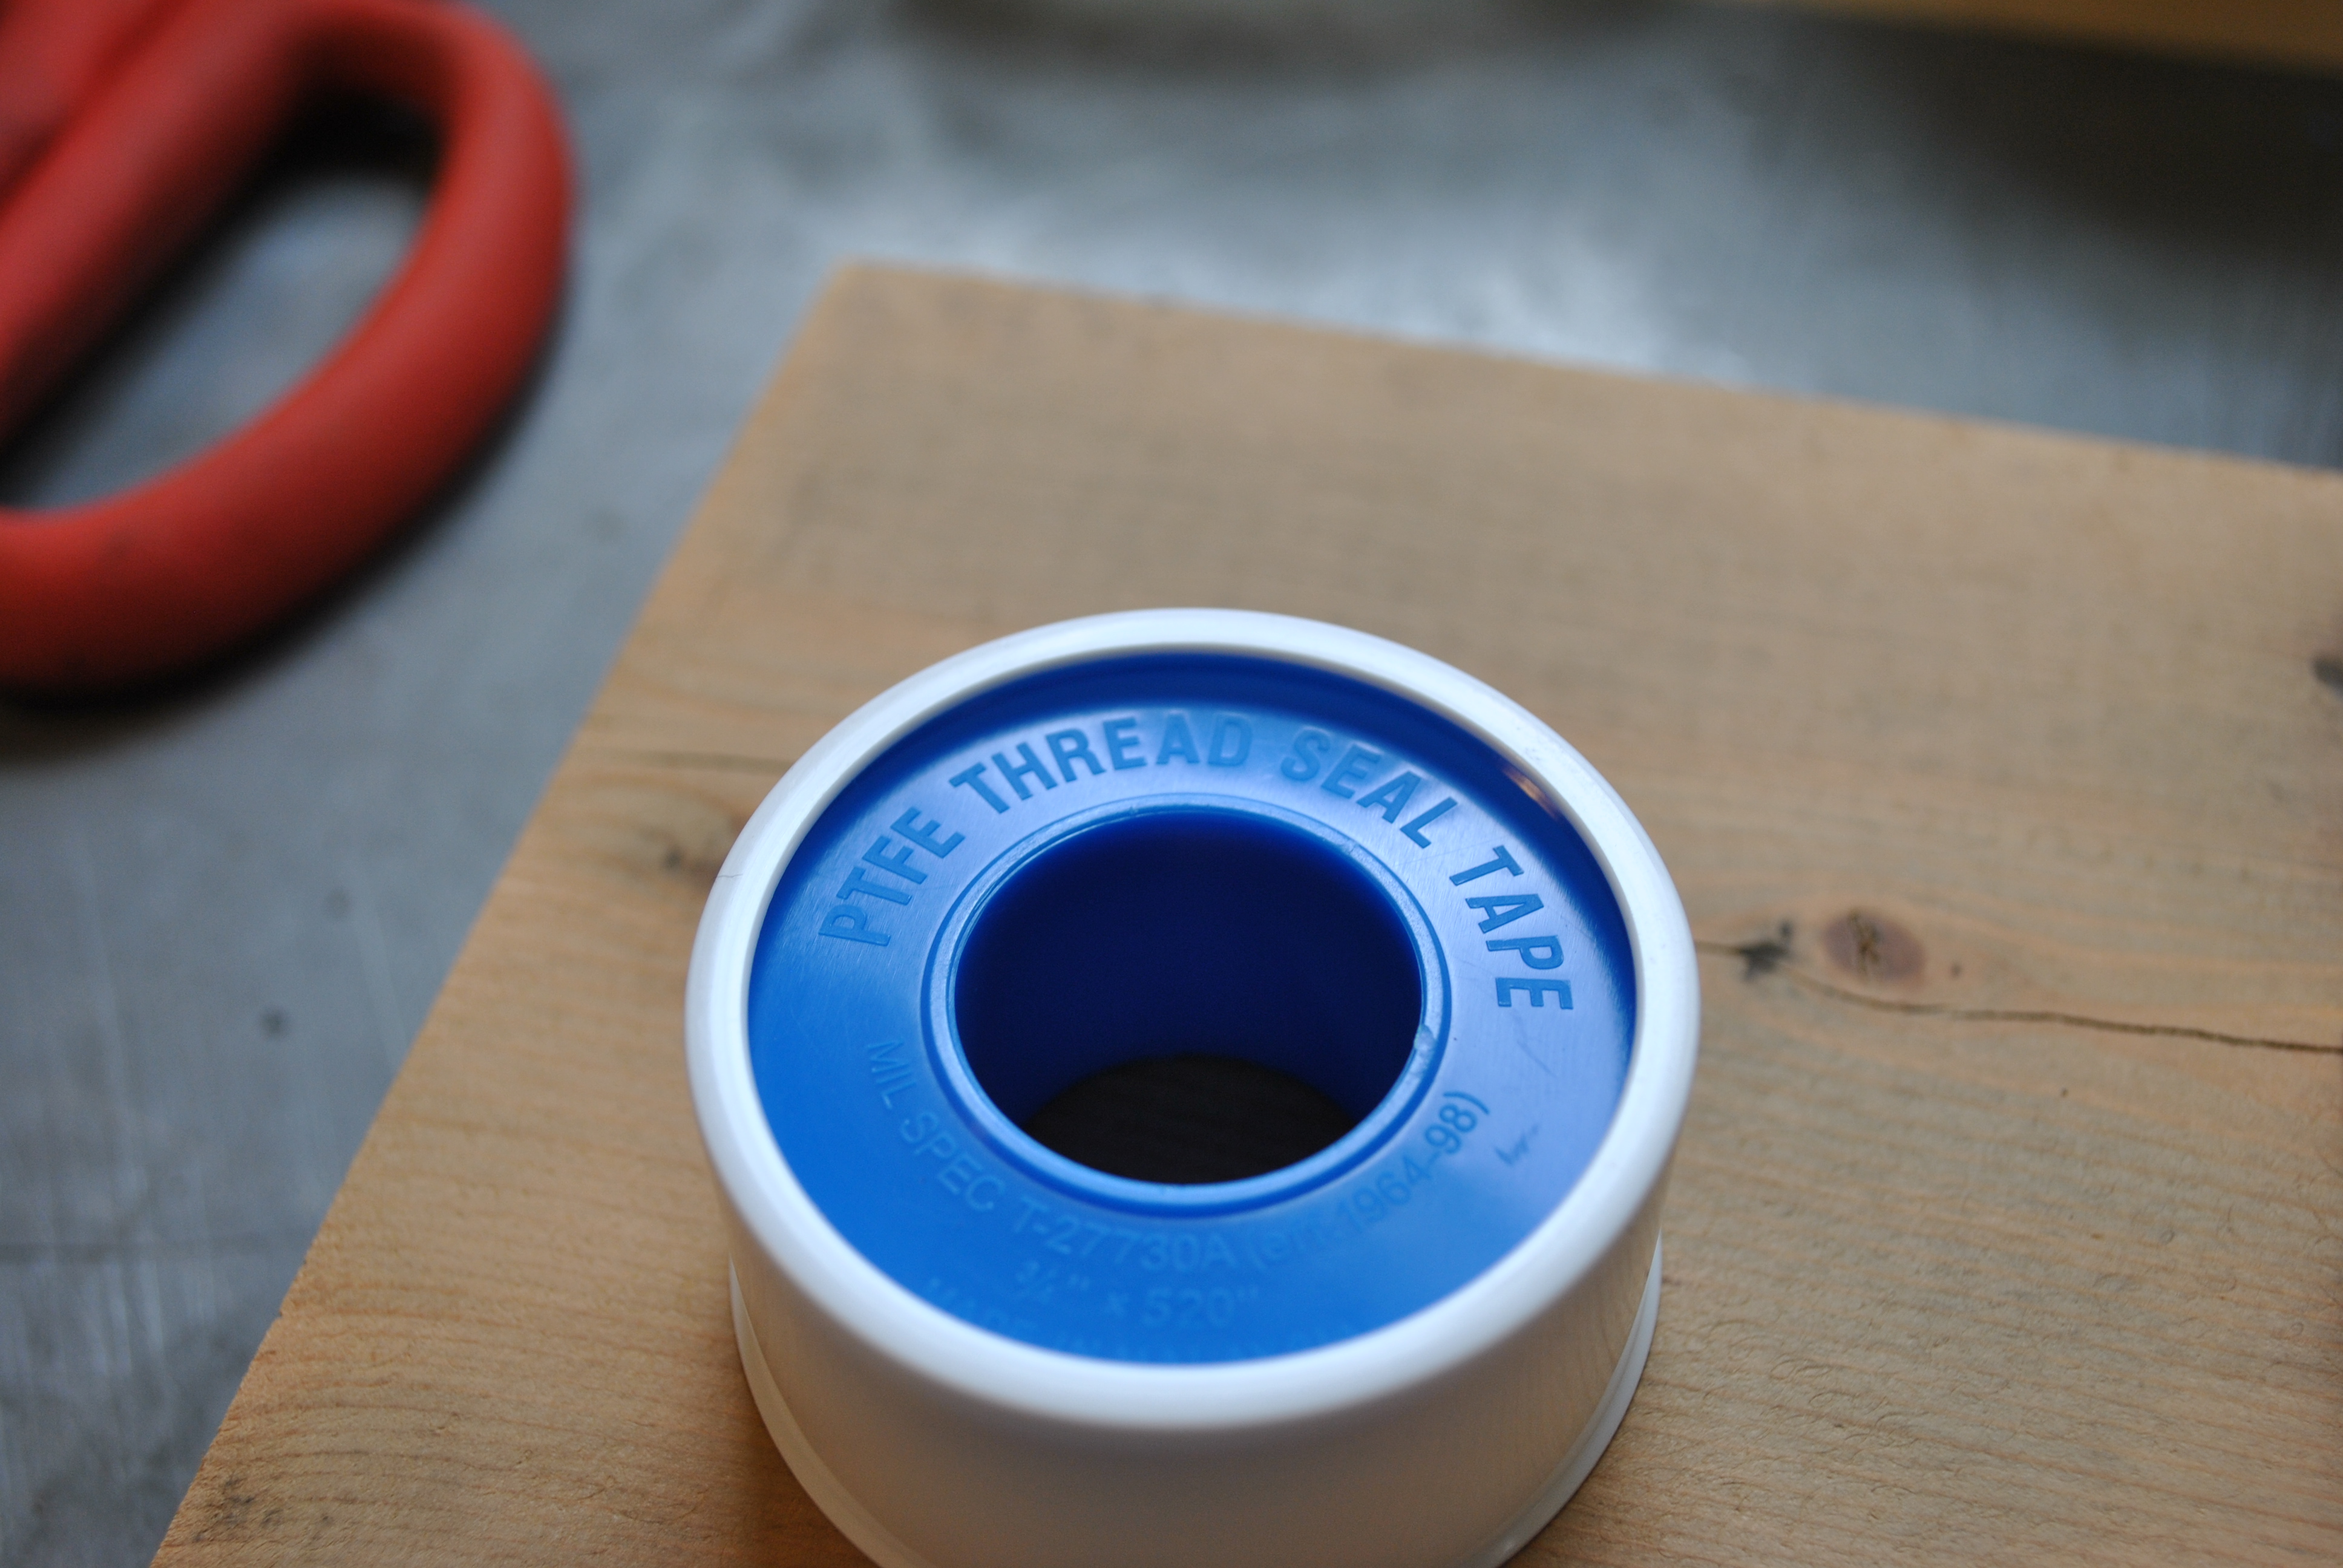
dixon valve ttb75 ptfe industrial sealant tap ($2)
Anderson Metals Brass NPT Pipe Fitting, Barstock street Tee 1/4″ female Pipe x 1/4″ Male pipe X 1/4″ female Pipe ($5)
a 4 inch piece of Red Brass Pipe Fitting Nipple Schedule 40 Seamless 1/4″ NPT male pipe ($4)
and a stainless steel (they were out of brass) 1/4″ NPT pipe mushroom style cap ($1)
A 1/4″ npt threaded ball valve to Barb ($3)
The top threaded part is “up” so that will be what sticks up through the plate to suck the air out of the flask. You will notice that I have placed a large section of pipe that goes “down.” The reason I did that is because if there is a catastrophic flask failure and molten metal pours down into the hole it will flow straight down into the pipe instead of down the hose into the vacuum pump jacking it all up. The square sides on the valve make it fit really well later in the process, so if you can find that kind do so.
When you do the final fit, be sure to wrap all the threads with the ptfe seal tape to get a strong airtight seal.
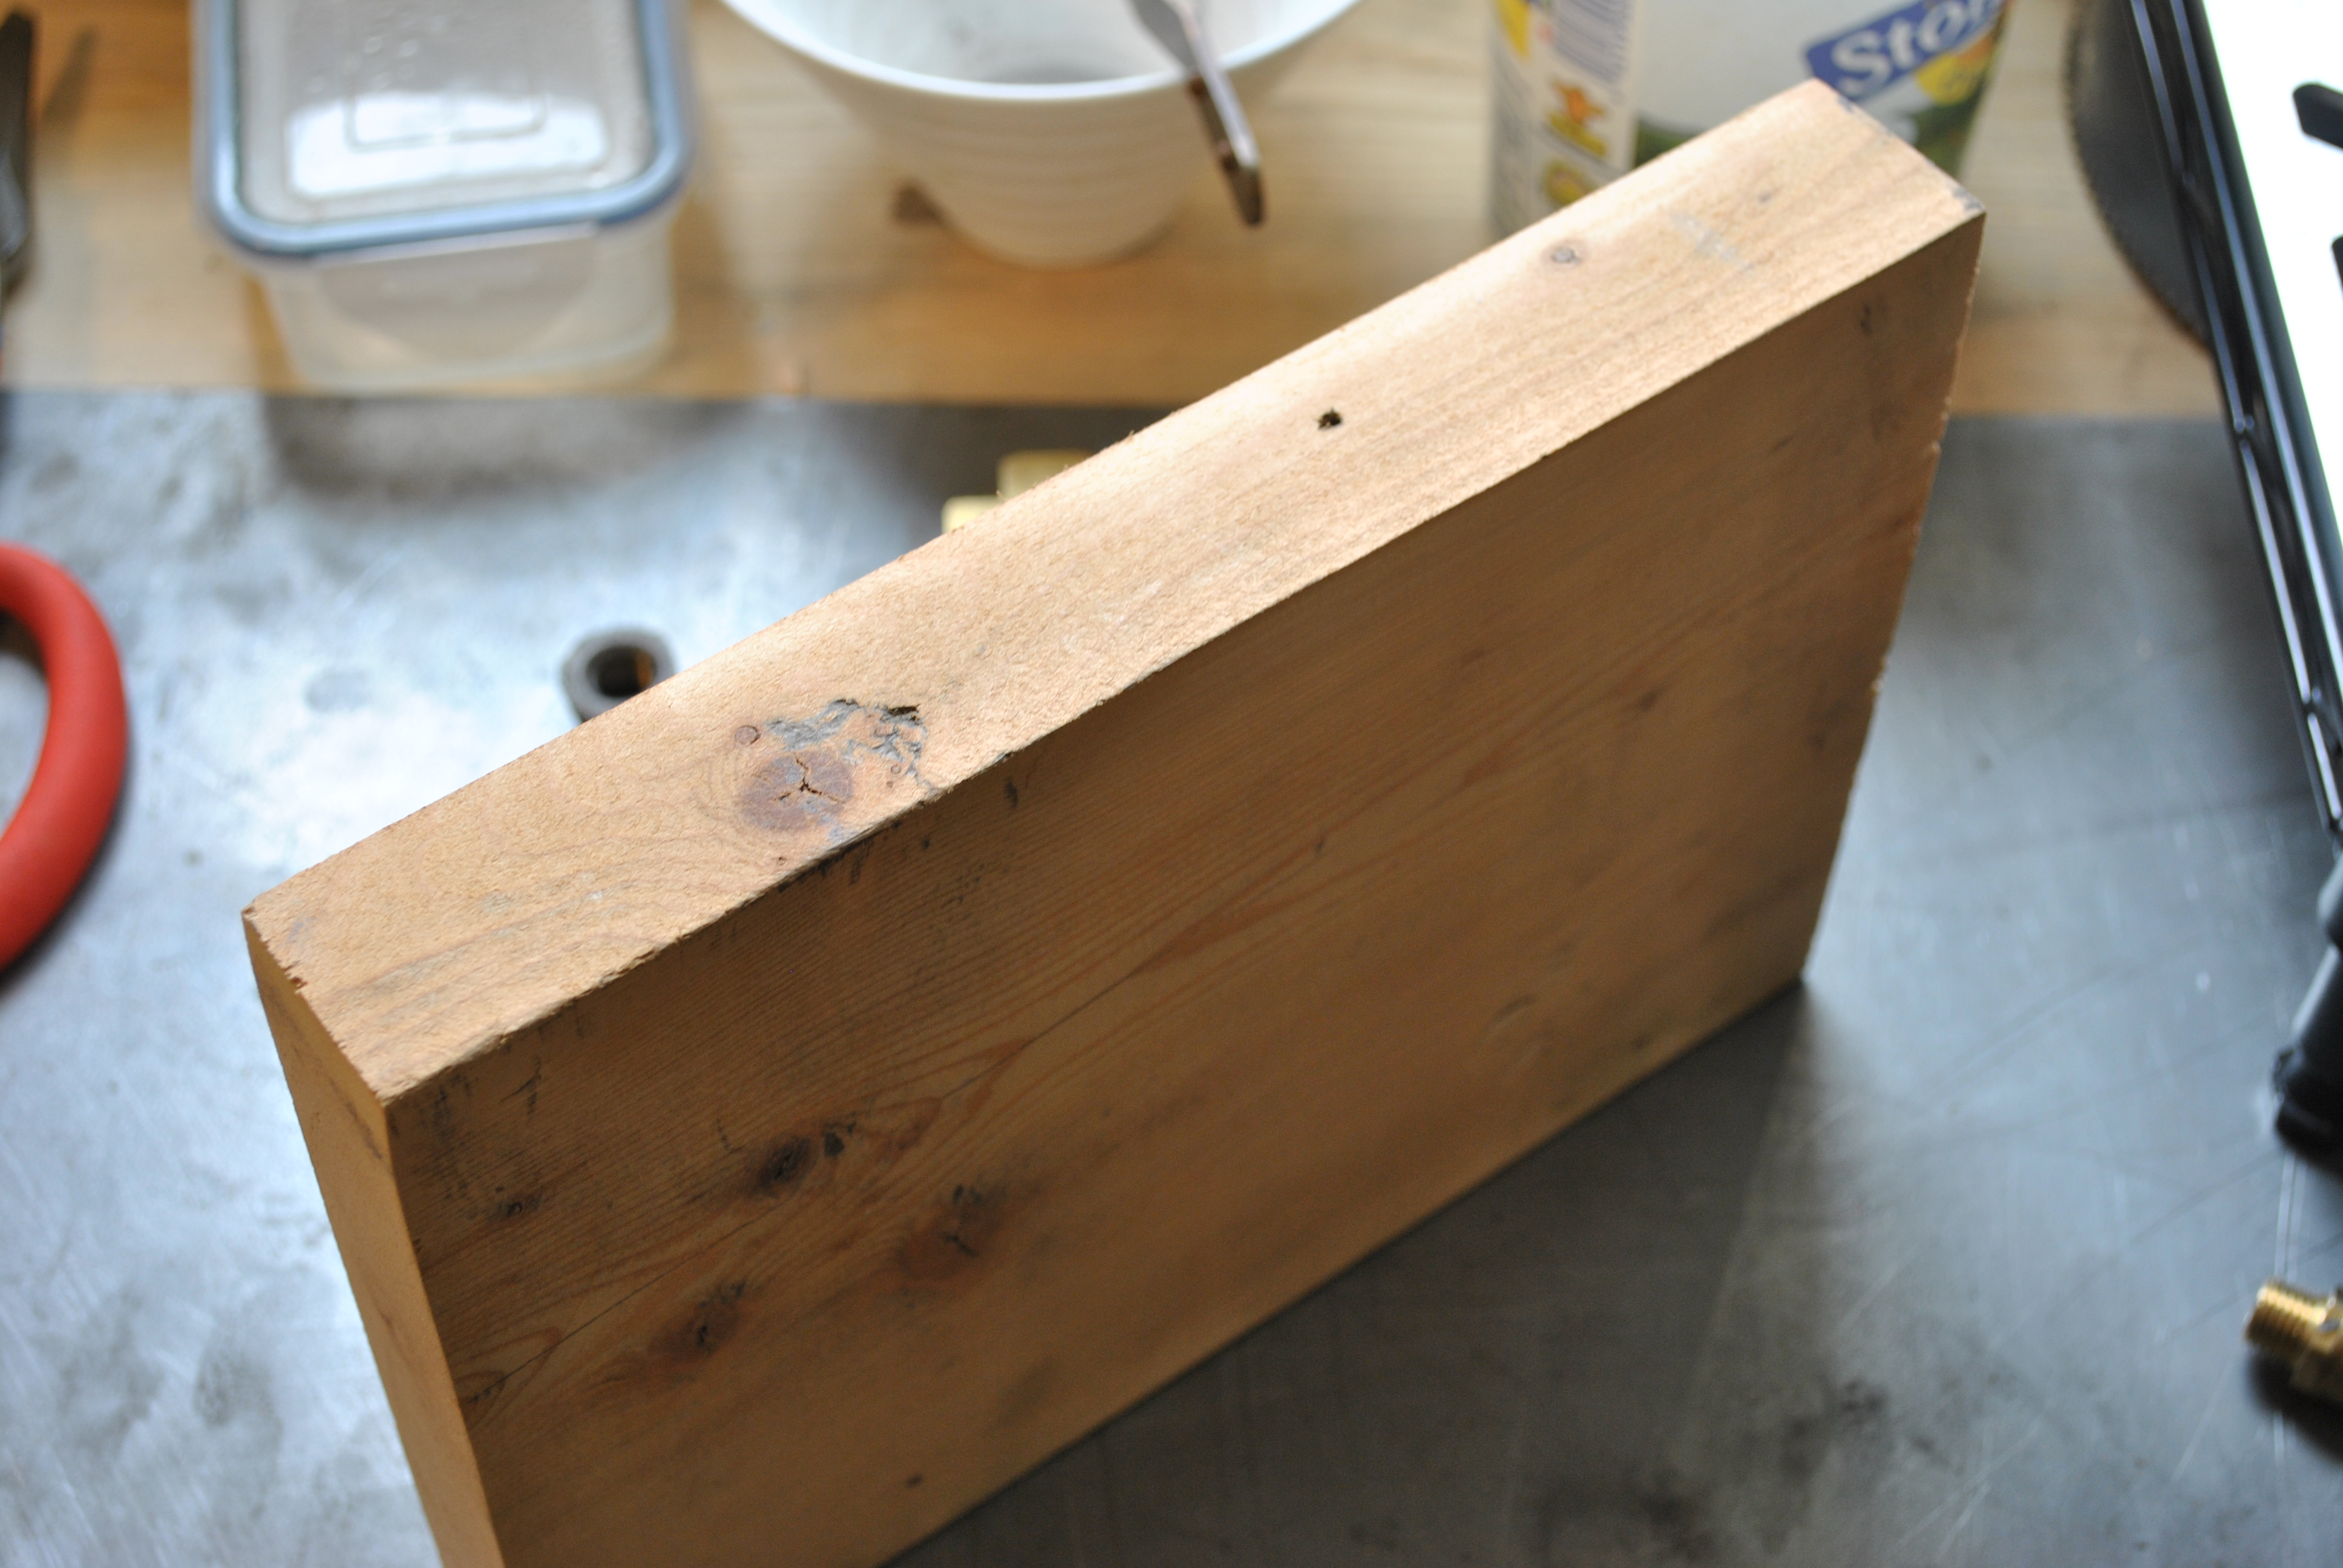
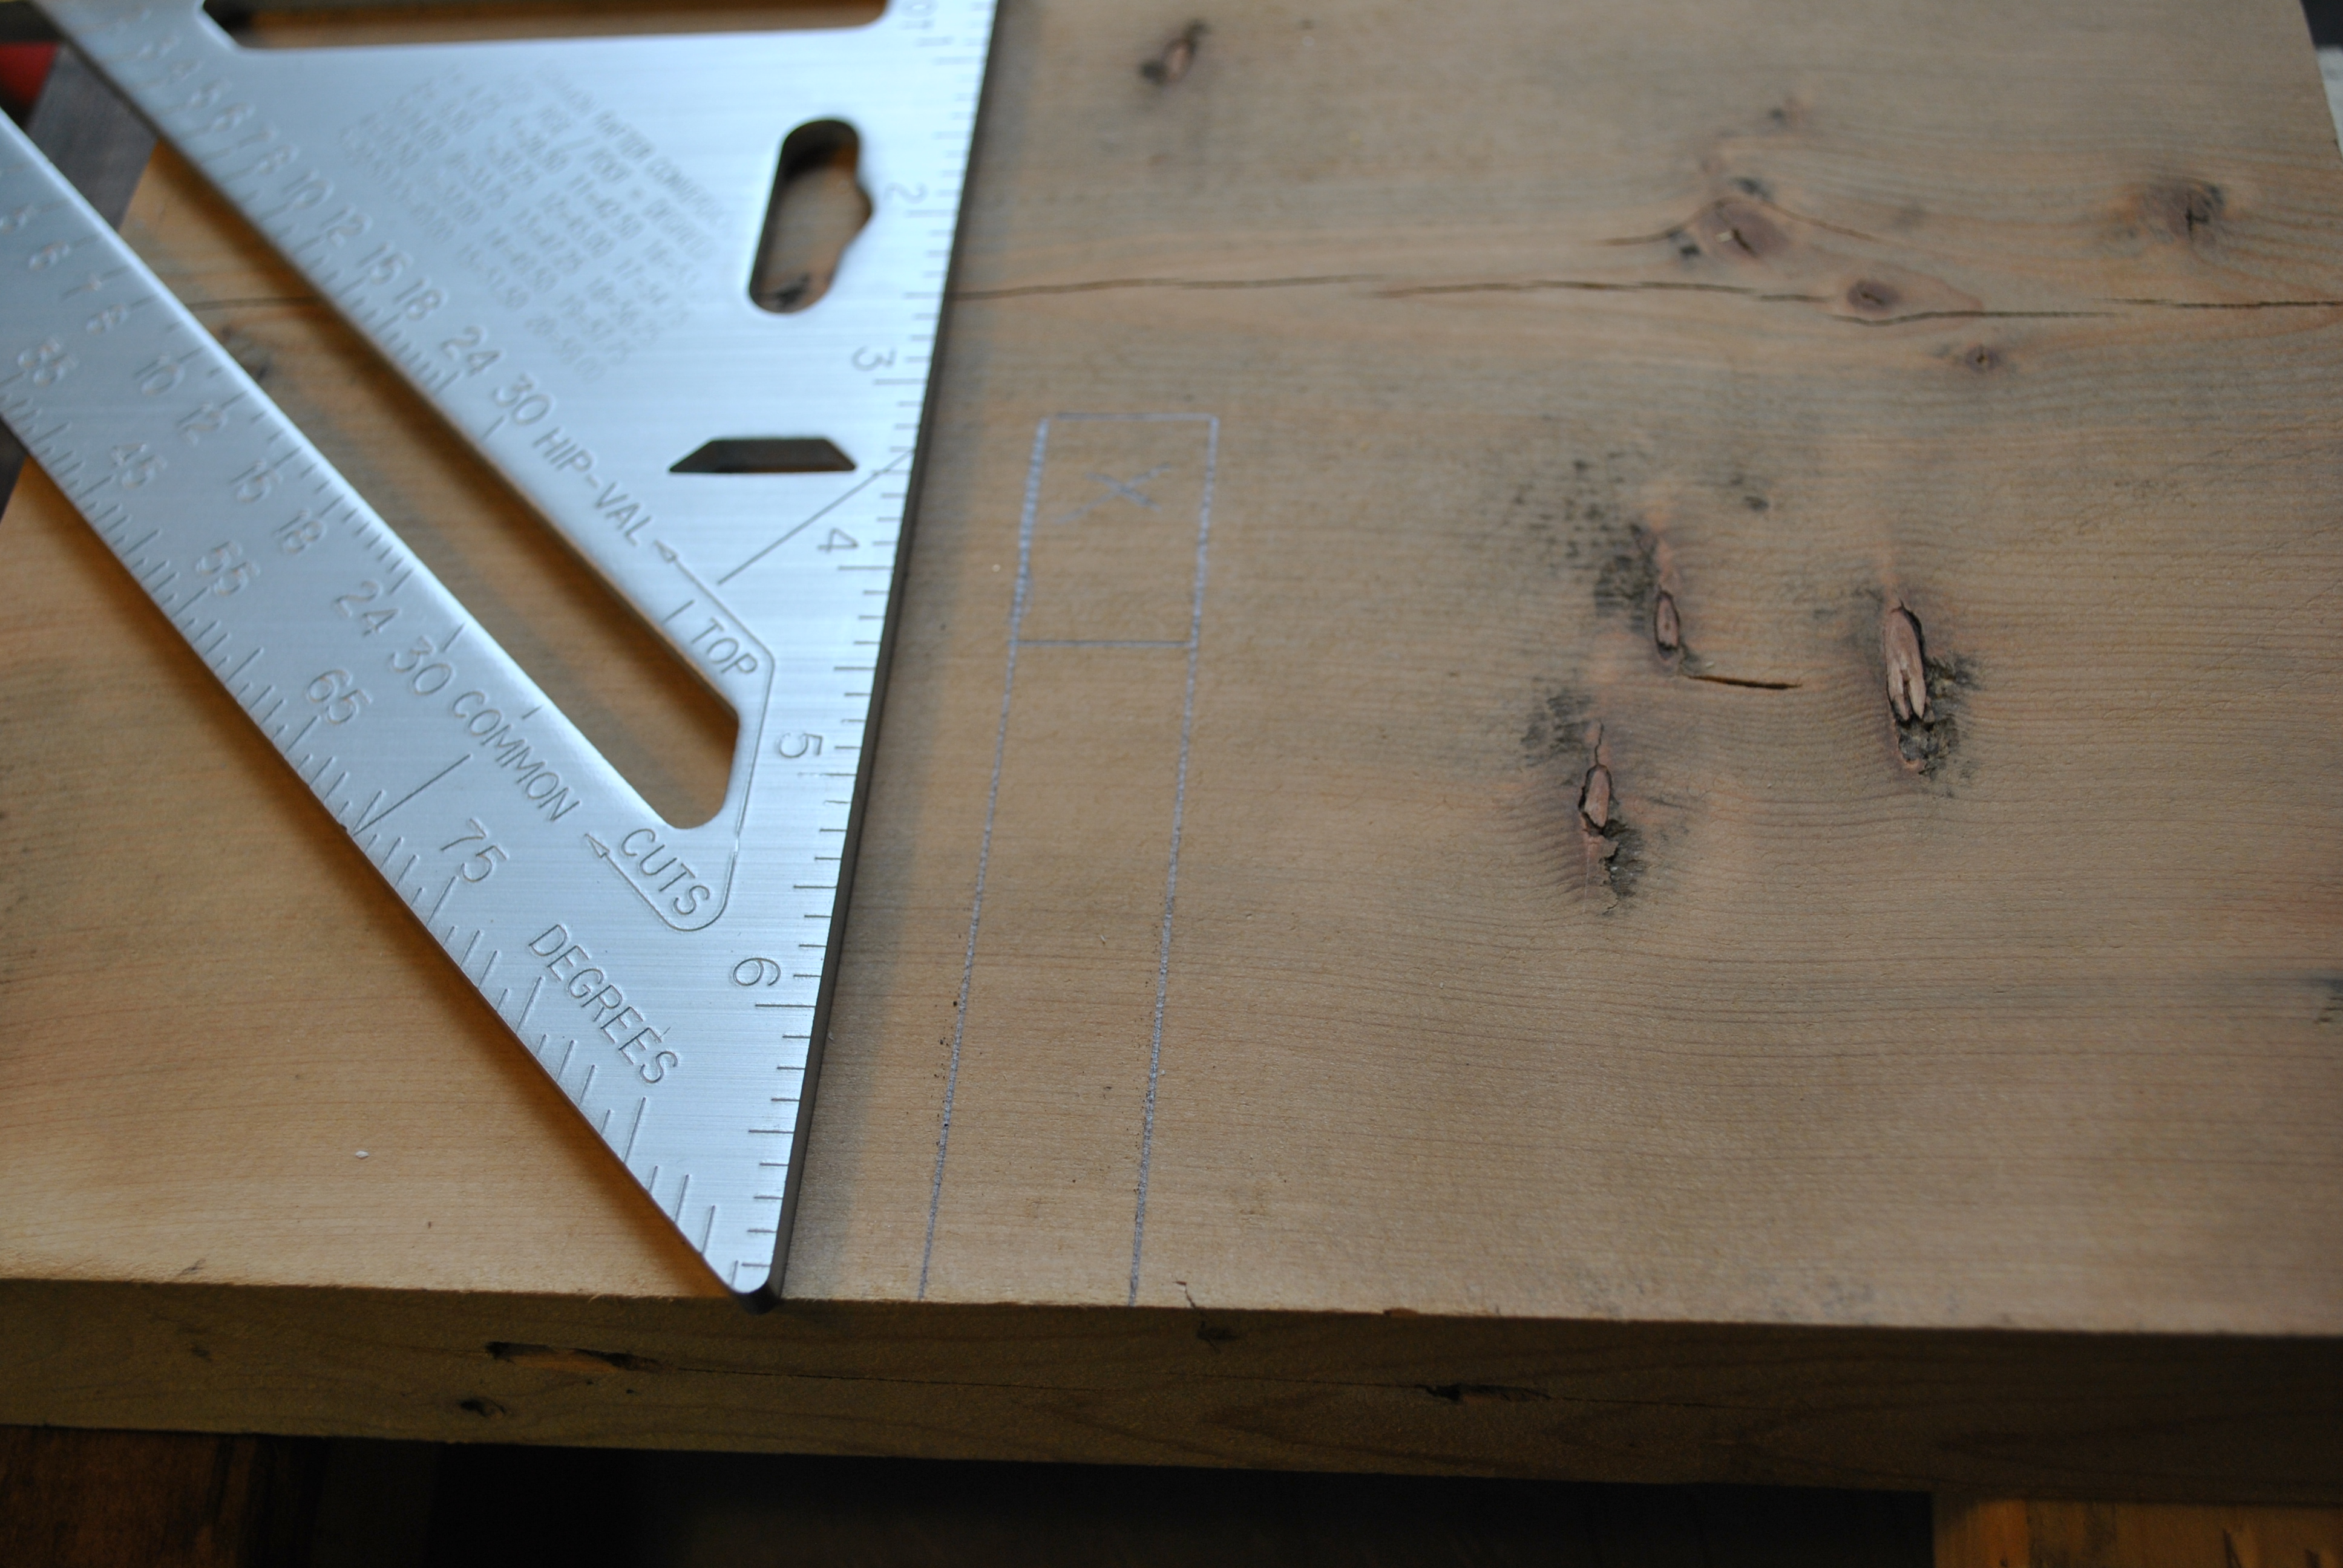
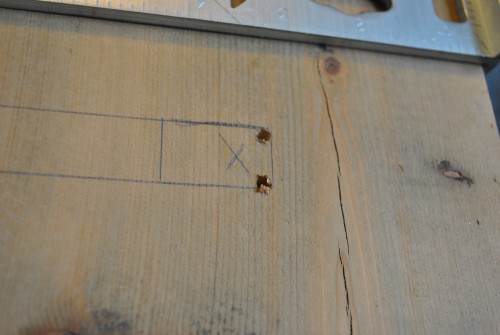
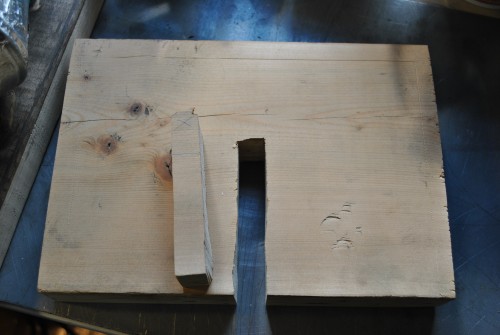
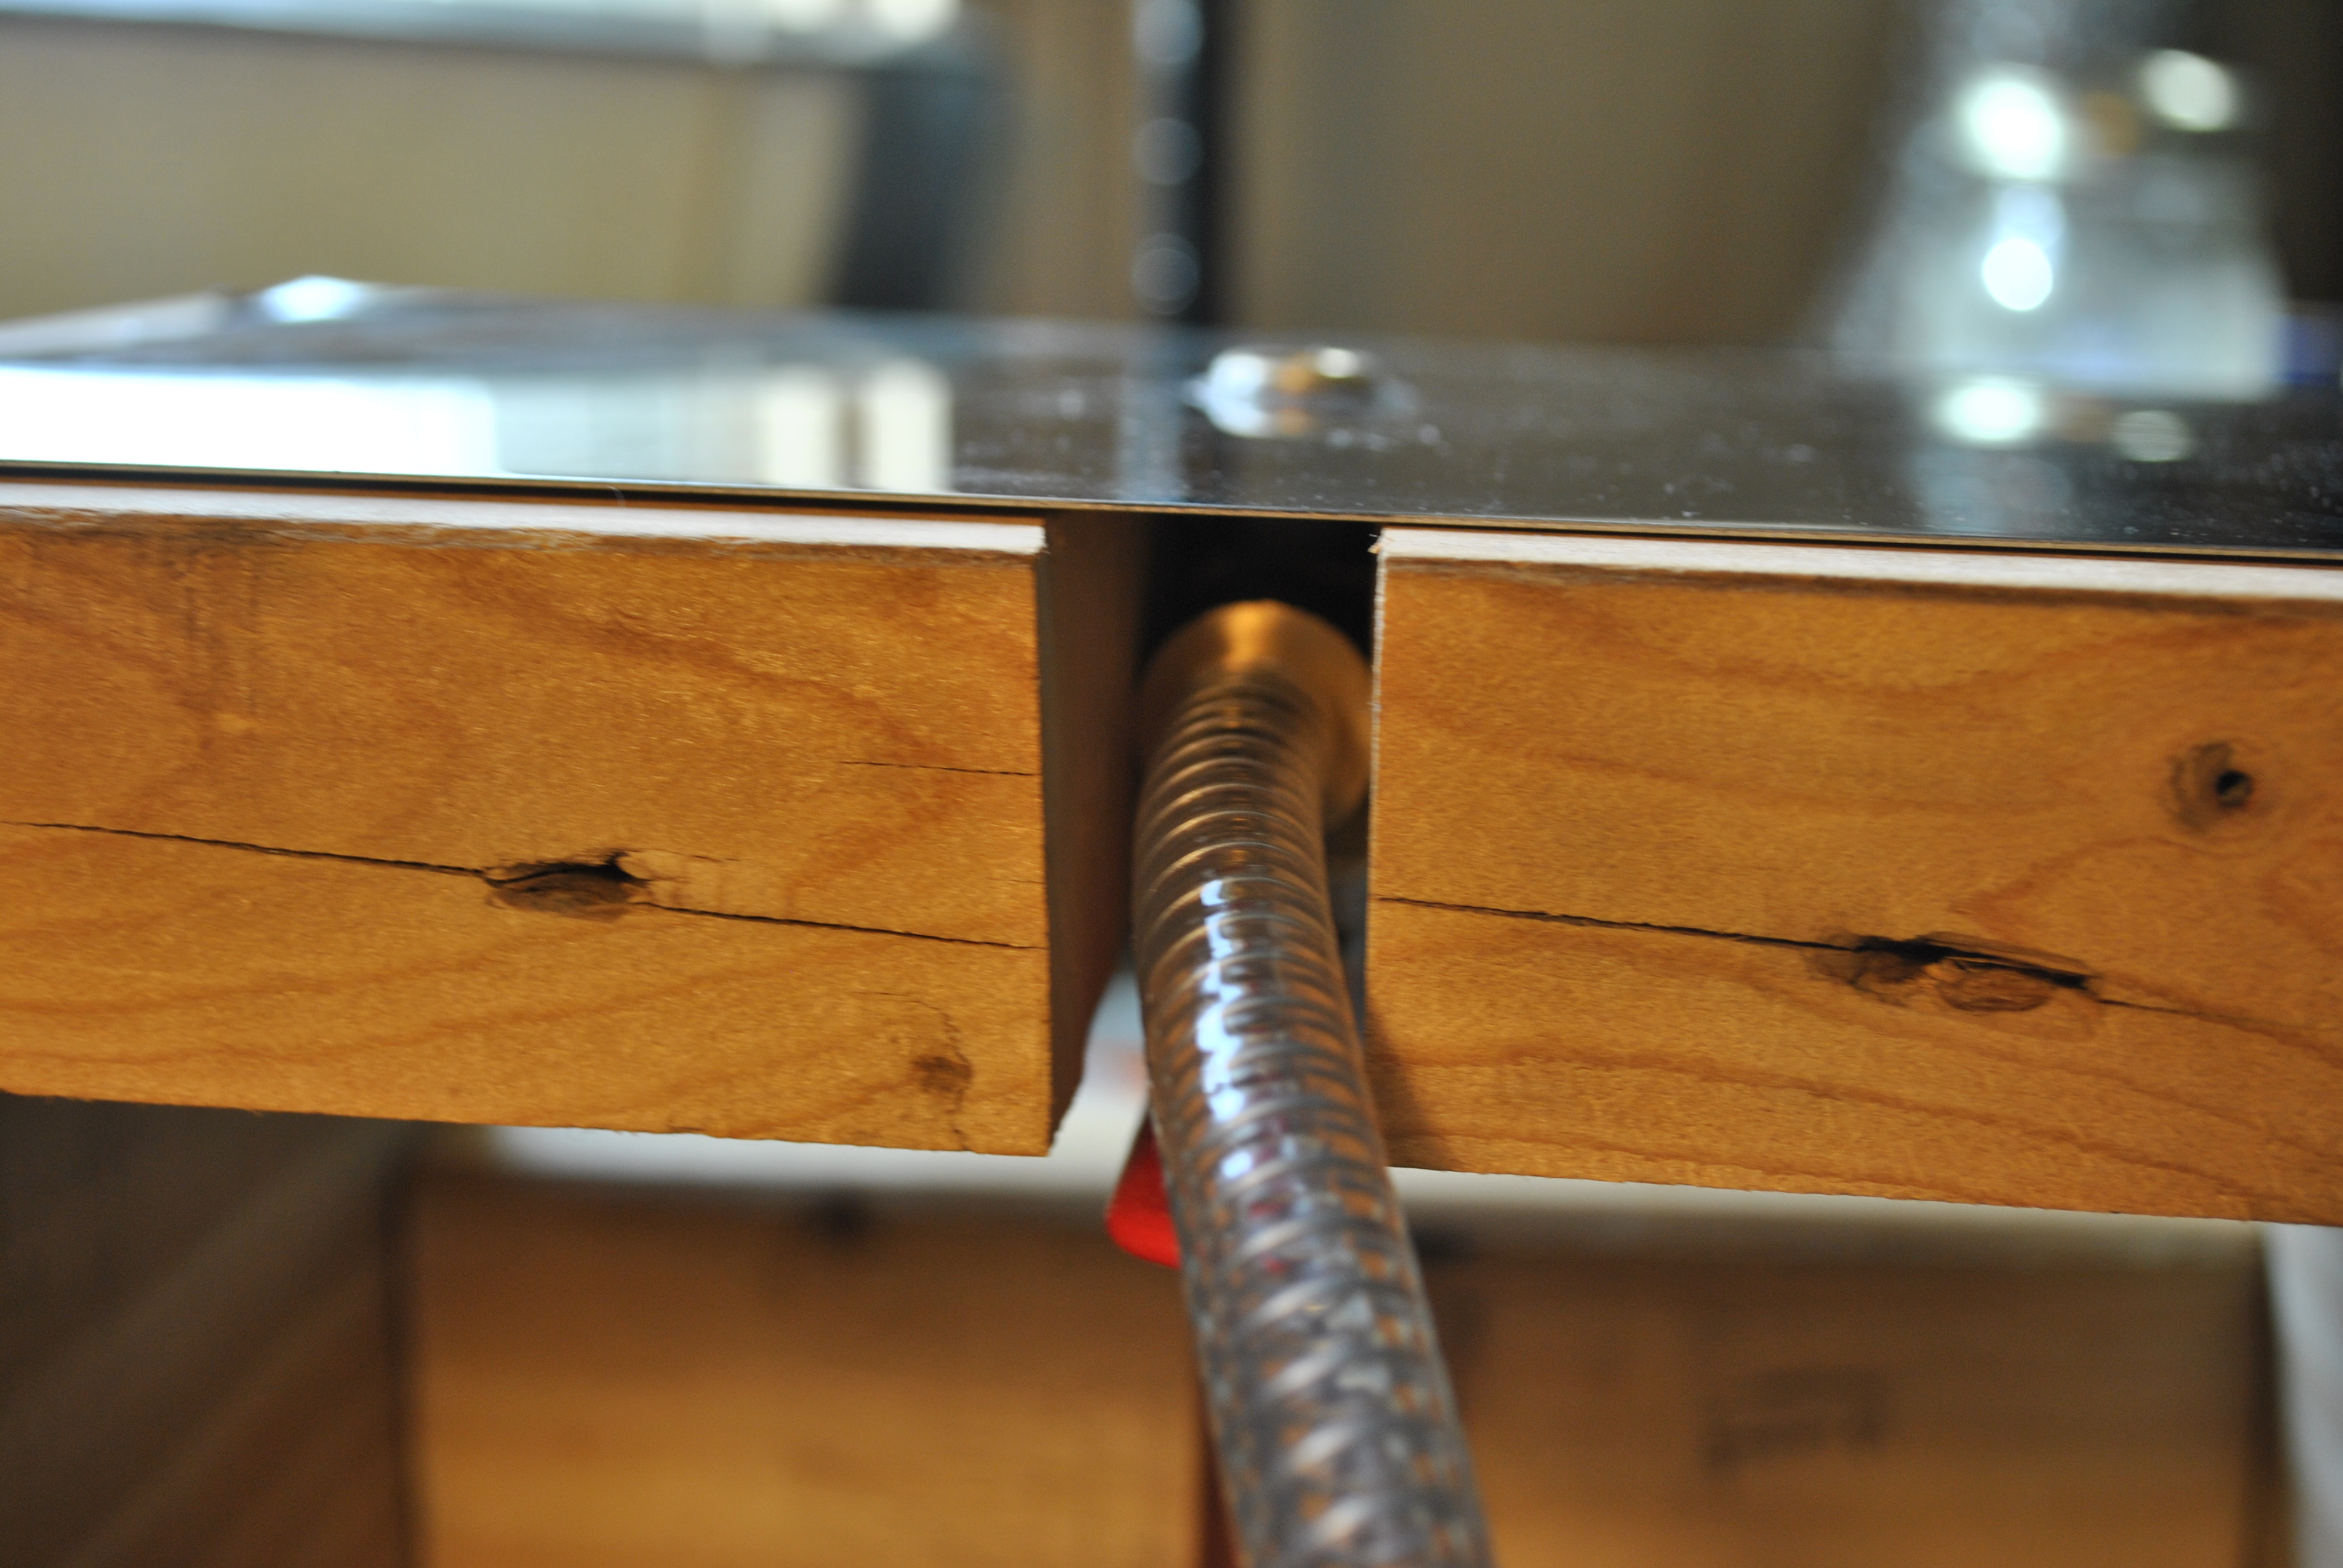
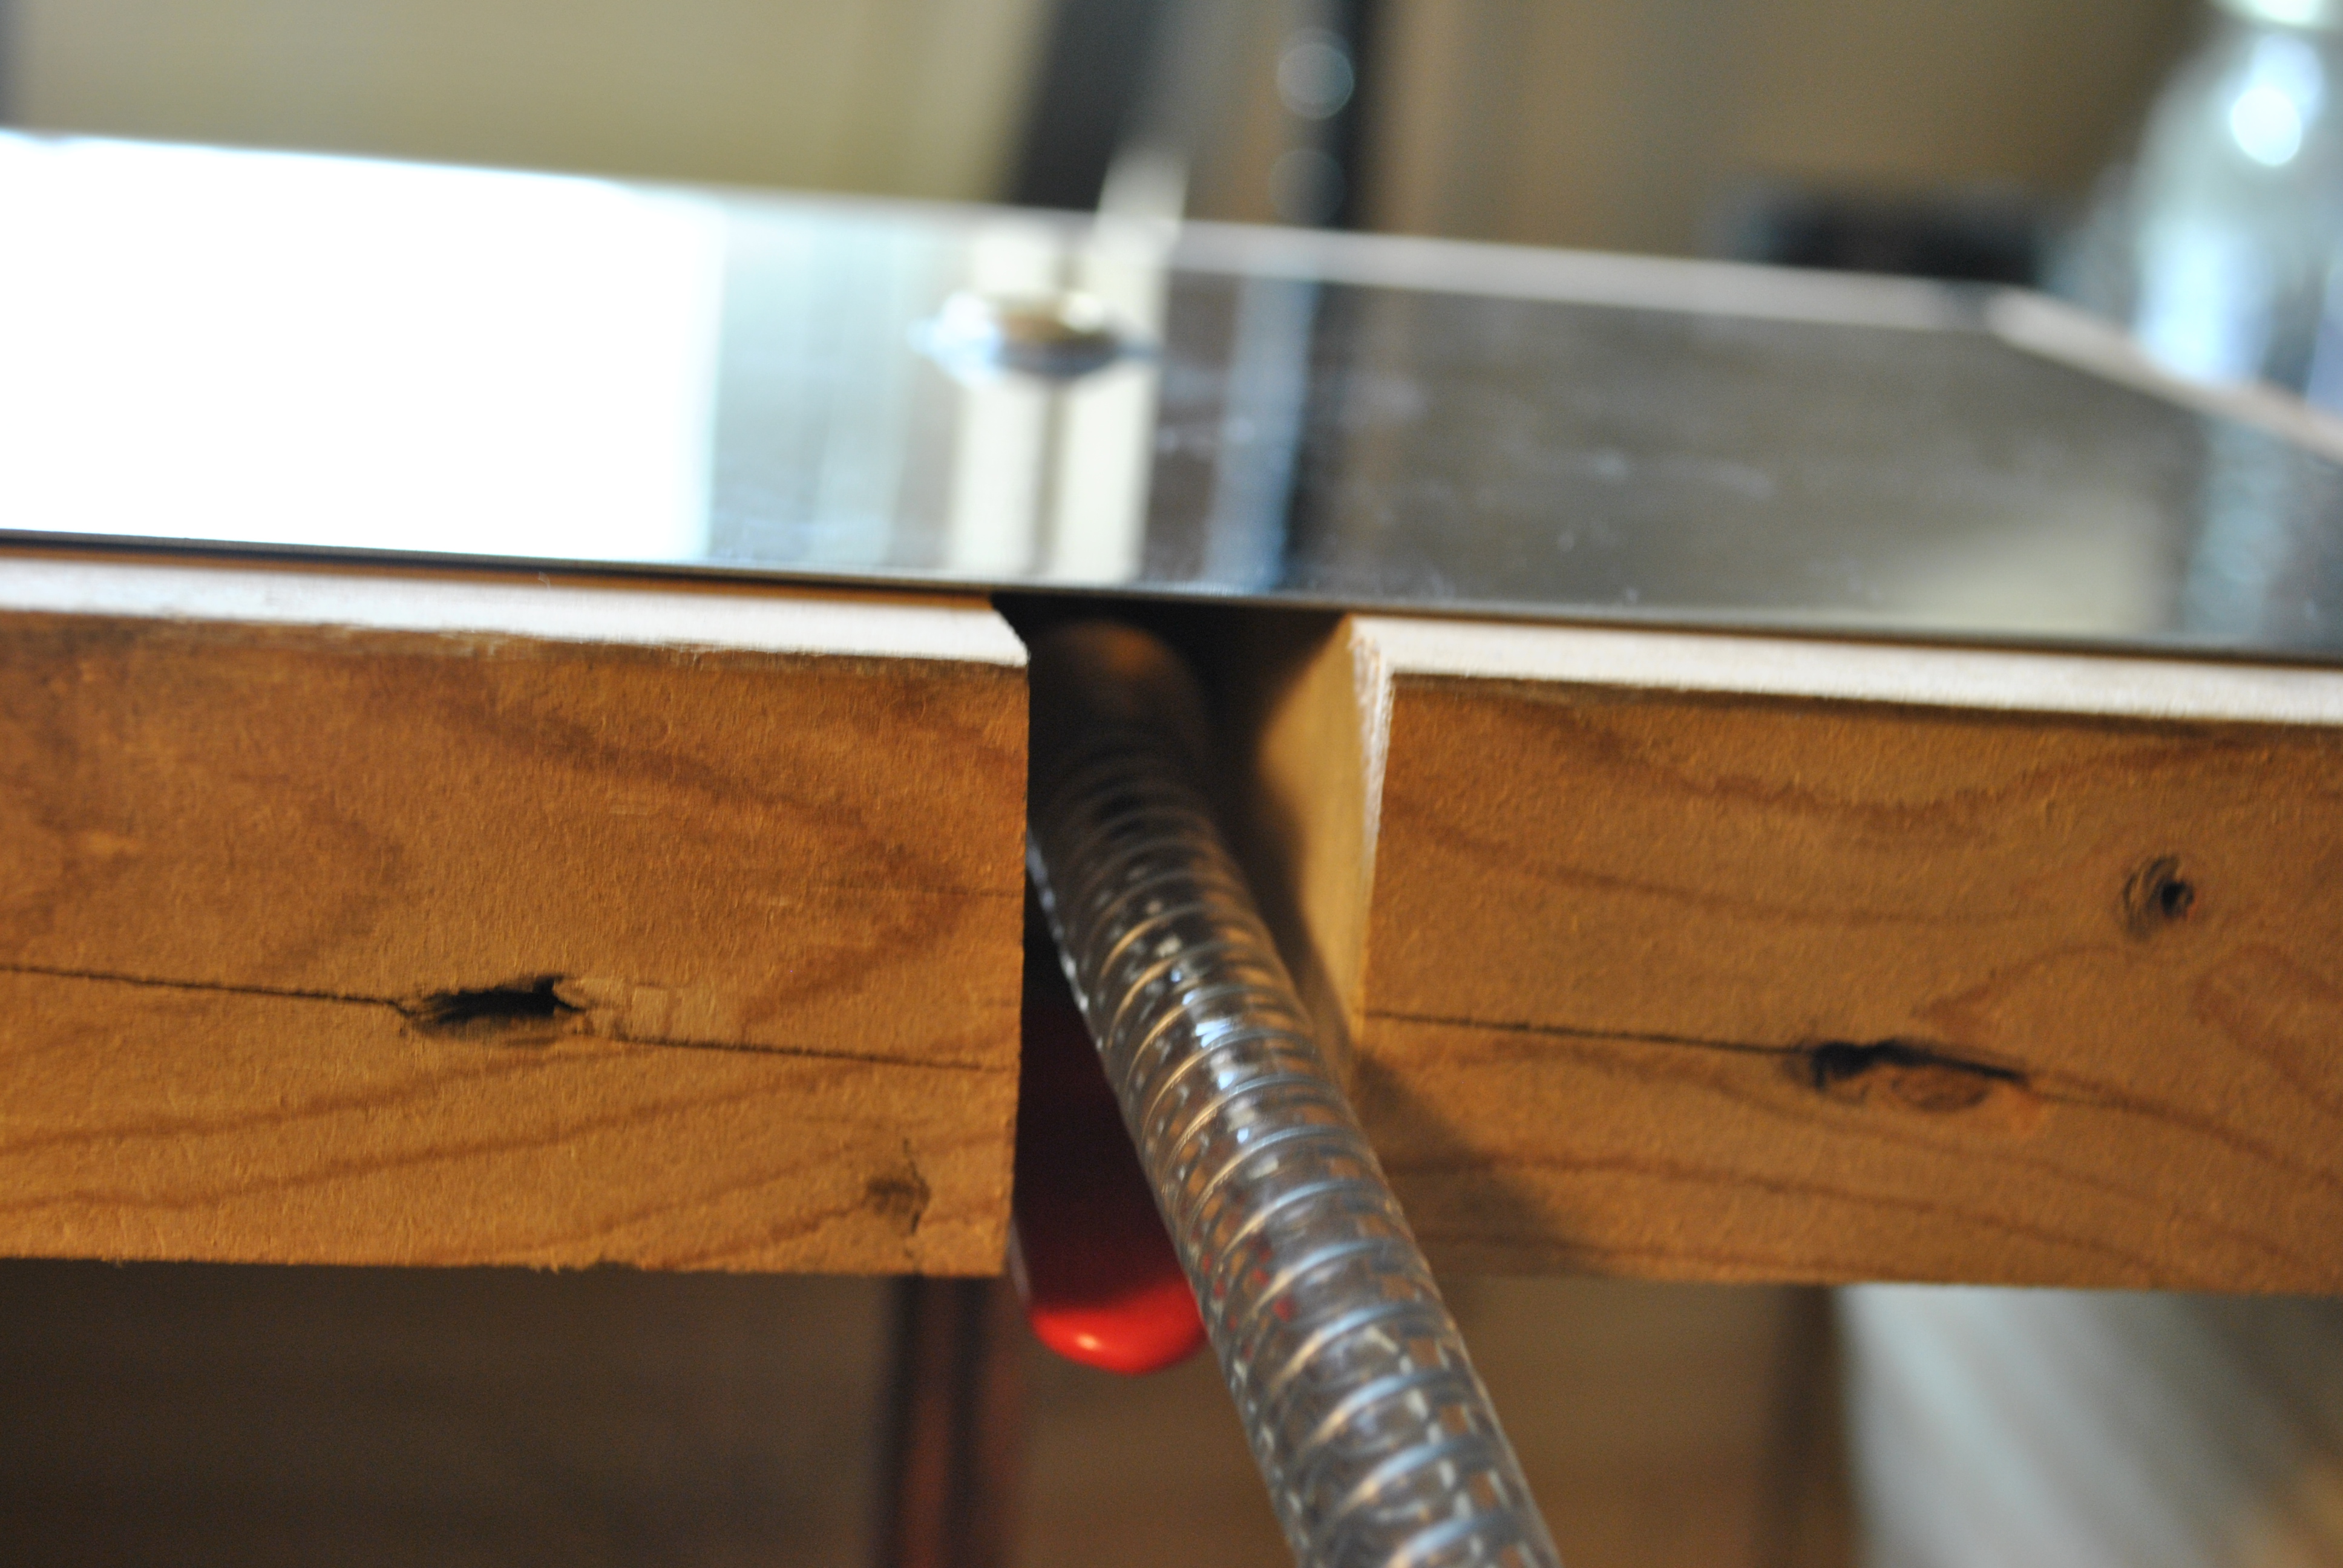
Next I measured a channel into the side of the board big enough to hold all the plumbing.
Be sure your plumbing will fit into the notch, and rough it out a bit more with sandpaper or a chisel if it needs more space.
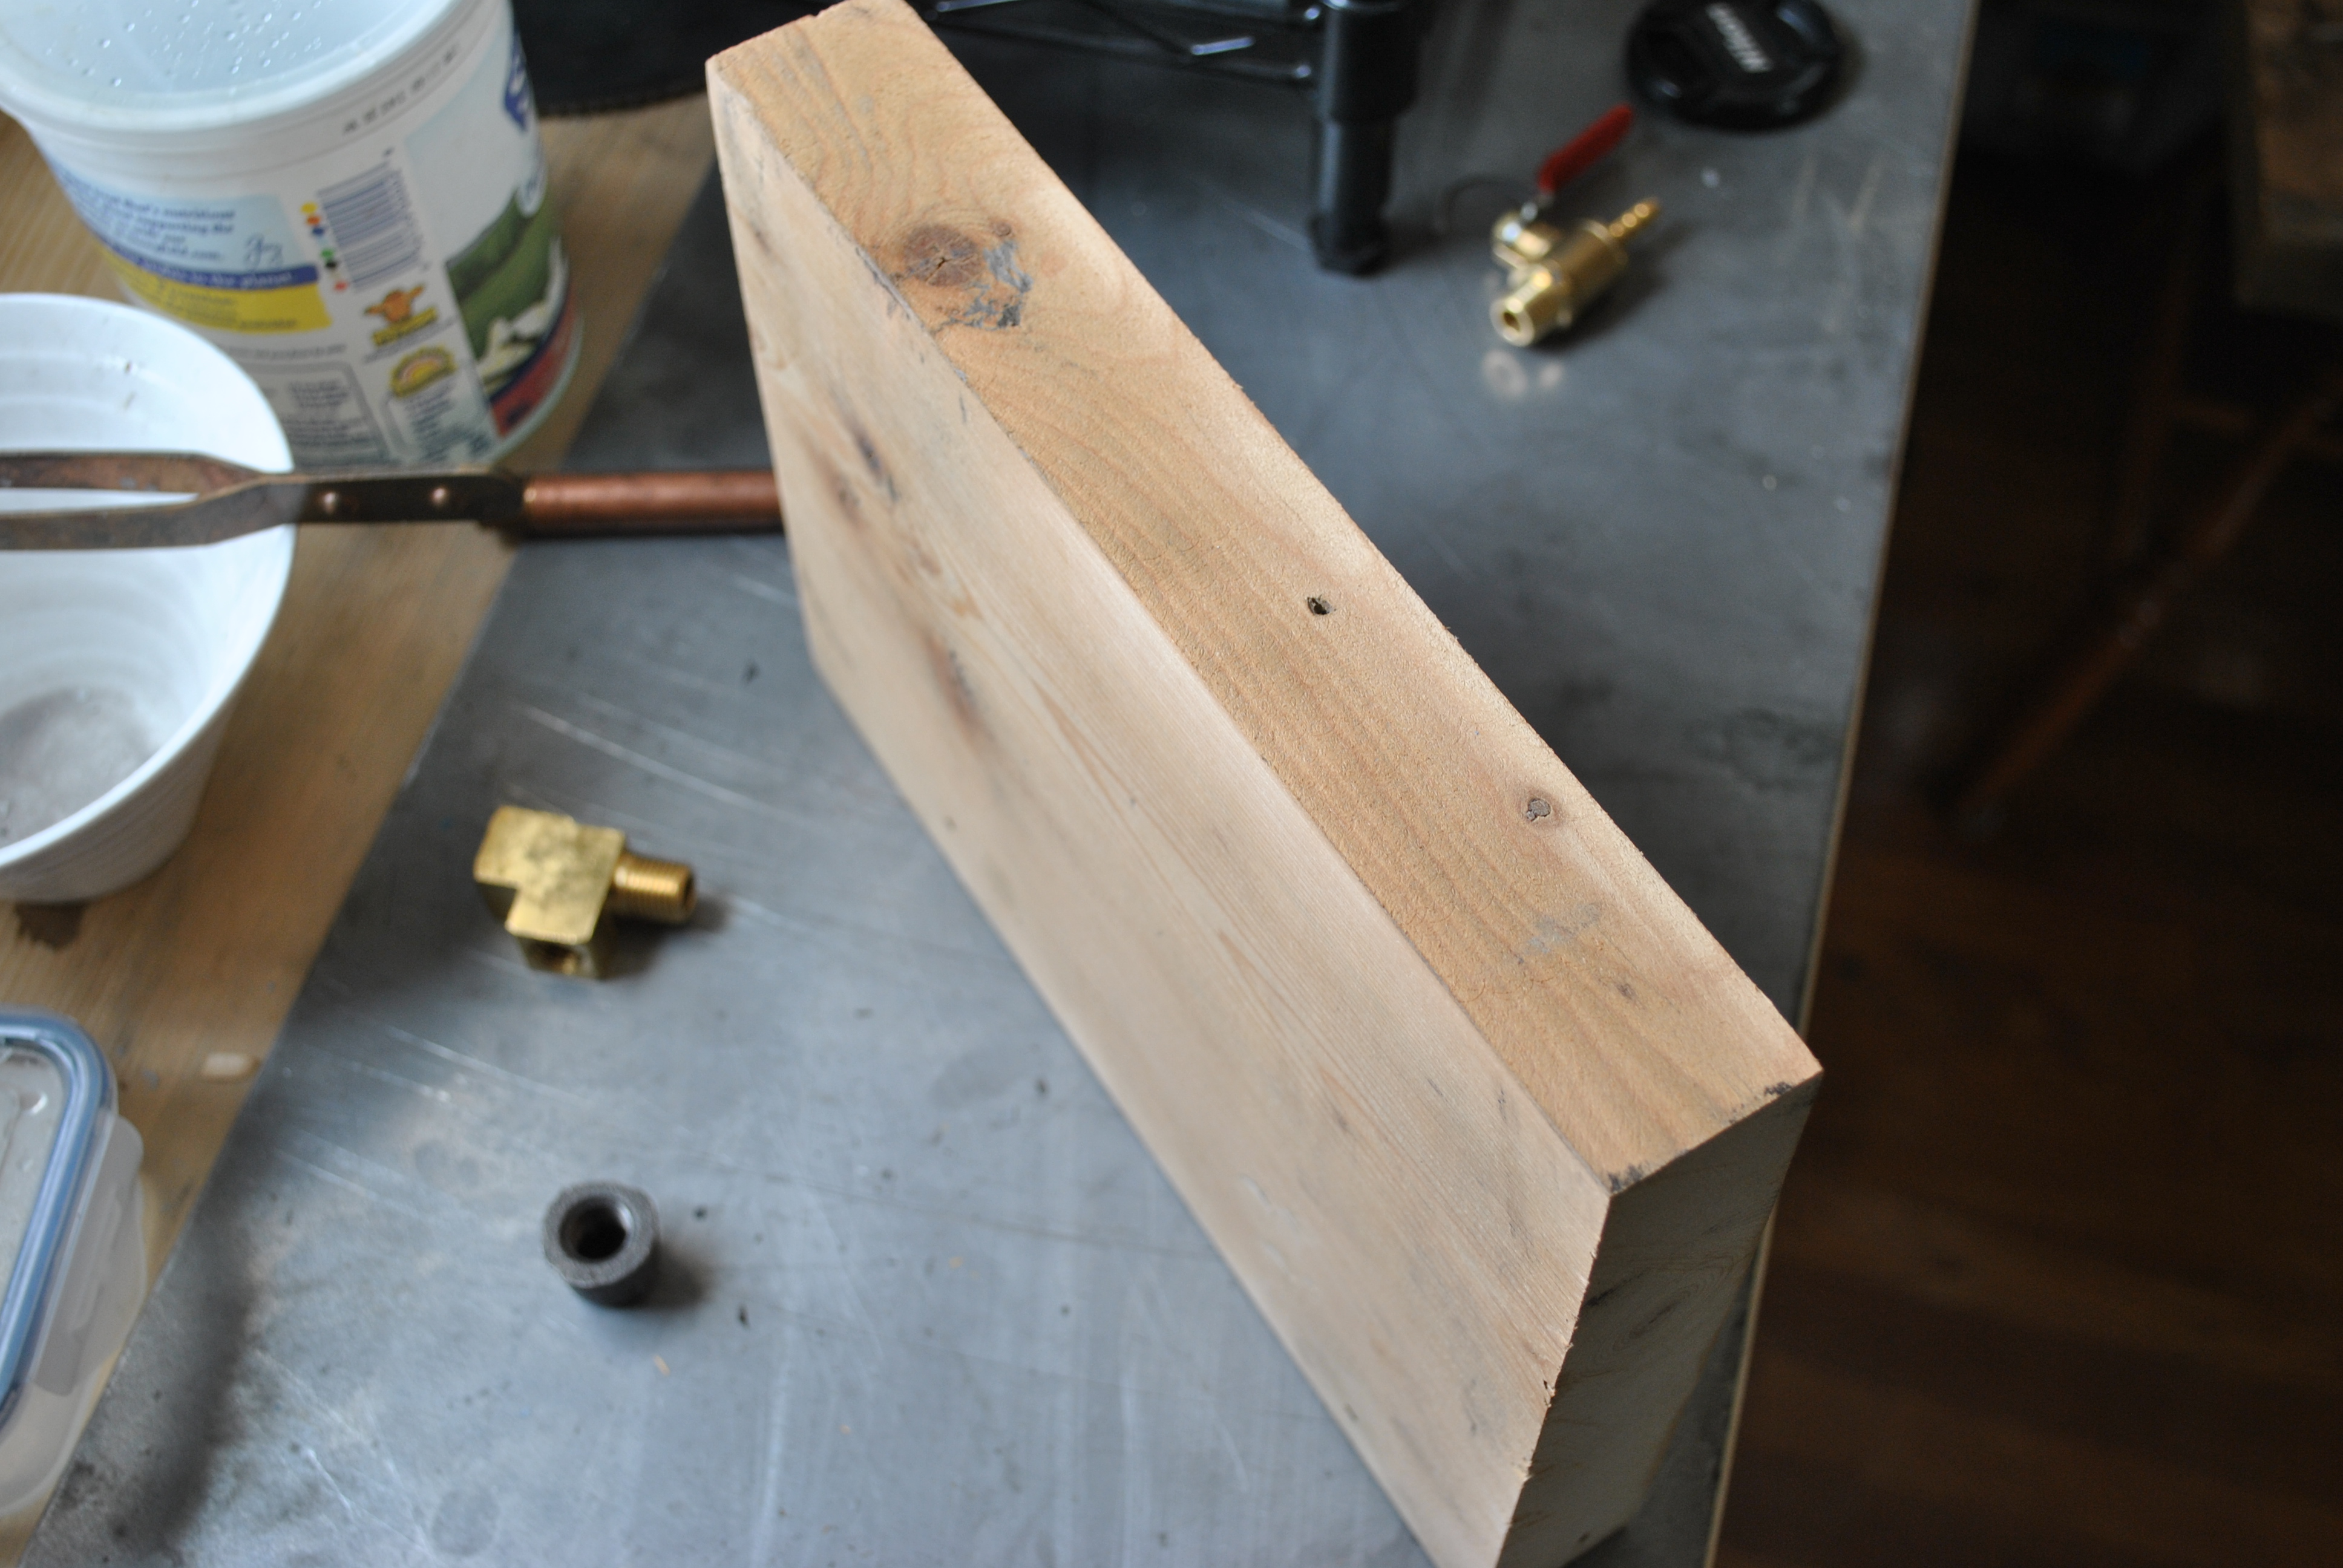
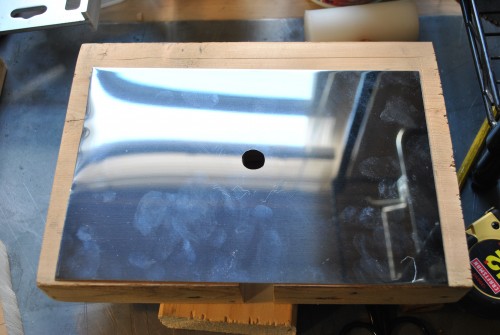
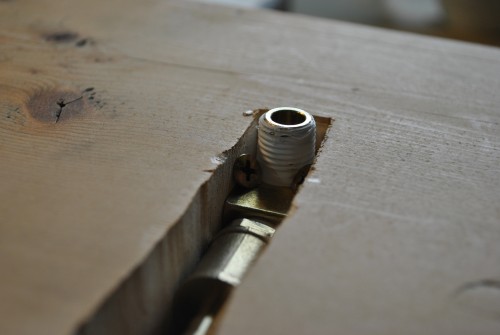
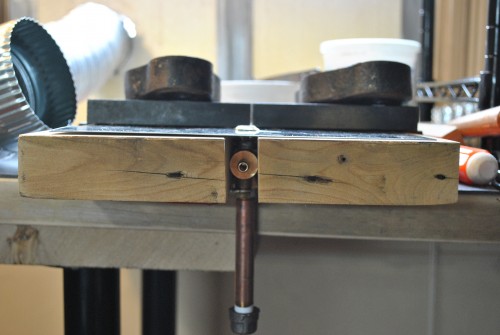
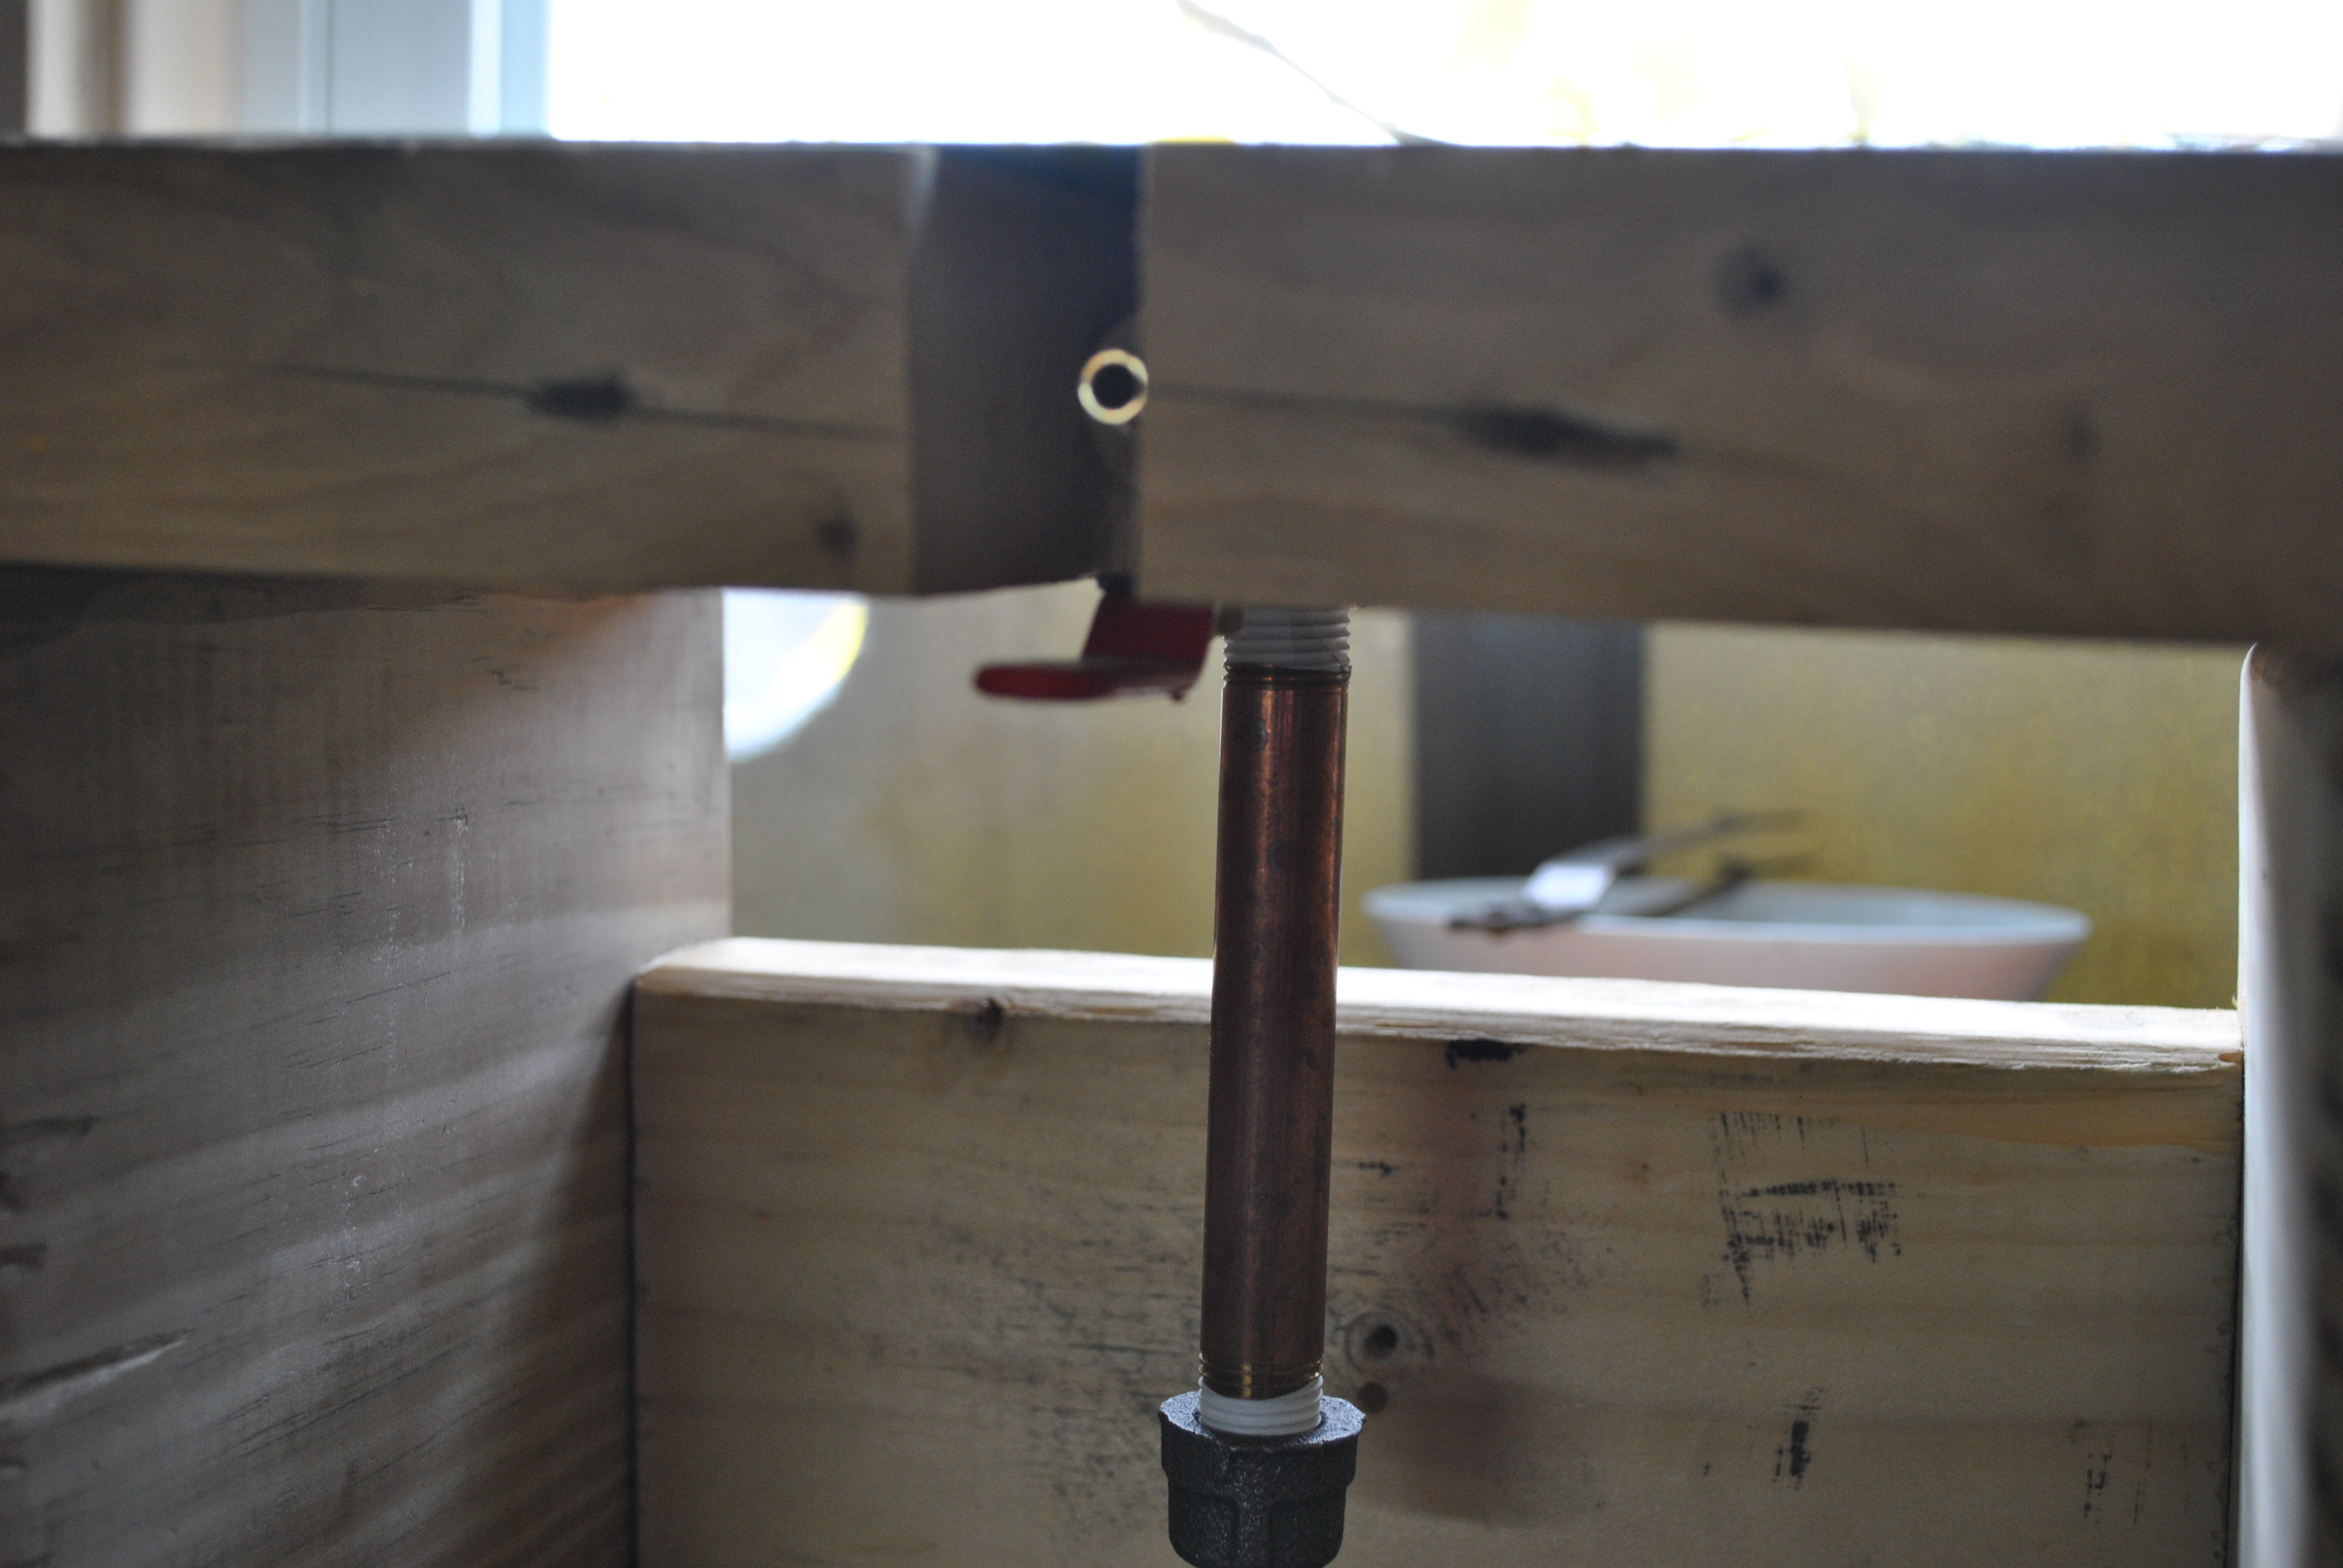
Next measure the steel plate and cut a small hole in the middle of it (I used a jewelers saw) big enough to hold the threaded end of your plumbing fixture. Line up the plate, and mark on the wood where it goes, then jam your plumbing contraption into the notch. This is a stainless steel plate I had laying around that is a little under 2 mm thick.
You can see that it sticks up just enough to go through the metal plate, and then I affixed it in place with two screws.
Here is the bottom, as you can see the ball valve has enough space to swing to both side. Two more screws are used to keep it rock solid.
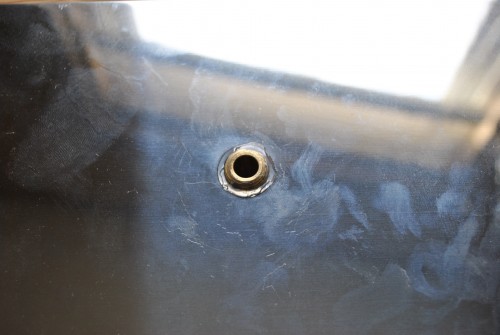
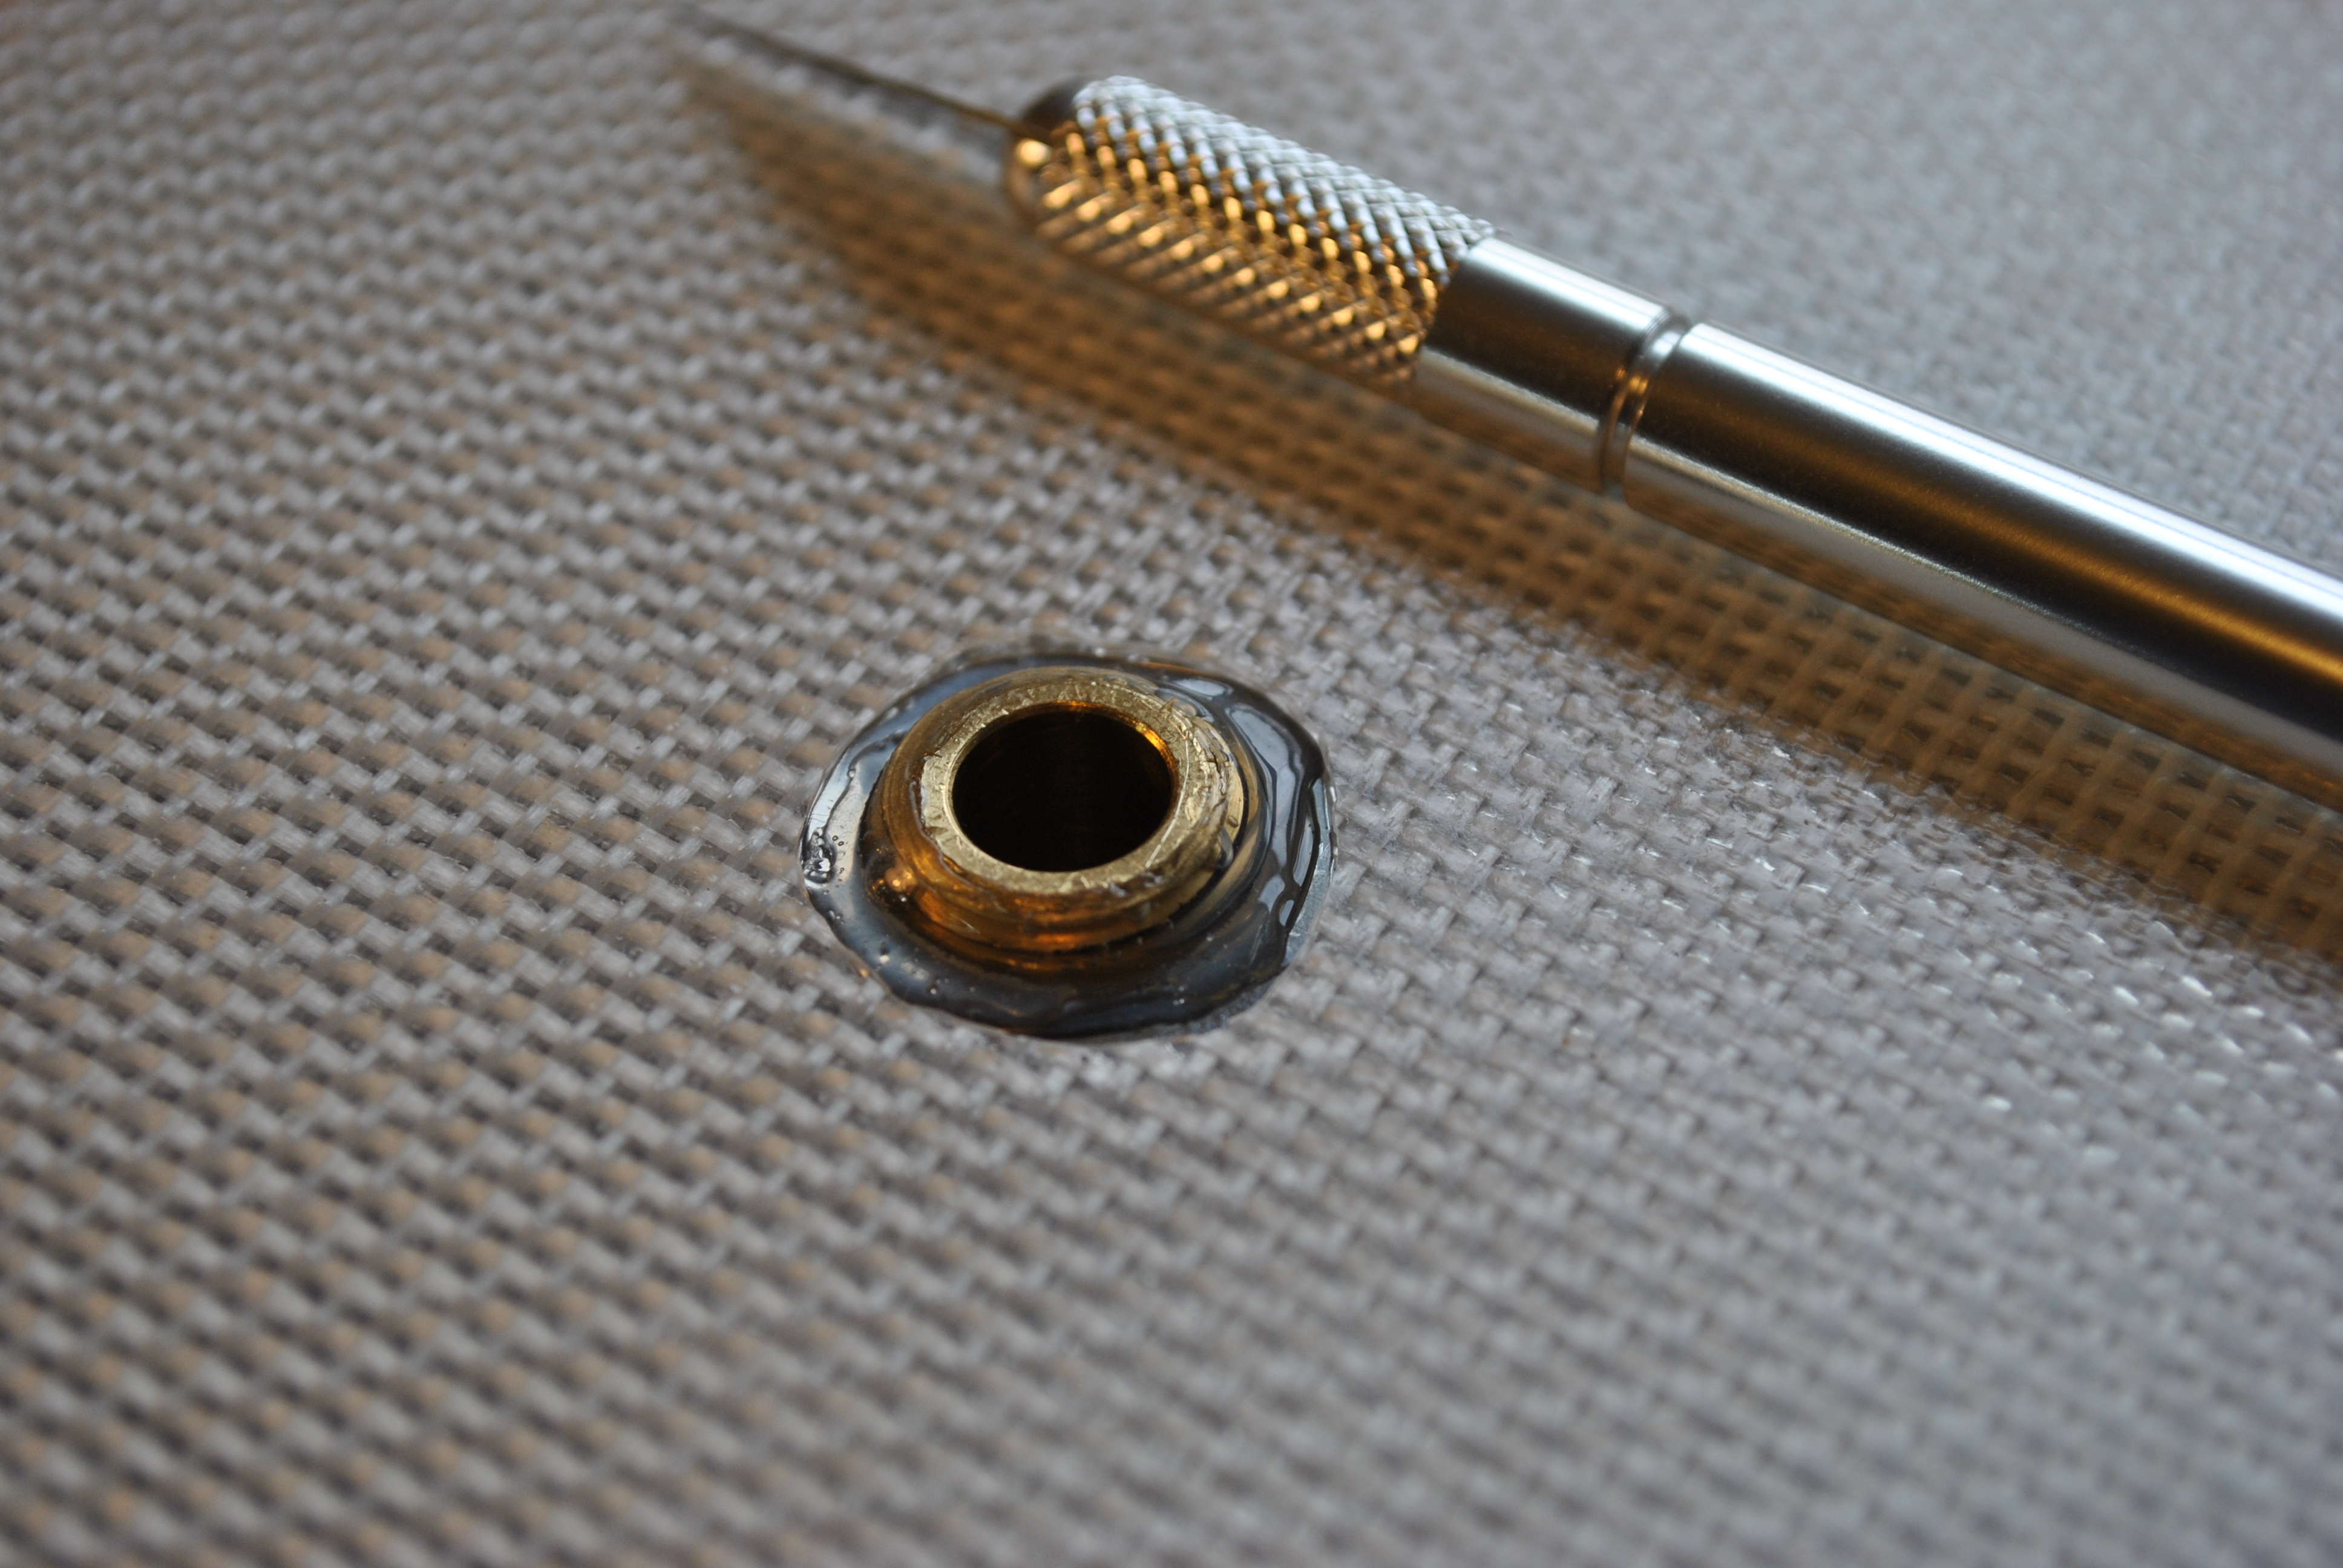
Stick the small threaded end through the plate, and use some silicon caulk, or in my case some e6000 glue left over from the kiln vent hood. Be sure to get a good seal and have it bulge out so it completely fills the gap and makes an air tight seal to the plate. The plate itself is not affixed to the wood in case it ever needs to be changed out.
Be sure to let it dry fully, I used two coats to get a really good seal.
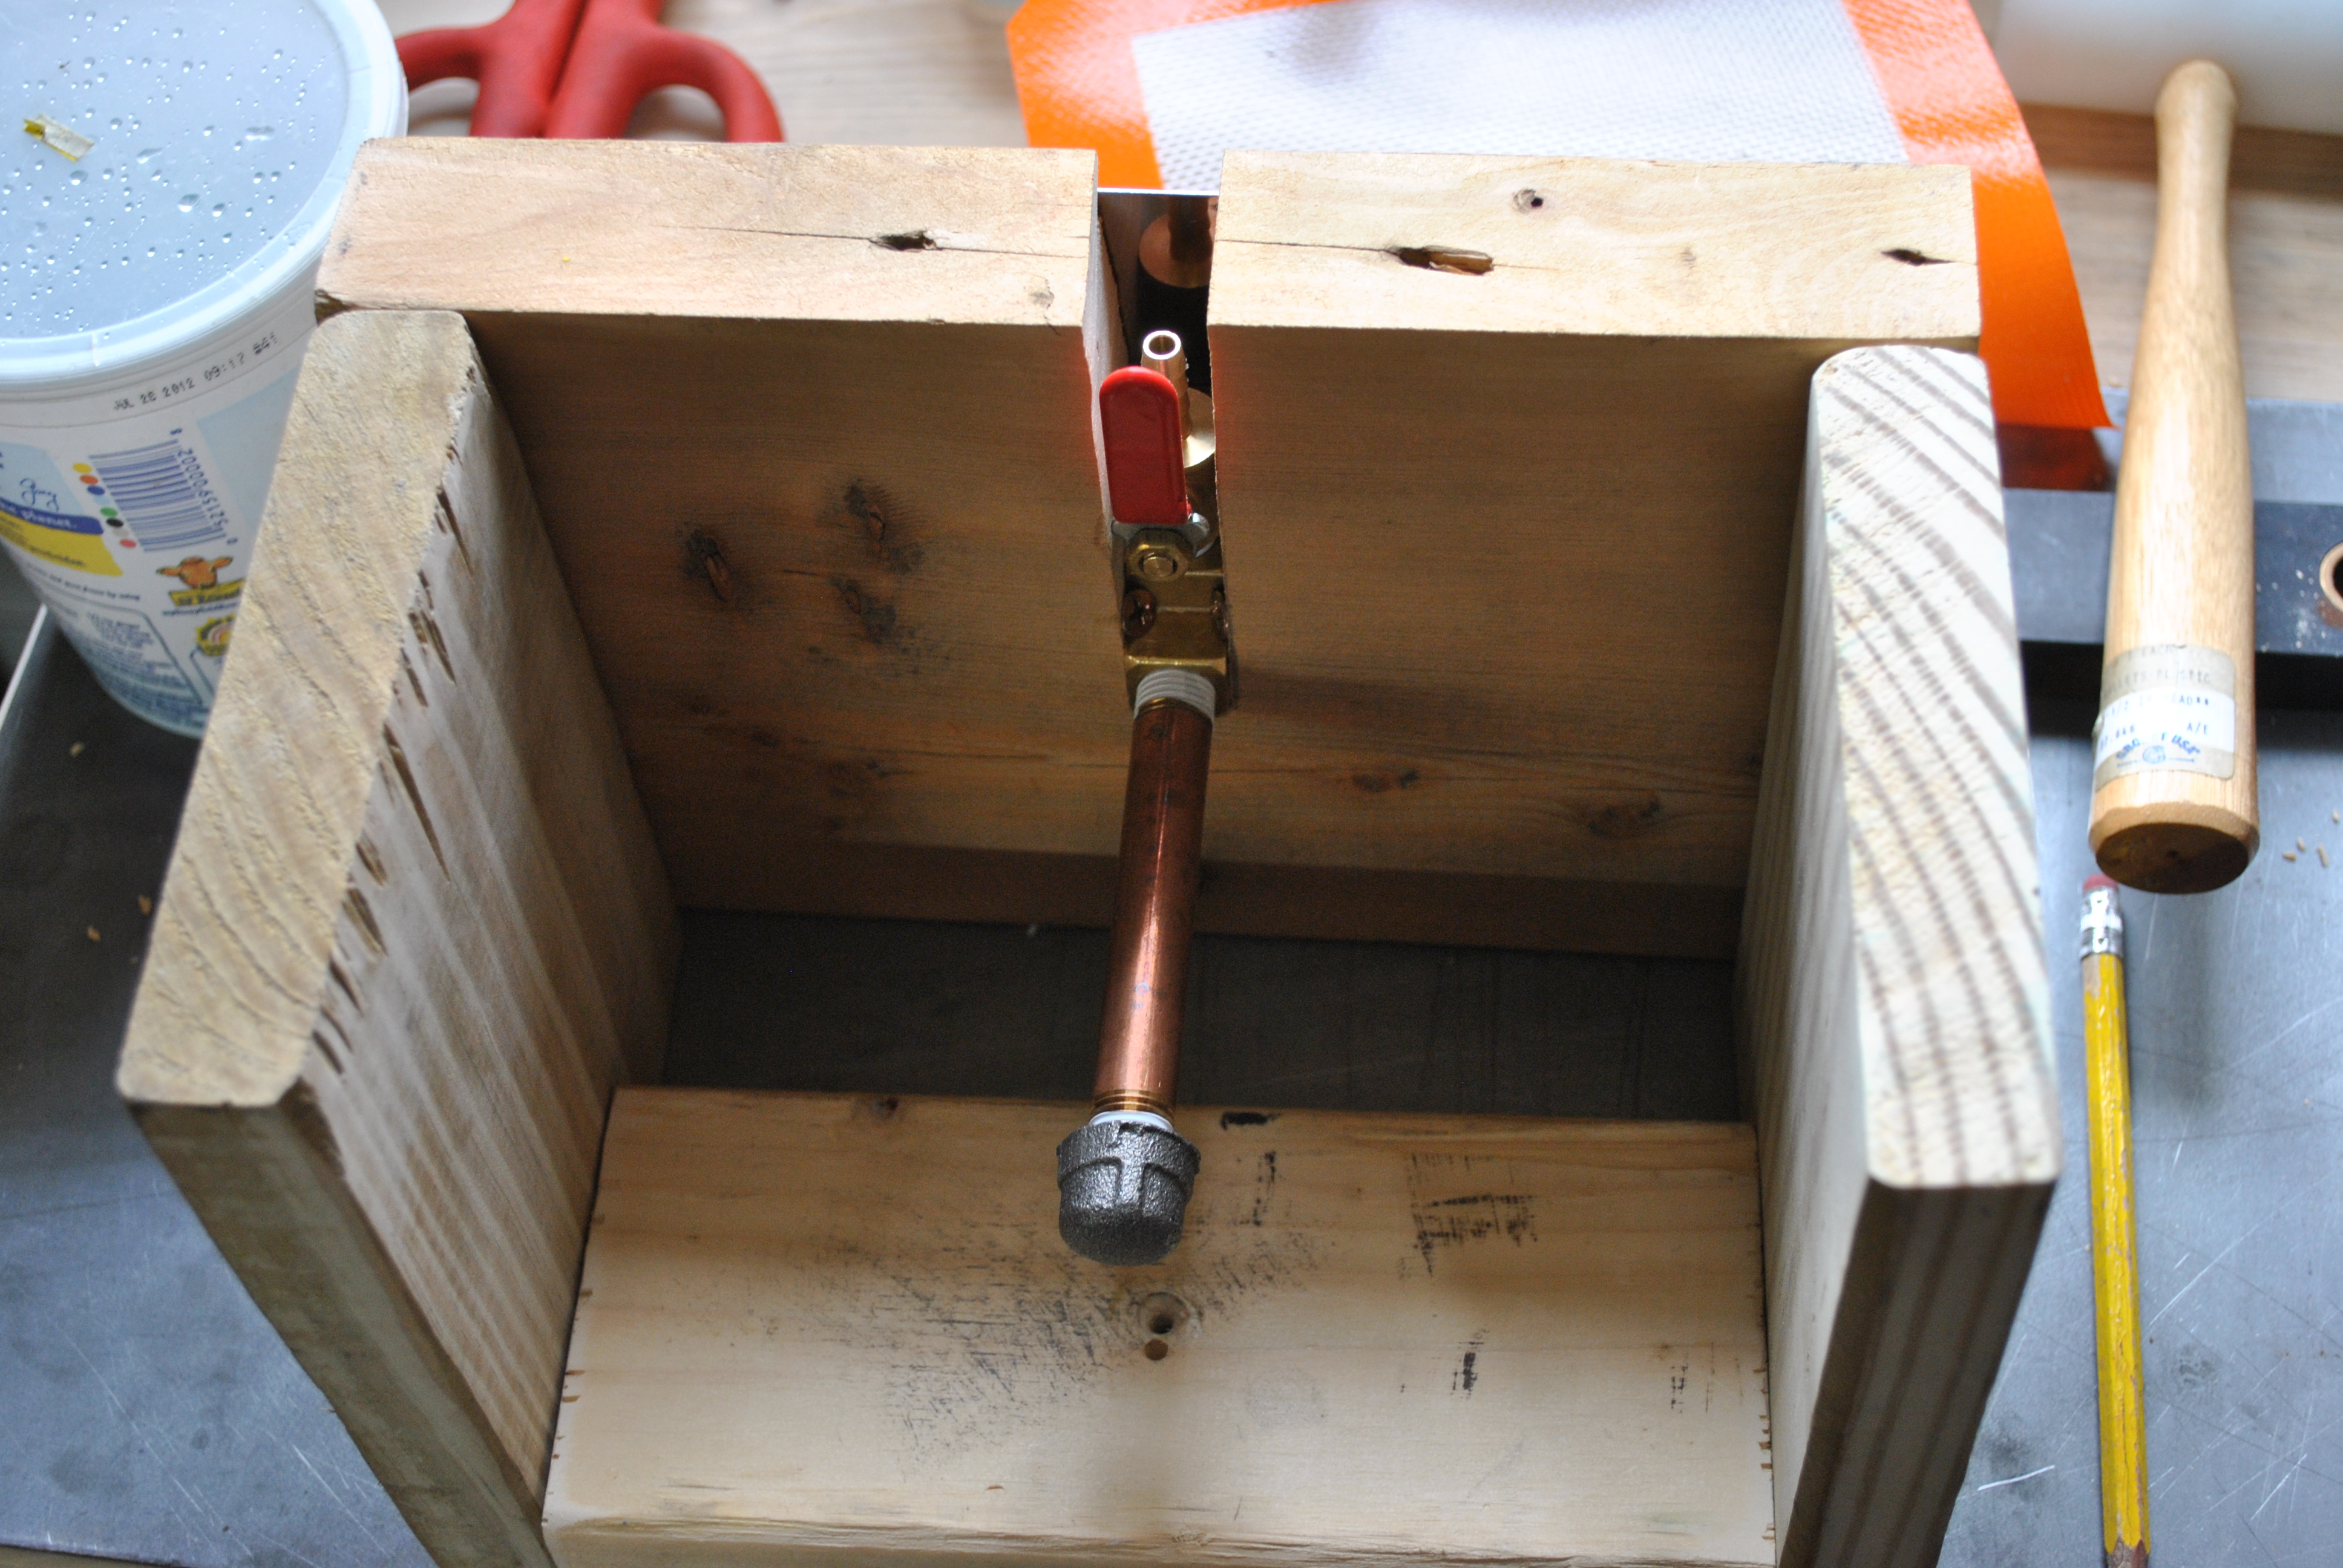
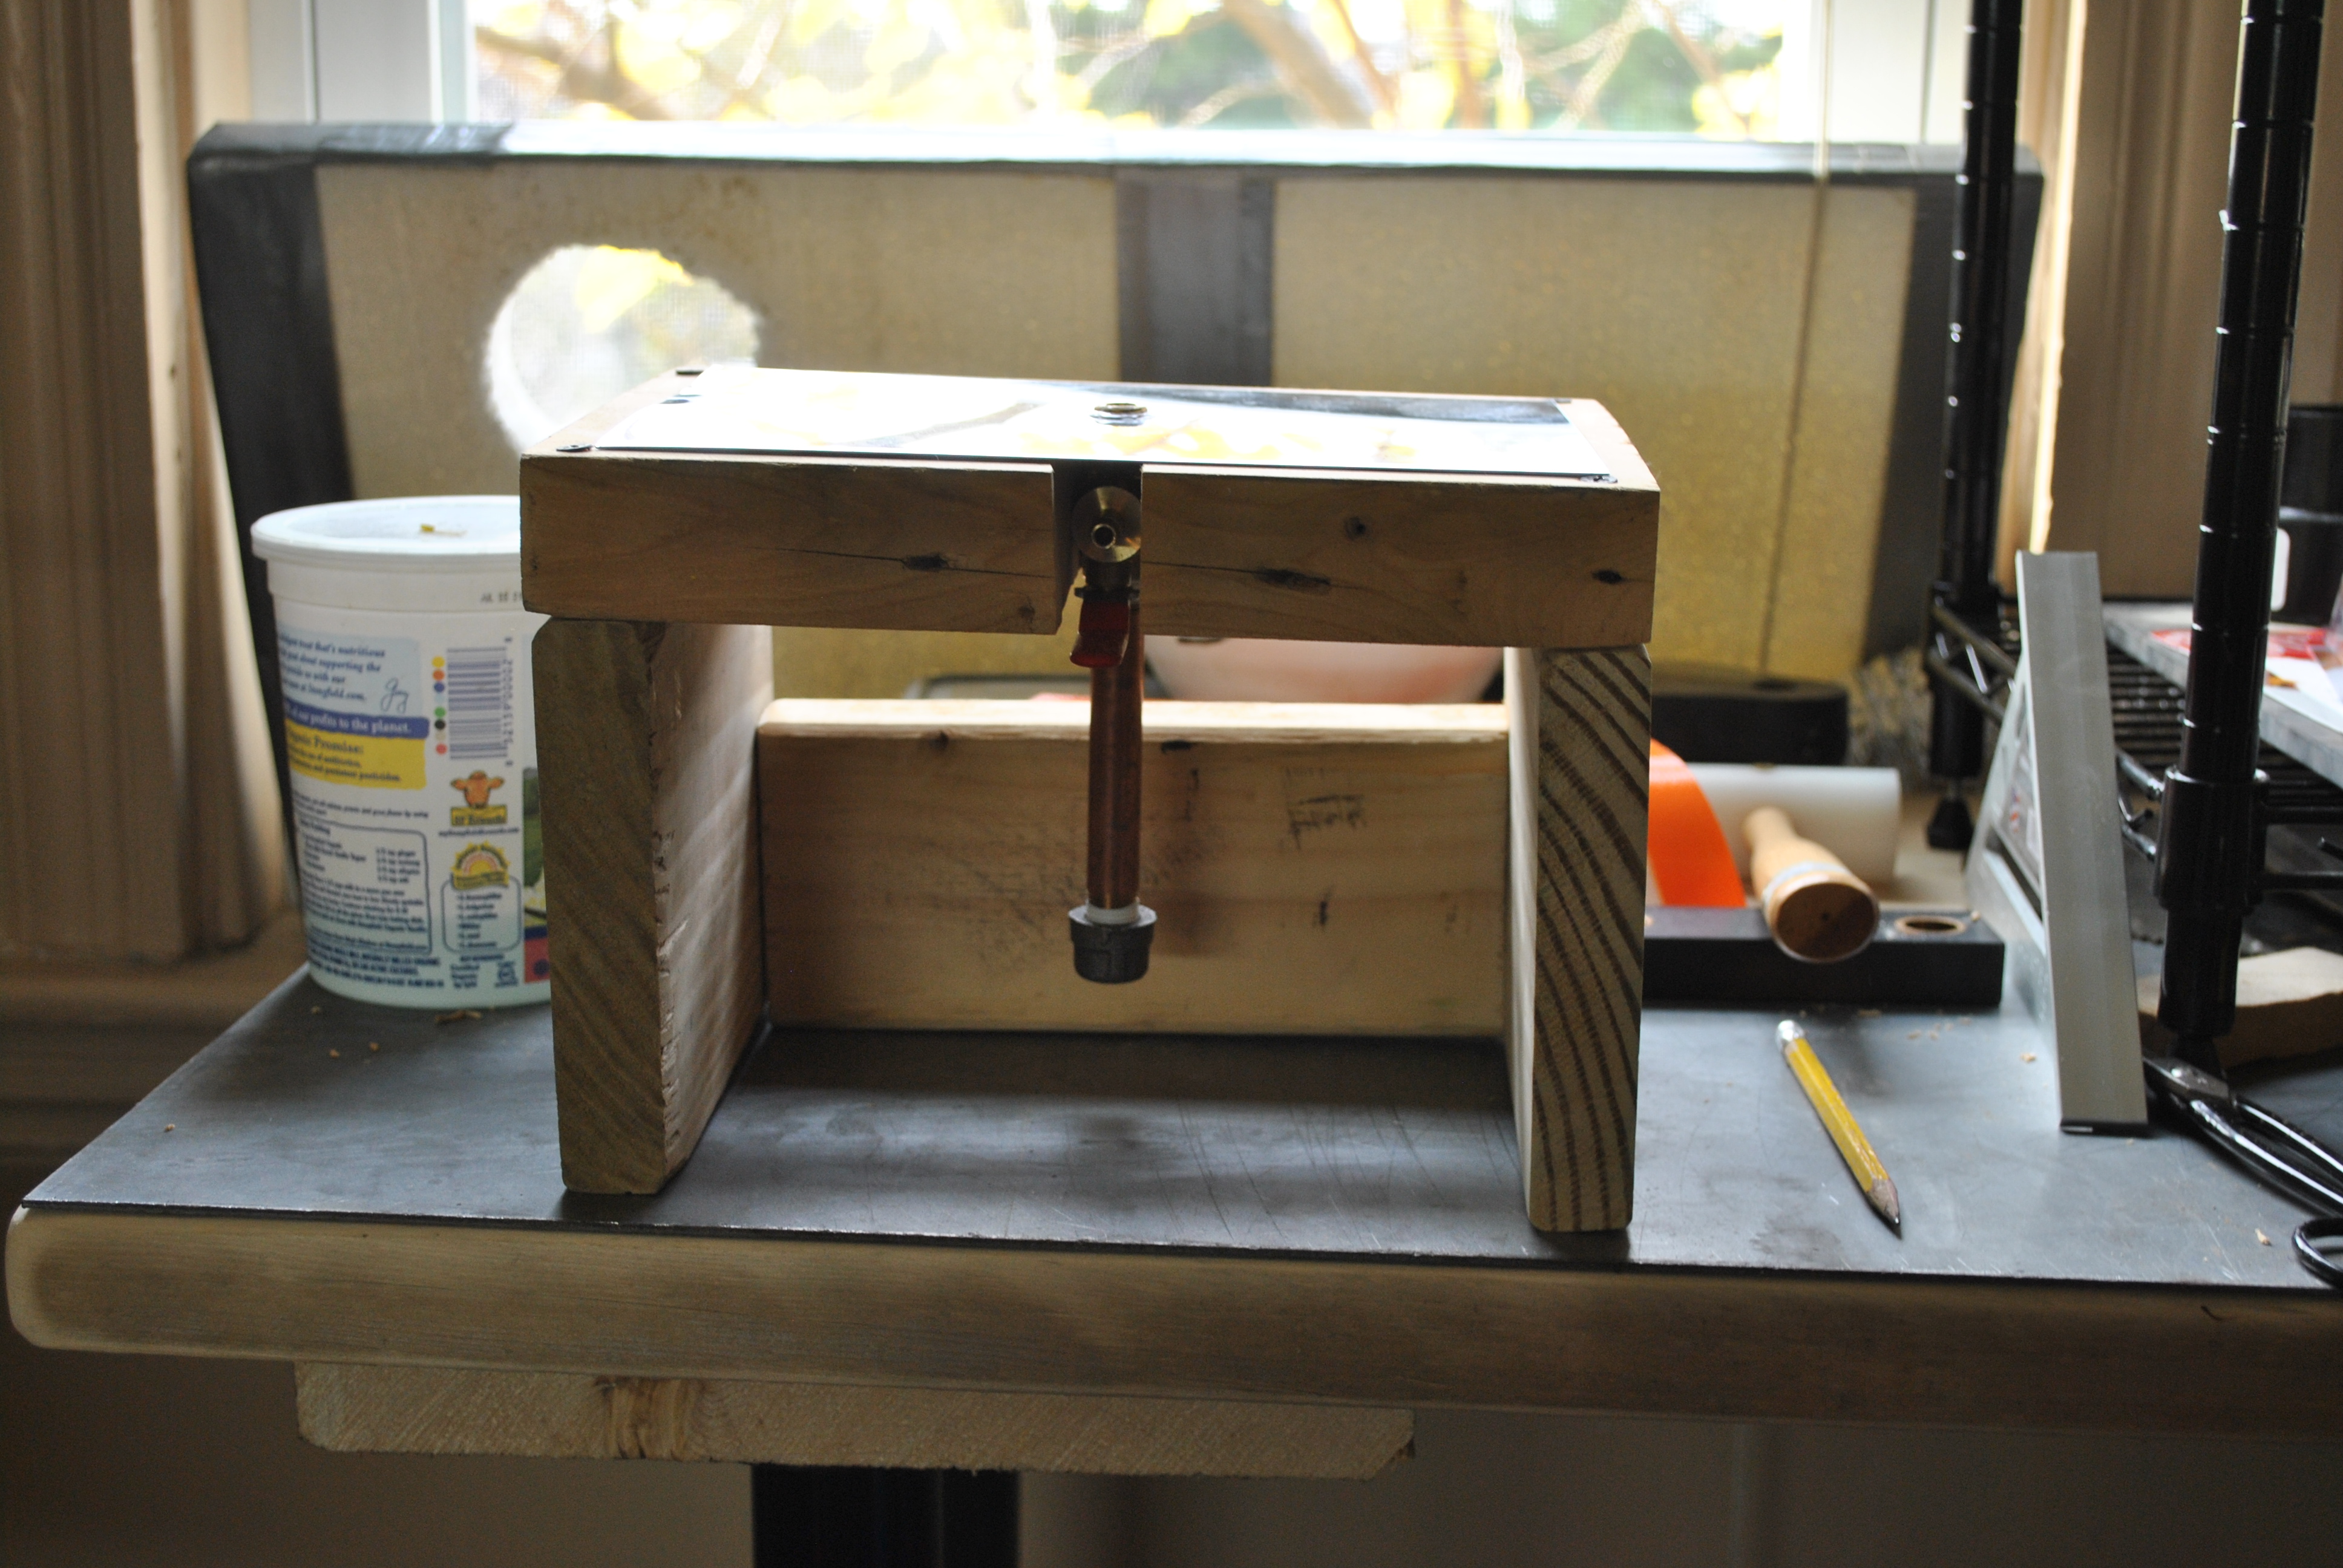
Let it dry overnight before doing anything else. It stinks, put it in a well ventilated area. Next I built some simple legs on the thing that would keep it sturdy and allow for the bottom drain pipe to stand up without hitting the table.
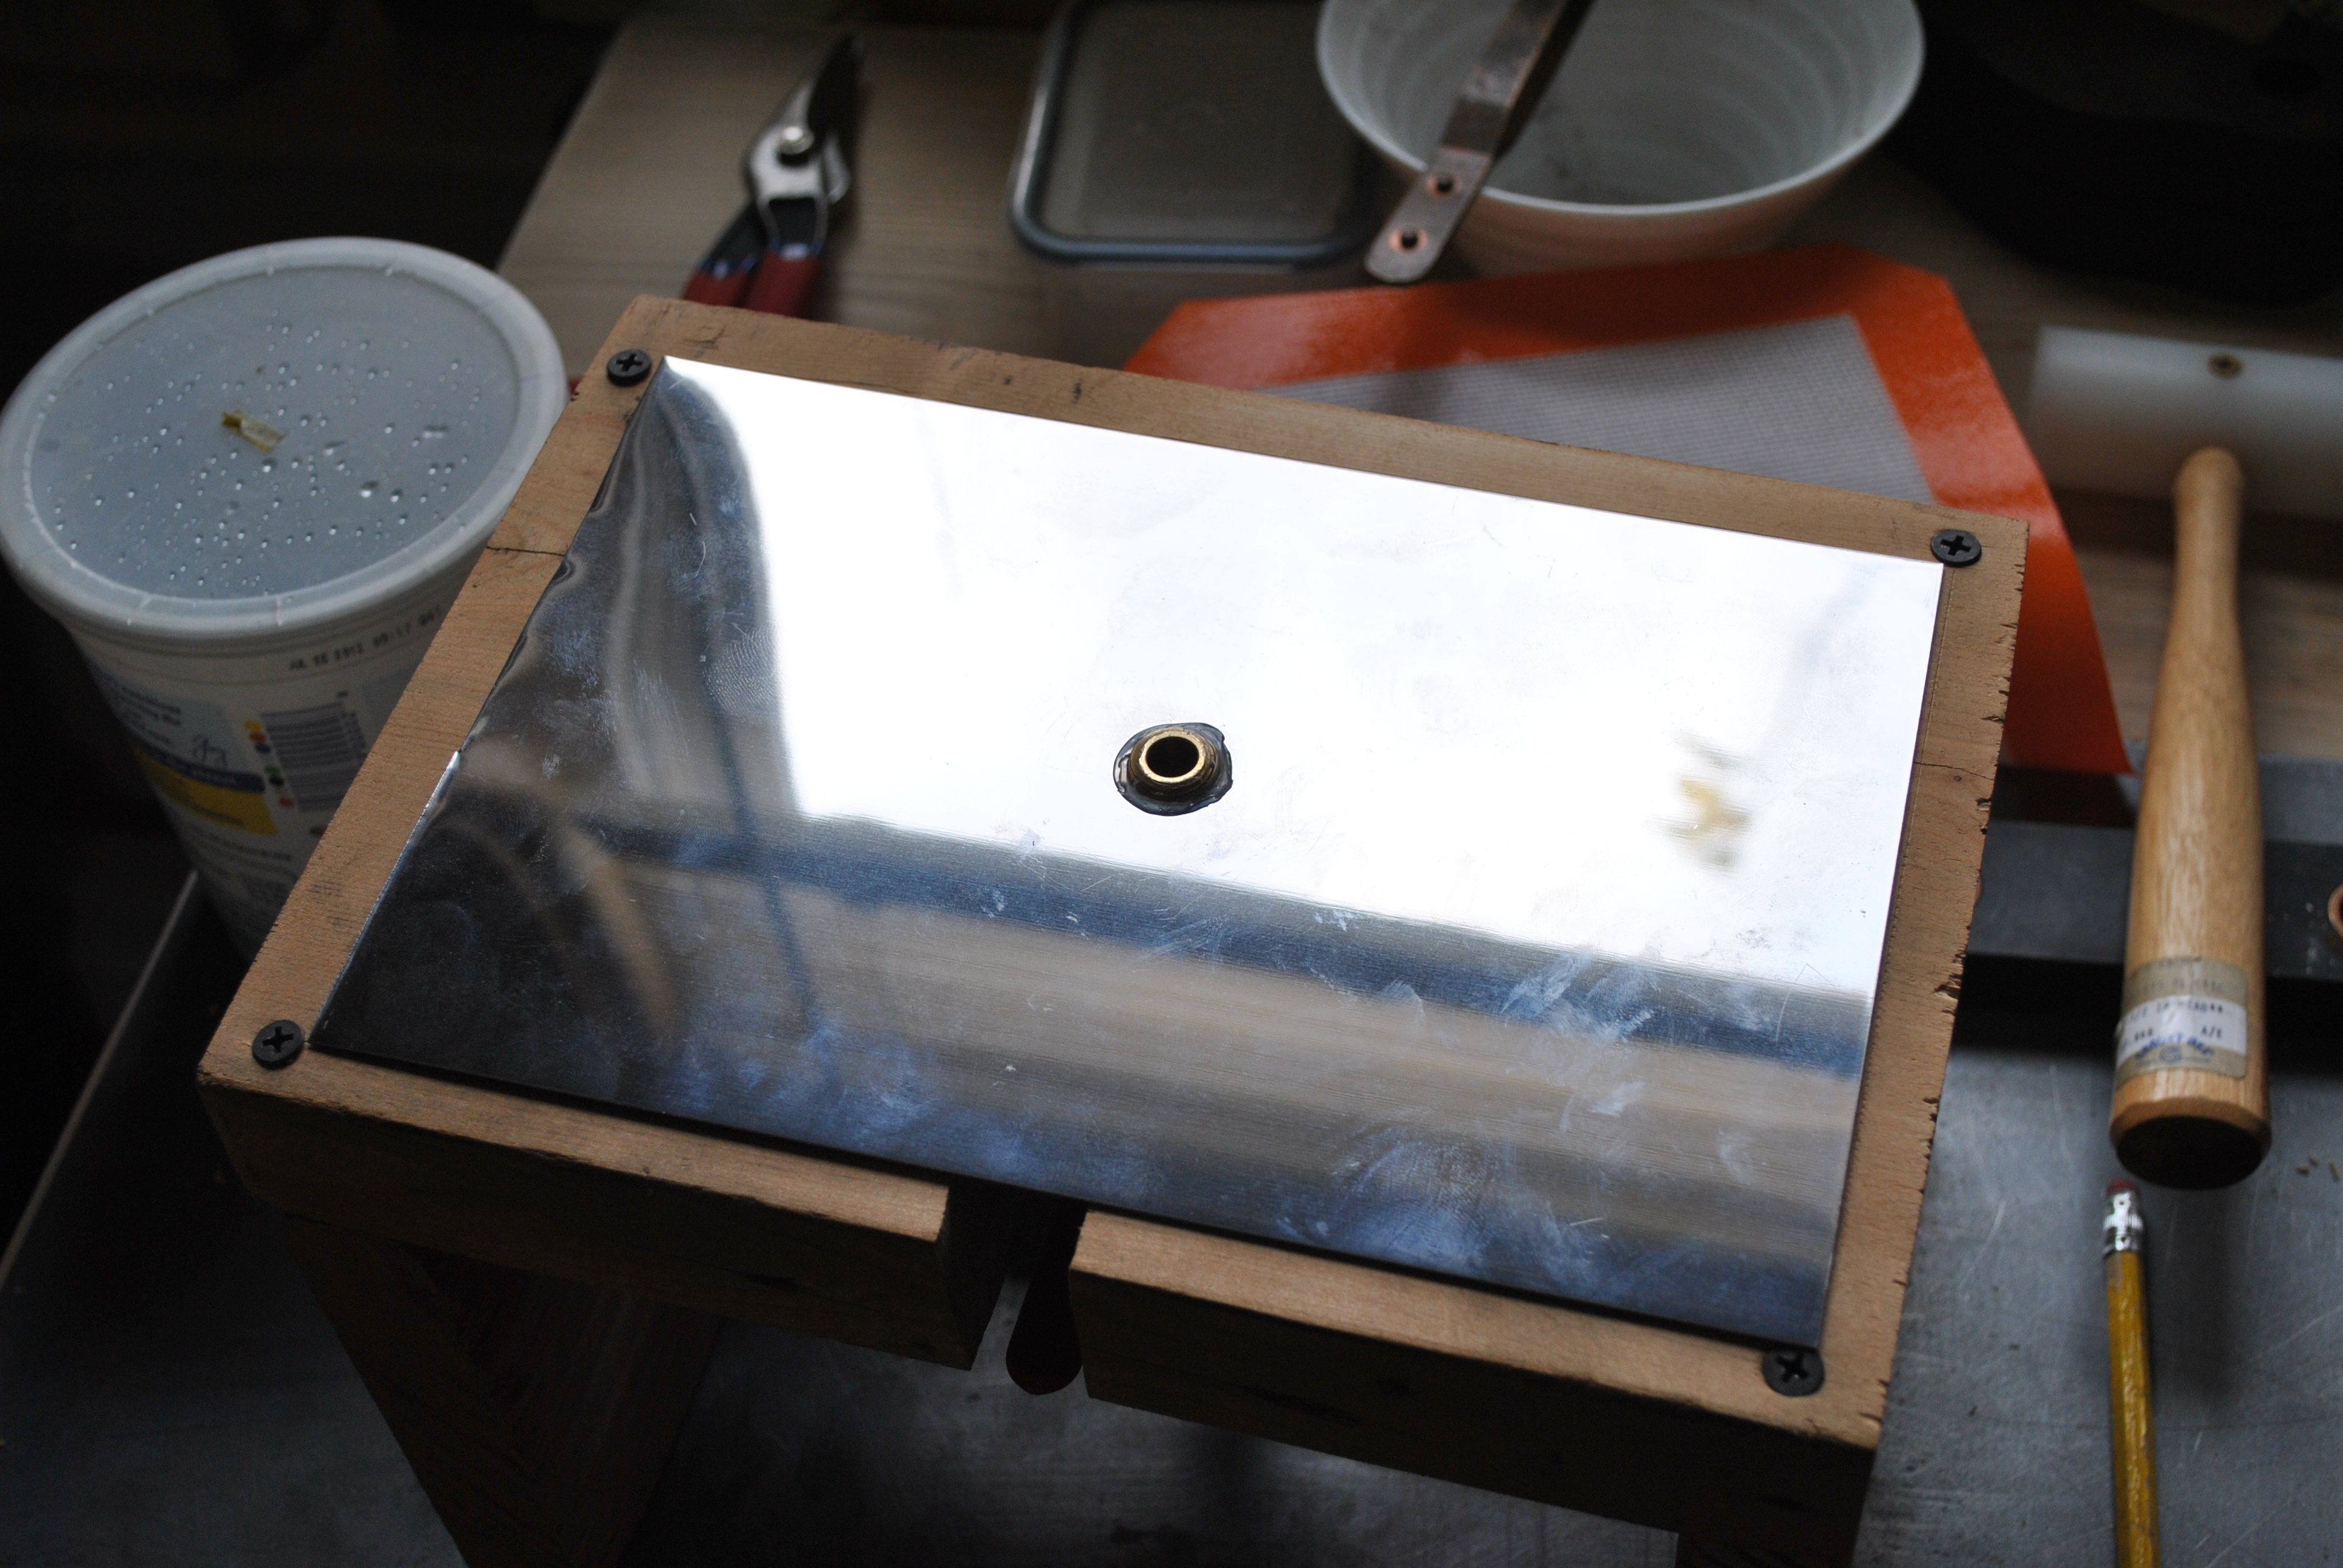
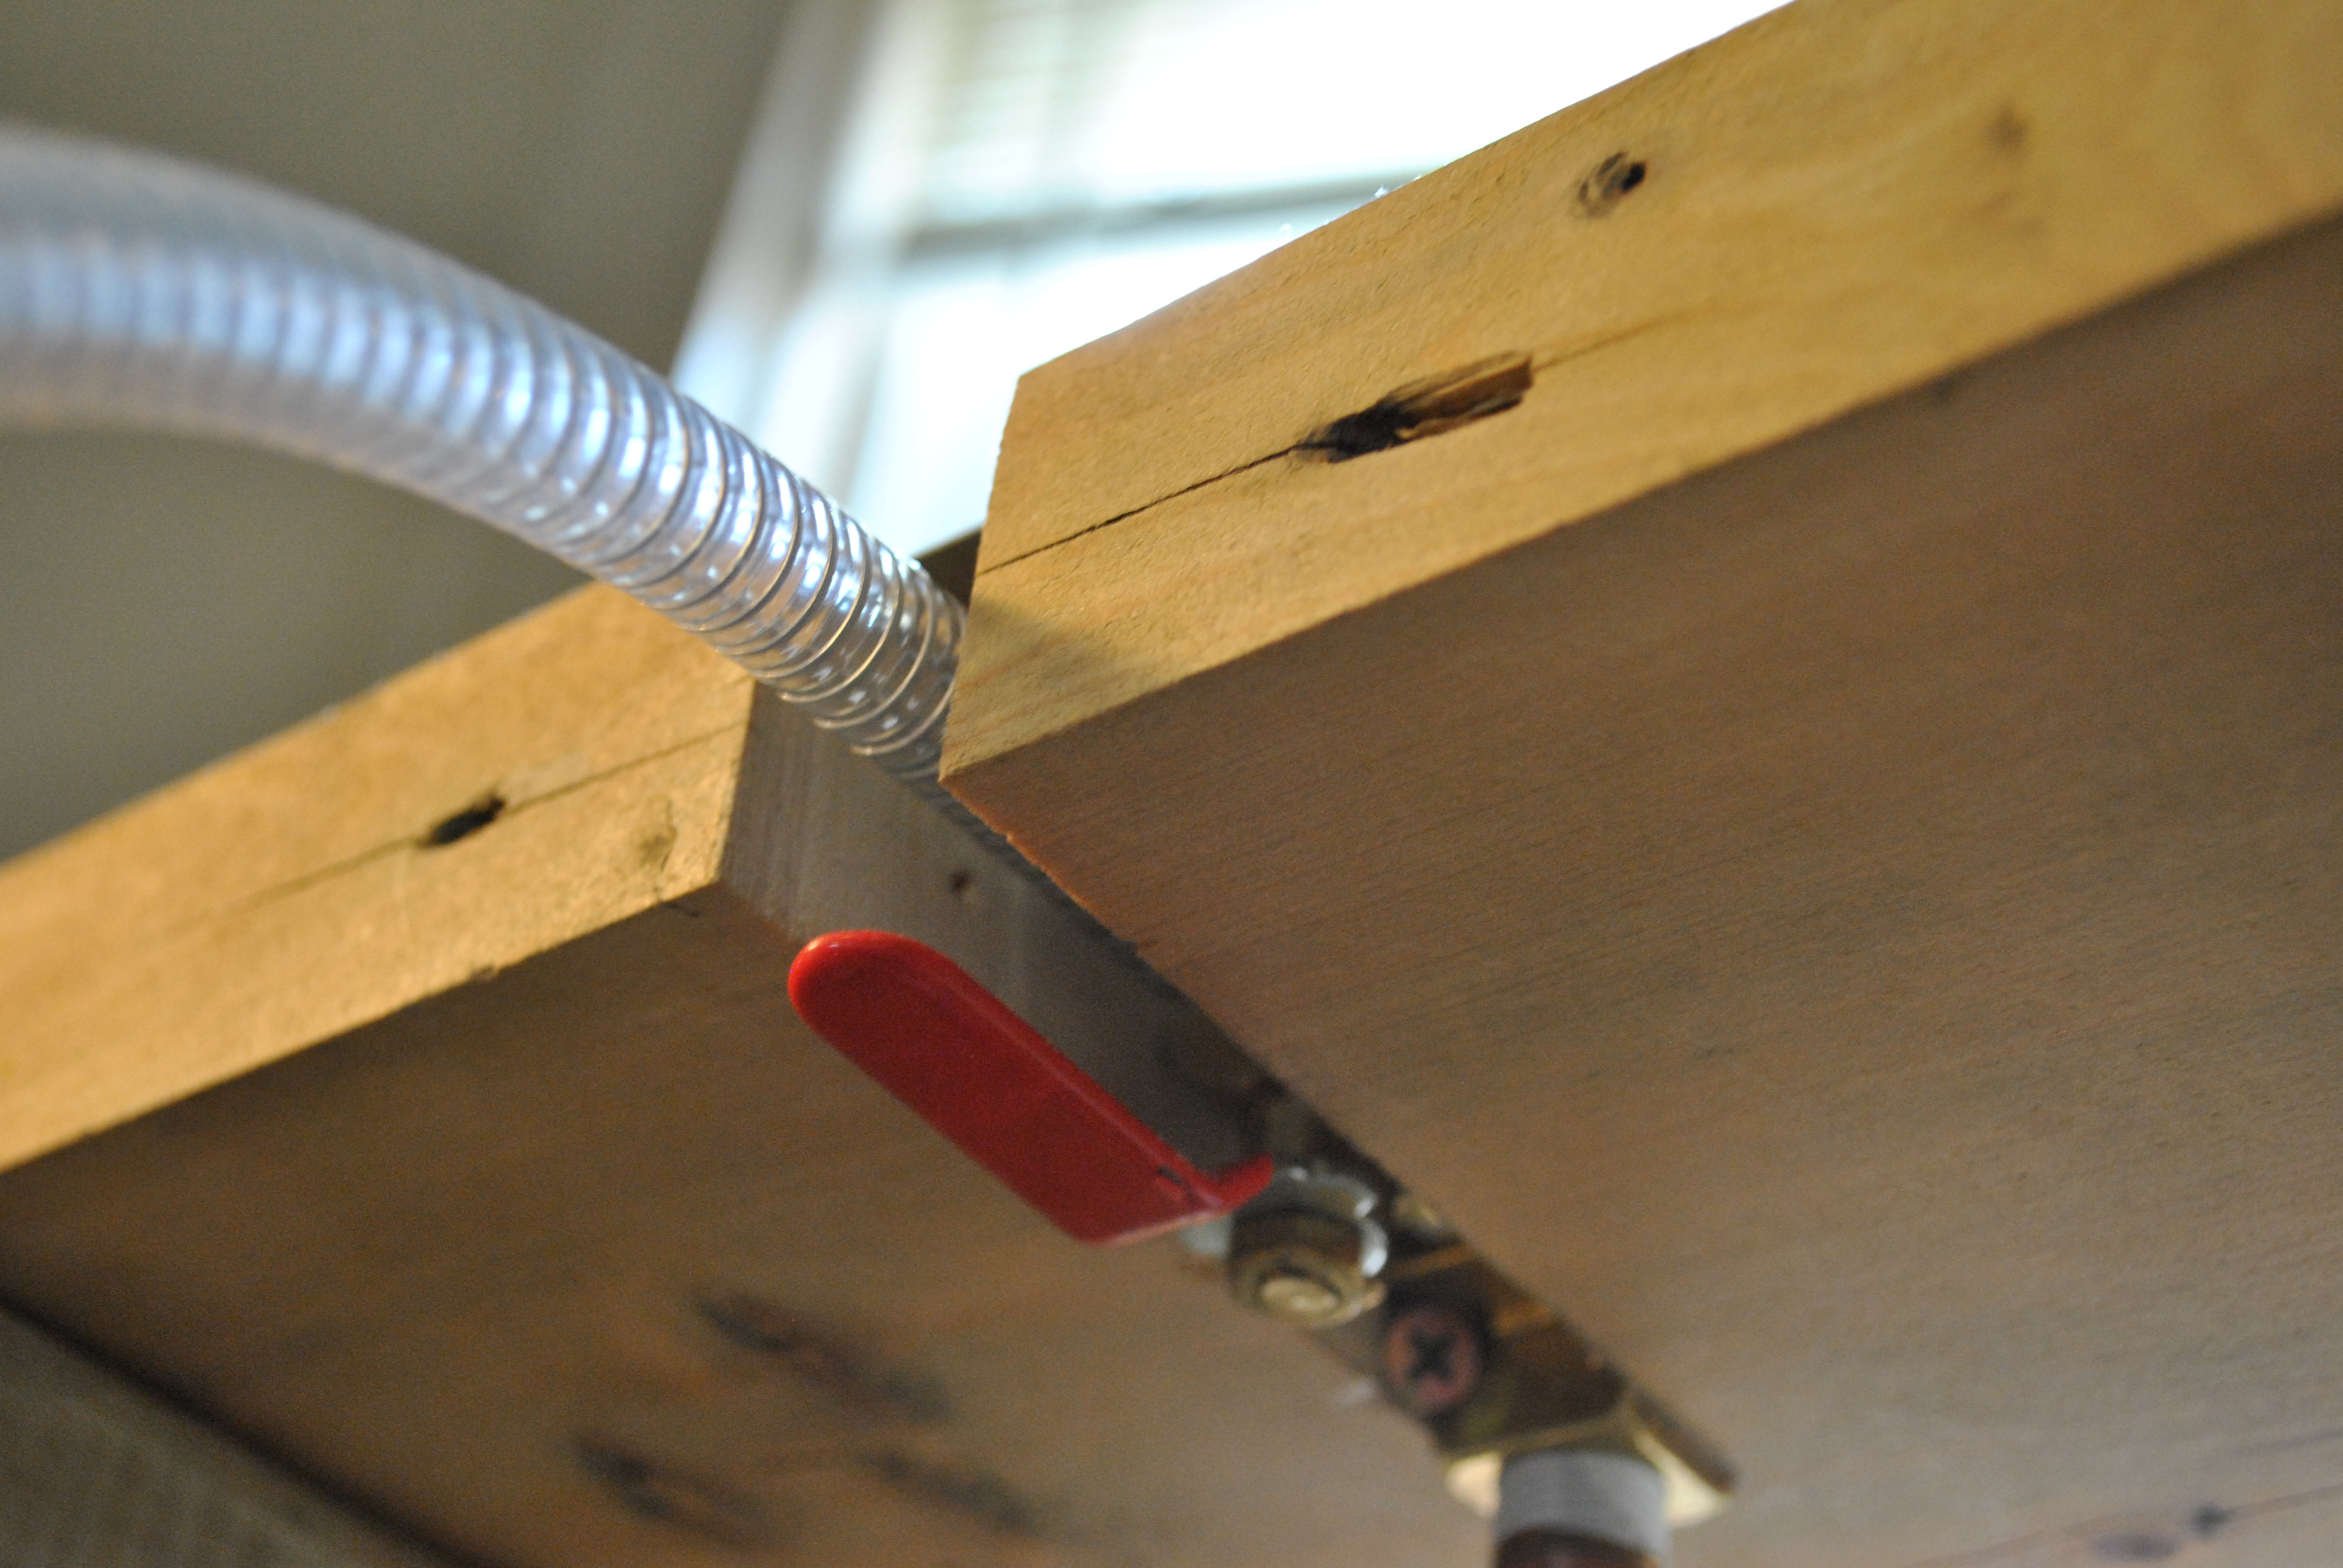
Here is what it looks like with the vacuum hose attached.
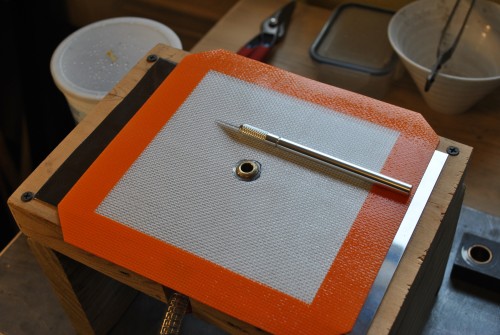
The four screws allow you to tug on the hose without anything moving around. Next I used a high temp backing silicon pad to make the base seal, another thicker high temp silicon sheet will be added in the future to absorb the heat of a prepared flask, cut the hole just big enough to surround the glue you used.
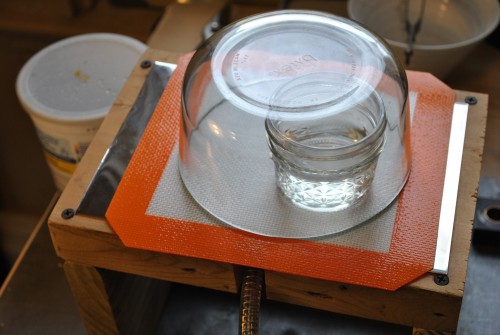
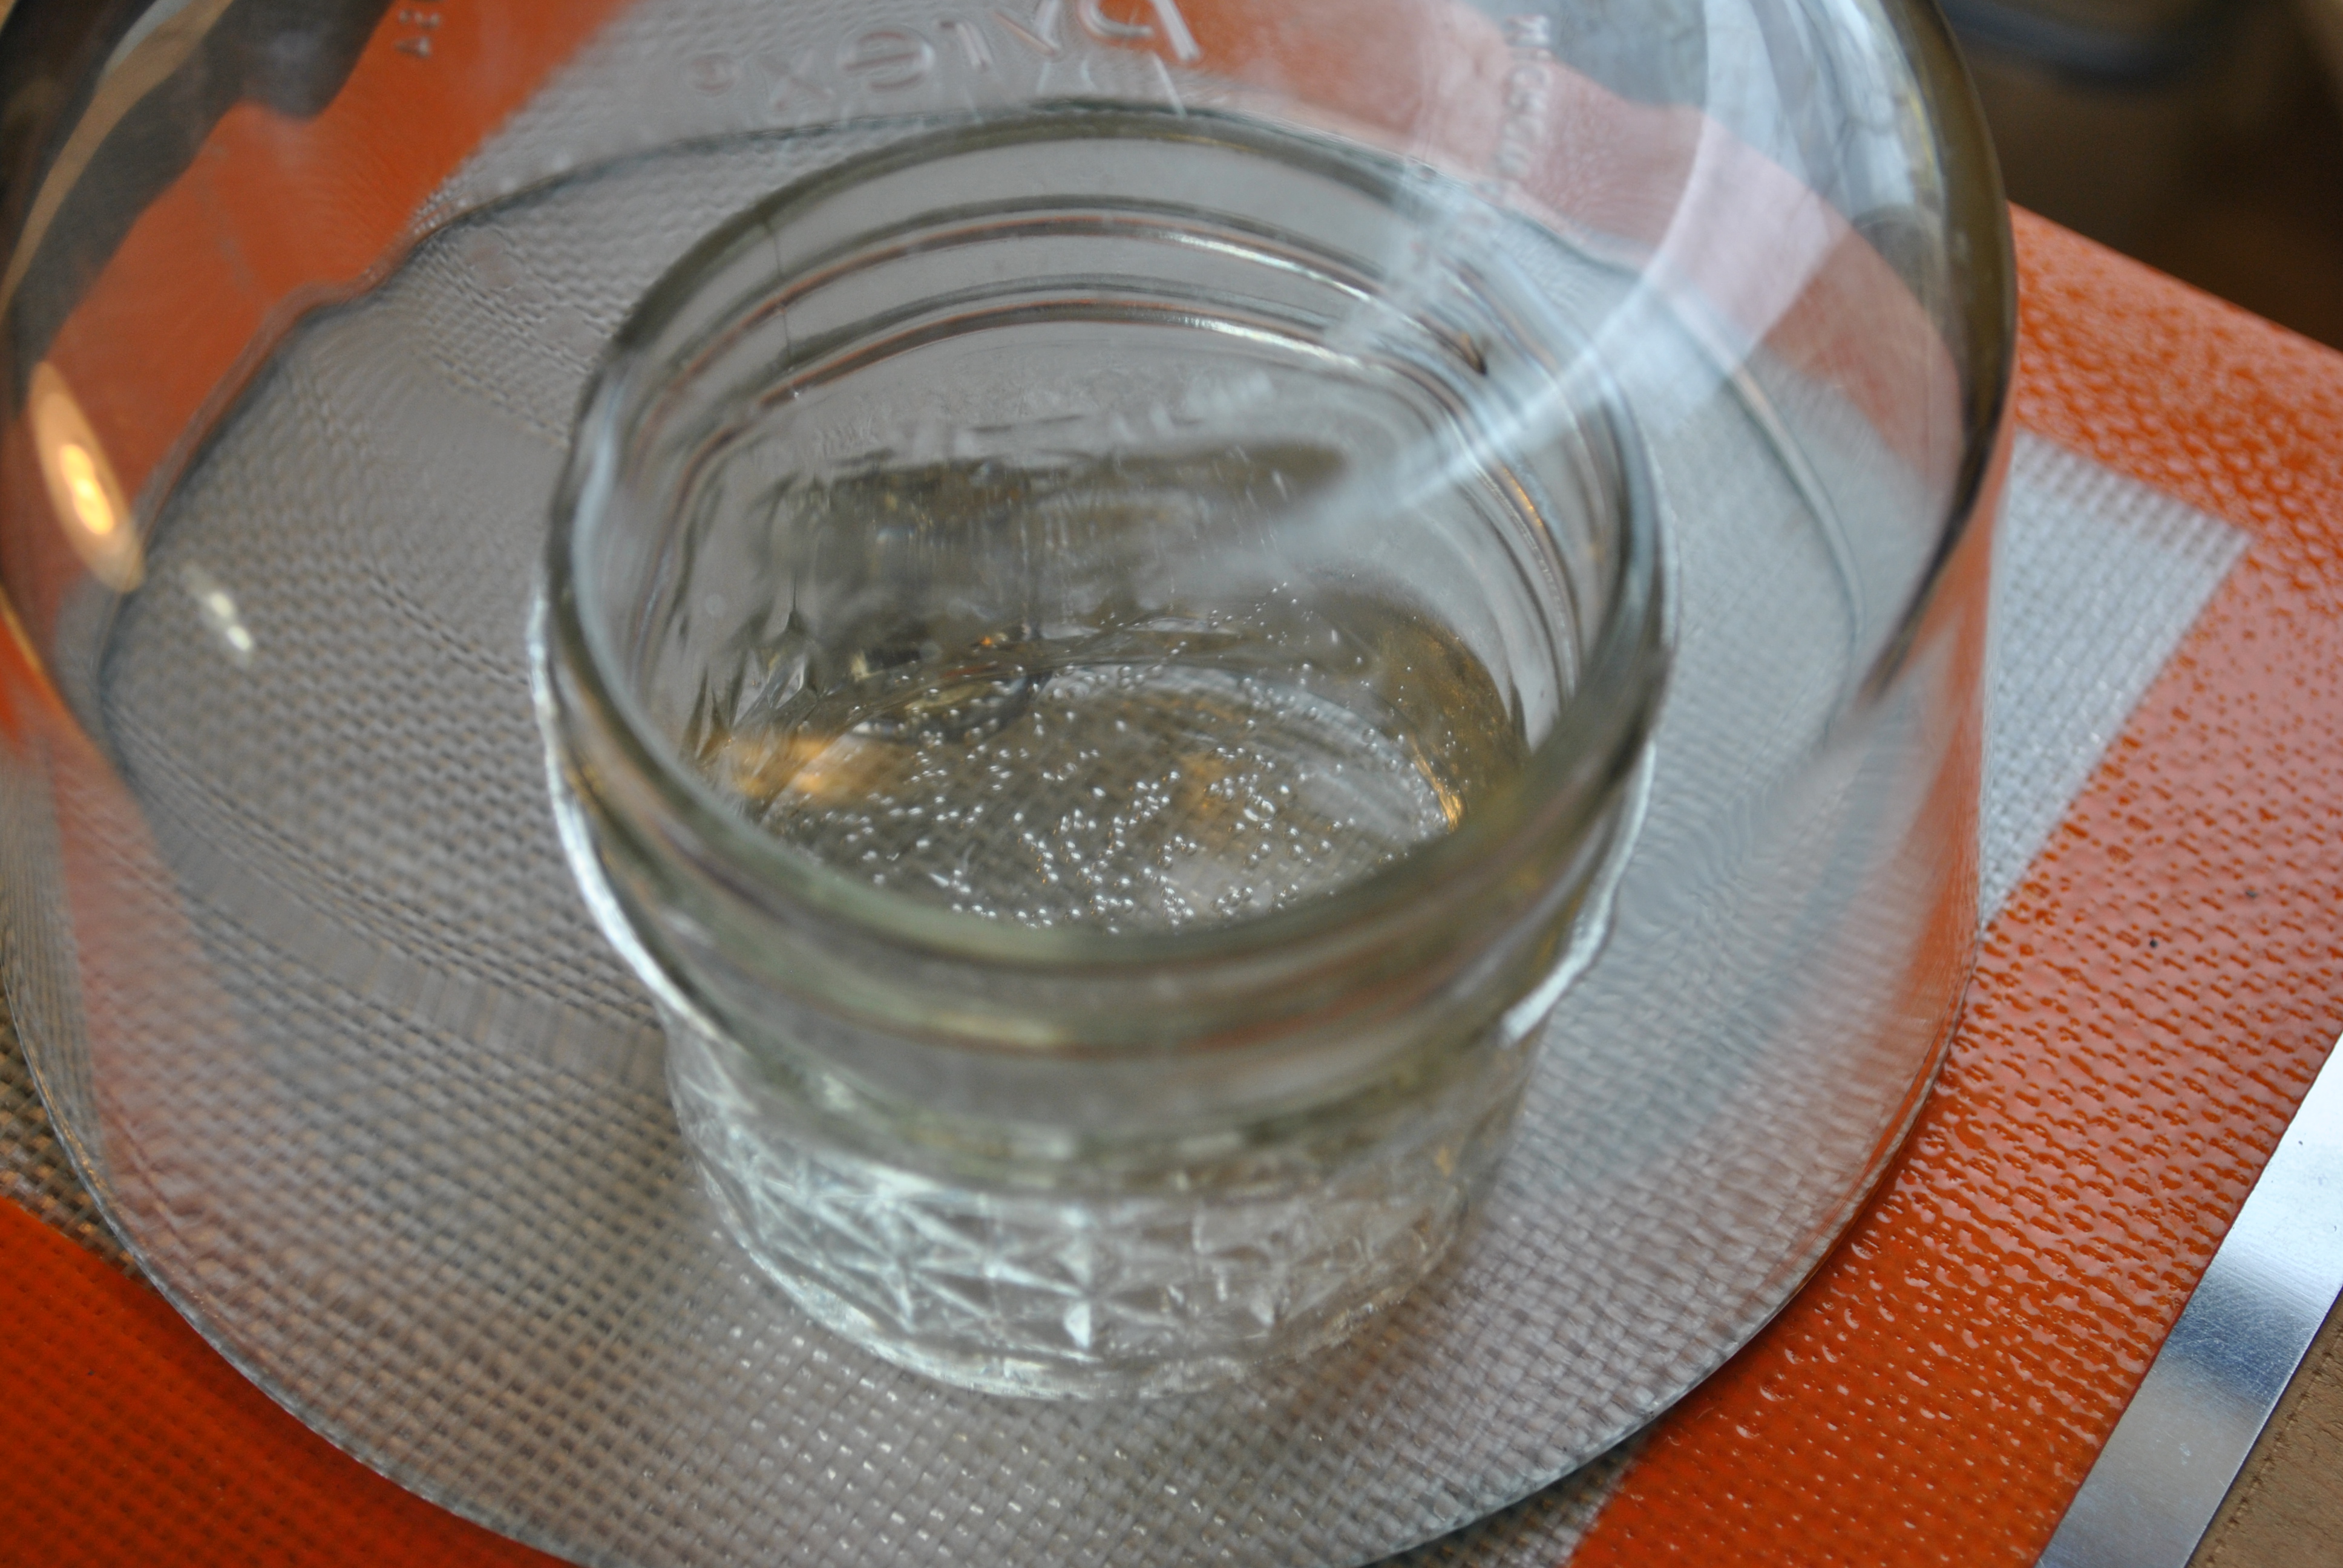
The only thing left to do was to fire it up and test it out. I have a vacuum chamber that I built with a vacuum gauge but this is just the plate and I didn’t know exactly how to measure if it was pulling a strong vacuum or not, until I remembered that water will boil in a vacuum, so I took pyrex storage dish and made a quick vacuum chamber and put a small glass of water inside.
It works!
Materials used:
Found wood
Dixon valve ttb75 ptfe industrial sealant tap ($2)
Anderson Metals Brass NPT Pipe Fitting, Barstock street Tee 1/4″ female Pipe x 1/4″ Male pipe X 1/4″ female Pipe ($5)
a 4 inch piece of Red Brass Pipe Fitting Nipple Schedule 40 Seamless 1/4″ NPT male pipe ($4)
and a stainless steel (they were out of brass) 1/4″ NPT pipe mushroom style cap ($1)
A 1/4″ npt threaded ball valve to Barb ($3)
High Temp Silicon Baking Sheet
e6000 glue
wood screws
Zeny® Single-Stage 3,5CFM 5 Pa Rotary Vane Vacuum Pump 3 CFM 1/4HP HVAC Air tool R410a R134, blue ($53.00)
Vacuum Hose
Tools used:
Hand Saw
Utility Knife
Jewelers Saw
Drill with Drill Bit
Rotary Sander
Cost:
Total cost $68 (stuff I had to buy is priced above, everything else I had or found)
Buying a vacuum pump was a bummer, but couldn’t find one cheap or used around me, the rest was simple plumbing and some found wood. This was really easy and can basically be used for all sorts of things. I might end up putting a fine mesh over the vacuum hole just to keep anything from being sucked in.
I looked up a vacuum plate online, and new ones go for $400+ and they don’t even come with a vacuum pump (!). So getting away with this for under $70 including the vacuum pump is a steal.
In my ongoing quest to build my own DIY home lost wax casting set up and not burn my house down, or asphyxiate myself I figured I would need a kiln vent. Kiln vents come in two kinds, top vents, and bottom vents. They help draw off any fumes, smoke, heat or other nastiness that your kiln might create.
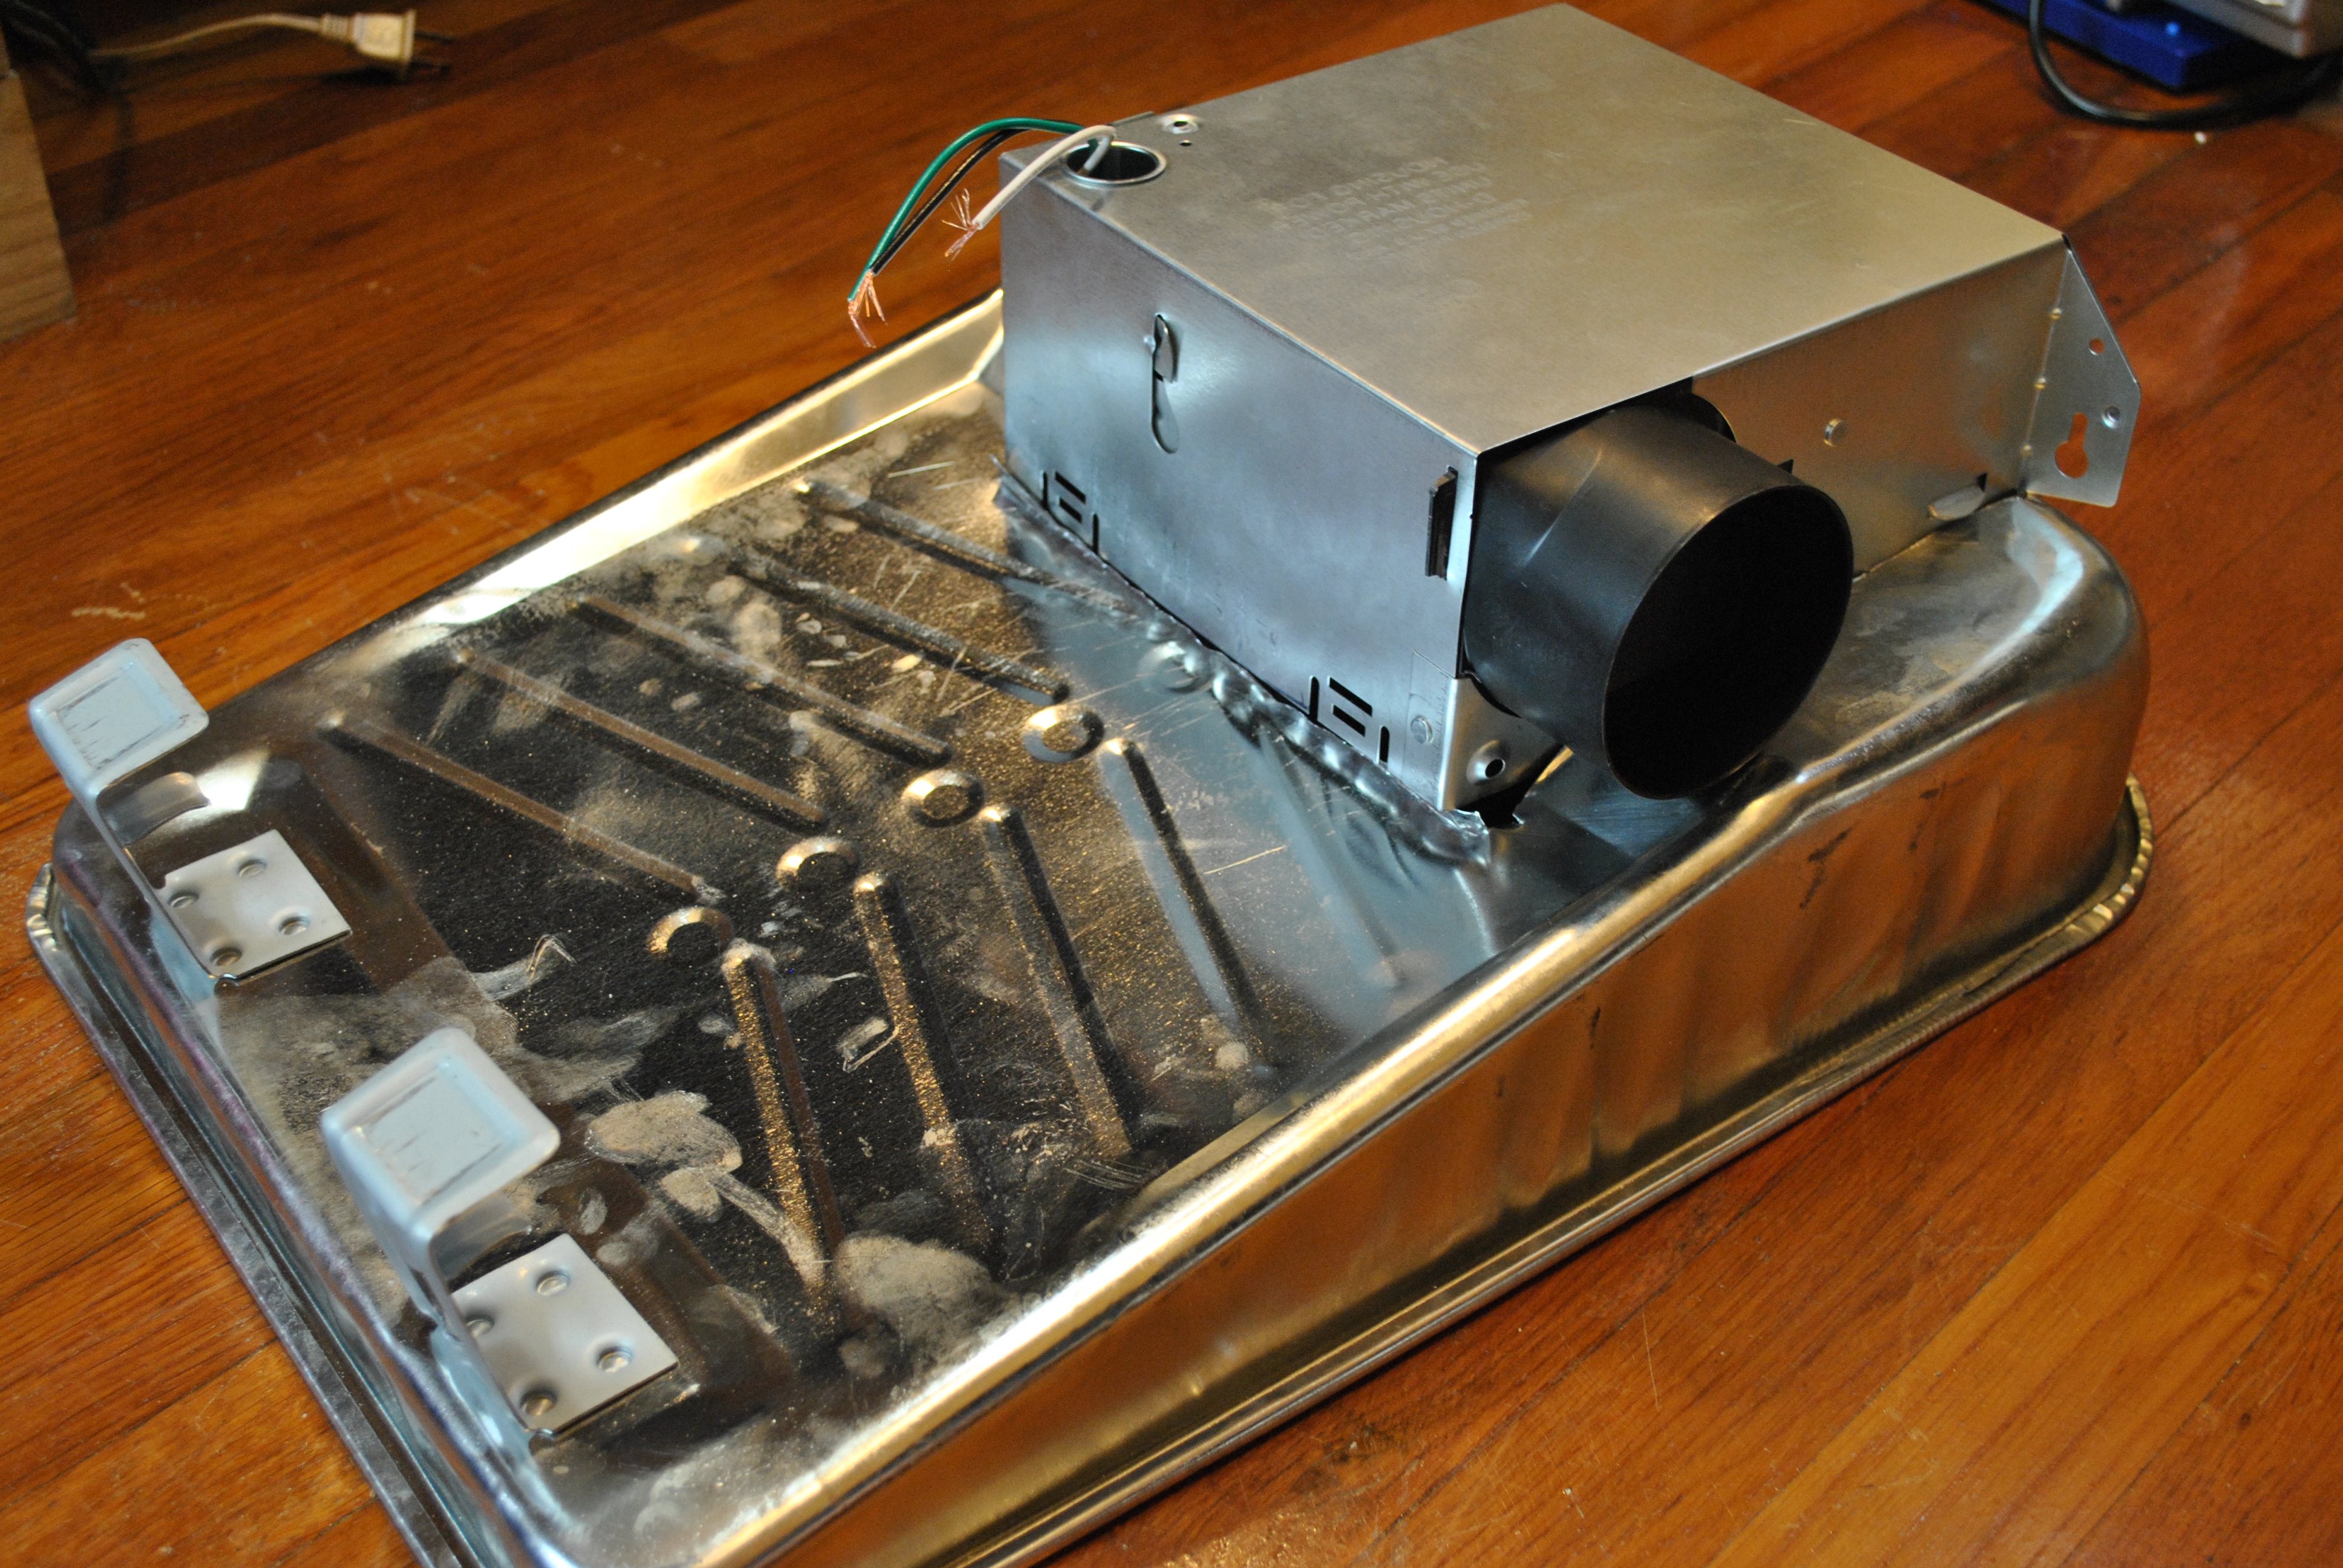
Here is an example of a top vent, and one that I will be emulating.
As you can see its deceptively simple. A hood to catch the rising heat and fumes, and a fan to blow it out a window. I figure I could make this with stuff from the local hardware store no problem.
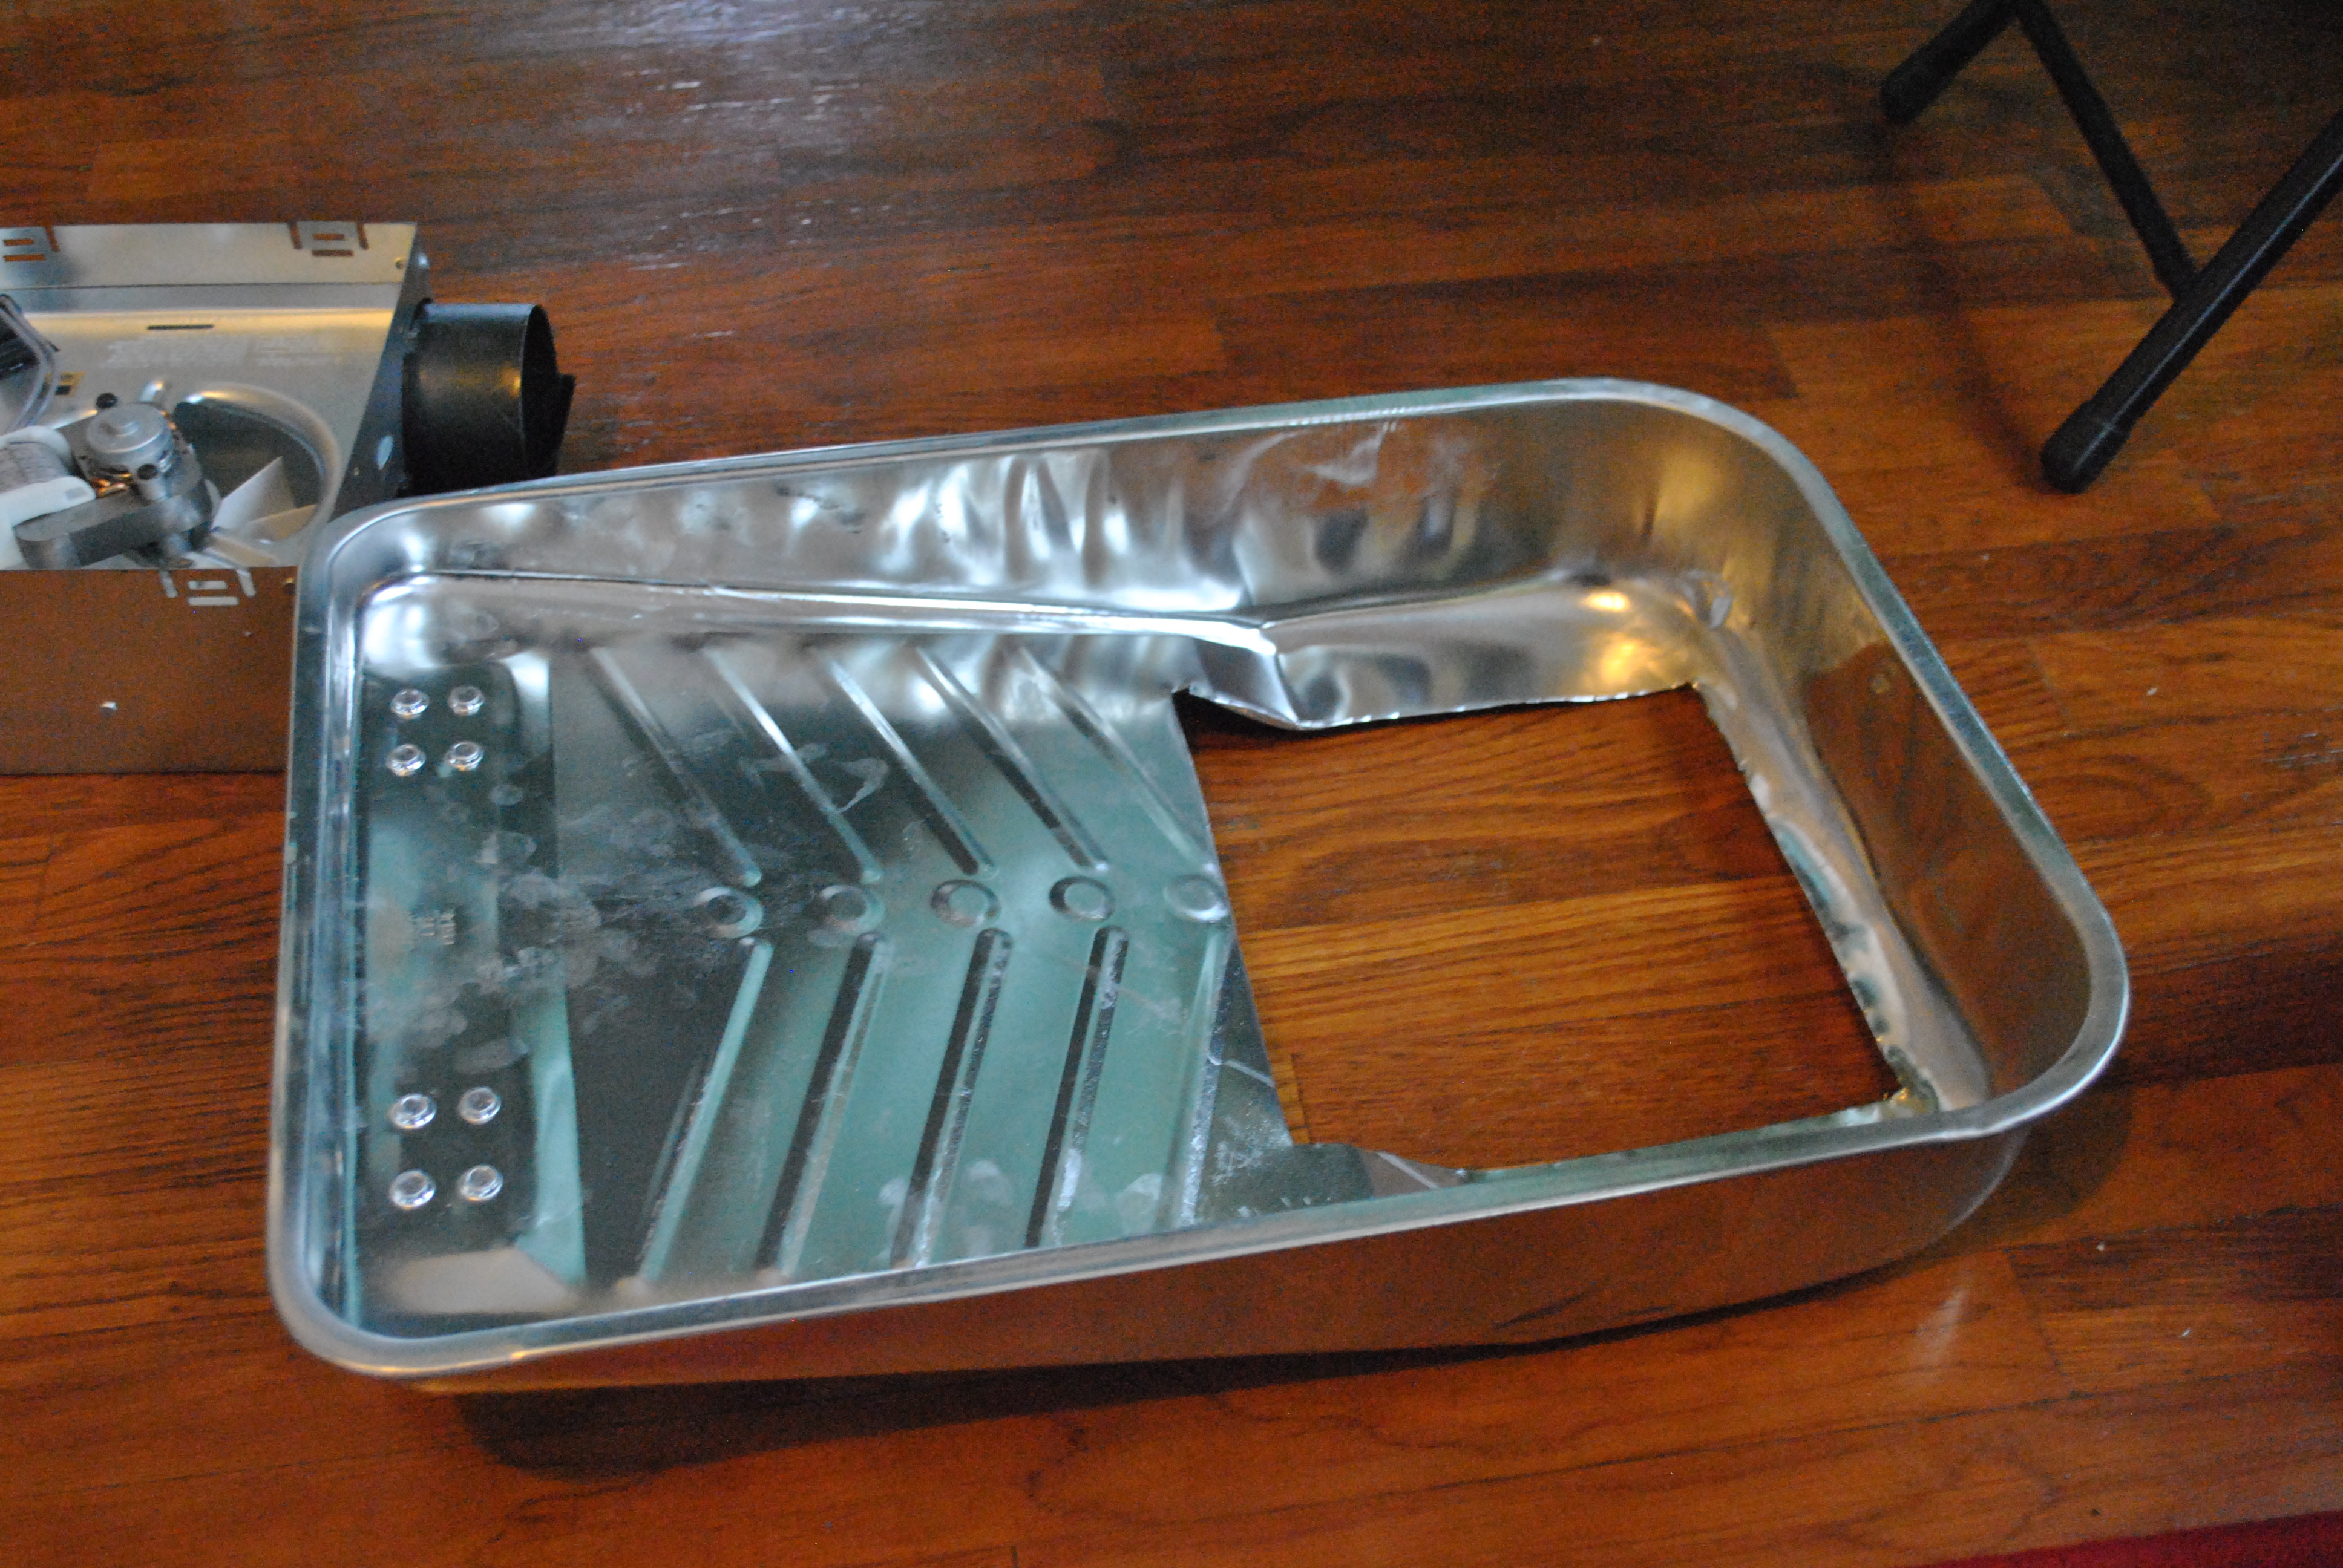
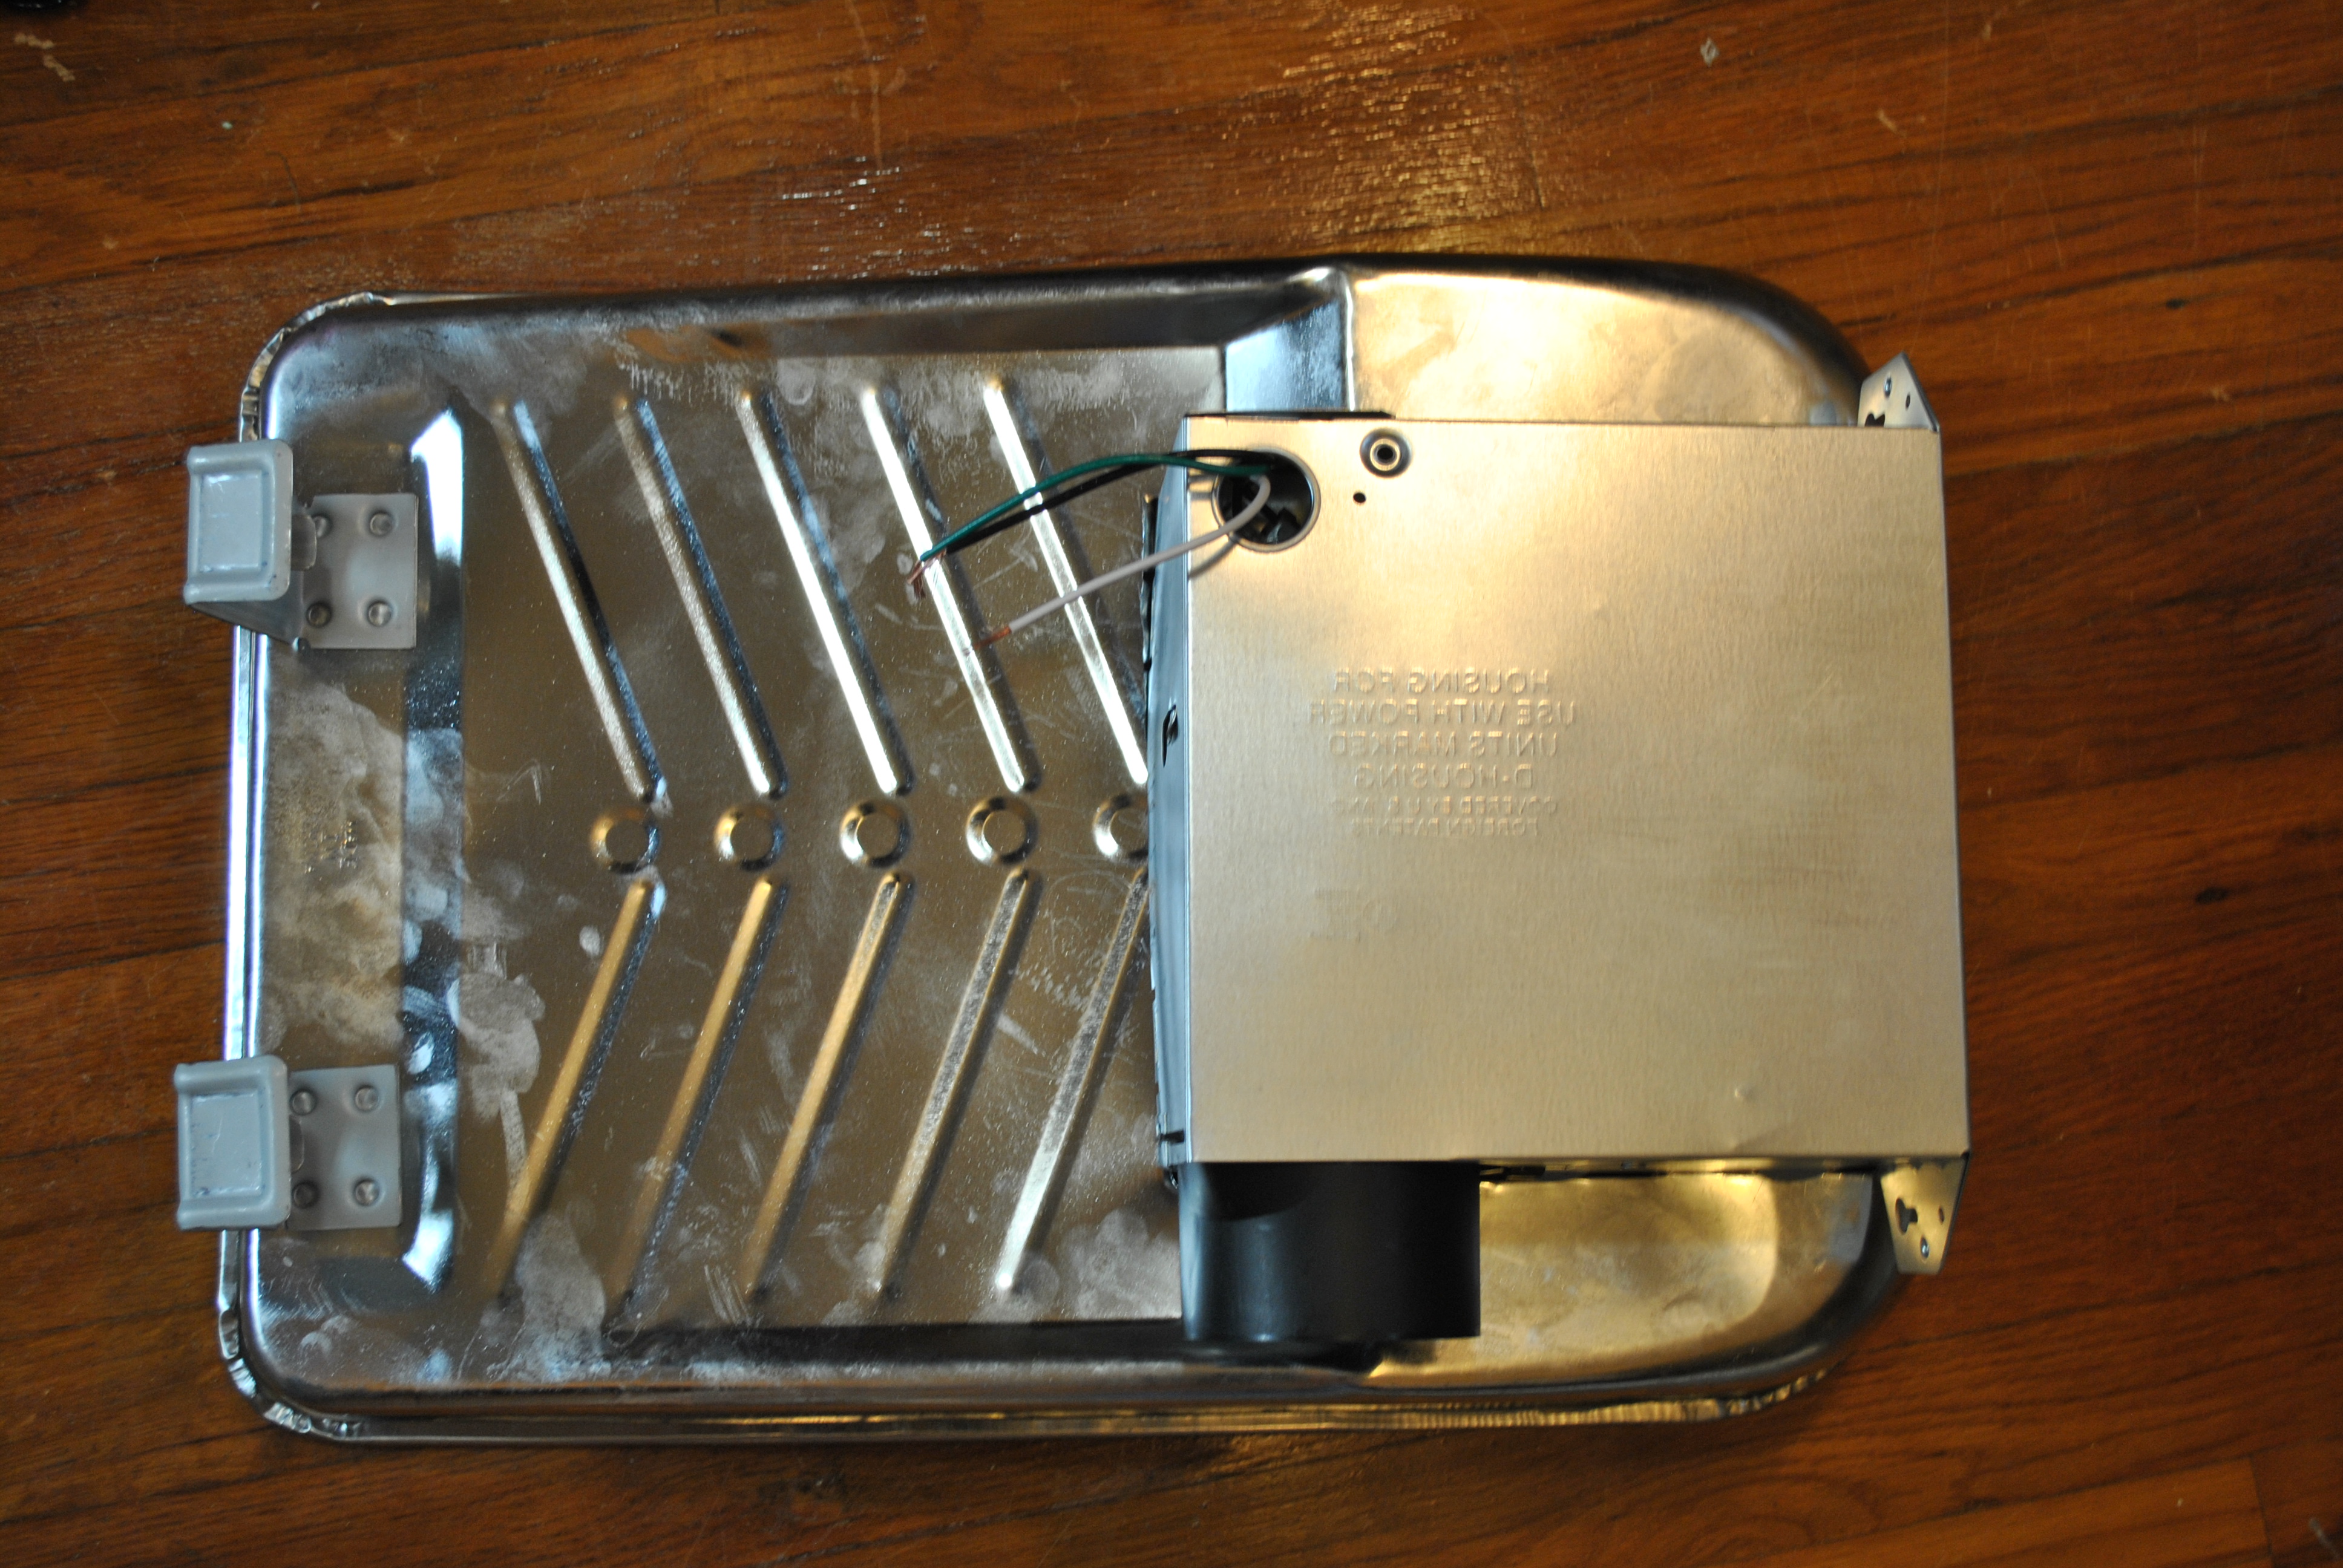
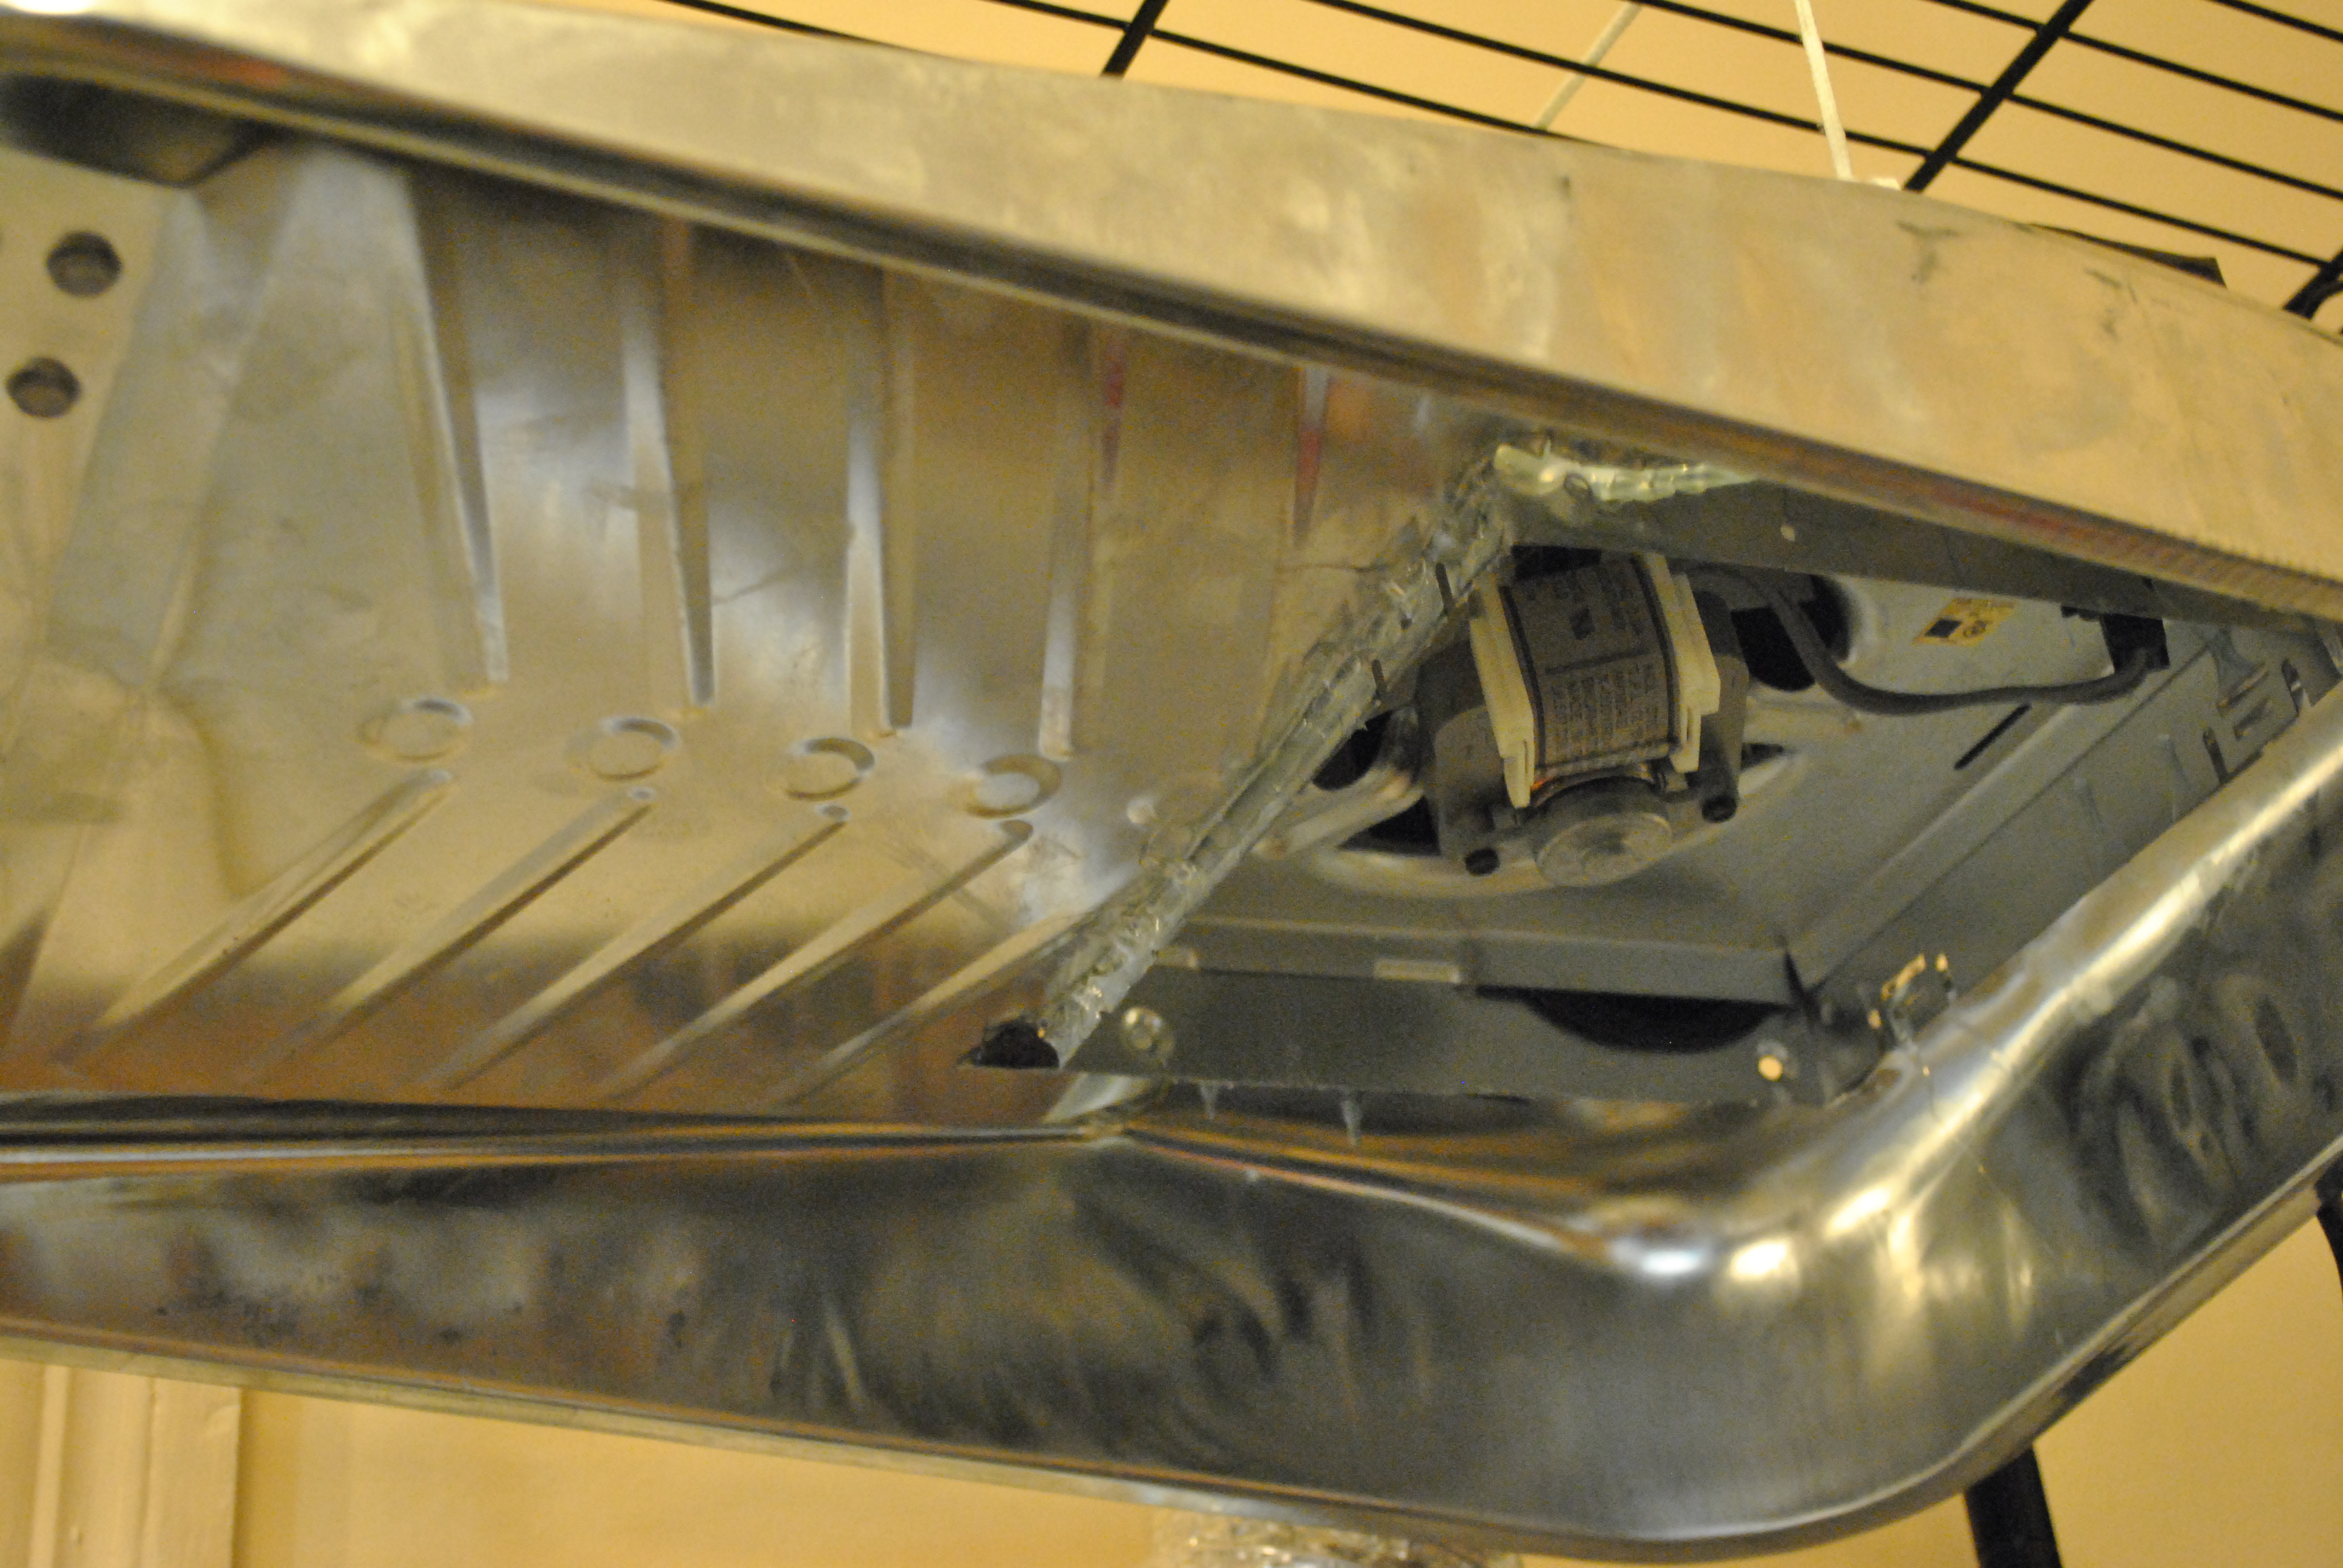
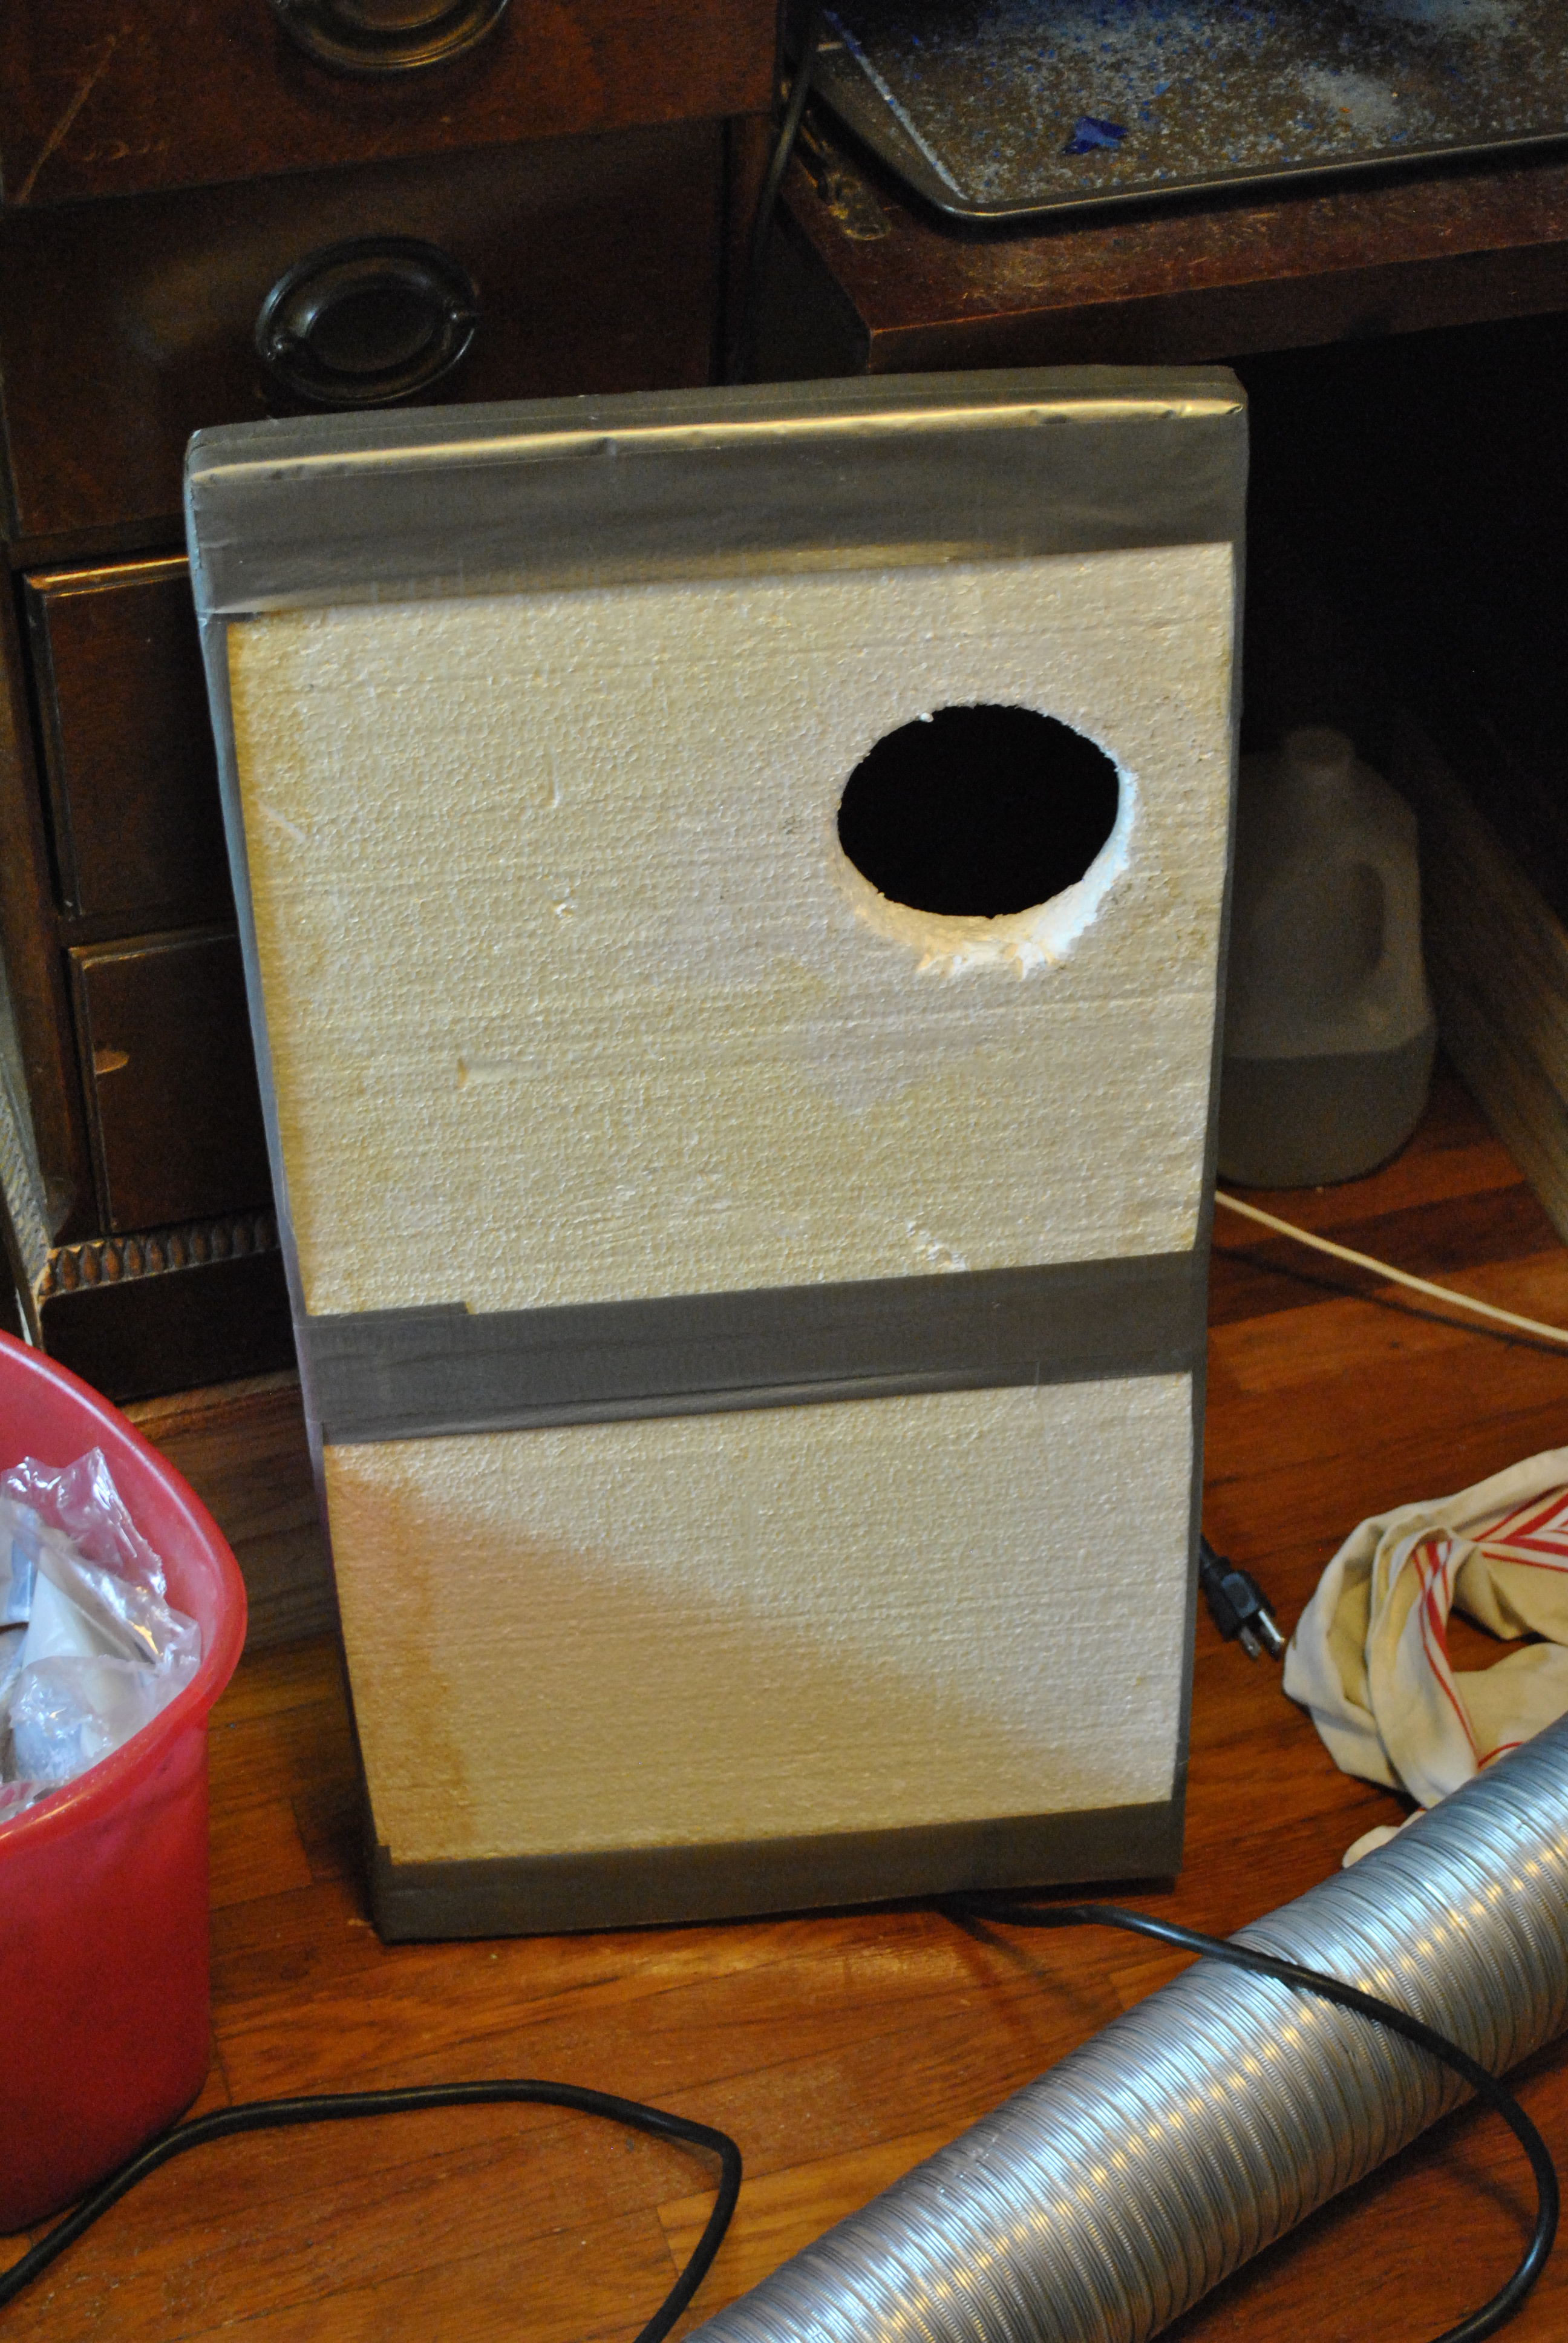
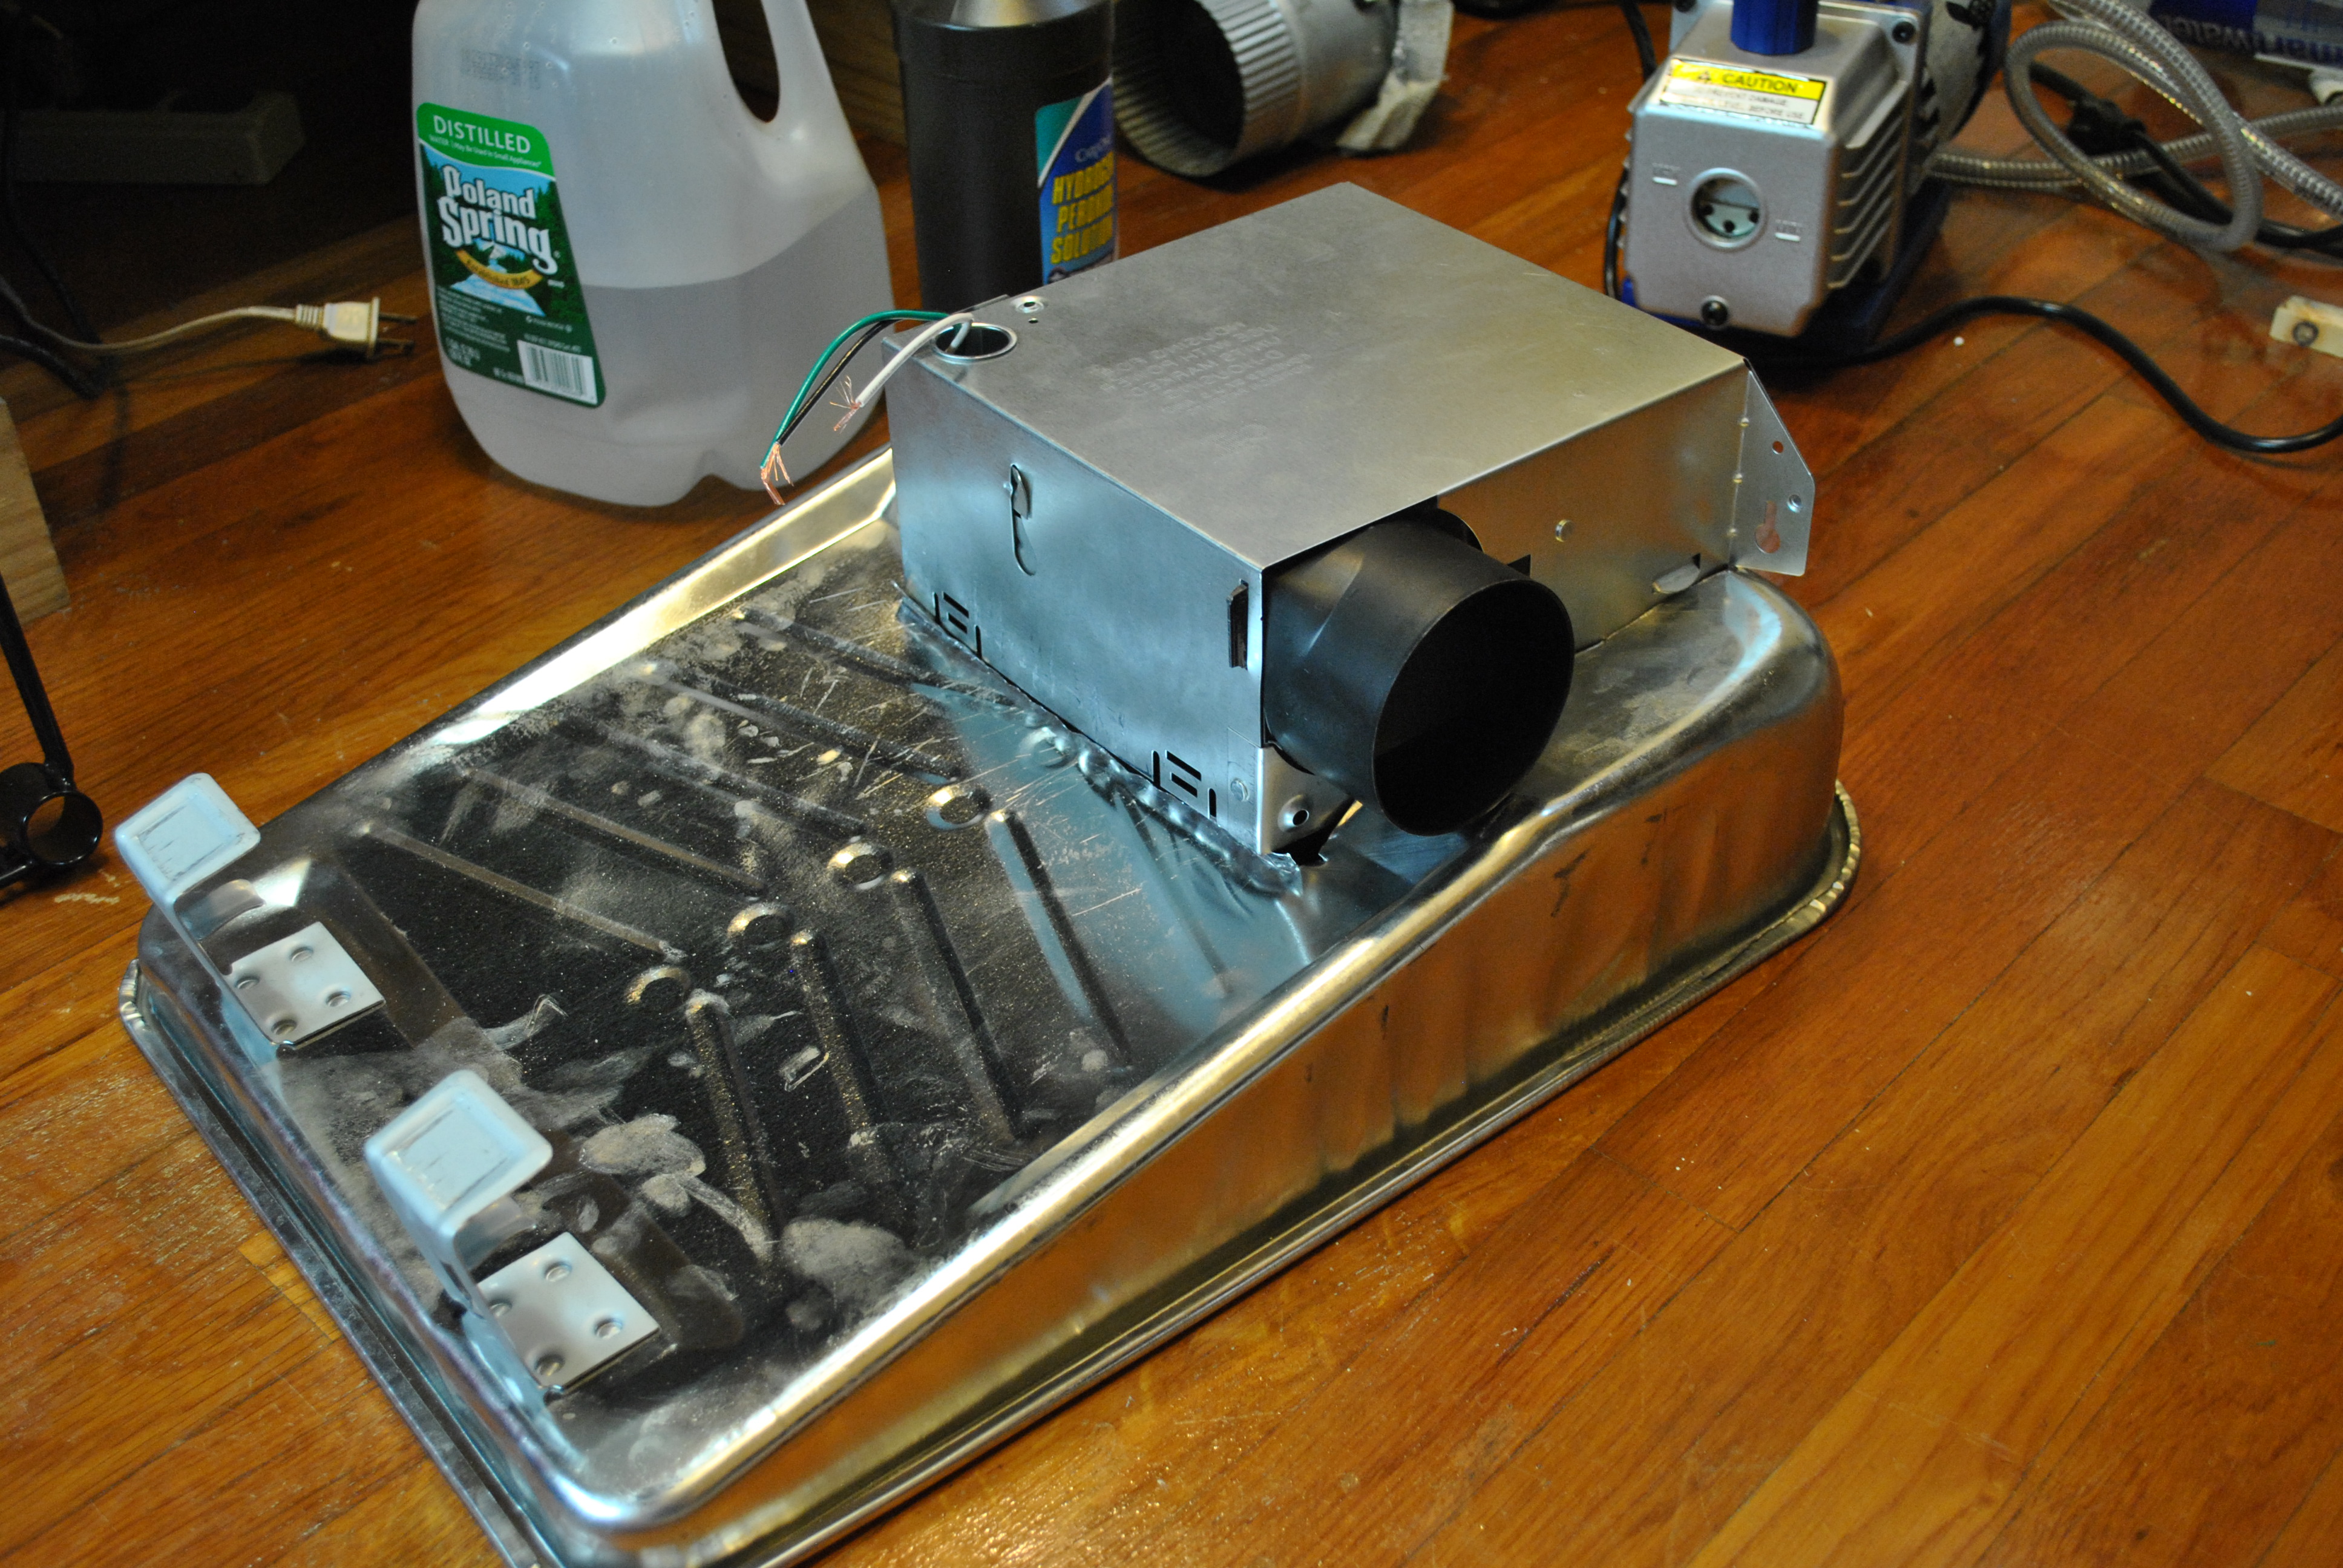
First I got myself a big paint tray made of steel and cut a bathroom ceiling fan shaped hole in it with tin snips.
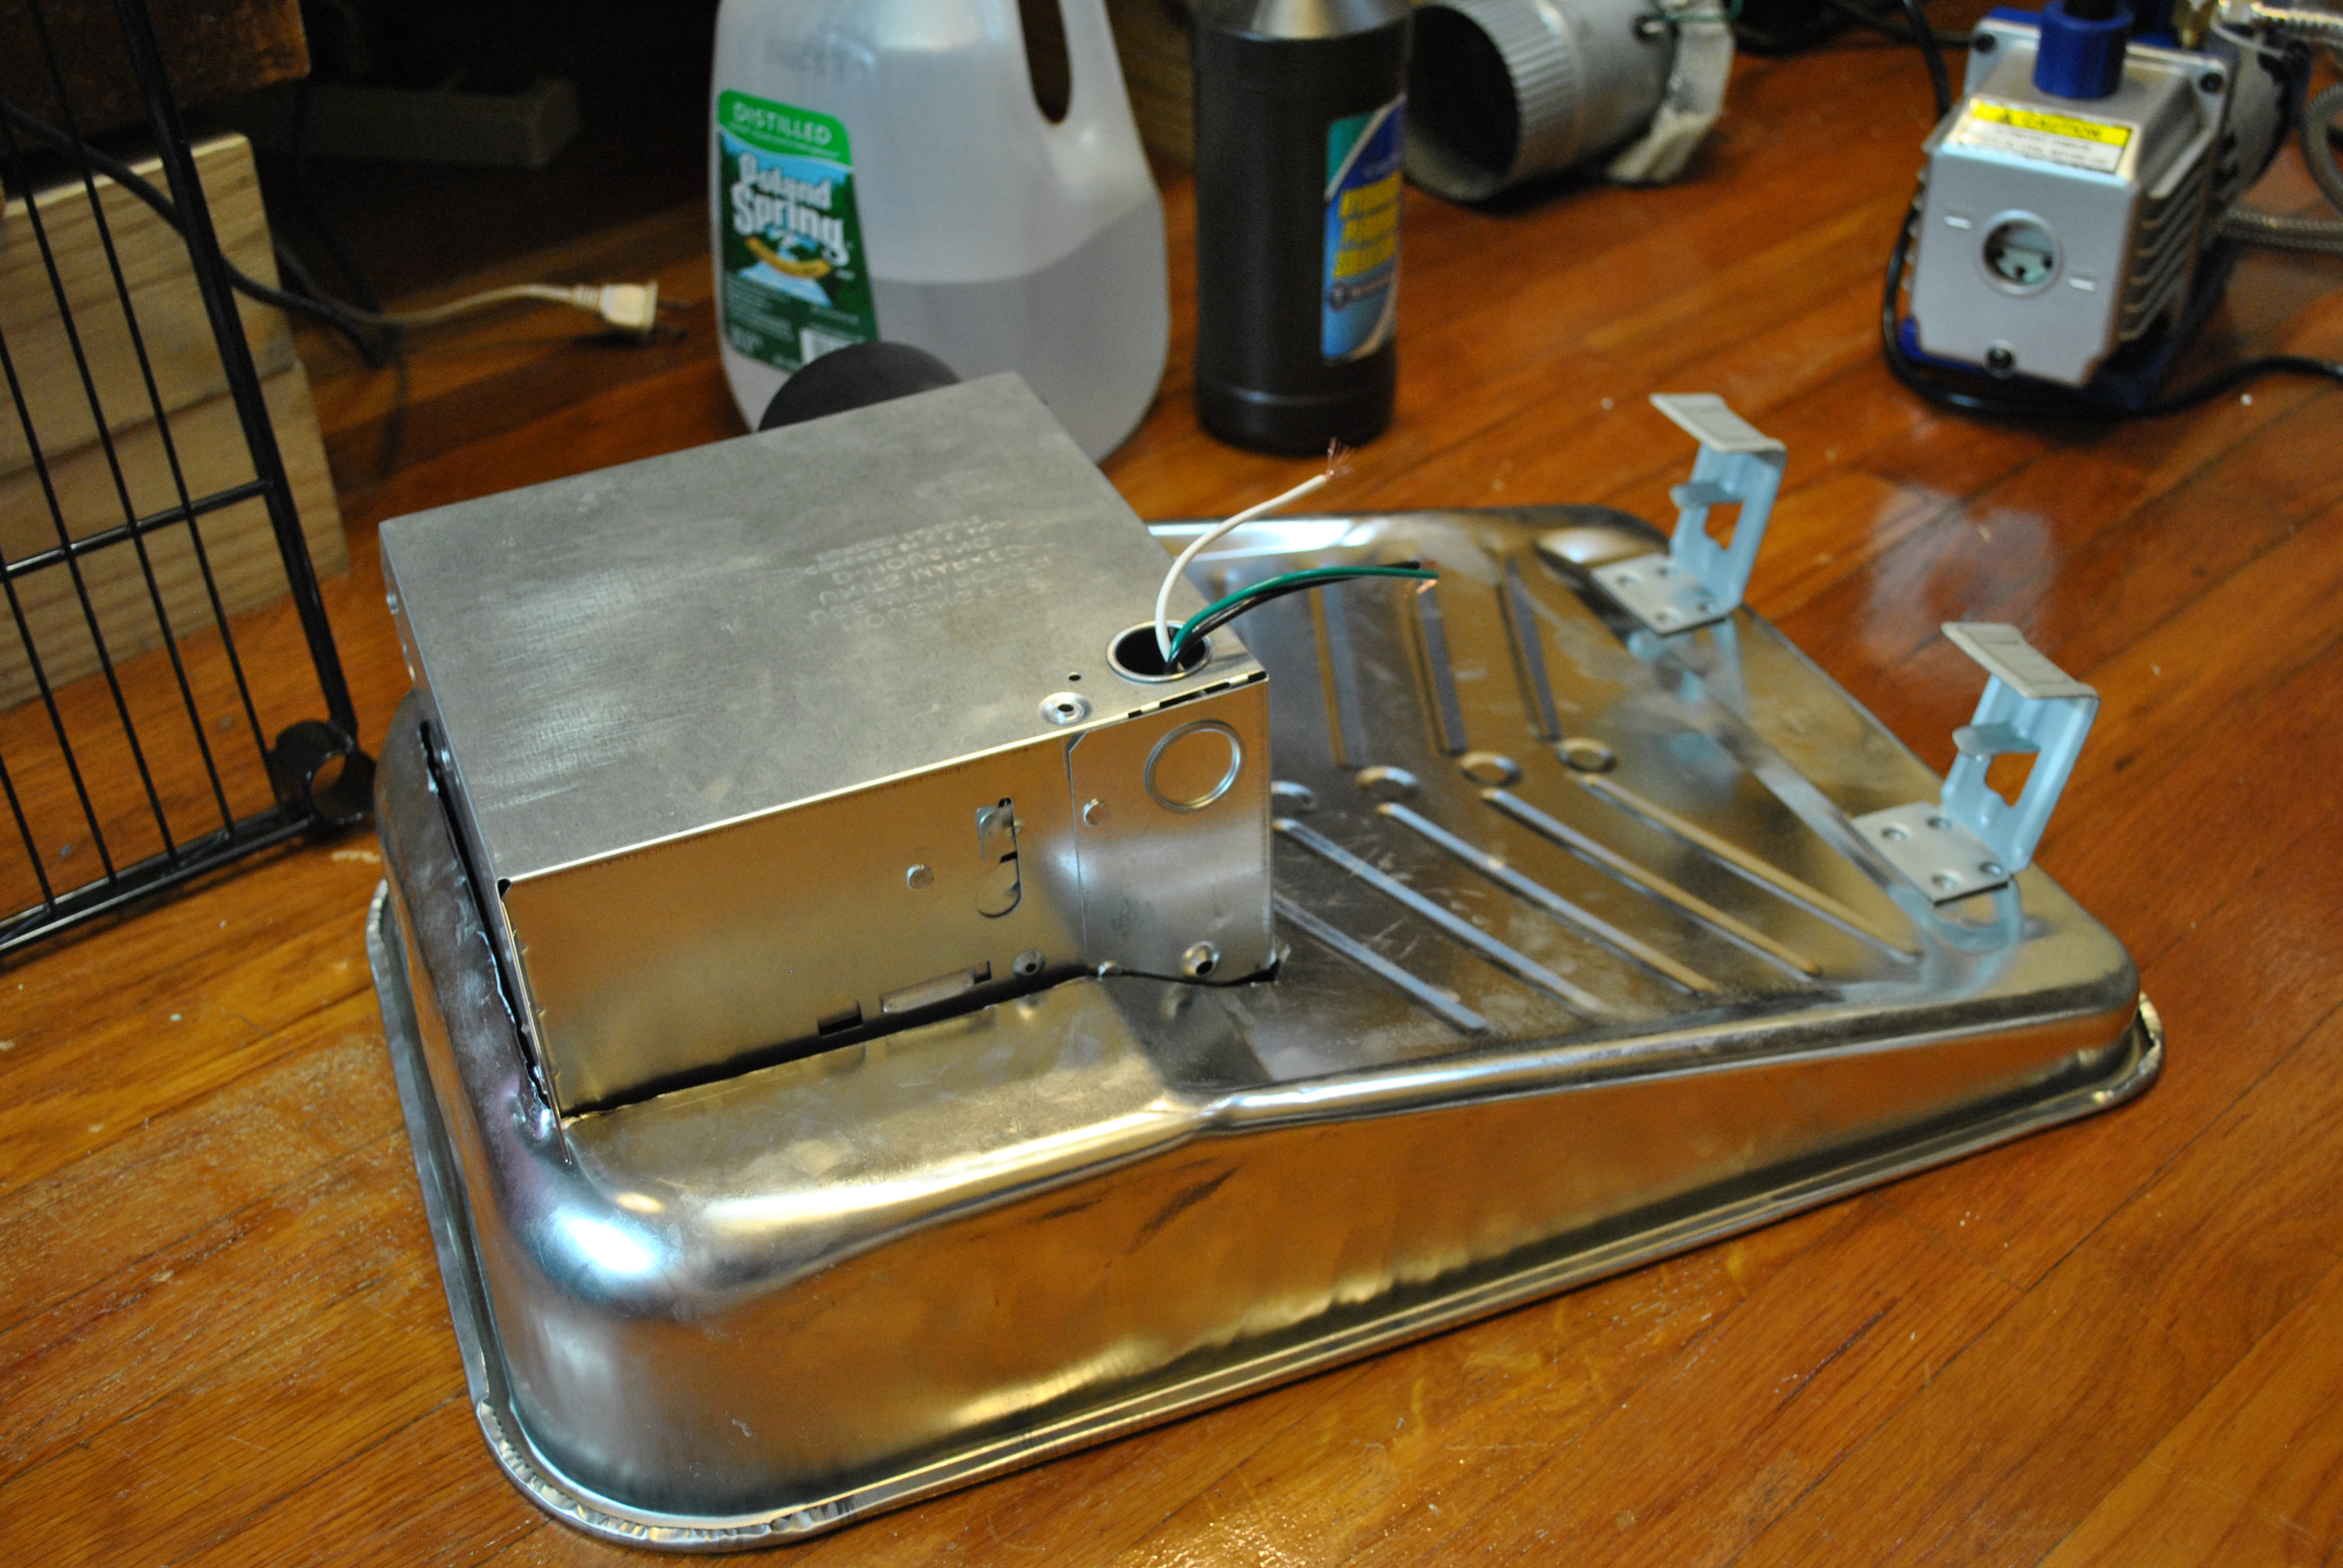
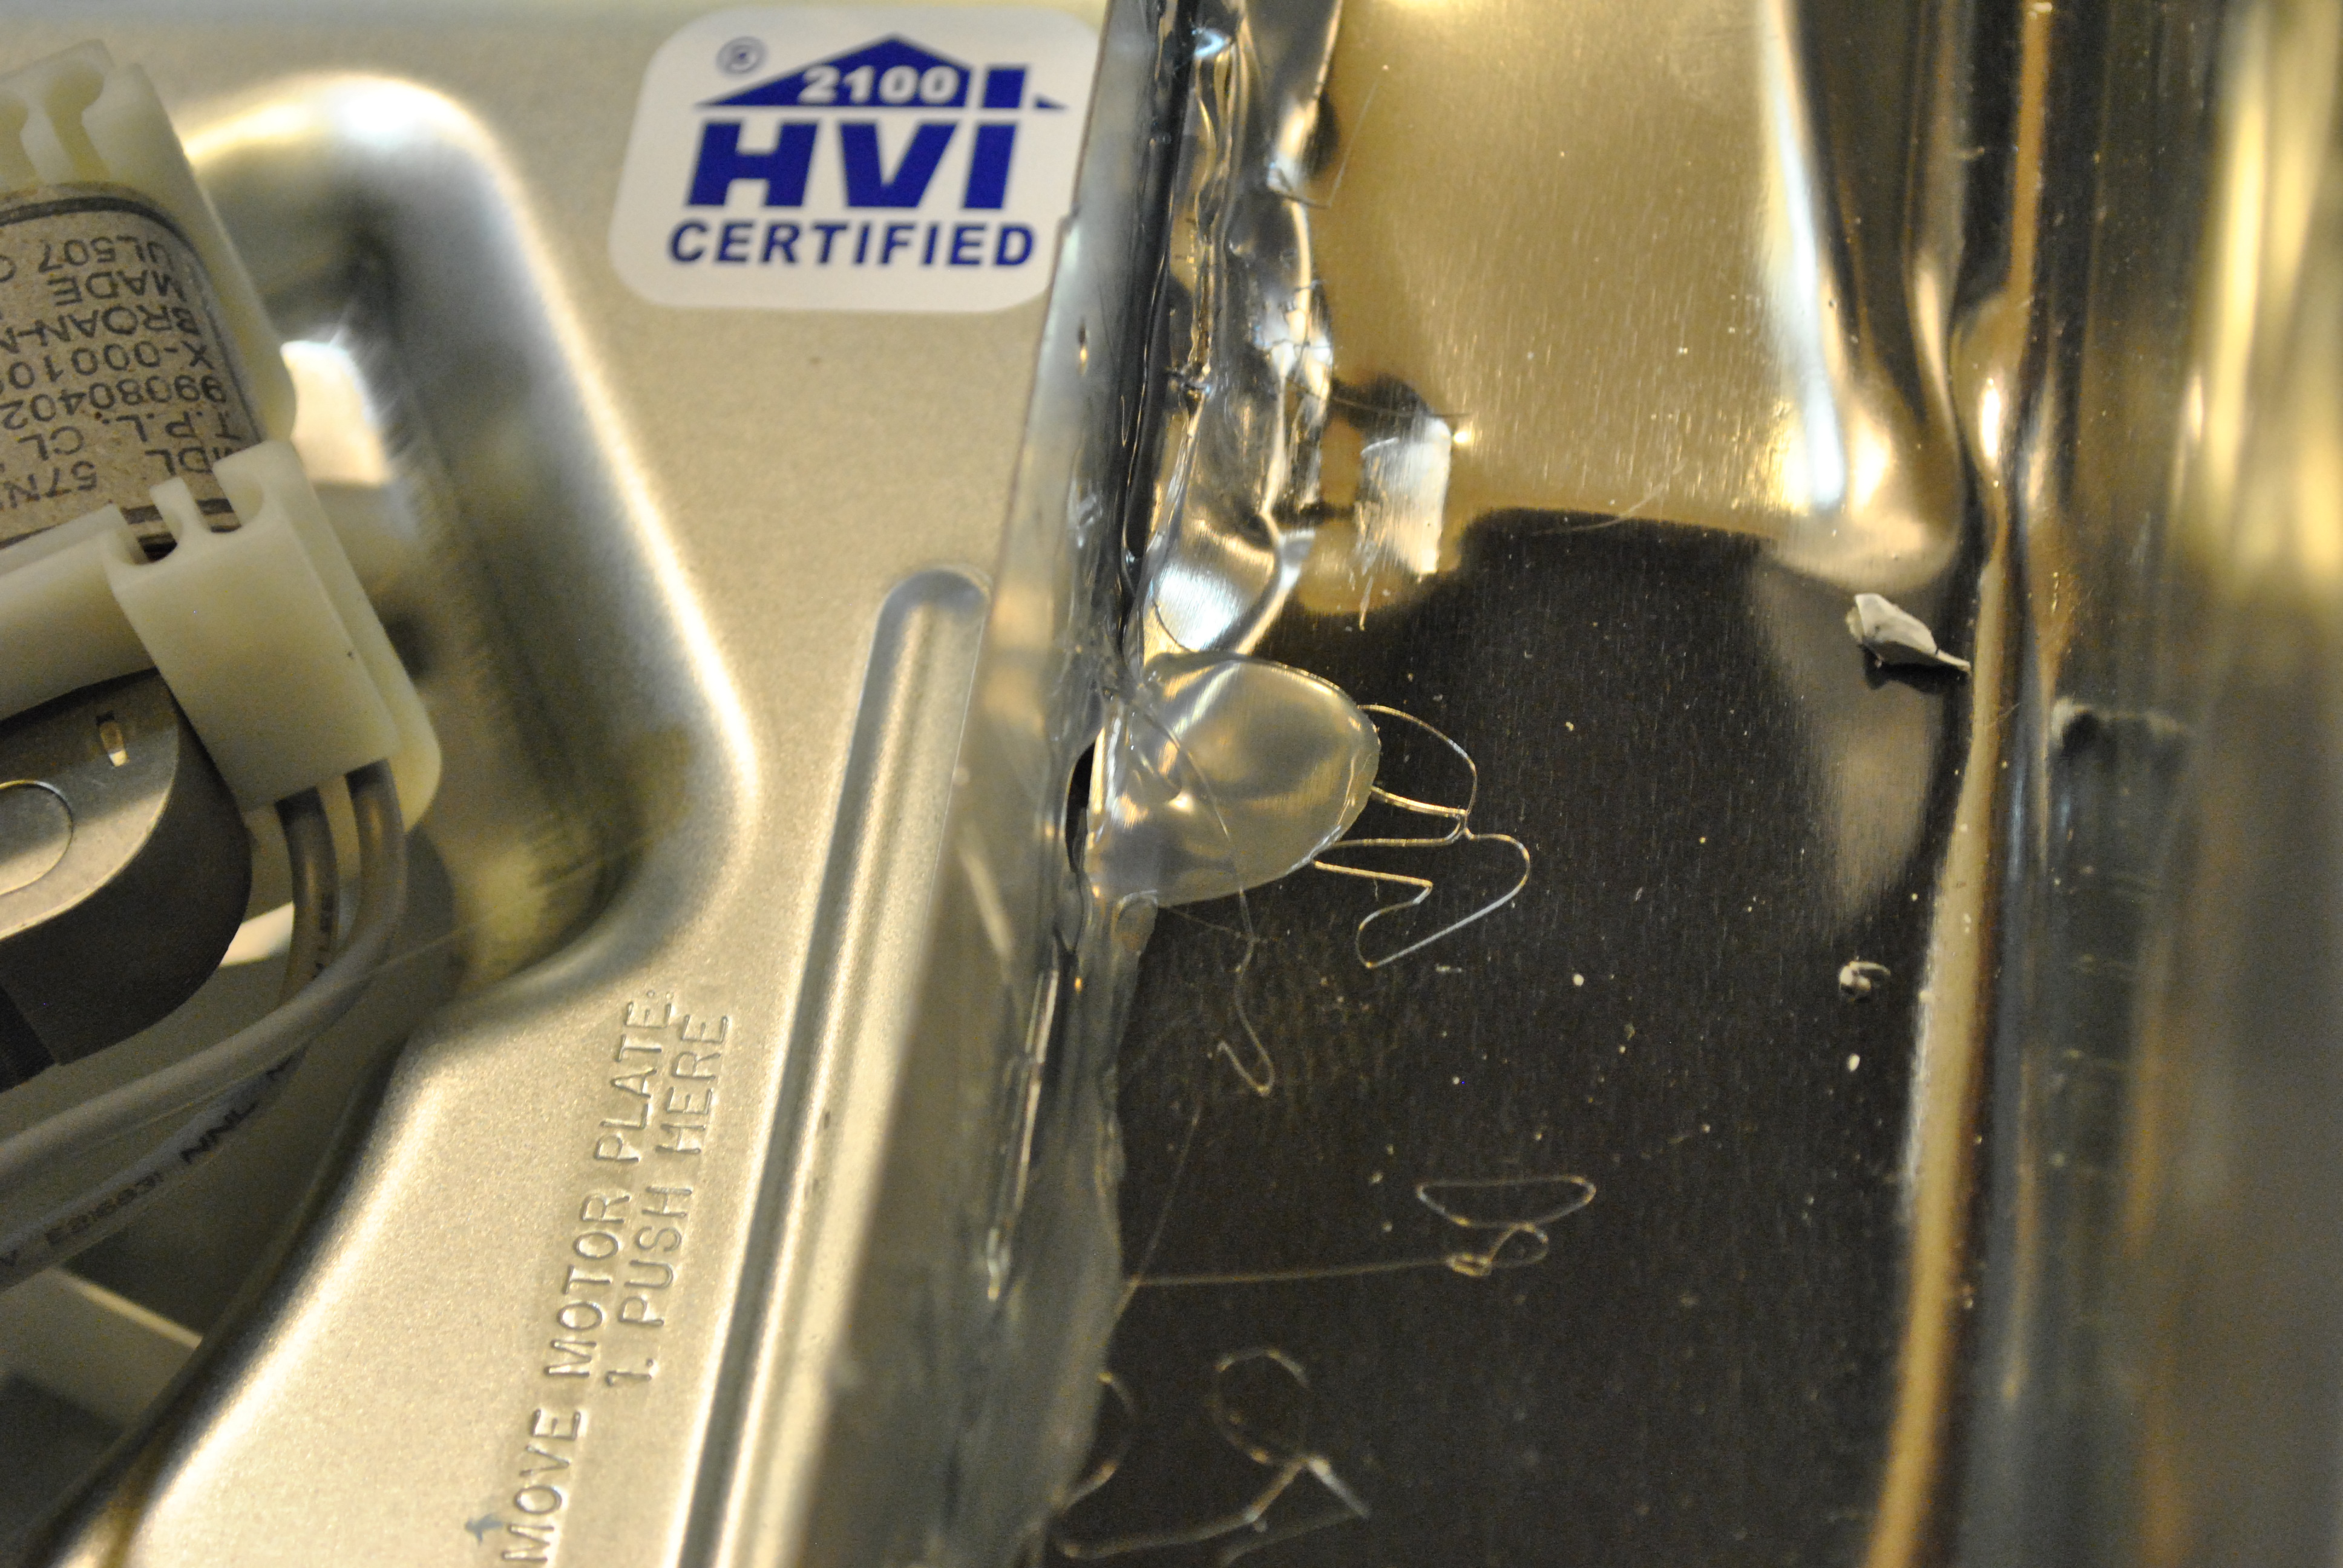
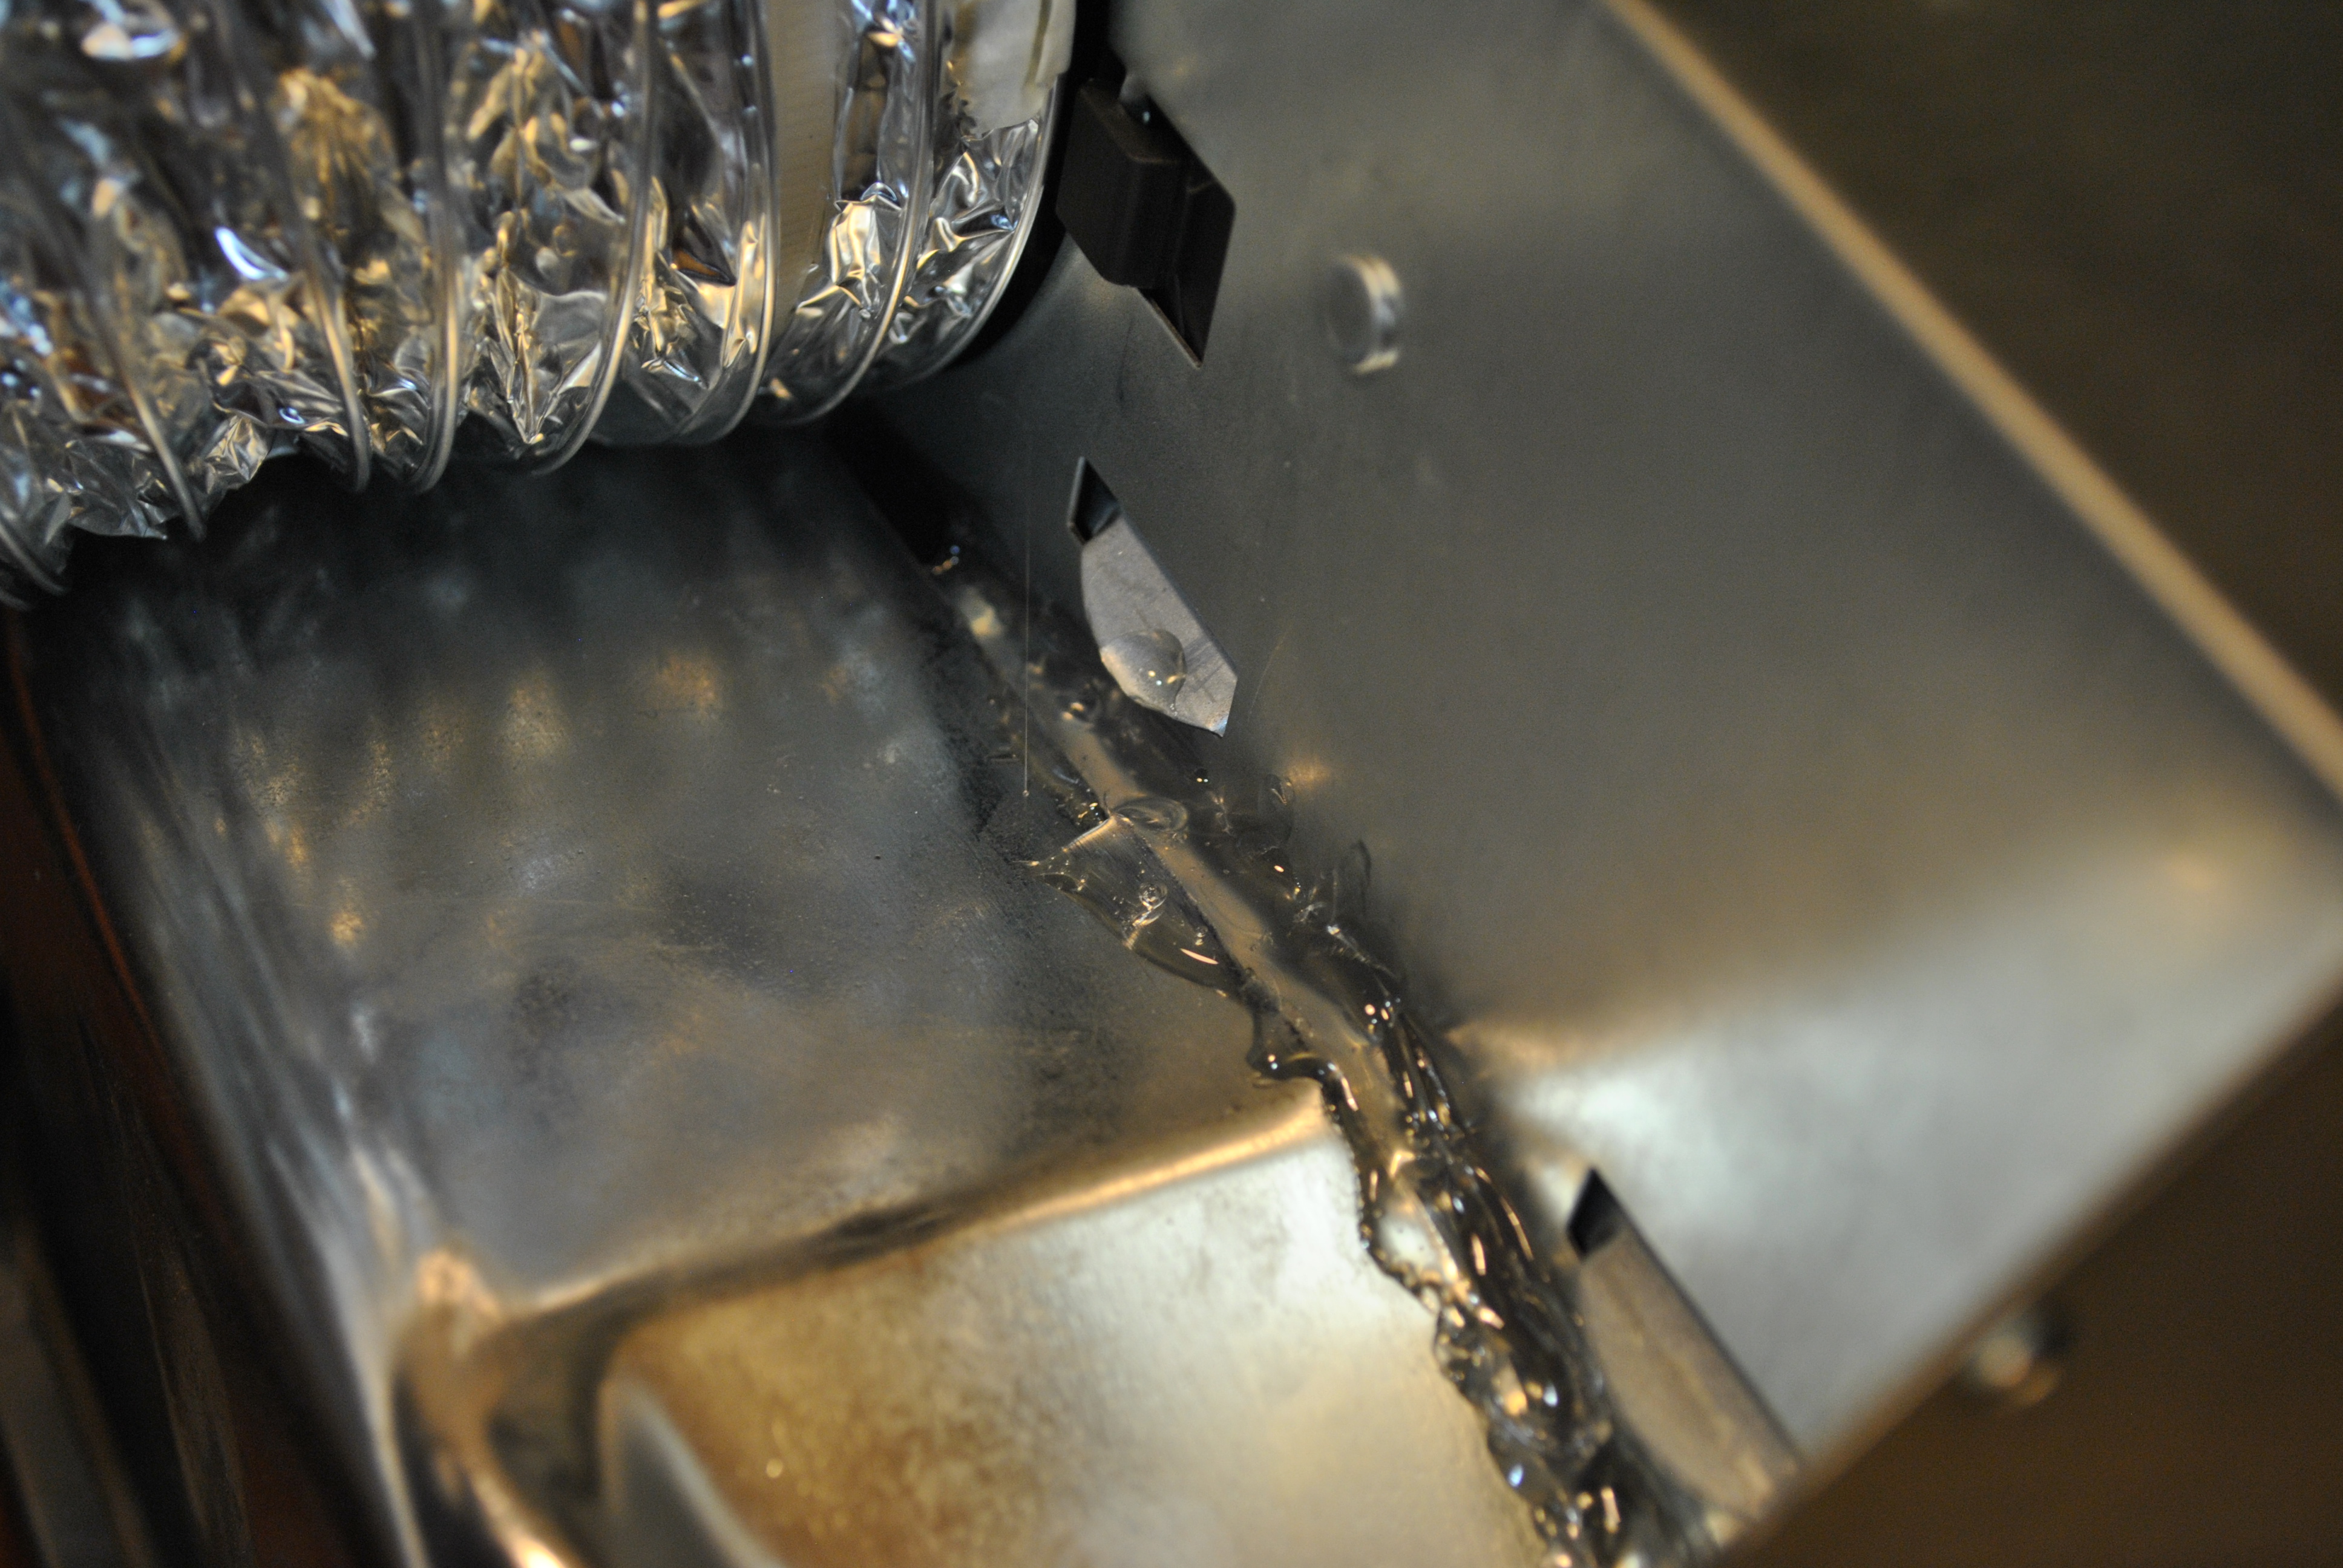
Then I took that celing fan and glued it into the painting pan with e6000 glue (damn that stuff stinks, do this outside if you can)
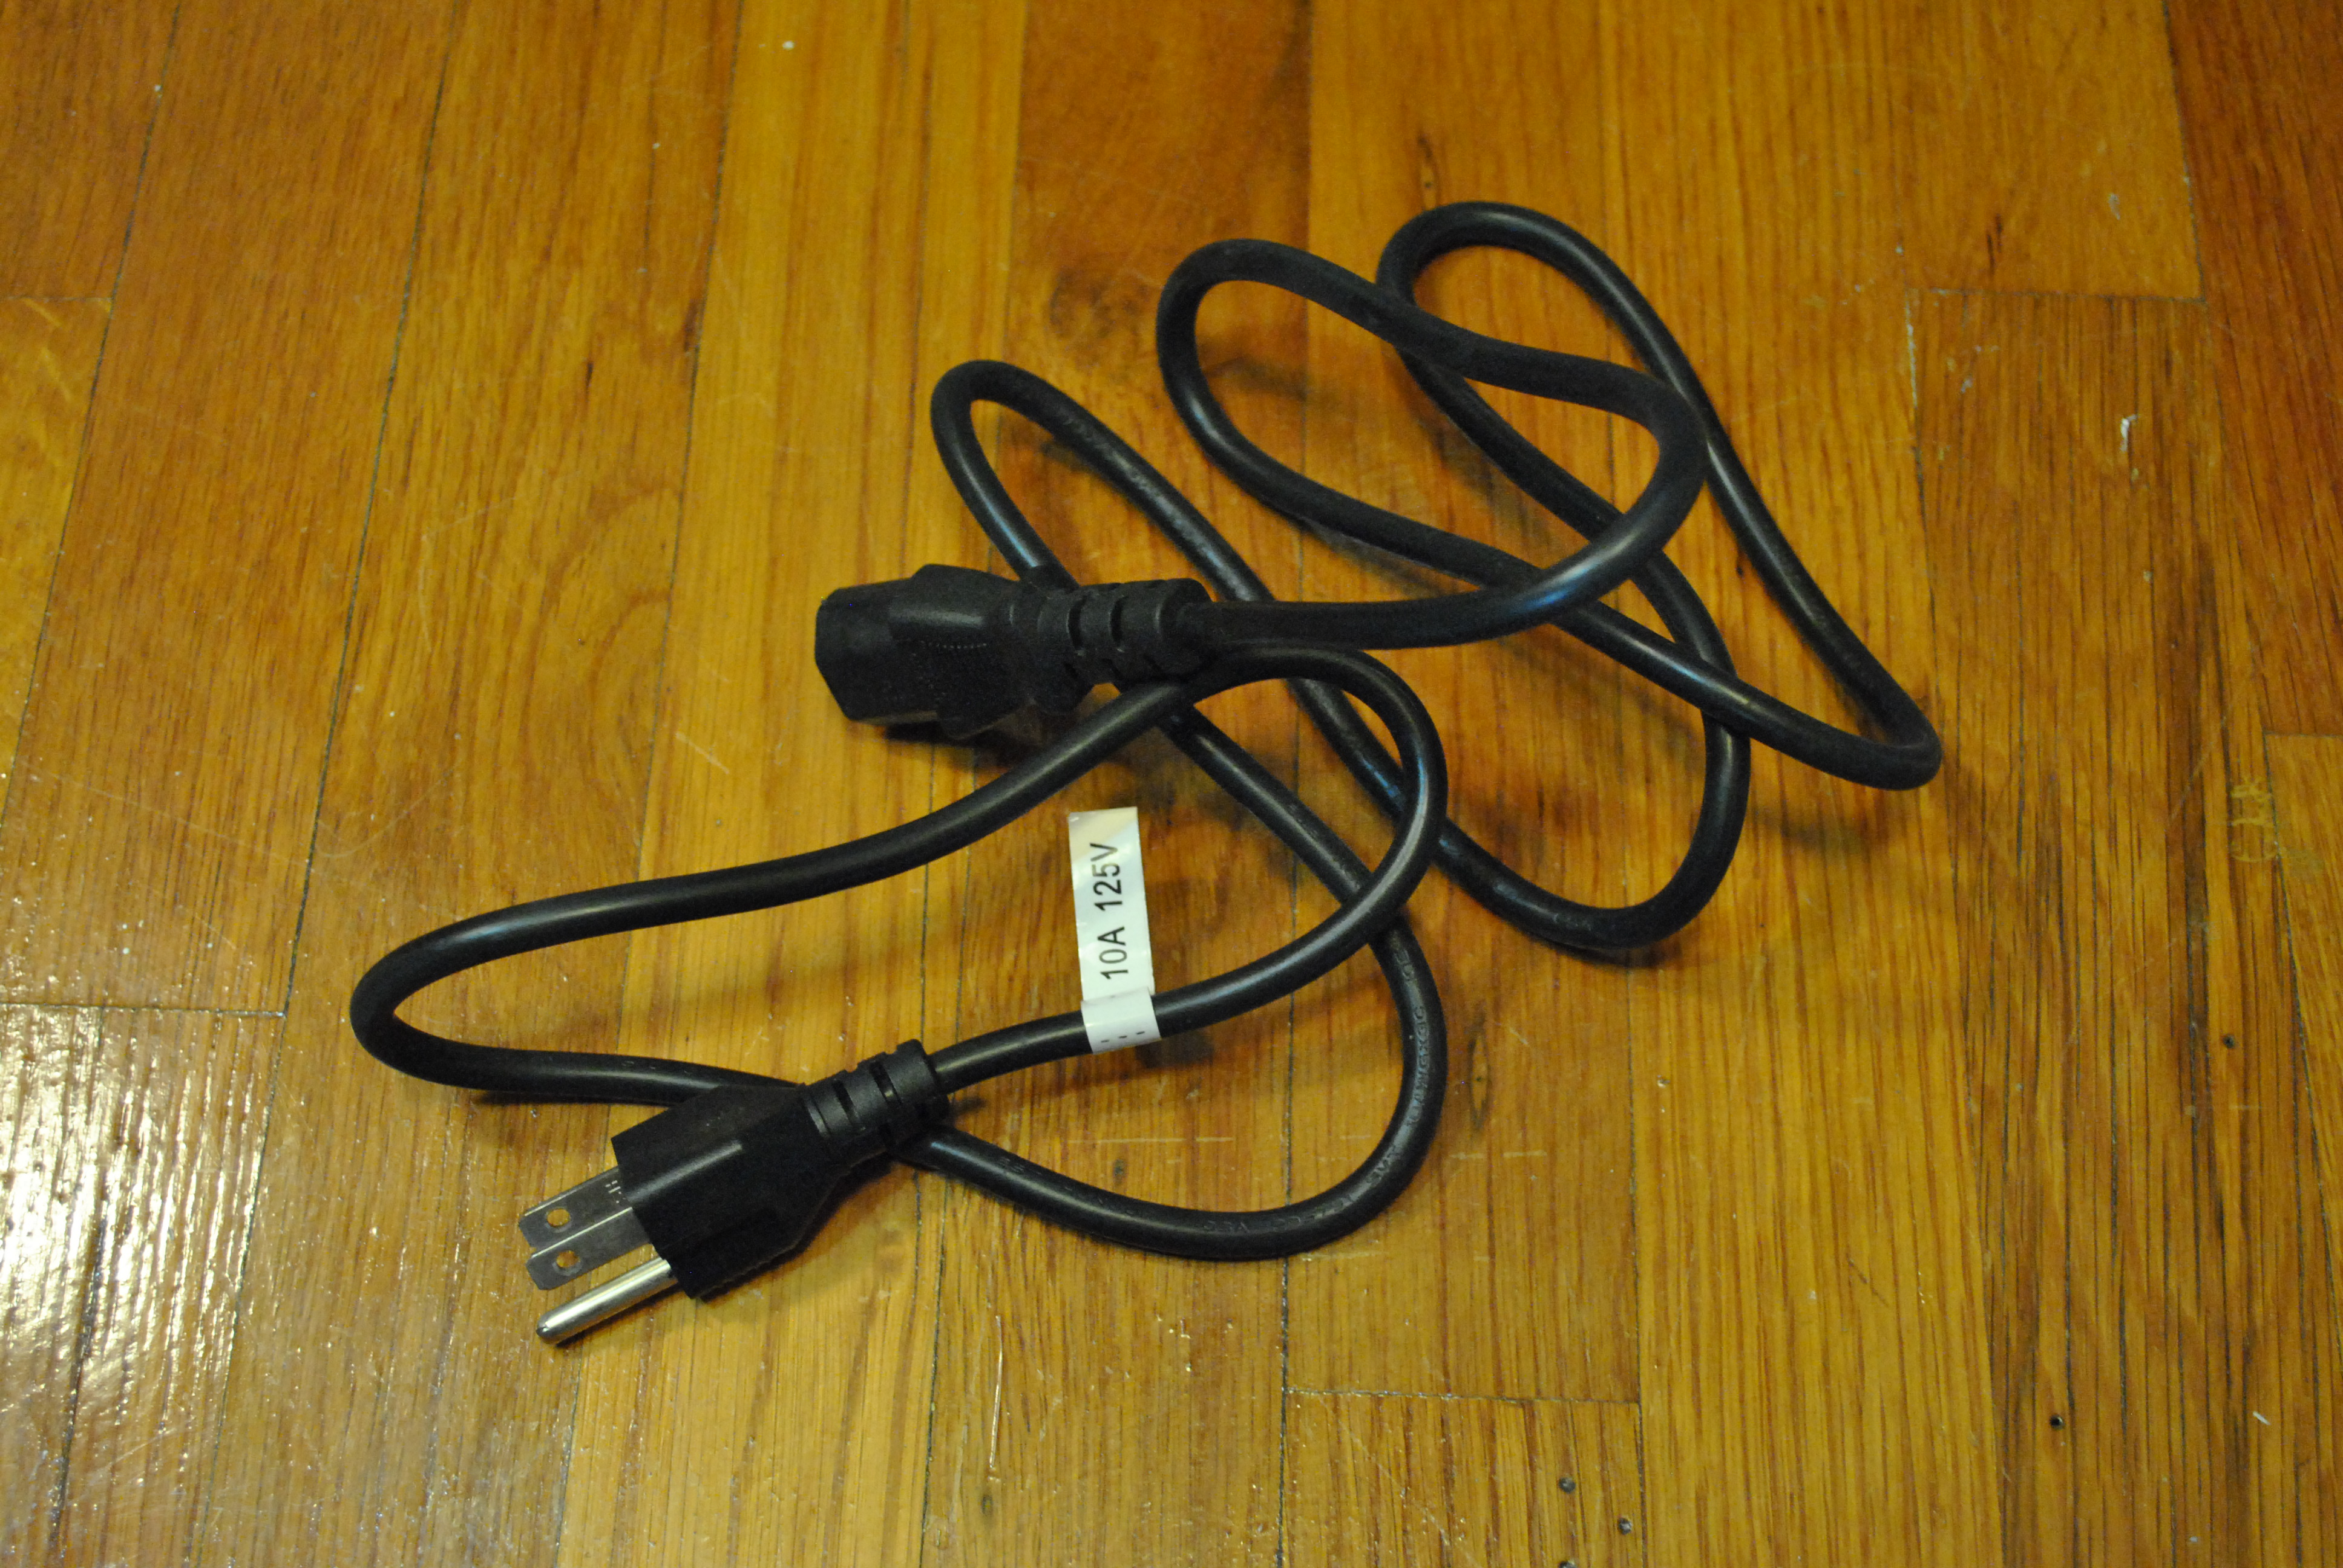
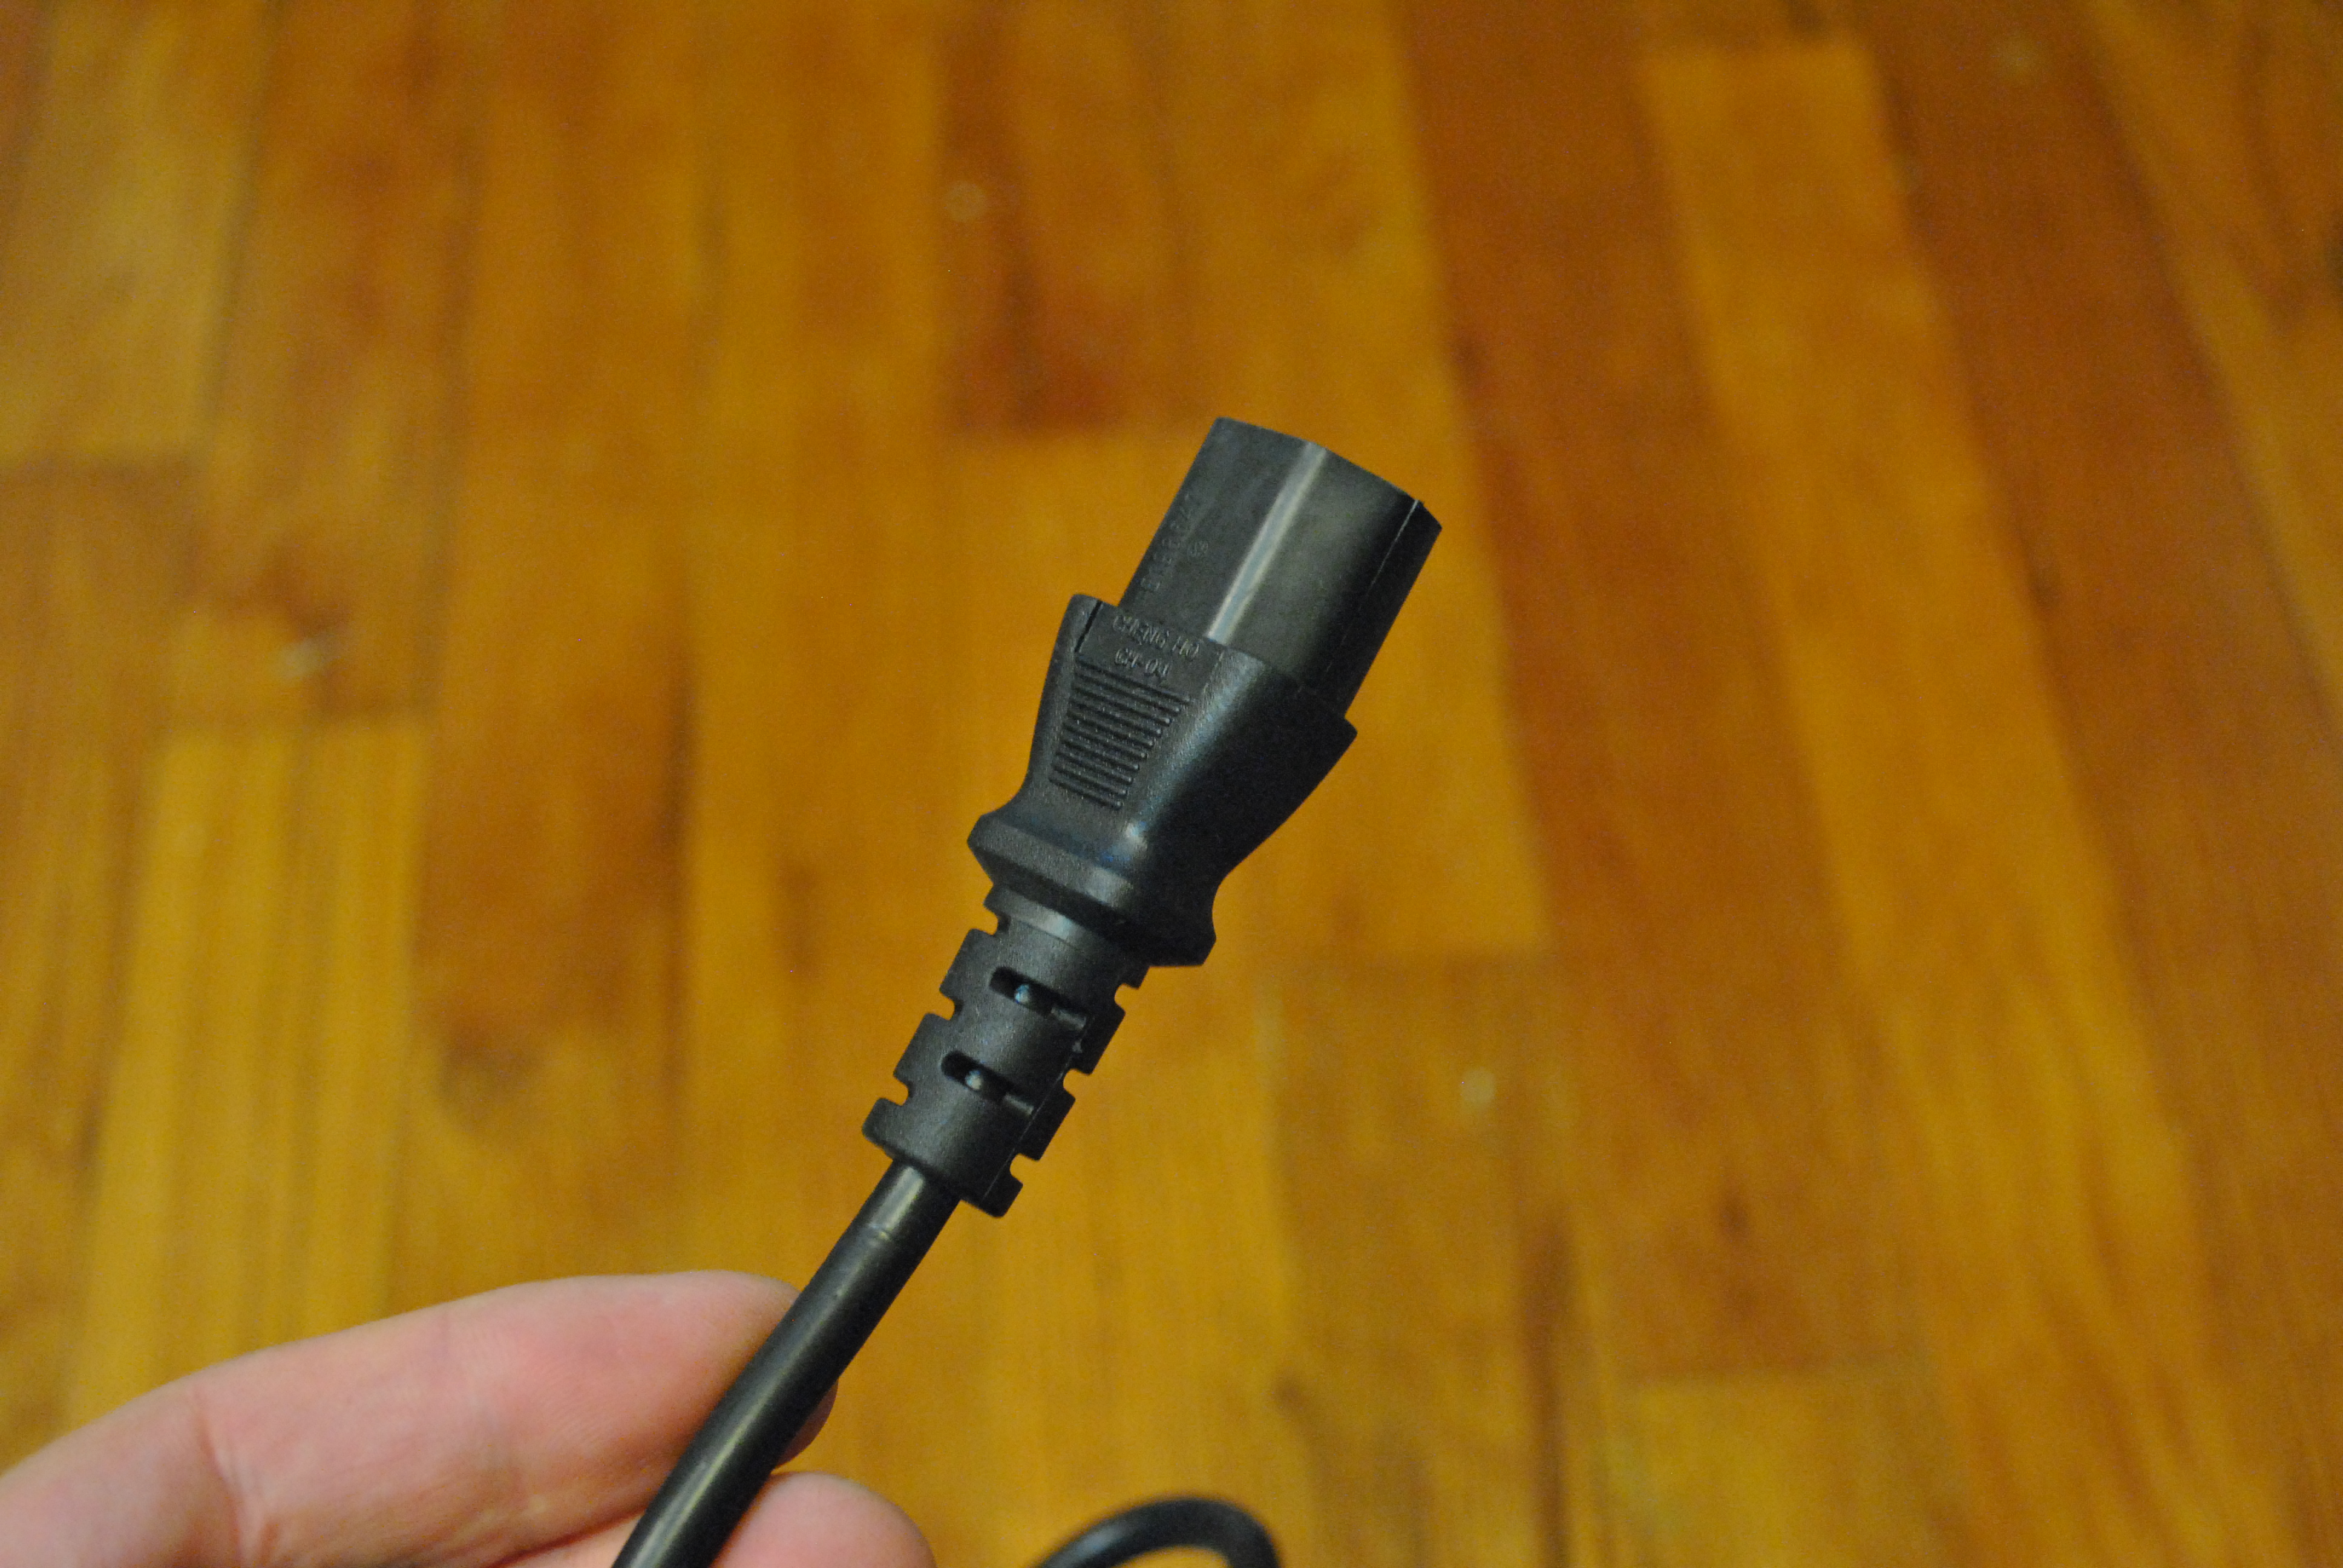
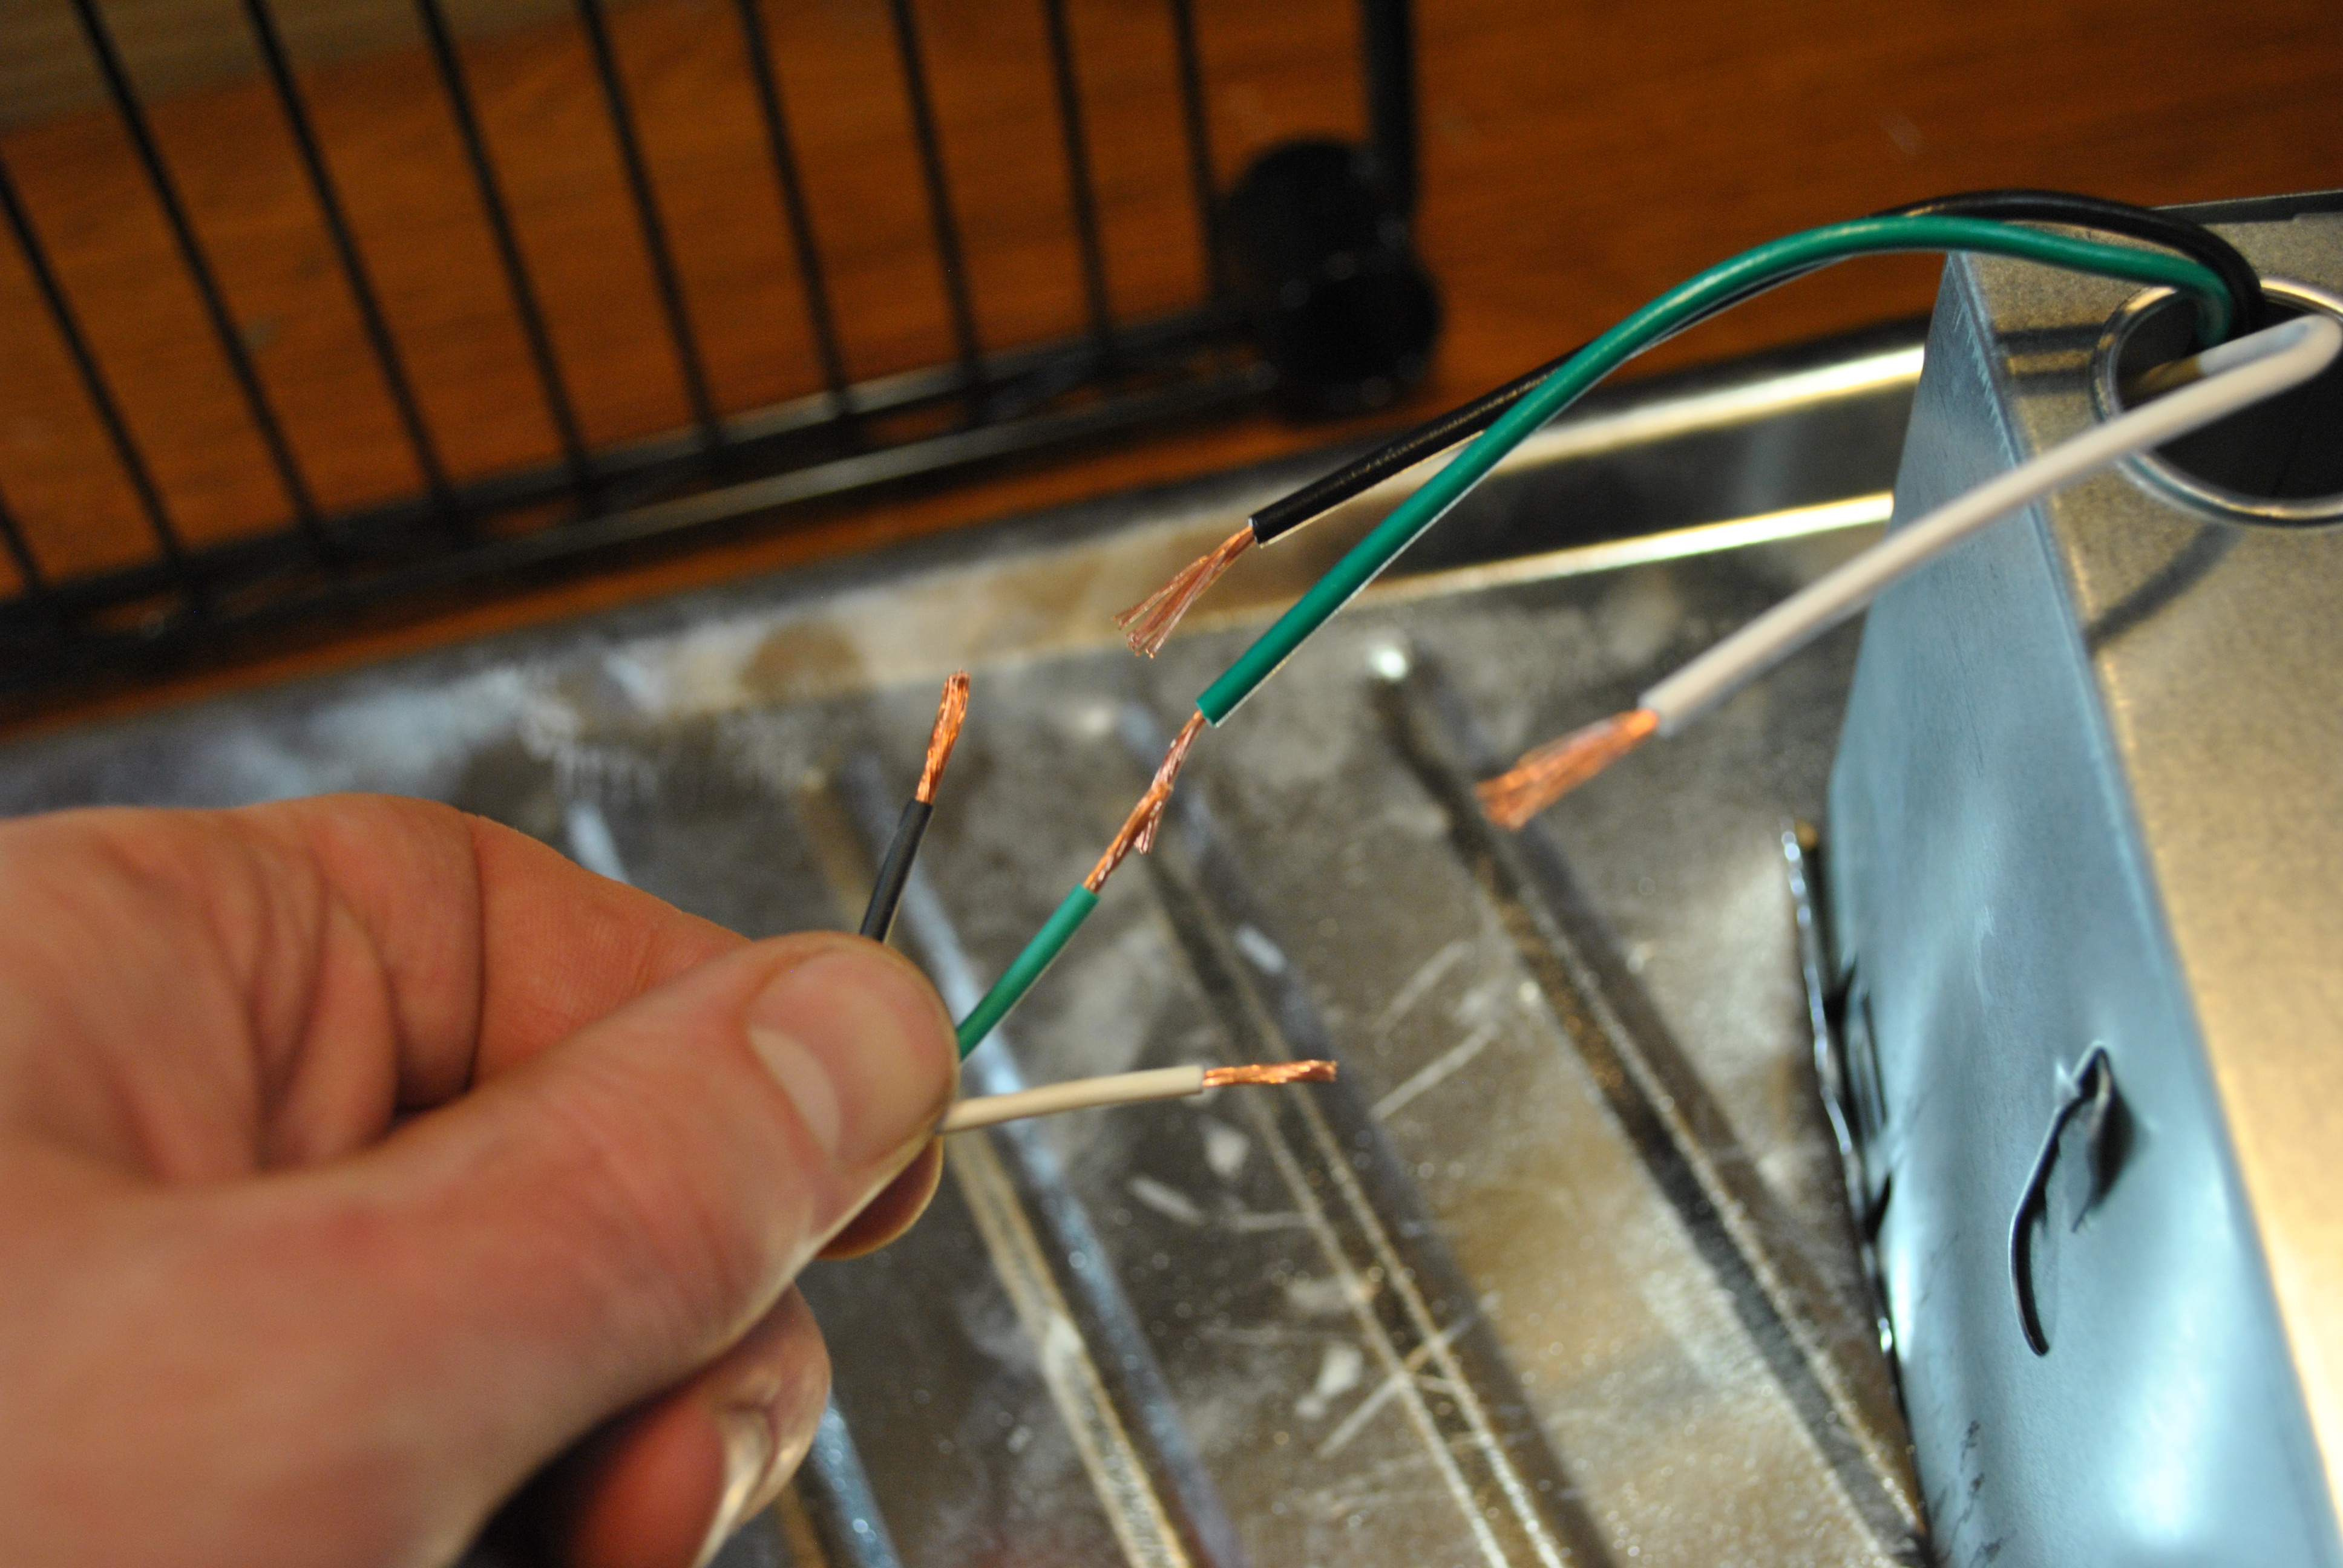
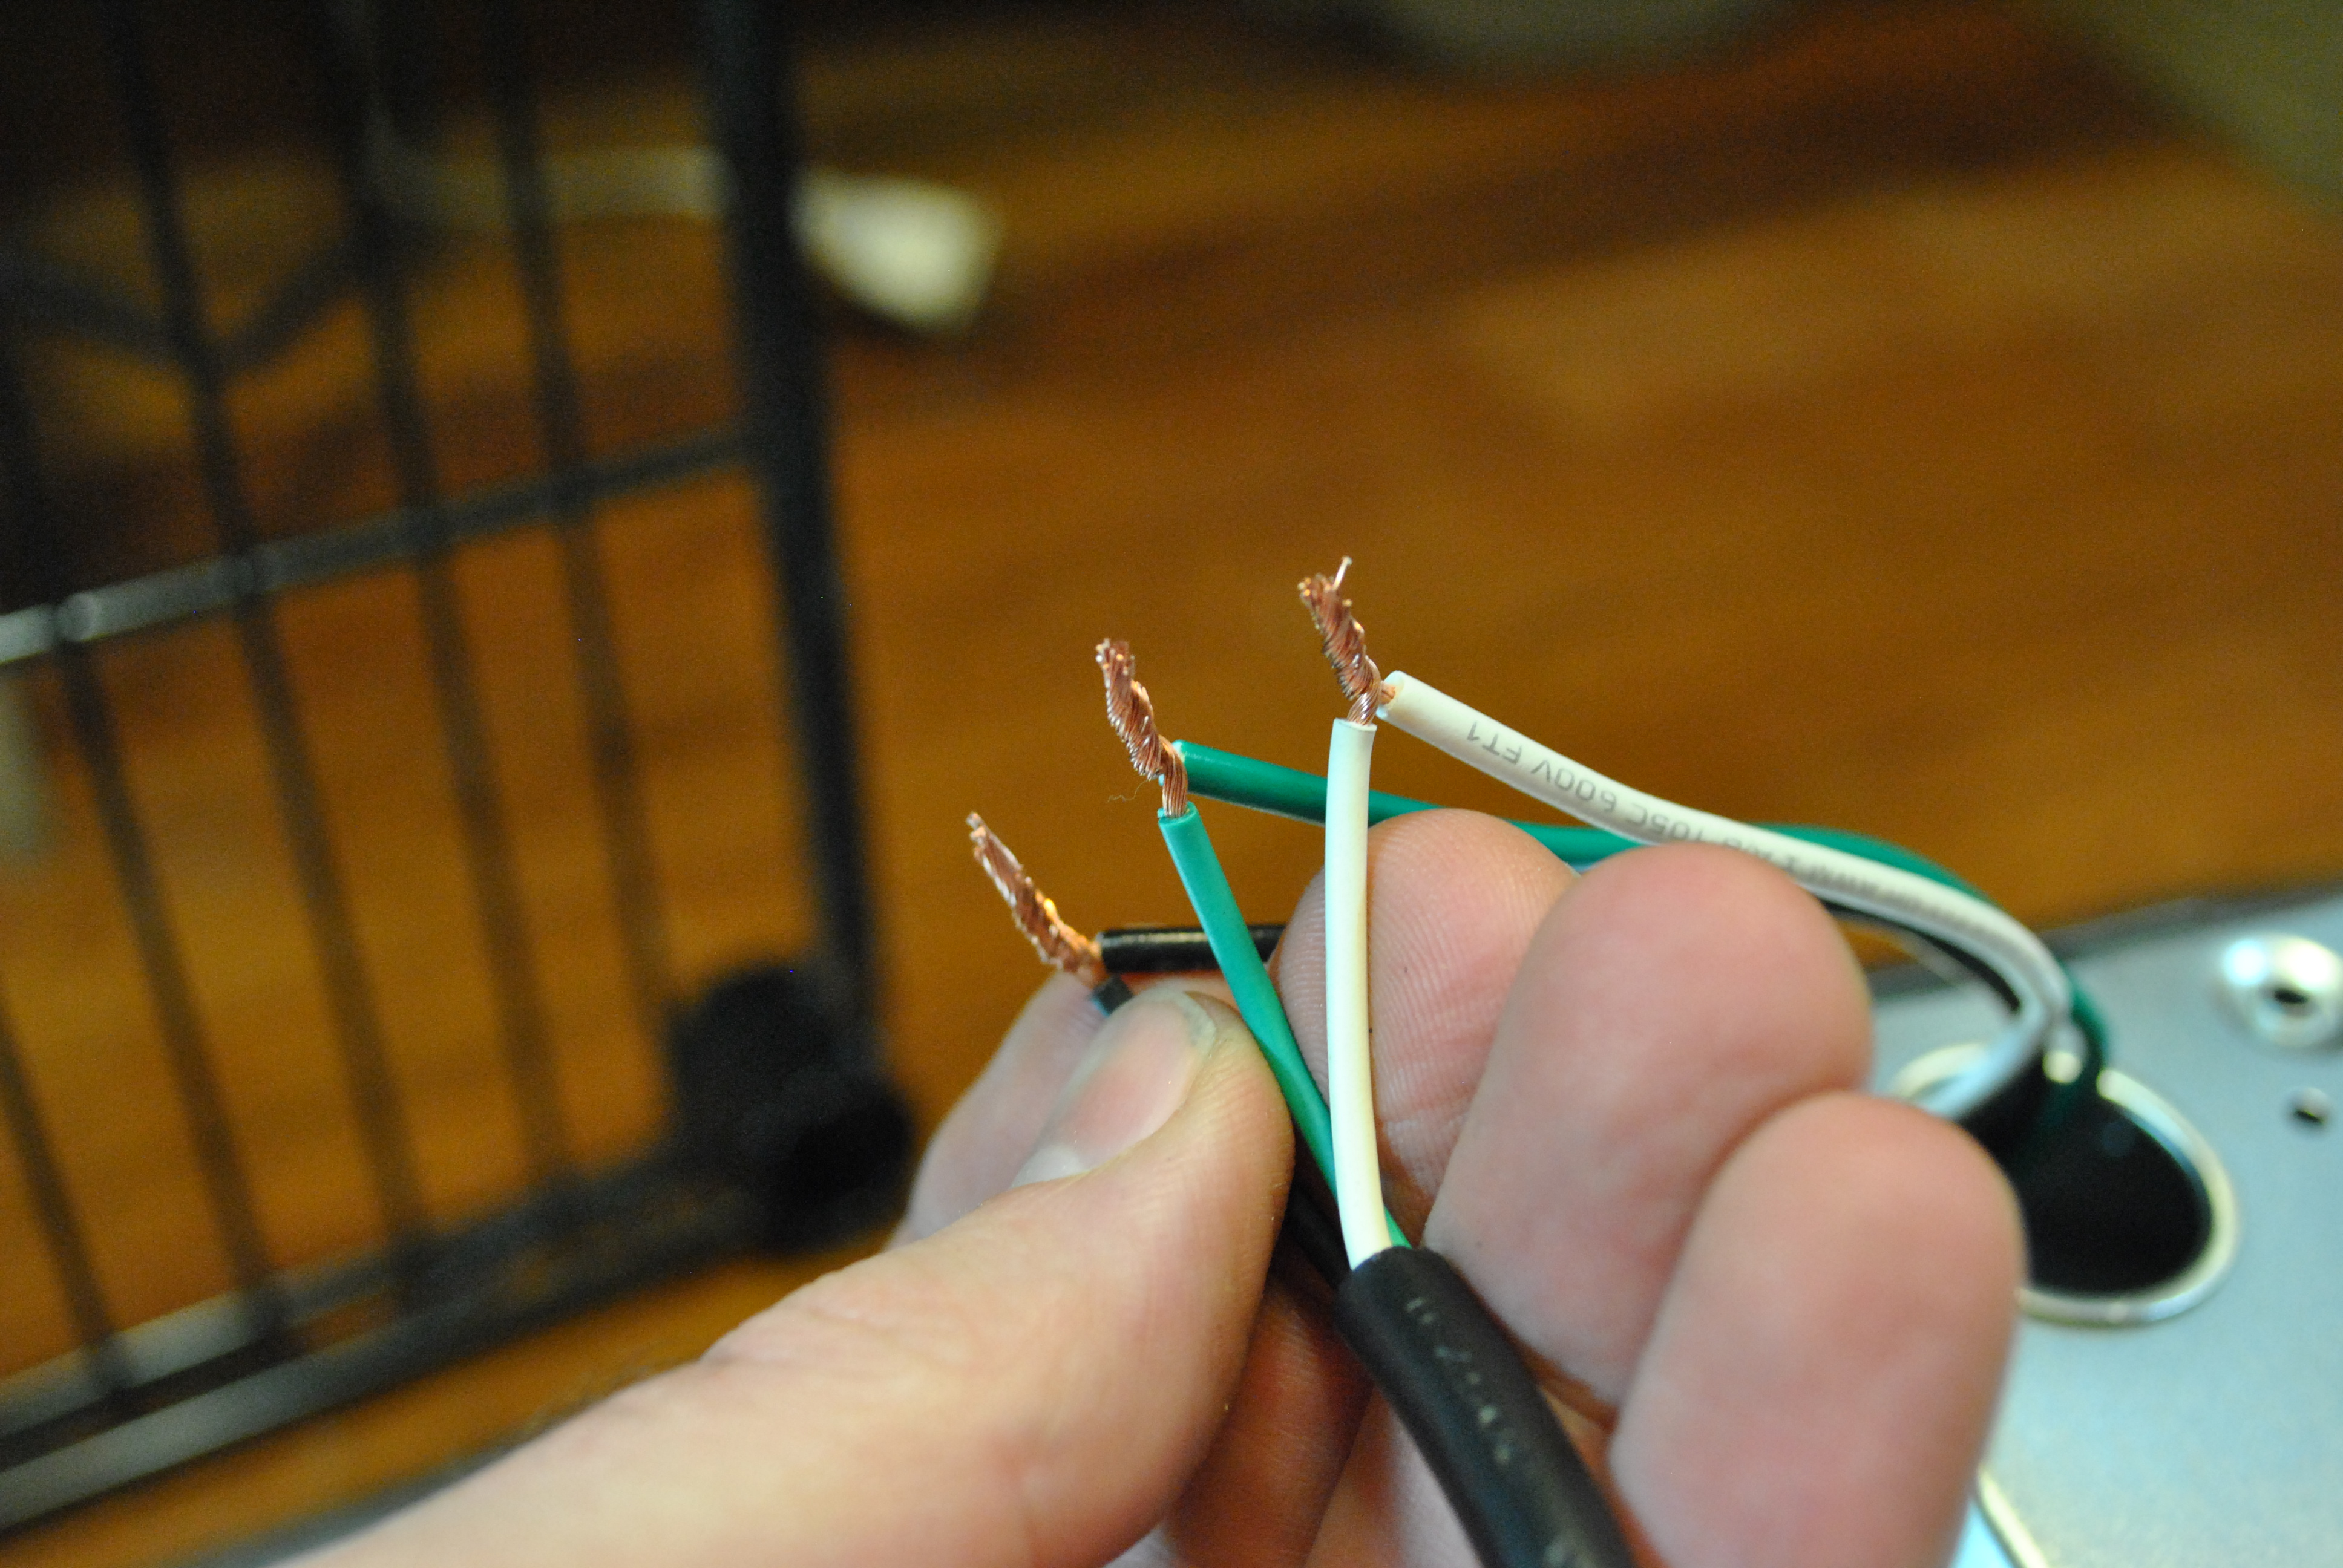
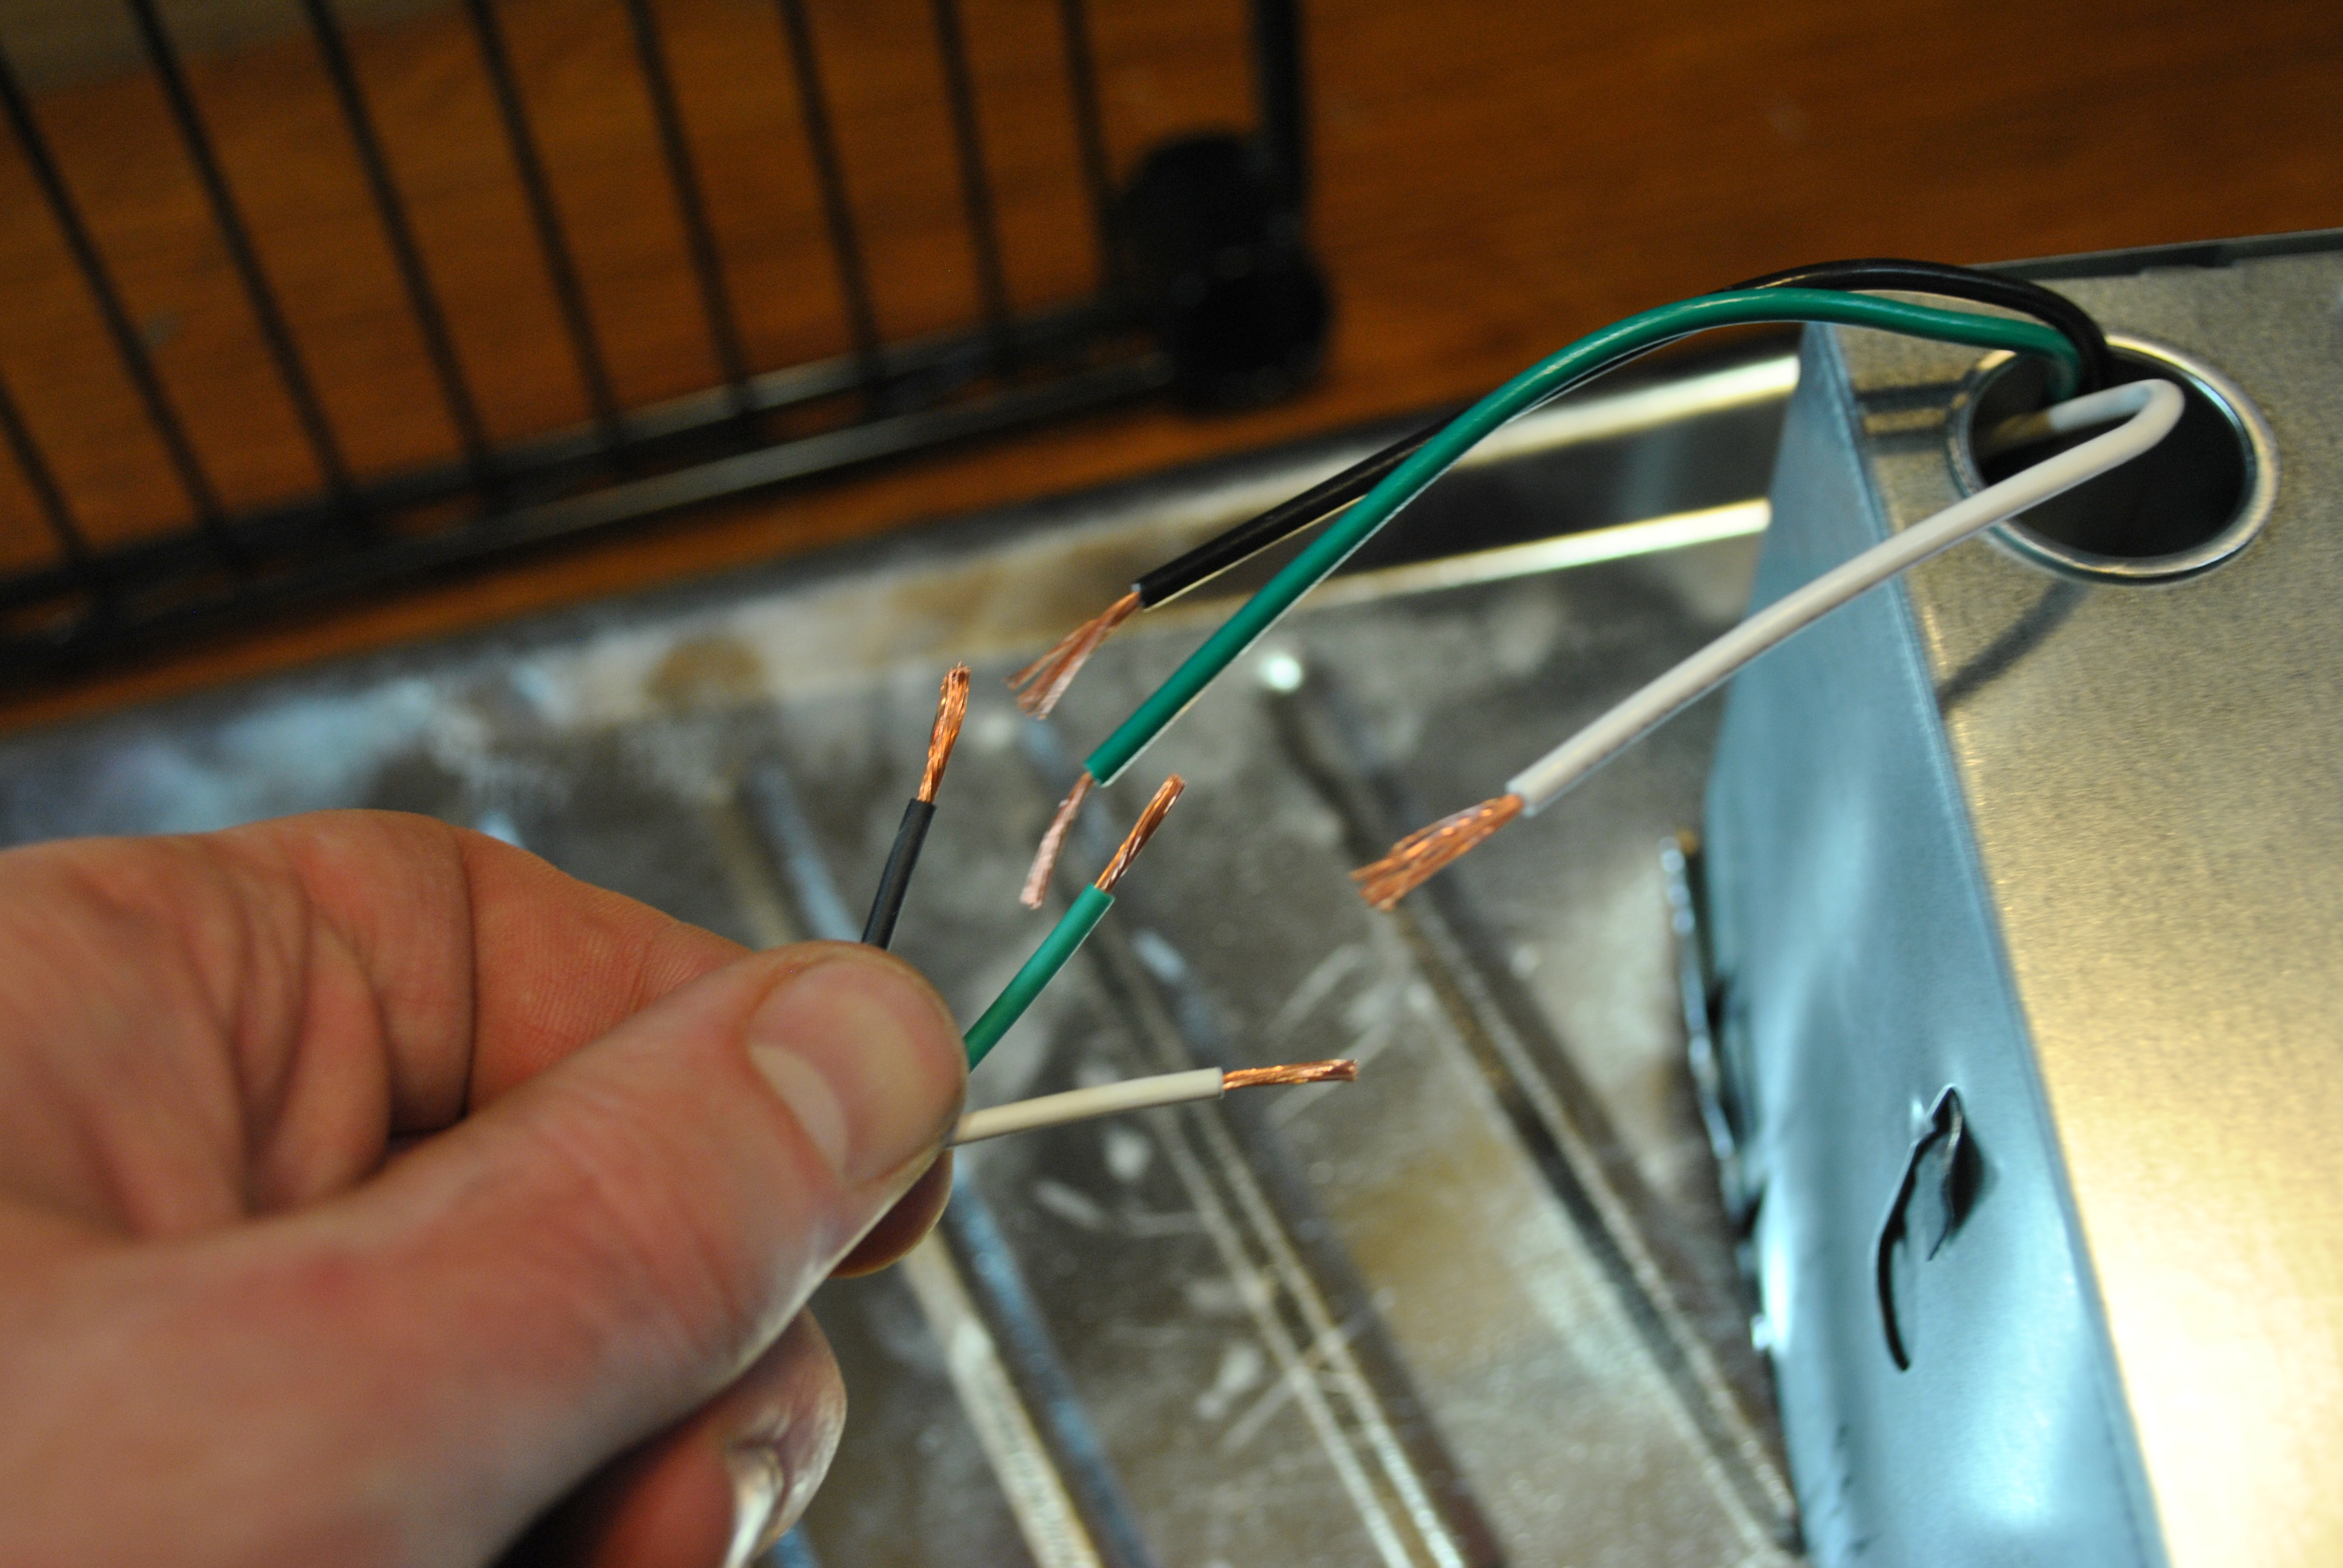
For a power cord I used an old computer power cord, Simply cut the end off and strip each of the three exposed wires about 3/4 of an inch down.
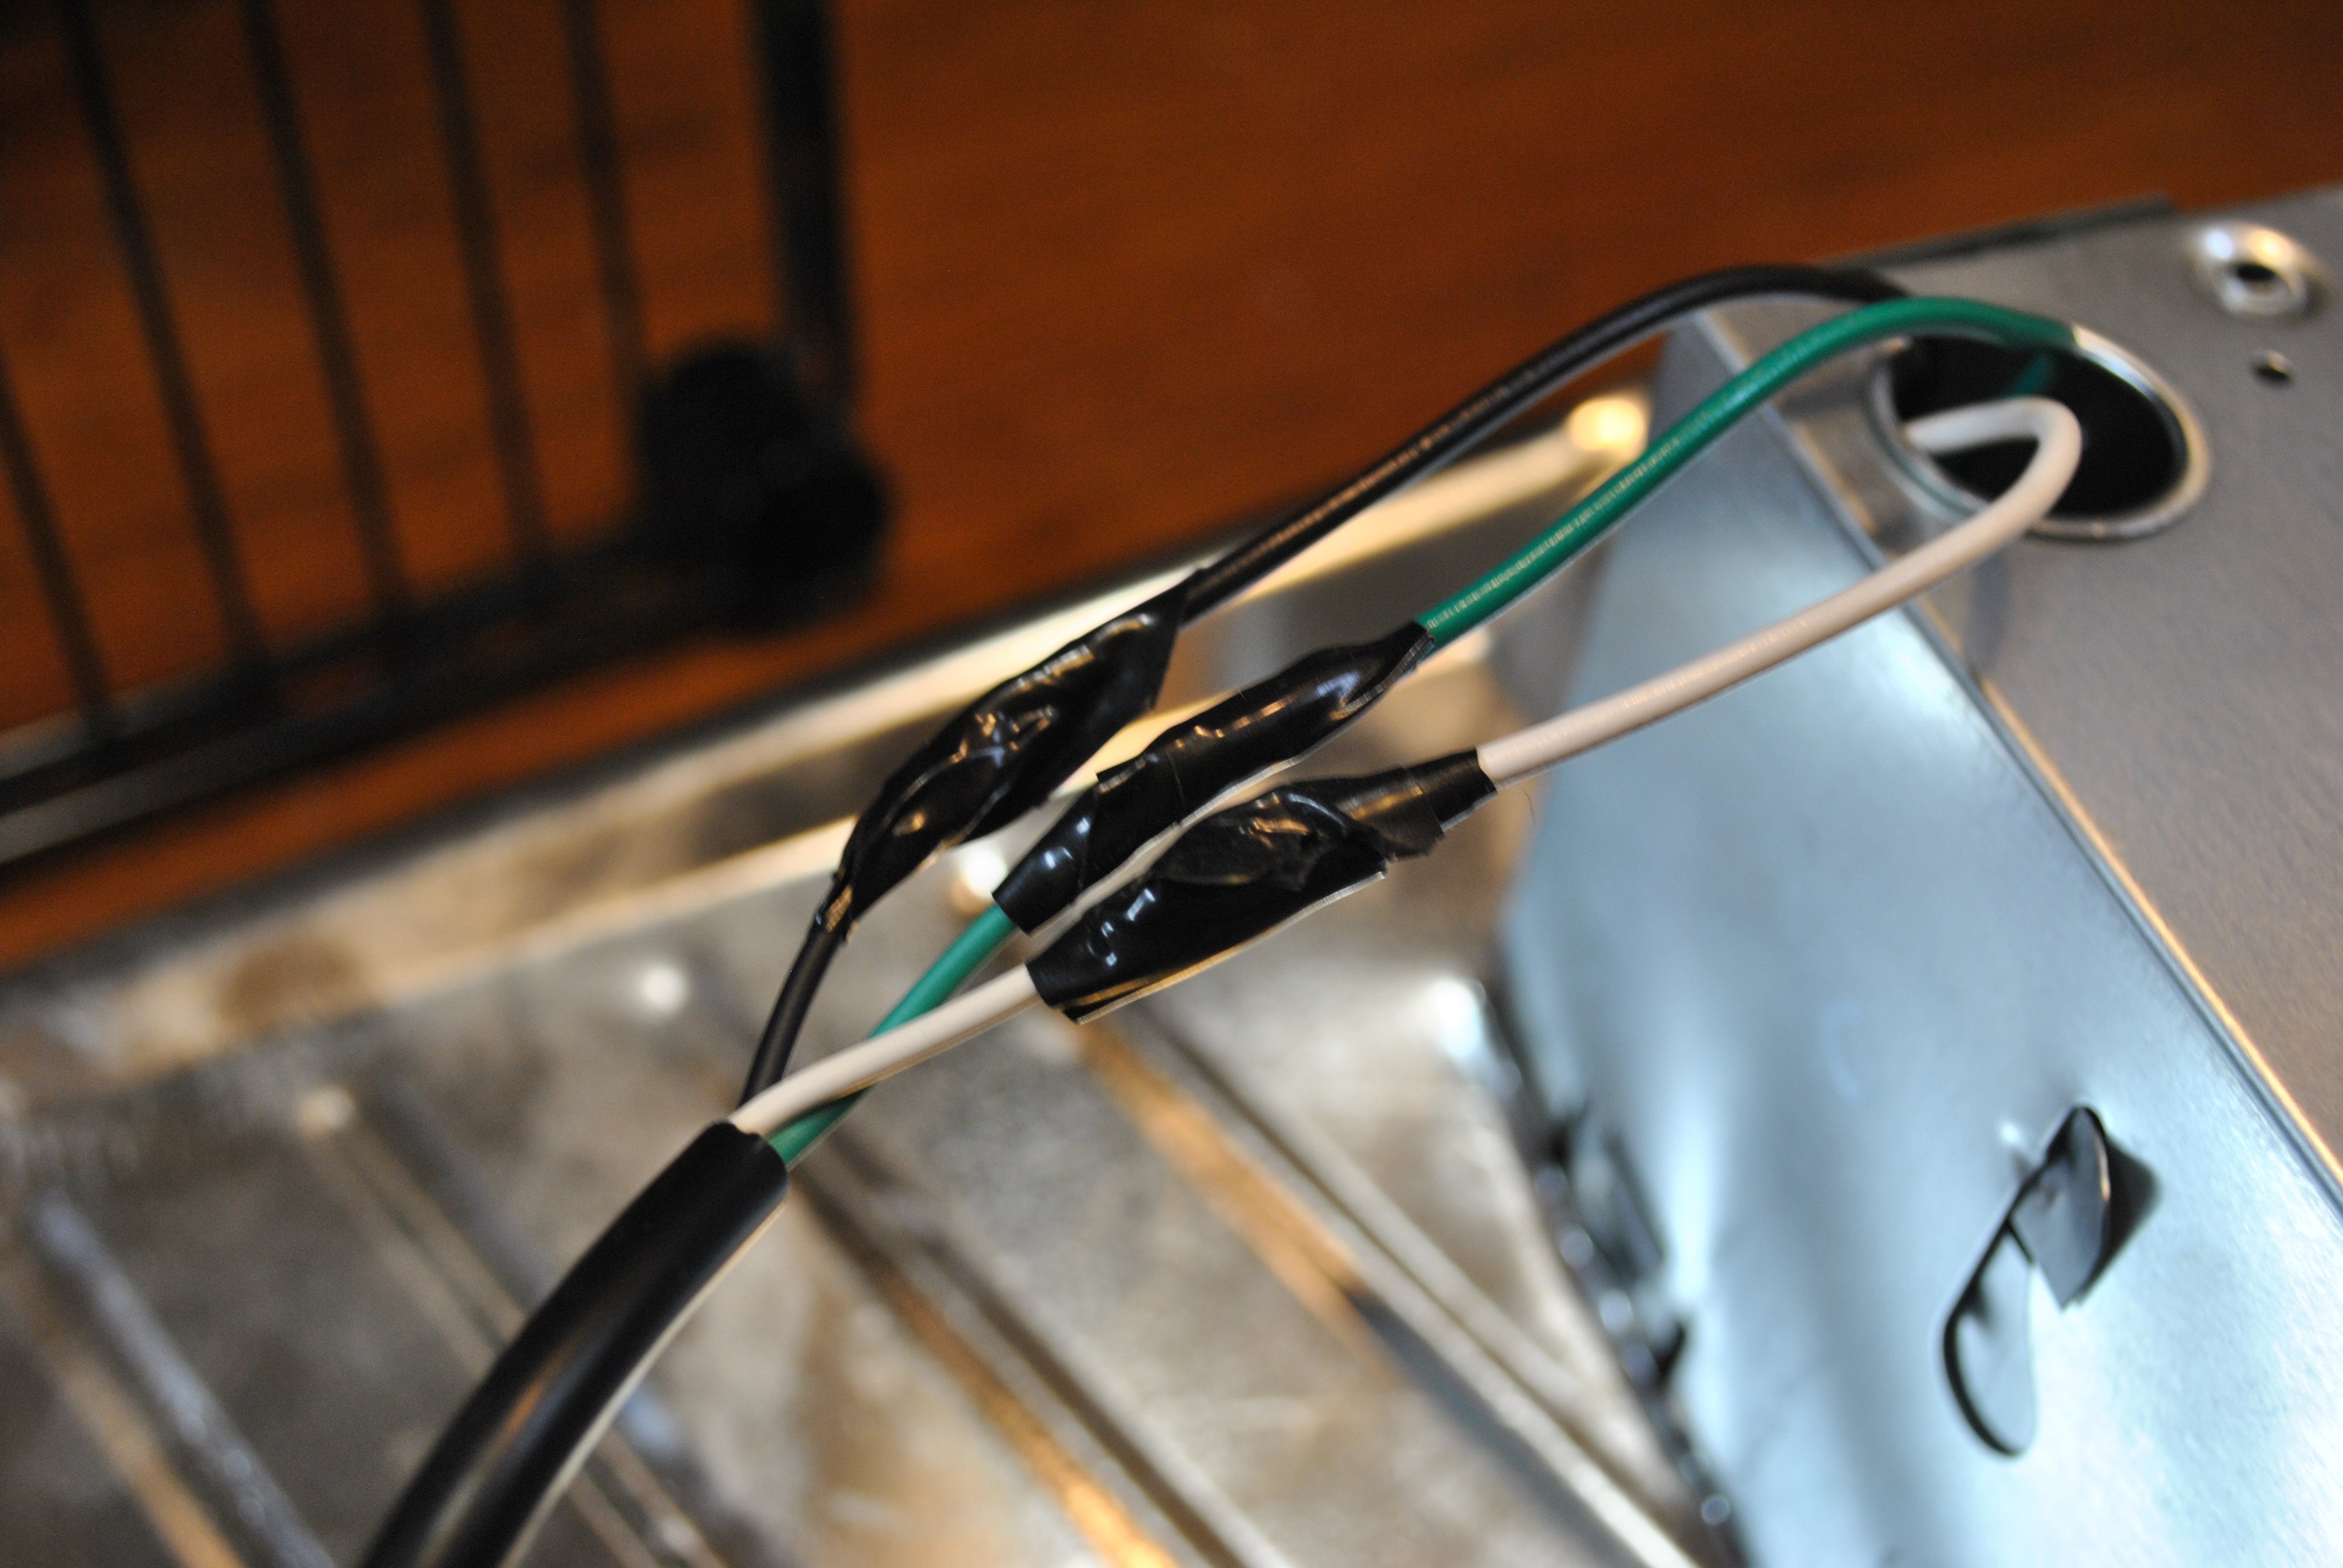
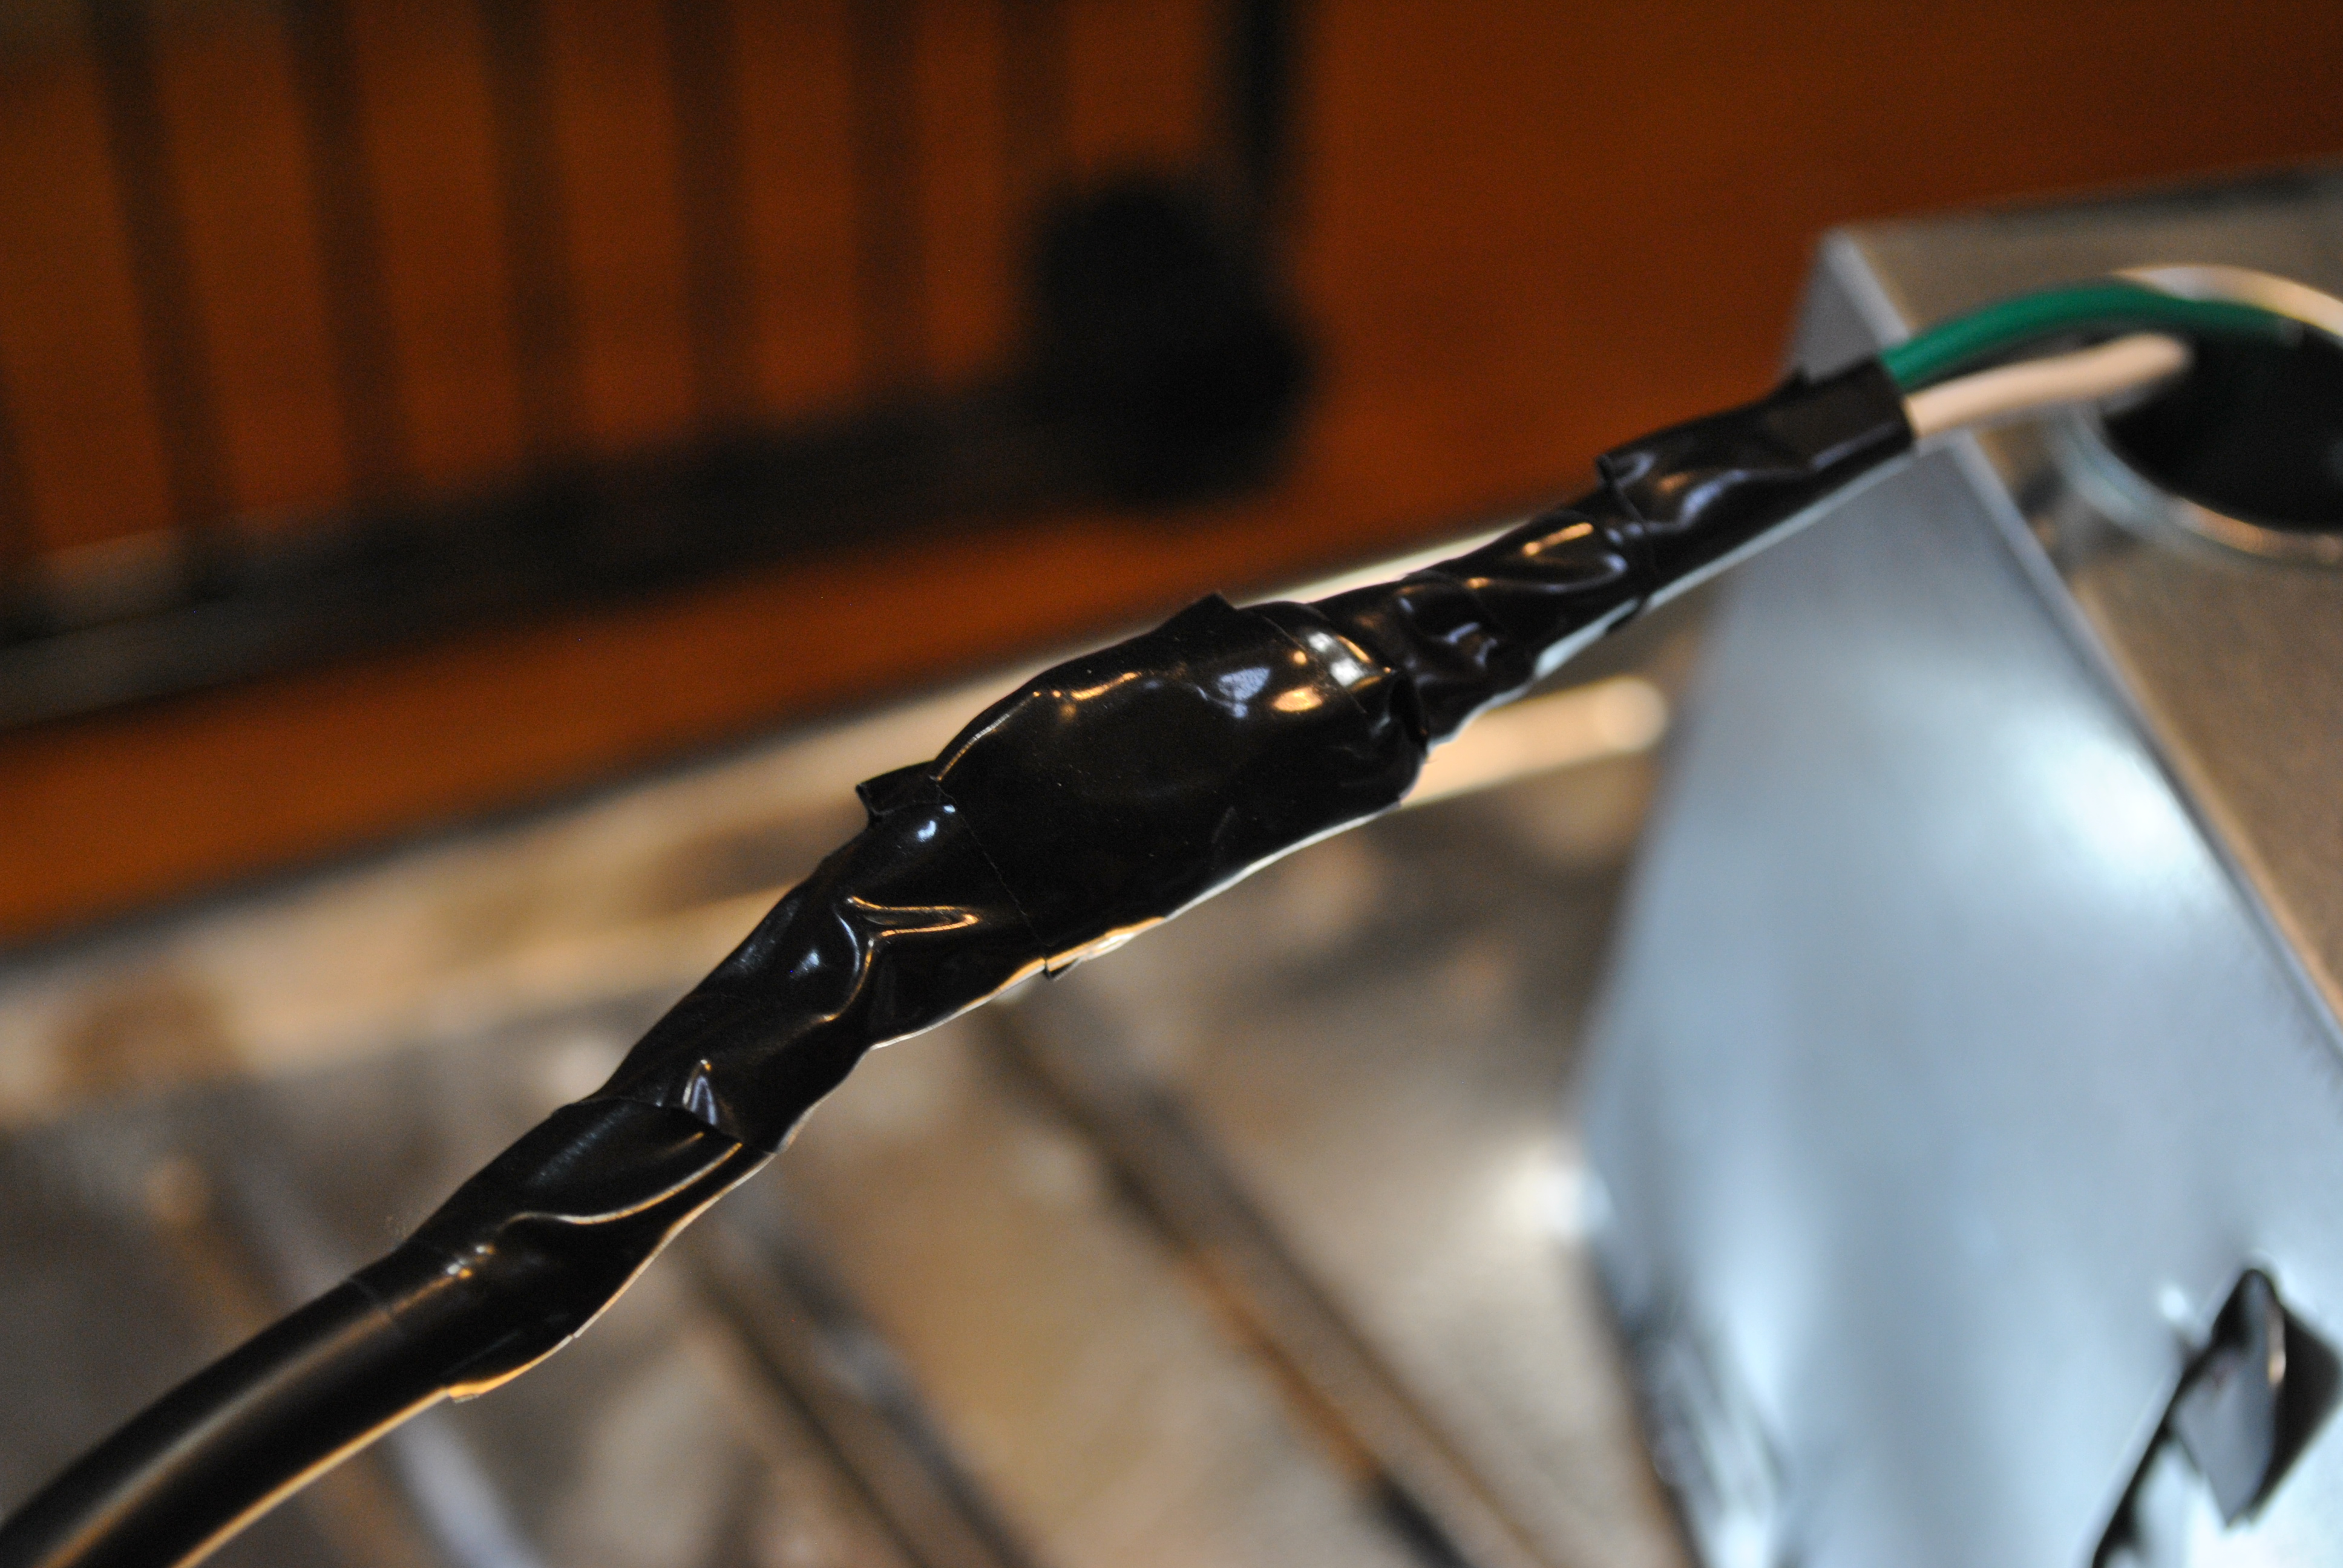
Match white to white, green to green, and black to black. Use wire nuts or electrical tape to carefully wrap each wire individually before wrapping the entire mess.
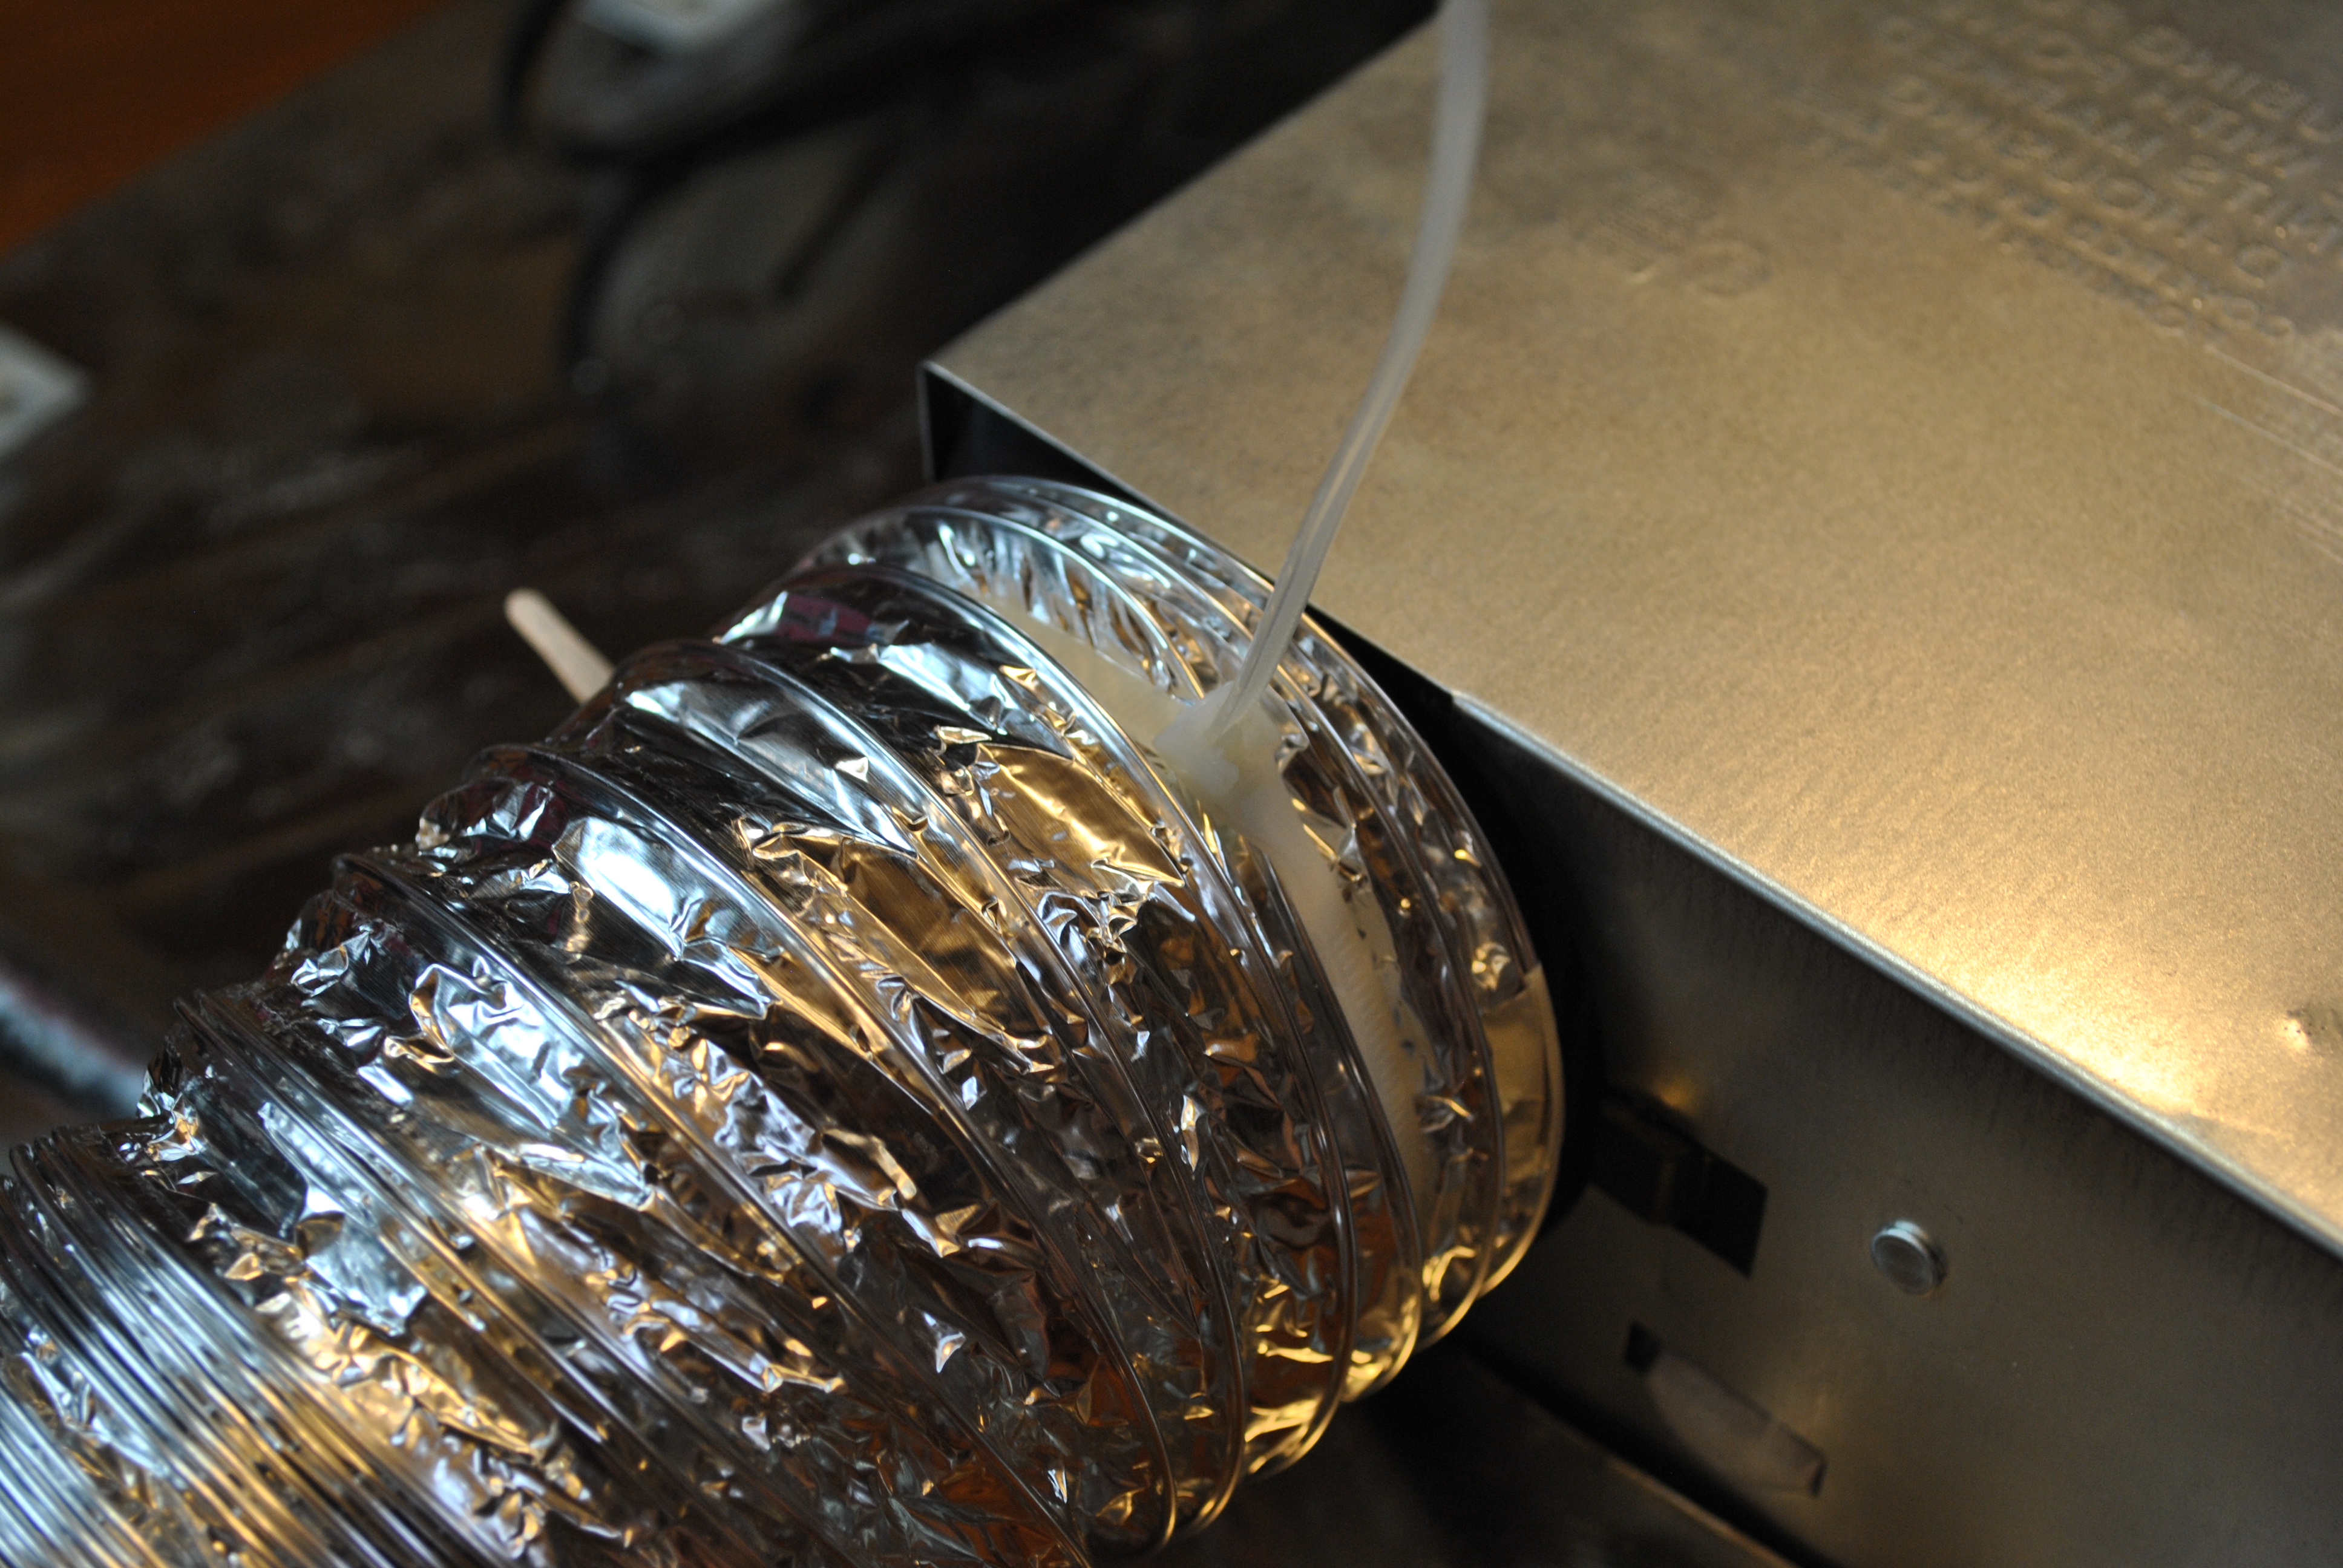
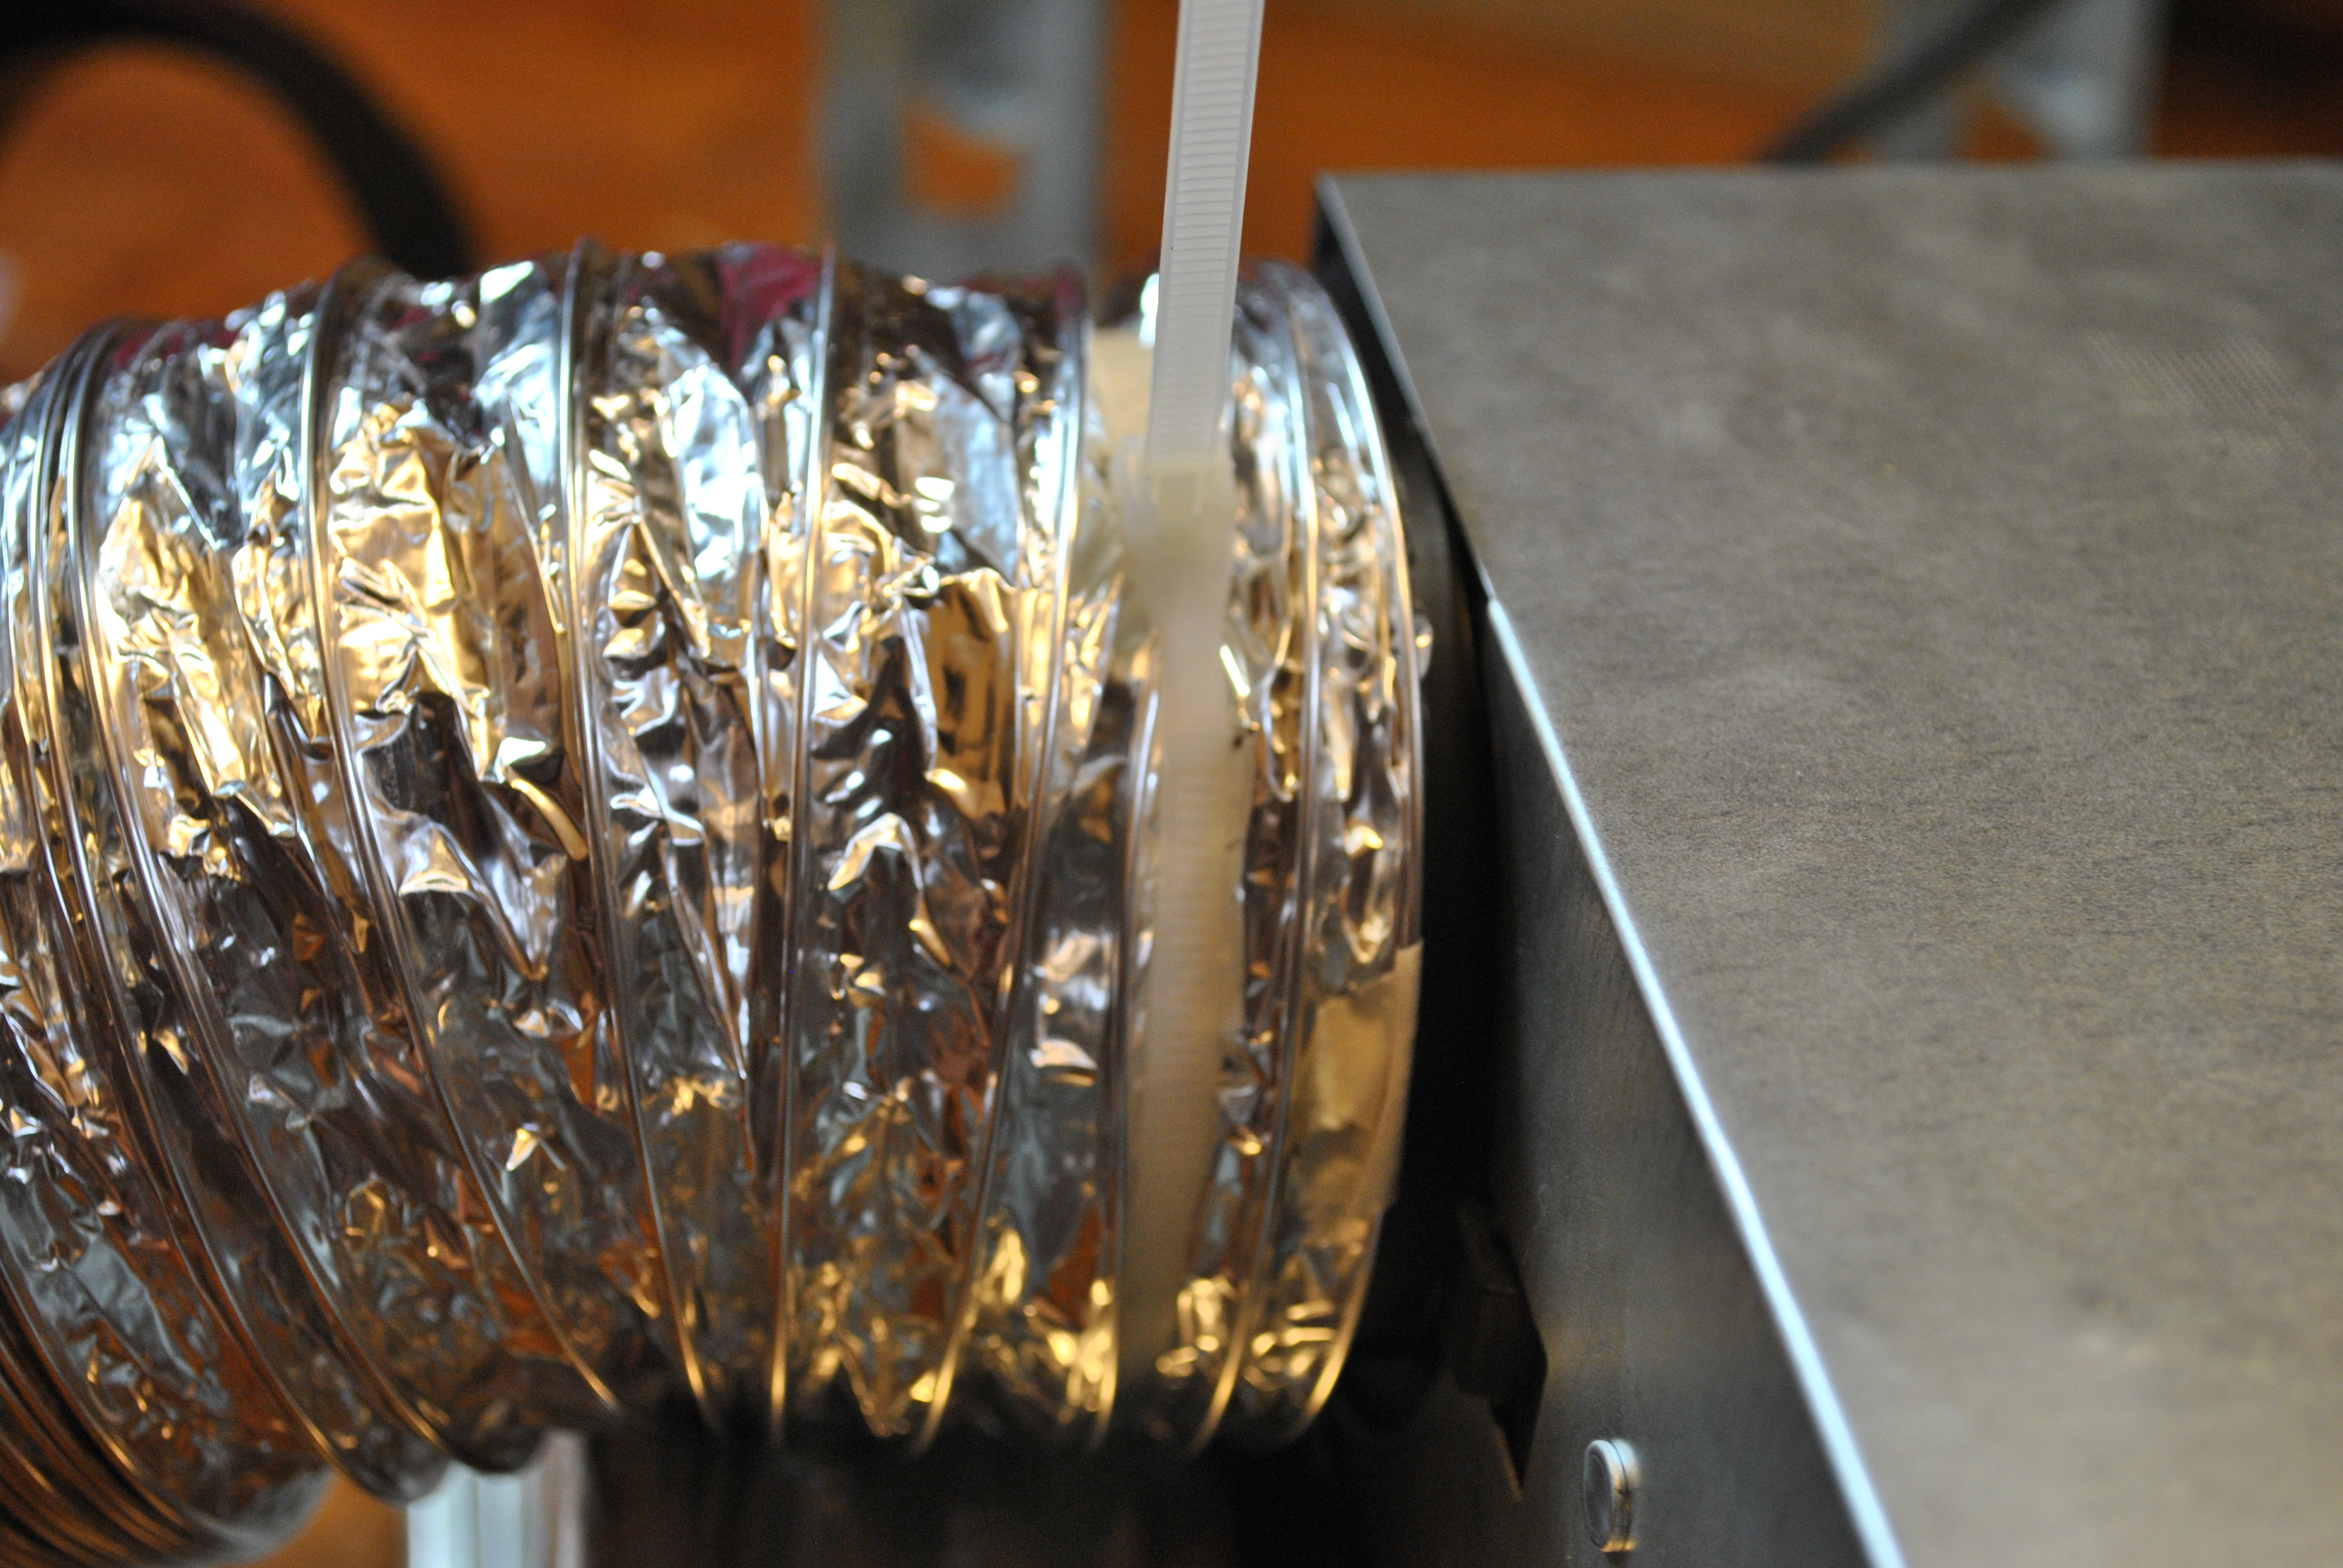
Attach the duct work to the fan, I used a zip tie with a small metal screw to secure it strongly to the black flange that sticks out from the fan.
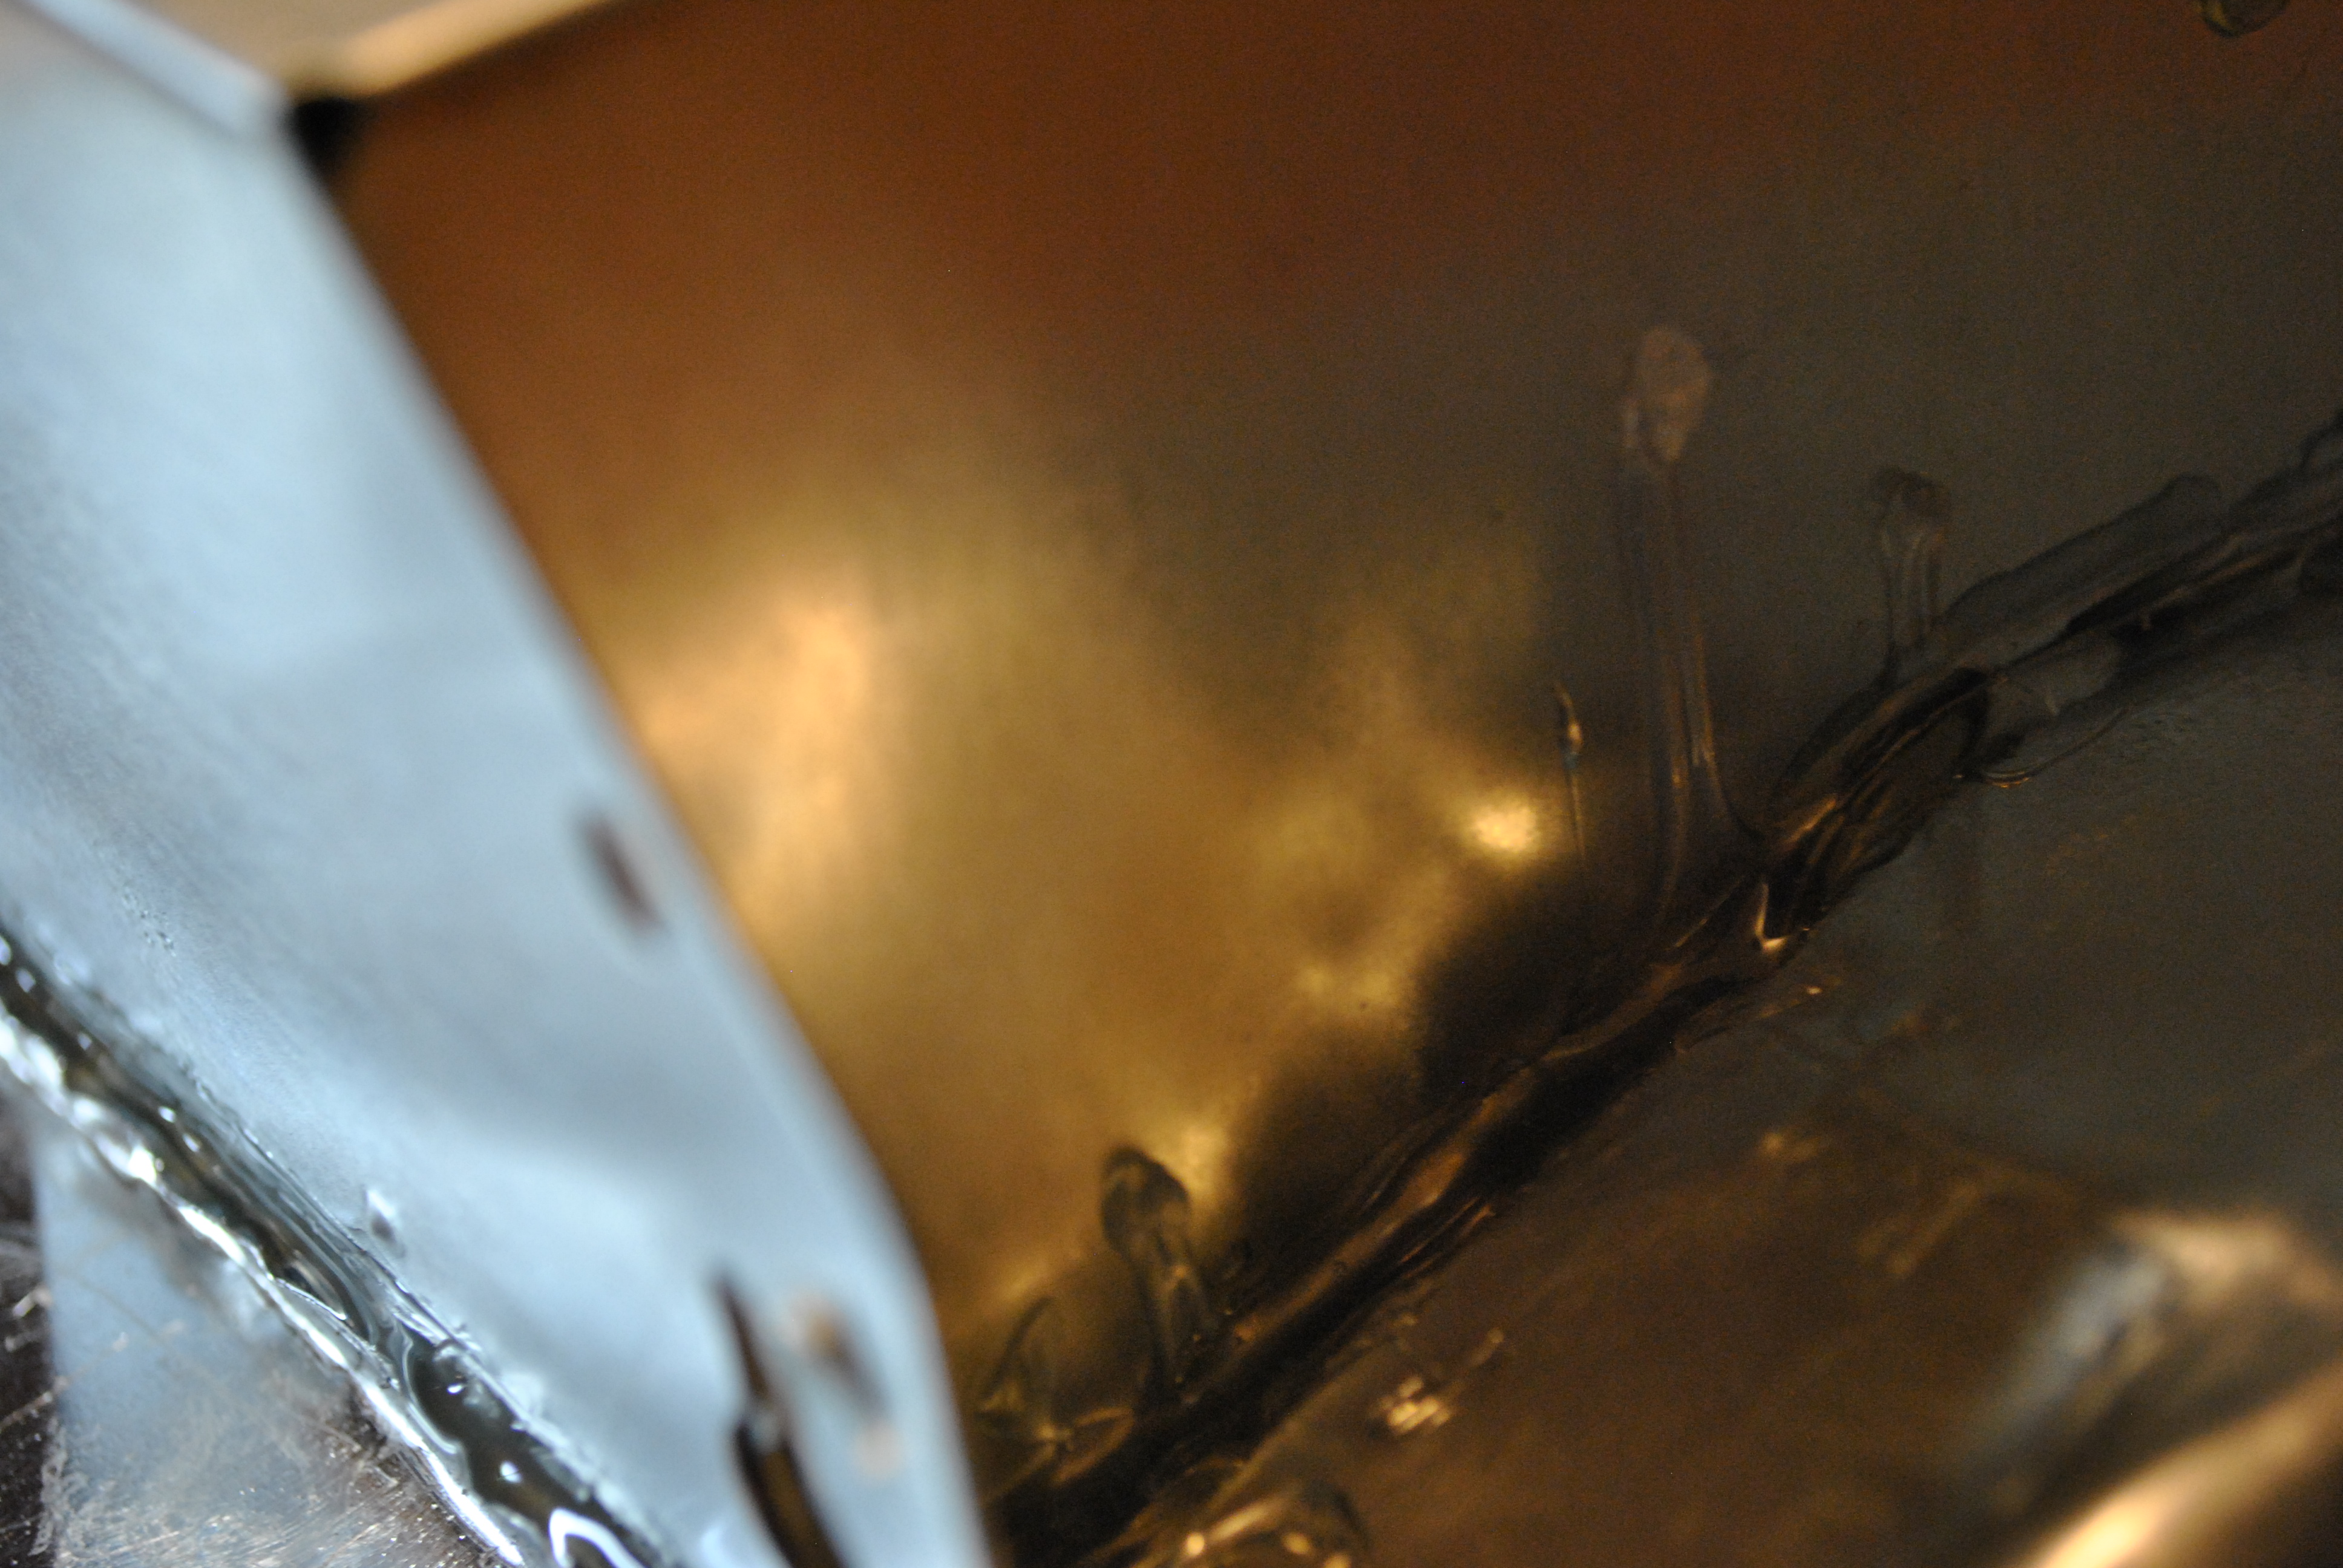
Some pictures of the glue job, remember this isn’t a fume hood, it will not have to catch every single vapor from your super toxic chemistry experiments, it just has to vent hot air from the kiln out your window. That being said, the tighter a seal you can get the better it works. Don’t be shy with the glue/tape to close up holes.
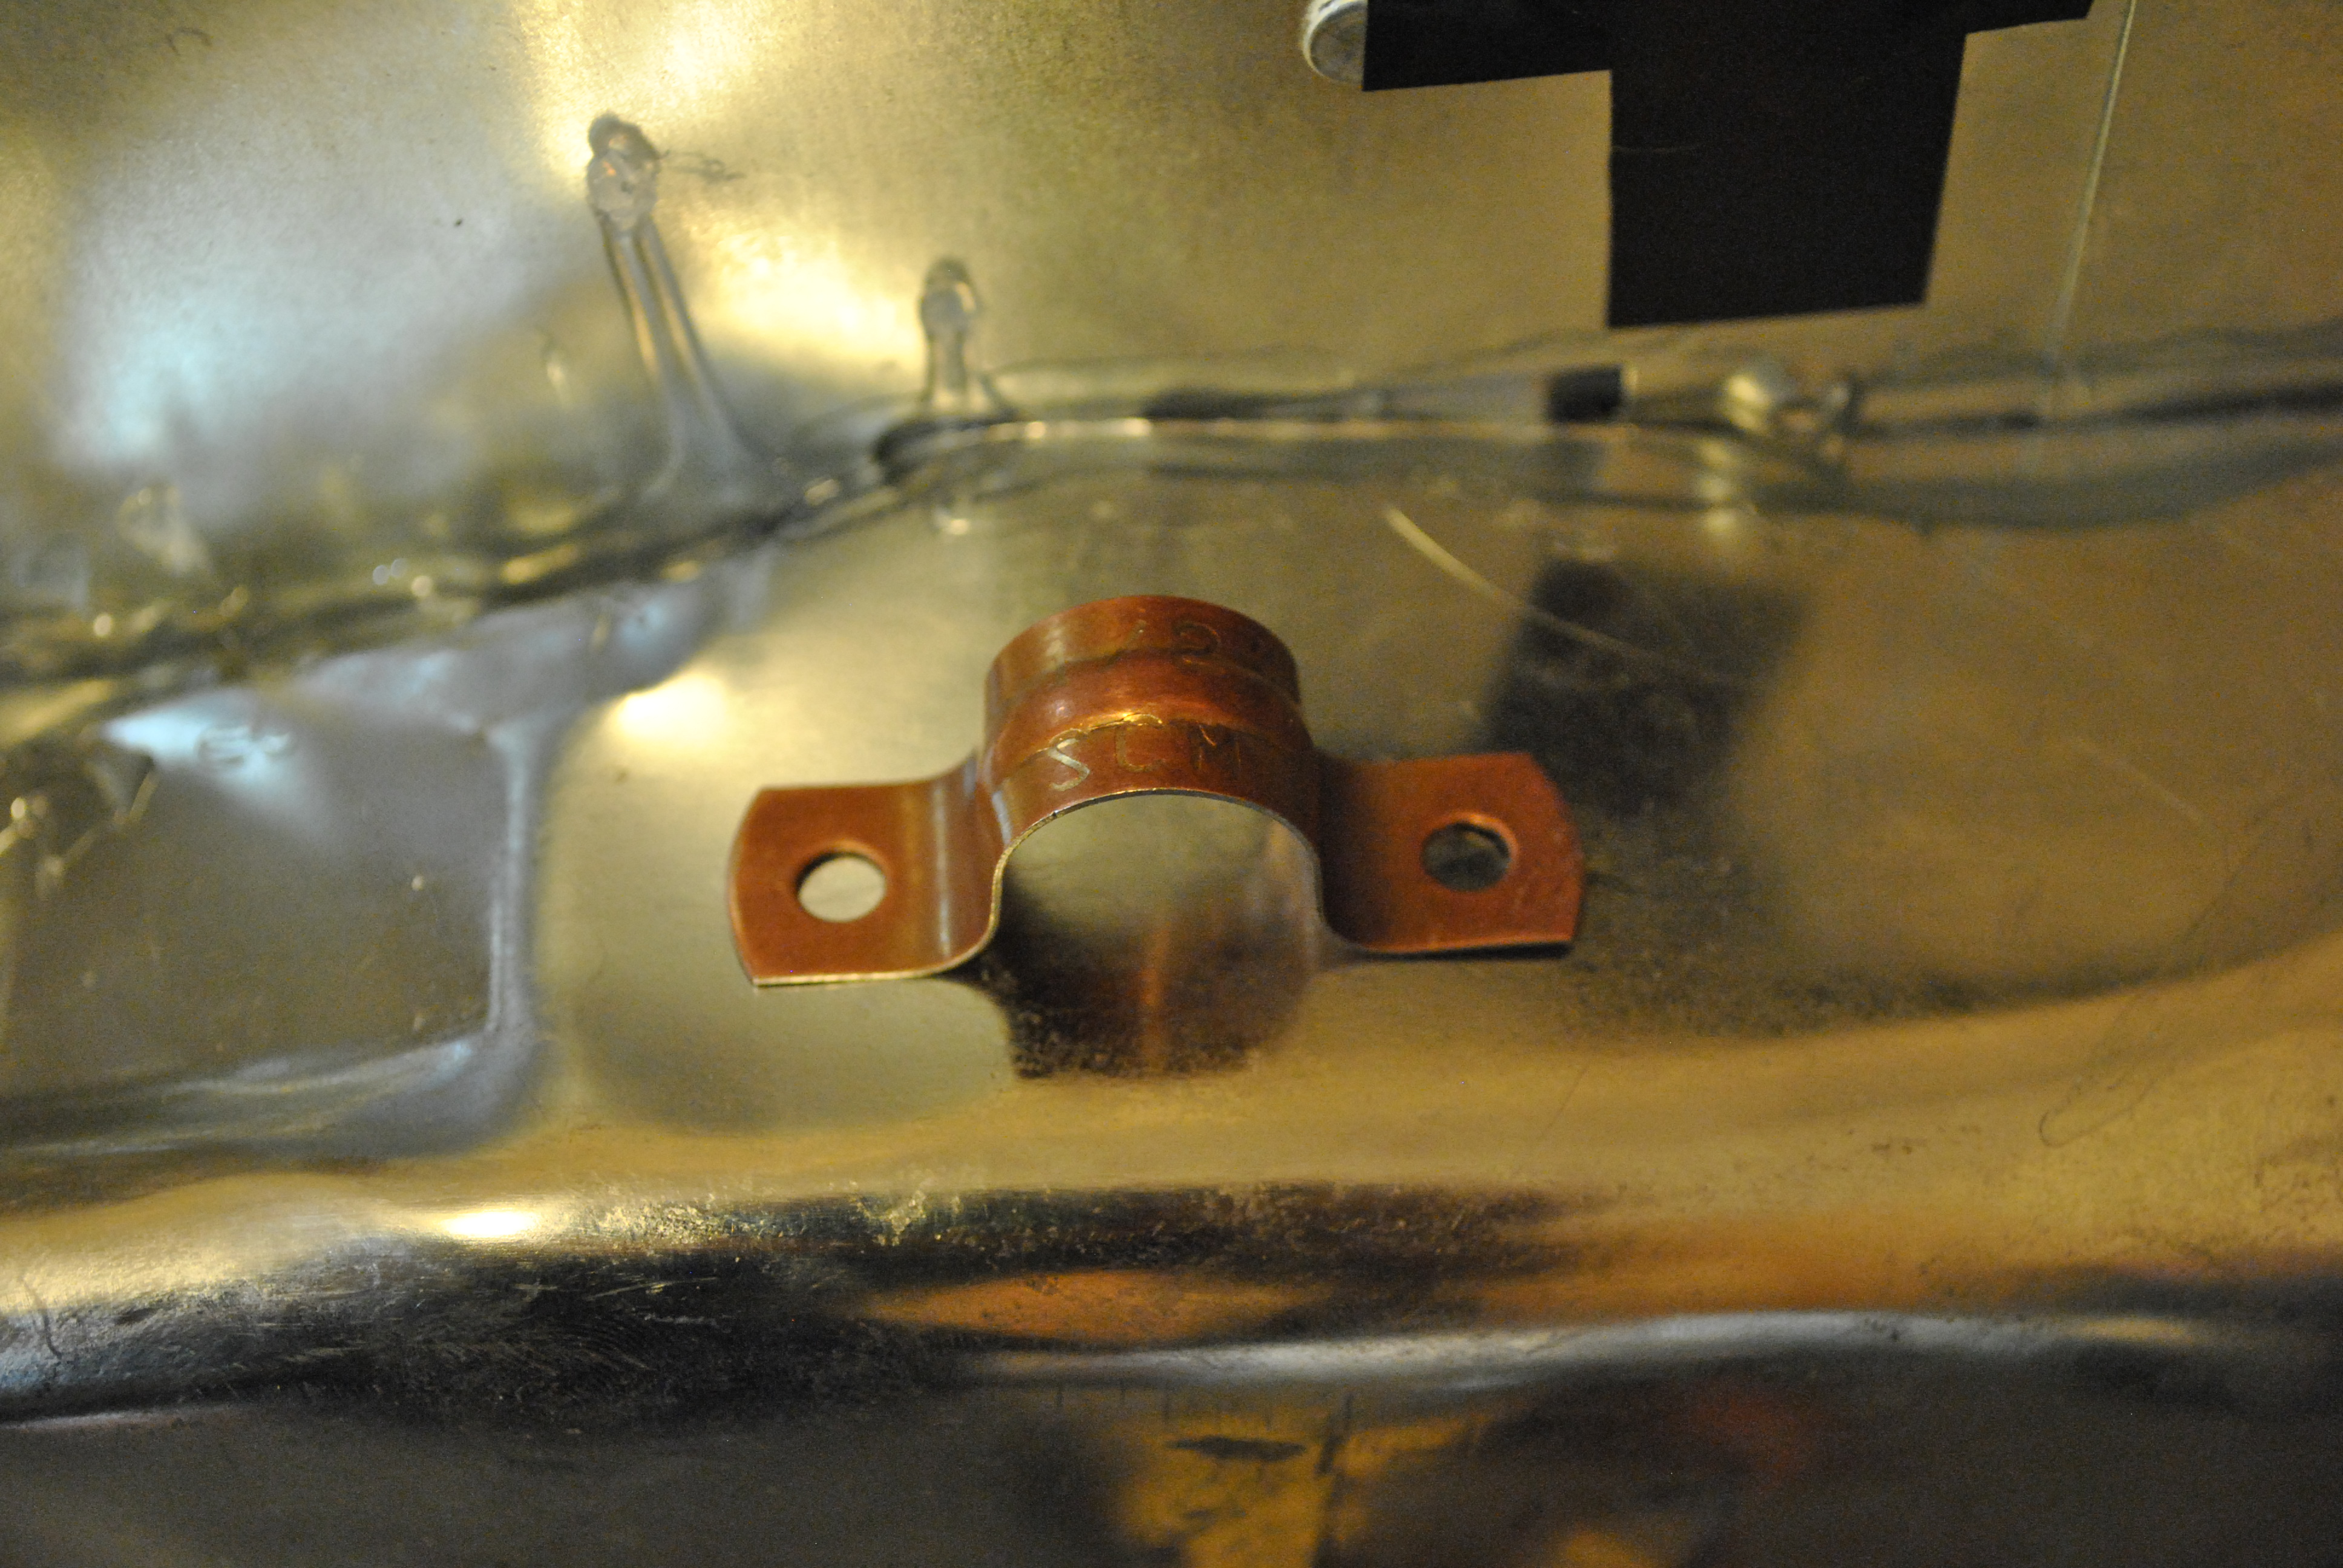
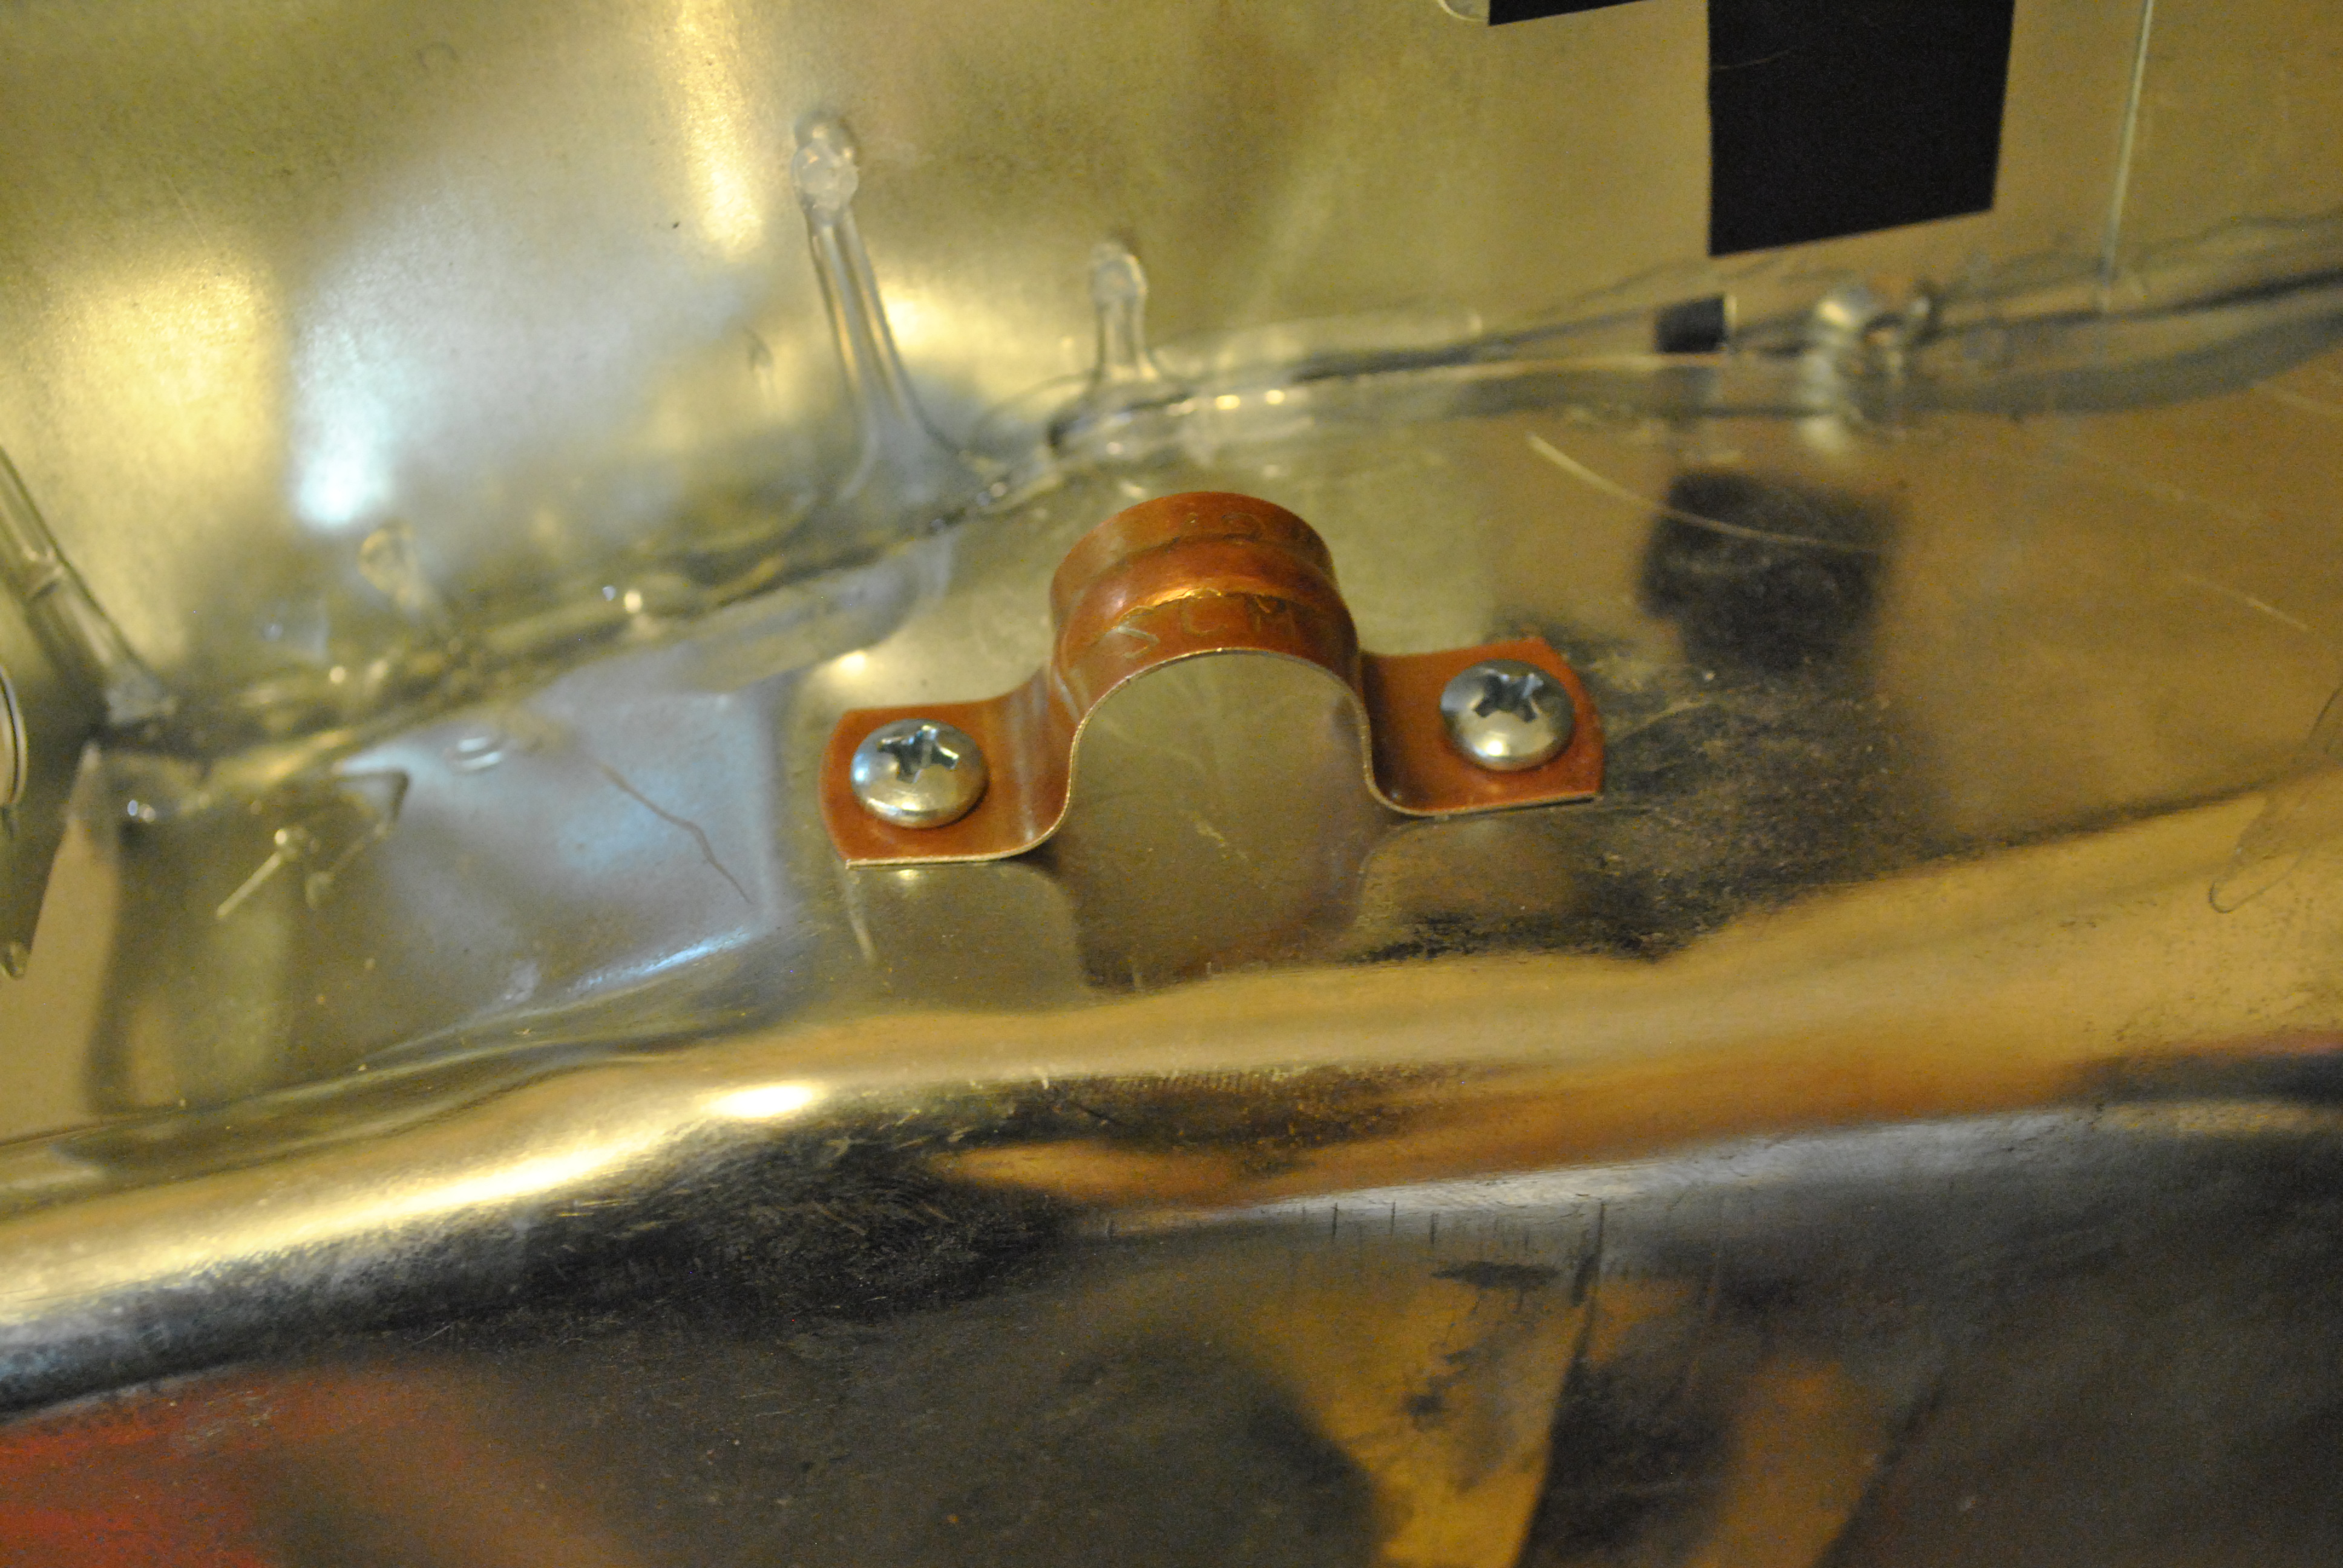
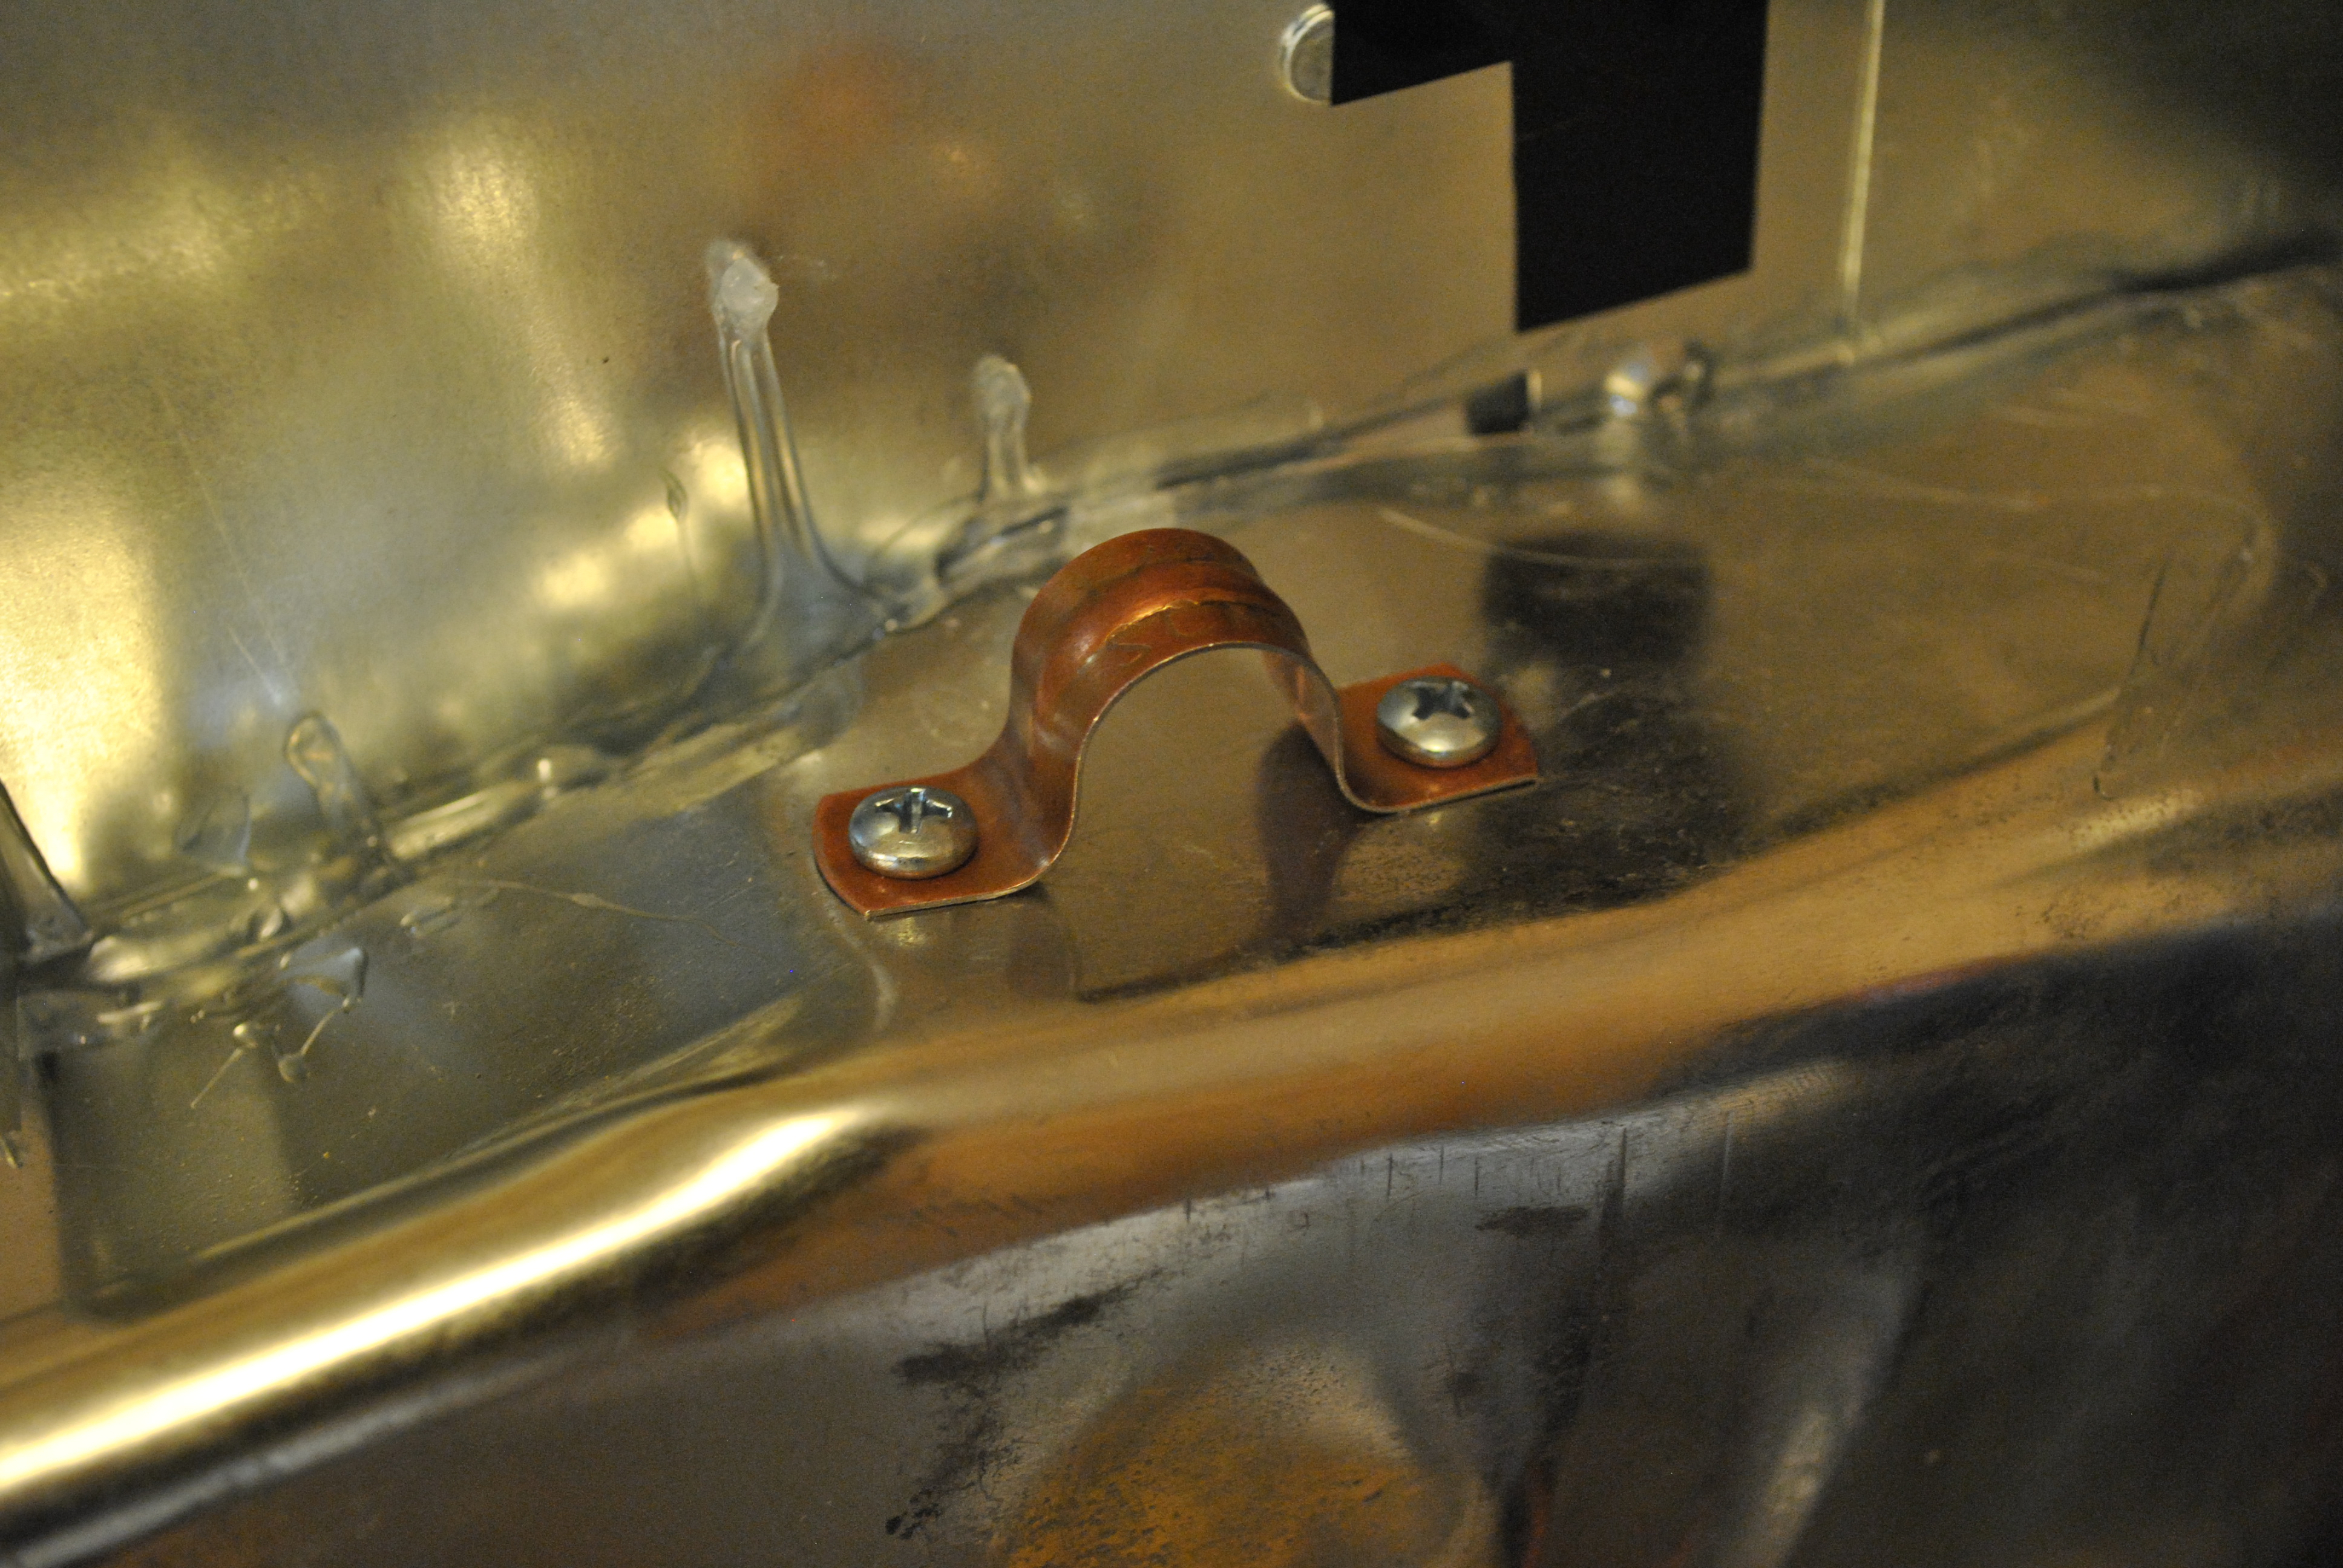
I used two copper pipe holders to create mounts for the mounting rope. I used the paint pans own legs on the other side as mount points. Simply attach them with self tapping metal screws.
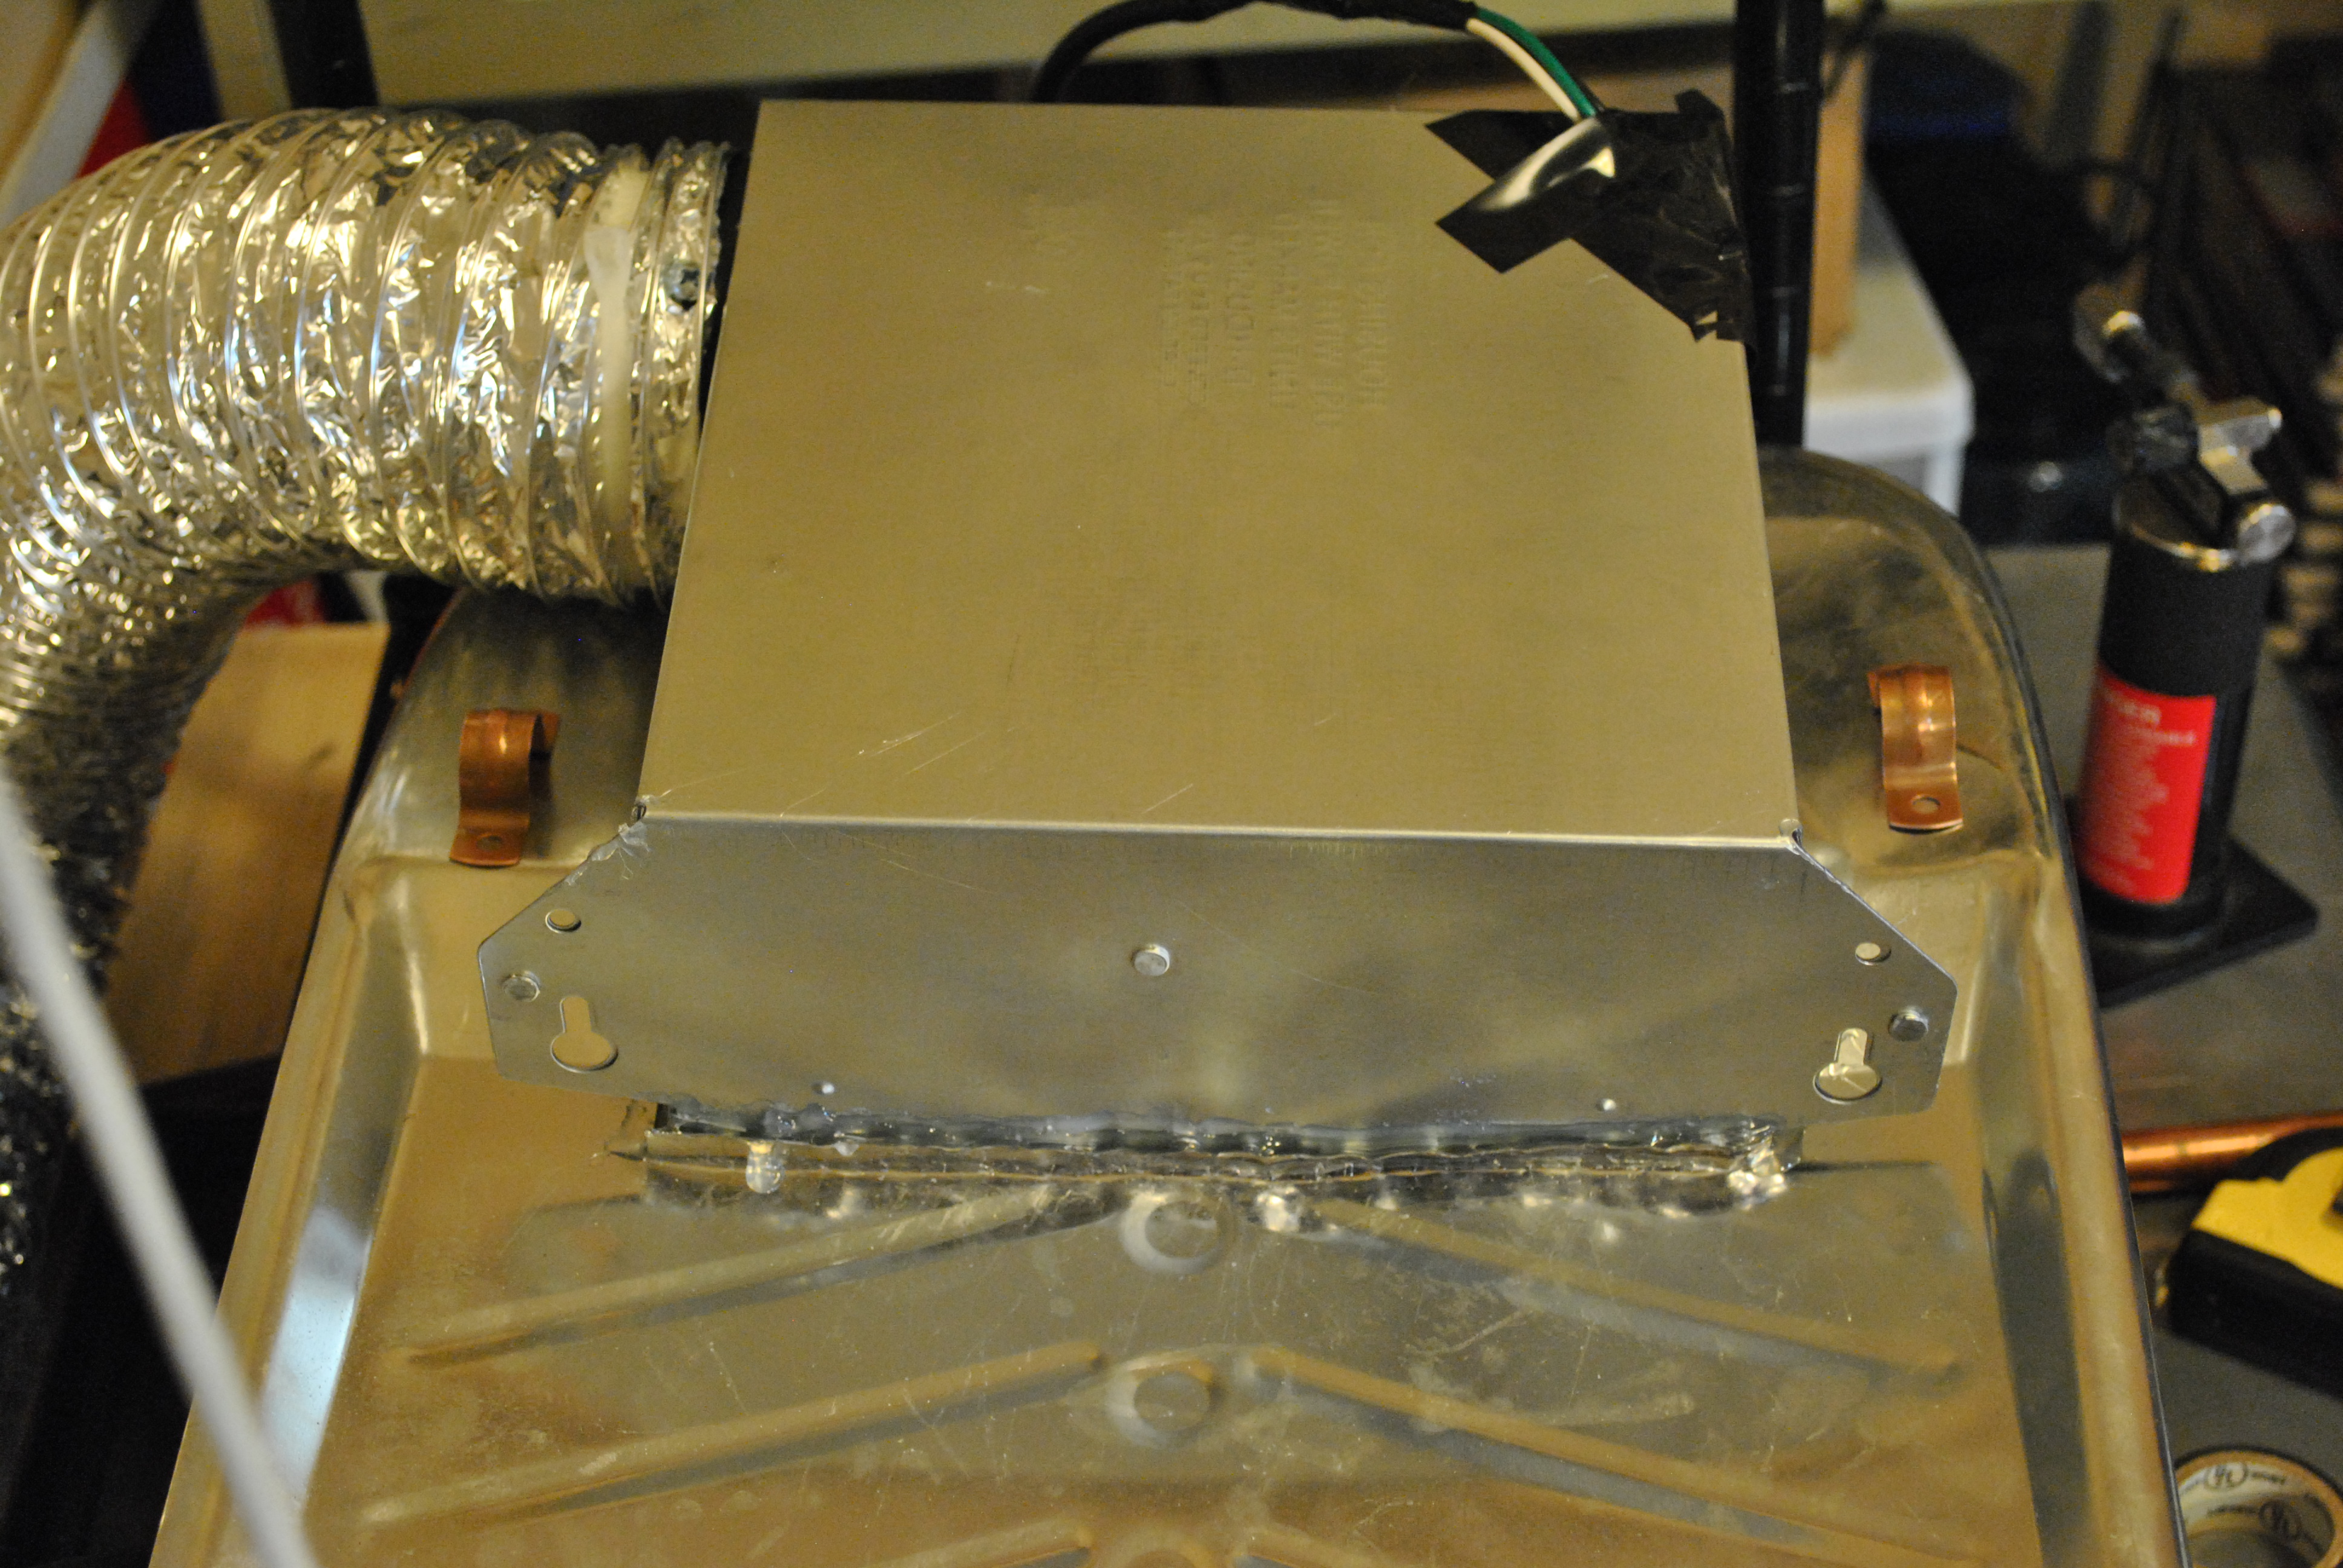
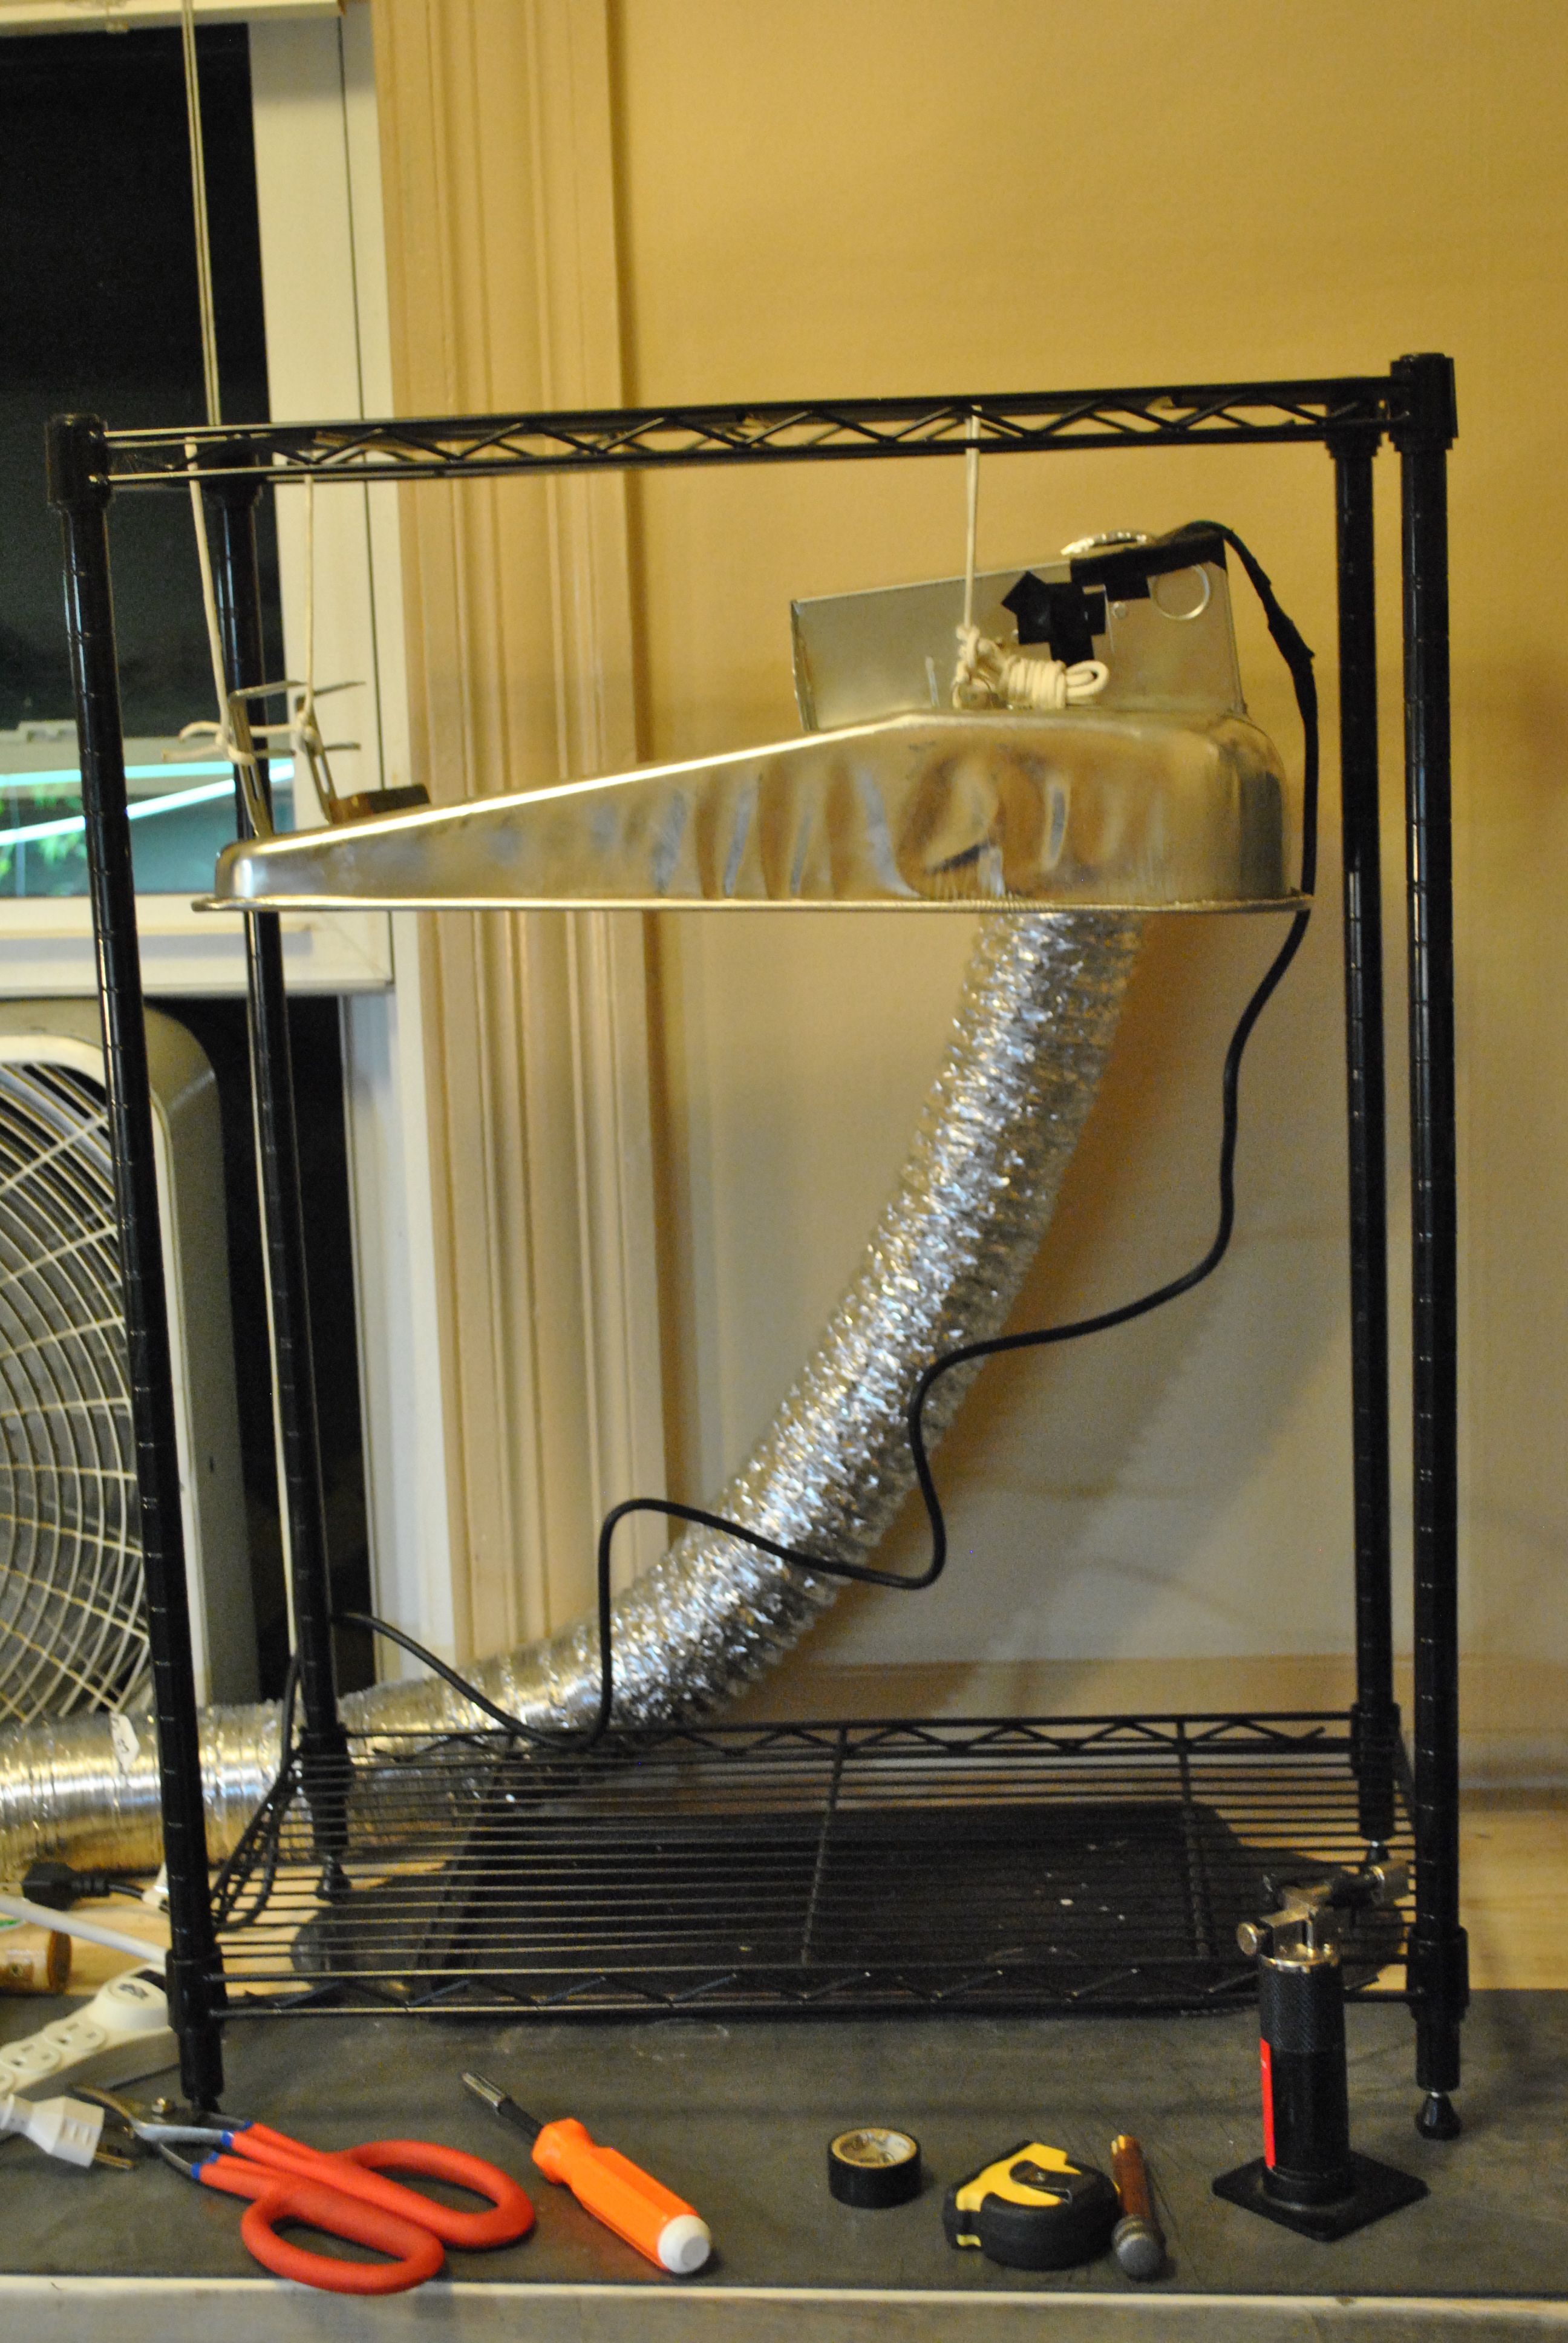
All done and hanging in the stand I plan on putting my micro-kiln in.
I tested this guy by lighting various kinds of smokey fires under it, and I have to say it works pretty well. I put the grate included with the kit on over this box and the efficiency went way up (as did the classy nature of the vent hood)
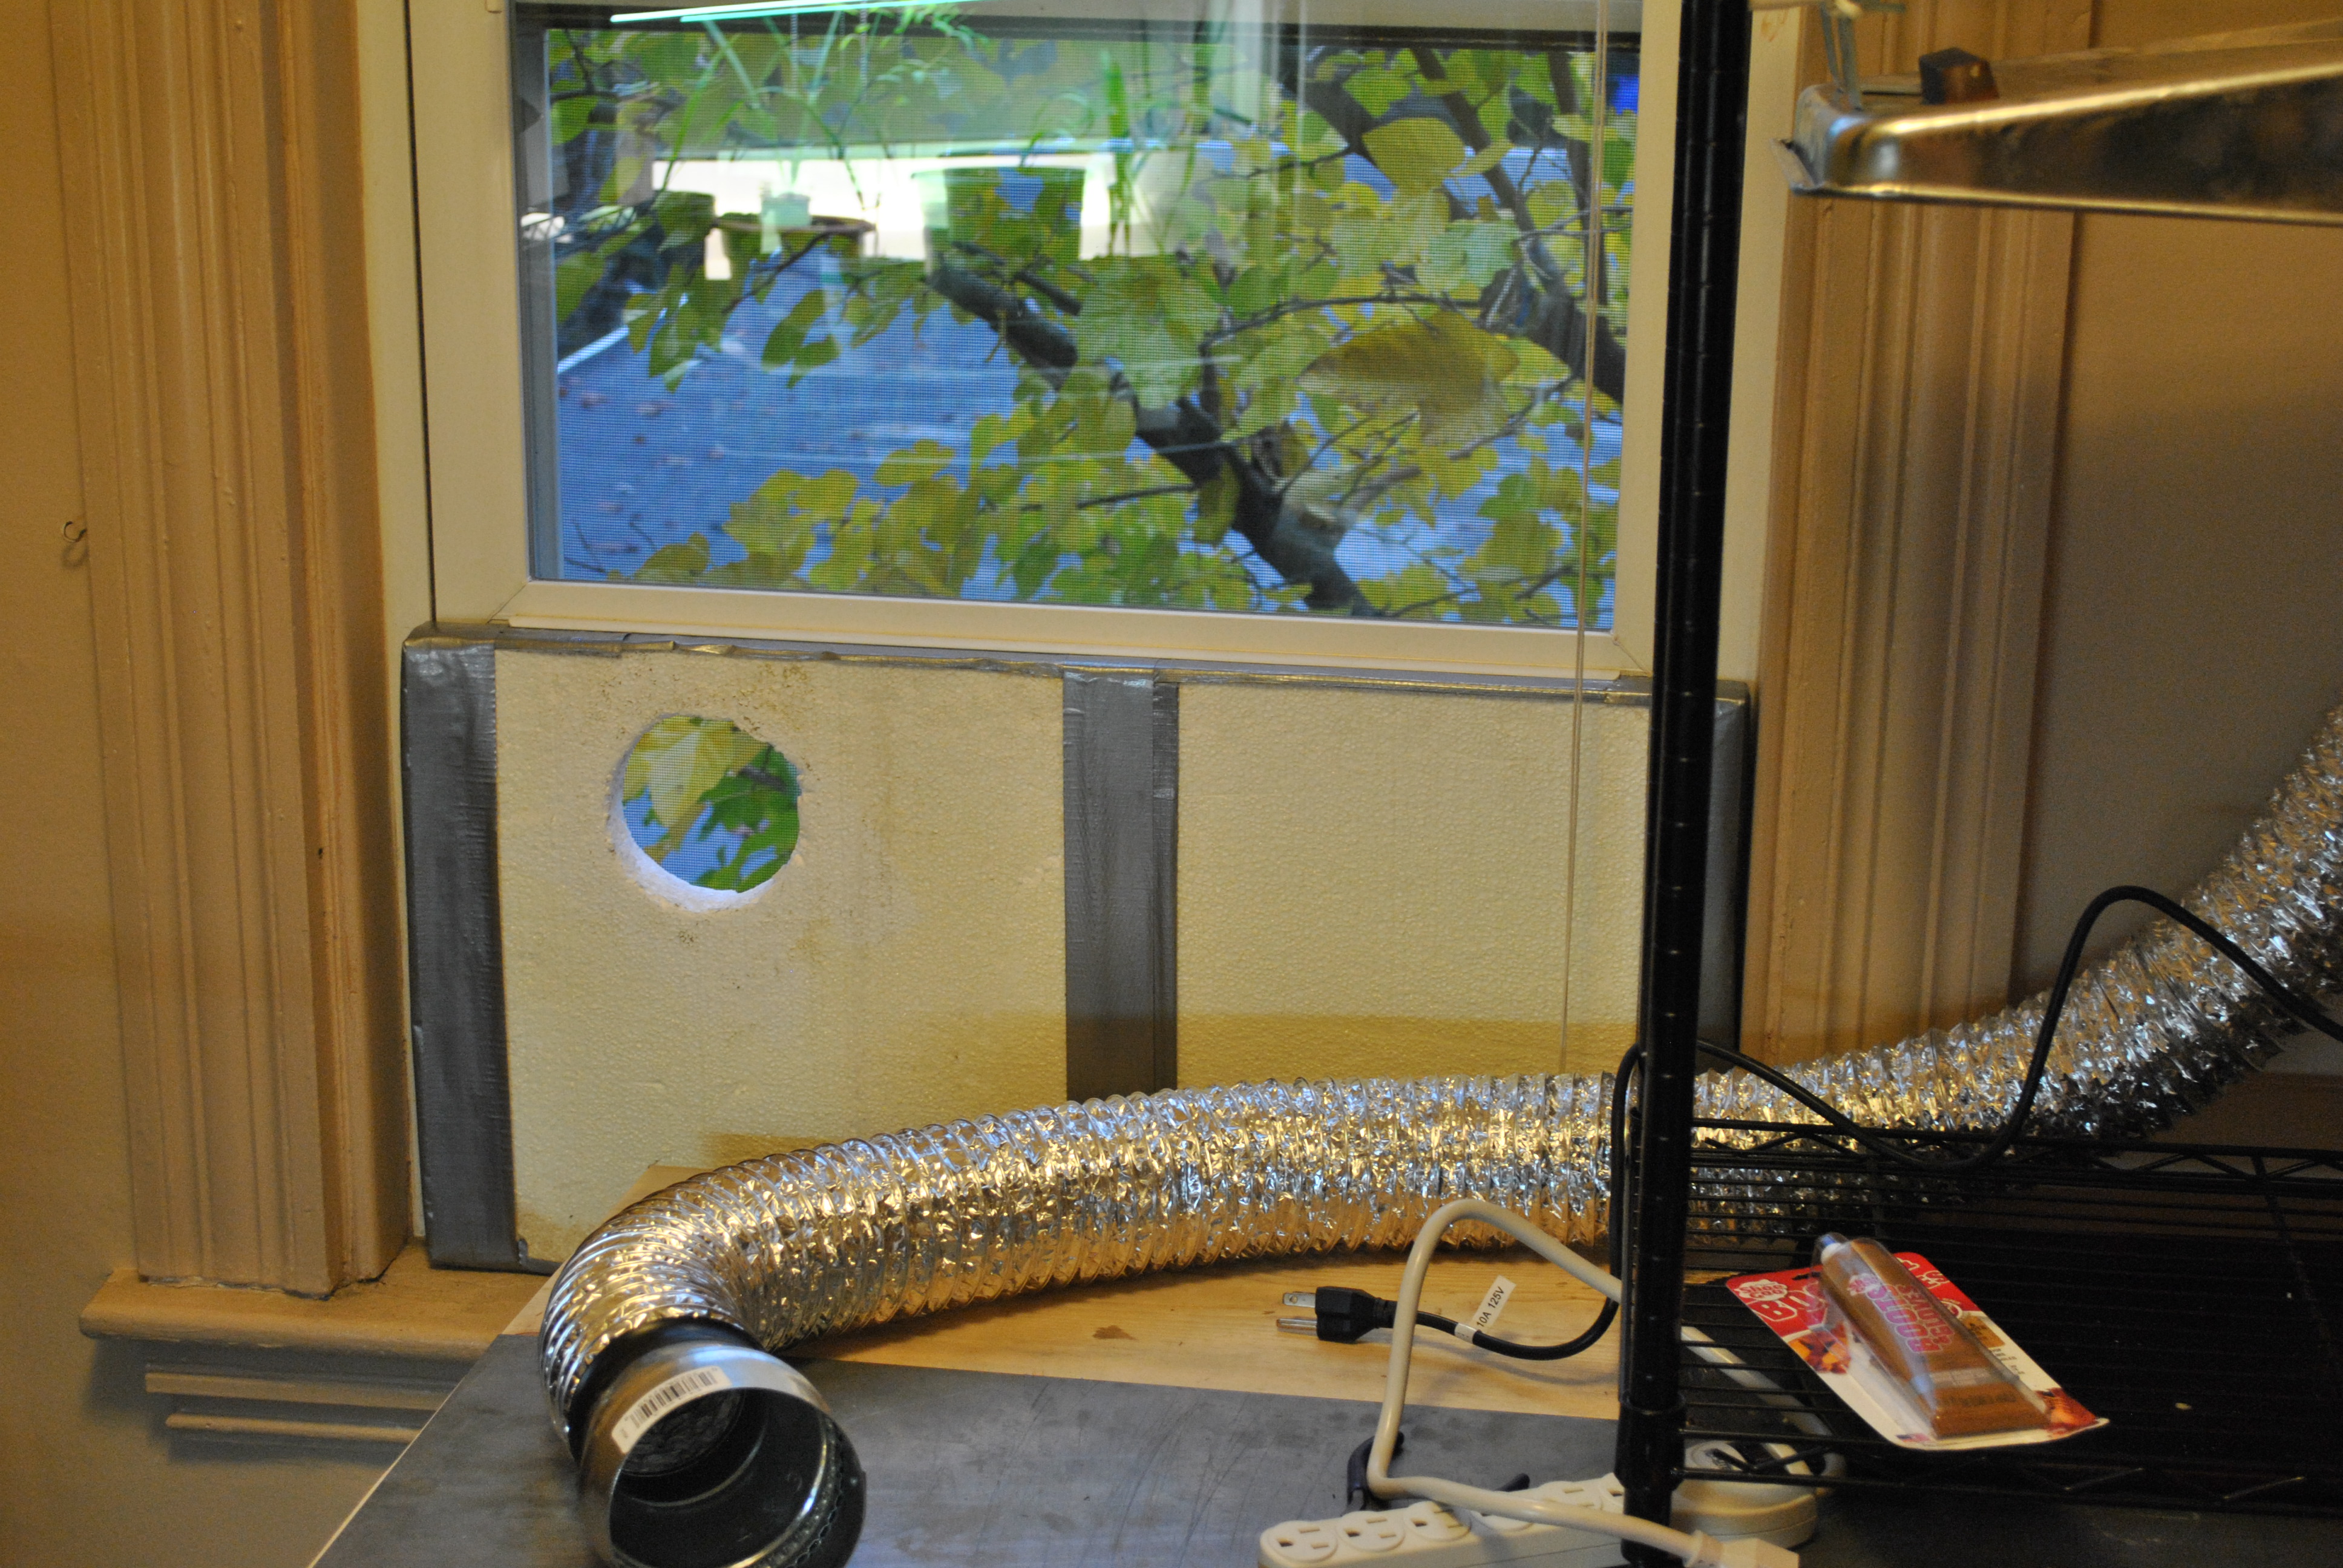
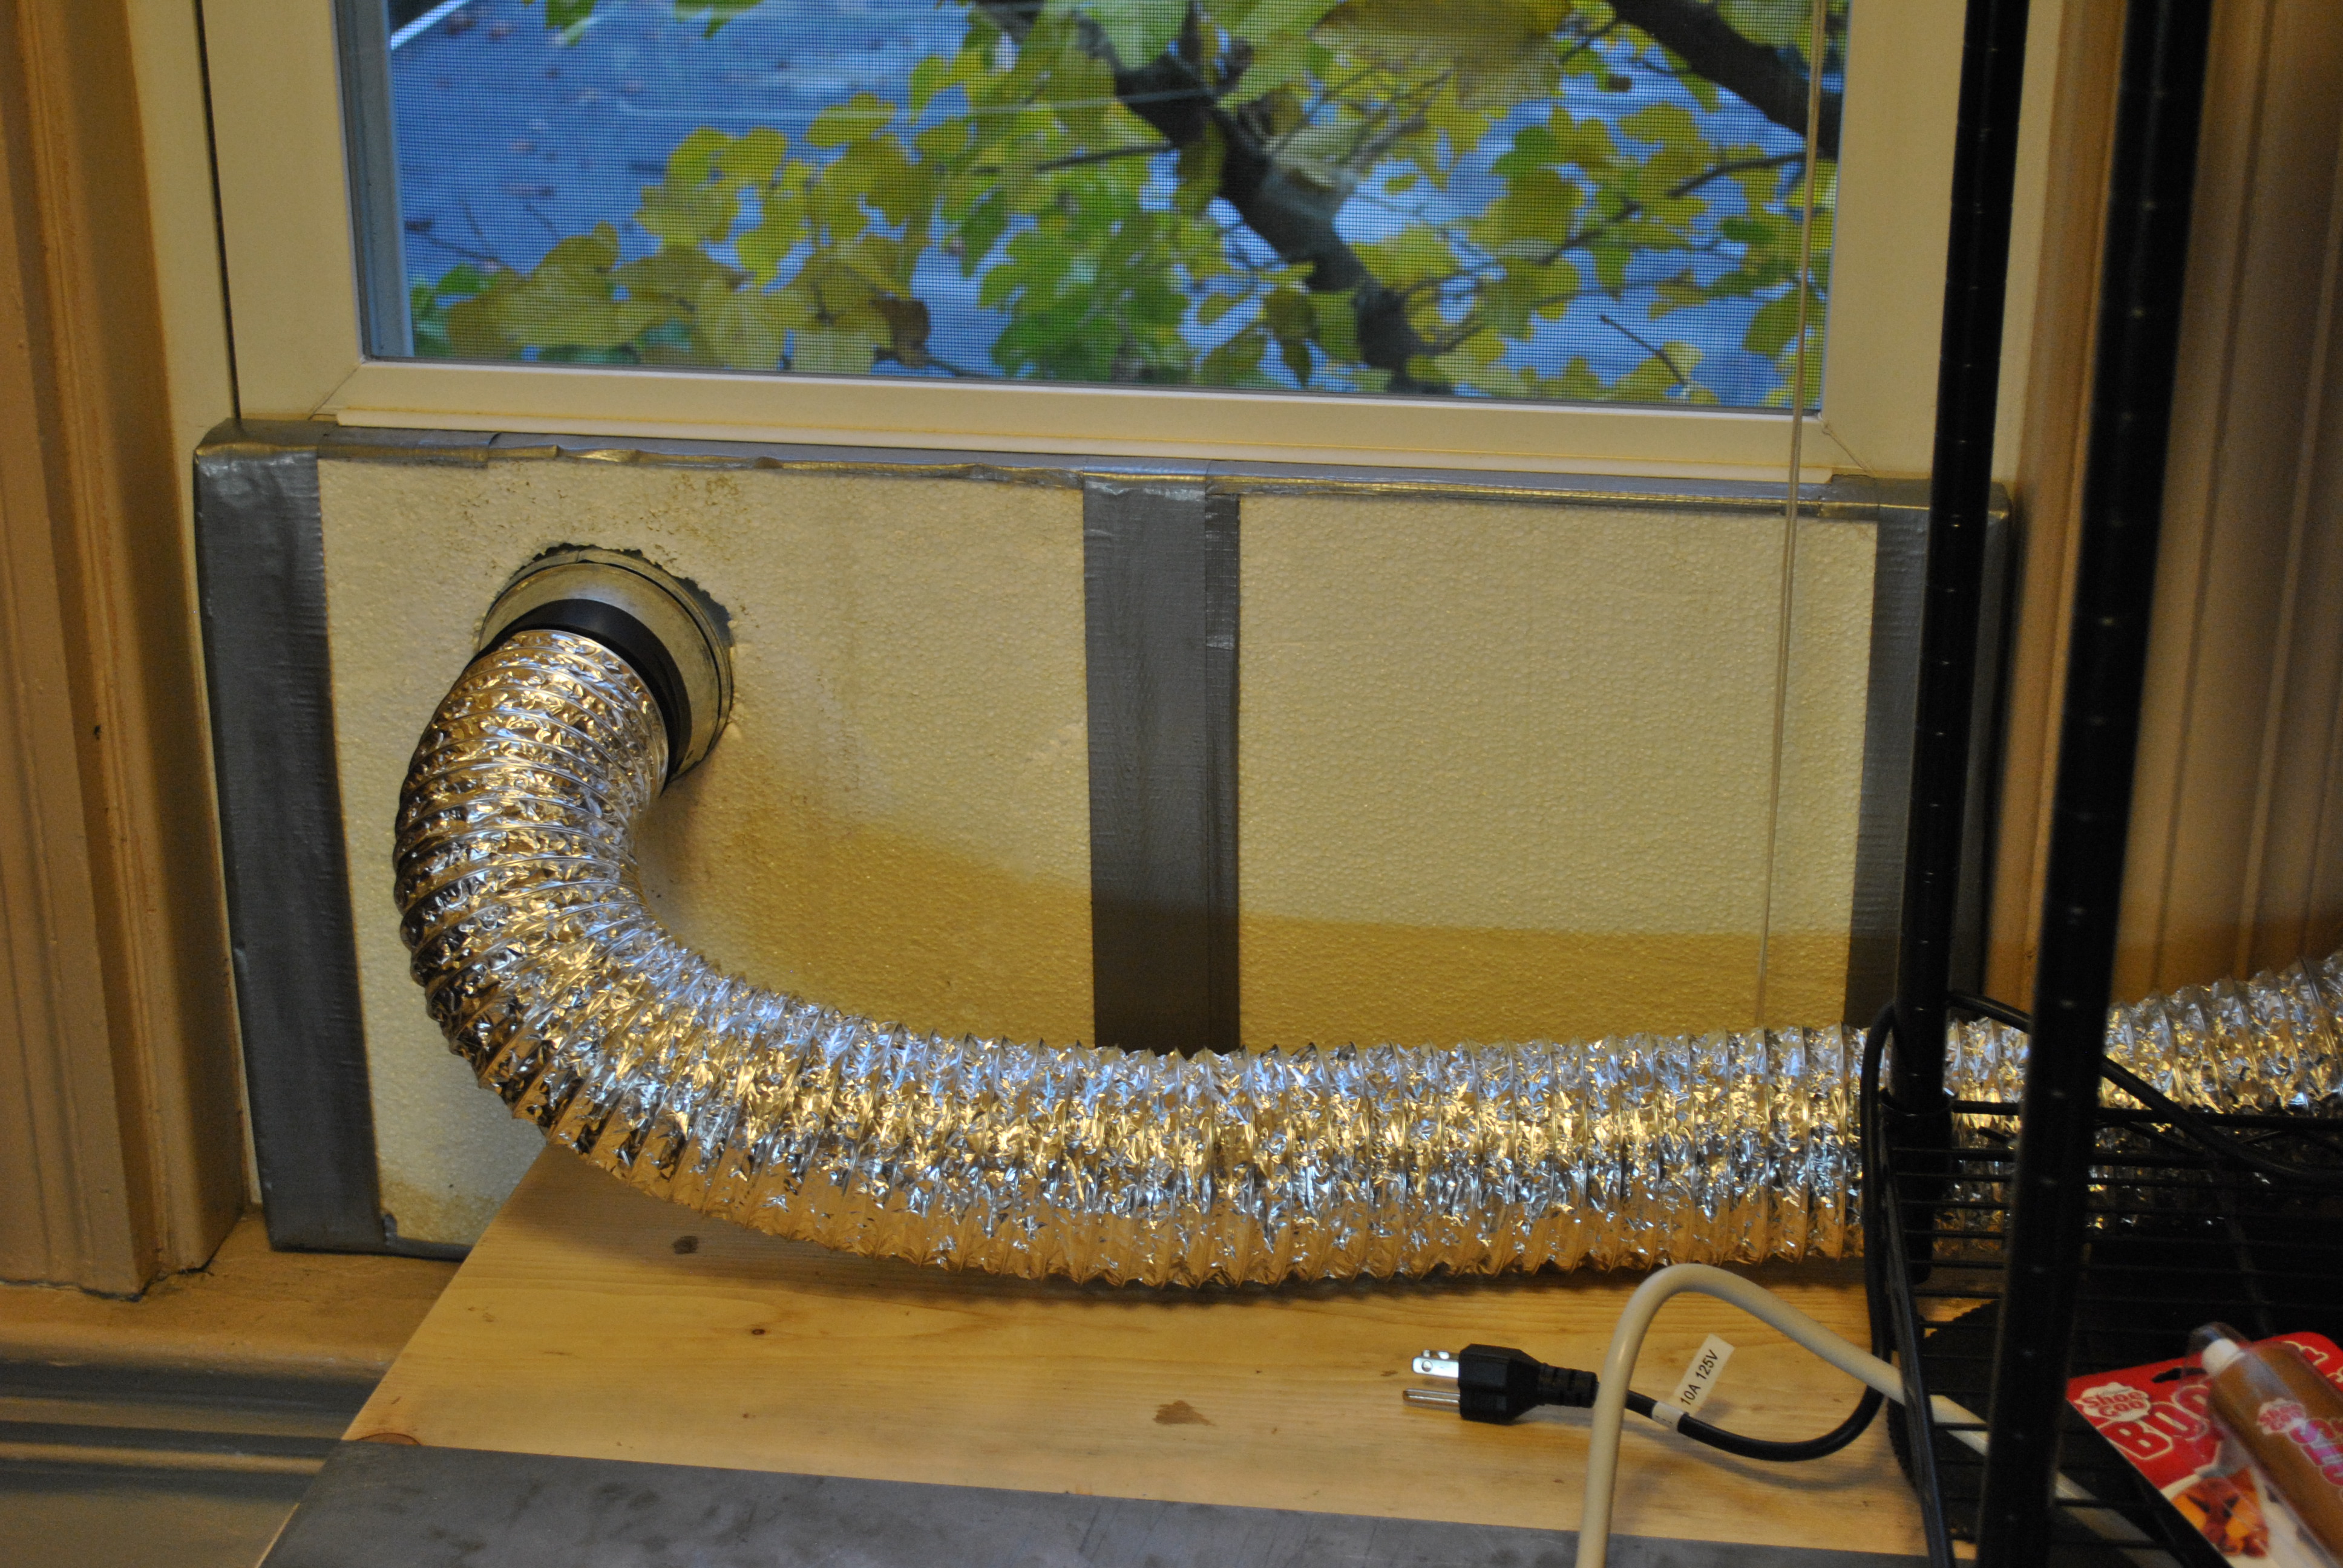
I built this little window plug so that I could use the vent in the winter without cooling down the house too much, its just a piece of insulating Styrofoam with duct tape wrapped around it.
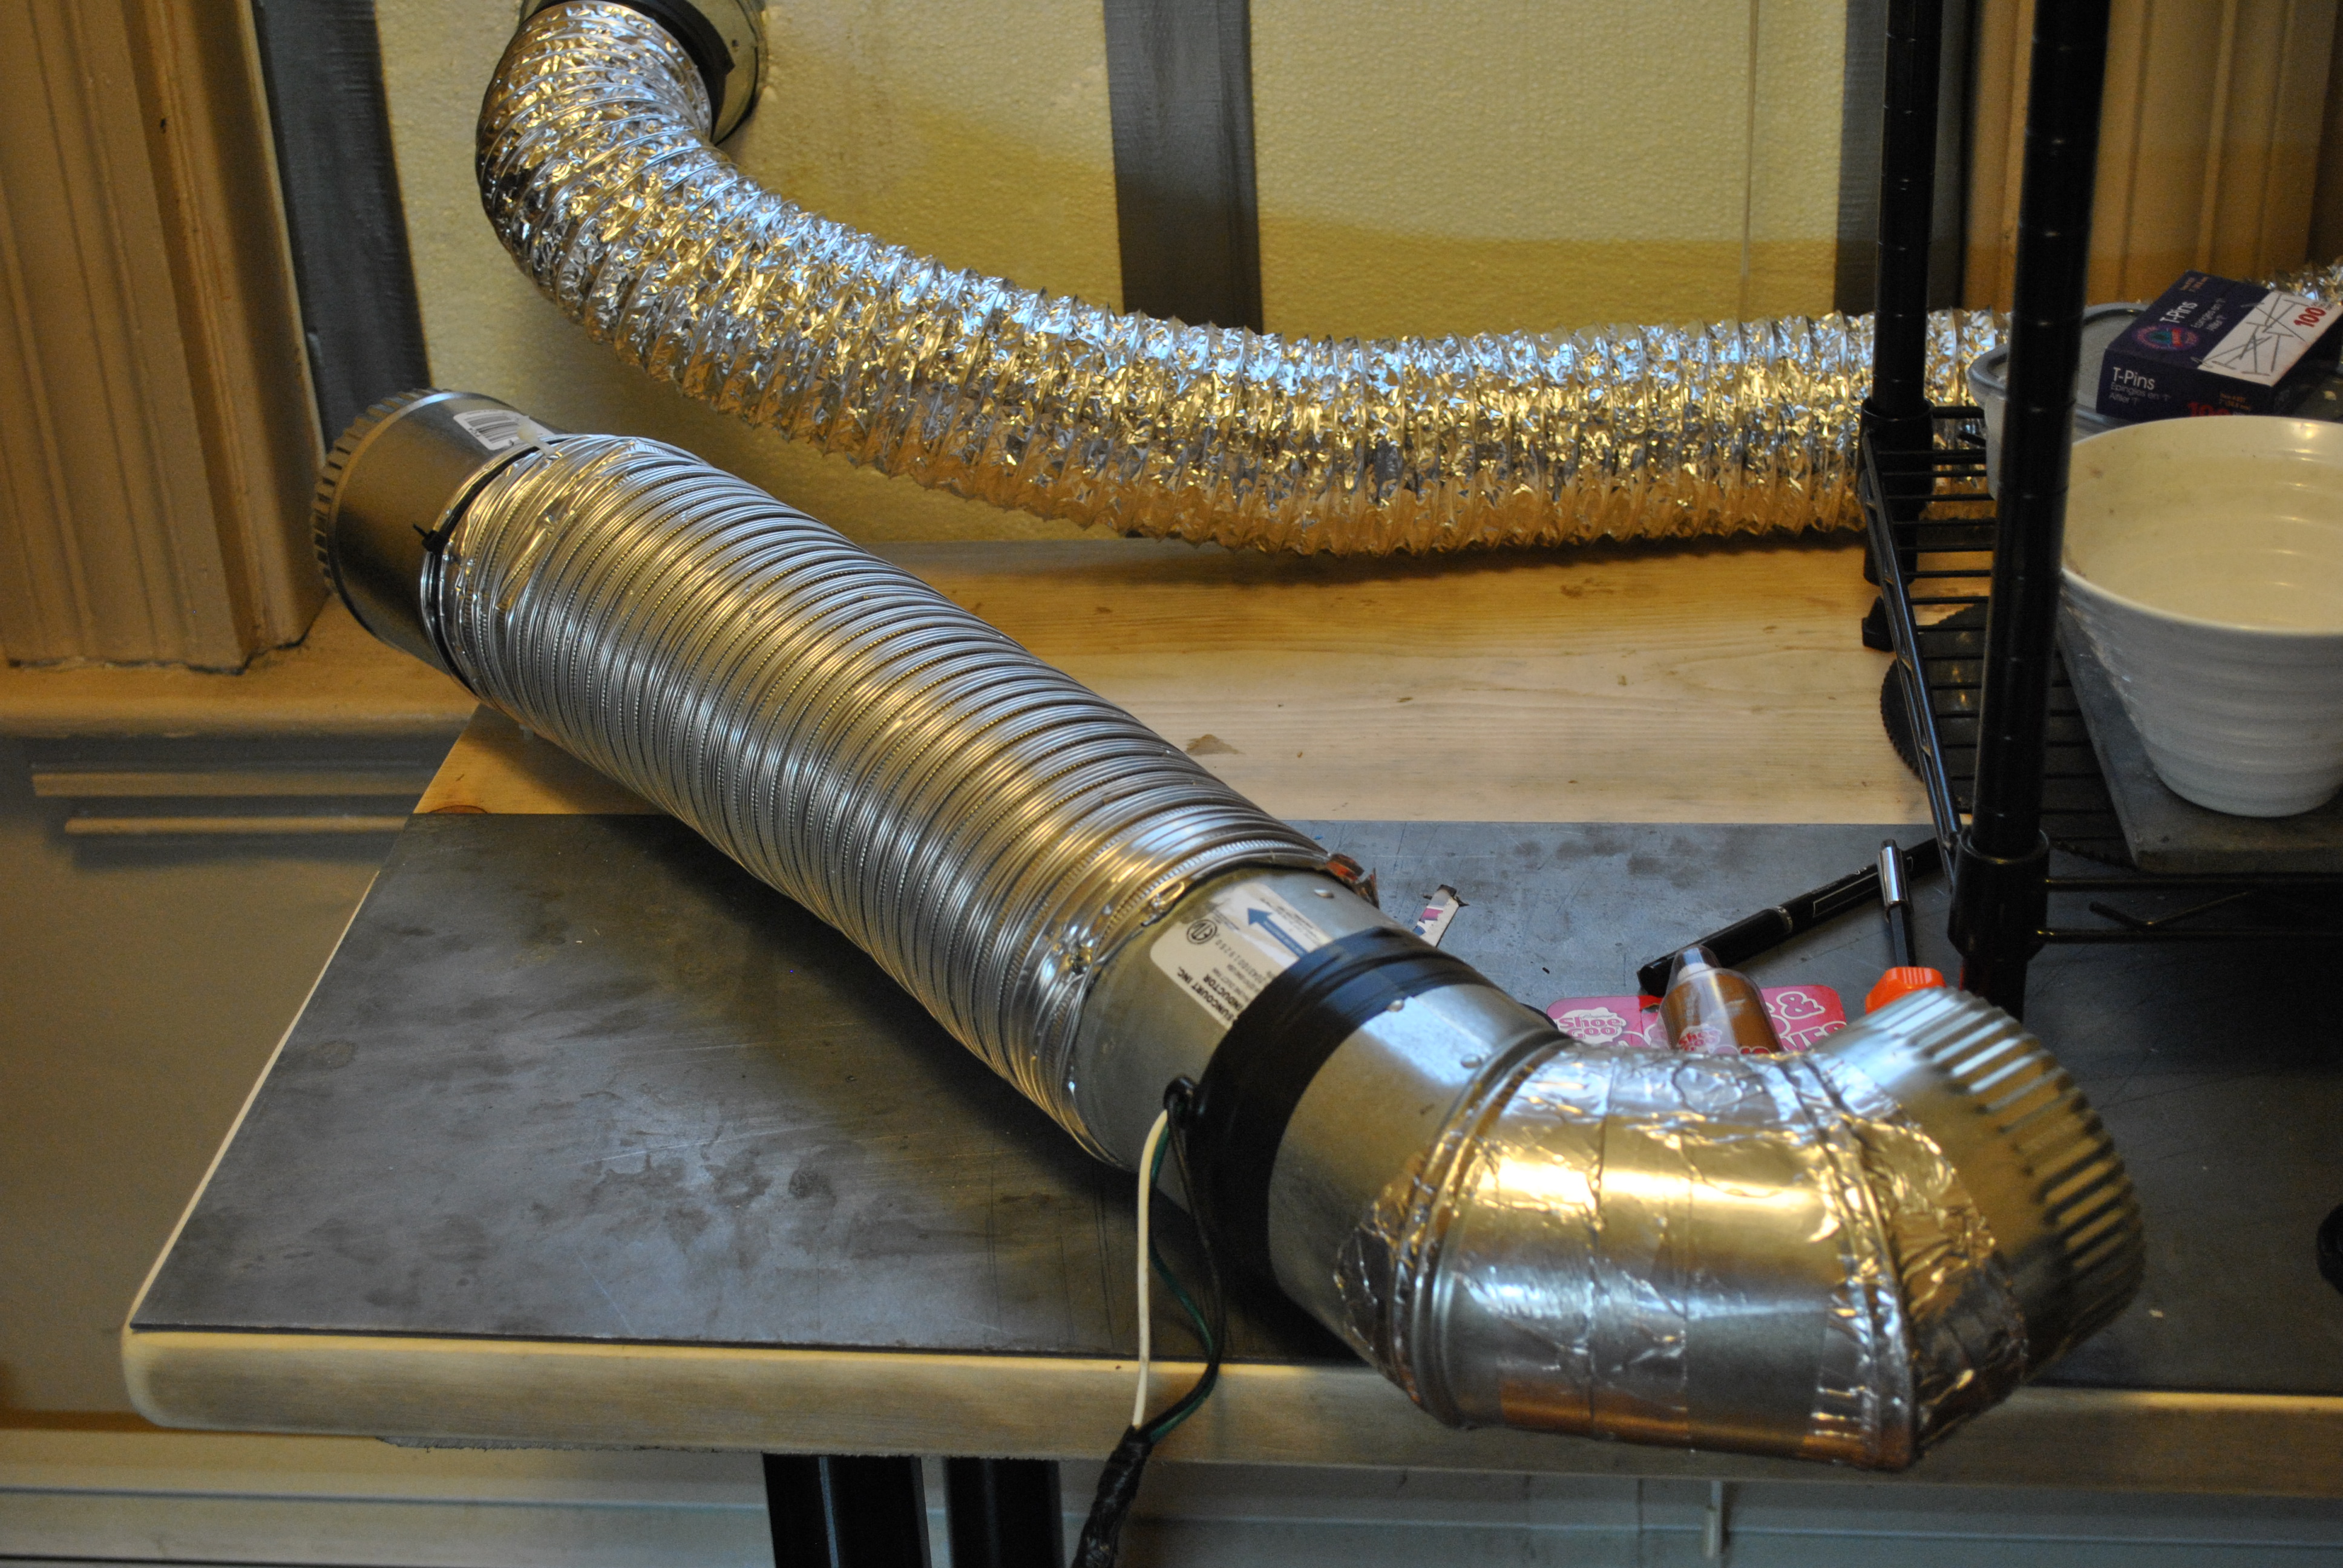
I had some duct work and parts left over from a previous project so I also made a soldering fume extractor out of an old impeller fan and some duct work.
The impeller fan is wires up the same way the bathroom fan was (you can see the cord coming off it.) It also fits into the little hole in the window plug and sucks pretty hard, easily removing all the fumes from soldering and other fire related torch work.
Materials used:
Paint Pan (12$)
Duct Work (12$)
Ceiling Fan (15$)
E6000 glue (6$)
Self Tapping Metal Screws ($4)
Electrical Tape
Old Computer Cord
Styrofoam
Duct Tape
Copper pipe mounts ($1)
Rope
Impeller fan
Tools used:
Tin Snips
Screw Driver
Utility Knife
Cost:
Total cost $50 (stuff I had to buy is priced above, everything else I had or found)
Sadly I had to buy most of this stuff as I didn’t have any of it laying around, and just didn’t feel like waiting until something popped up in the trash, I know that tomorrow I will find the perfect bit of trash laying around to do this project on the cheap, but I wanted to get this done now because the supplies for my DIY kiln are arriving soon! And if you consider that a brand new one of these will set you back at least 300$ I think this is a pretty good deal.
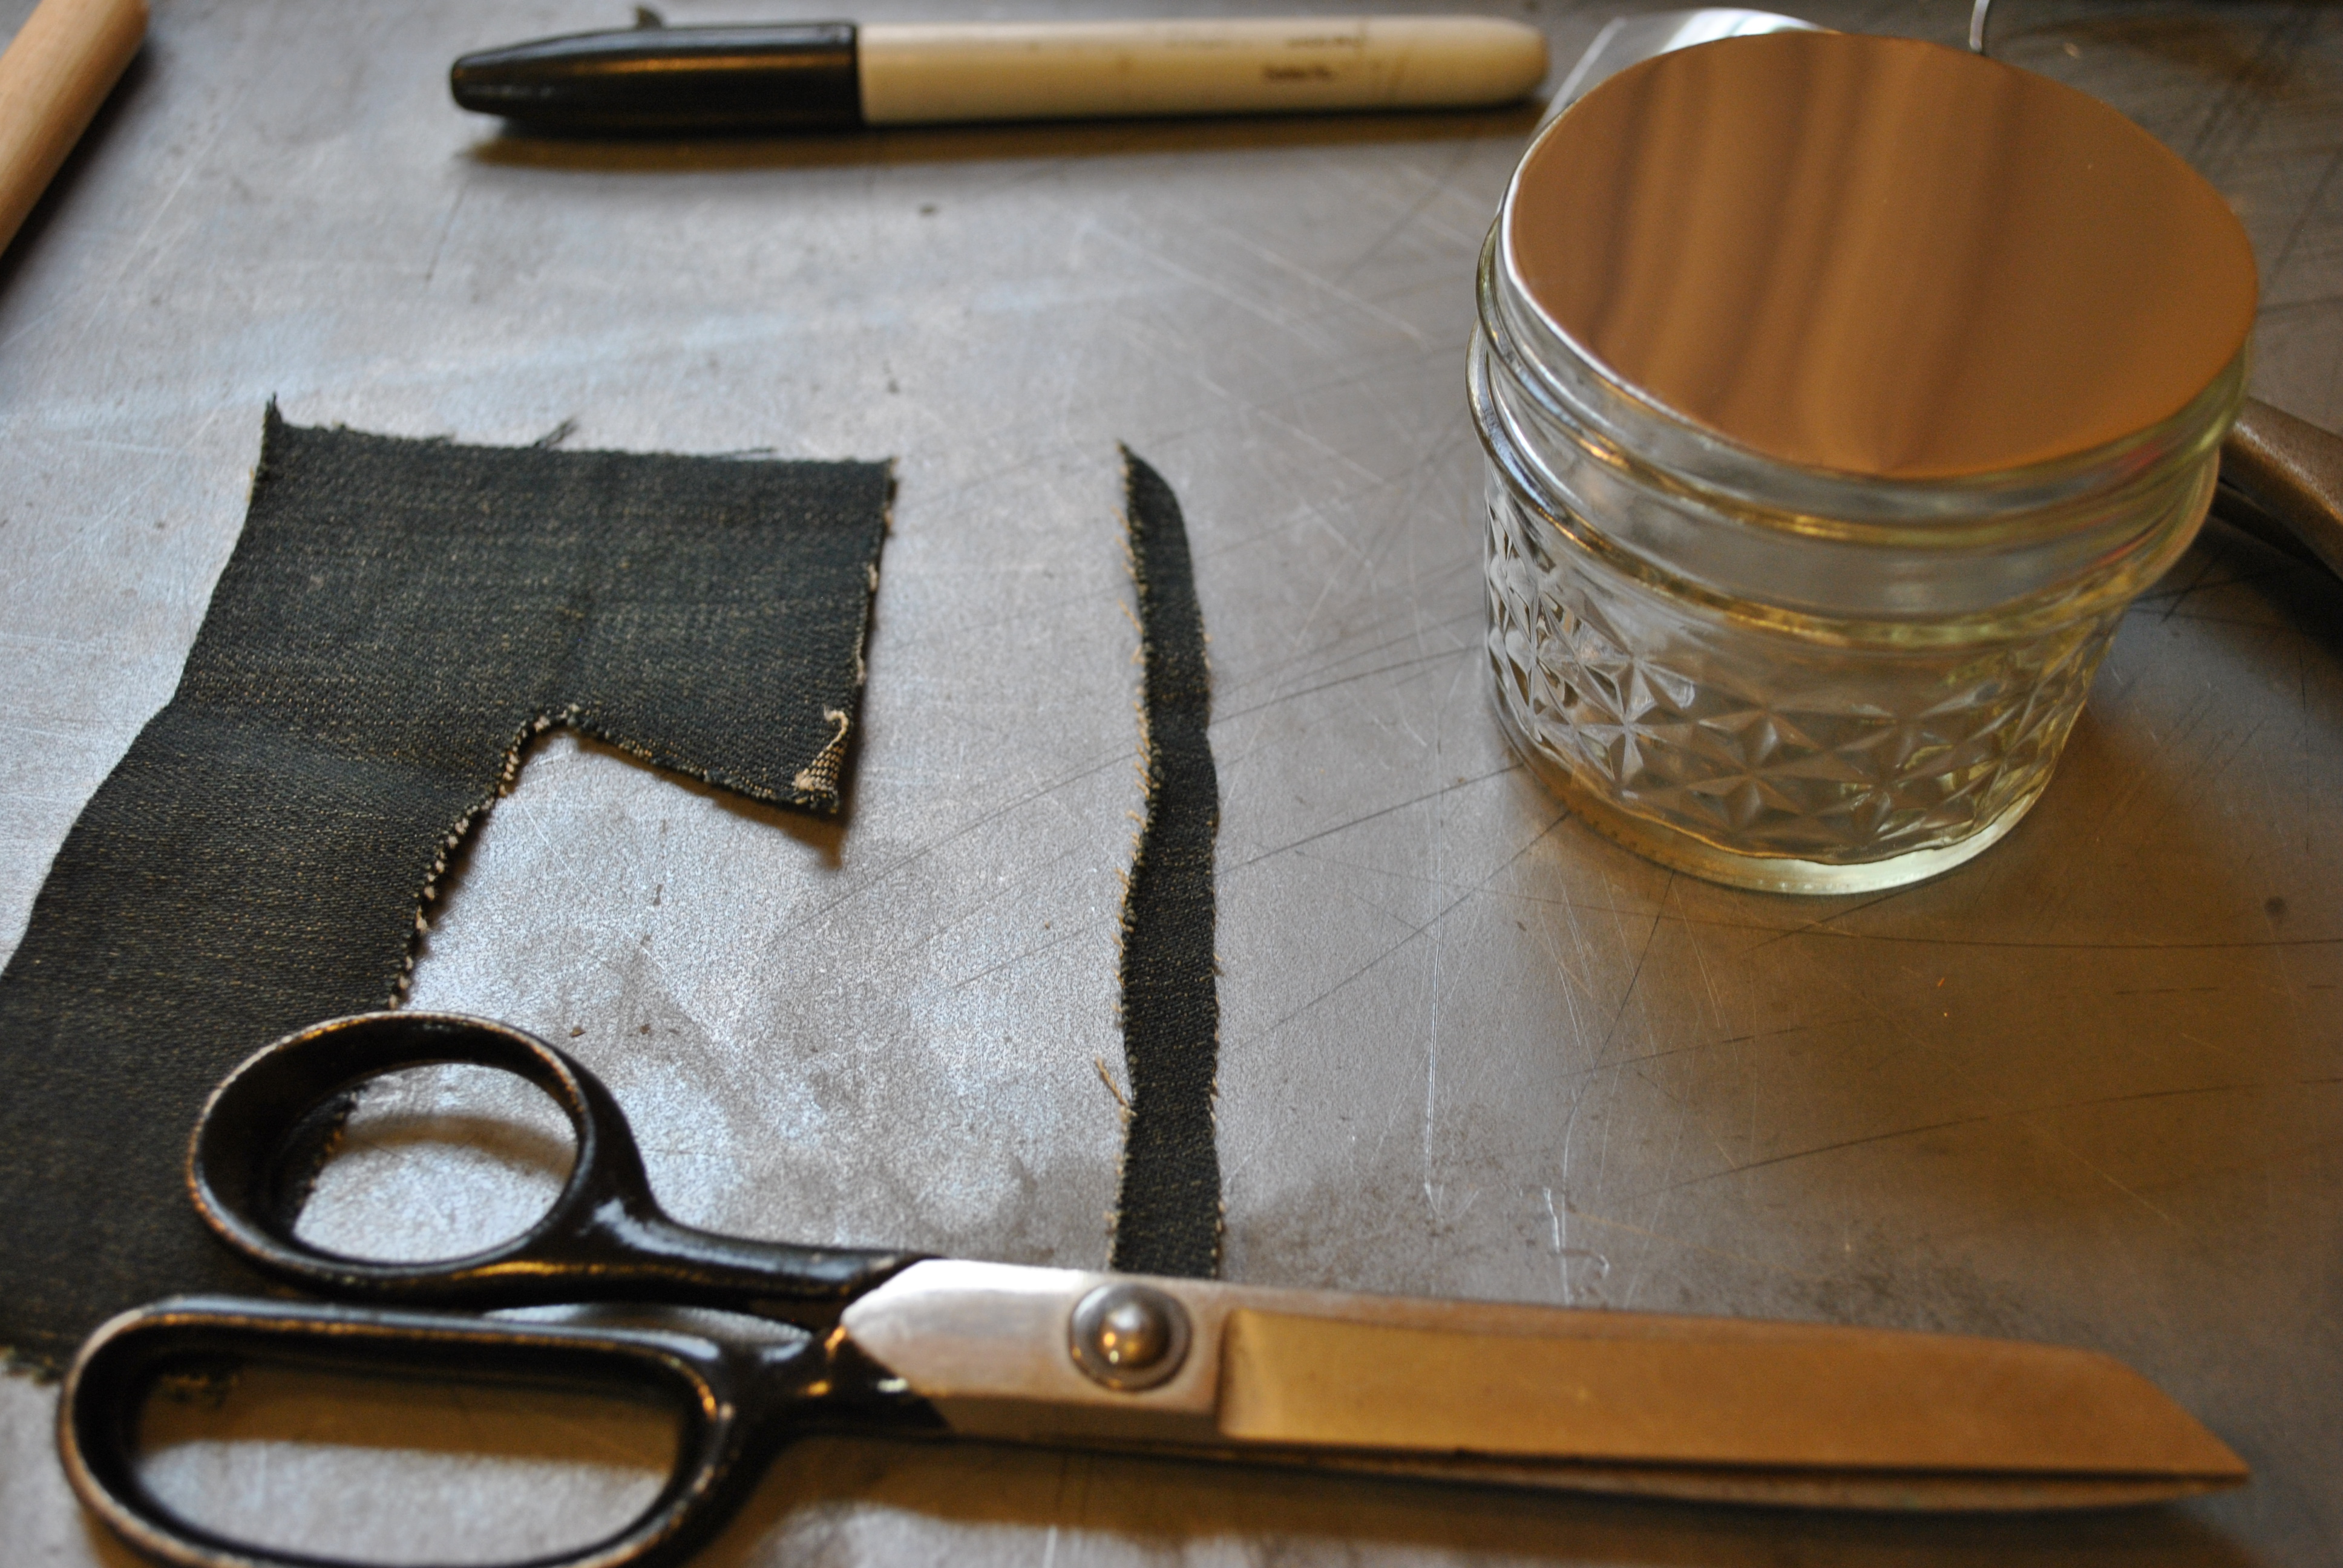
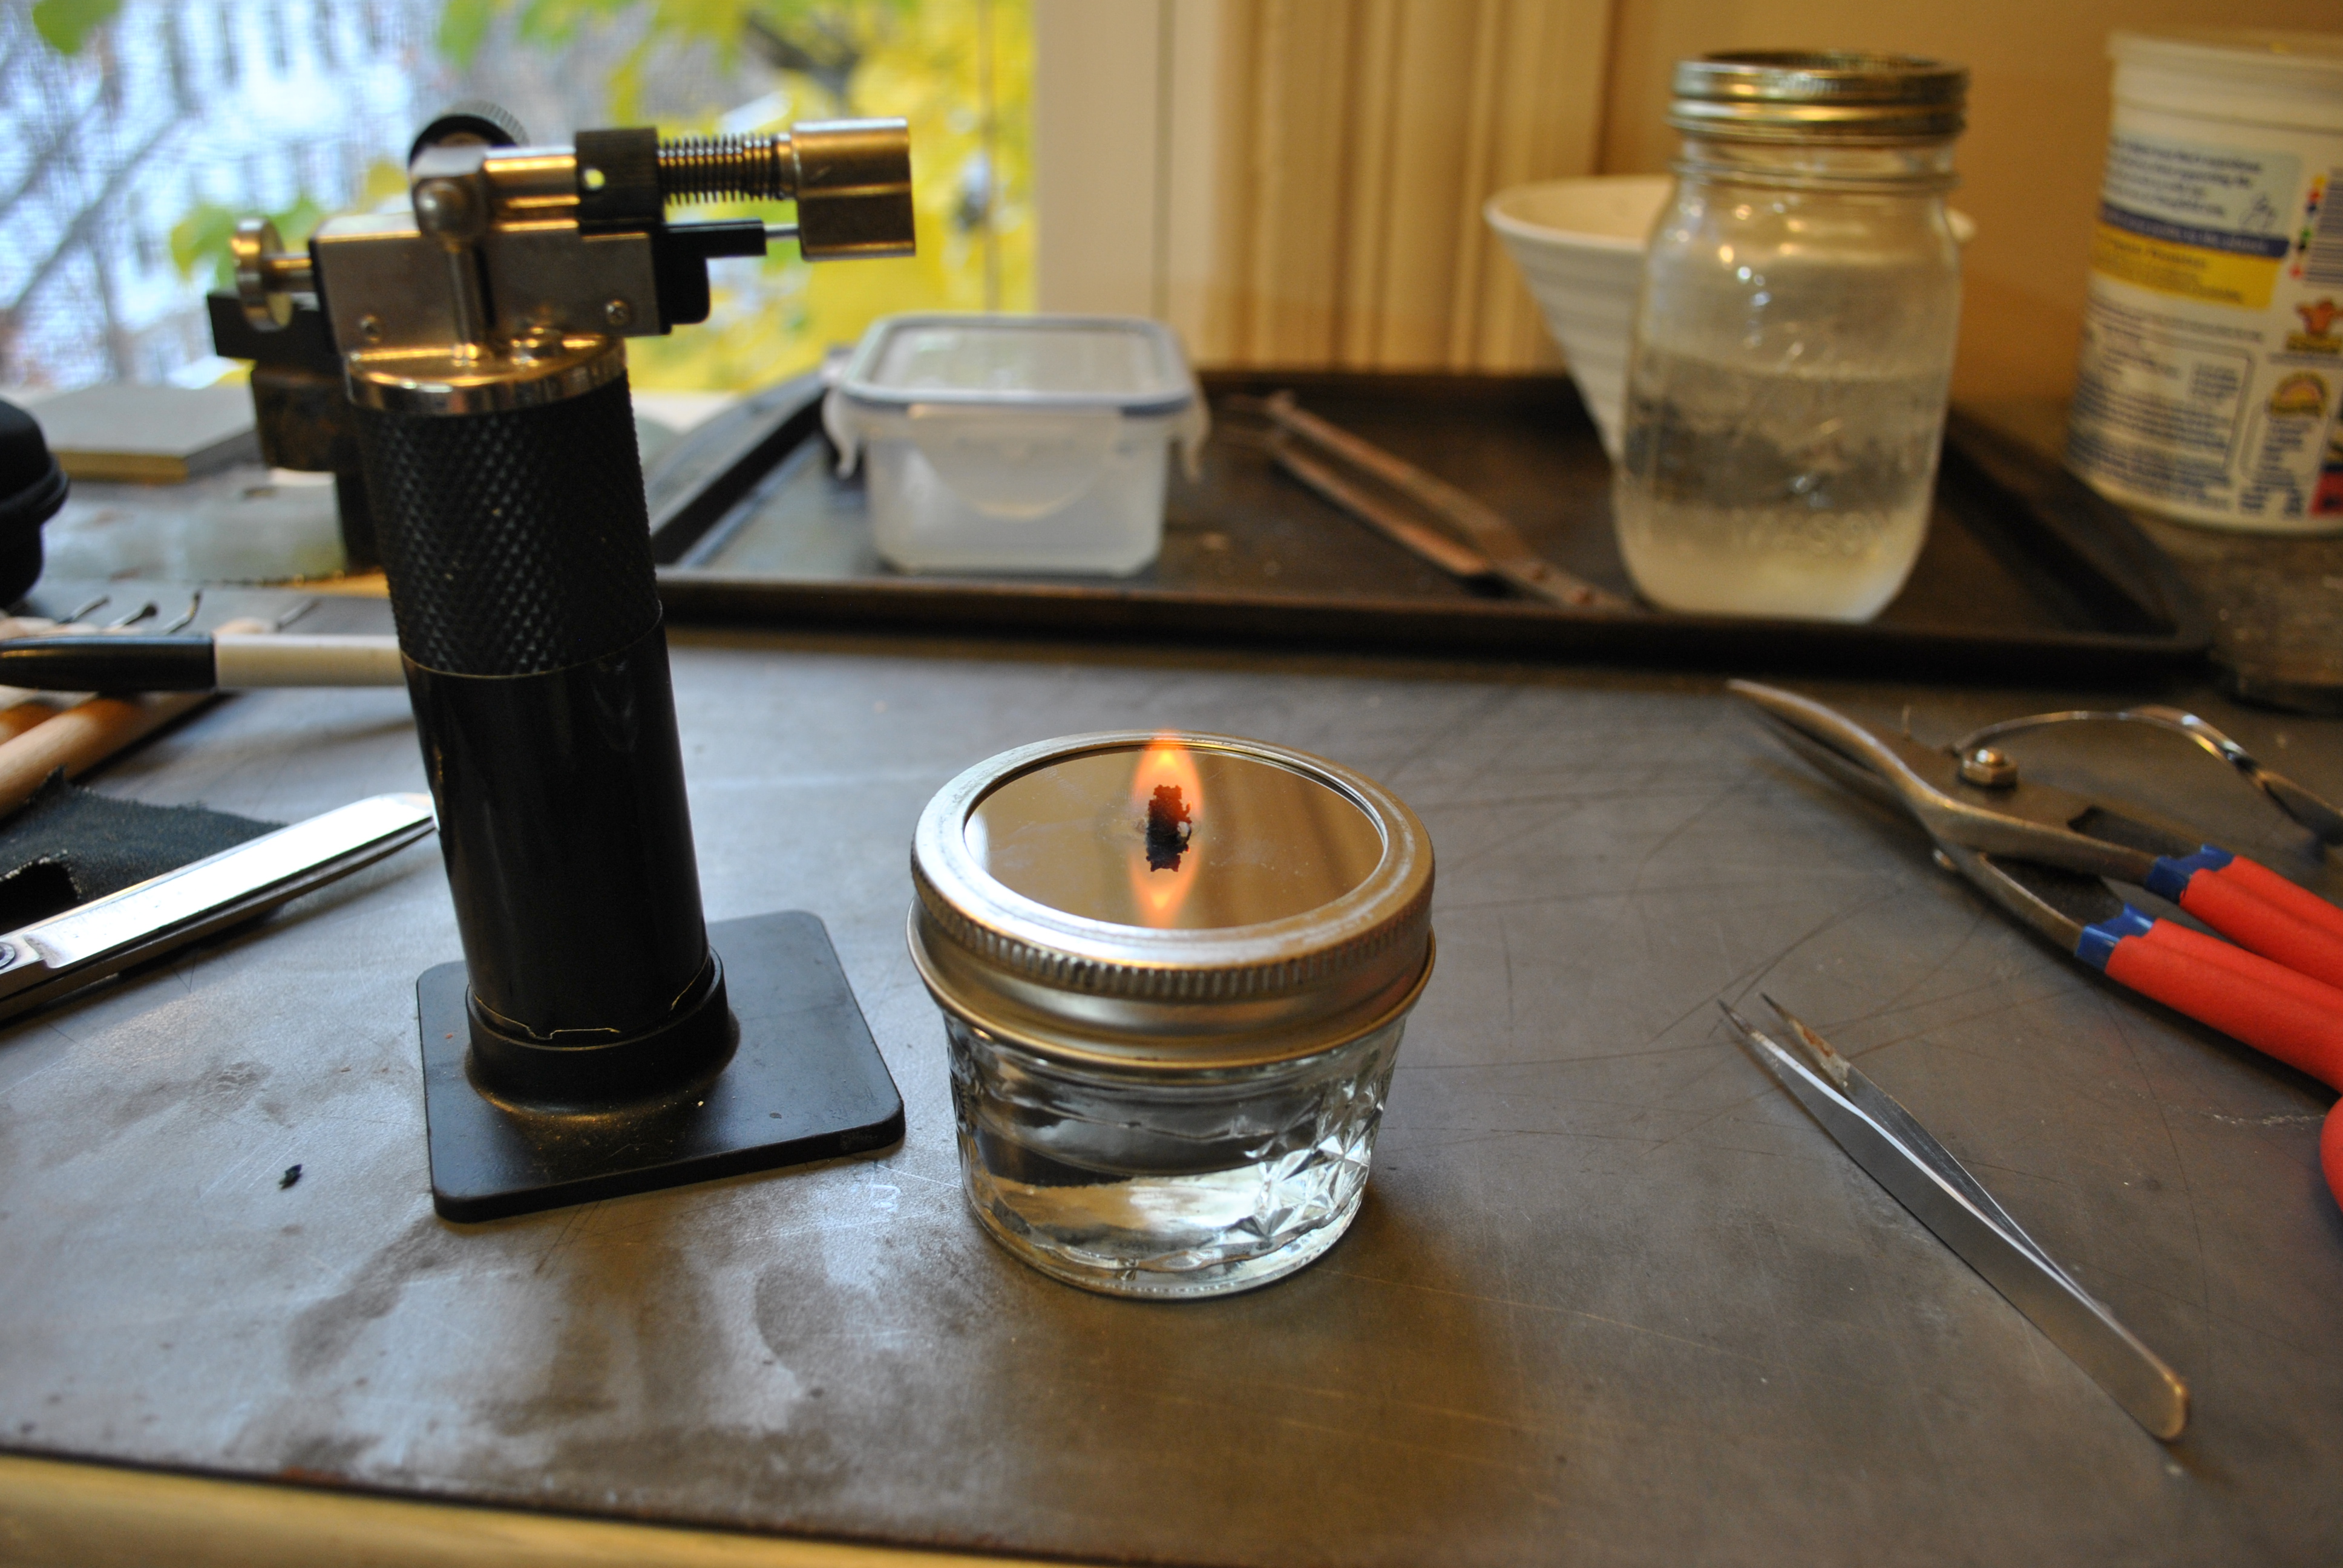
Another really handy thing to have is a source of heat for wax carving, adding sprues, and other waxy business. This can be as simple as a candle, but I wanted something a little more old school, but also something with some class. The tried and trusted way to do this is with a tiny alcohol lamp. I could have easily purchased one of these for 8 or 9 dollars online, but I am trying to save money. Plus I already had everything I would need for free!
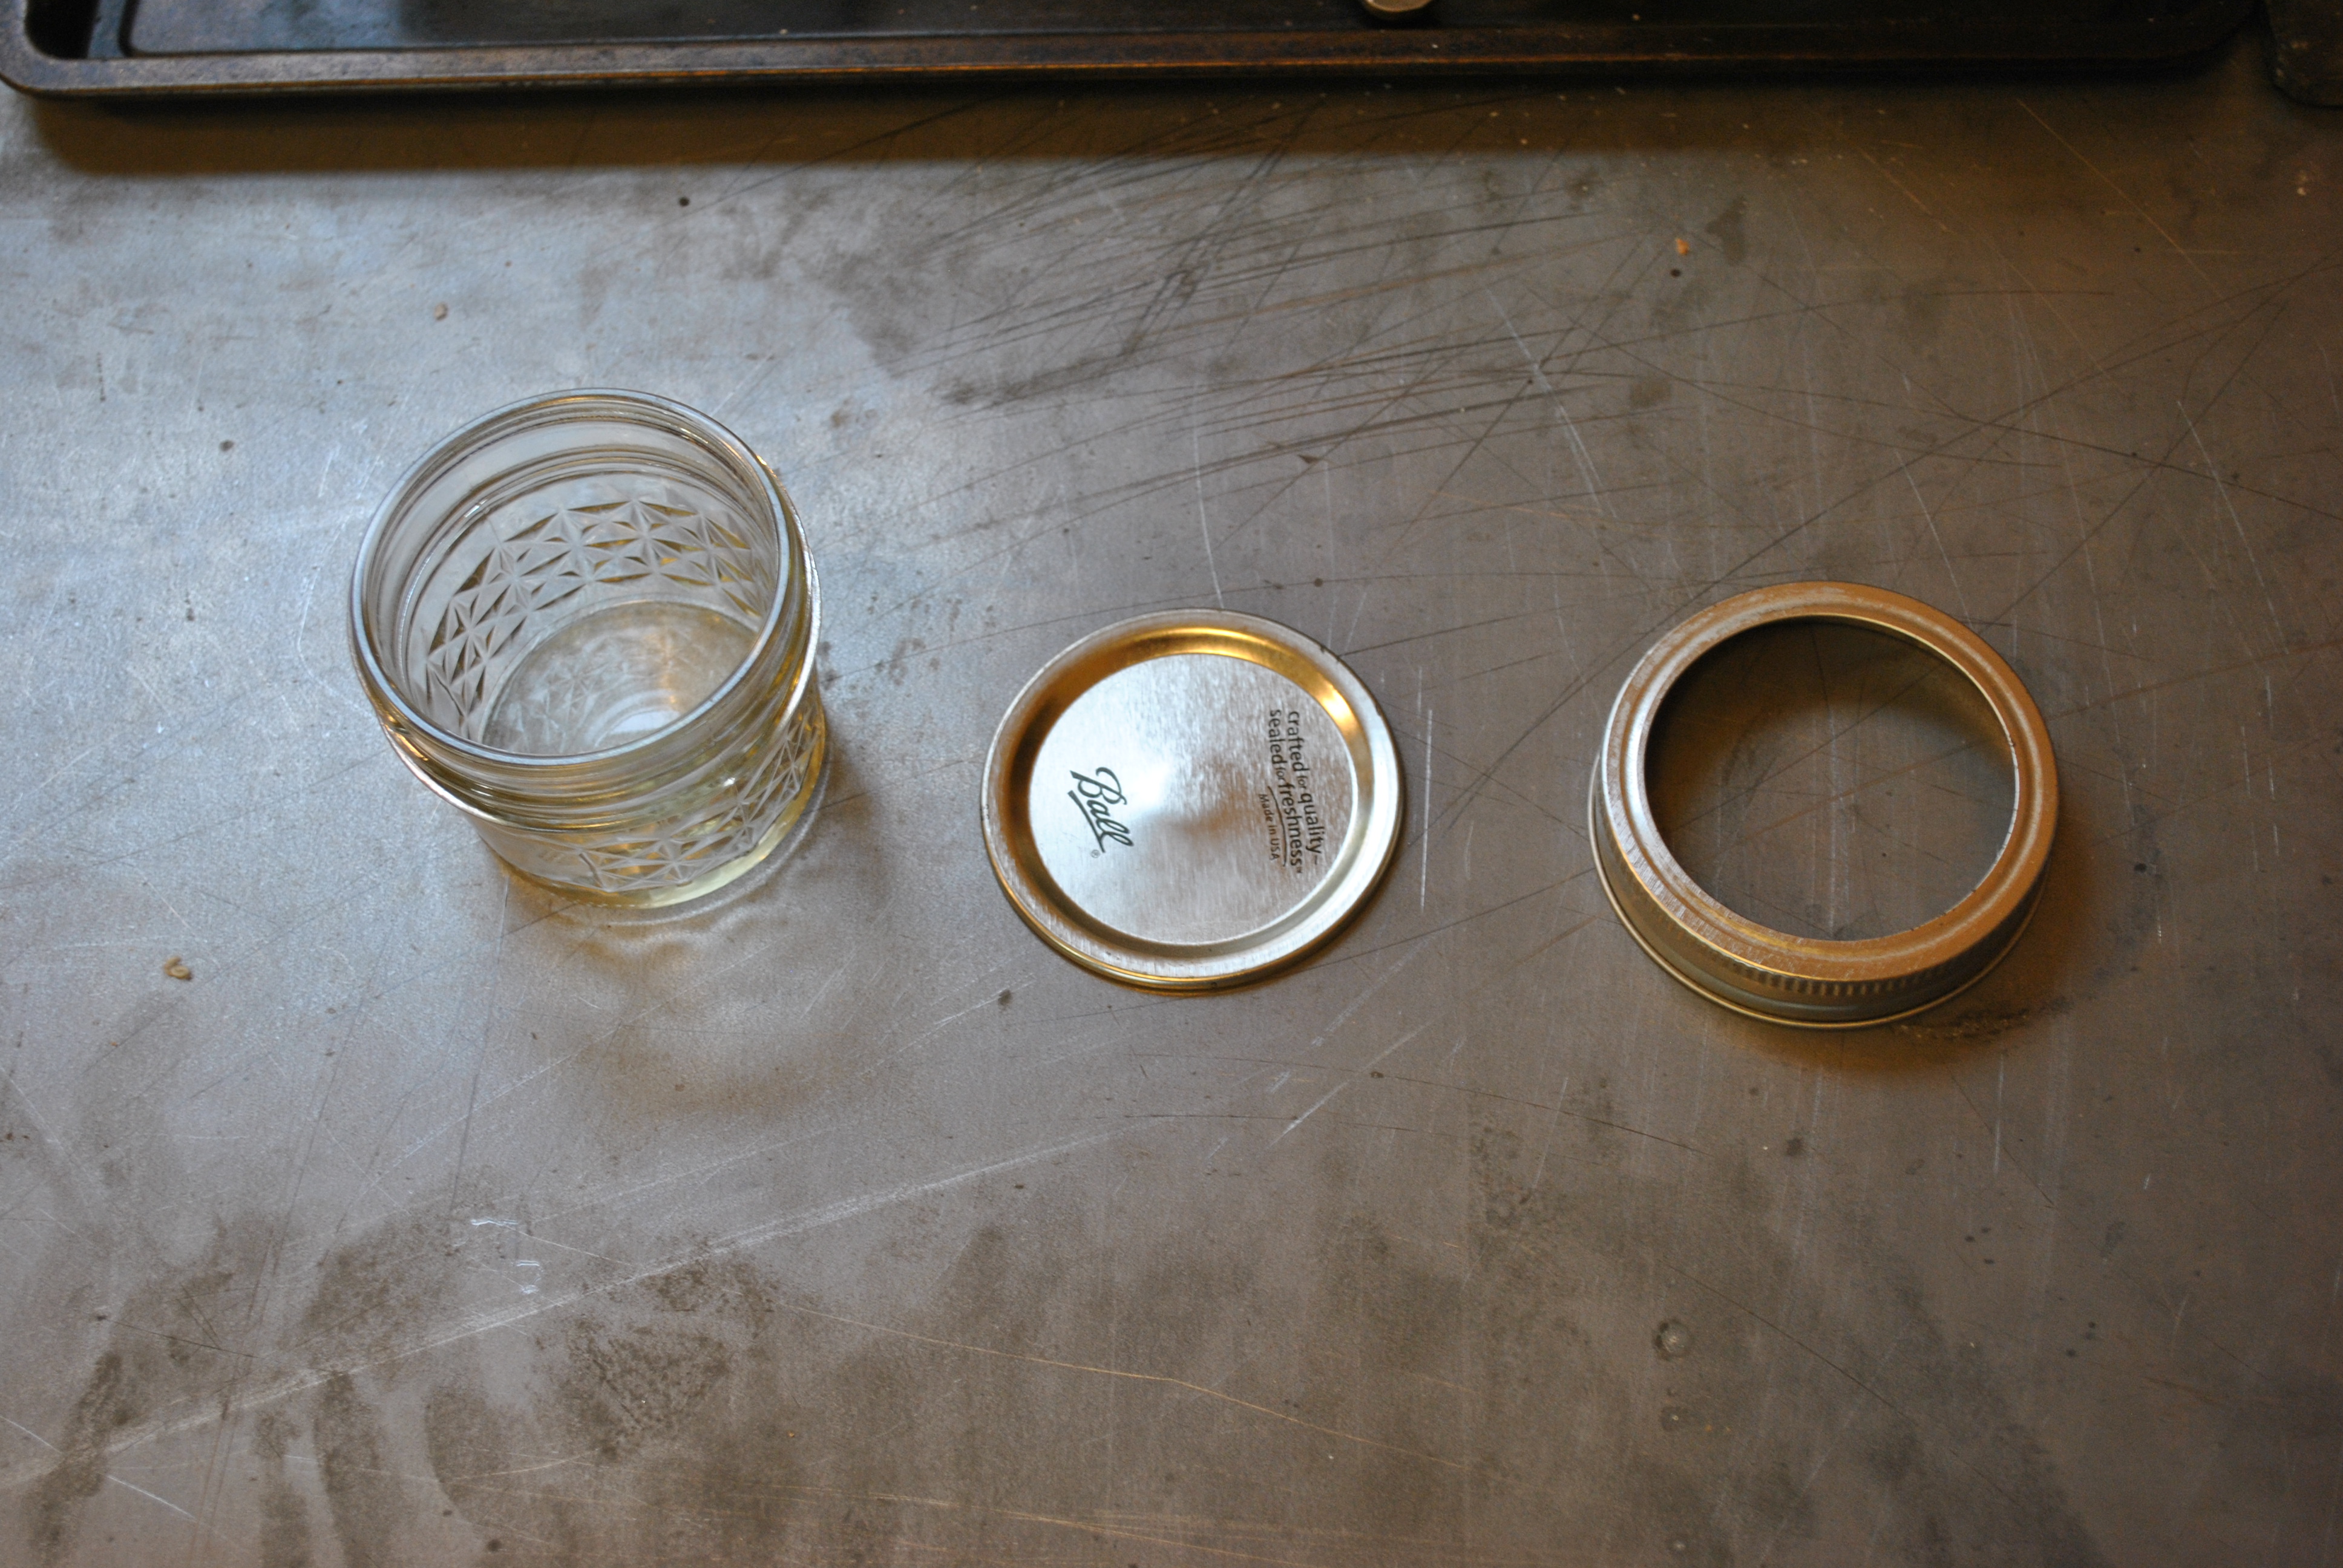
Step one, find yourself one of those super cute tiny mason jars. I use mason jars for just about everything, so I already had dozens of these things laying around. Make sure your’s has no cracks, and that the sleeve is in good shape.
We are not going to use the middle lid (it has a rubber/plastic backing that would burn up), but we are going to use it to trace. the size of the replacement lid.
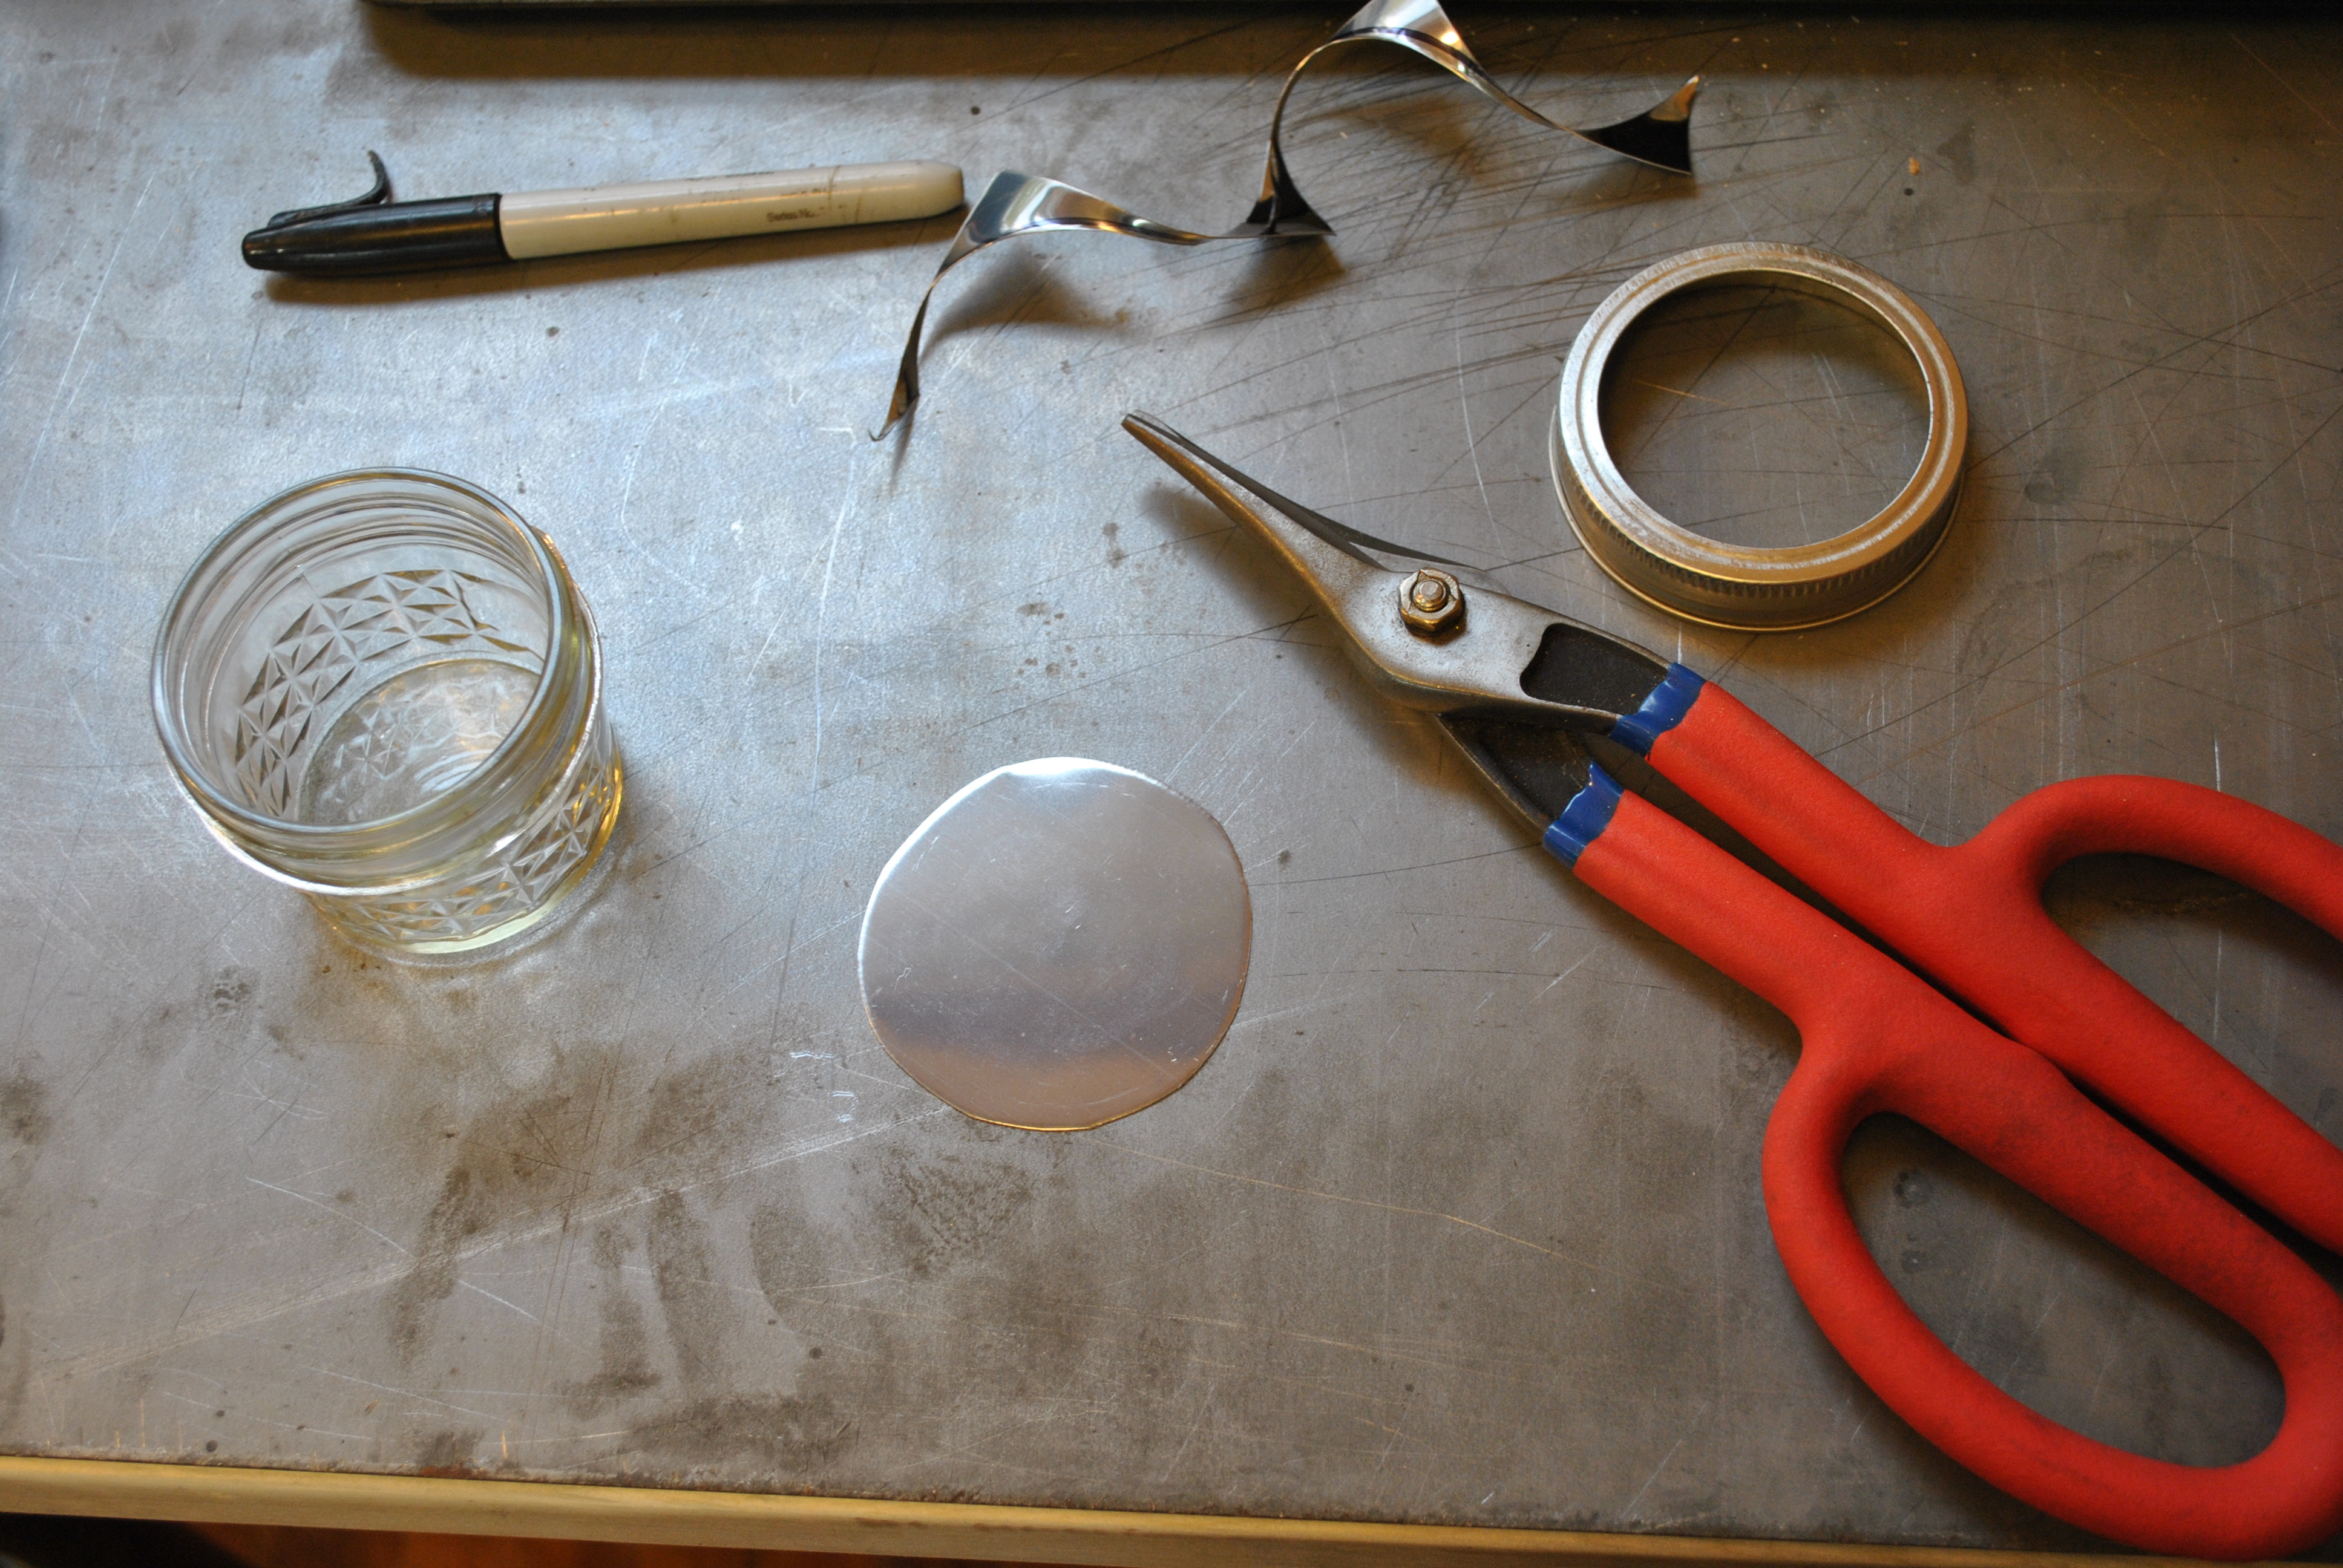
I had some stainless steel sheet laying around so I got a thin sheet out and traced the lid on it.
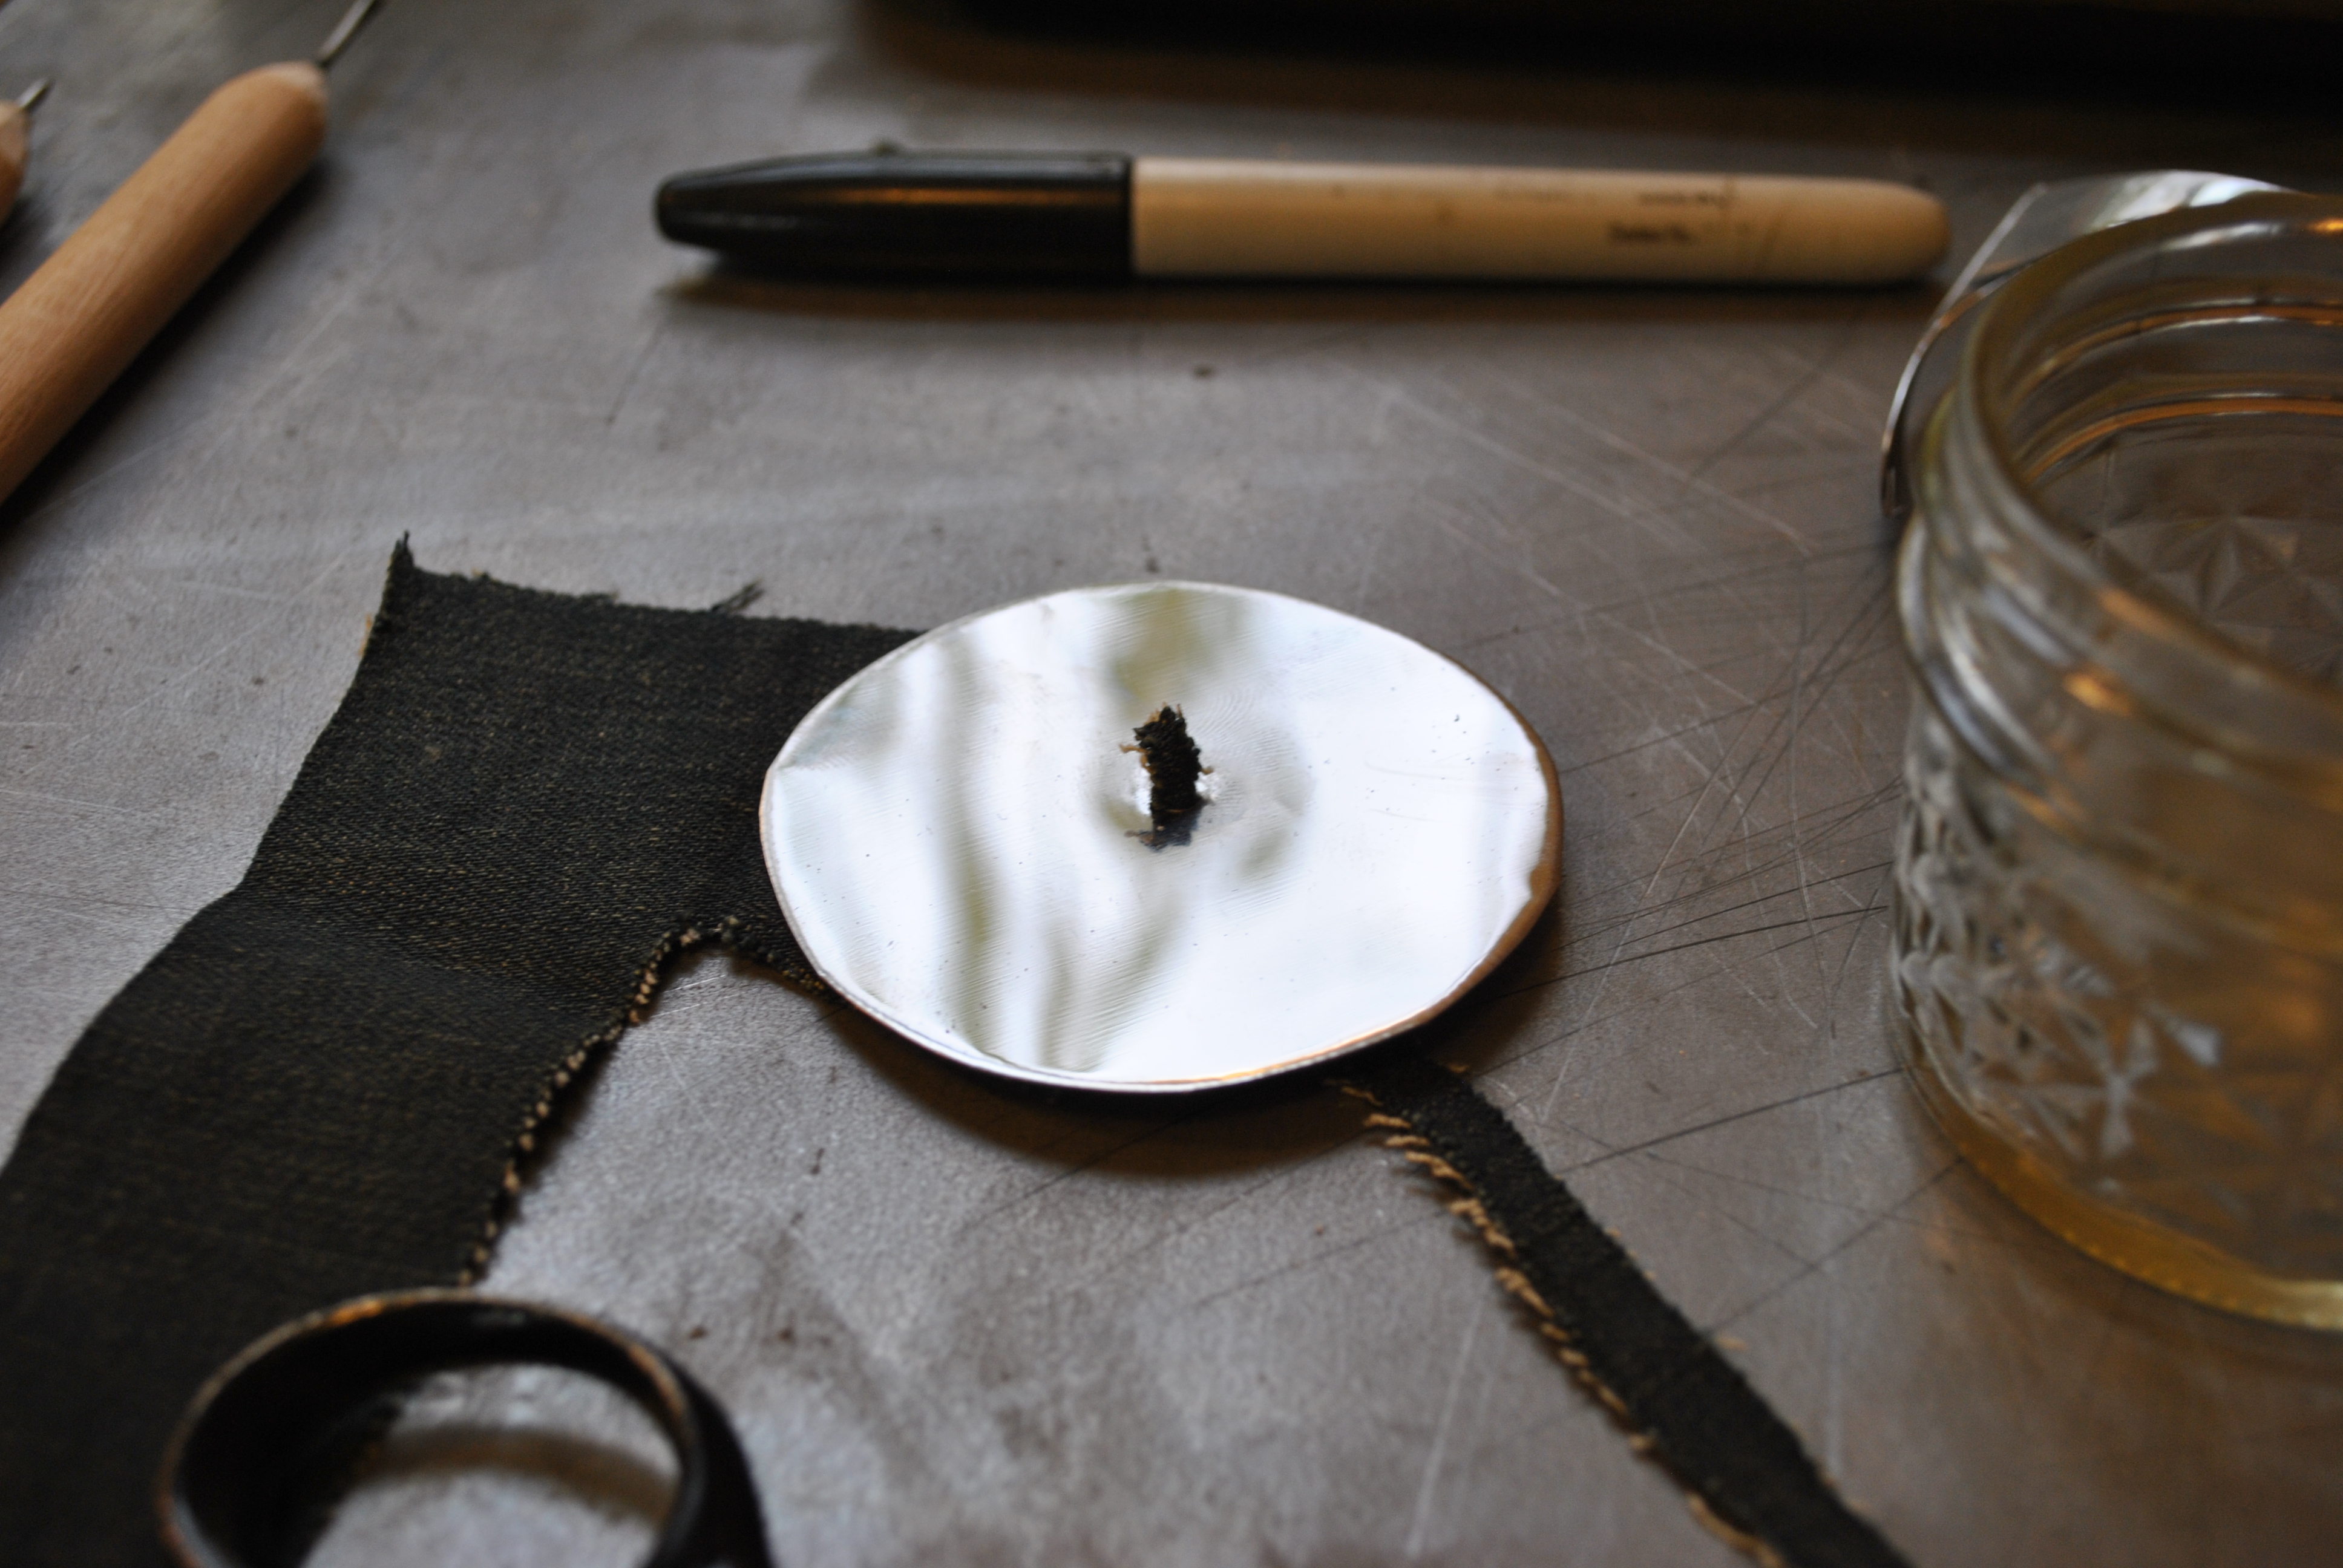
It was quick work with the tin snips and I had a very shiny lid replacement. It is important that the part of the lamp that will come in contact with the flame be entirely made of metal (for obvious reasons).
Your wick material can be any fabric or rope, so long as its 100% cotton. And old piece of jeans that I was using to sew up a newer pair of jeans made the perfect wick, denim is 100% cotton.
Drill a small hole in the middle of the steel circle. Your wick should be slightly wider than the hole but not by too much. Size your hole/wick combo accordingly.
You will need a fuel to burn, I highly suggest something intended for the job. Otherwise you might blow yourself up, or at the very least cause a nasty fire. Denatured alcohol should be your only choice. Don’t blame me if you use gasoline and burn your house down…I had this denatured alcohol laying around from a previous project.
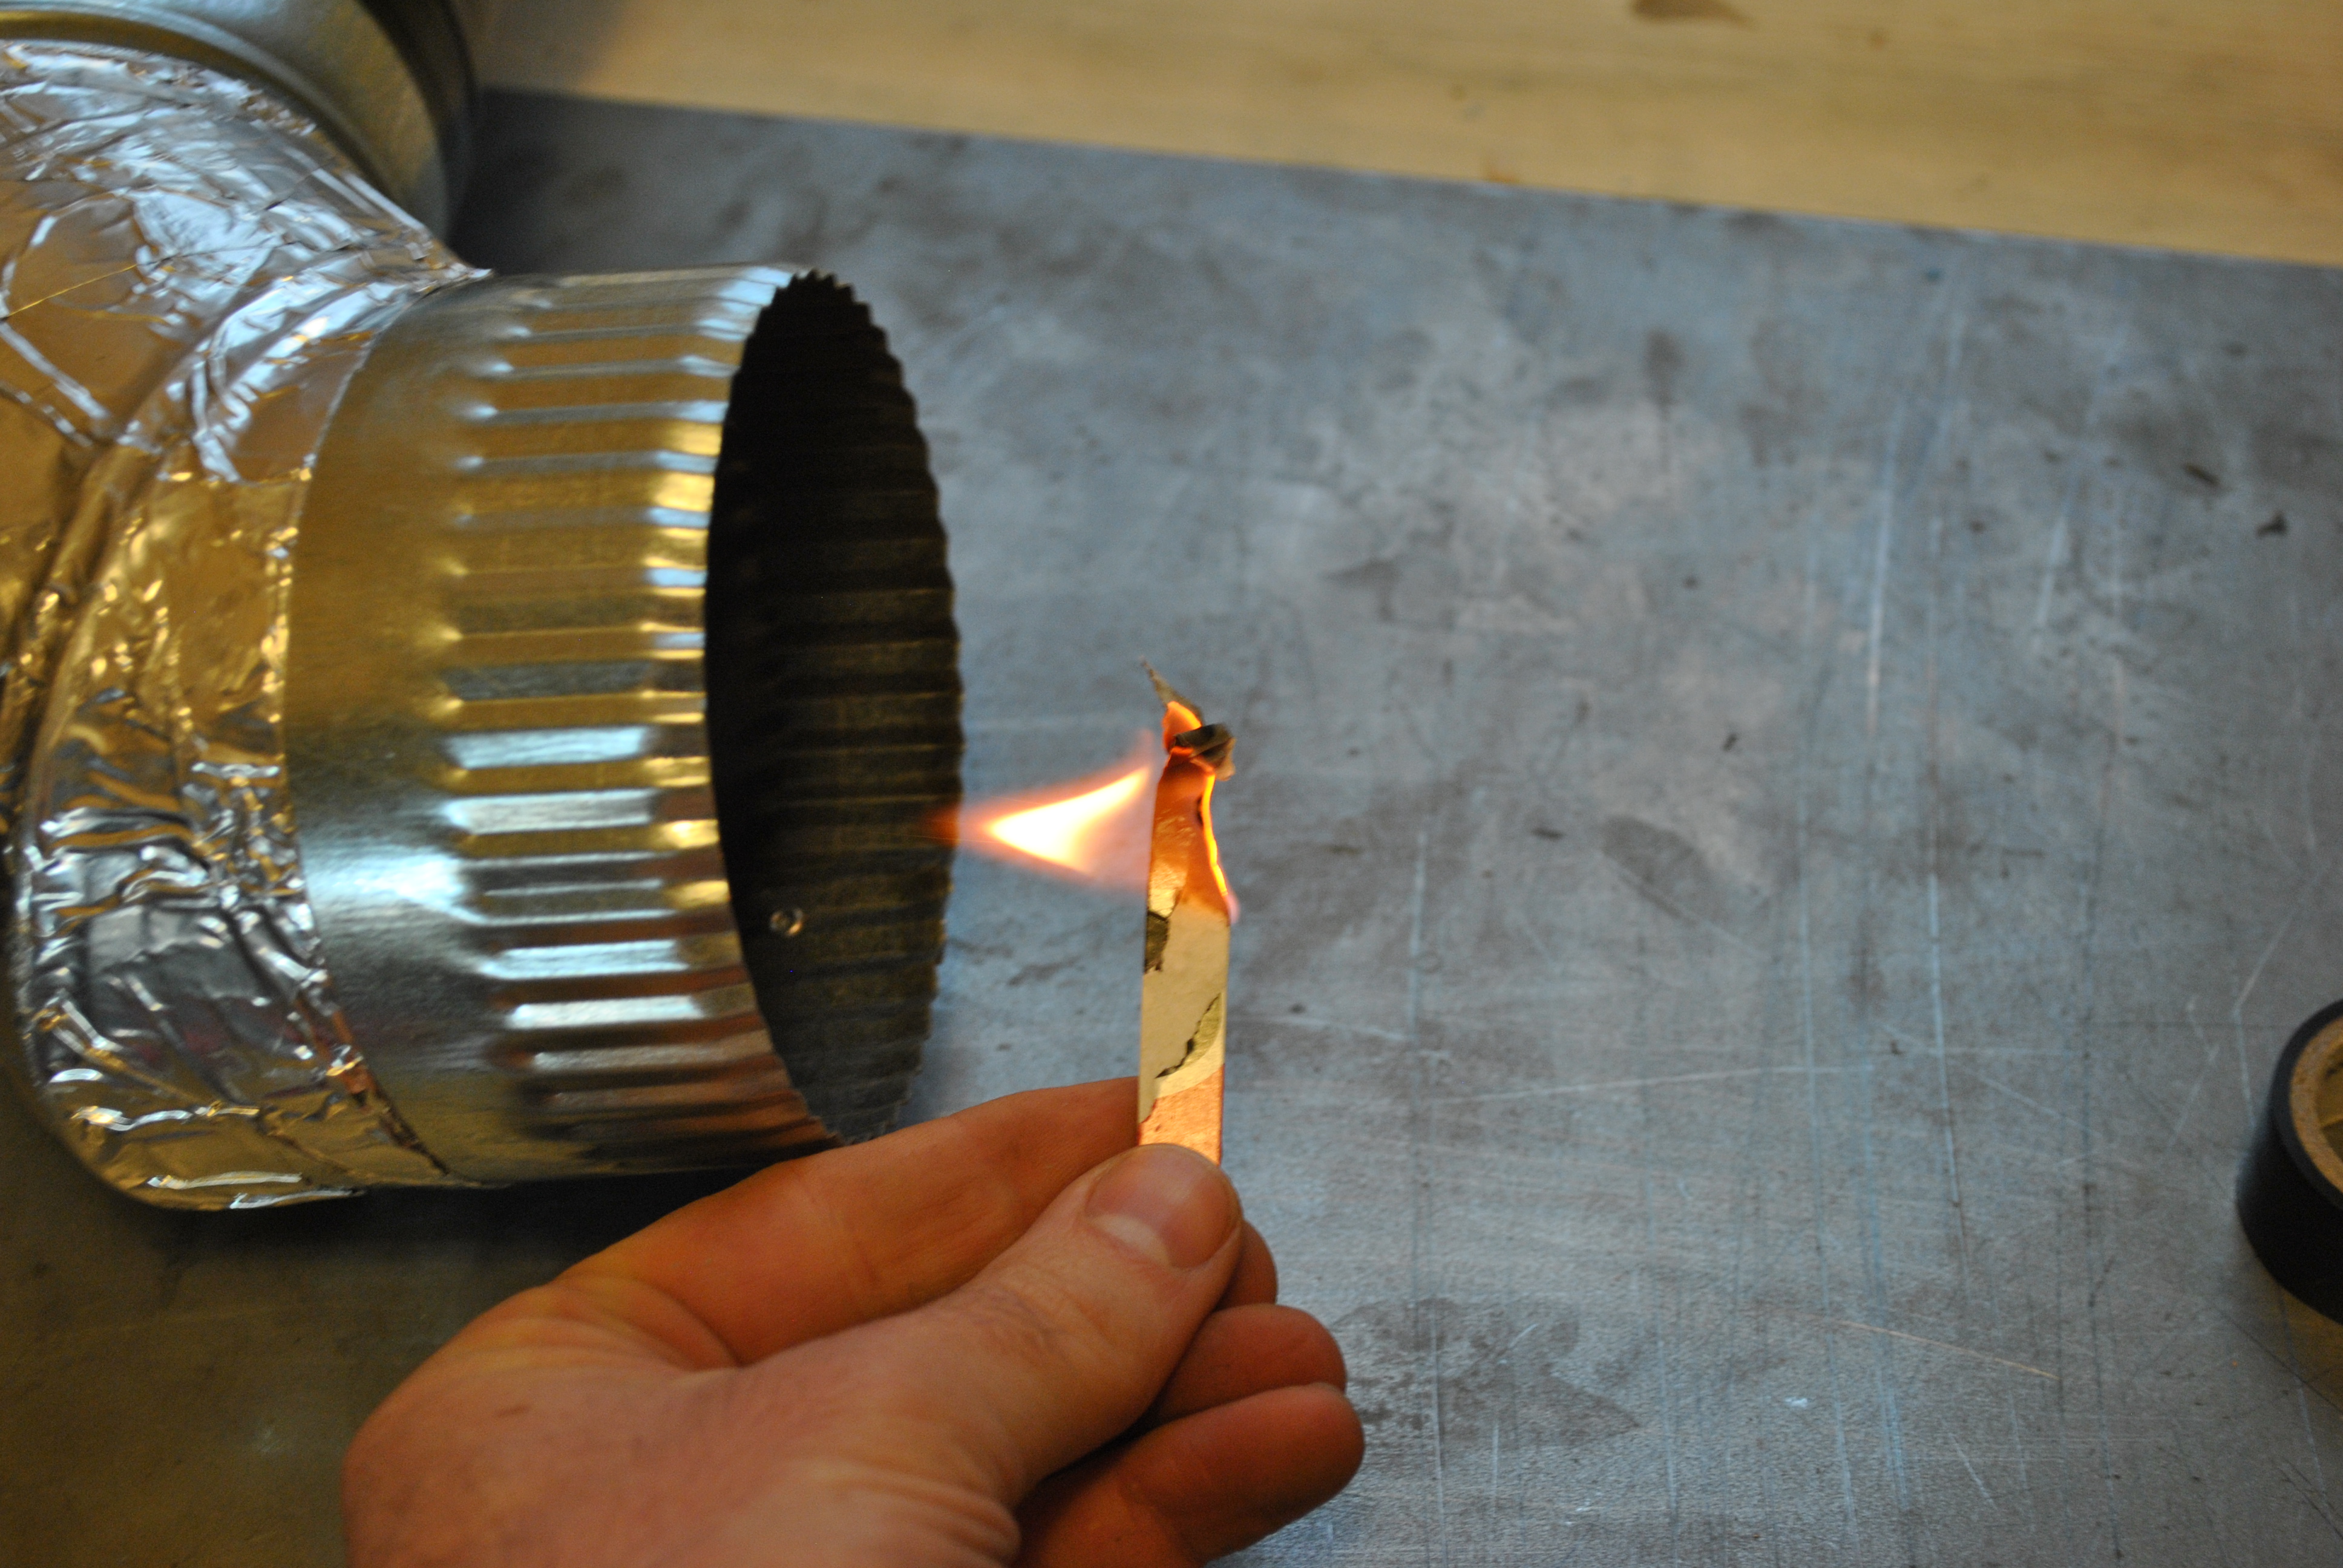
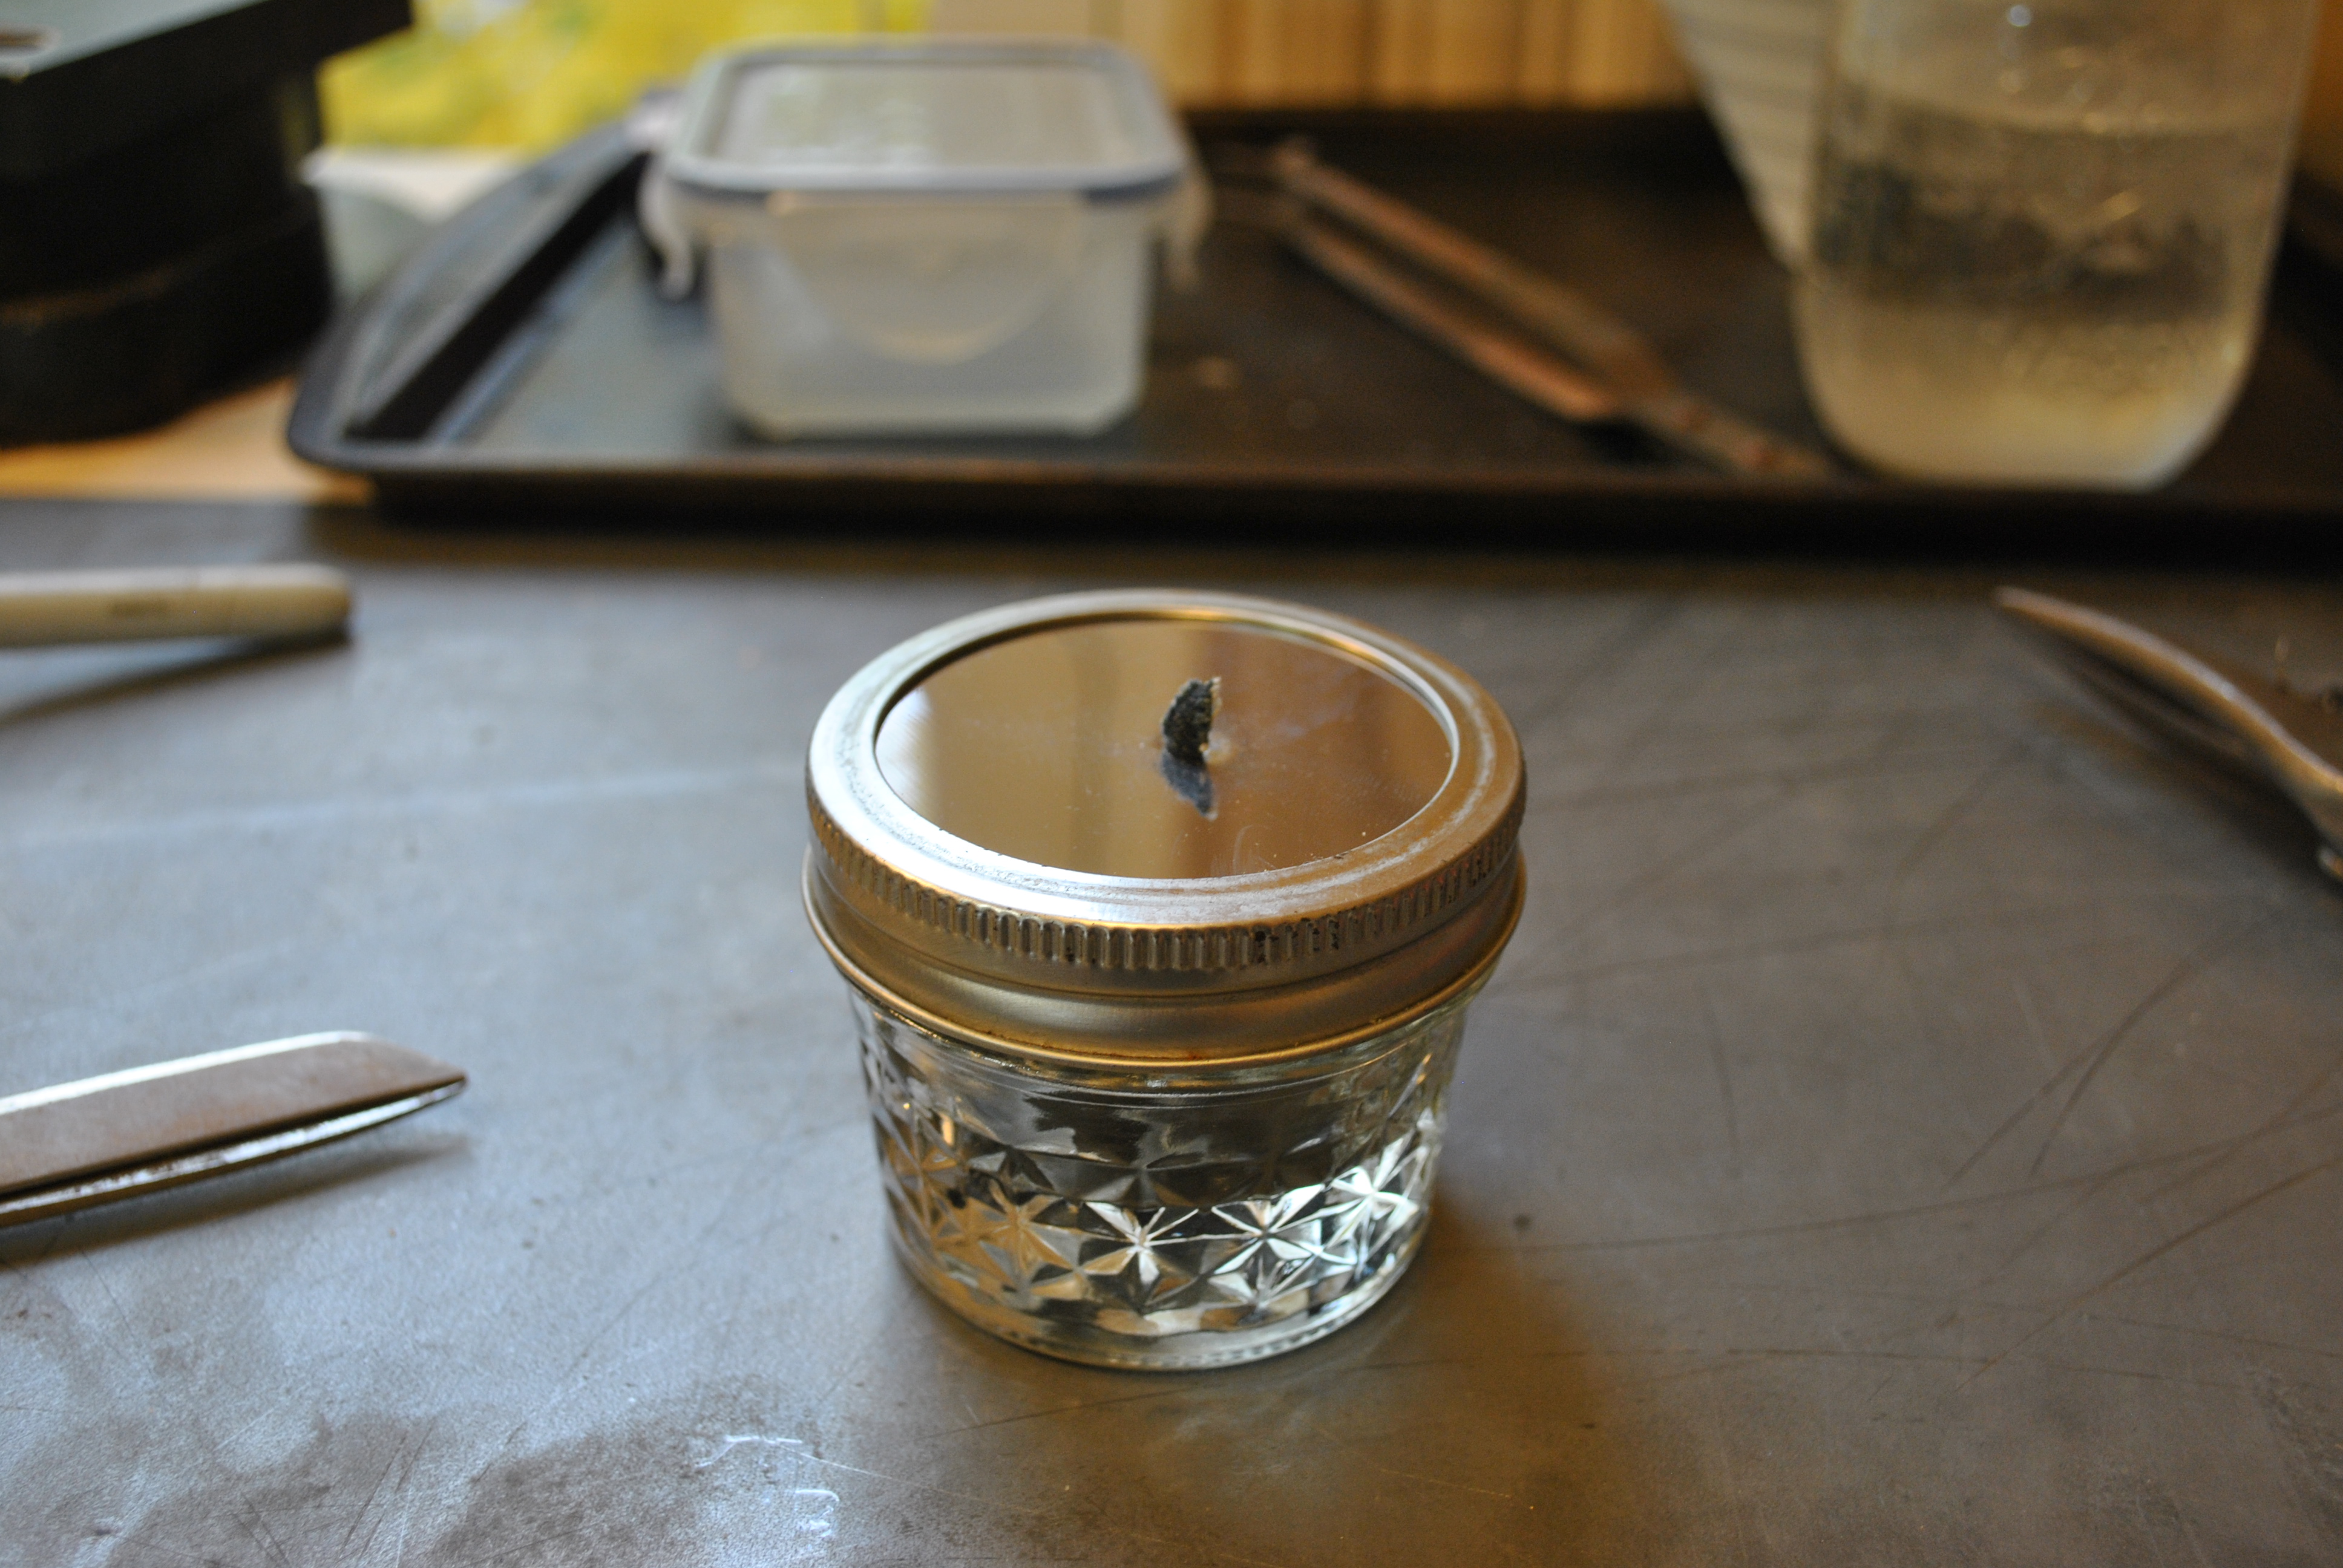
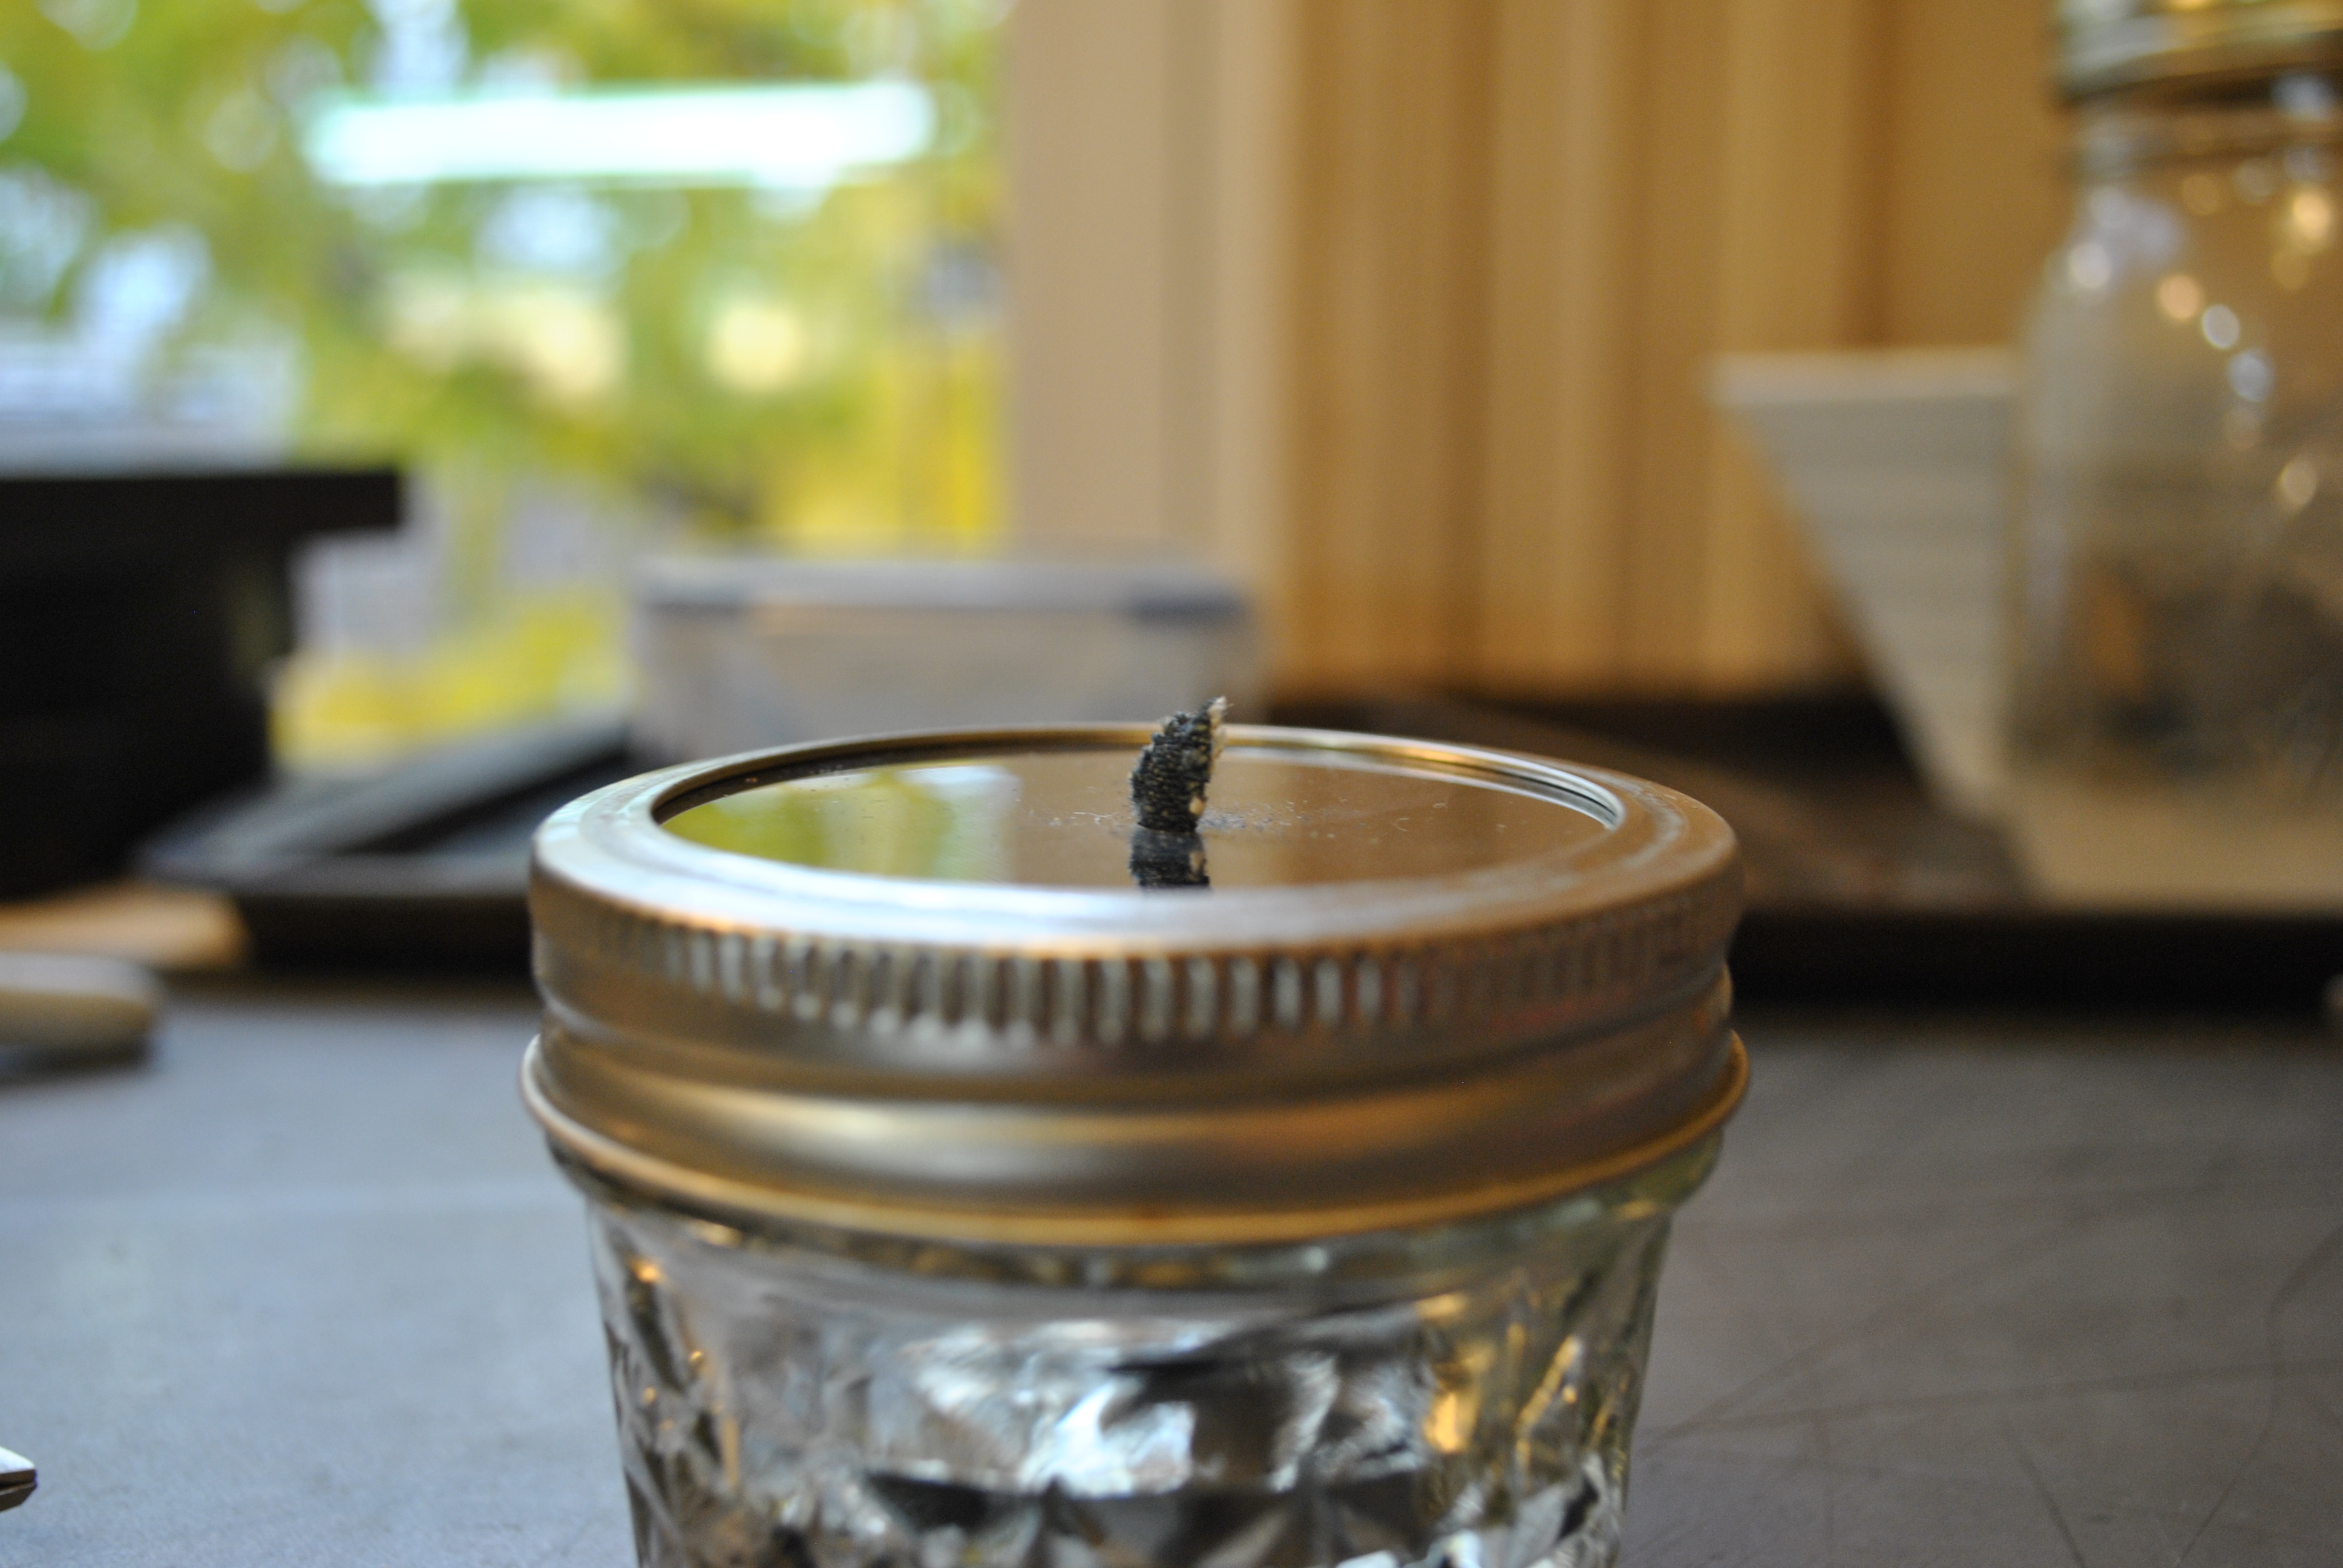
Fill the glass 3/4 full and soak the wick in the alcohol for several seconds before pulling a small bit of it through the hole. Put the lid on securely with the sleeve and light your new alcohol lamp!
I let this guy burn for 5 or 6 minutes just to see what would happen. You know you have done it right when the wick stays blue and only turns black on the top, that means that the alcohol is burning and not the wick. You can control the size of the flames by controlling how much wick you pull through. If you are having trouble with your wick burning down too fast try putting a bit more alcohol into the glass (still leaving an air space at the top), as I have found that it helps it soak up the wick faster if the level of the fuel is closer.
Materials used:
Small mason jar
Stainless steel sheet
Old piece of denim
Denatured Alcohol
Tools used:
Sharpie
Scissors
Tin Snips
Drill and drill bit (but you could use a screw driver or punch and a hammer)
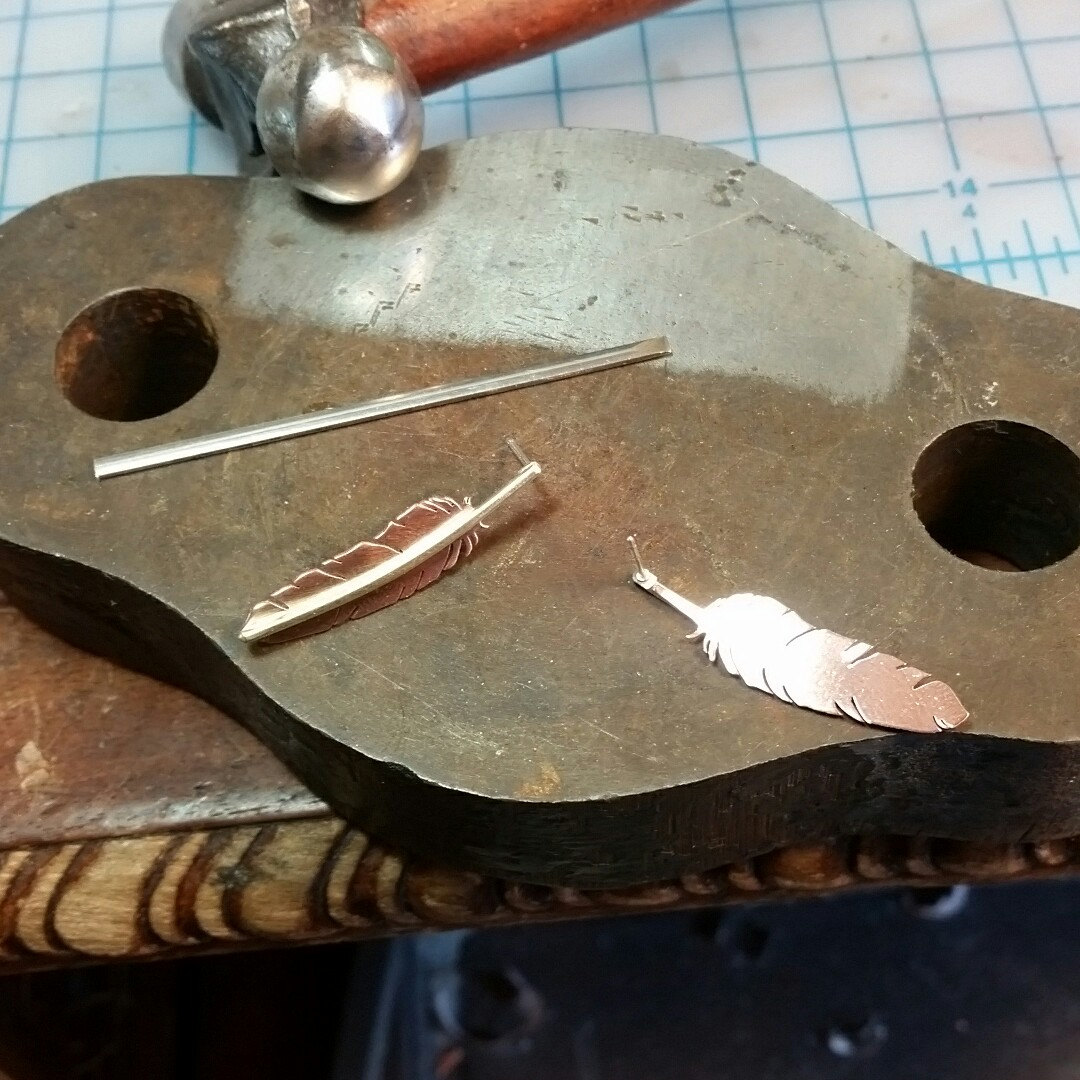
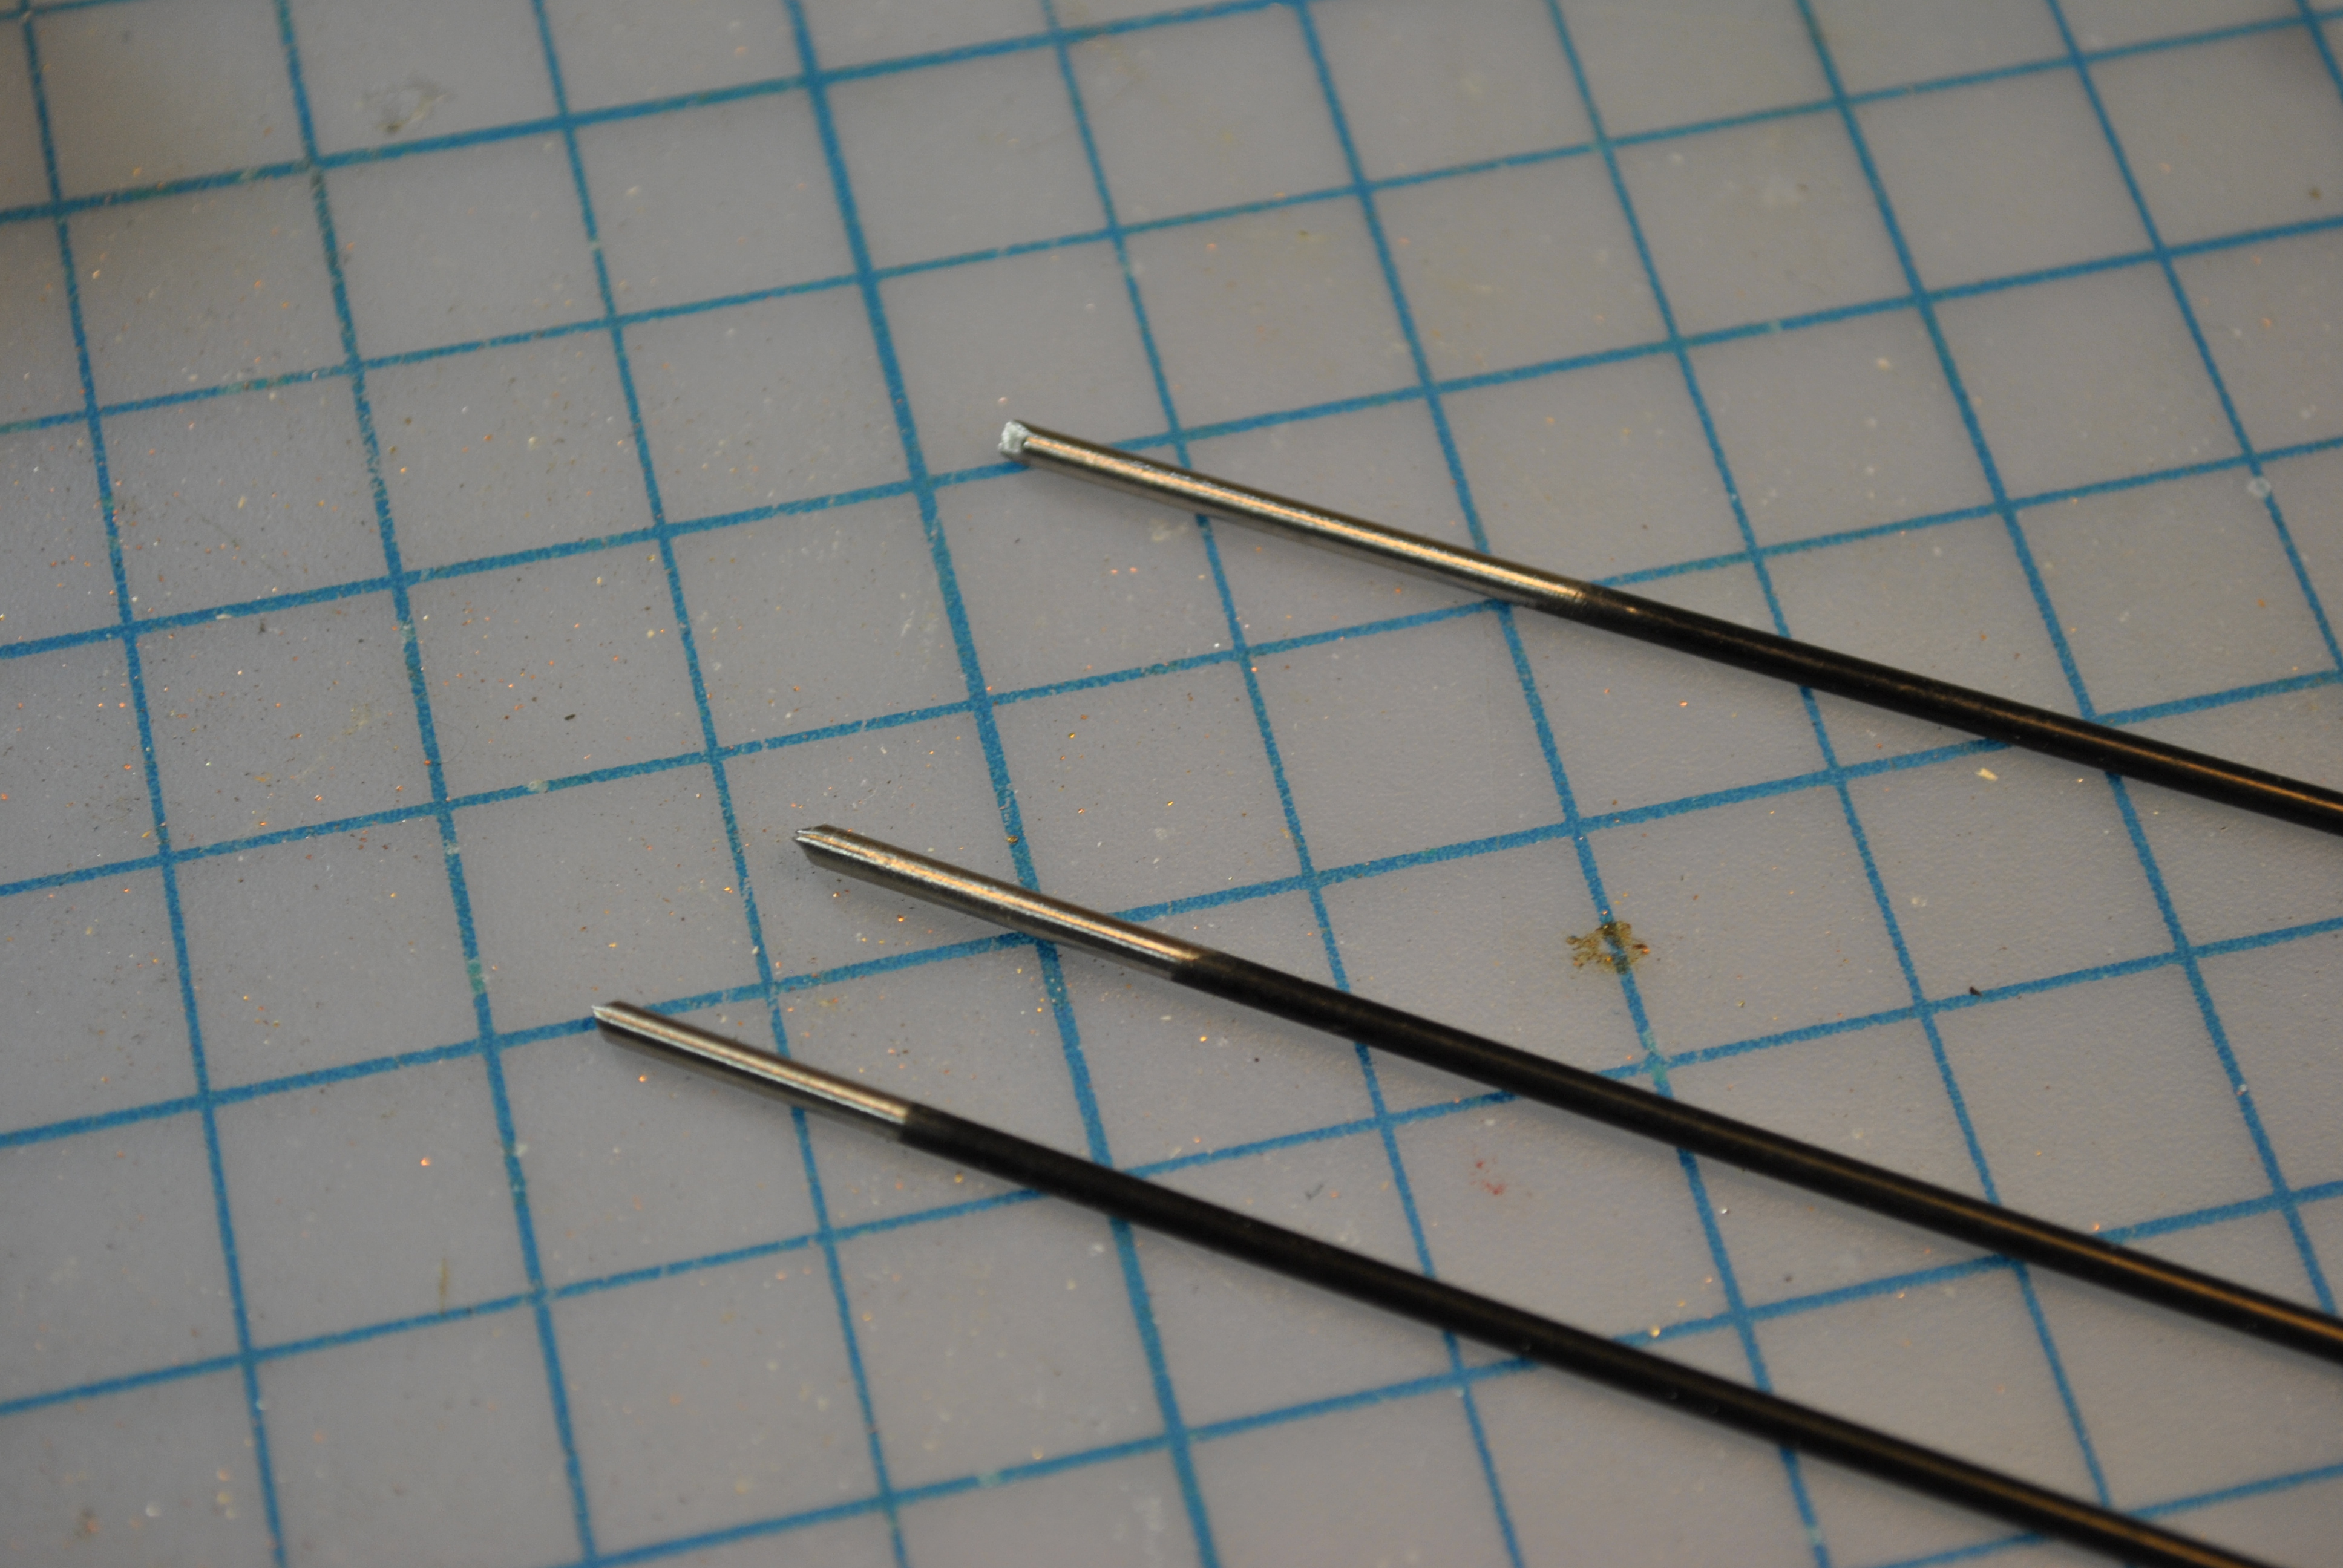
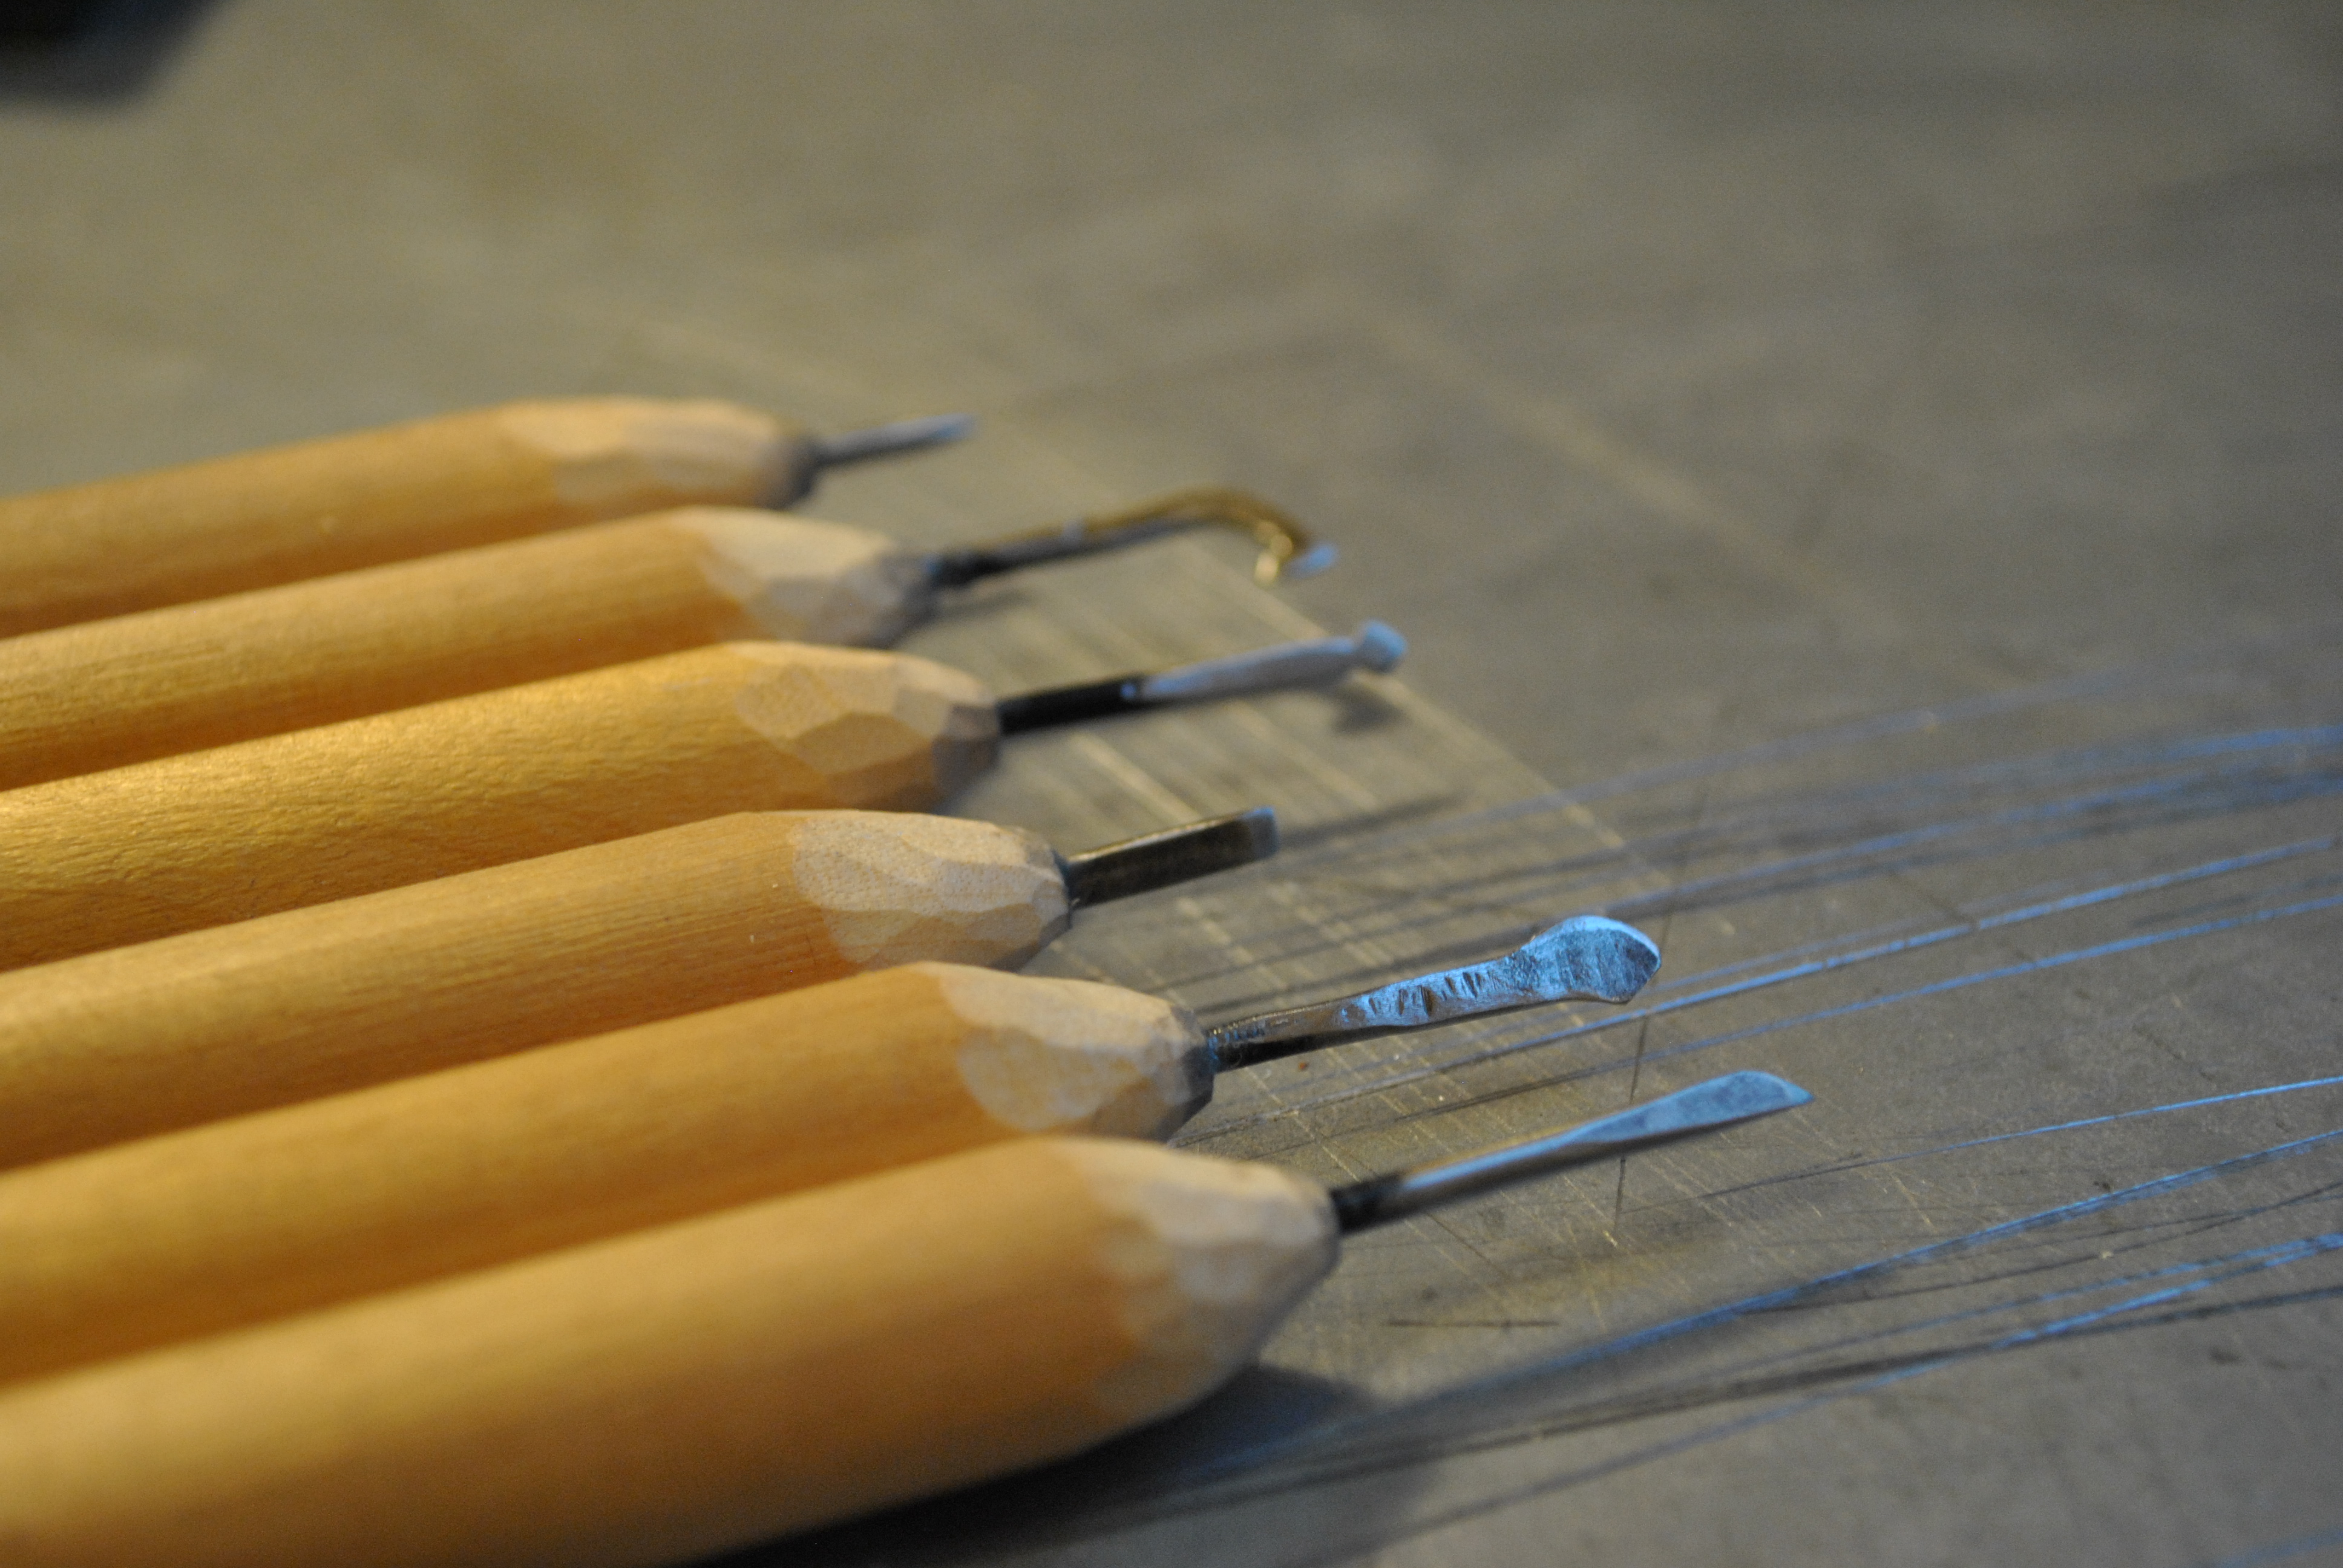
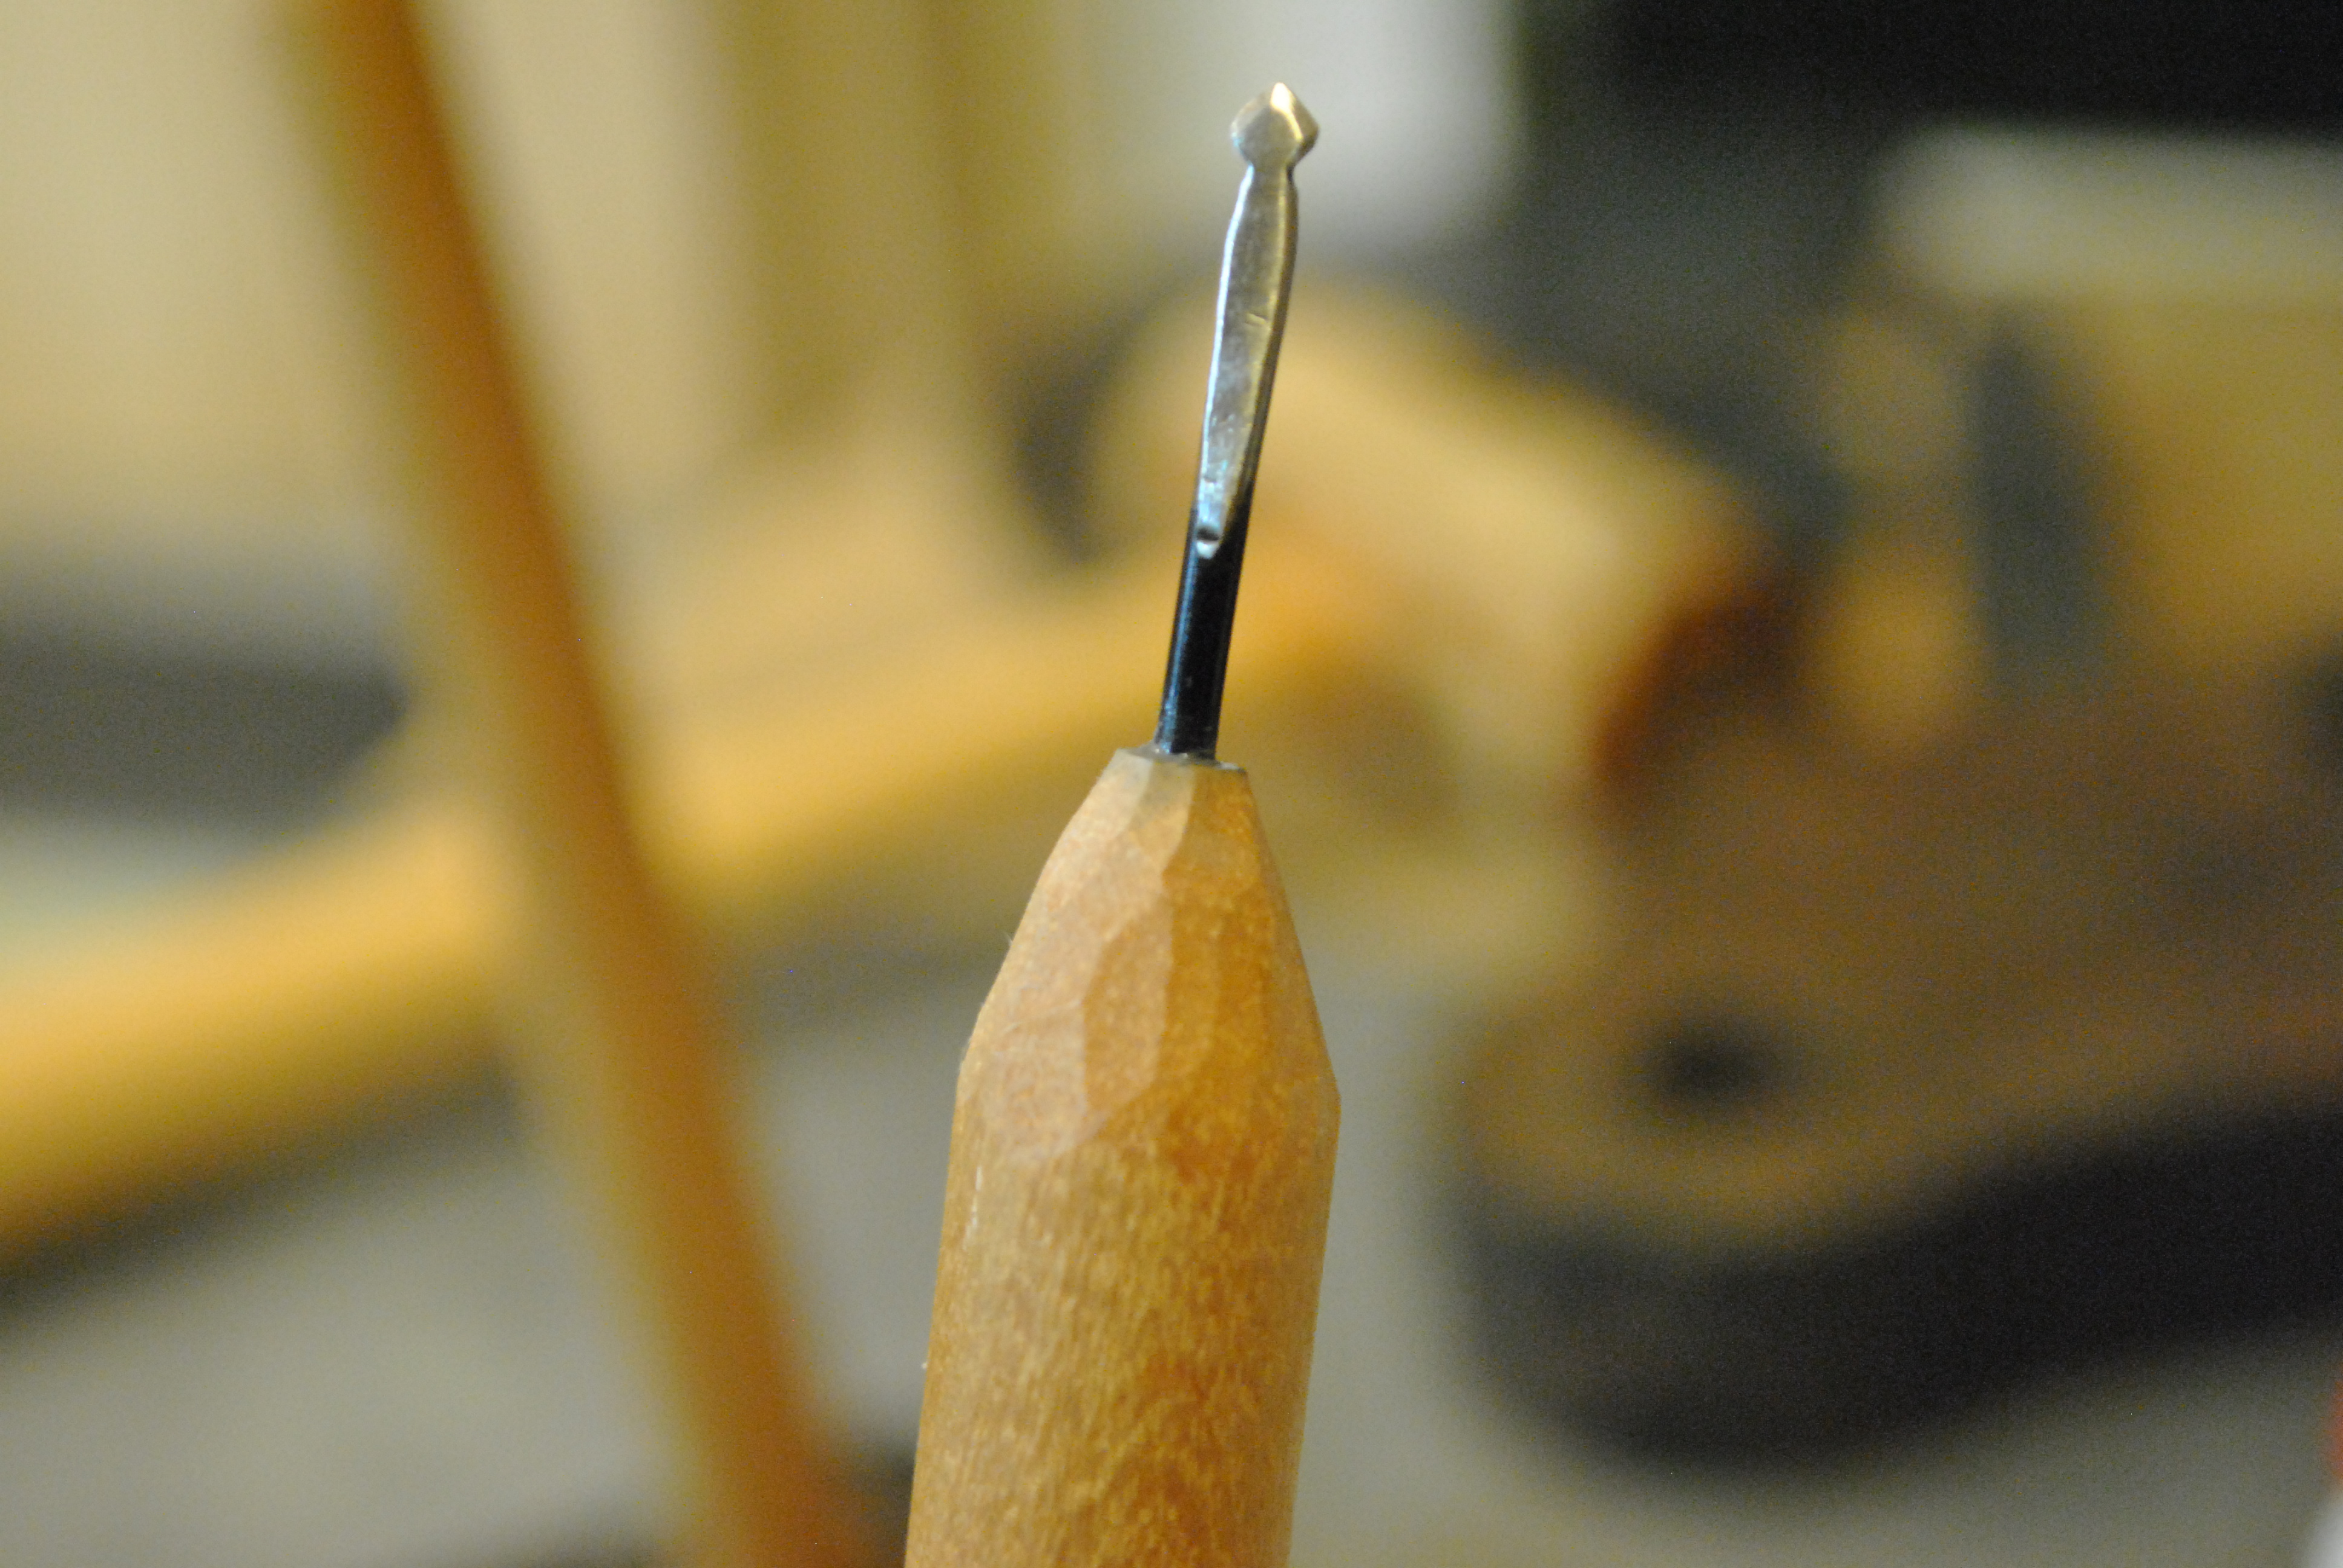
You want to carve wax, you need wax tools. There are some rather dashing and lovely tools available on the internet, problem is they all cost money, money I am trying to avoid spending. A quick google search or two confirms my suspicious that wax carving tools are basically wooden handles with steel point bits at the end. I have some steel bicycle spokes, and a hard wood dowel that will make a lovely handle. So off I go!
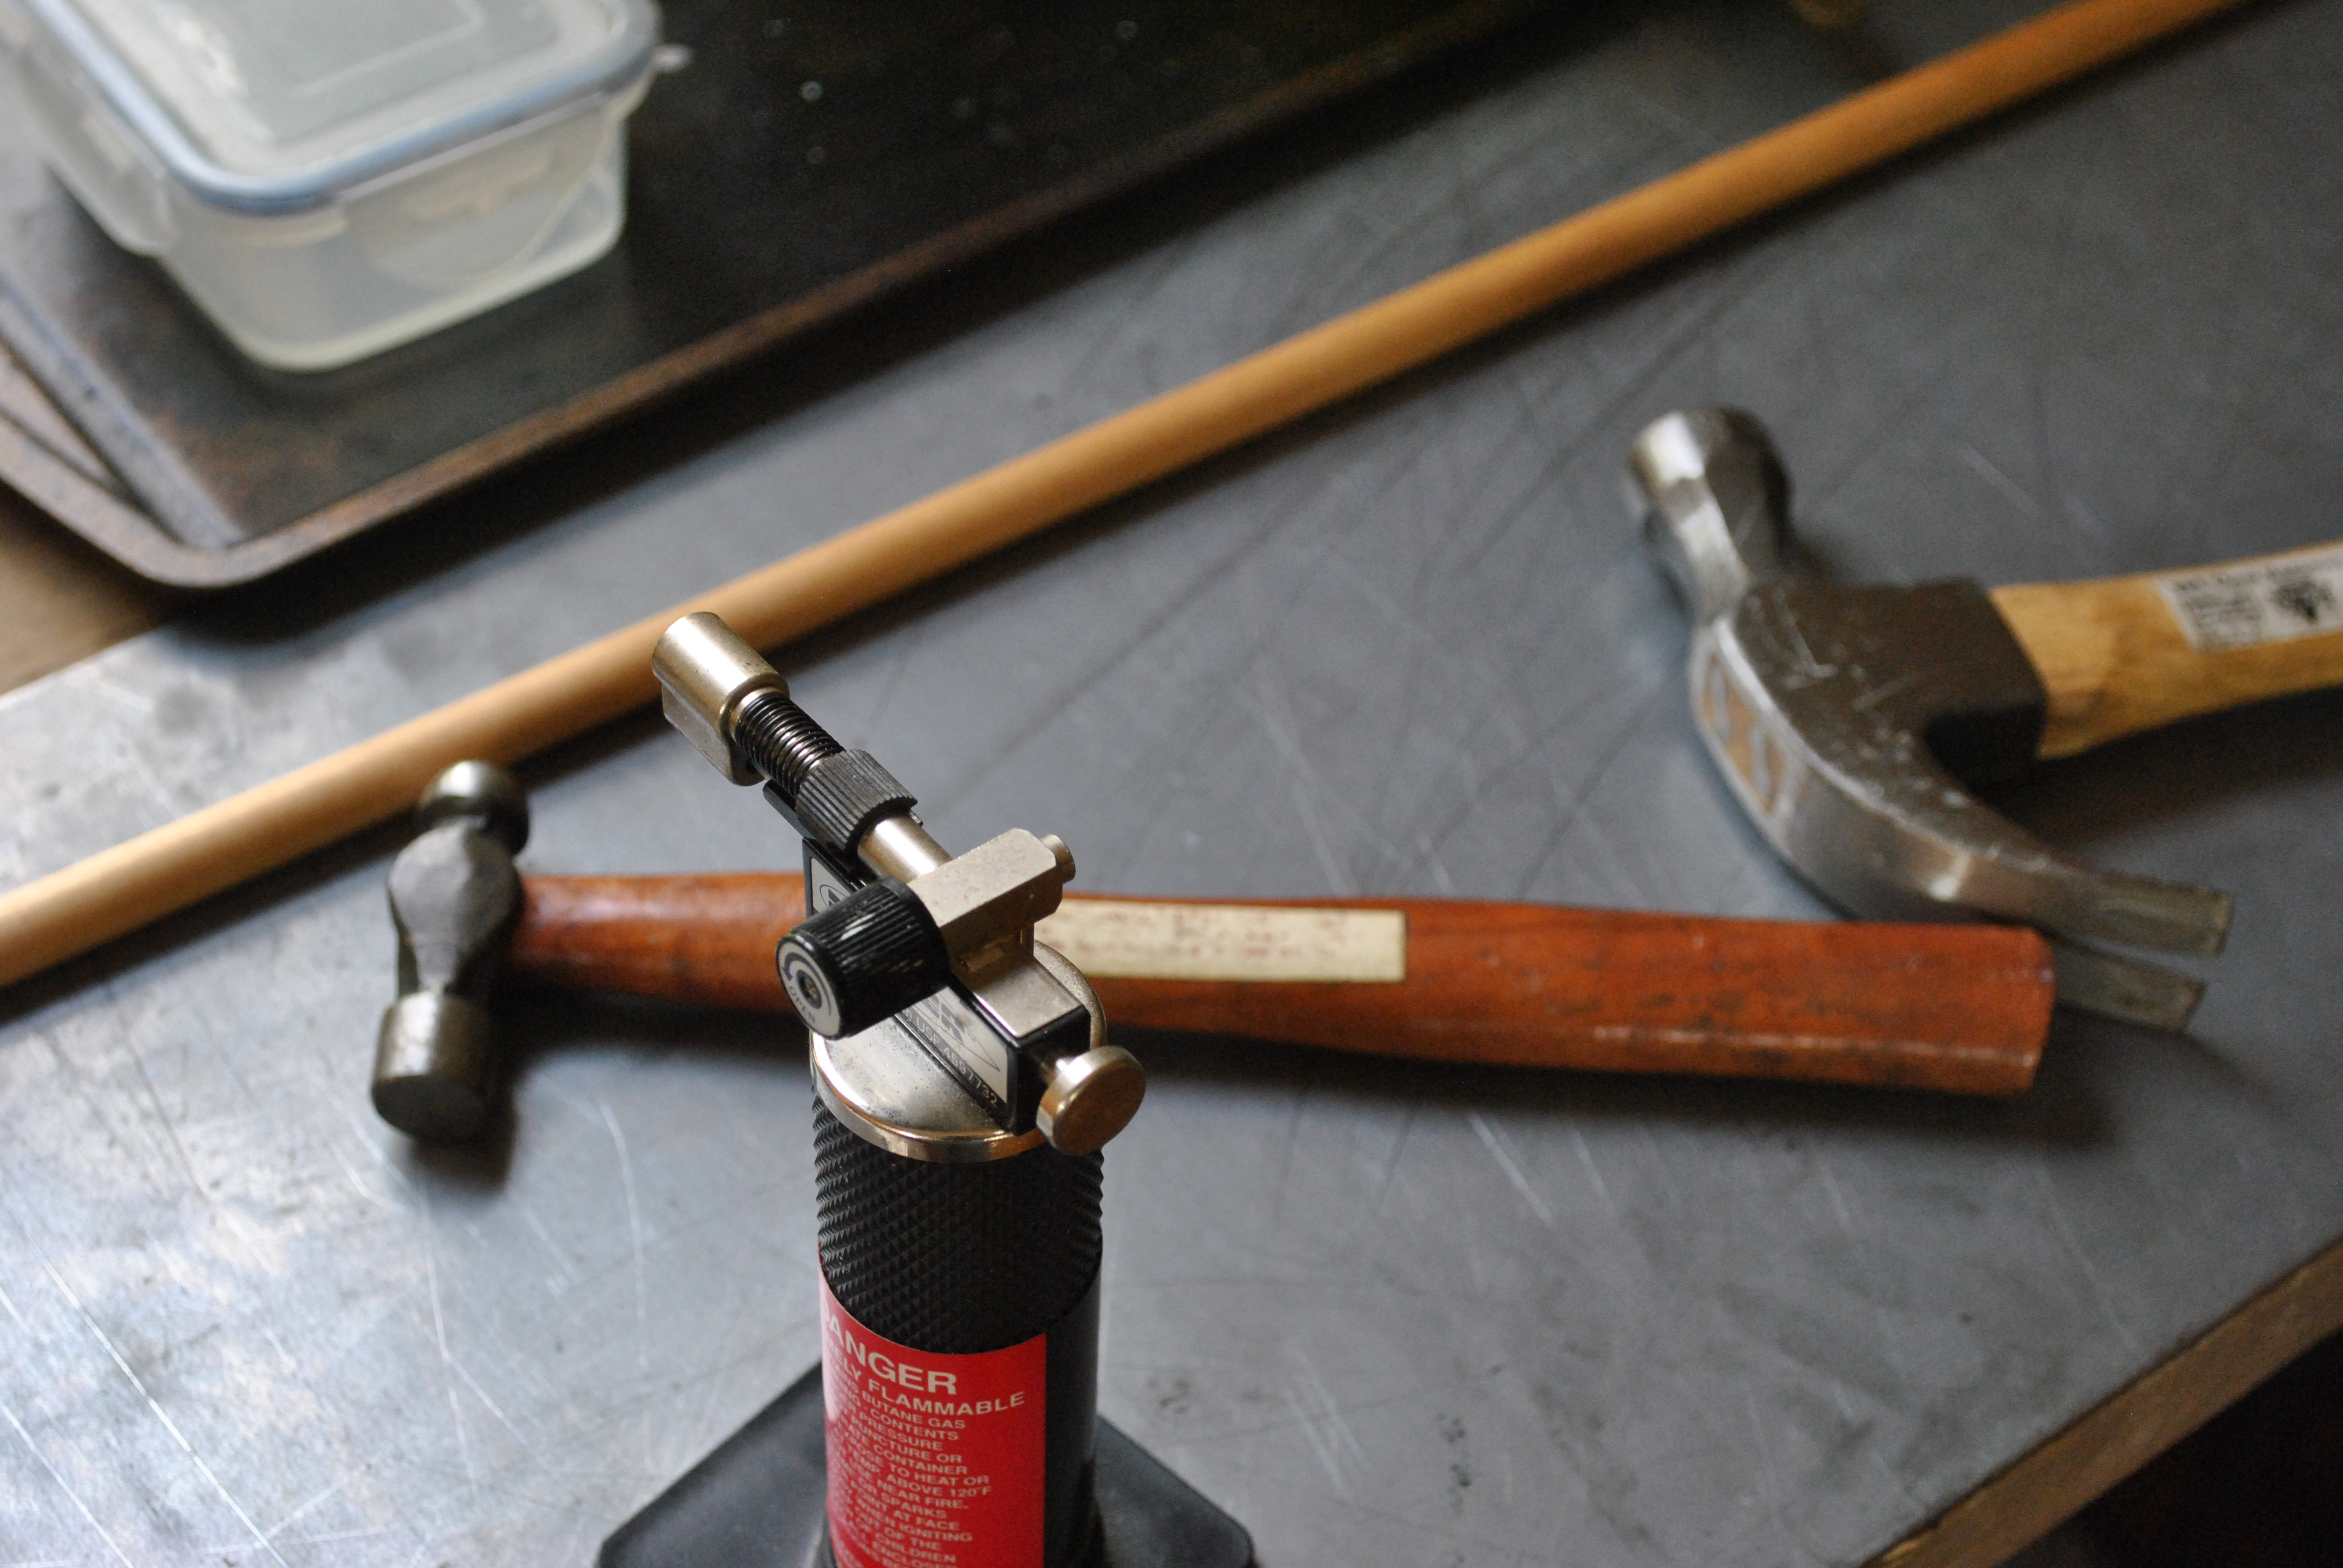
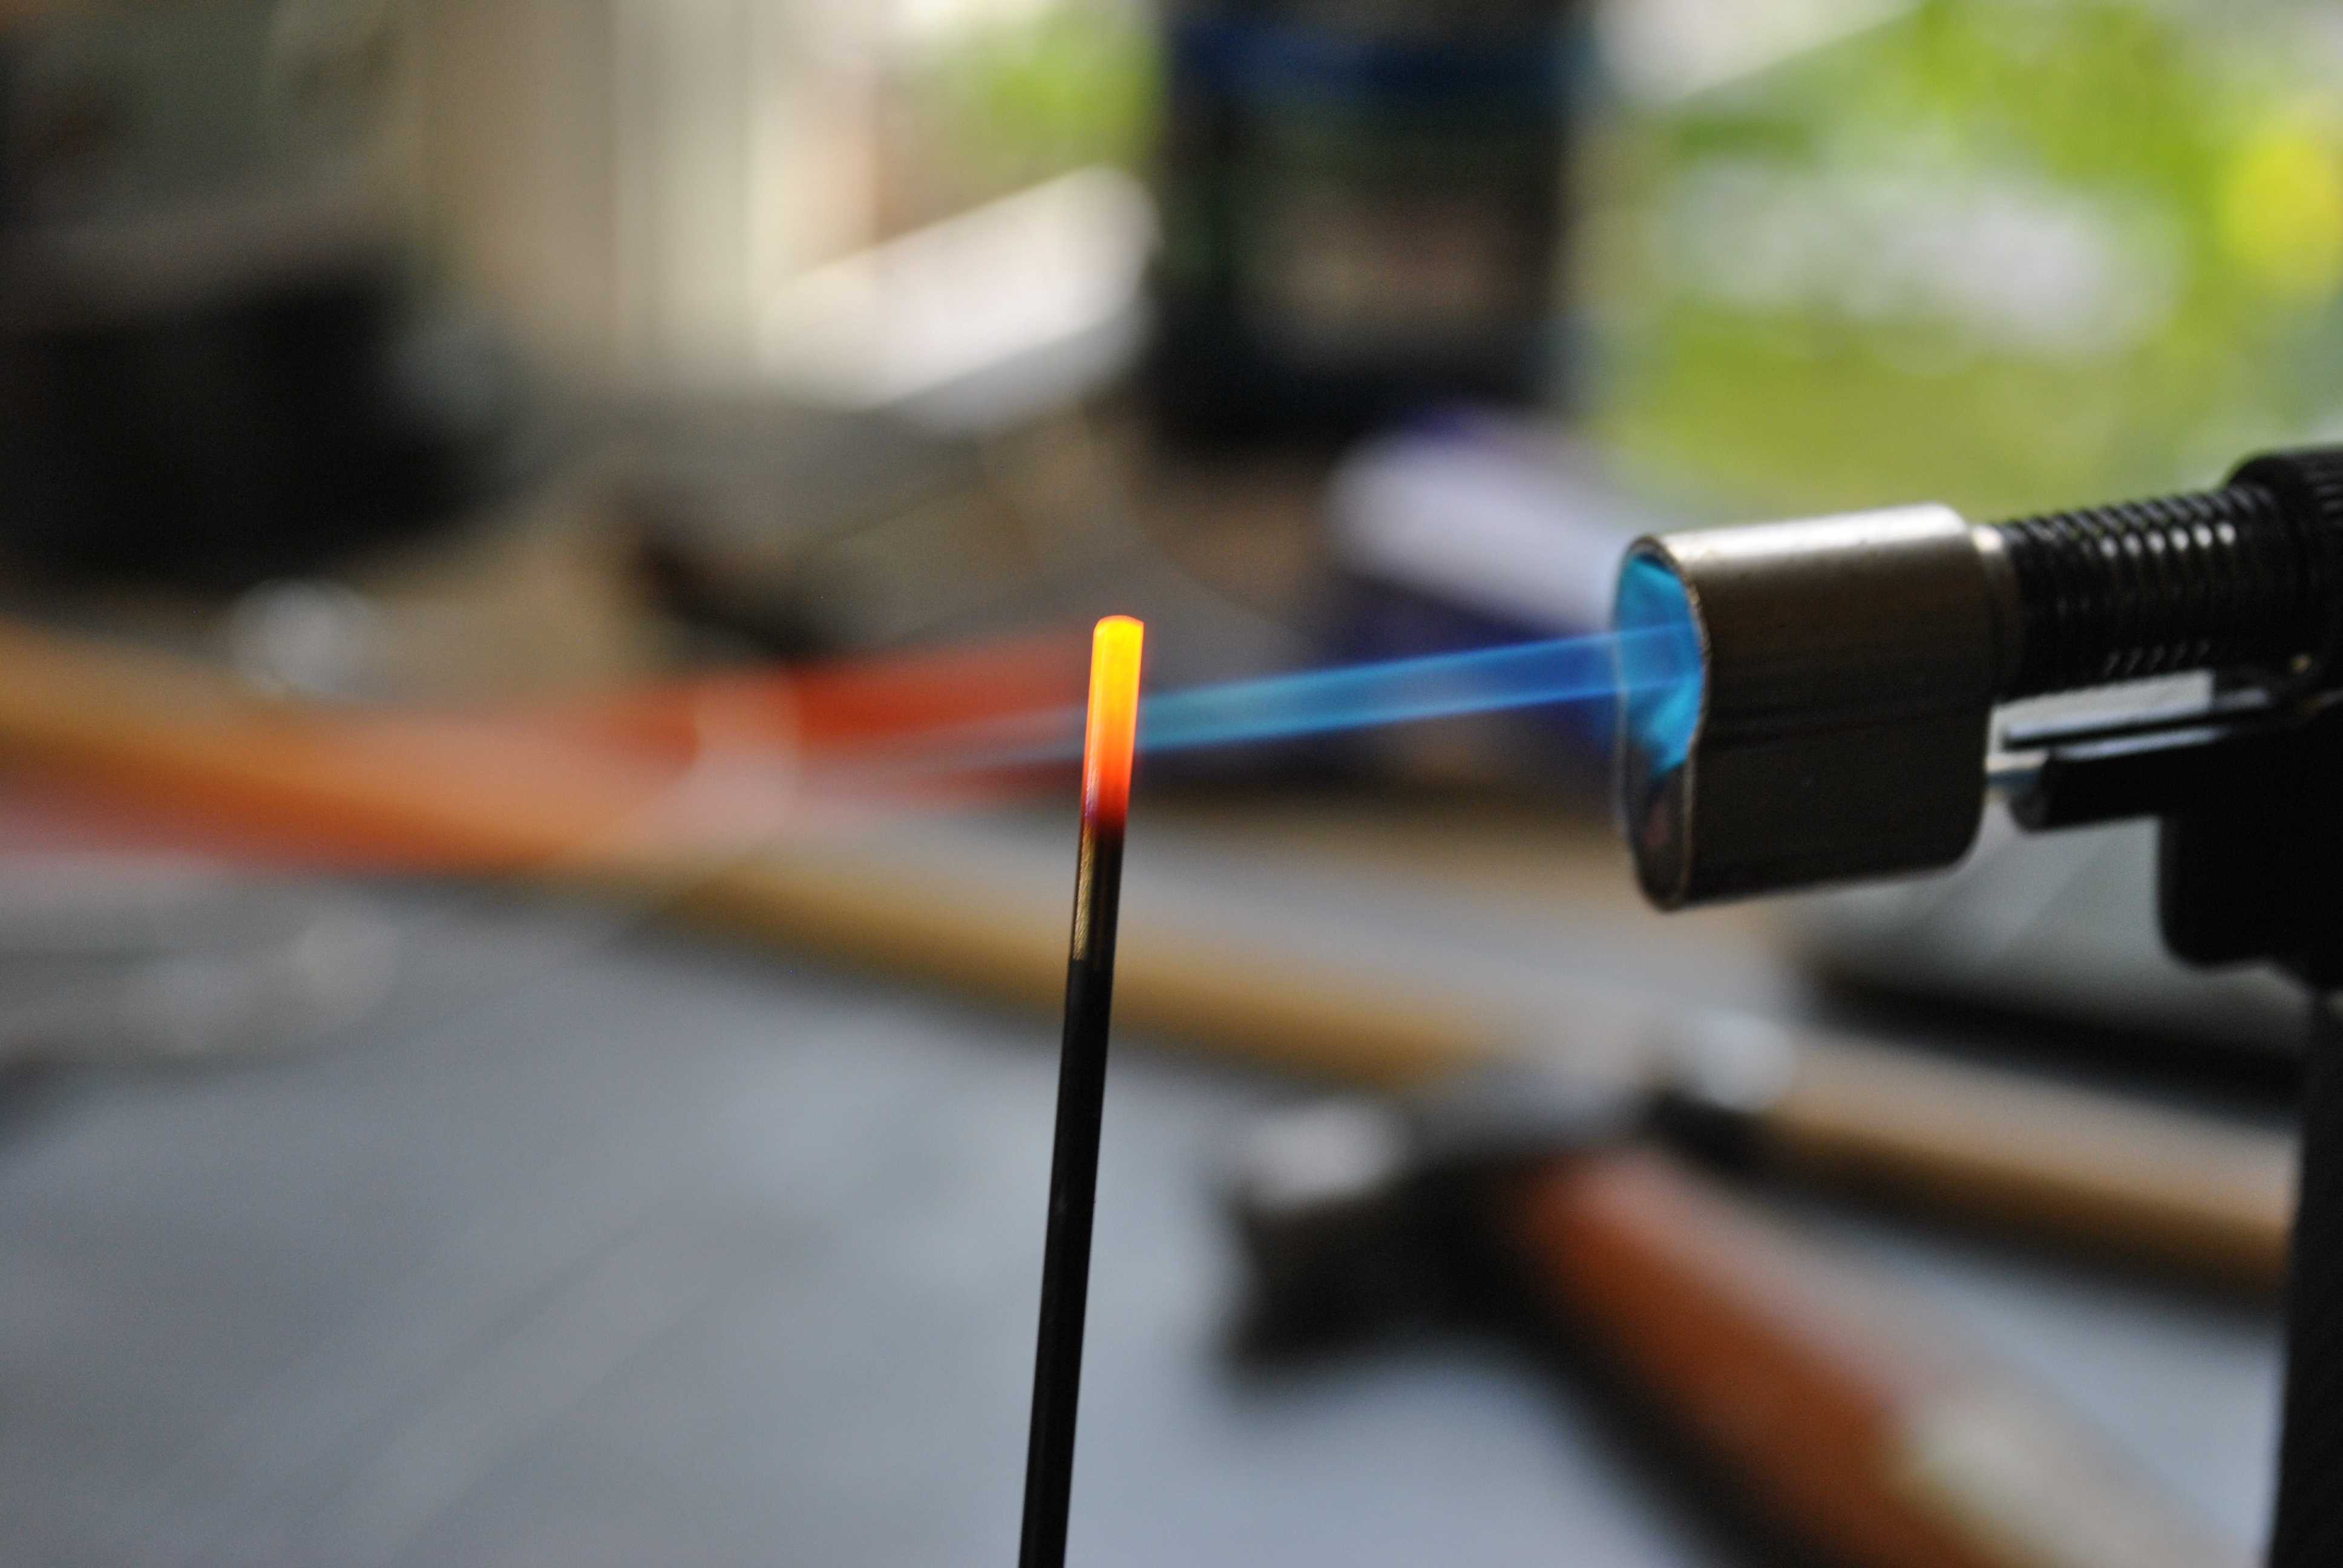
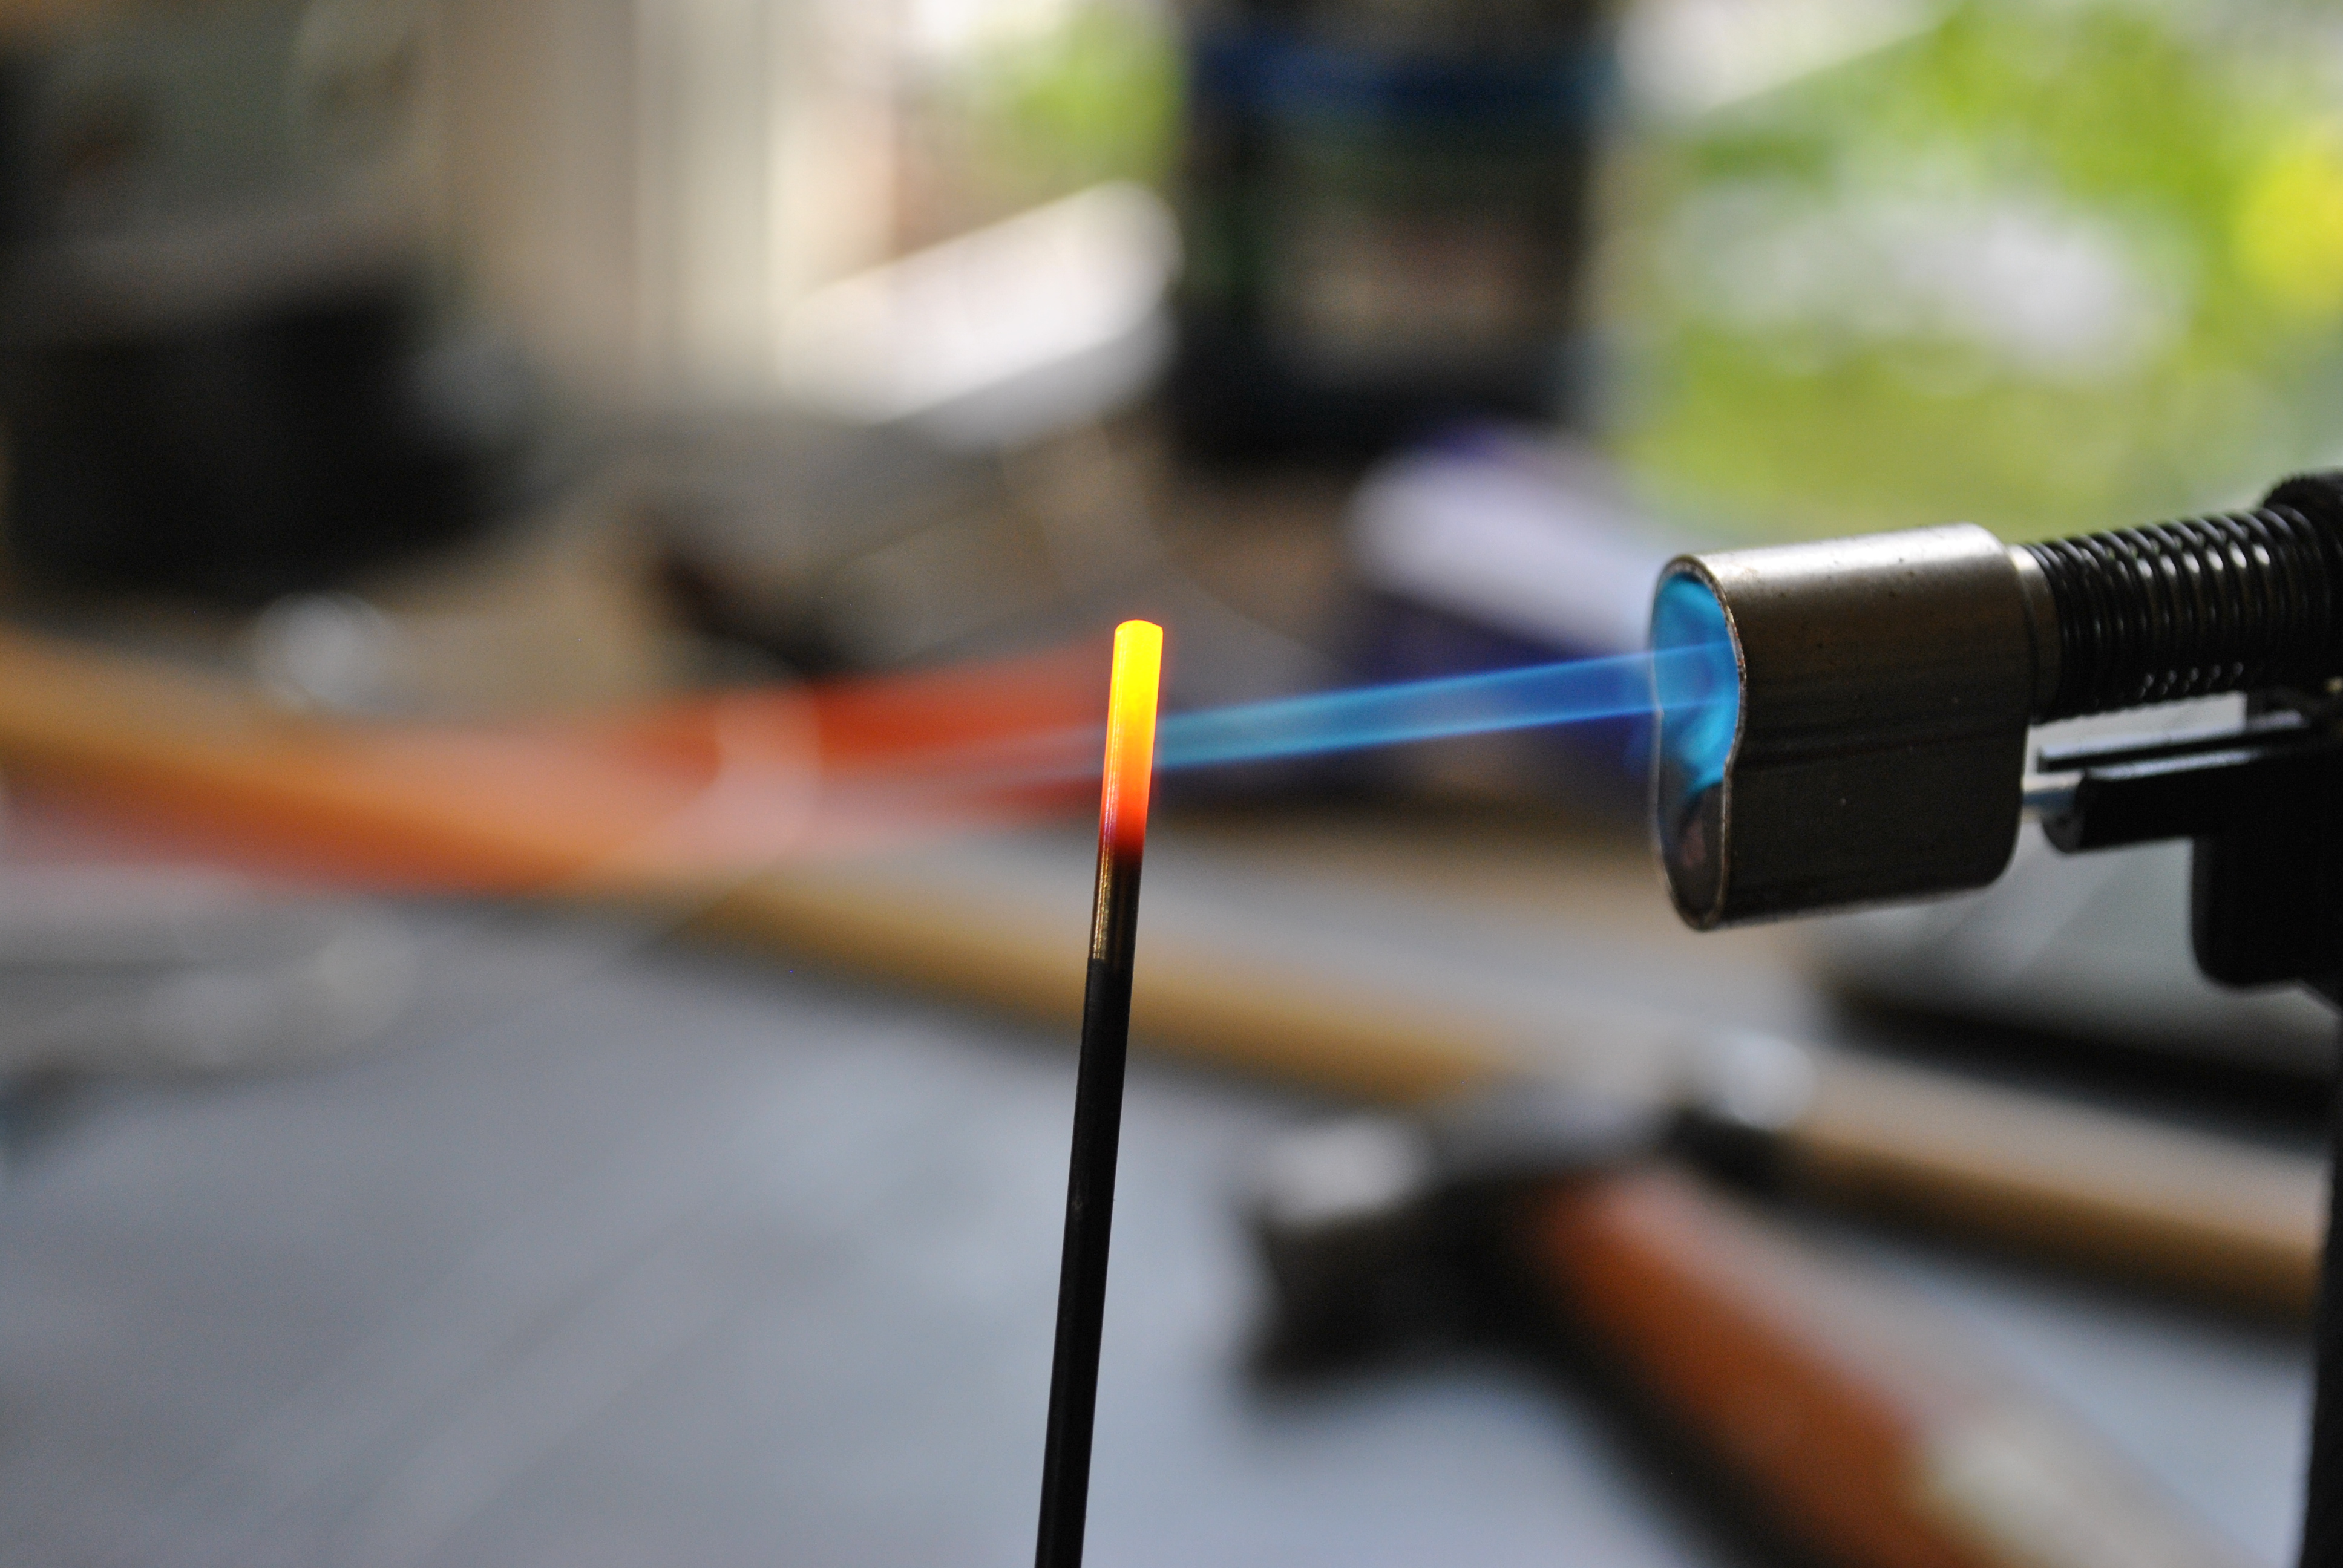
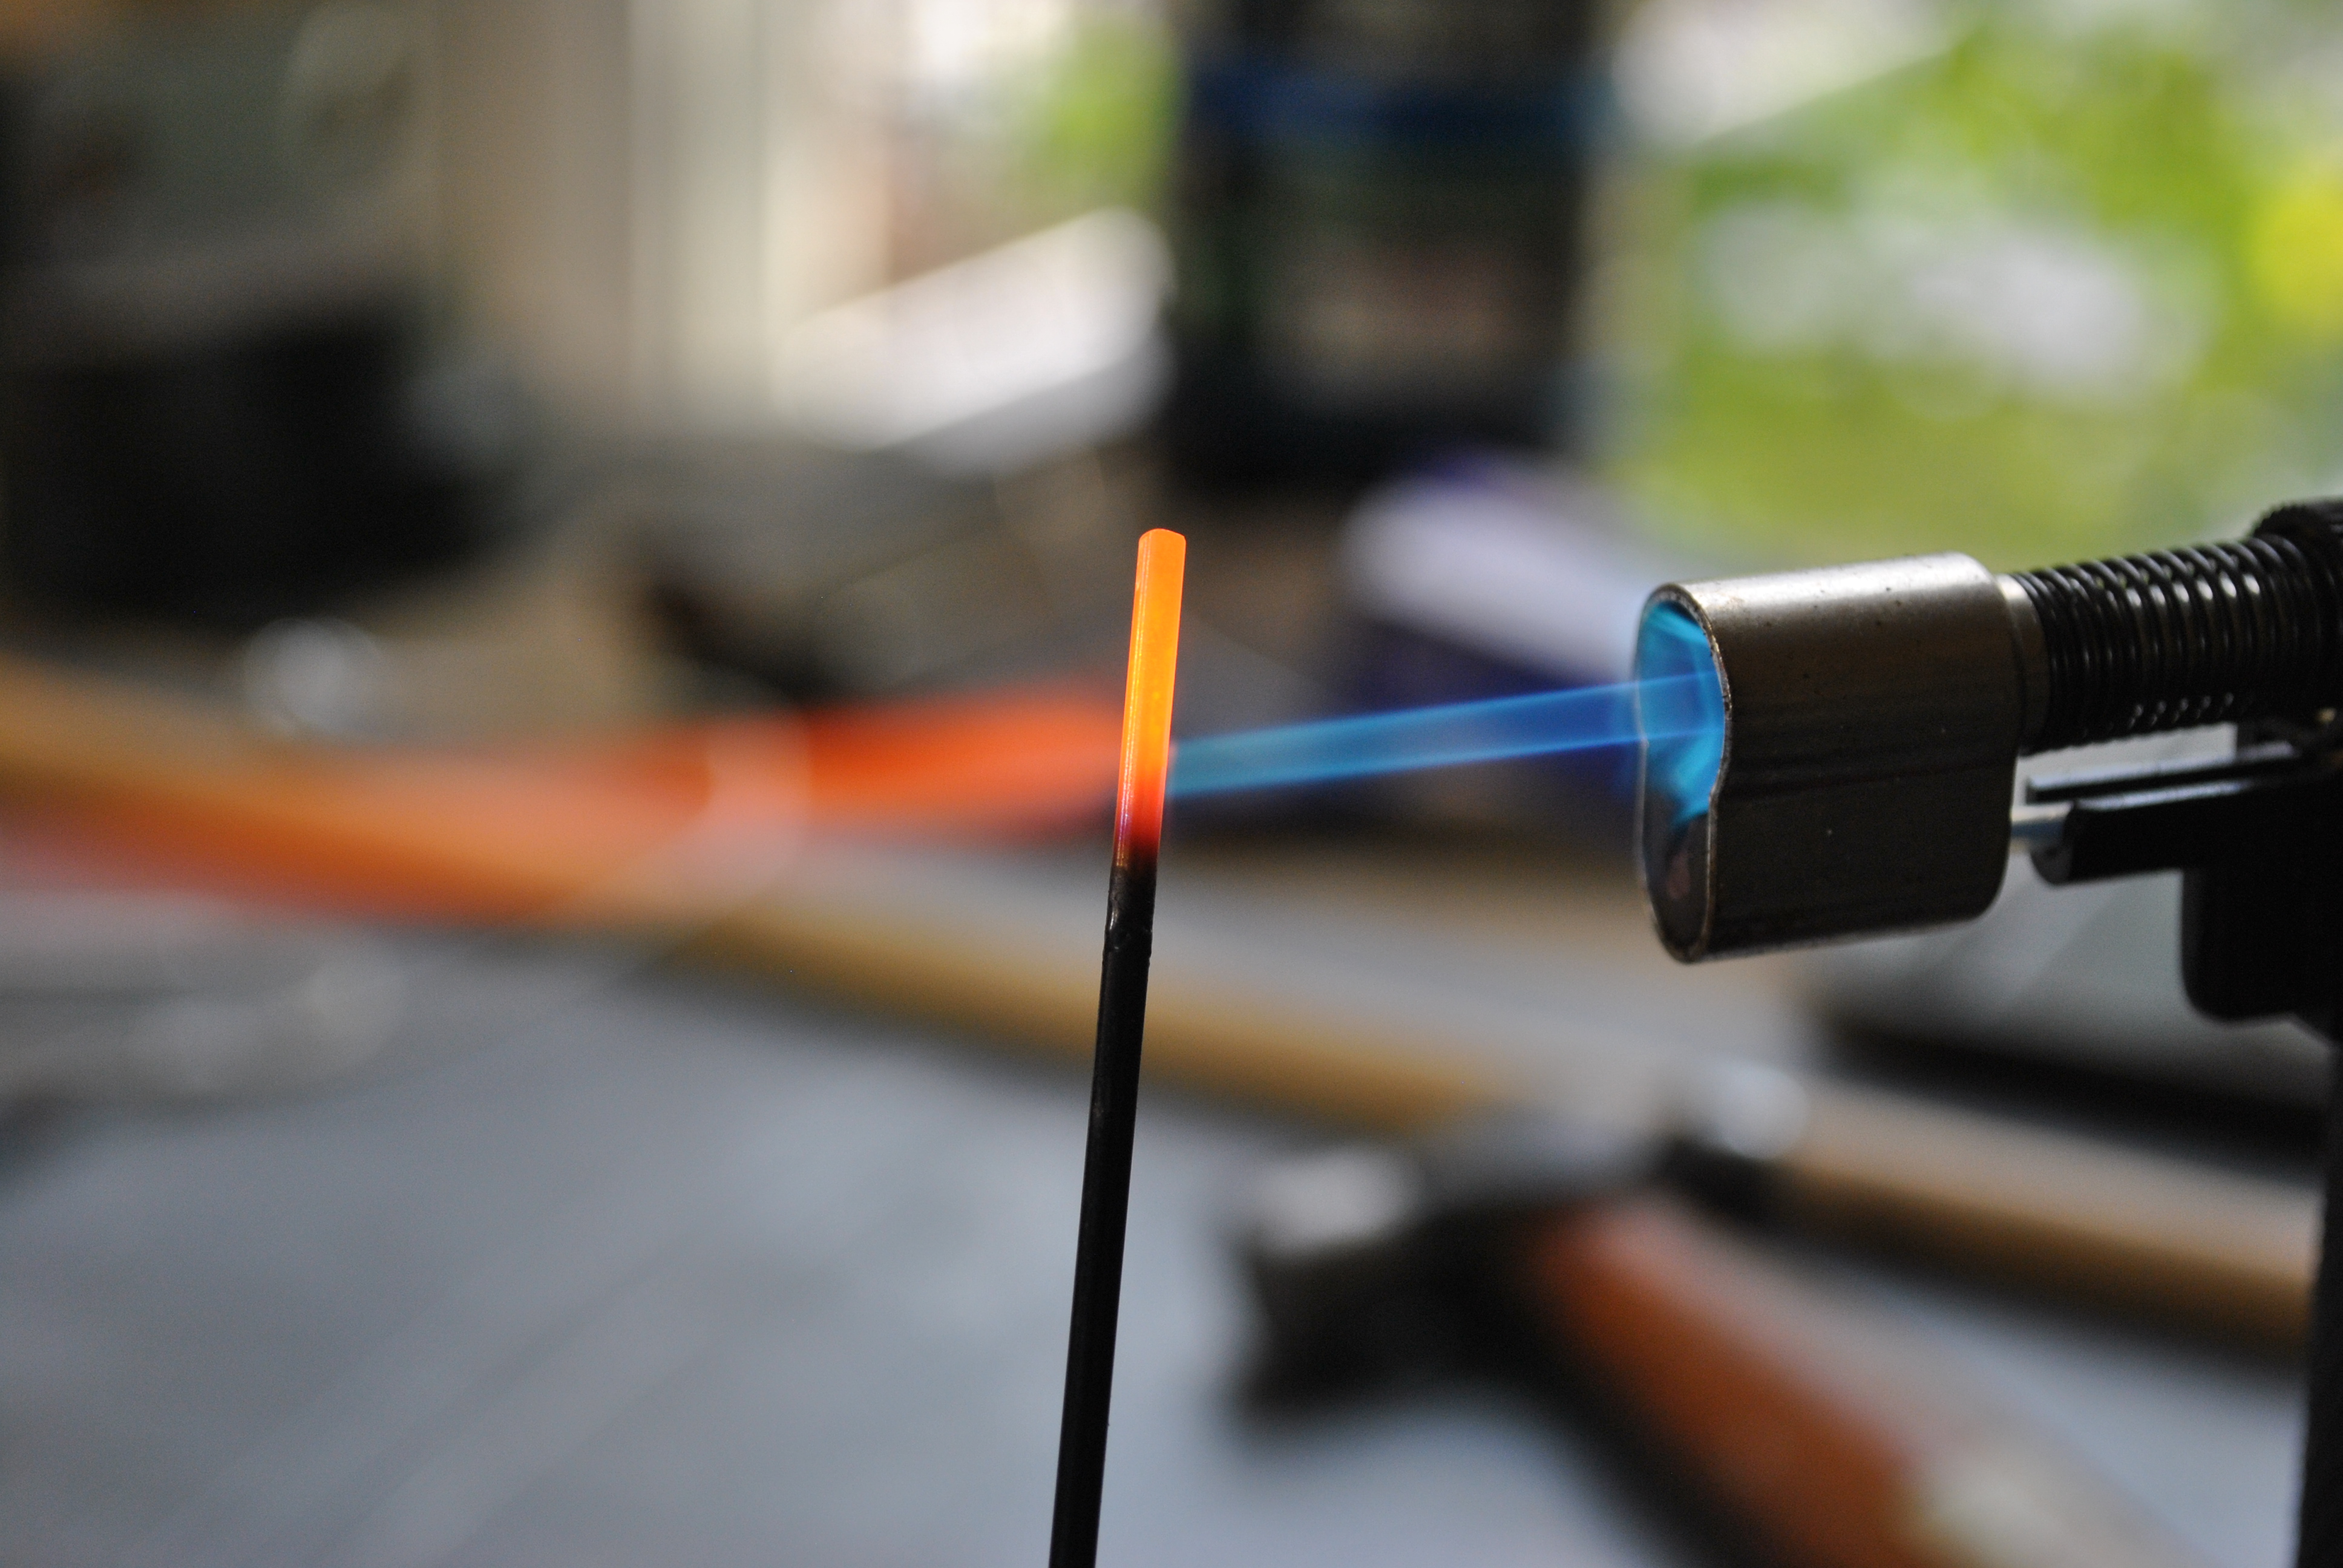
I surveyed a bunch of pictures of wax carving tools online and picked the shapes that seemed to be most common. I then set up a pico-forge on my new bench, consisting of a hammer, a chunk of metal, and a tiny torch.
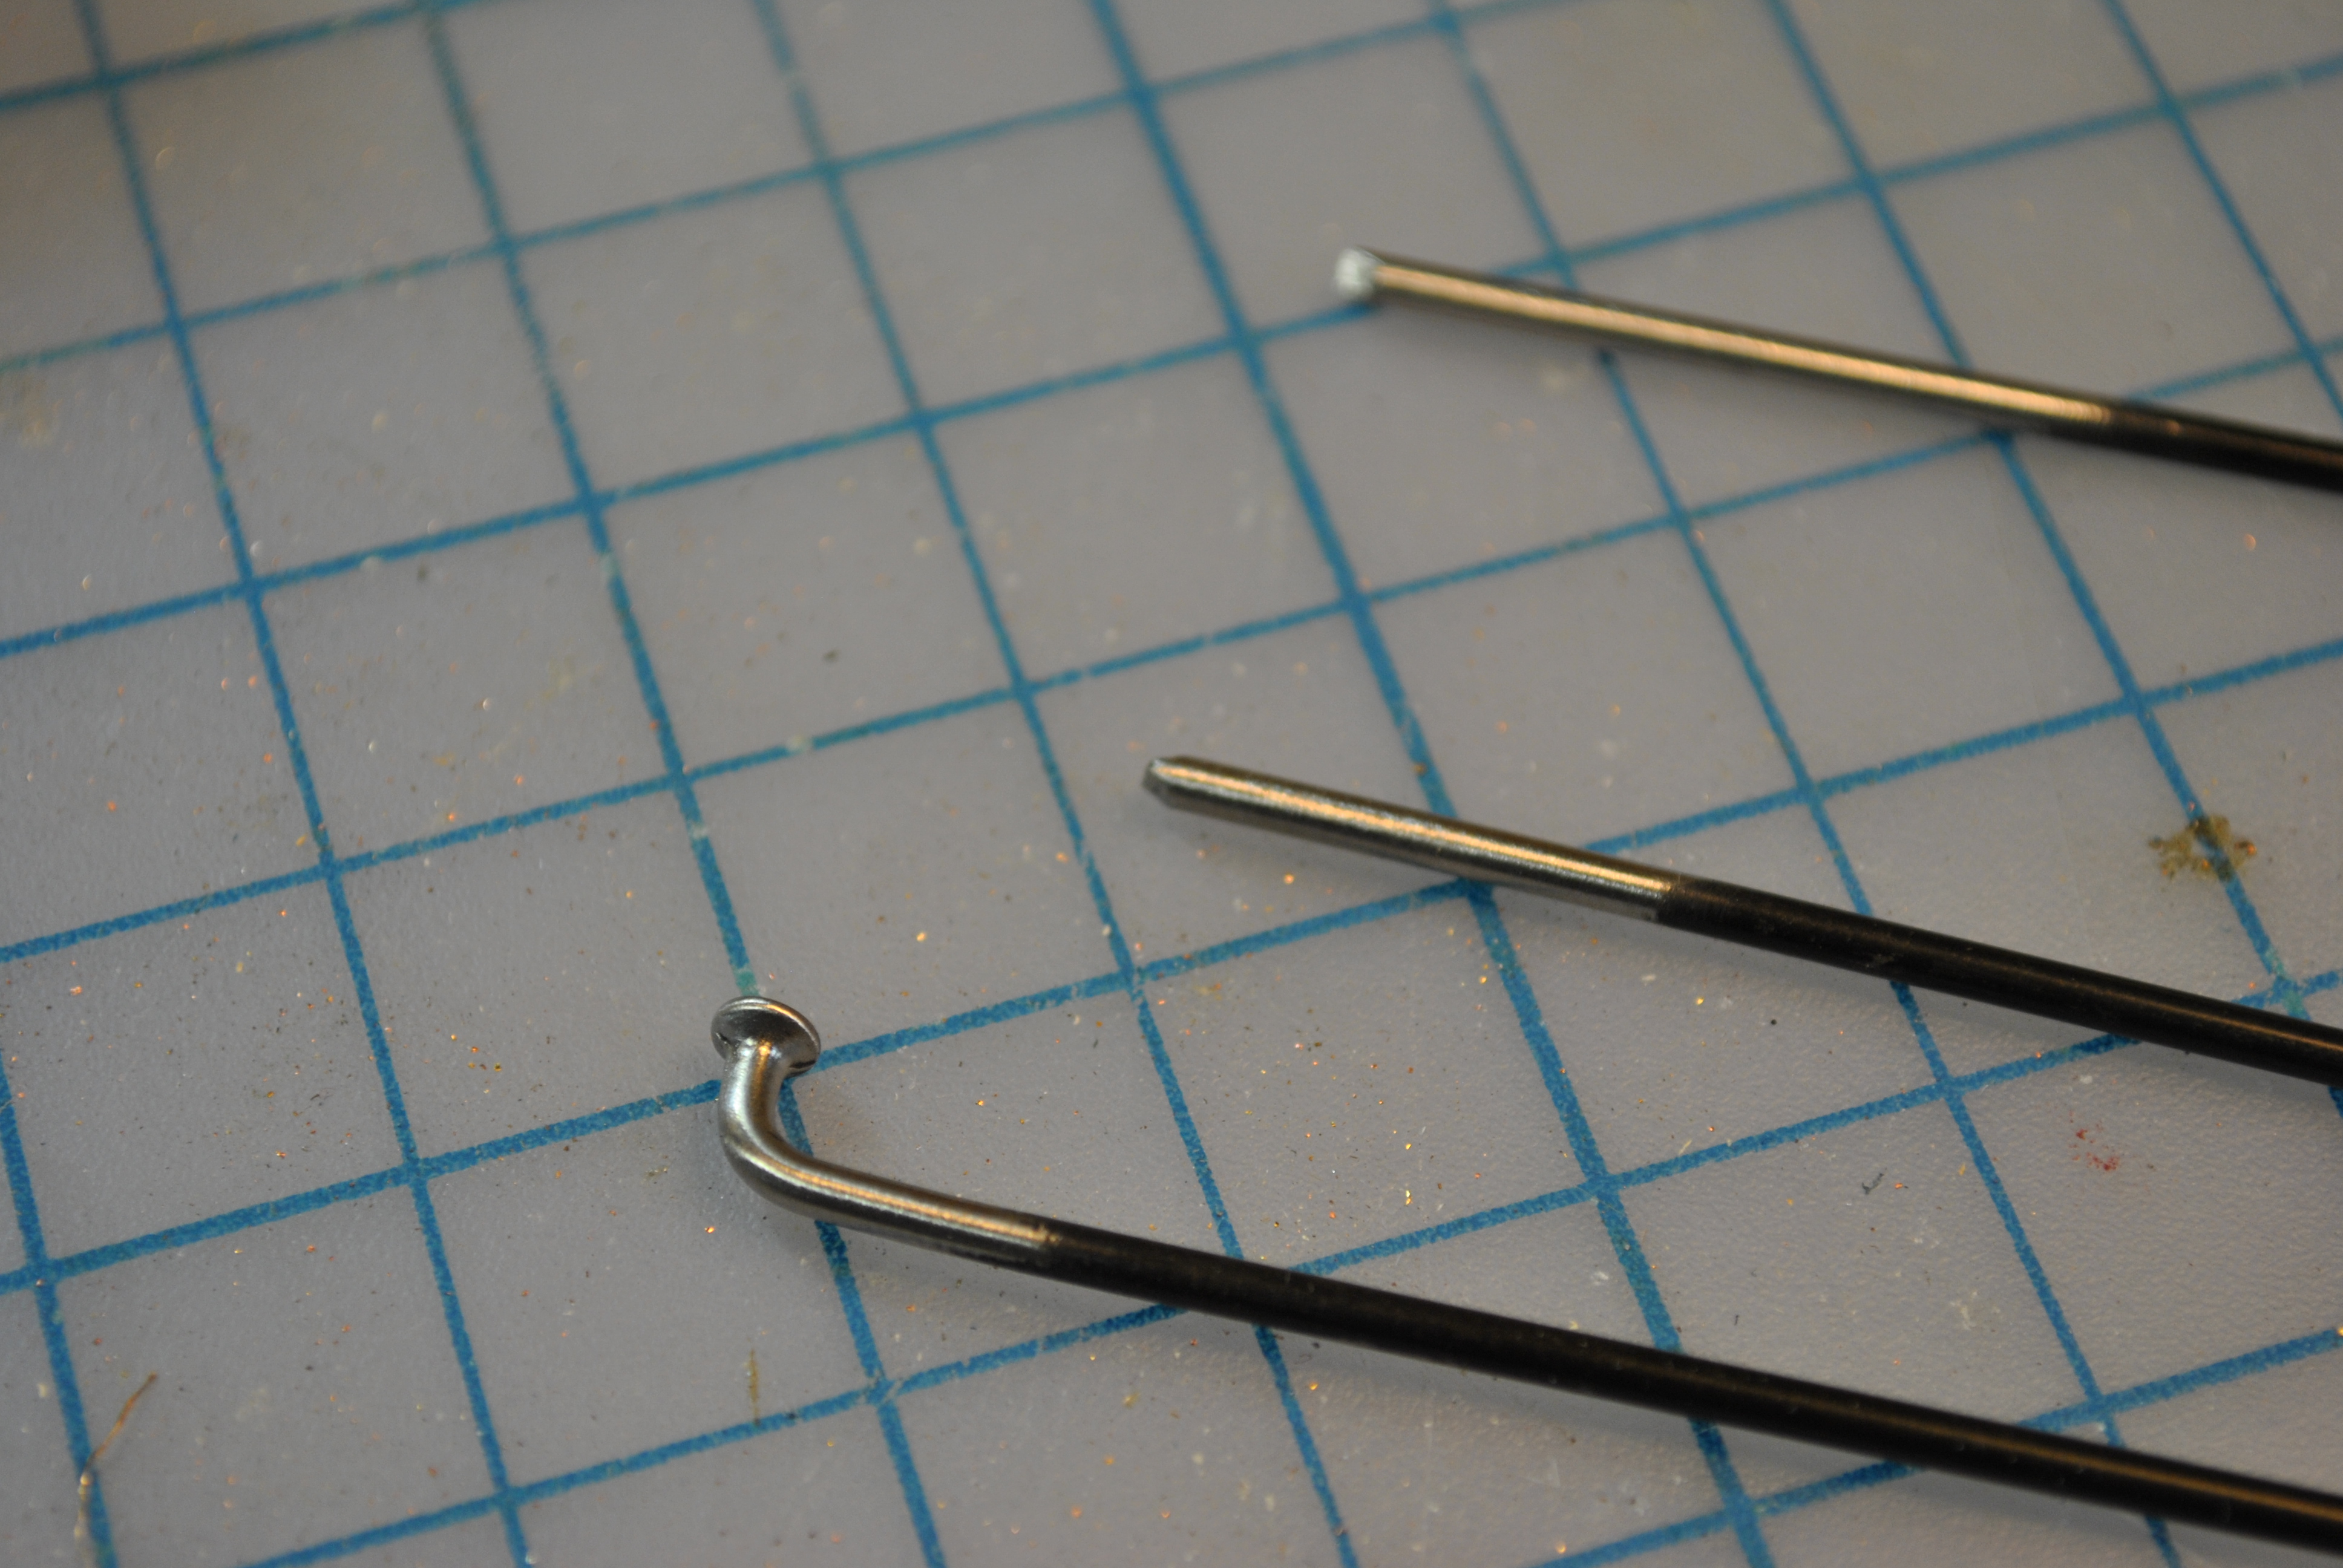
I took some old bike spokes I had from an old bicycle tire, cut off the threaded bit, and sanded the powder coat off (if you have plane steel spokes you can just lop the threaded part off…or honestly leave it, I learned later that the threads probably wouldn’t have made much different.
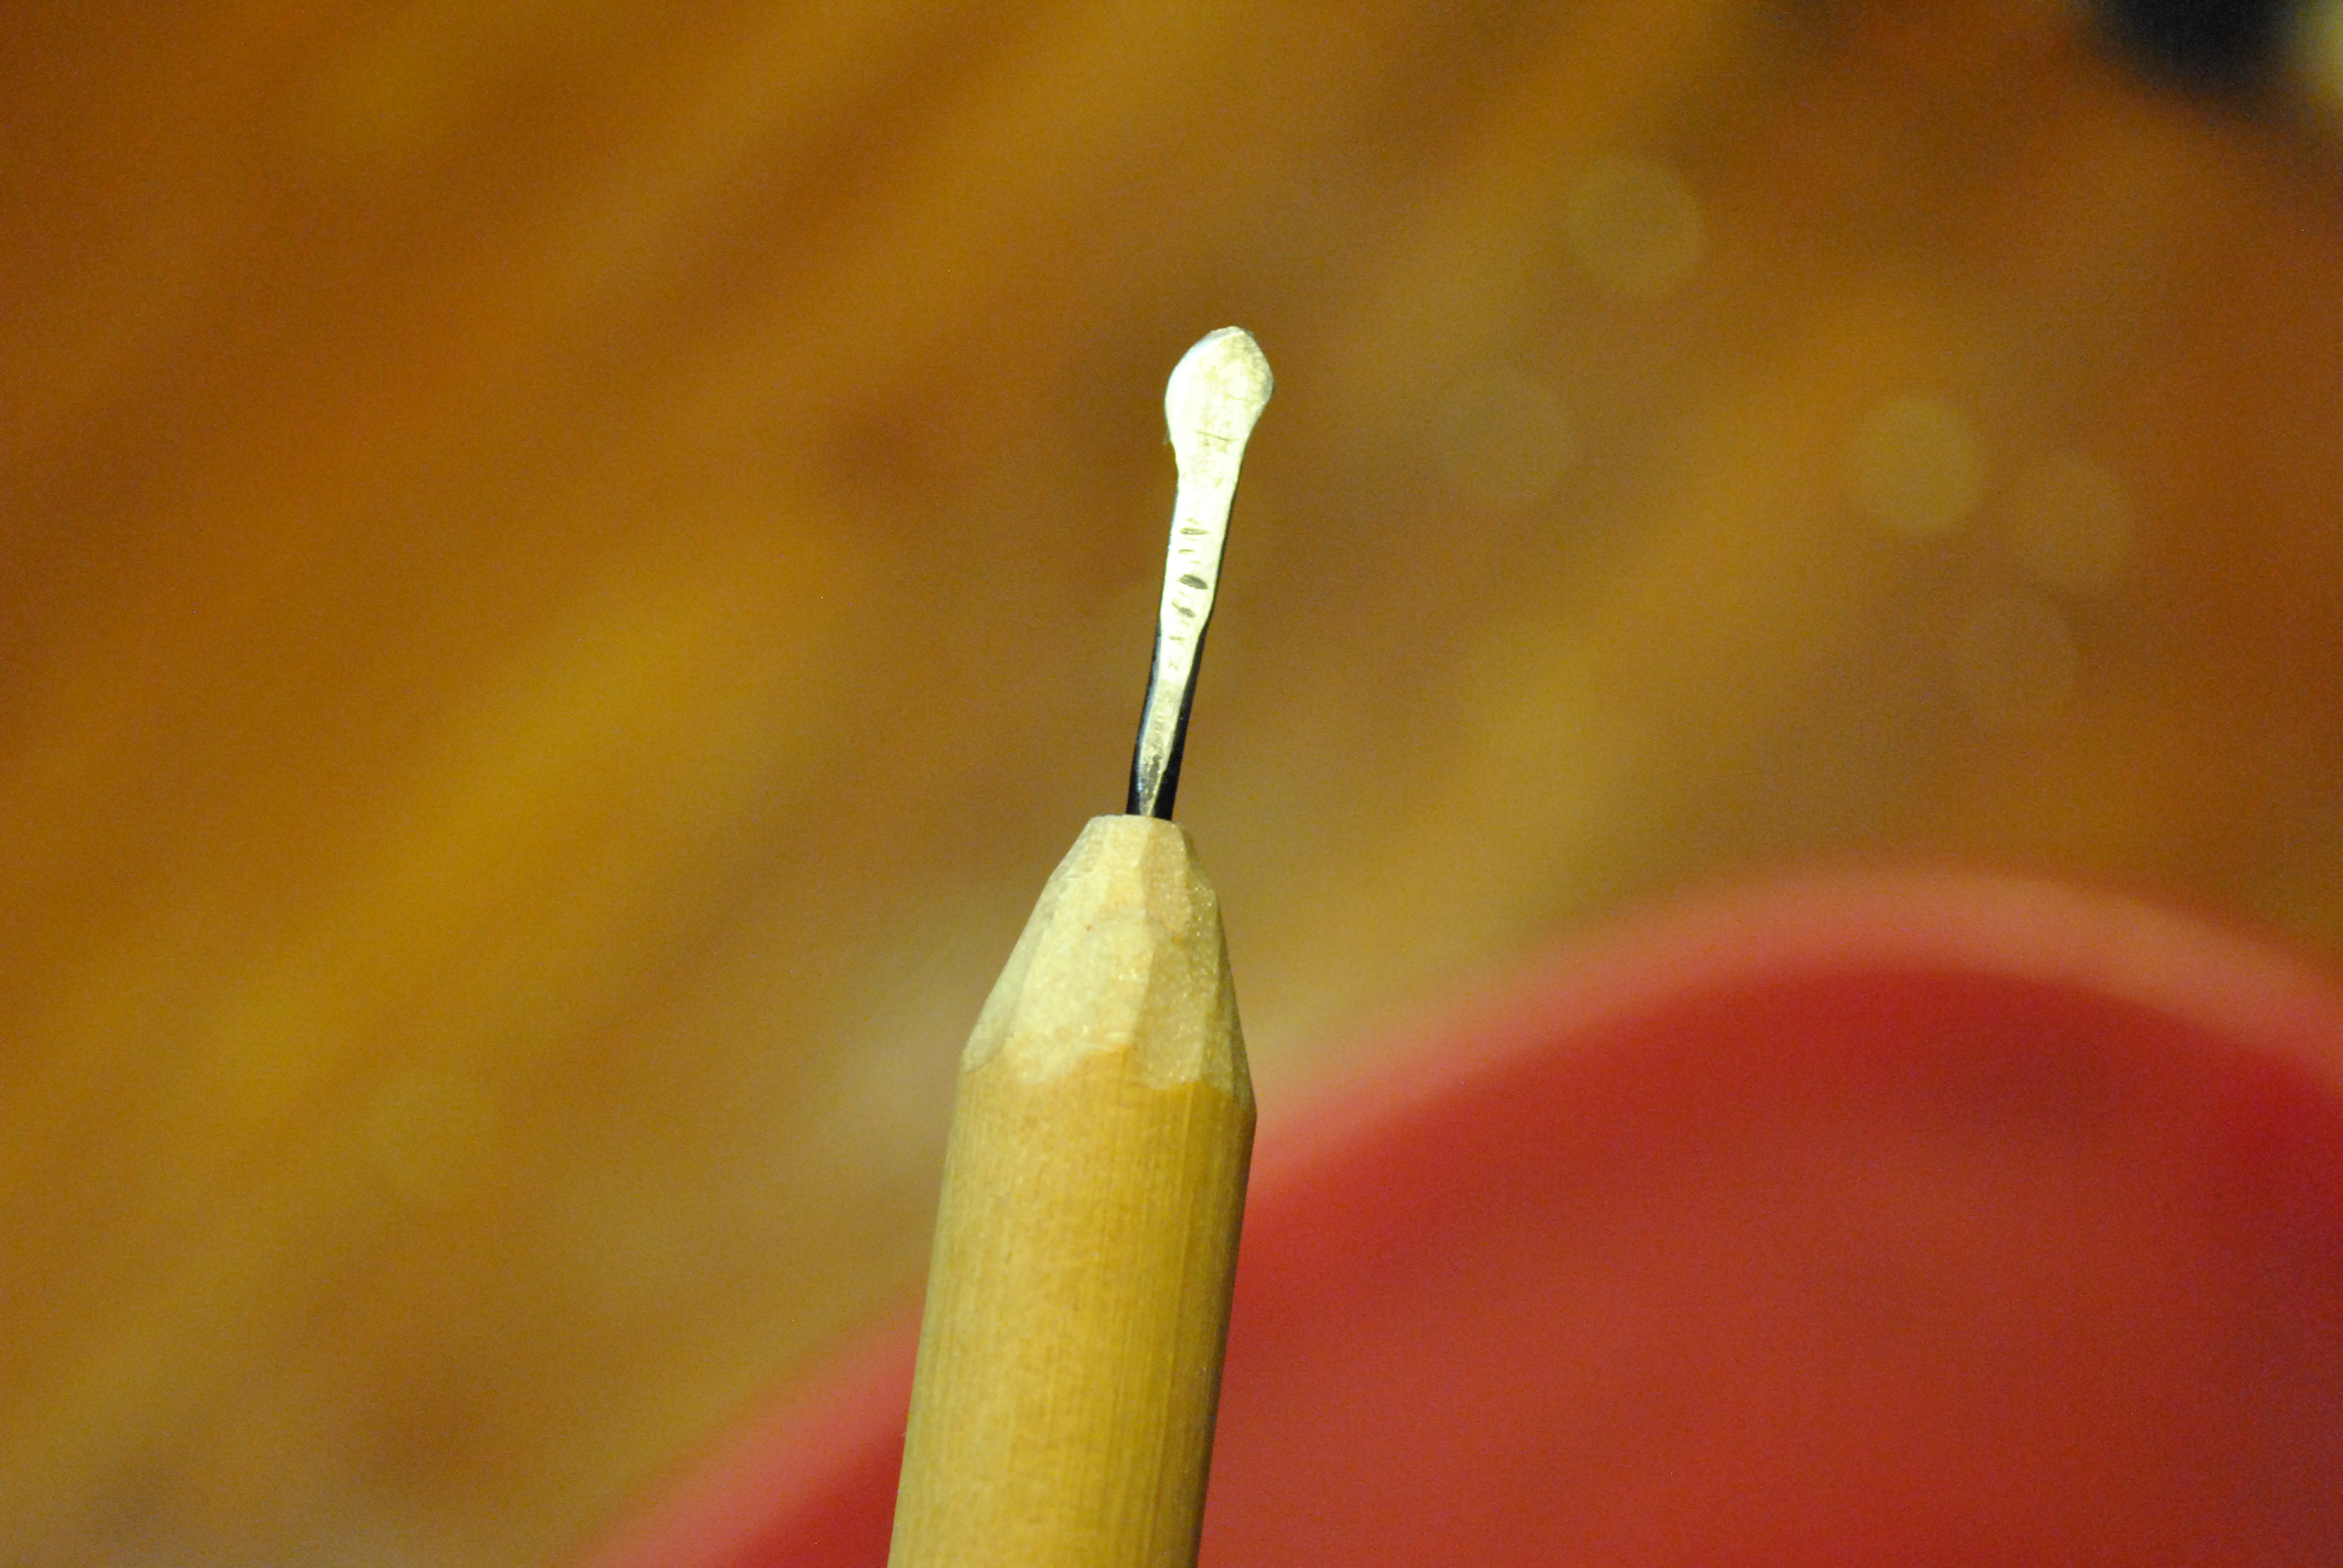
You can even use the bent end of the spoke for special shapes as I show later.
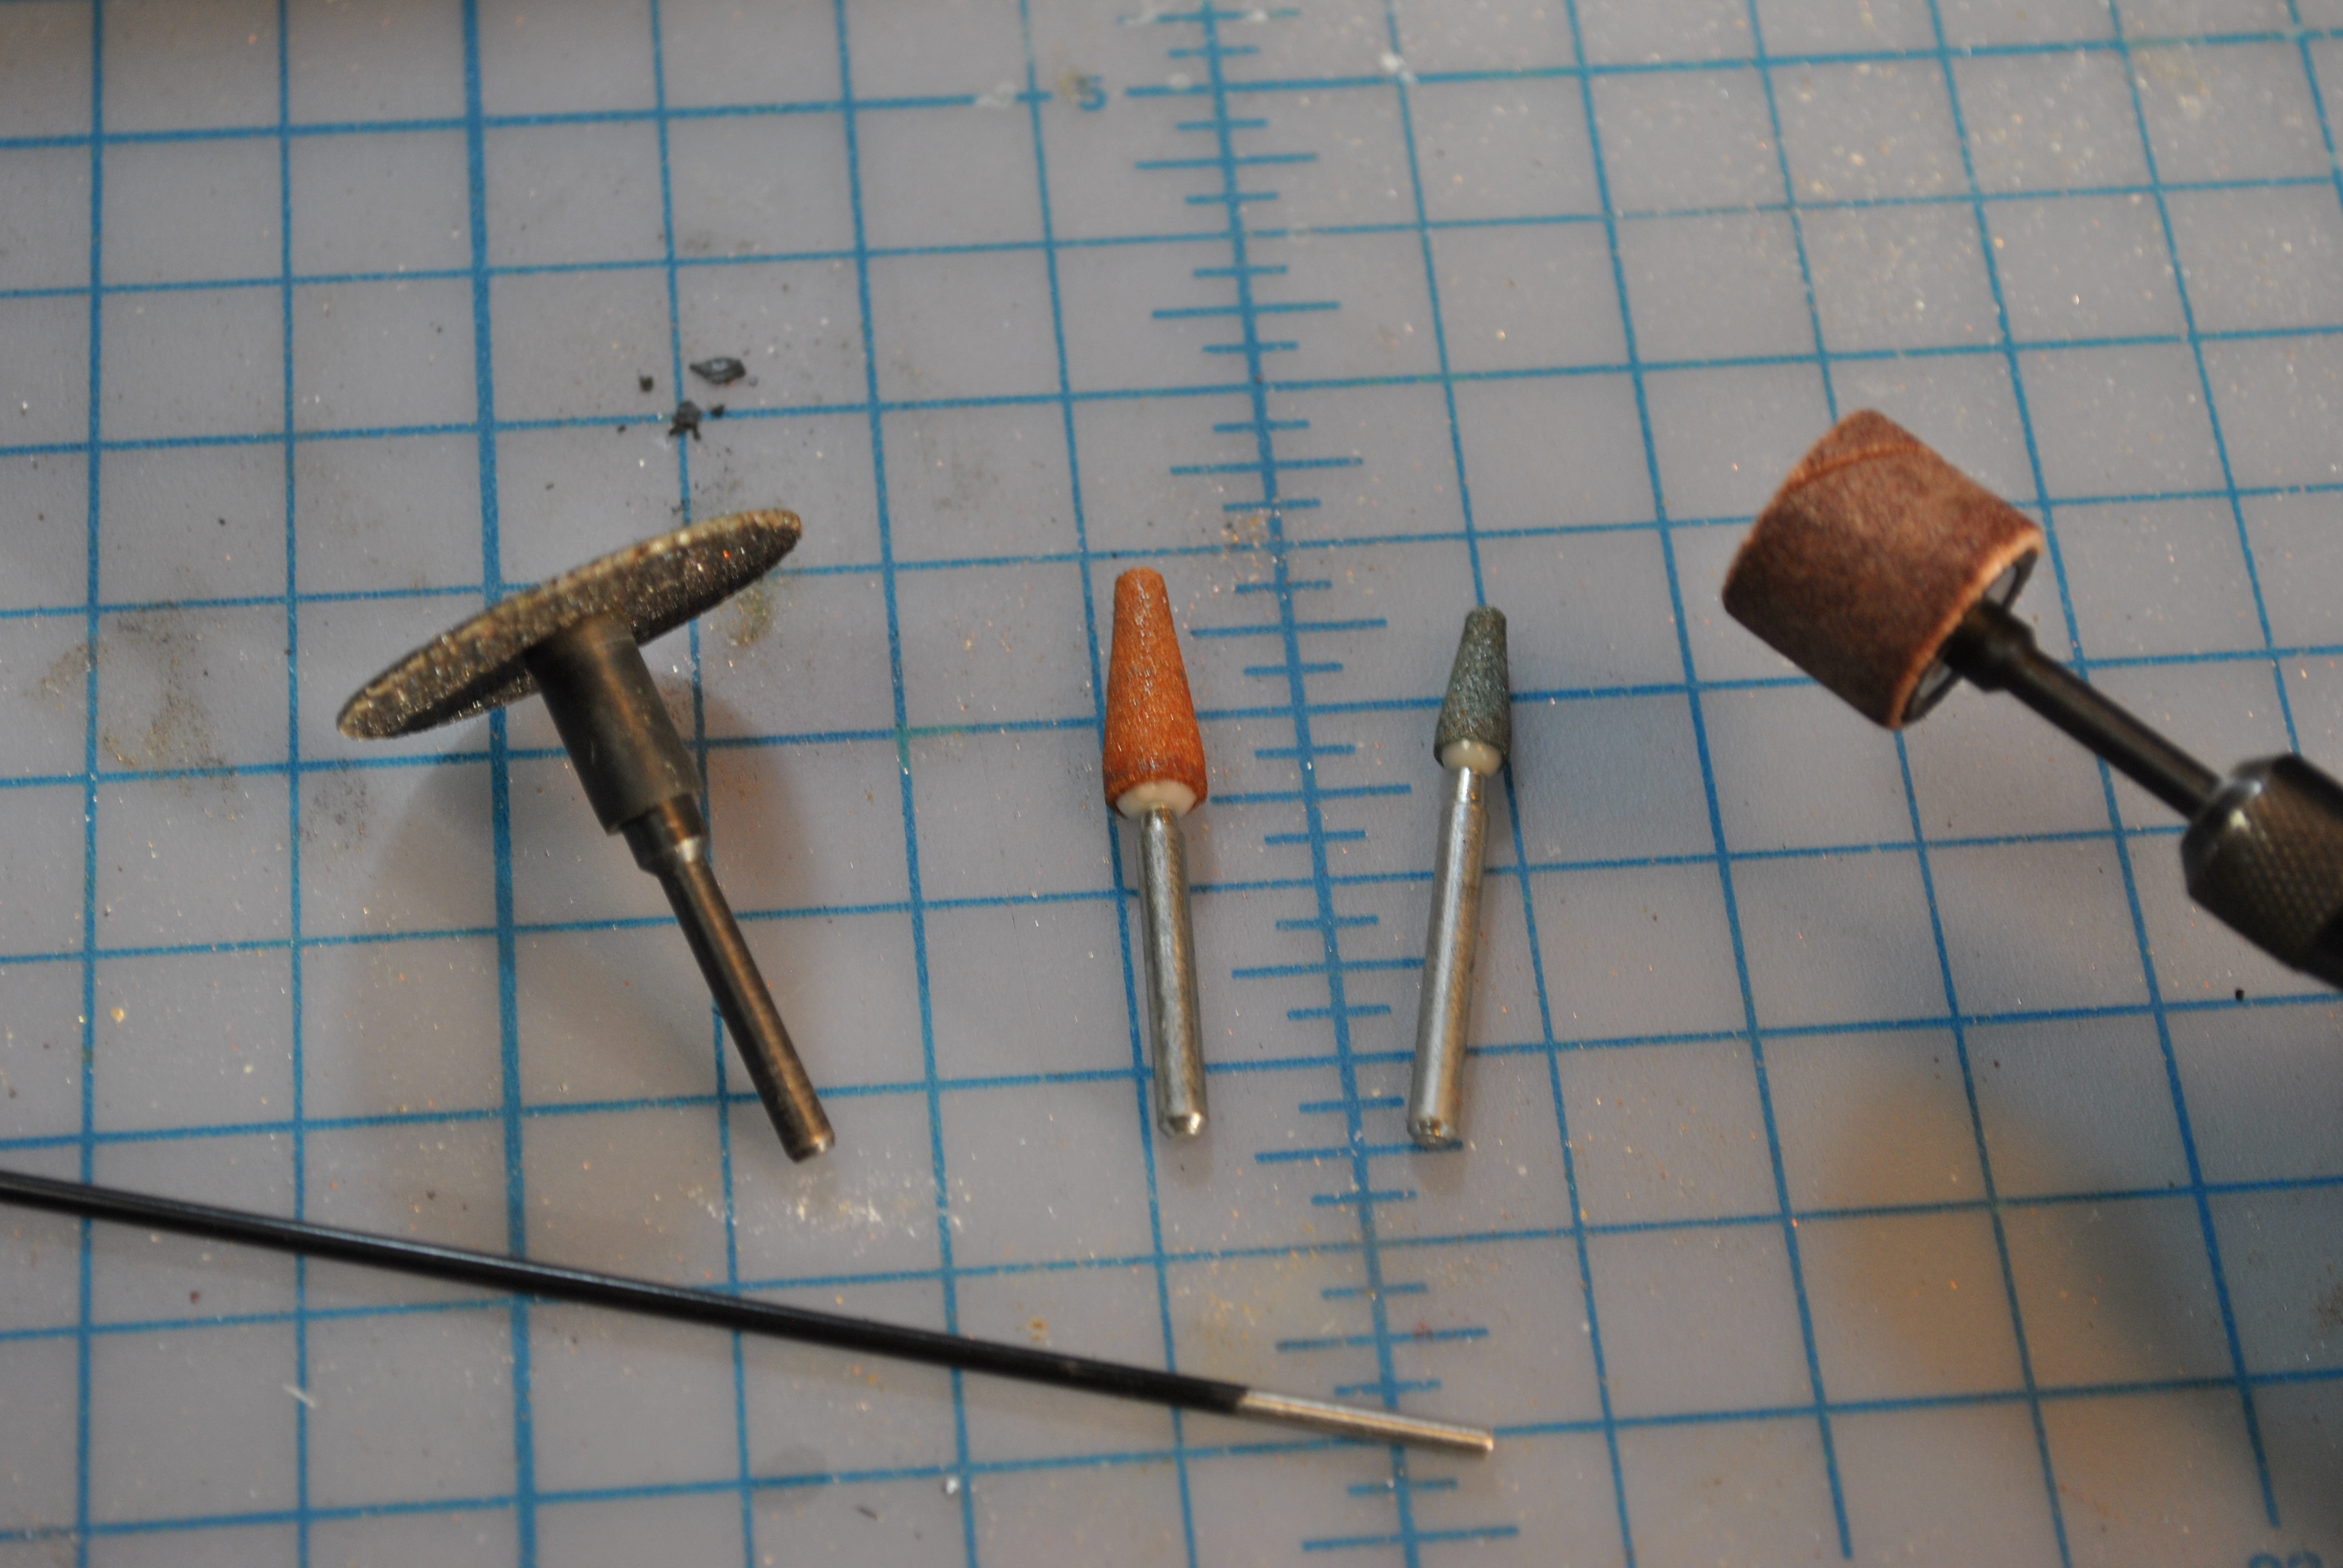
Get your dremel ready for some grinding.
My pico-forge. The smallest forge in history.
Heat the end up.
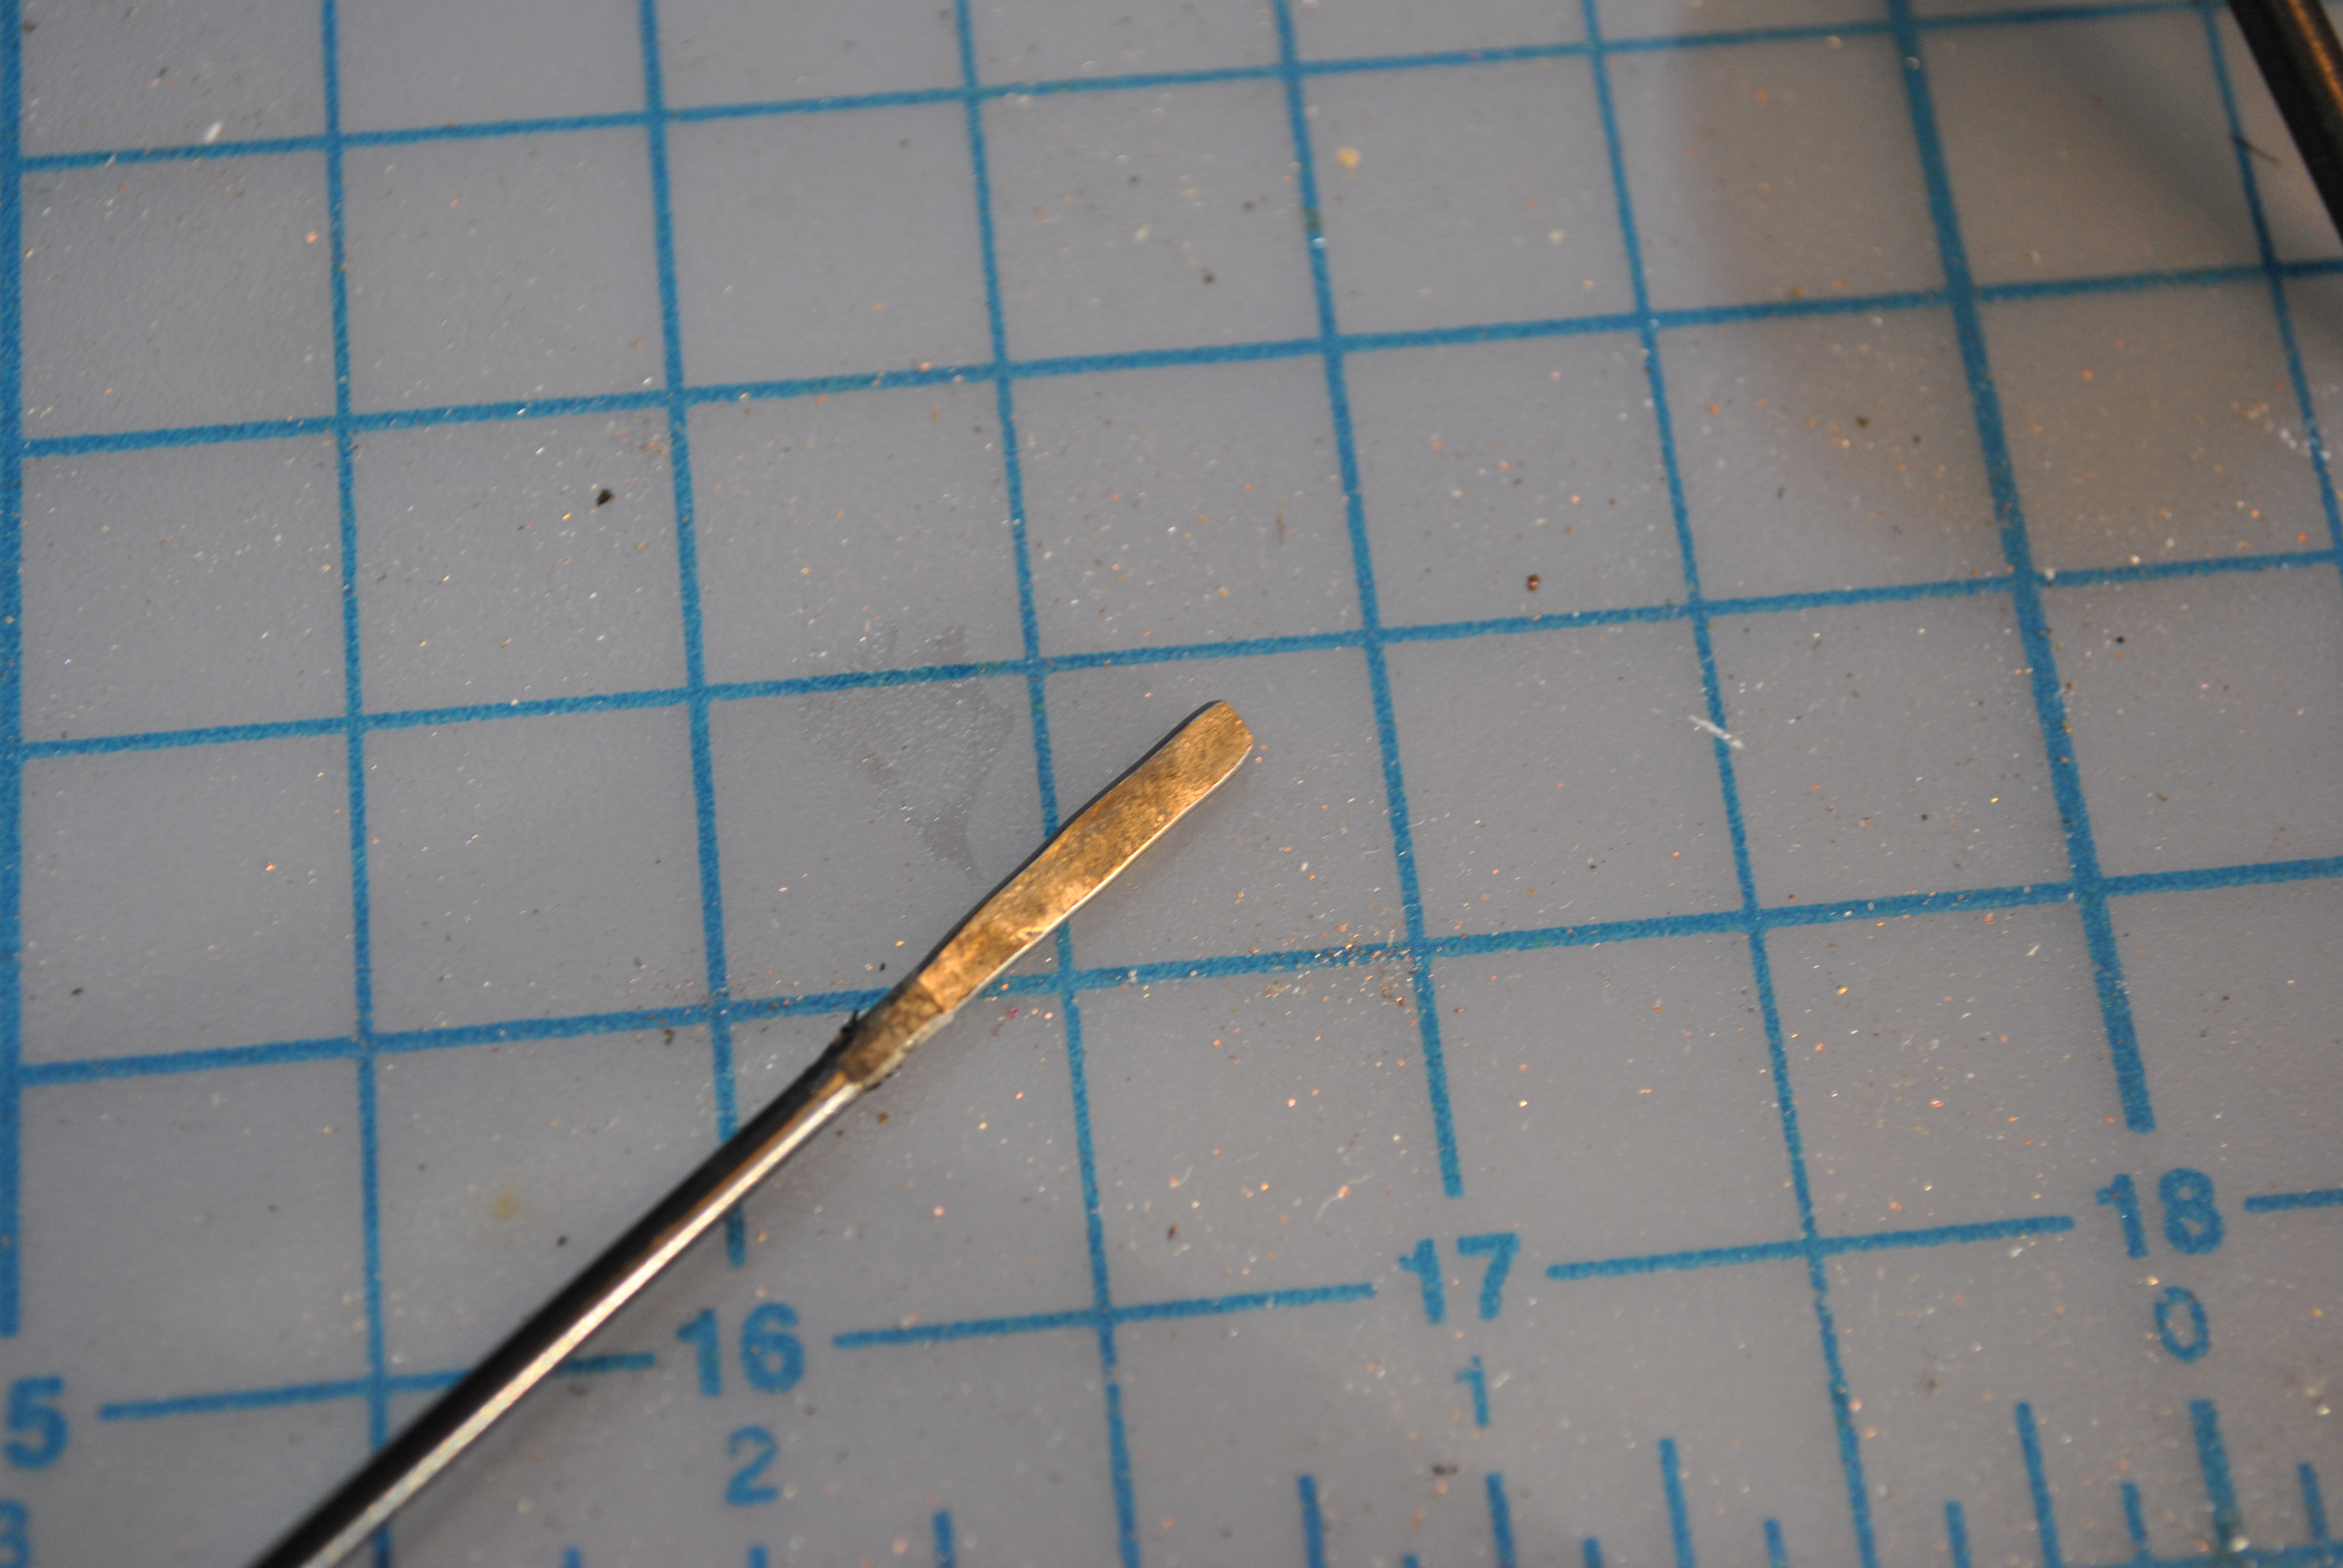
Then hammer it into the shape you want.
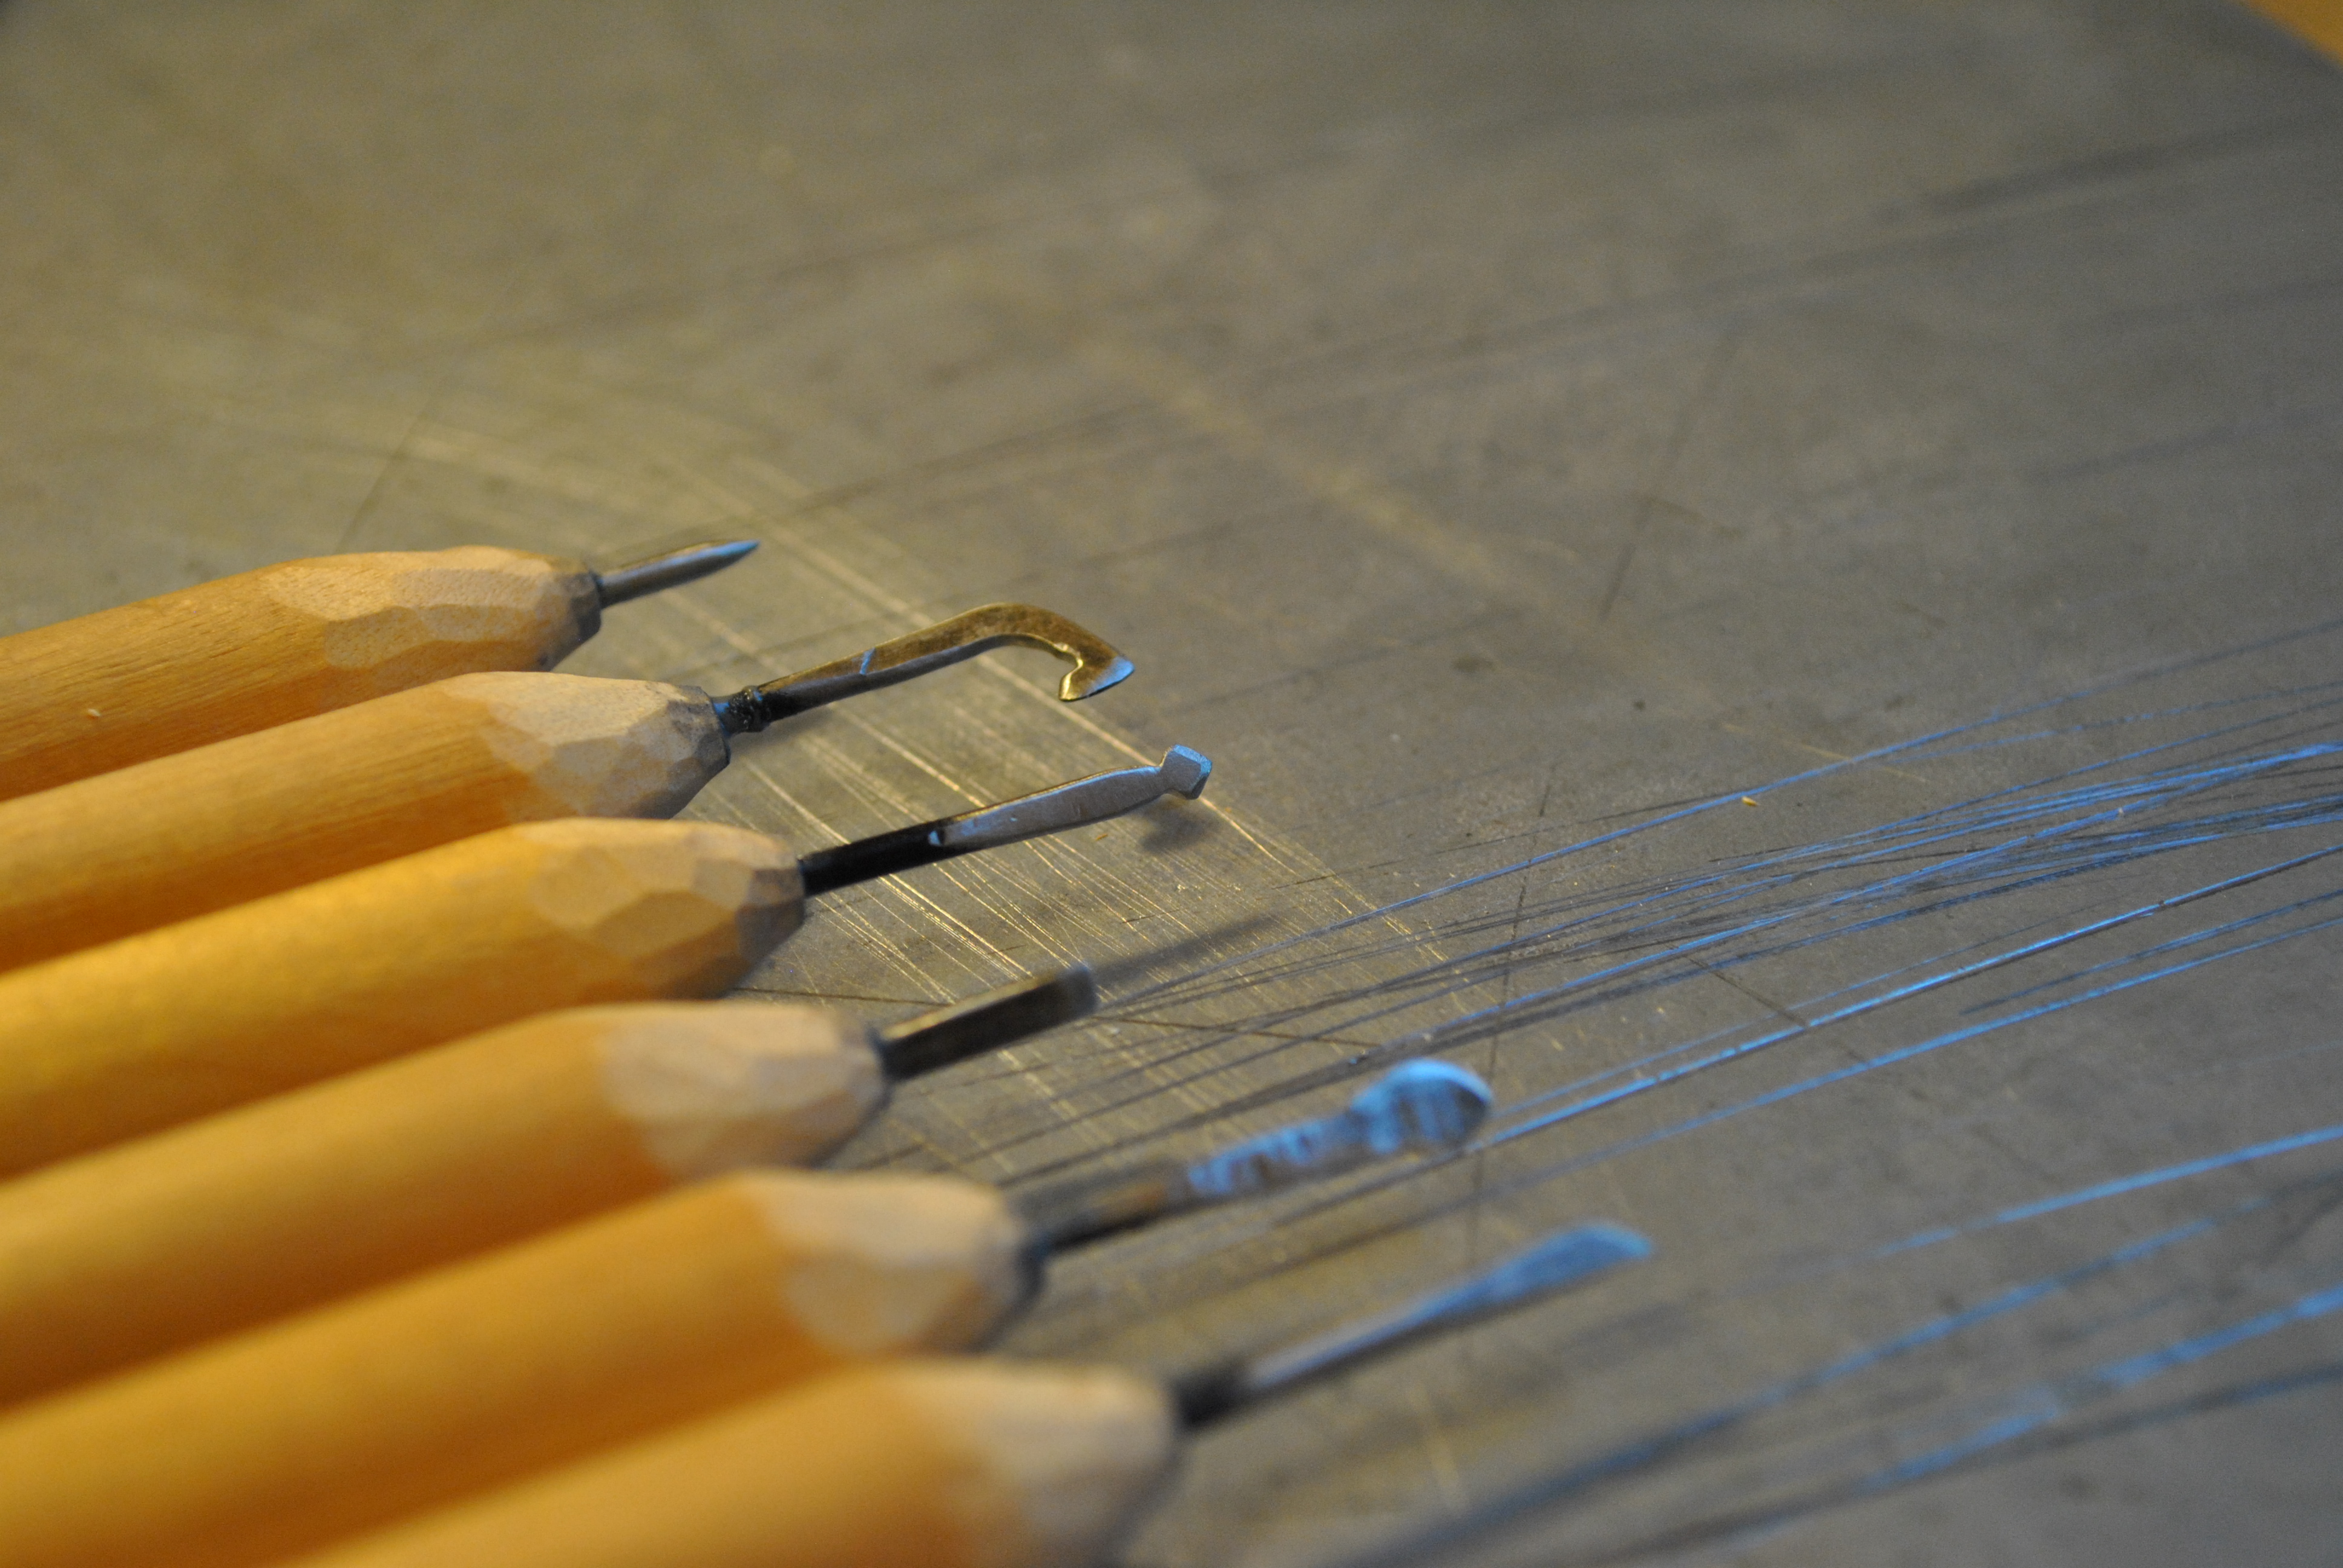
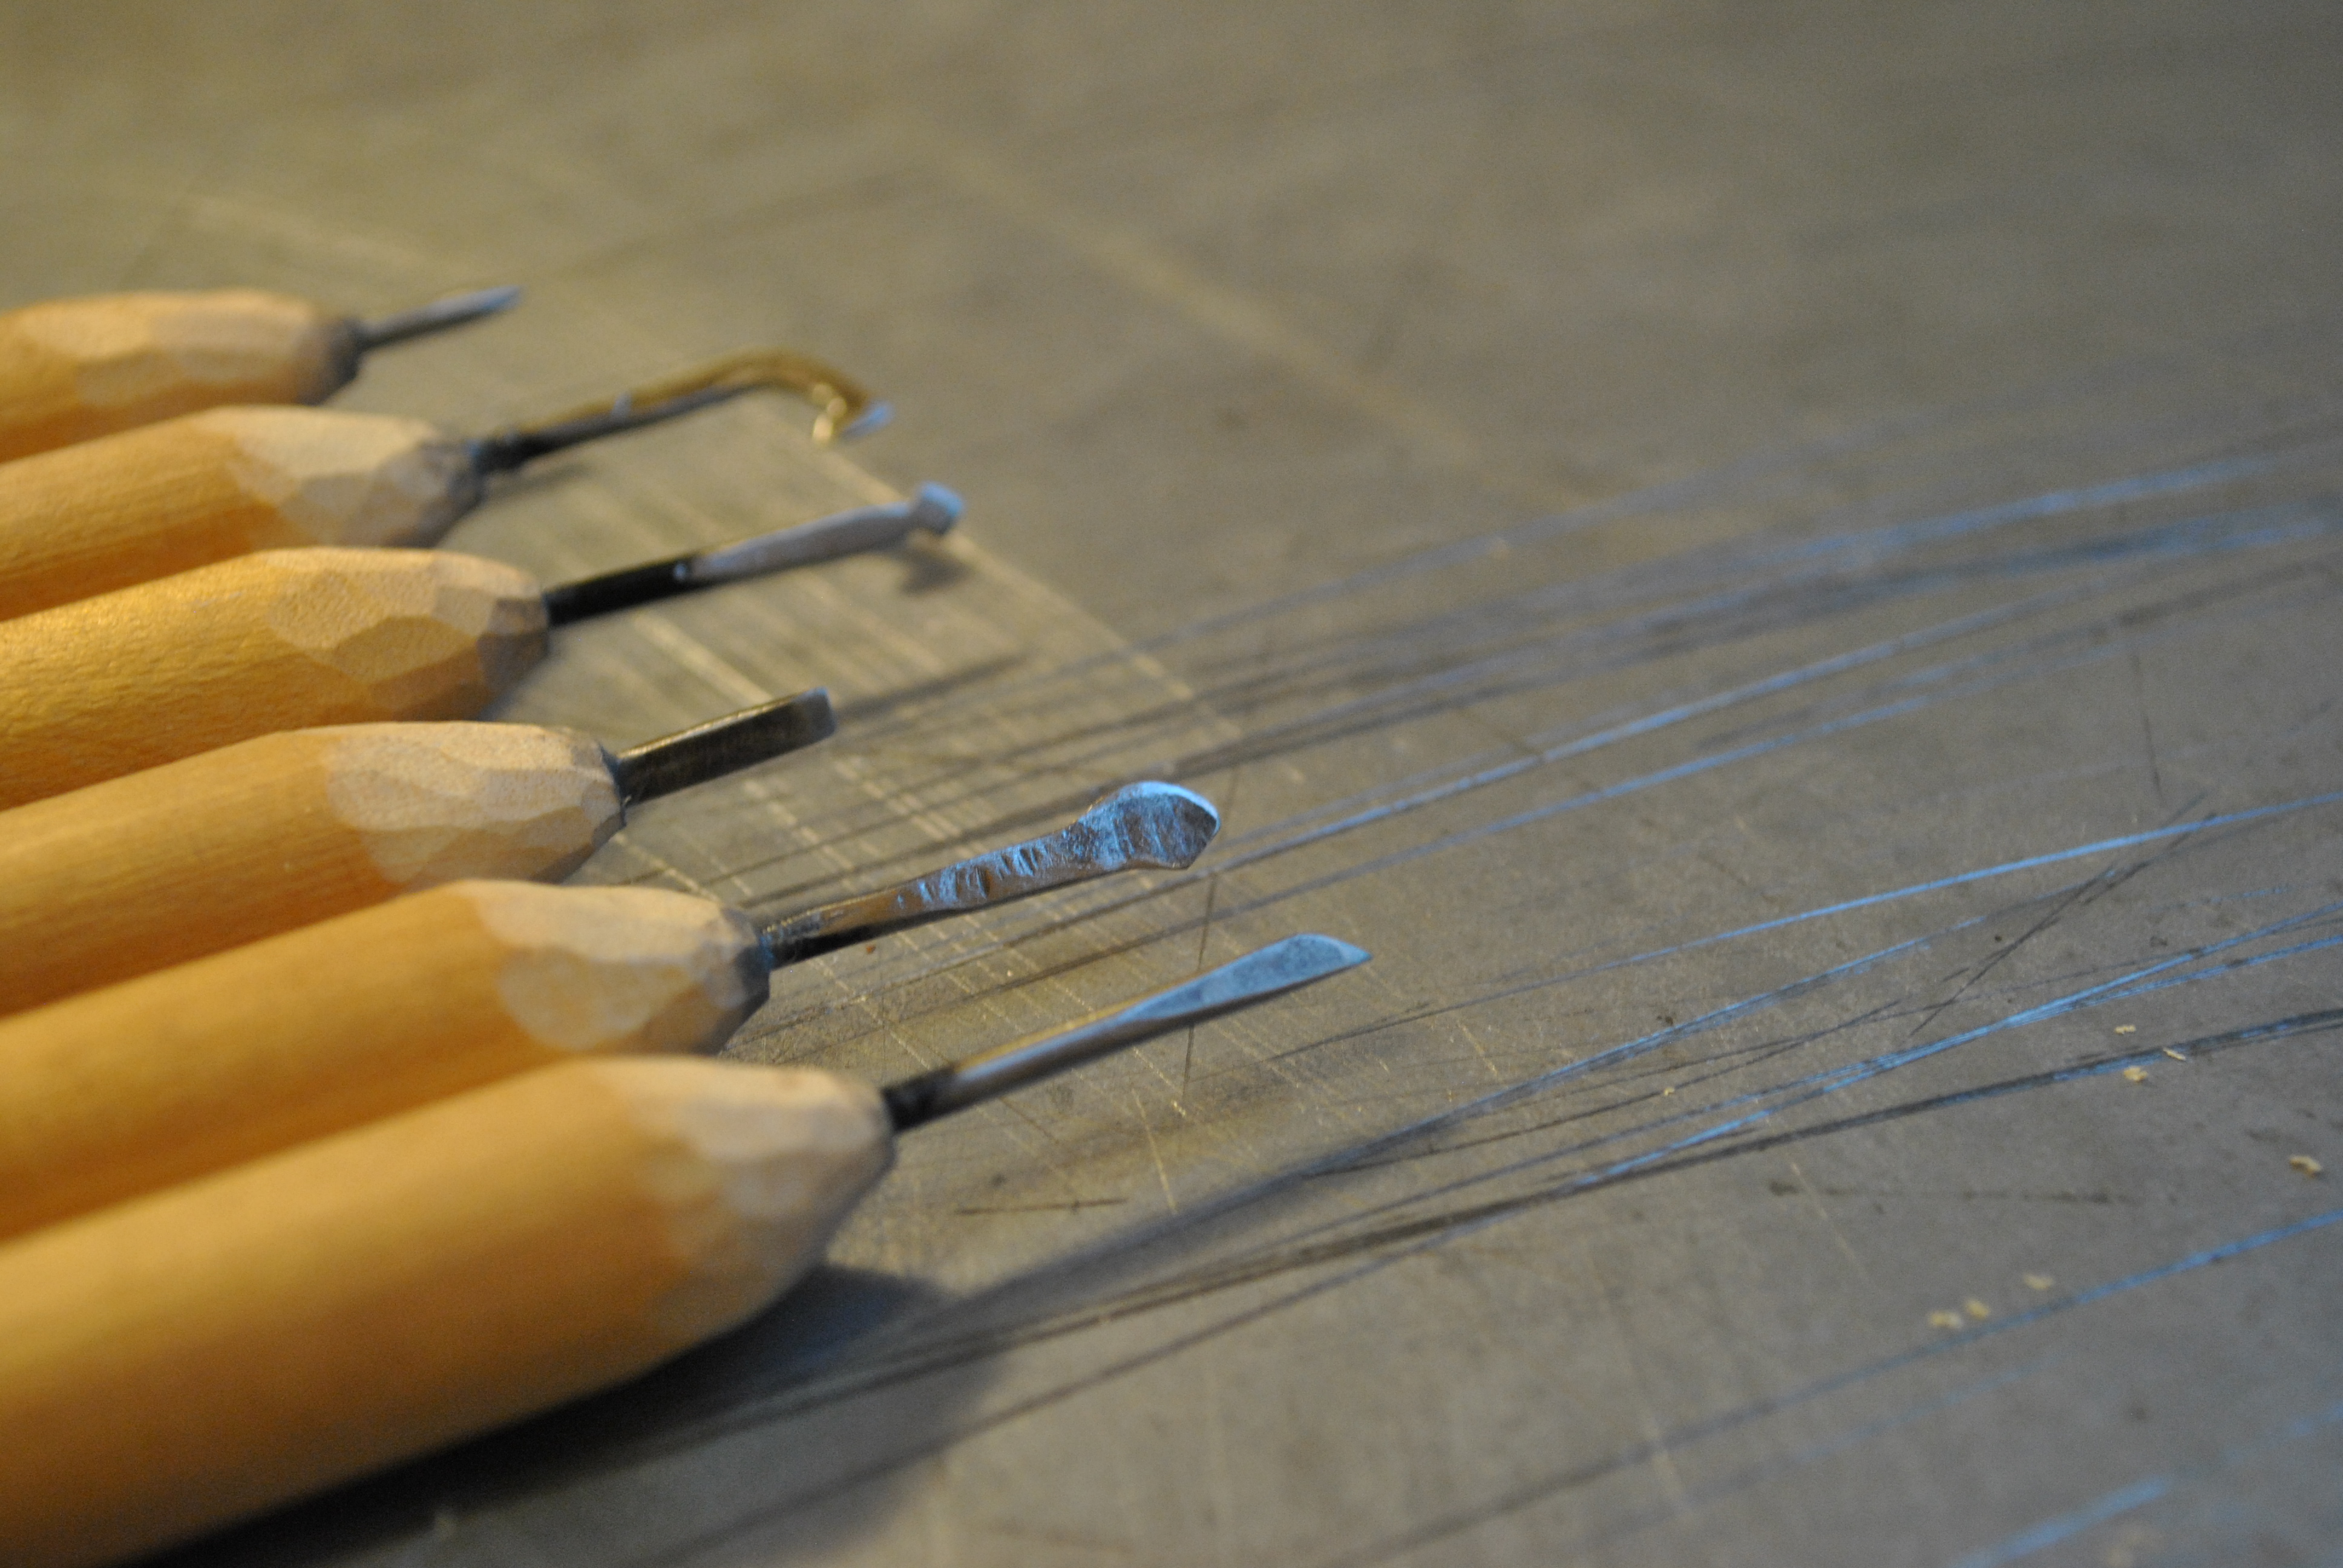
Use a file, or sand paper, or your dremel. And make all the other shapes you want.
The nice thing about this process is that I can forsee myself making custom one off tool with this technique for basically free. I have about 200 bike spokes, and you only need about 3 inches of one, so you can make multiple tool heads from just one spoke.
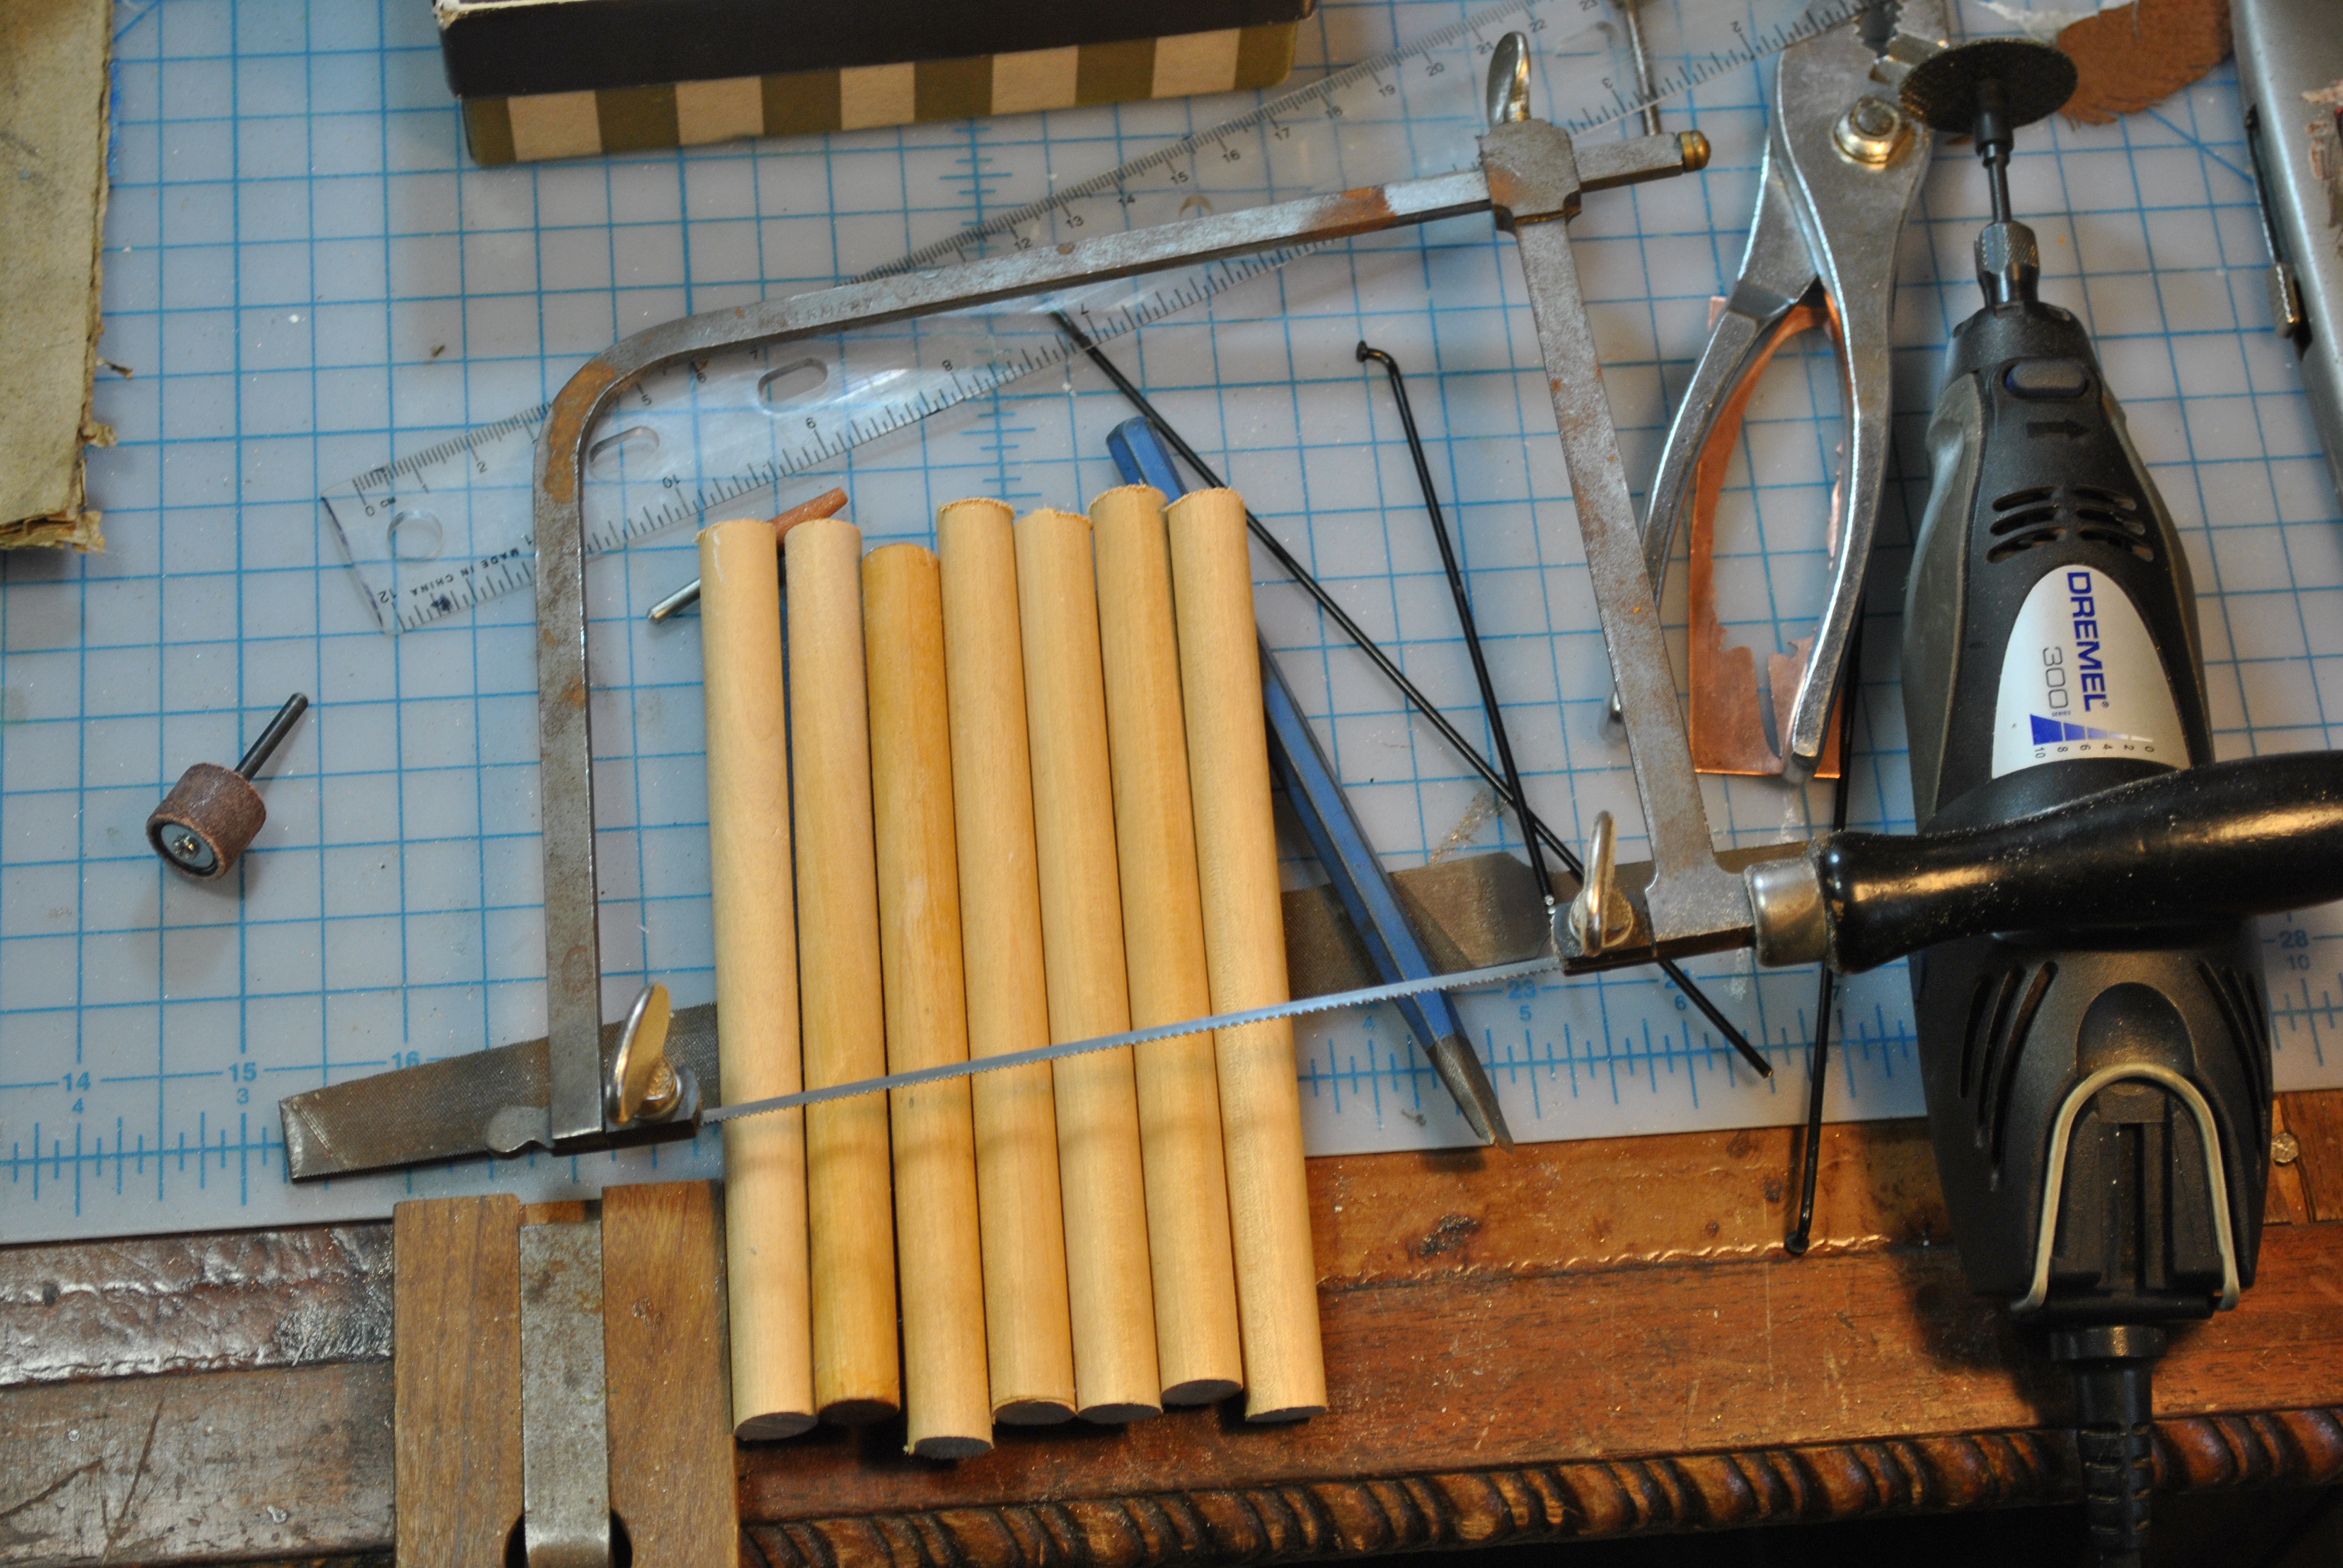
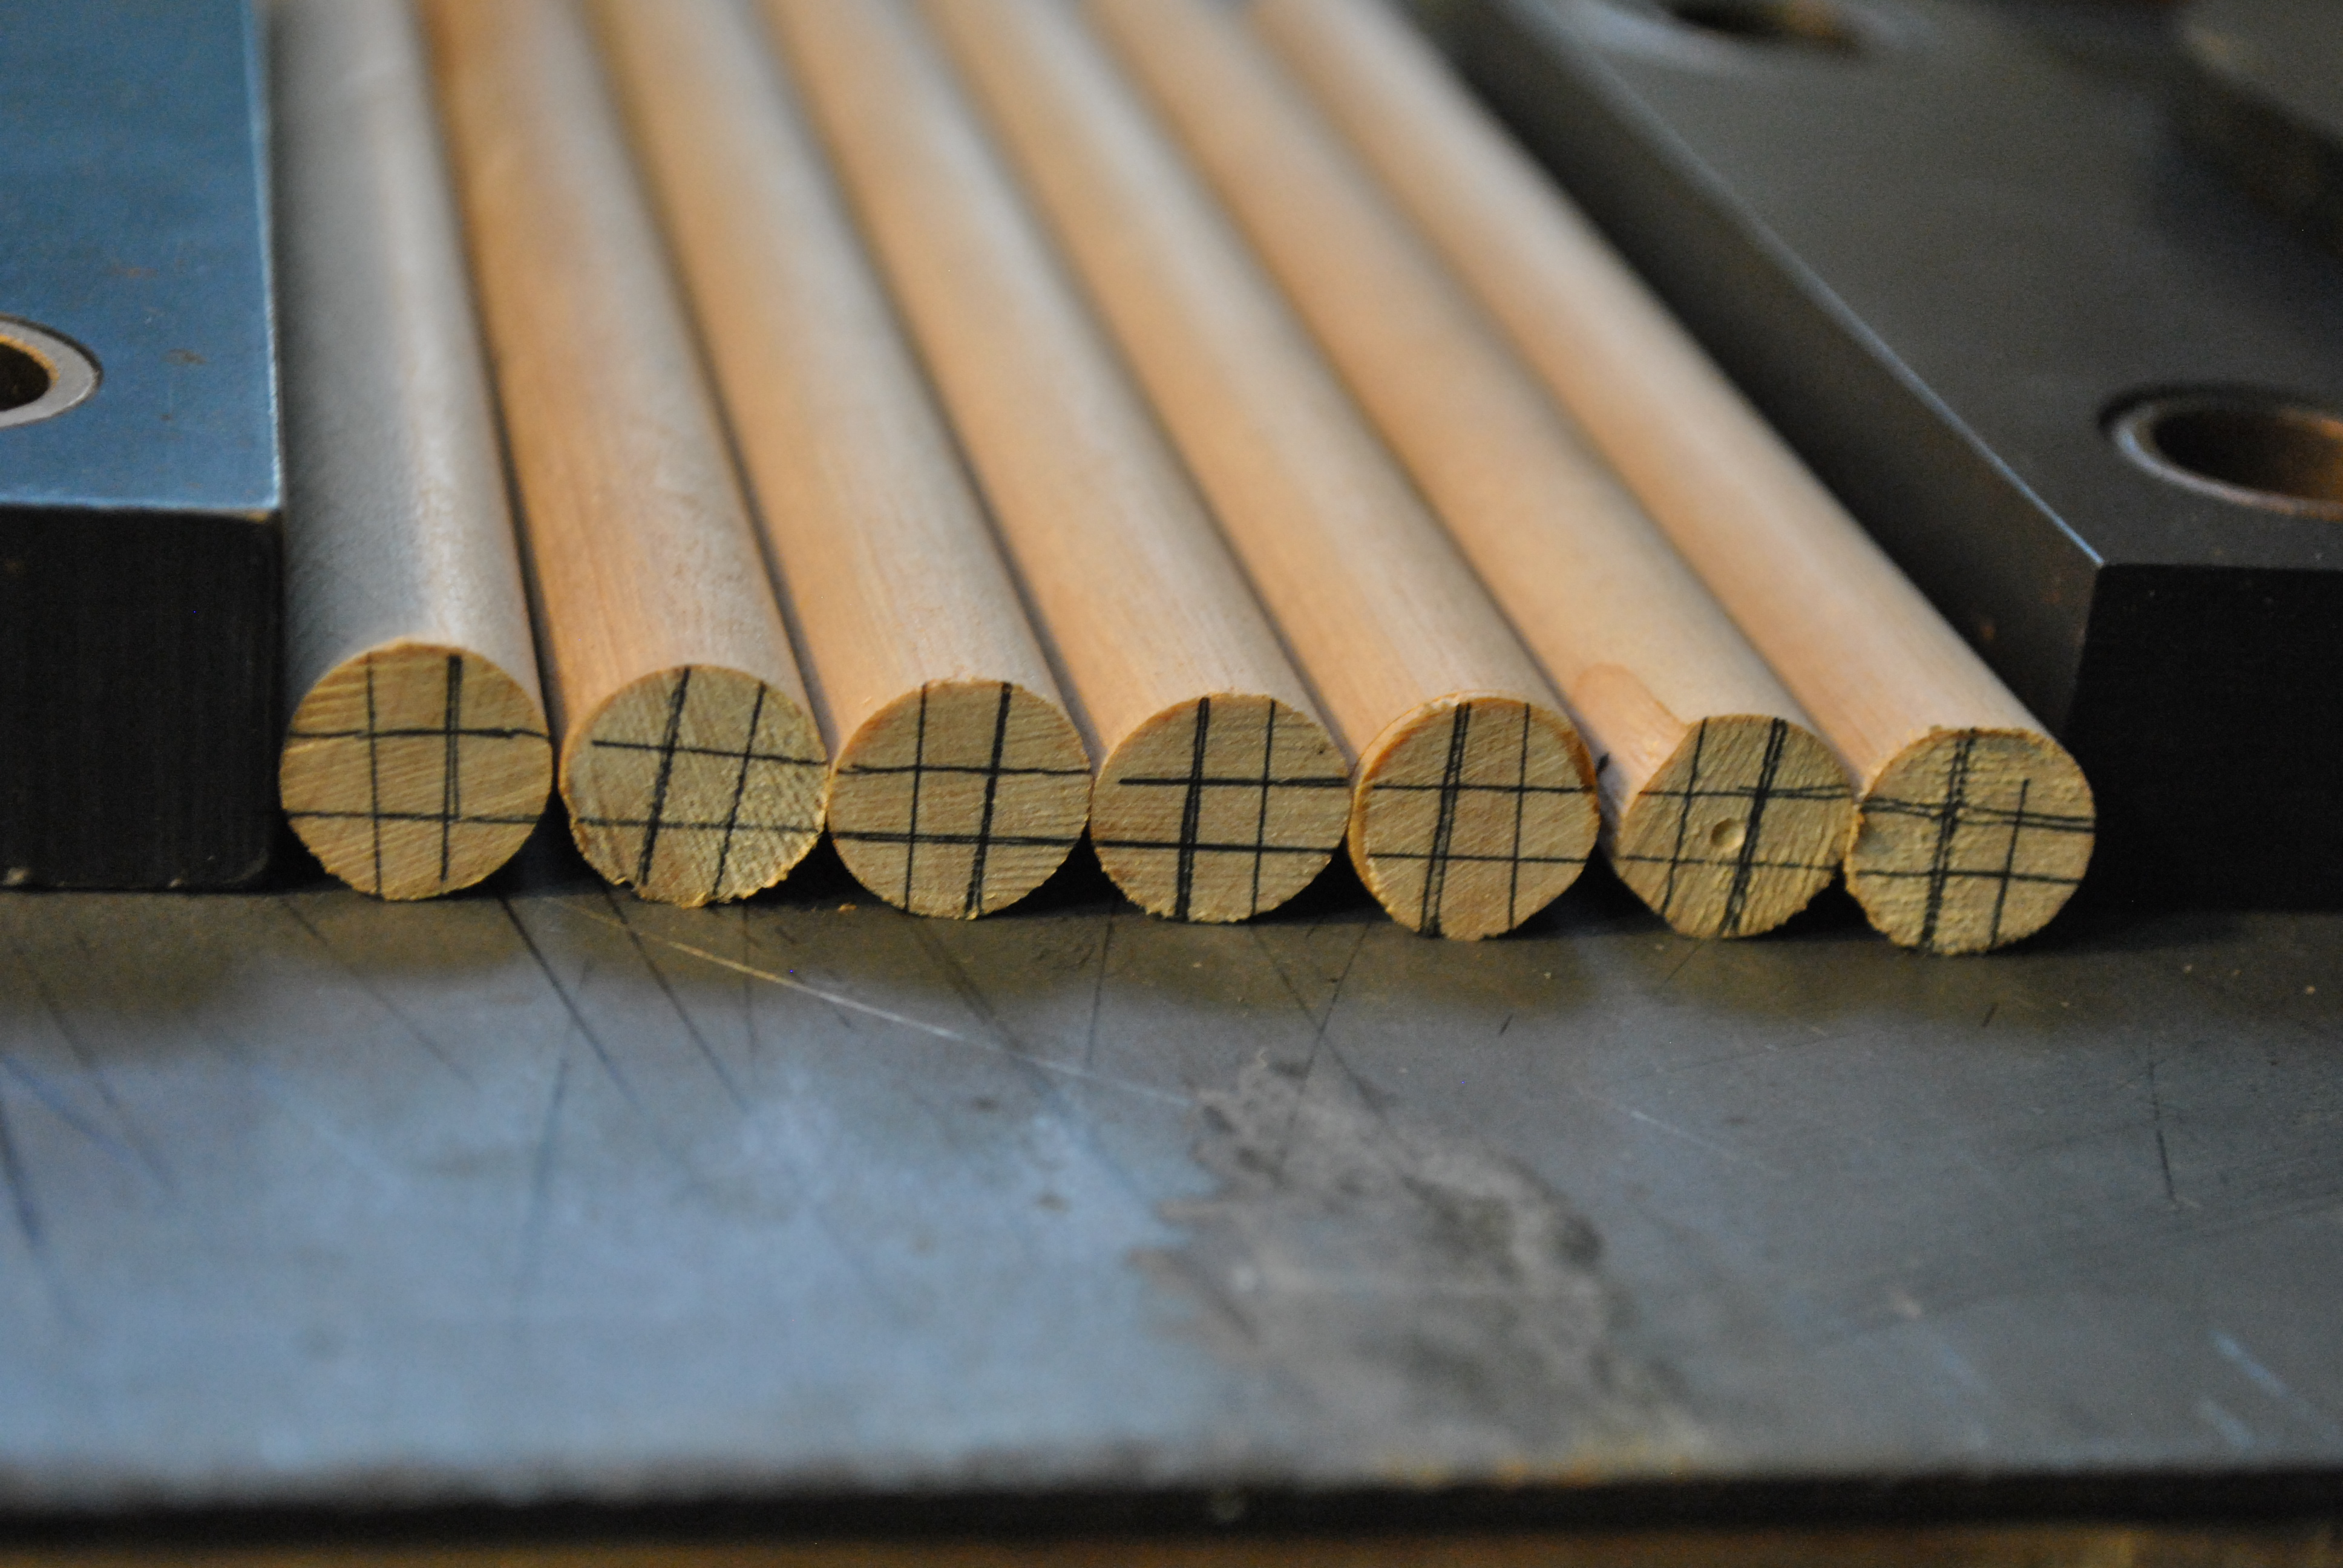
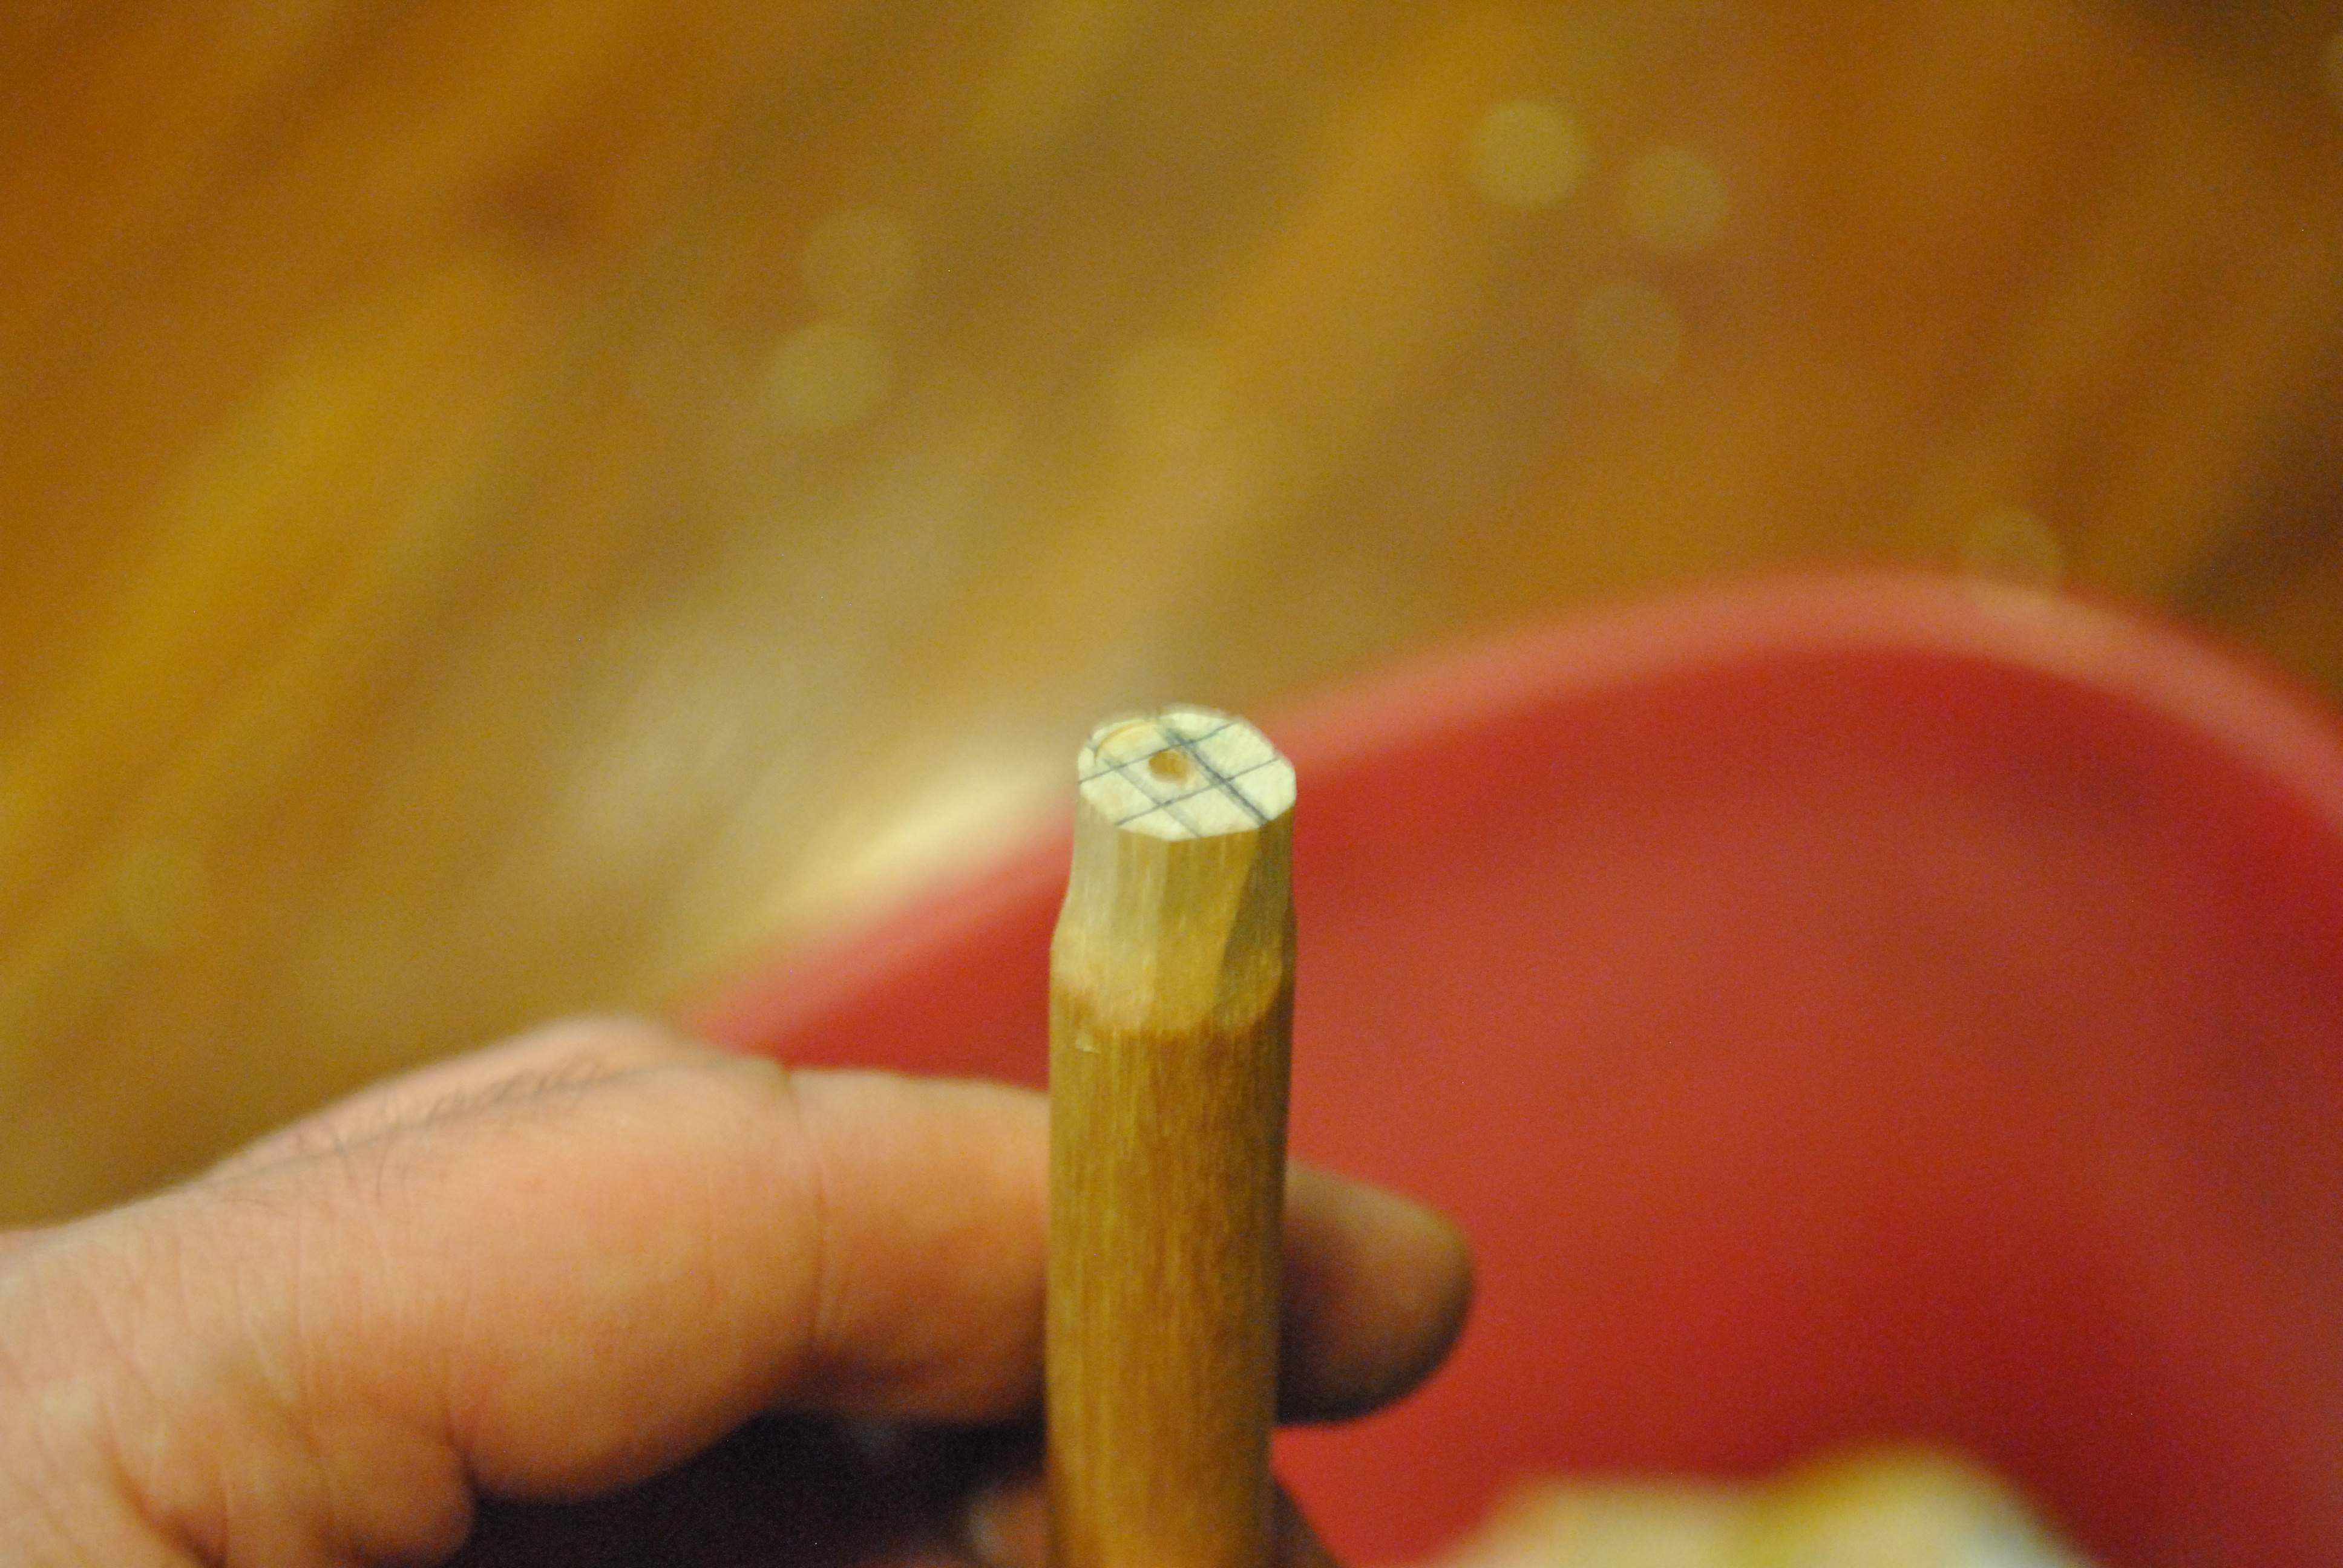
Get your dowel, and cut it into handle sized bits, I made mine about 6 inches long so, because I have larger hands, and I thought later I might want to put a tool head at each end to make them more useful and wanted enough room for that. And yes that is my jewelers saw with a jig saw blade mounted in it. (Simply snip the two ends off that have the little mounting peg for the jig saw and tighten it down into your jewelers saw, you now have a precision jig saw for the cost of the blades.)
Do your best to center the holes, although a little bit off doesn’t matter. Now drill a hole the diameter of your bicycle spoke into the end of each one. Once that is done its time fer some good old fashion wittlin!
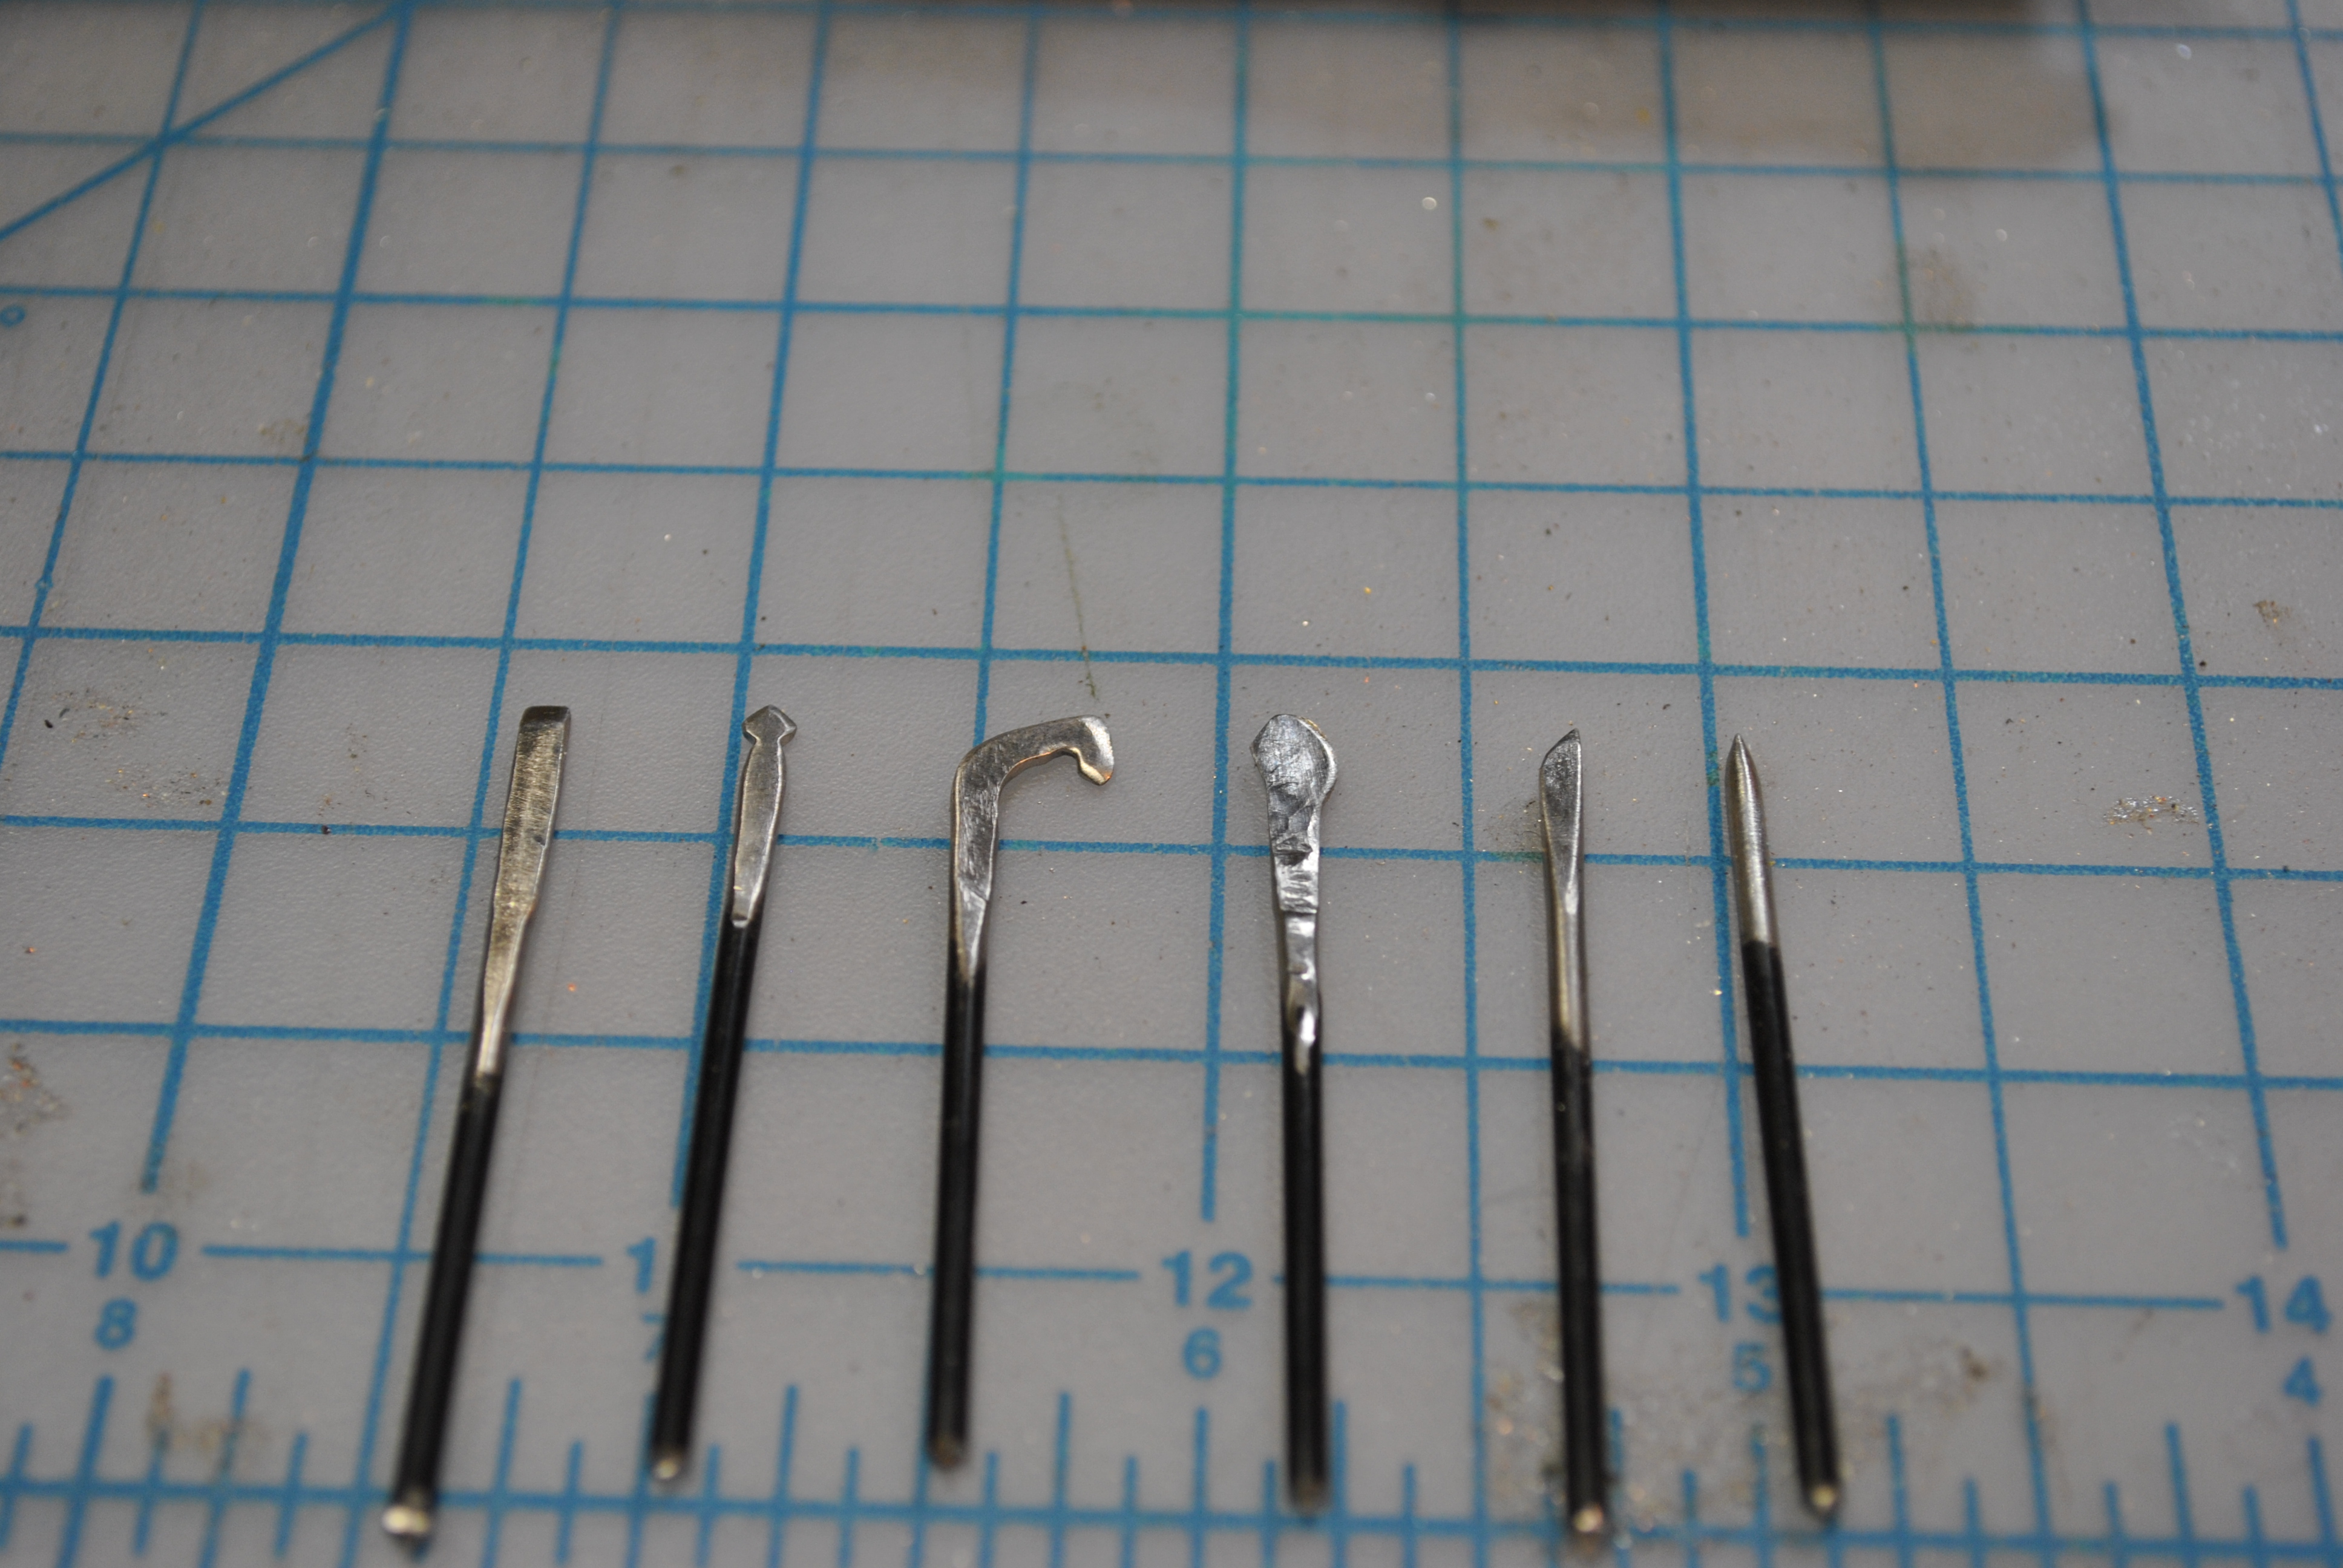
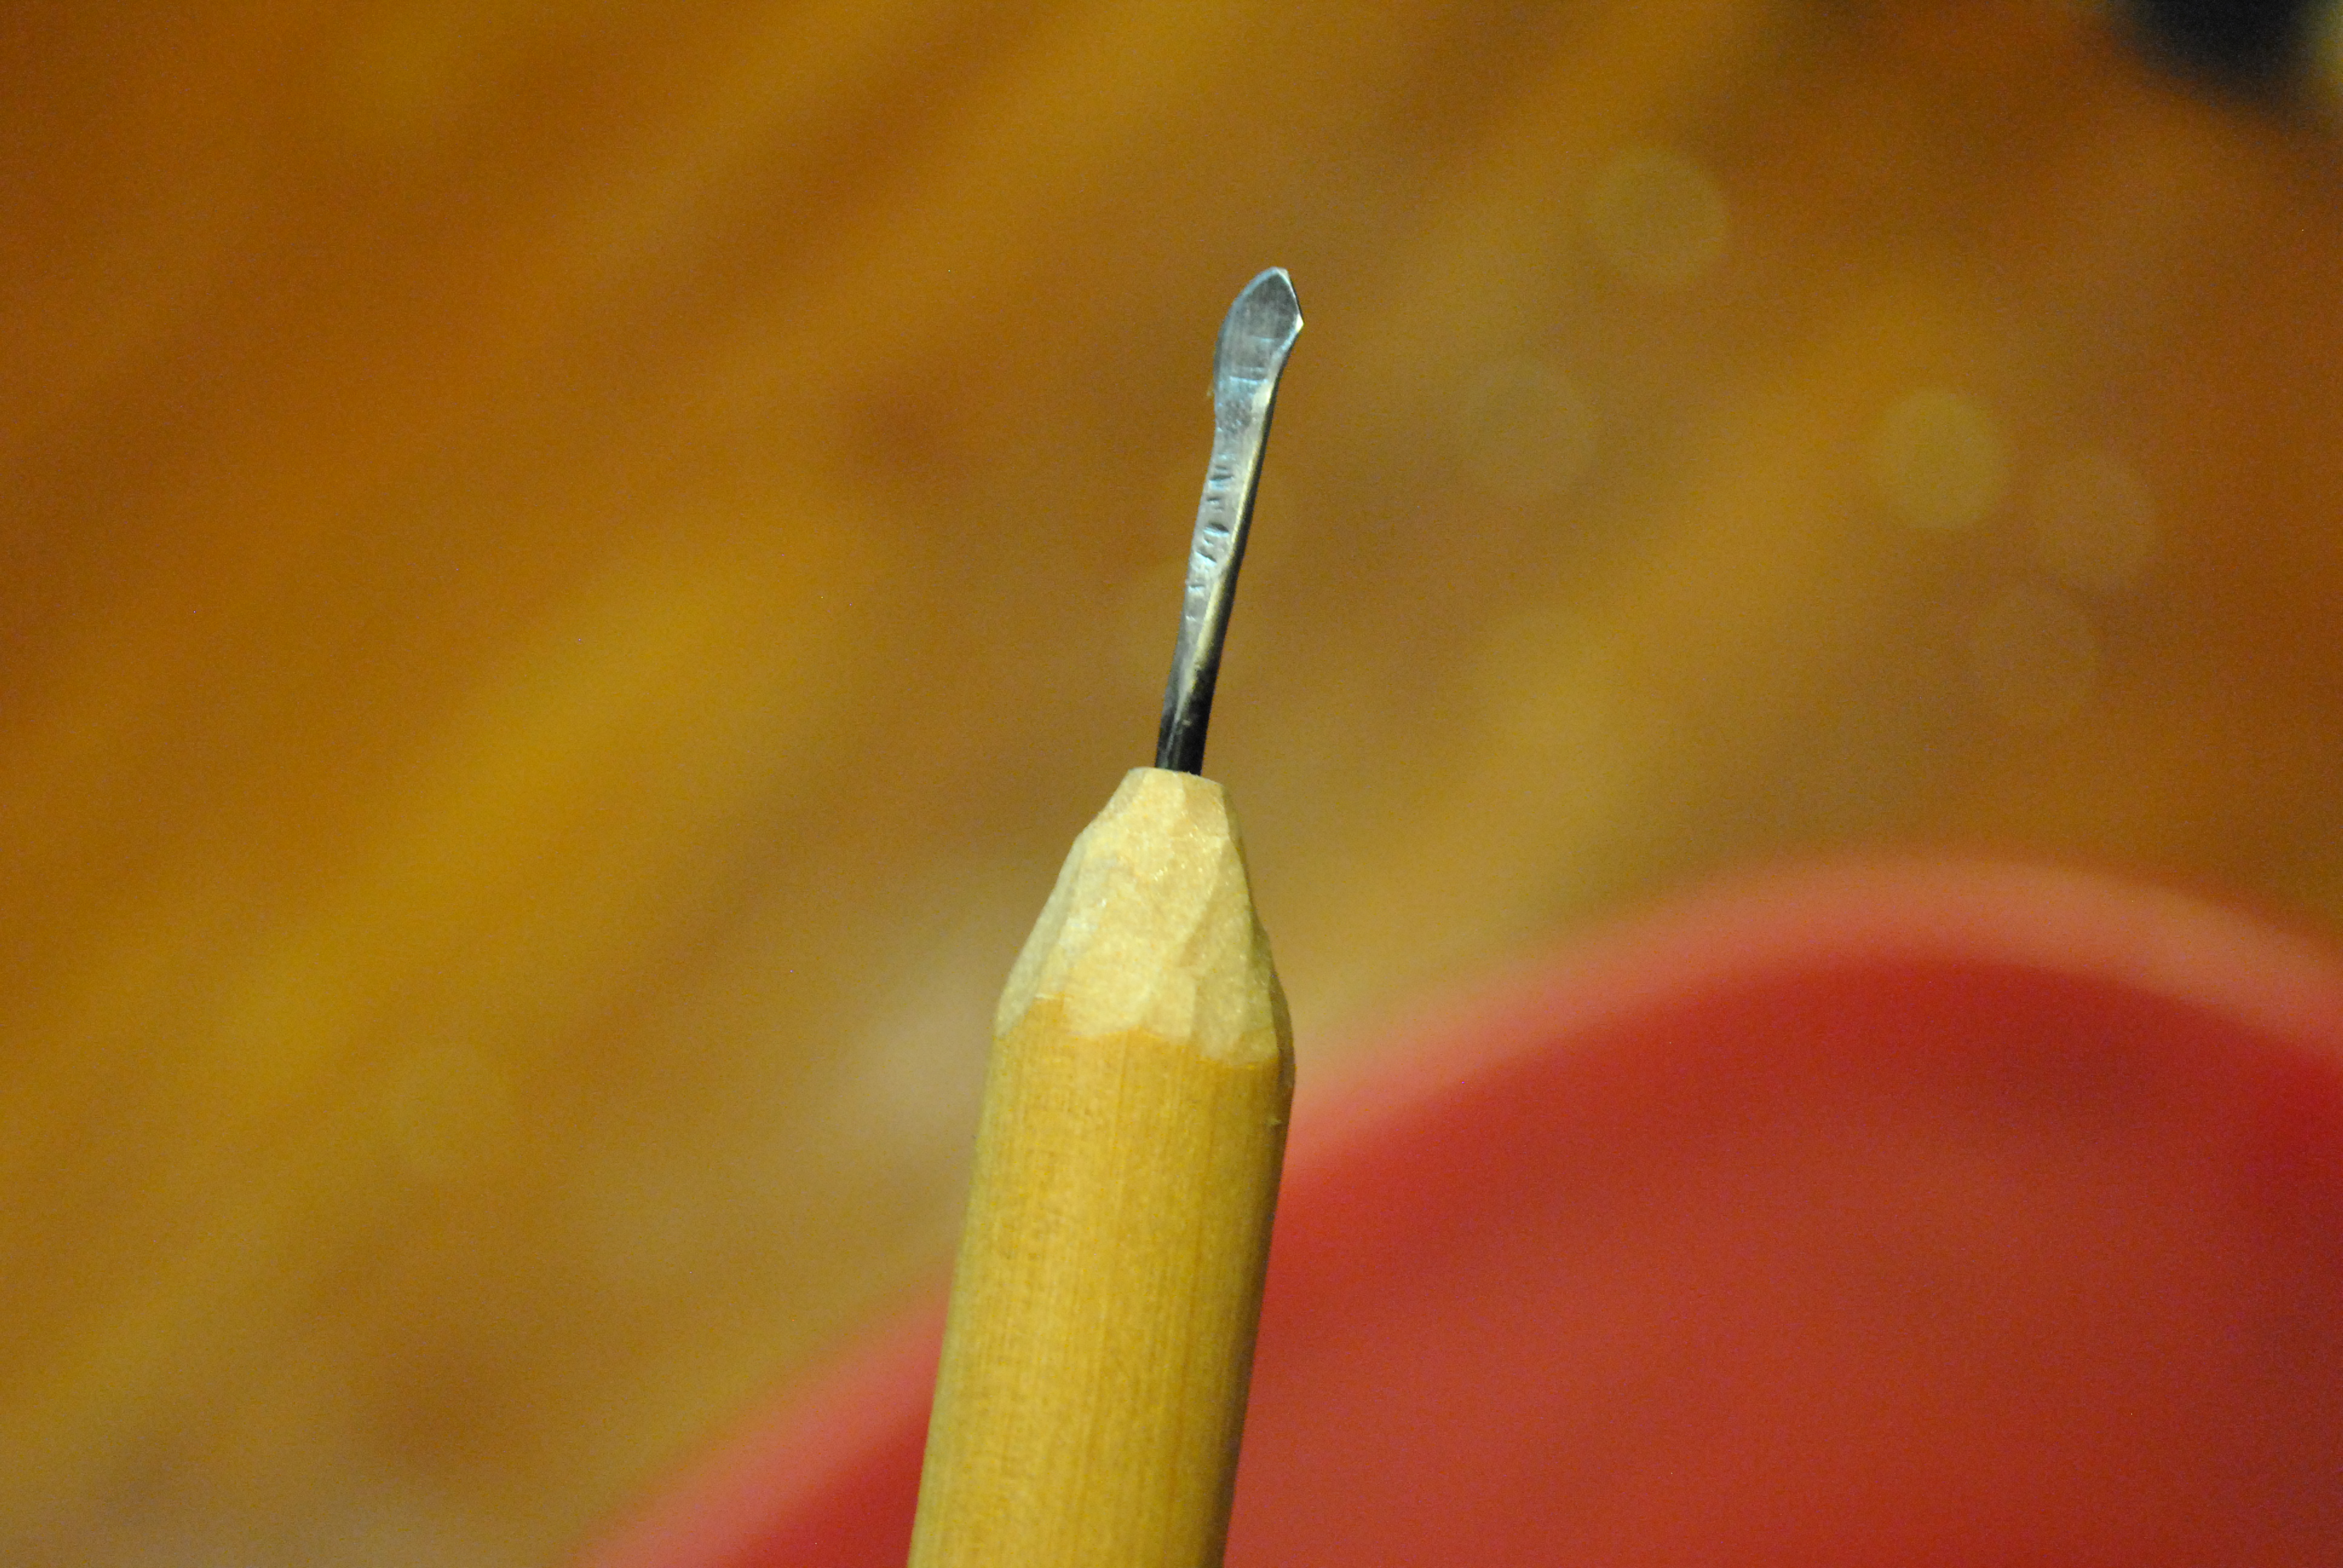
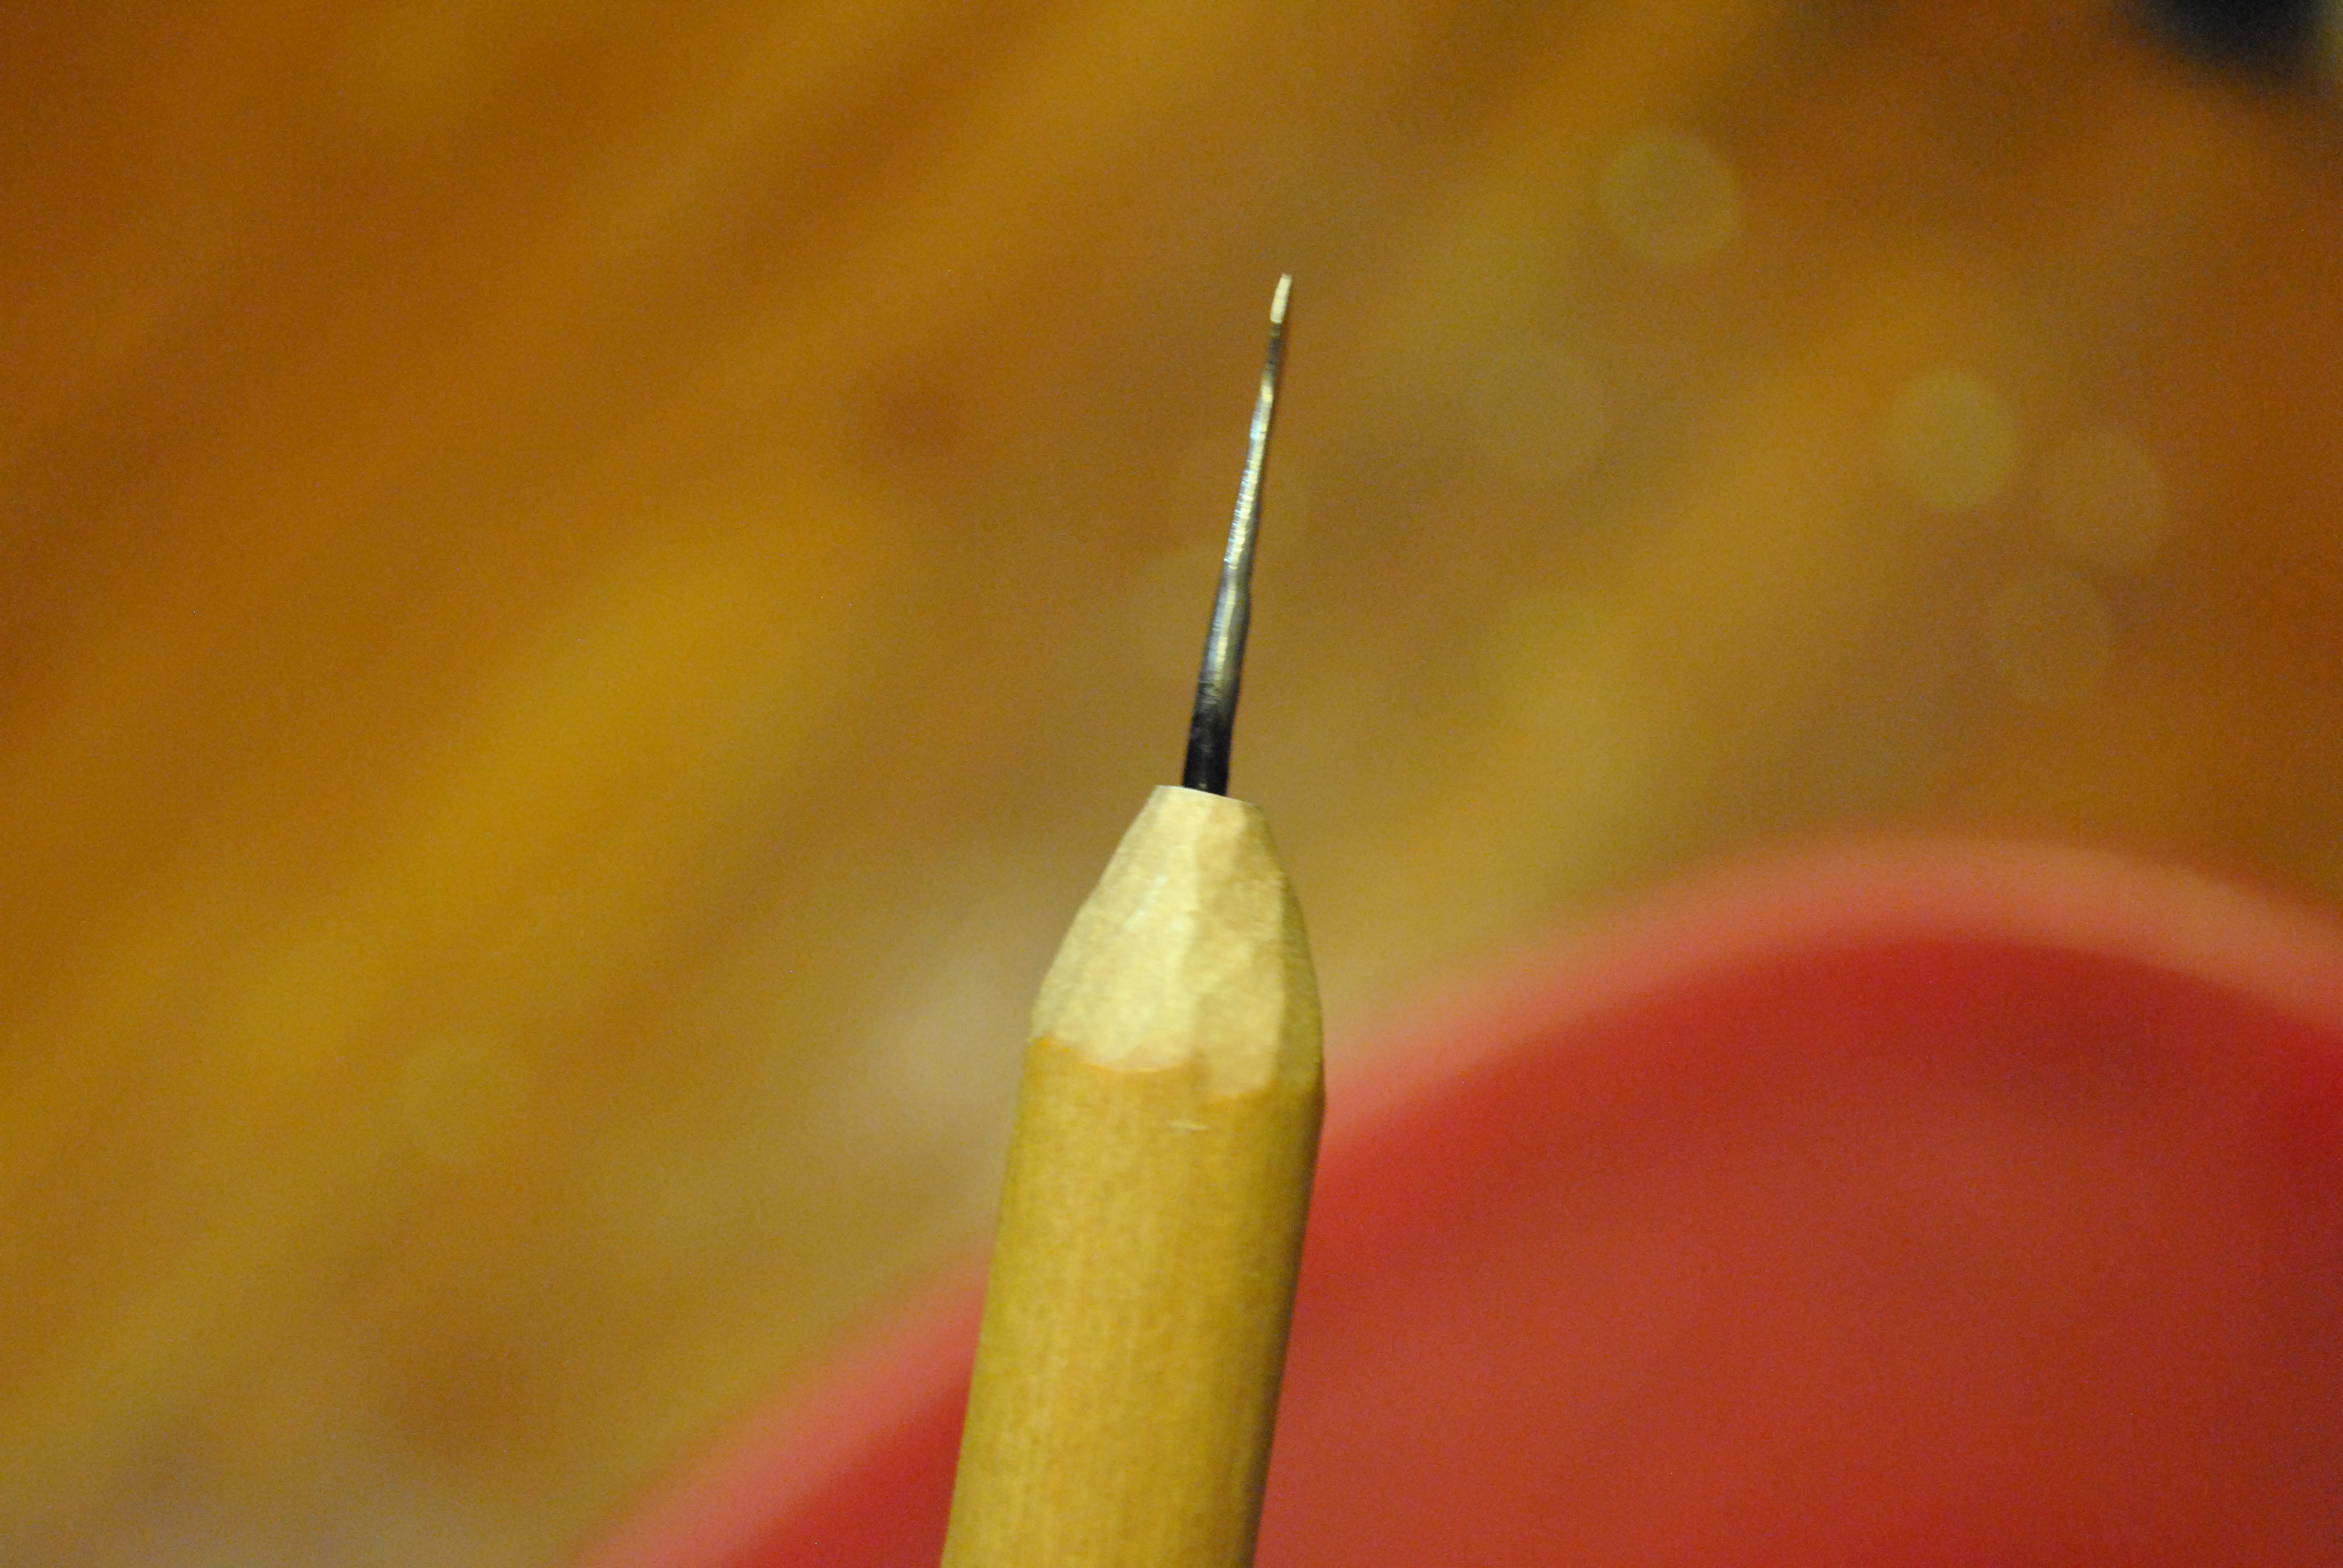
I took a utility knife, and carefully carved down the tips rotating and taking small chunks off until it came to a nice point for each tool. This was the second most fun part, (playing with fire will always be number one).
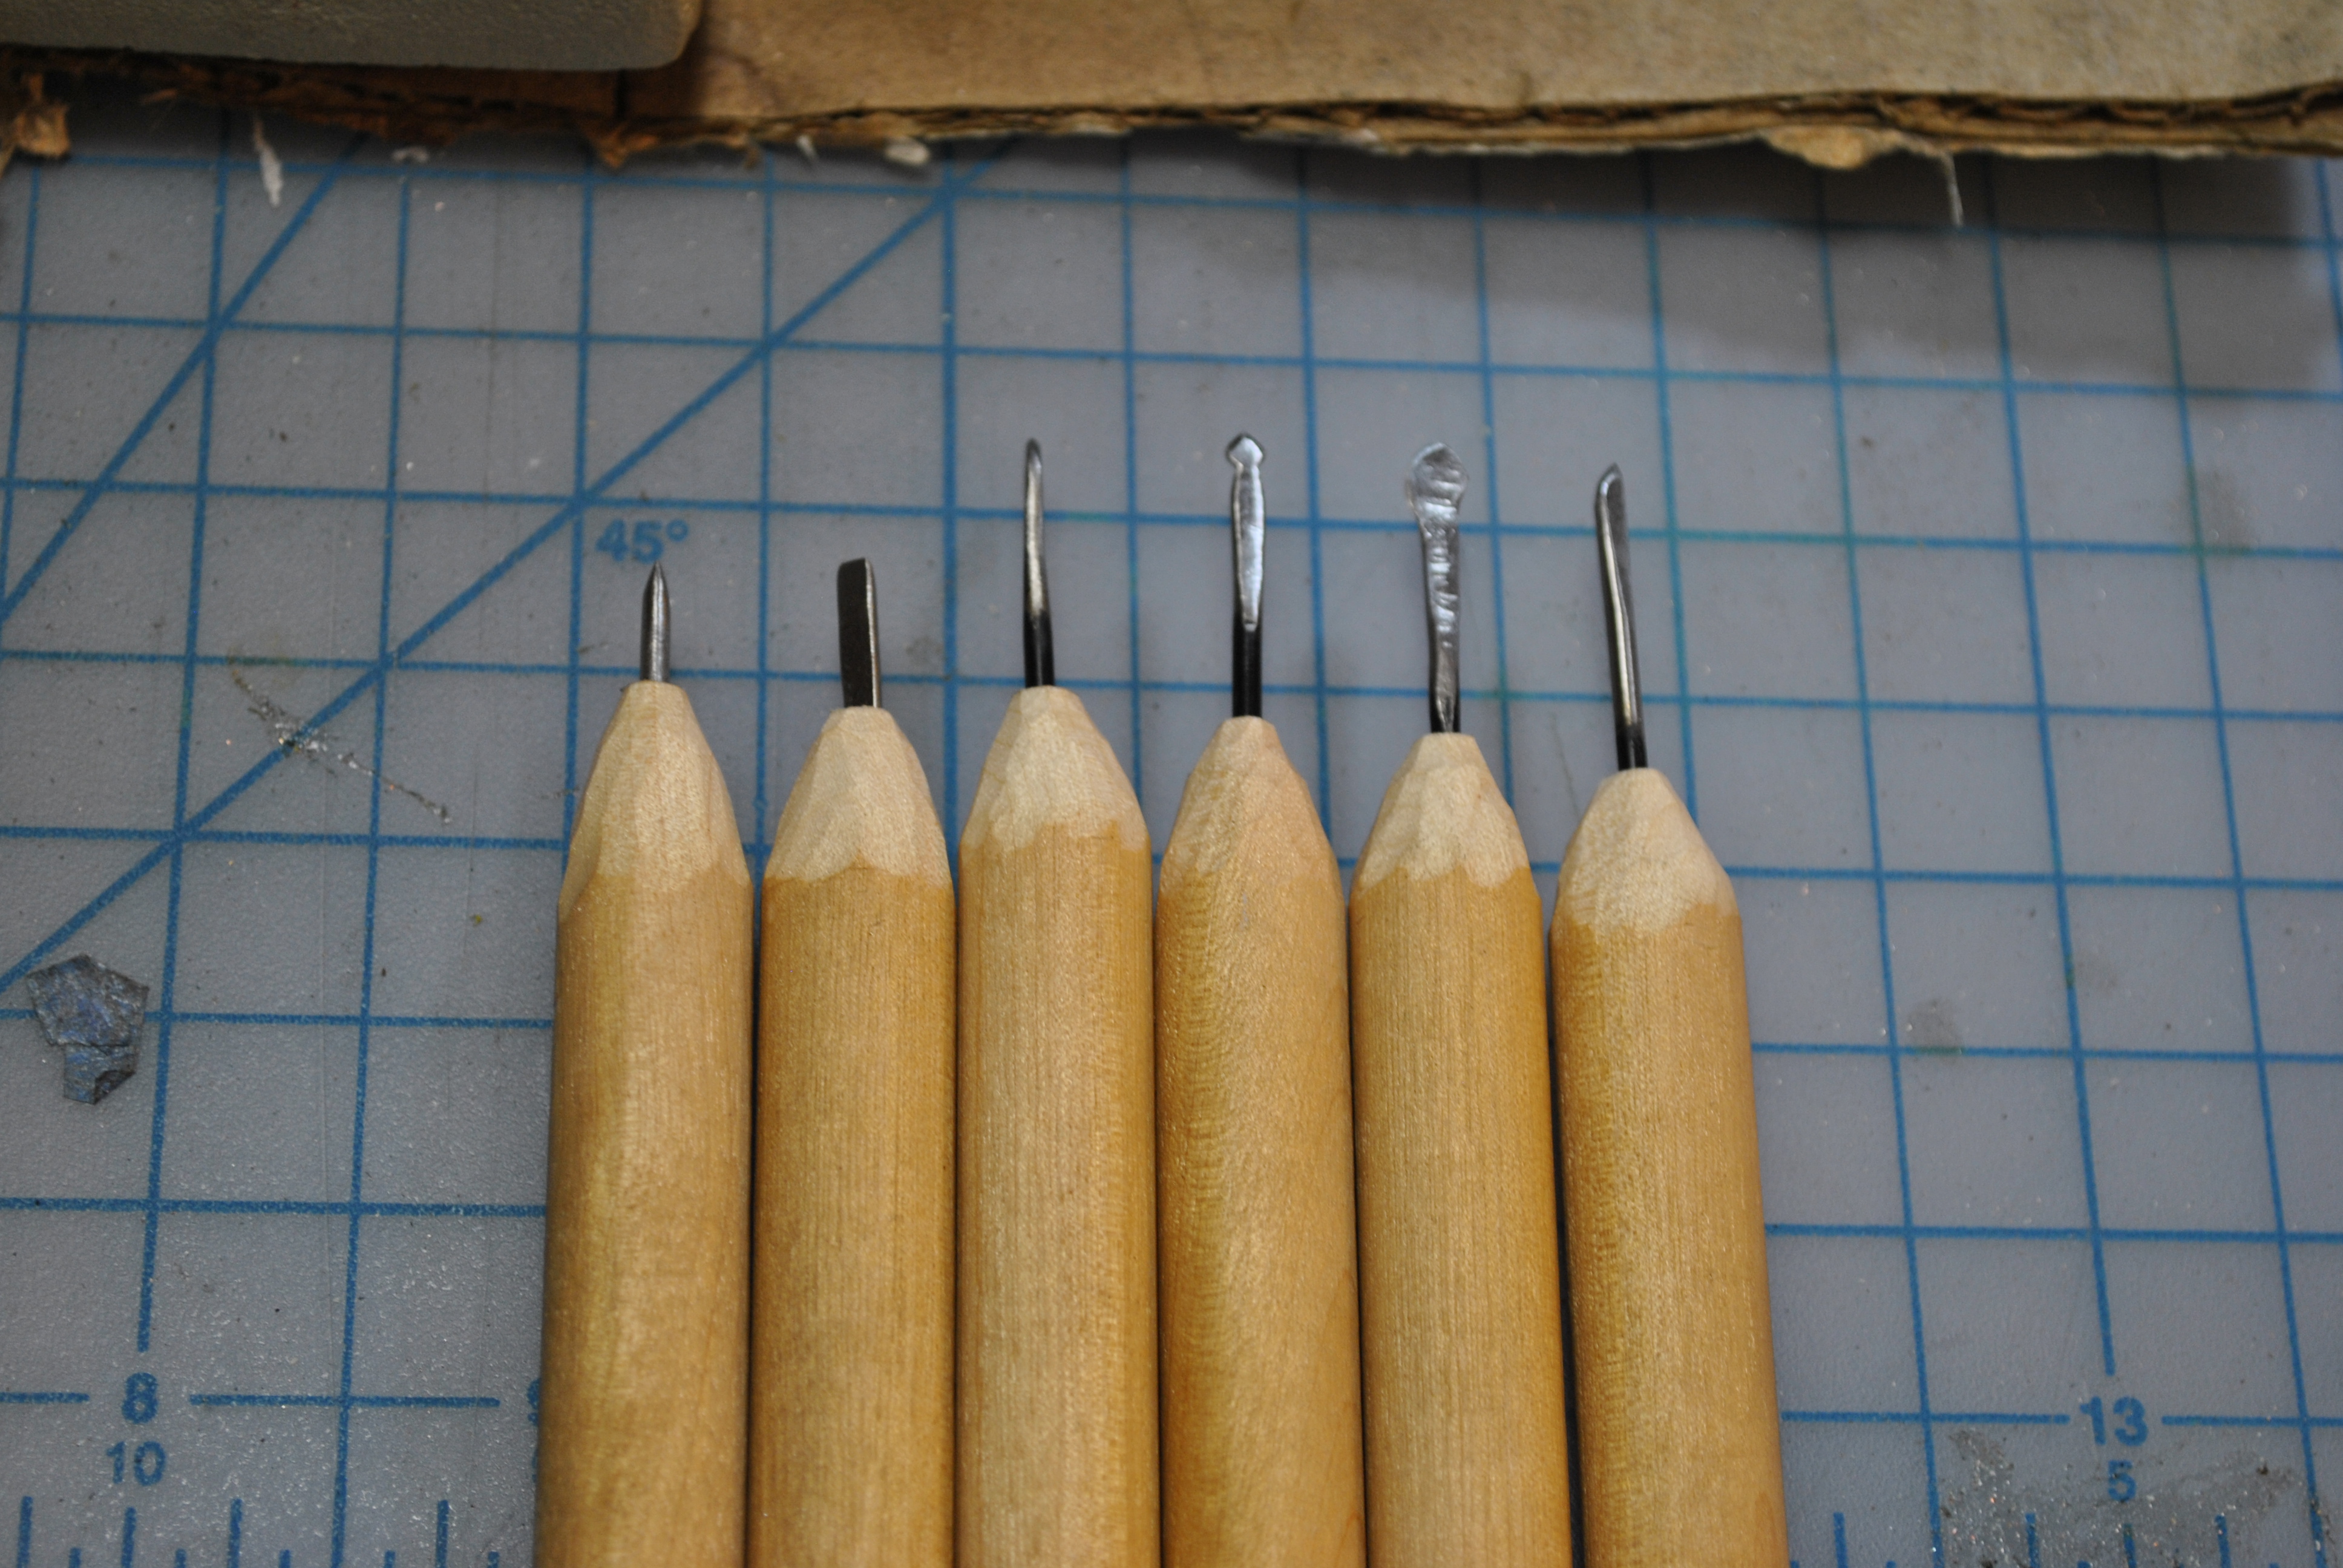
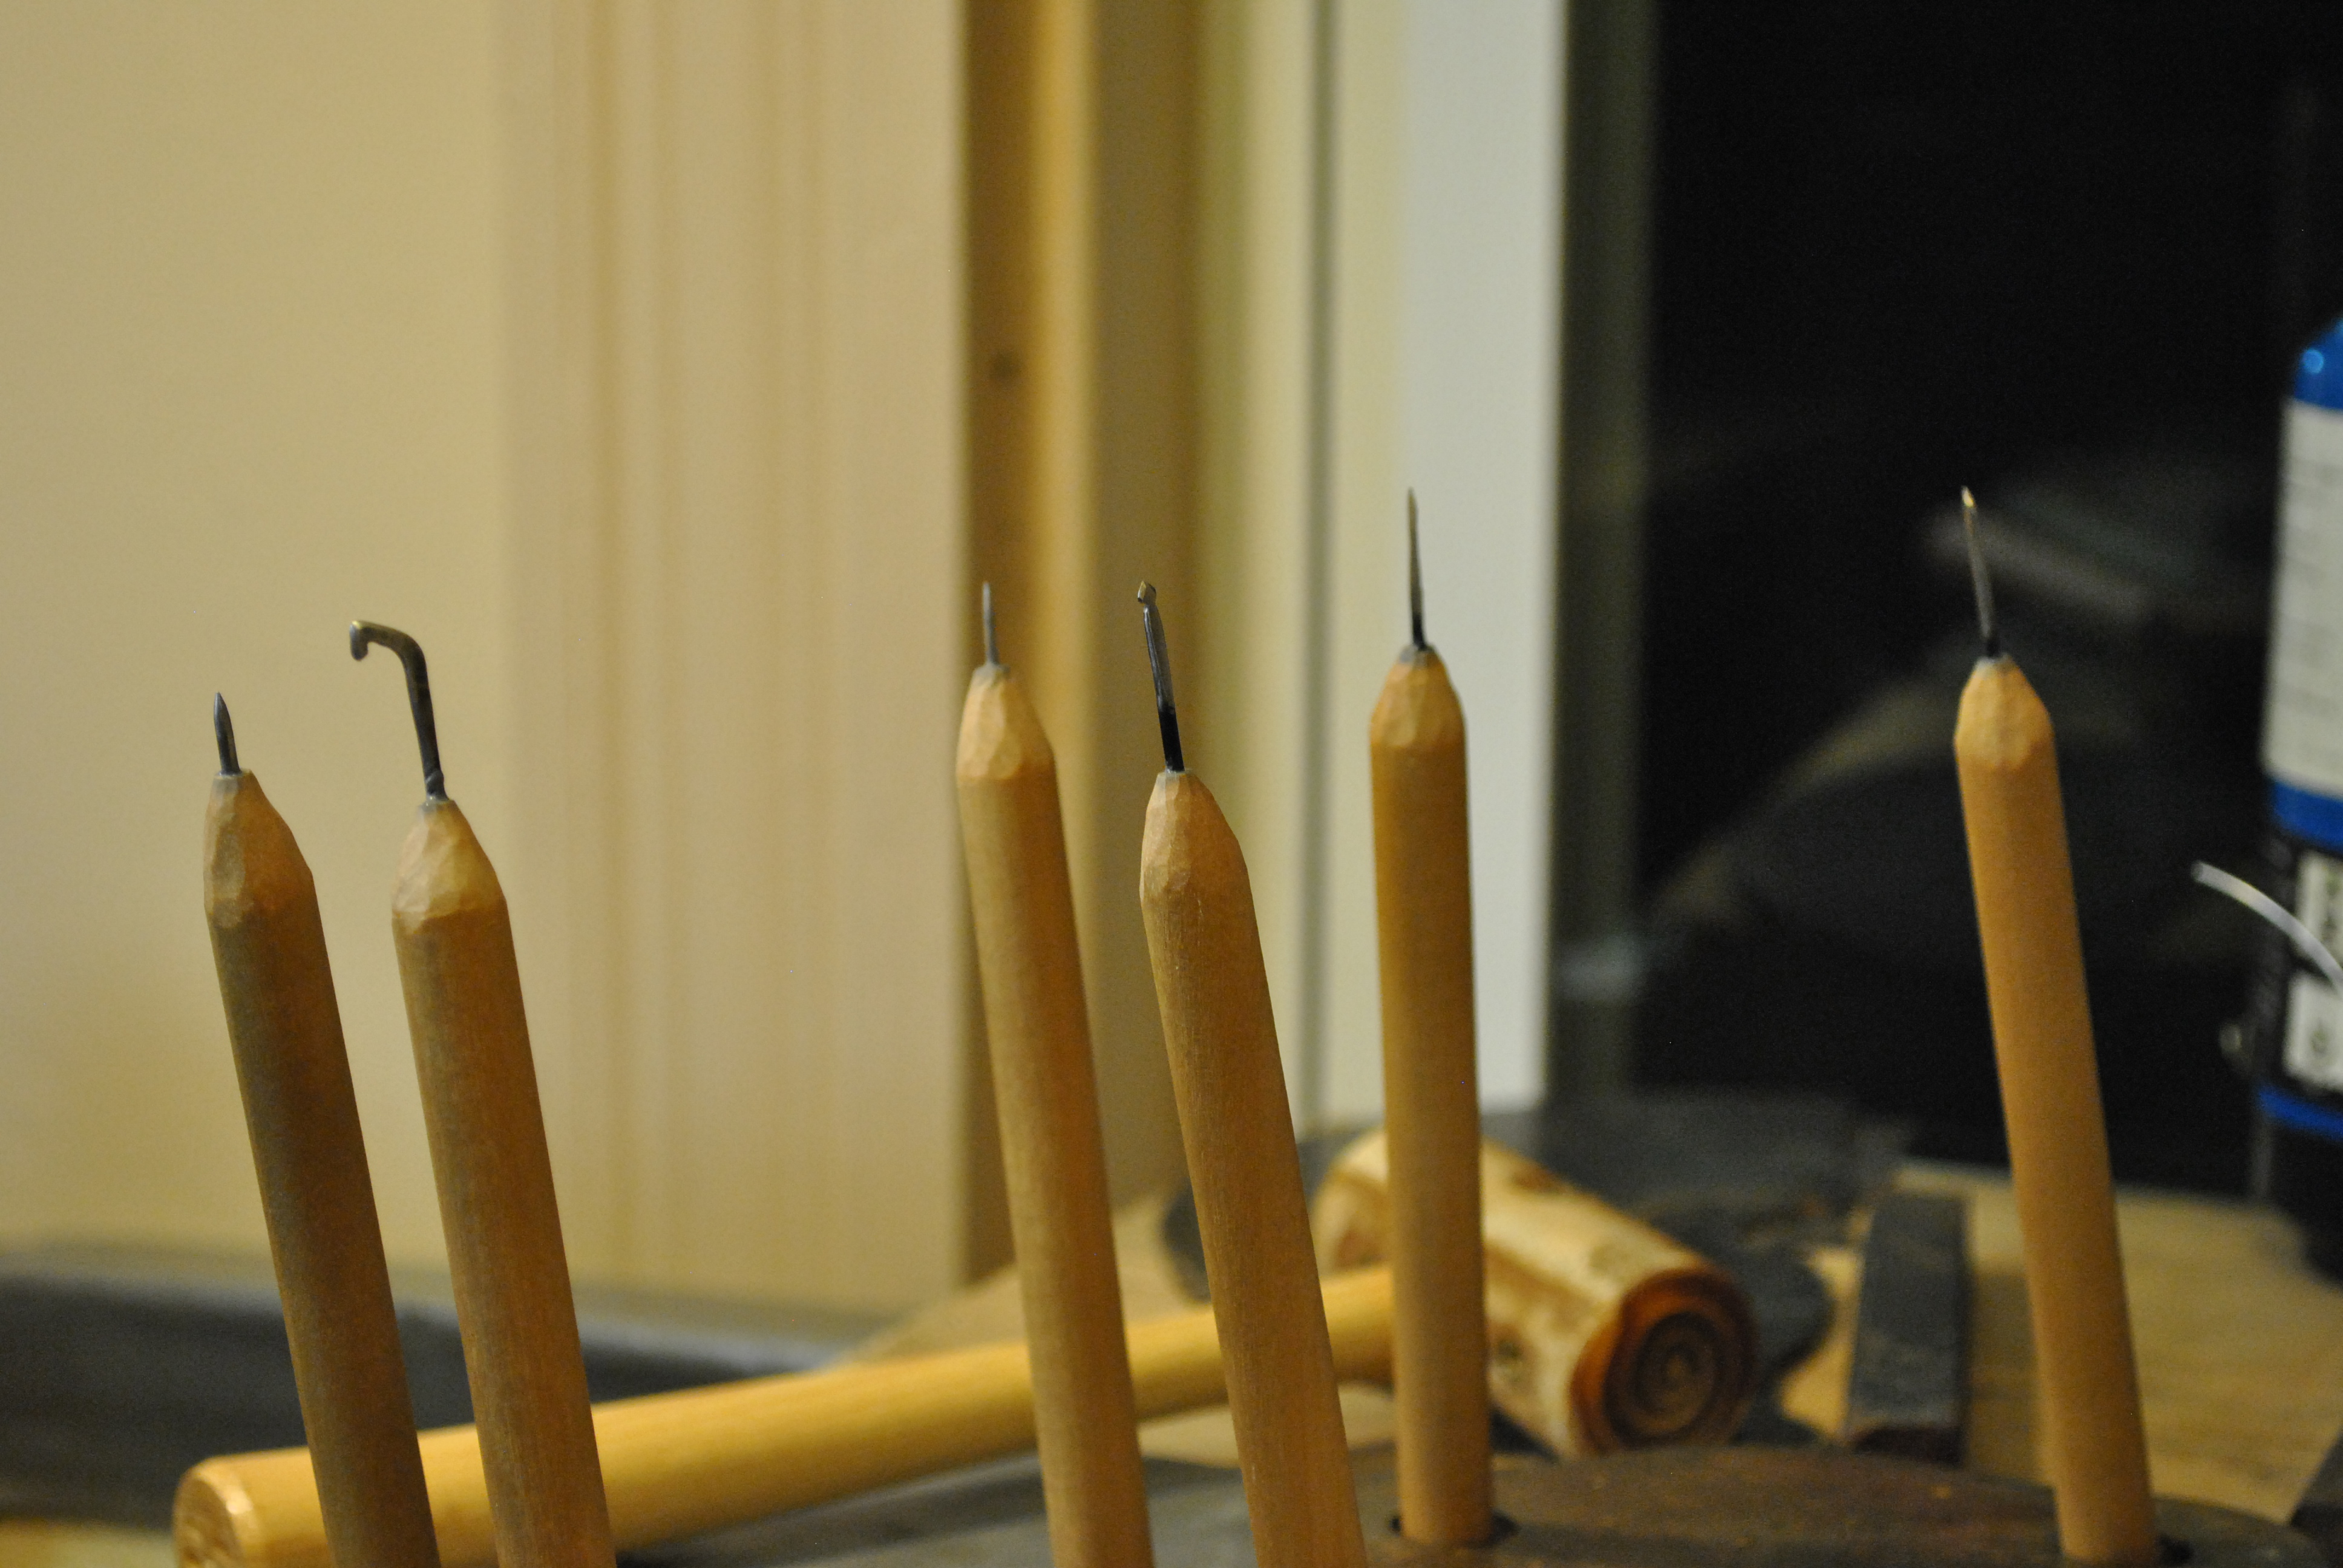
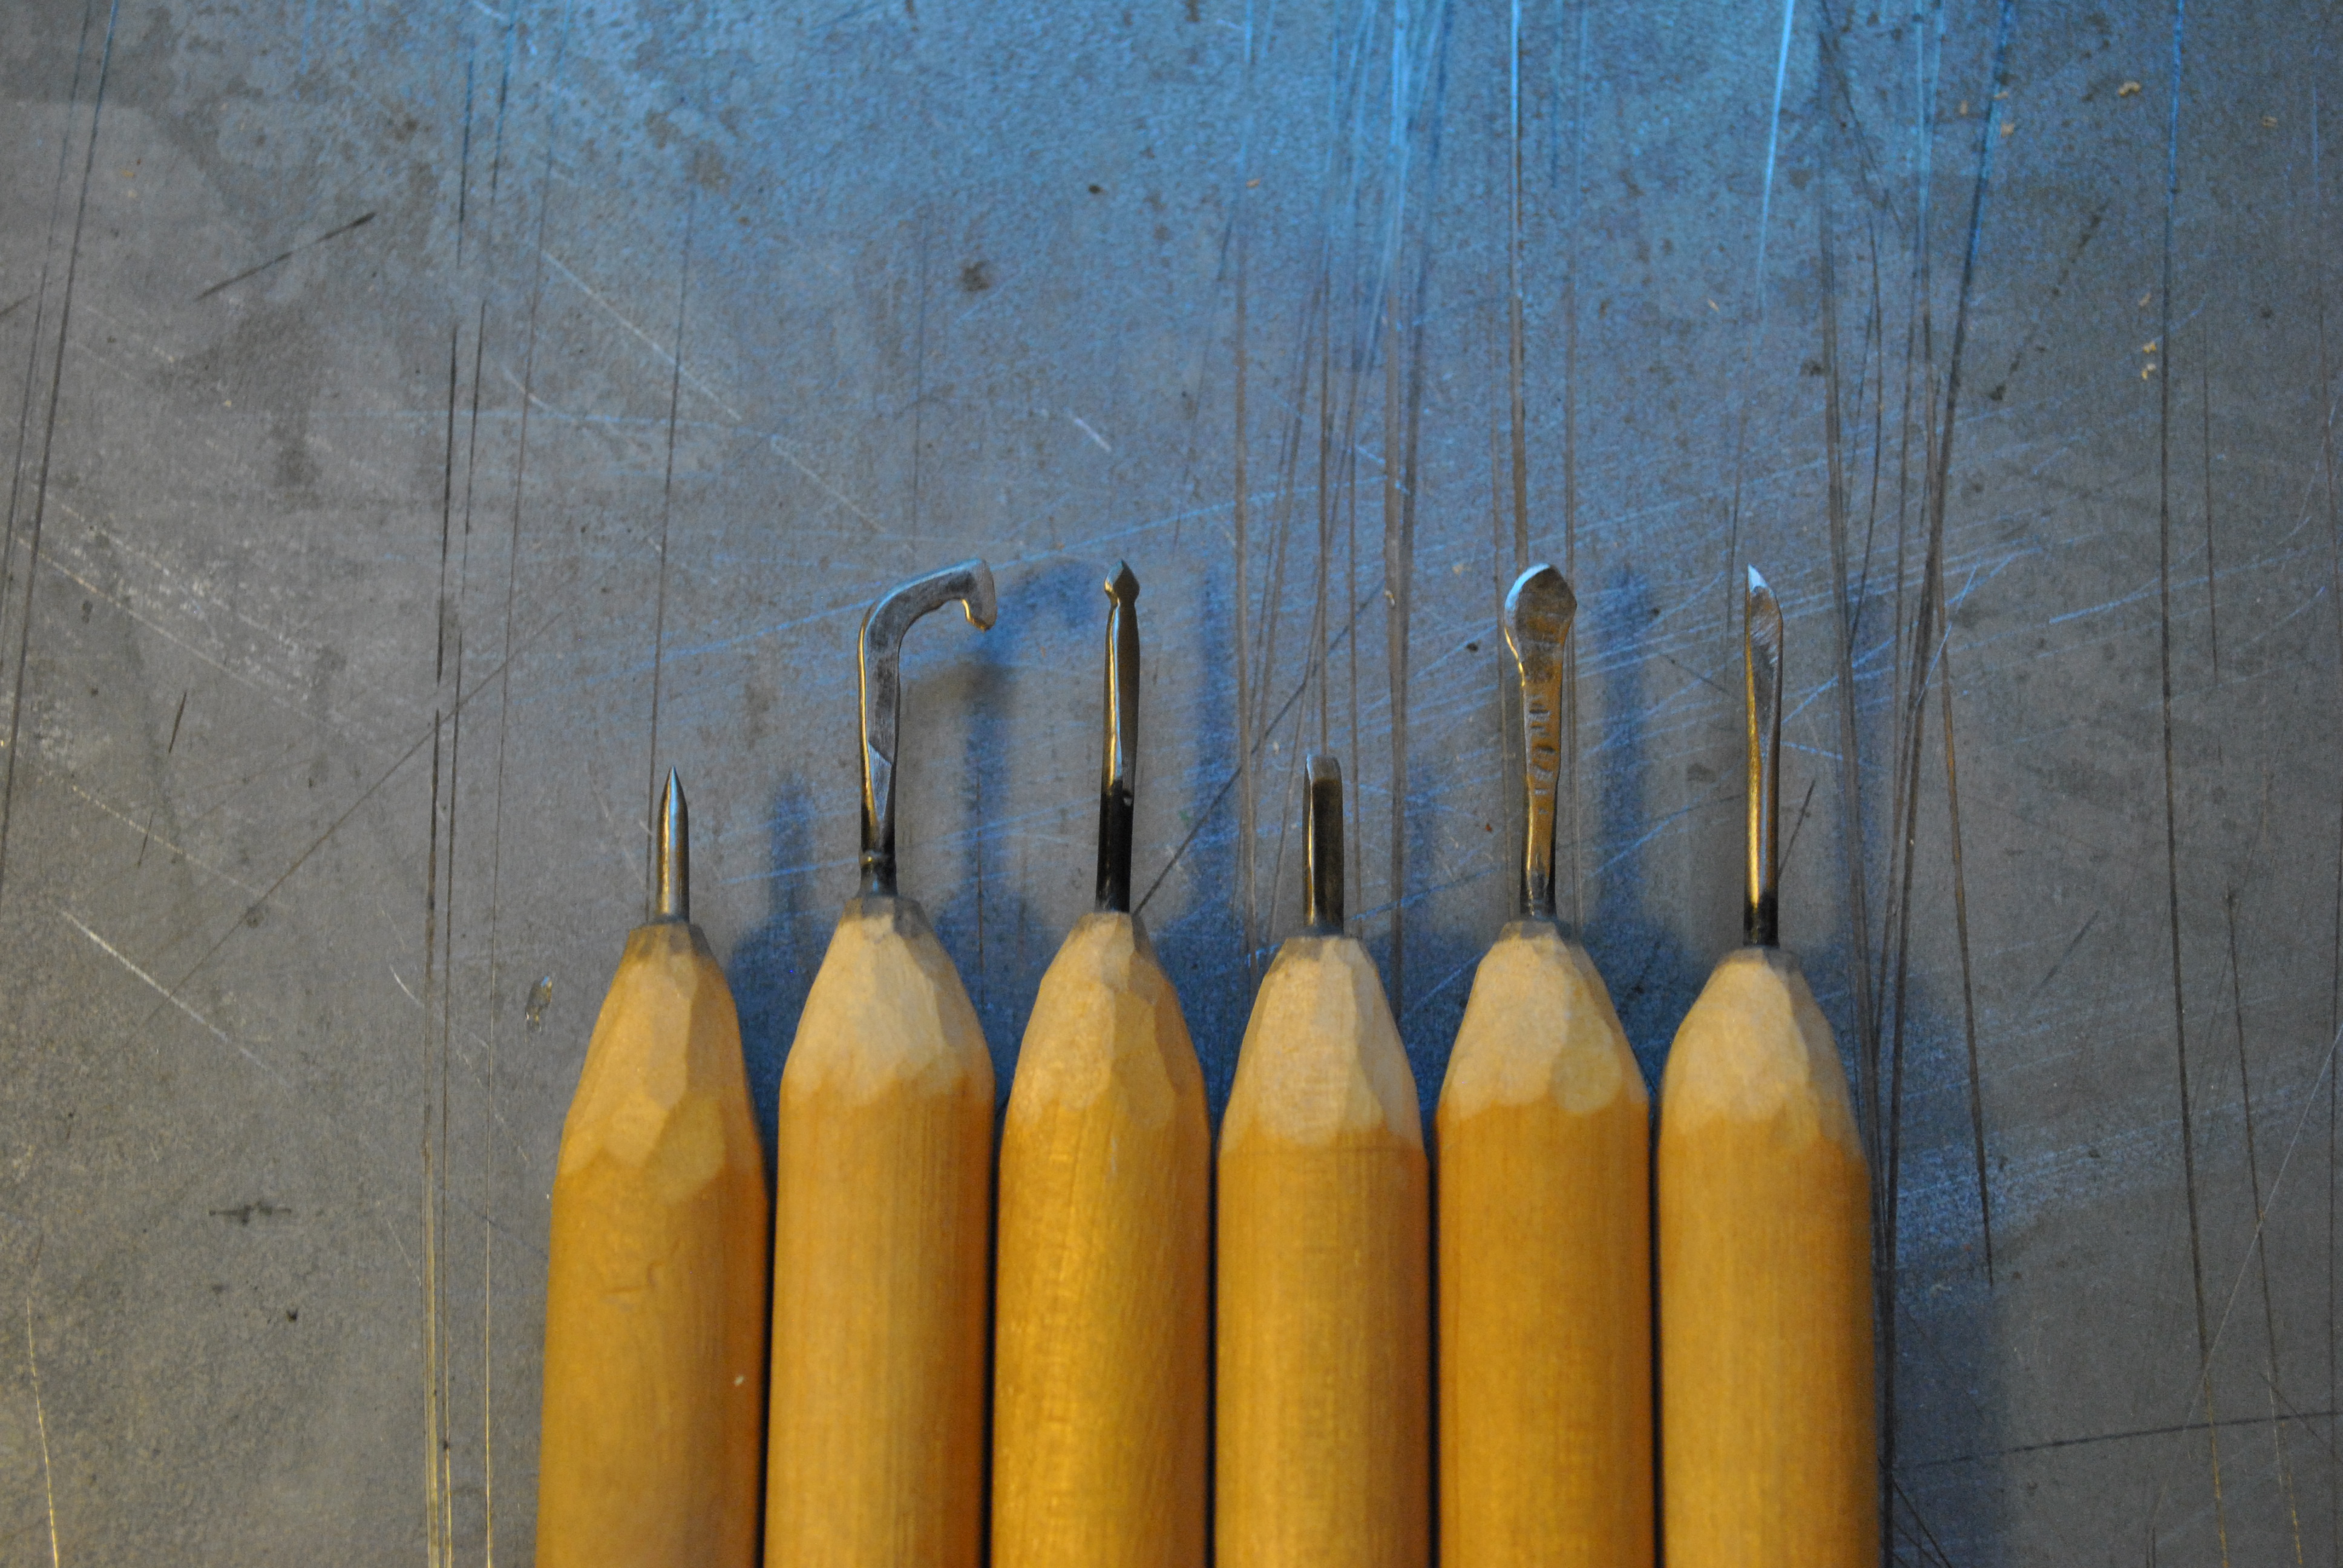
Test fit with all the tools. I set the scribe head, and chisel head further into the handle for more stability. From left to right I have named them. Scribe, chisel, hook, diamond, scraper, and graver.
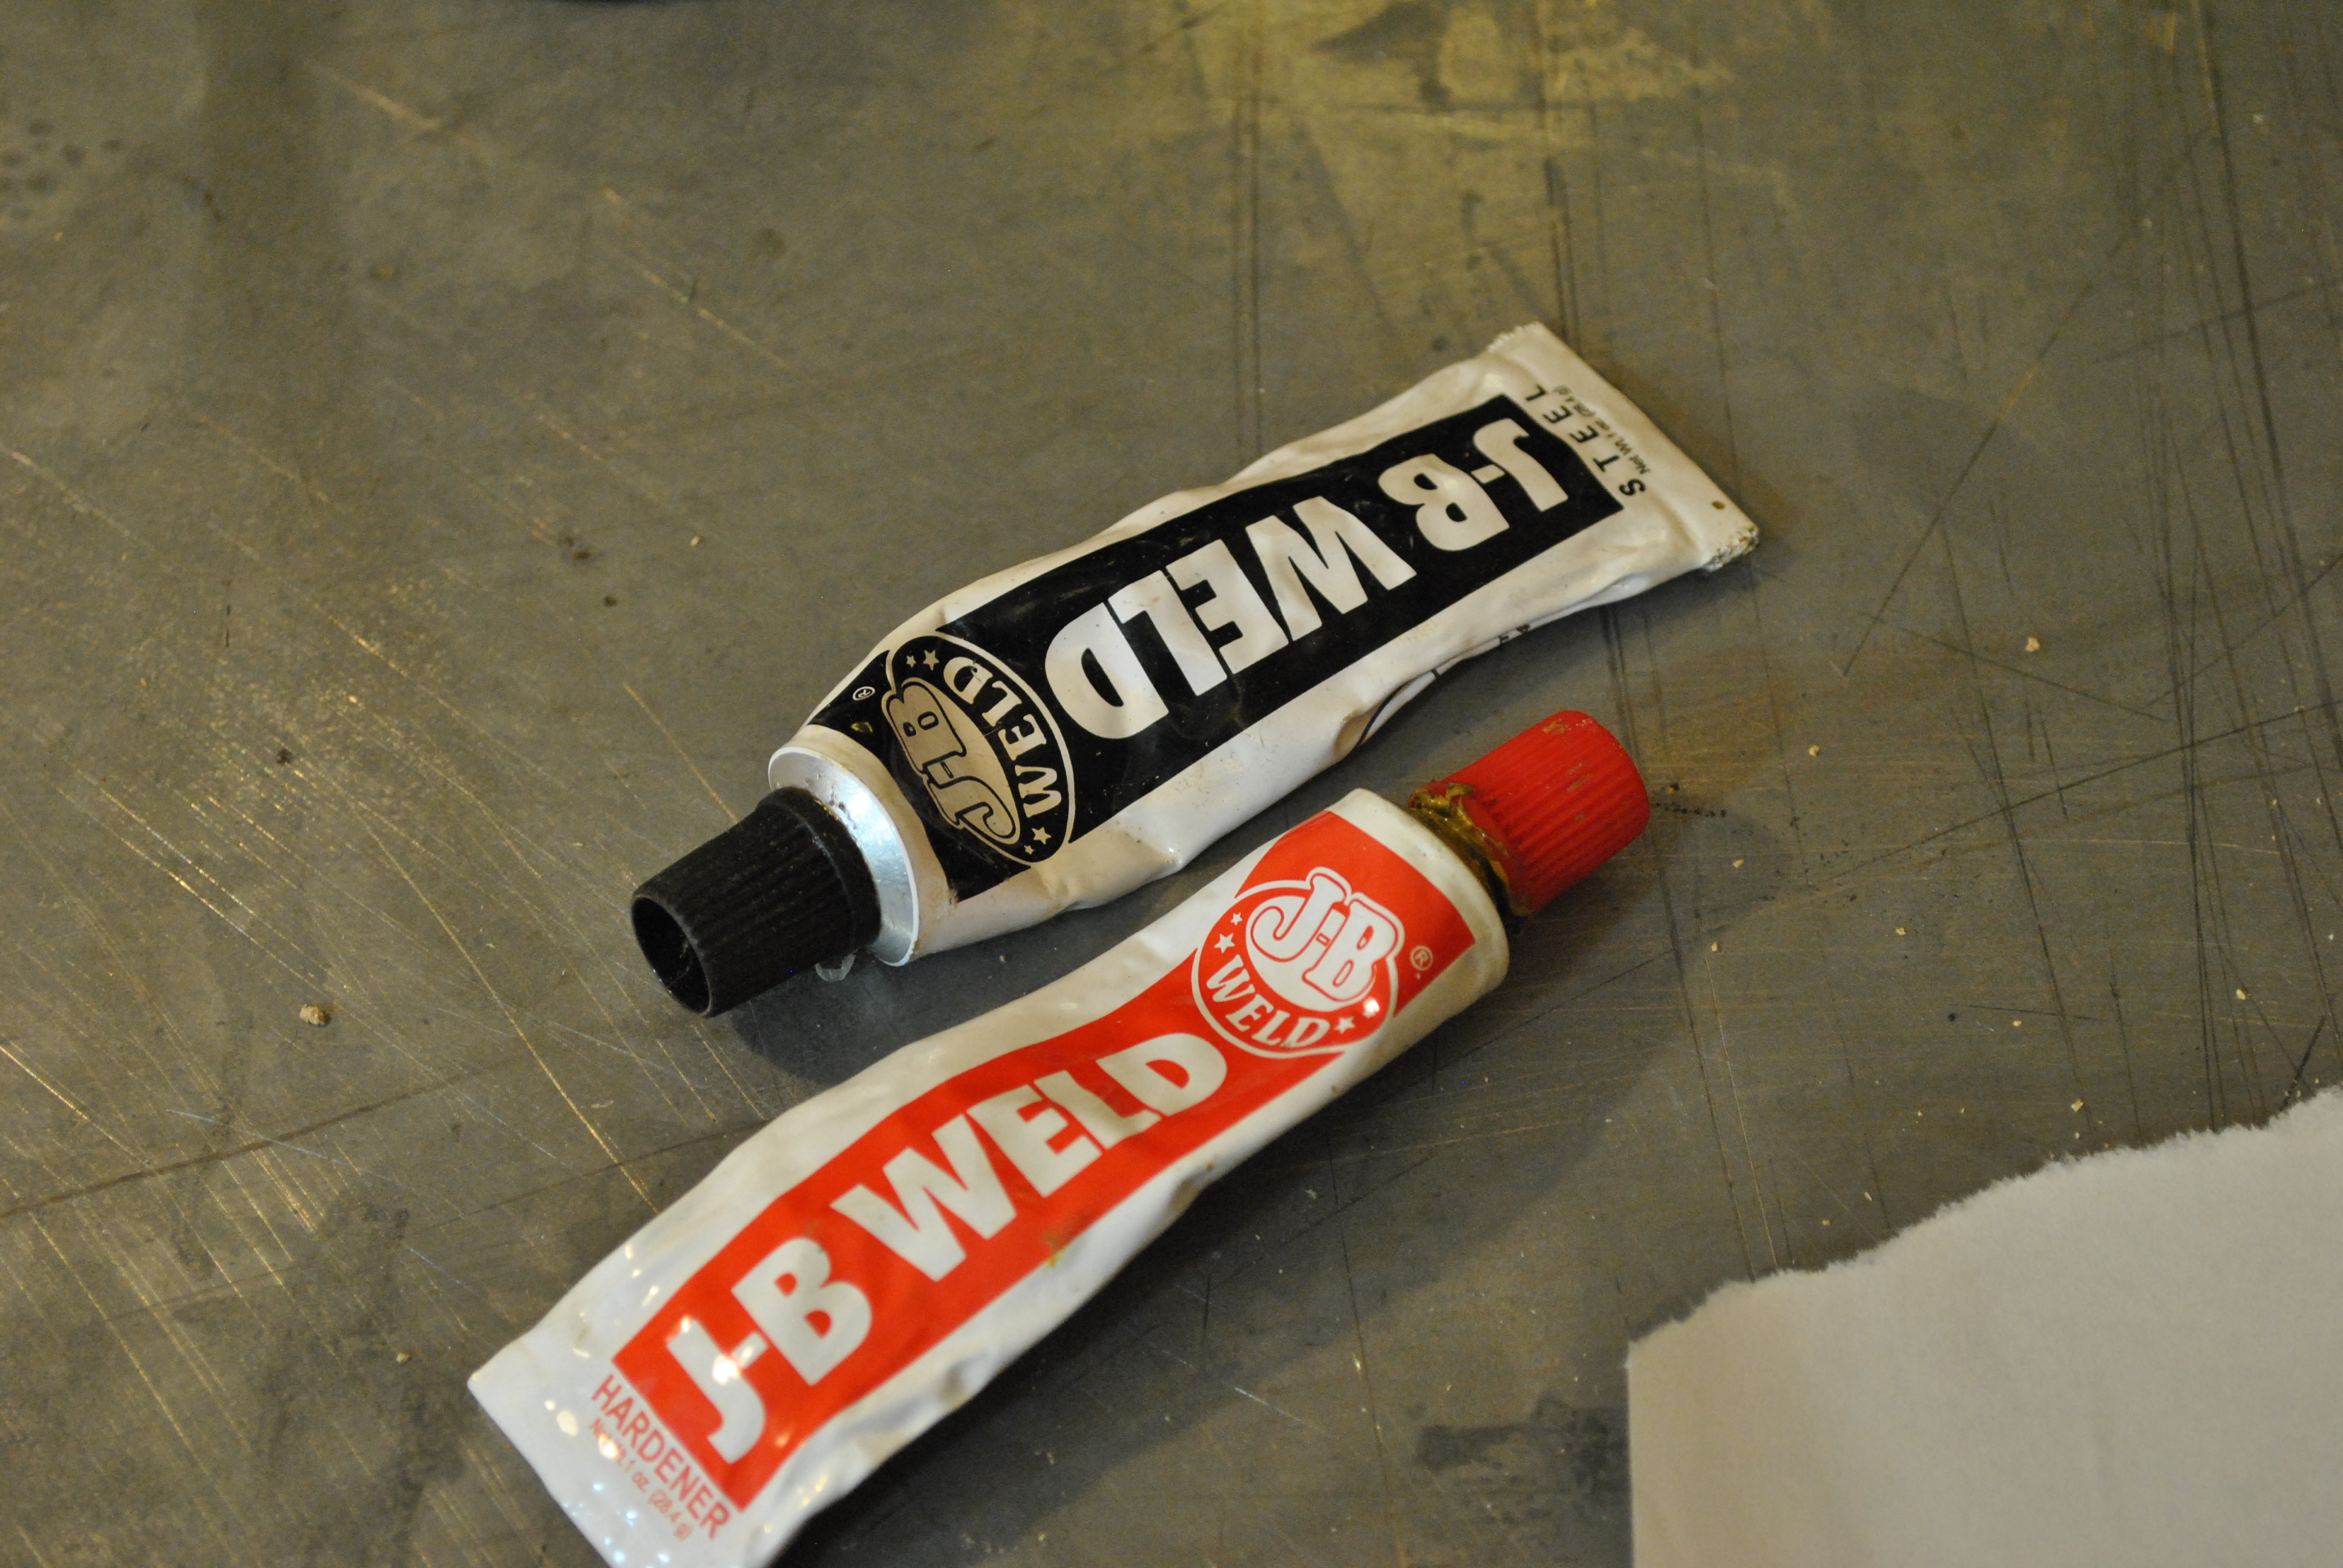
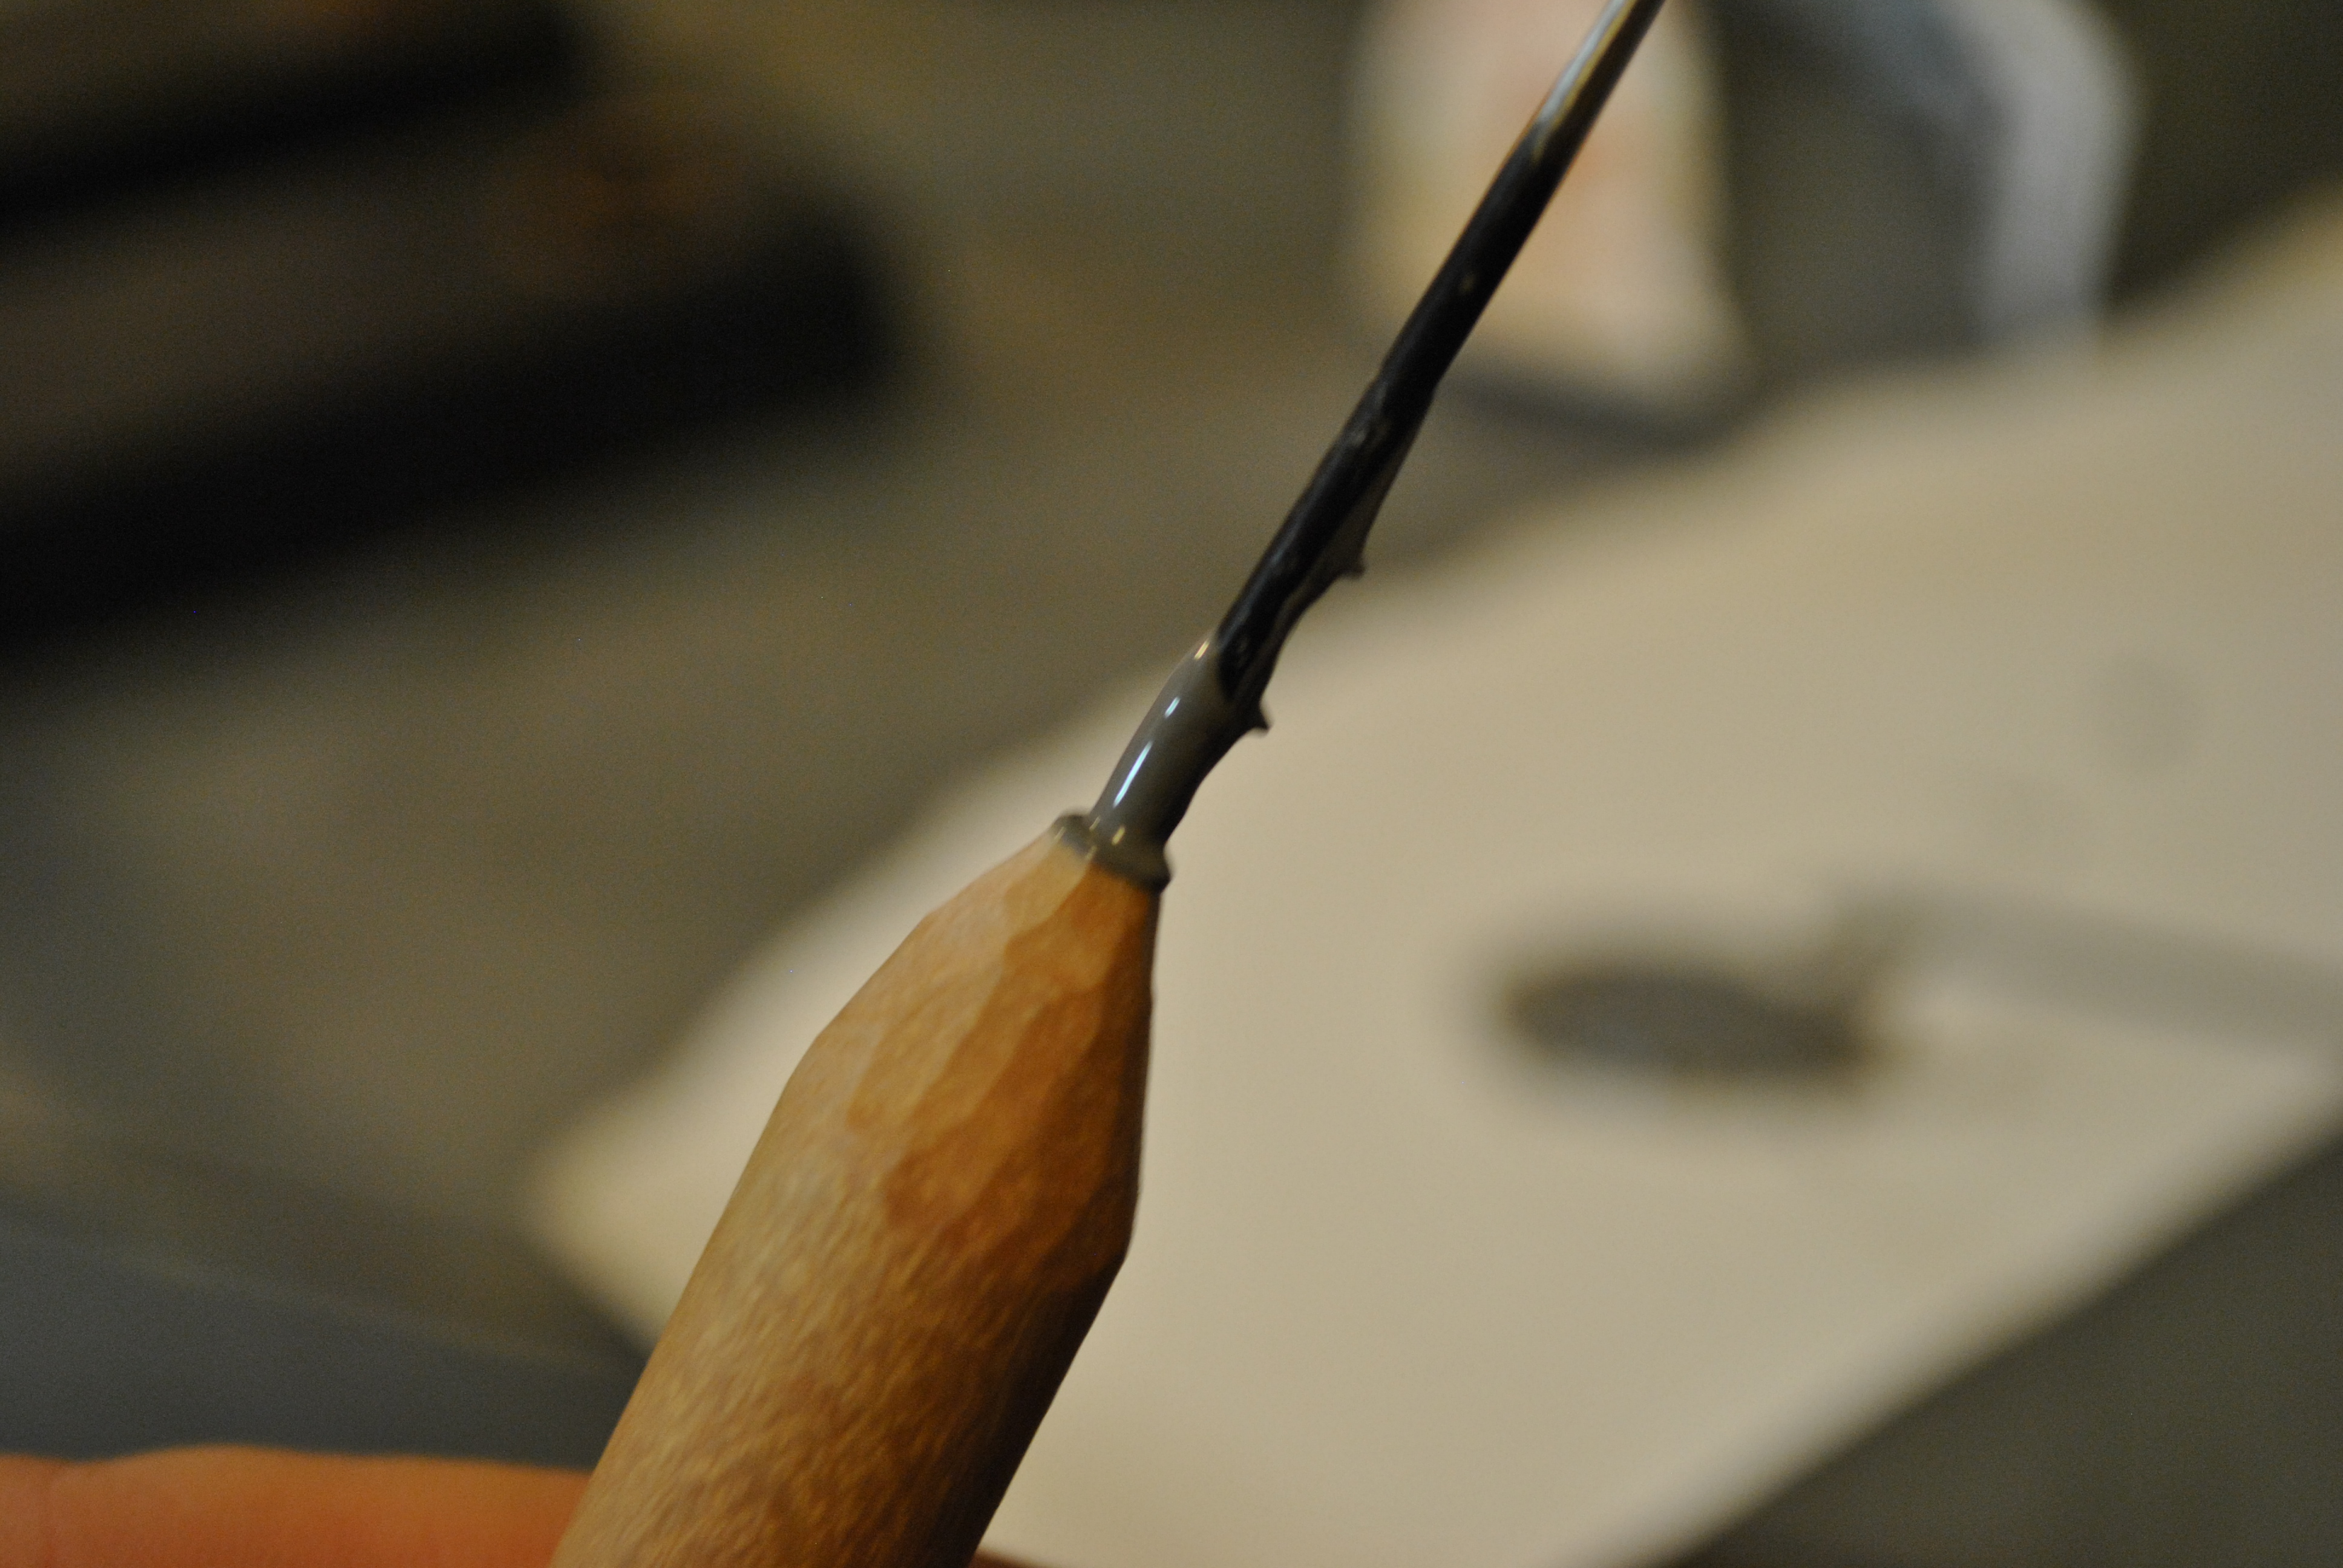
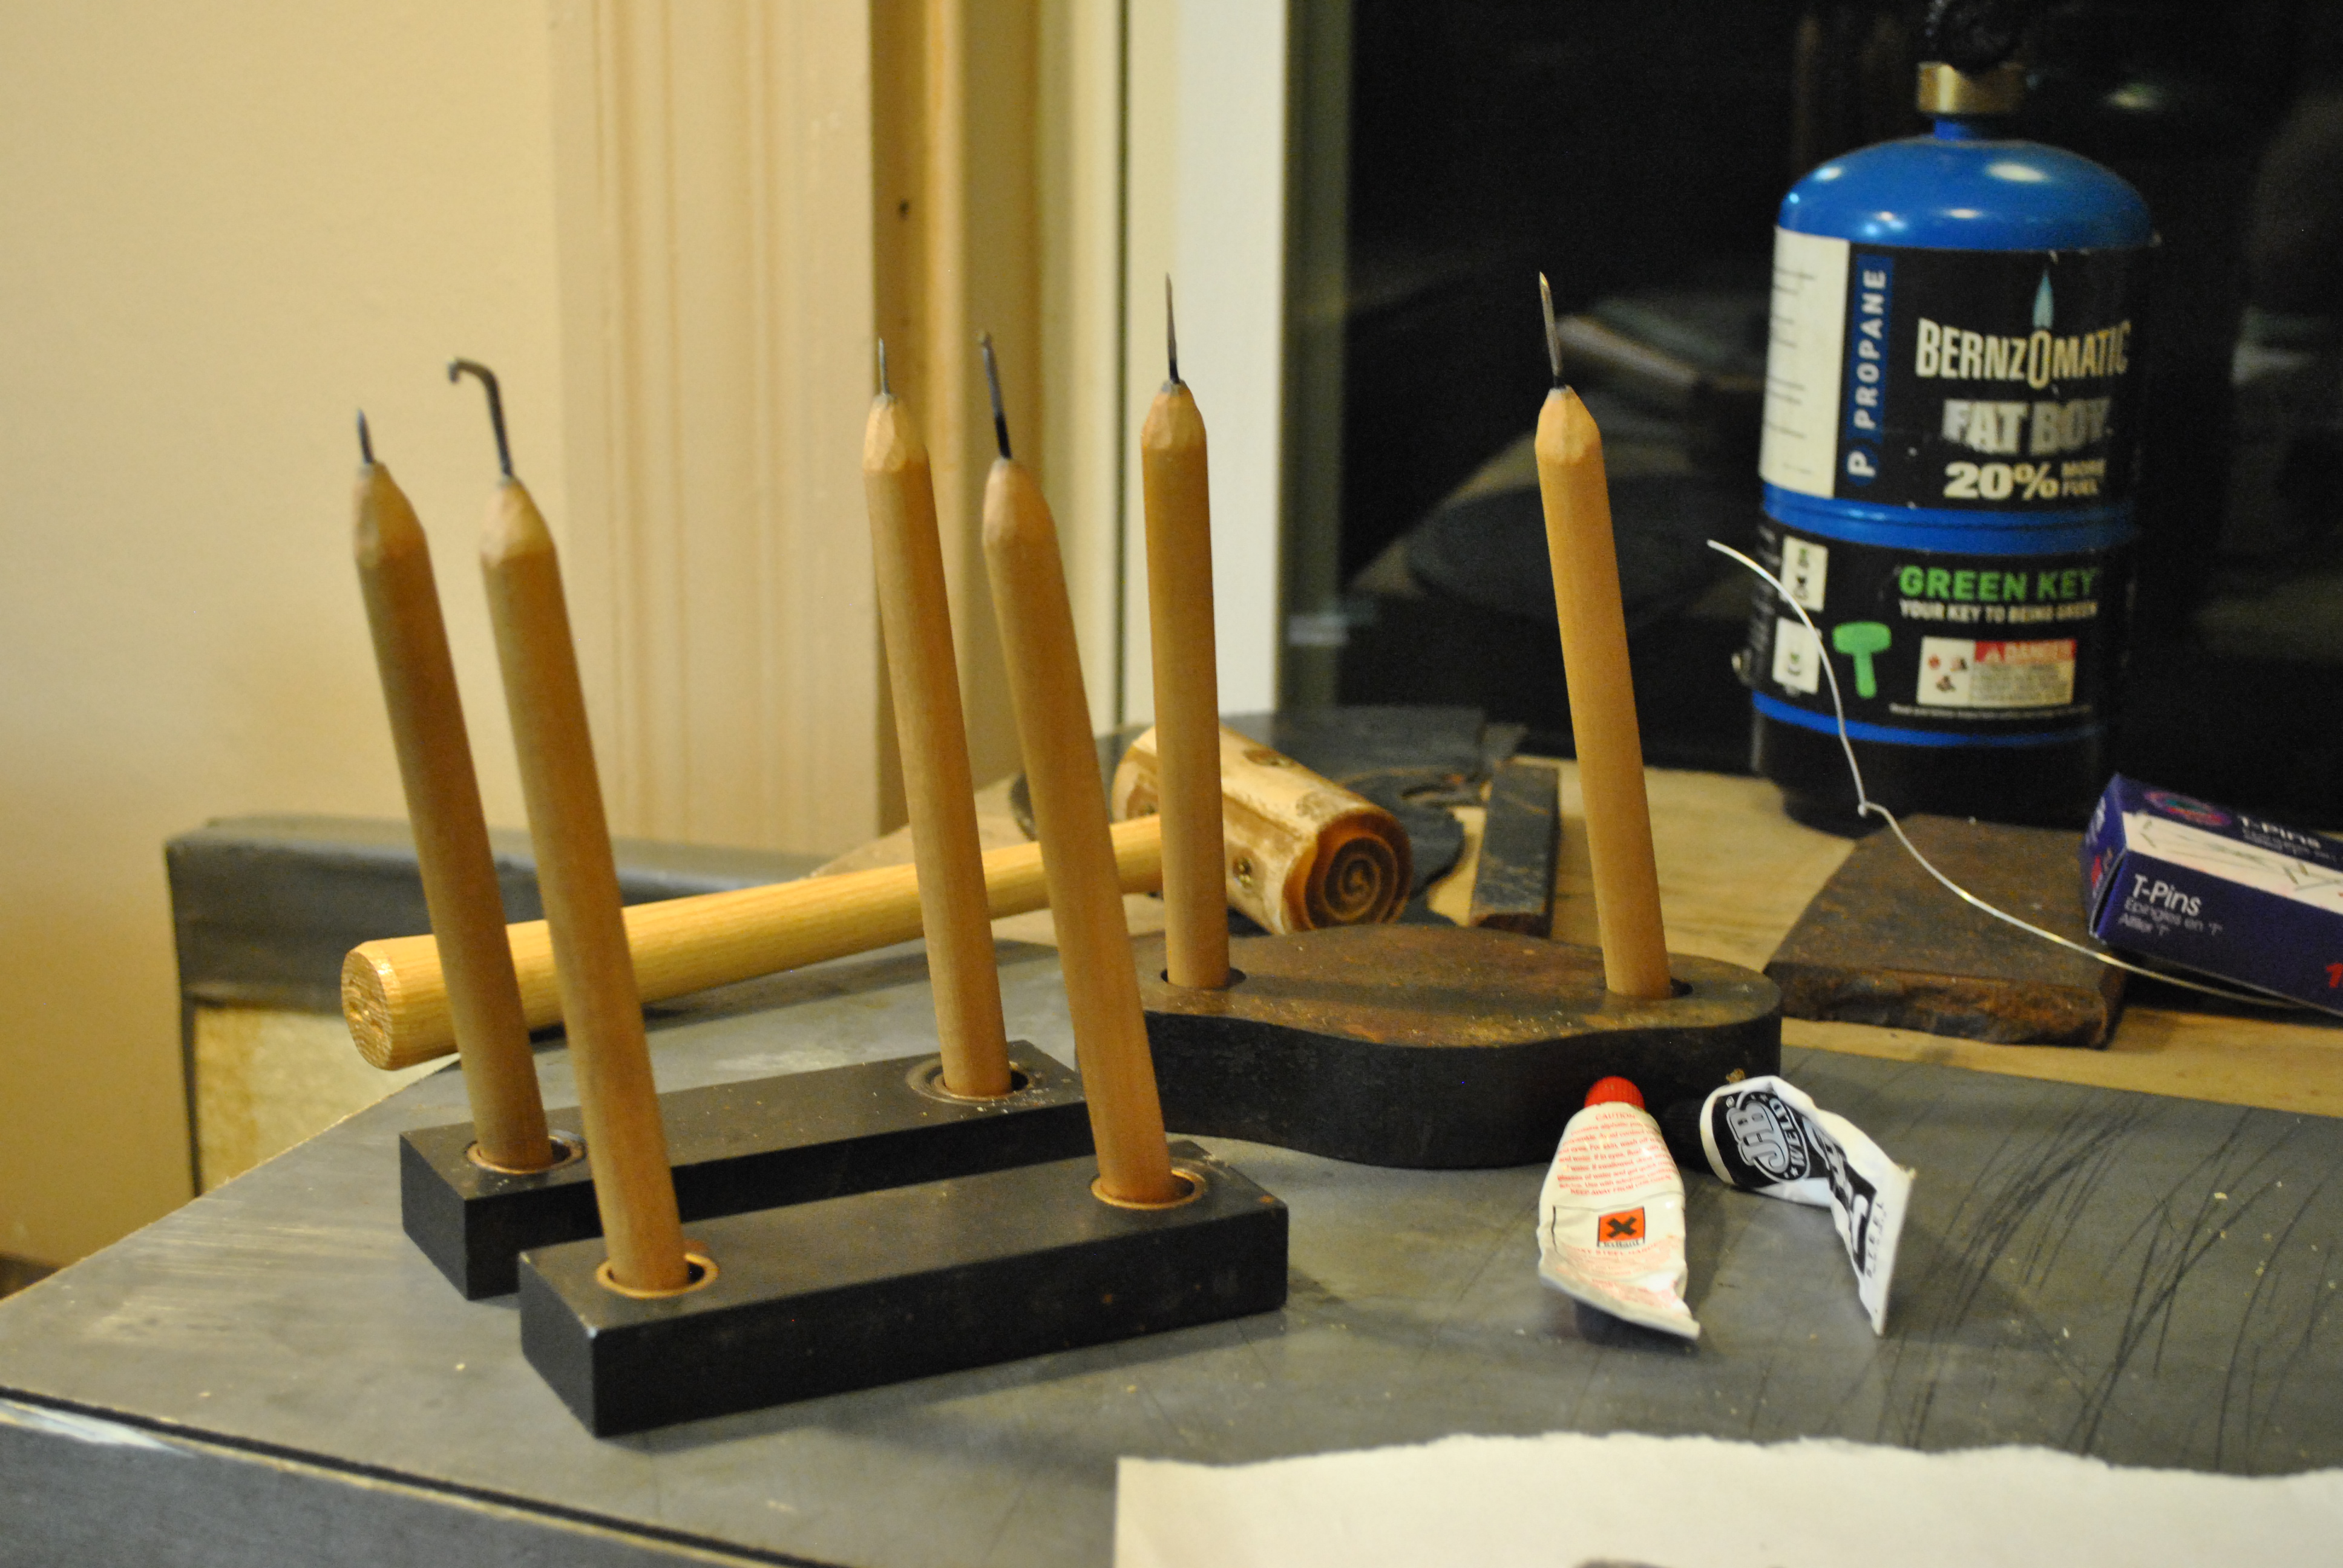
Now get yourself a strong two part epoxy. I like jb weld. and goop up the base of each tool head and let it sit overnight to harden.
Let them set up overnight.
All done!
If I ever need more/different versions of these I just have to wittle down the other end and mount another tool, I also have another dowel that would make me another 6 or 7 of these. Made entirely from found/recycled/junk parts. I have tested these with various waxes and they do a fine job, I did take some time to carefully sharpen the heads with a fine file, which dramatically improved their performance.
Materials used:
found wood dowel
old bicycle spokes
JB Weld
Tools used:
drill and drill bit
utility knife
jewelers saw with jig saw blade in it (you could use the utility knife if you didn’t have a saw)
torch (a tiny kitchen torch works, you might be able to get away with using the stove)


