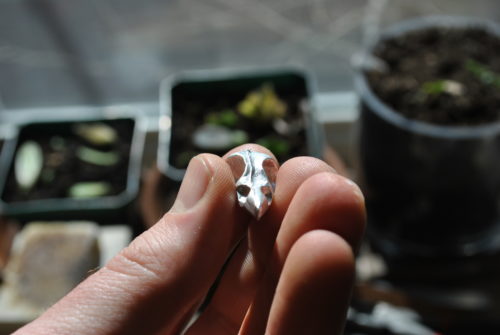
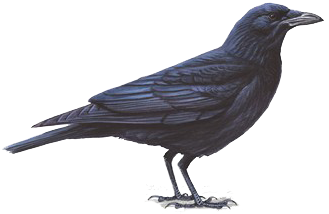
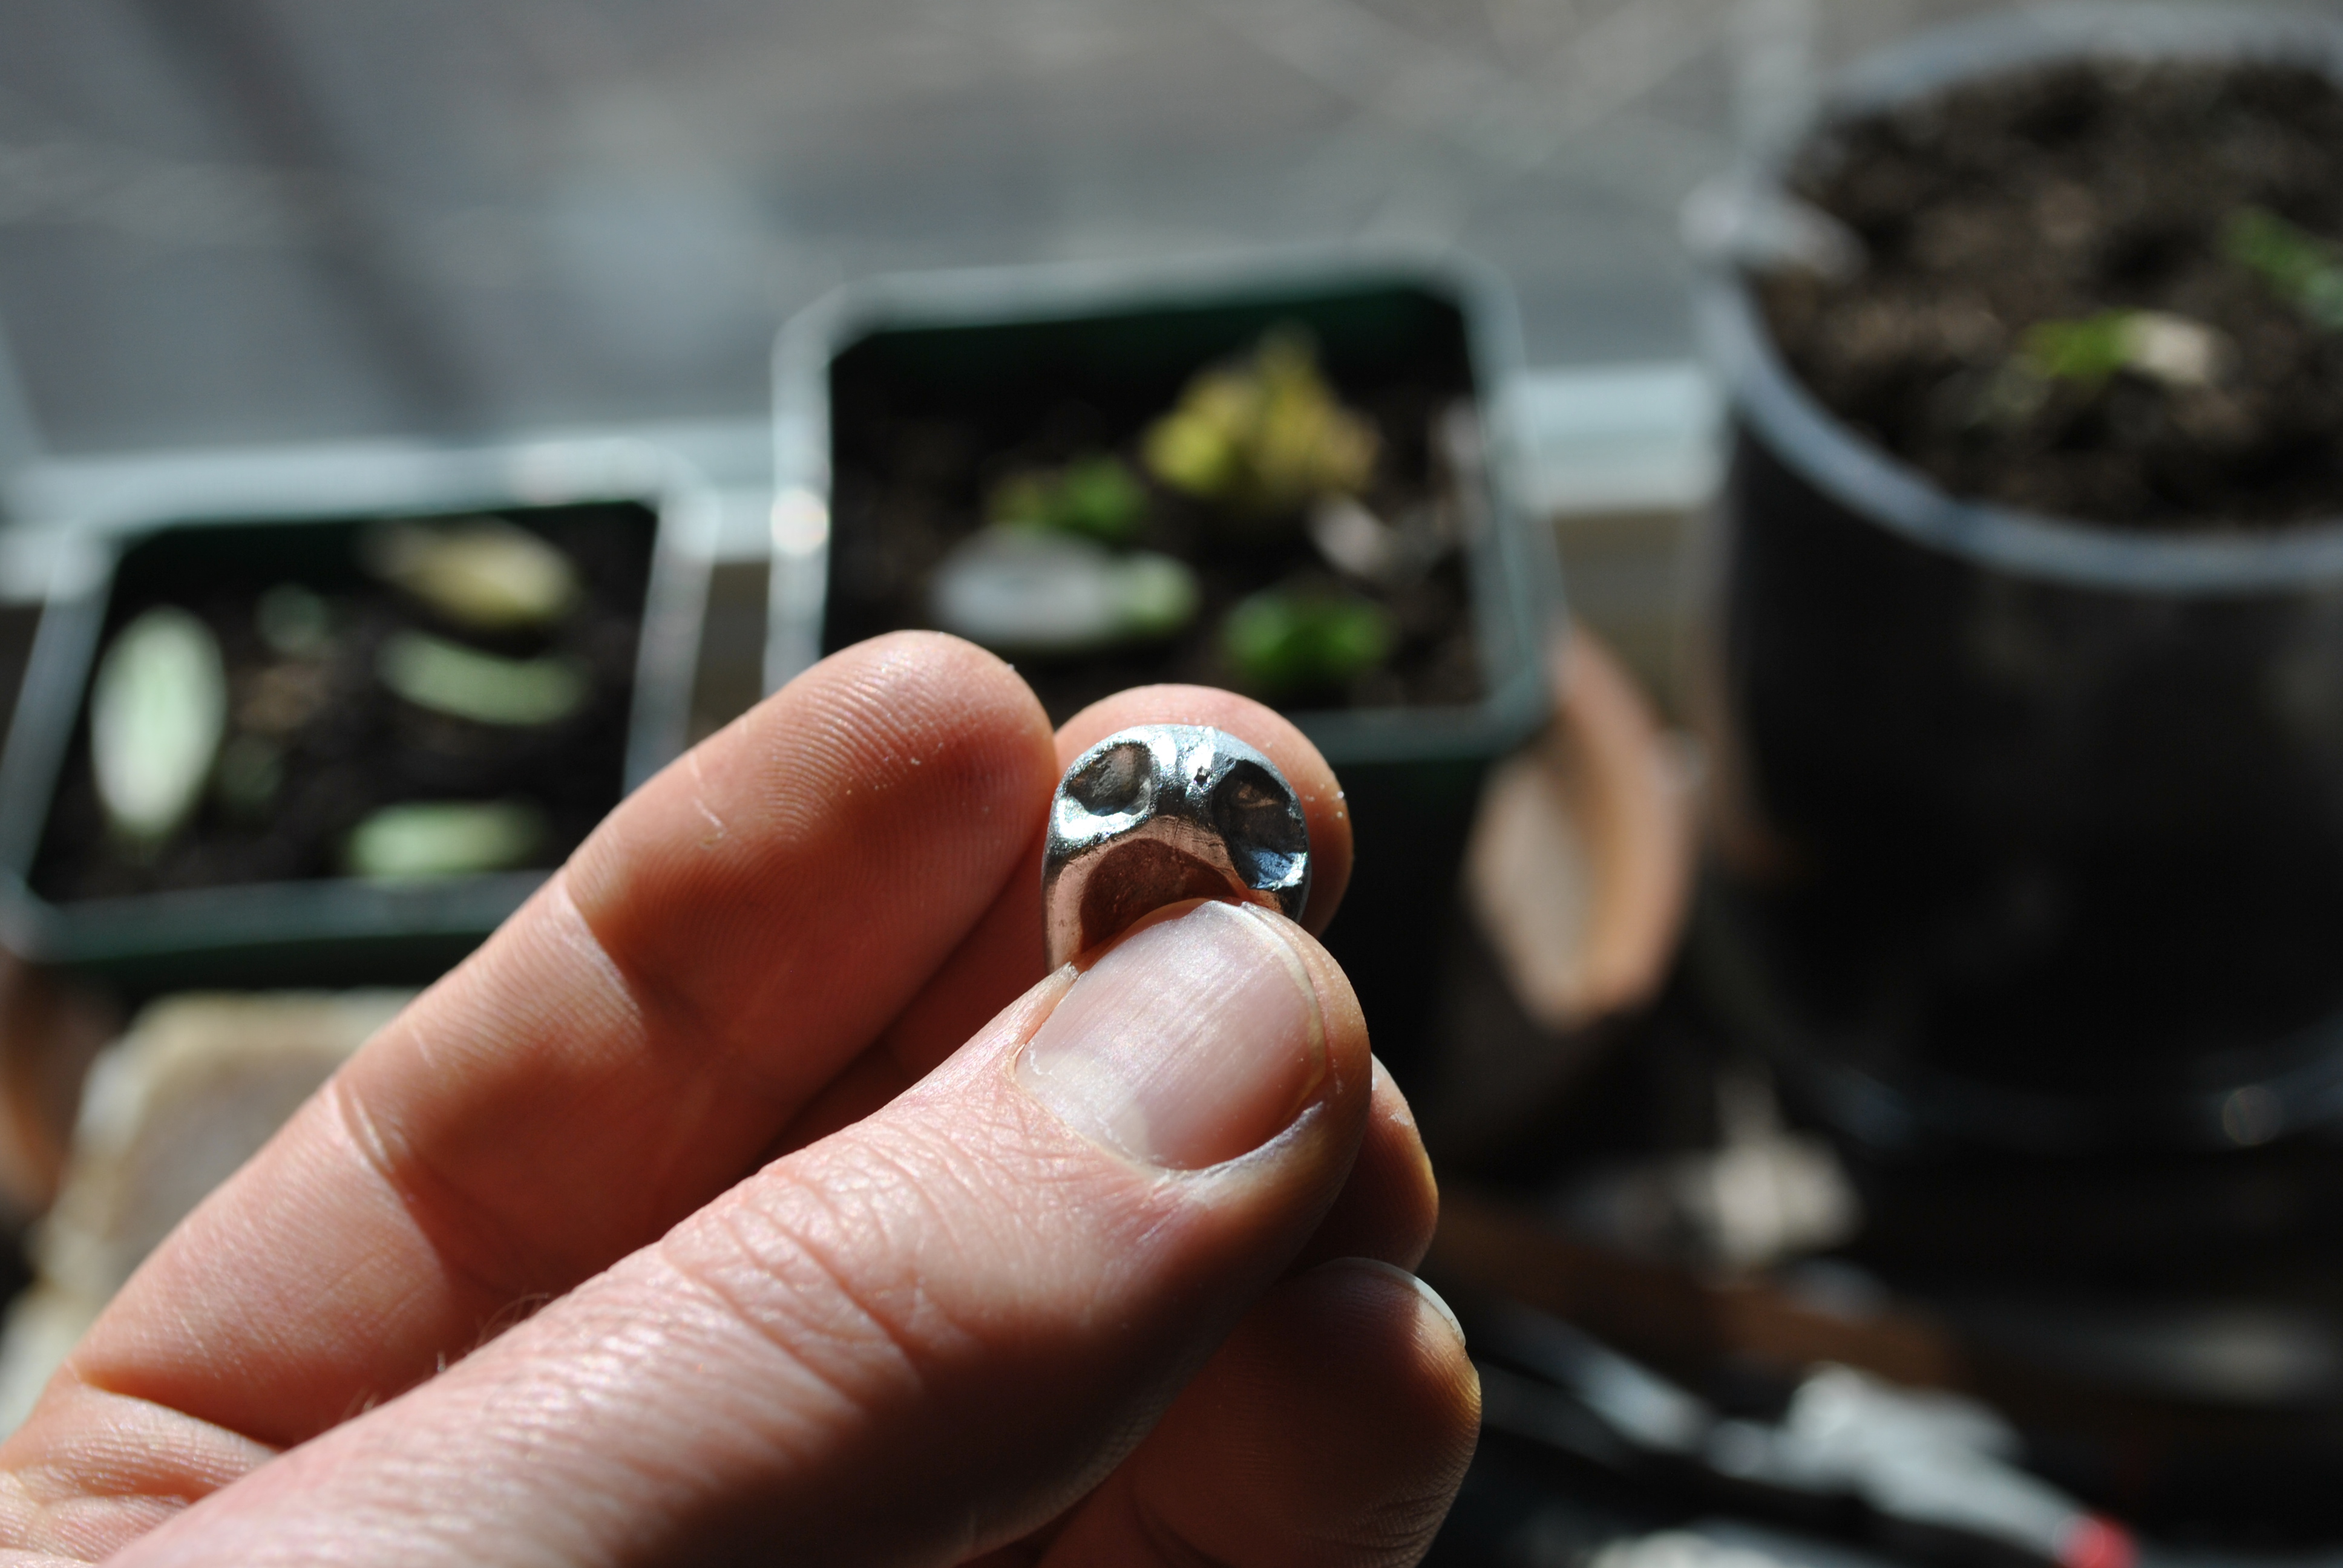
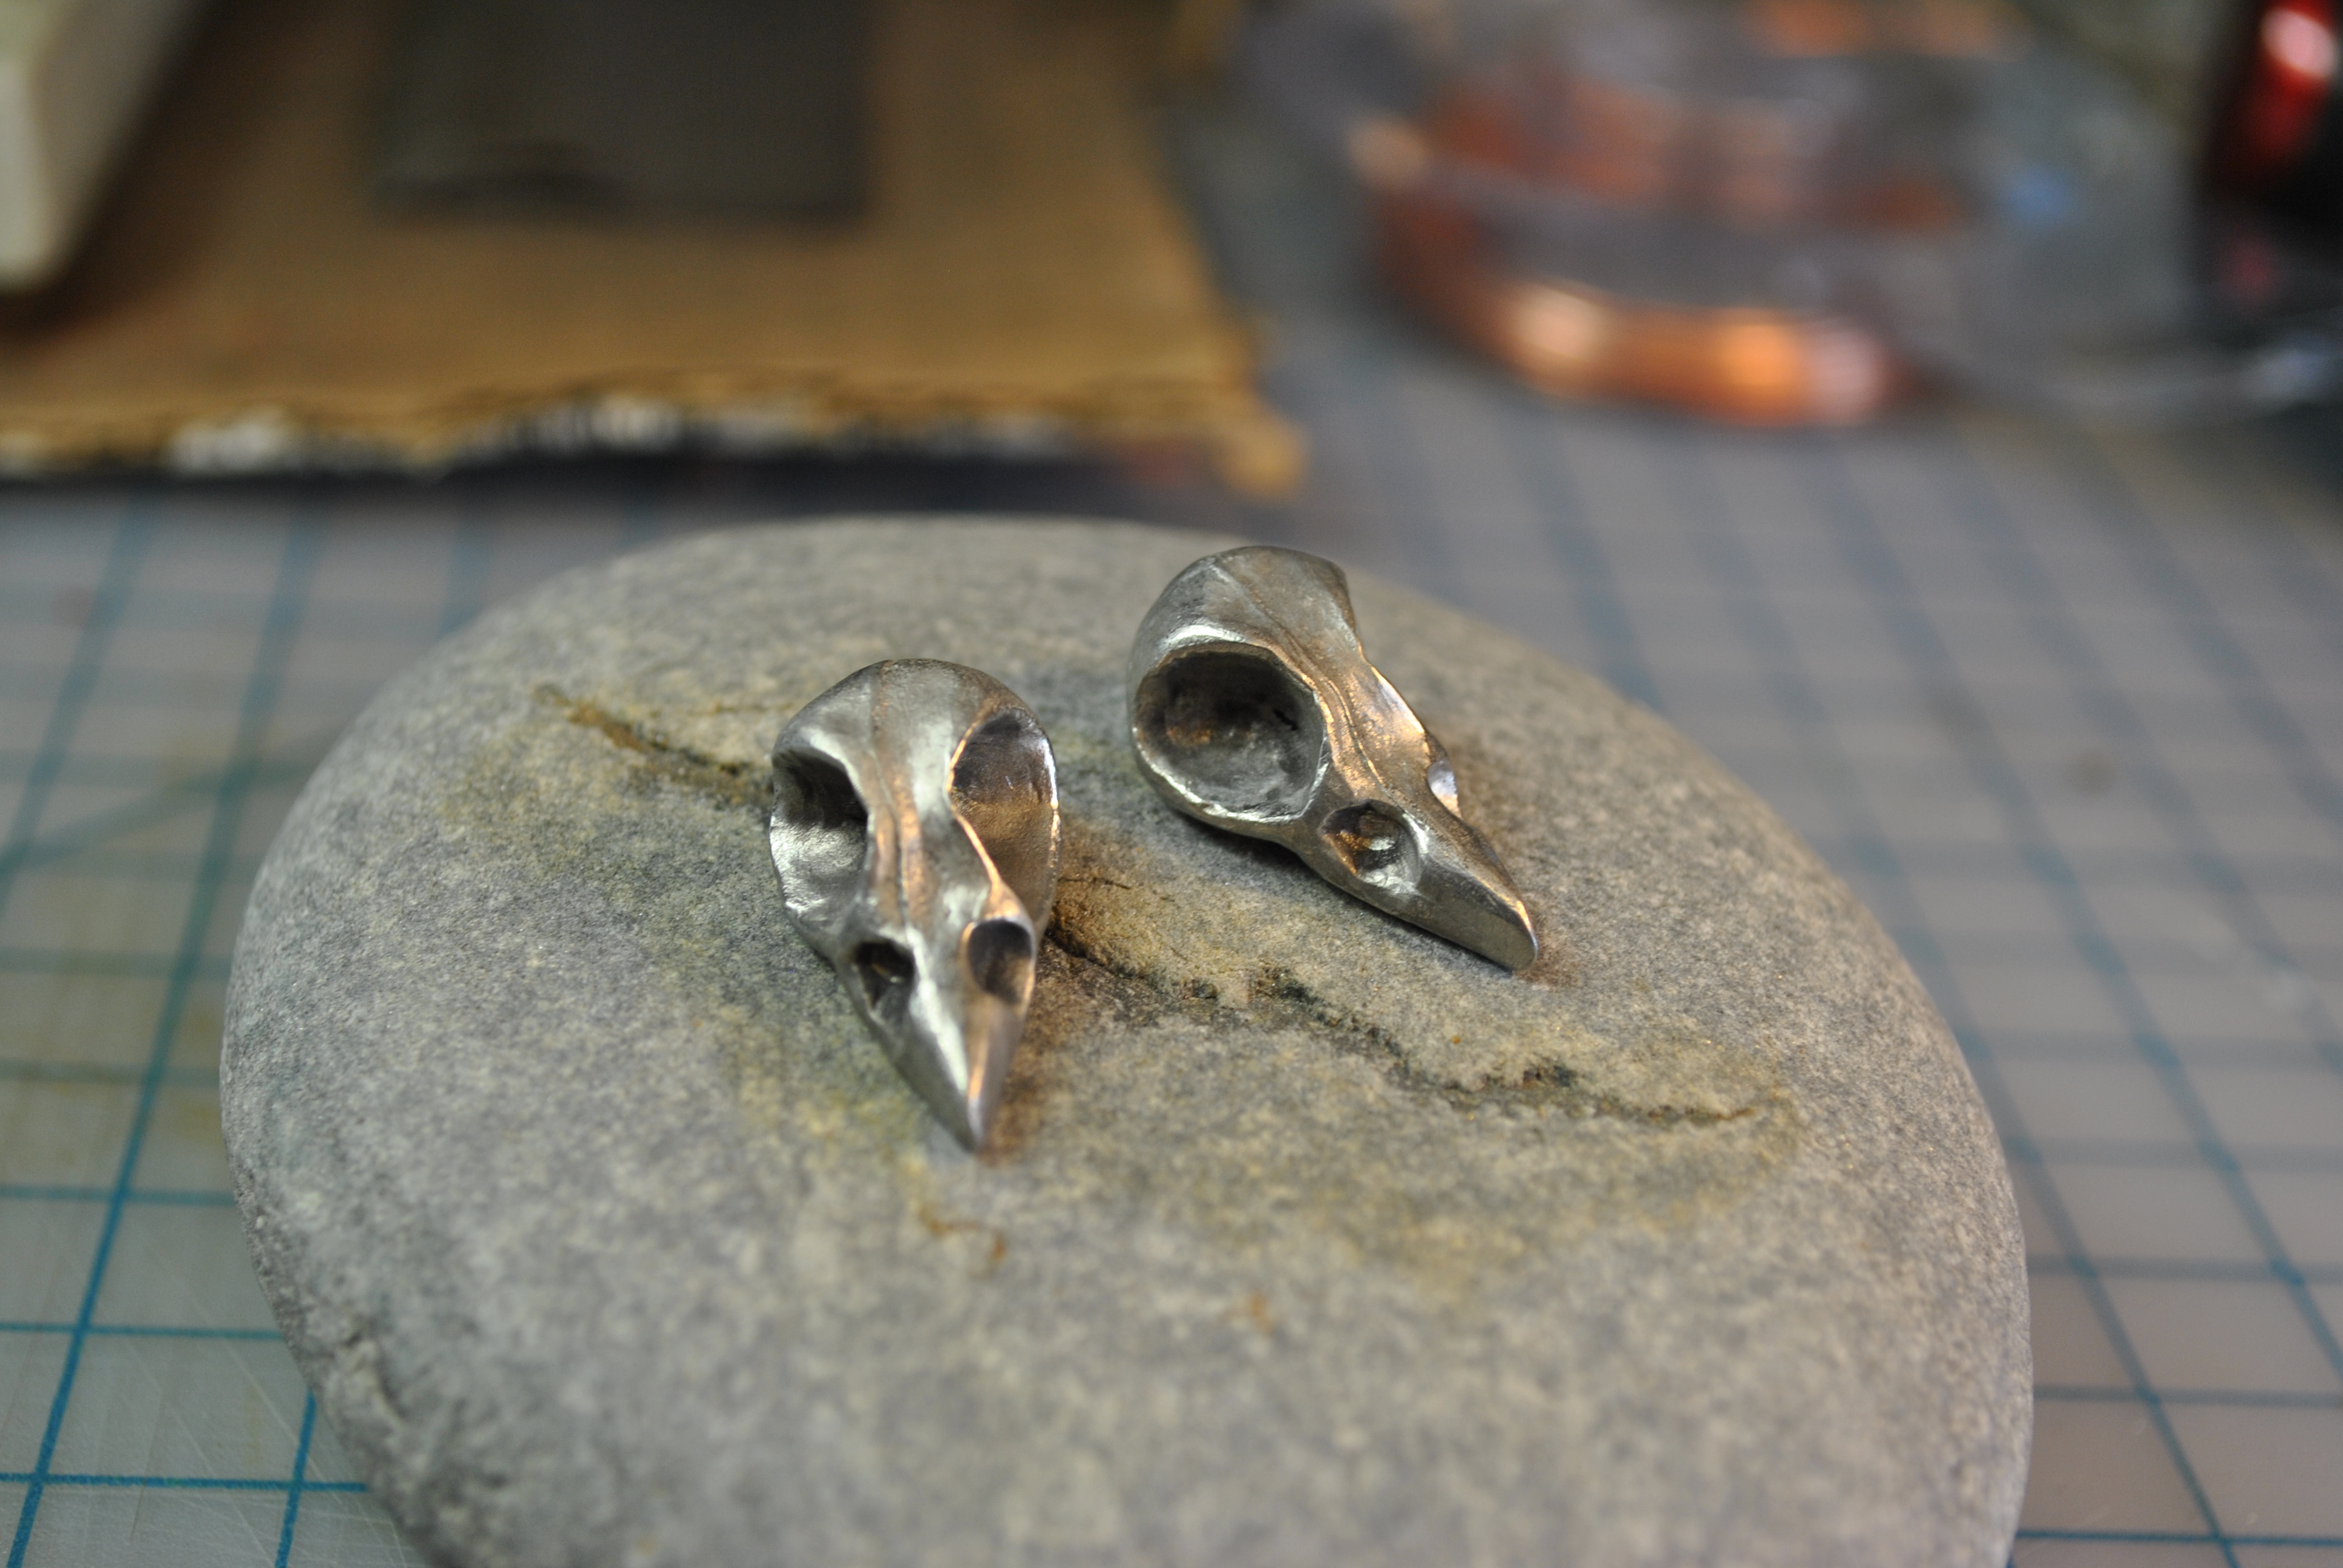
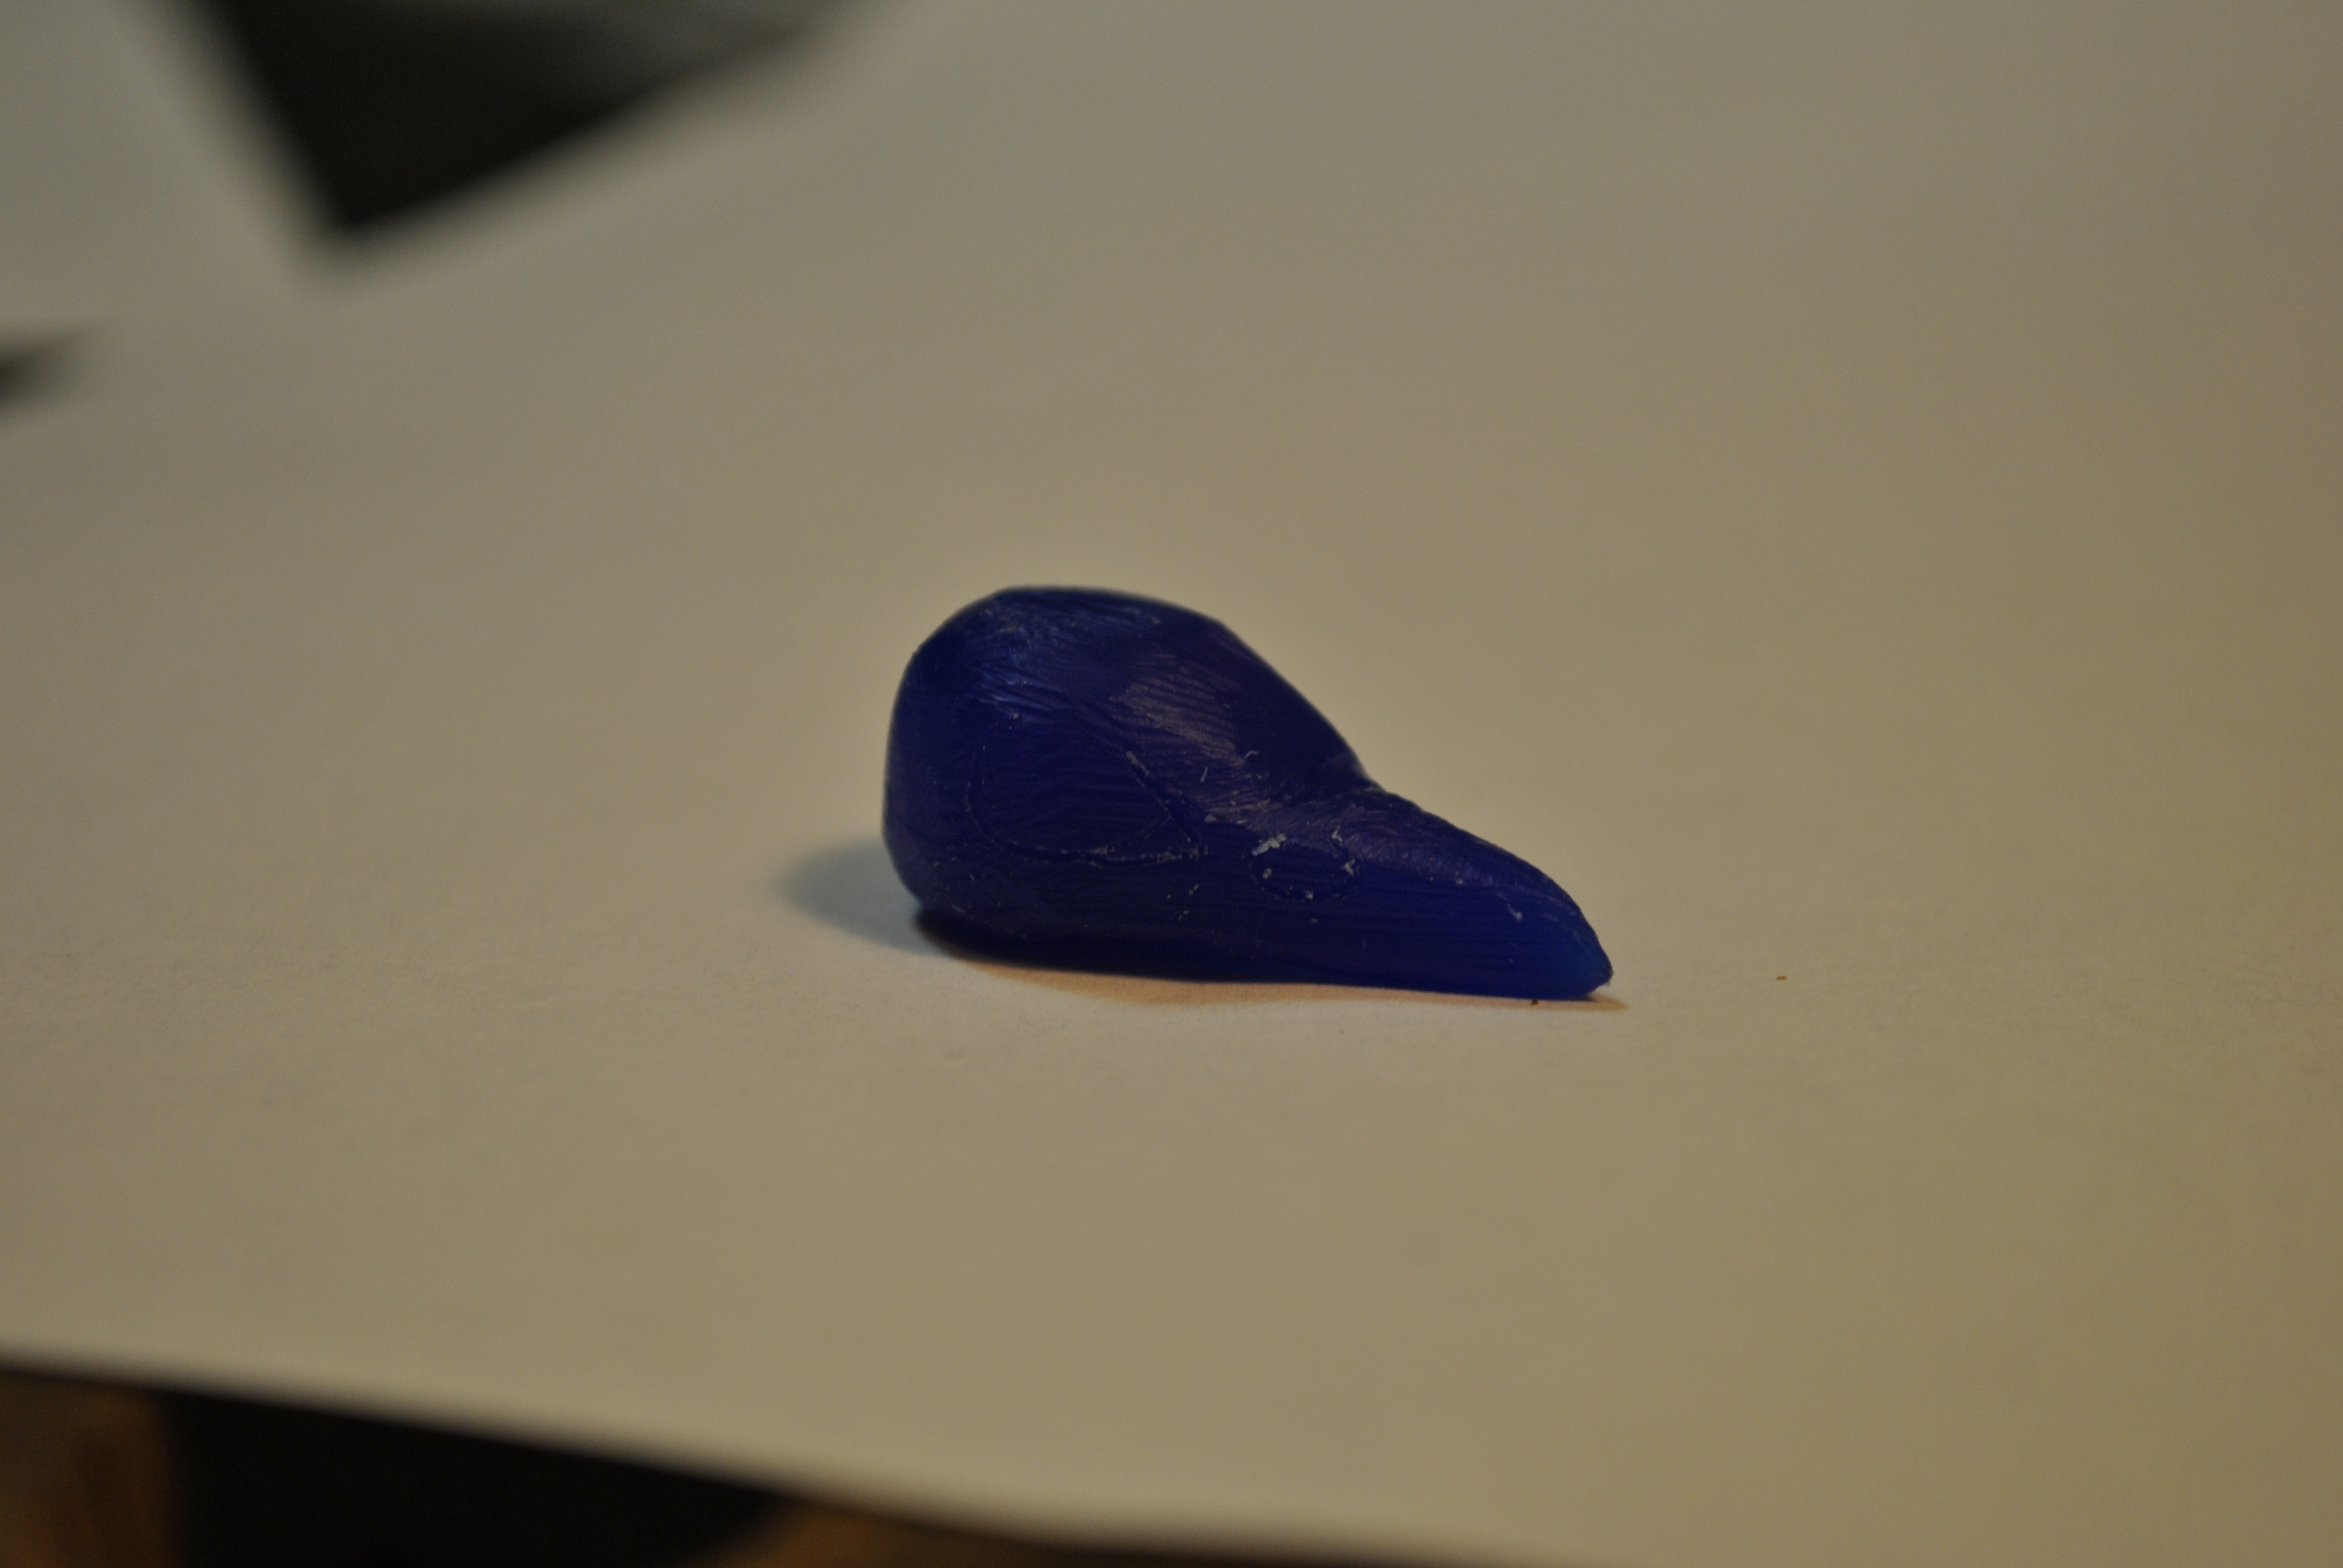
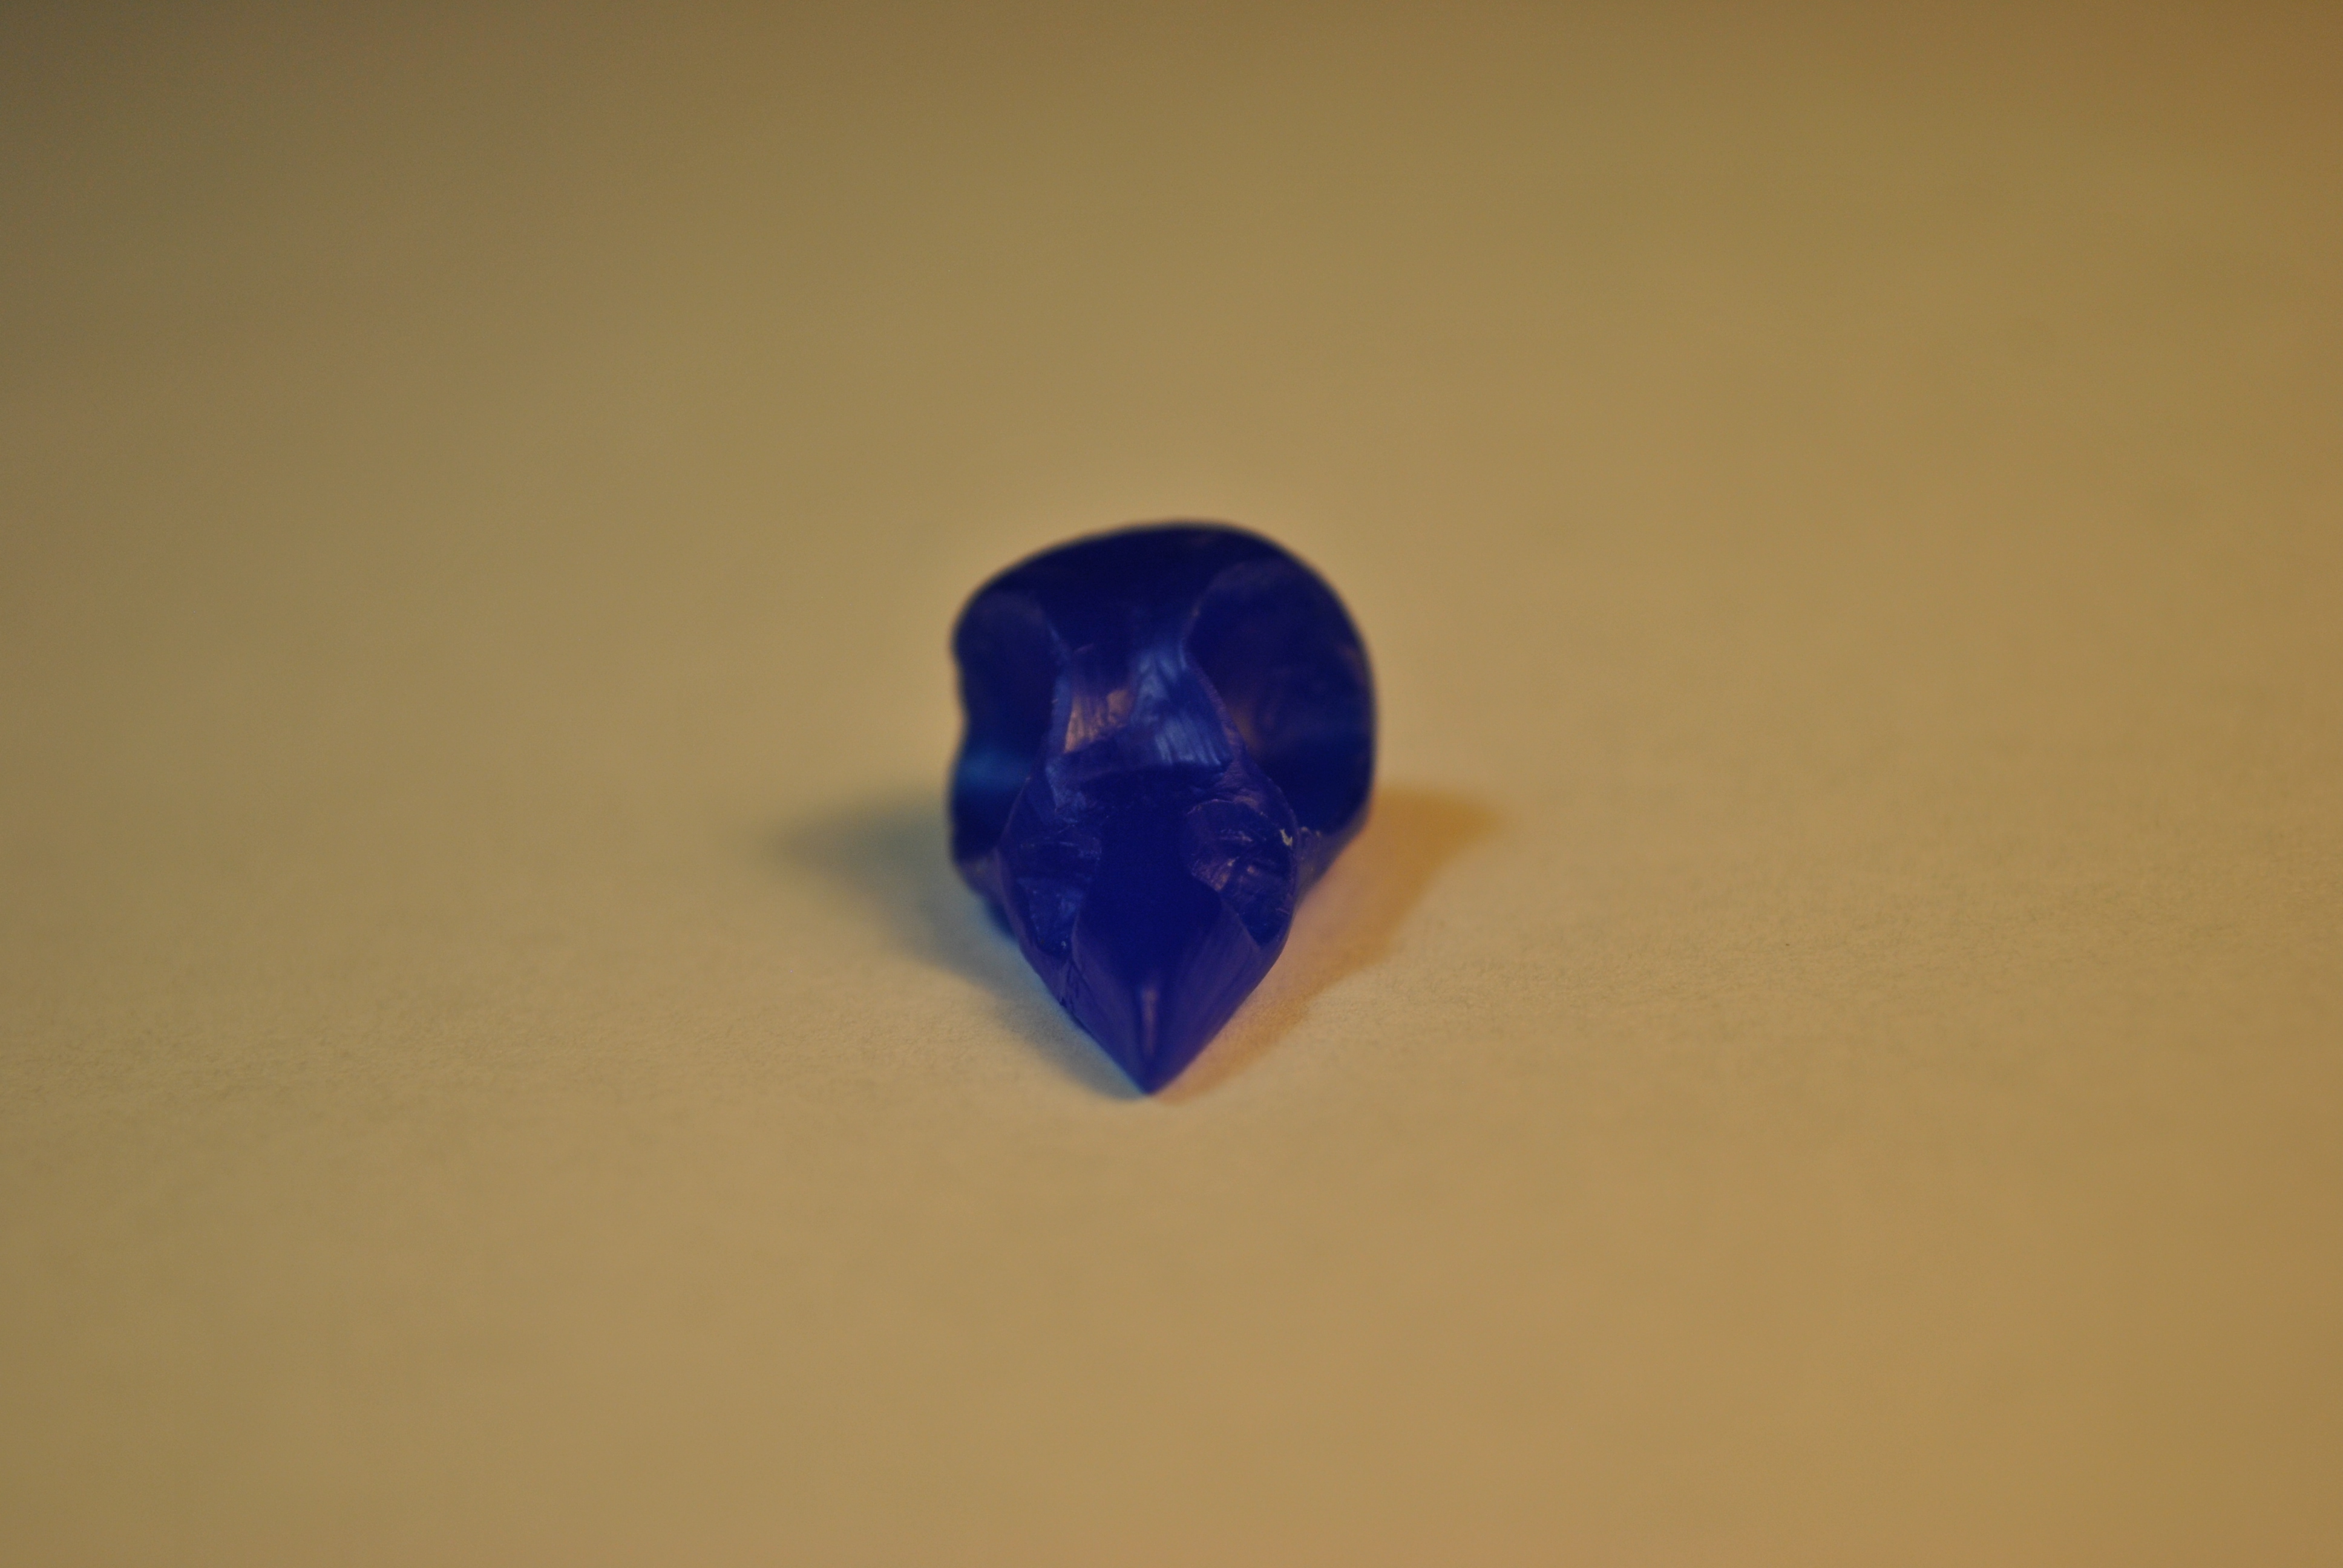
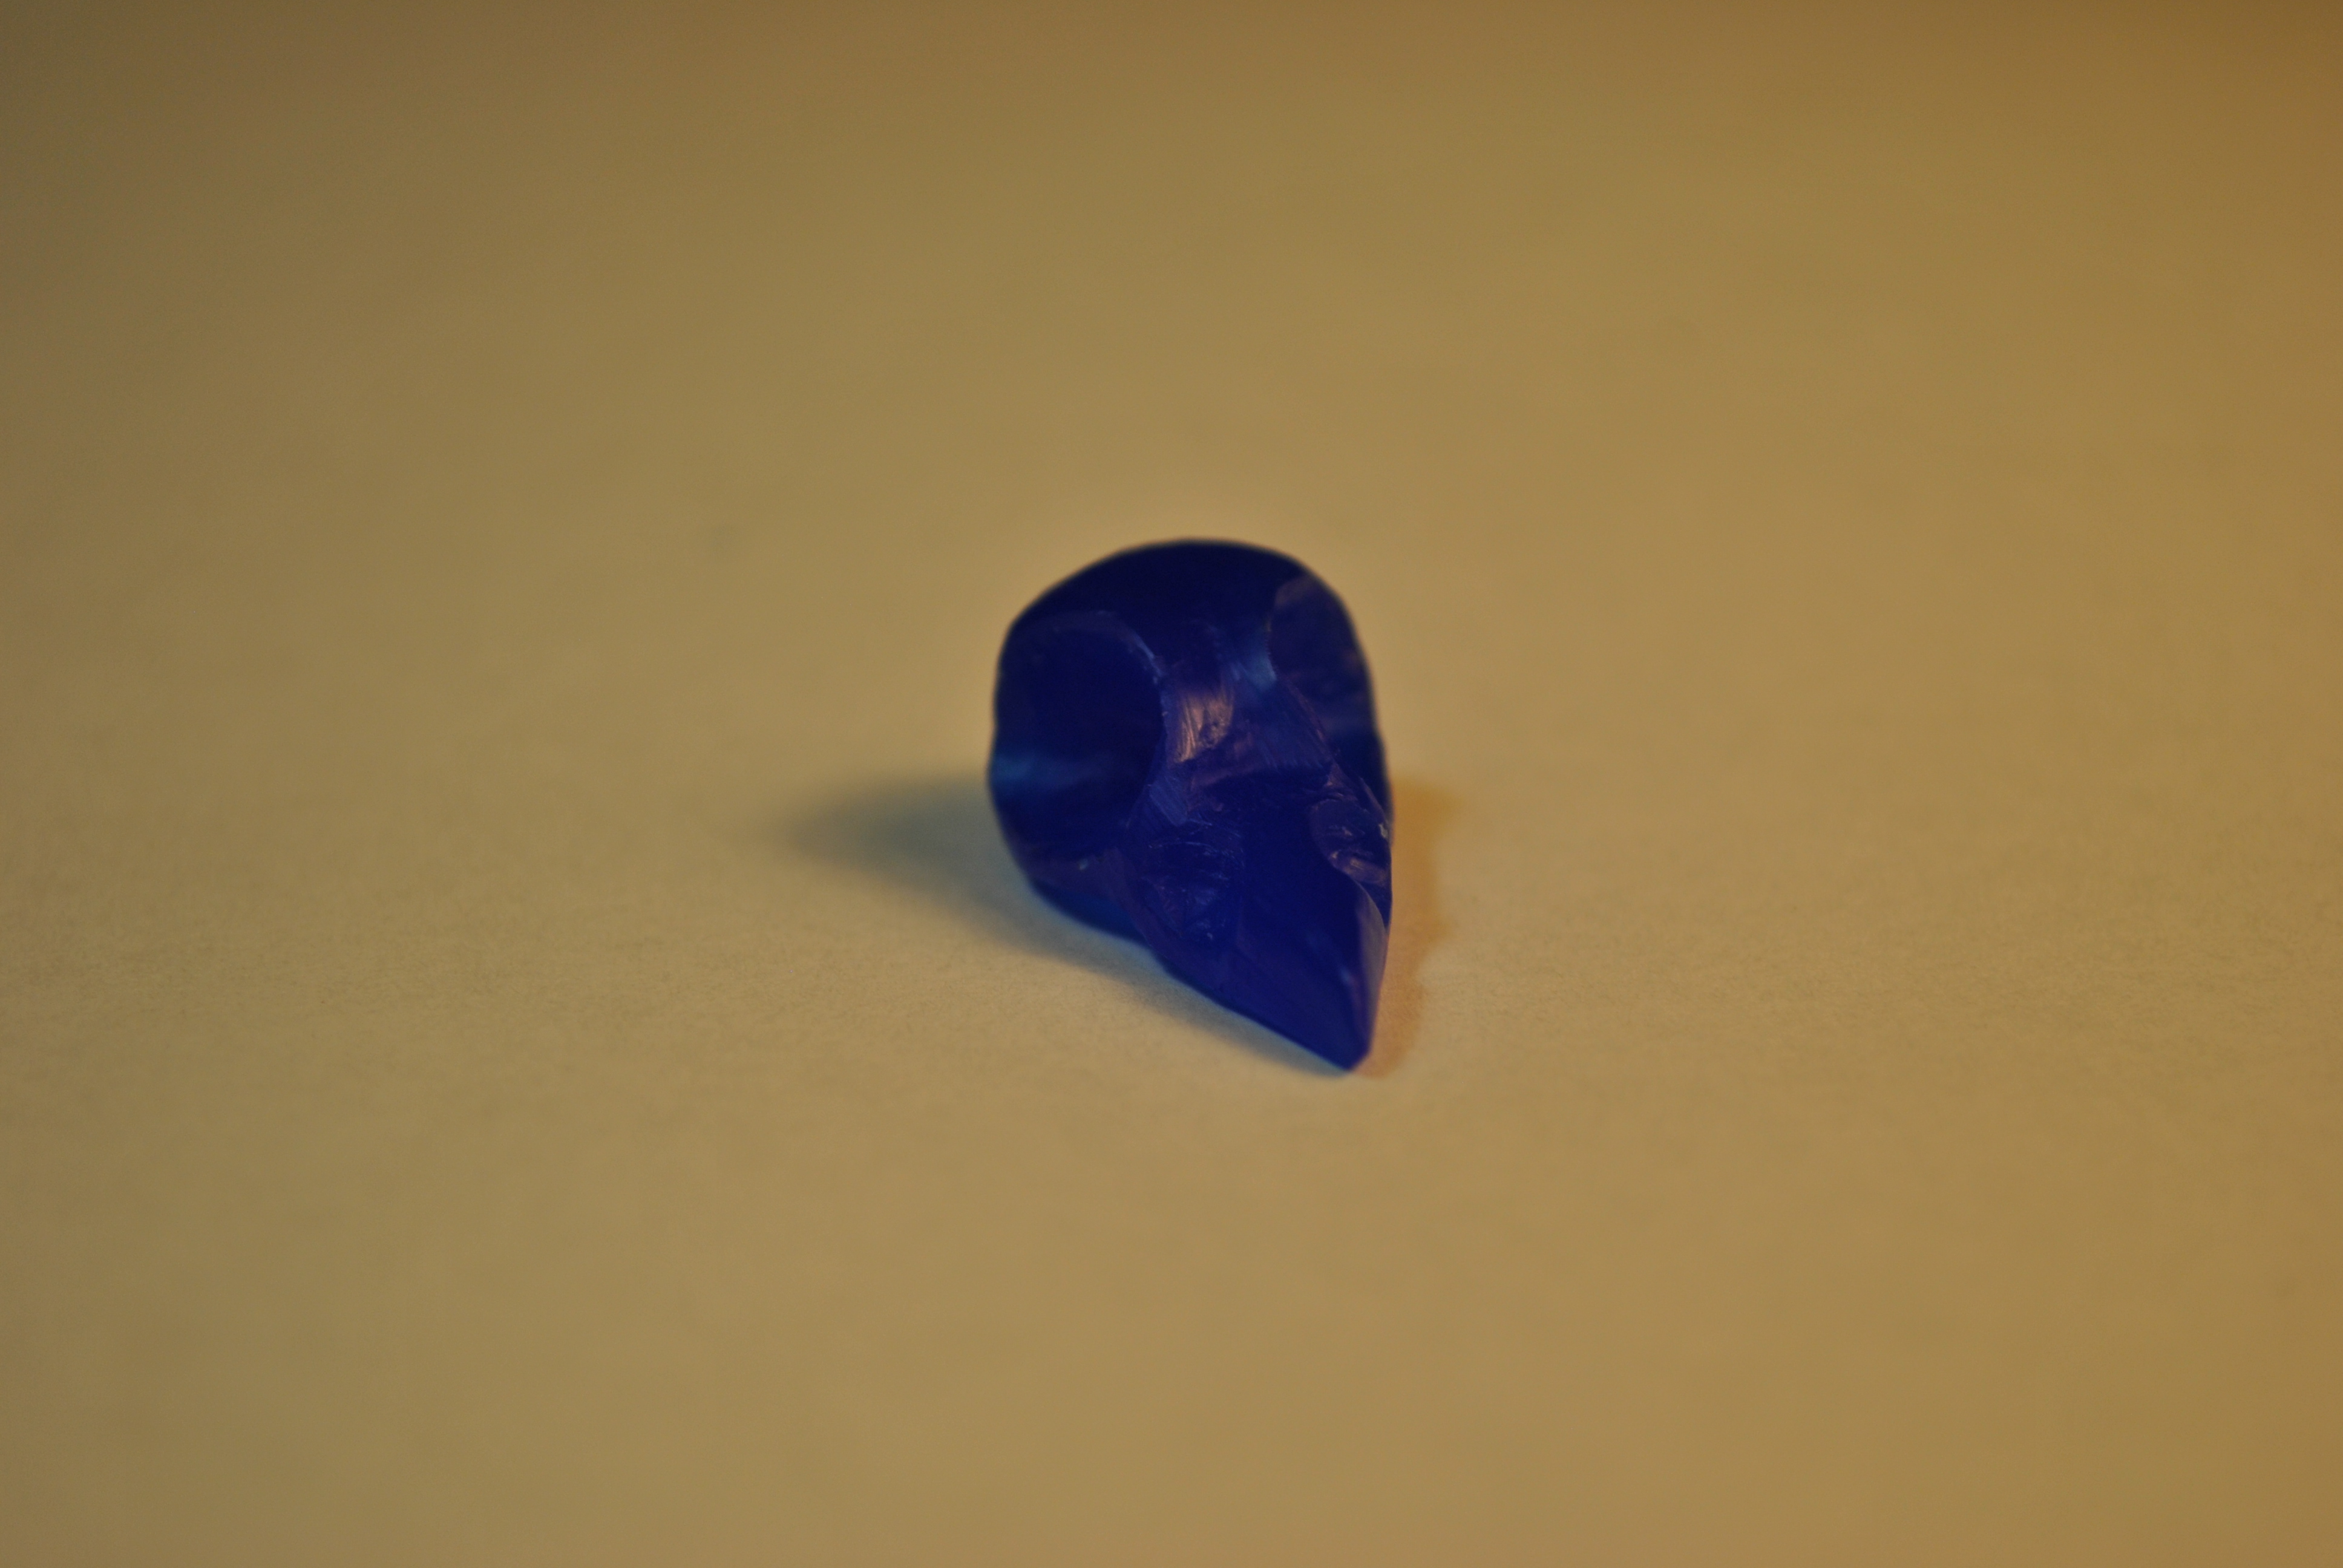
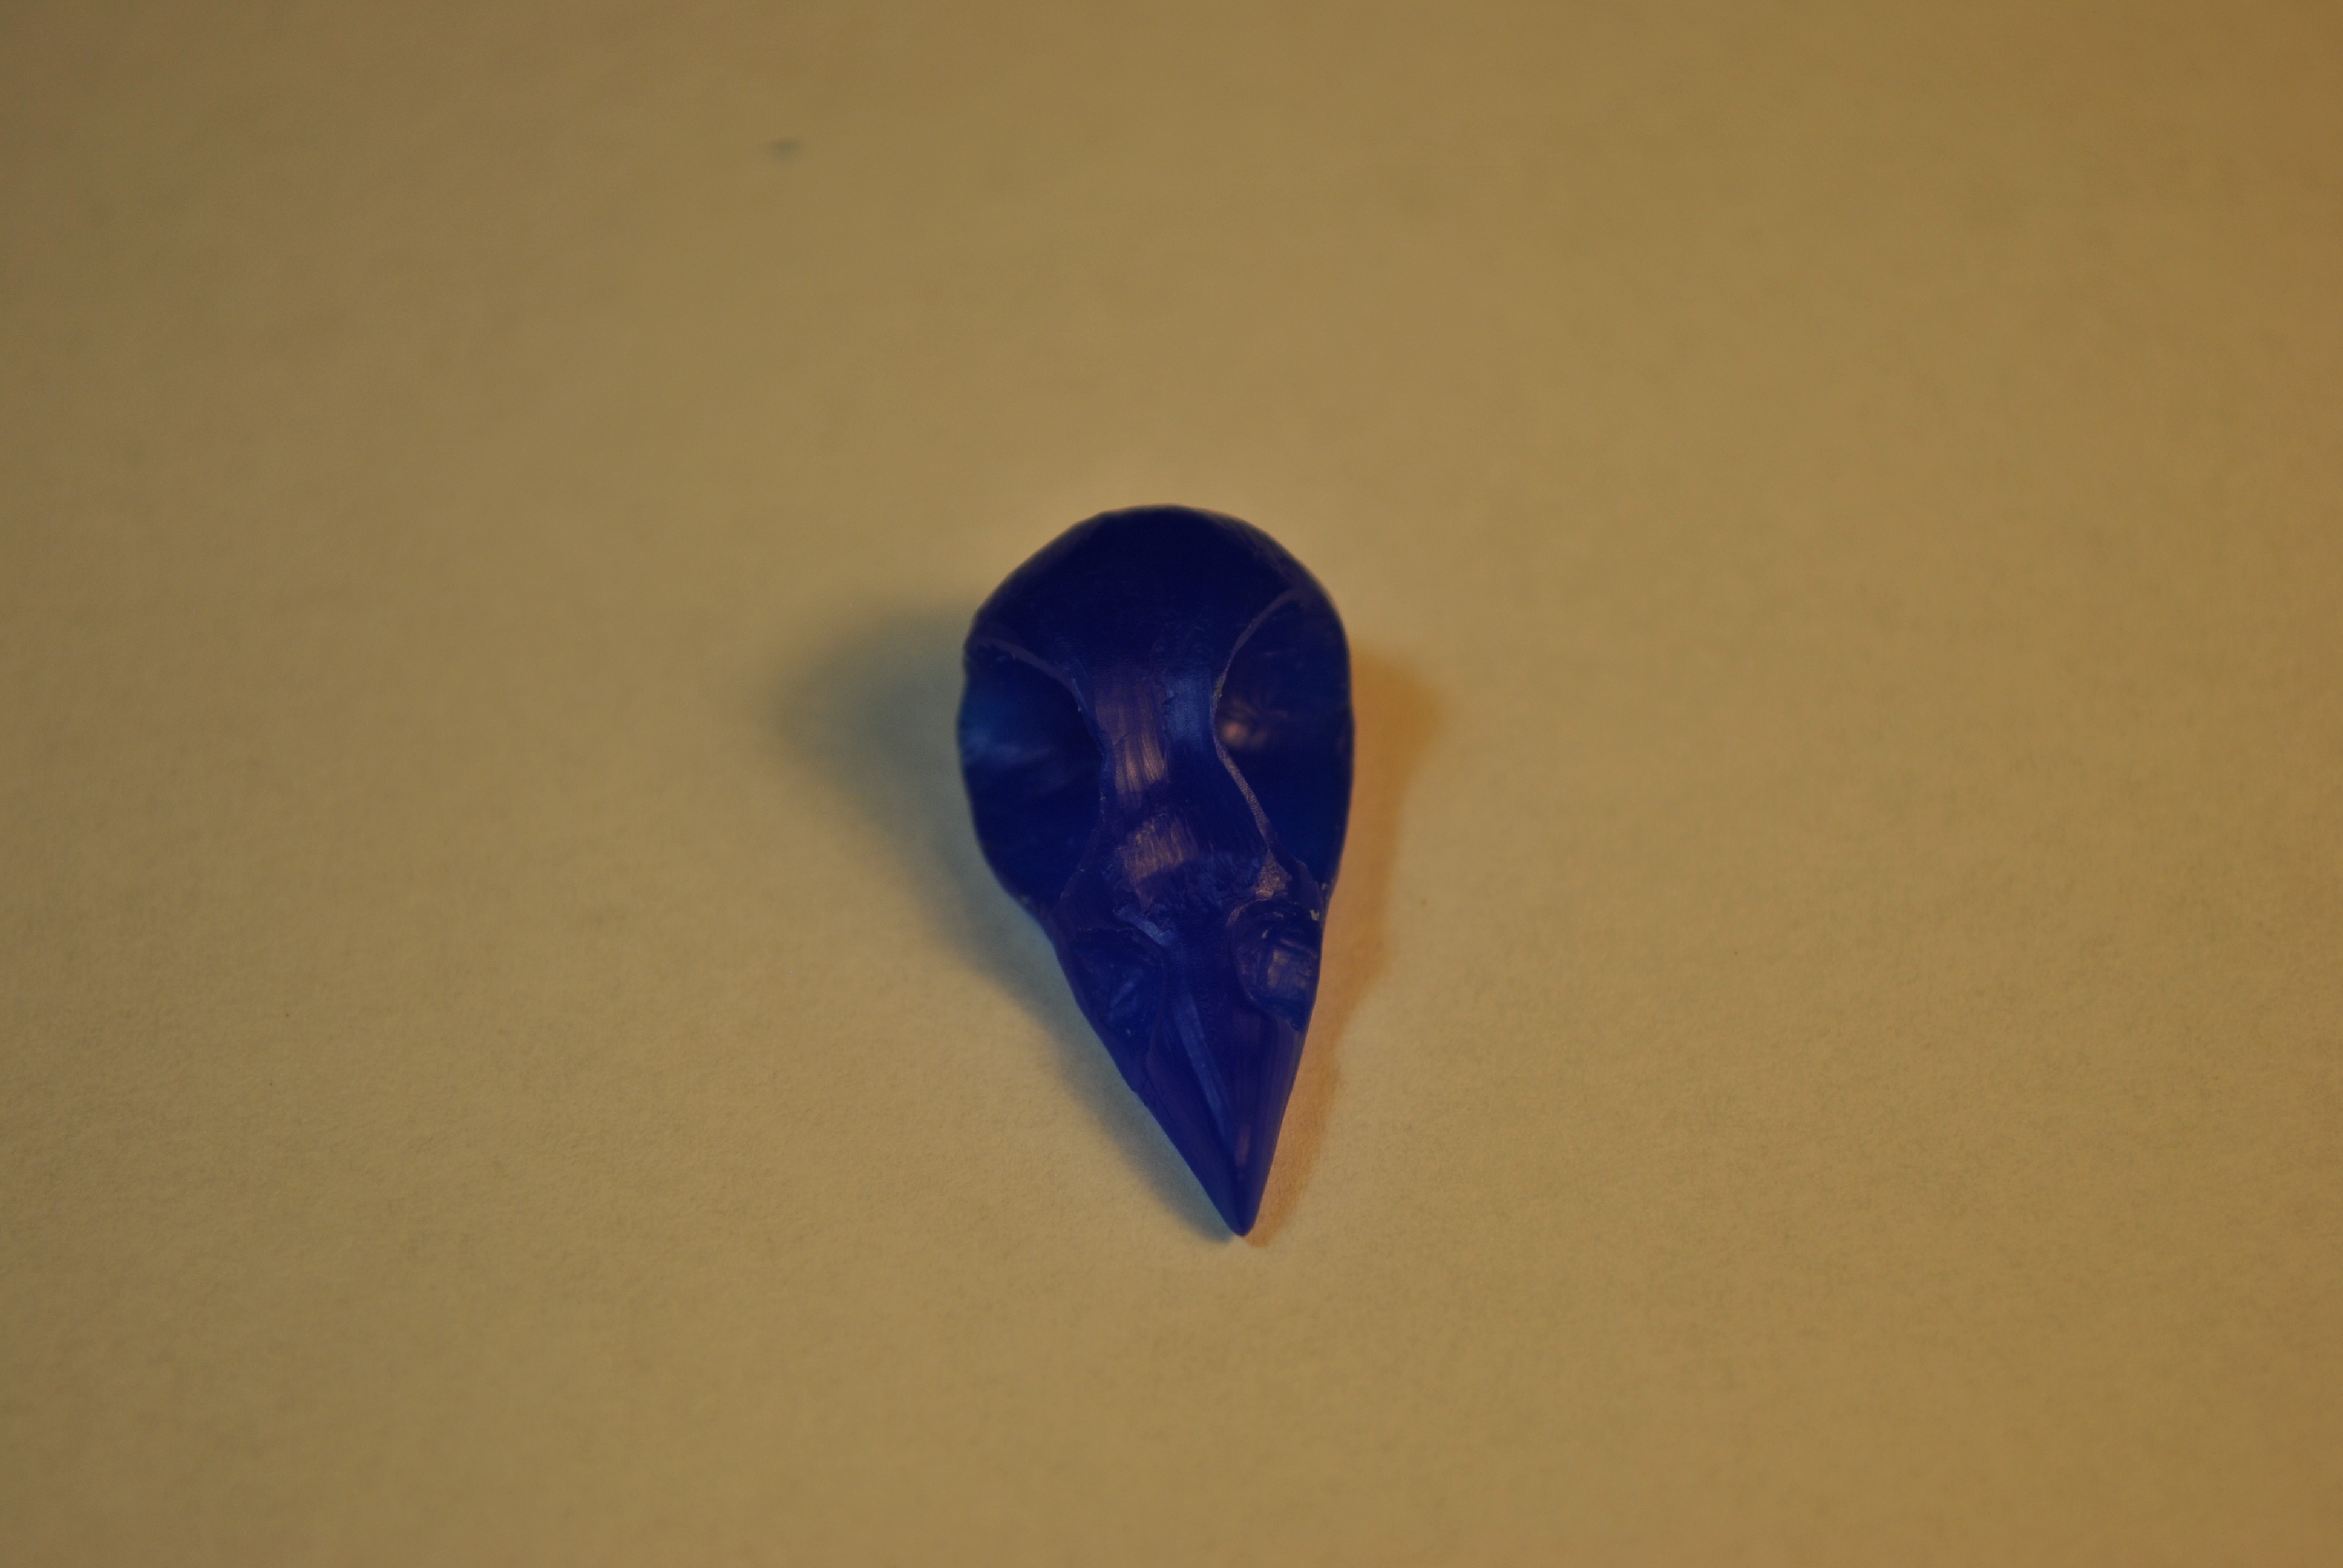
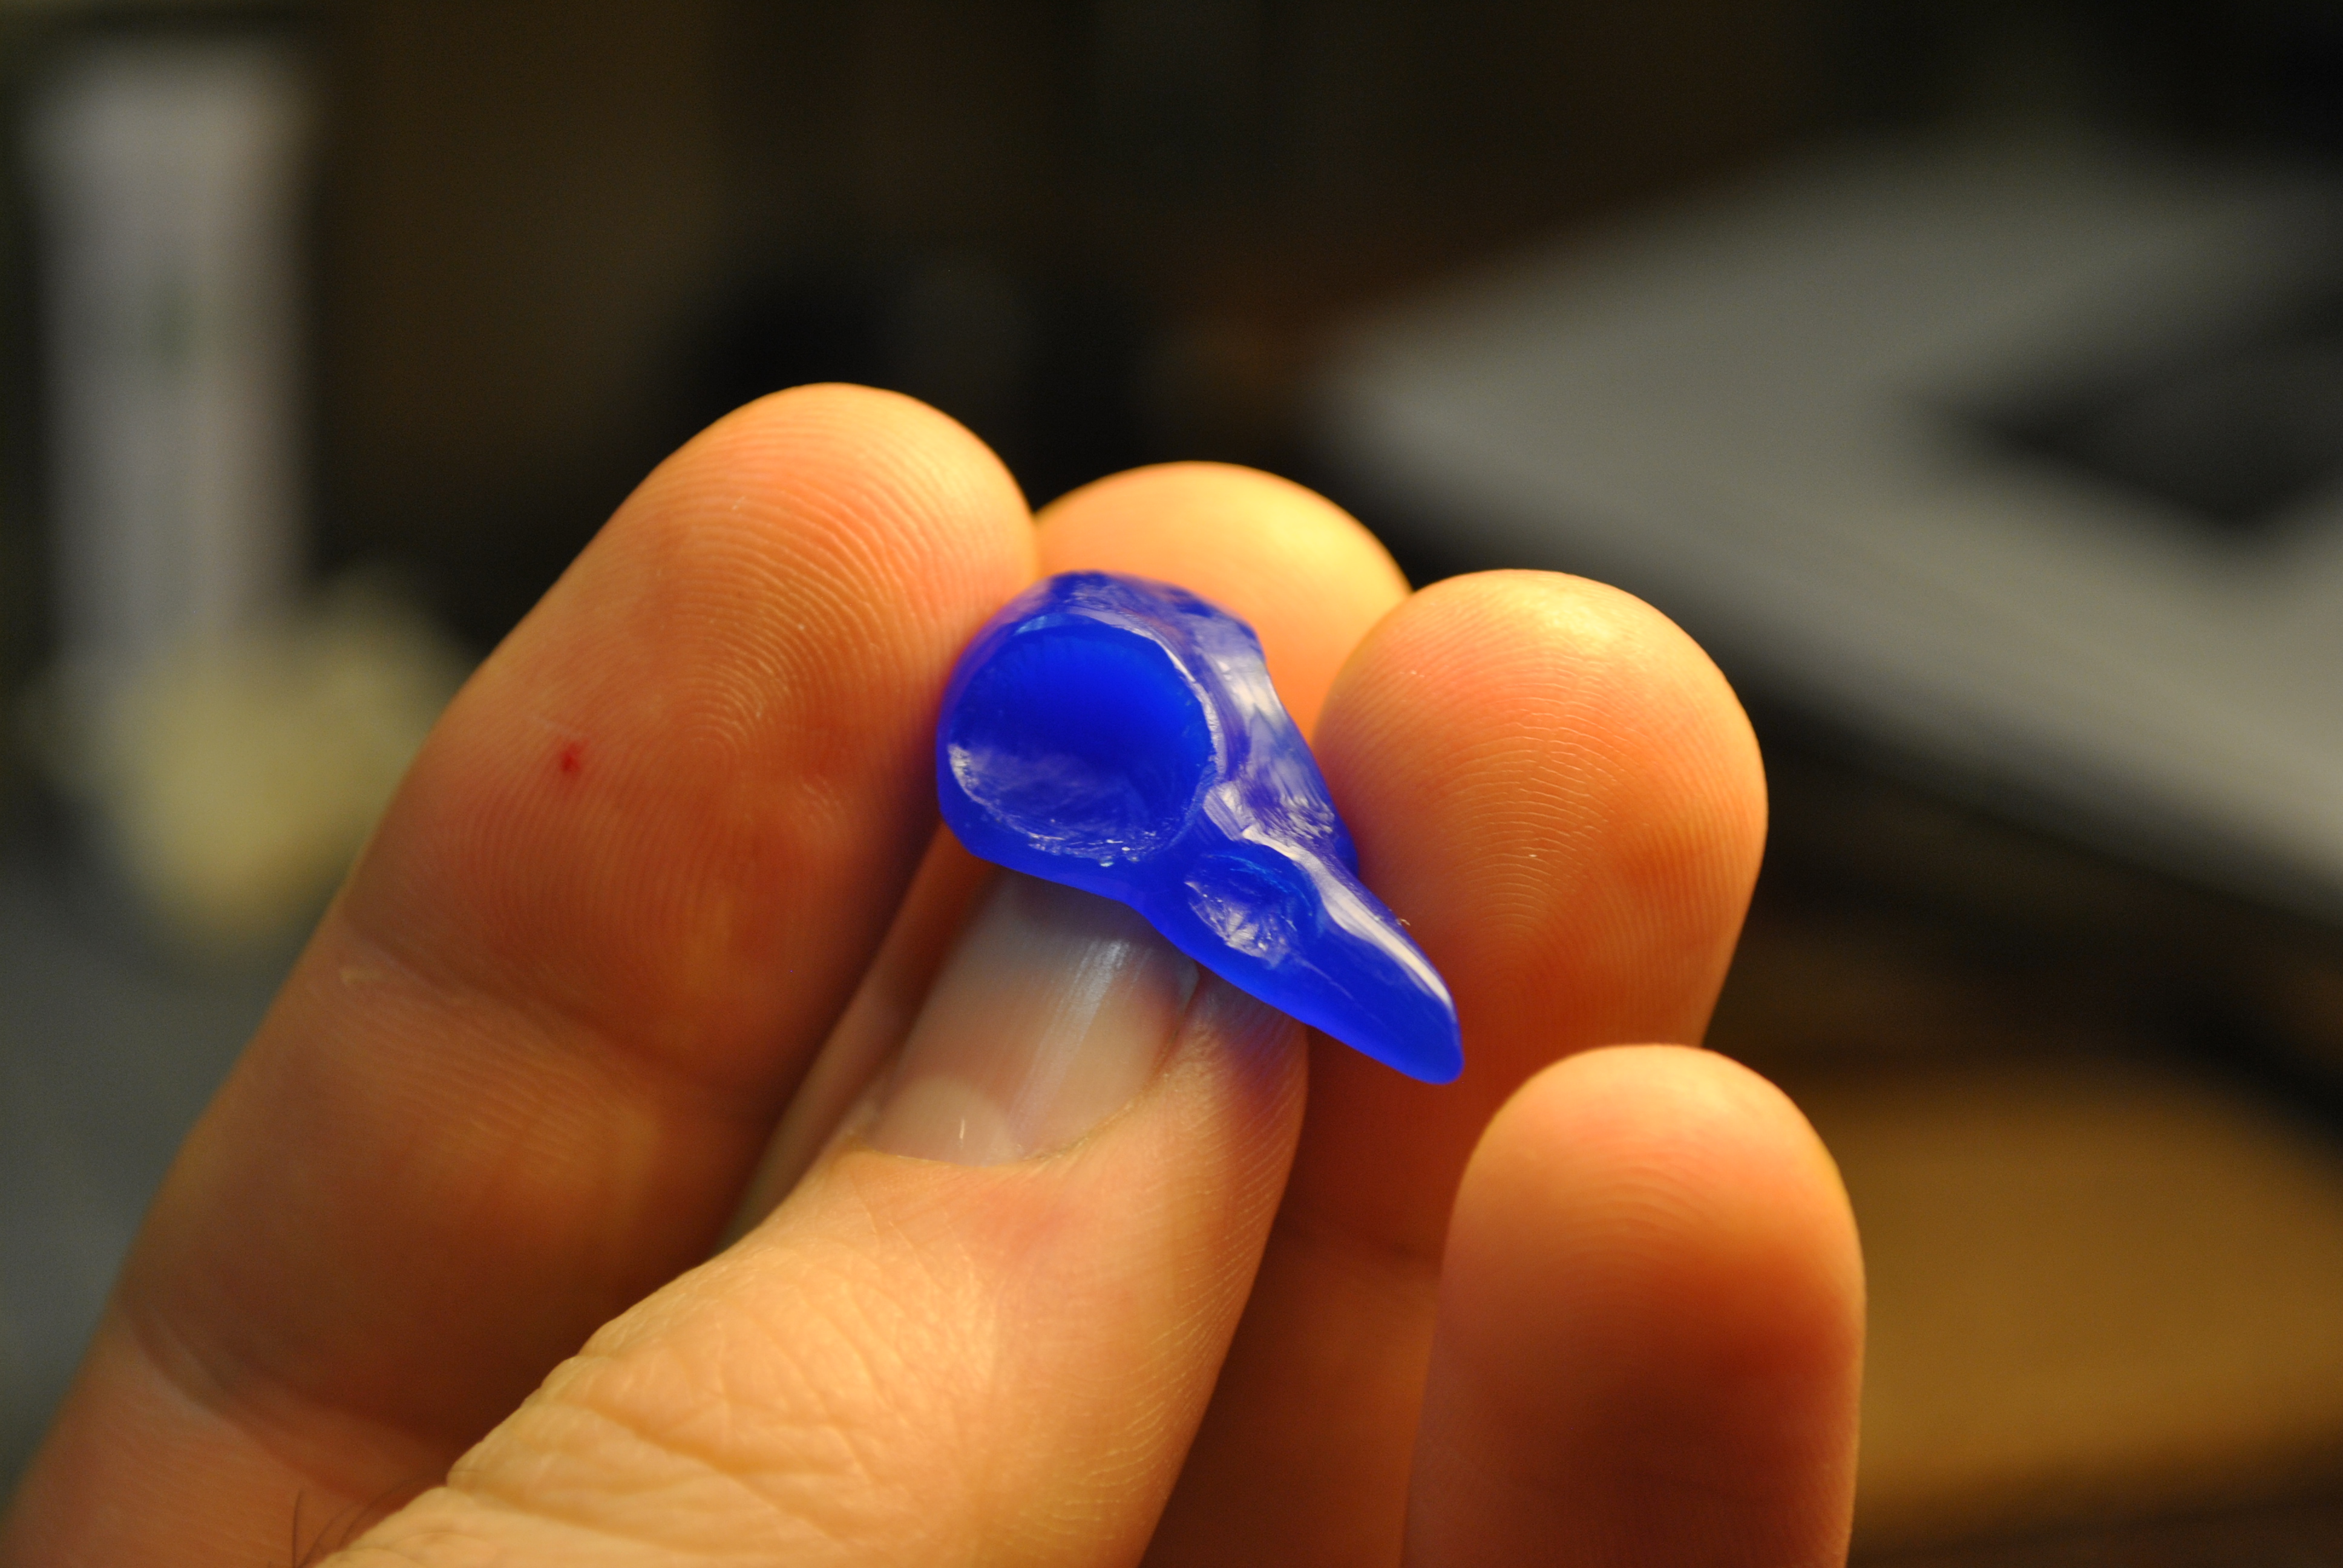
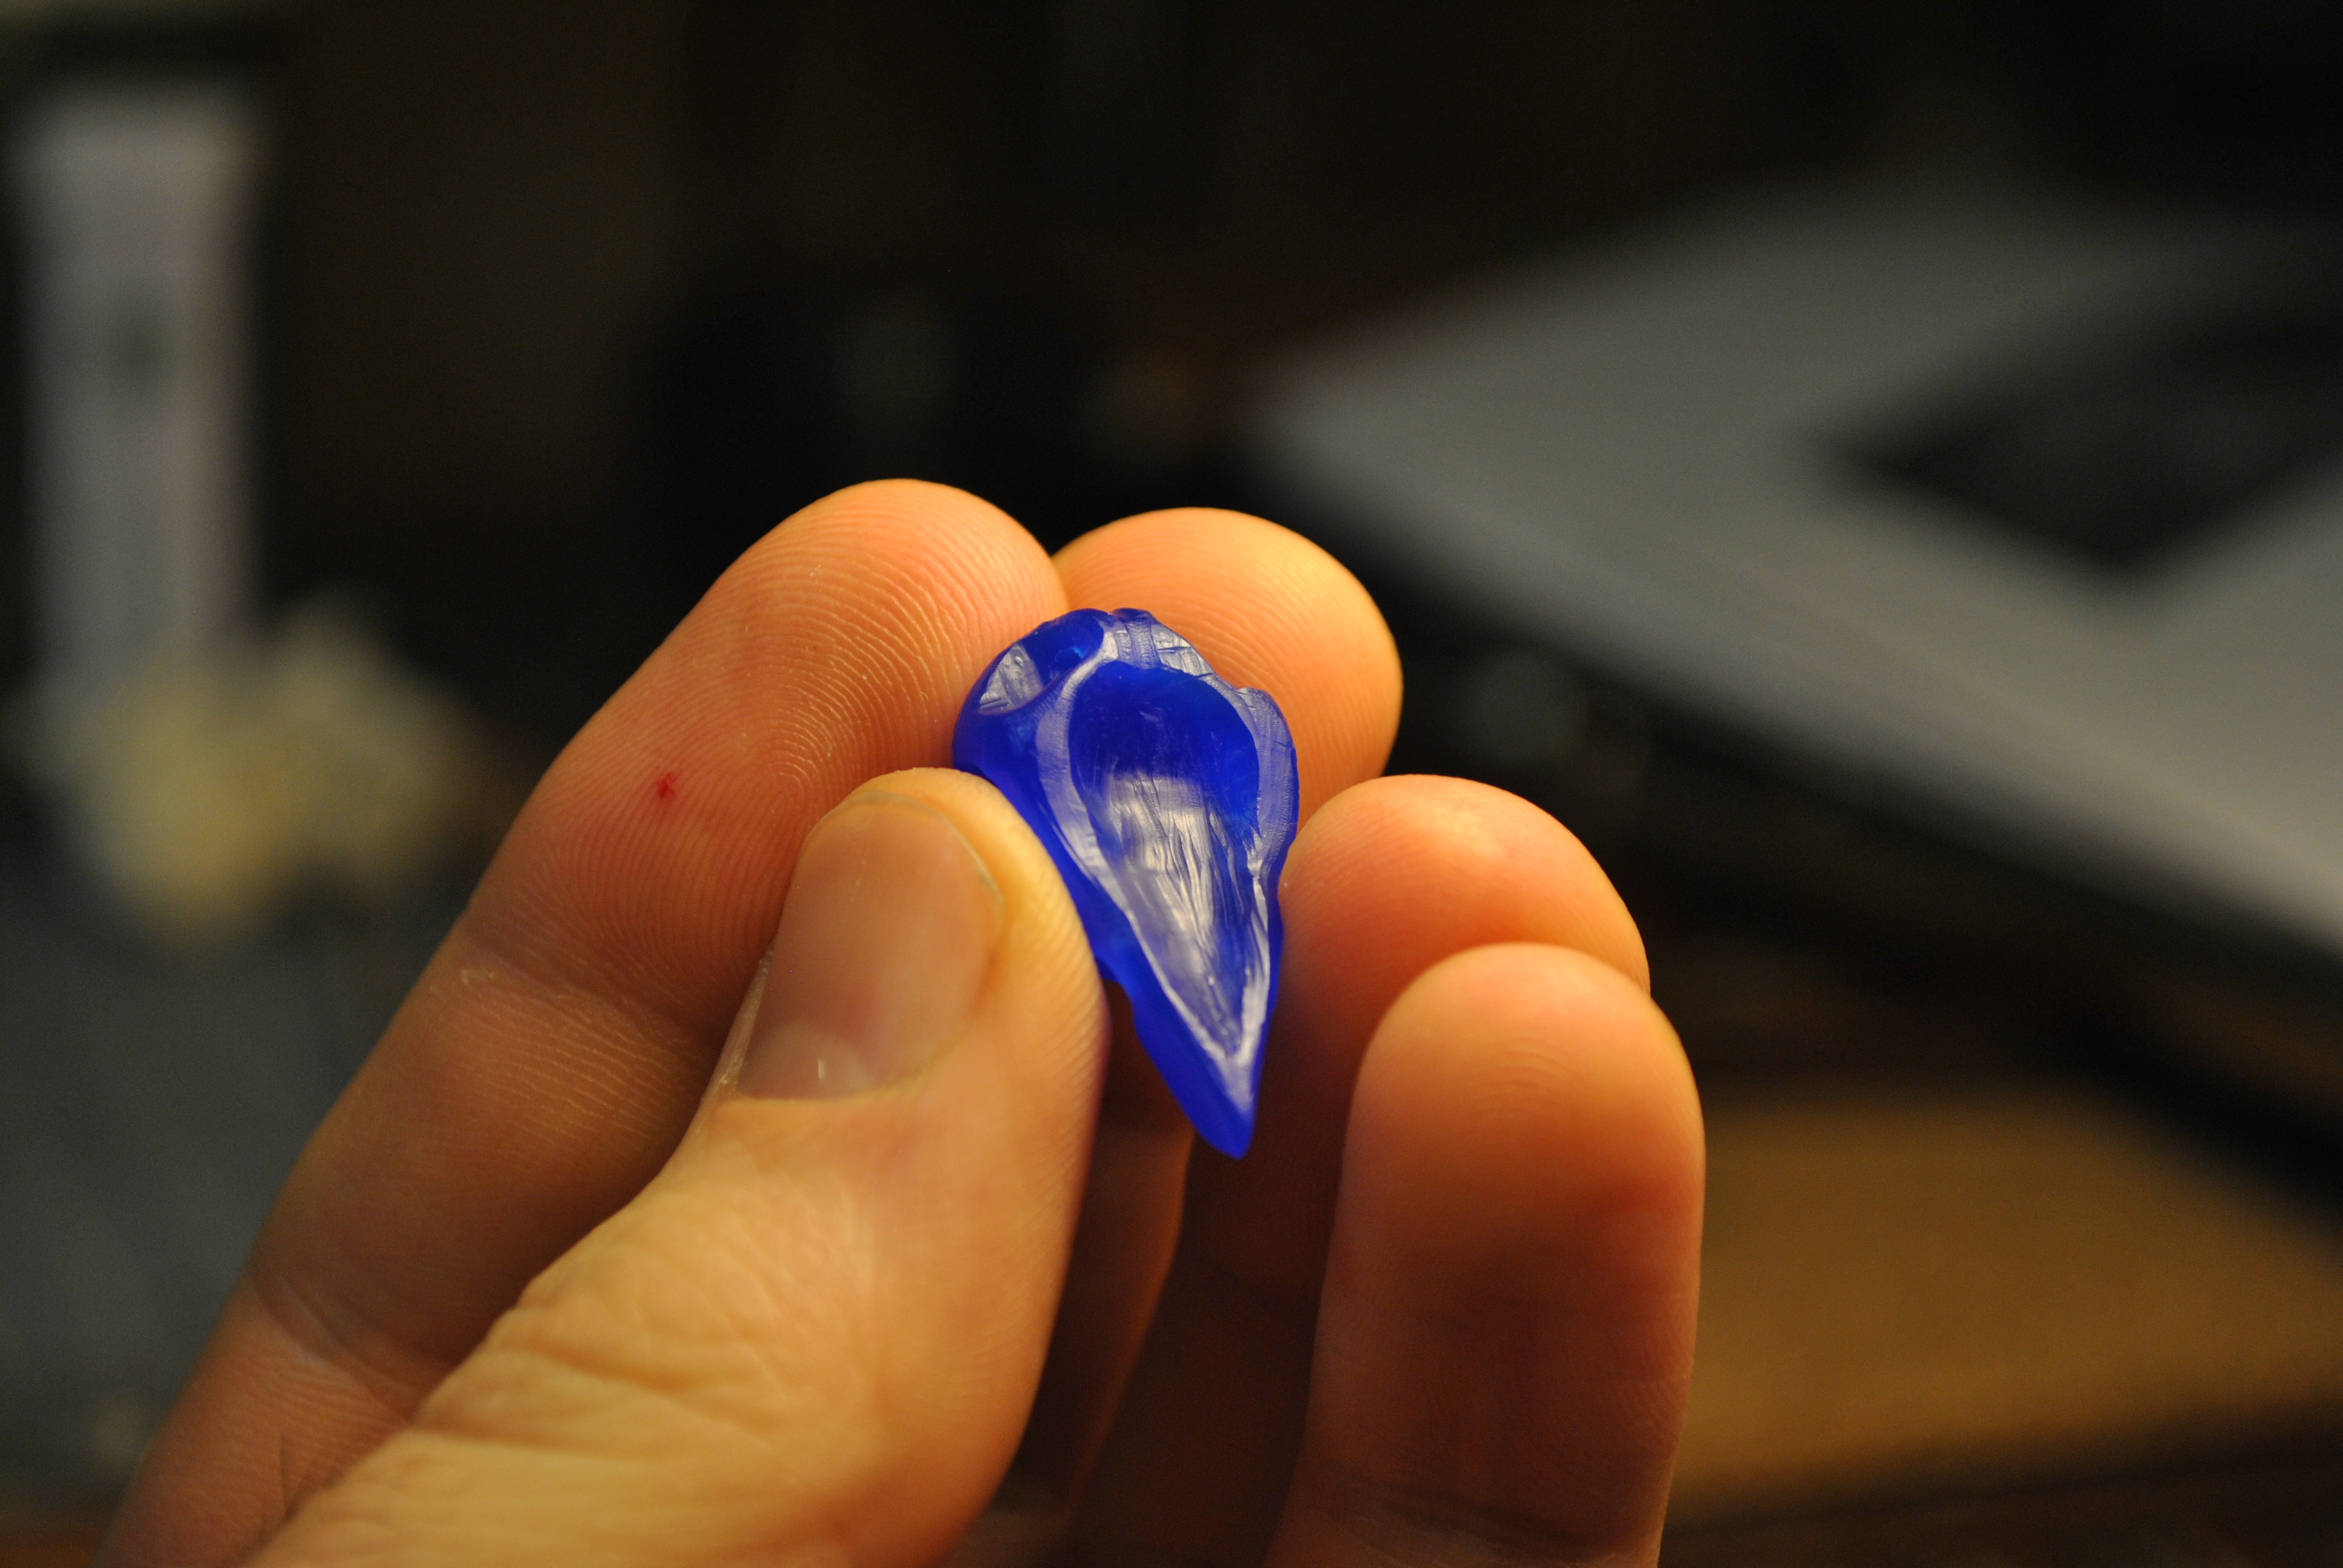
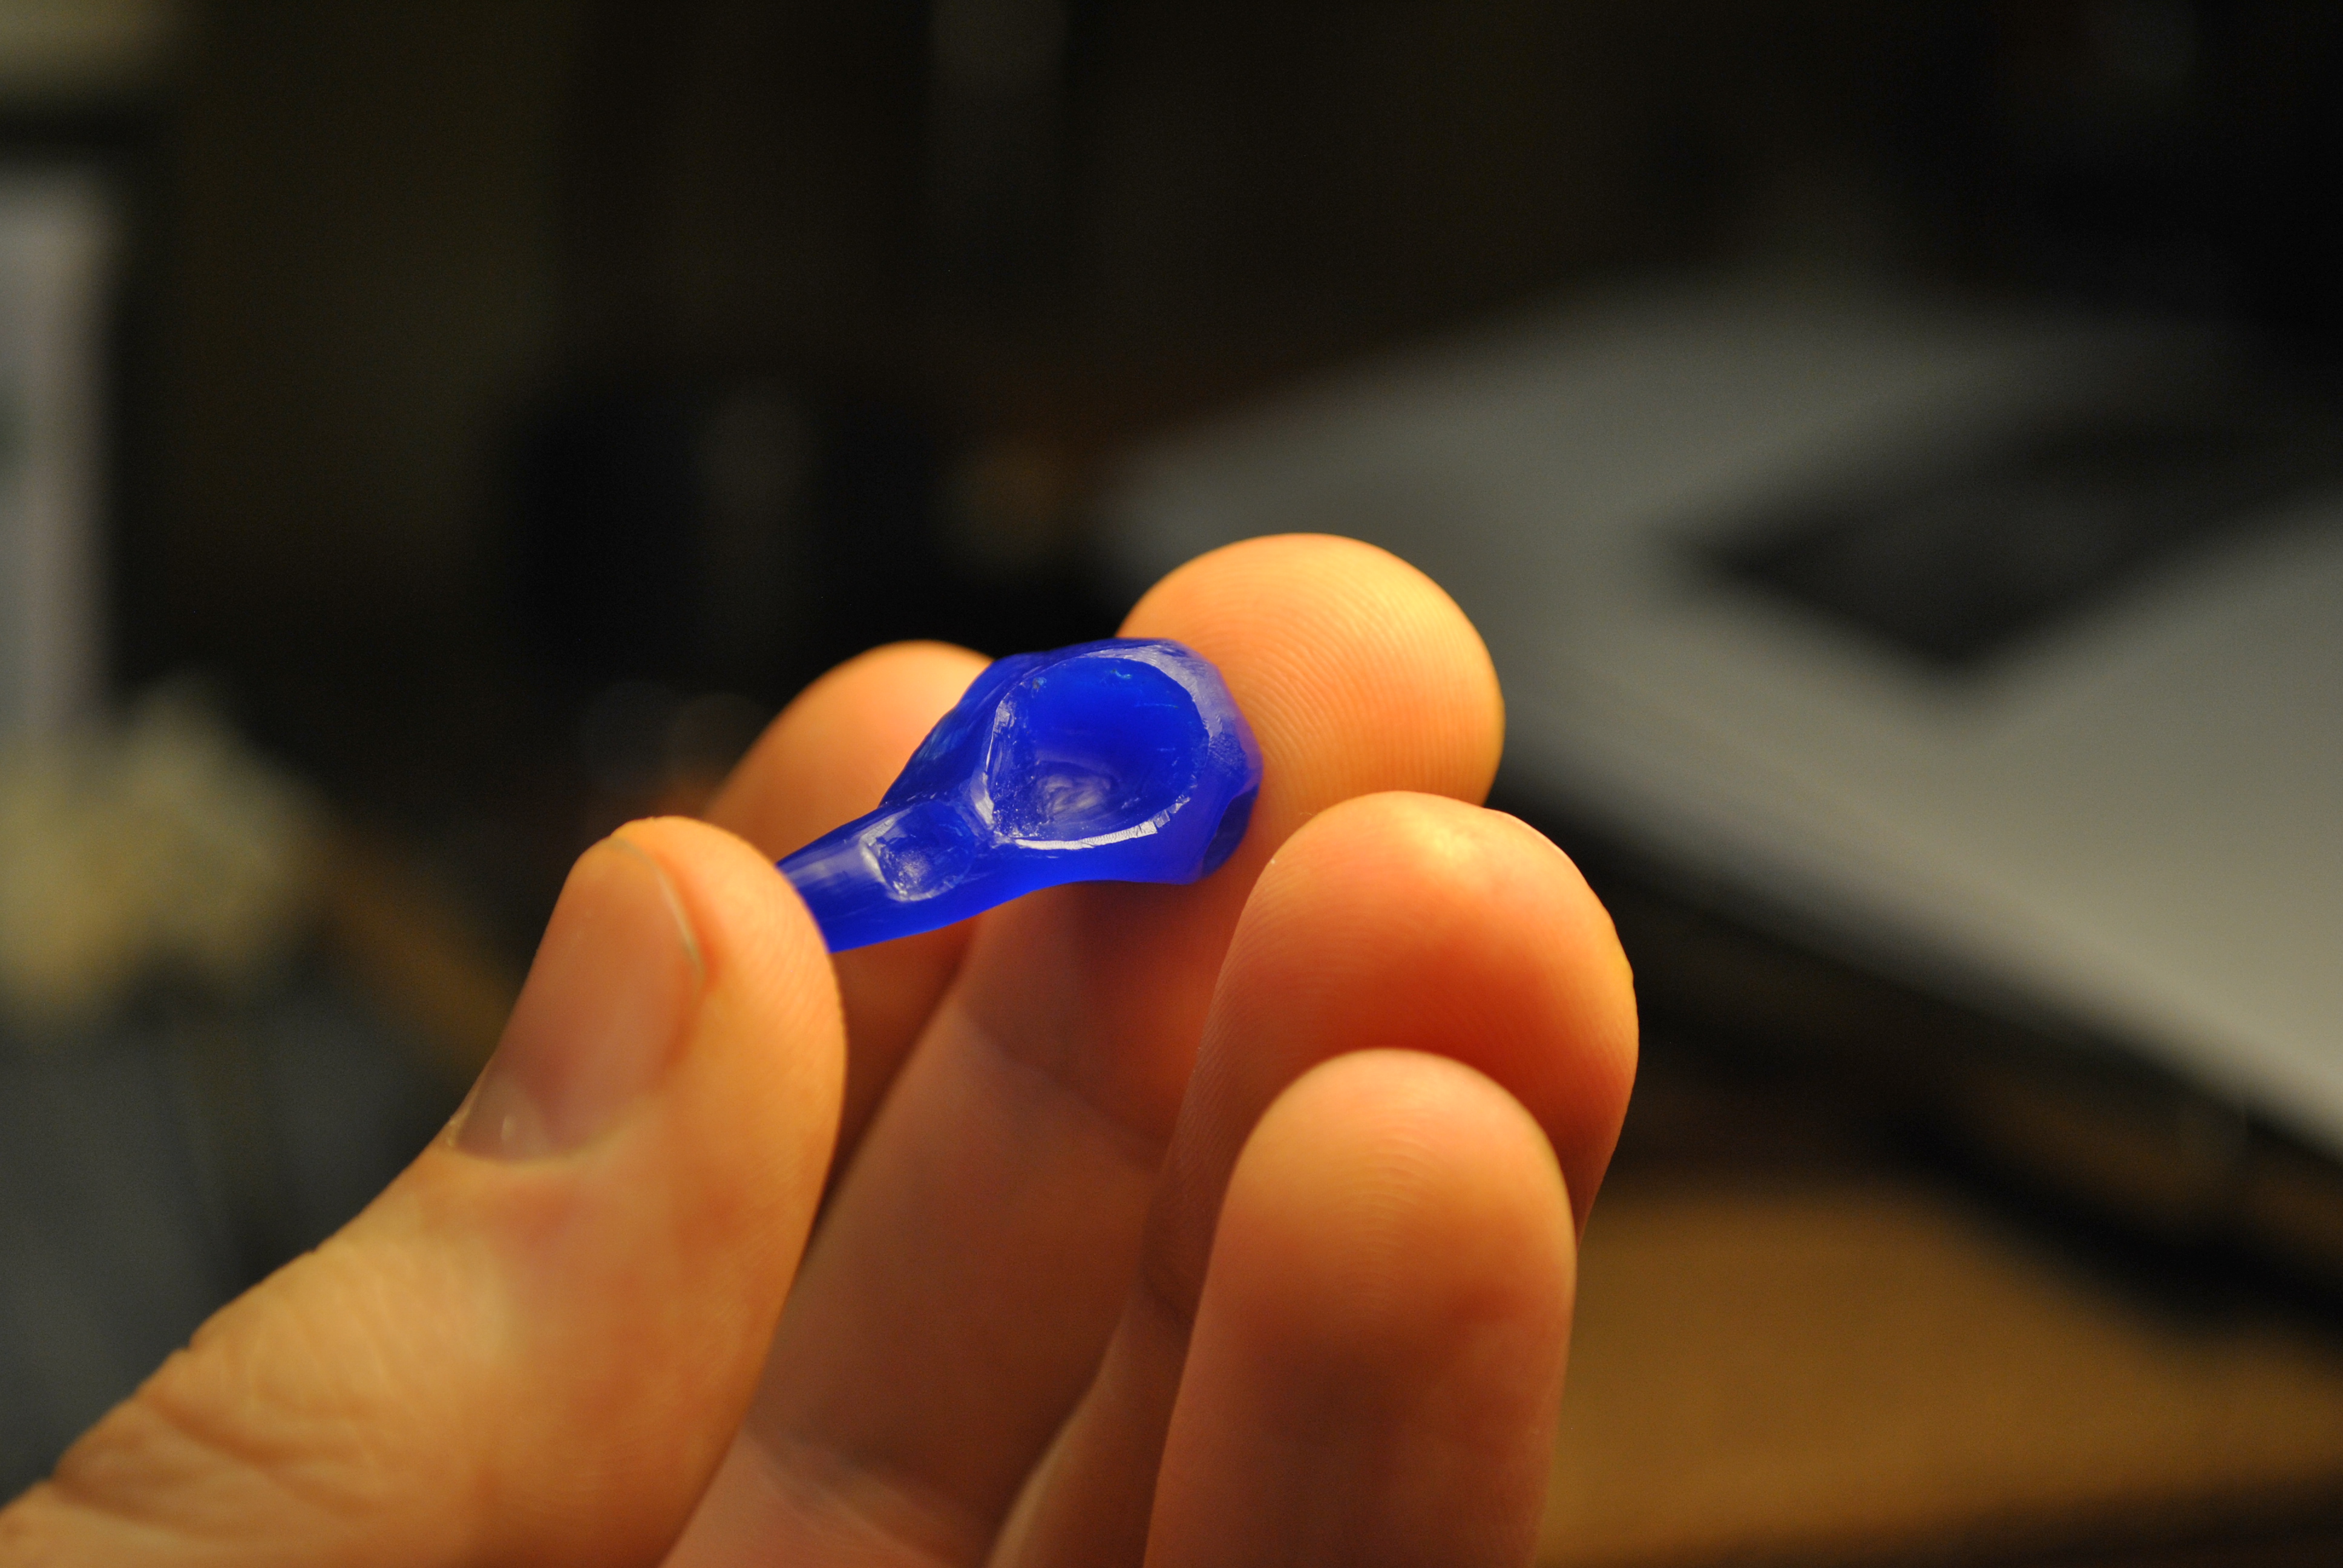
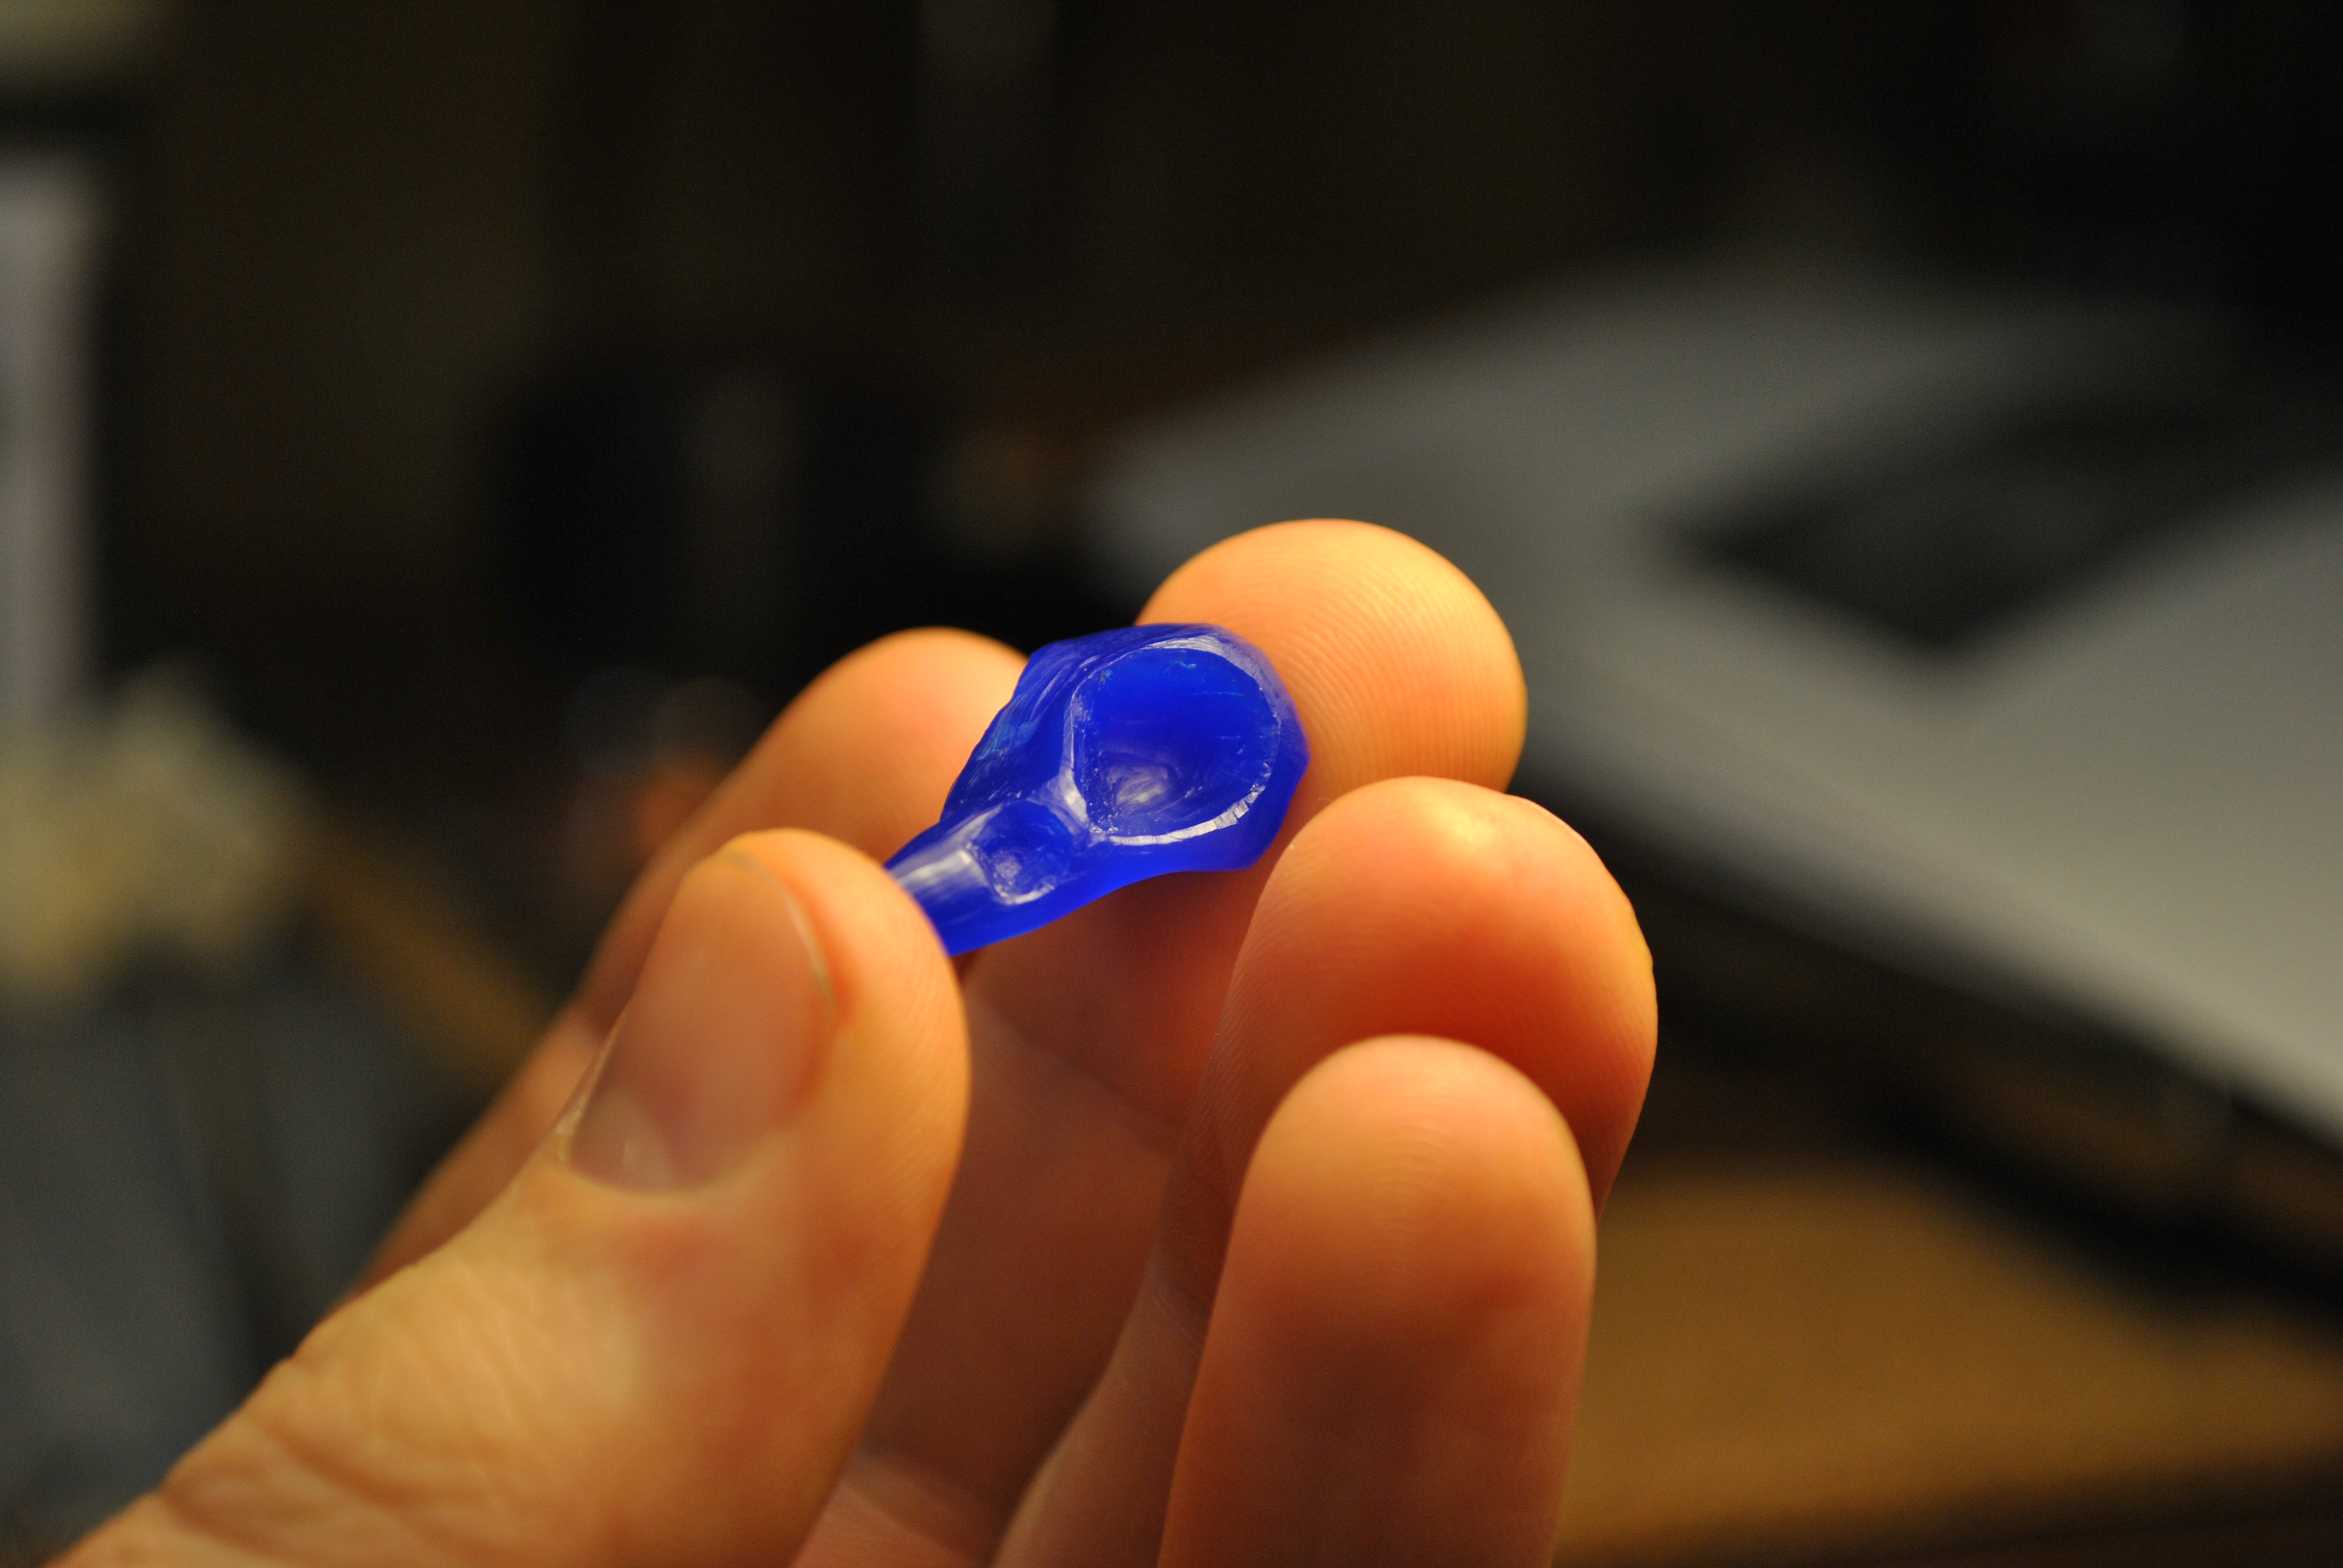
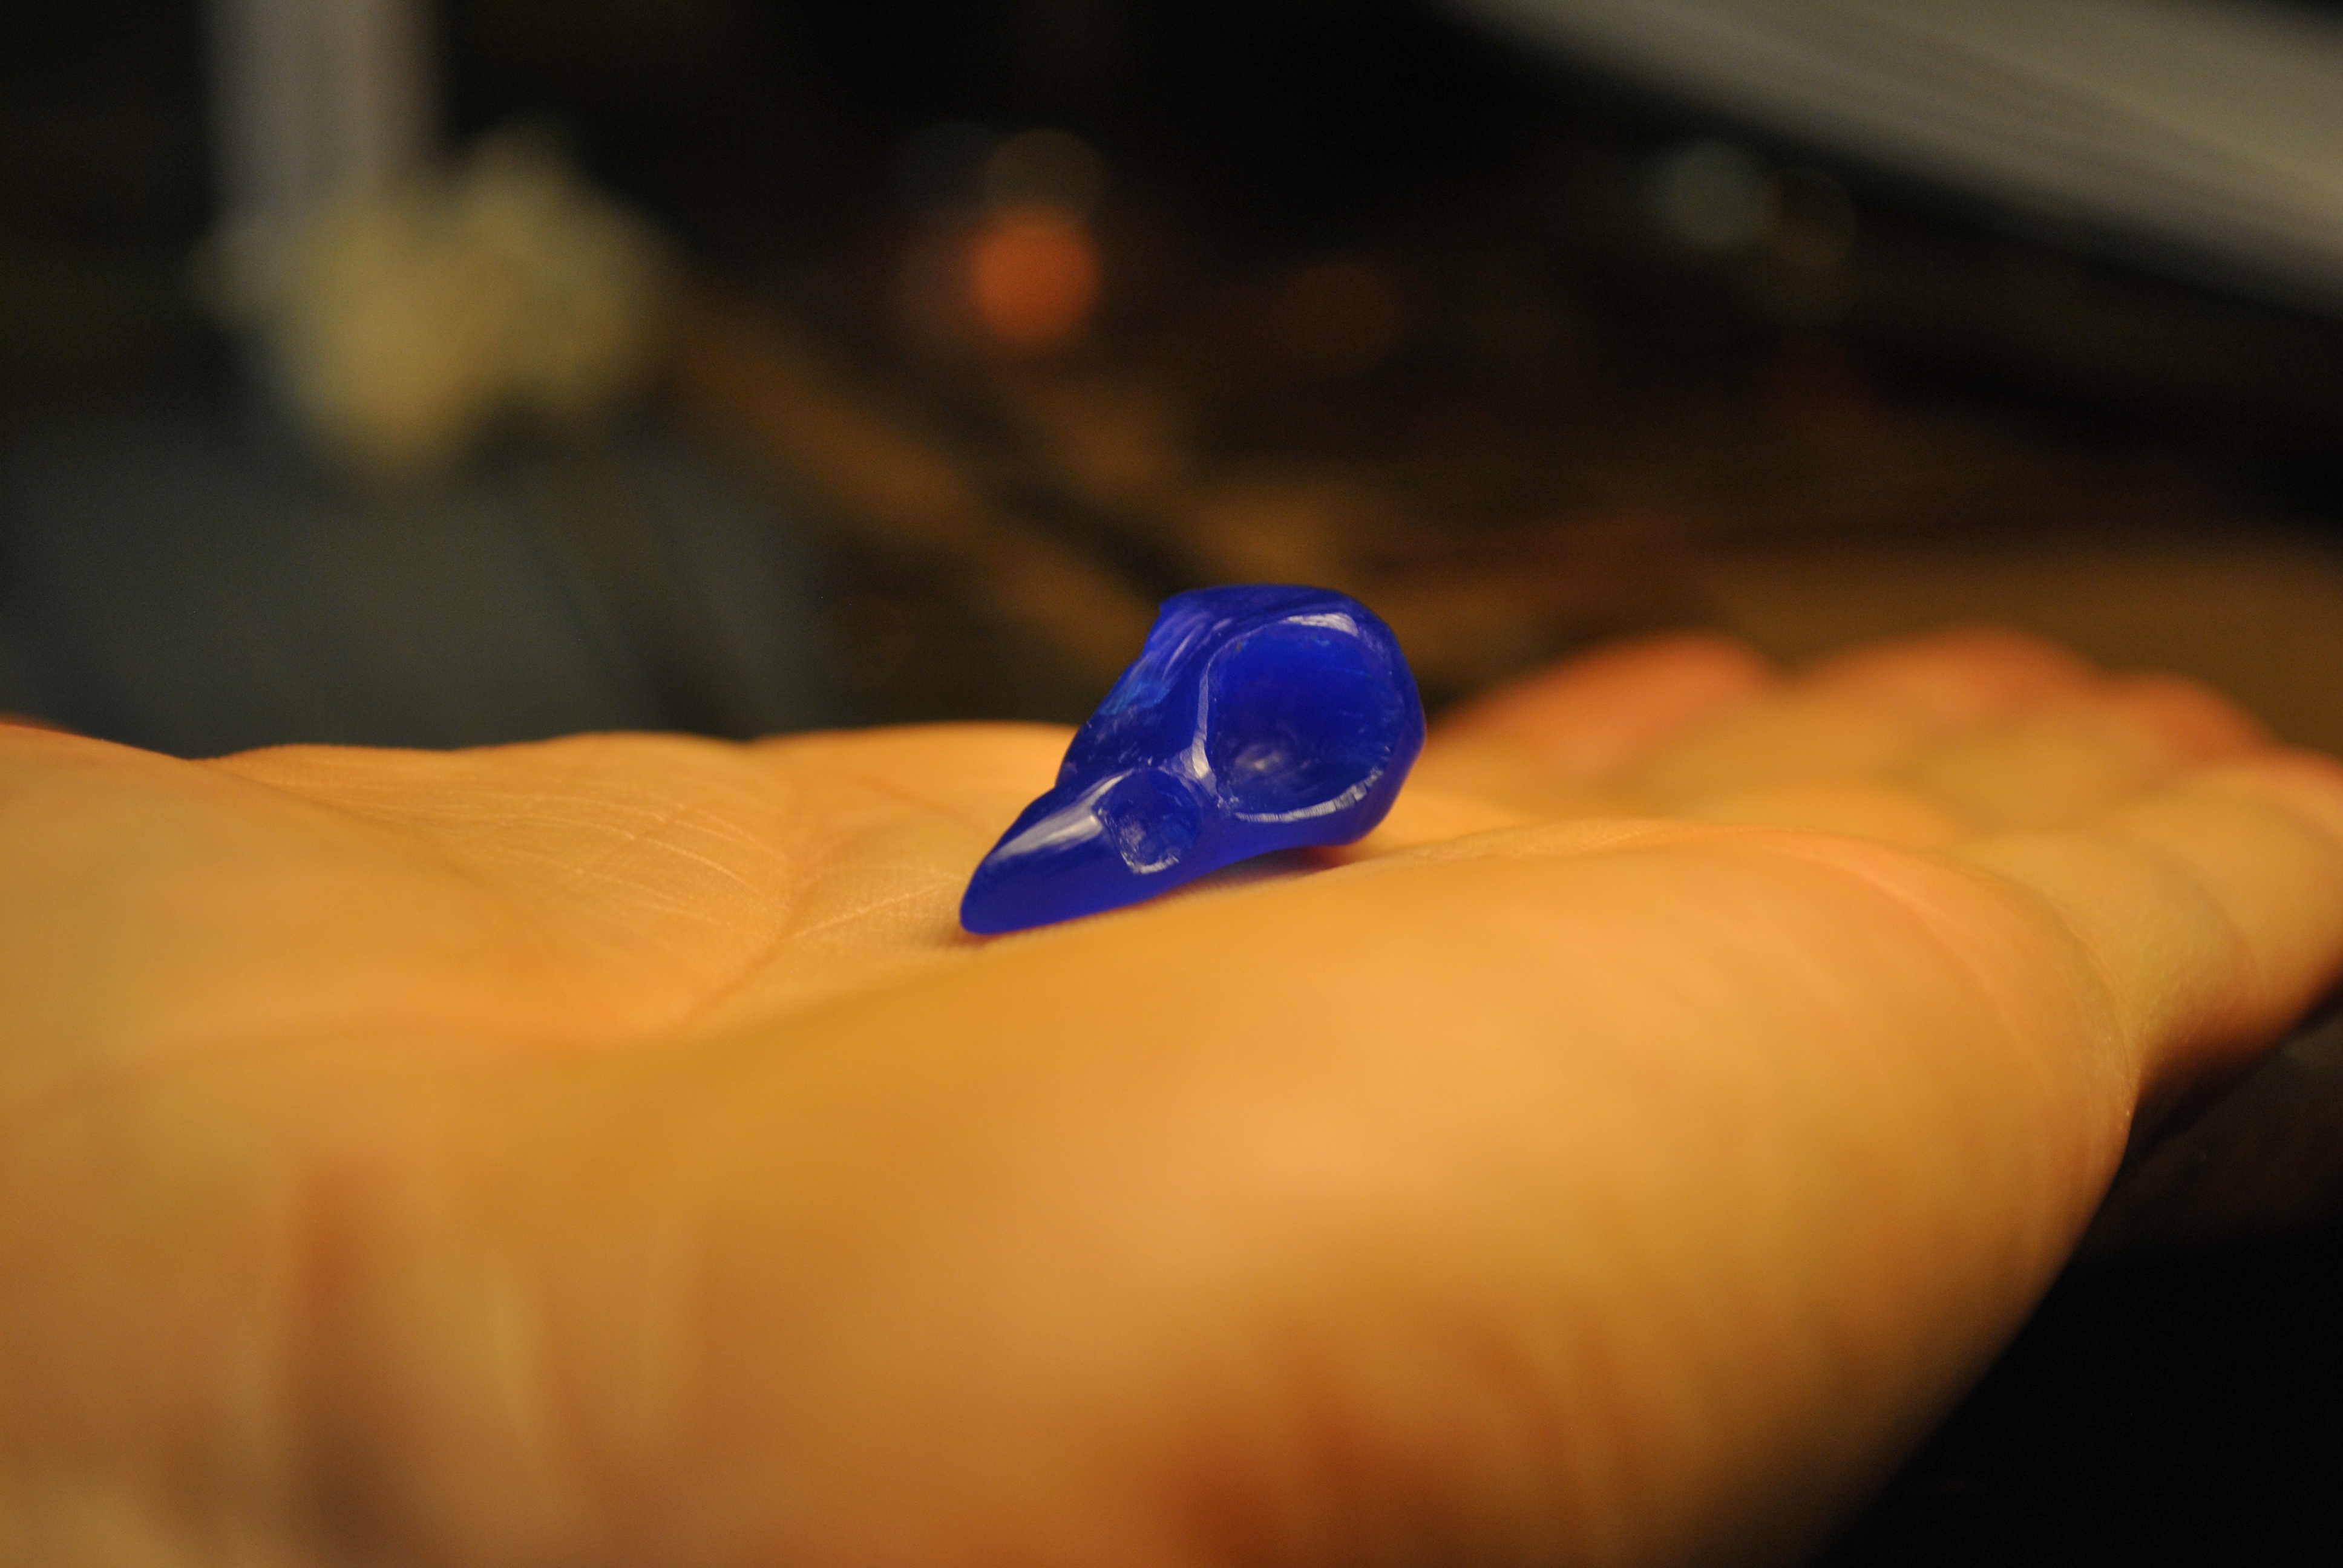
Last week I carved a wax crow skull, or at least sorta one (I am no sculptor). Now I want to cast it in Pewter.
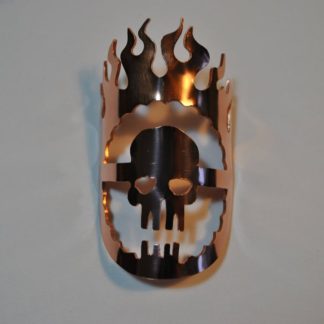
(Update: See some of the finished products I made from this here)
Before I can do that though I have to make a mold.
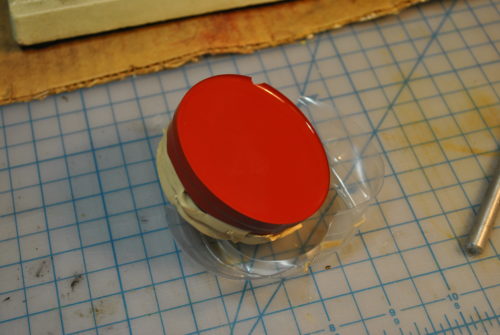
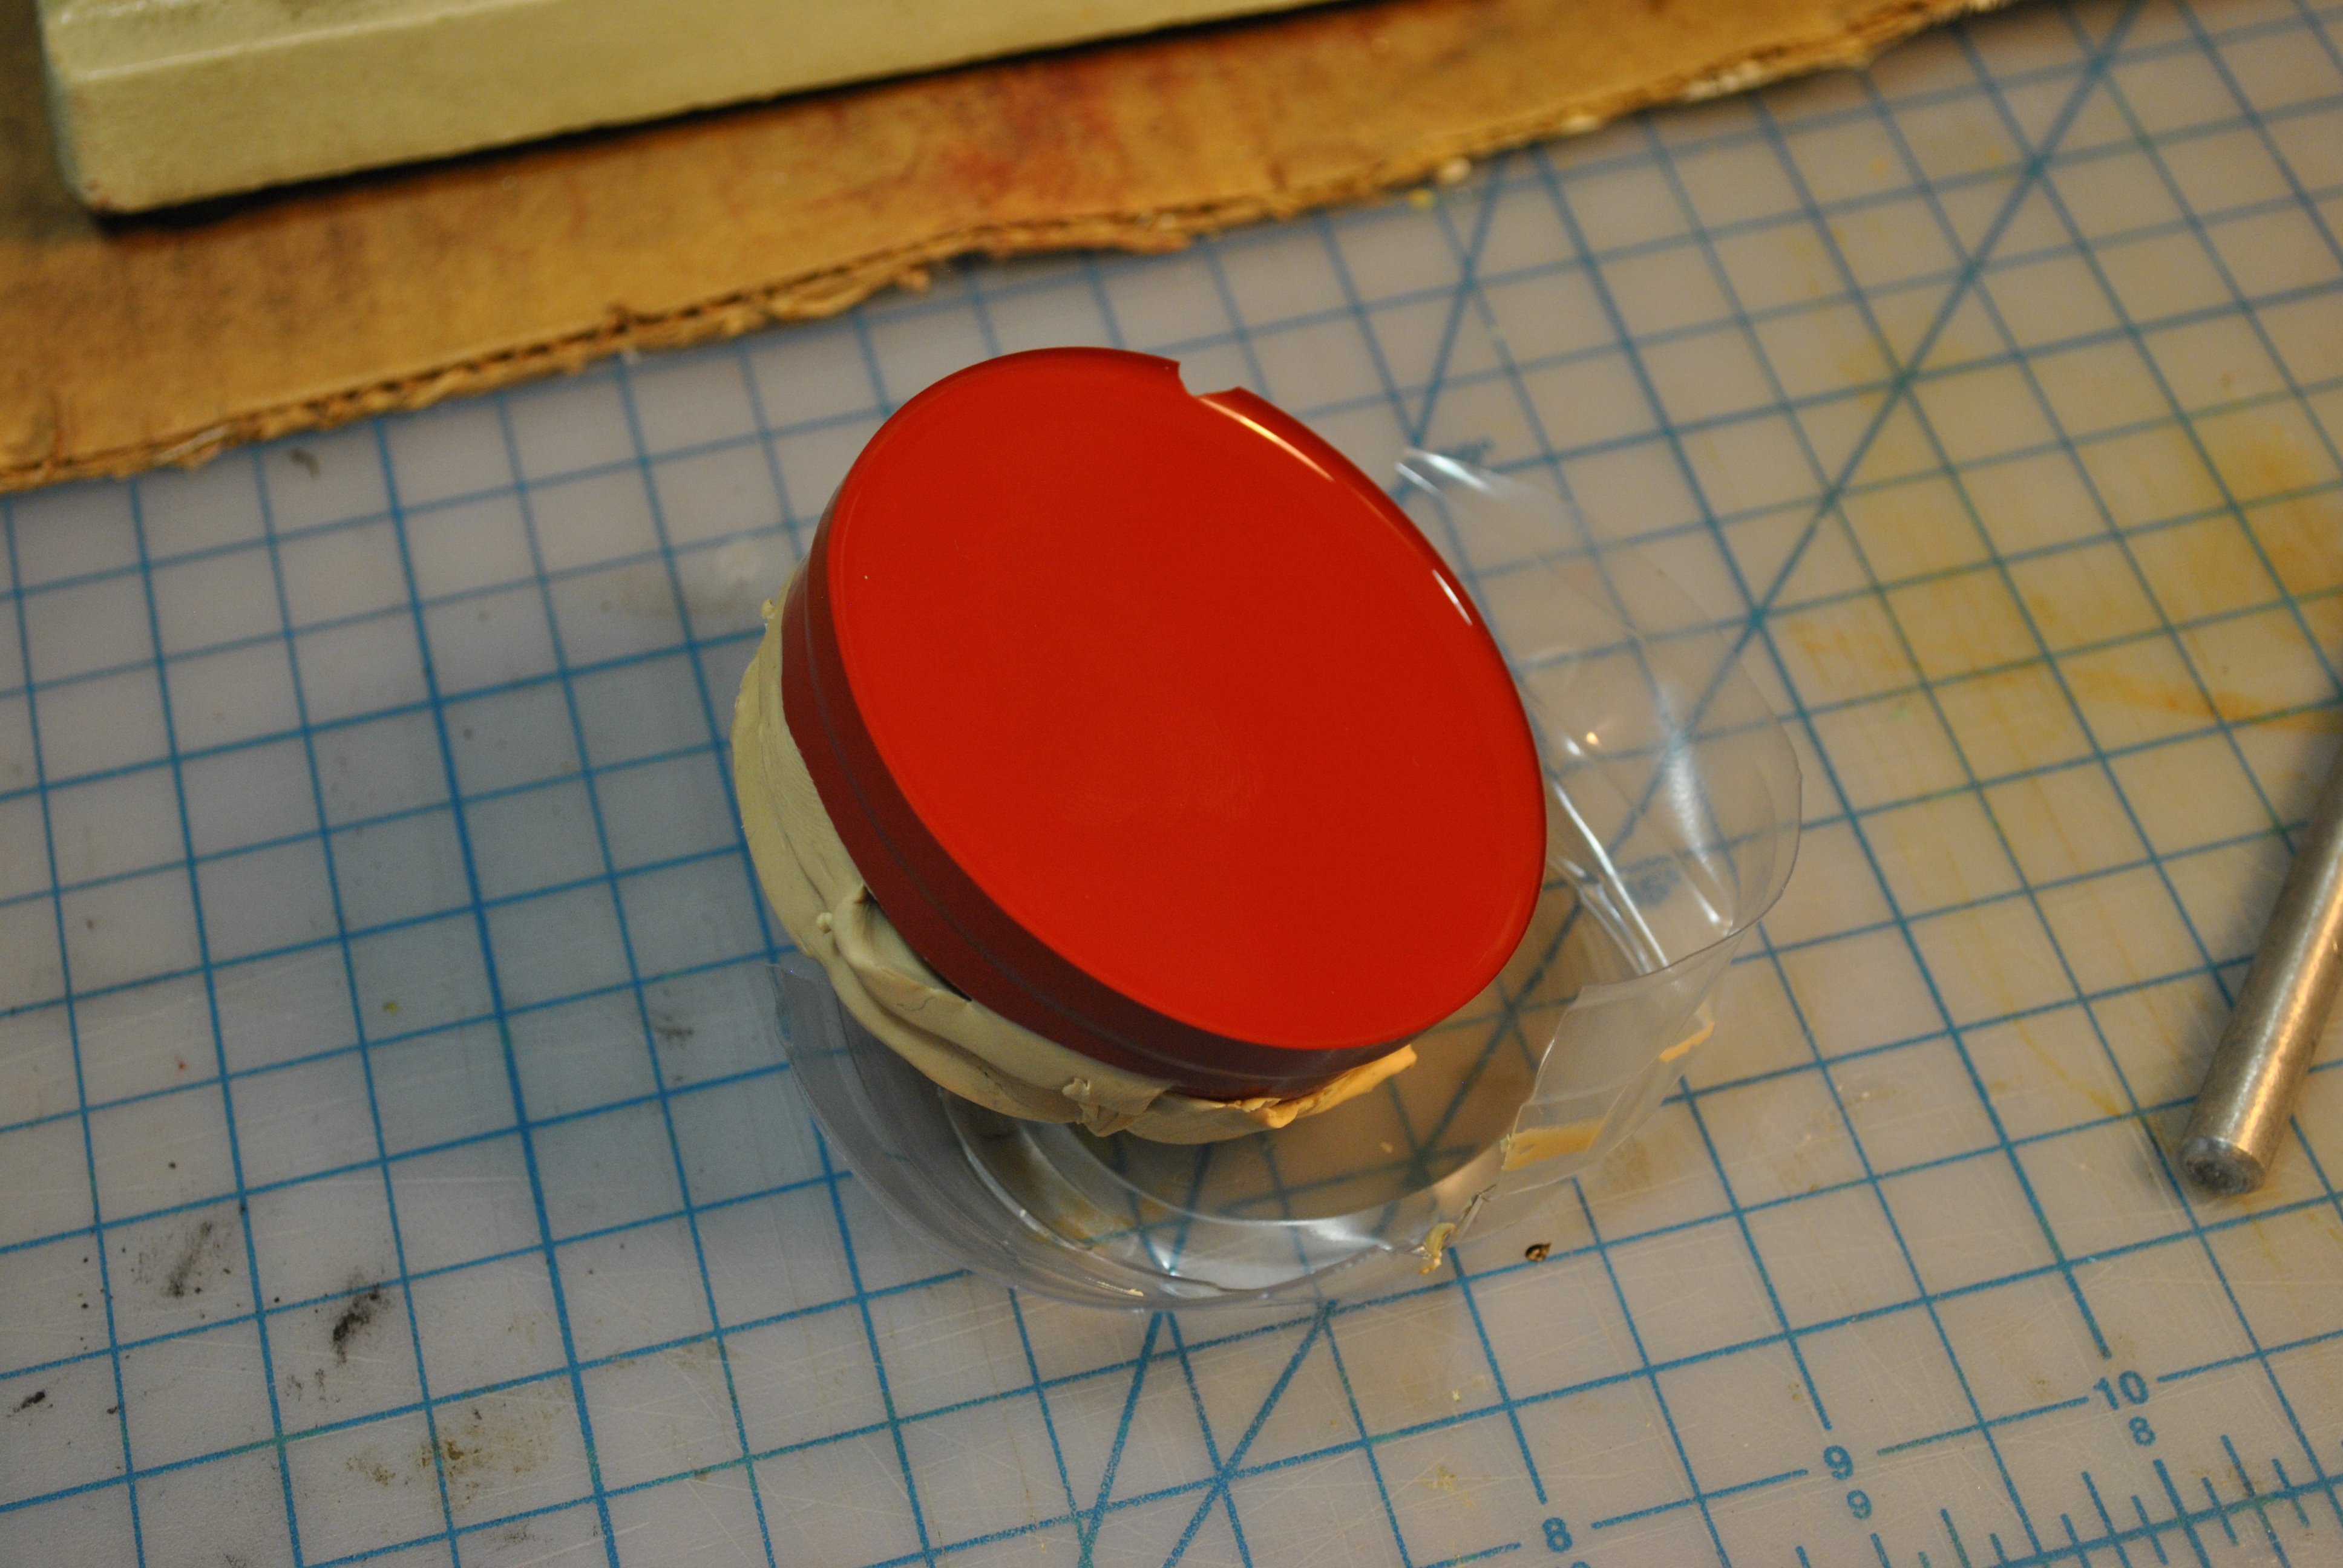
First I got a plastic cup and cut the bottom off.
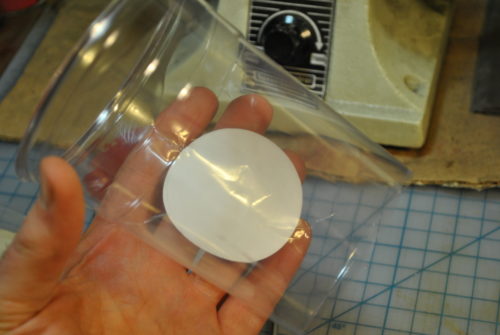
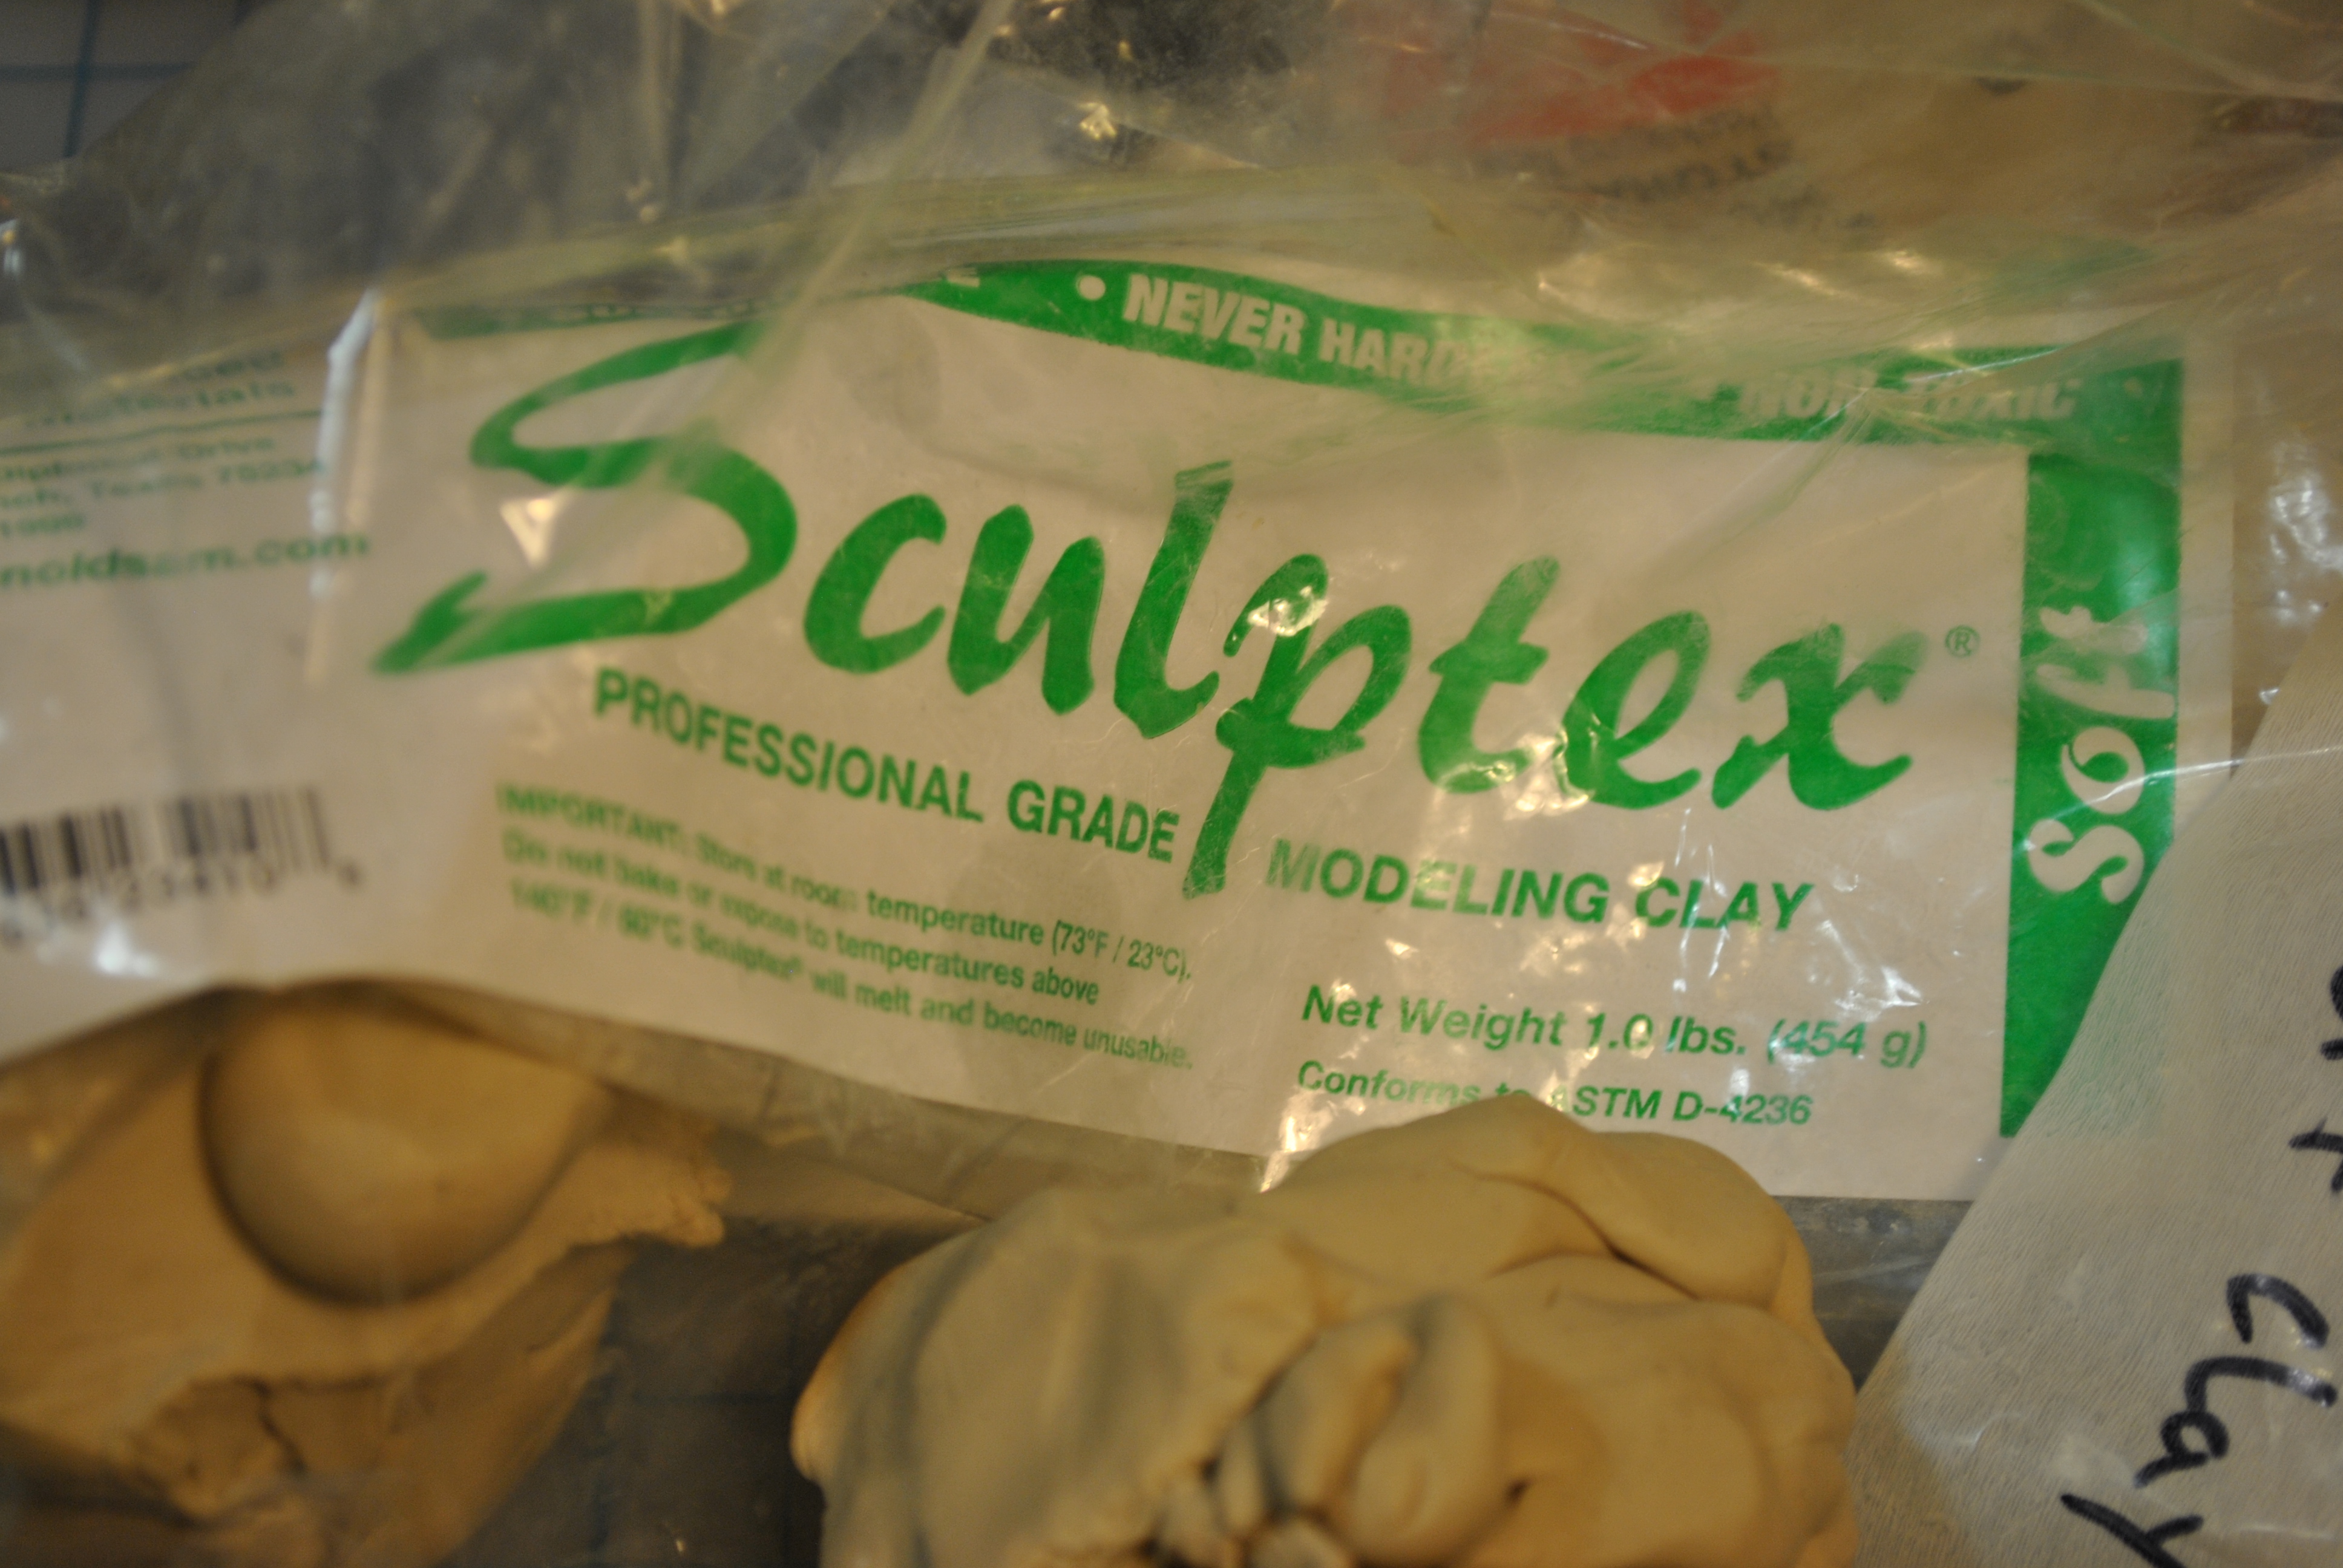
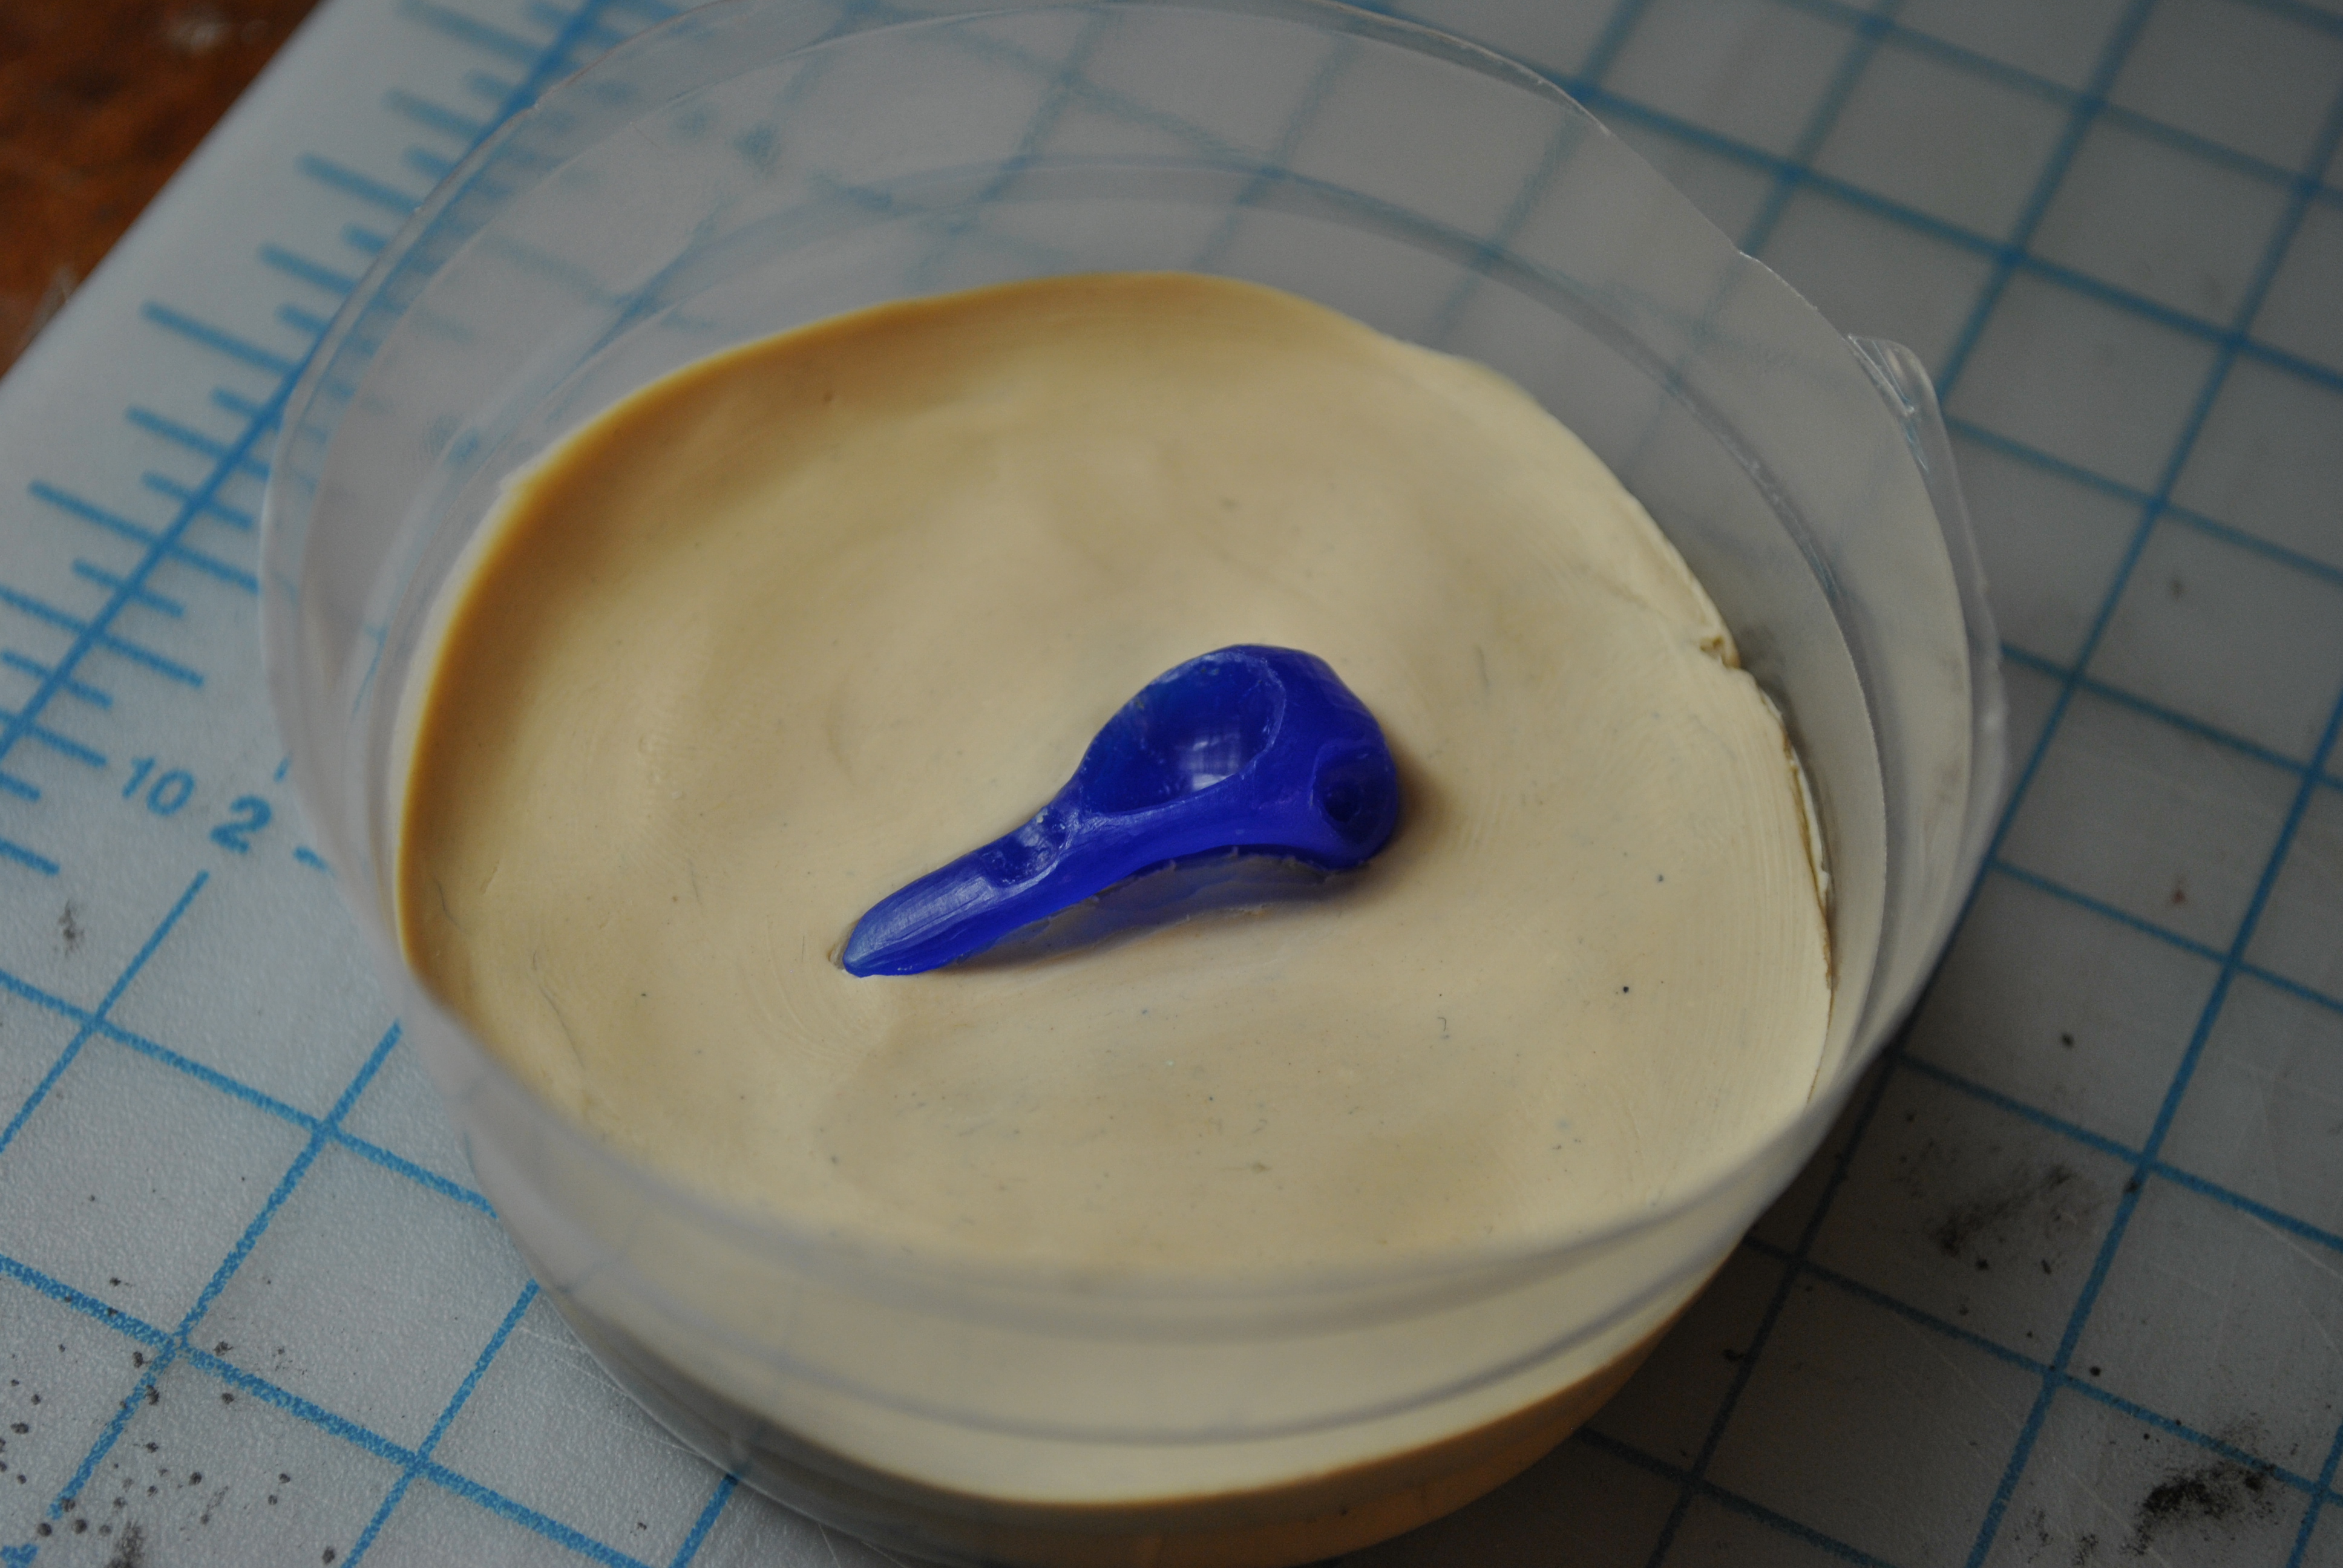
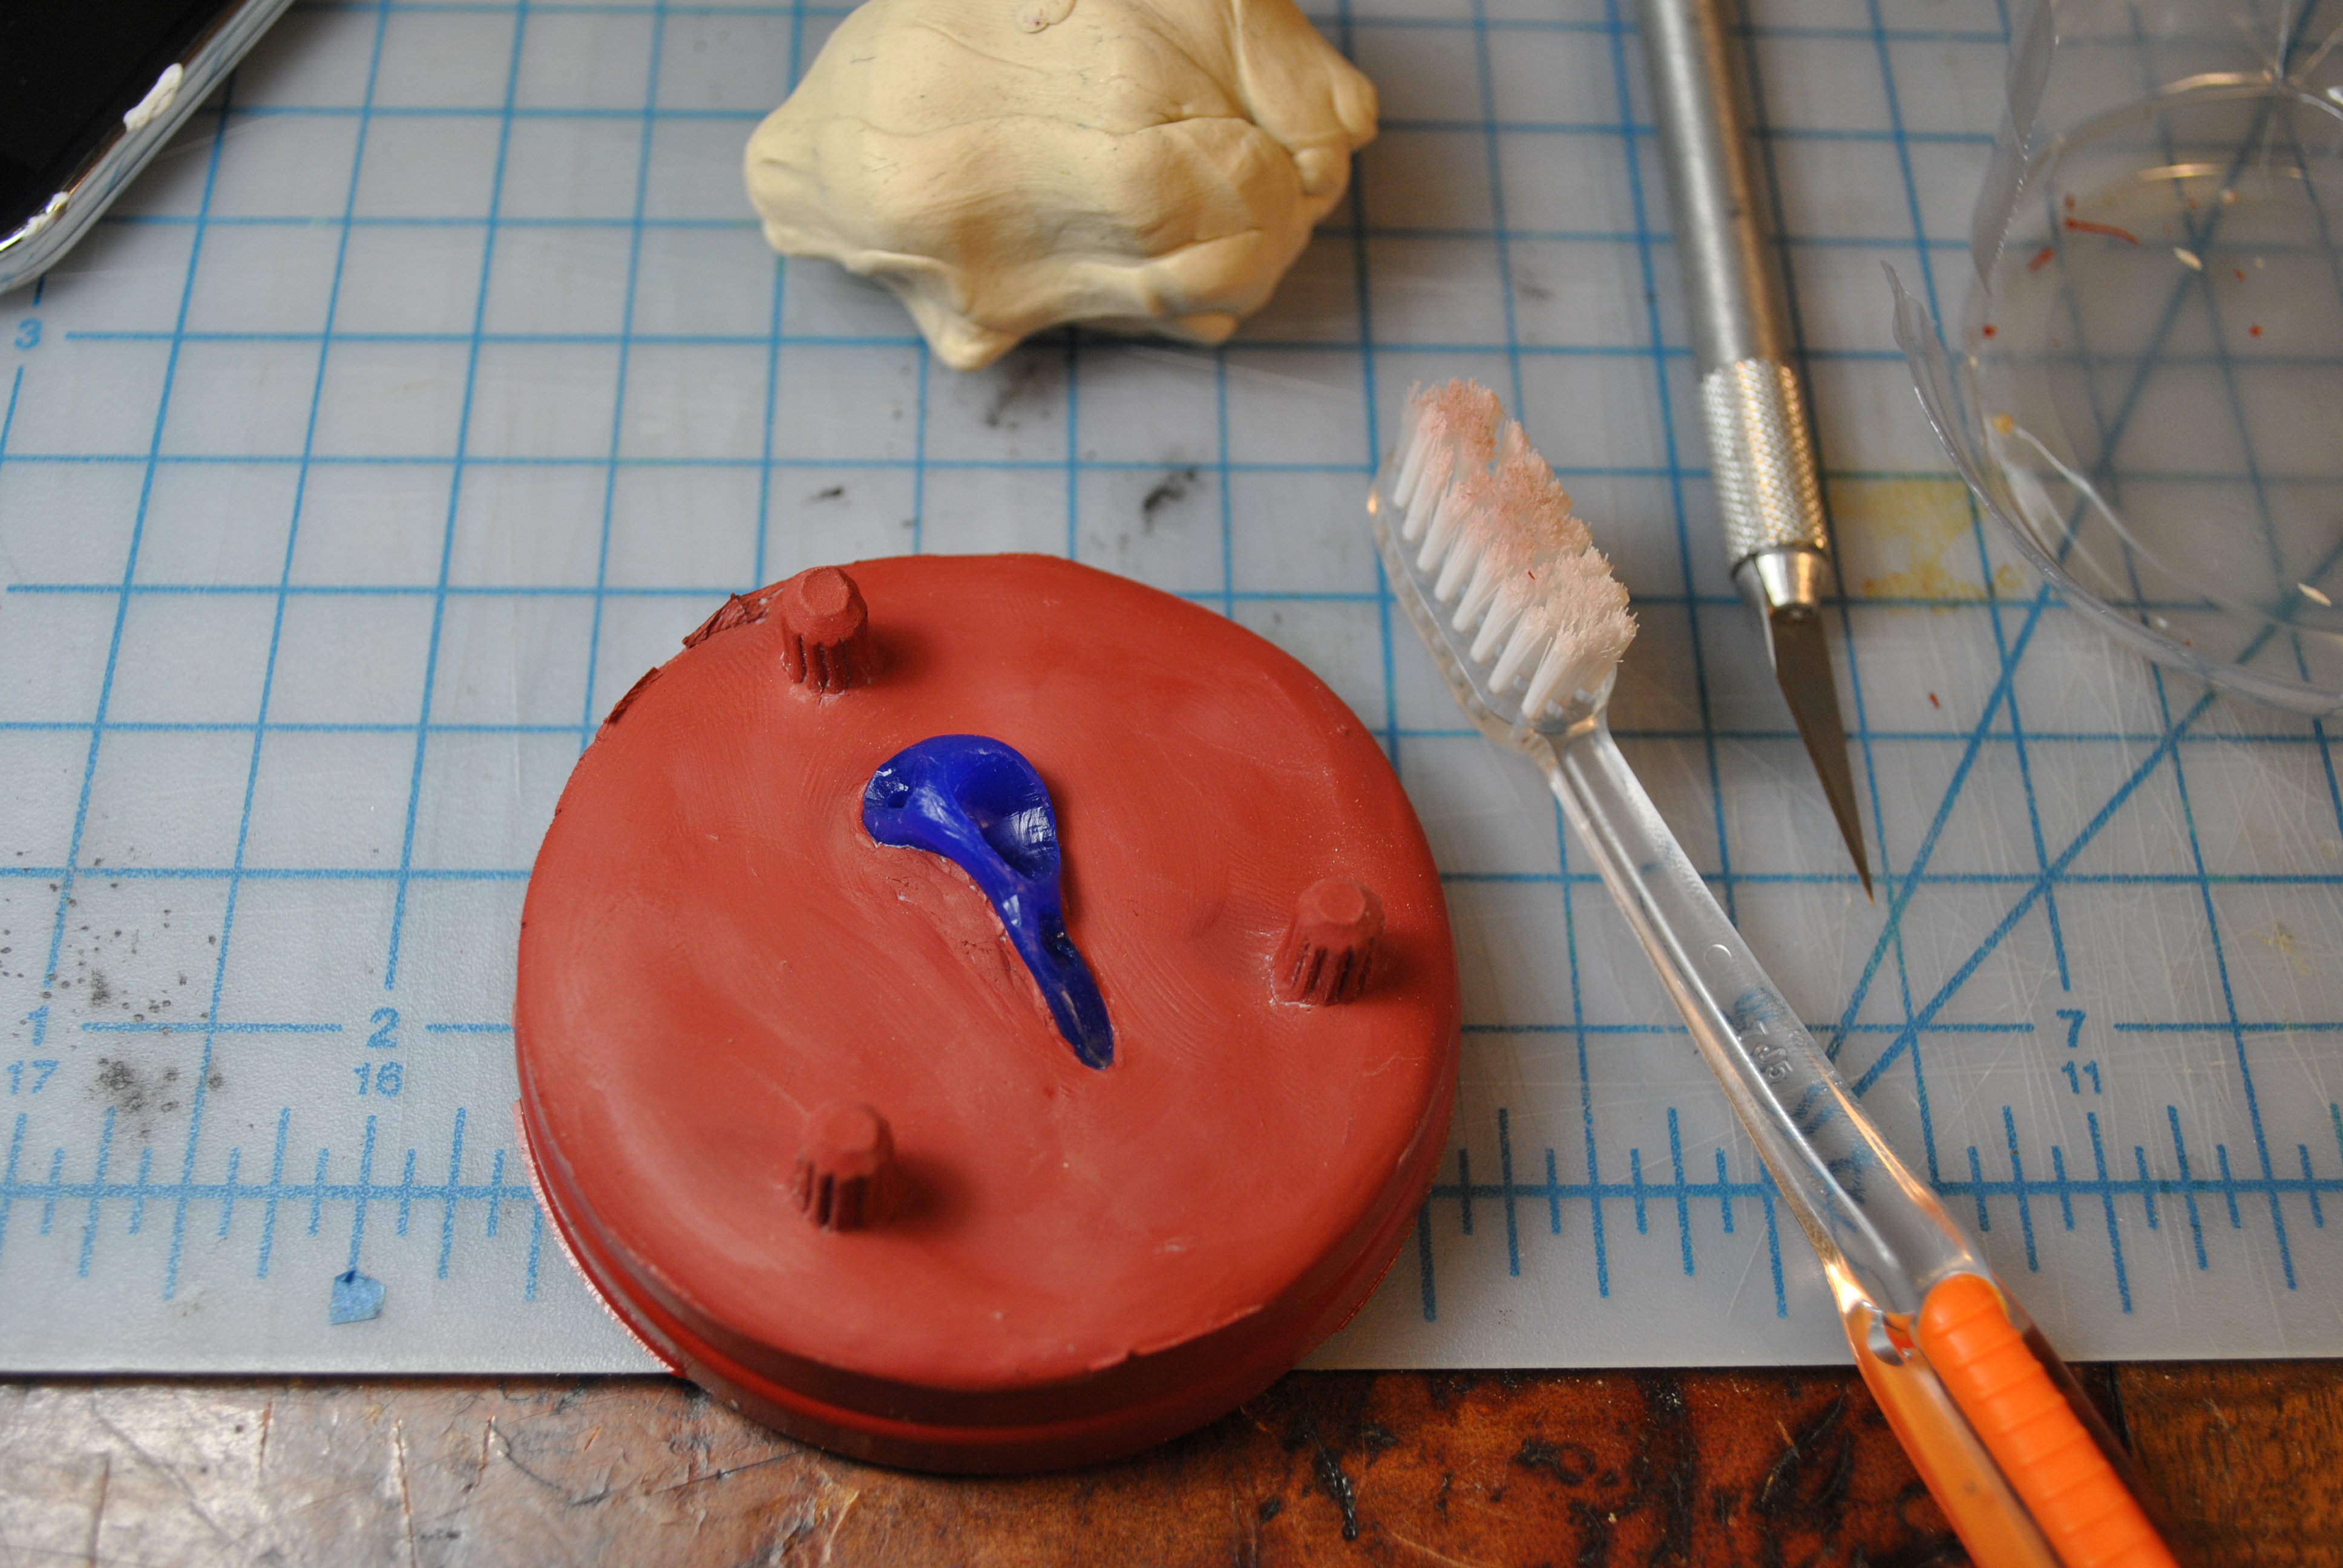
Then use some molding clay to fill the bottom.

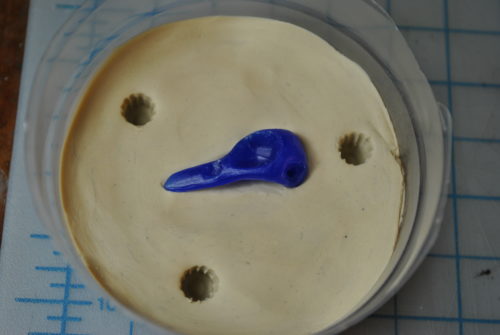
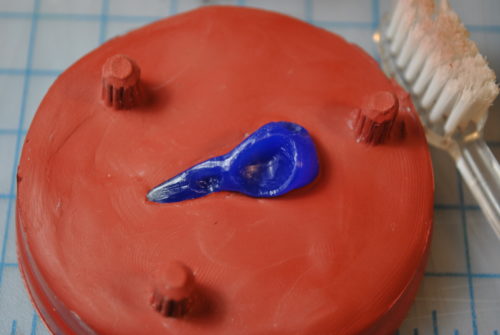
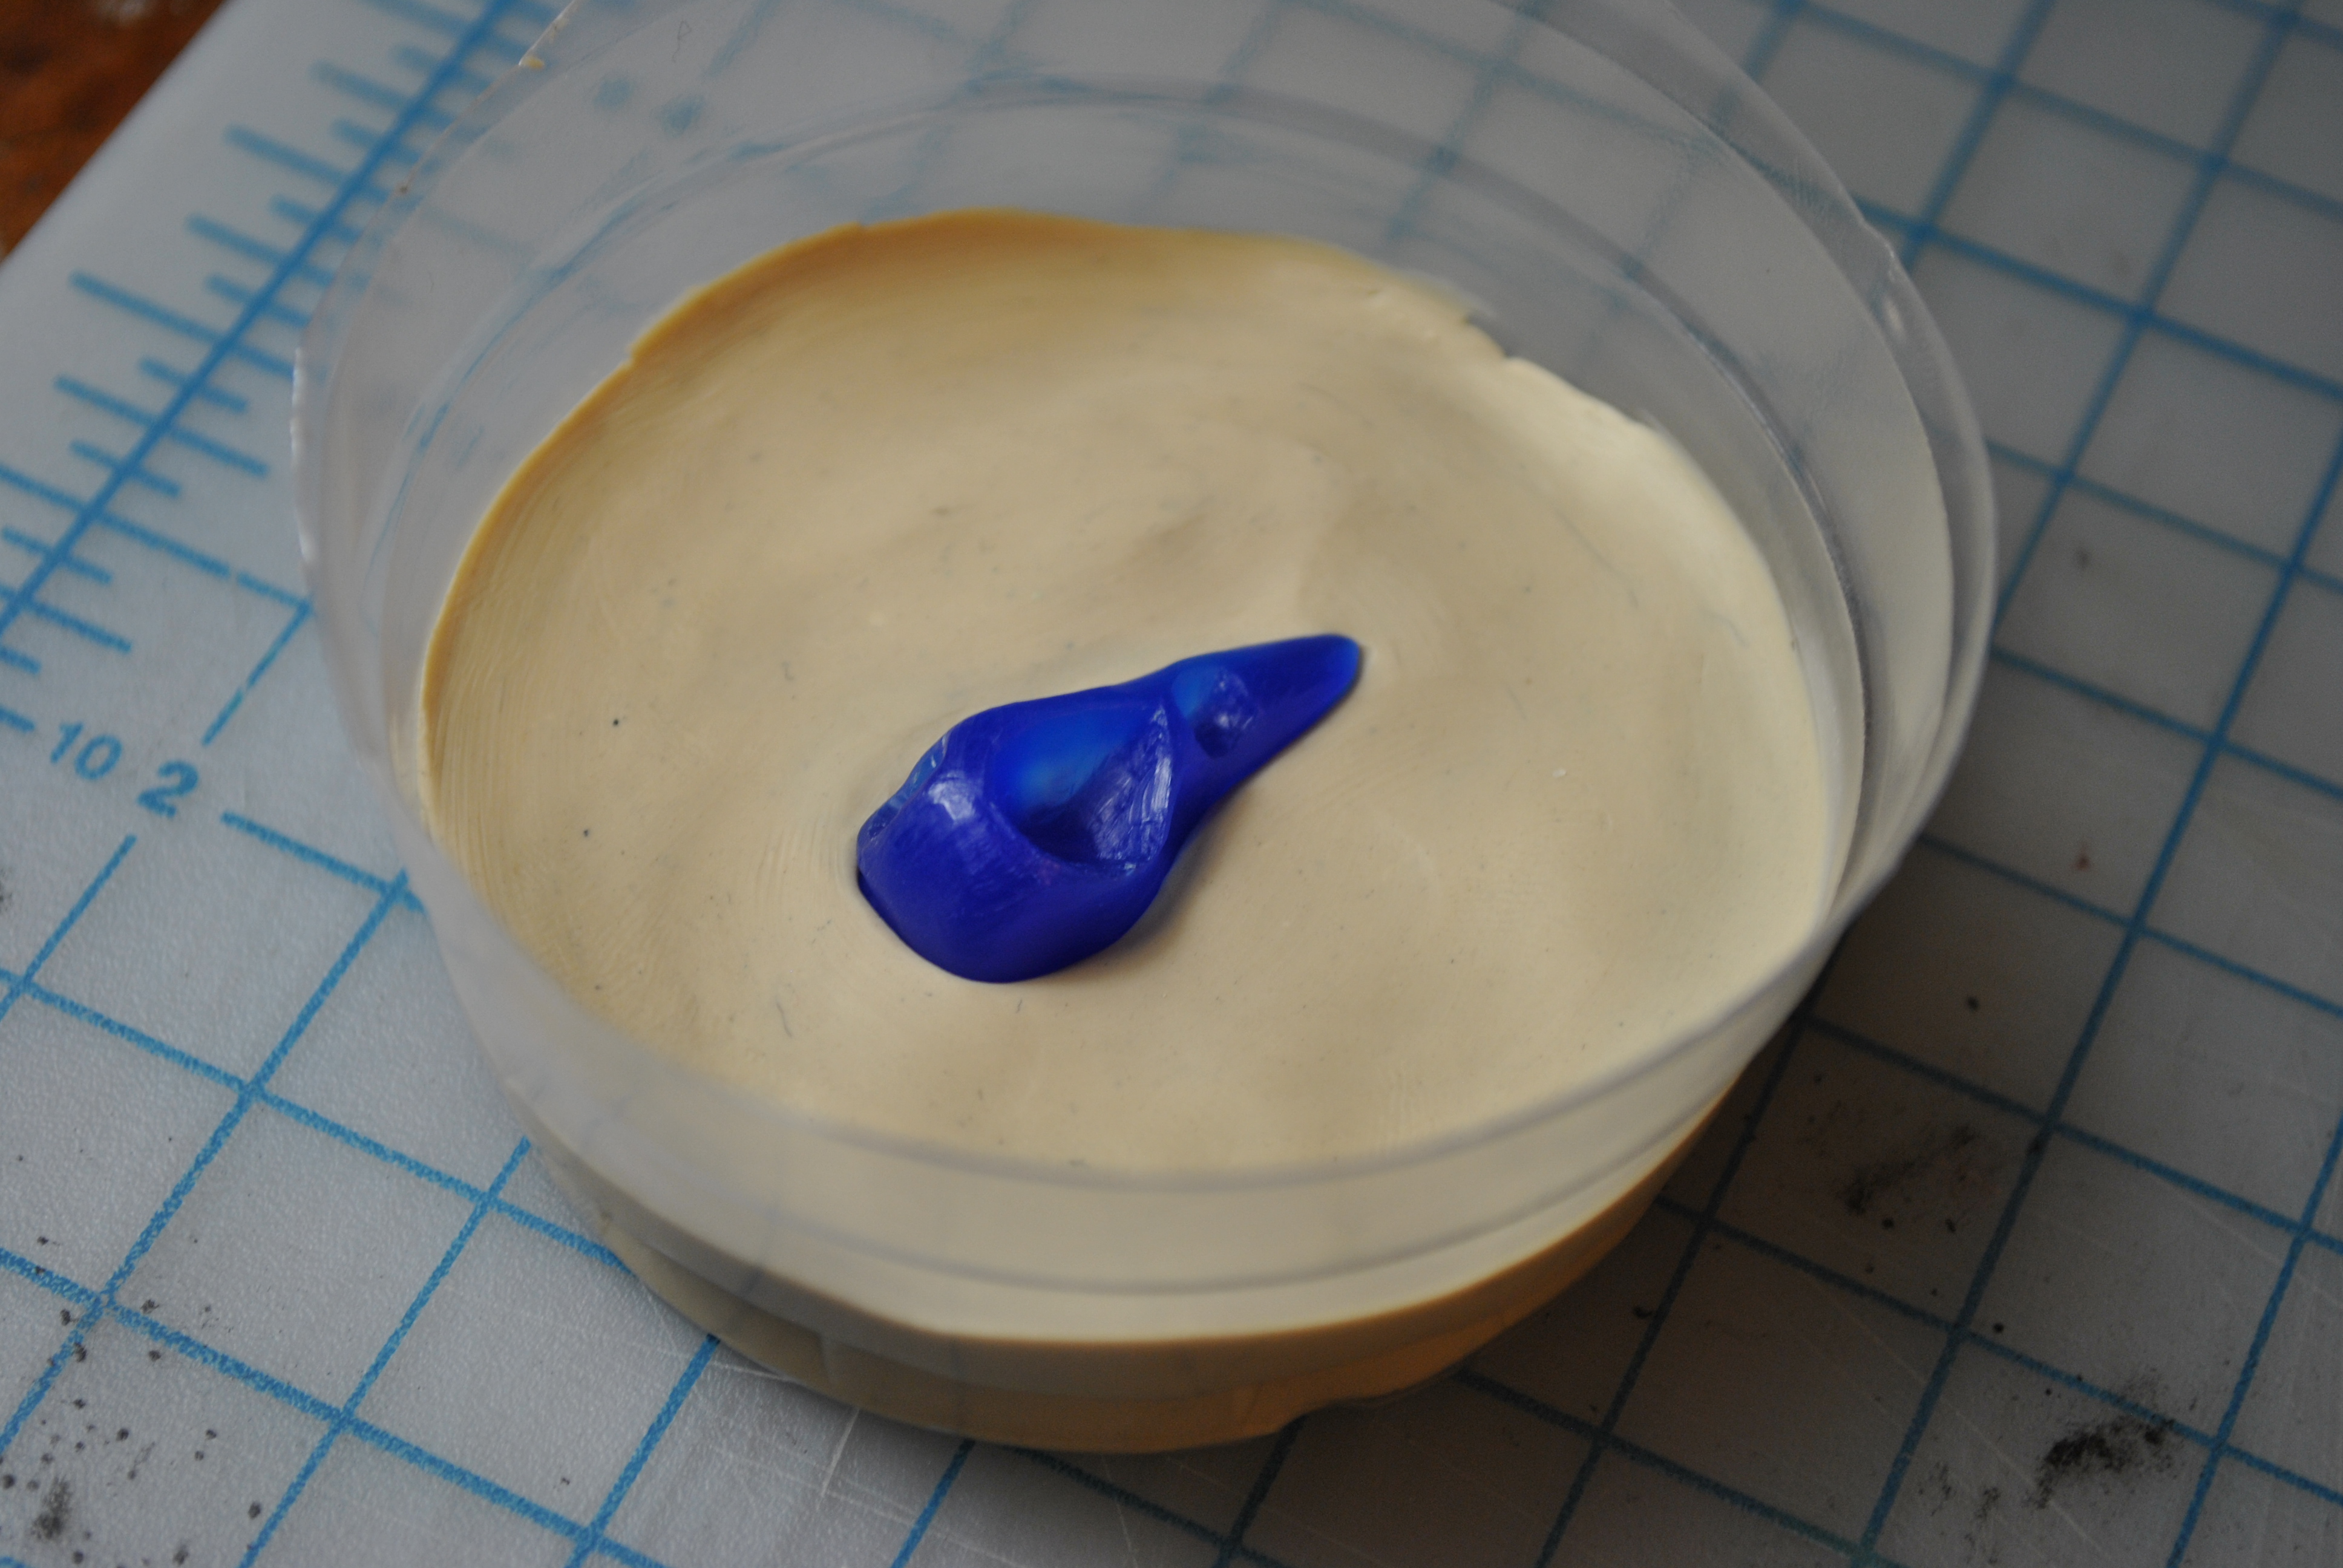
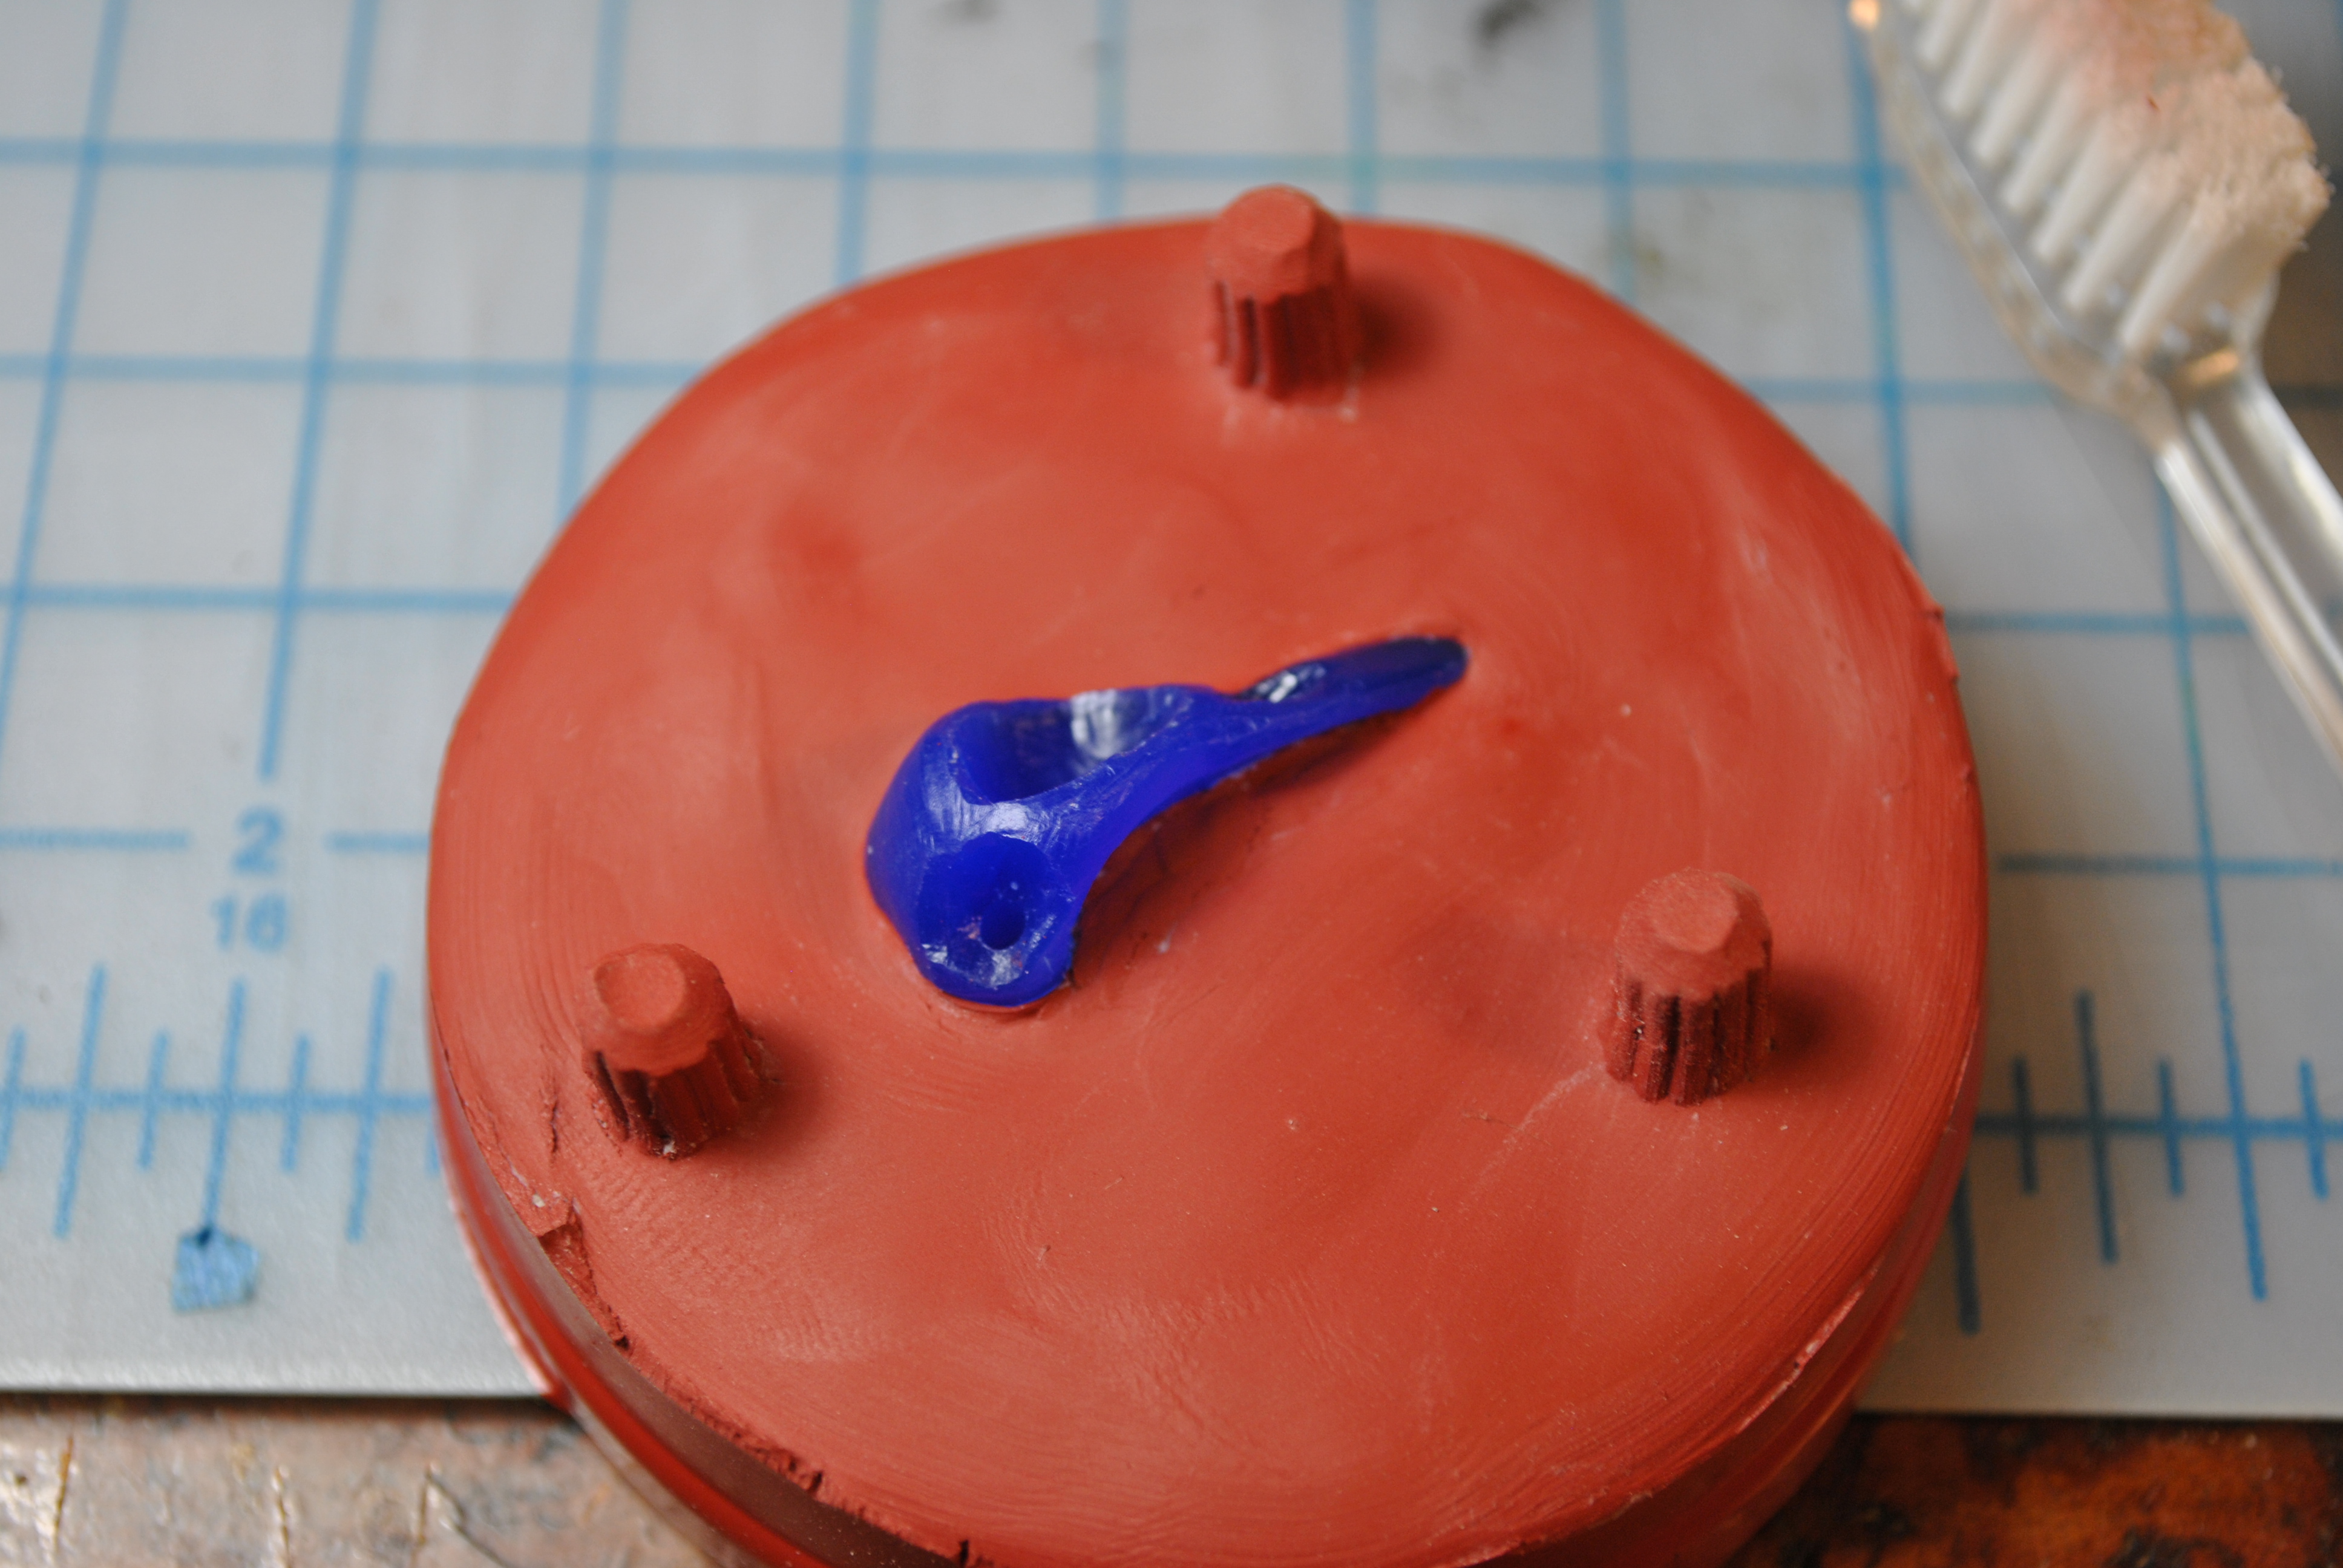
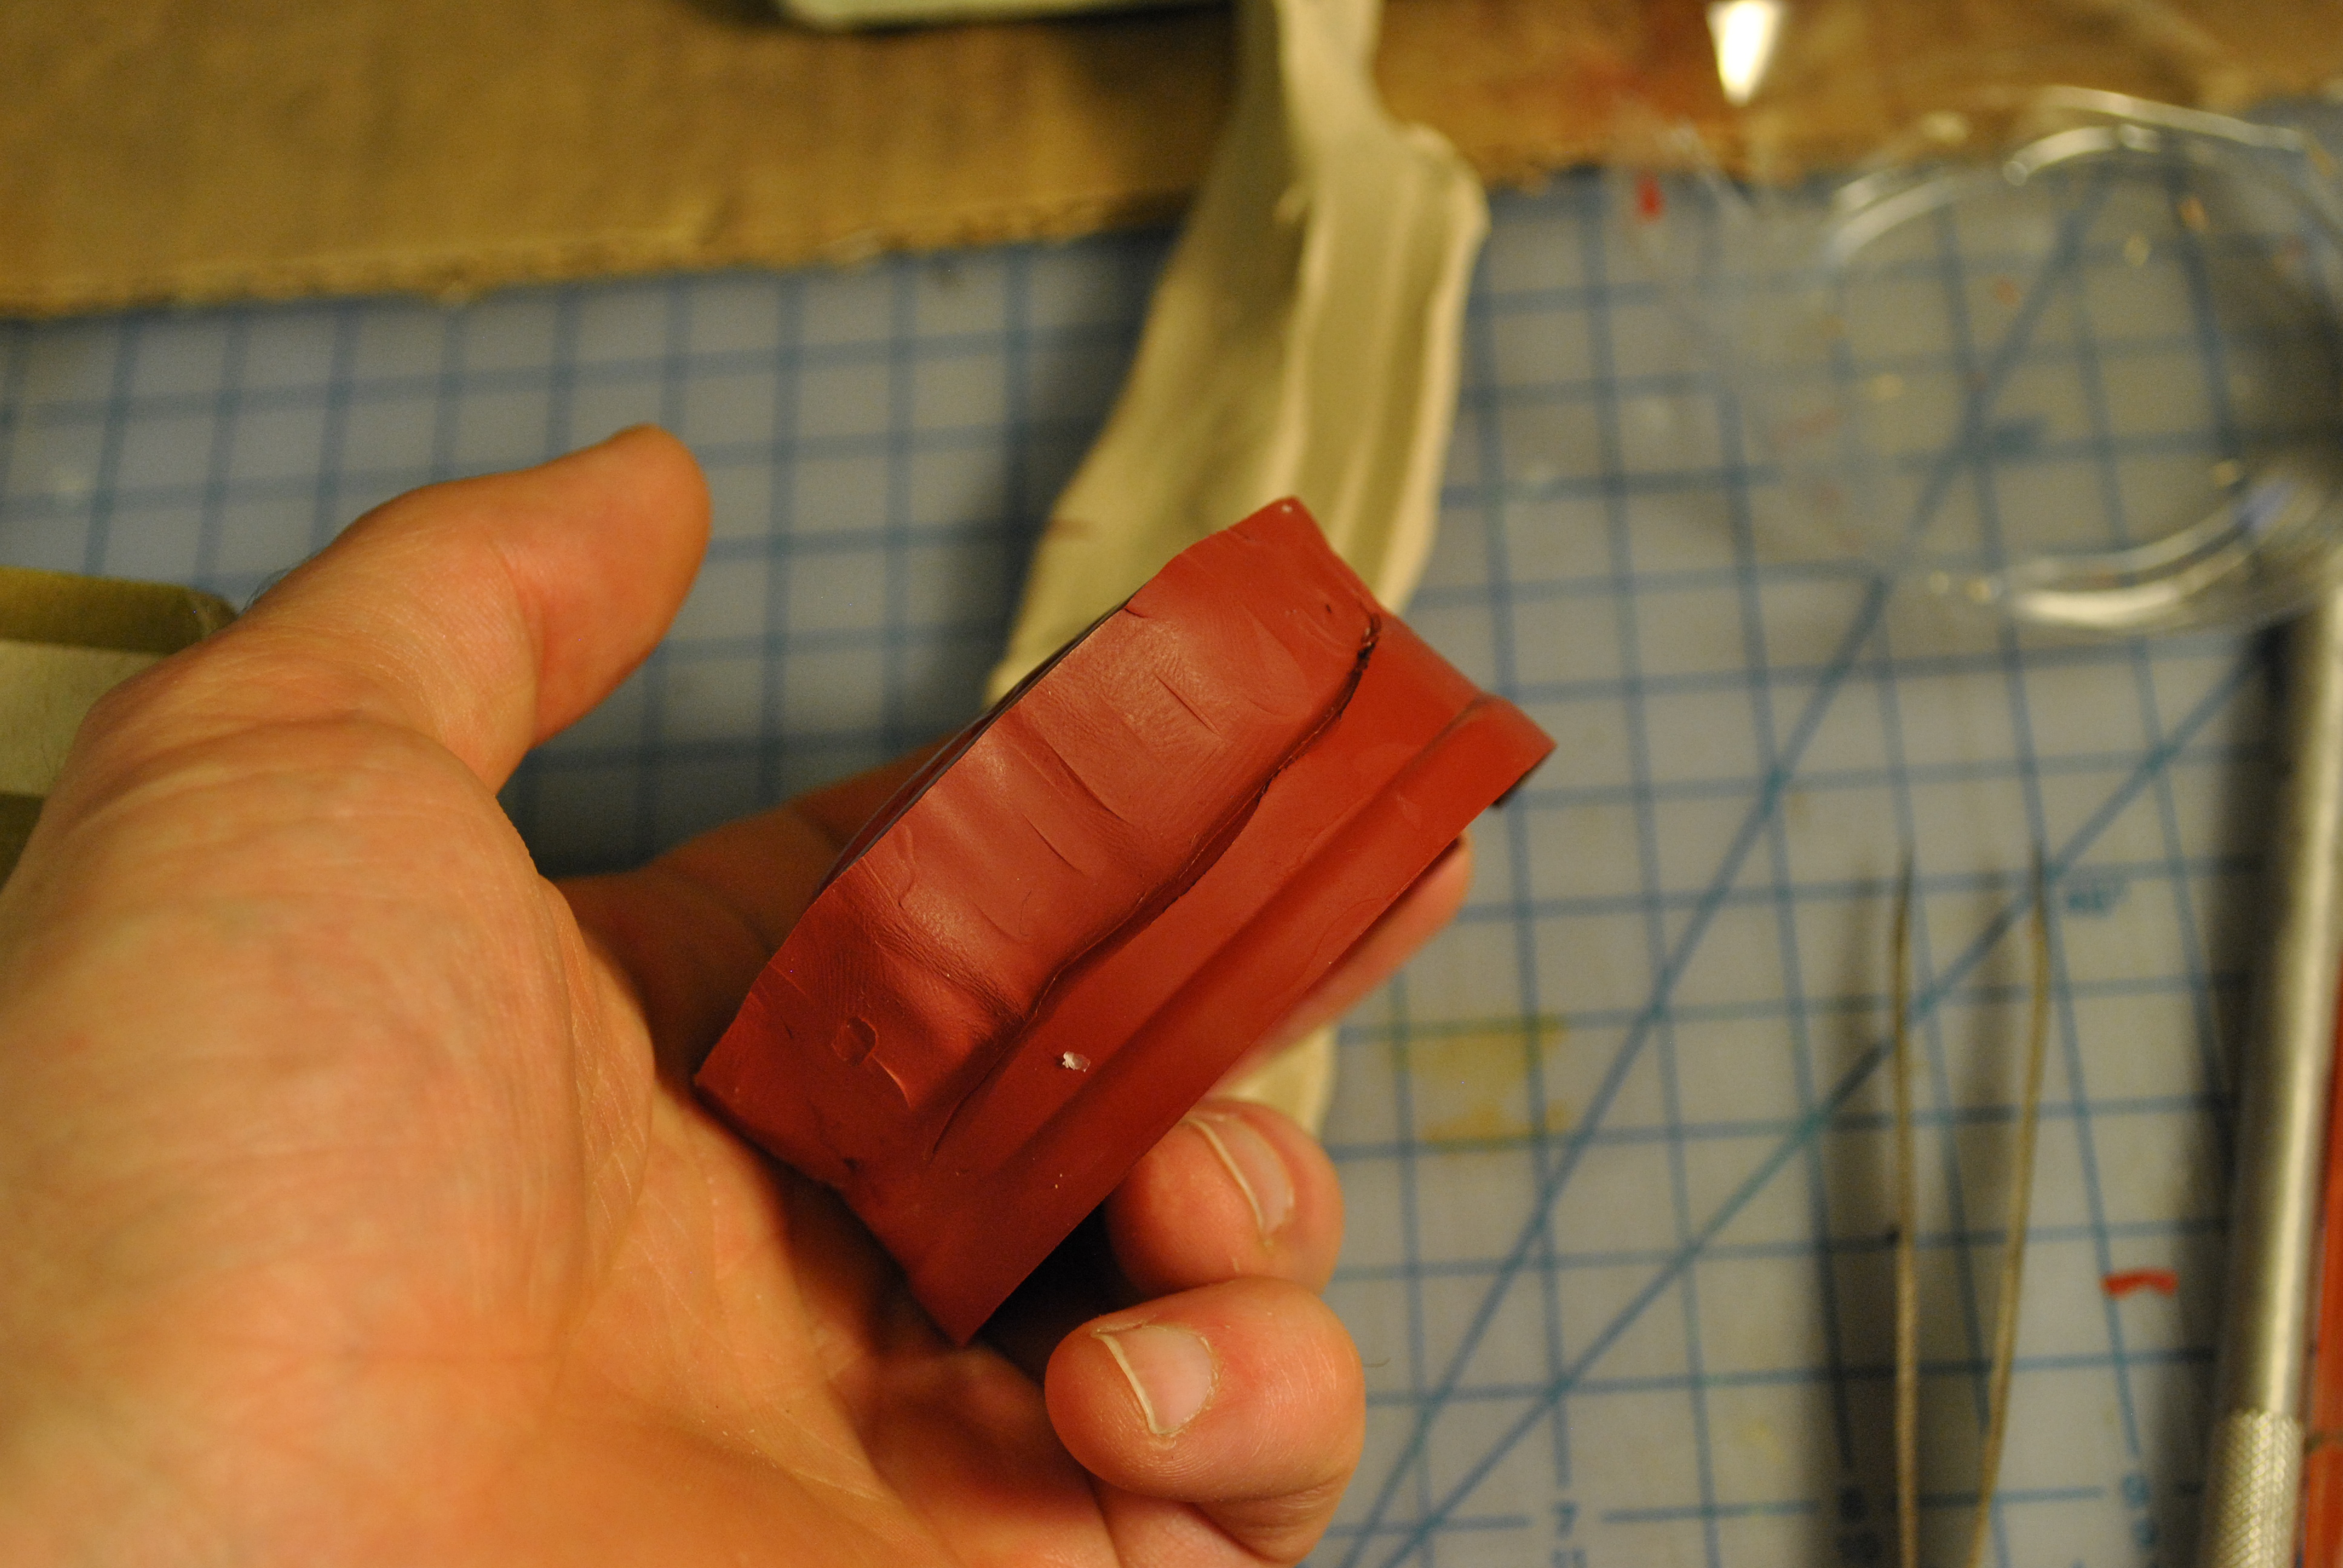
I then took the carving I made and carefully pressed it into the clay, carefully smoothing it around the model. I think made sure that roughly half the wax was “under the clay.”


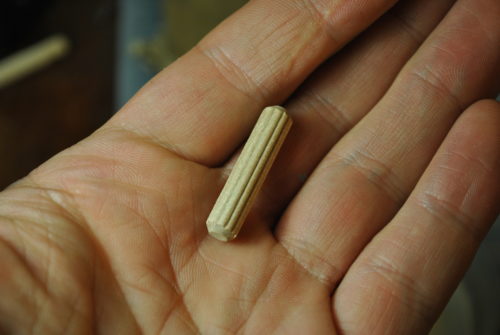
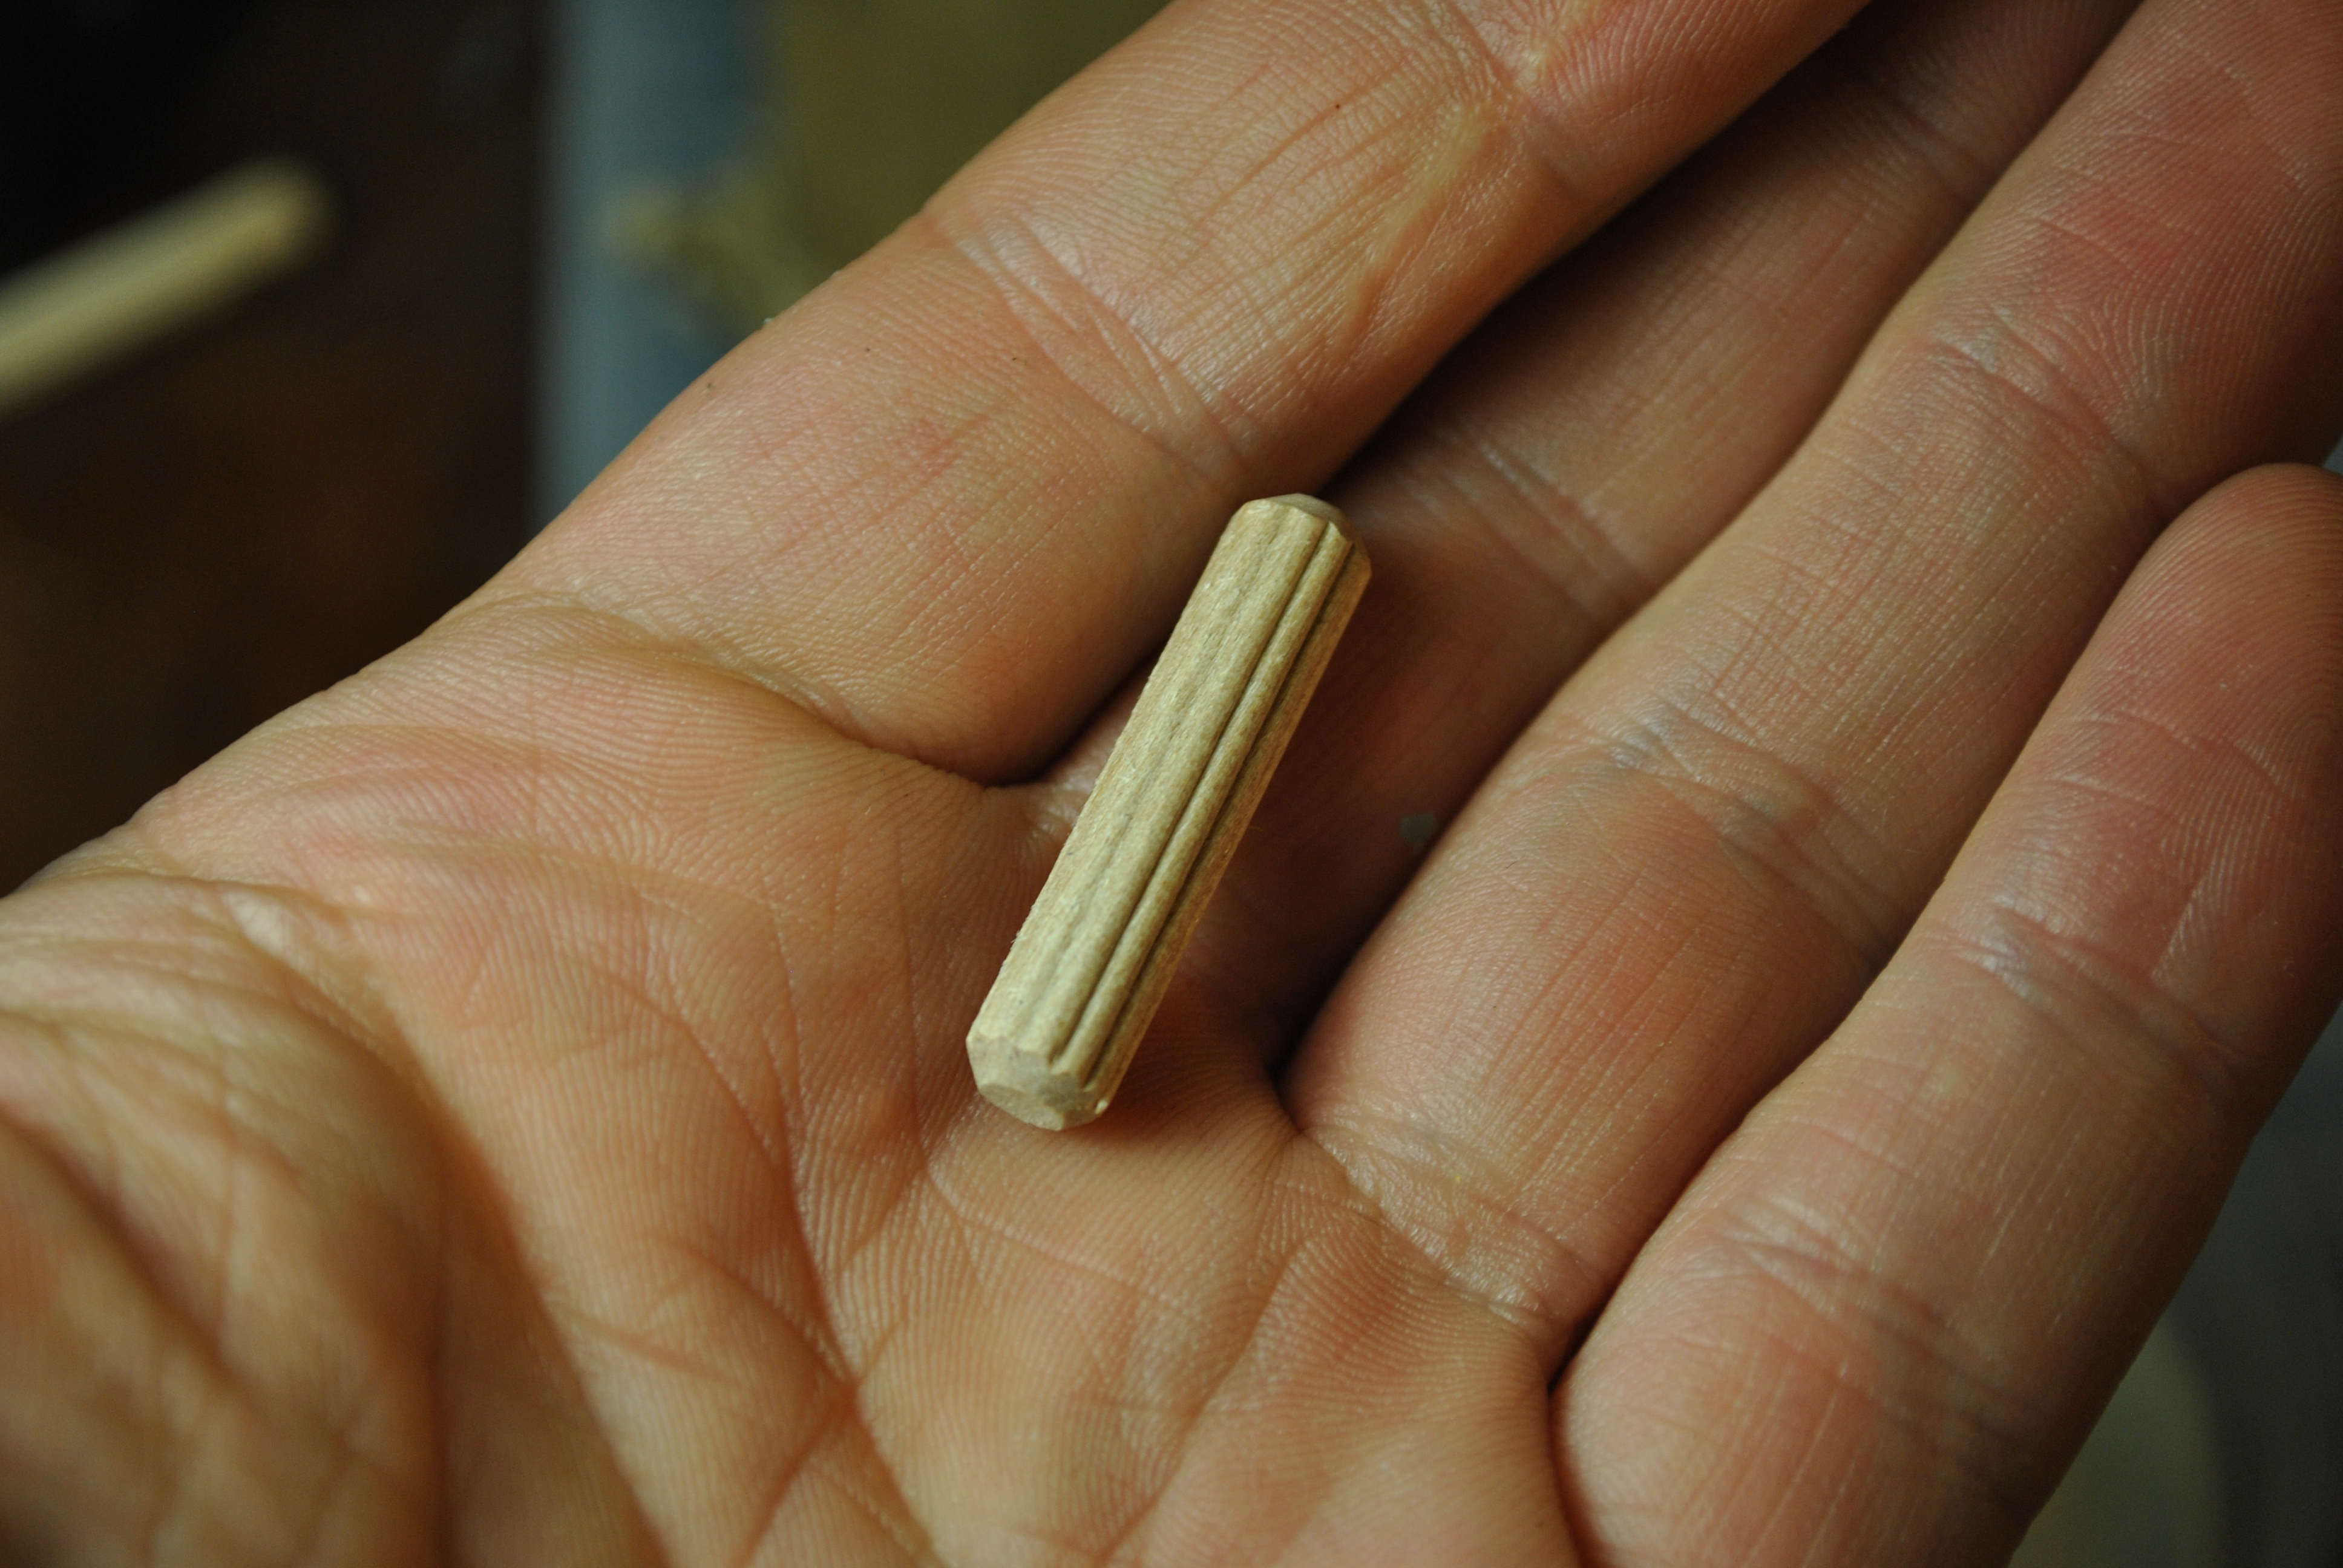
I then took one of those little wood things that come in flat pack furniture, and made some distinctive indents into the clay, making sure to leave room on one side for a future sprue. I found 3 to be the ideal number of divots that left room, but also made it so the mold would index.
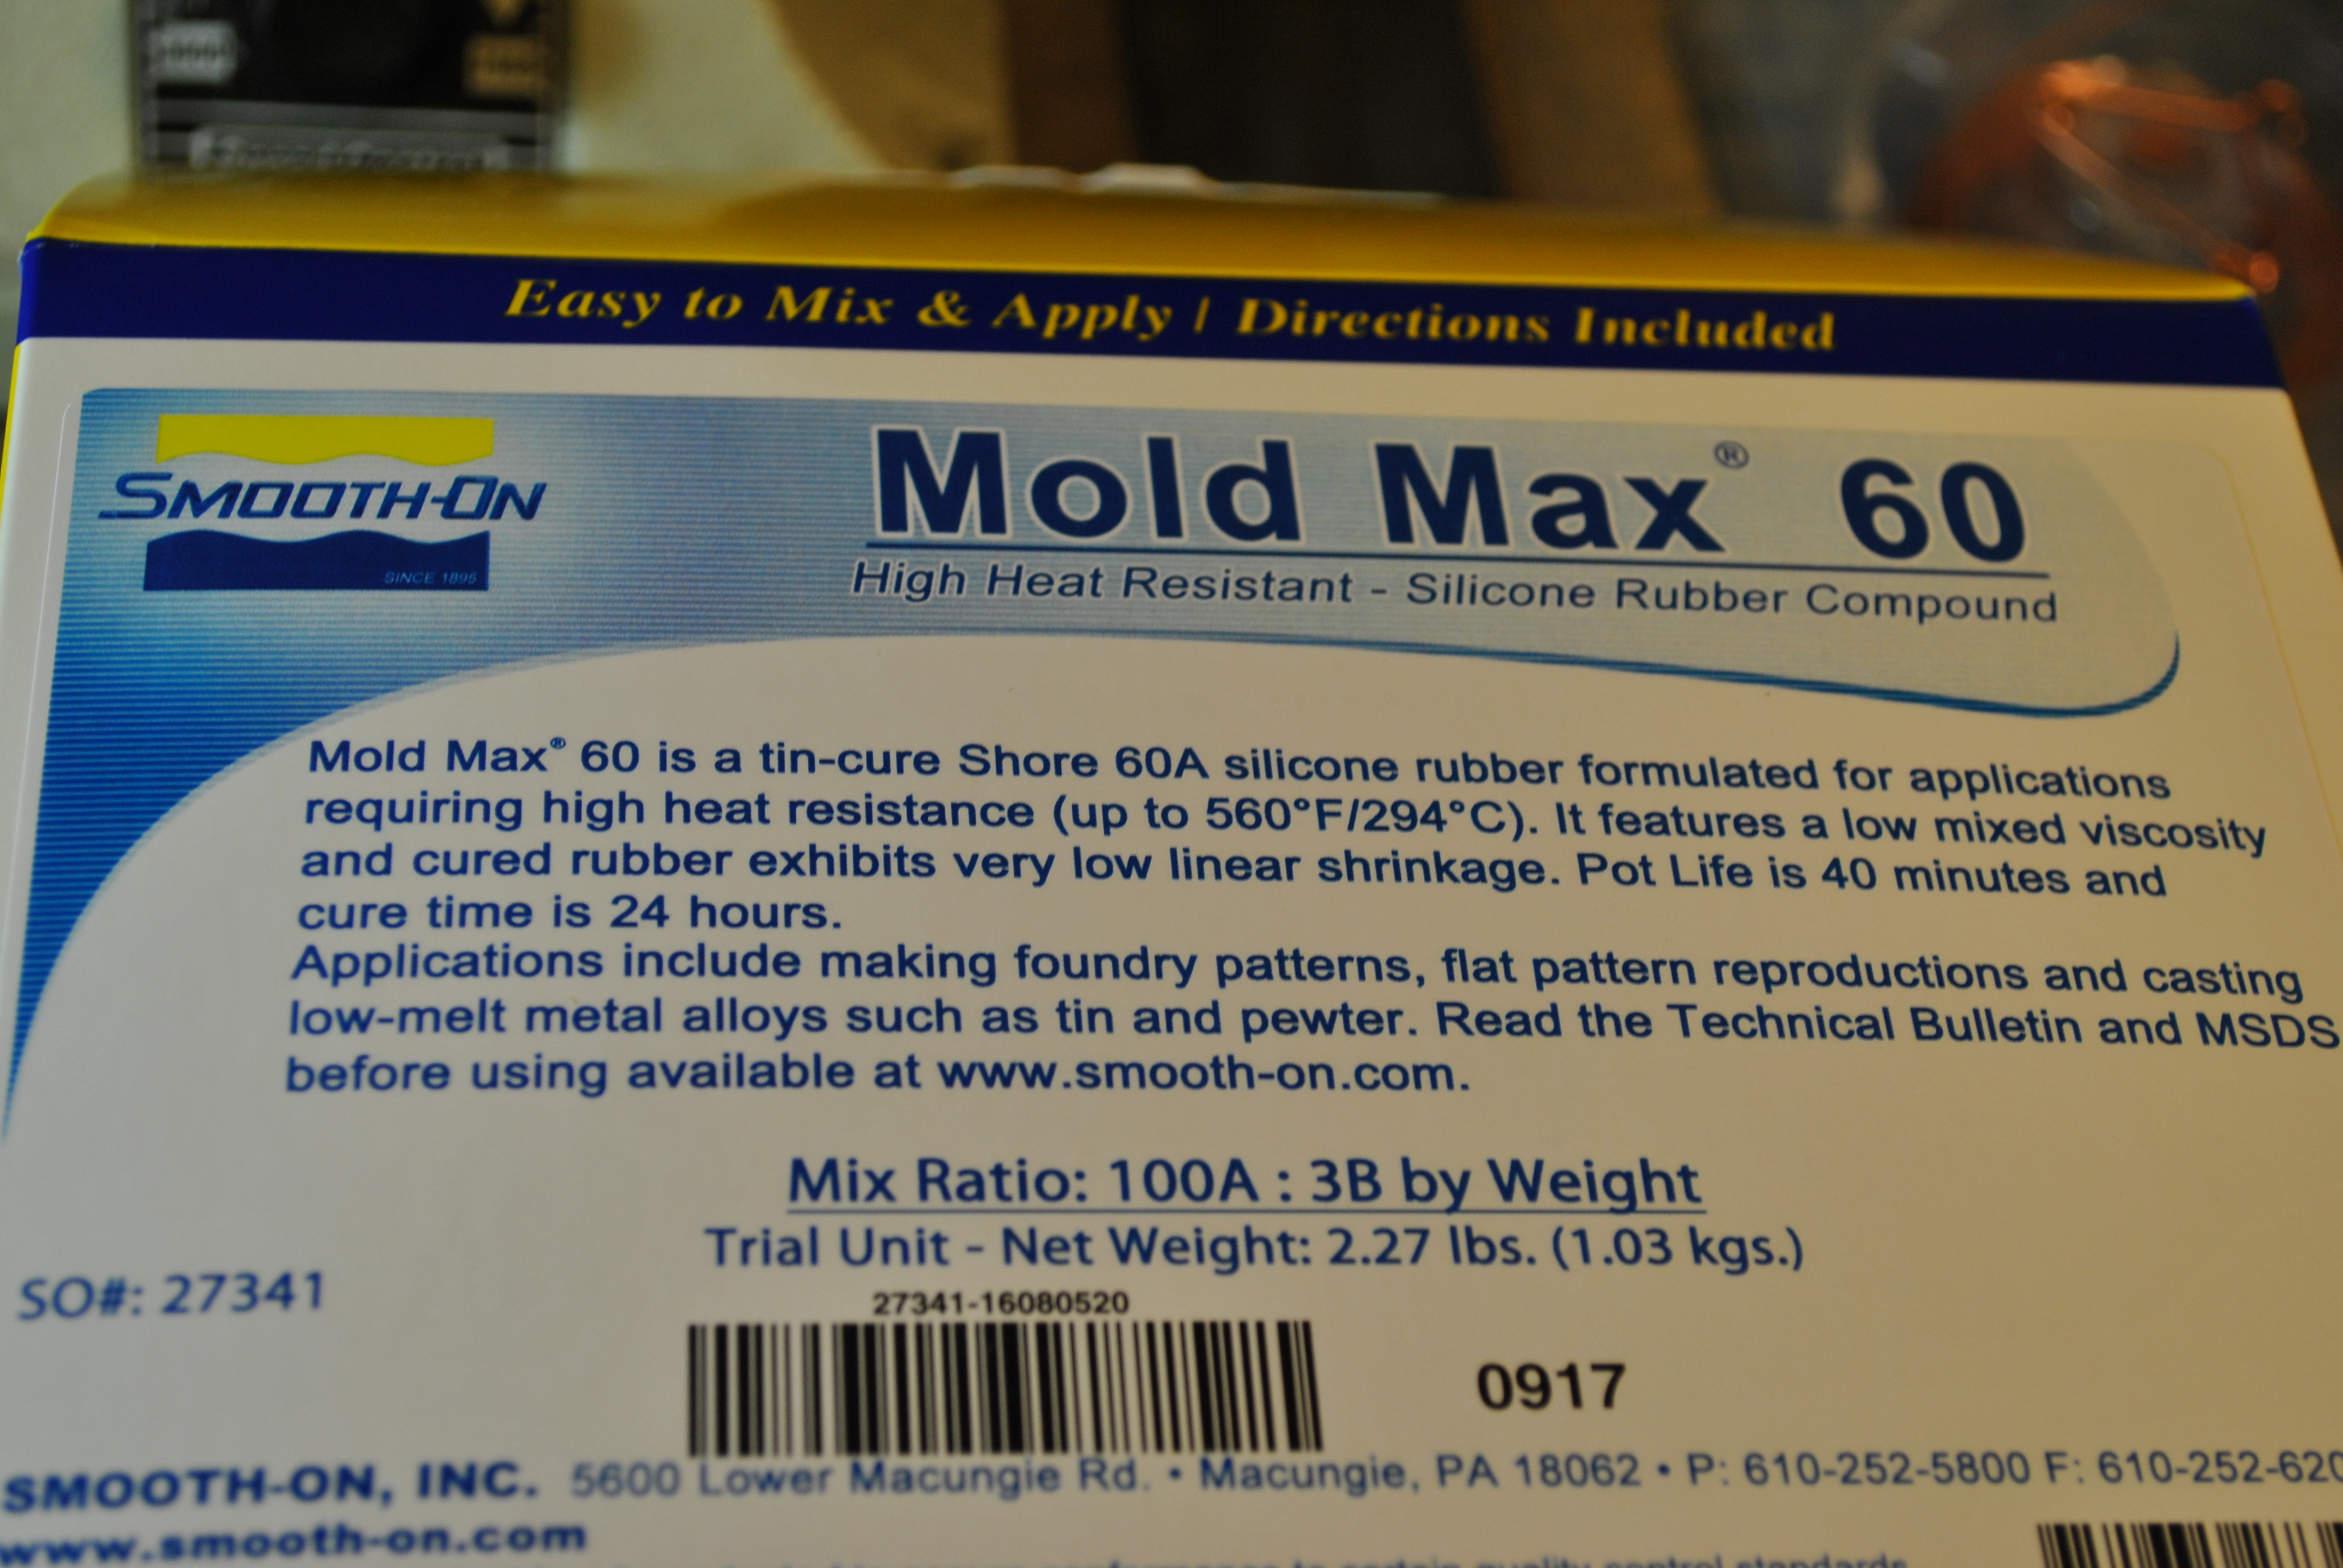
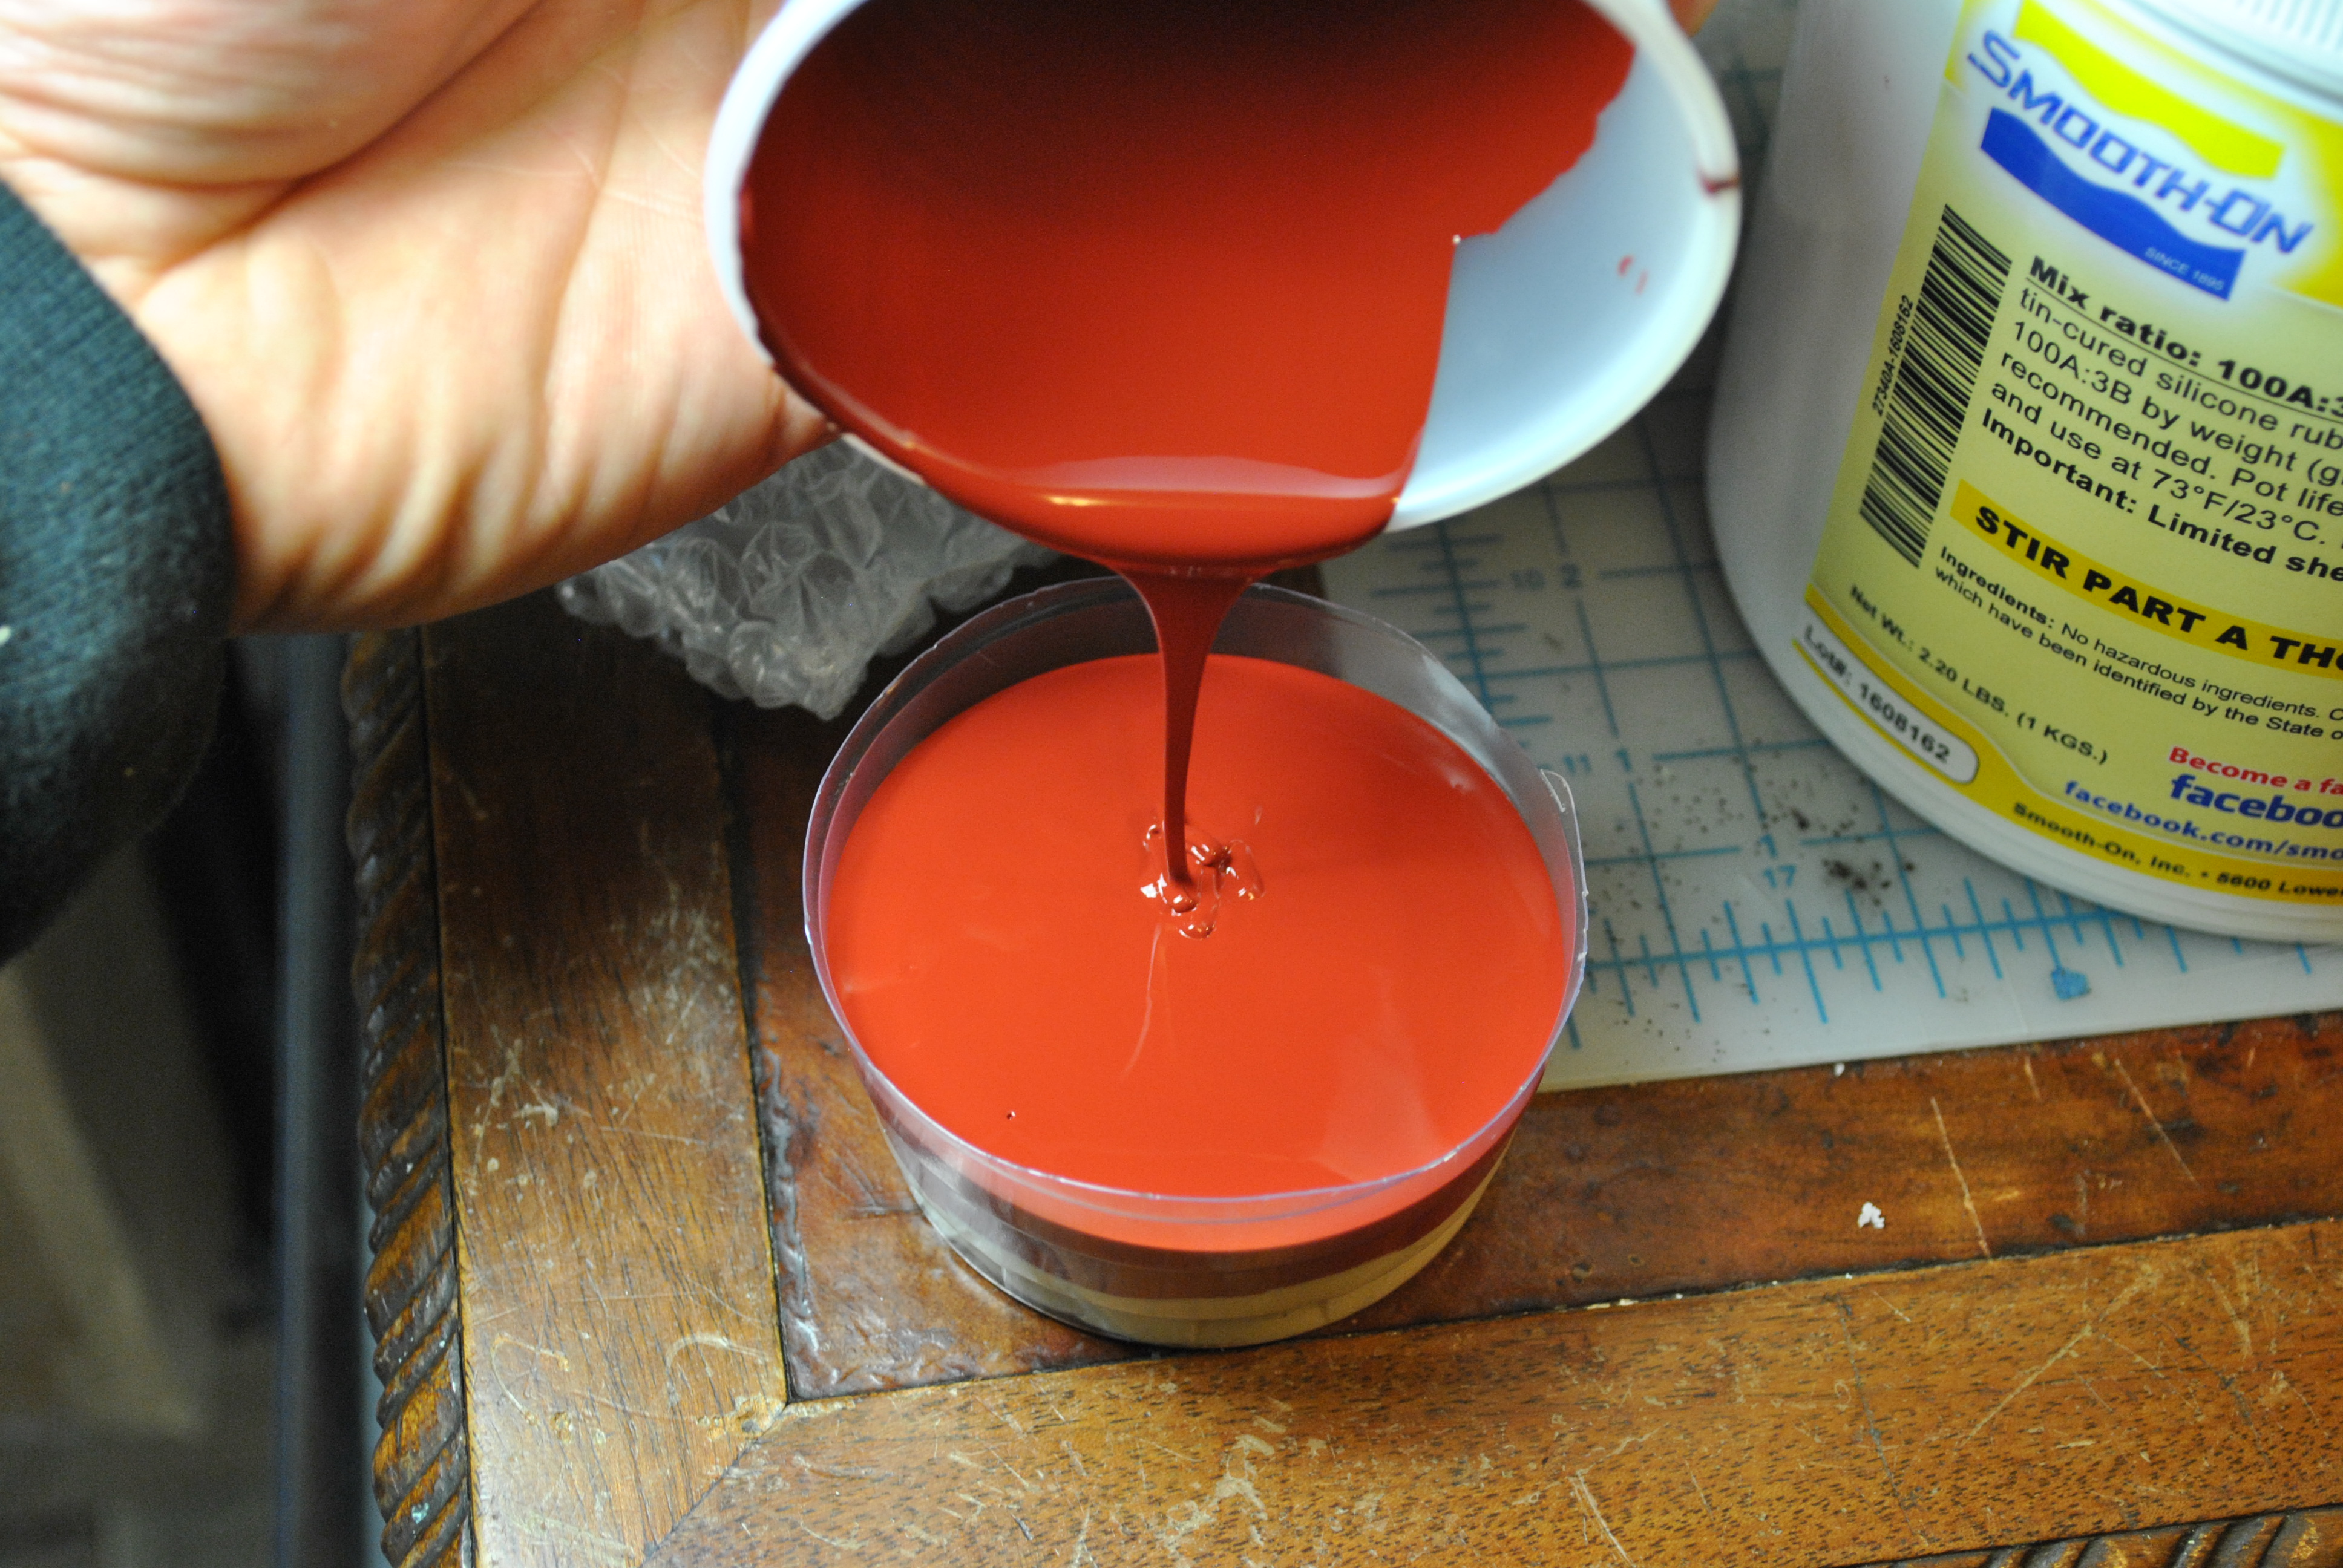
Then I mixed up a small batch of Mold Max 60, a high temp. silicone that will withstand the heat of “low temp” melt metals like tin and pewter.


I mix in one cup, and then scrape the whole works into another cup. This makes sure you don’t have any gunk on the bottom that is unmixed. Follow the instructions, use a scale, and if you have it use a vacuum chamber to degas the silicone. Then wait 24 hours. This stuff smells pretty rubbery, so do this in a well ventilated area.
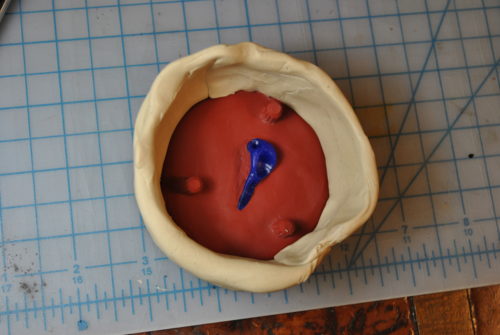
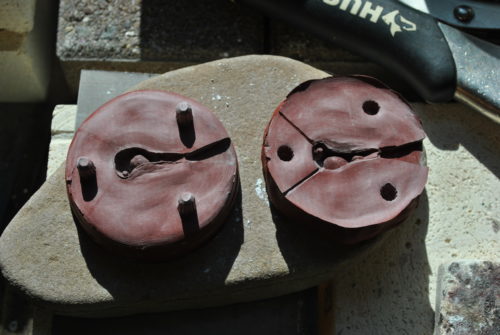
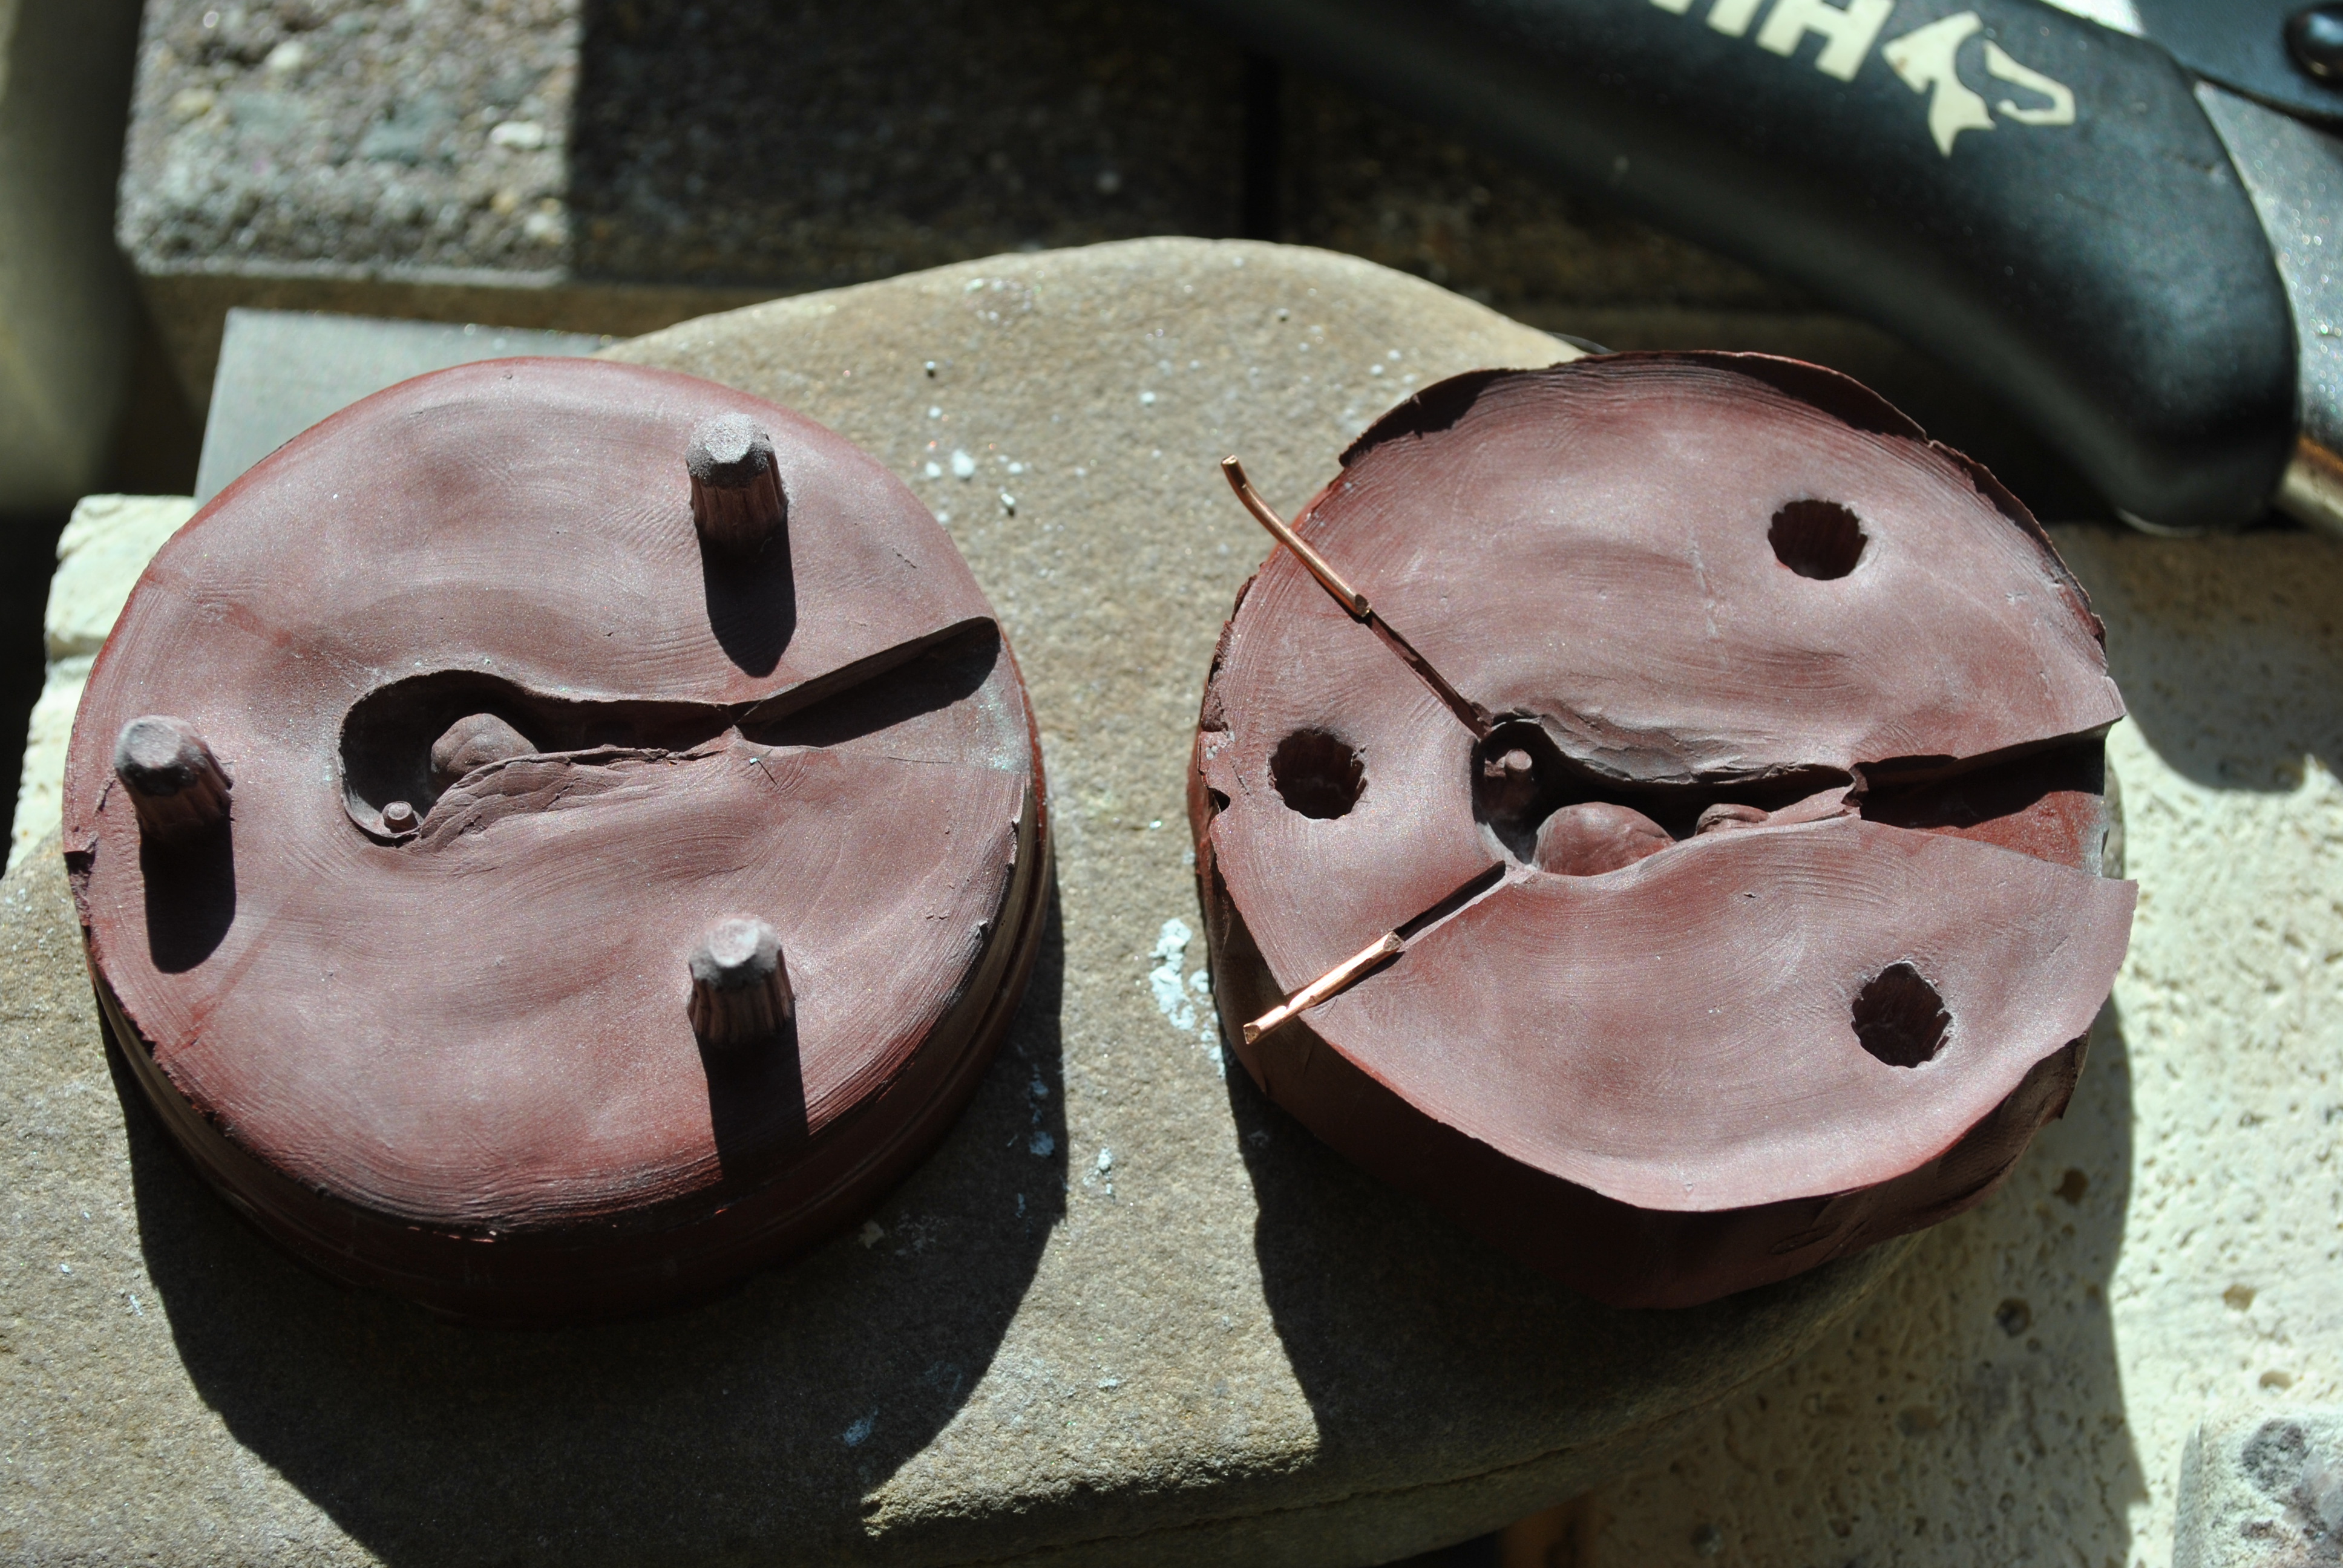
Cut the cup away, and slowly remove the clay.
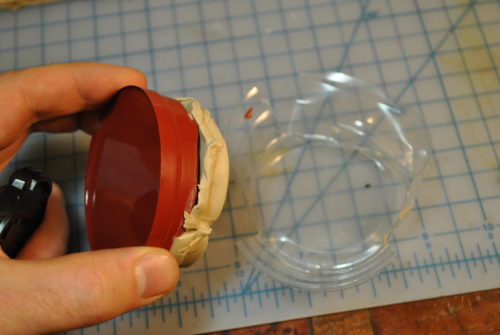


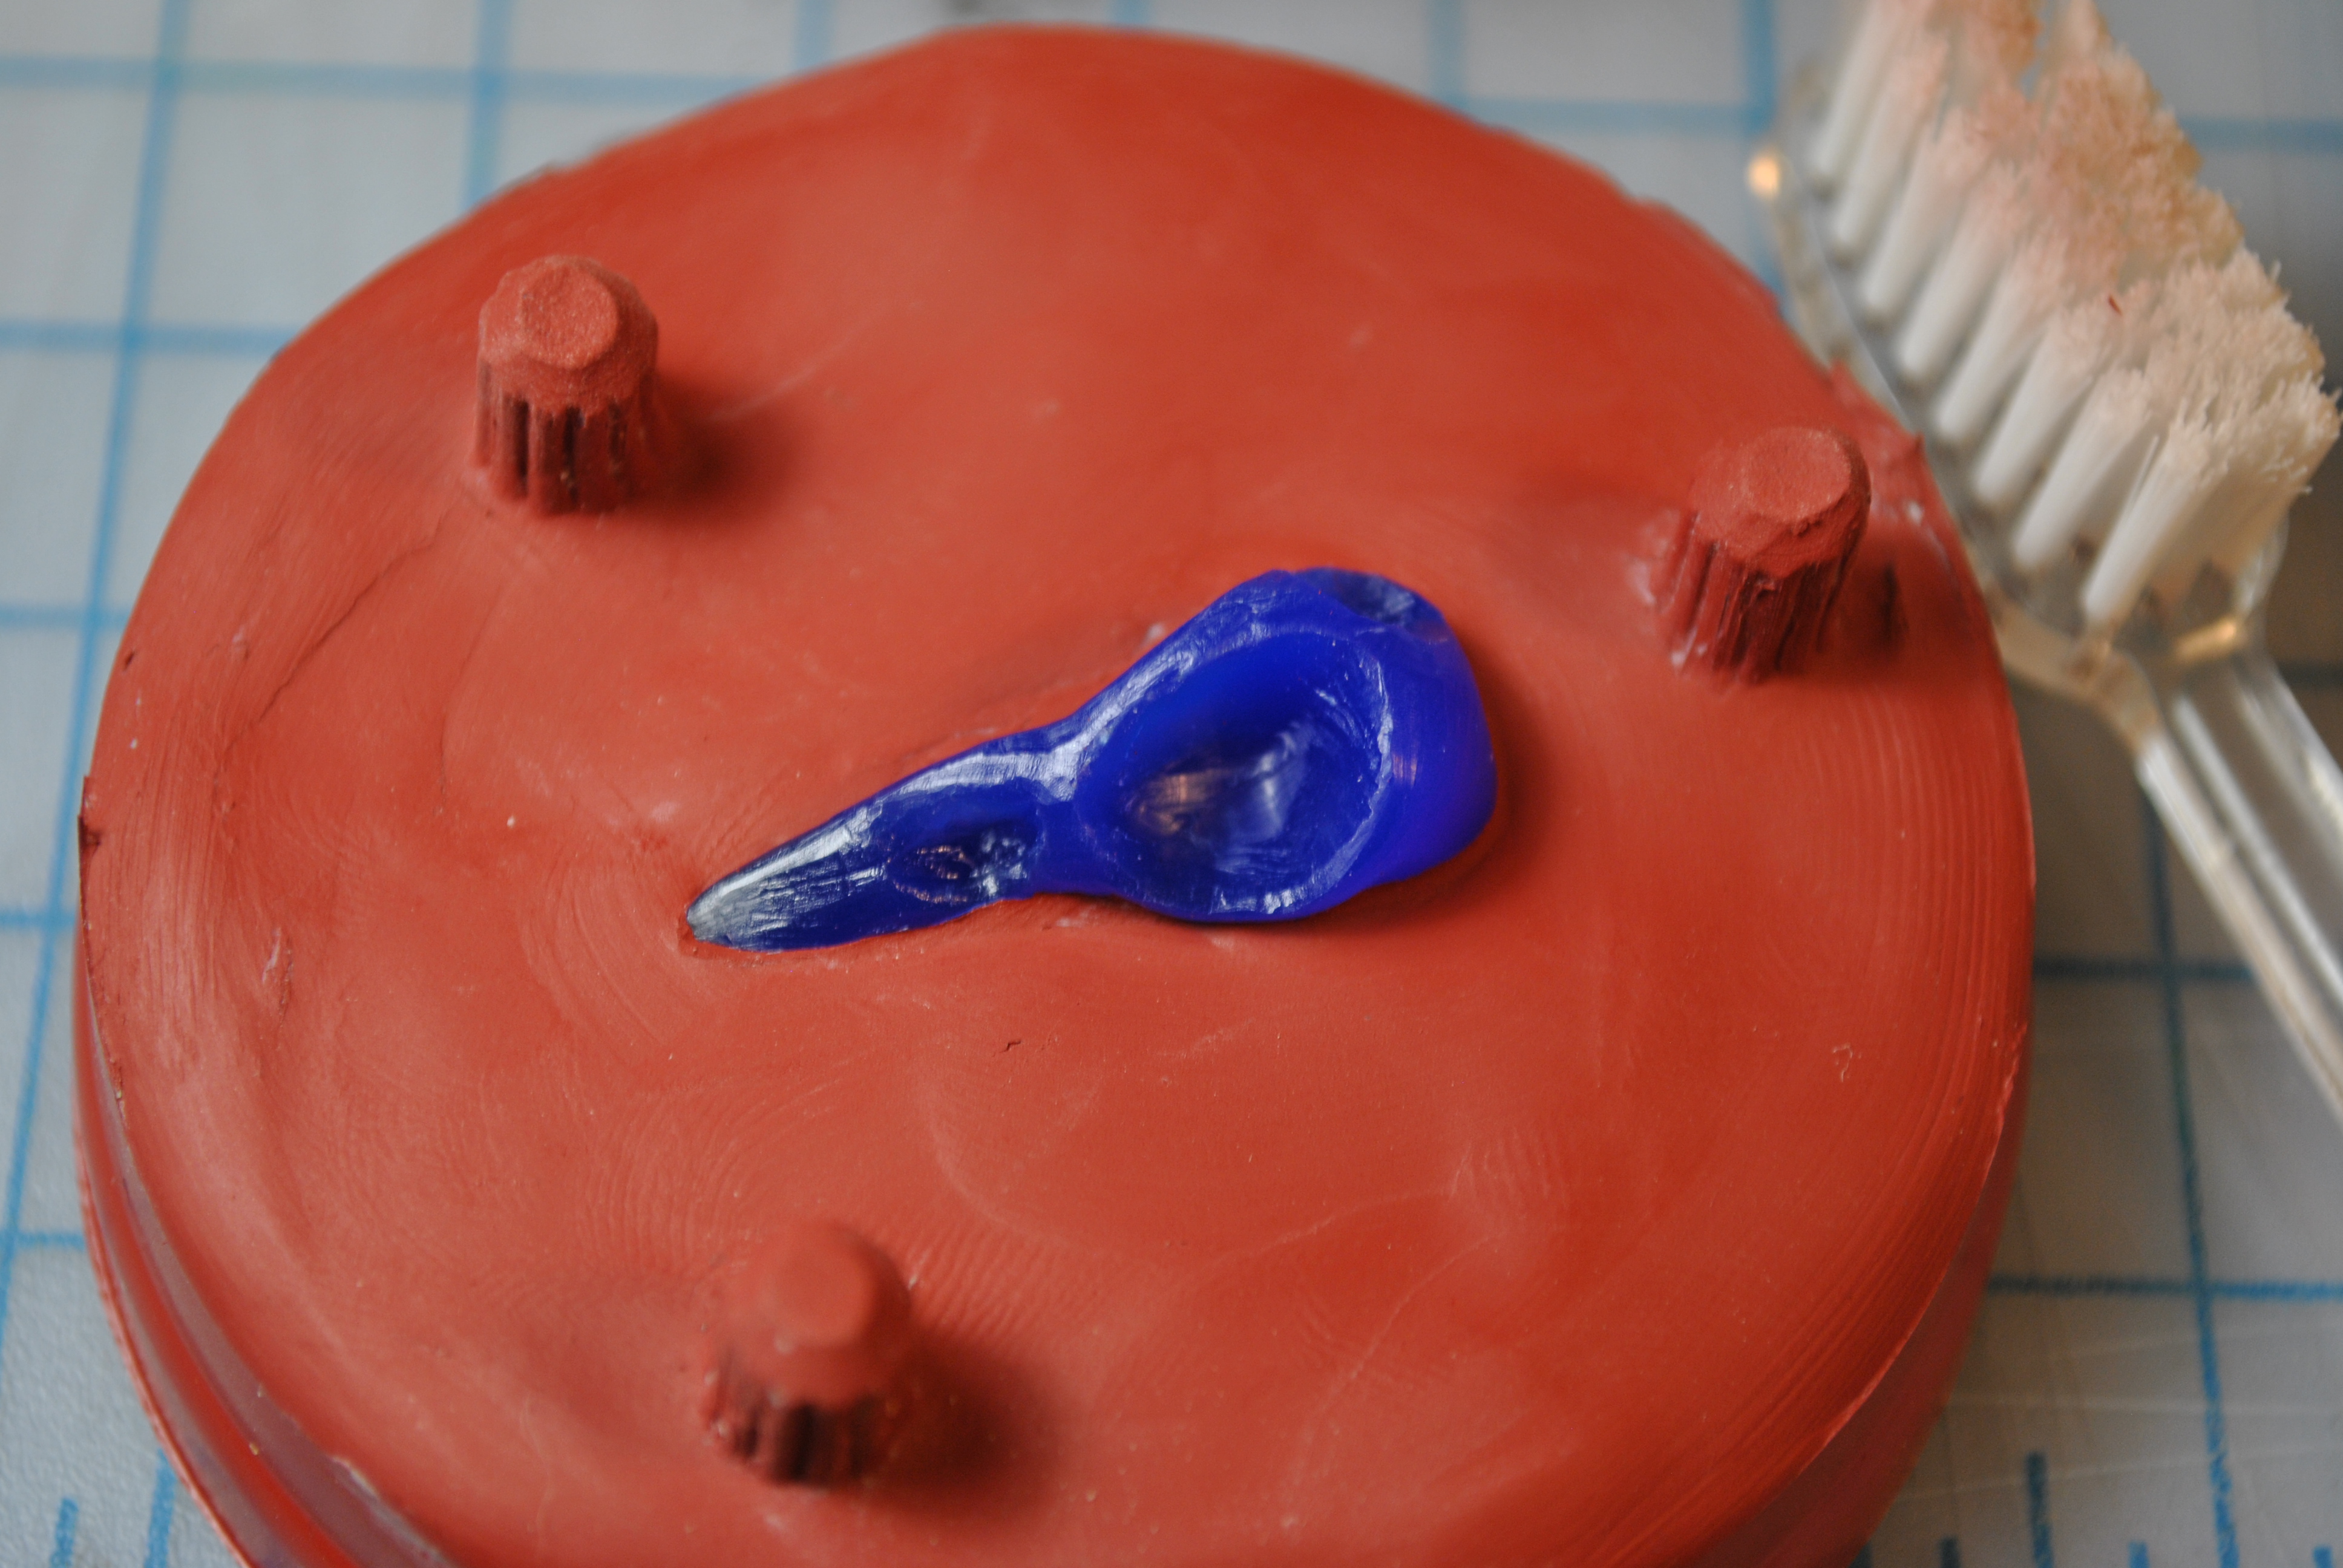
Carefully clean off all the clay, and very carefully cut away any flash that might have leaked in (around the beak area you can see some). I used a brush to get clay out of the cracks. DON’T pull the wax model out, you want it nice and snug in there.
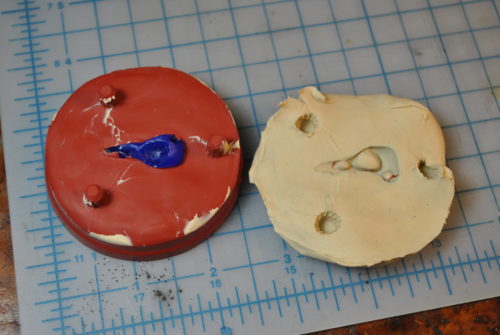
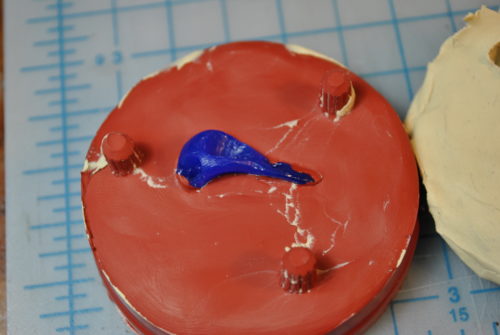
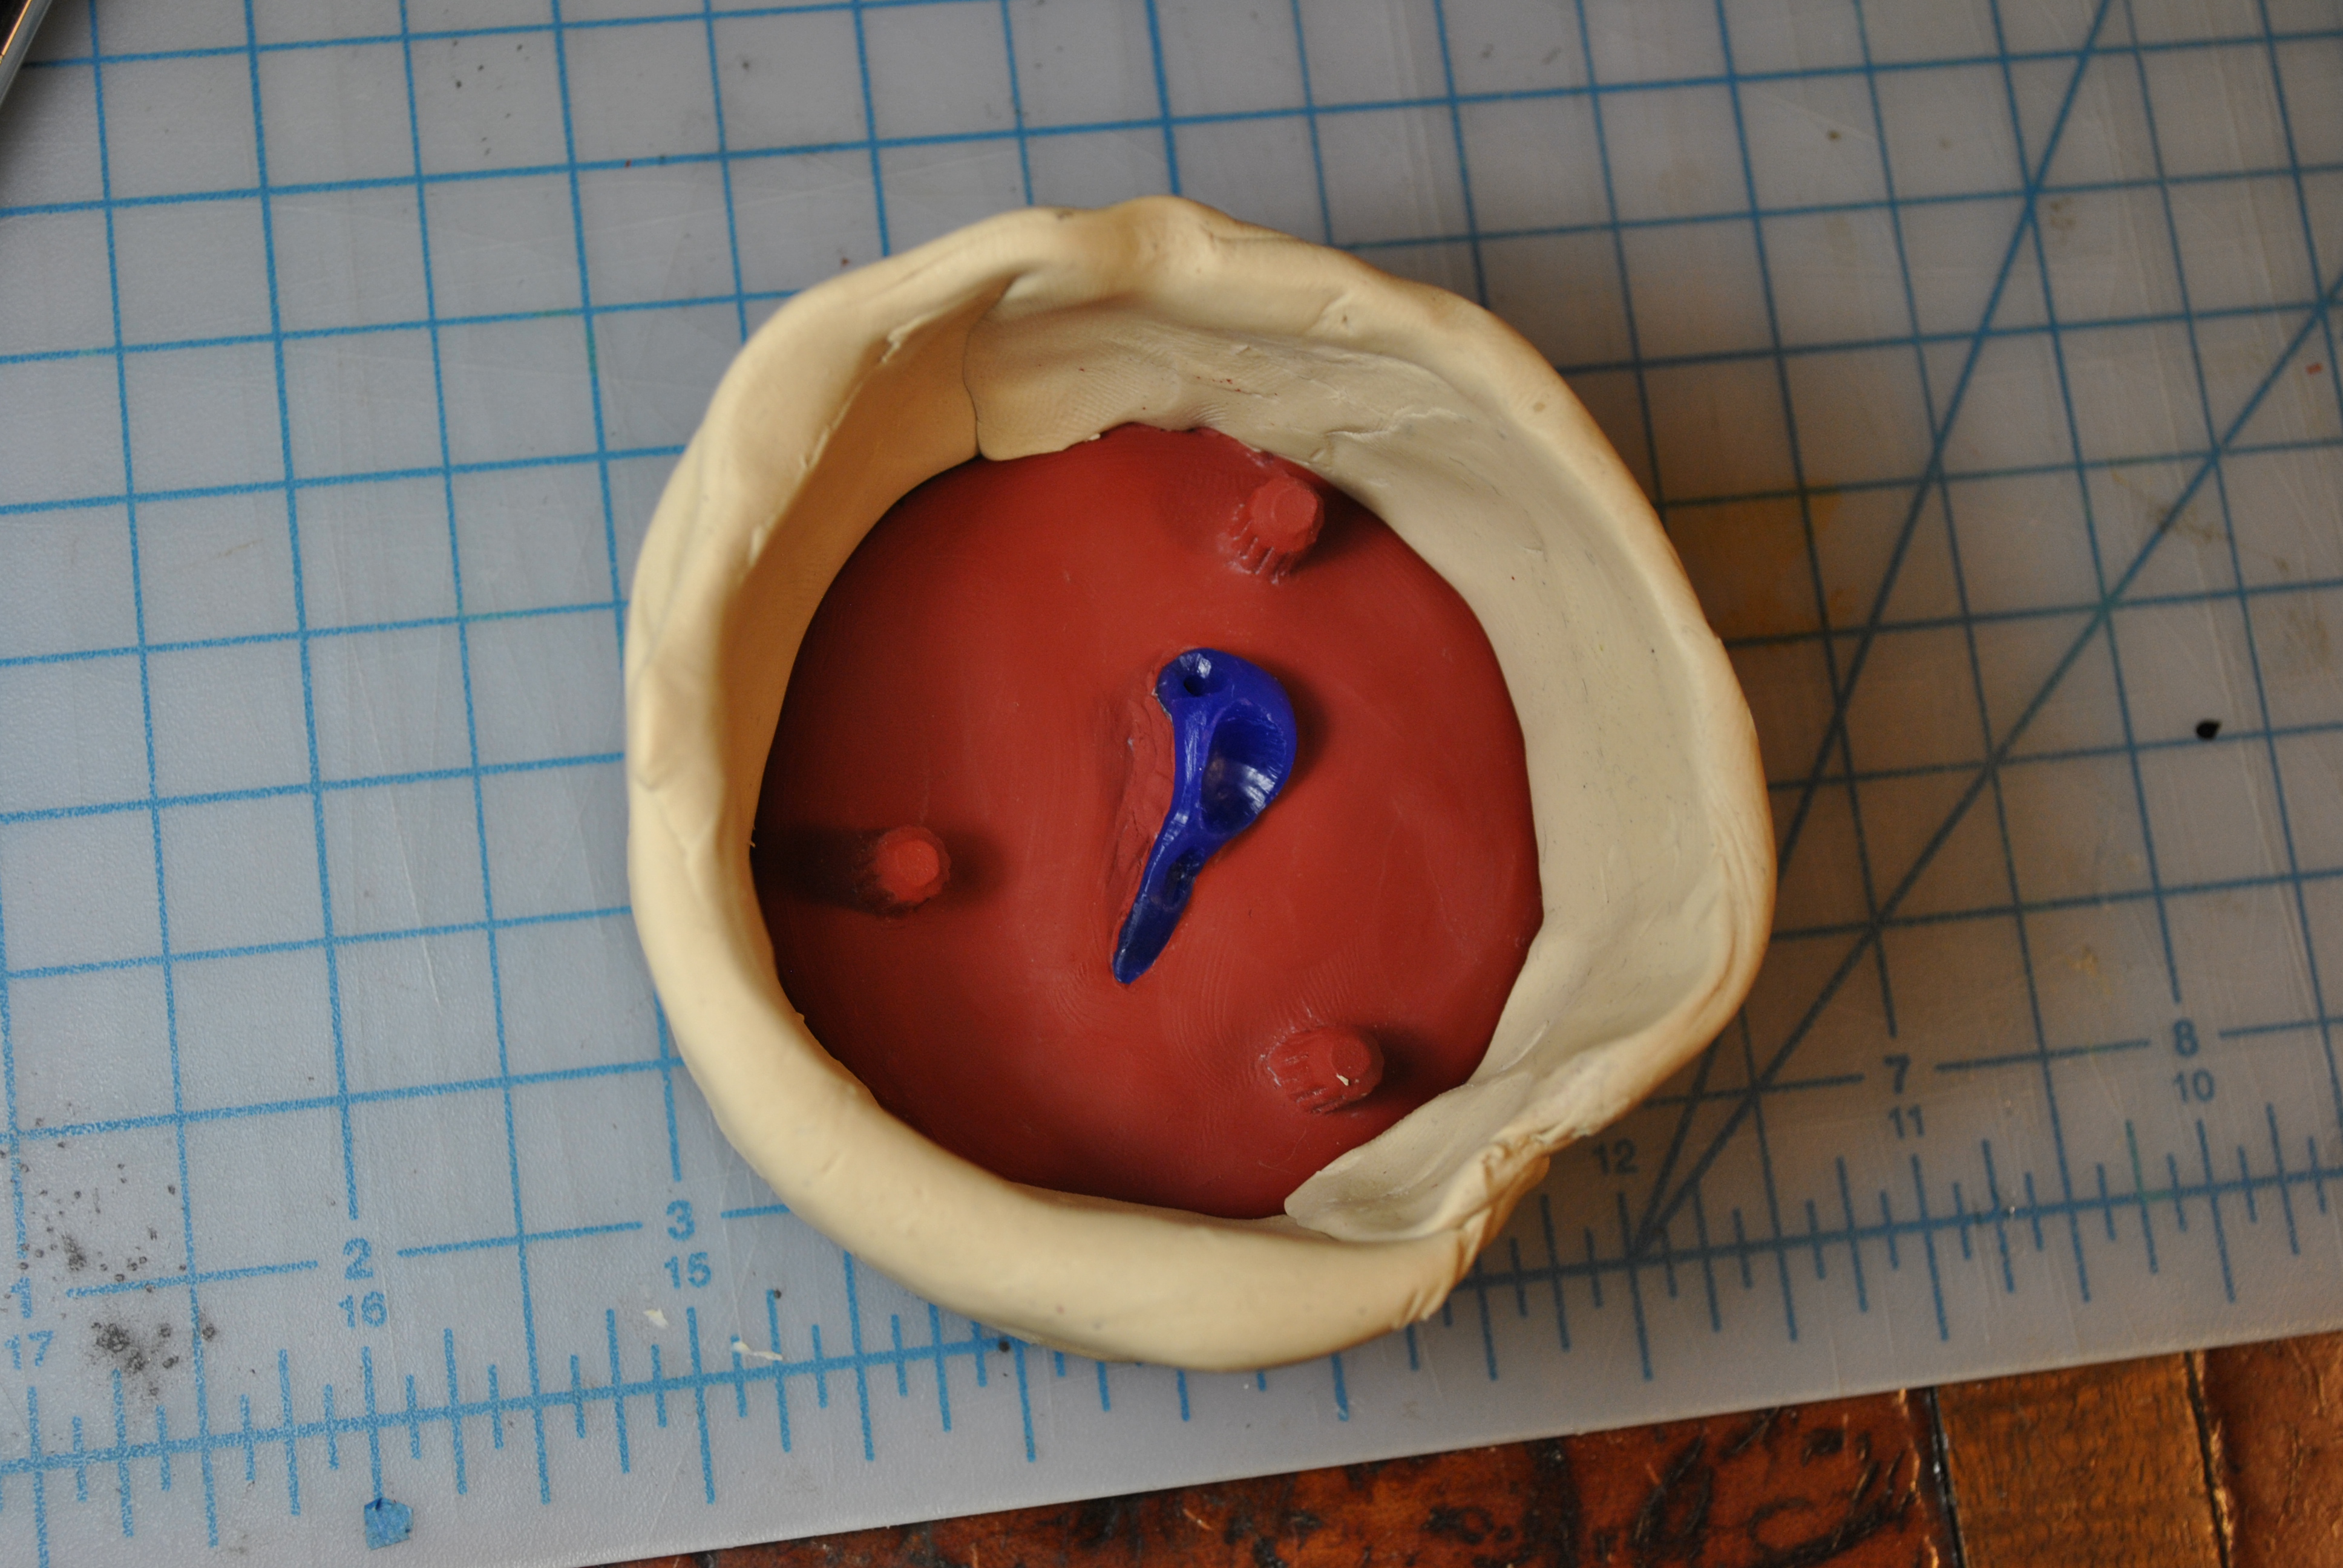
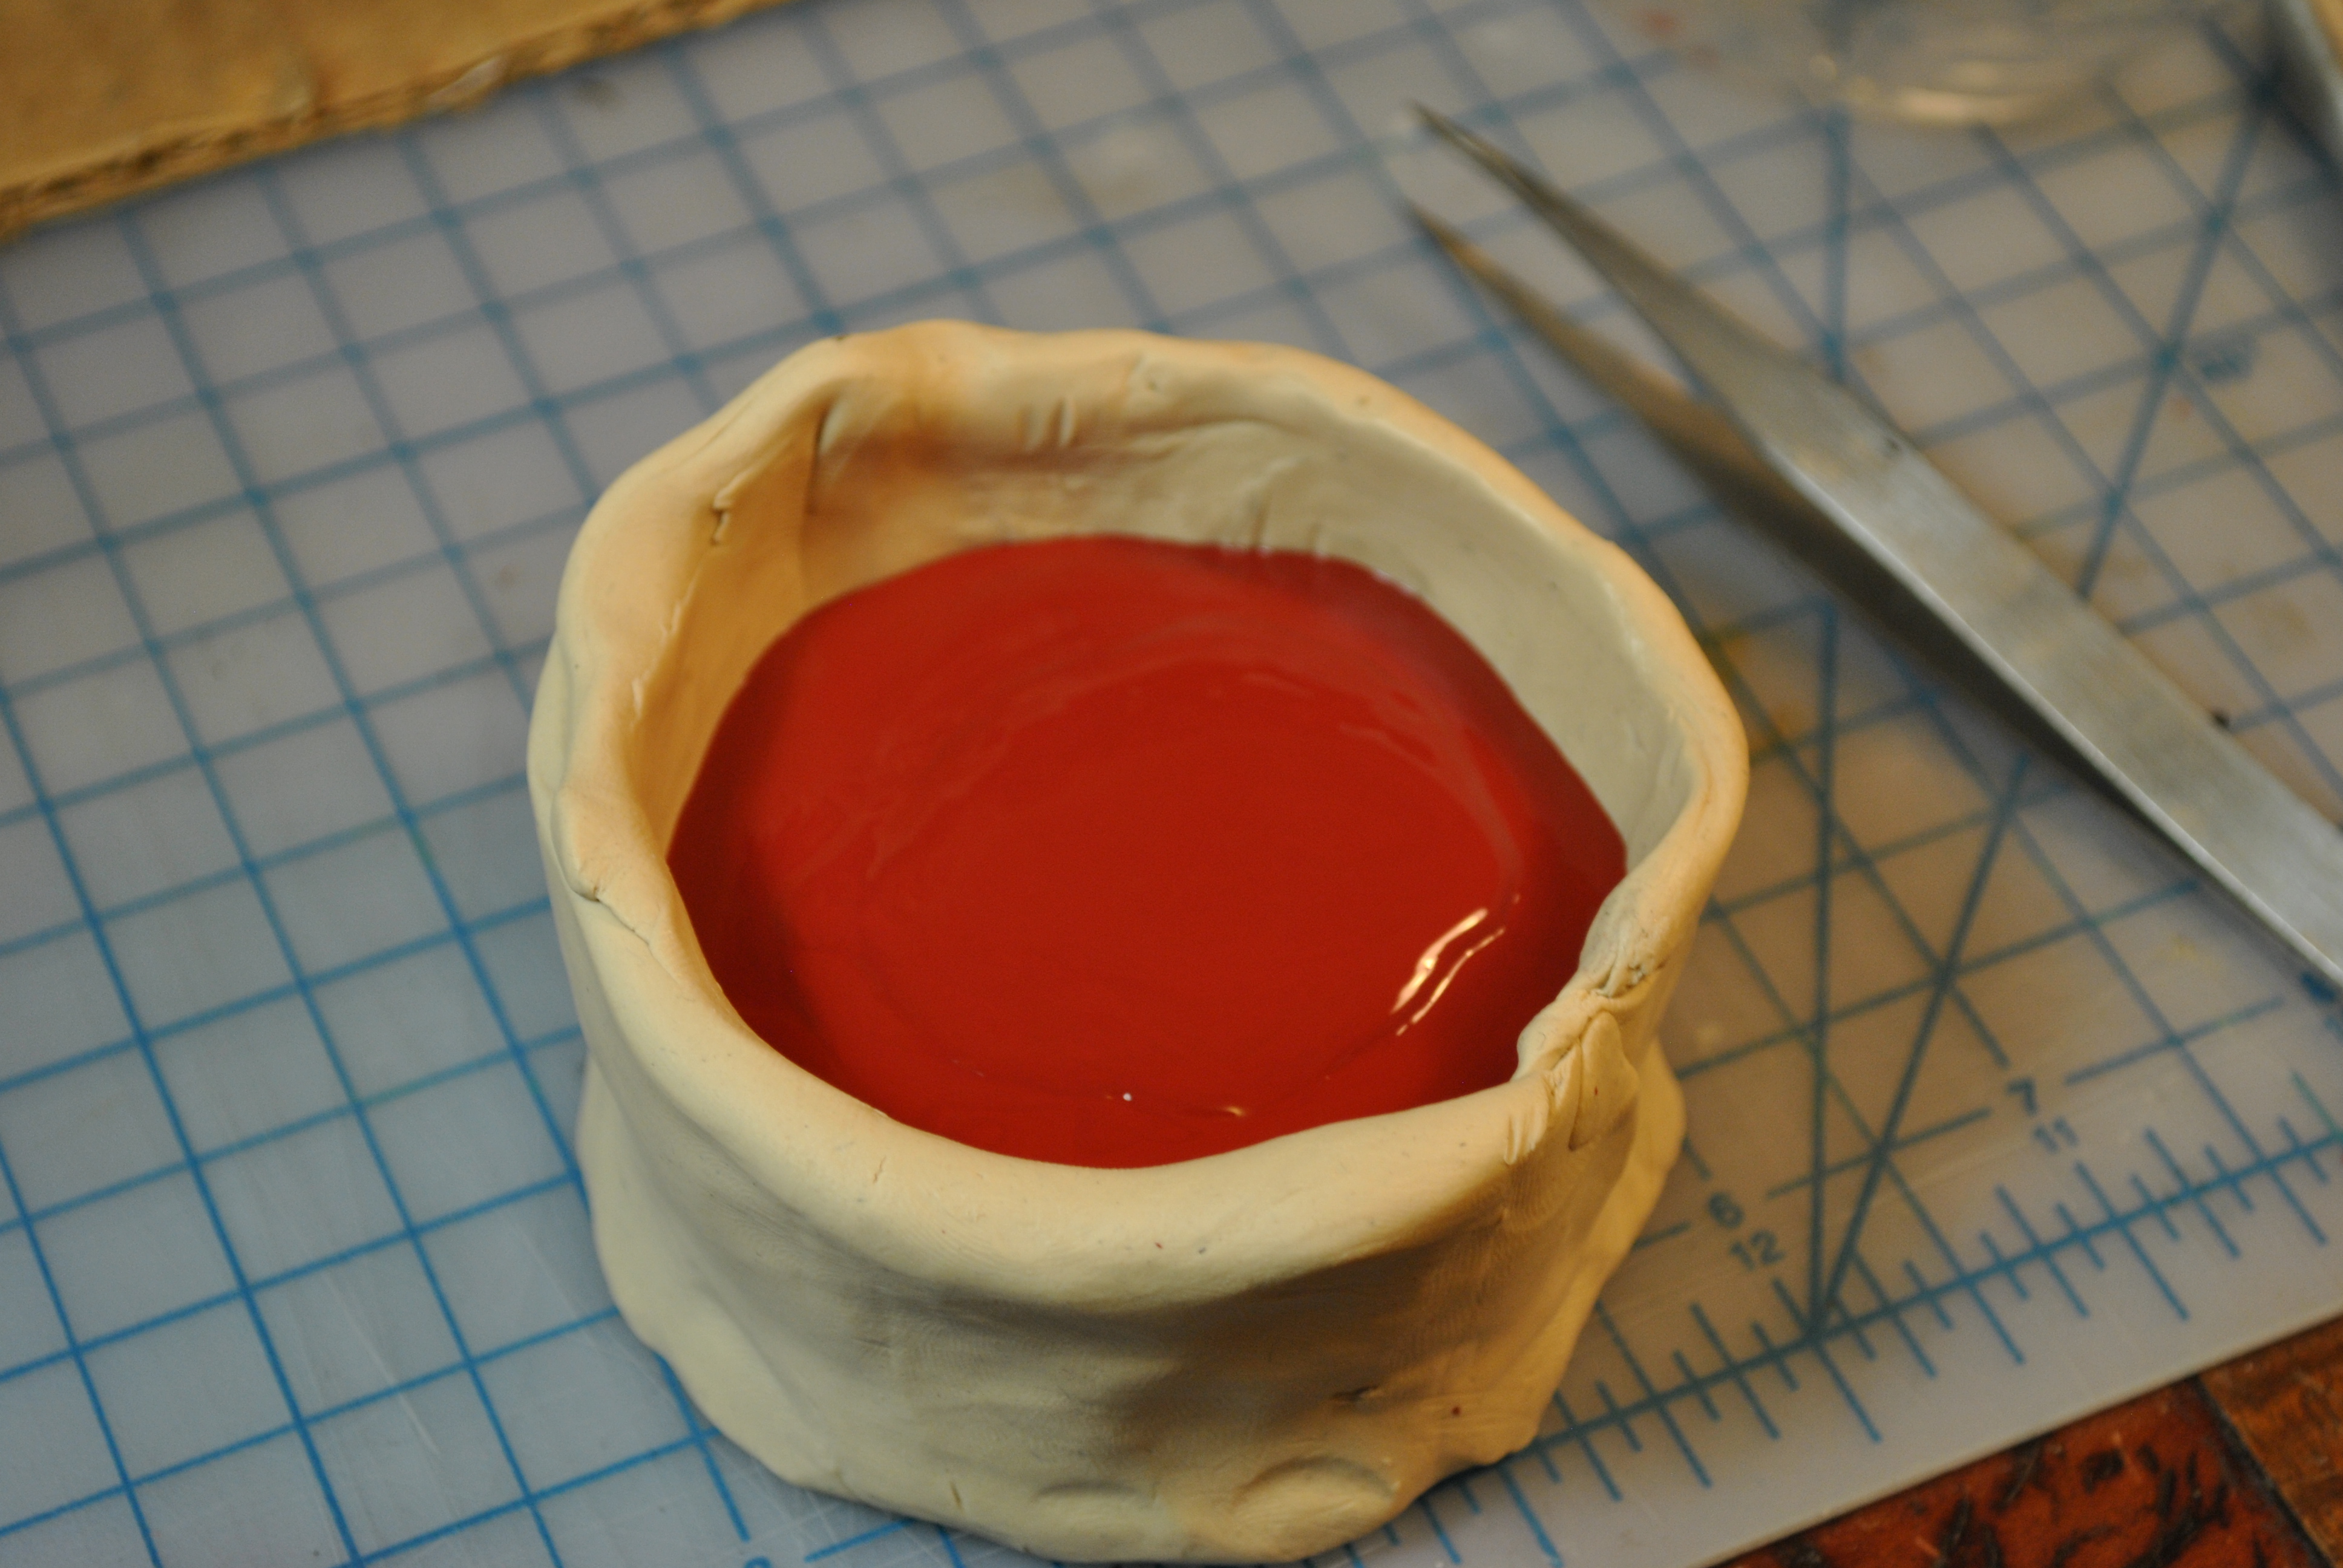
Take that clay and flatten it out, then make a little wall around your mold. Its very important that you spray a layer of mold release on it at this point, or you will end up with a huge chunk of solid silicone.
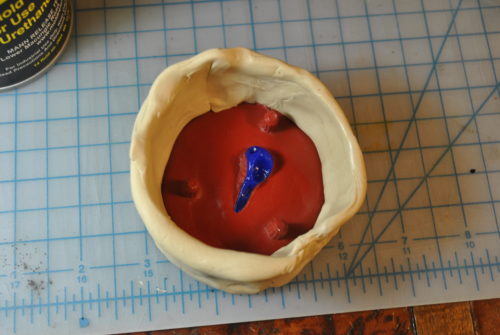
You can see the mold release shiny area. Follow the instructions on the can. Then mix up another batch and pour it on top. Wait another 24 hours.

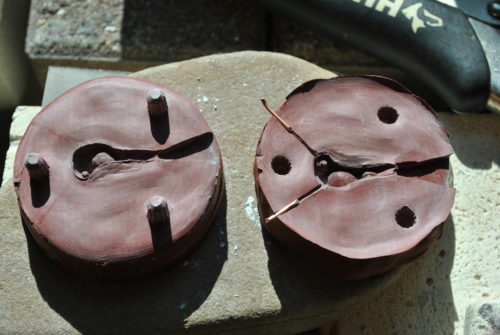
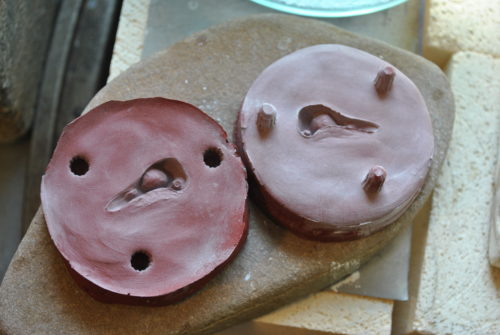
Carefully crack that bad boy open, and see if everything came out ok.

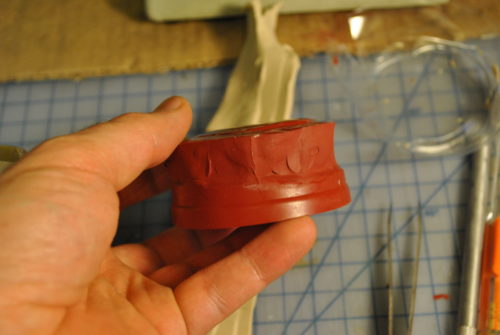
Success!

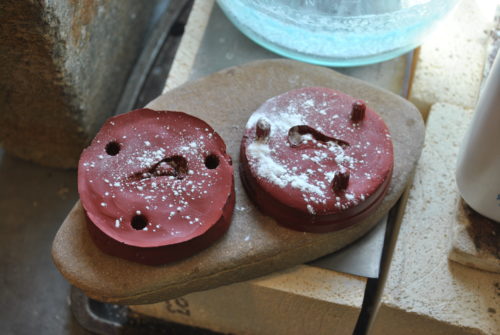
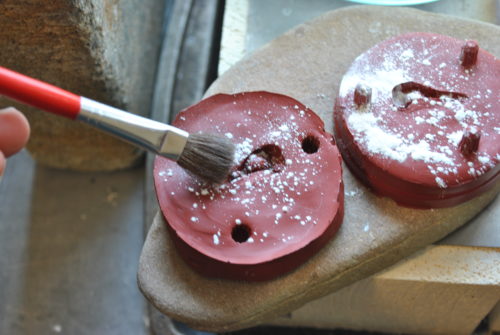
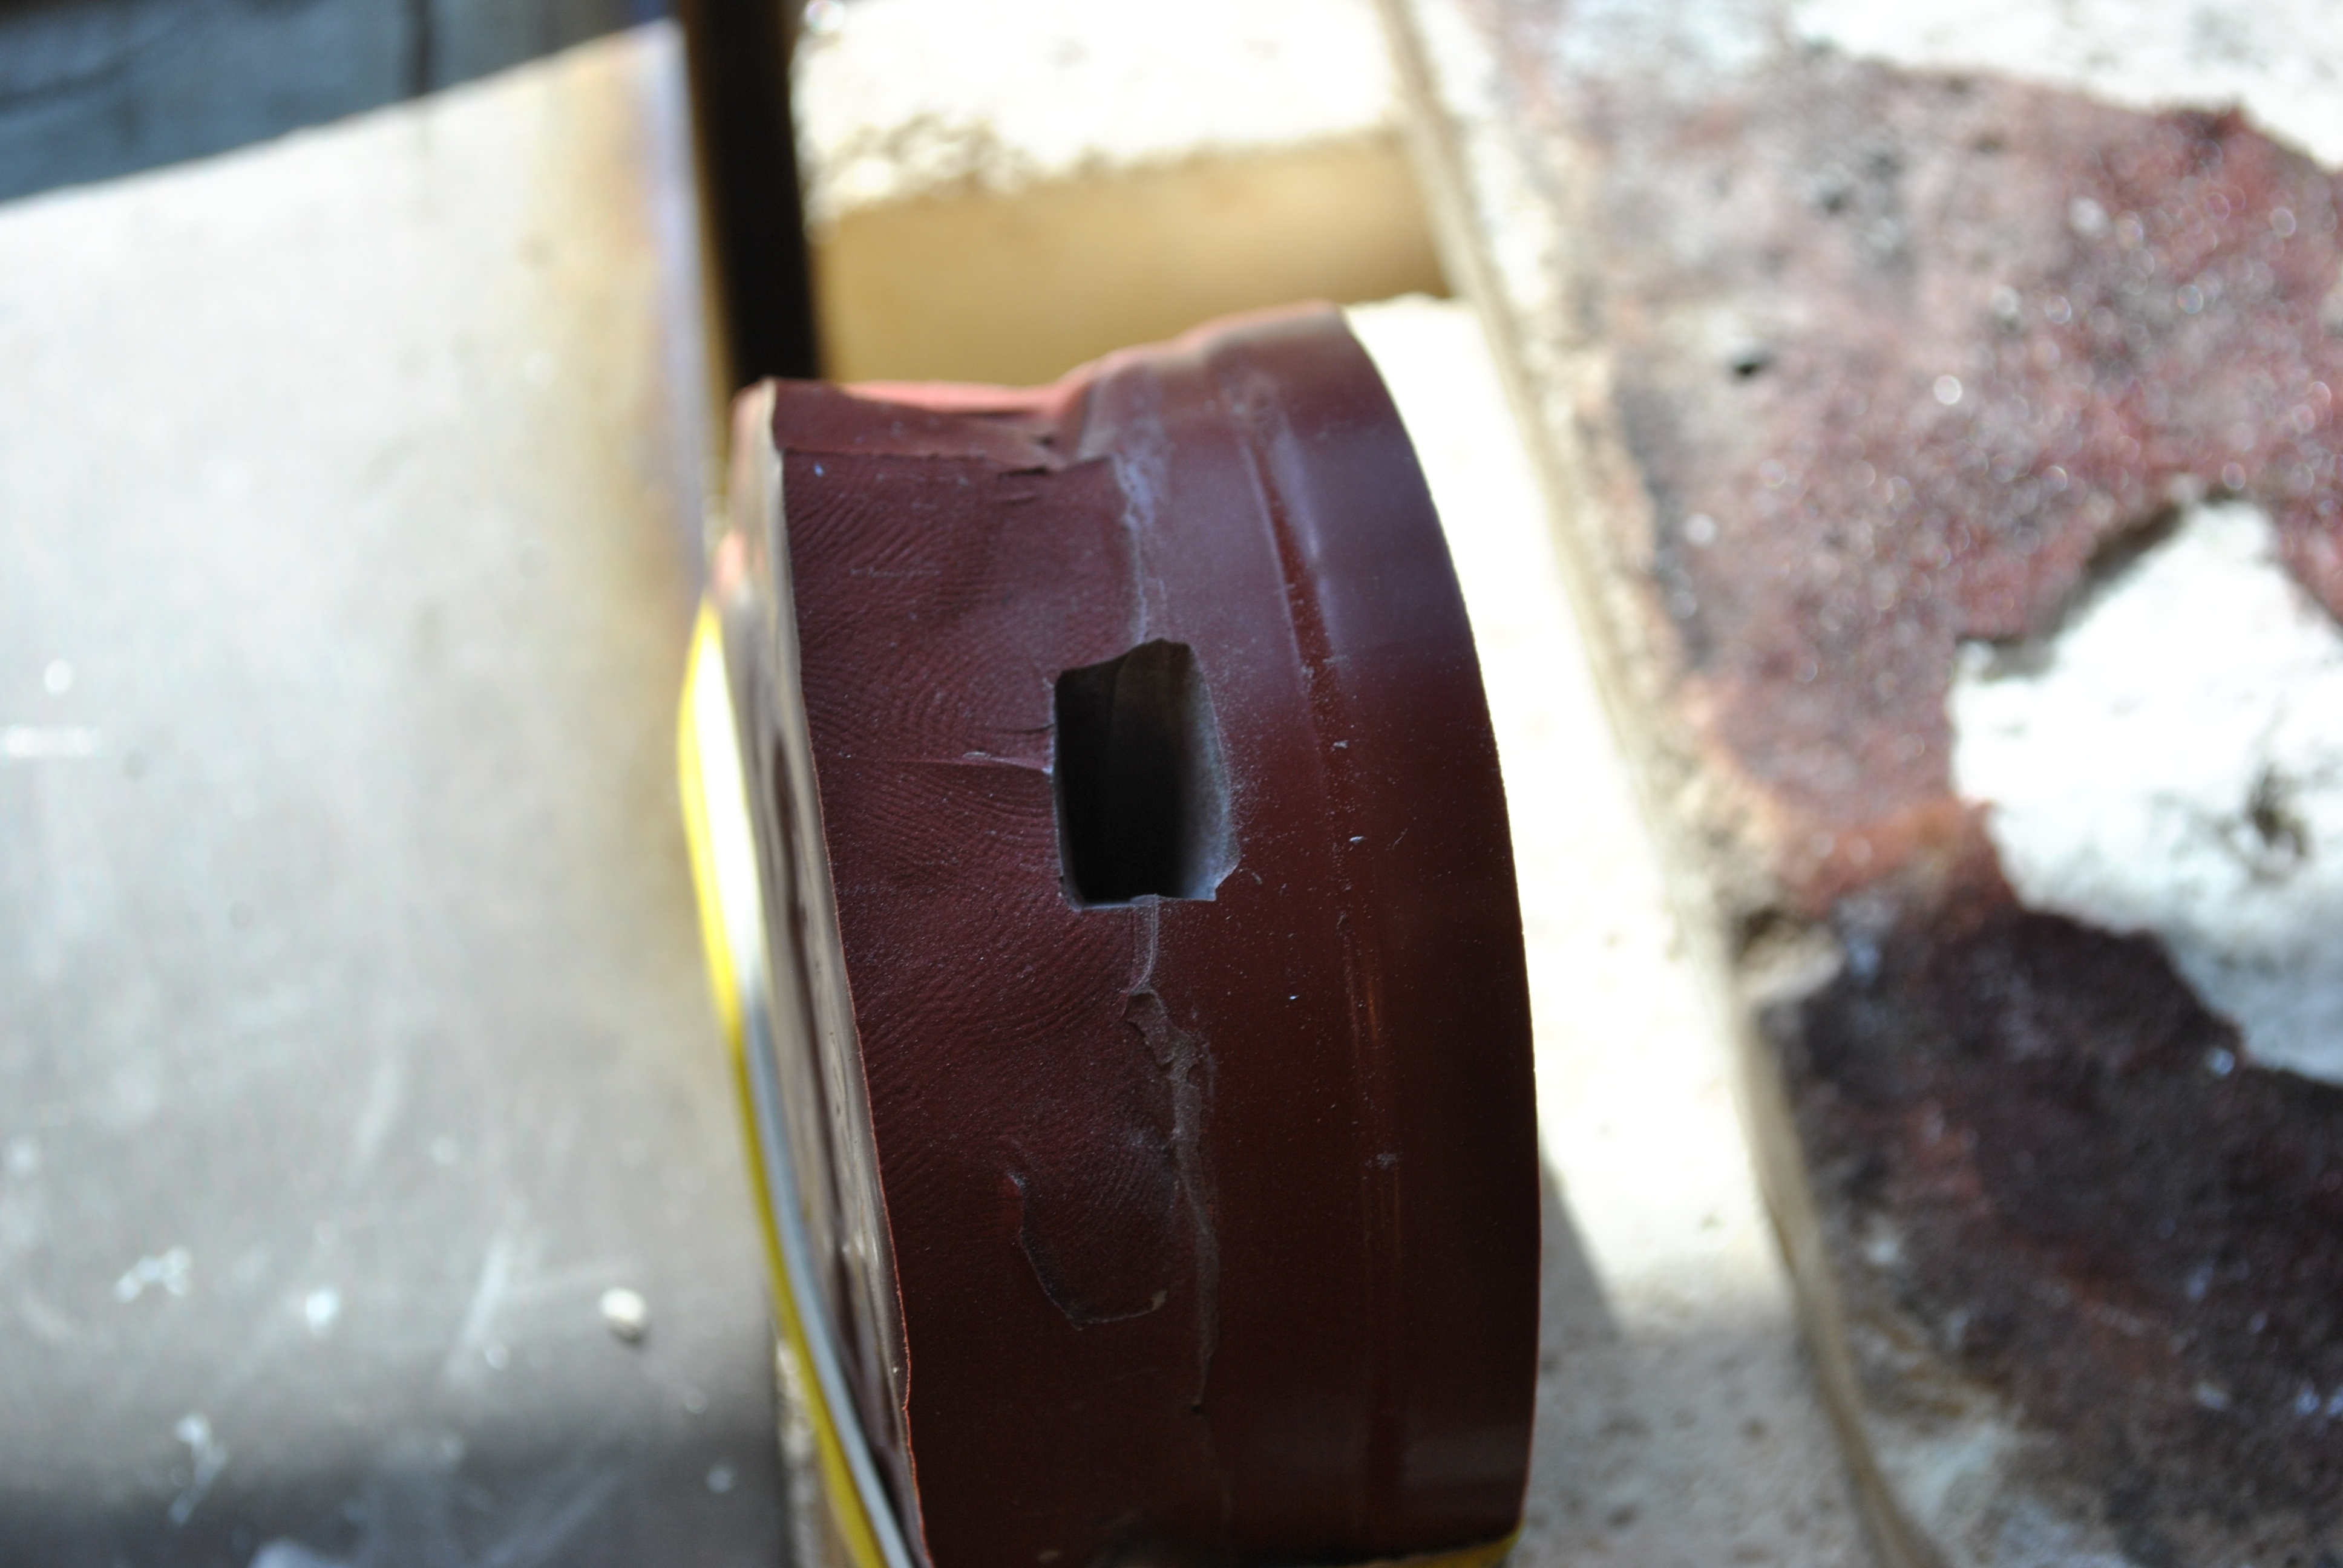
I then carefully cut a pour spout, and some air vents. I then realized the air vents were probably too big, so I put a little chunk of copper wire in there.
Dust a little baby powder on the mold (these pictures are from before I cut the vents) and push it into all the cracks with a fine brush.

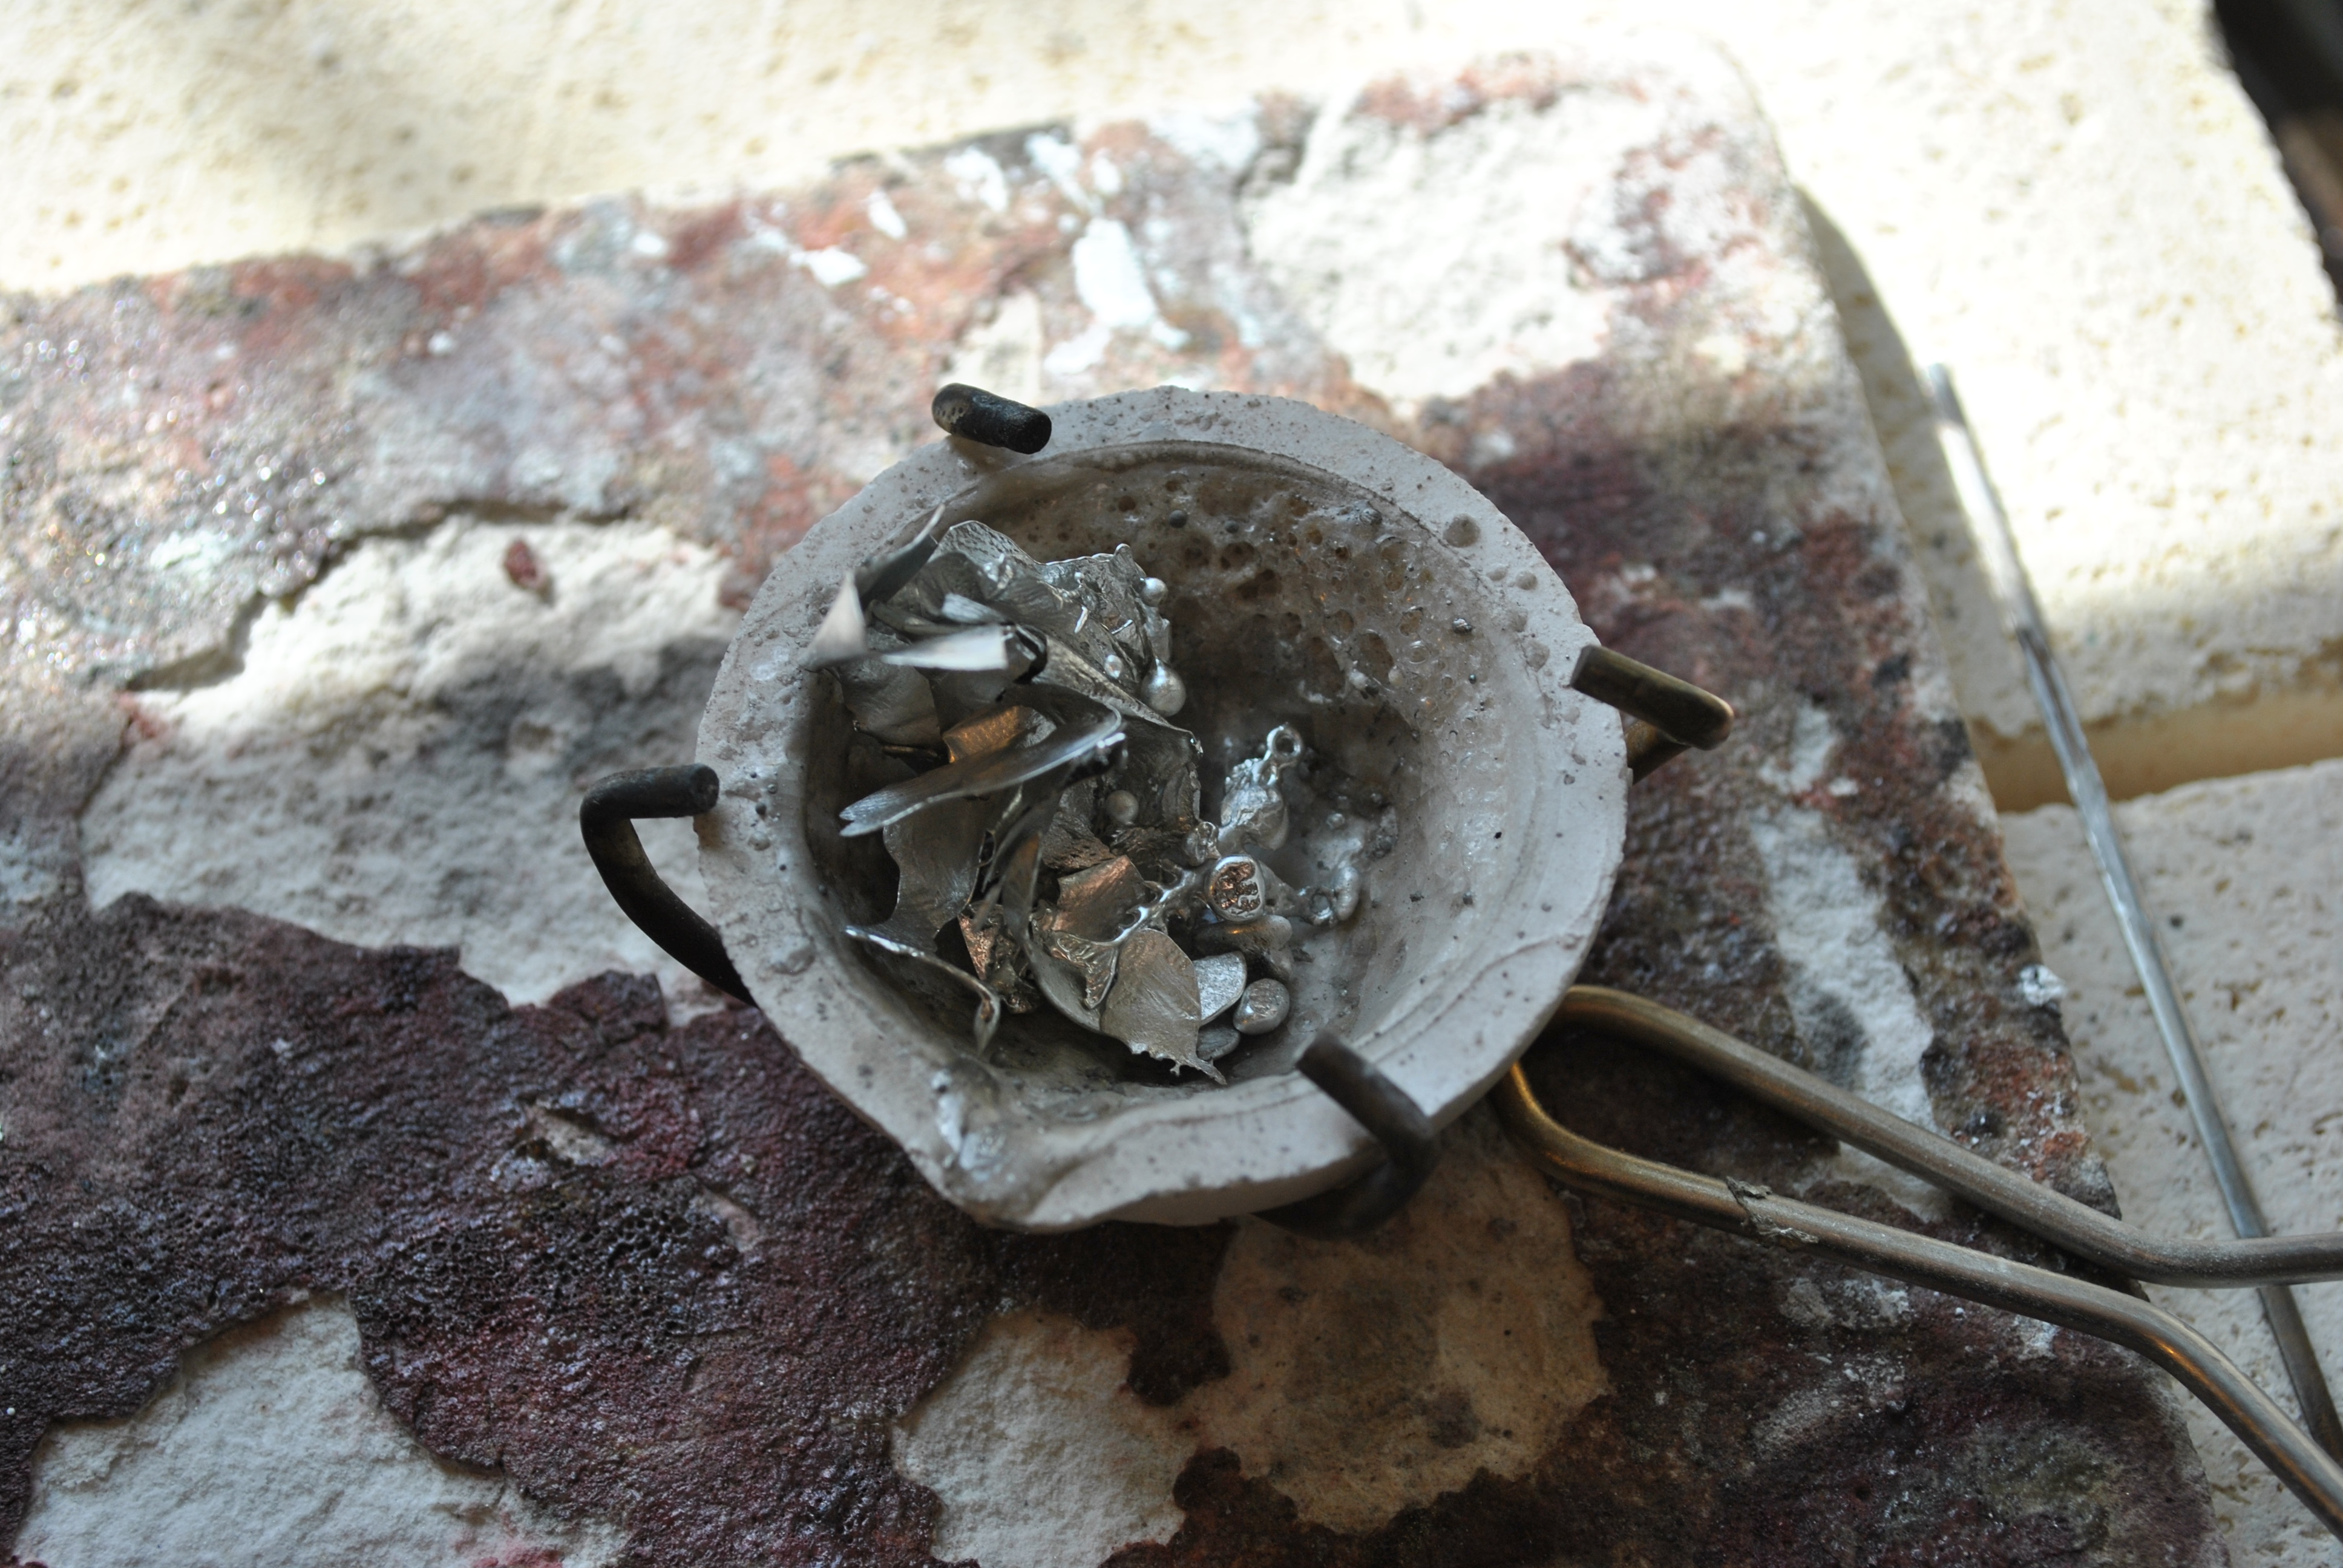
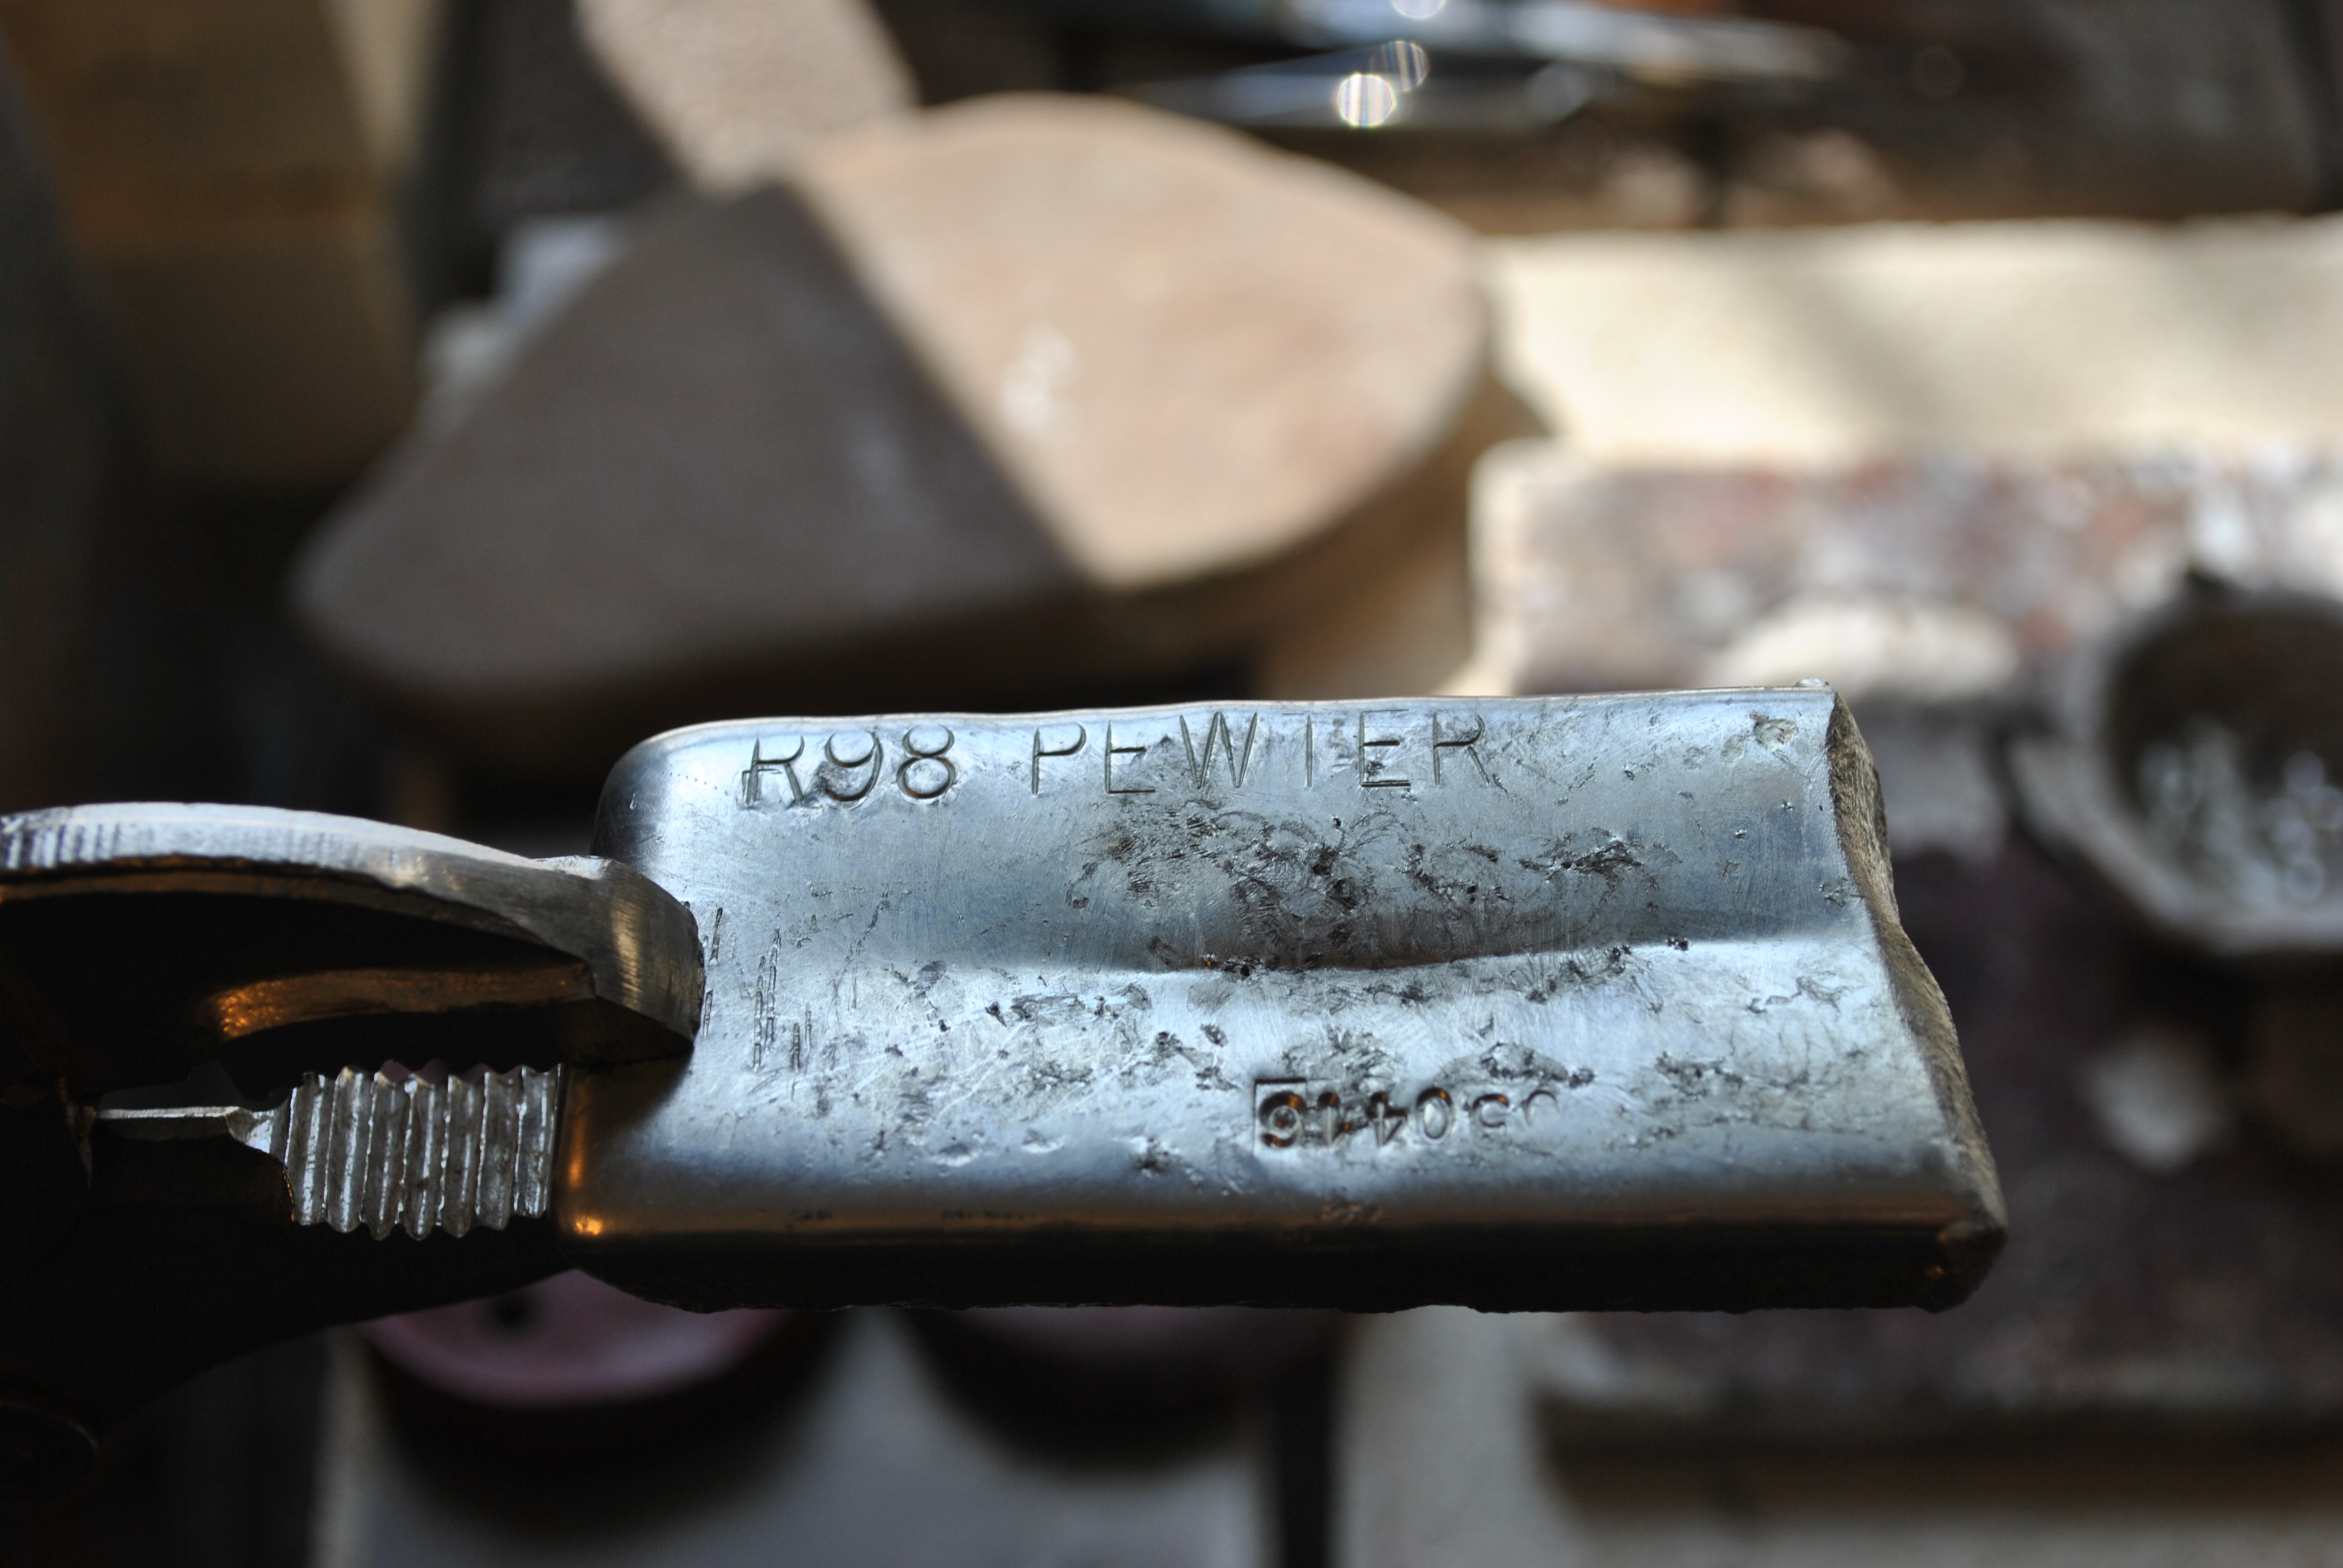
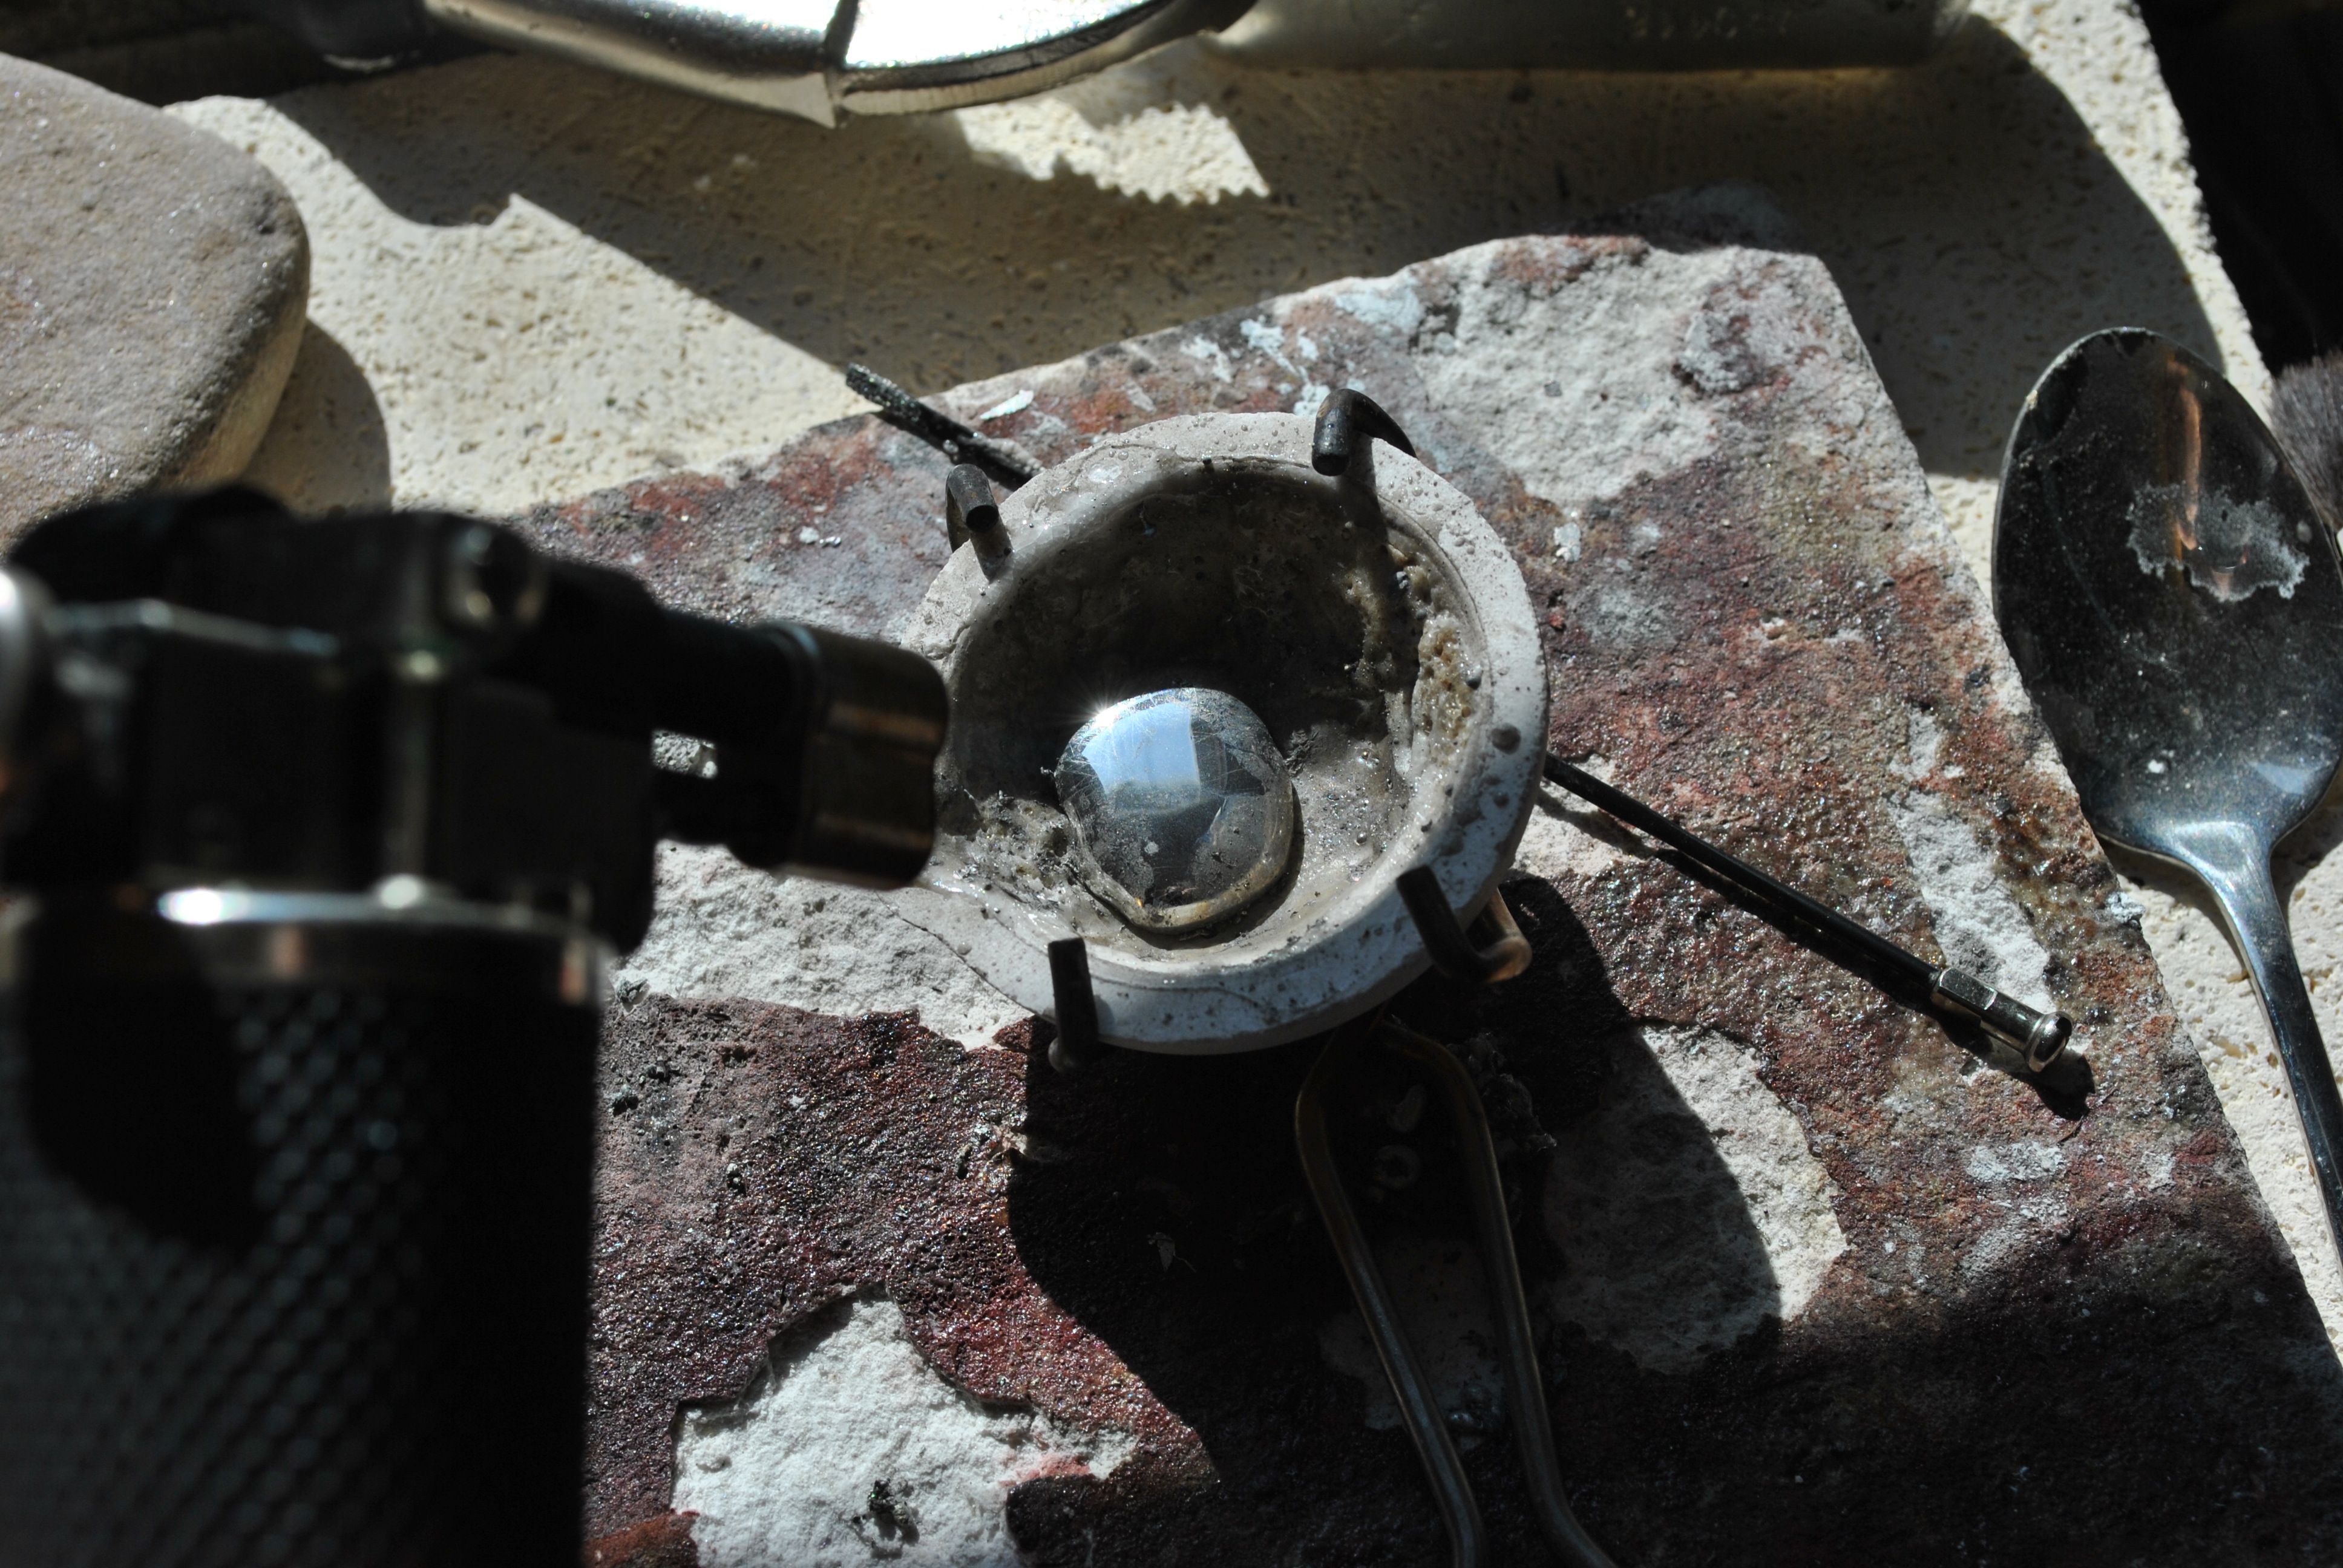
Get some pewter, I got this big hunk off the internet, it was pretty cheap, I just use a torch to melt some off the end, I also had some leftover bits from previous pewter projects, so I dumped those into the crucible as well.


Heat it up until it balls up into a lump, it doesn’t take long, then scrape the gunk off the top with a spoon. That gunk is impurities and will make your casting ugly.

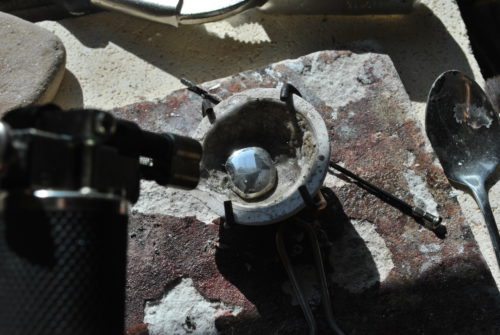
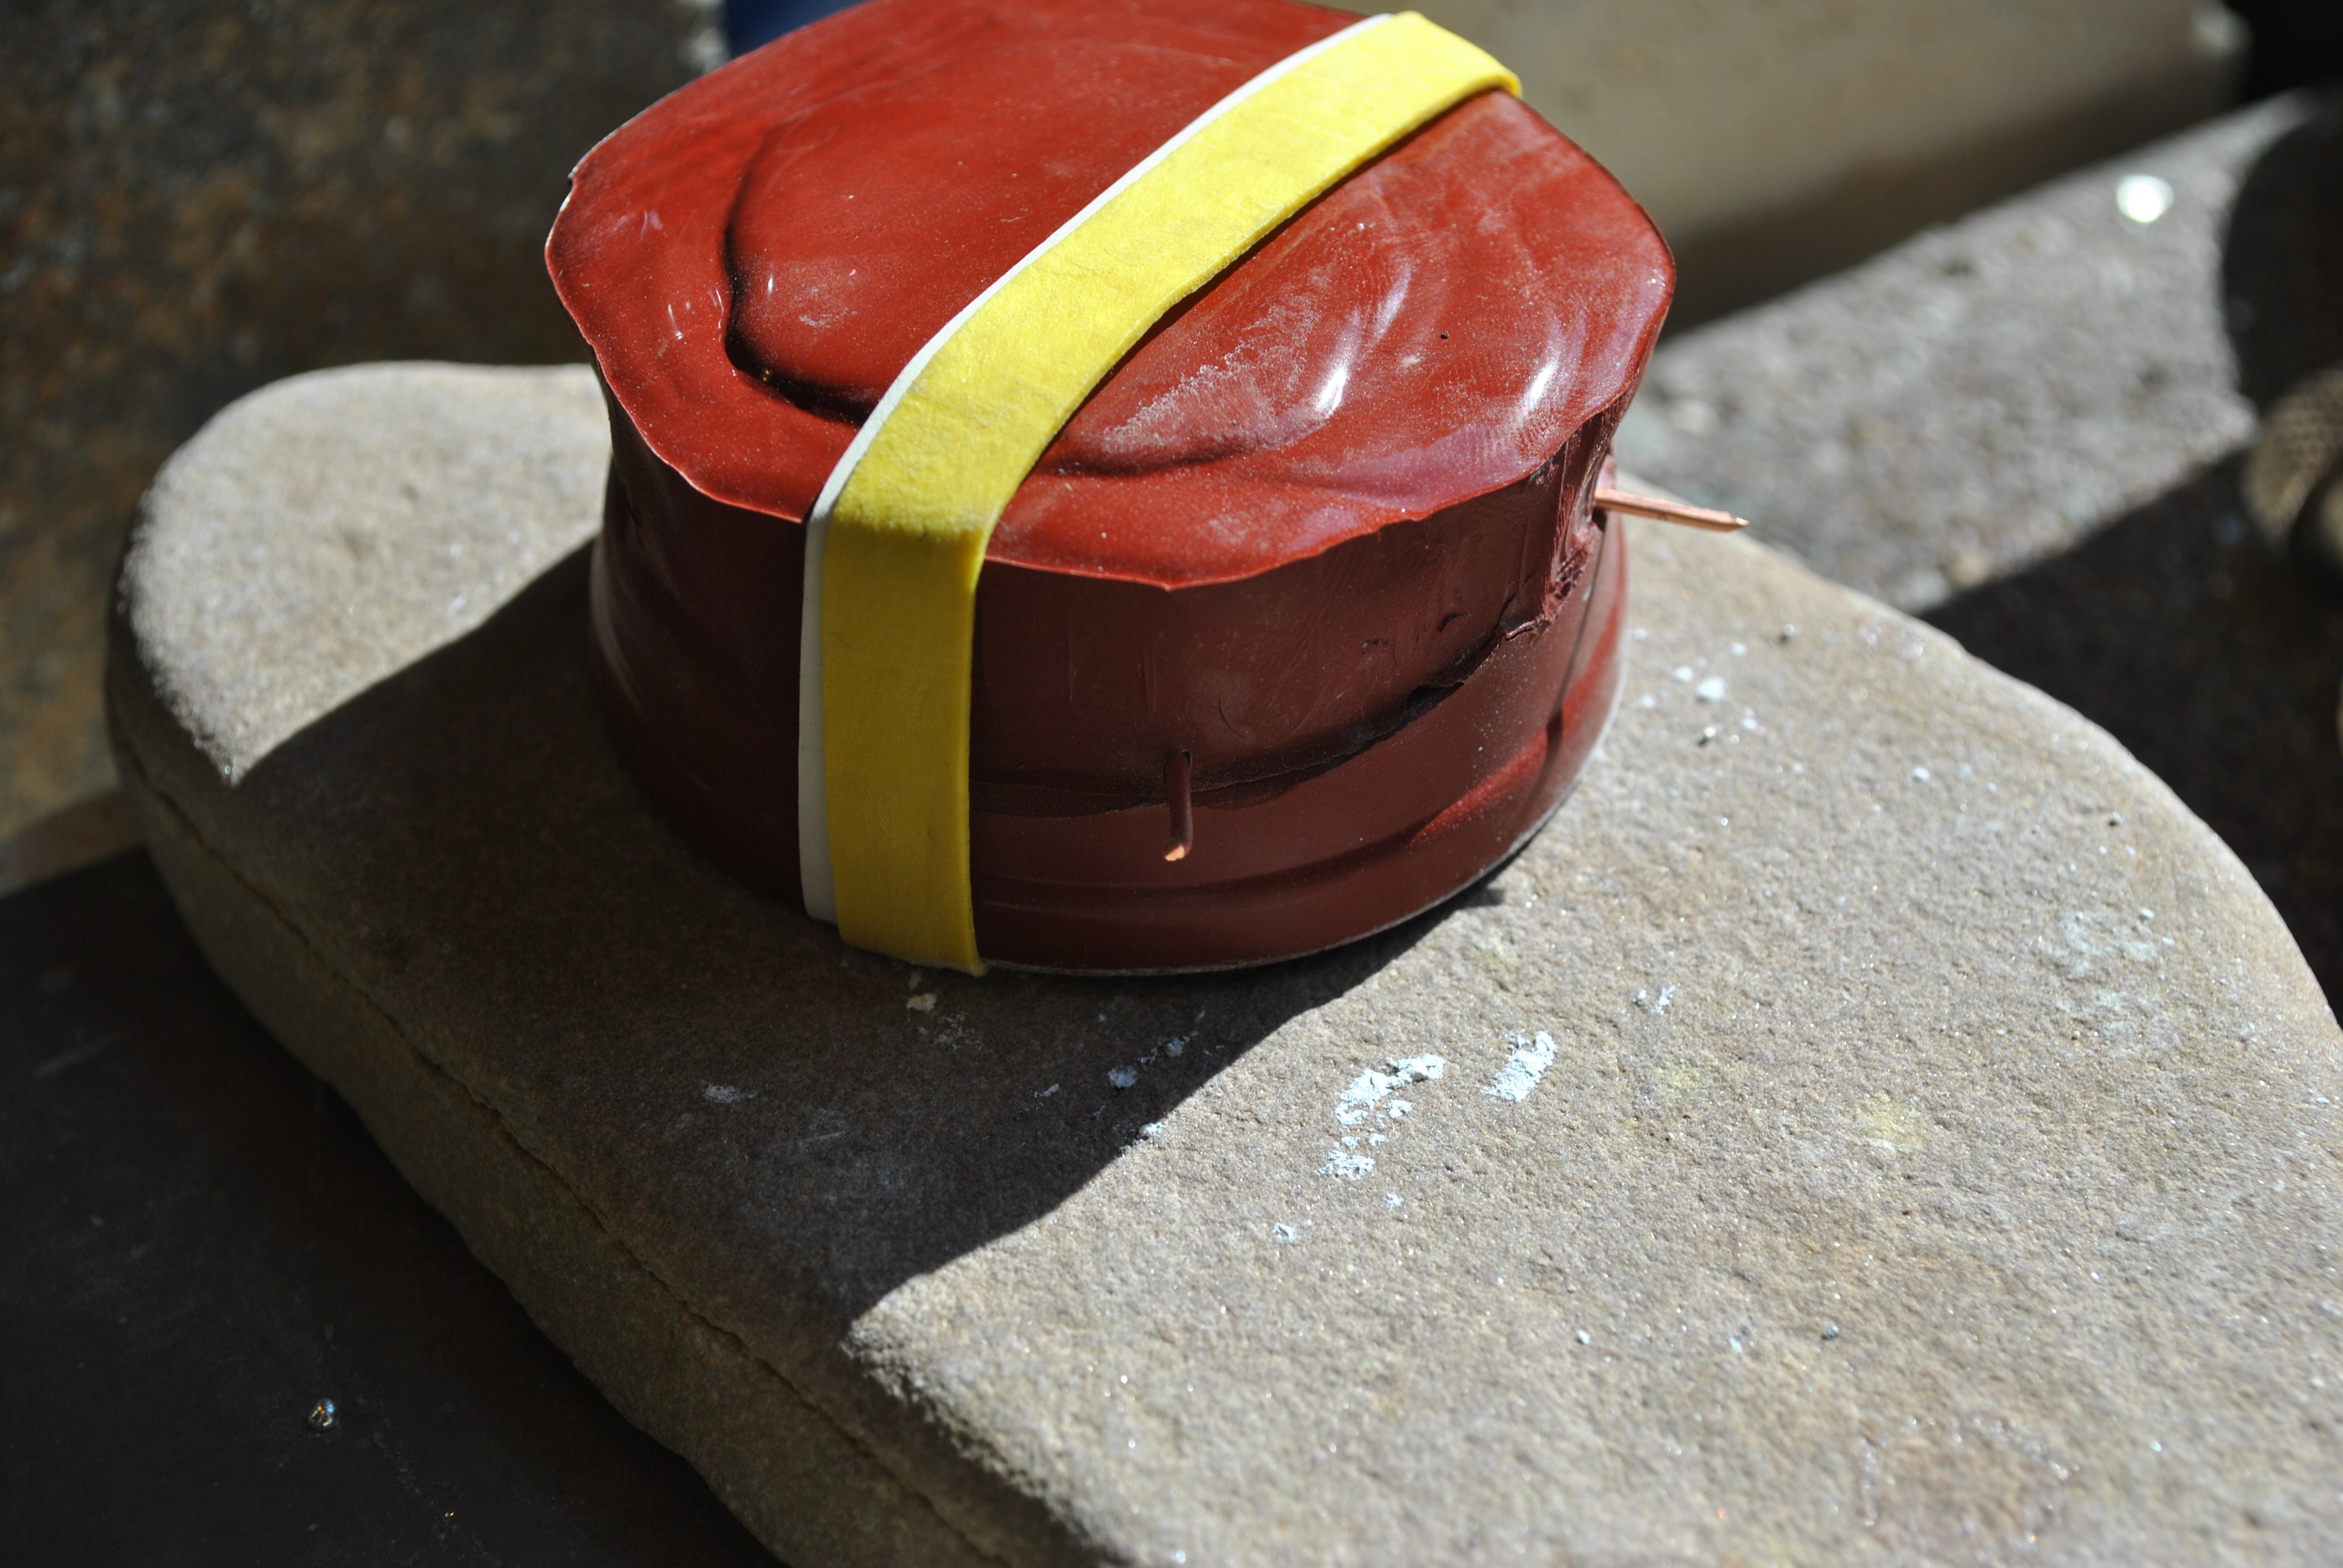
I put a rubber band around the mold, and stuck it between two fire brick with a metal pan under them to catch any spillage.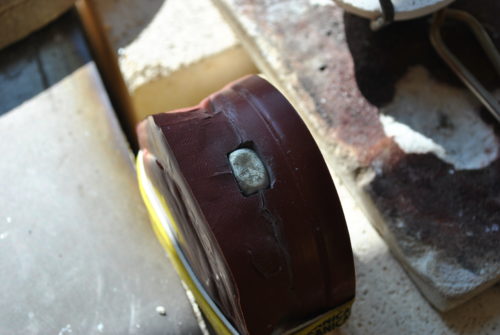
I dumped it in slowly, and gave the side of the mold a tap. You might have to do this more than once until the mold warms up. But if you mess up just melt everything down and go again.
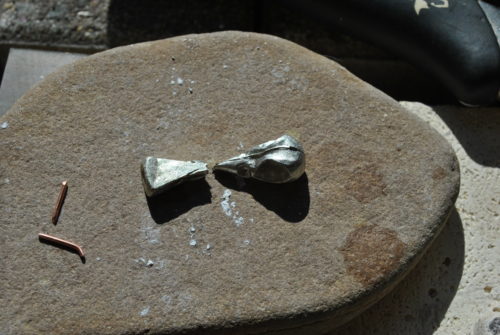
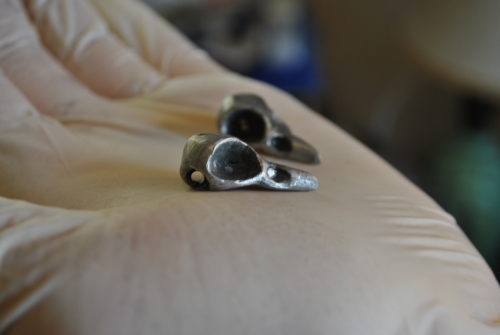
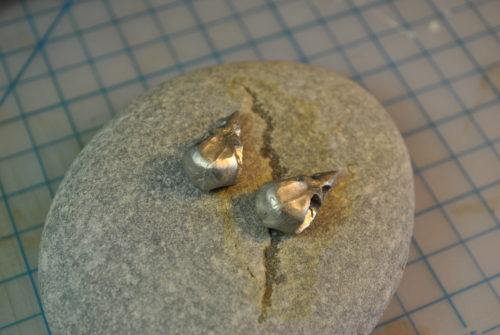
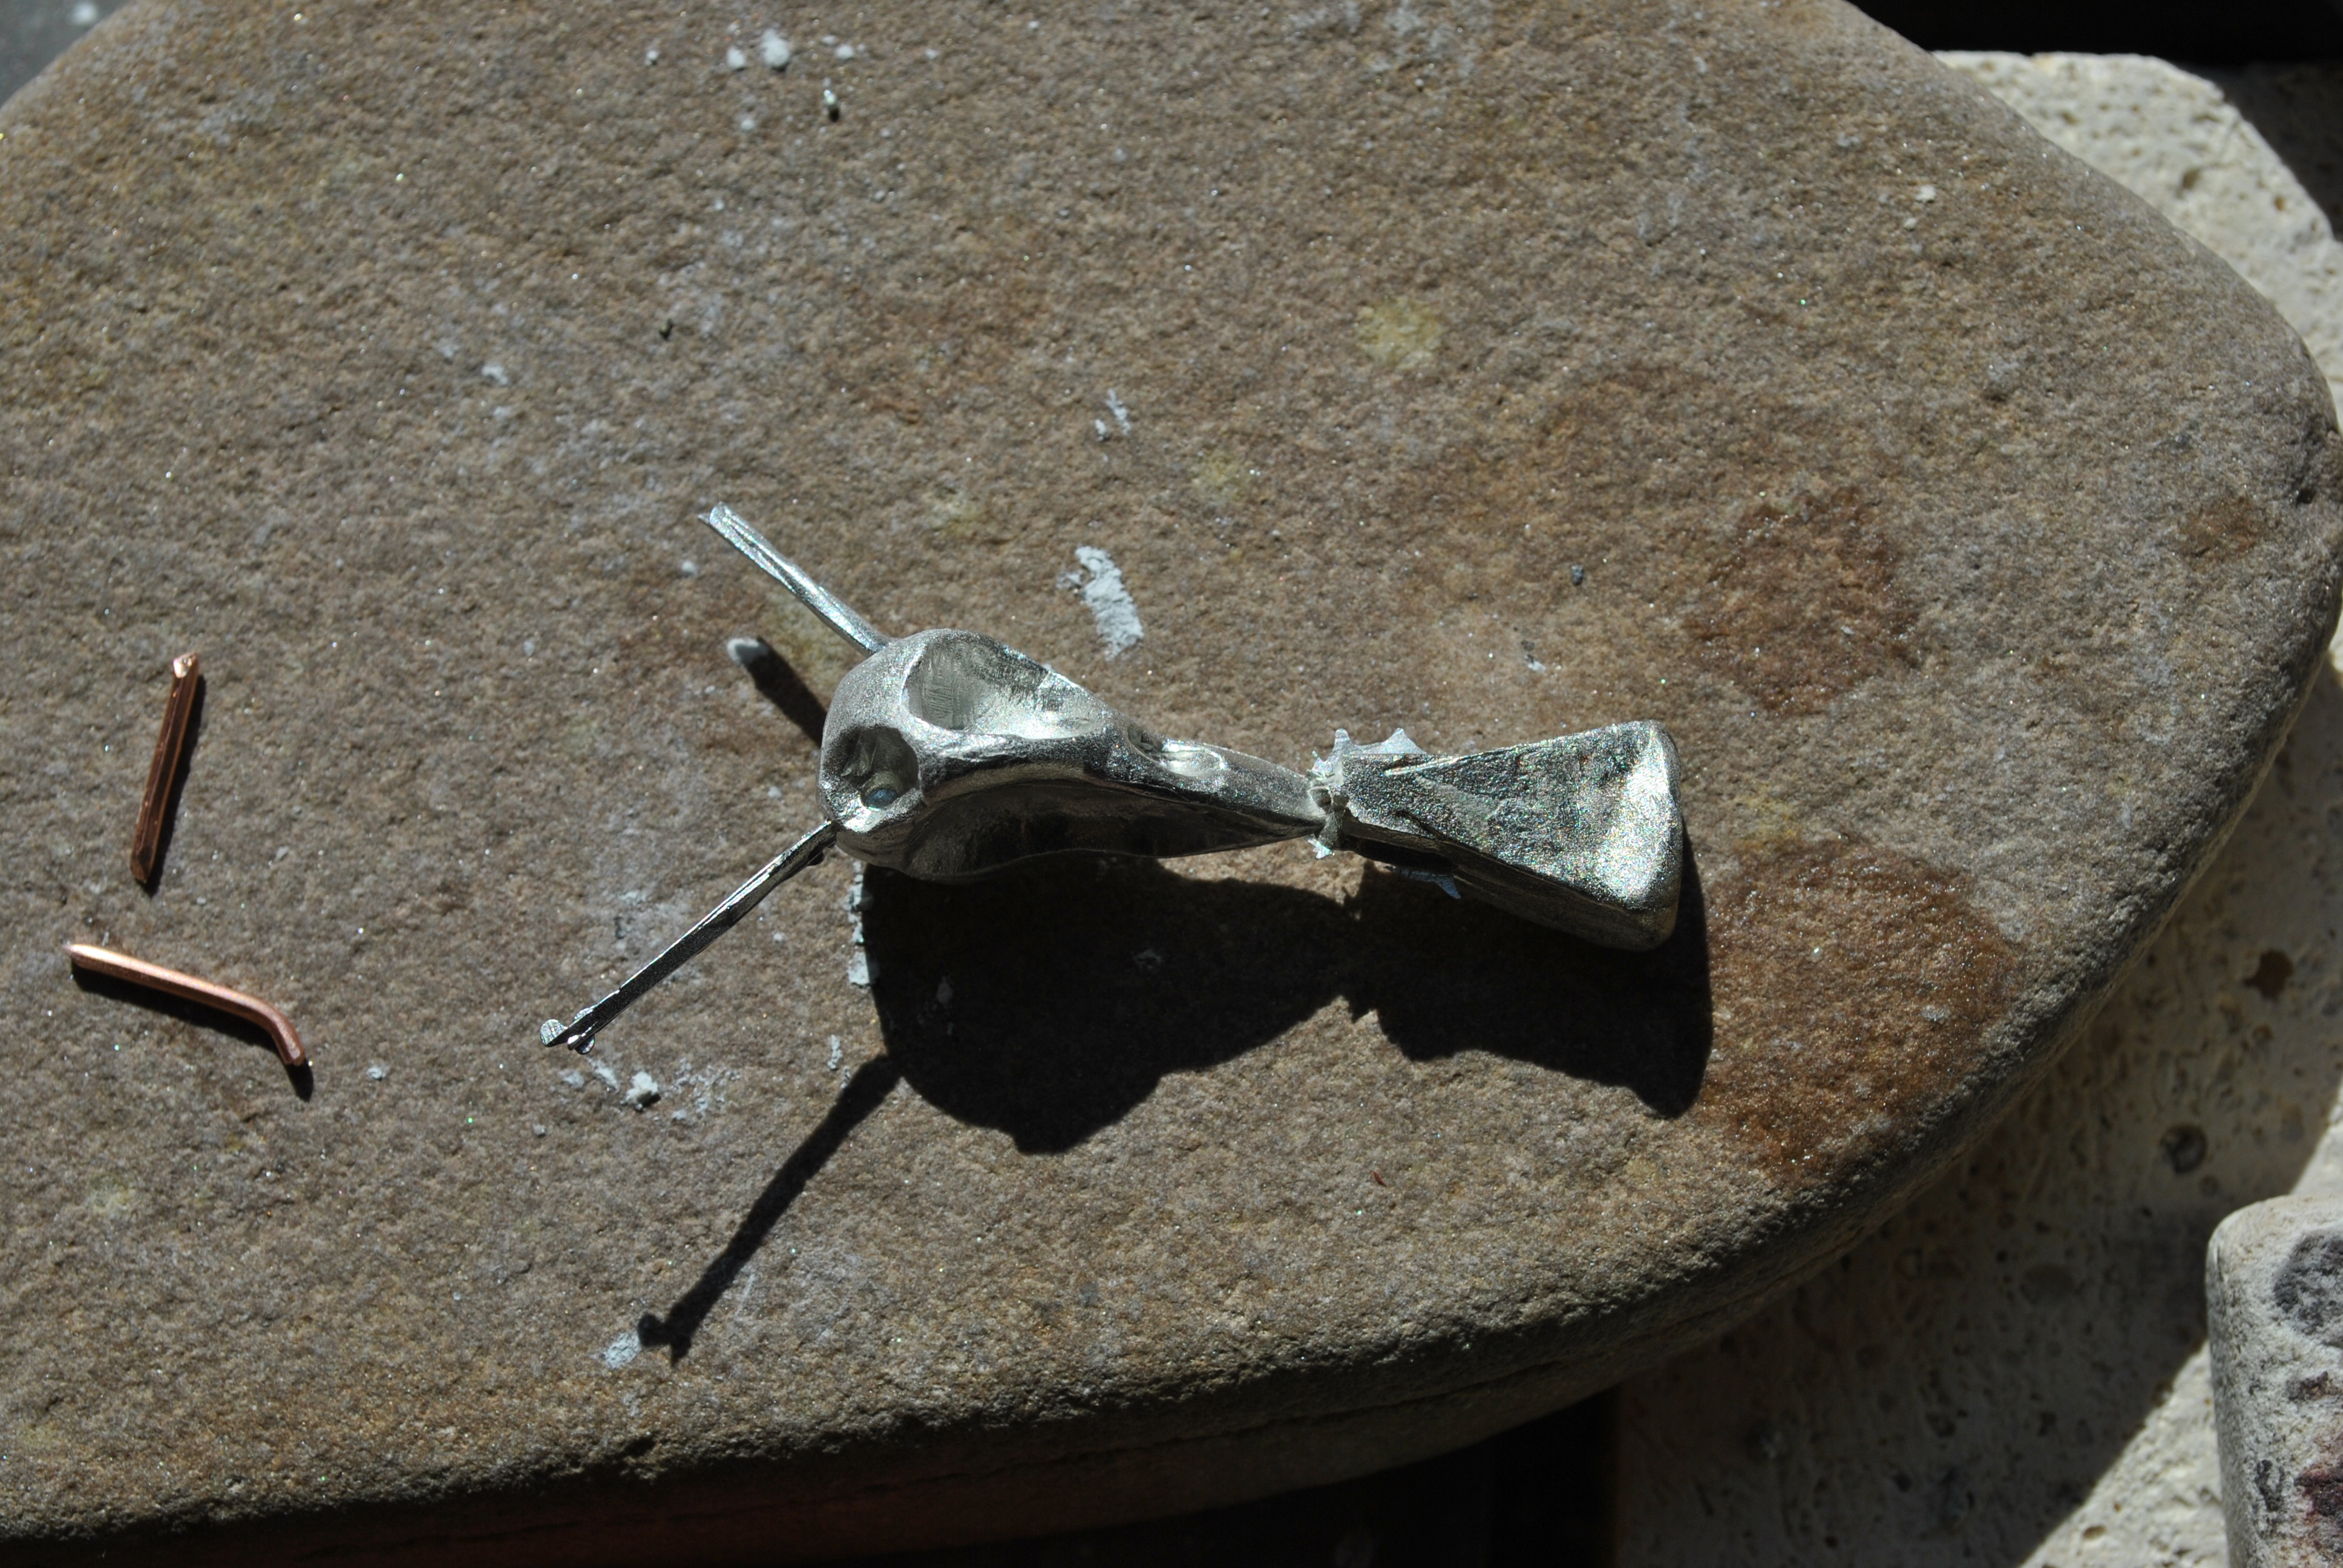
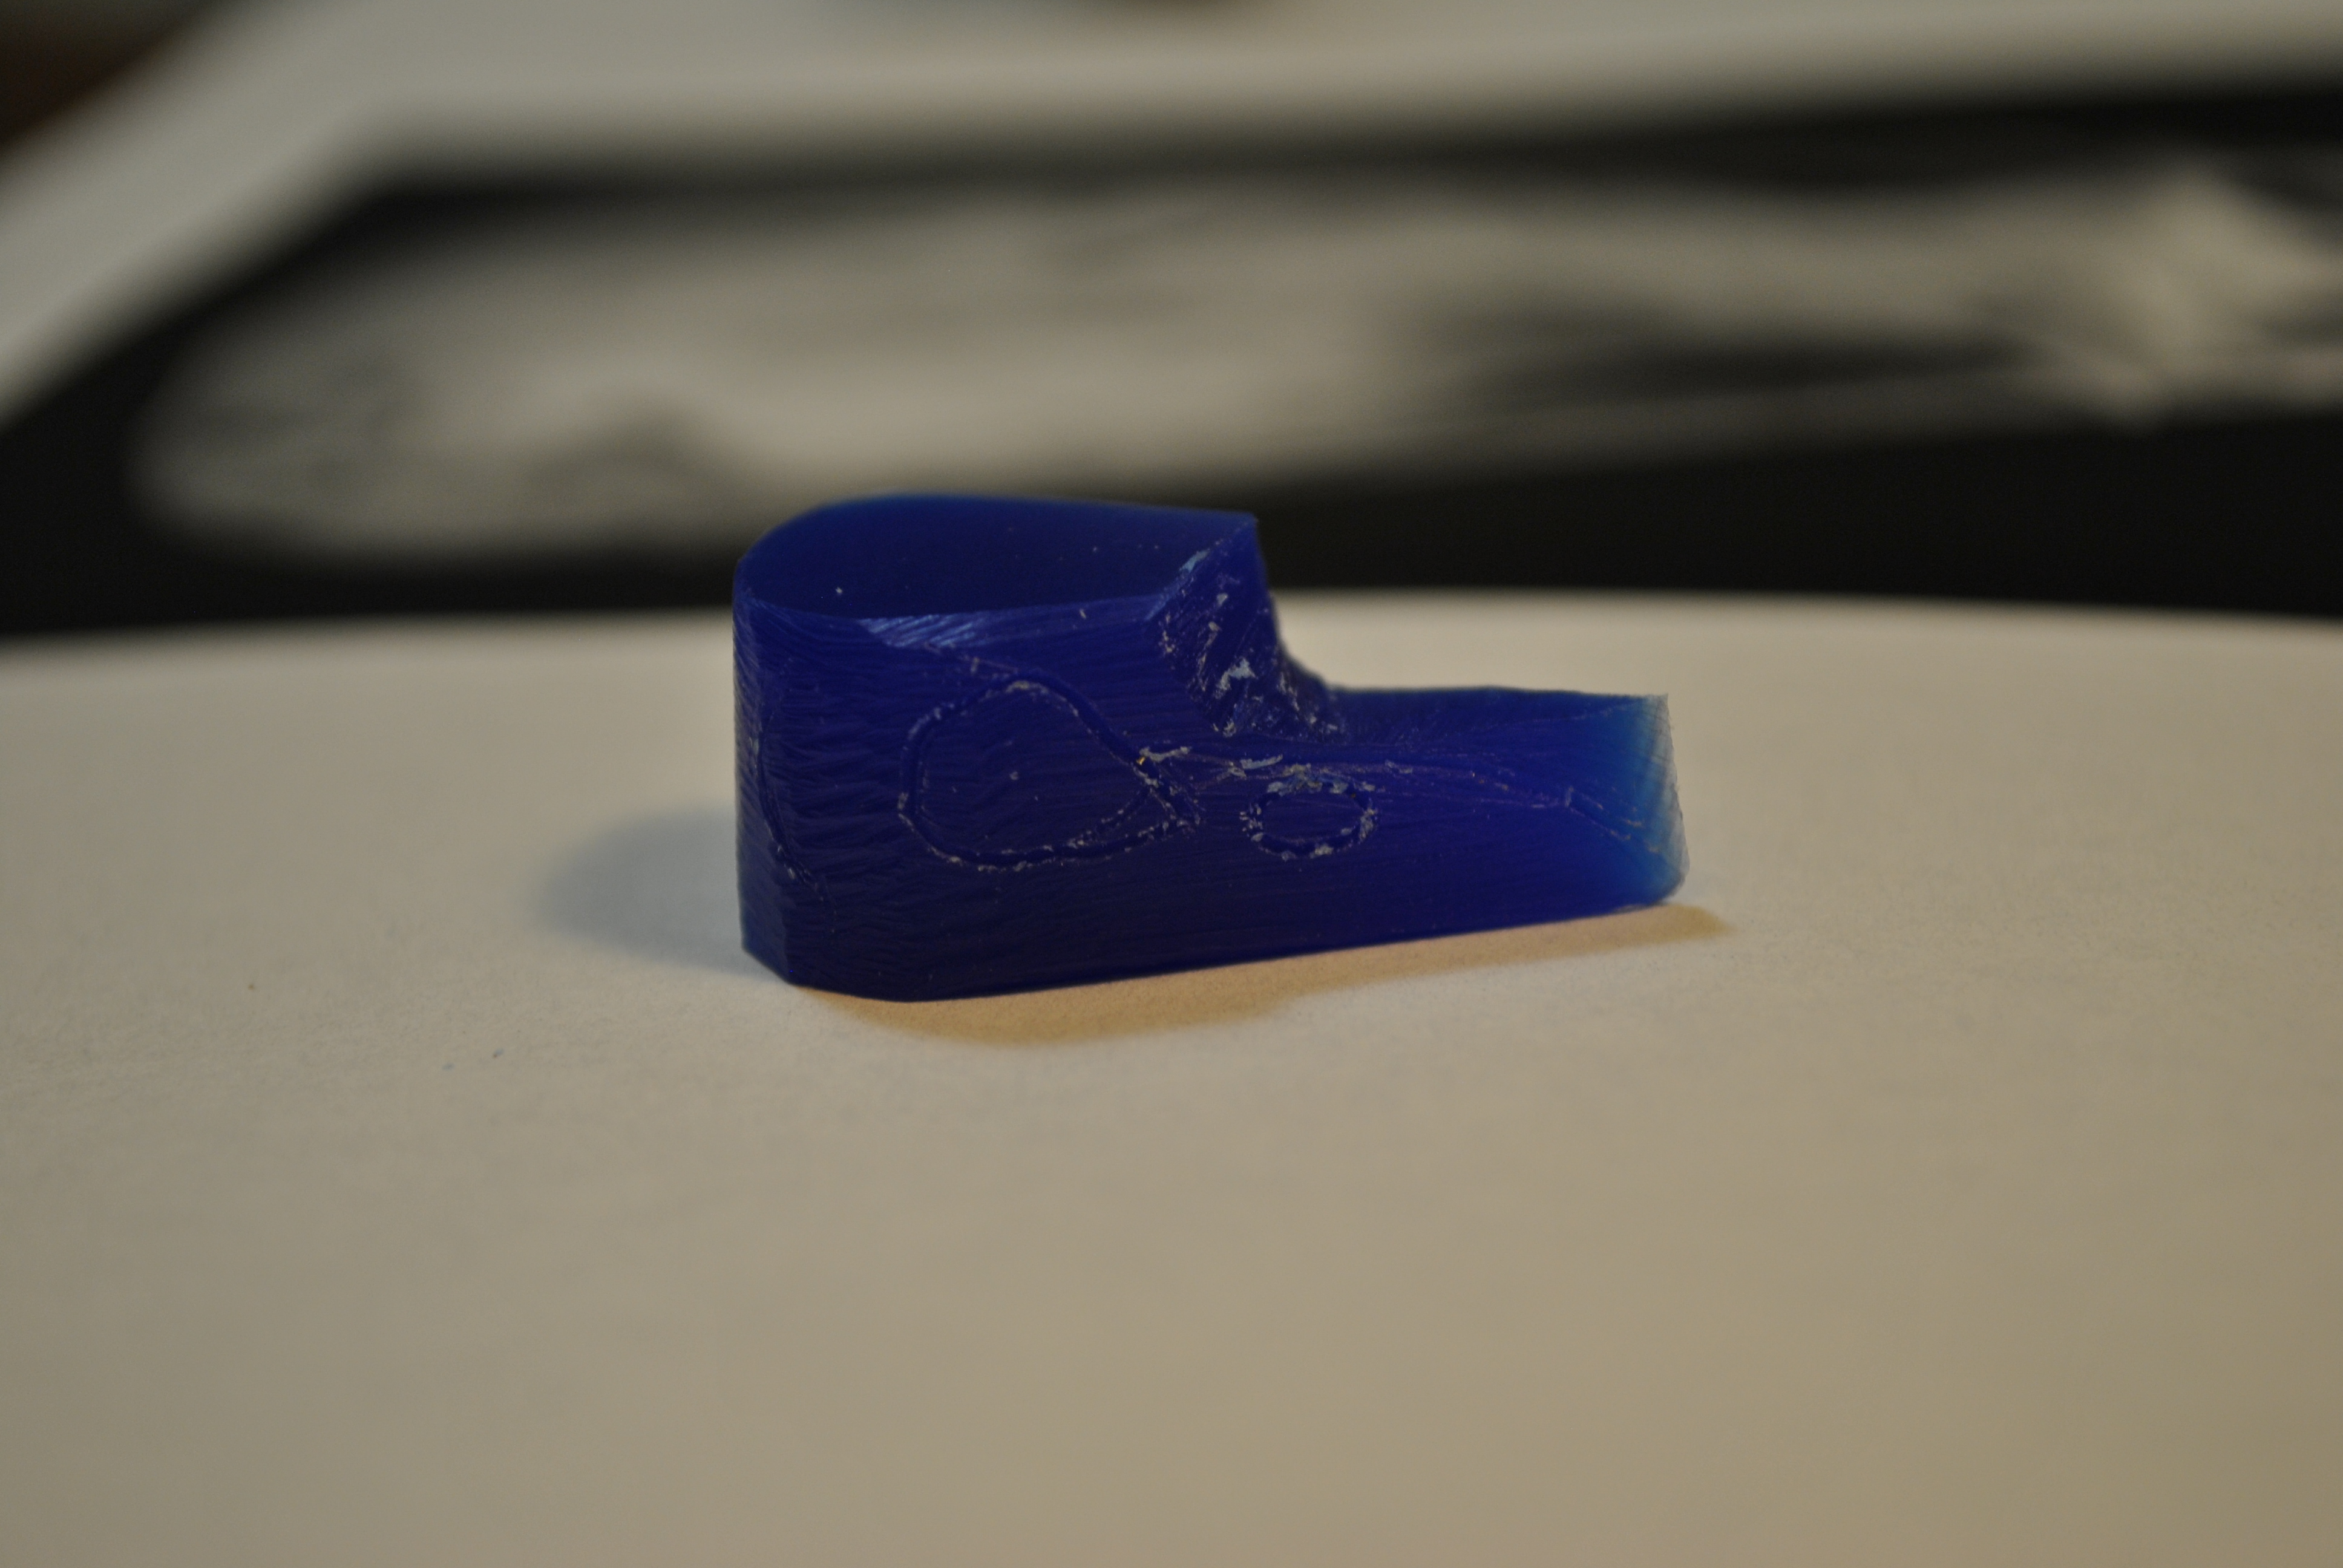
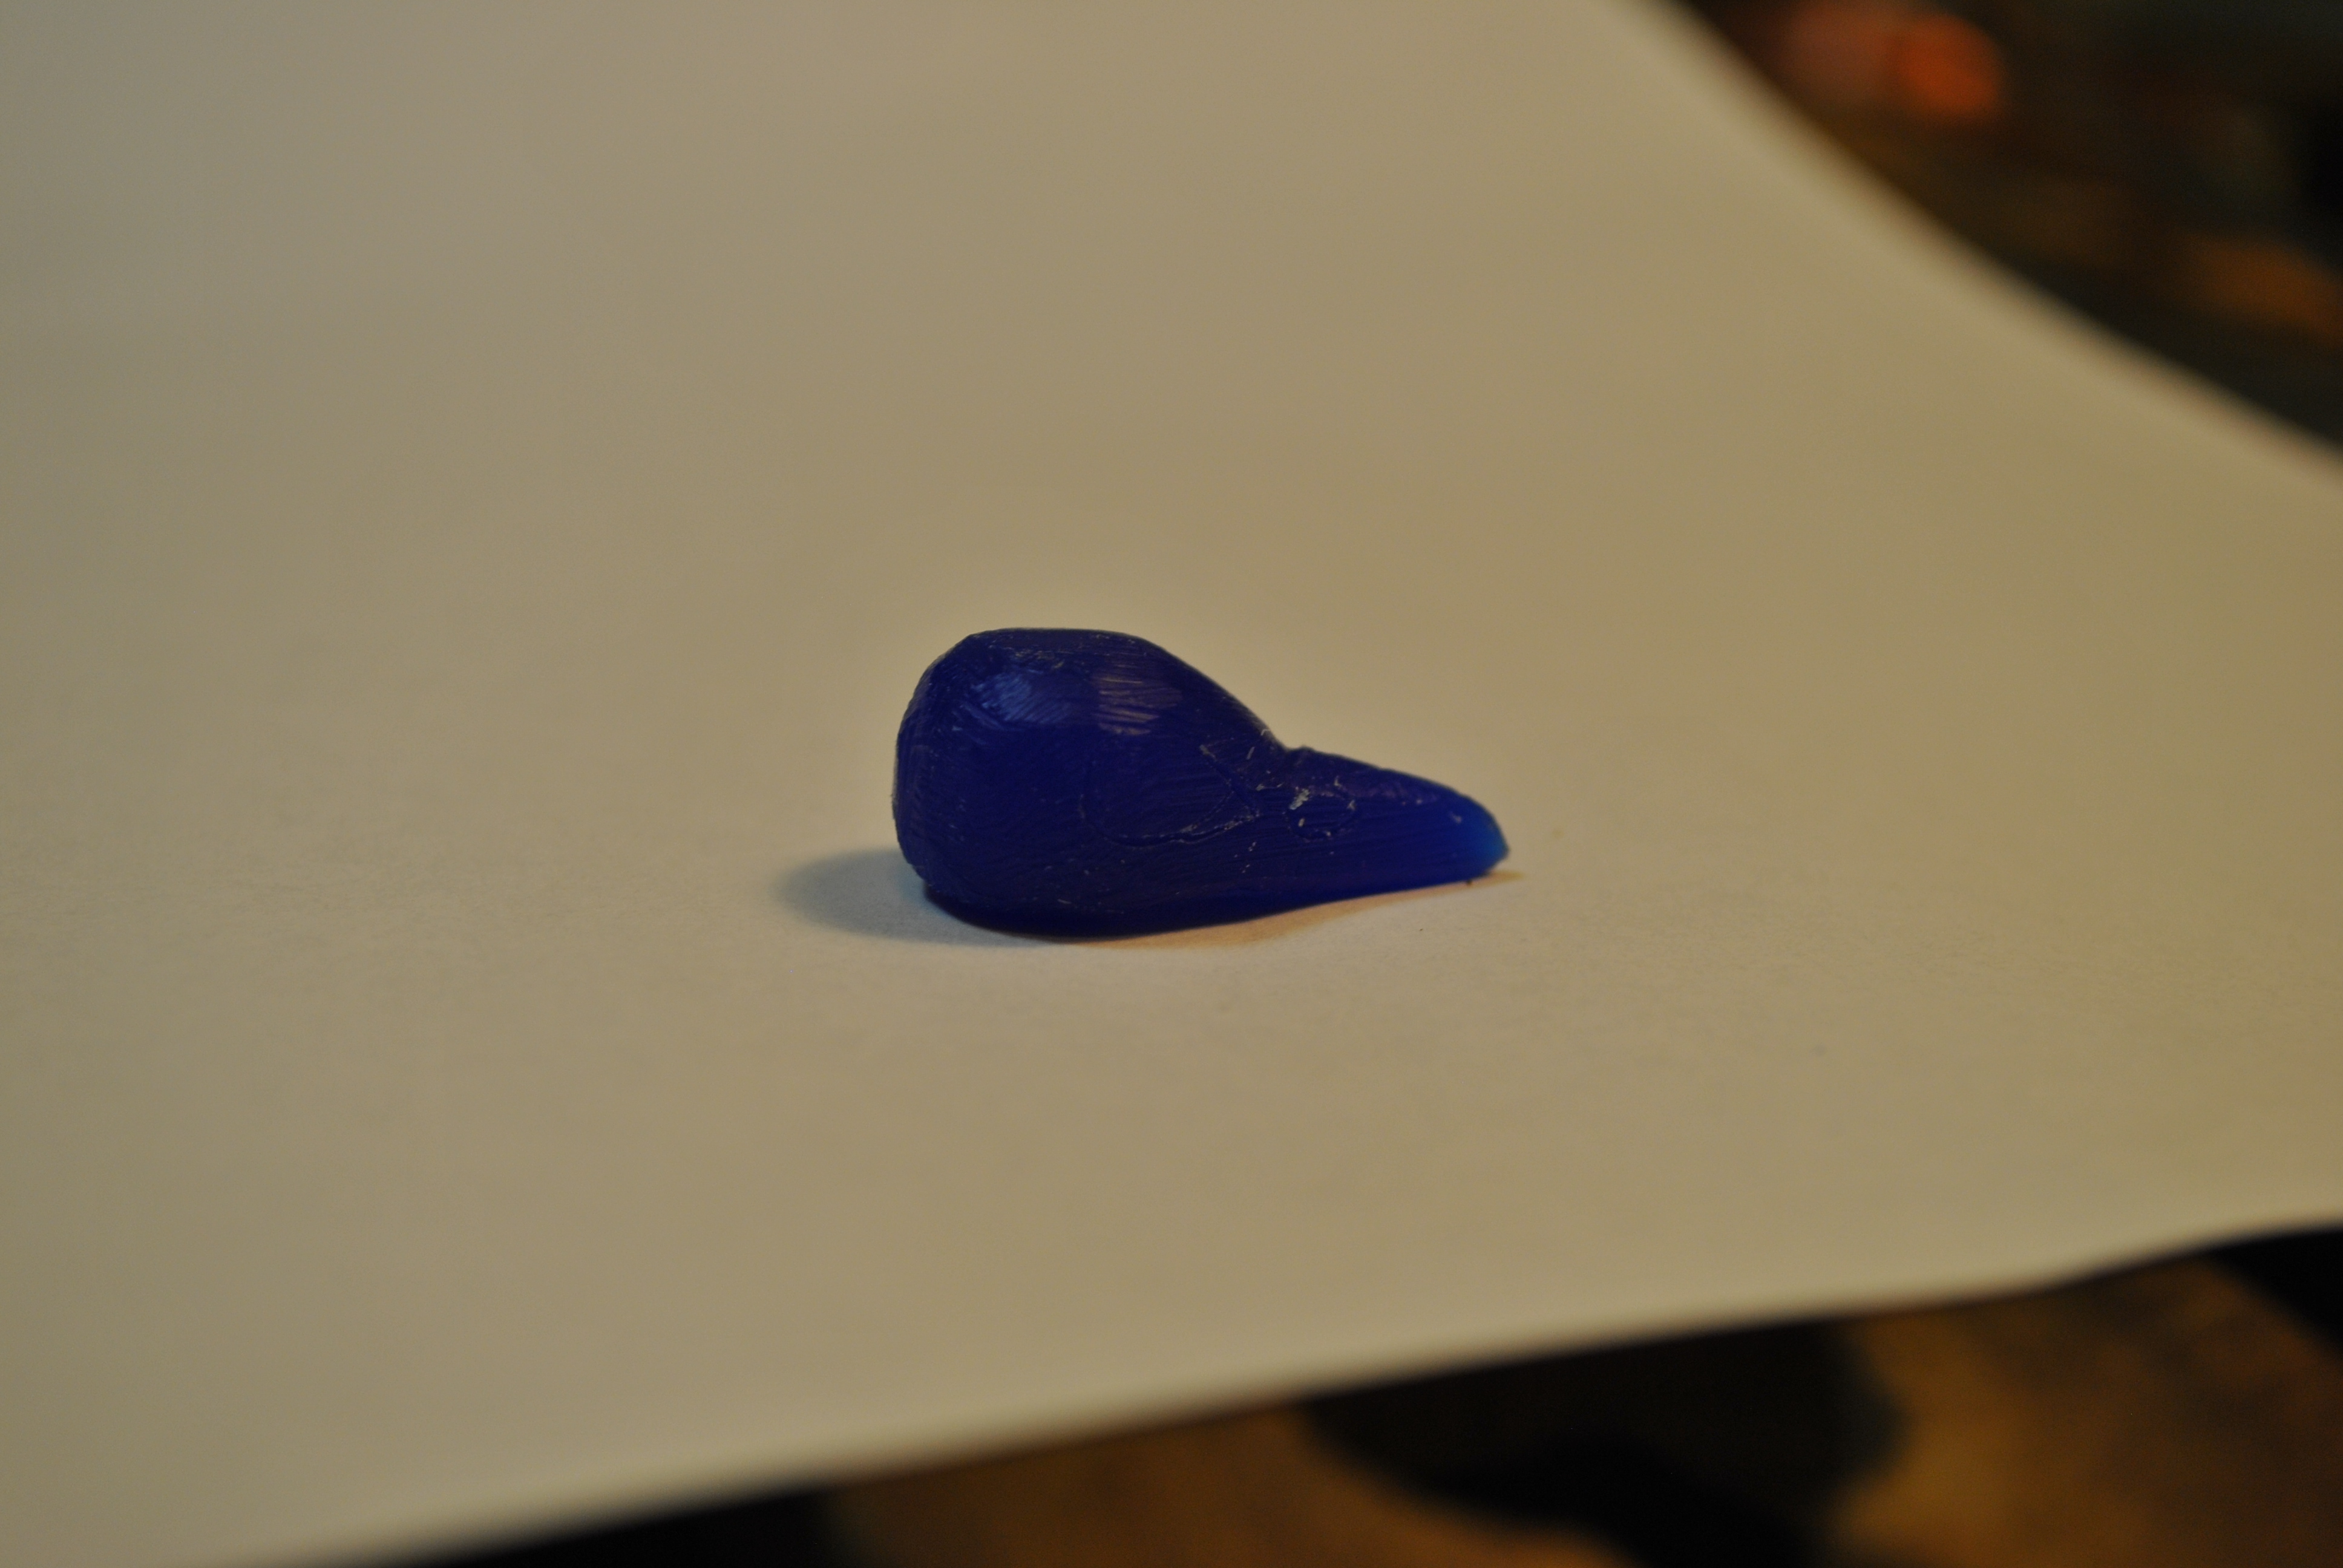
Let it sit for a while until the top part solidifies, than crack it open and see what you got.
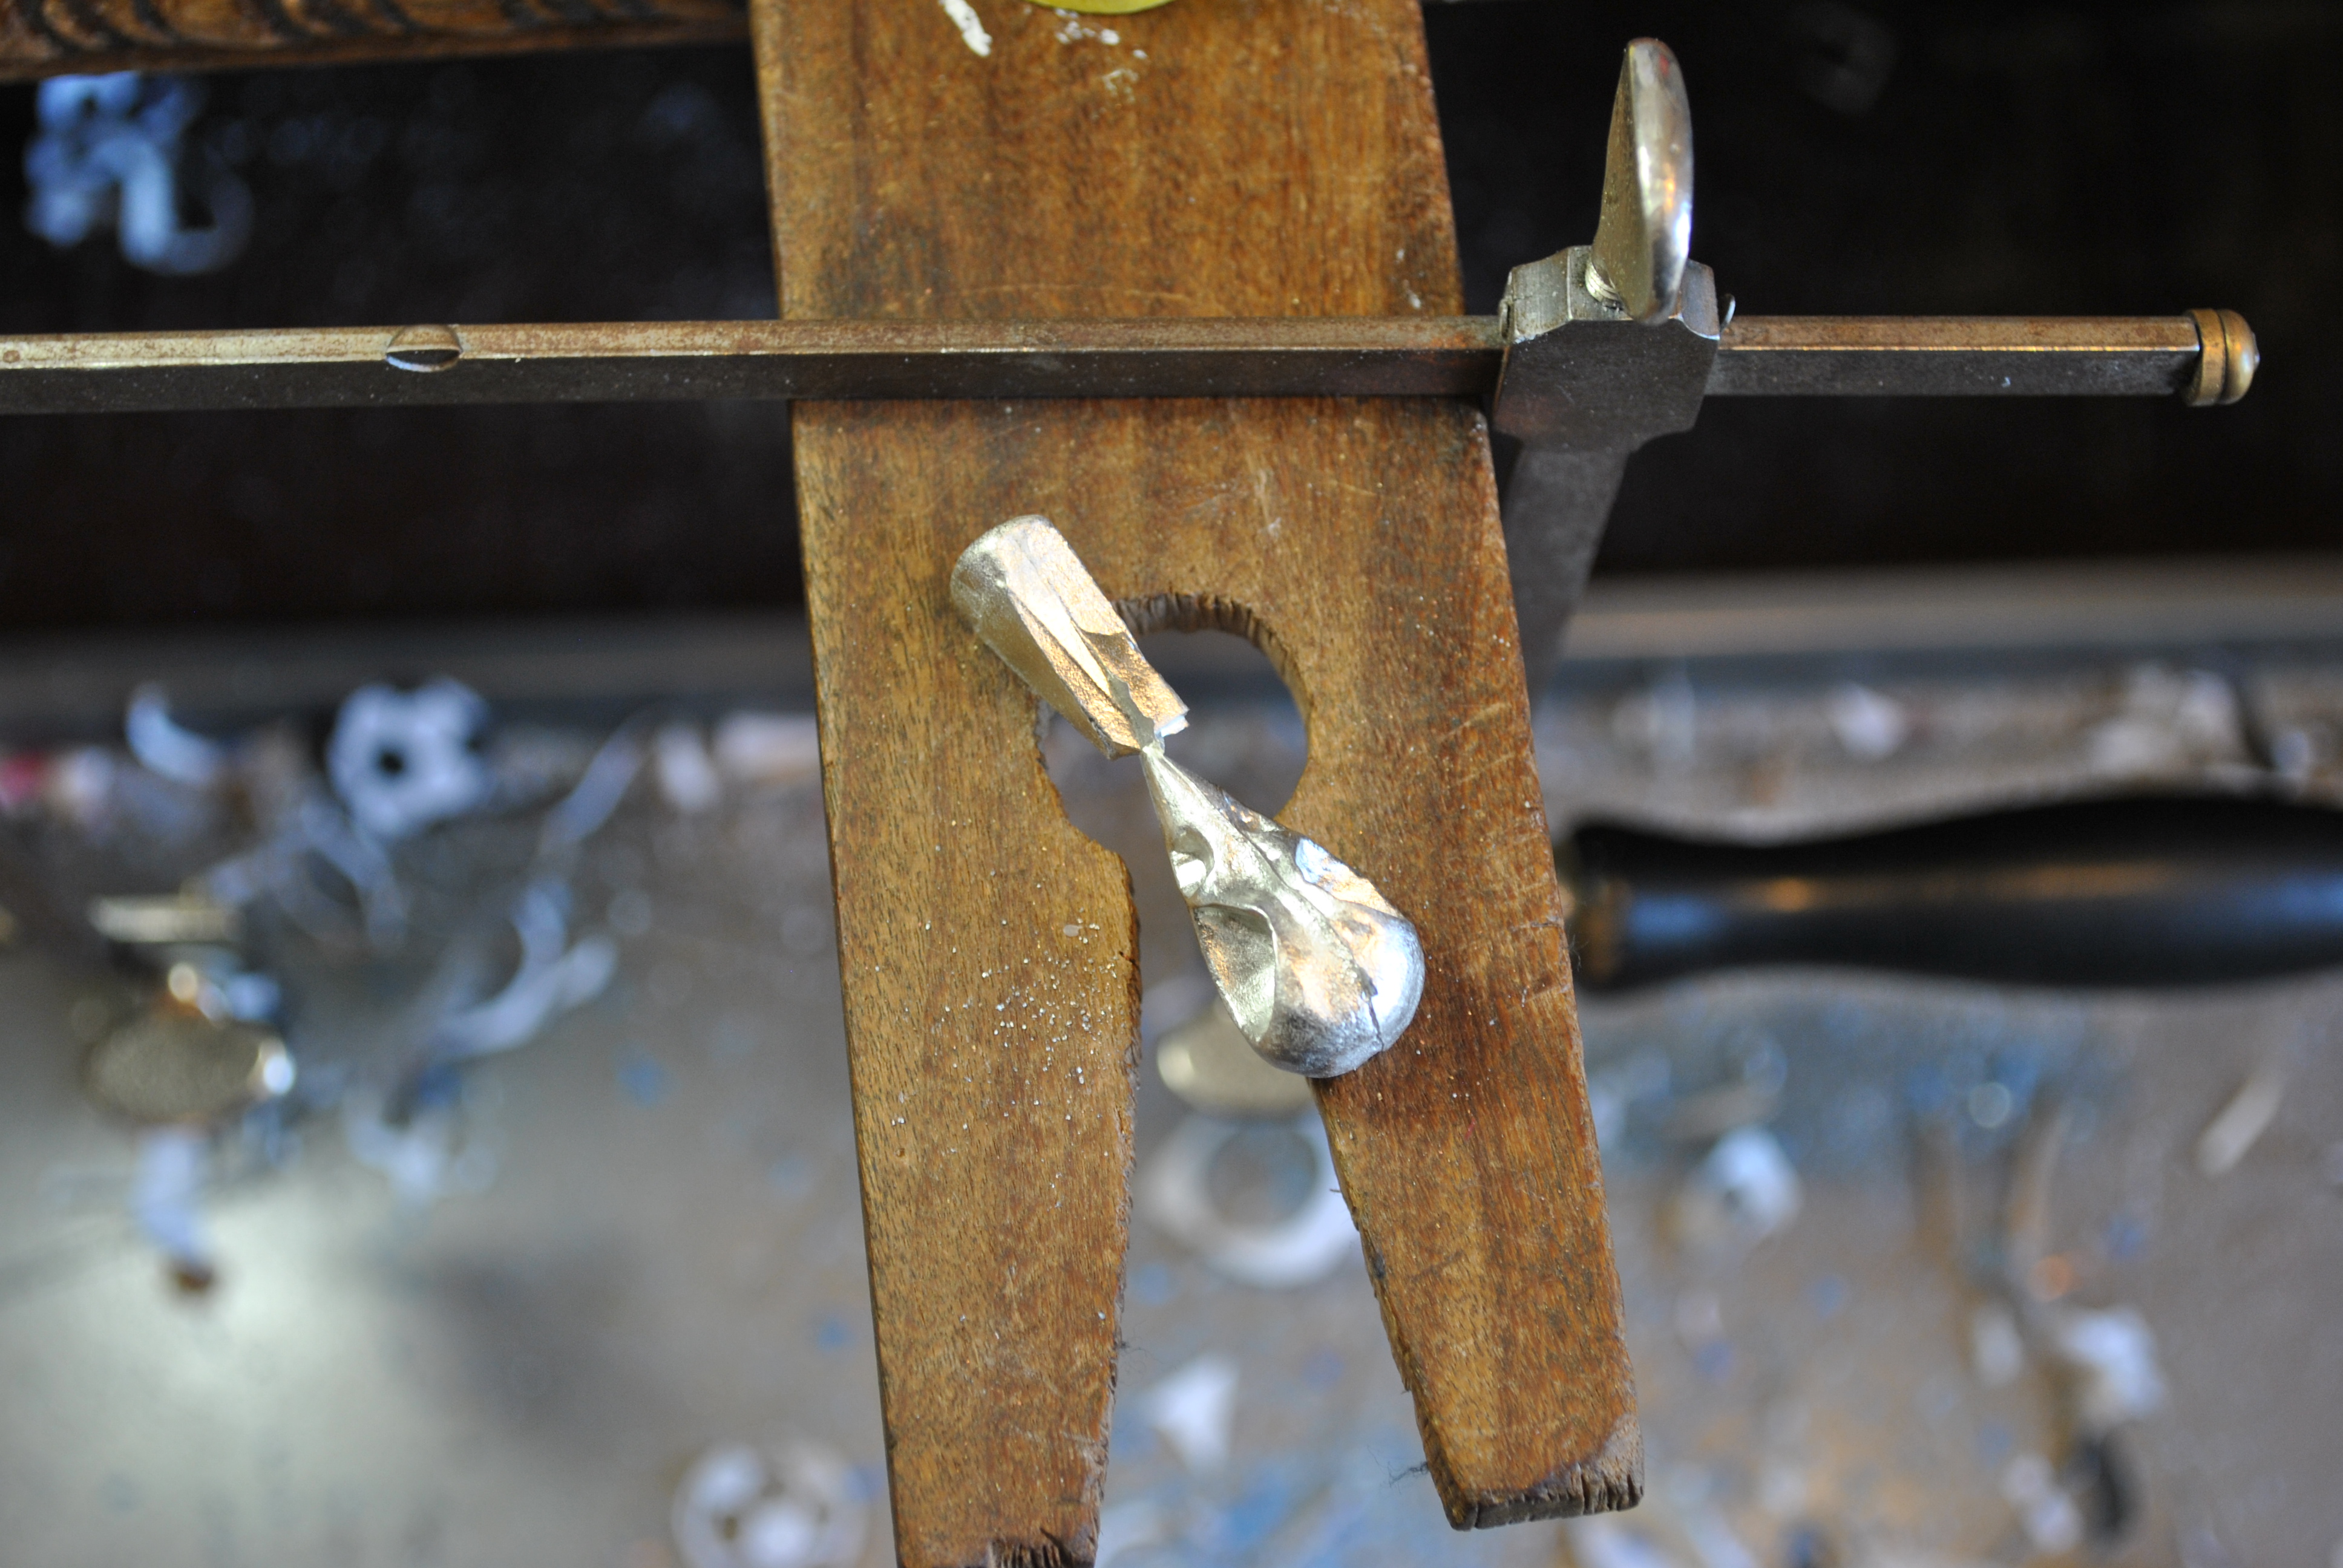
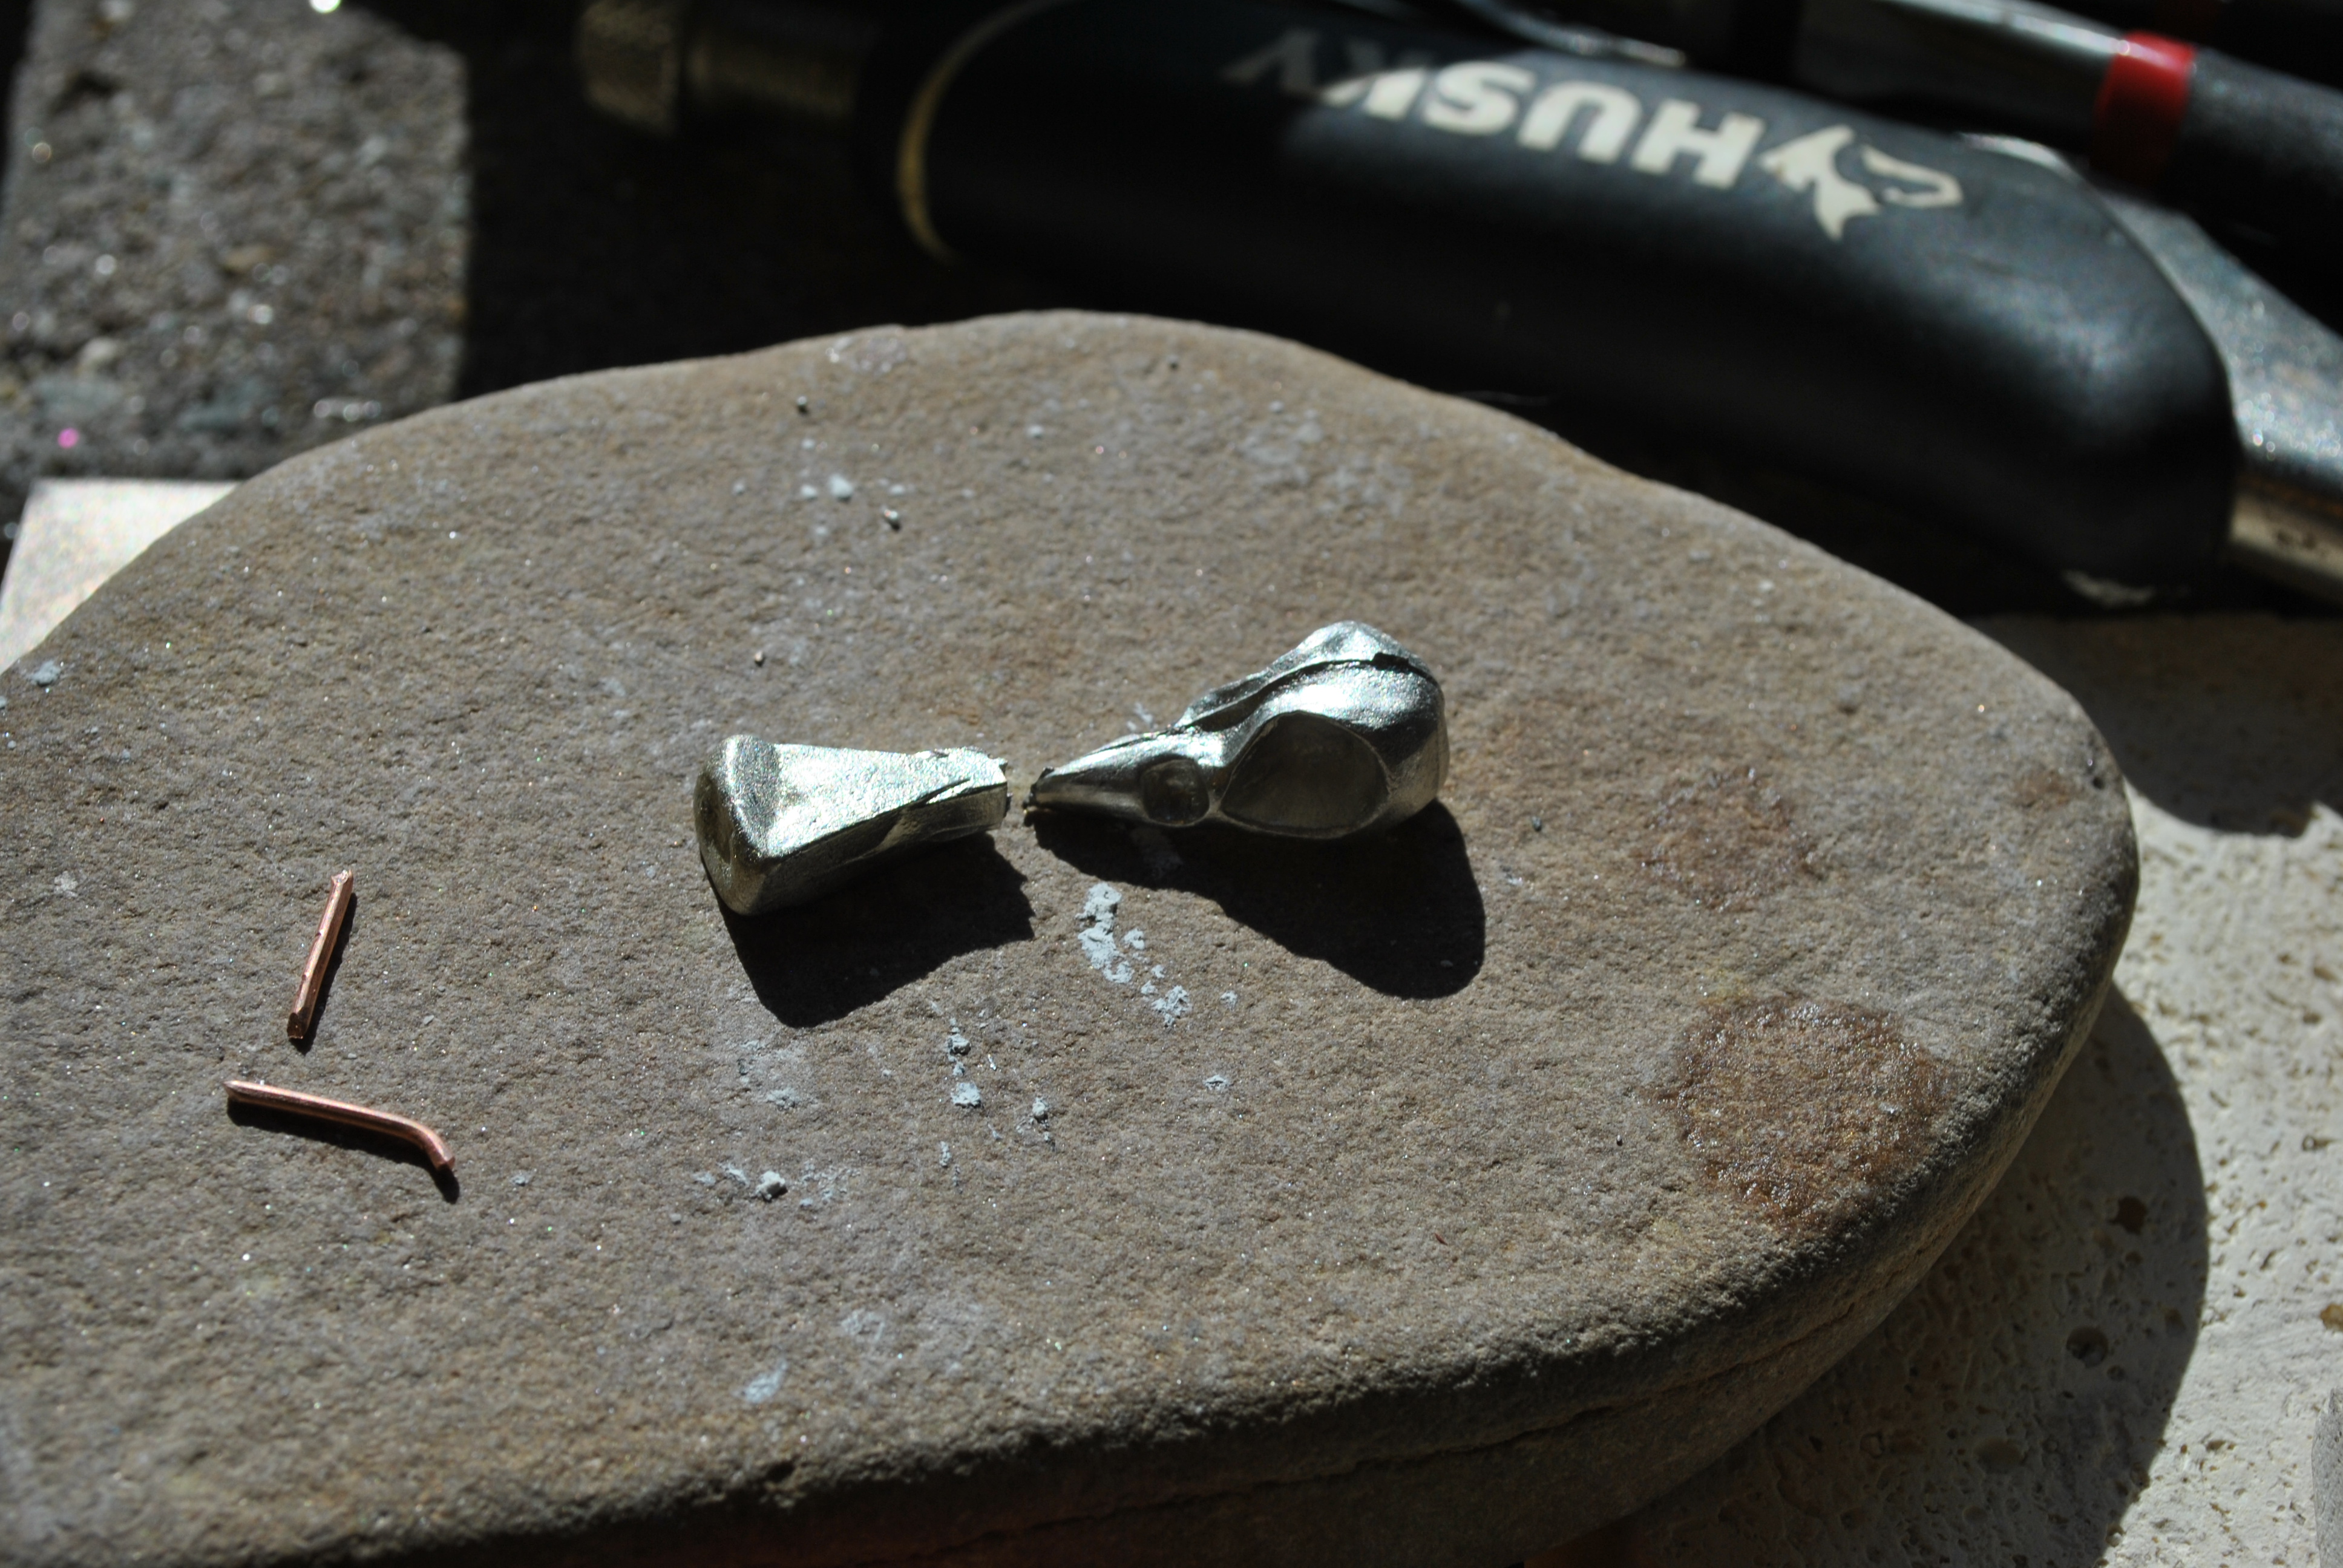
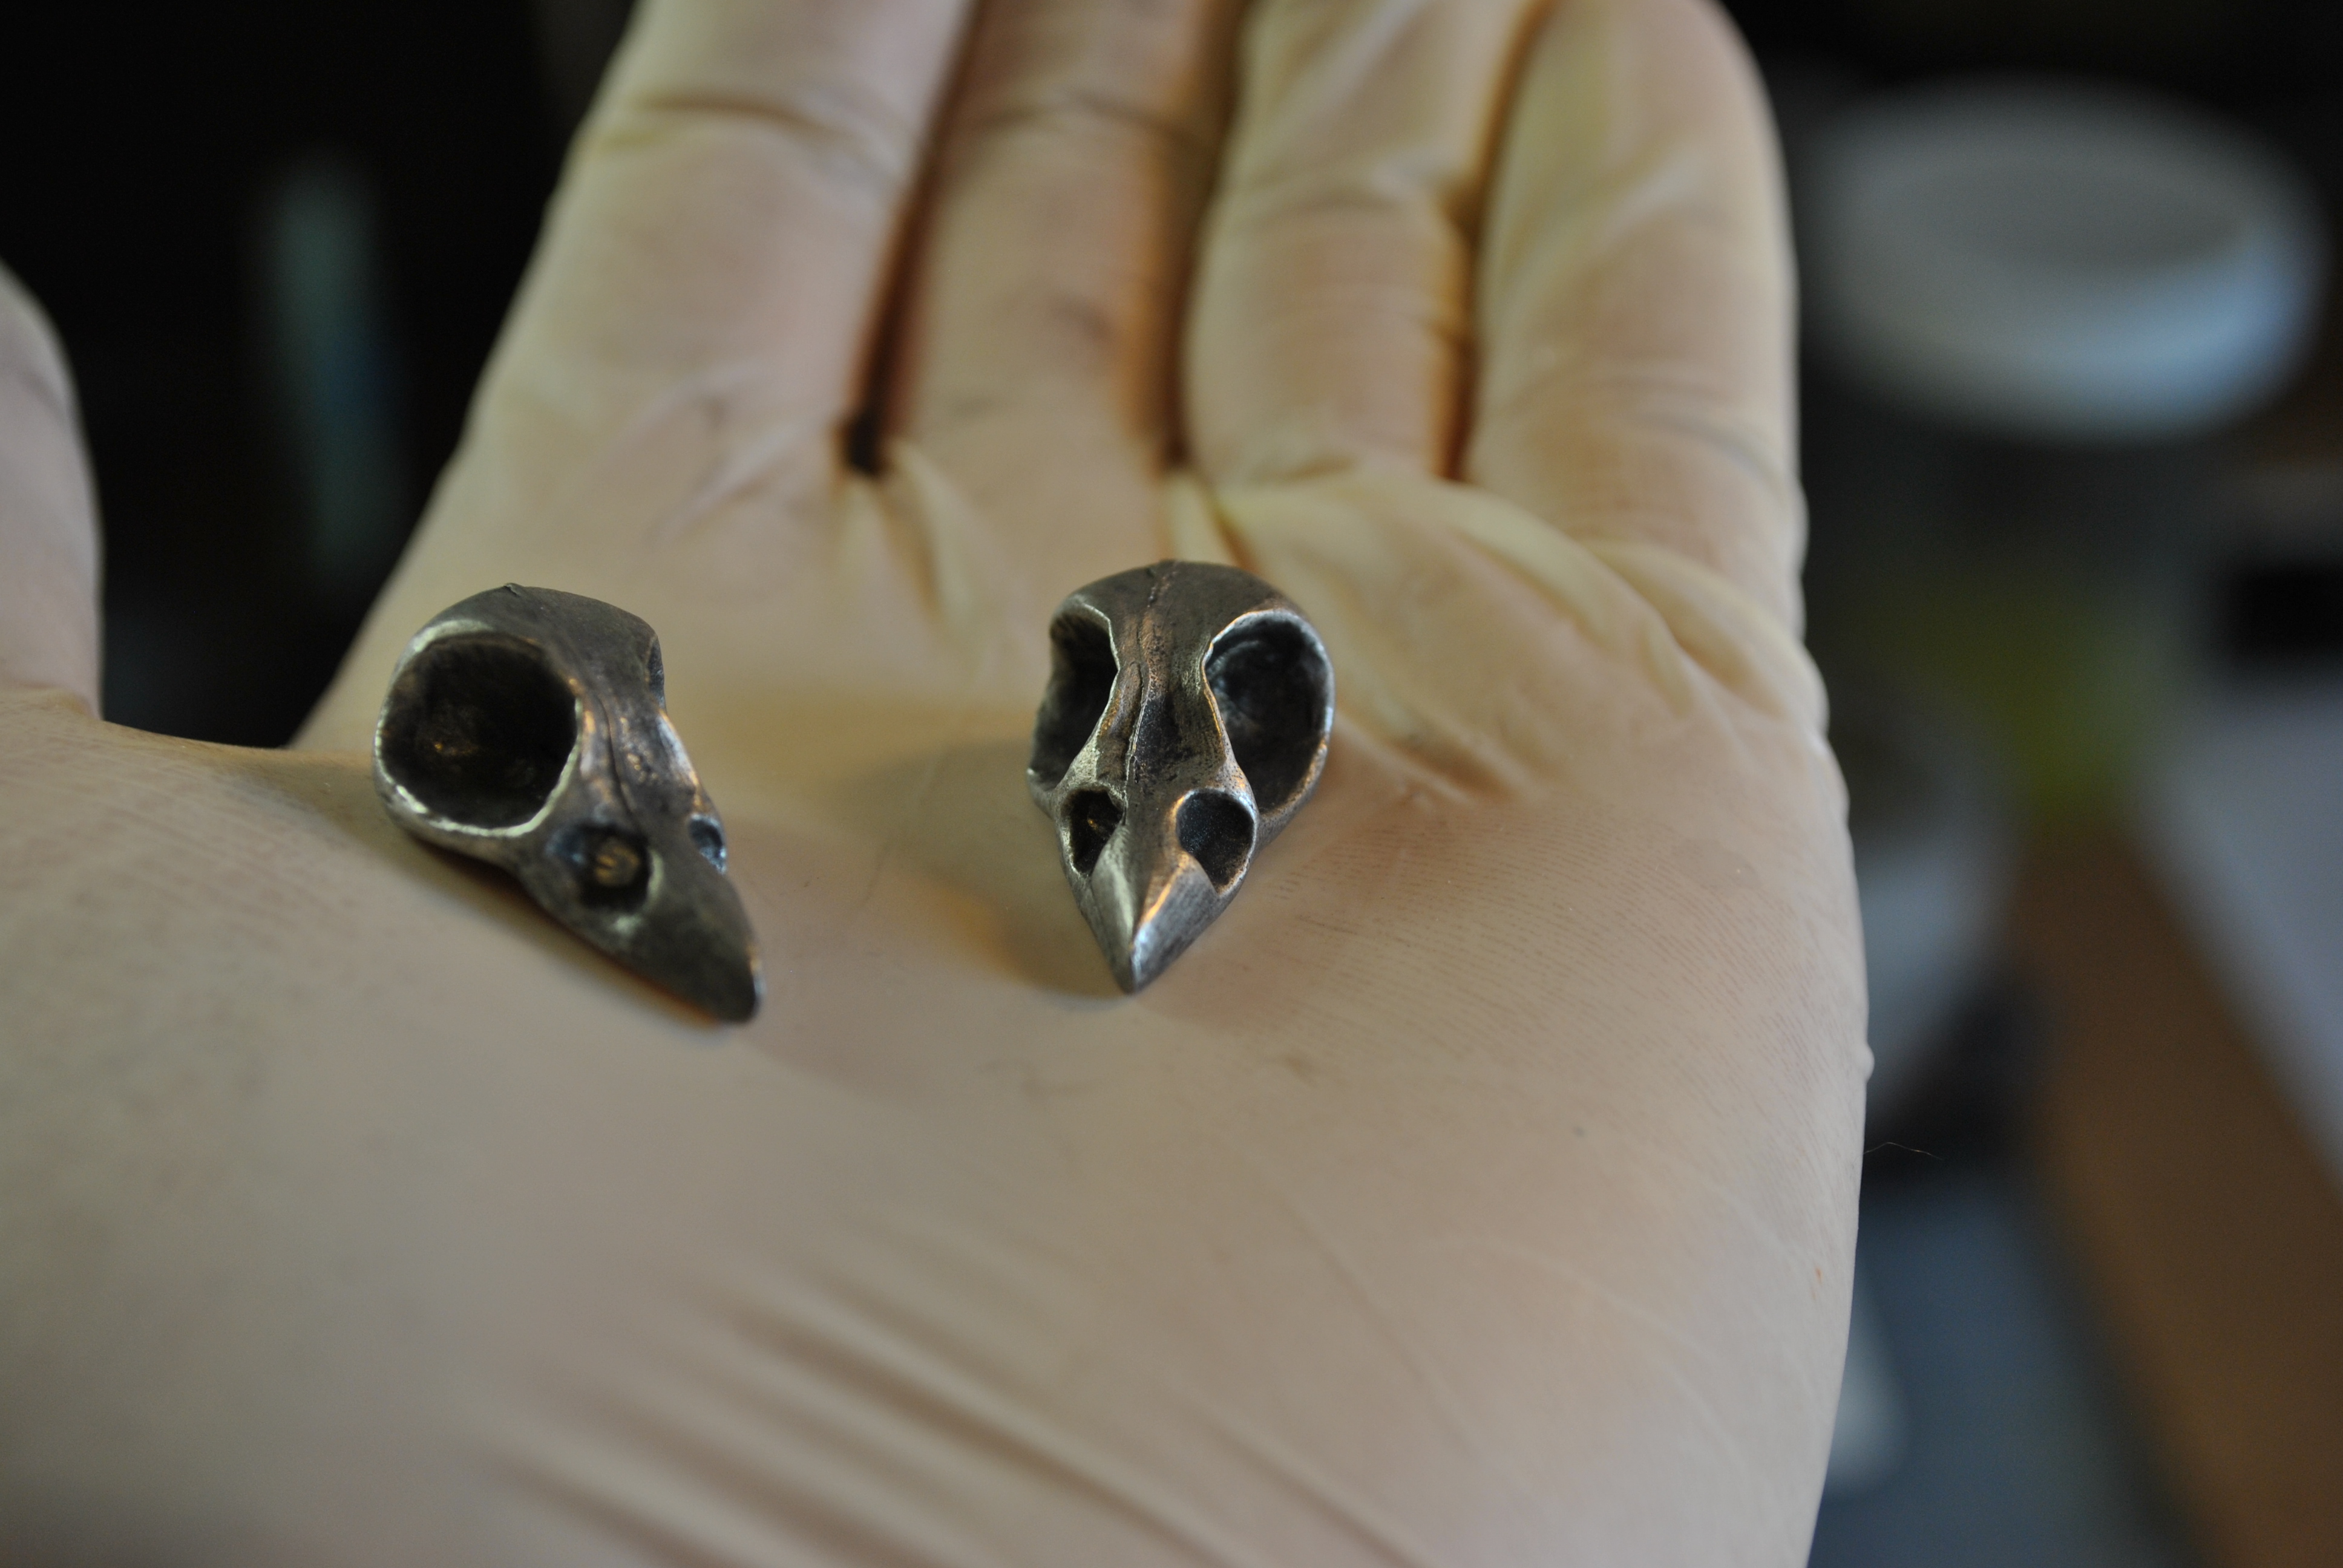
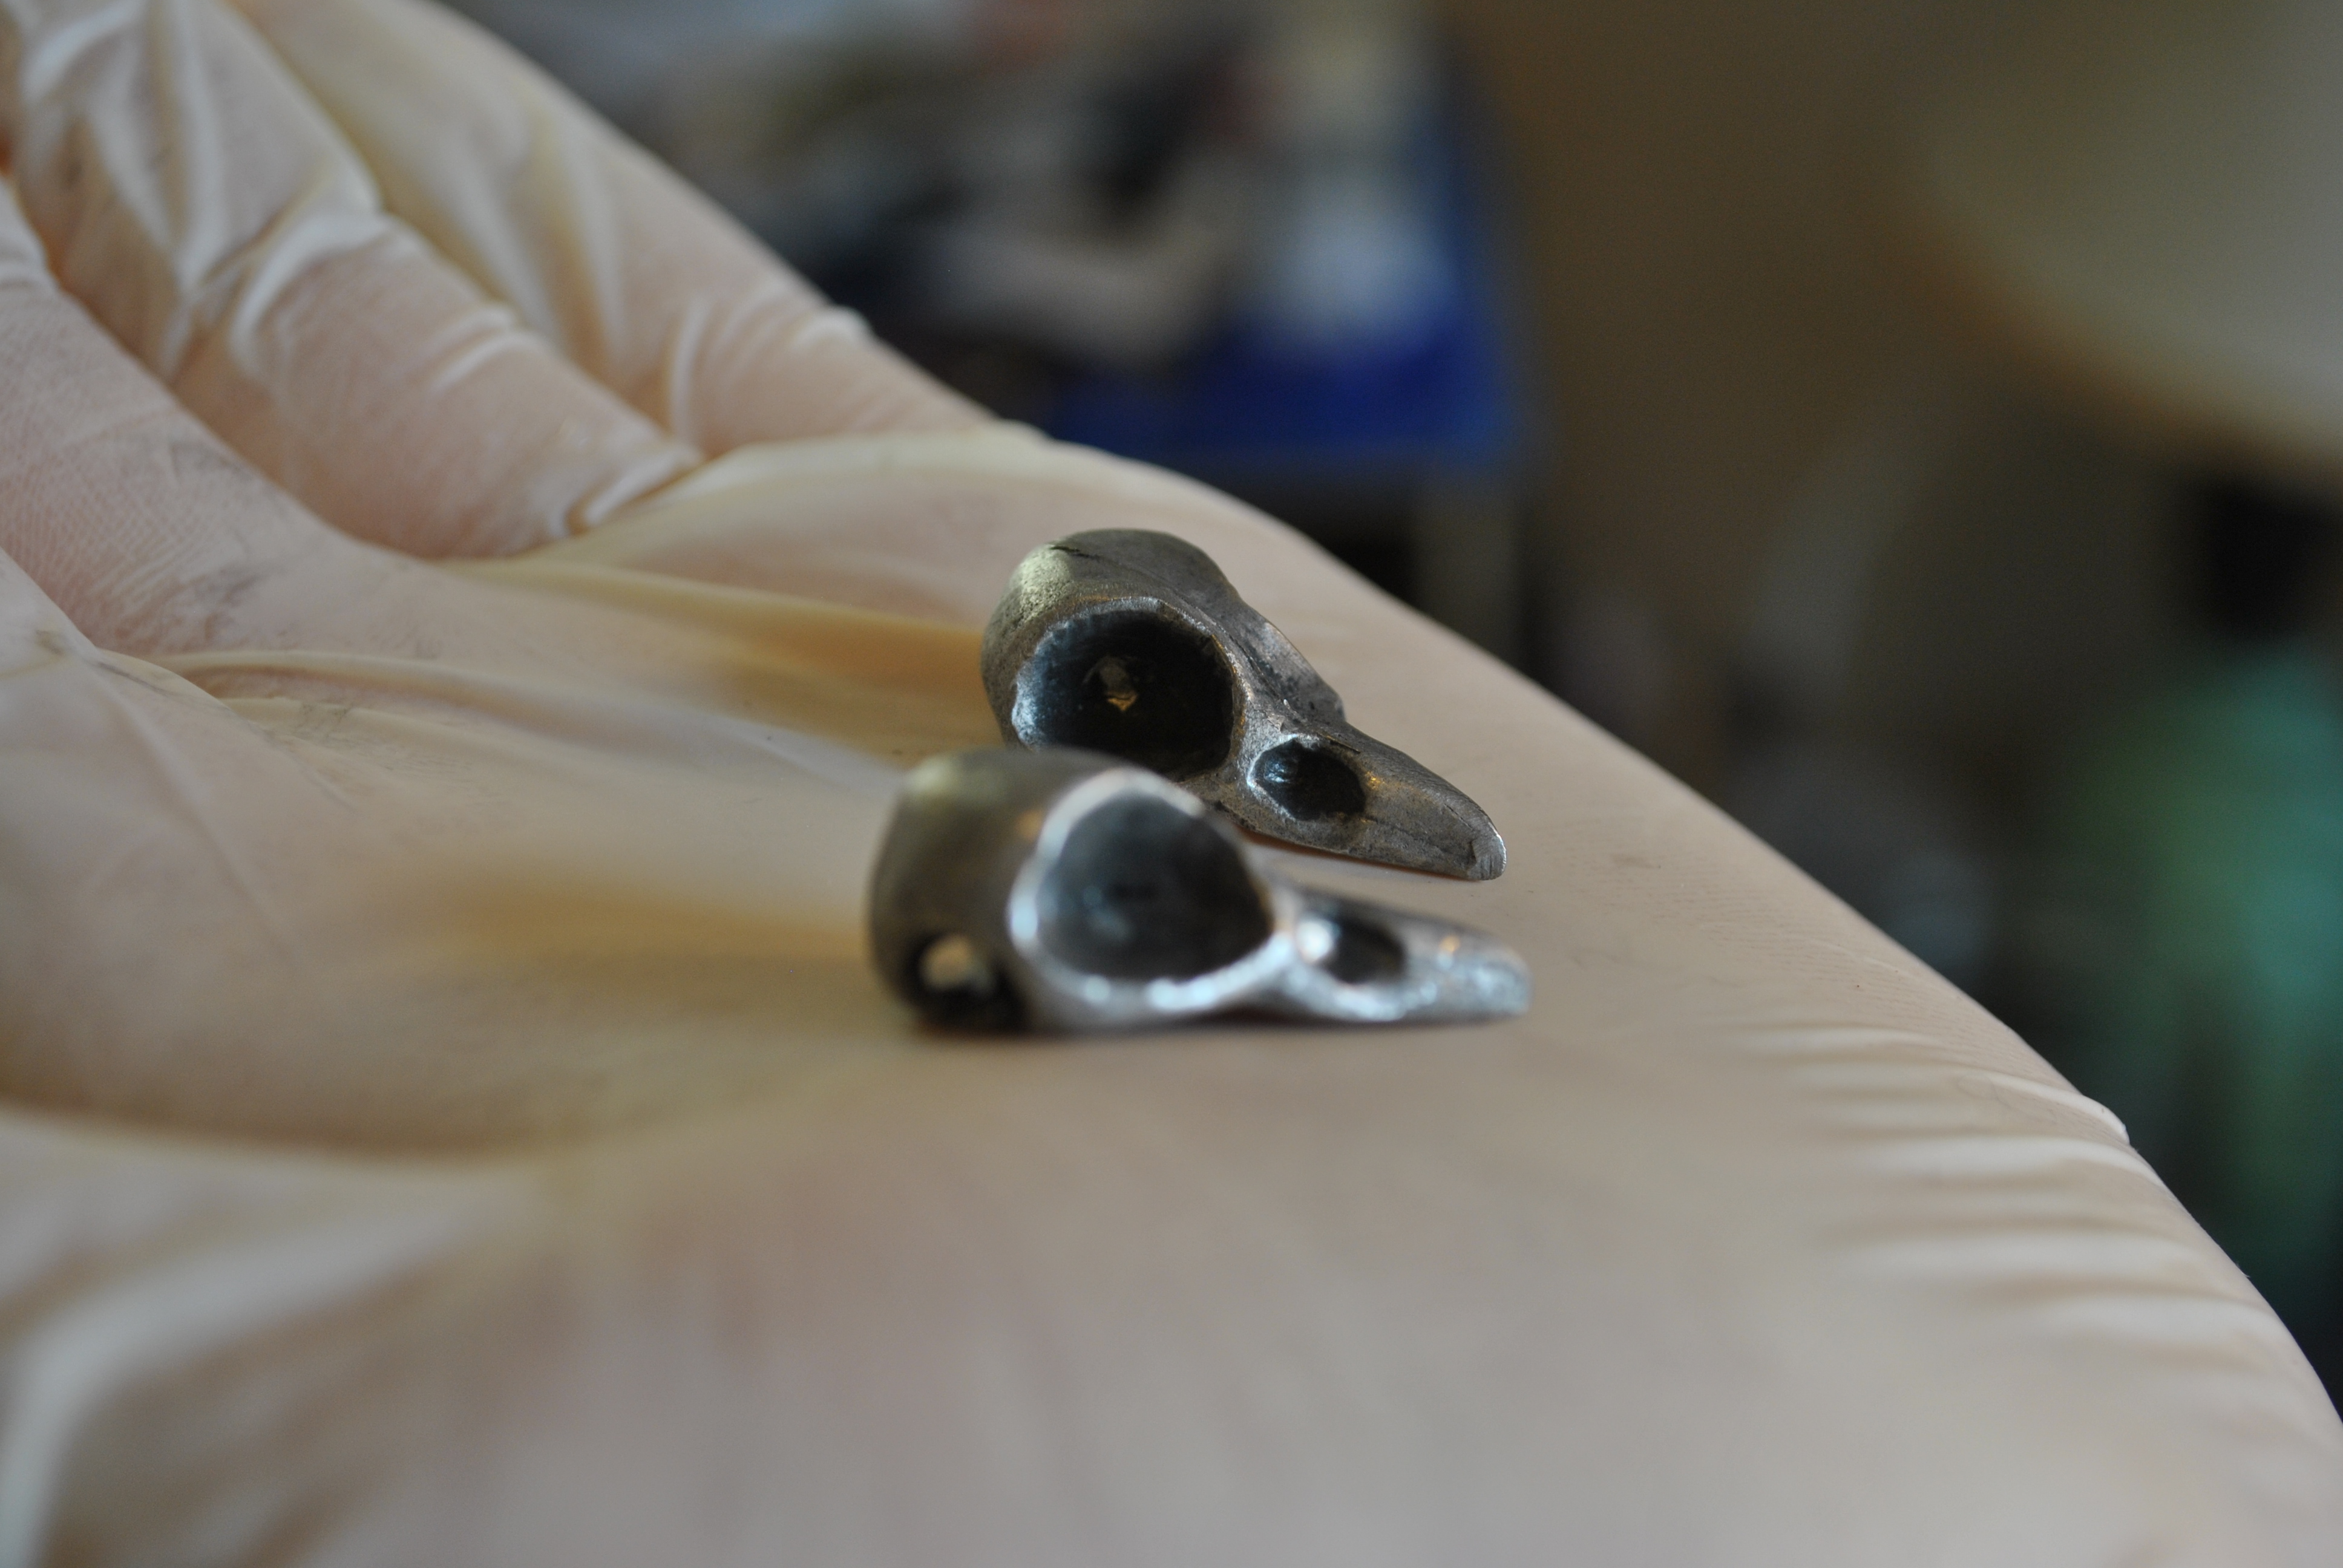
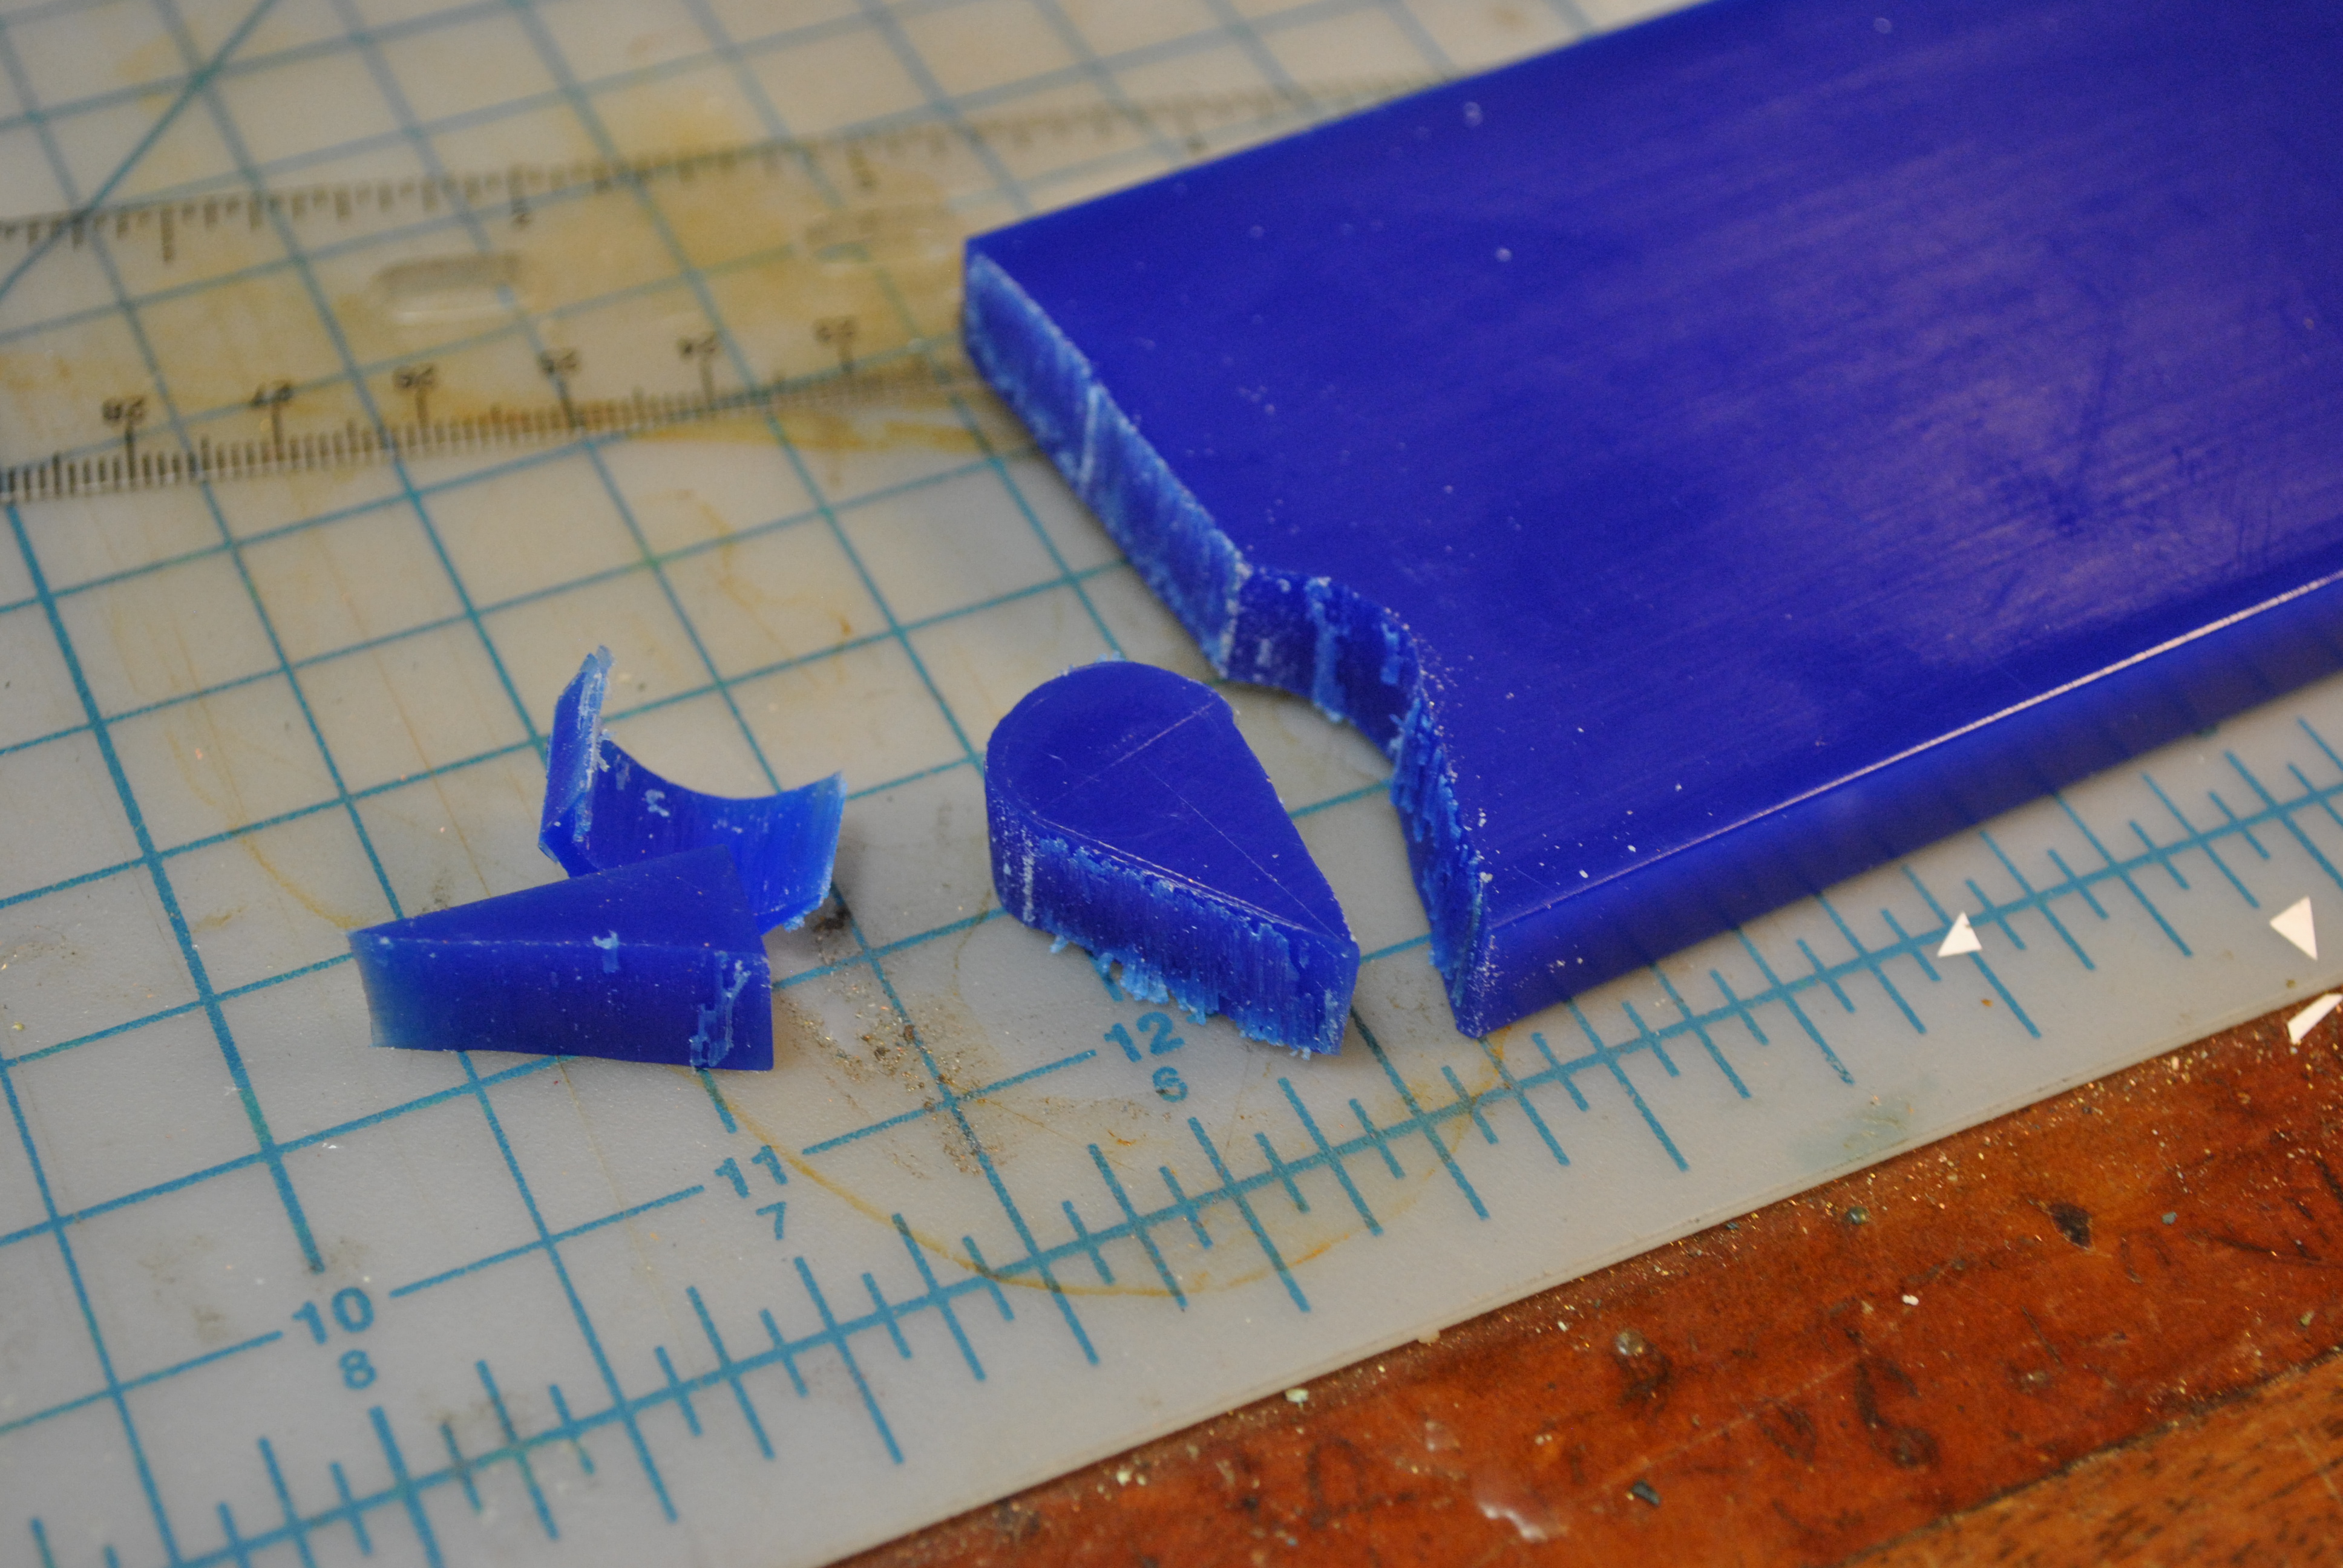
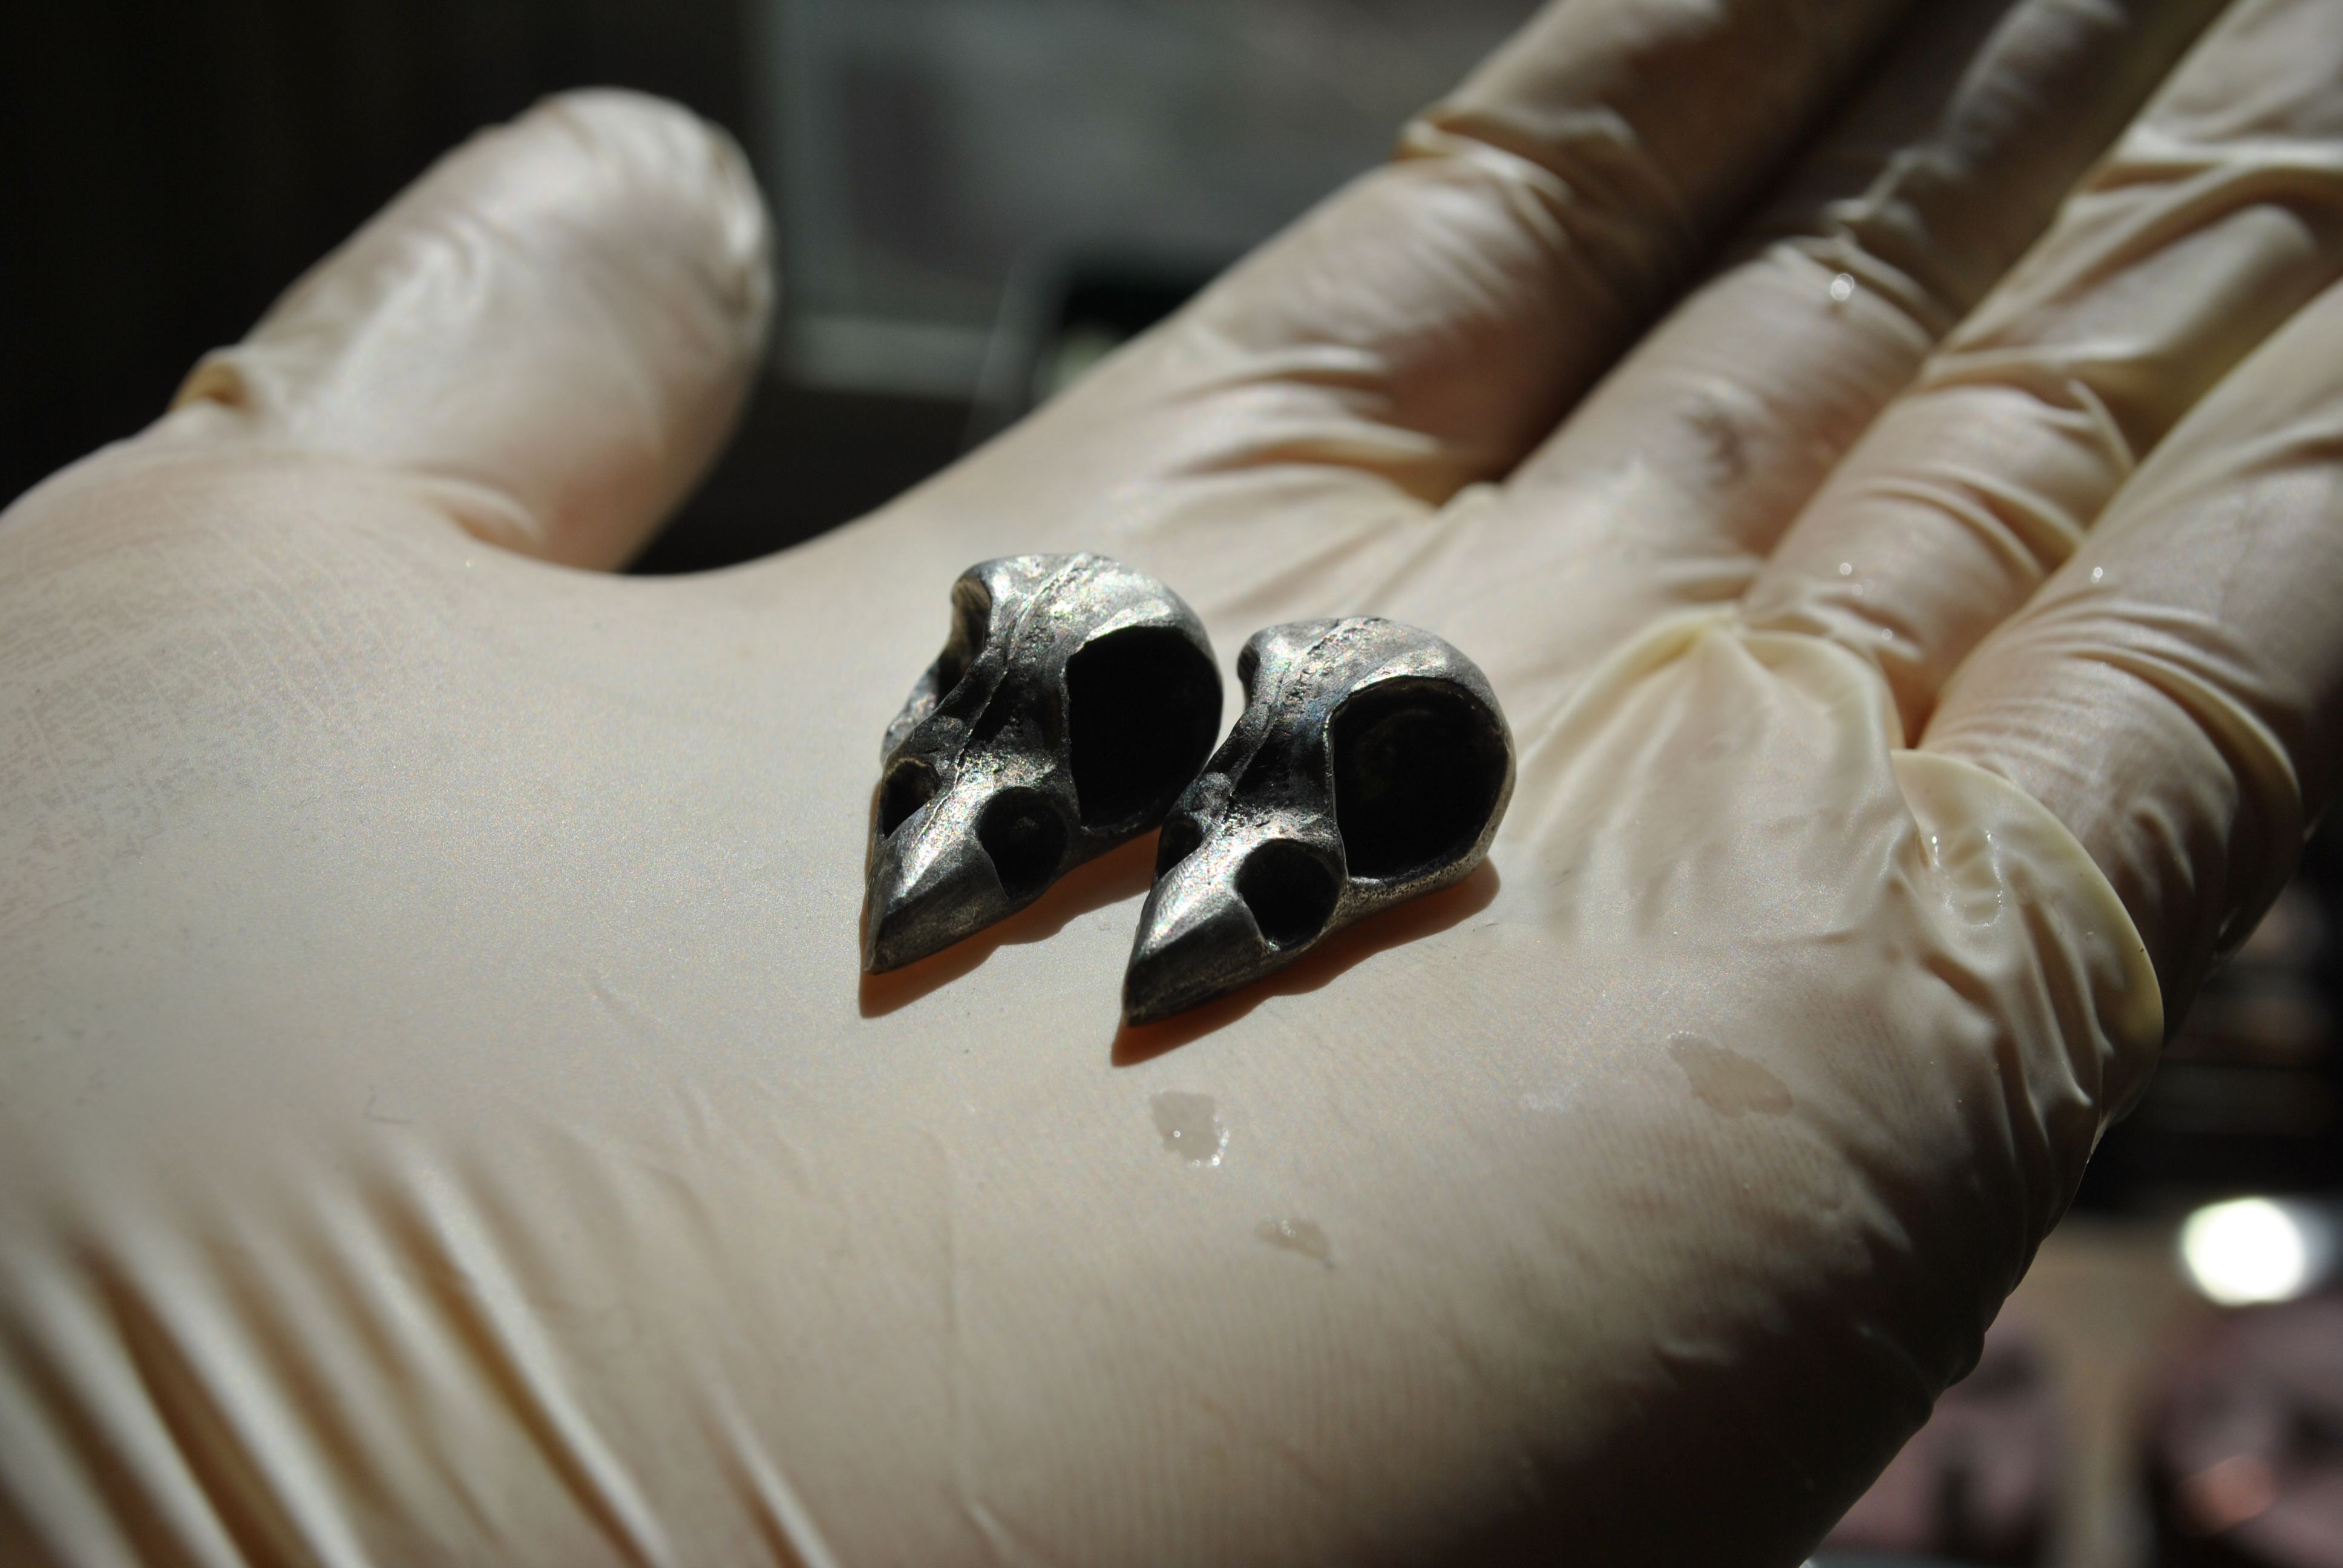
I cut off the sprues with a wire cutter and jewelers saw.
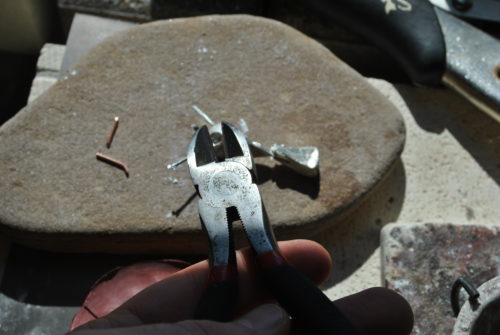

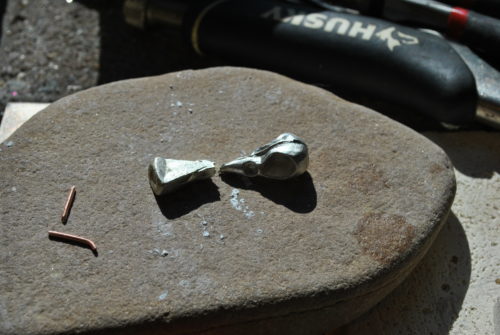
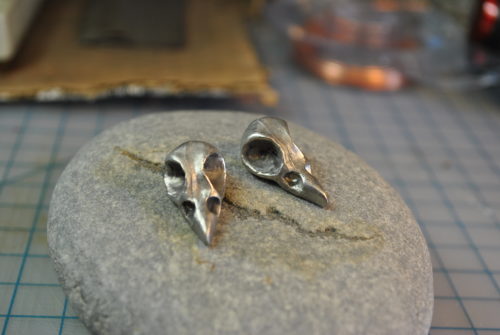
I think cleaned them up with a file, and polished them a bit.


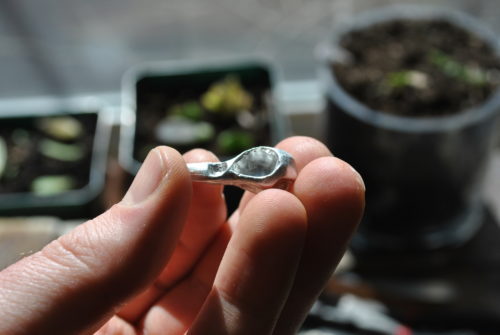

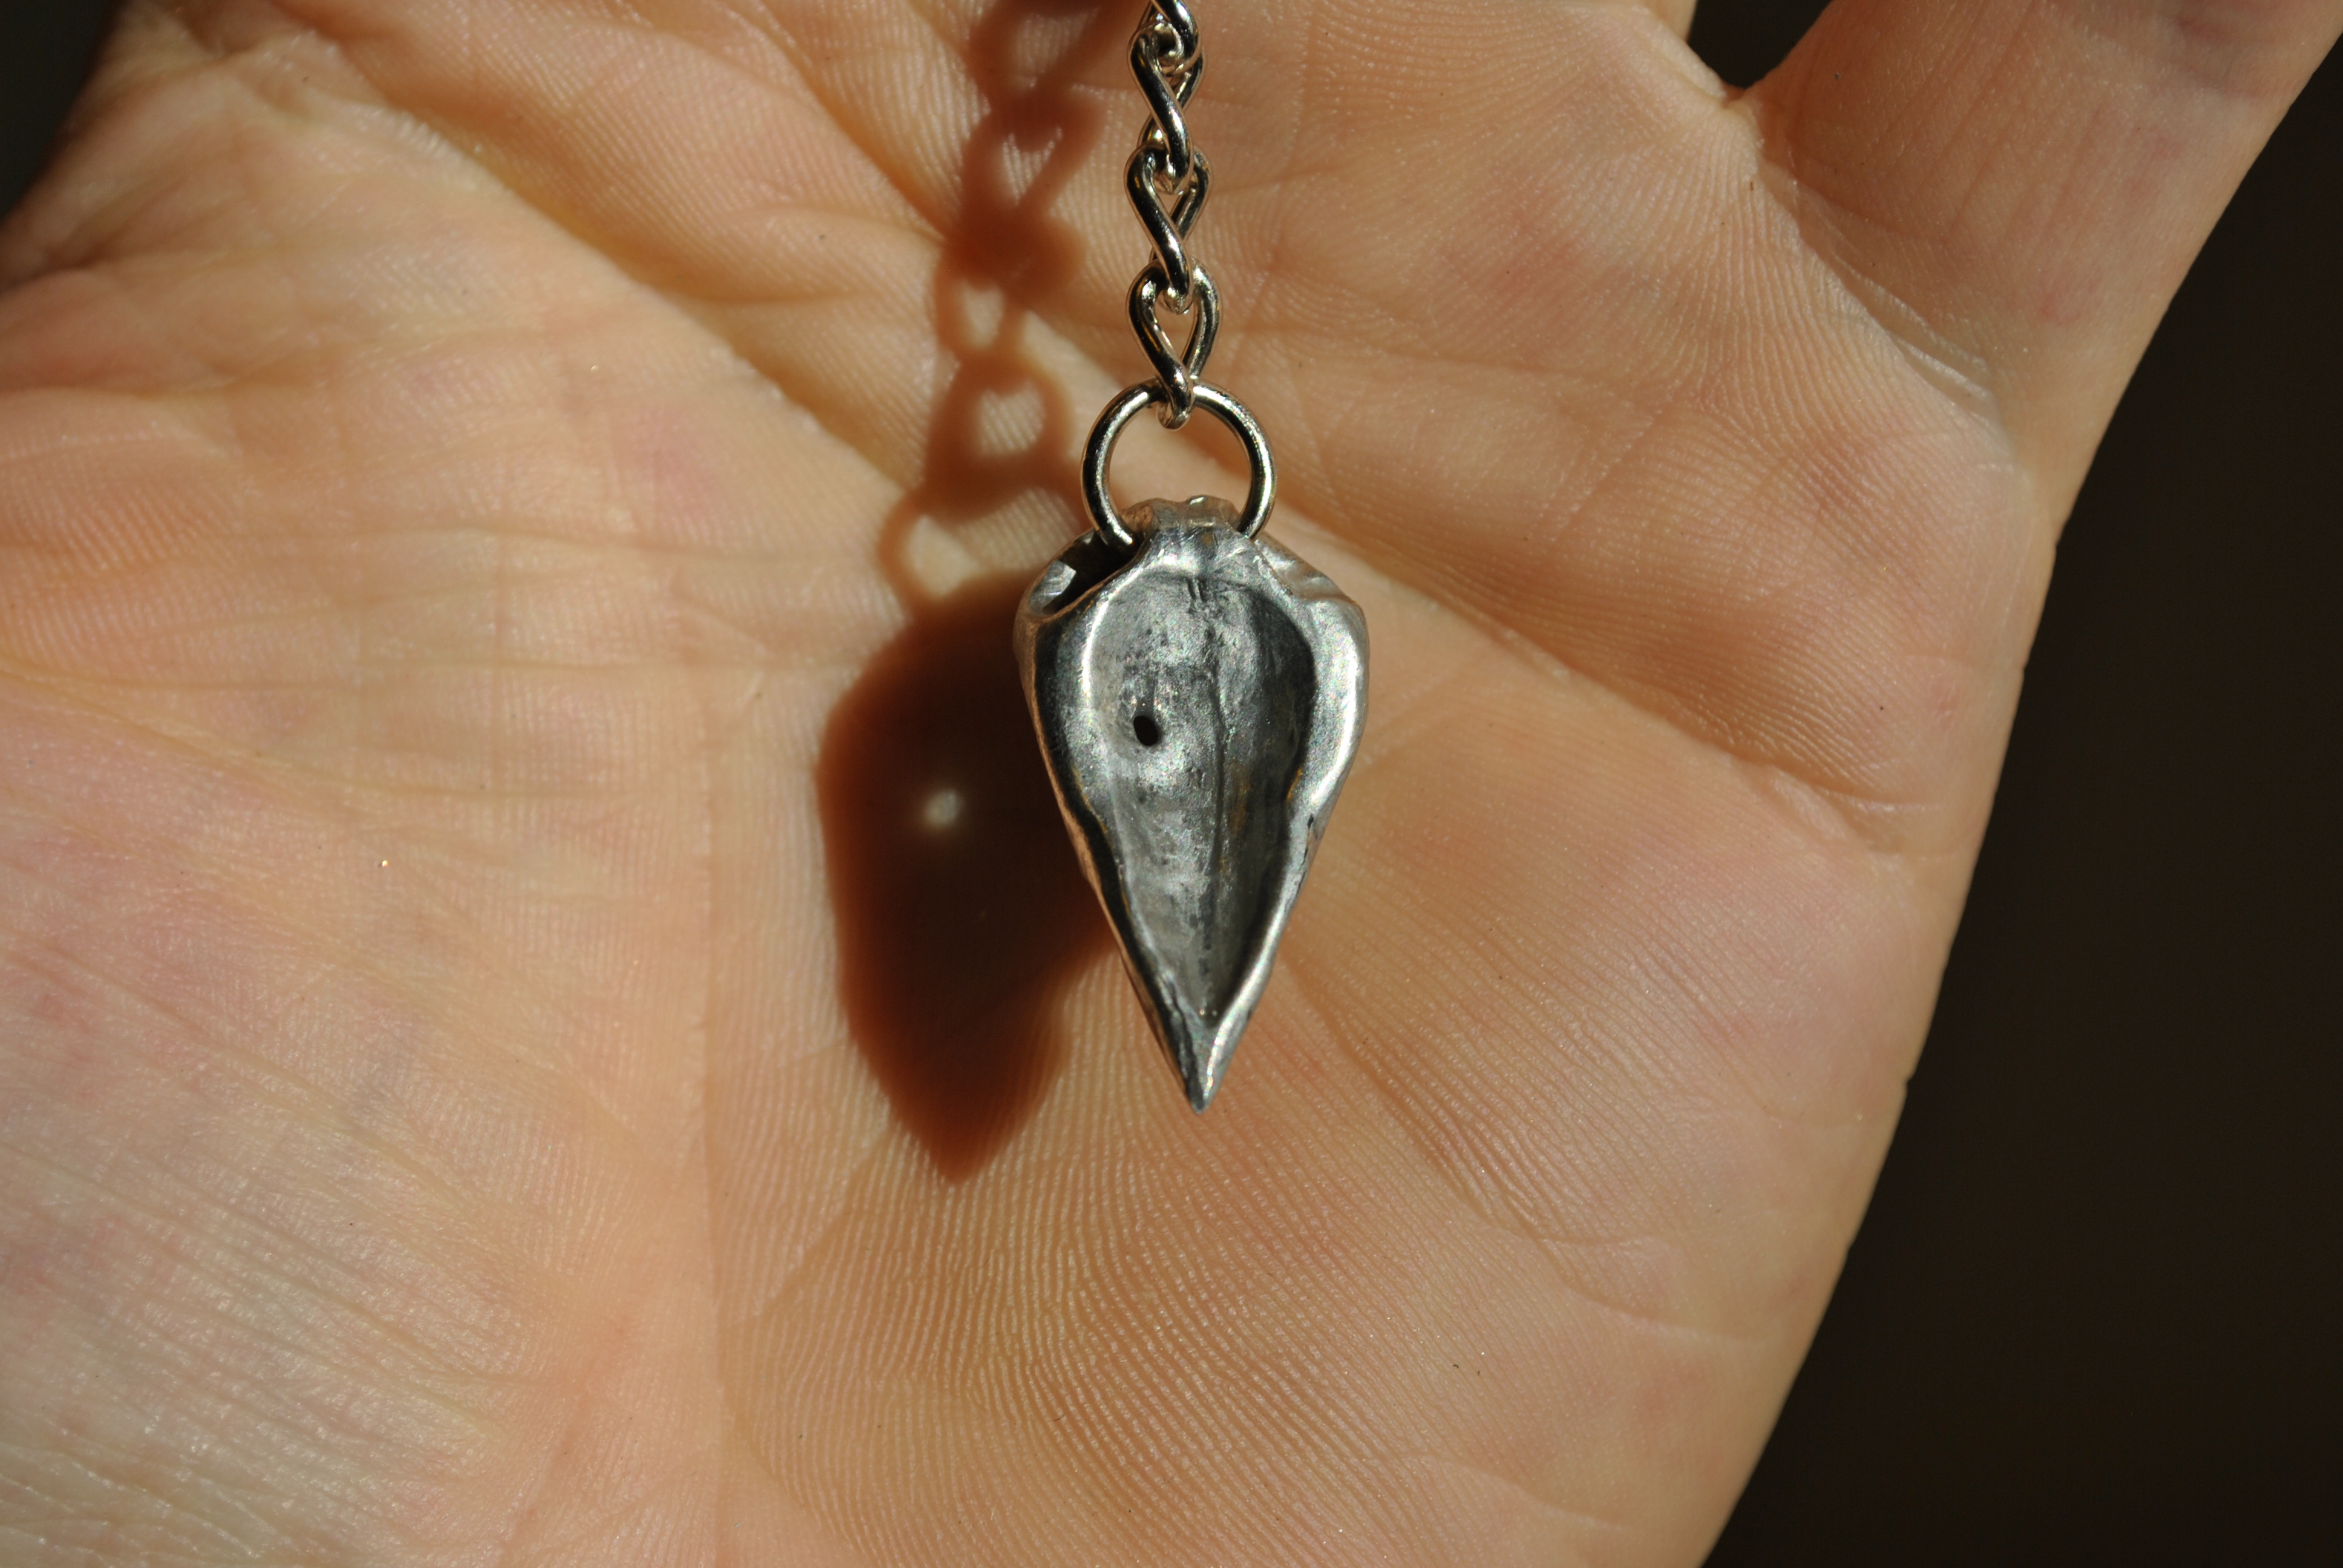
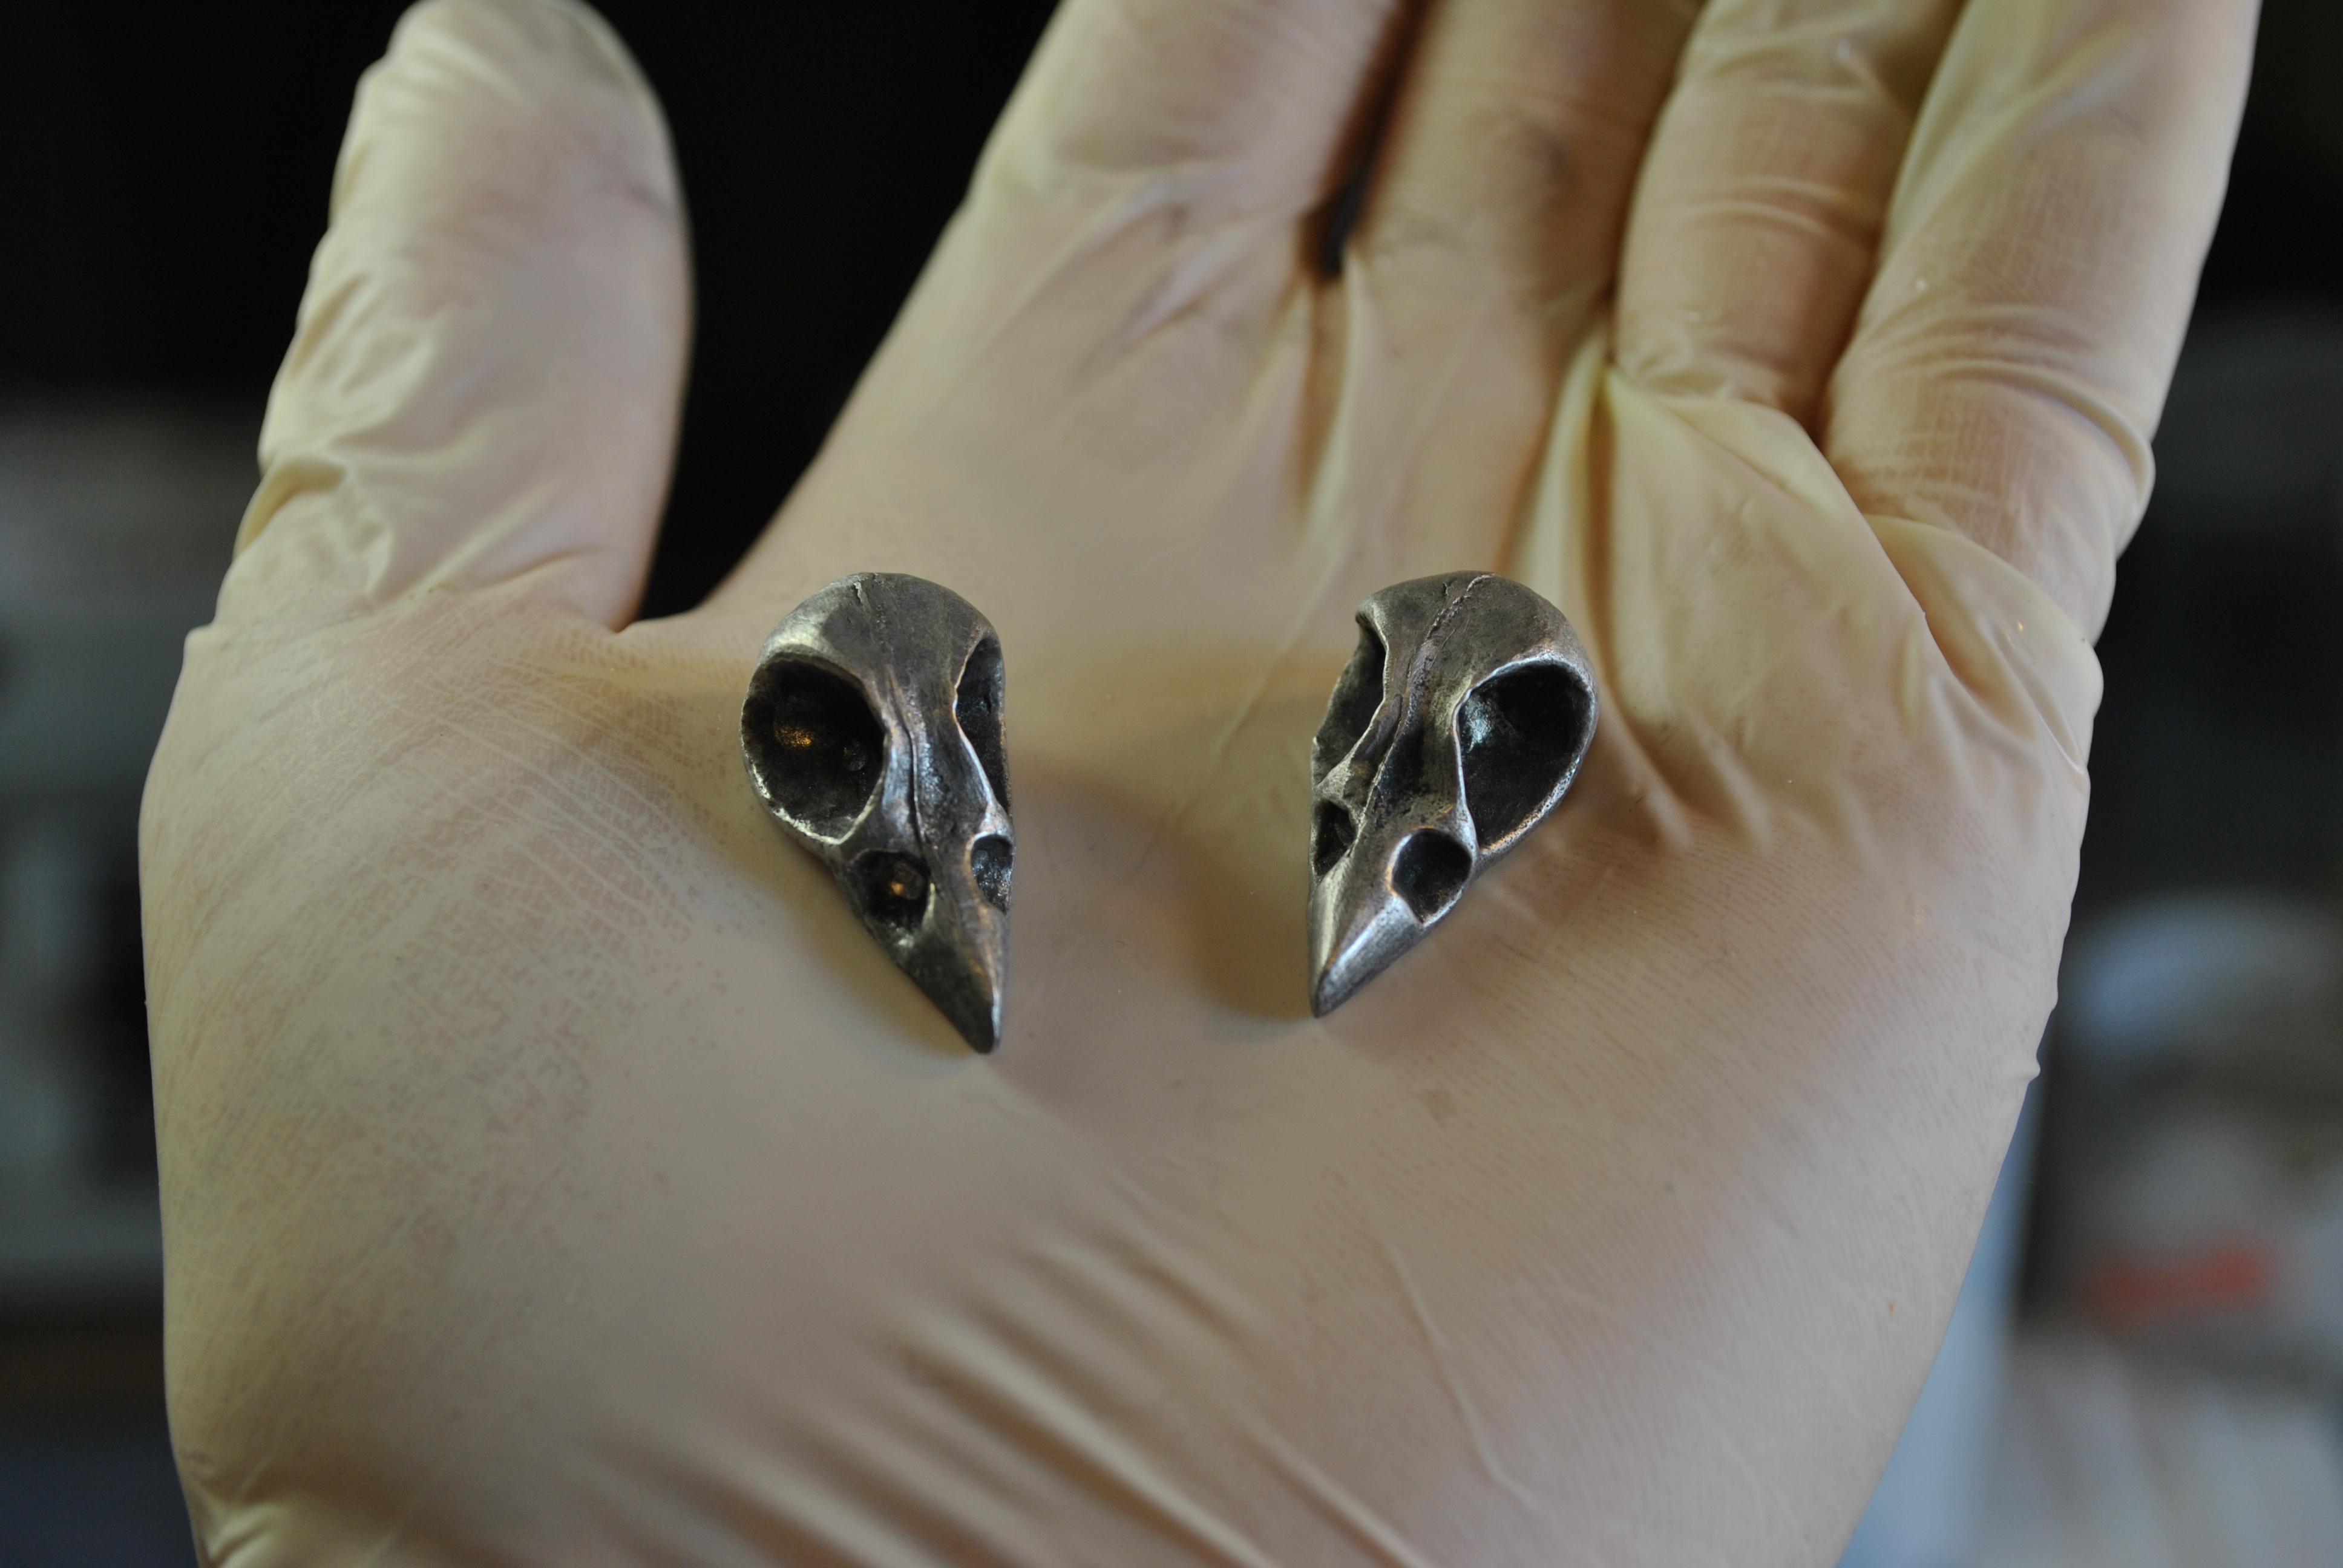
If you want to darken them up a bit, dip them in some ferric chloride (its the stuff you use to etch copper), it turns pewter a lovely dark color. Ferric Chloride is an acid, so put some gloves on.


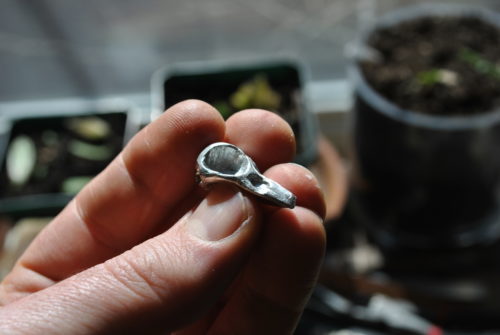
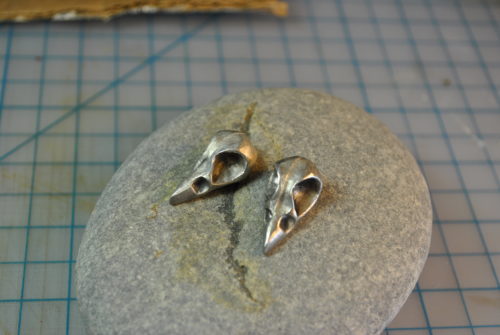
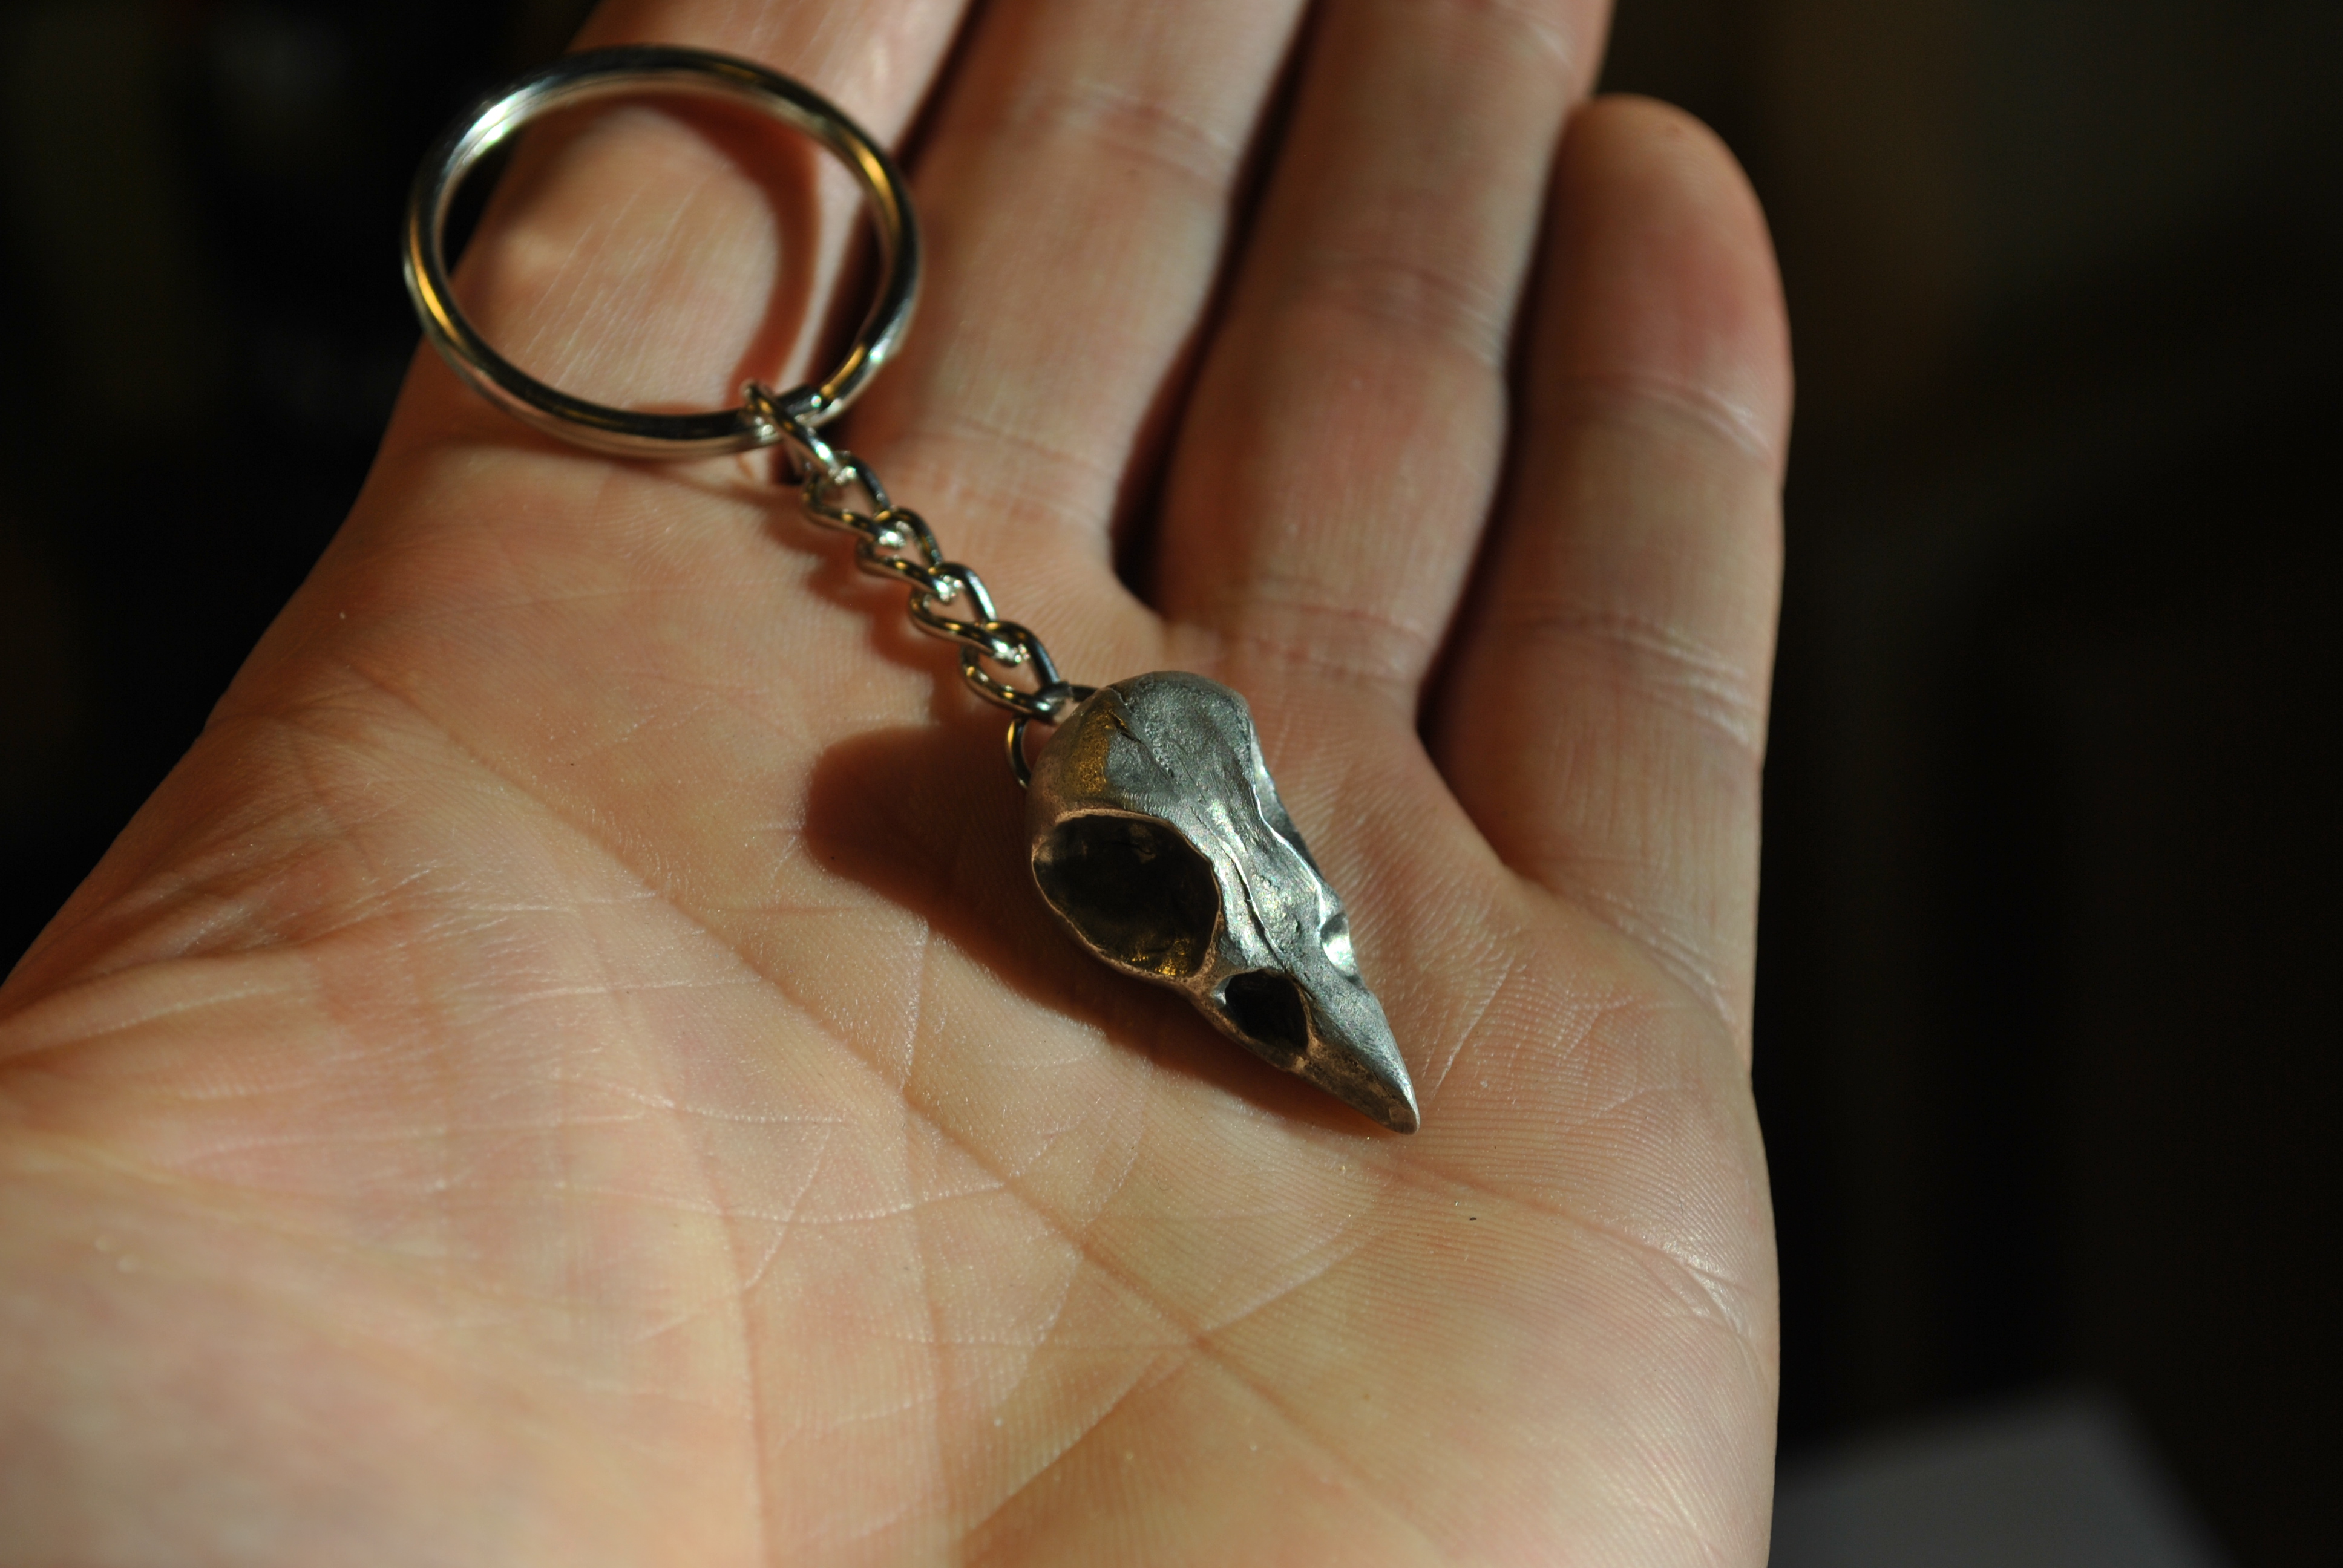
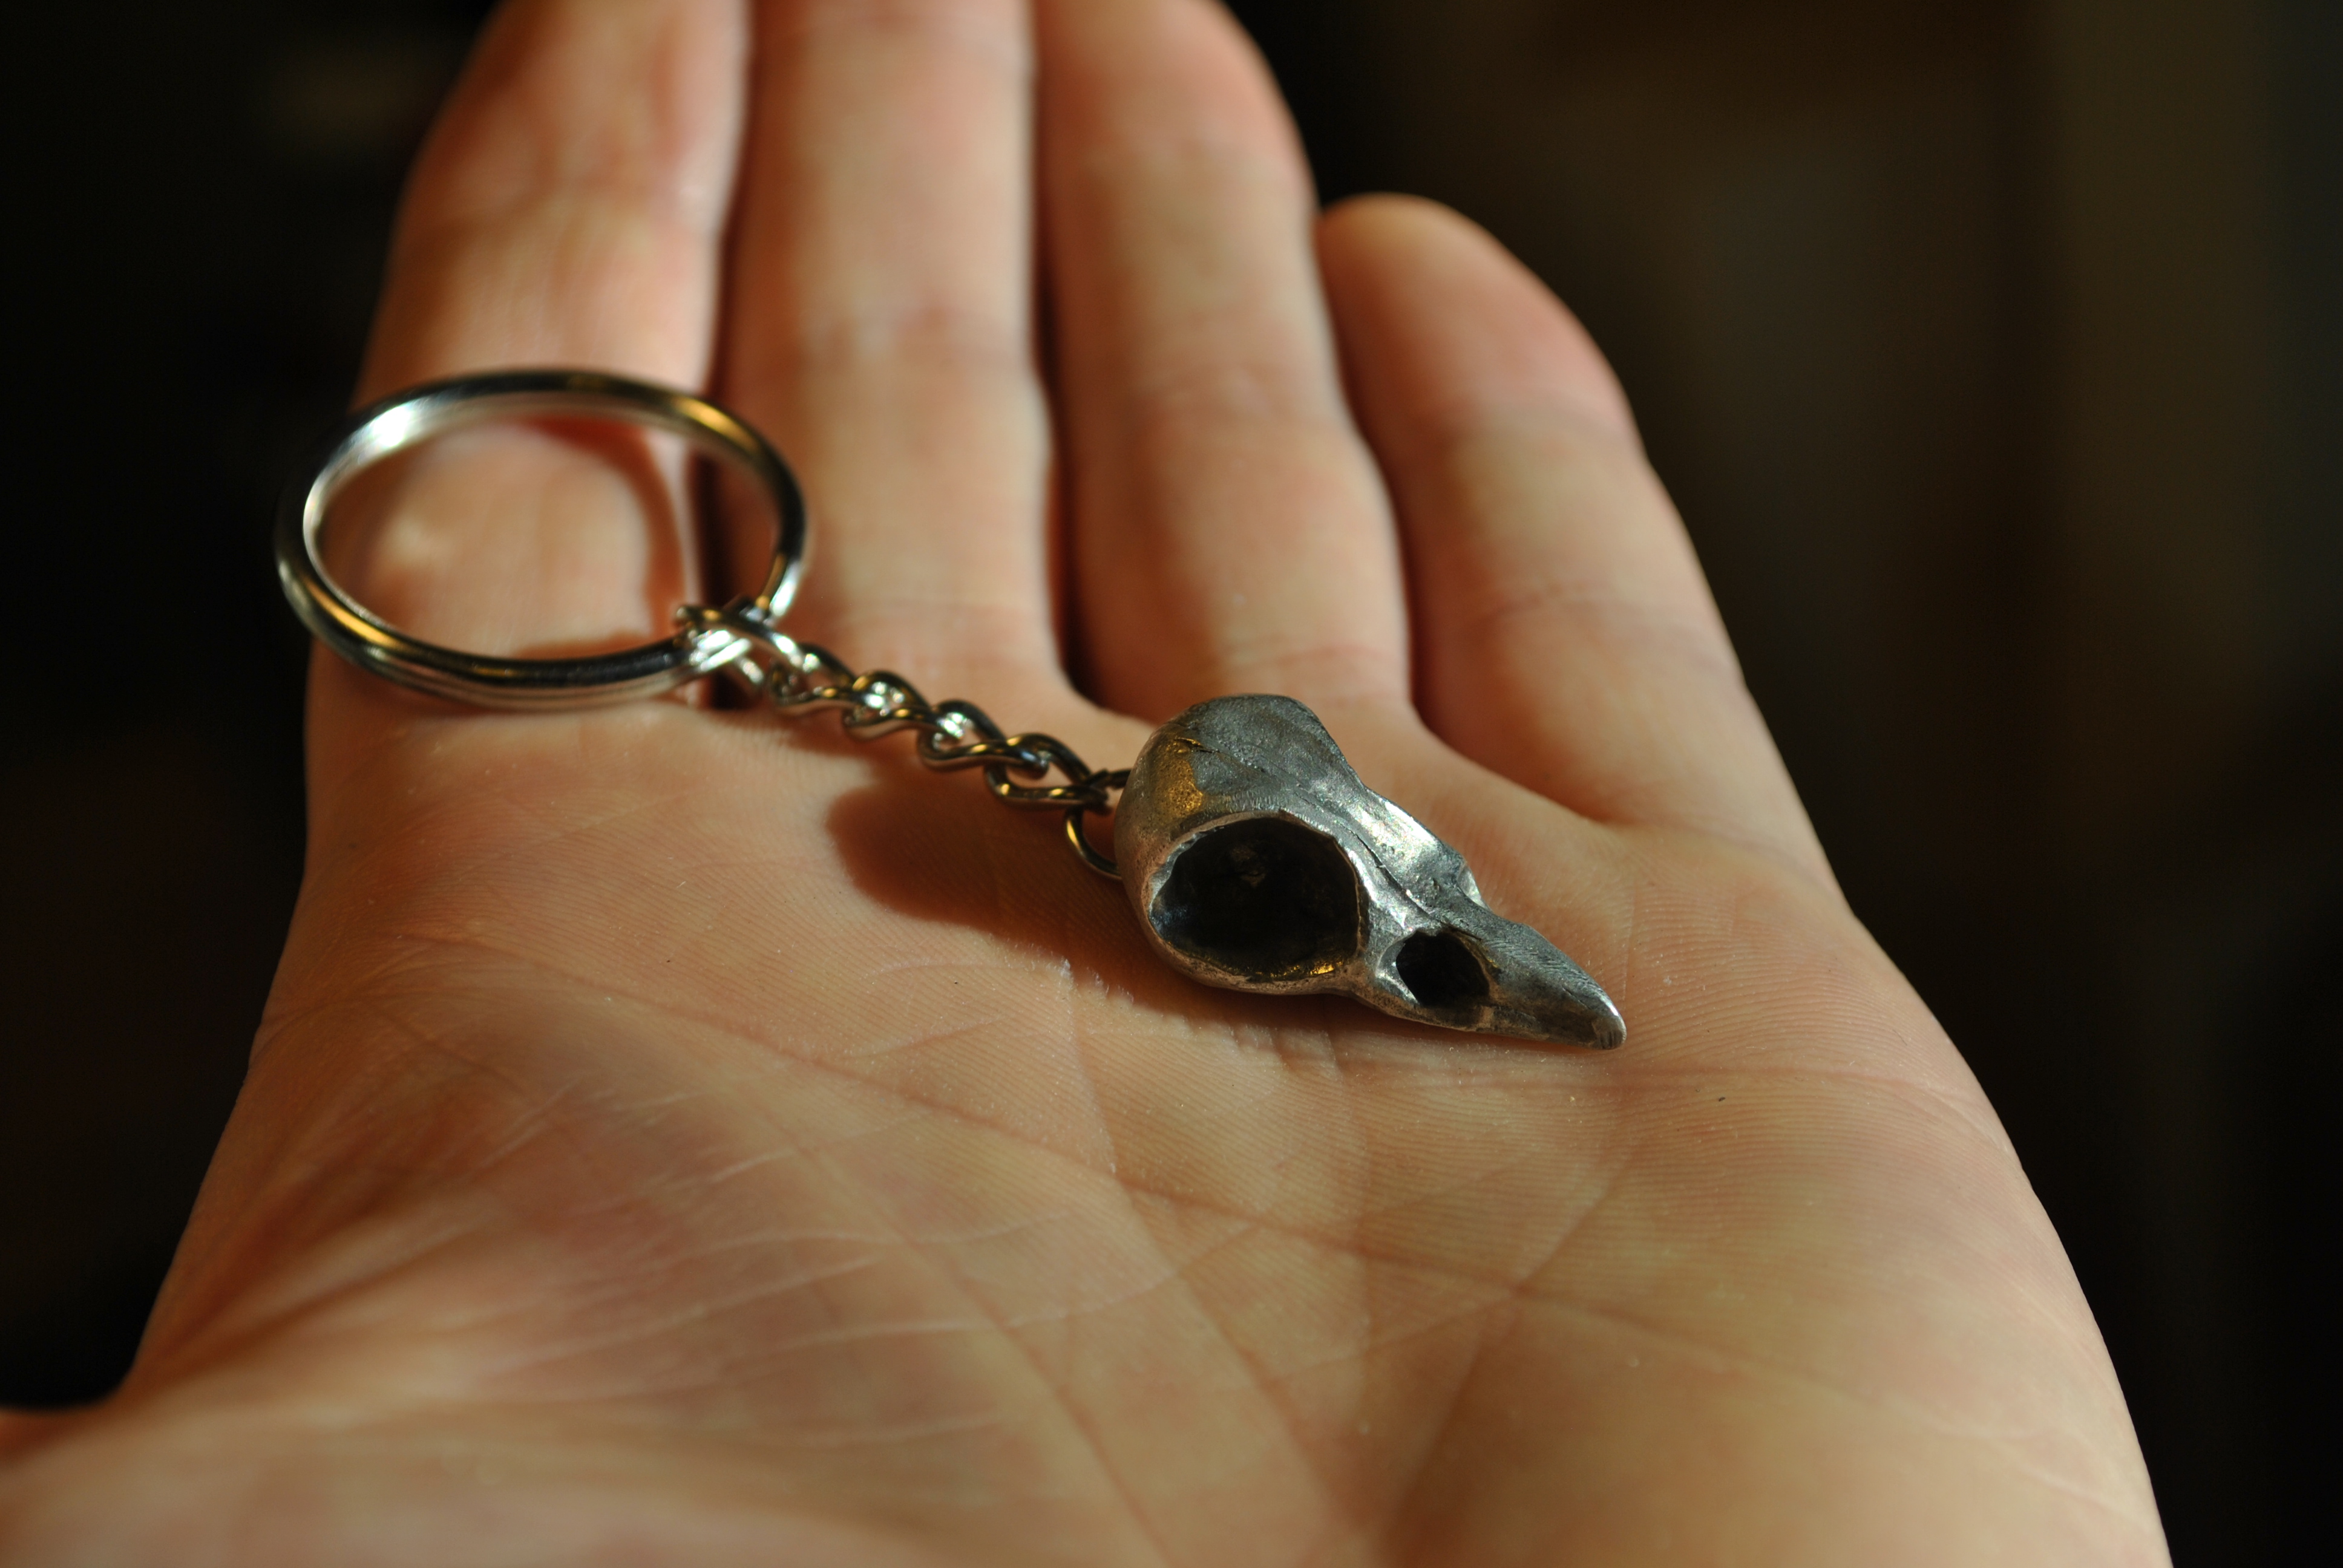
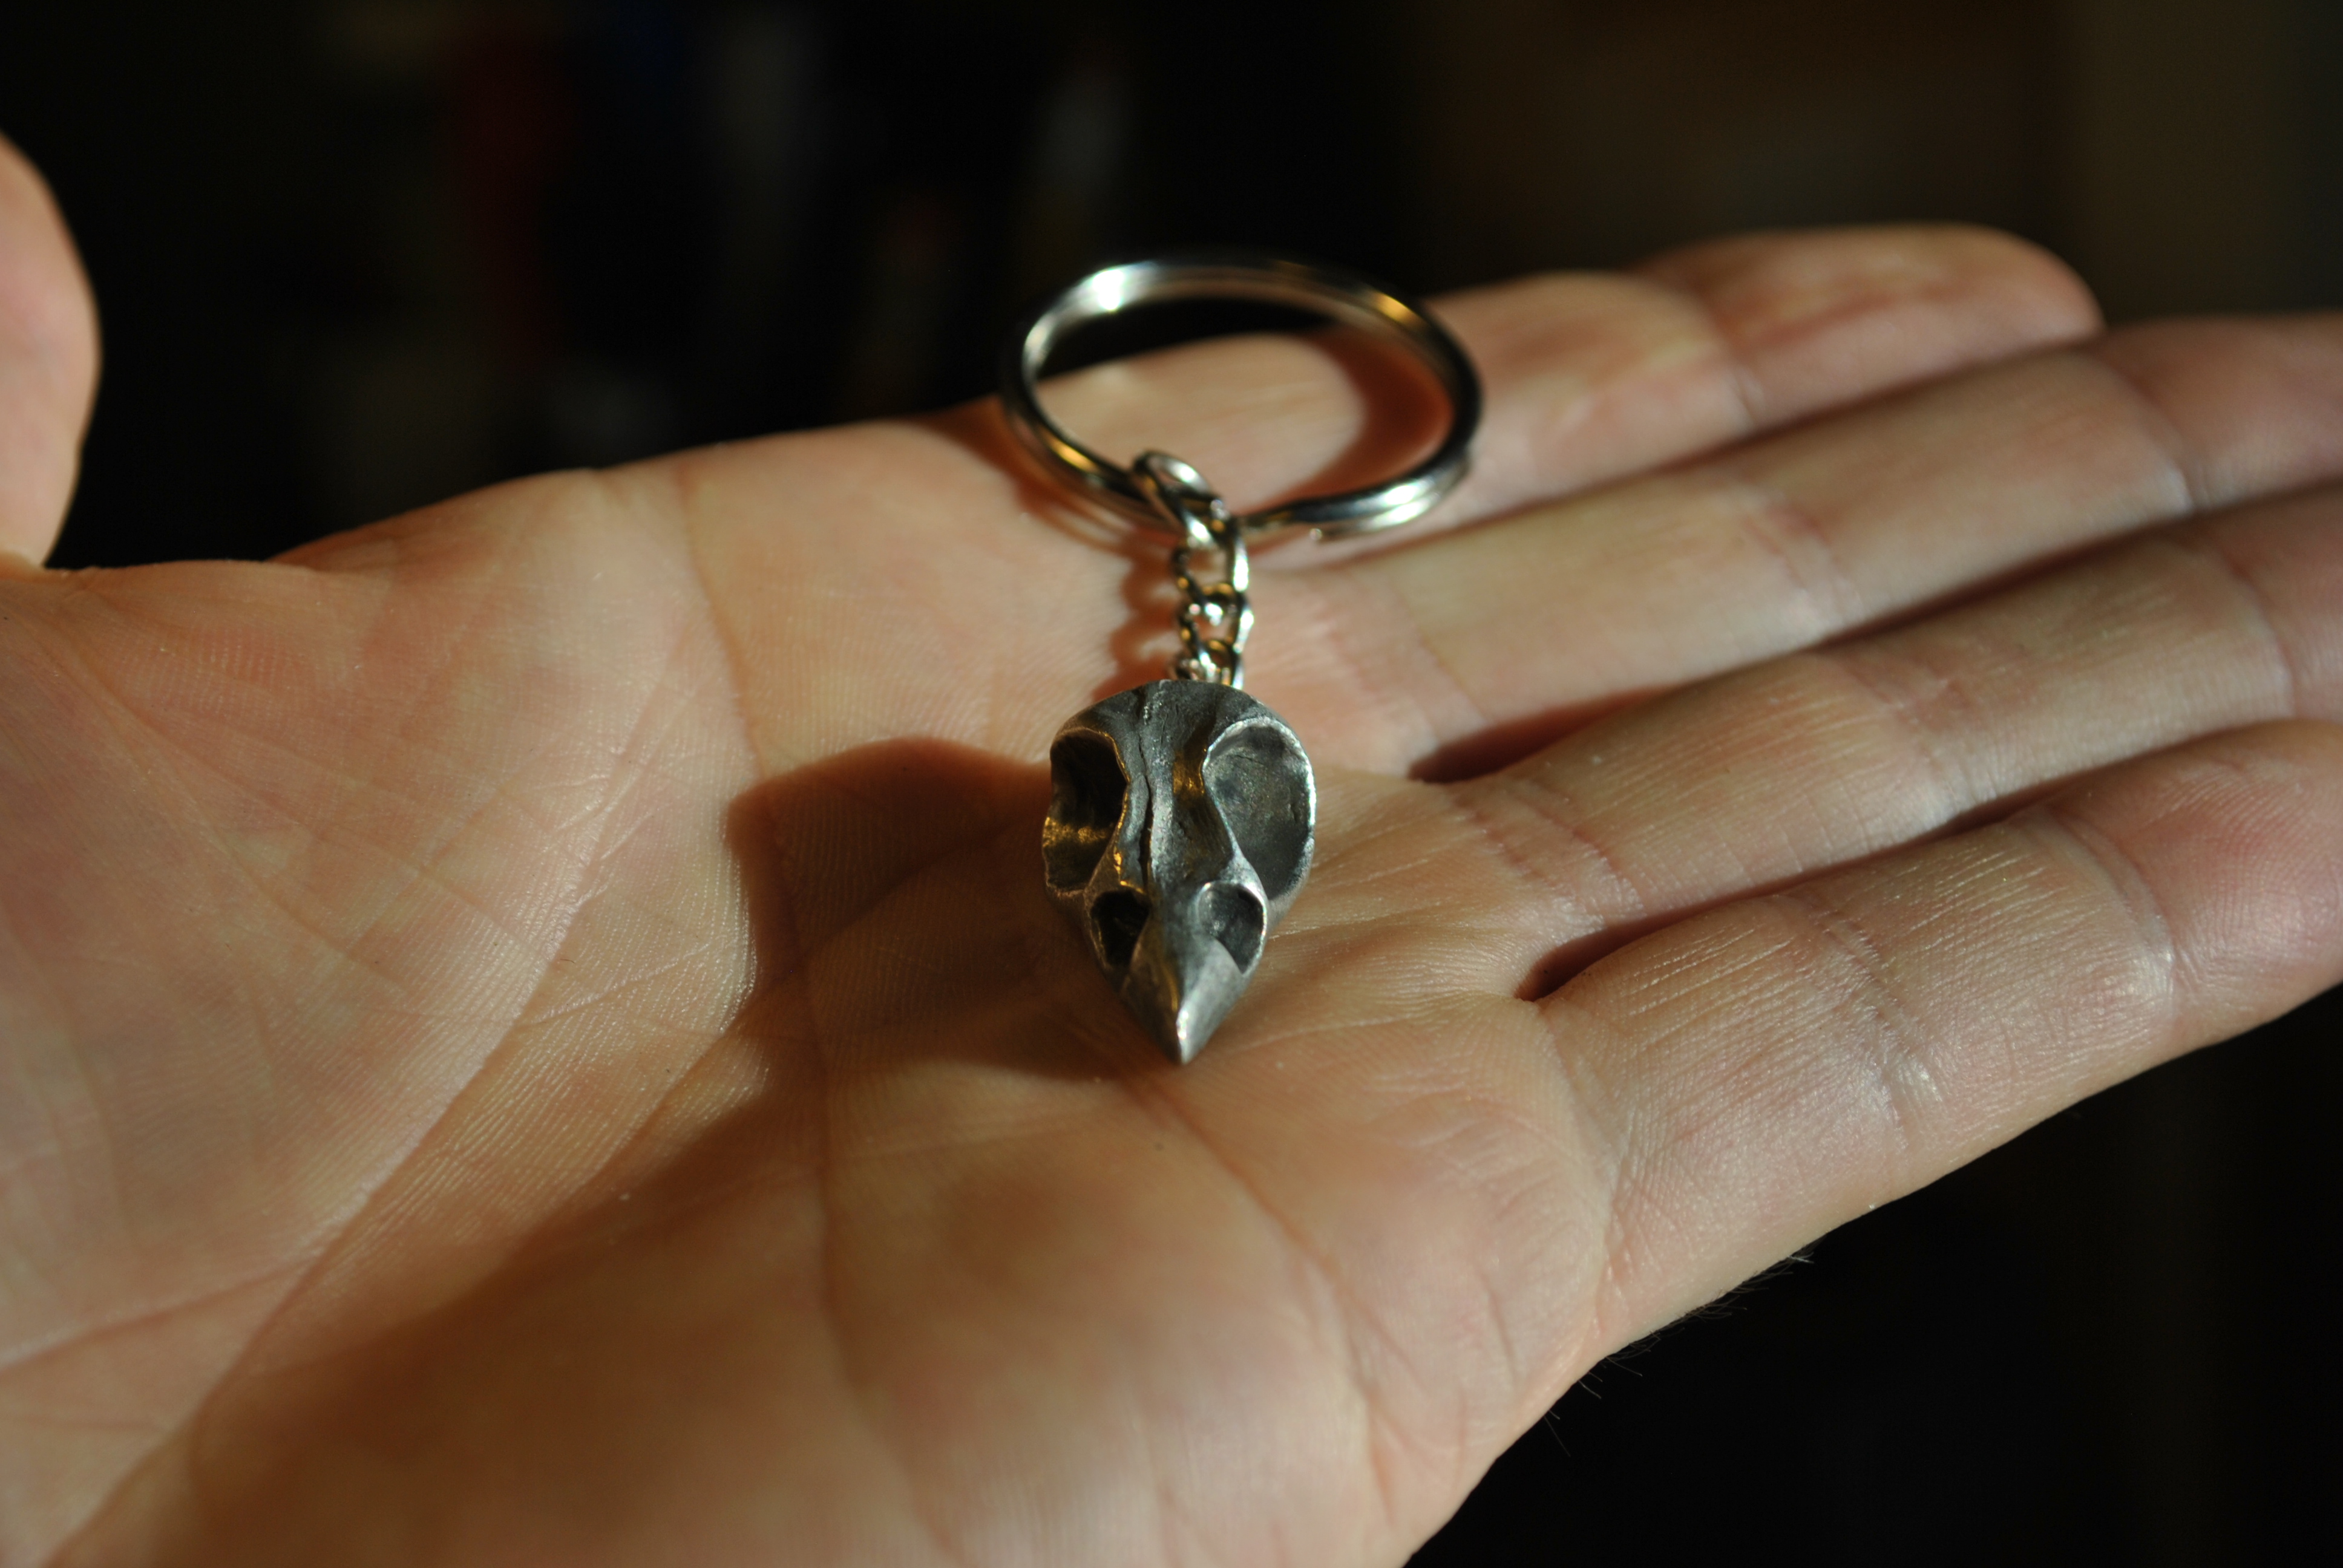
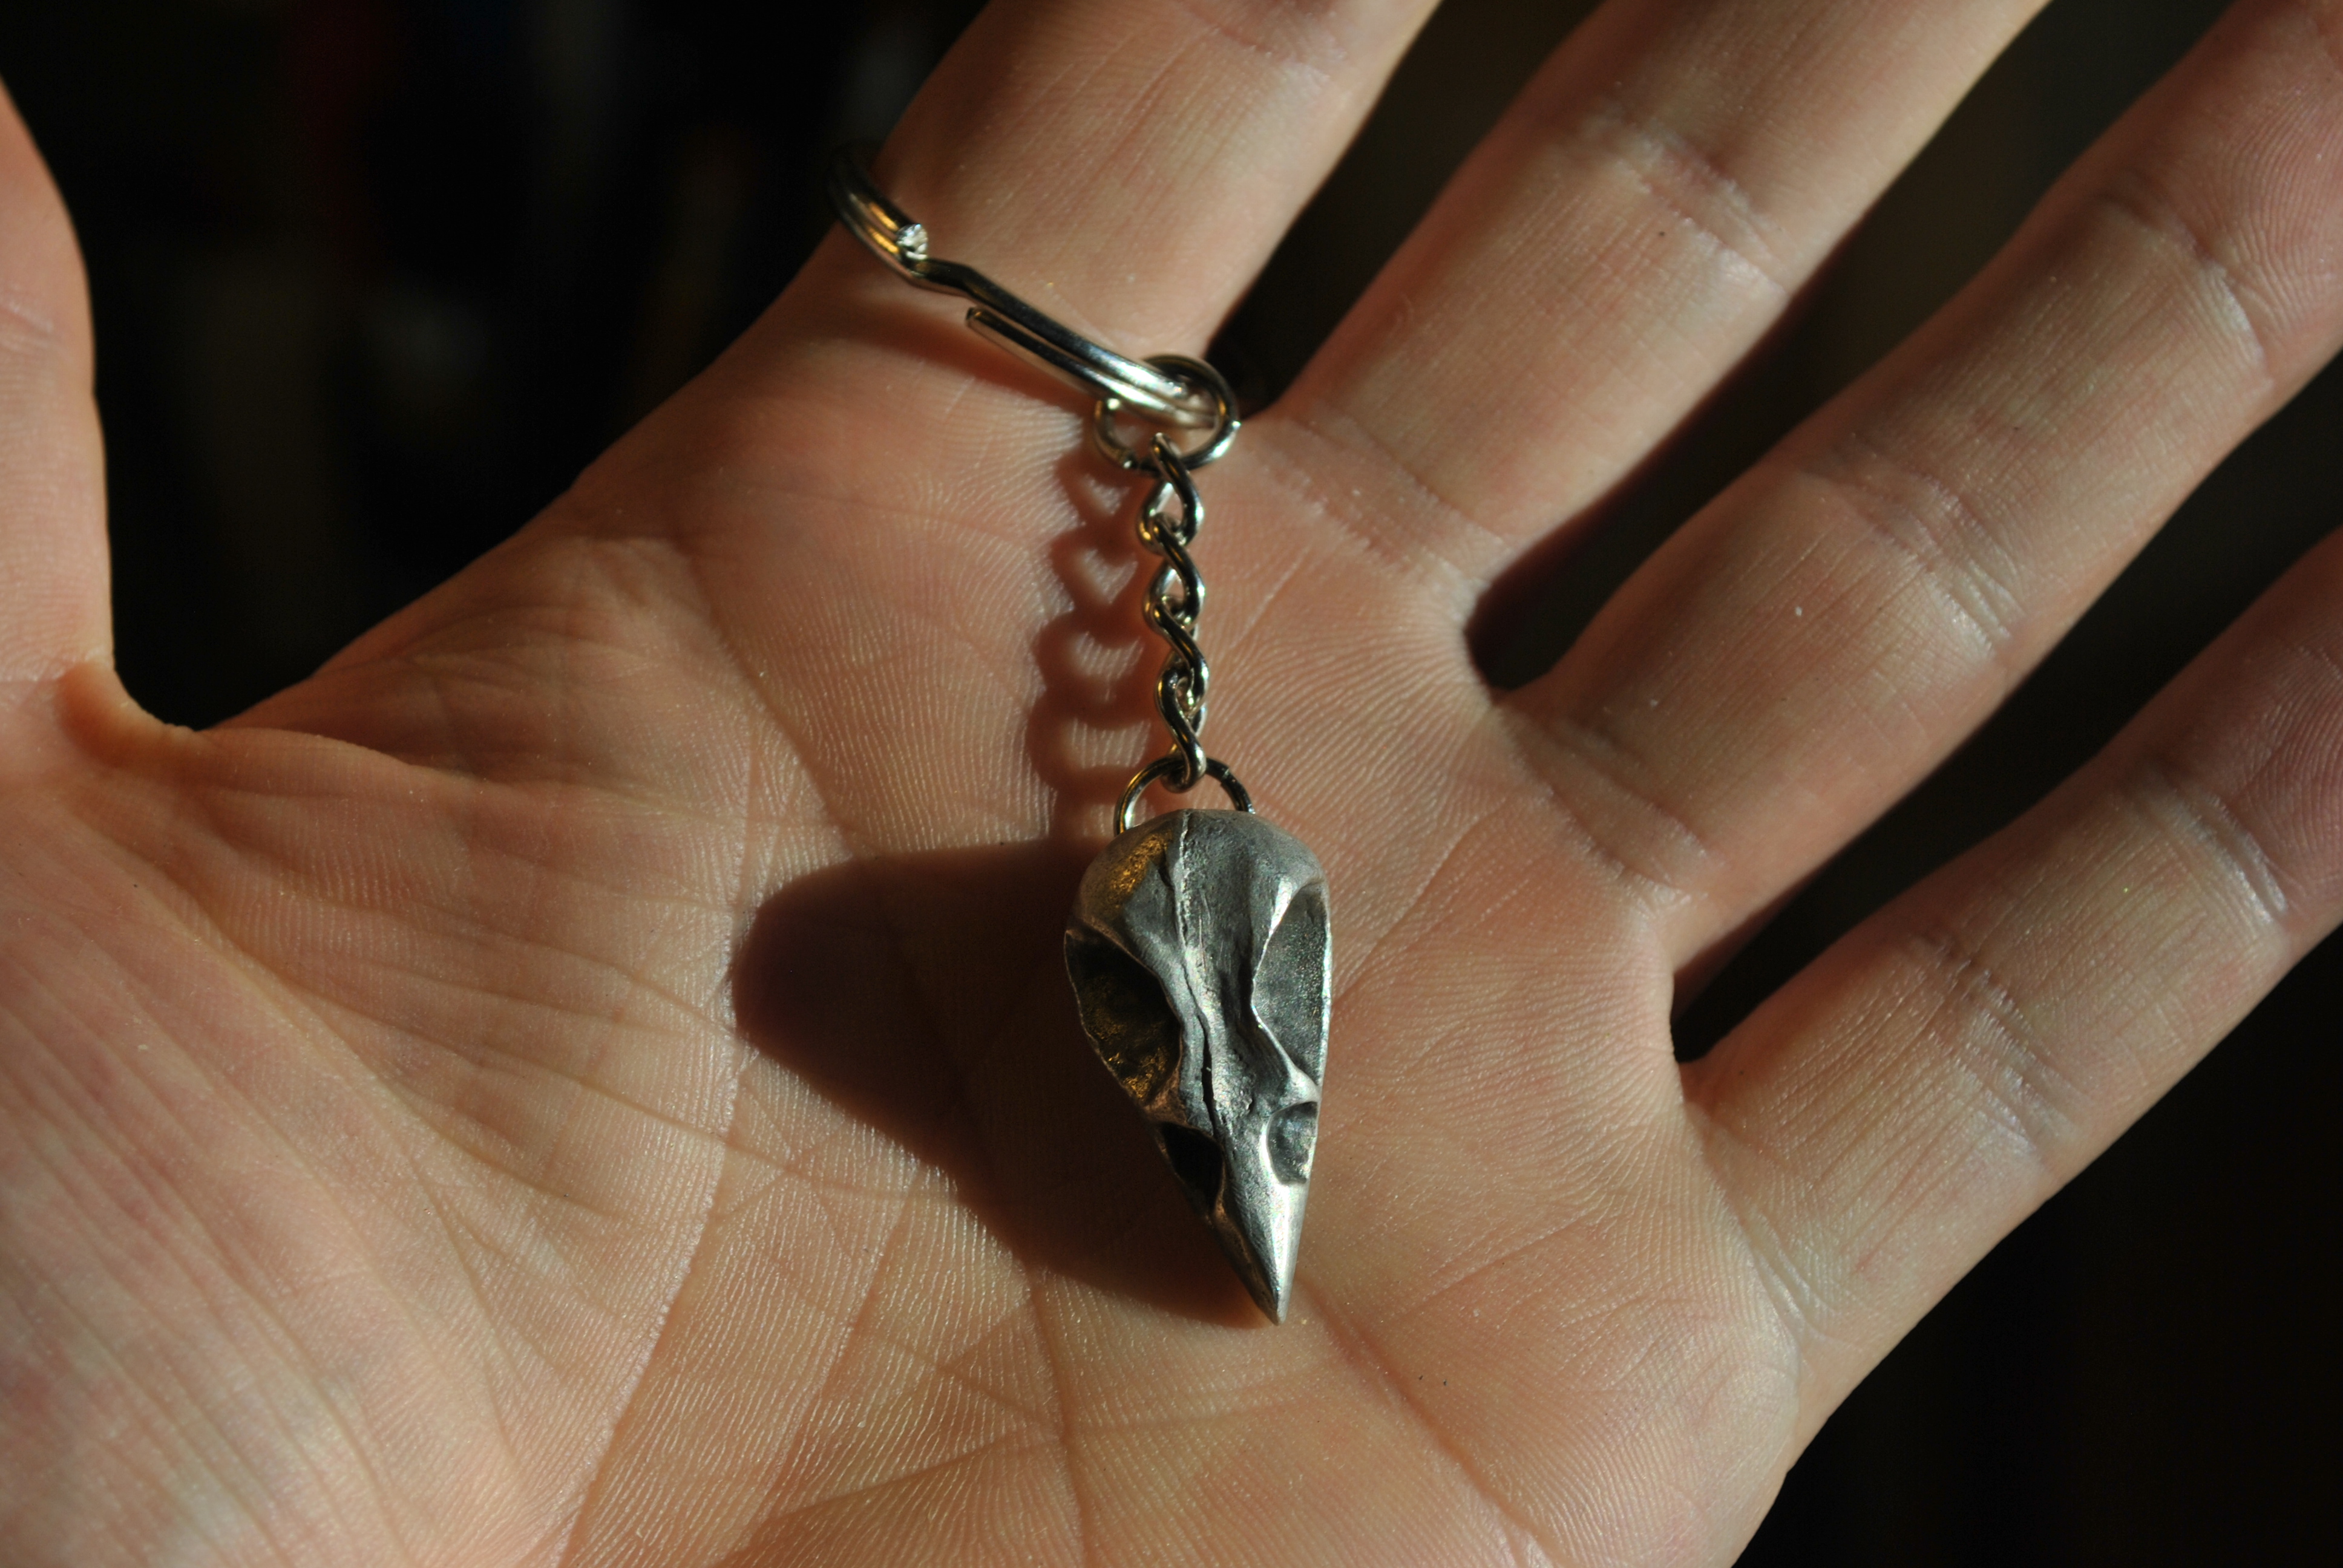
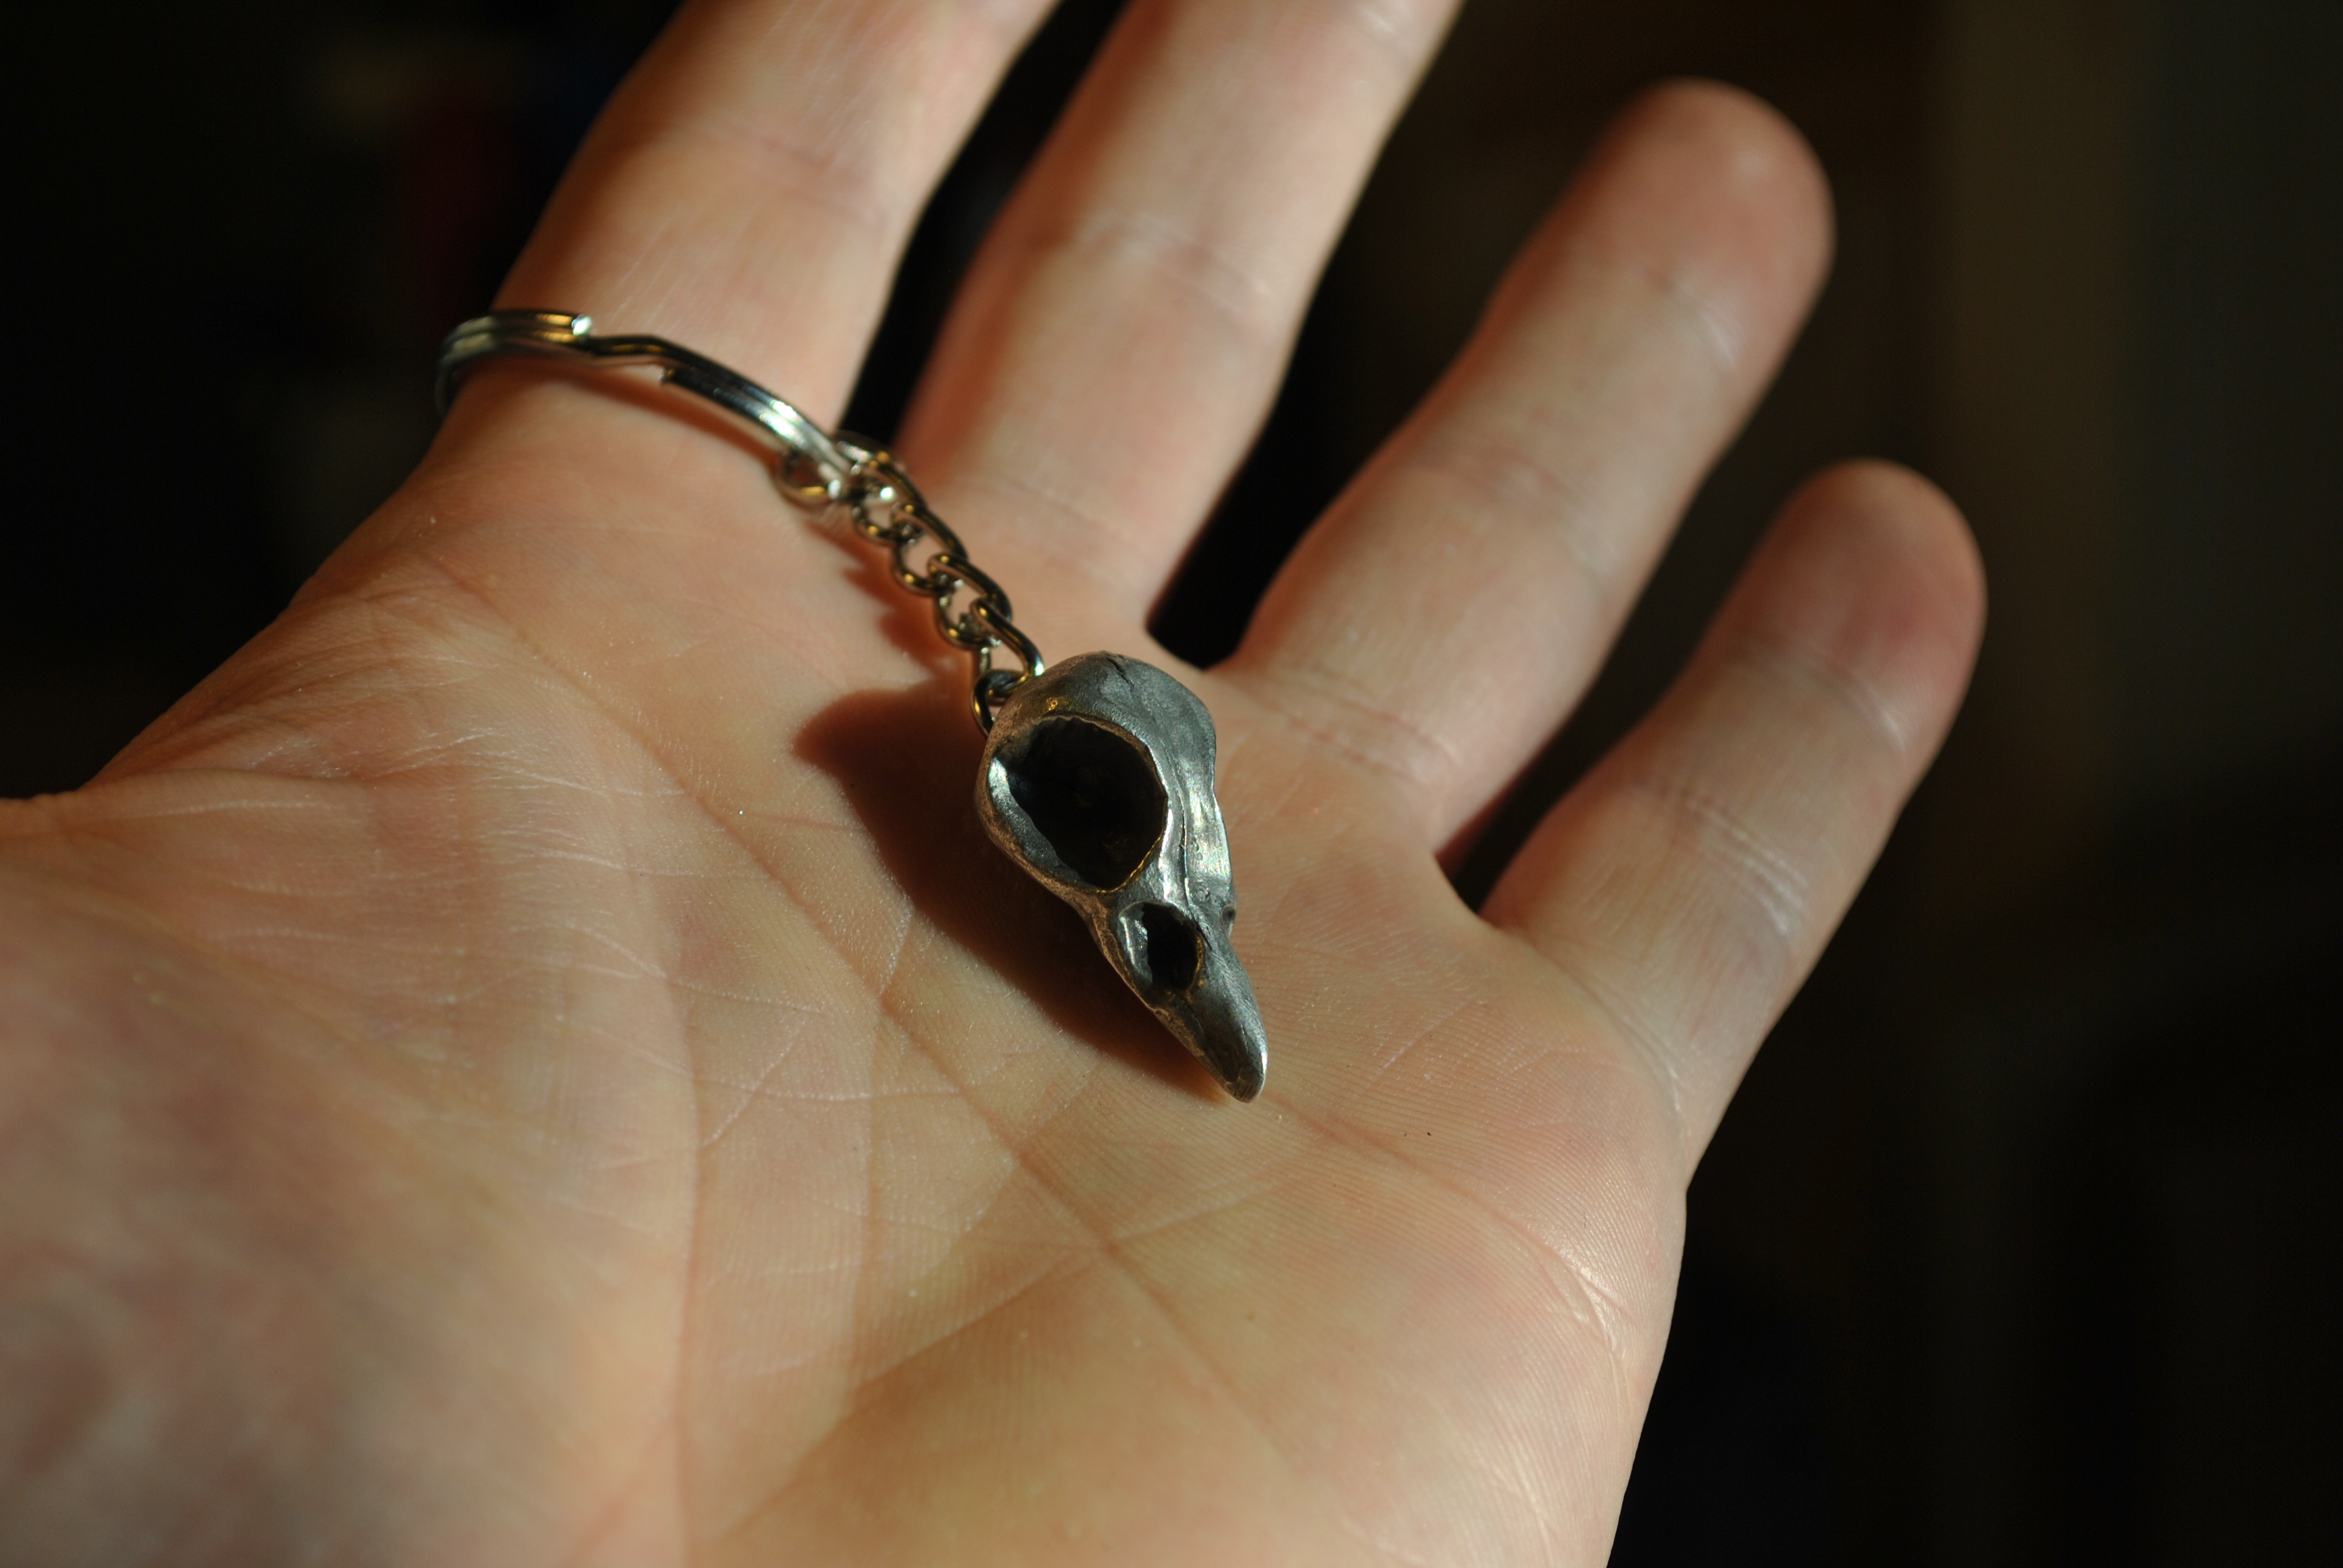
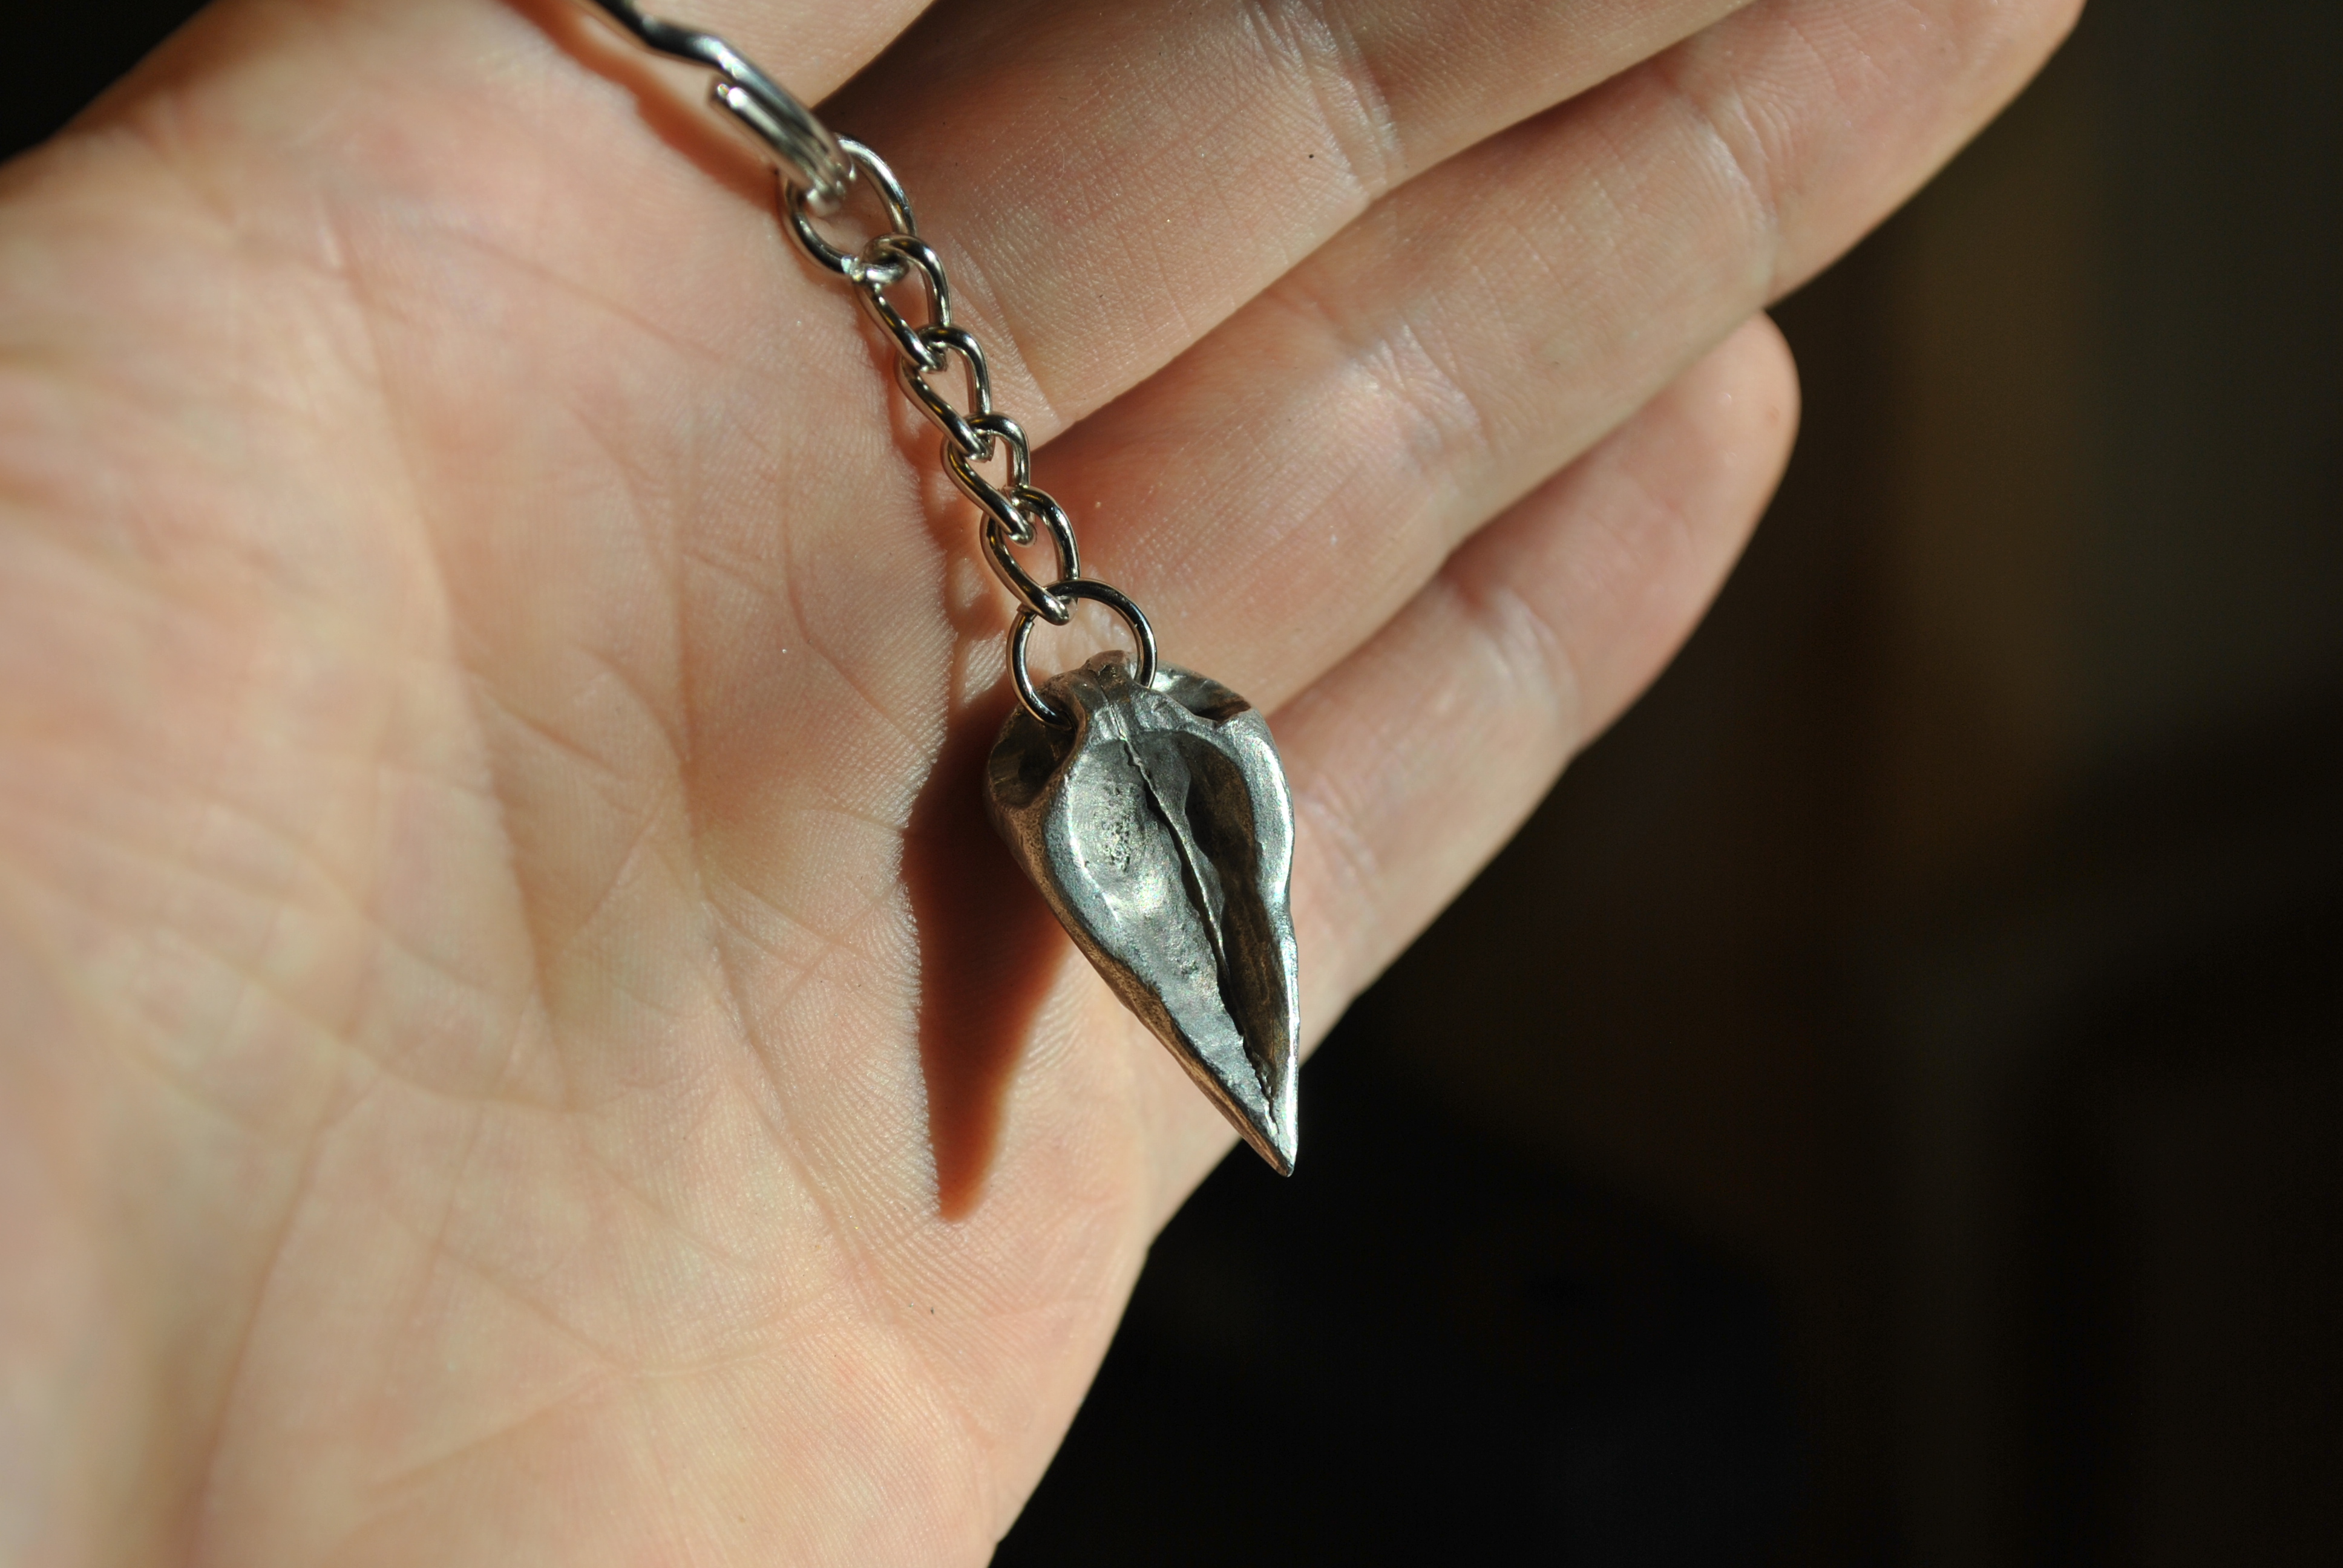
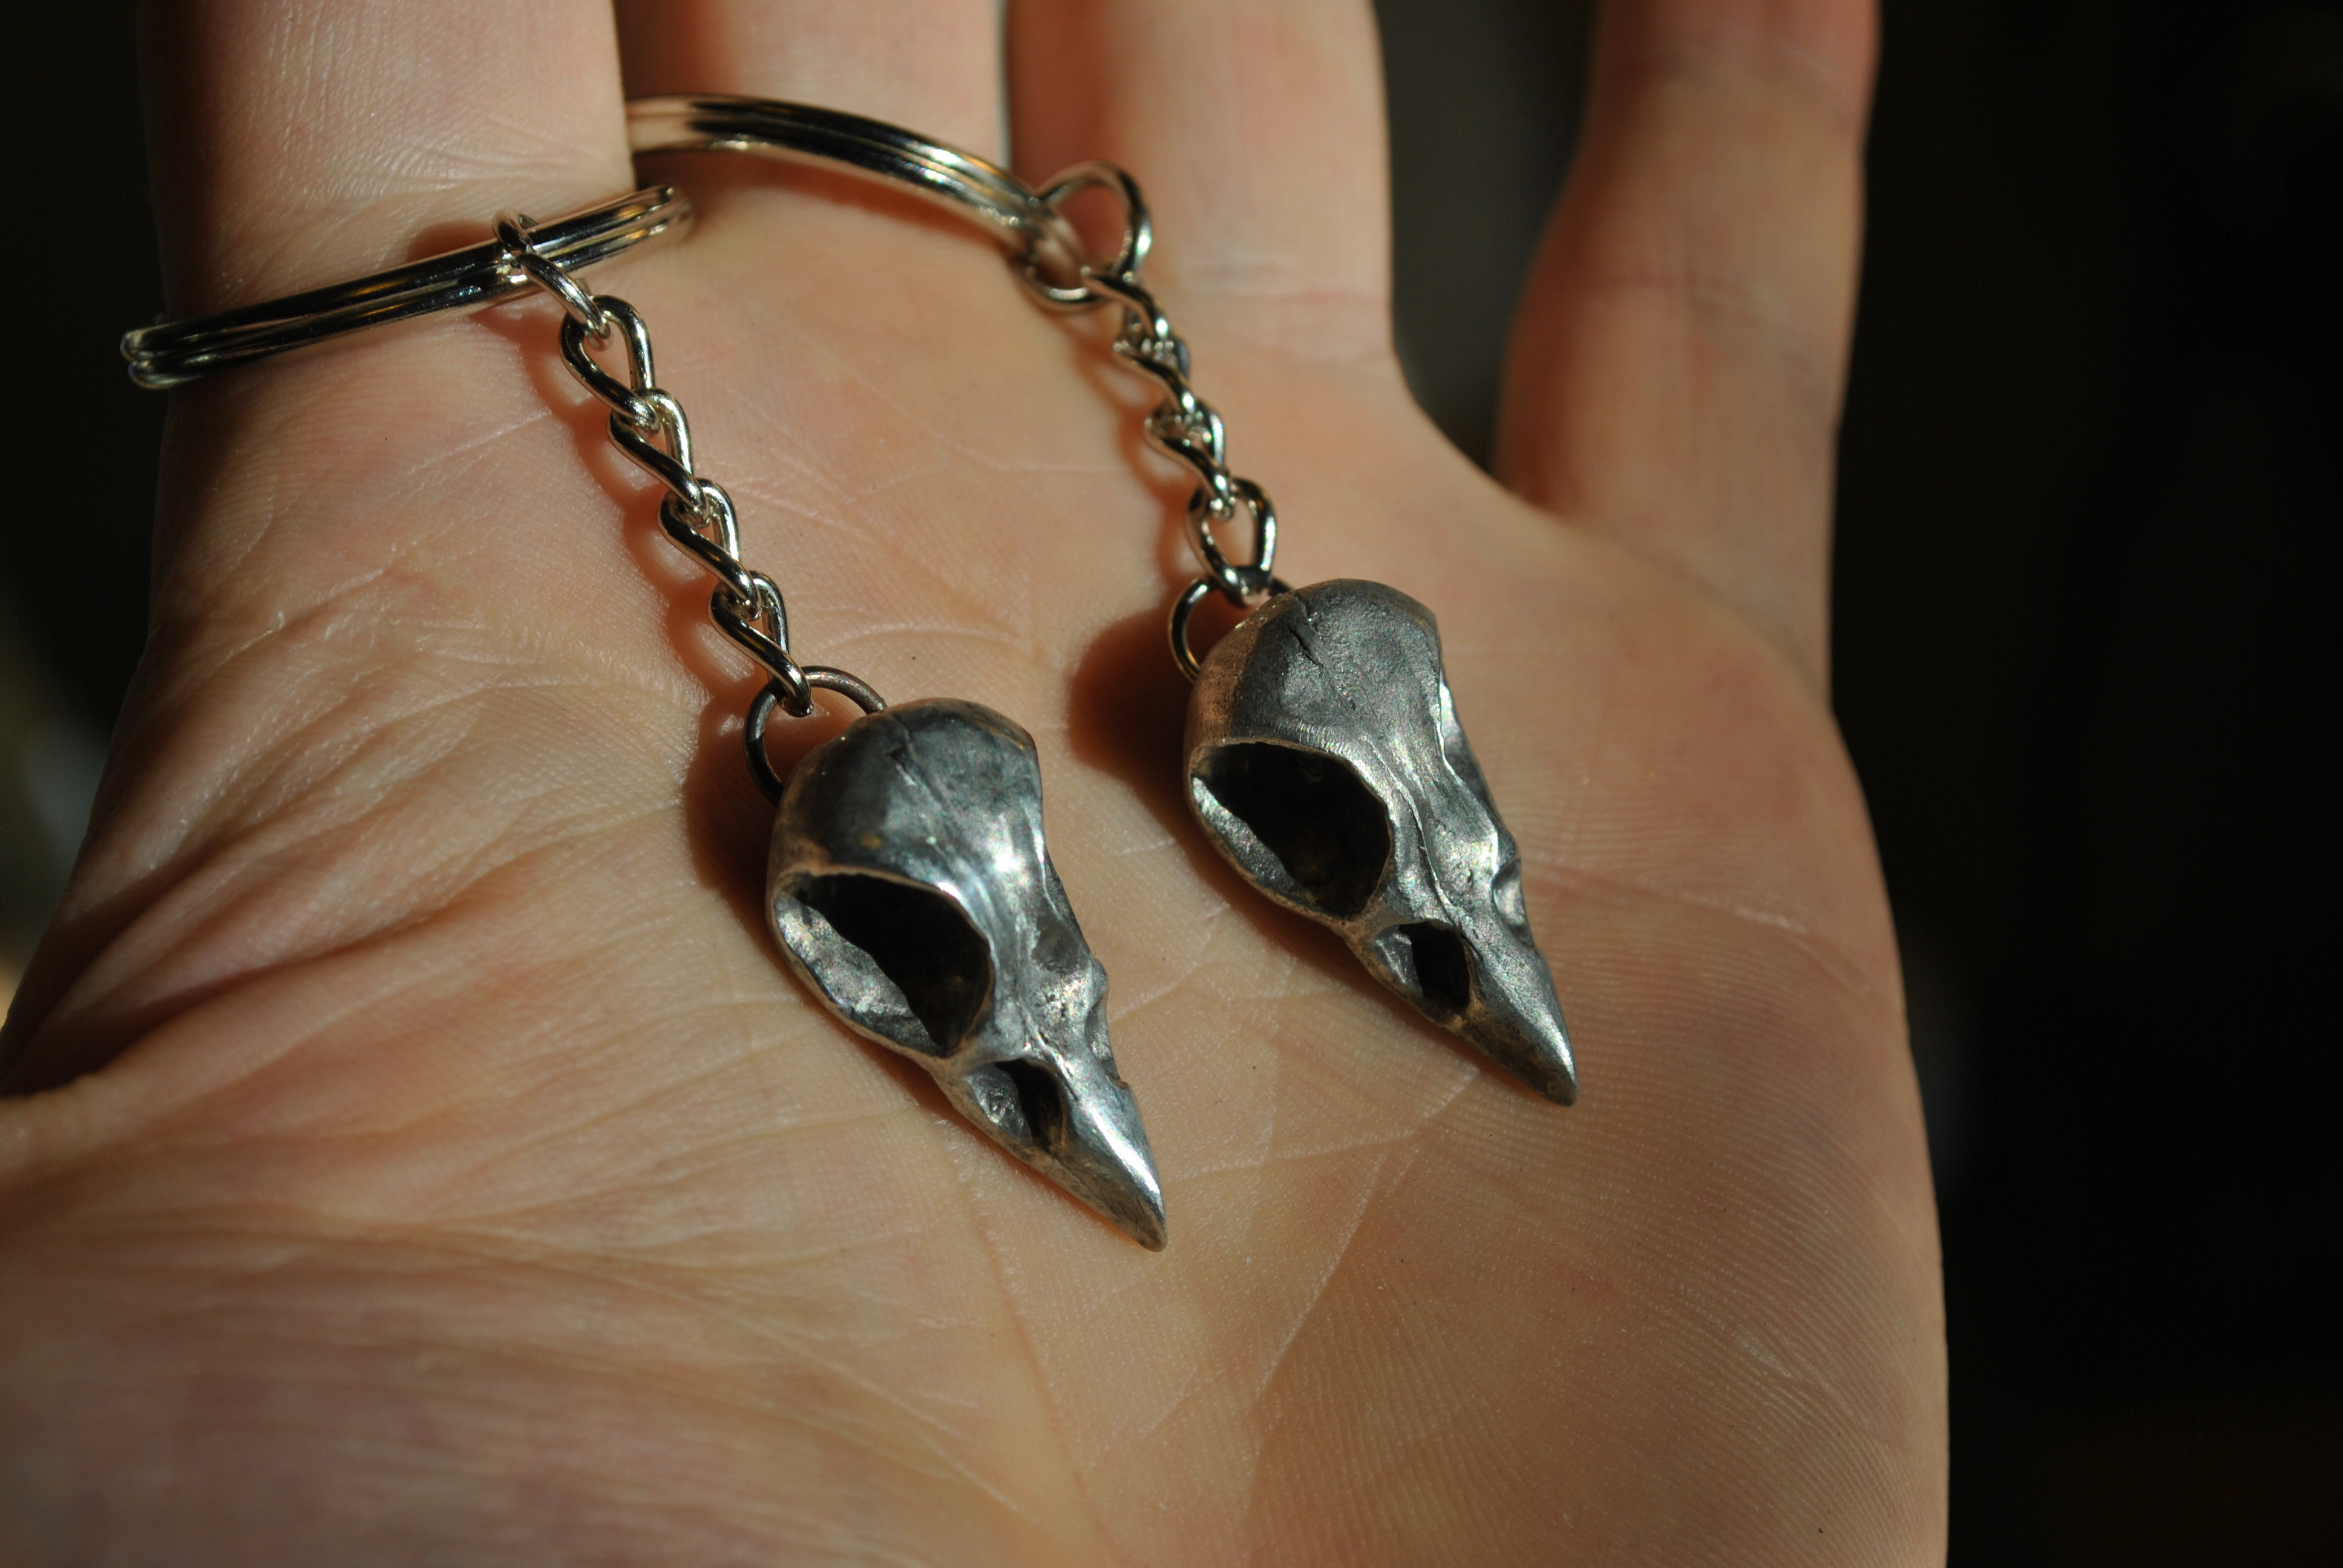
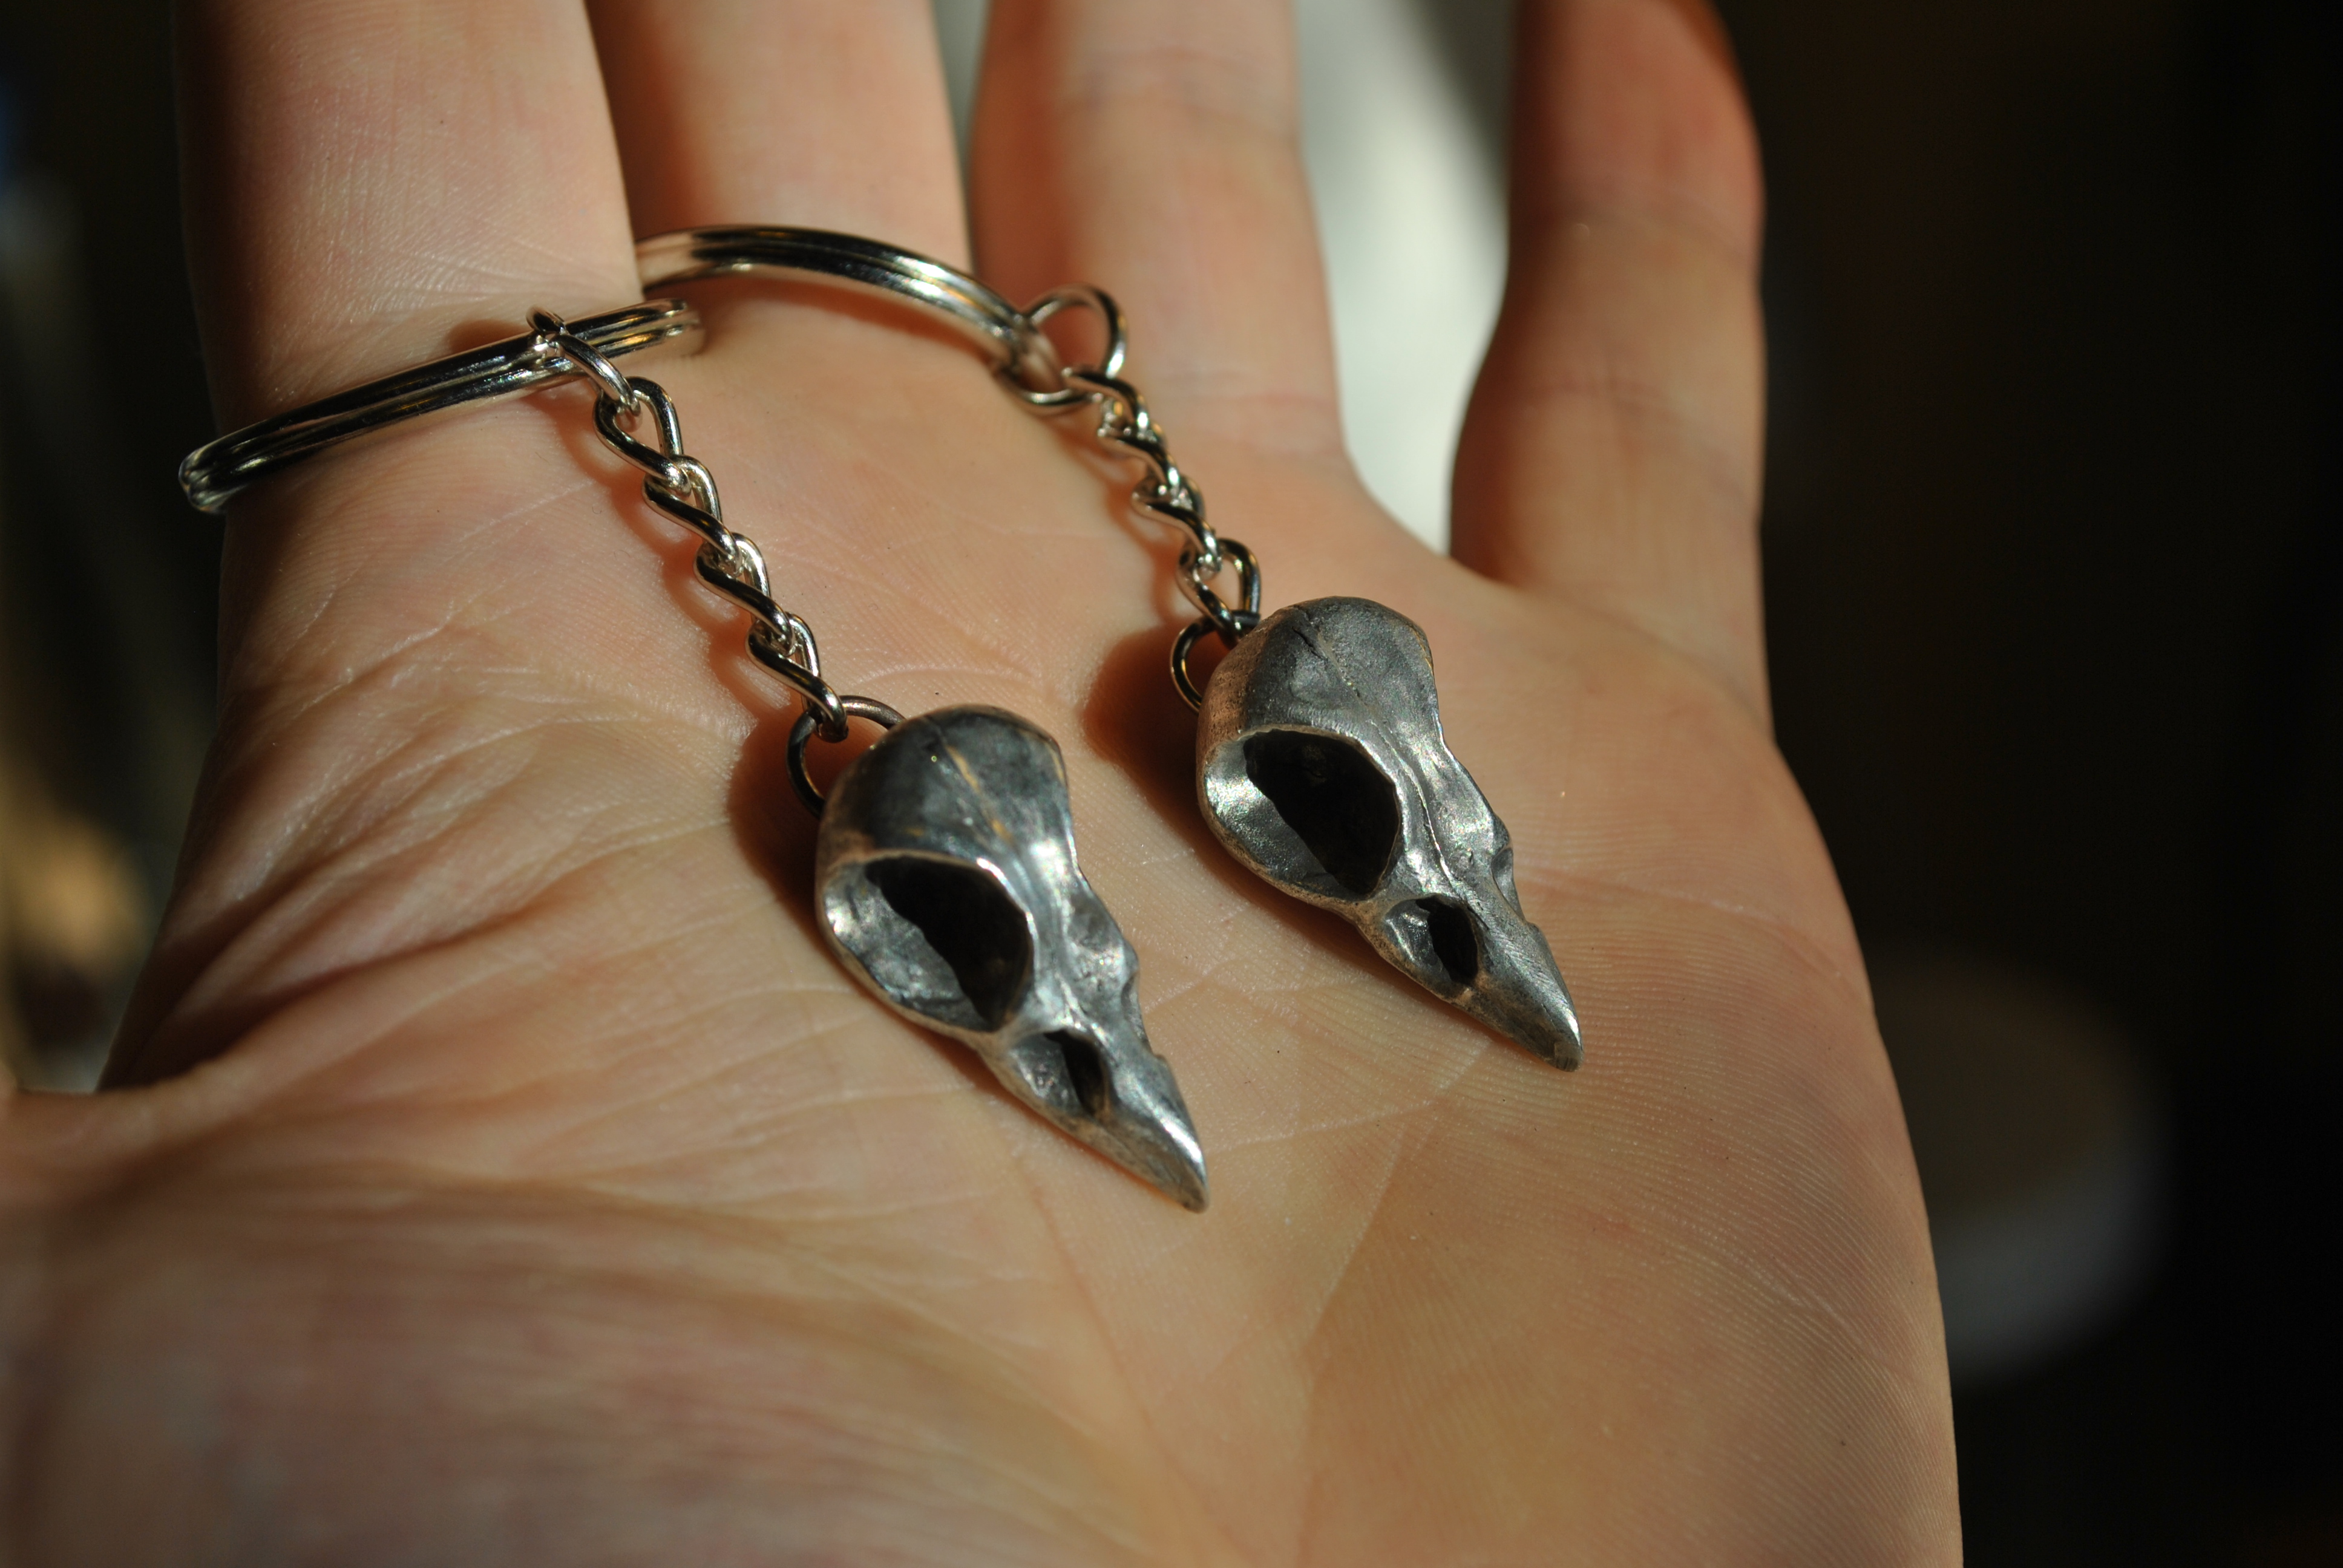
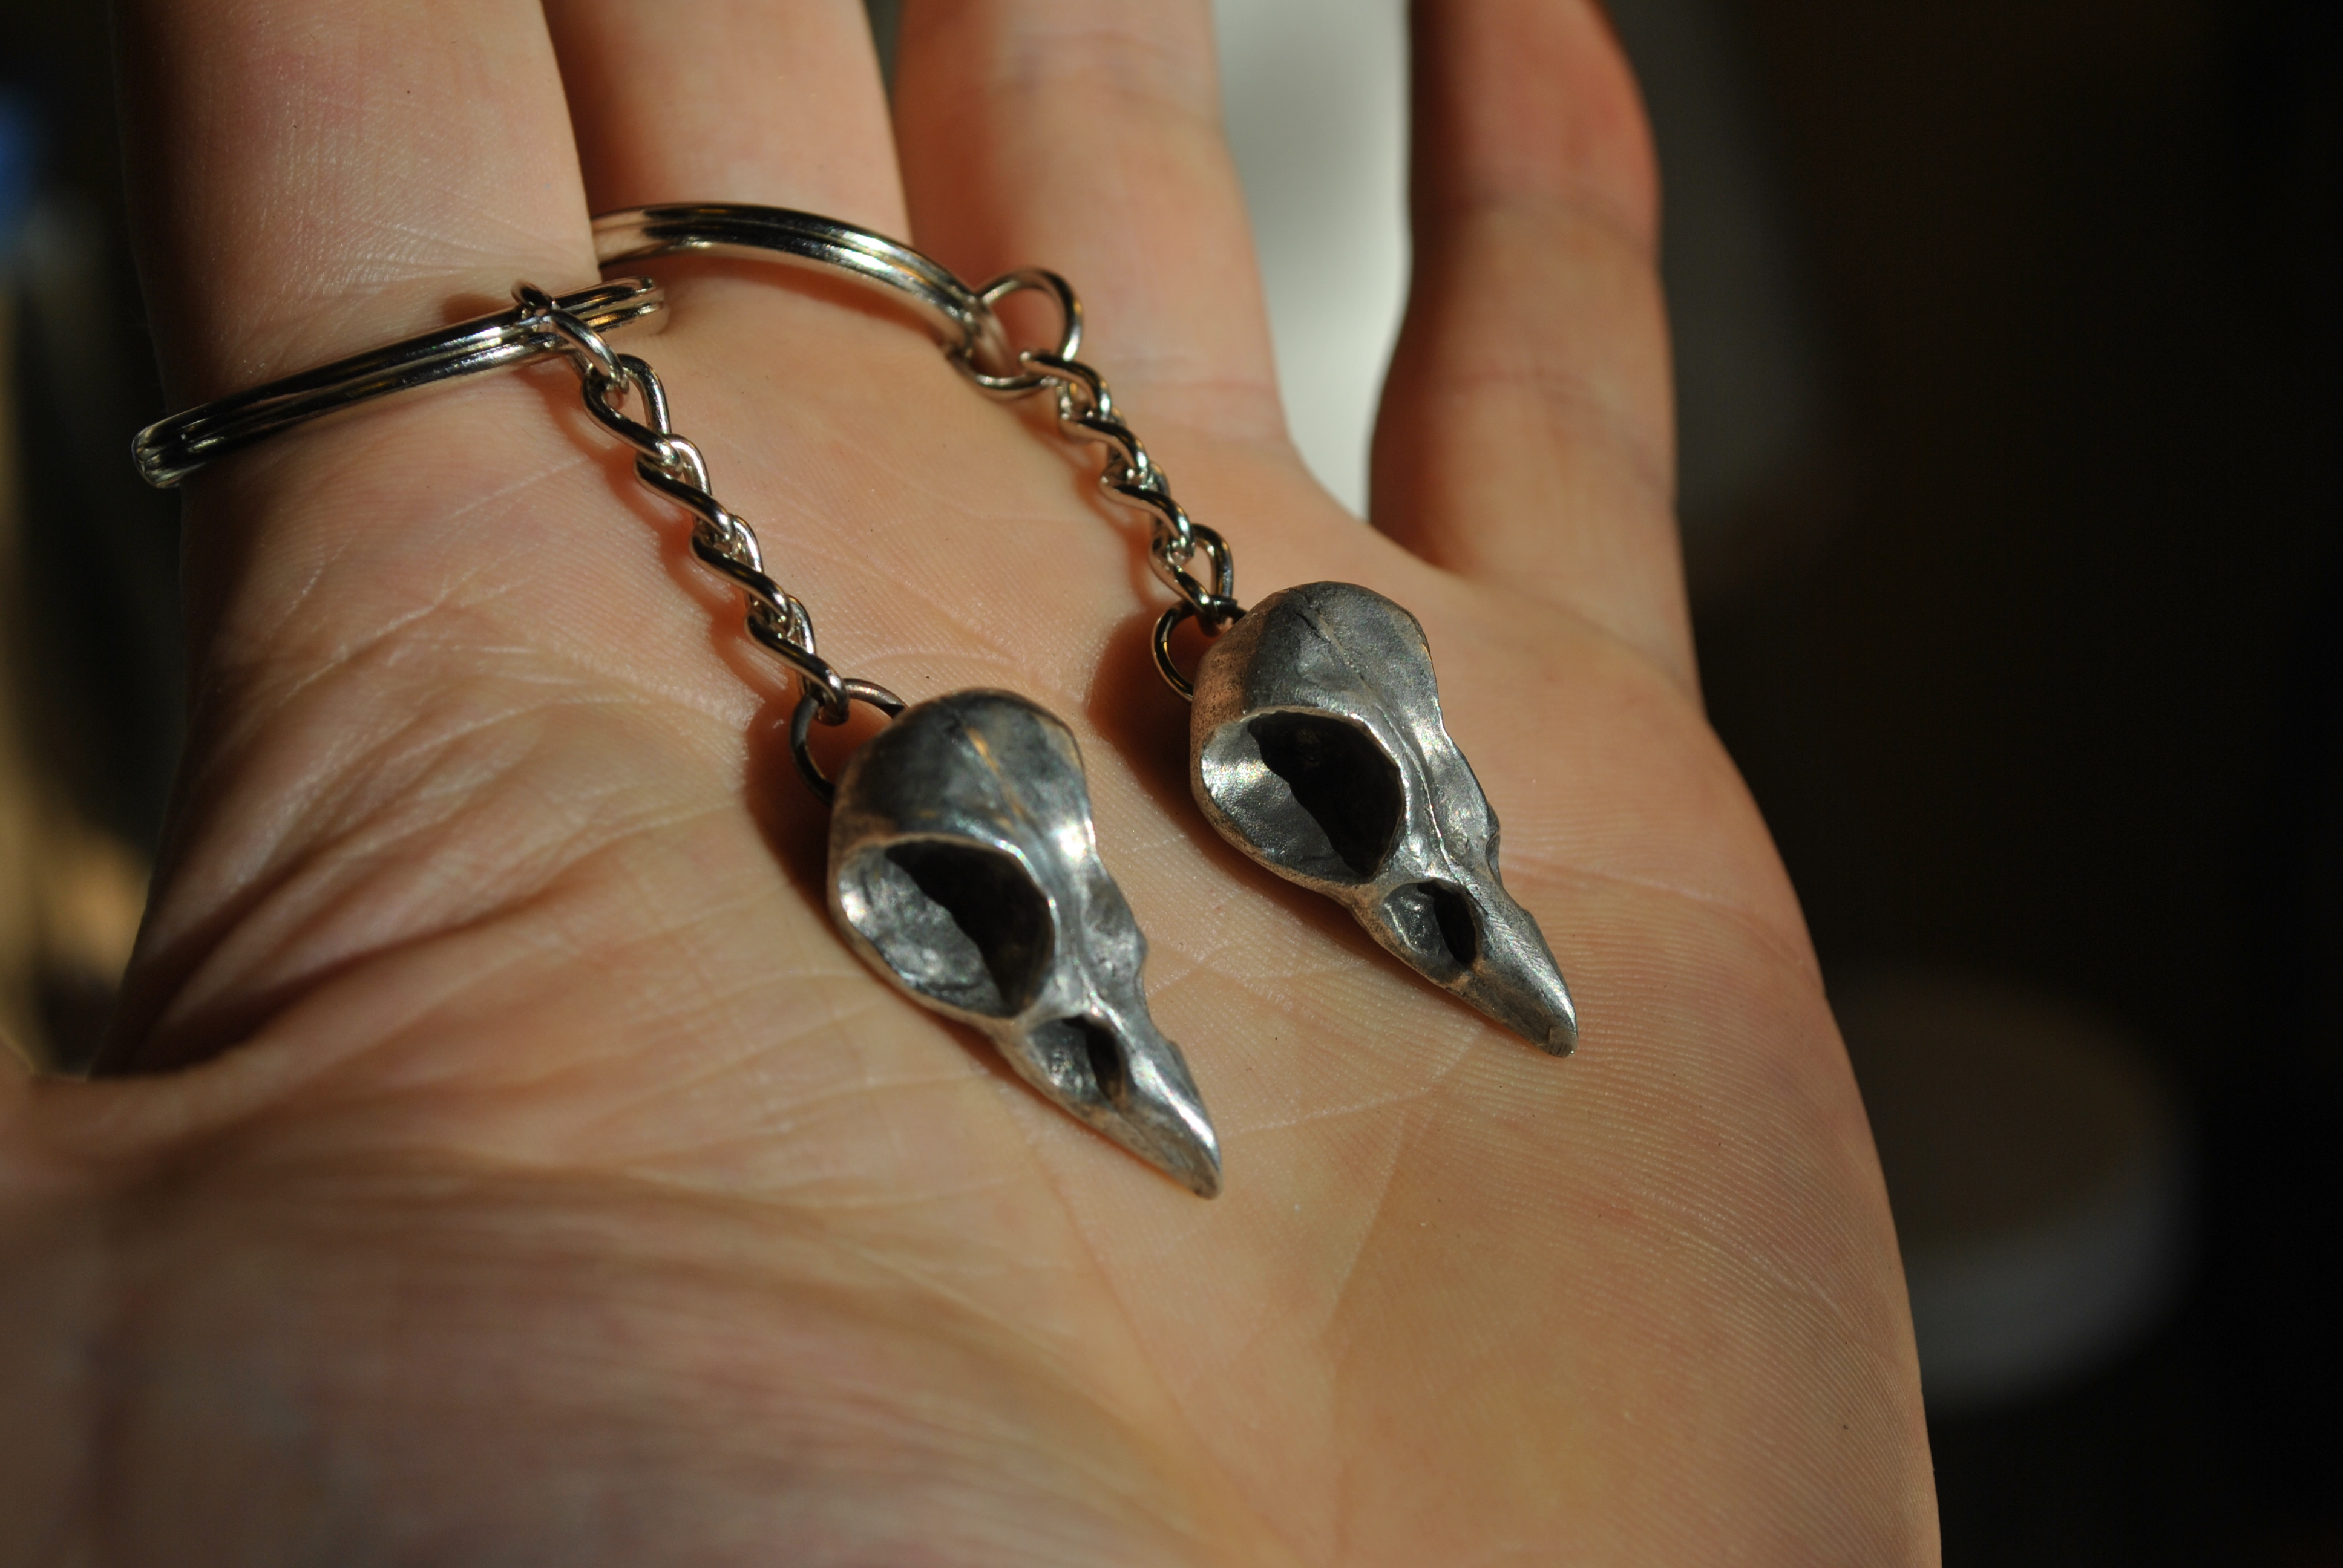
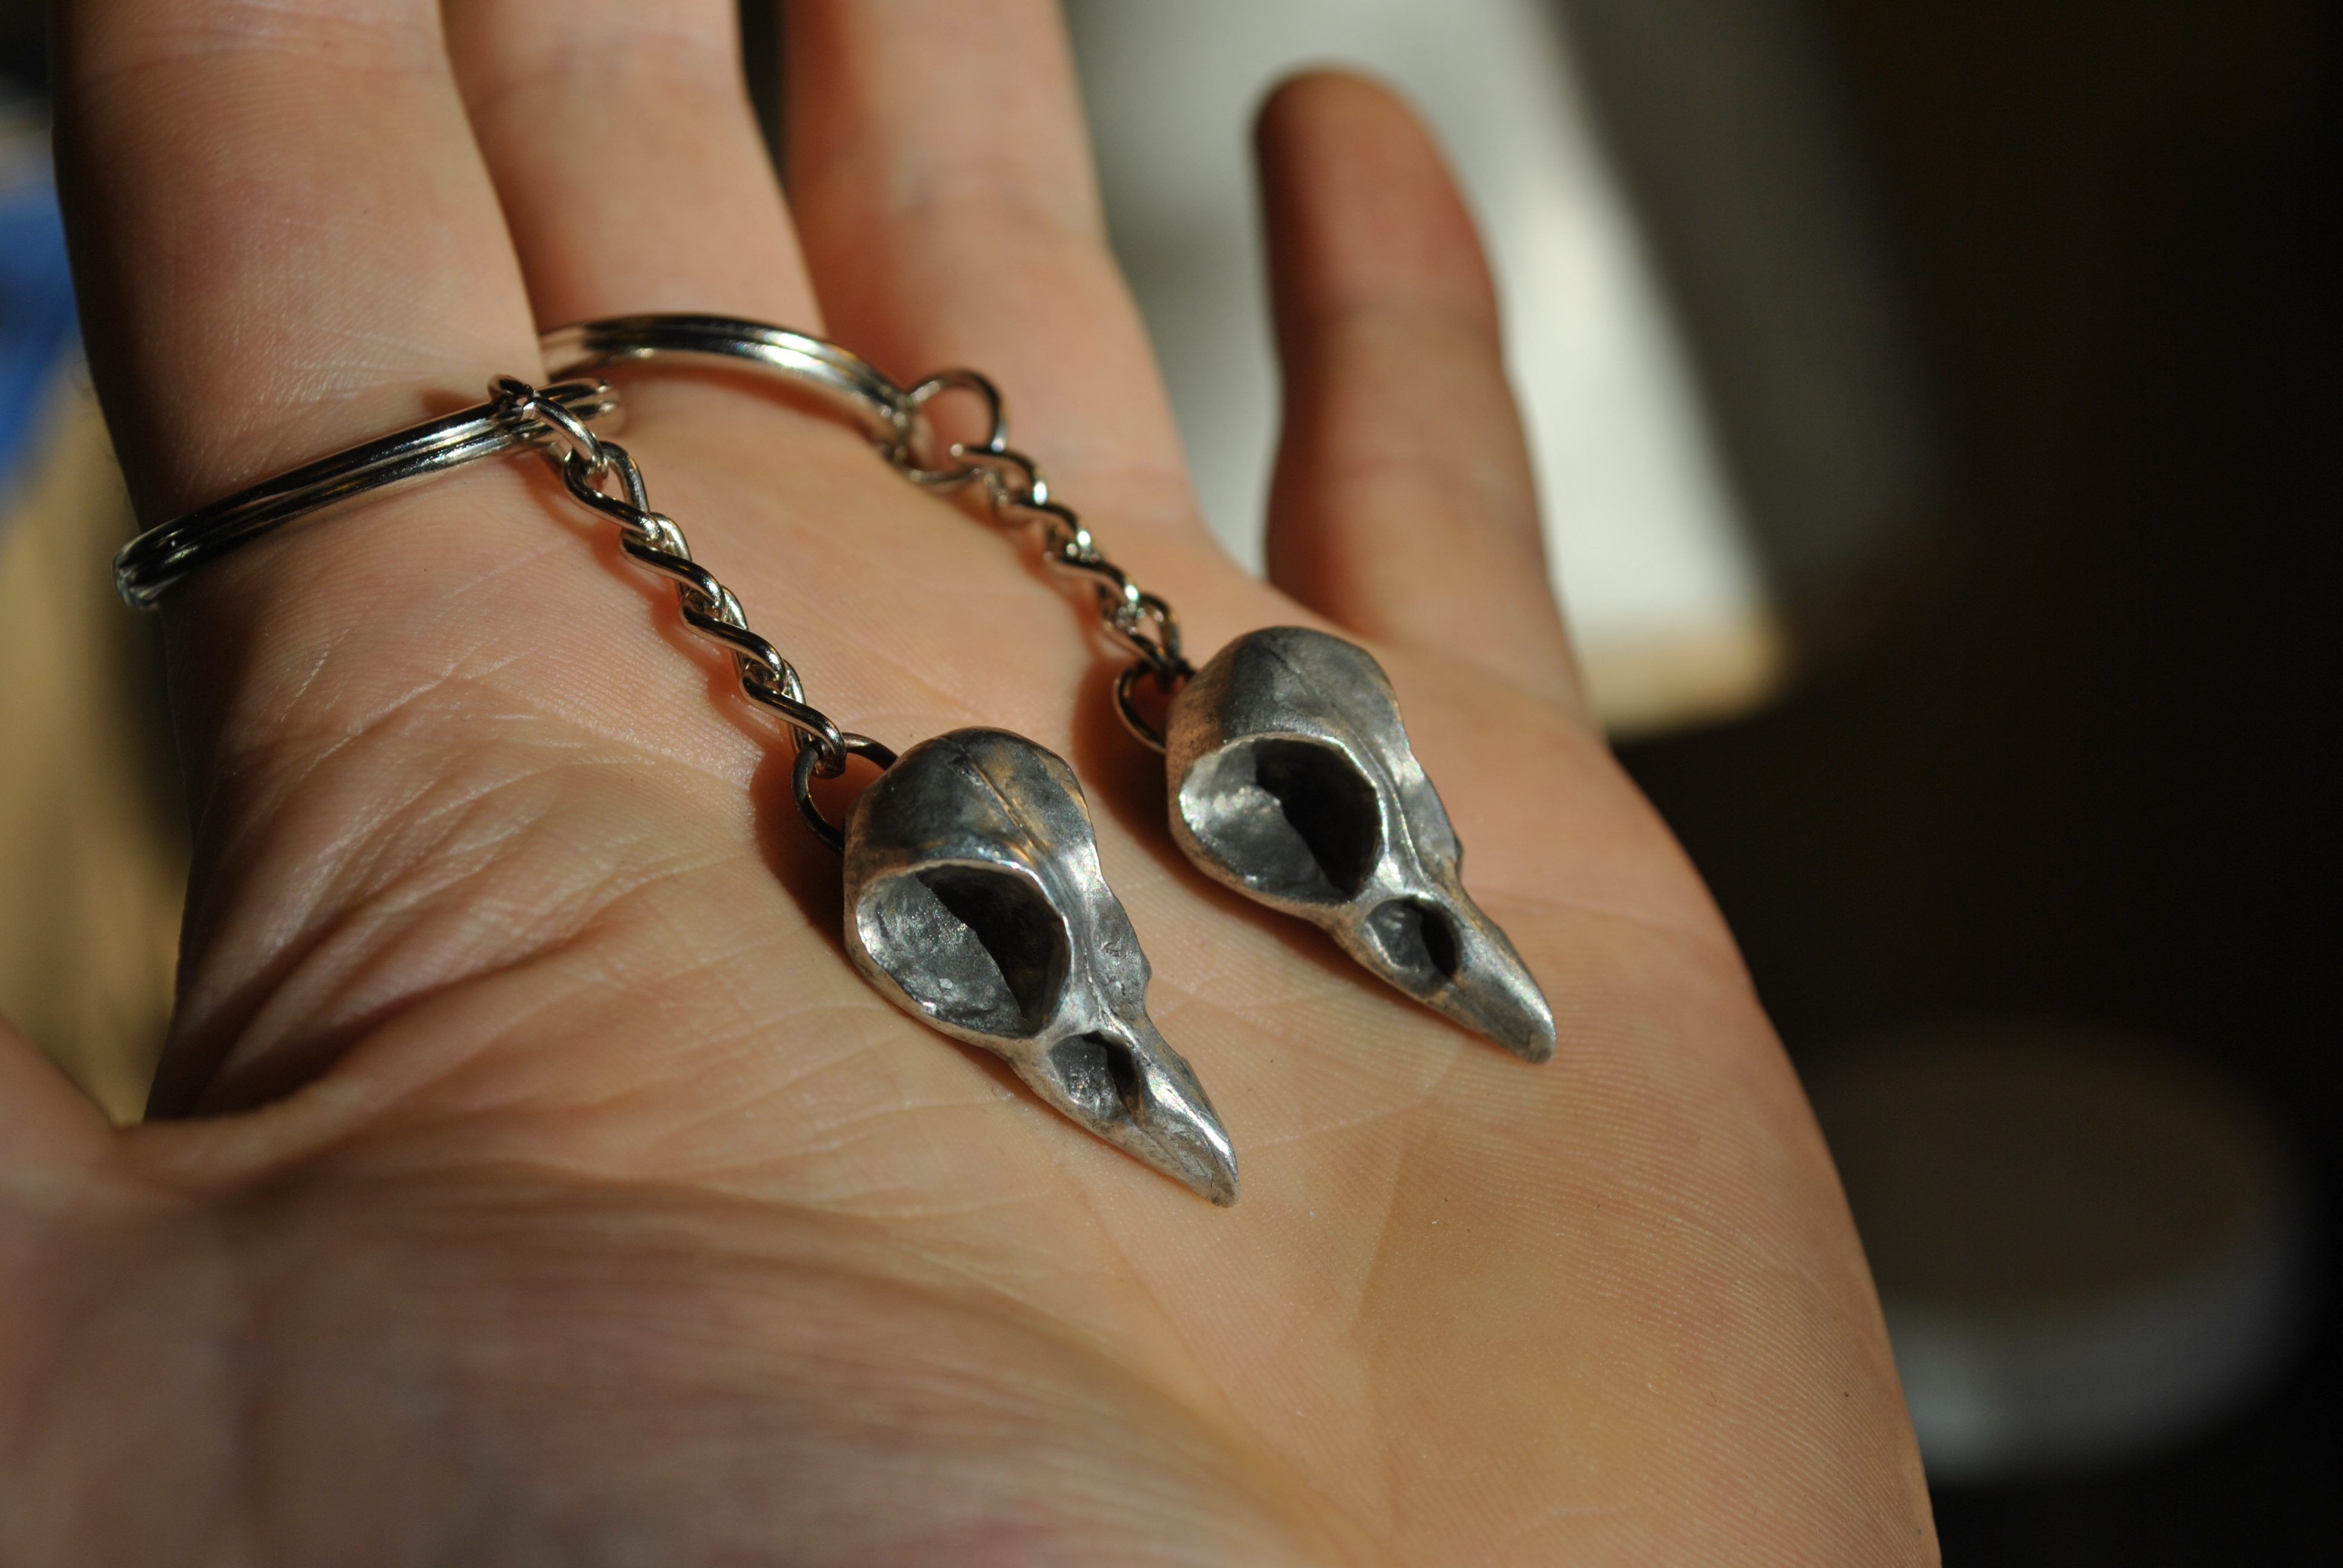
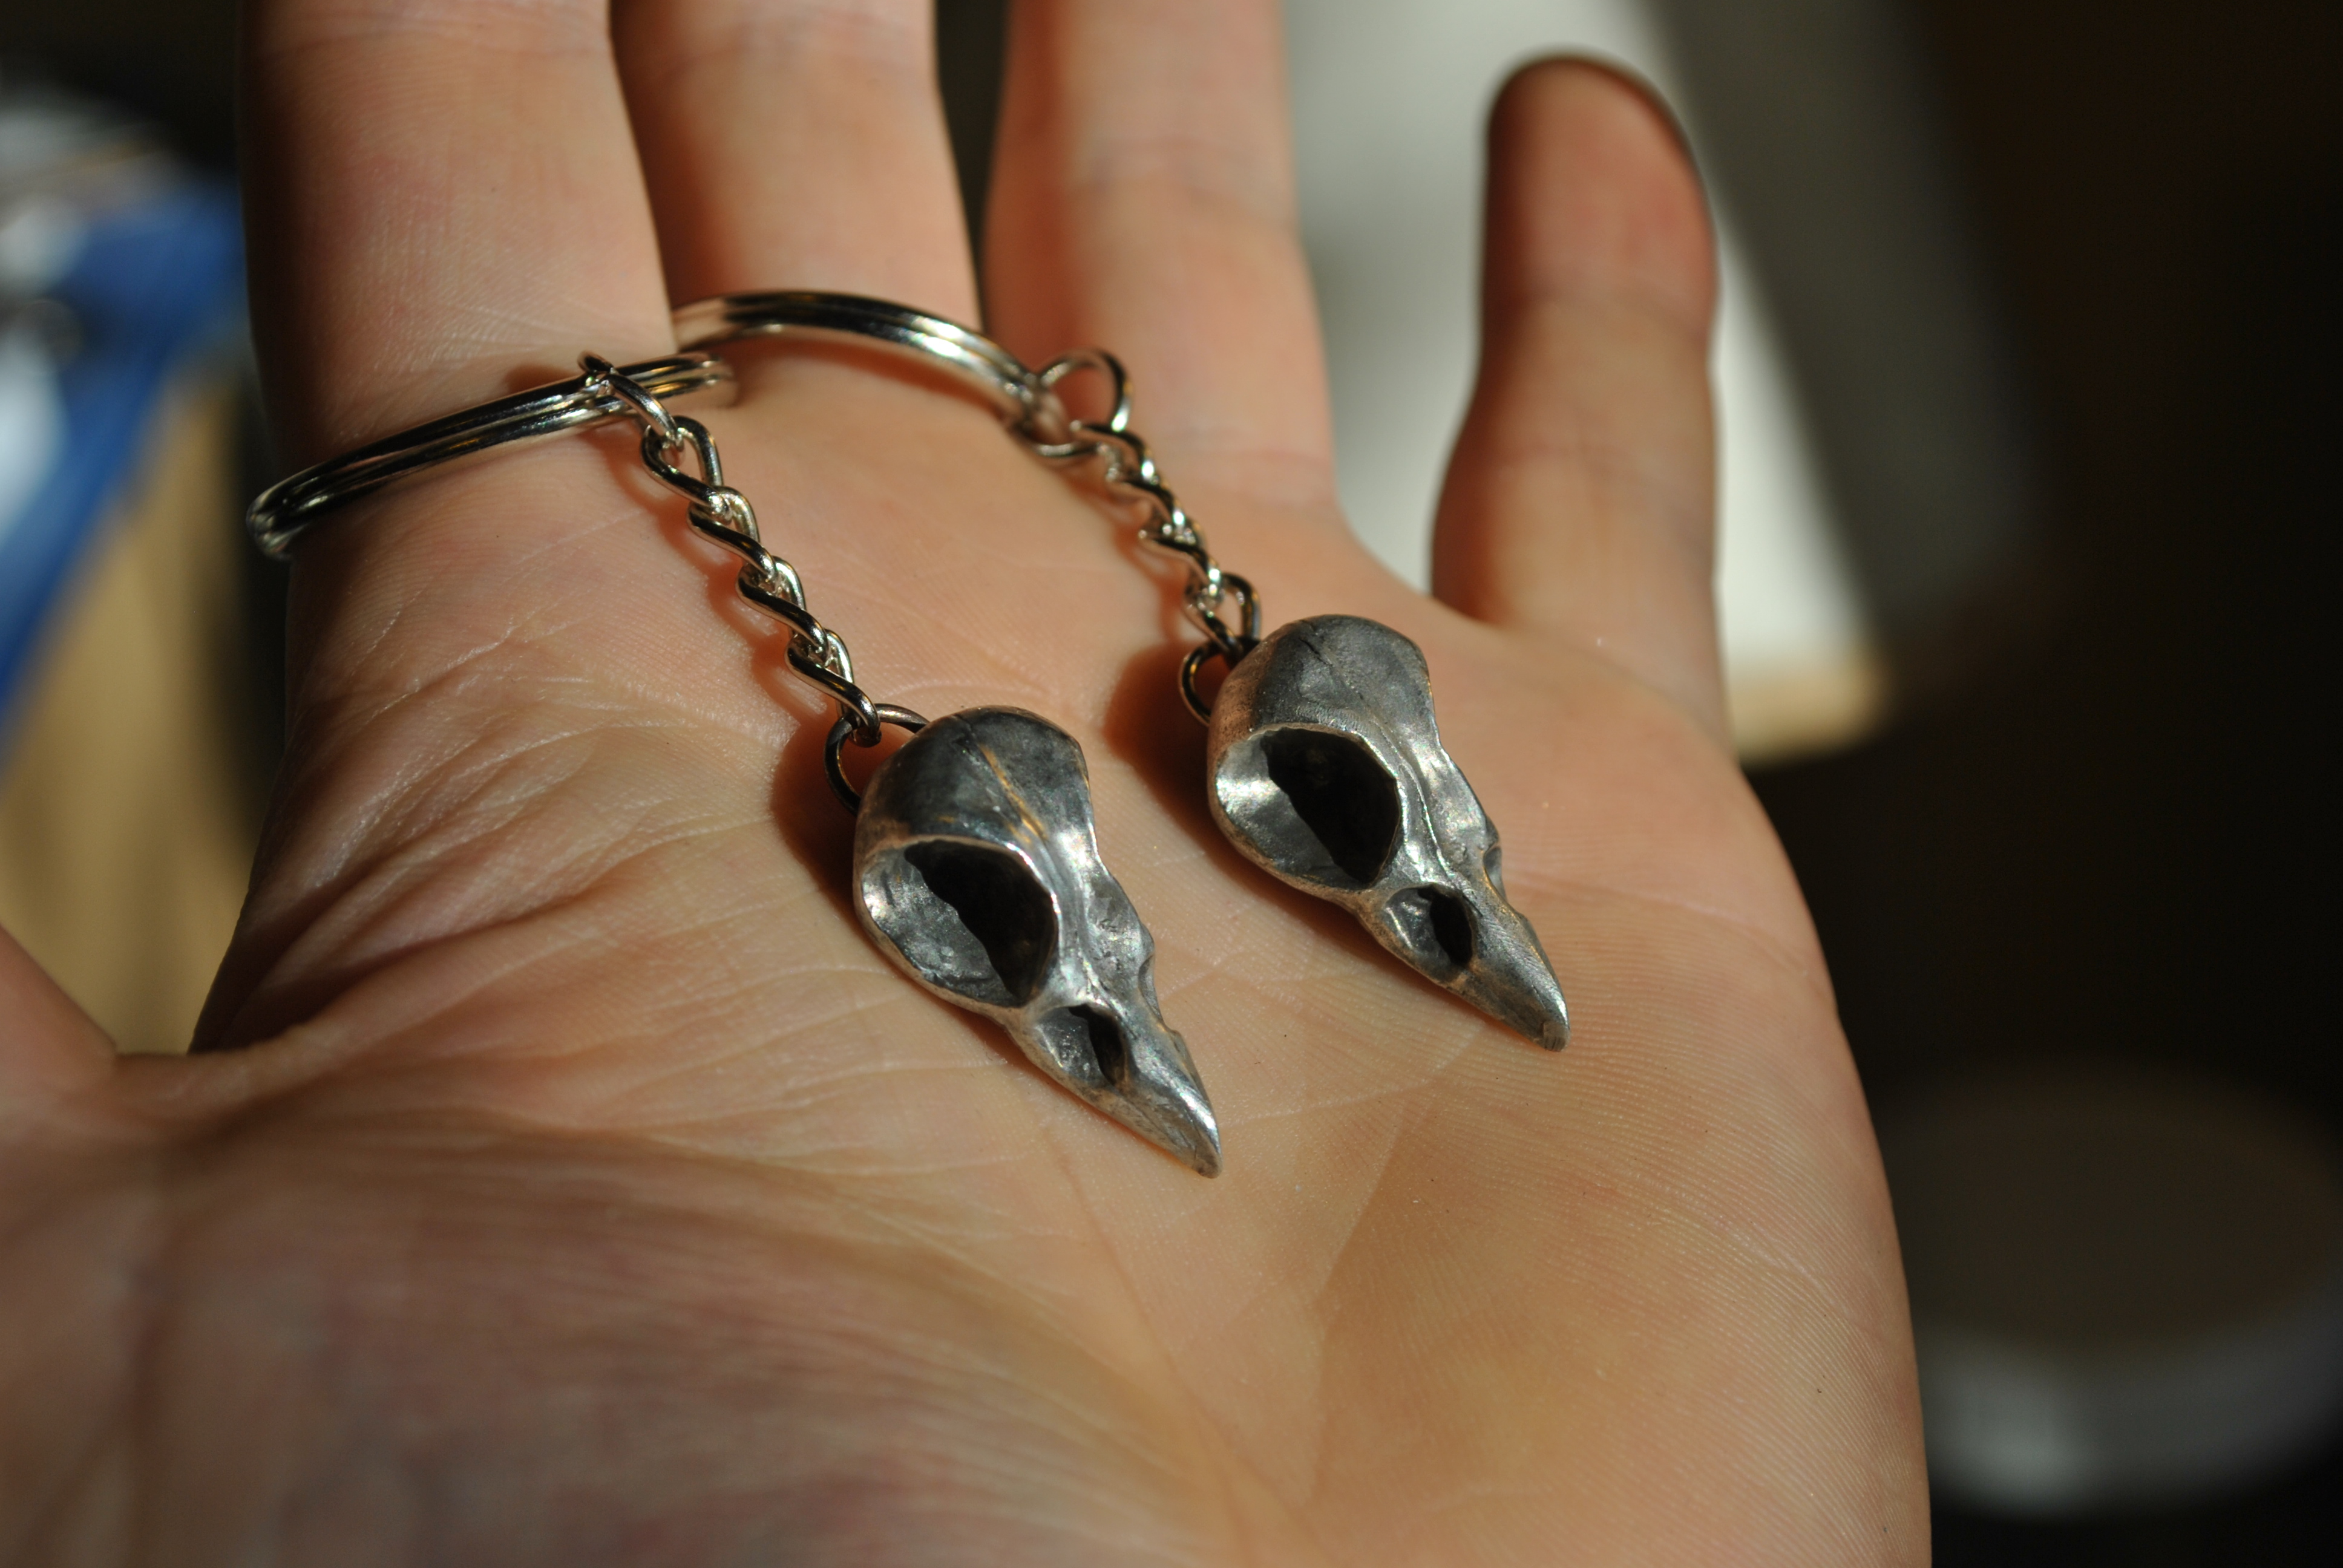
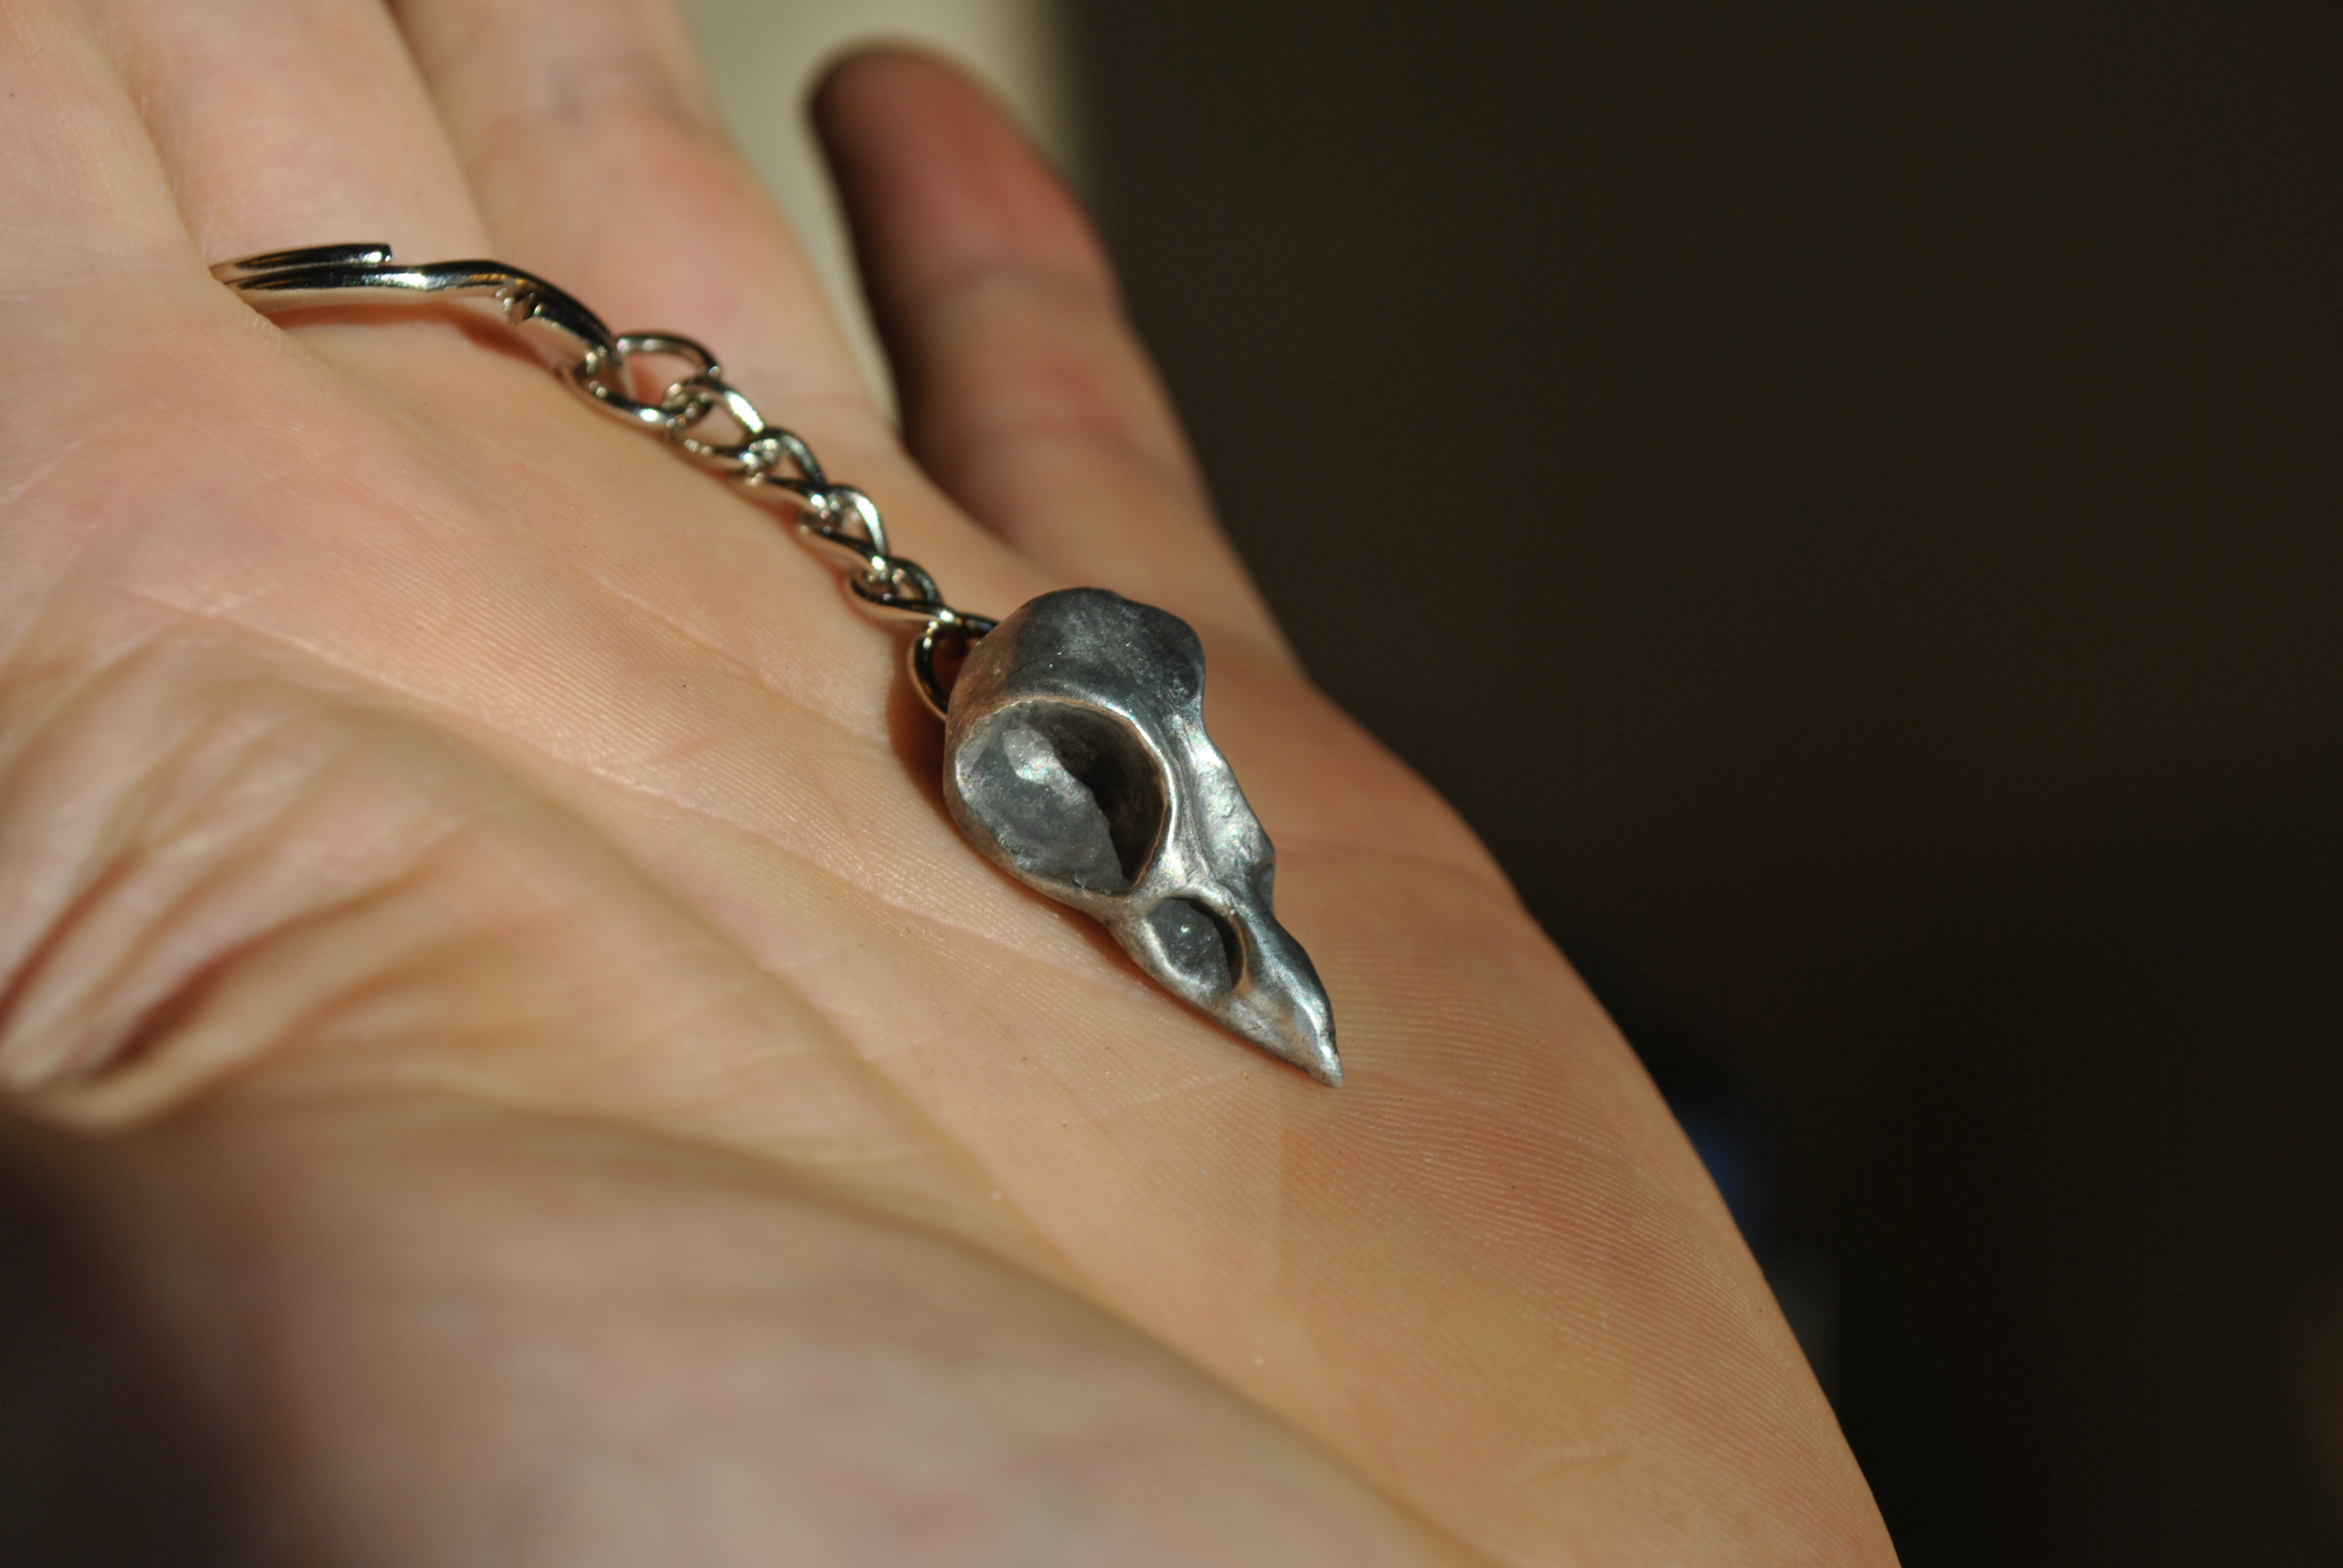
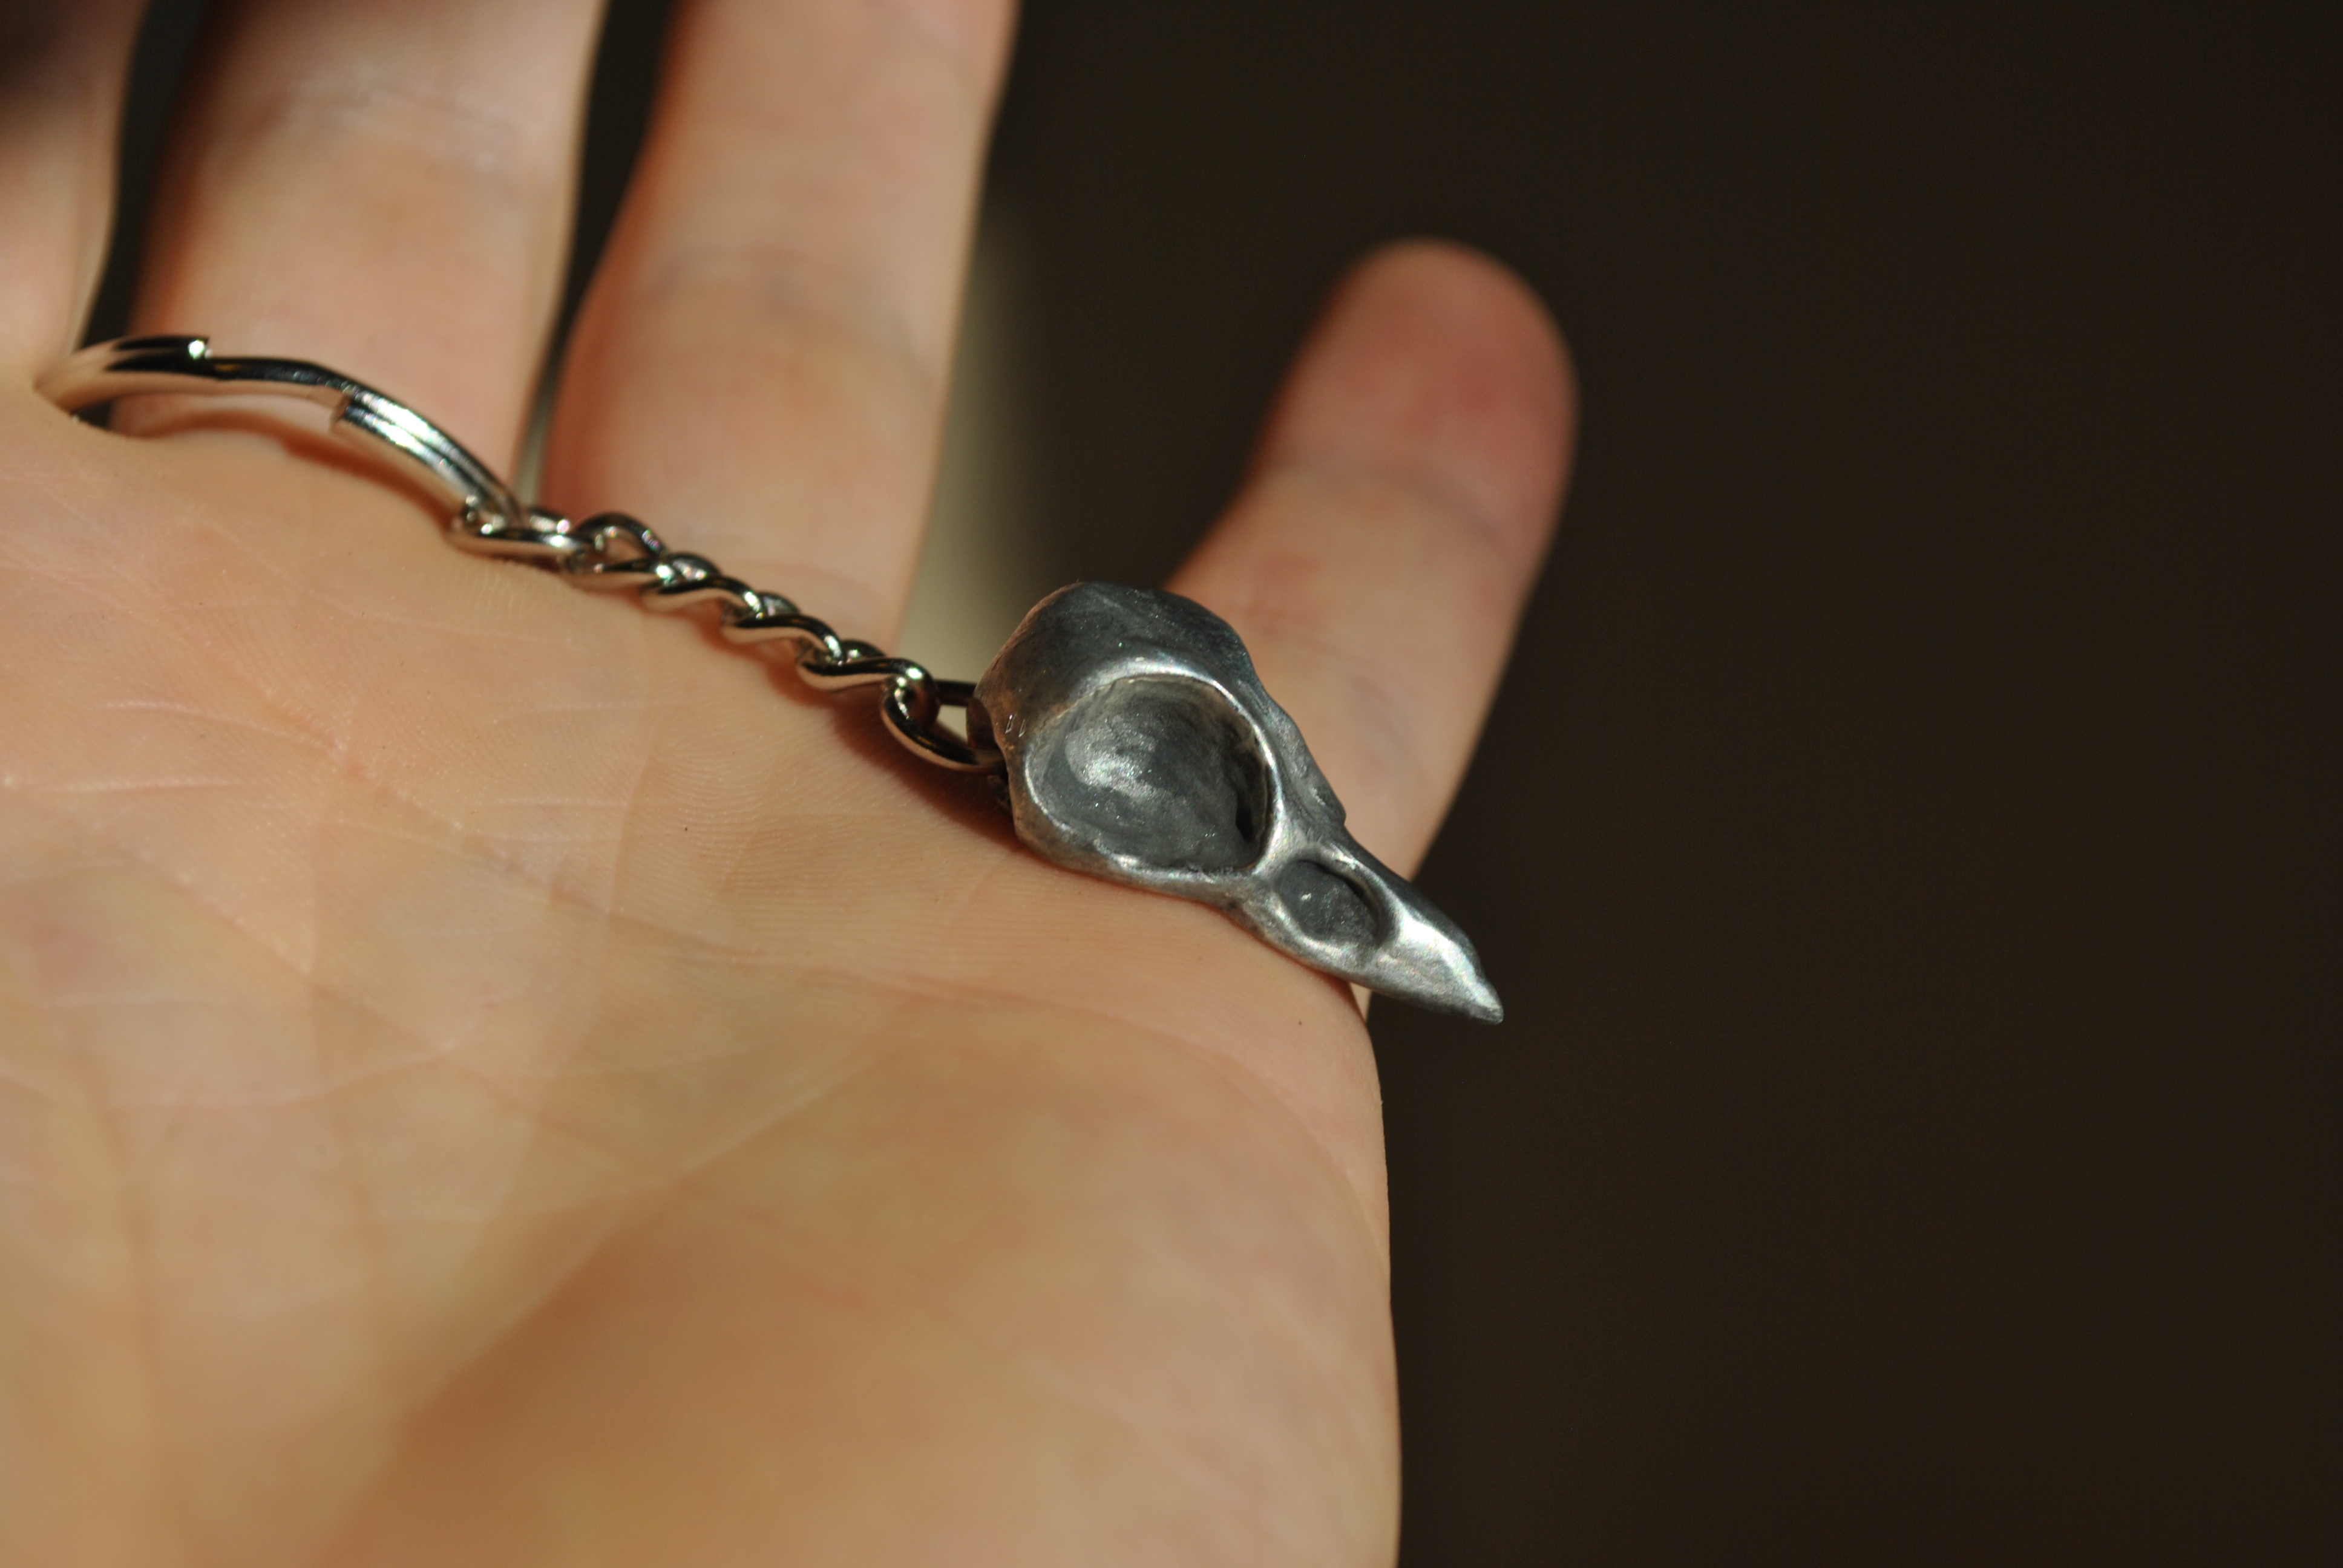
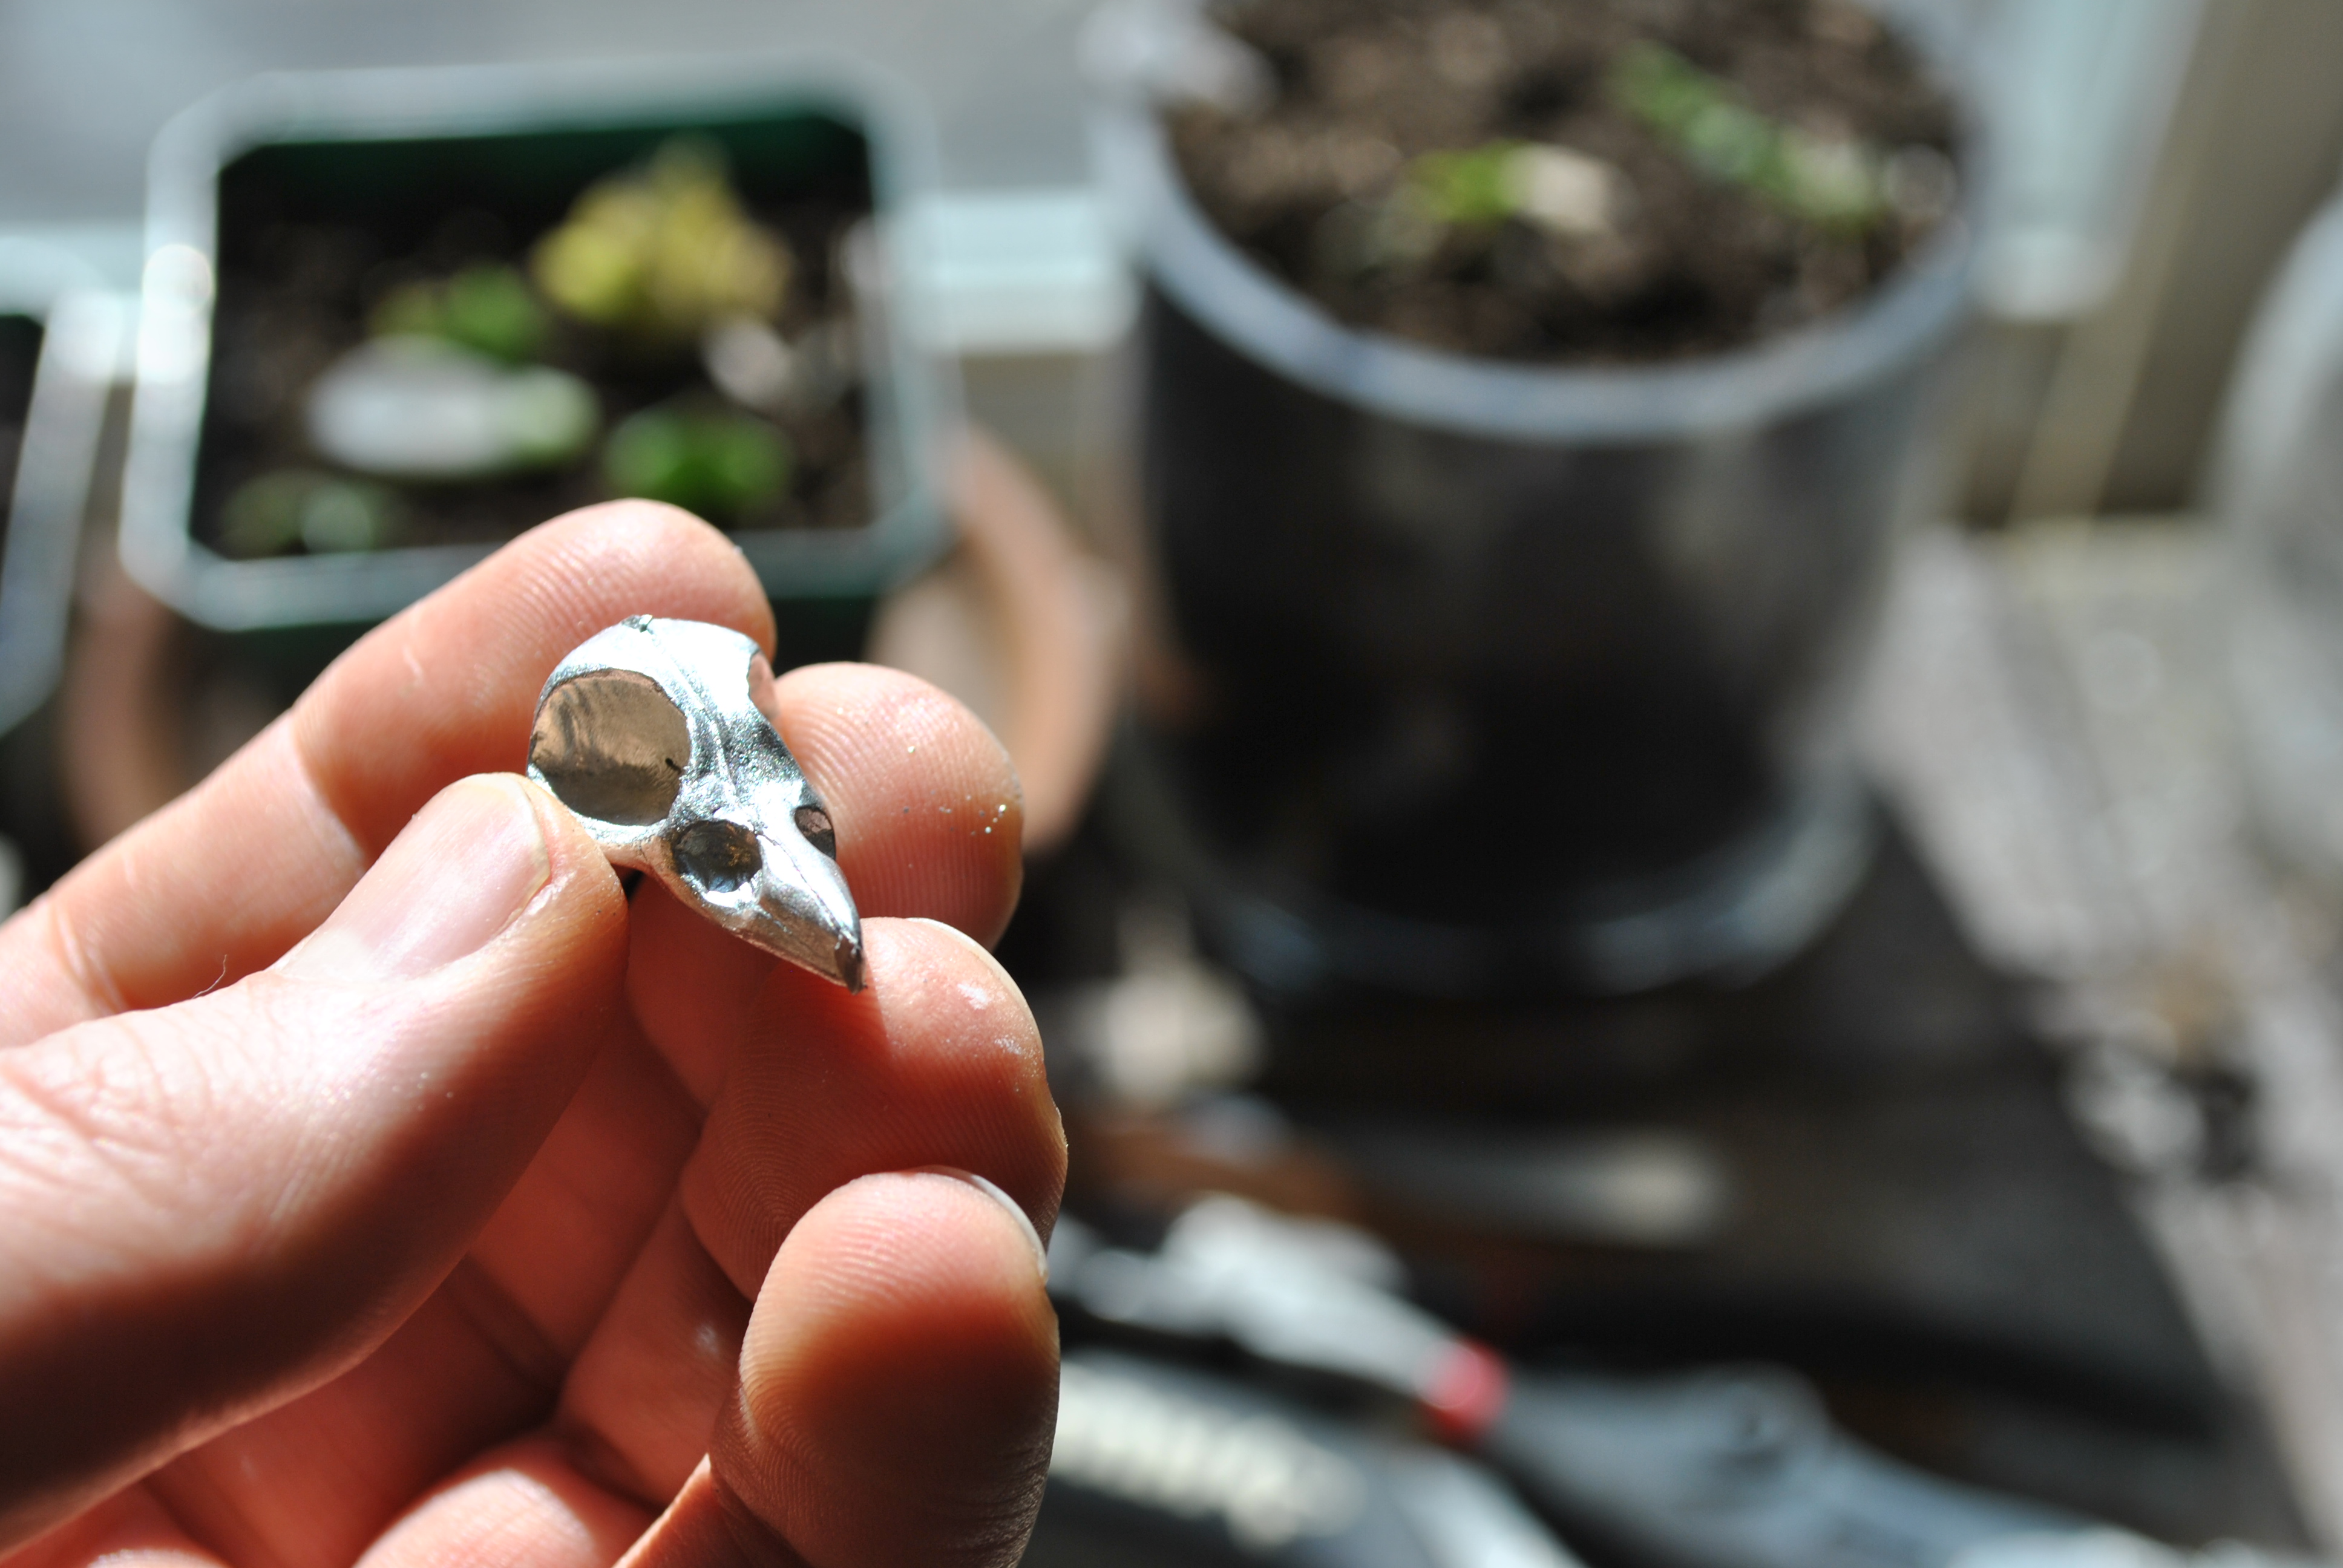
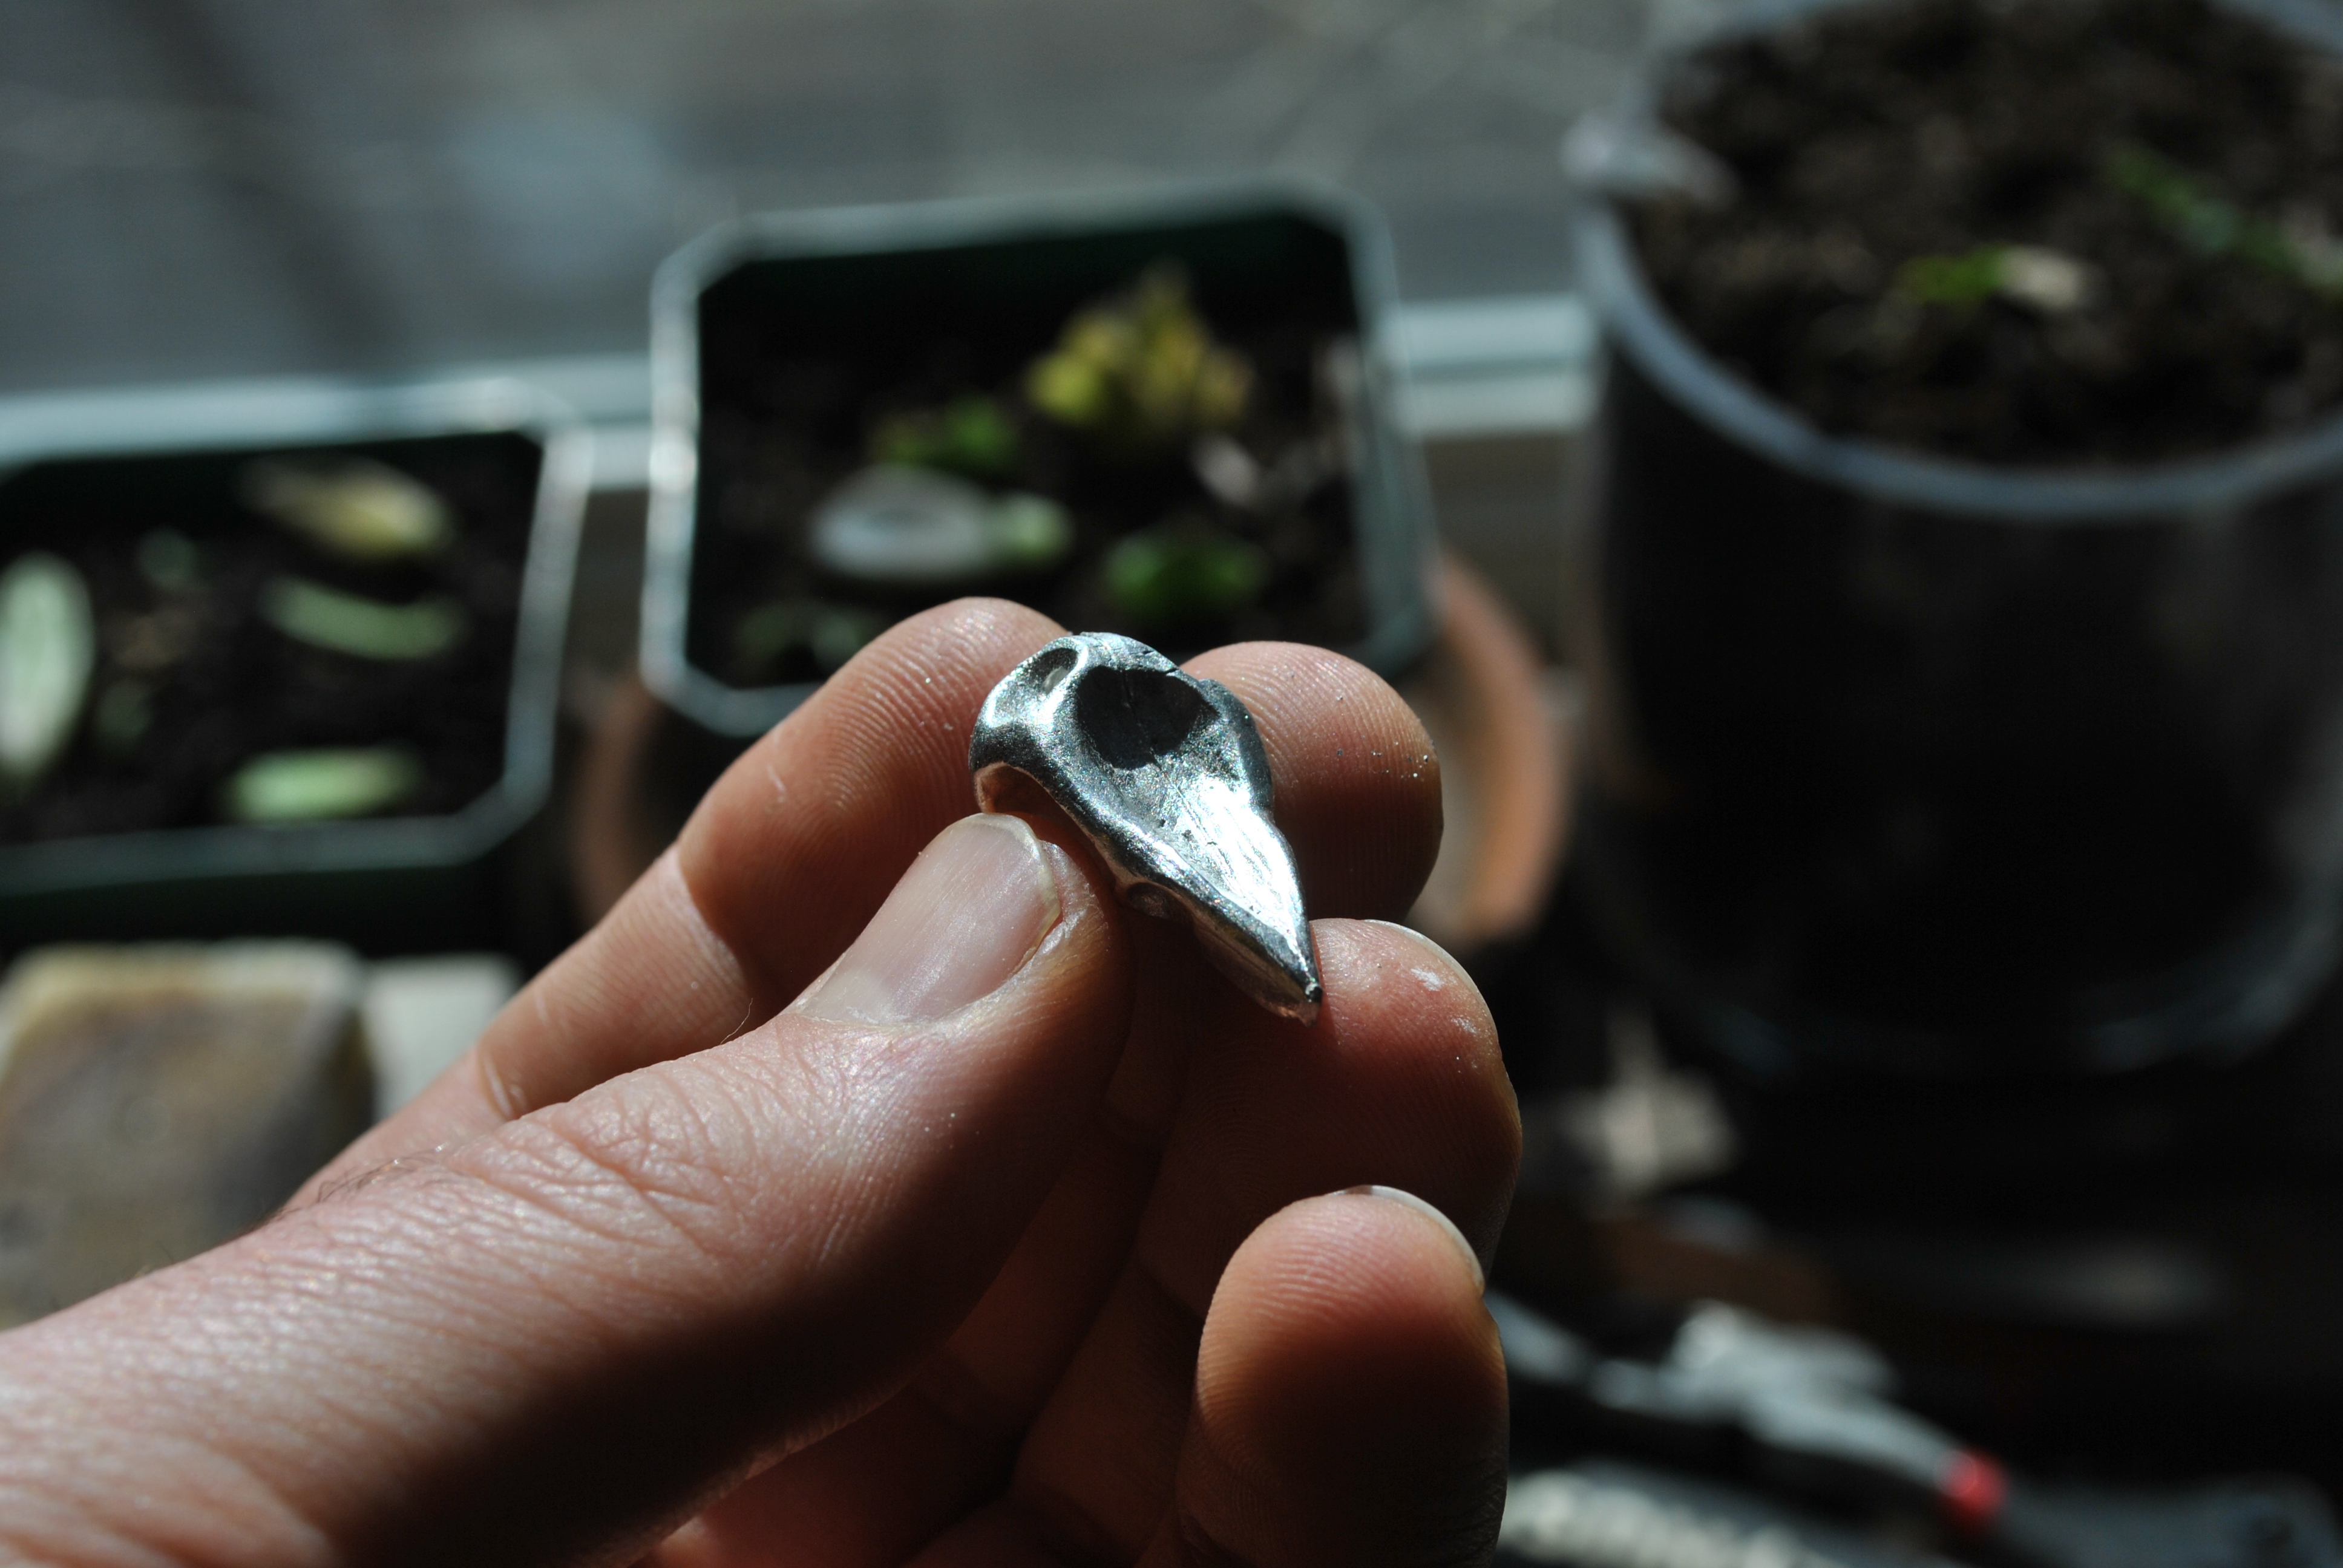
Then polish up the high spots and you have a pretty nice looking pendant. I made the model with a little hole in the back of the skull to put a chain through, it didn’t come out in the mold so I just used a drill to open it back up.

This is the second time I have used this casting method for small things, and have had really good success both times. I like it so much that I think I am going to make some more things over the next couple weeks.
Do you want to help me continue to bring you great projects, while also getting great rewards? Then support me on Patreon!
Become a Patron!
Thank you!


 ‘
‘
