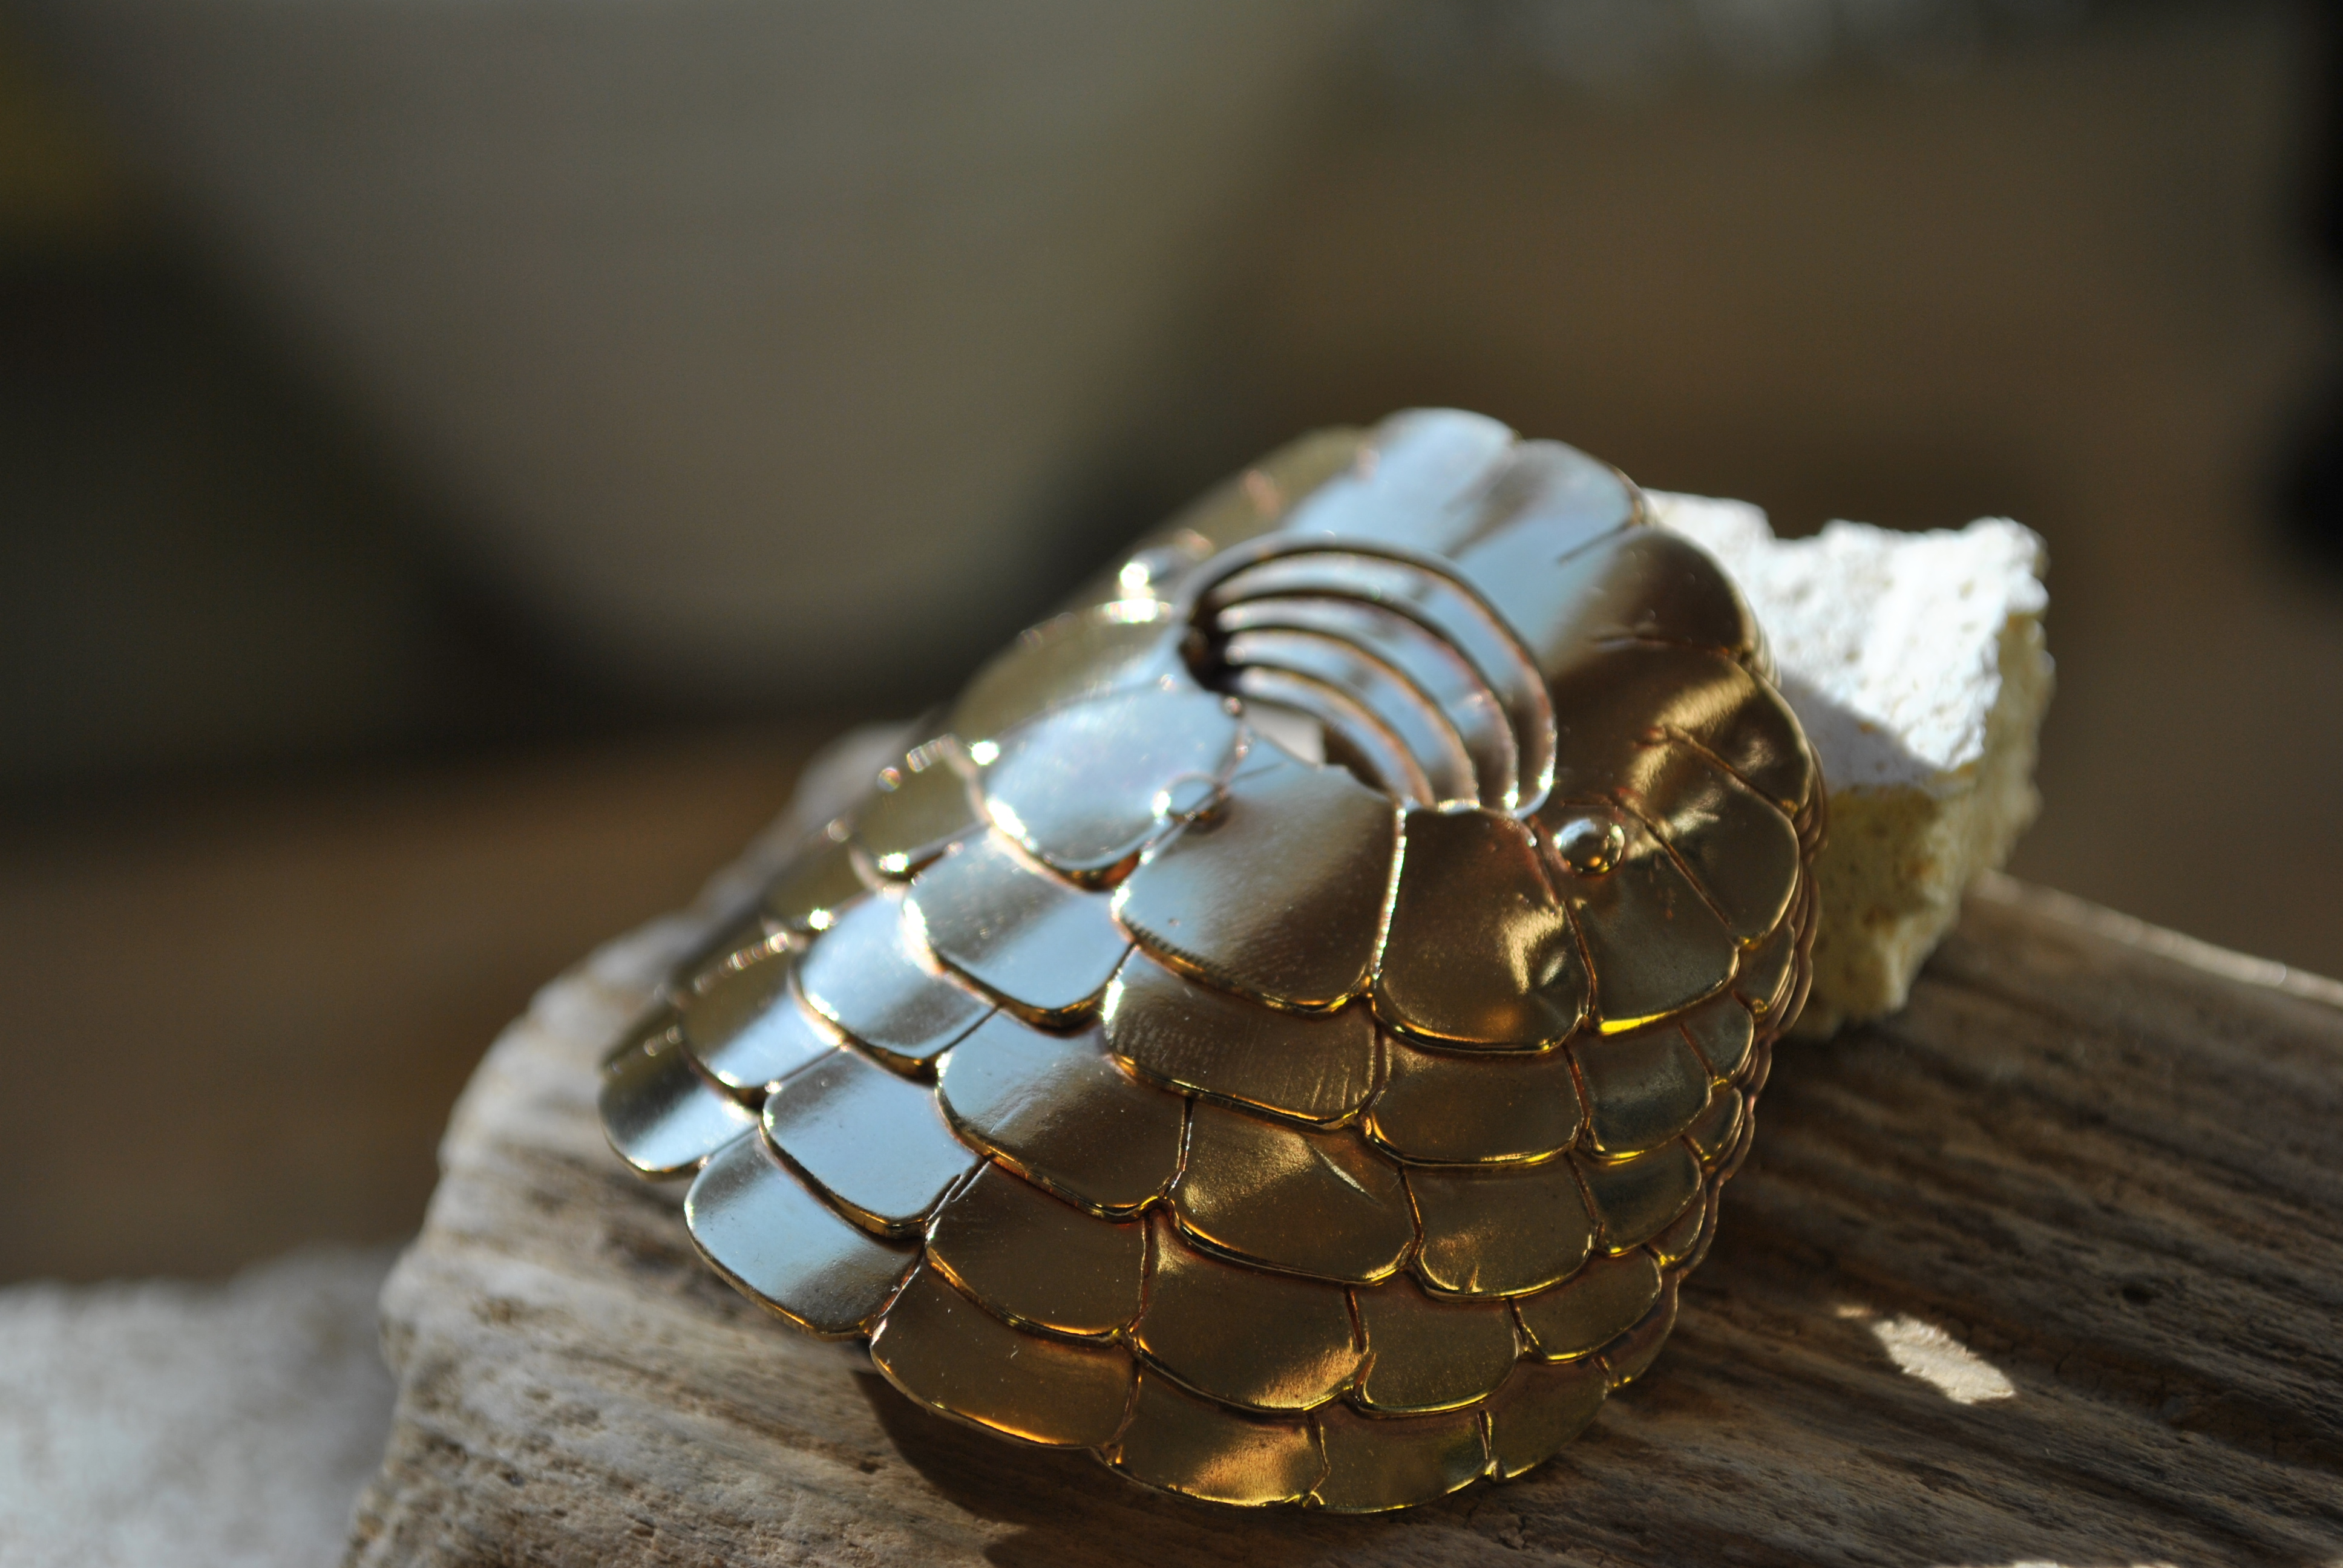
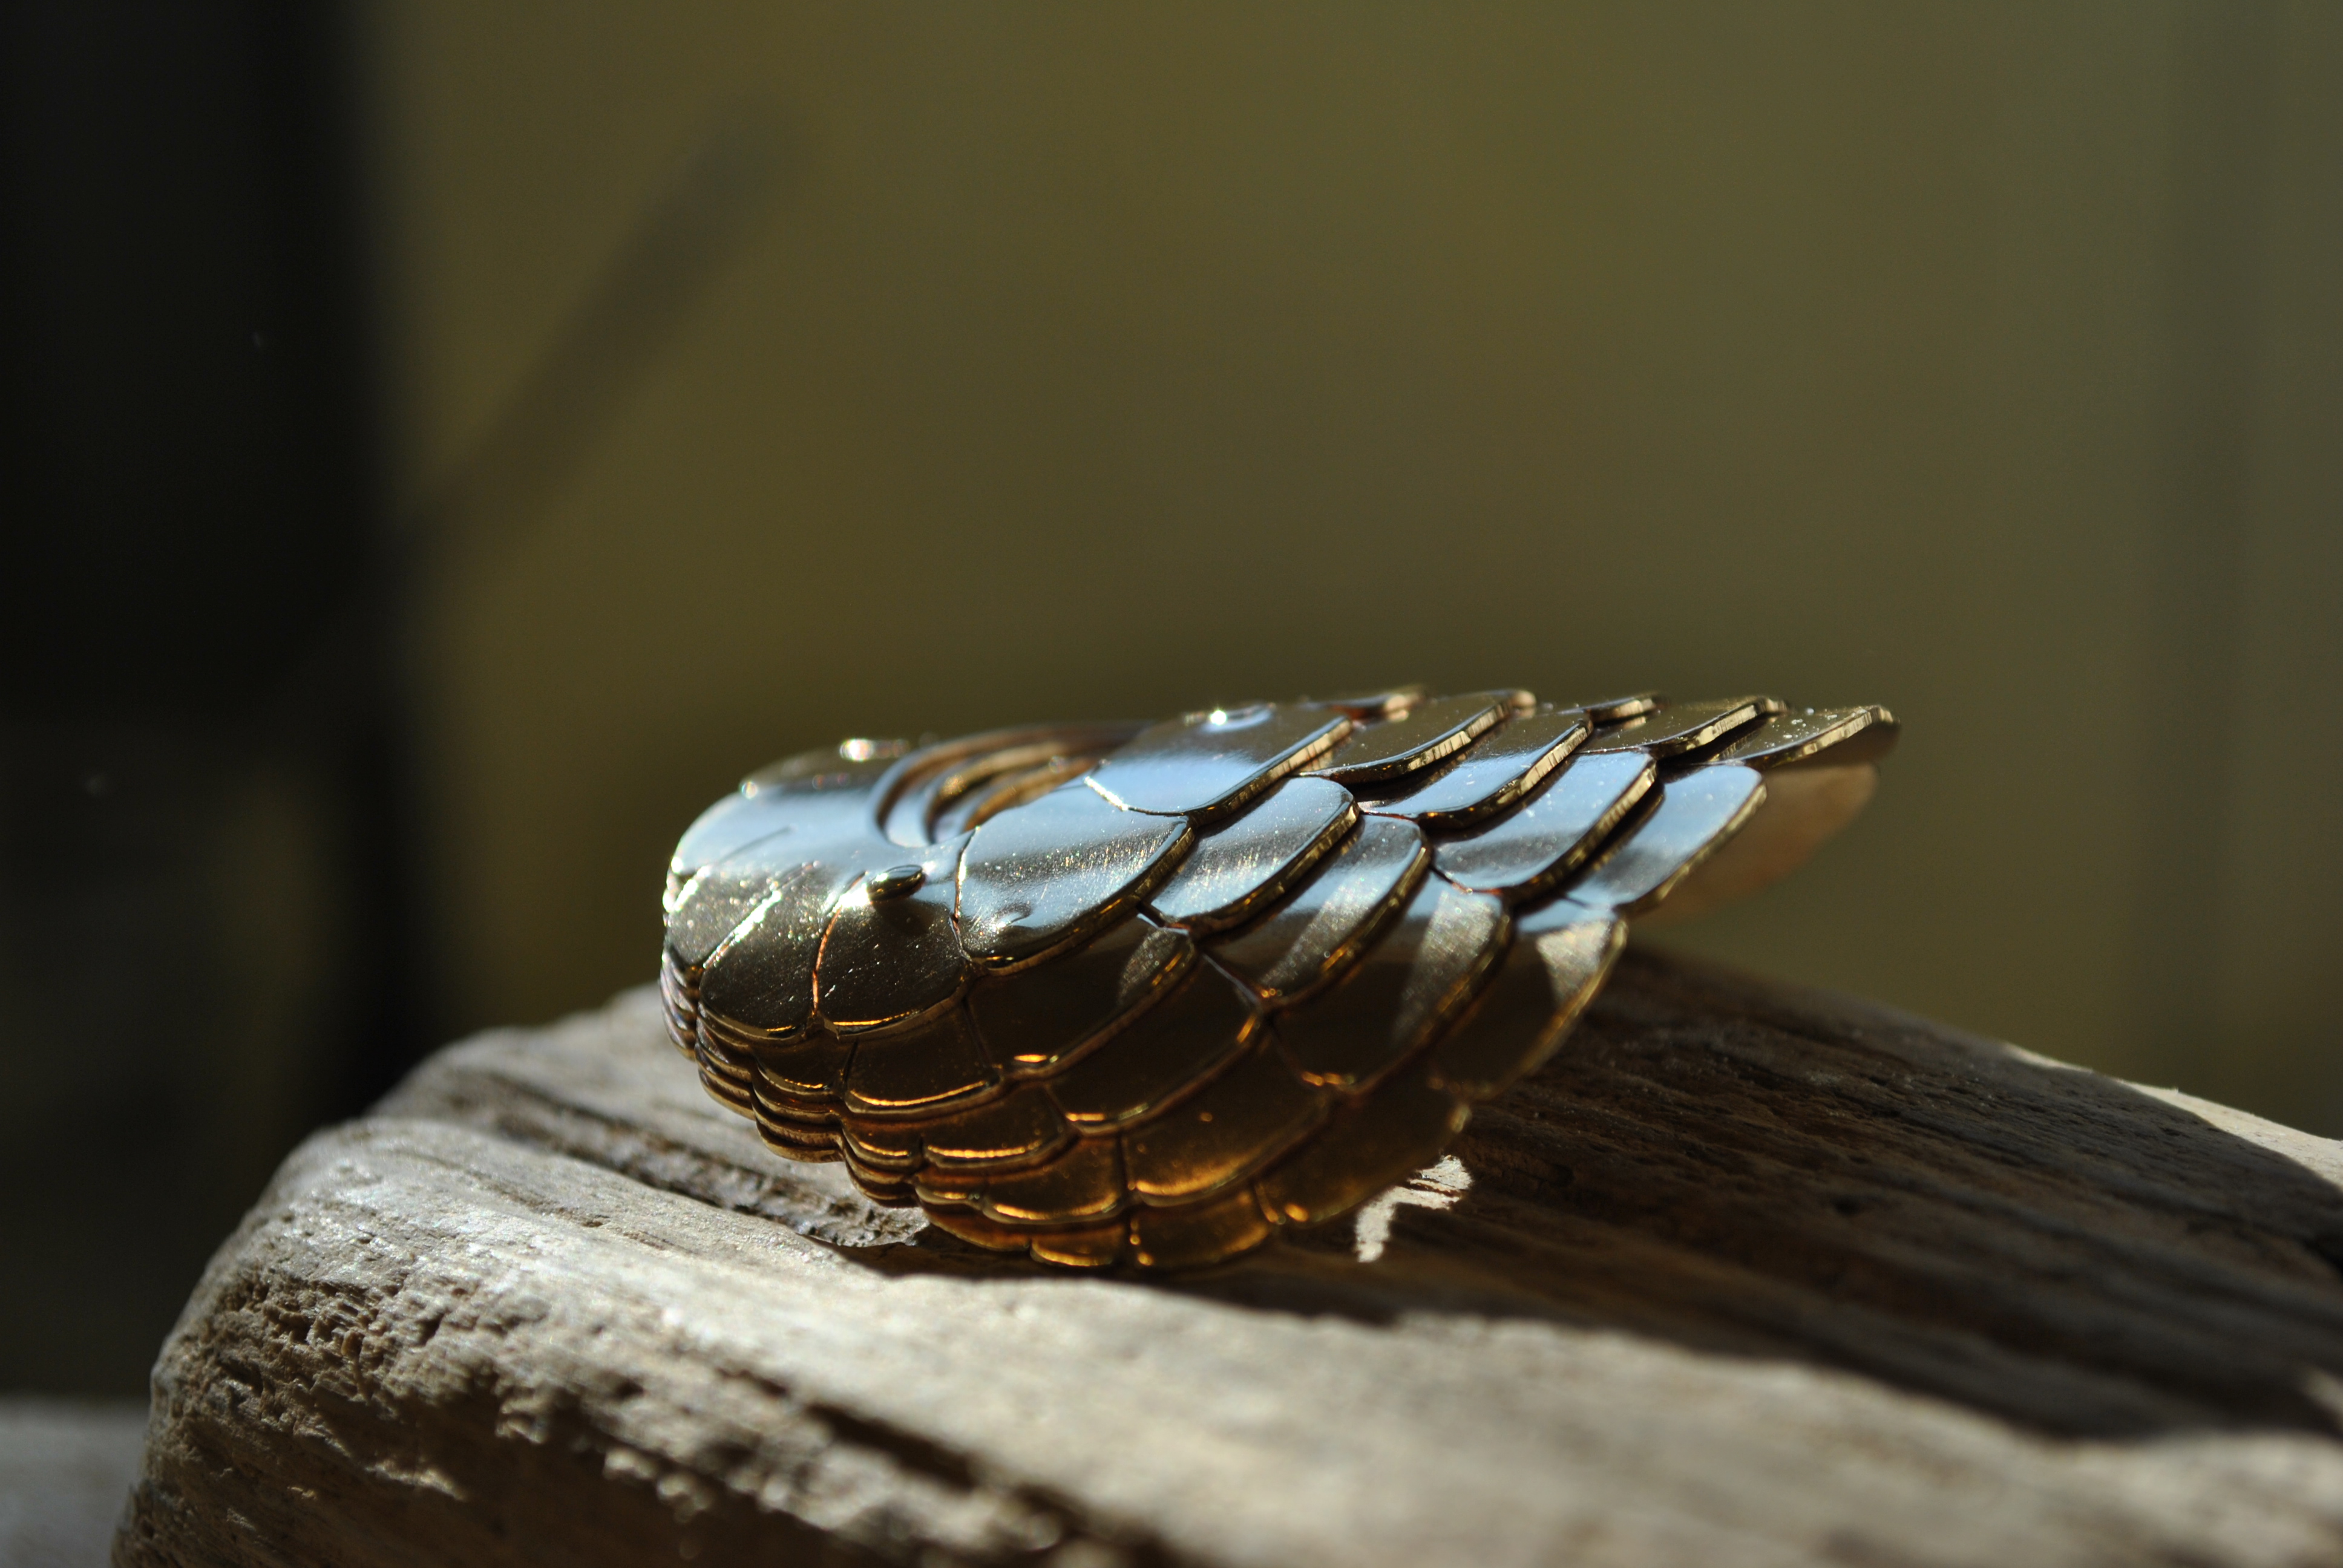
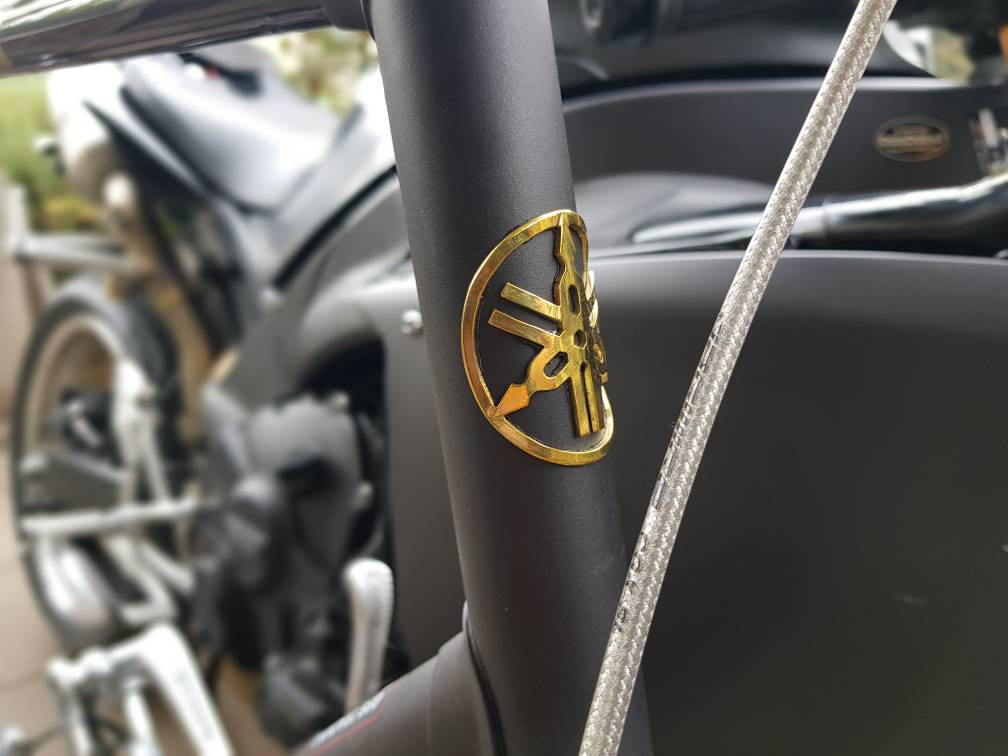
Got these awesome pics of this badge installed on the bike. Looks great!
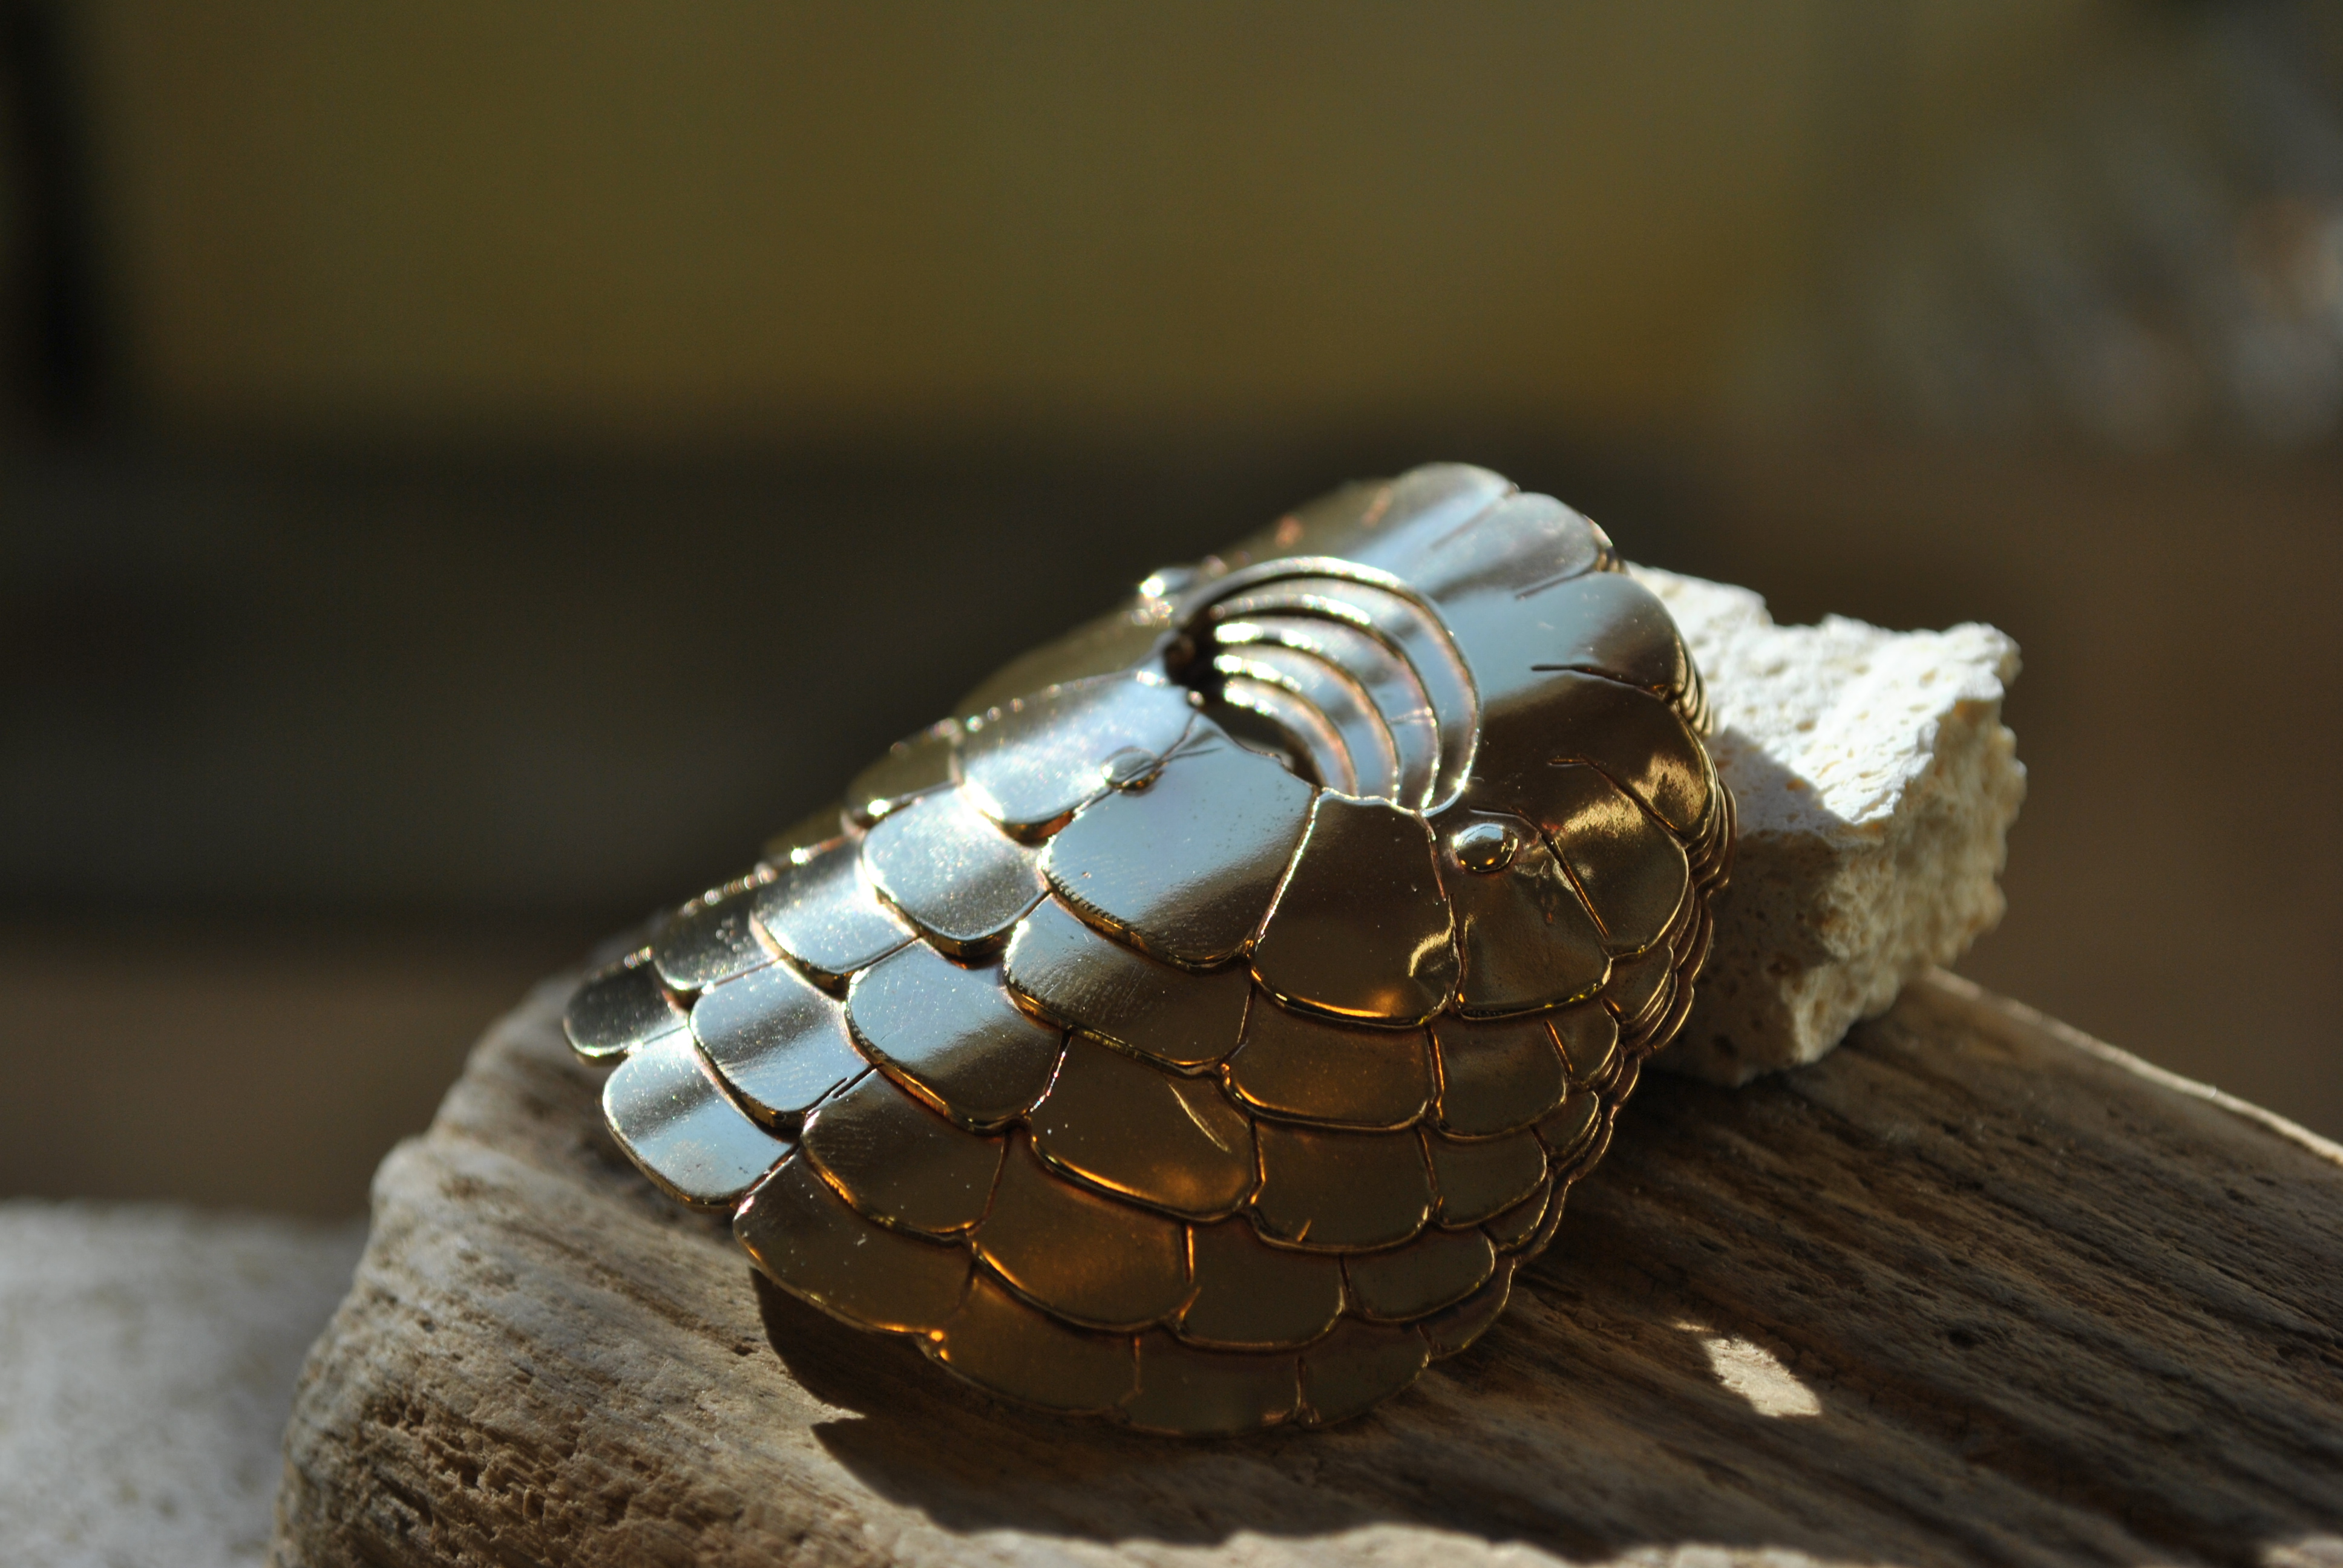
Got these awesome pics of this badge installed on the bike. Looks great!
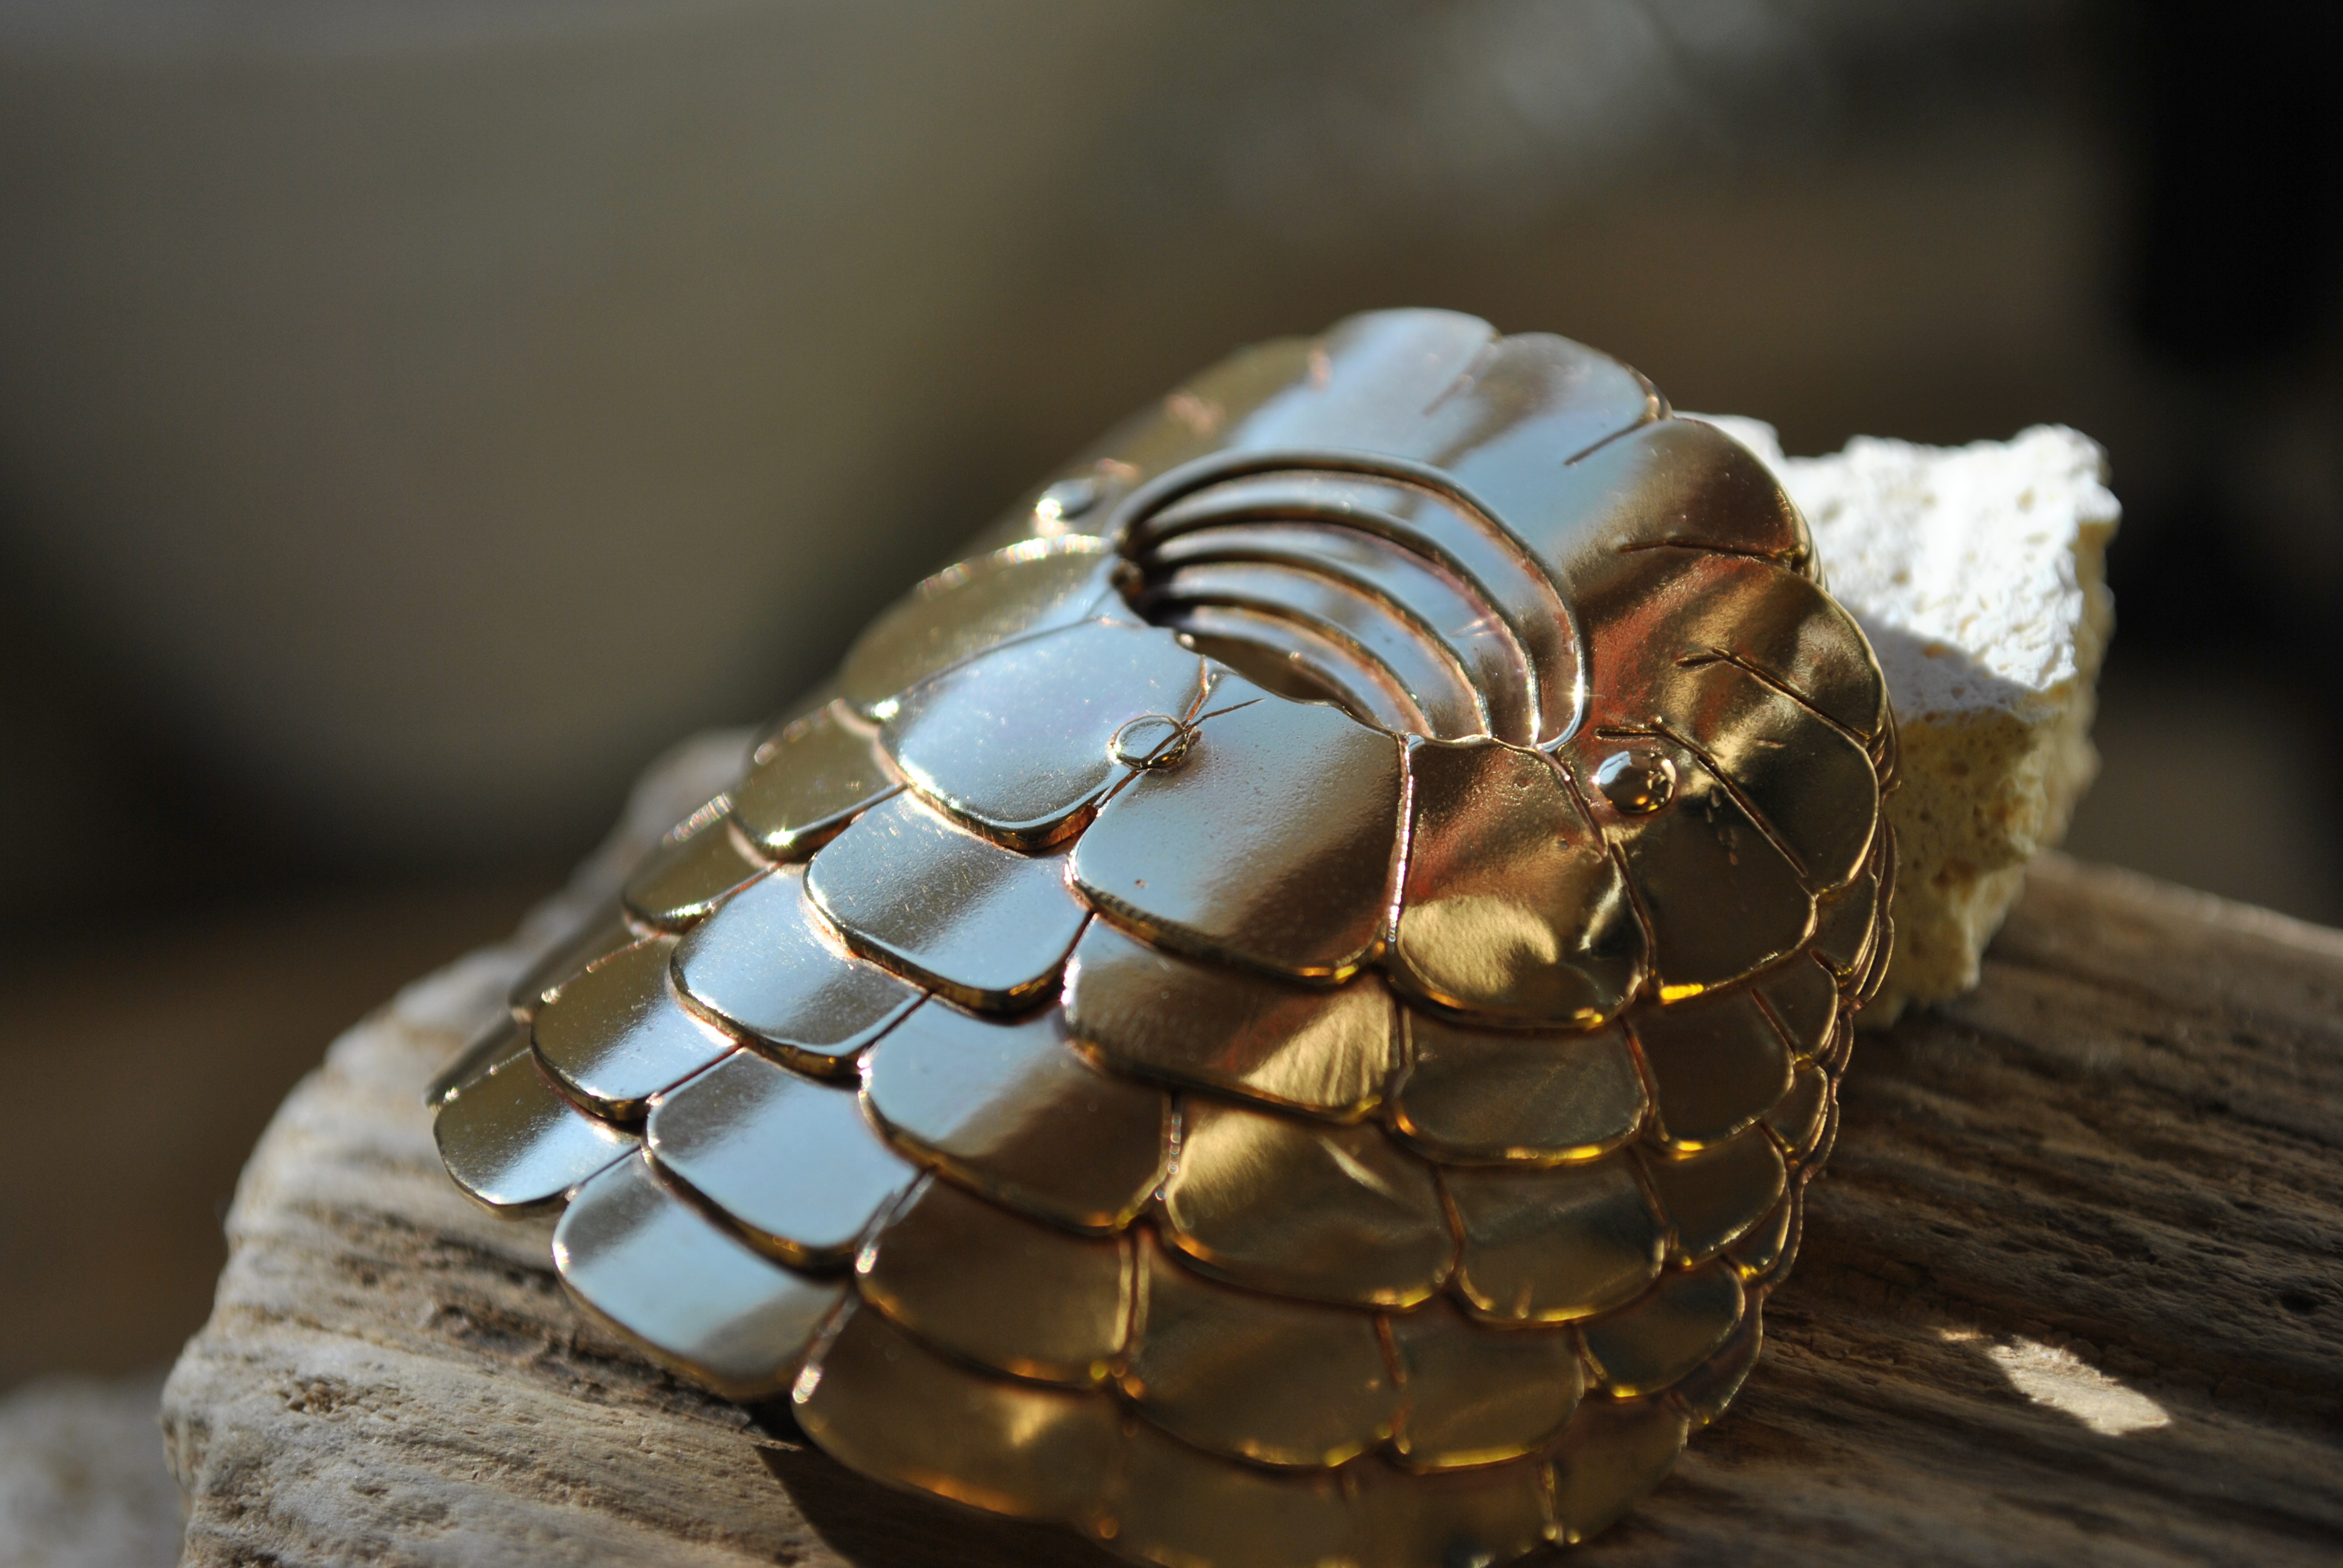
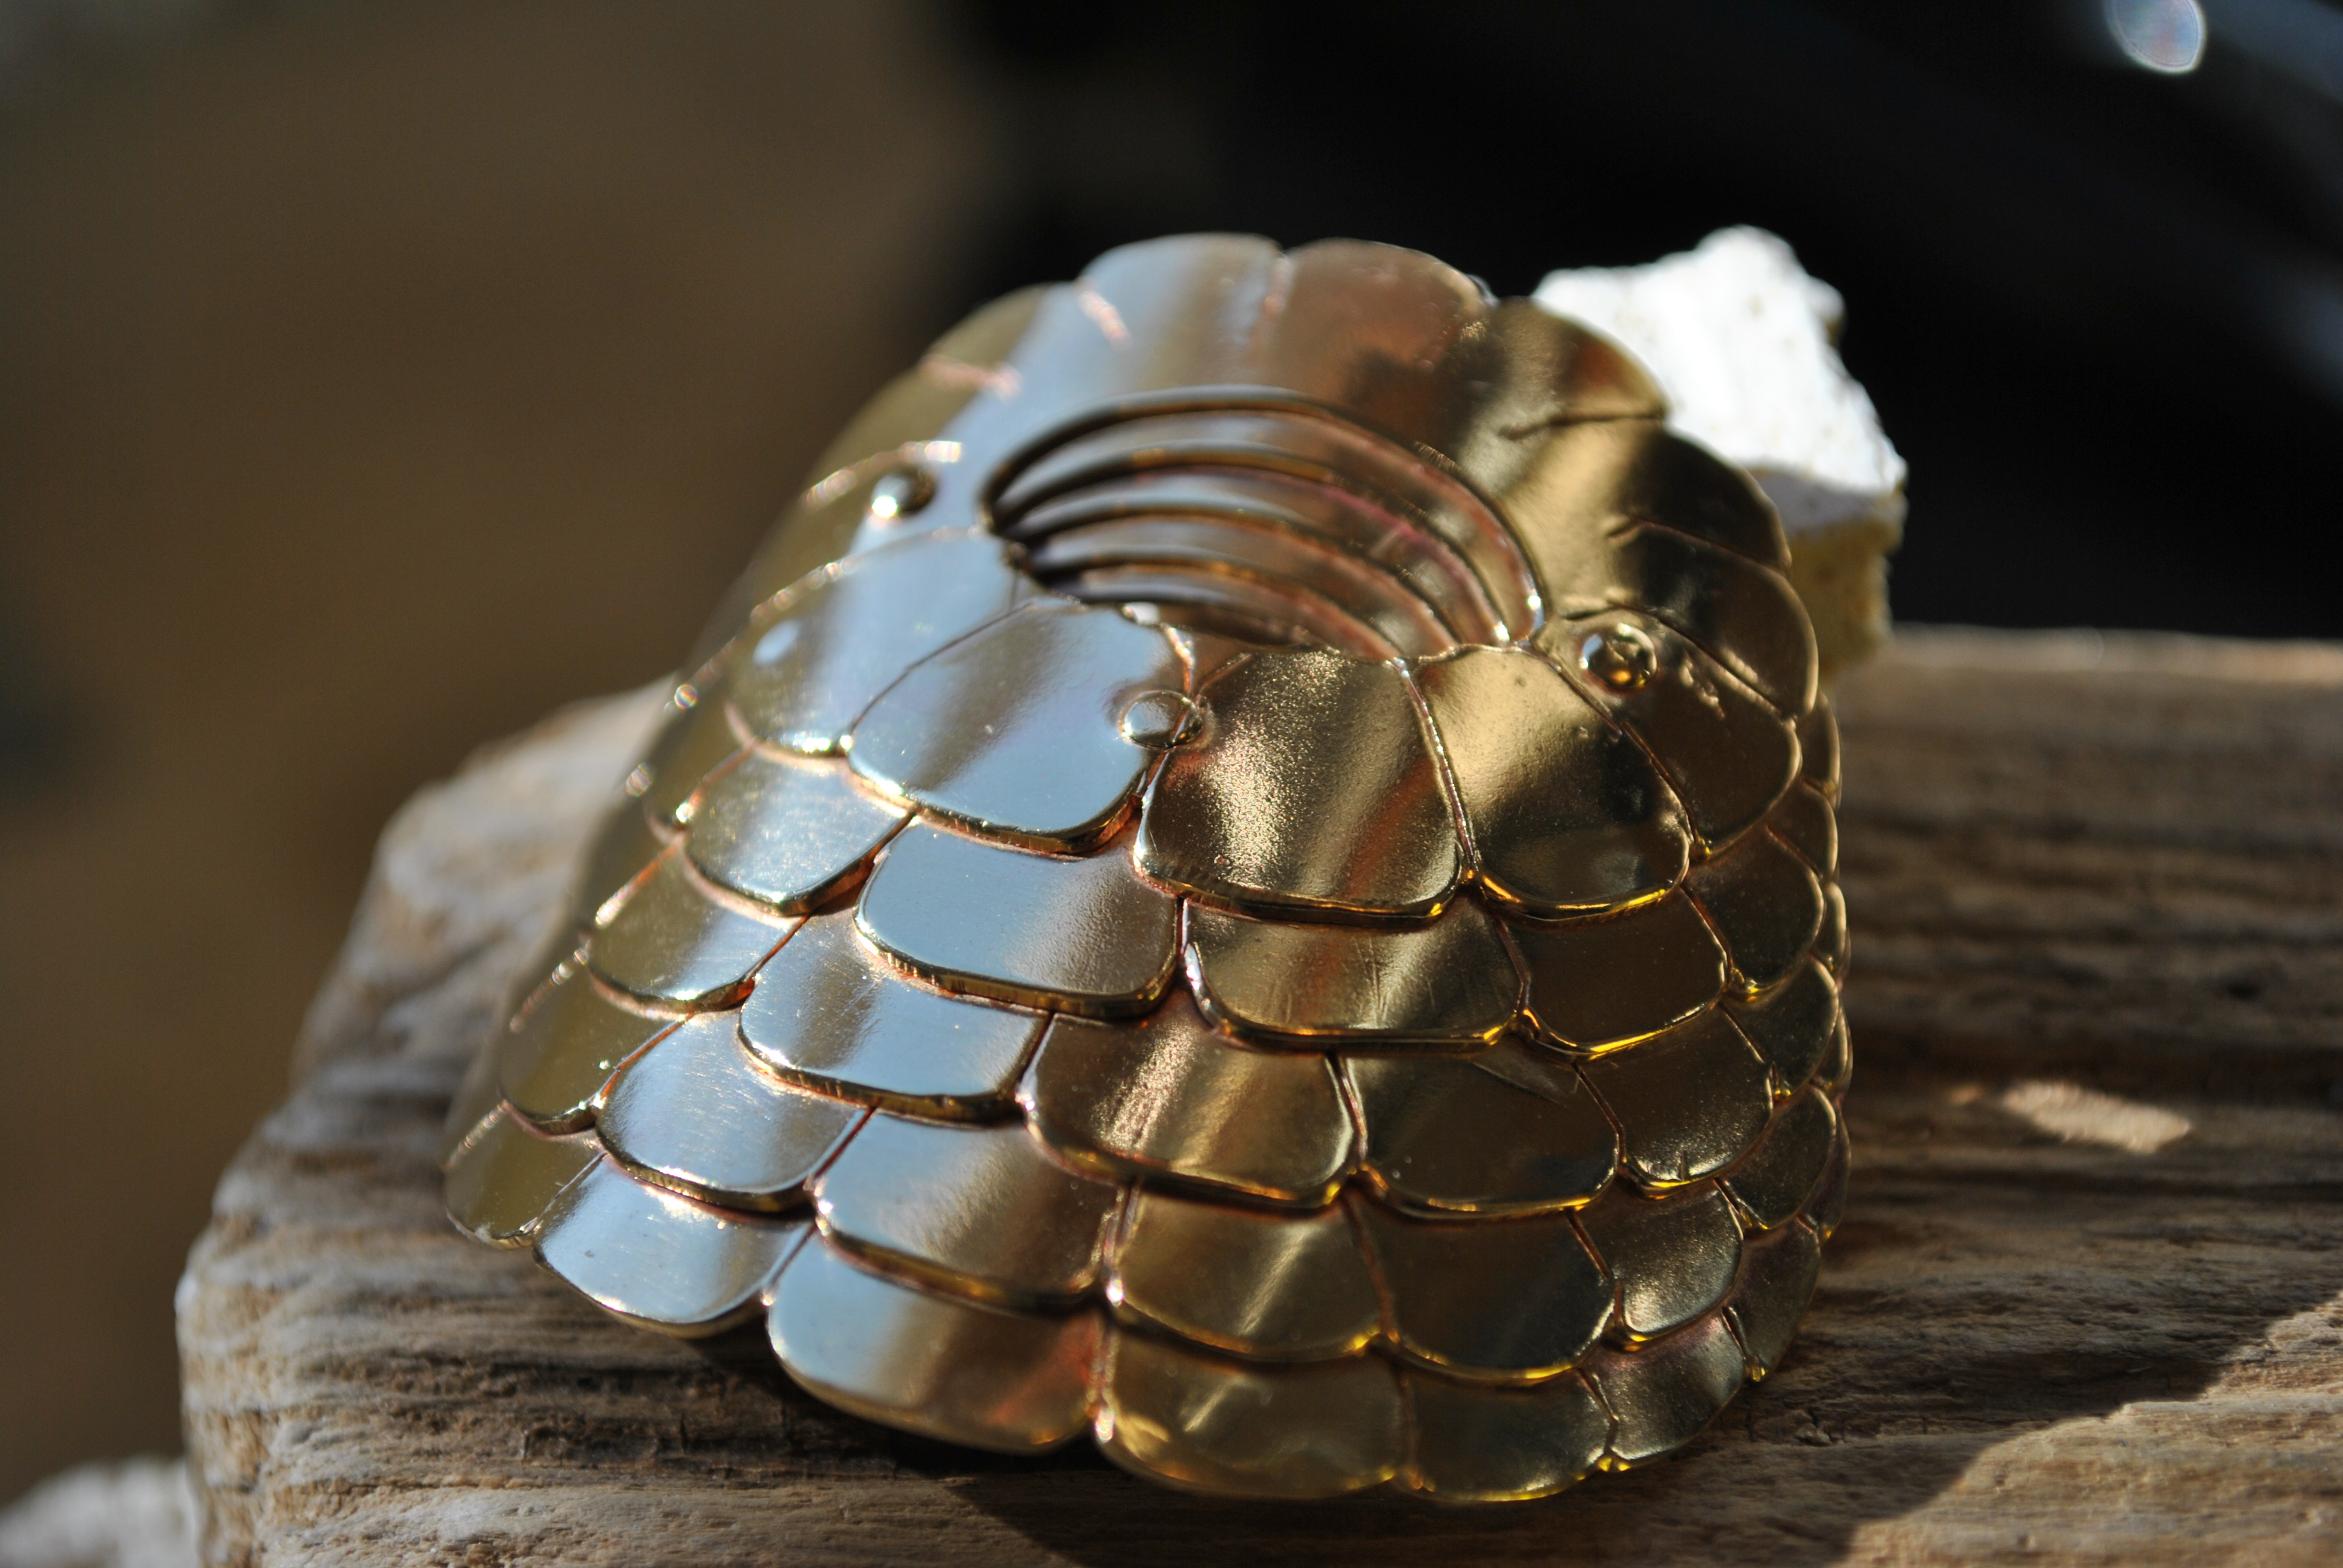
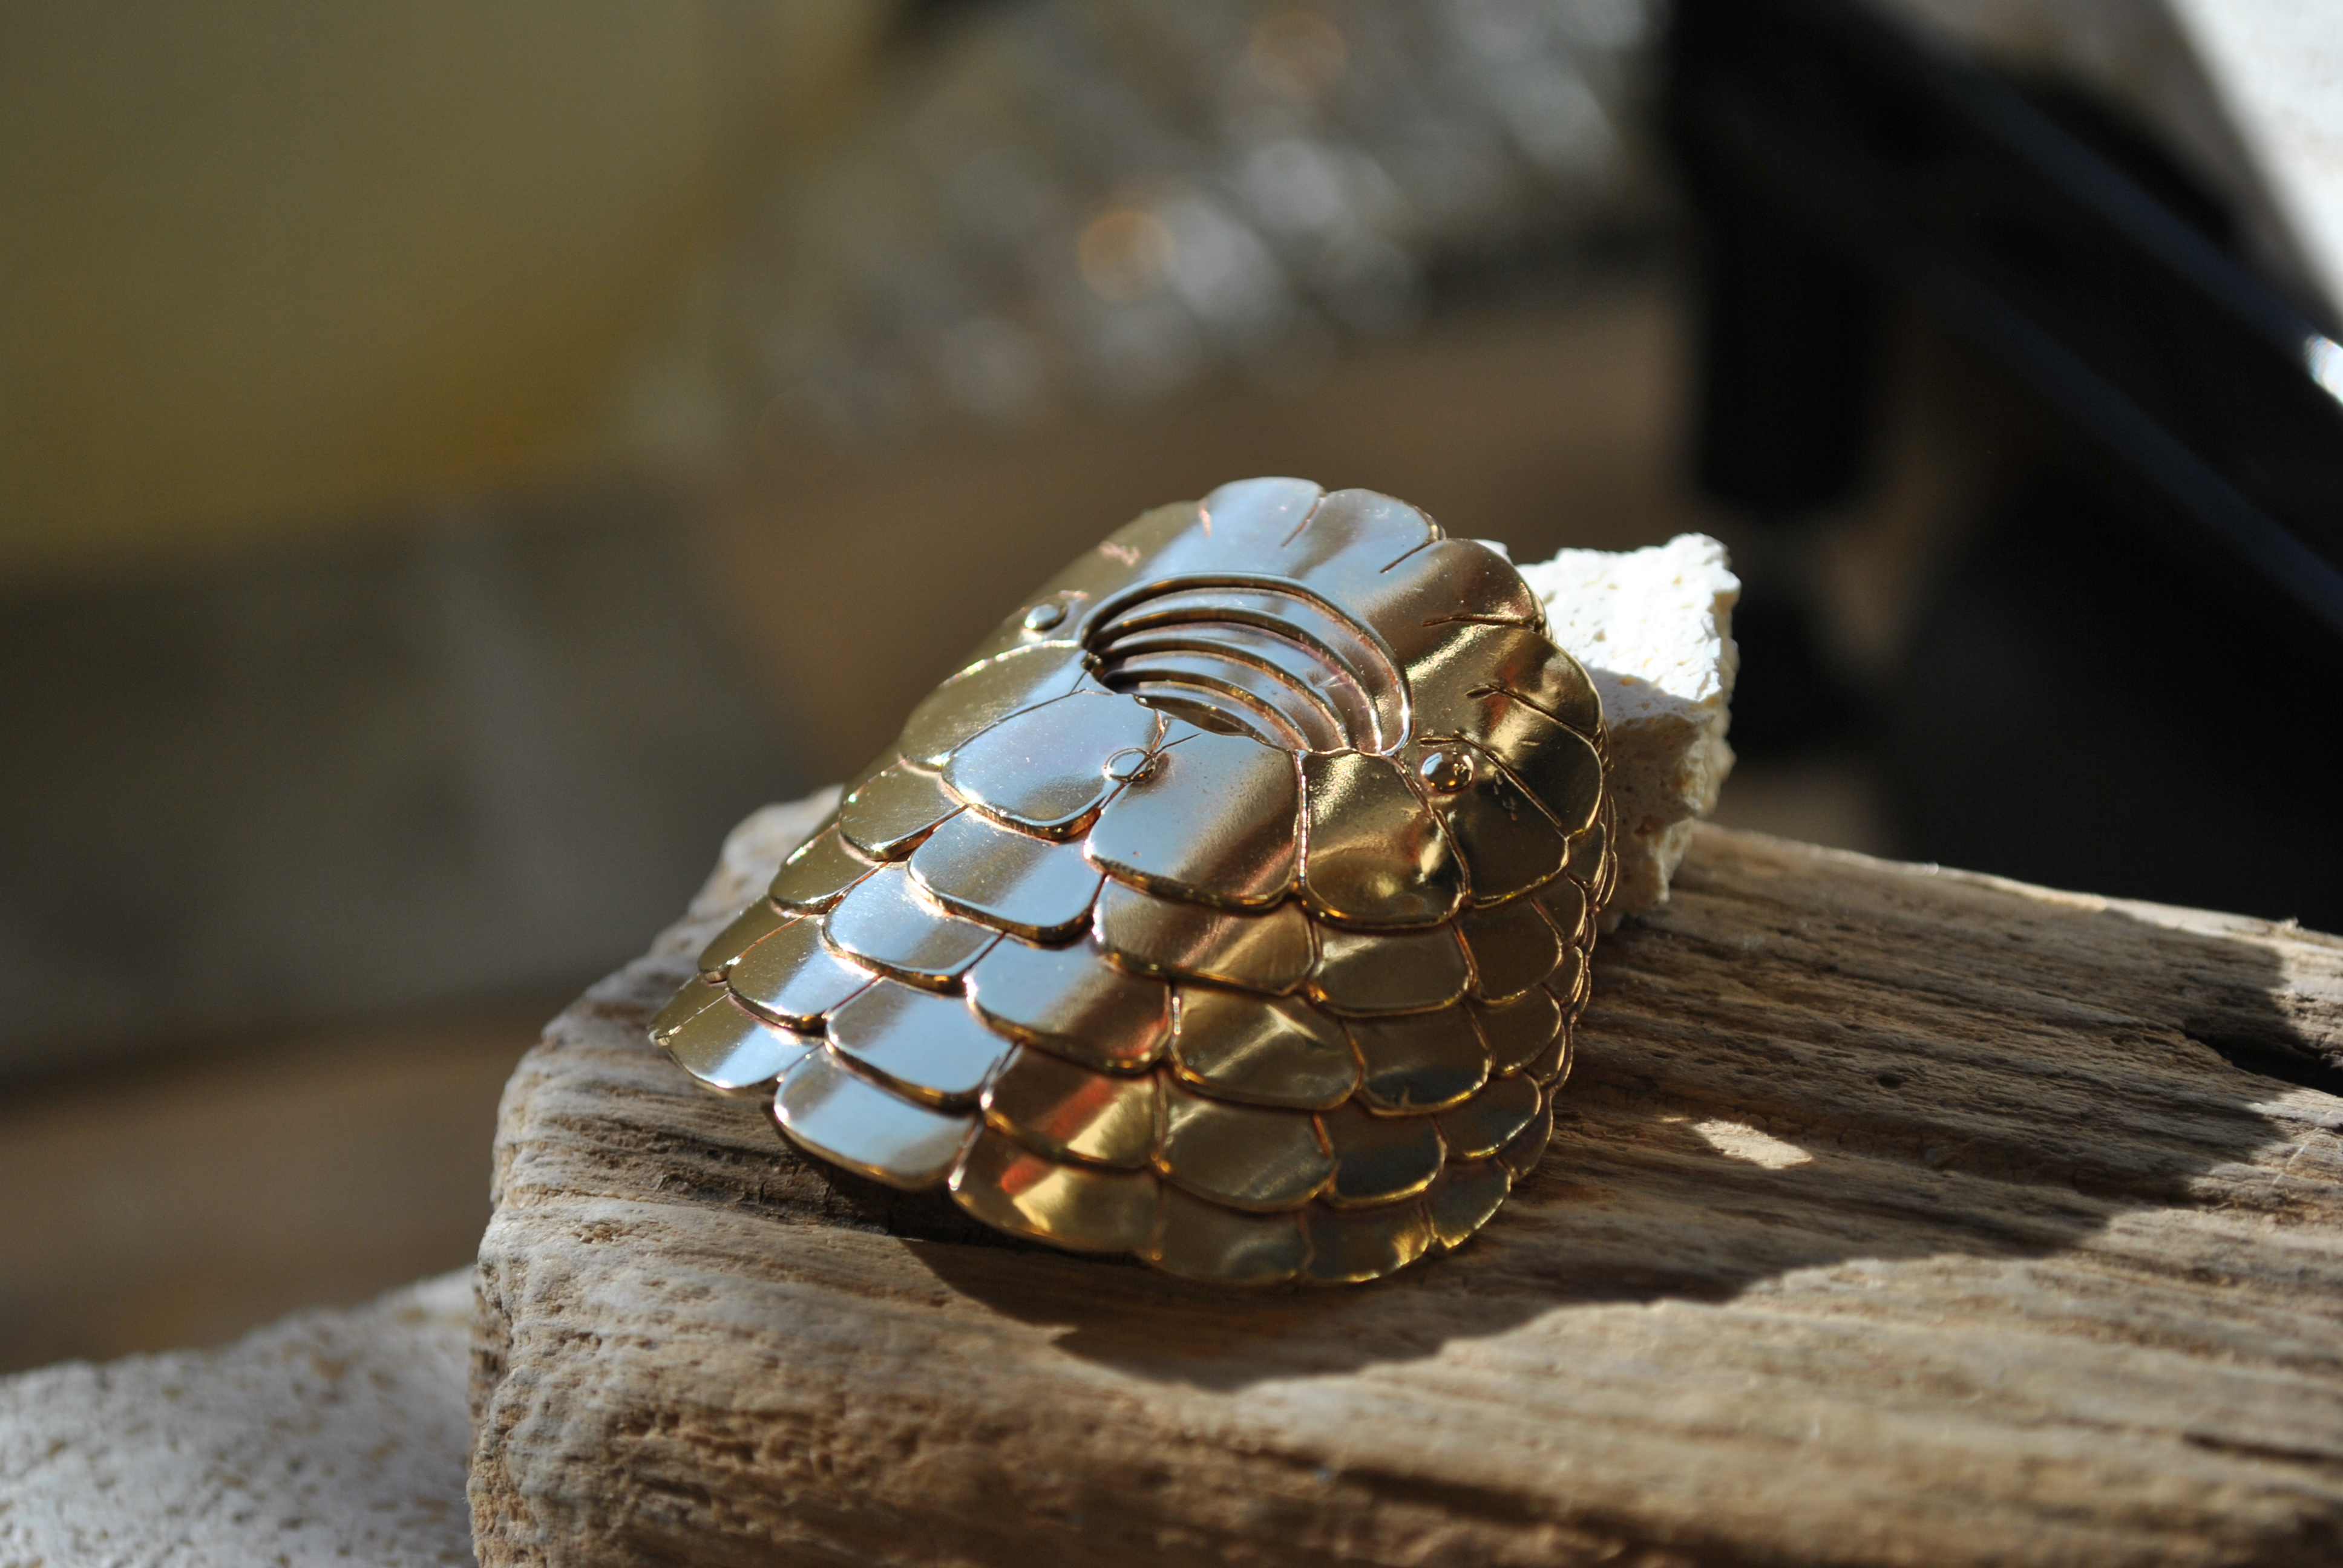
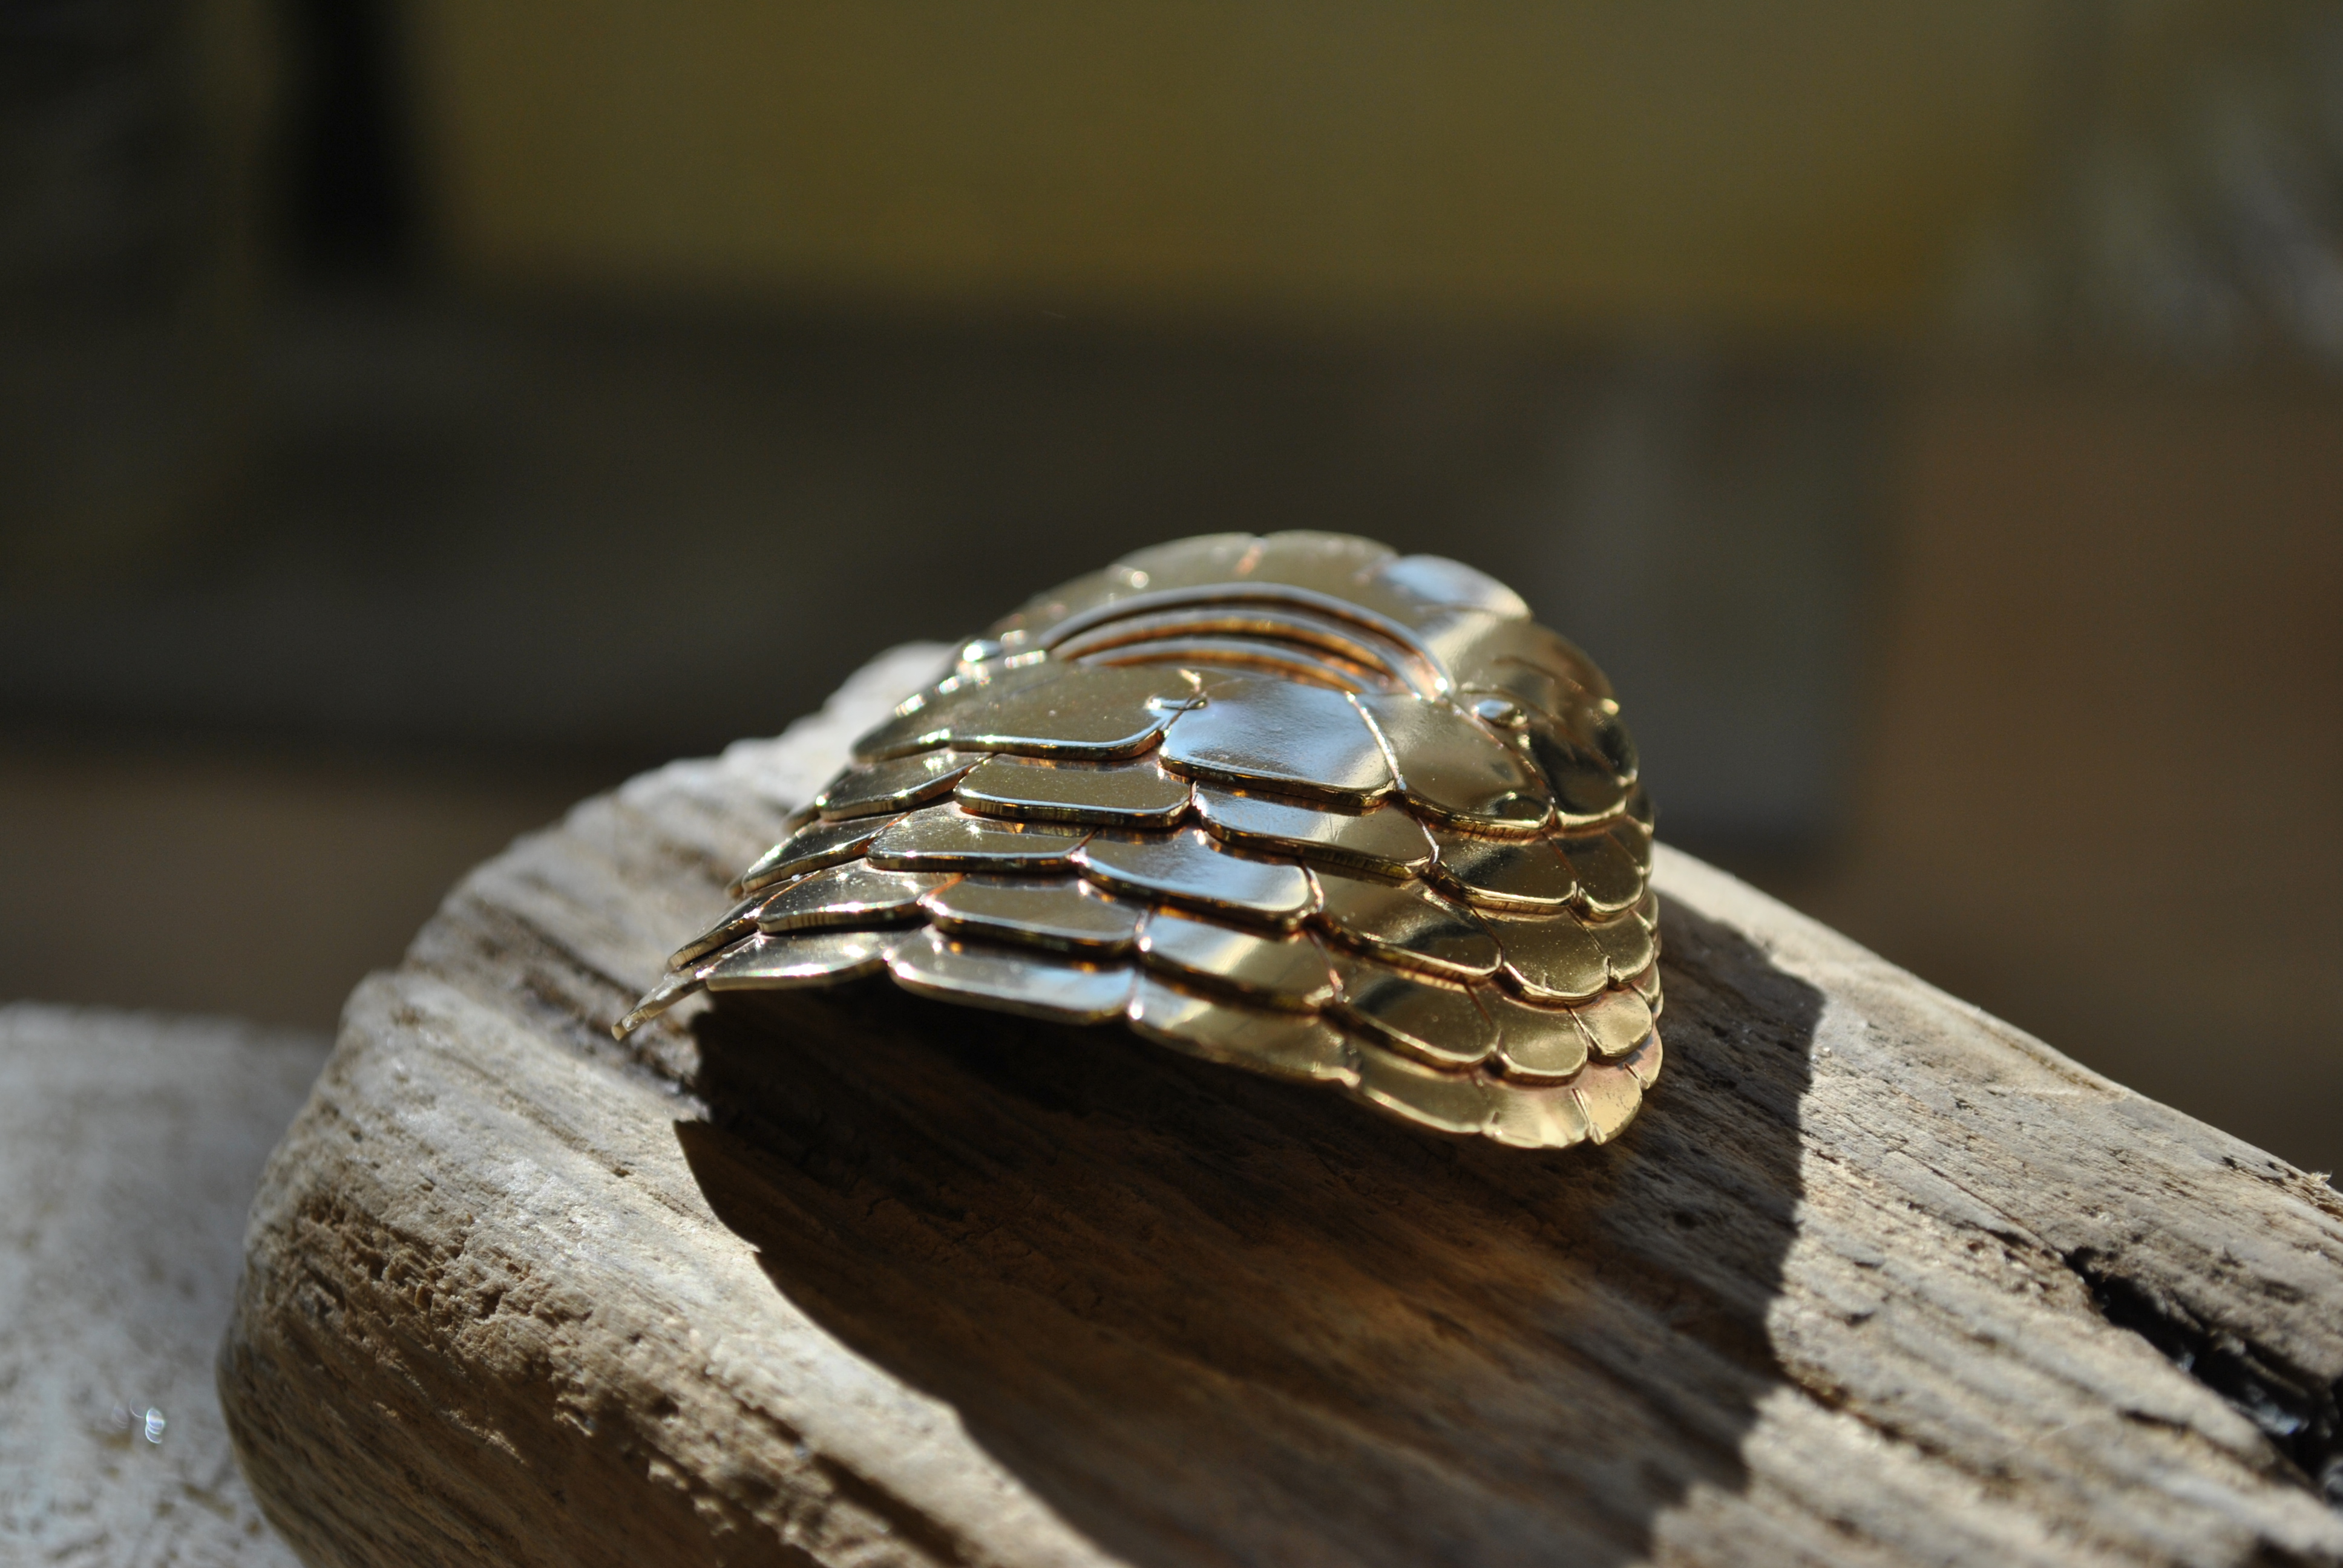
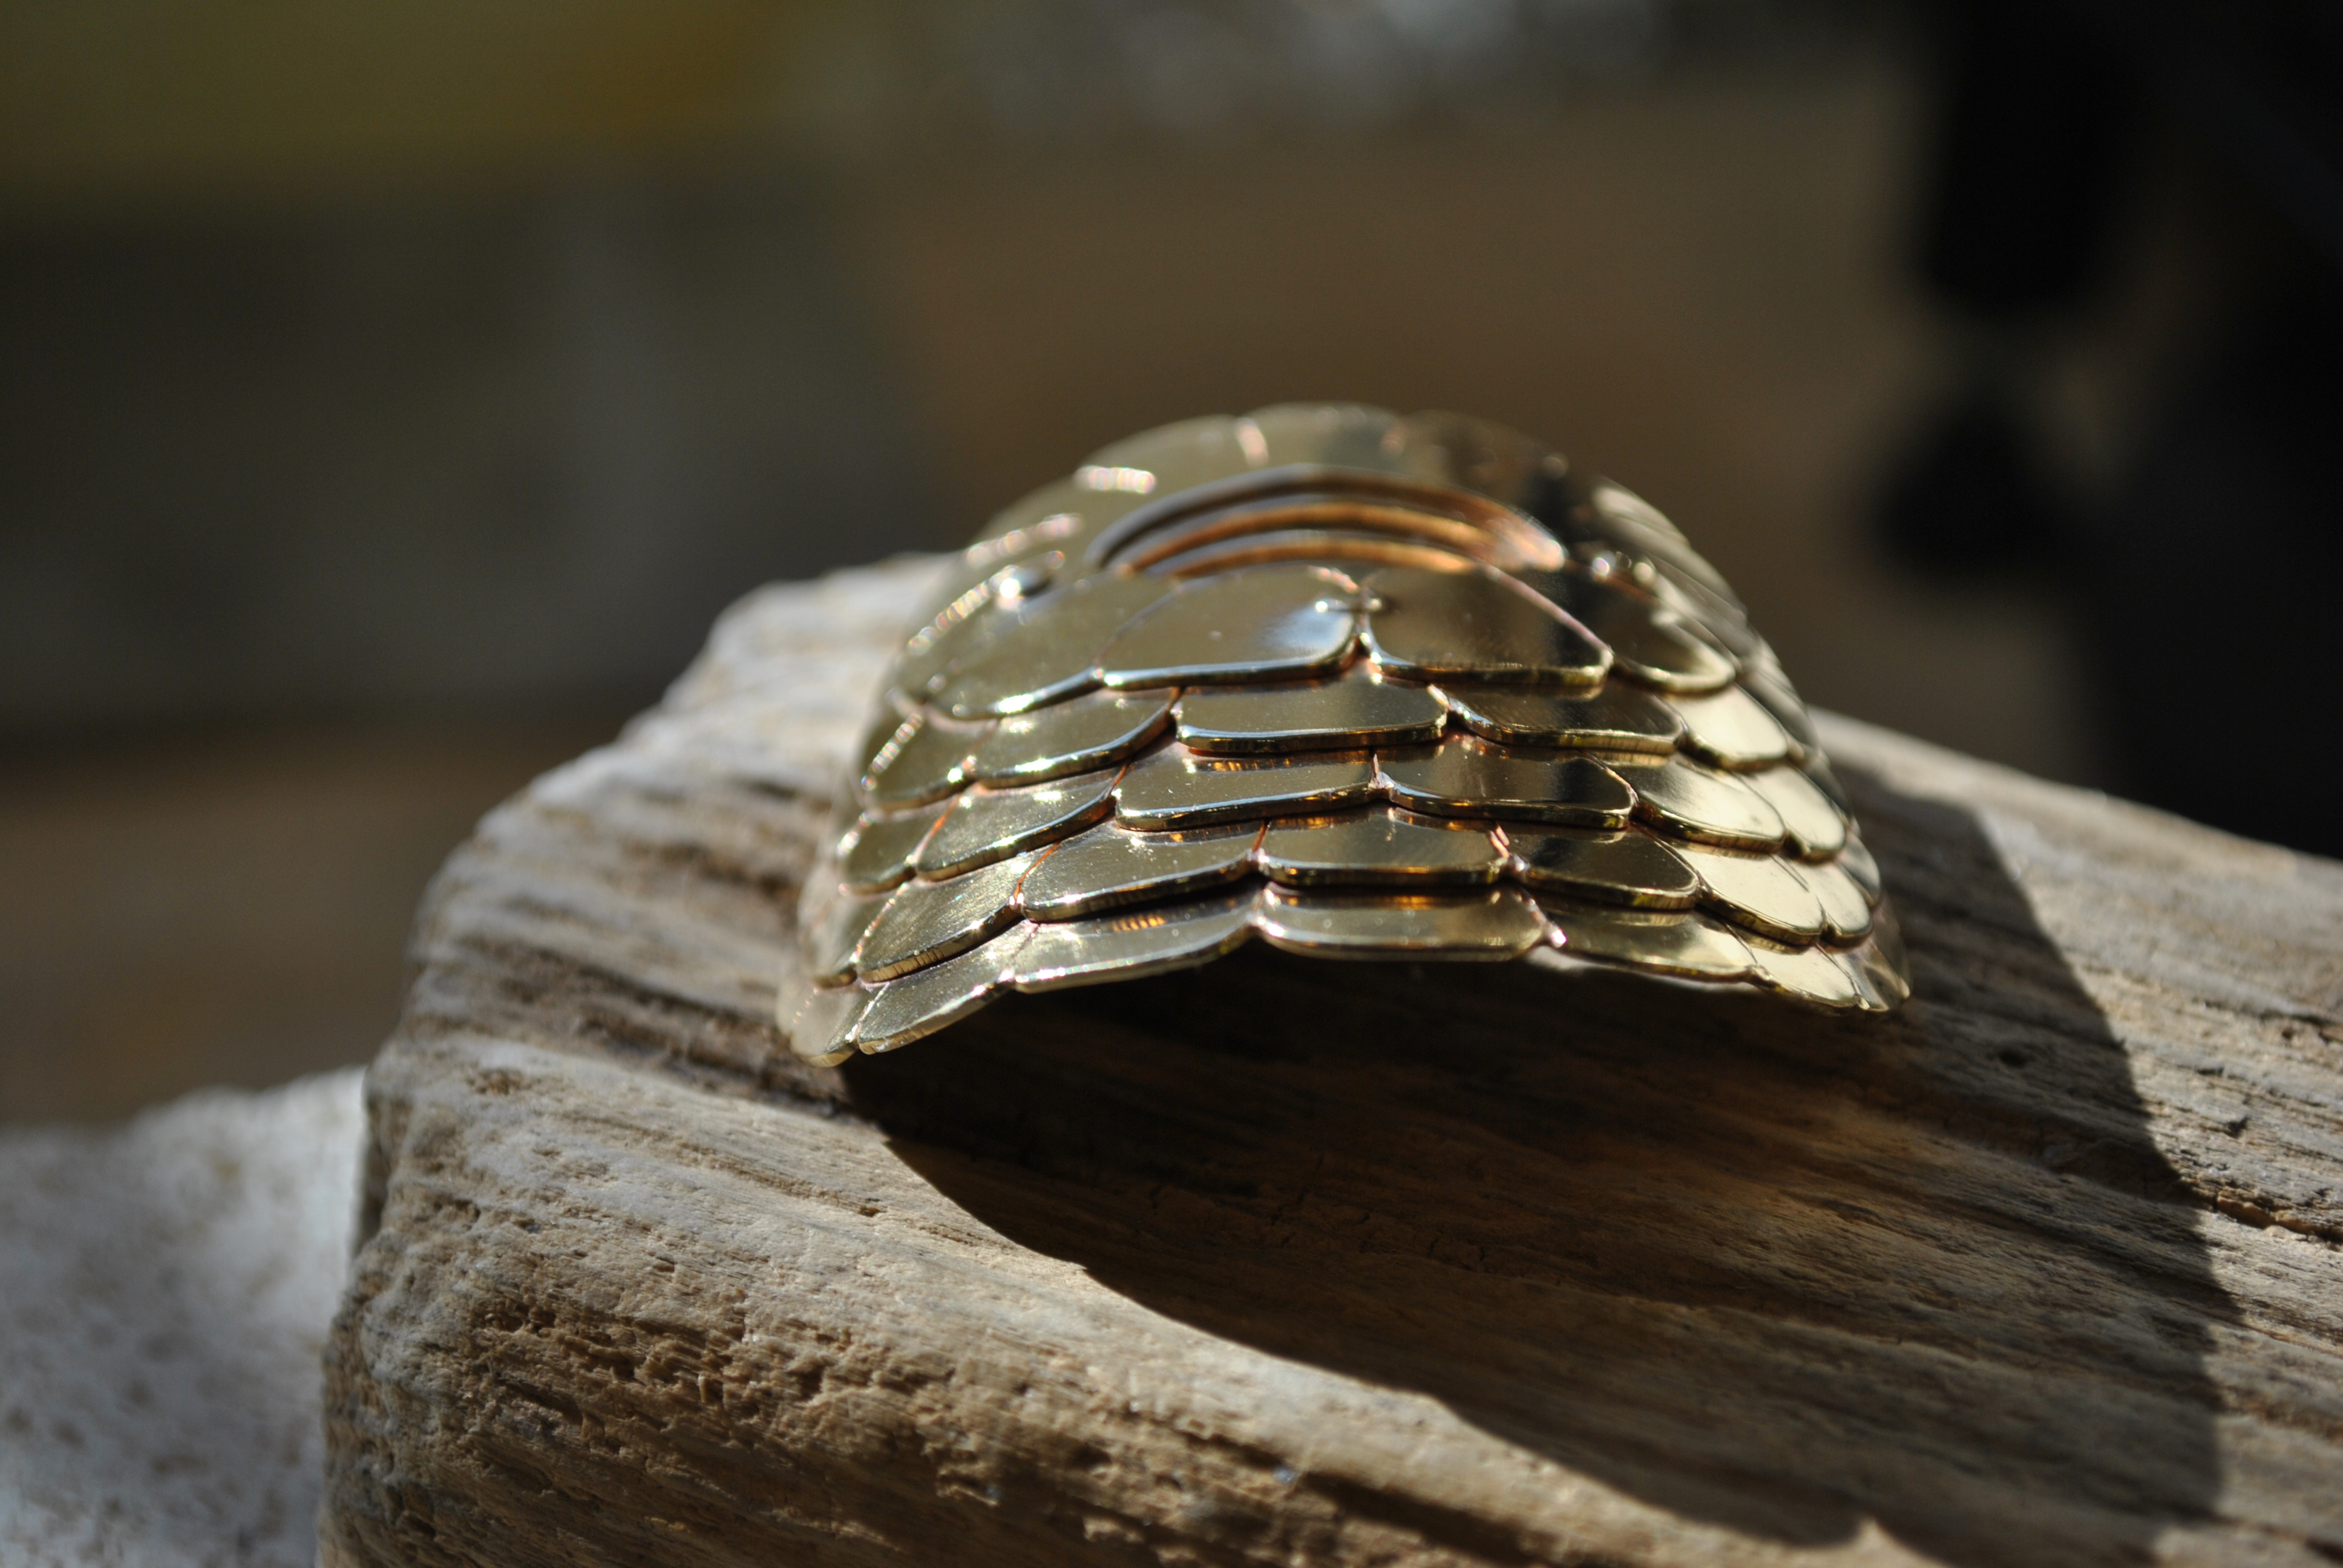
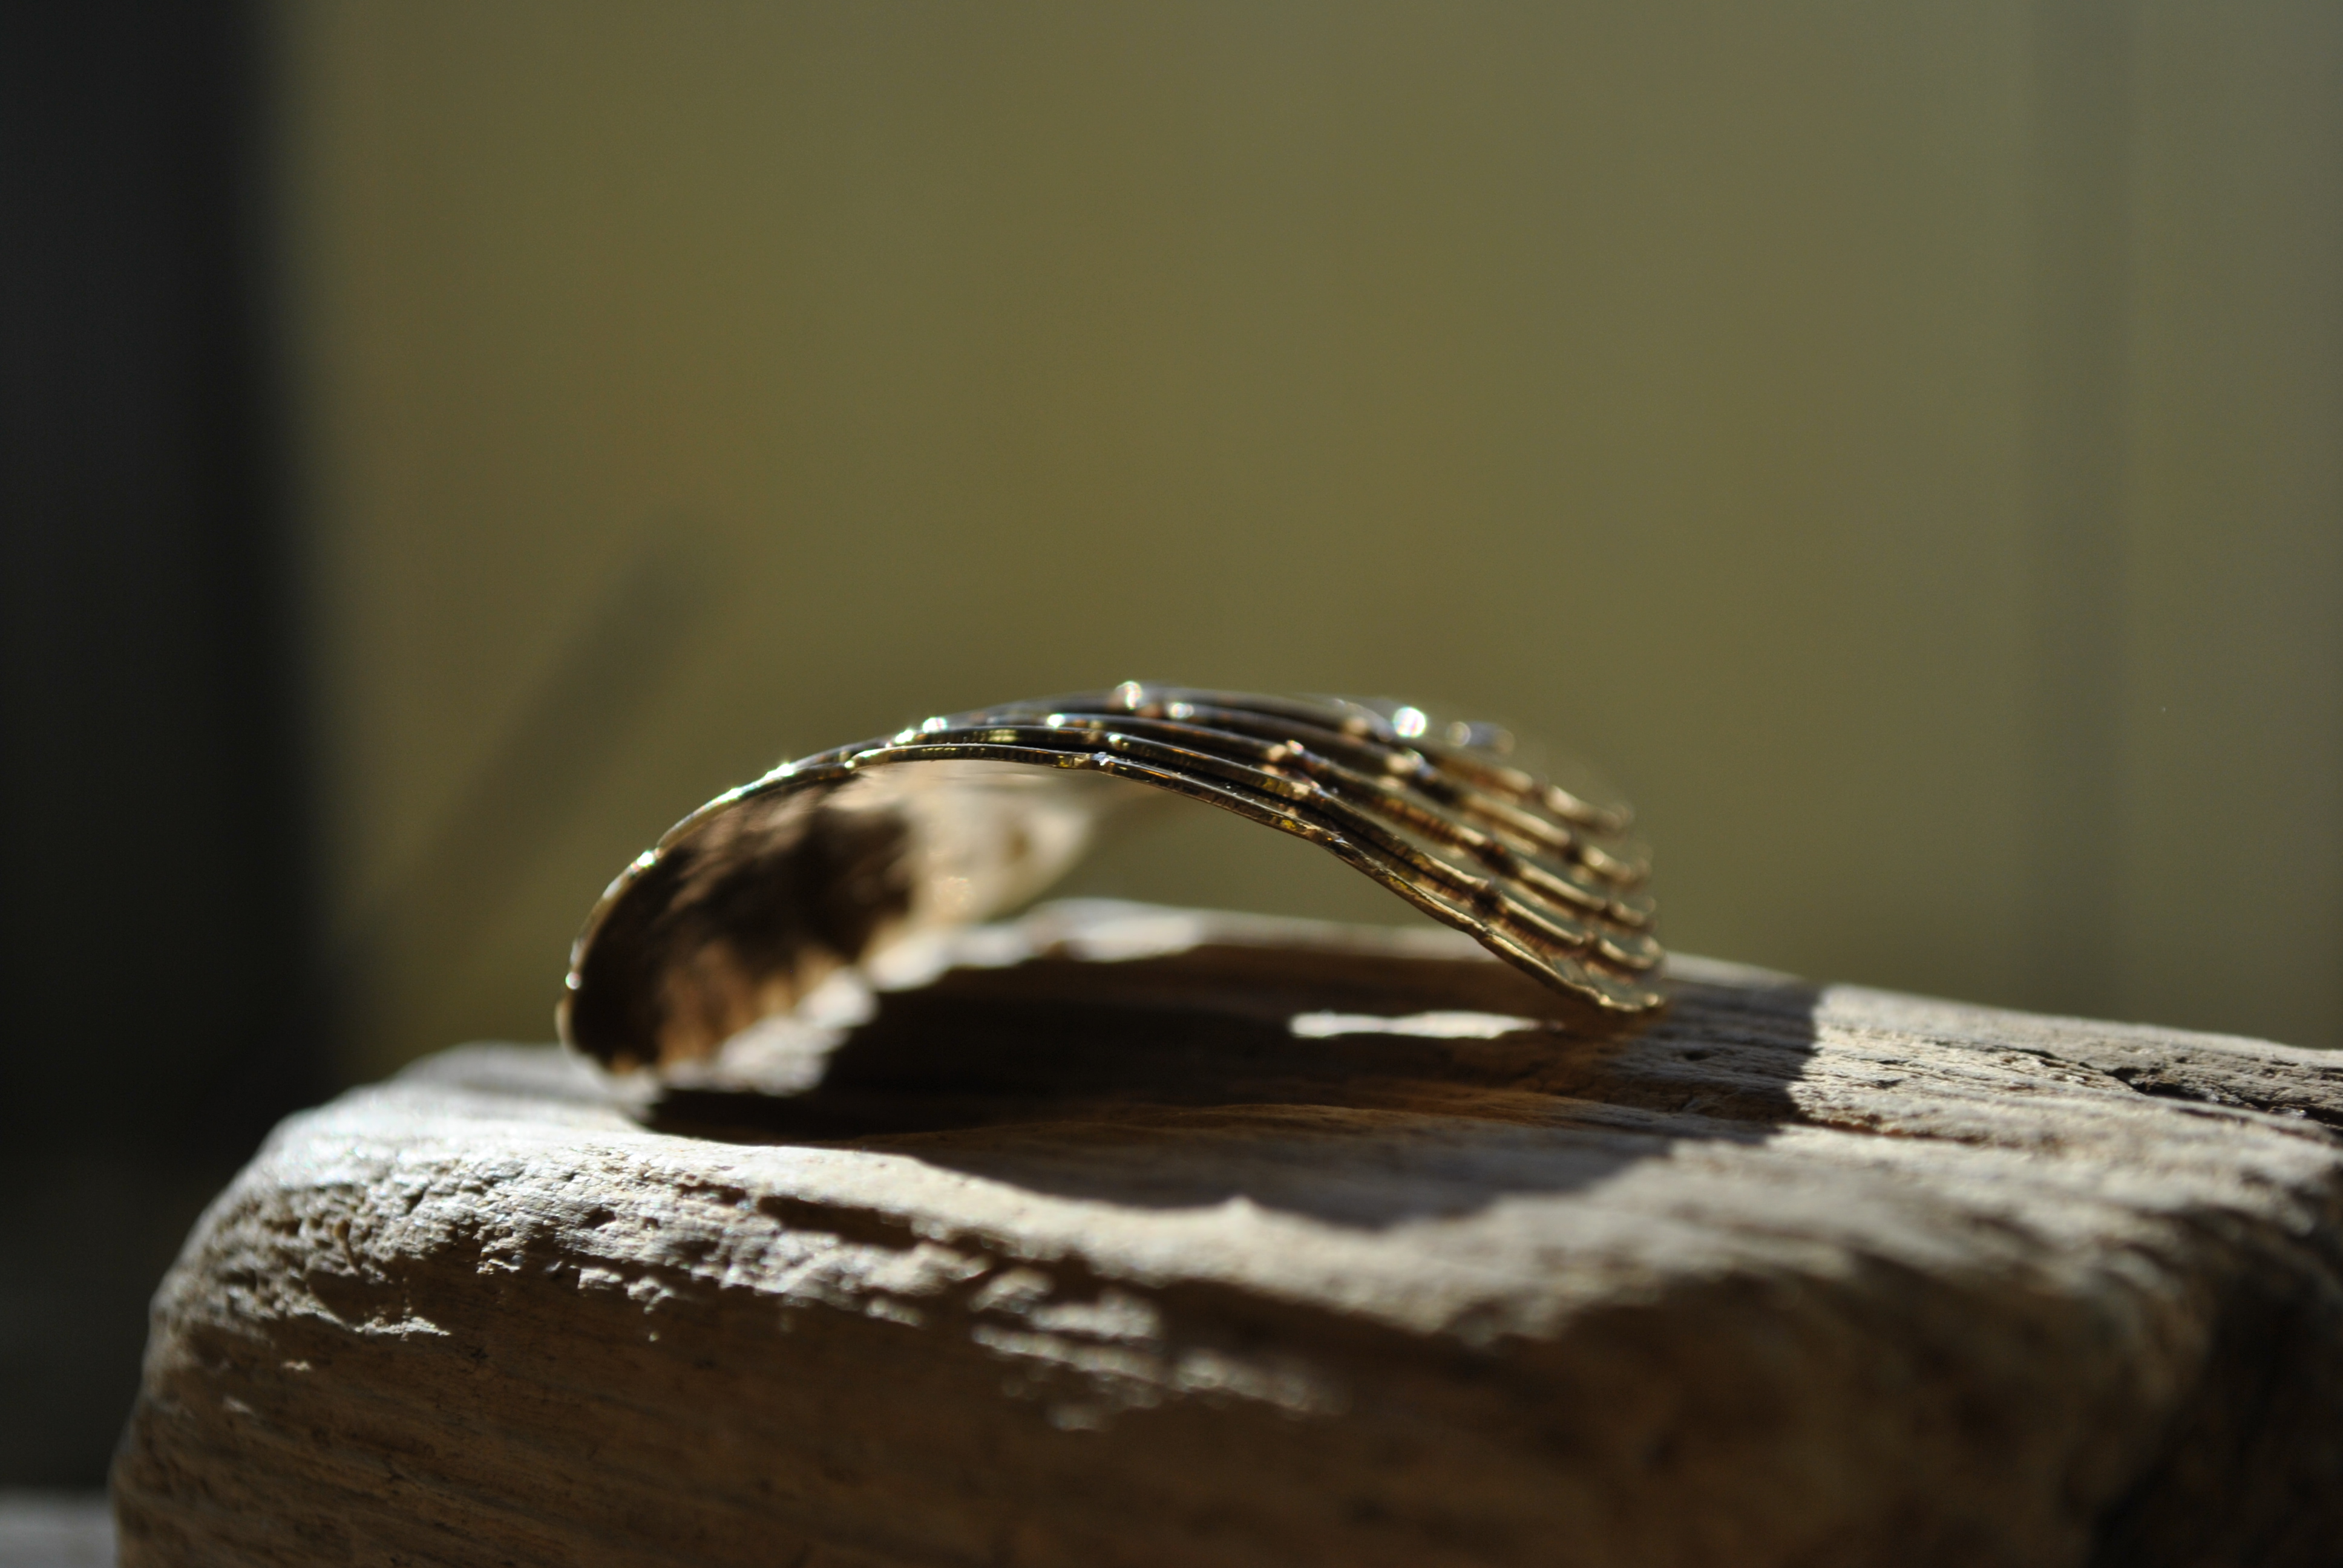
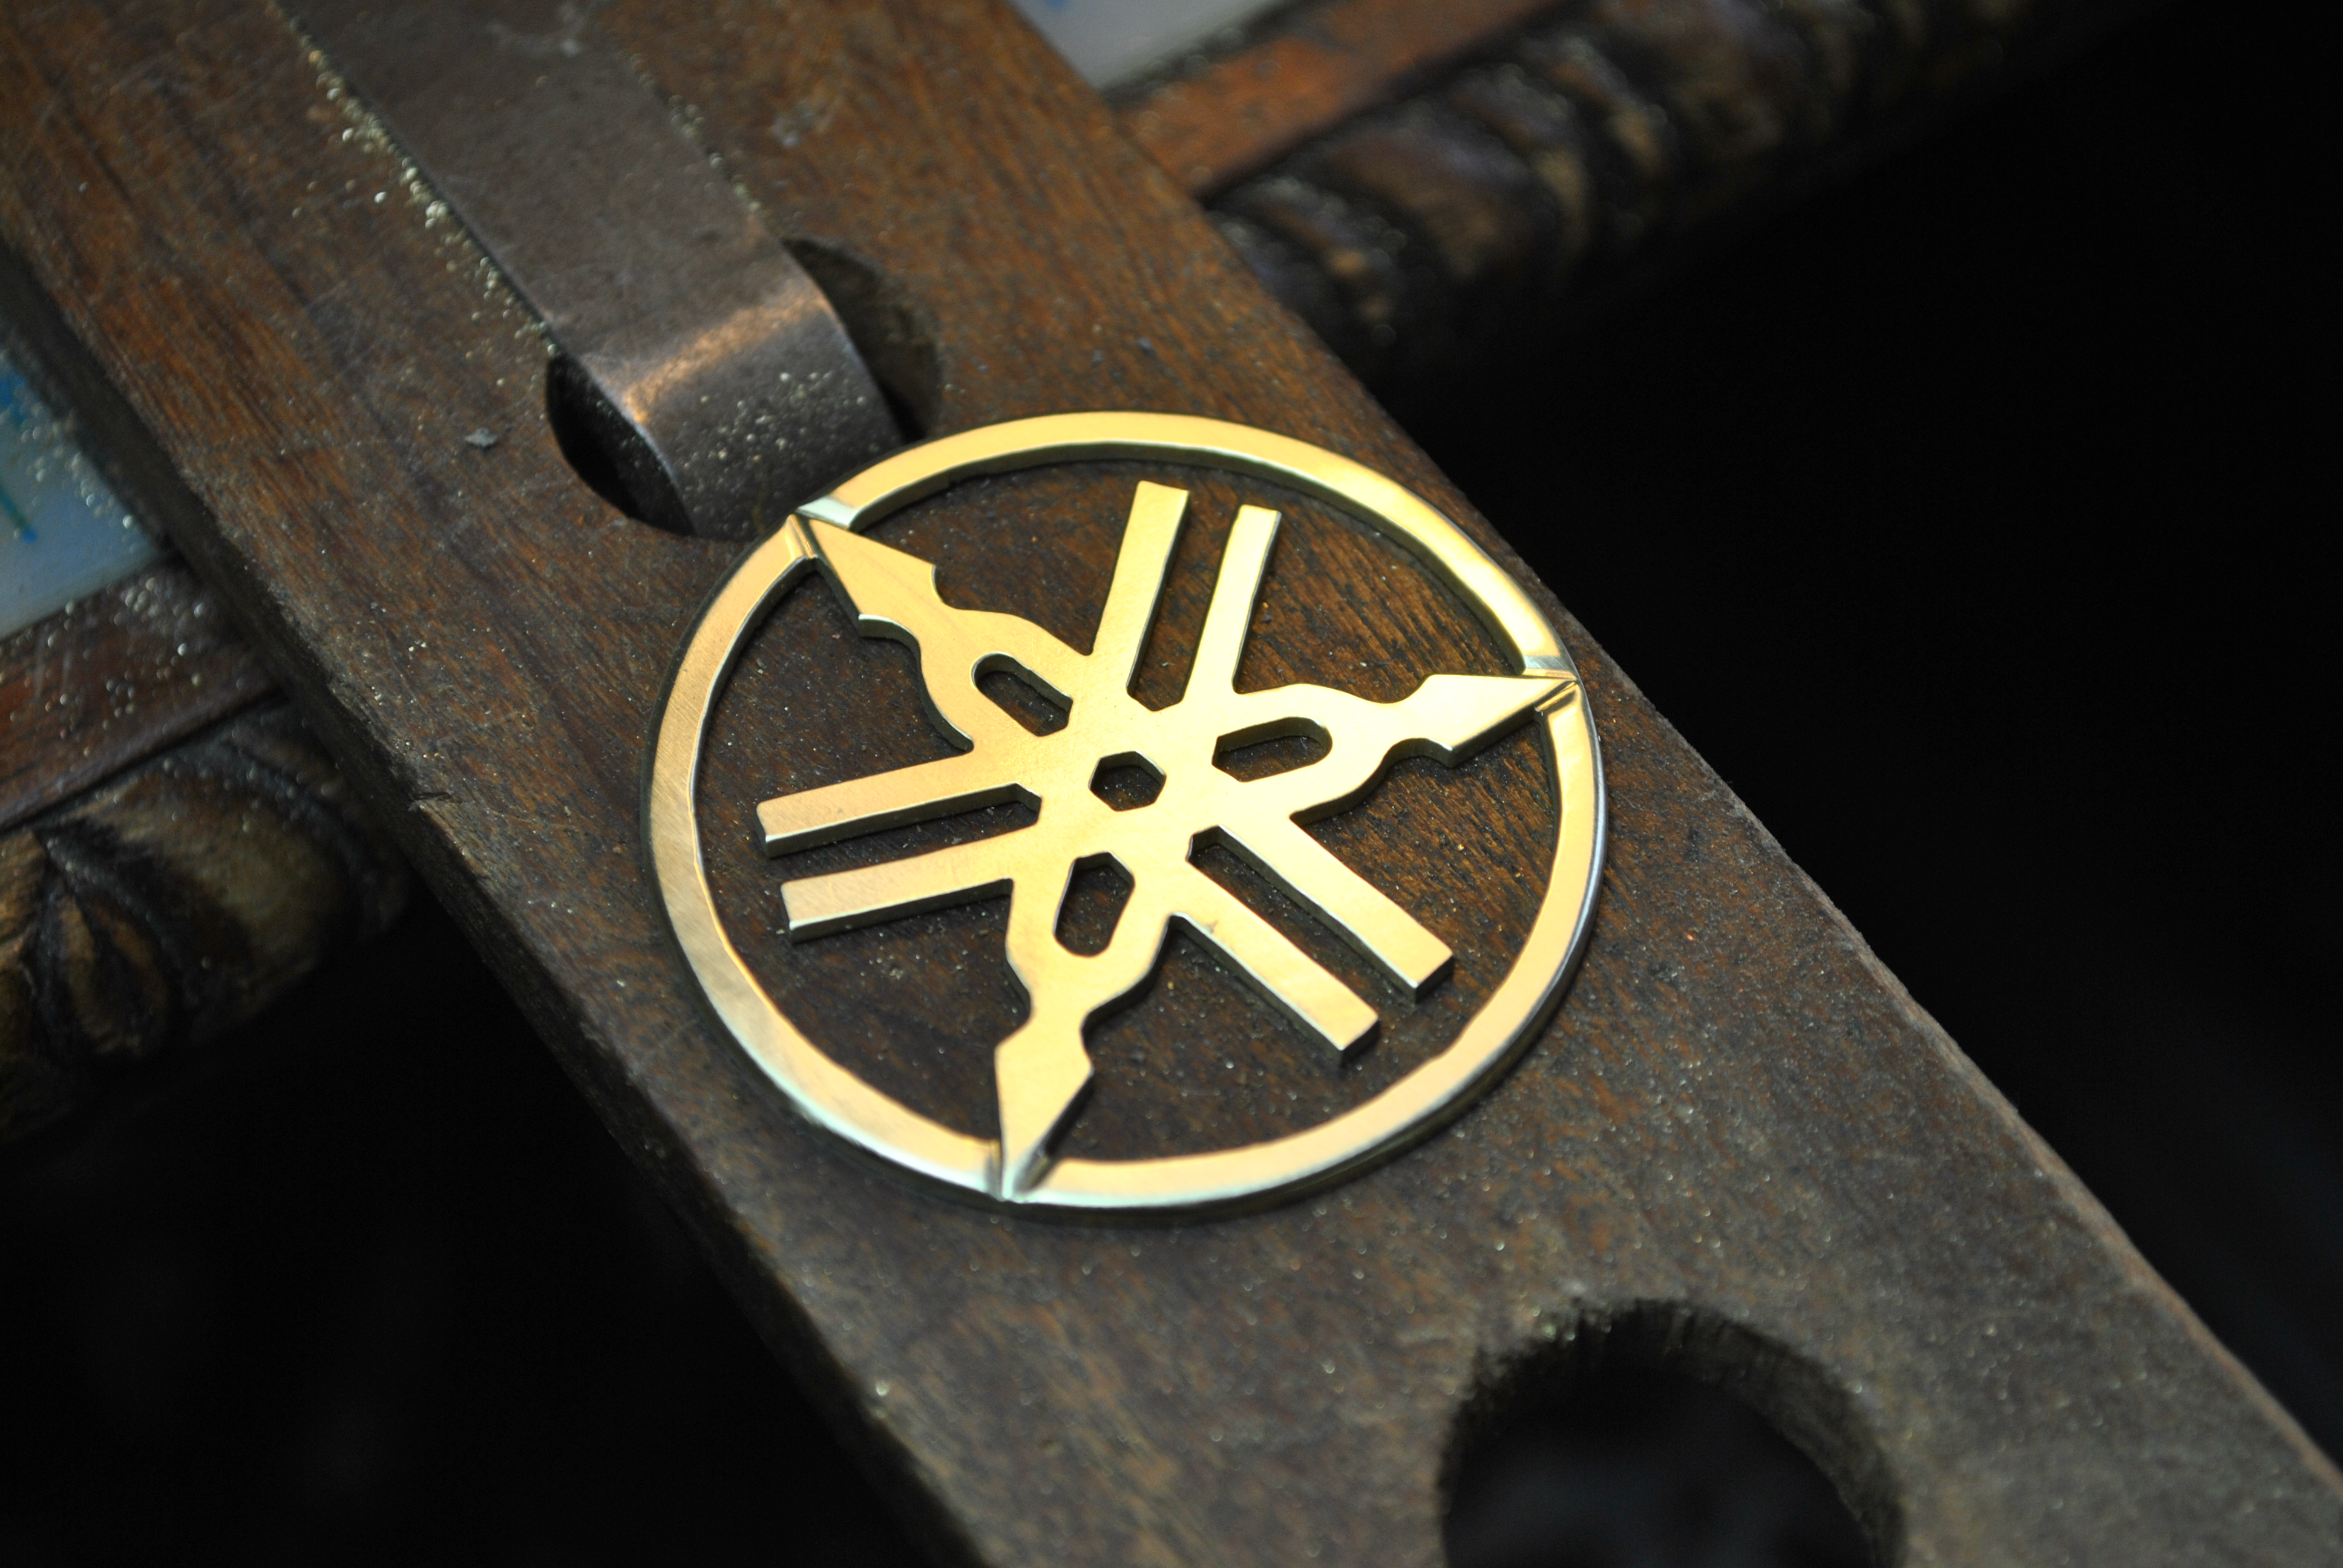
I was contacted by a client in Australia to make this badge. I am pleased with the way it came out. The outer softness contrasts the hard lines of the inside. The way the points intrude into the outer circle, and the over all design. It also feels really nice when you pick it up, which is always a good sign. I can’t wait to see it on the bicycle!
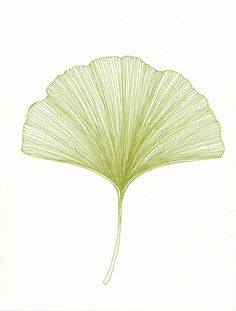
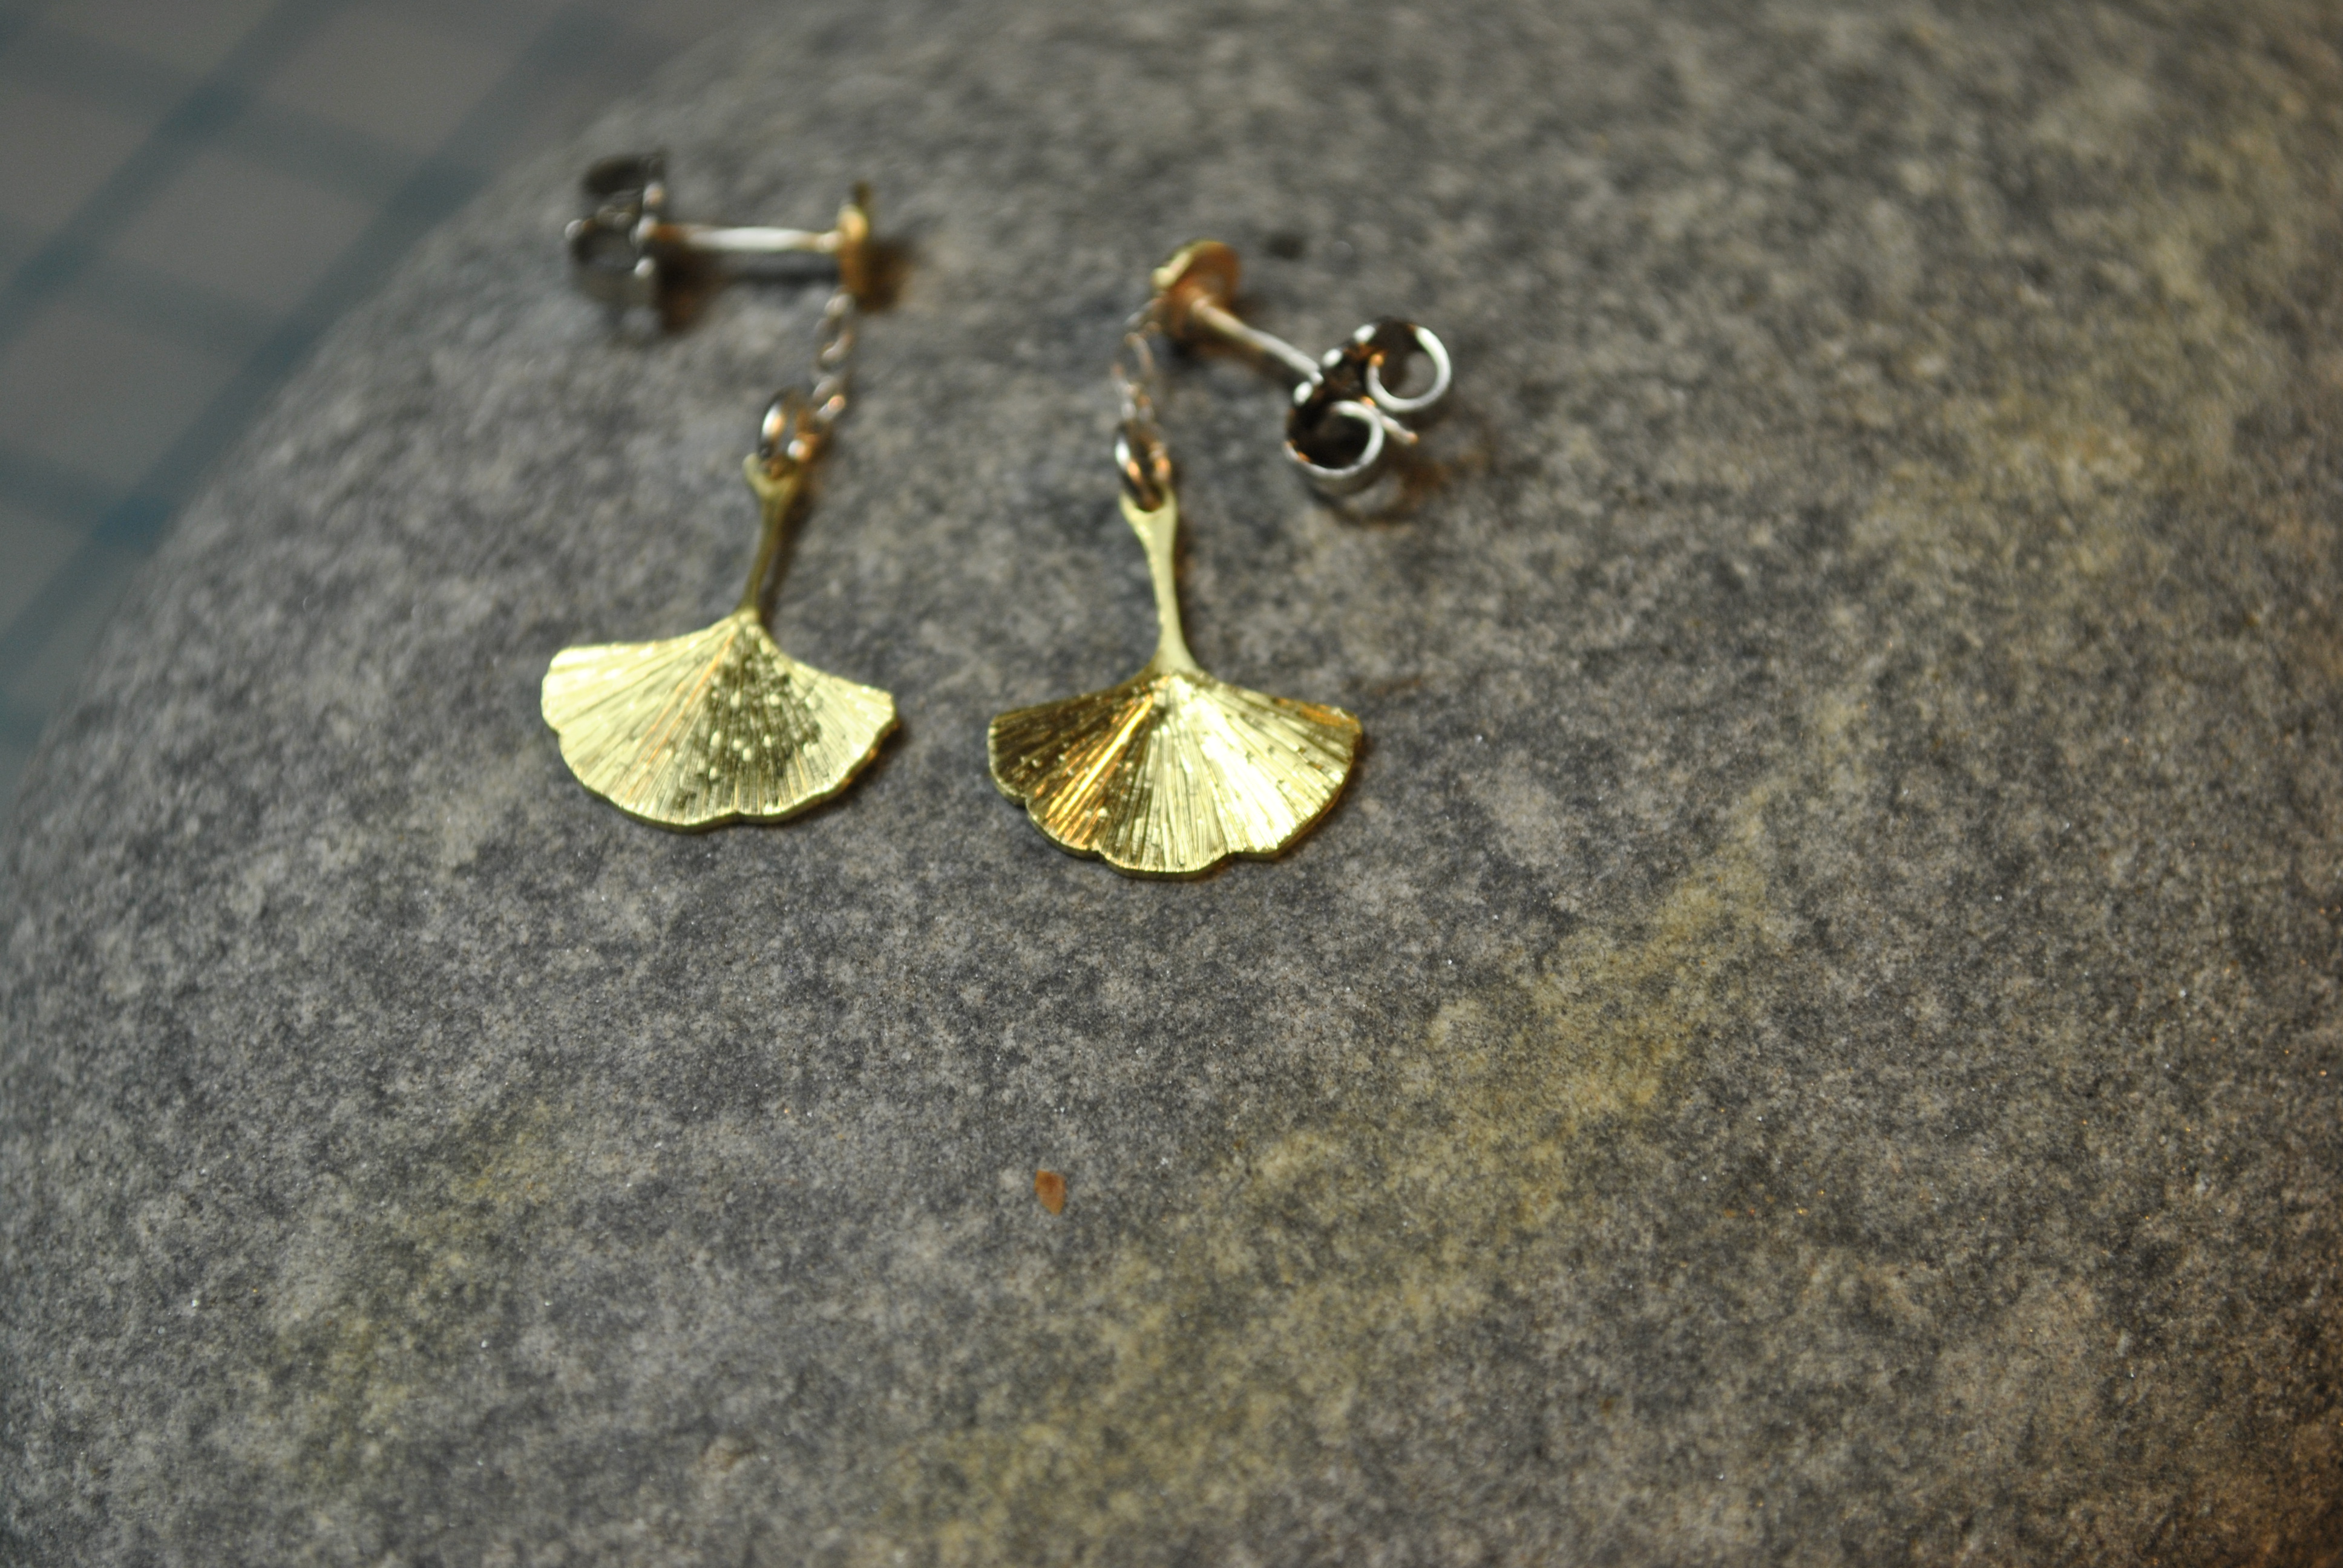
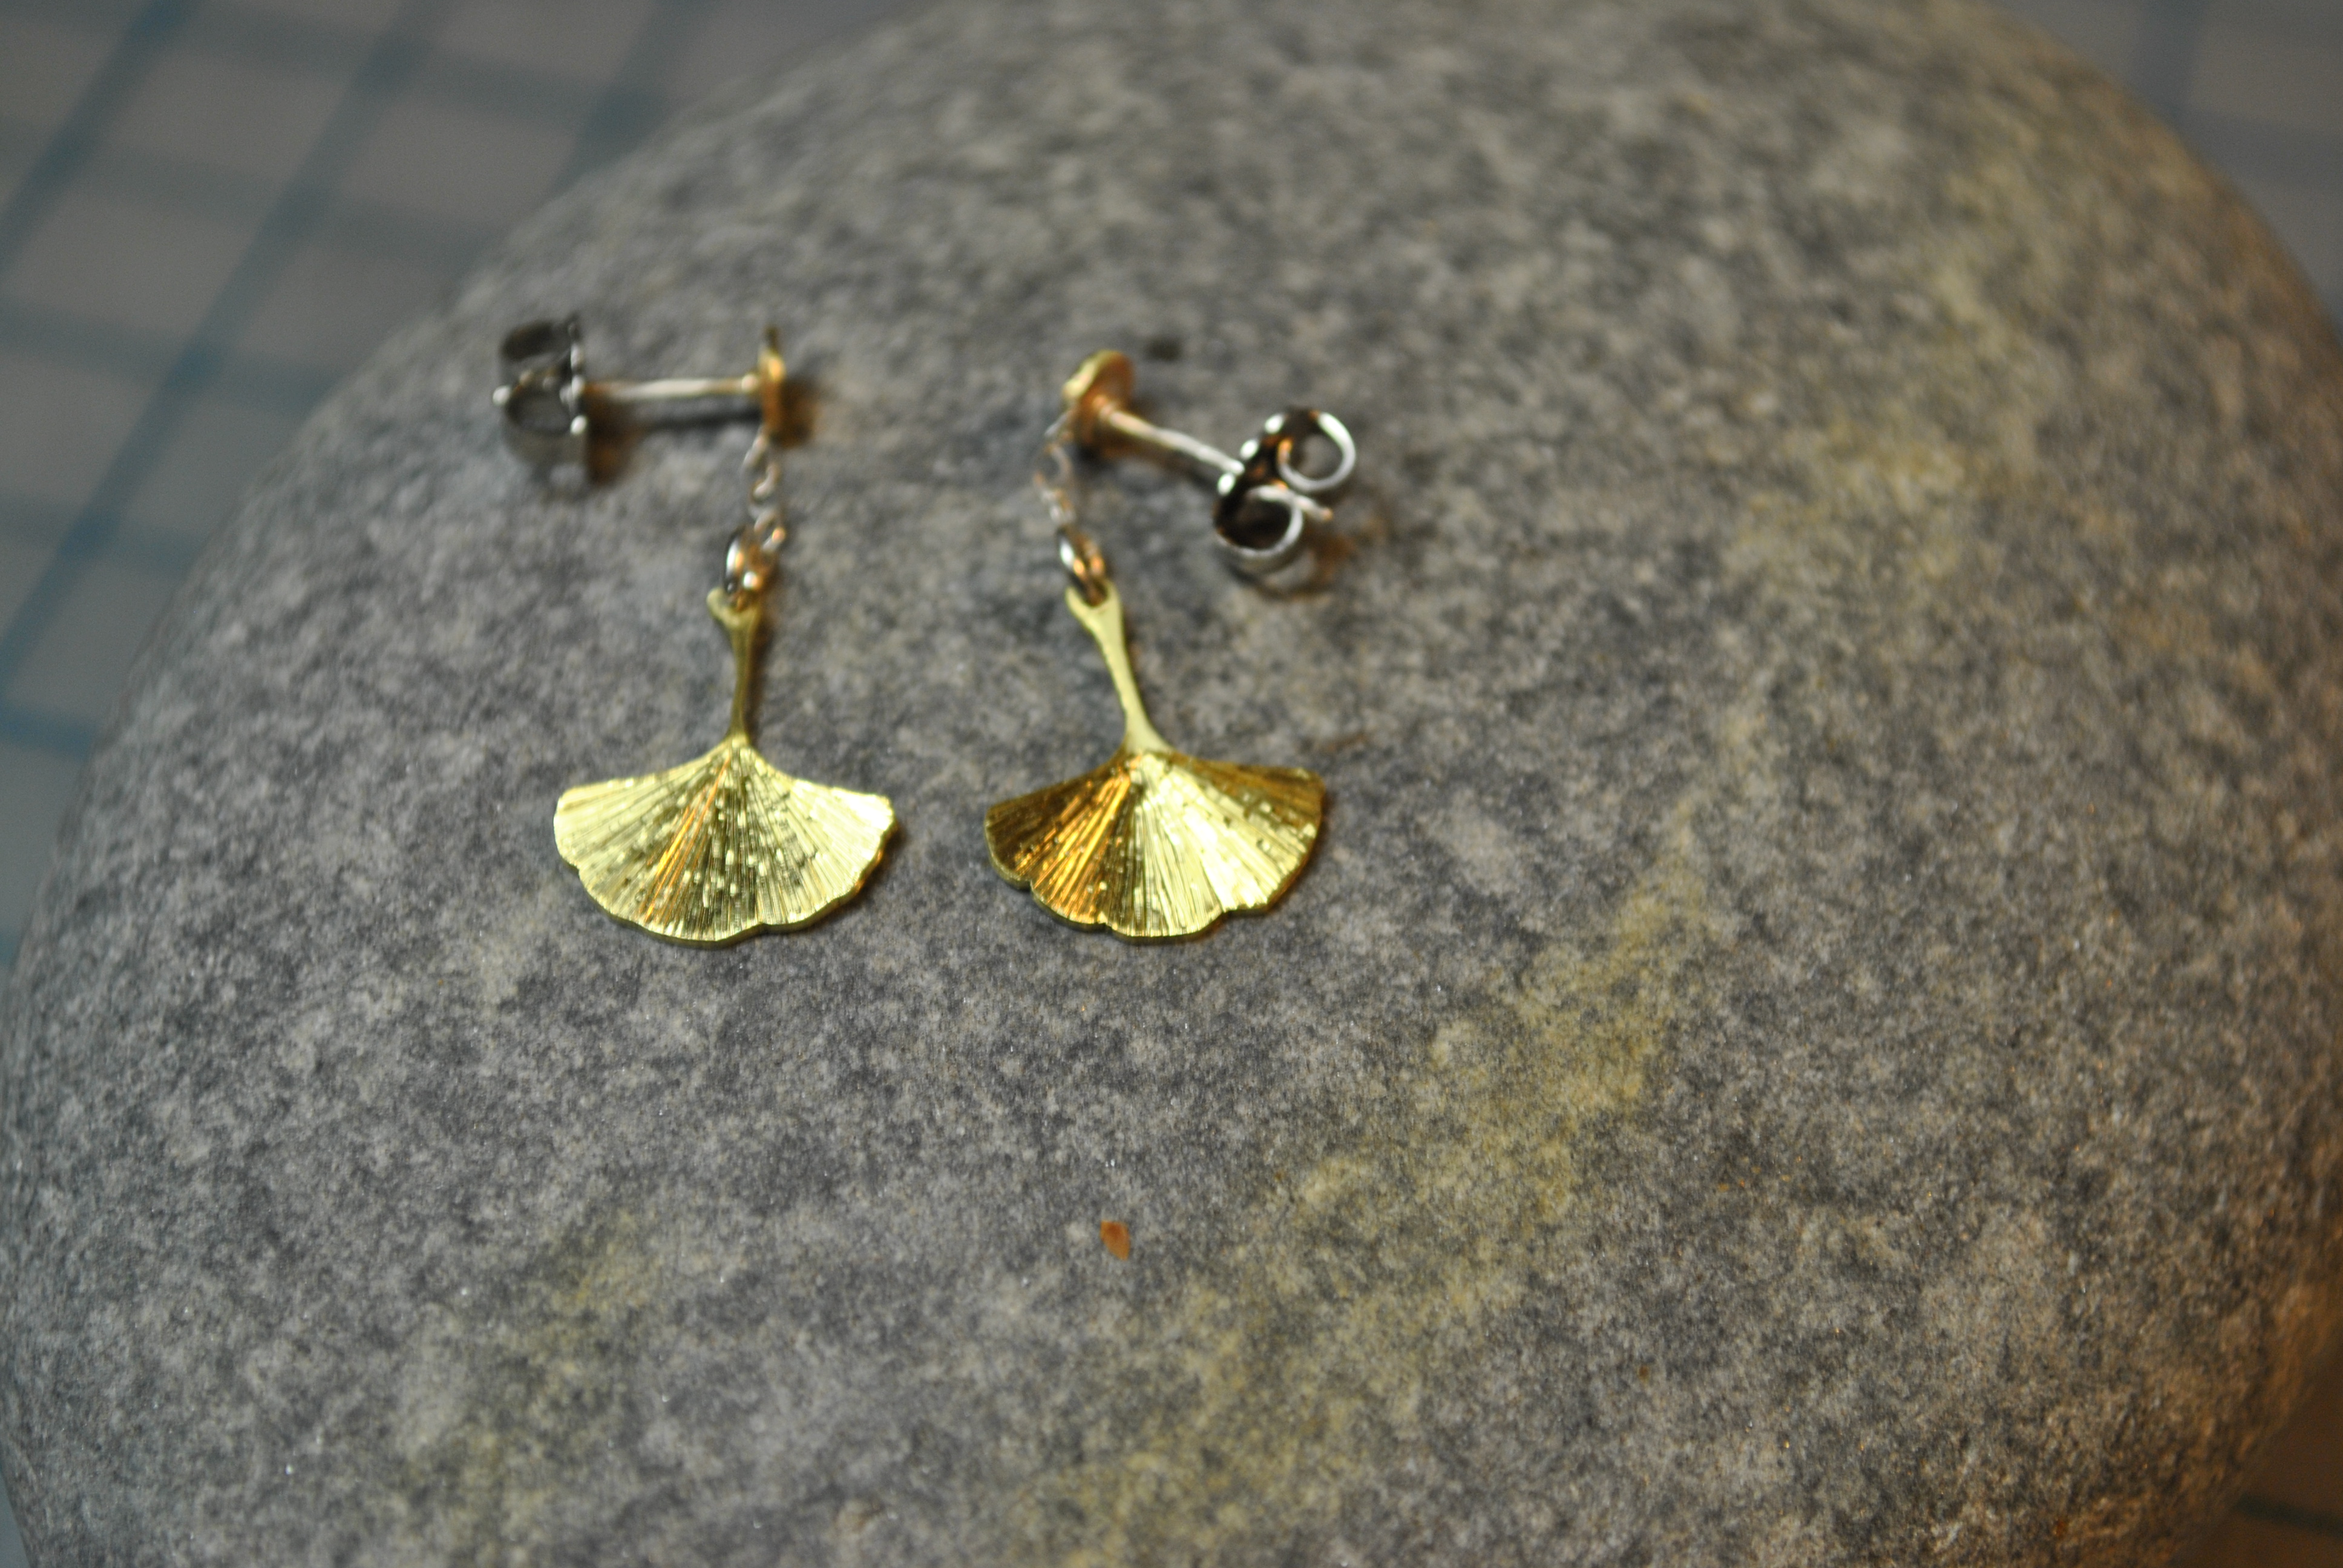
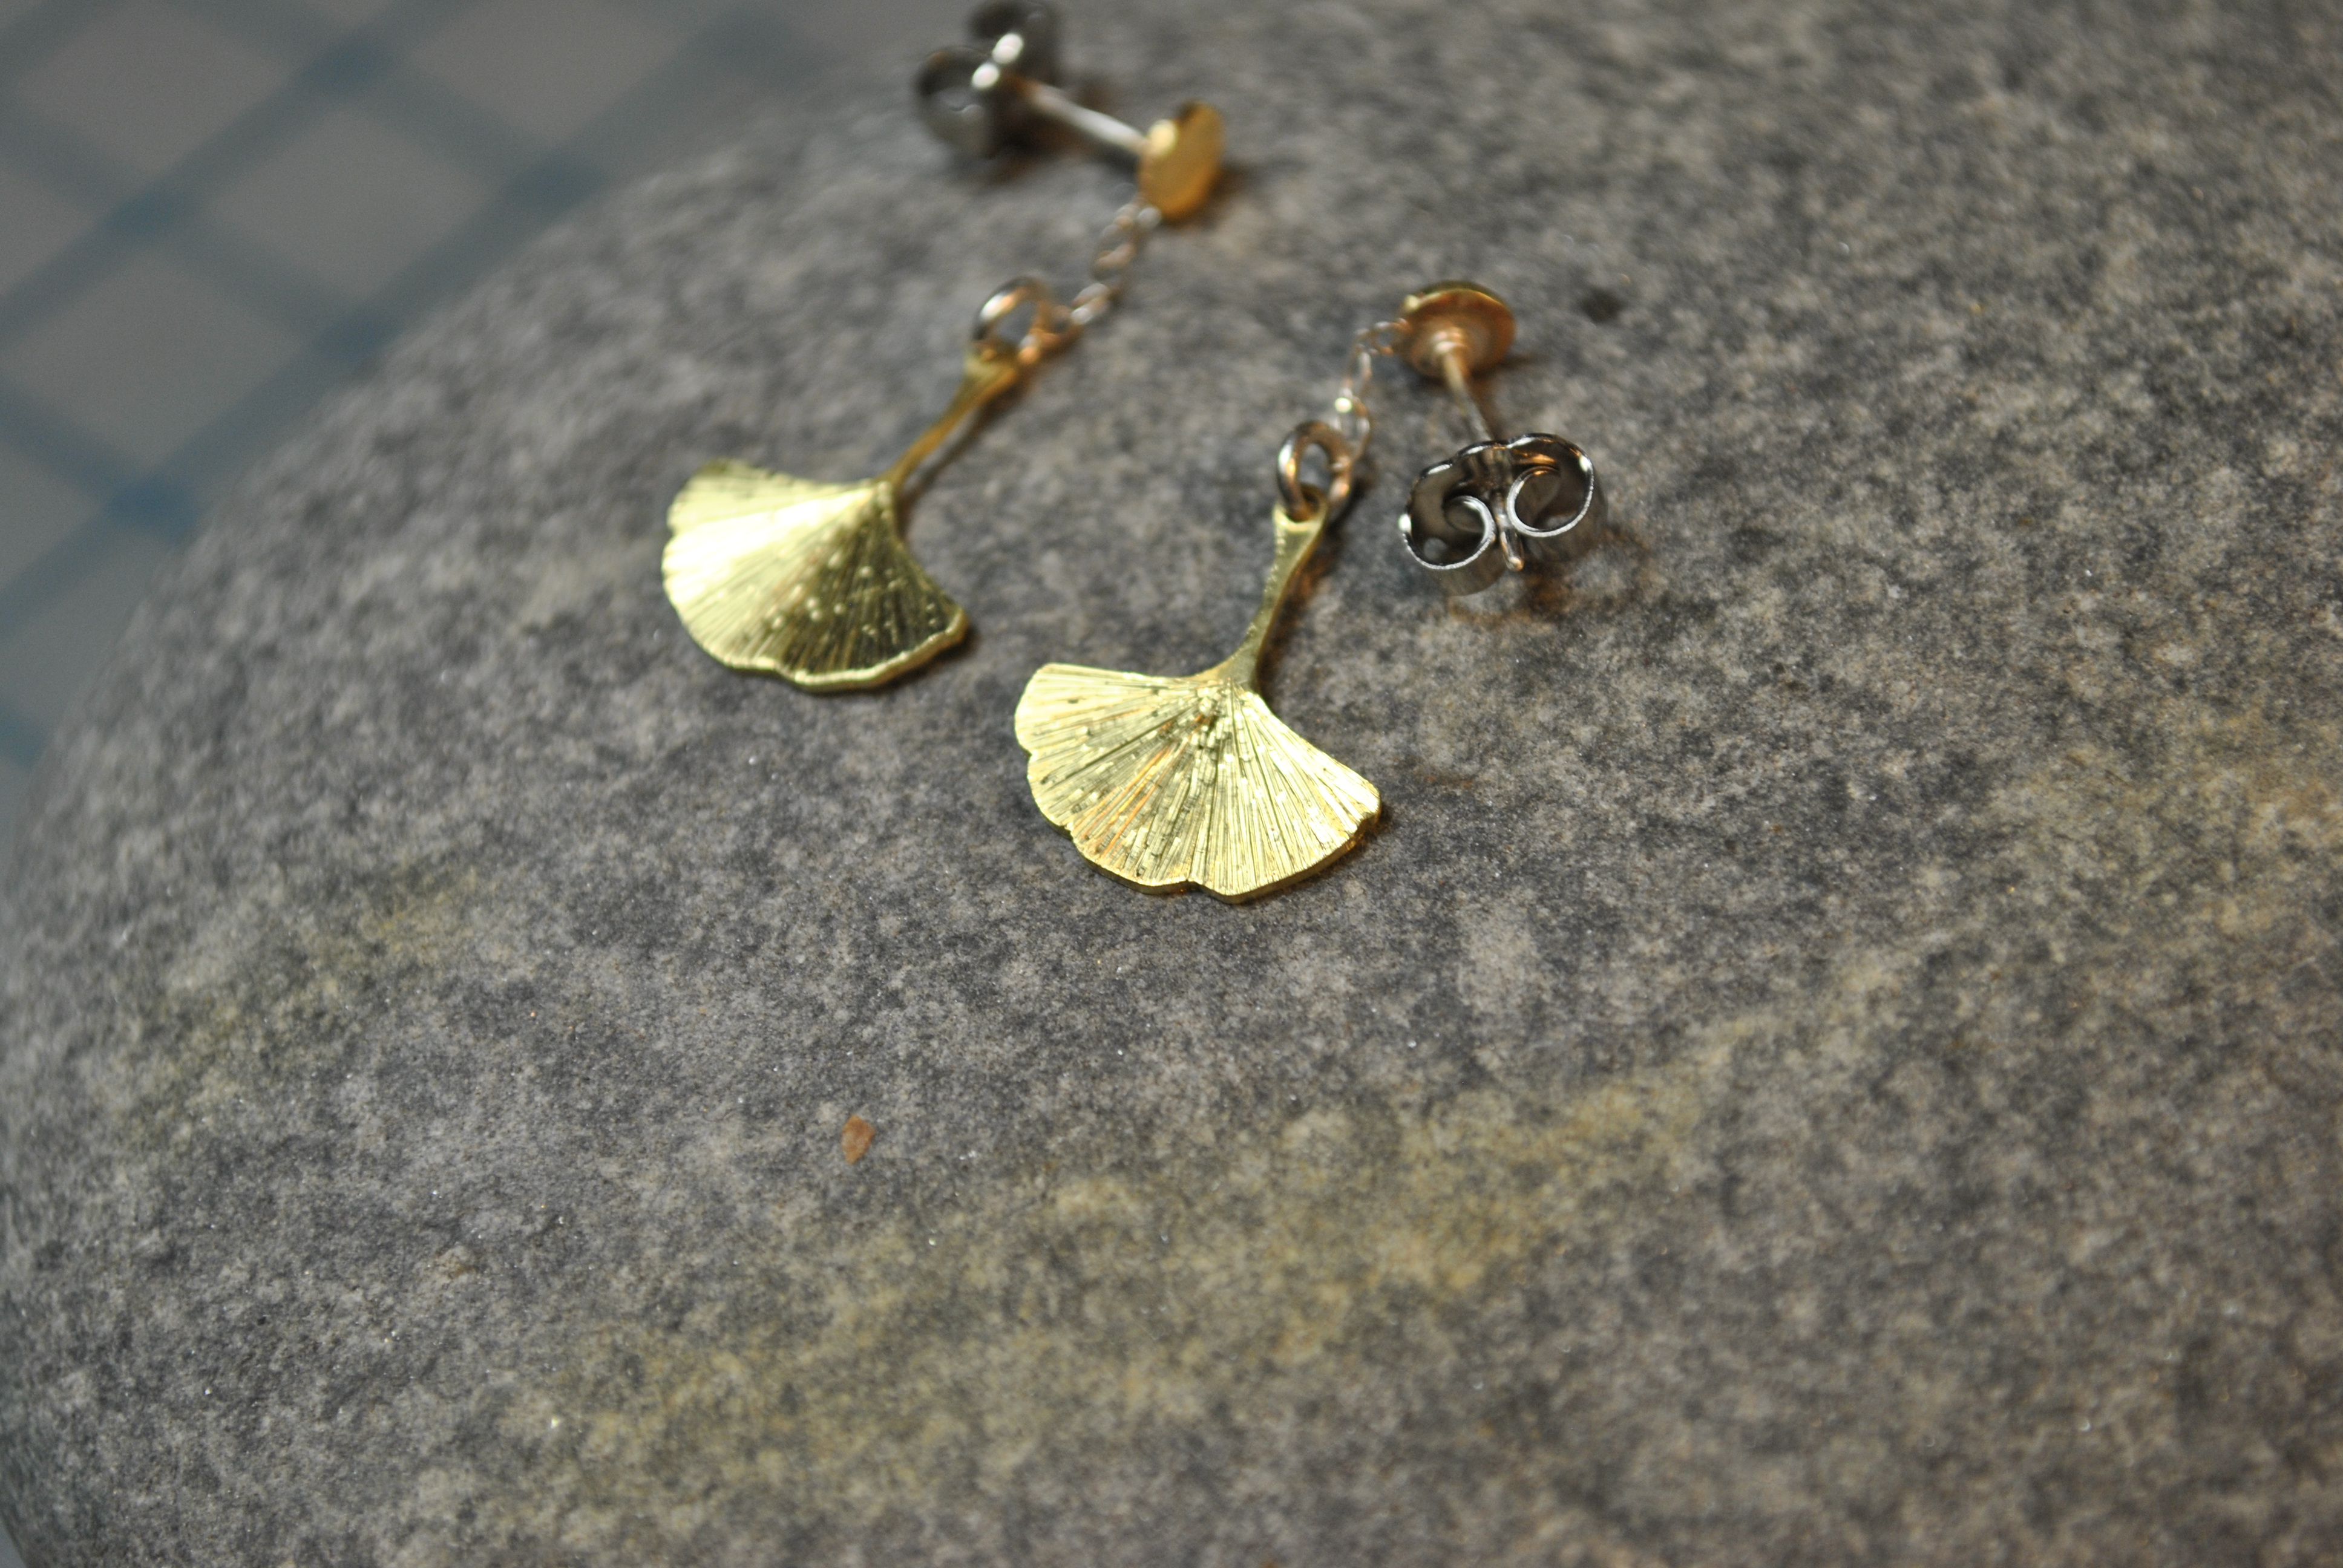
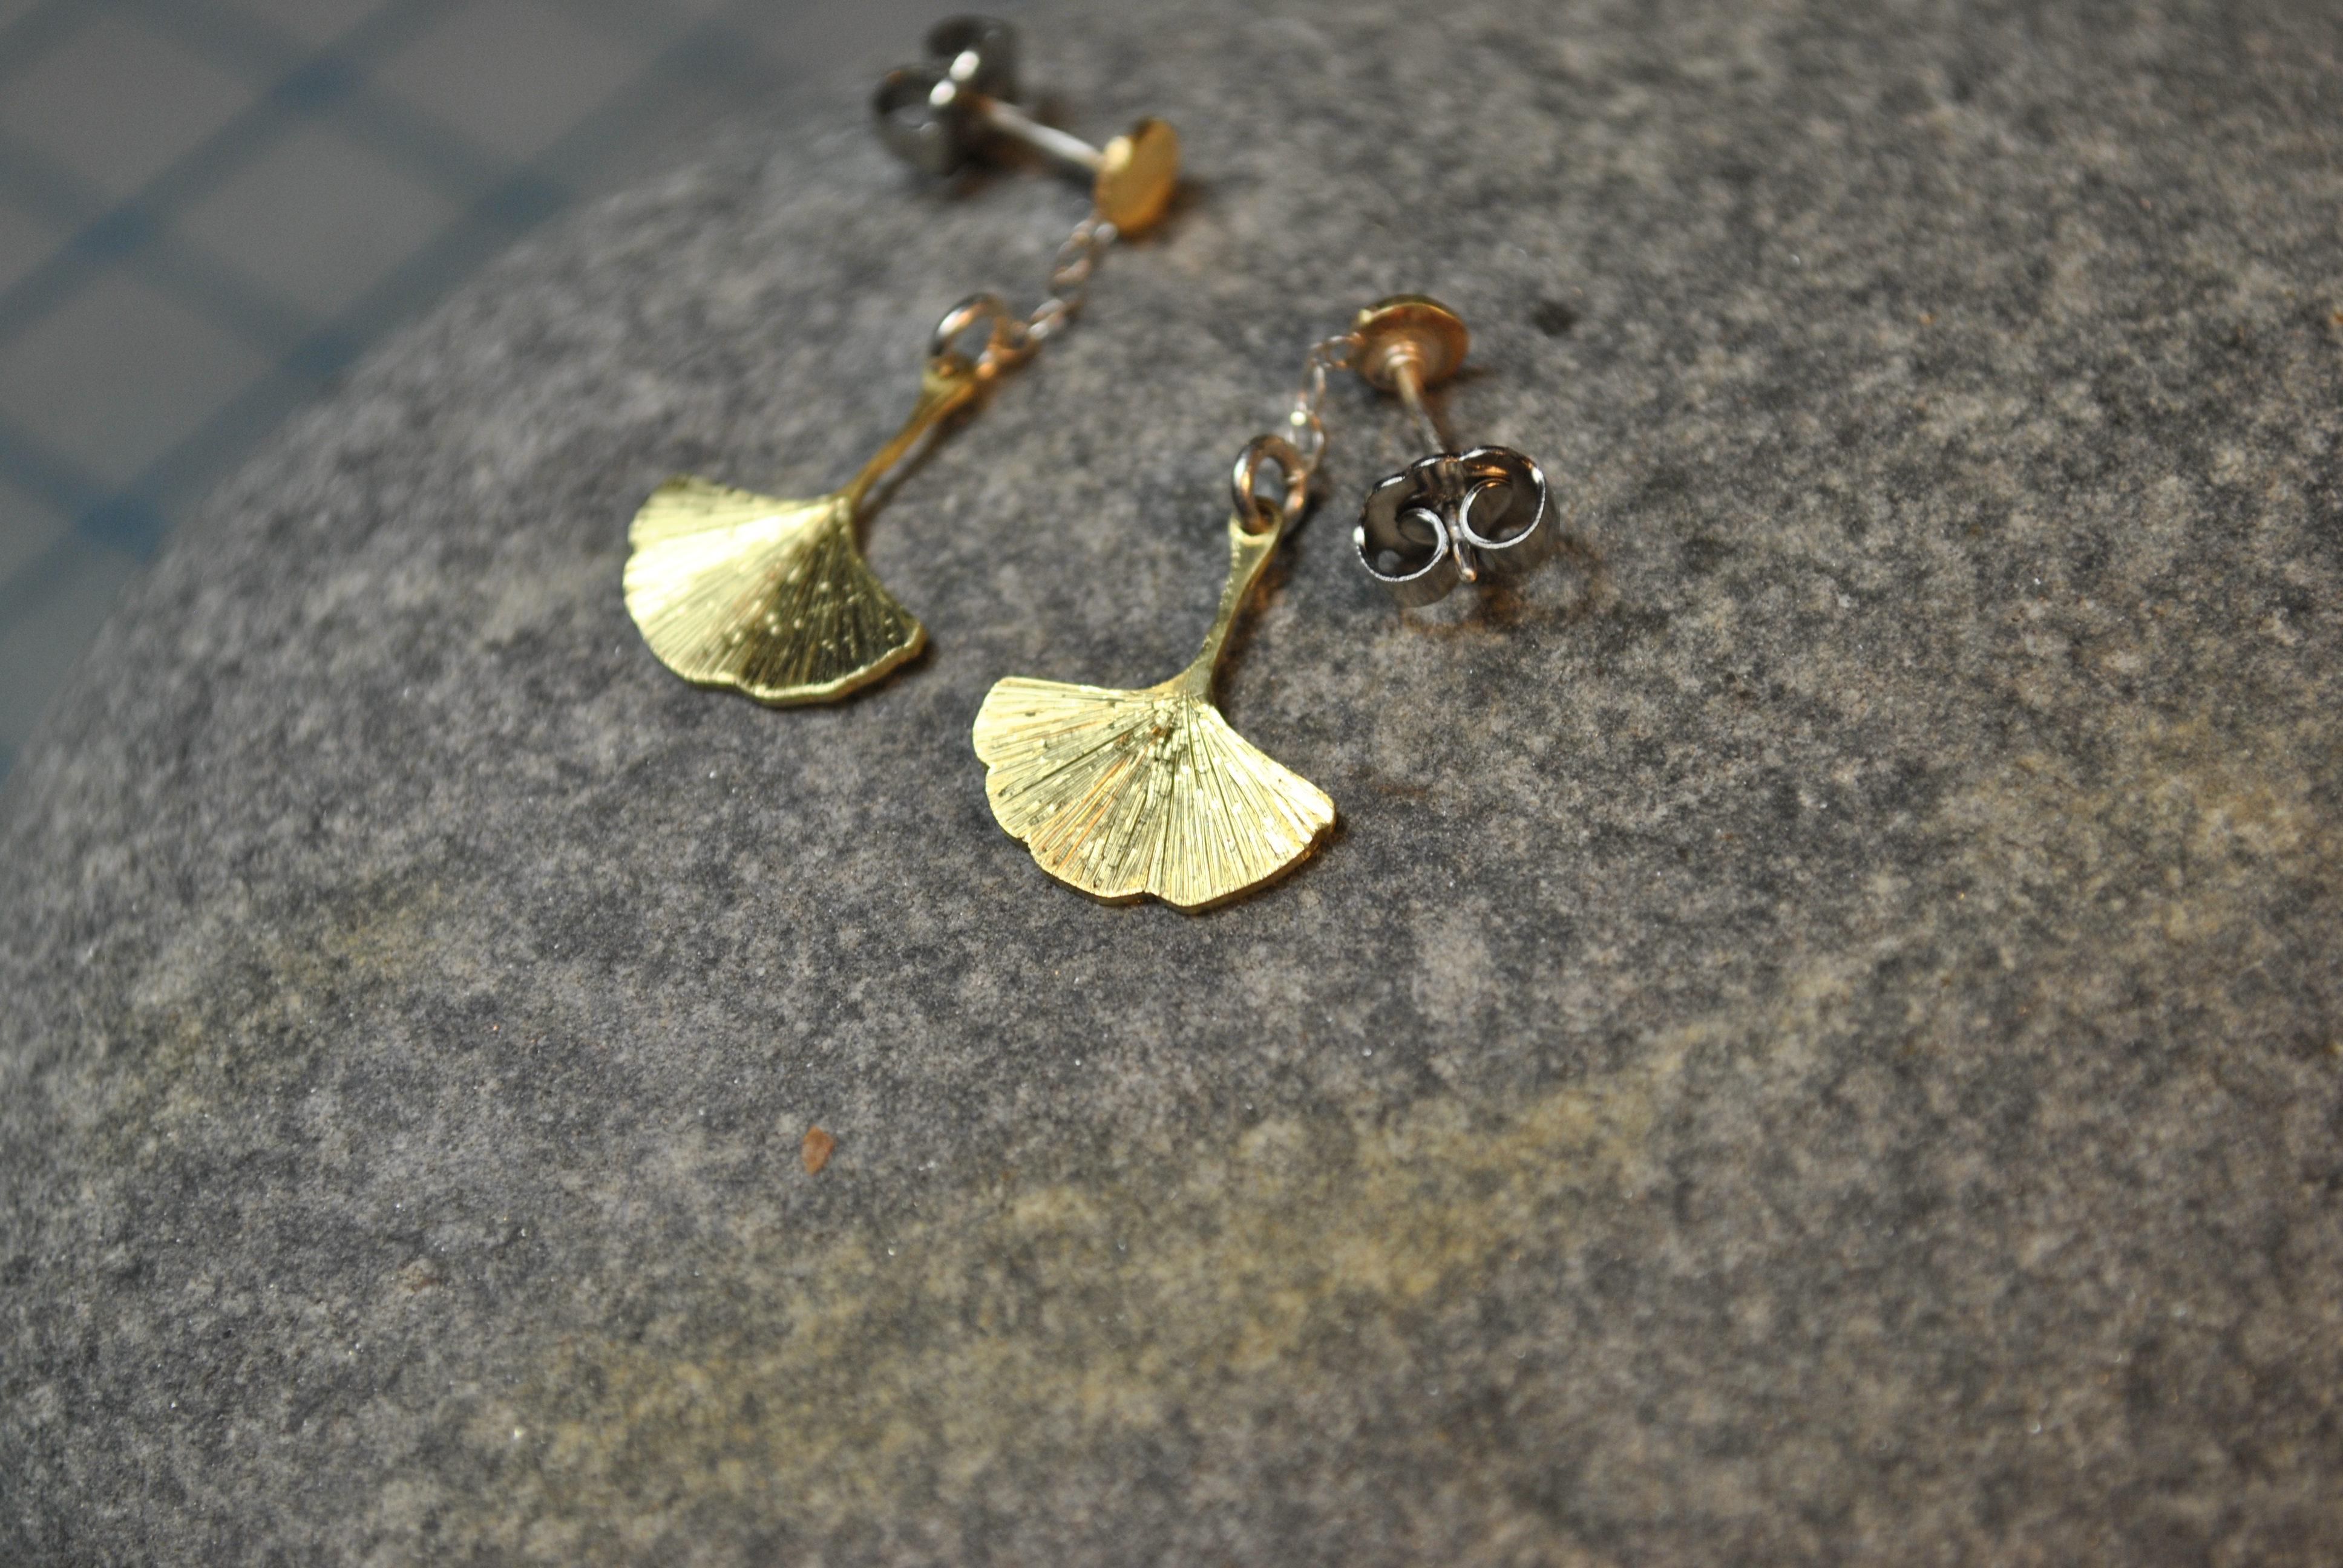
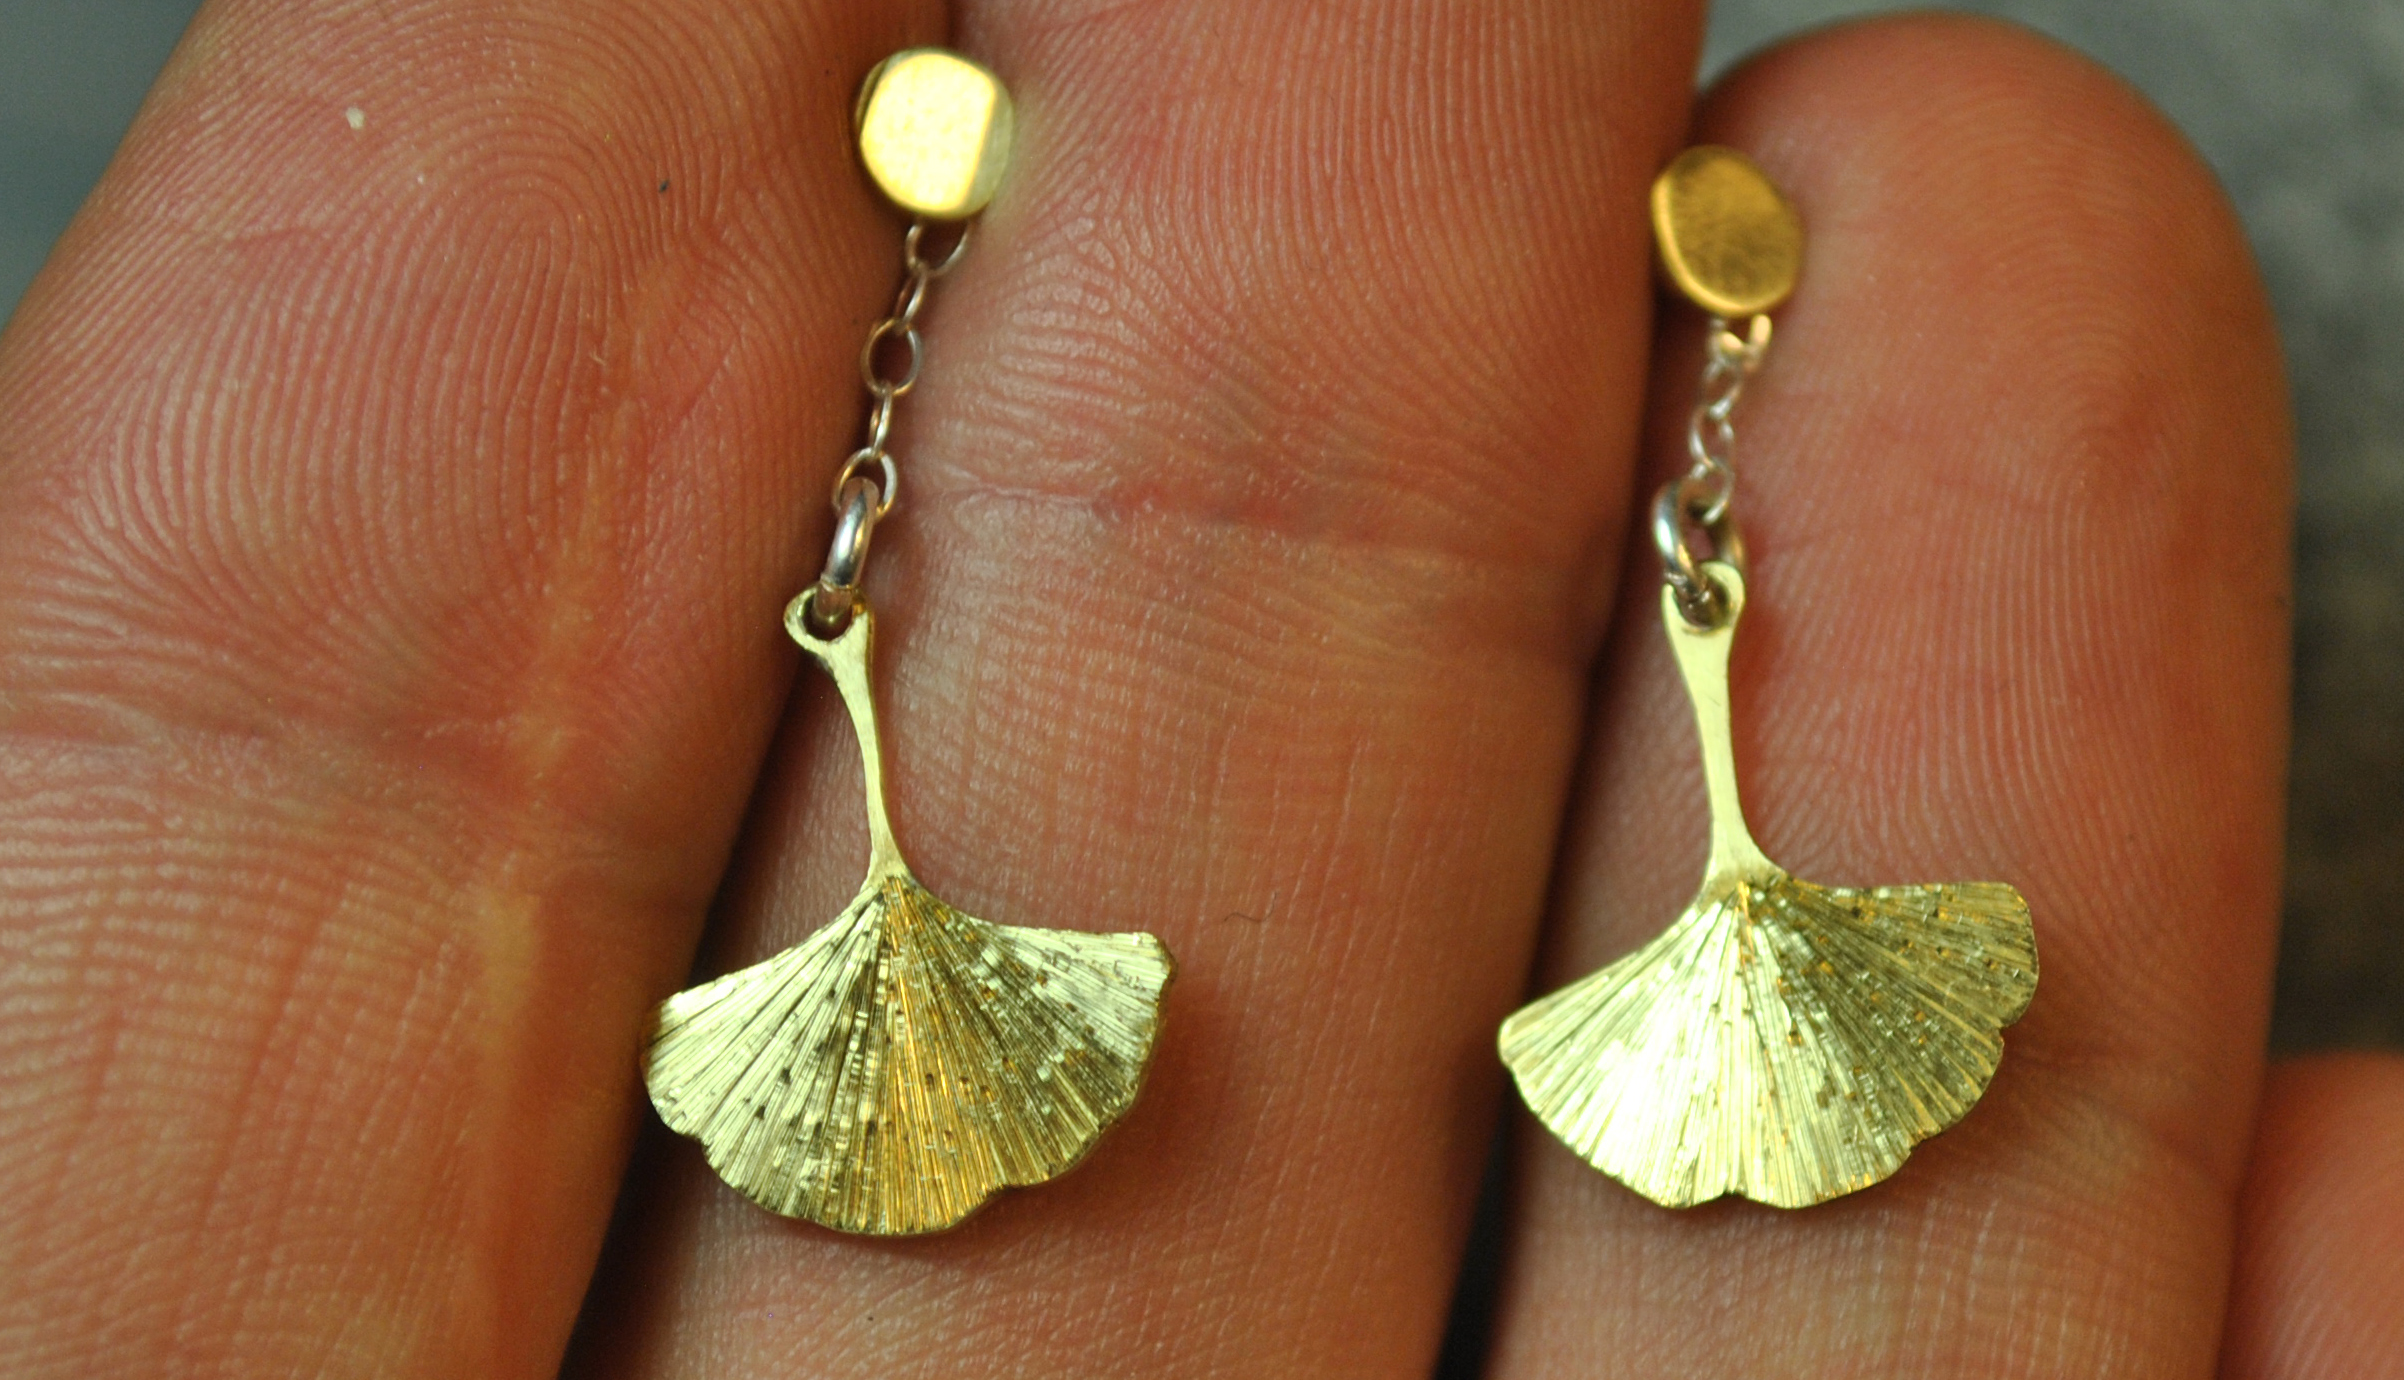
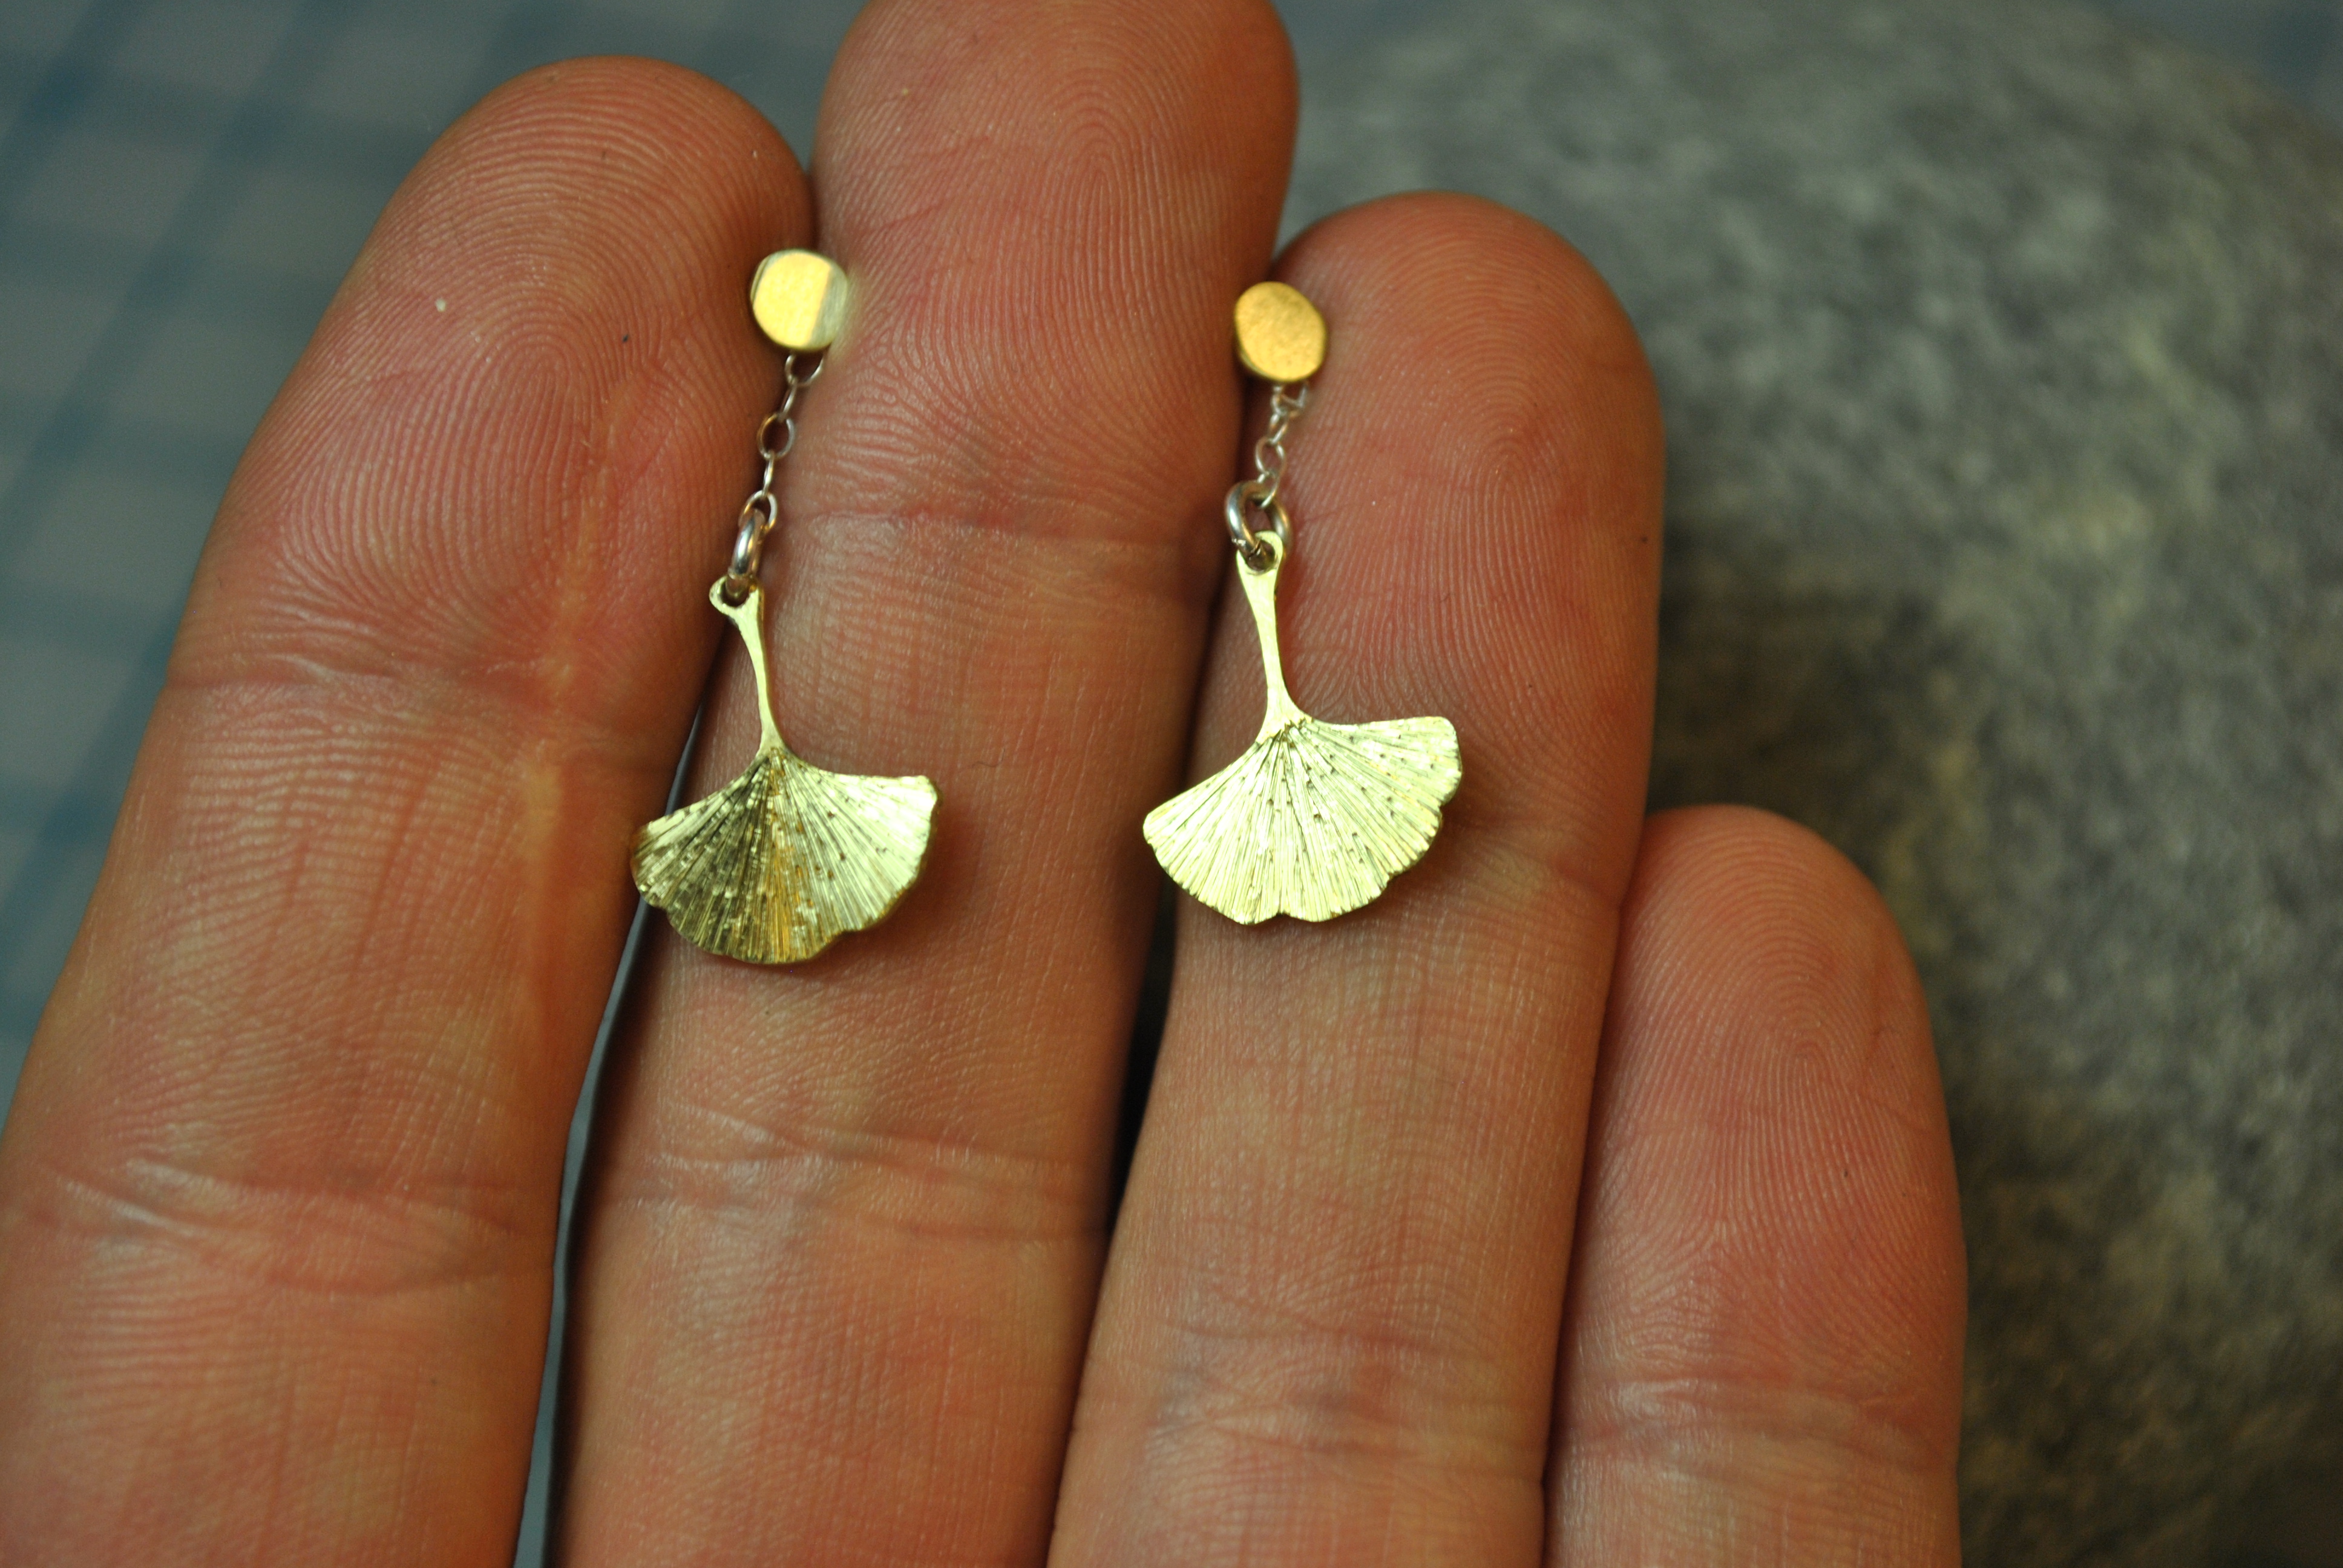
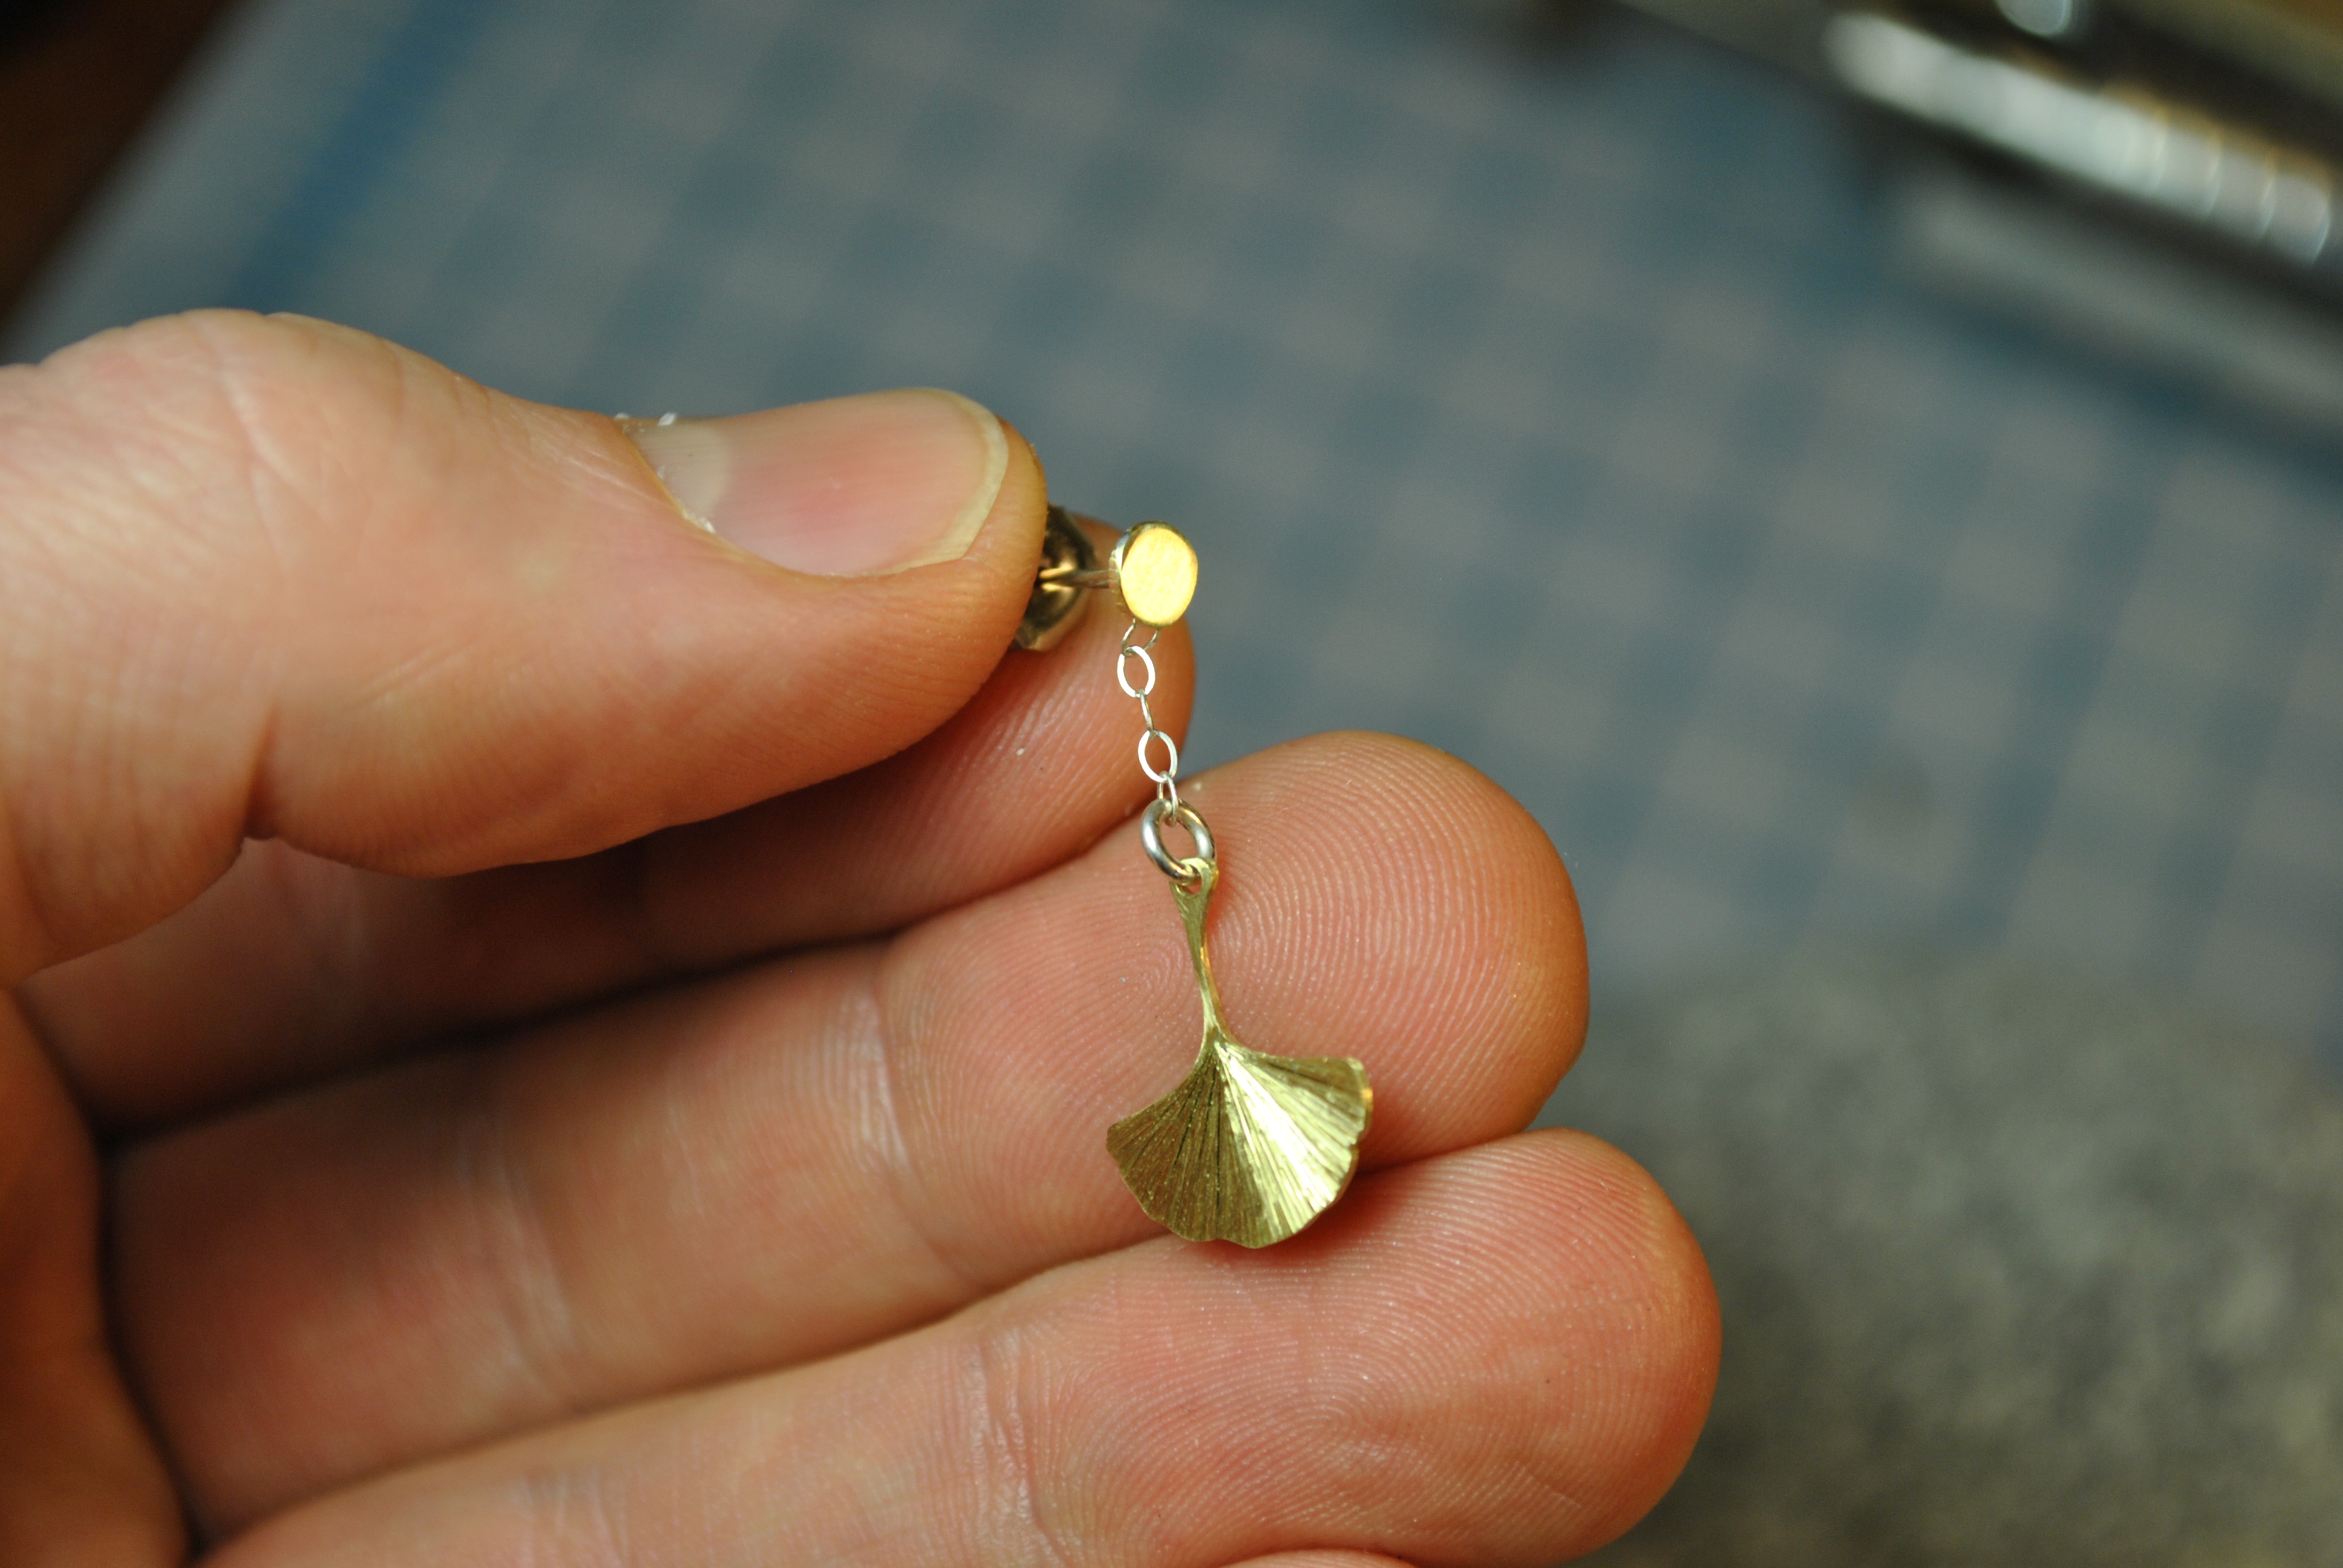
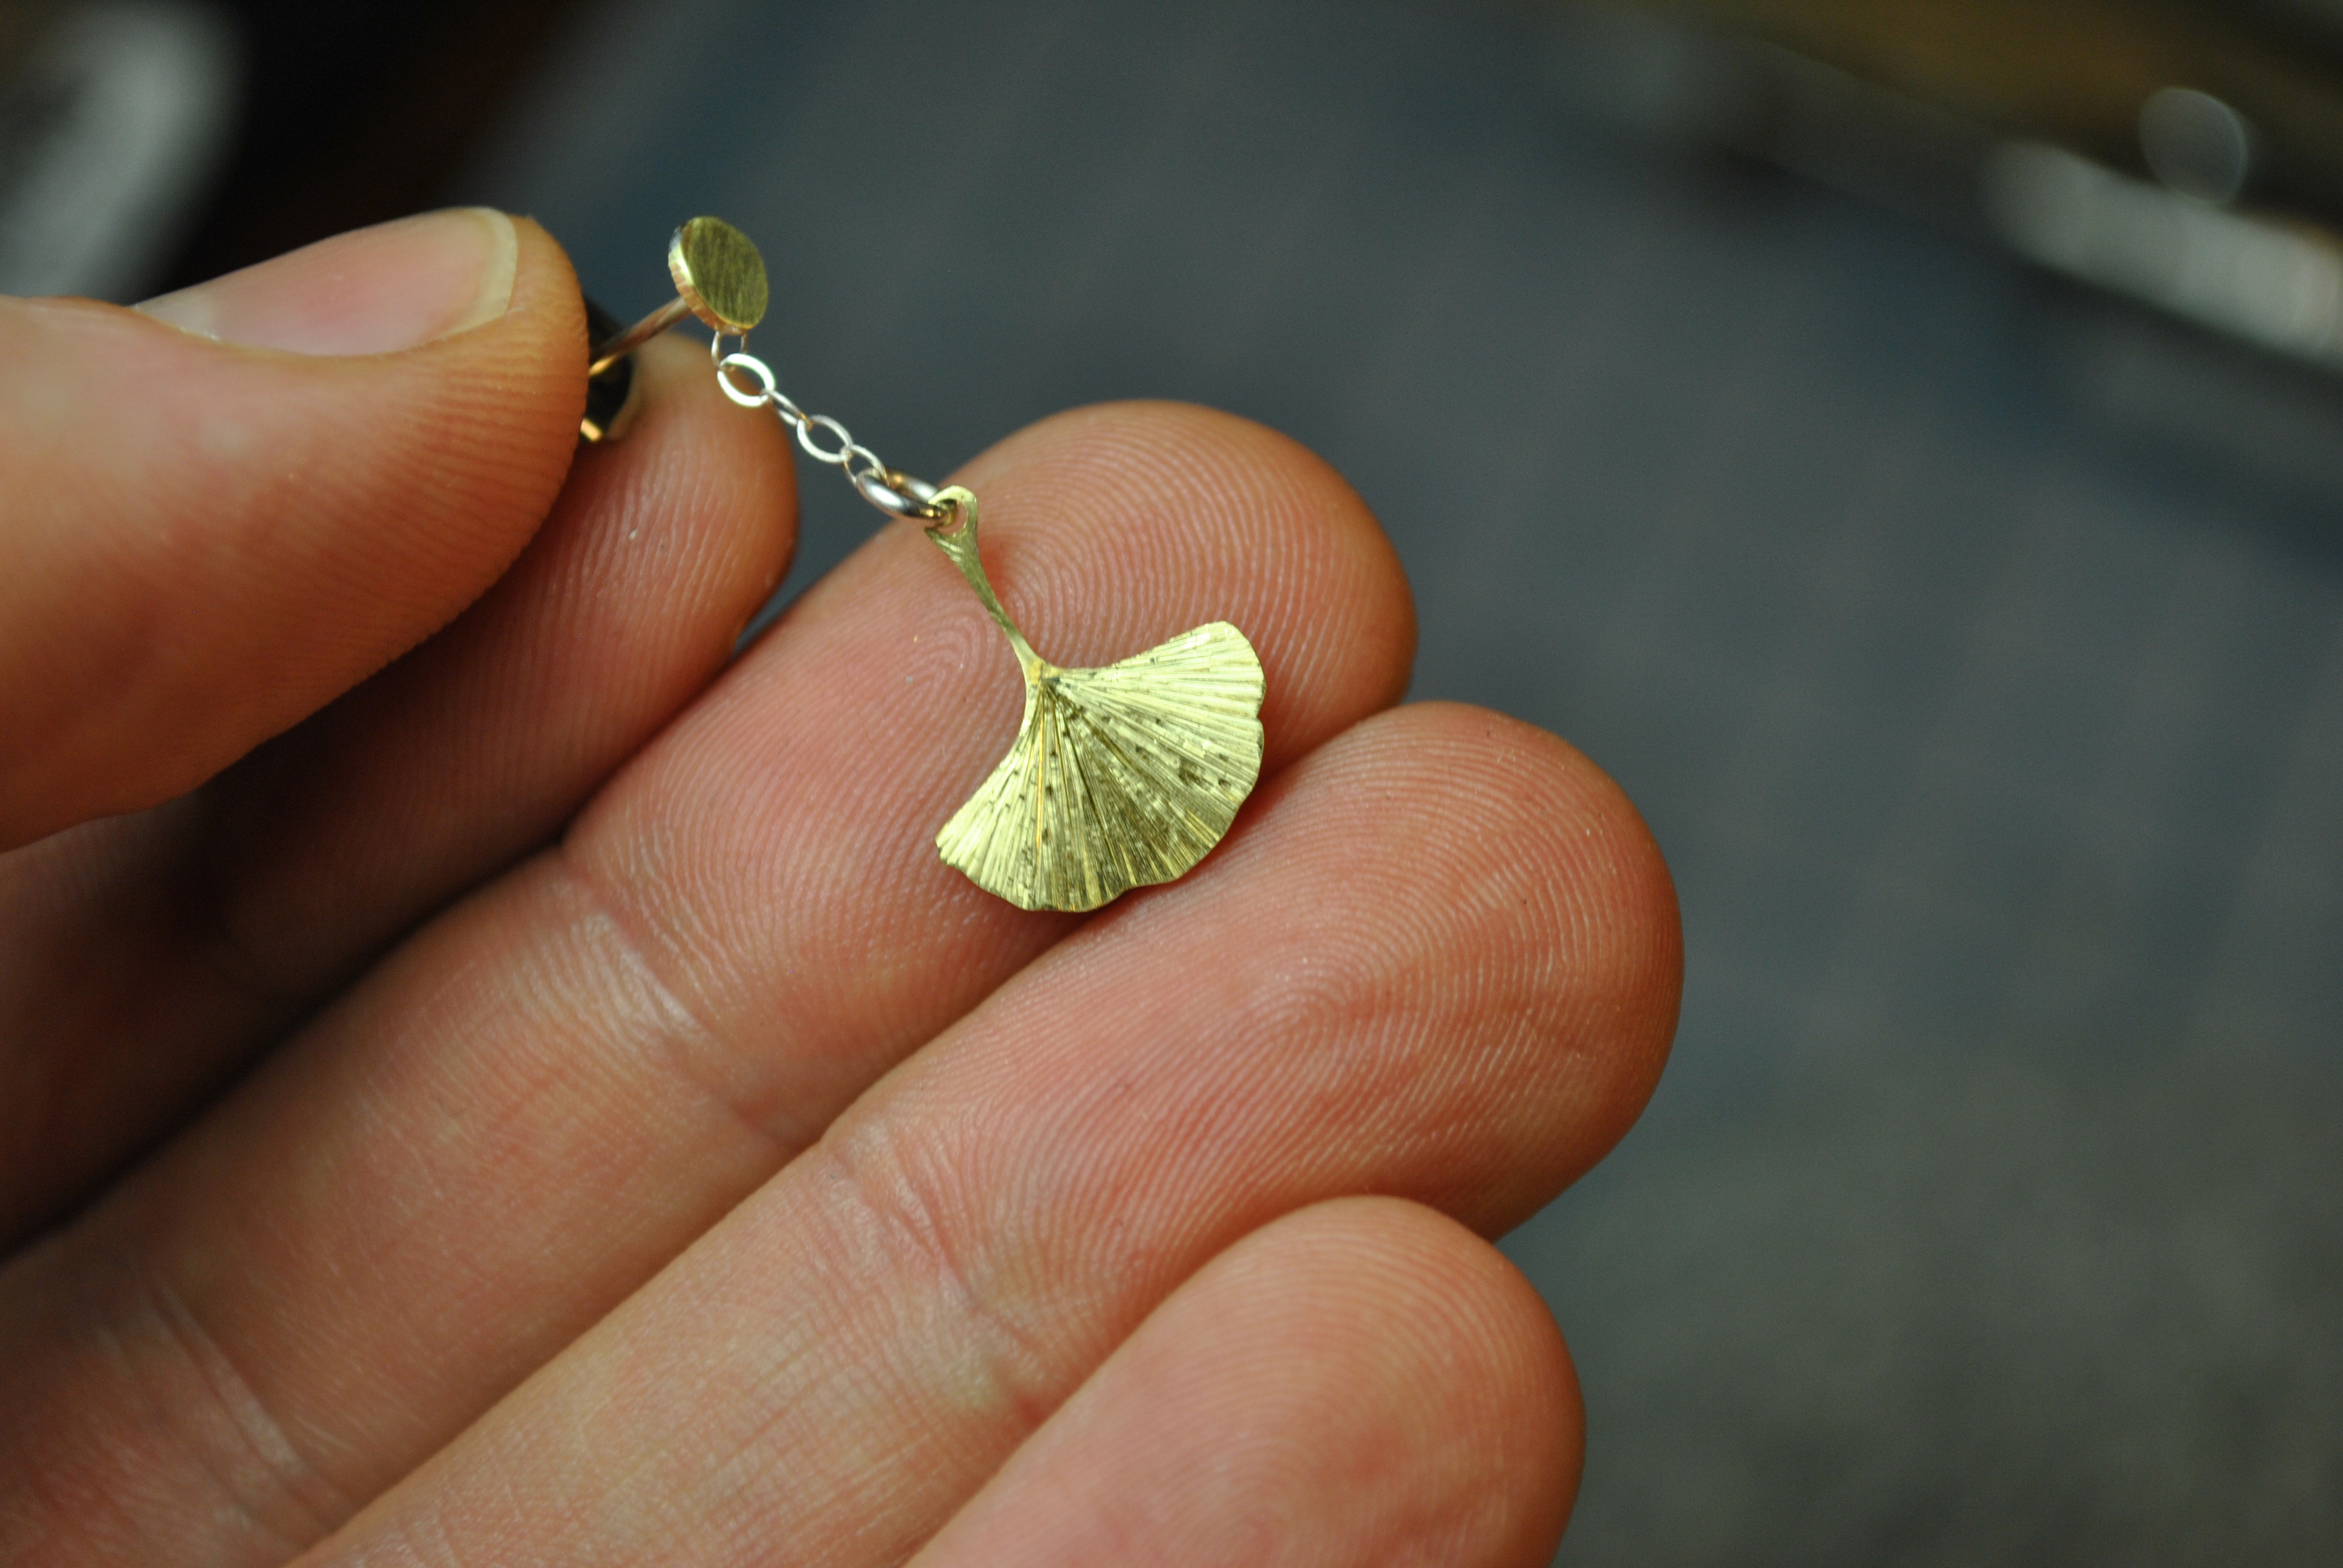
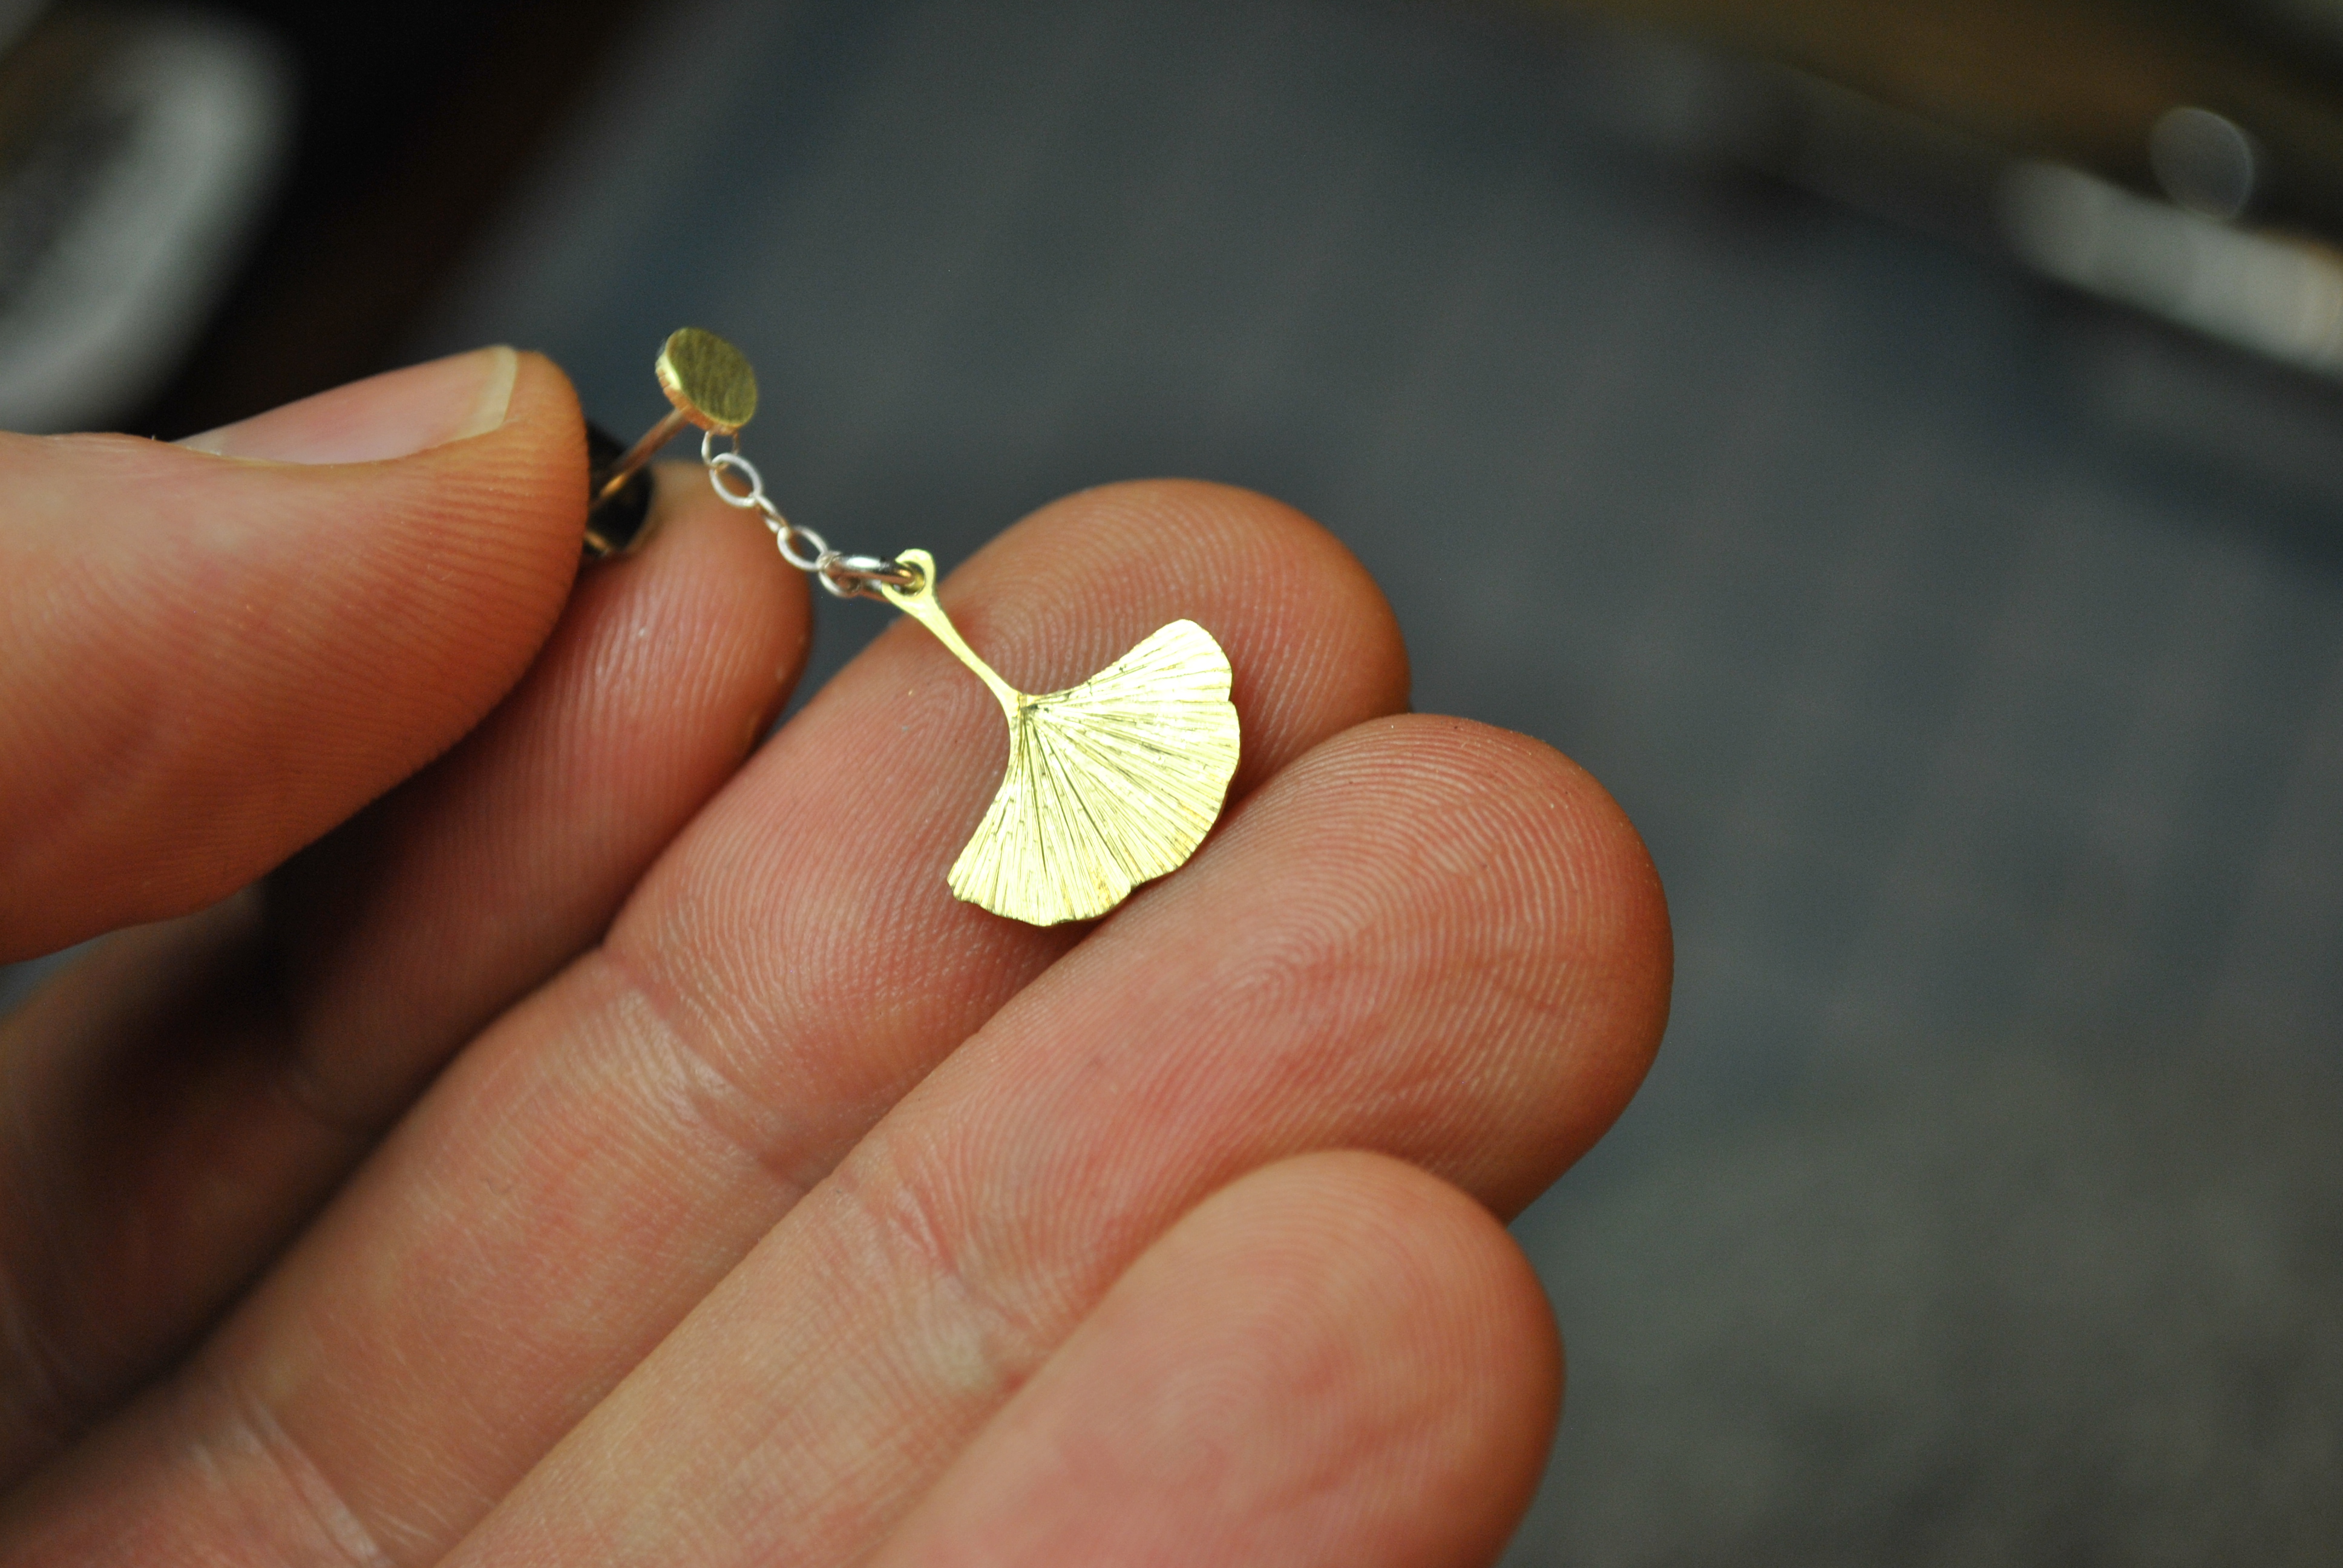
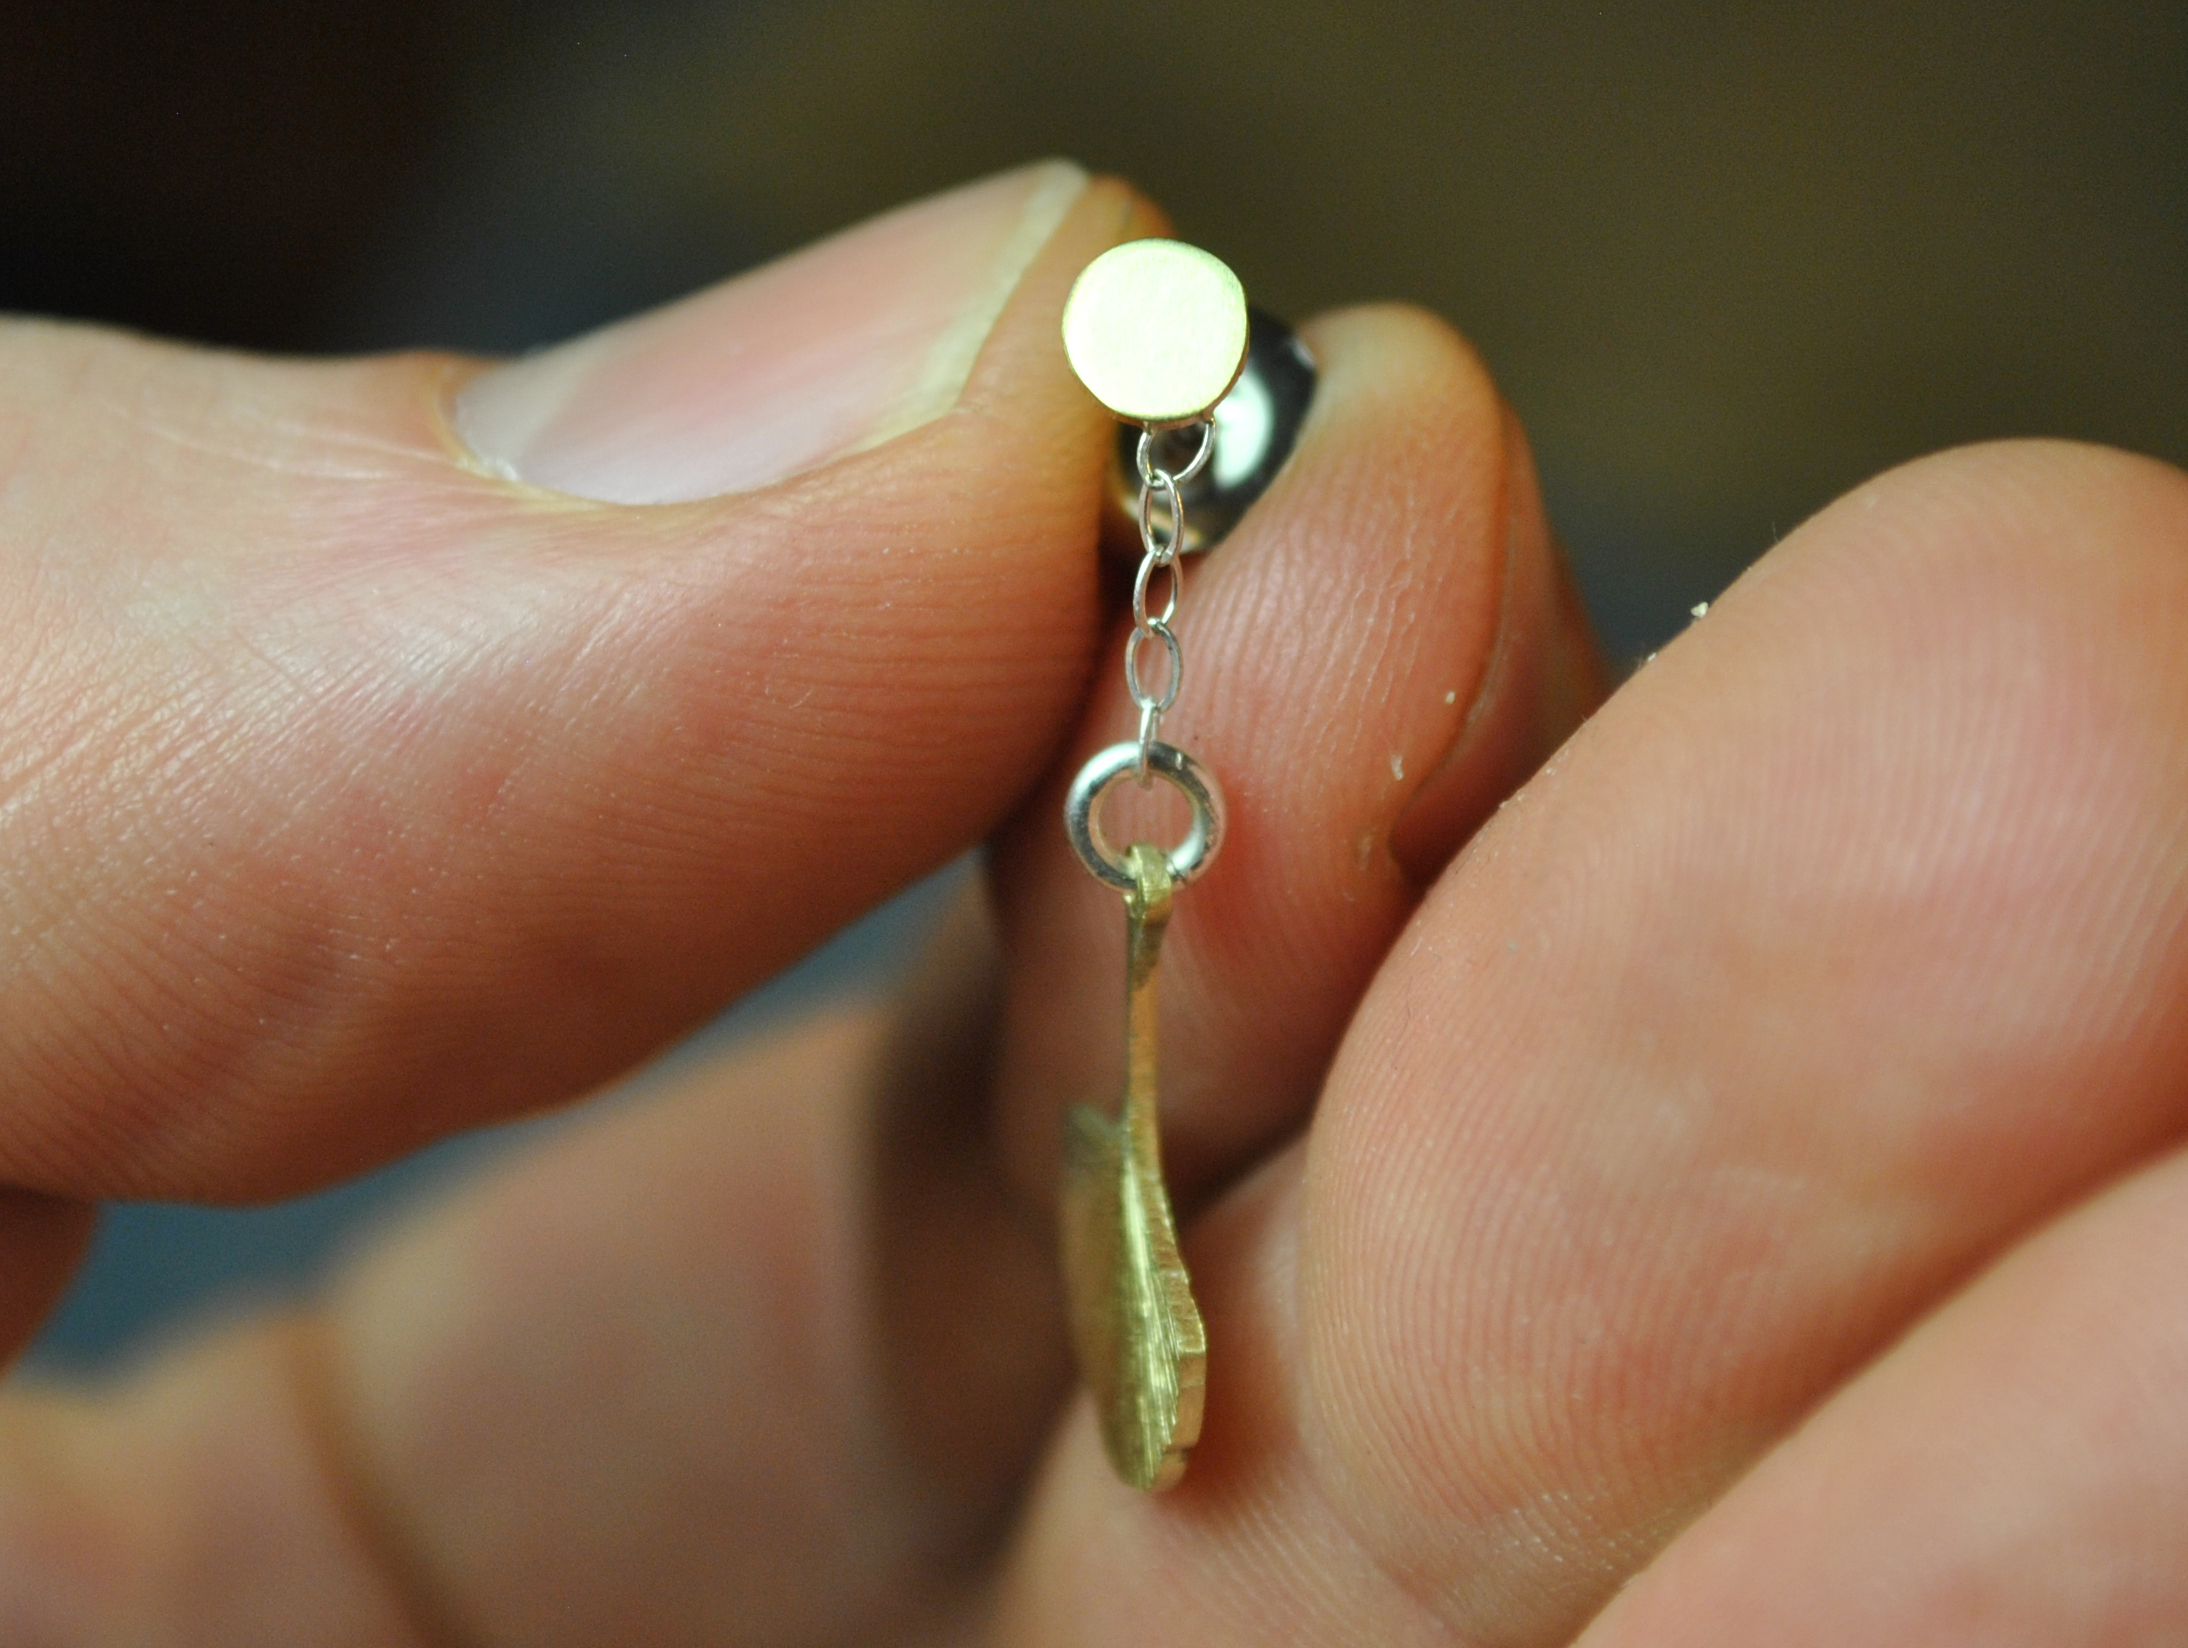
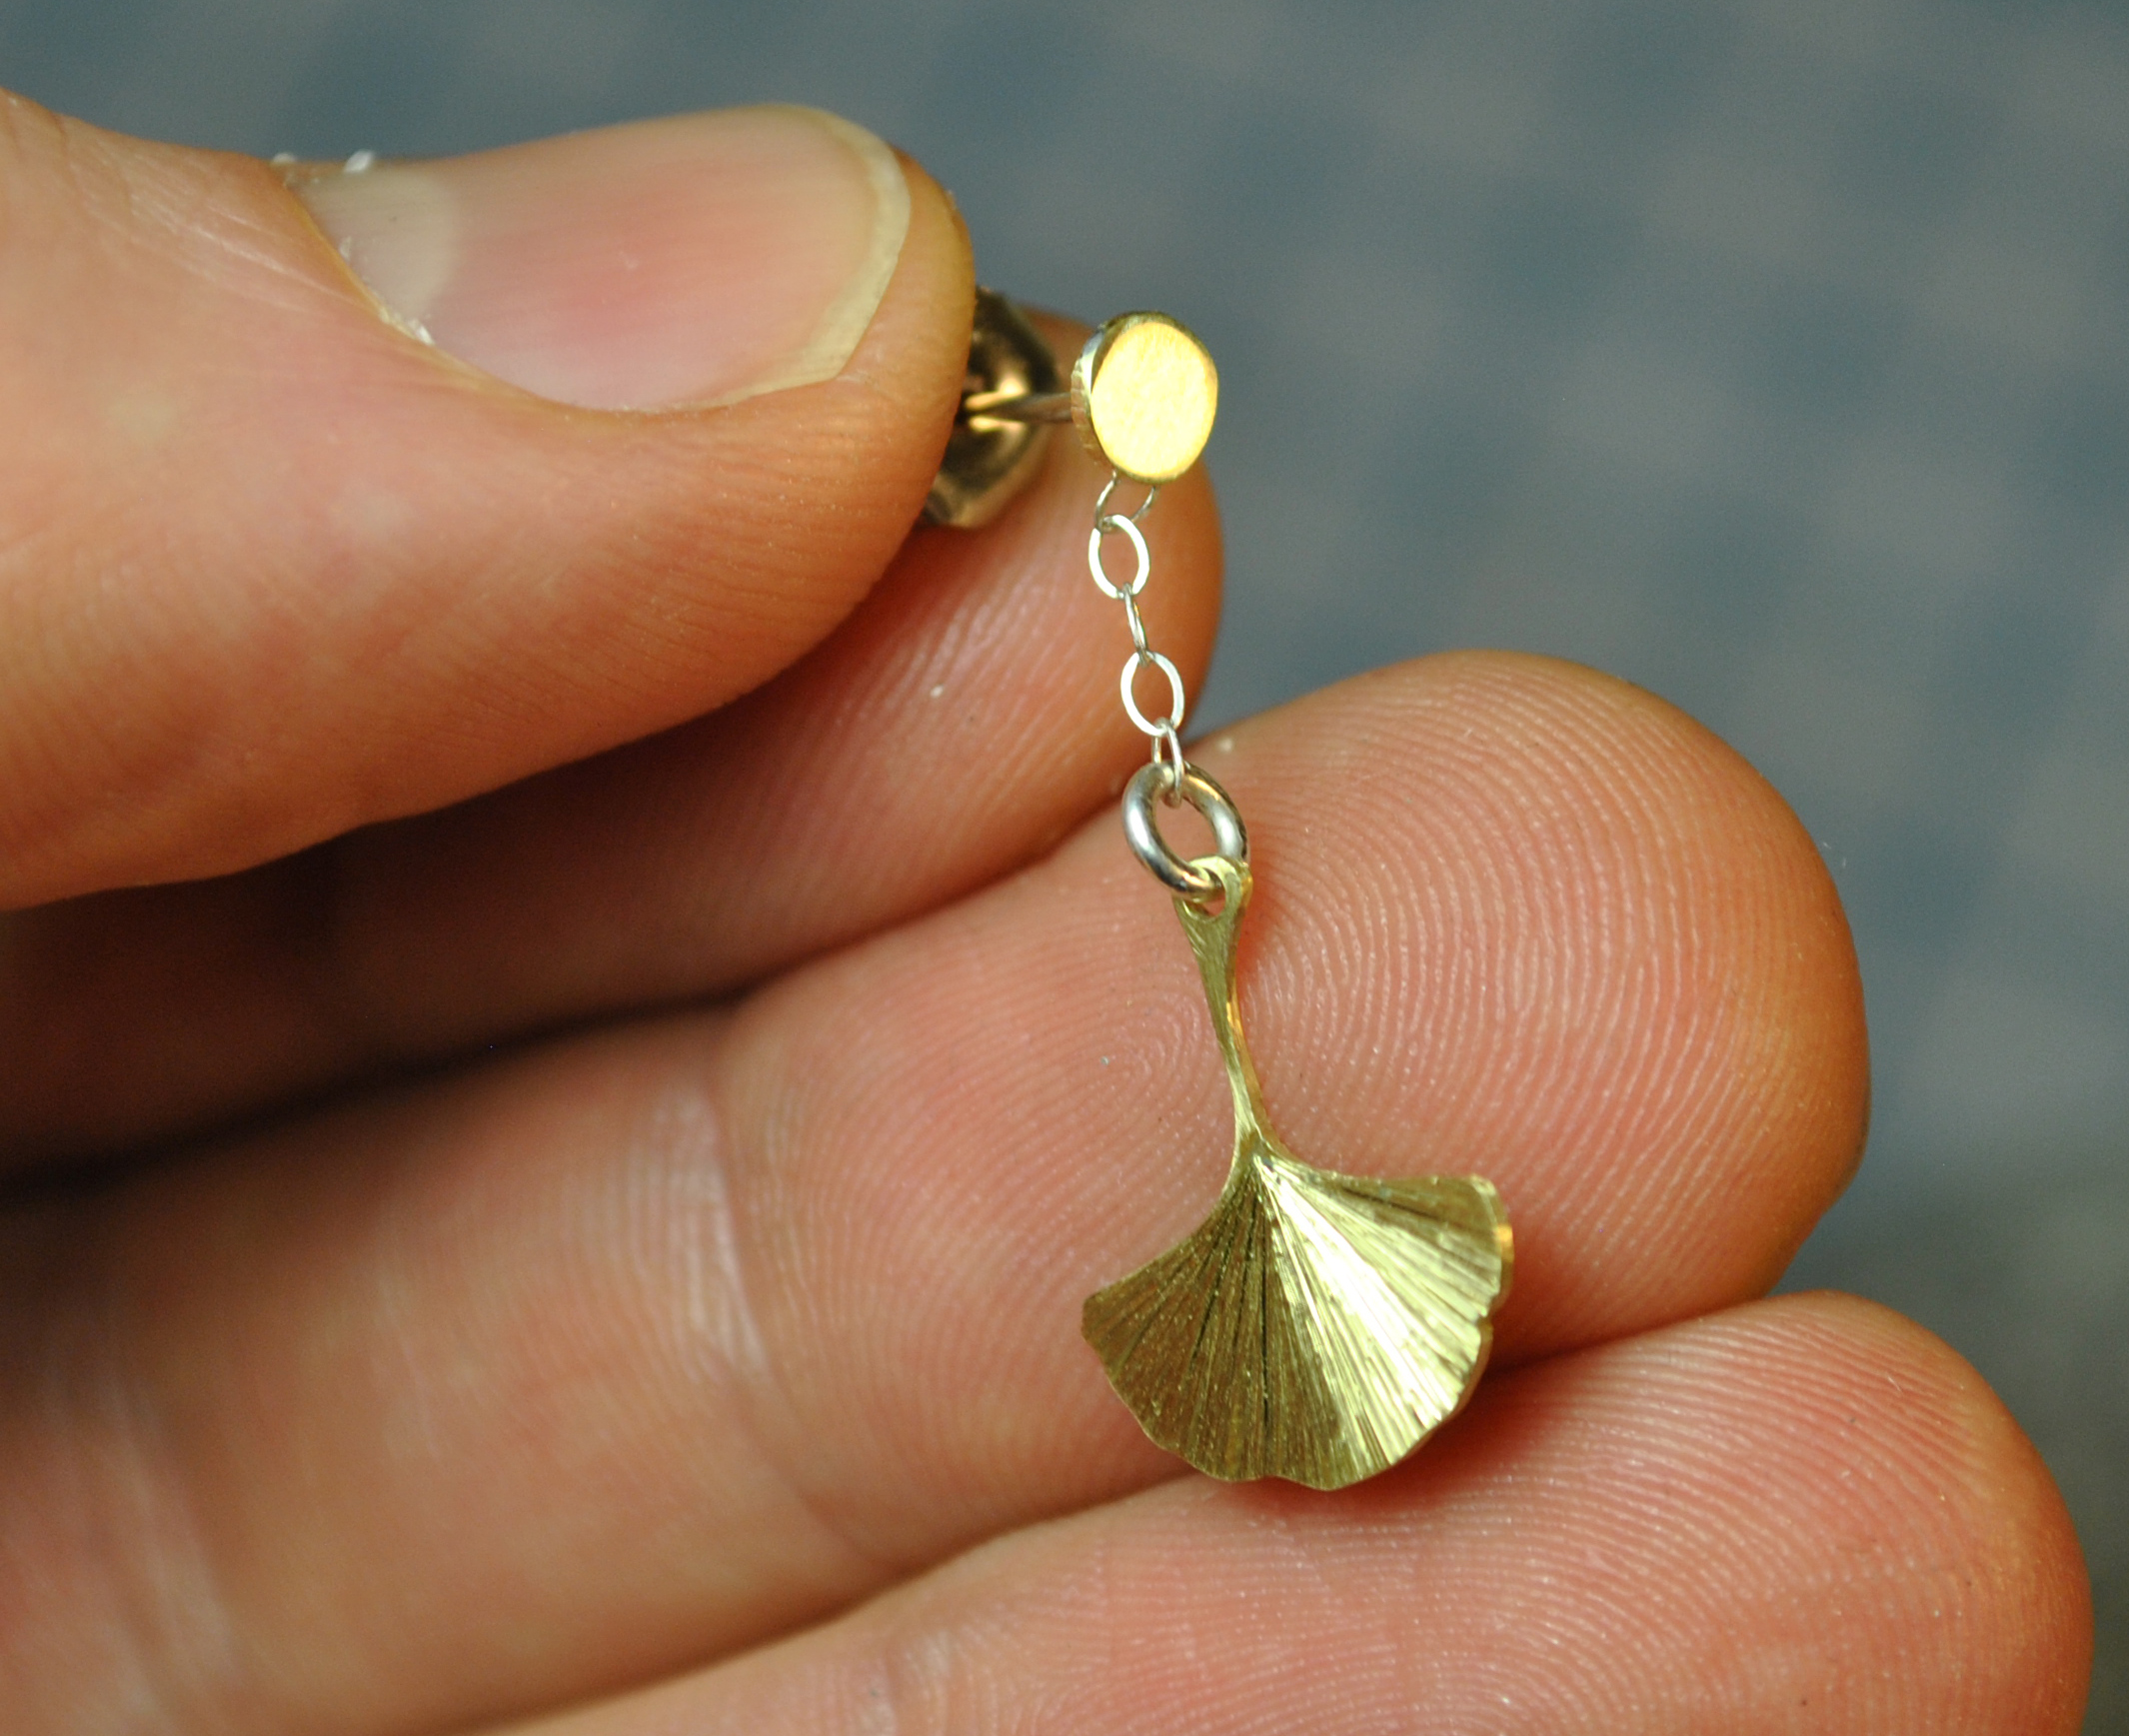
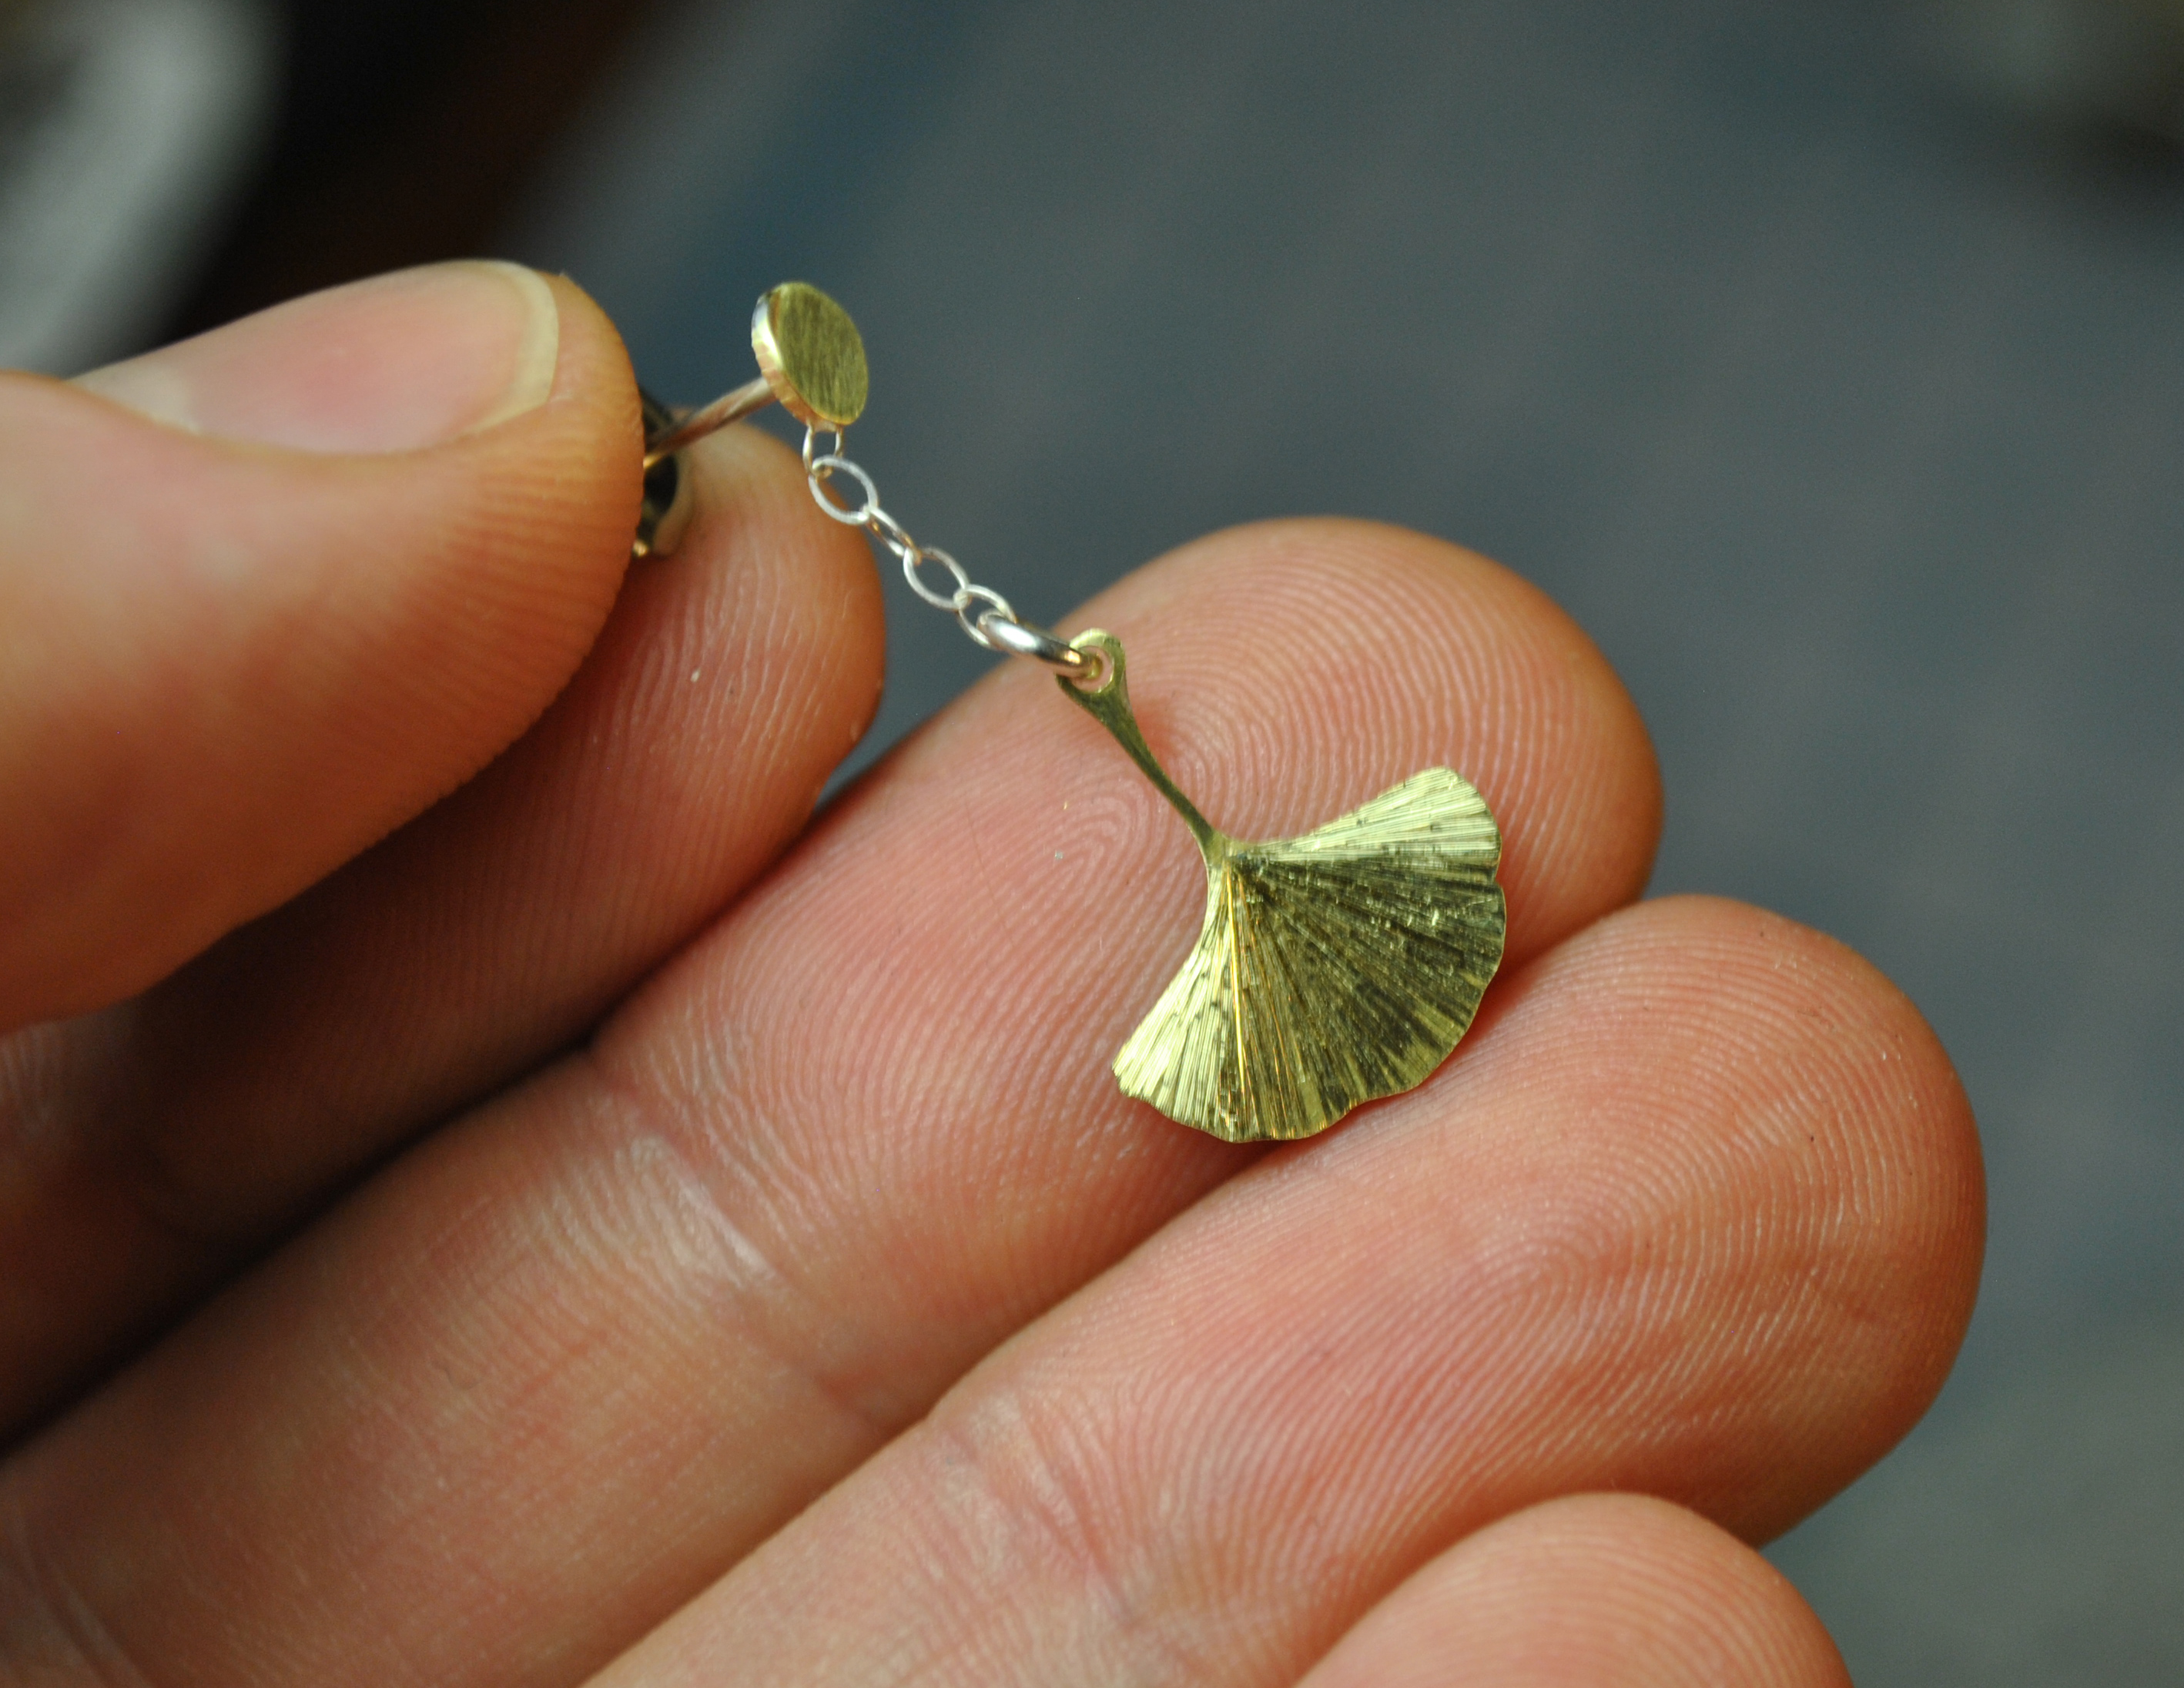
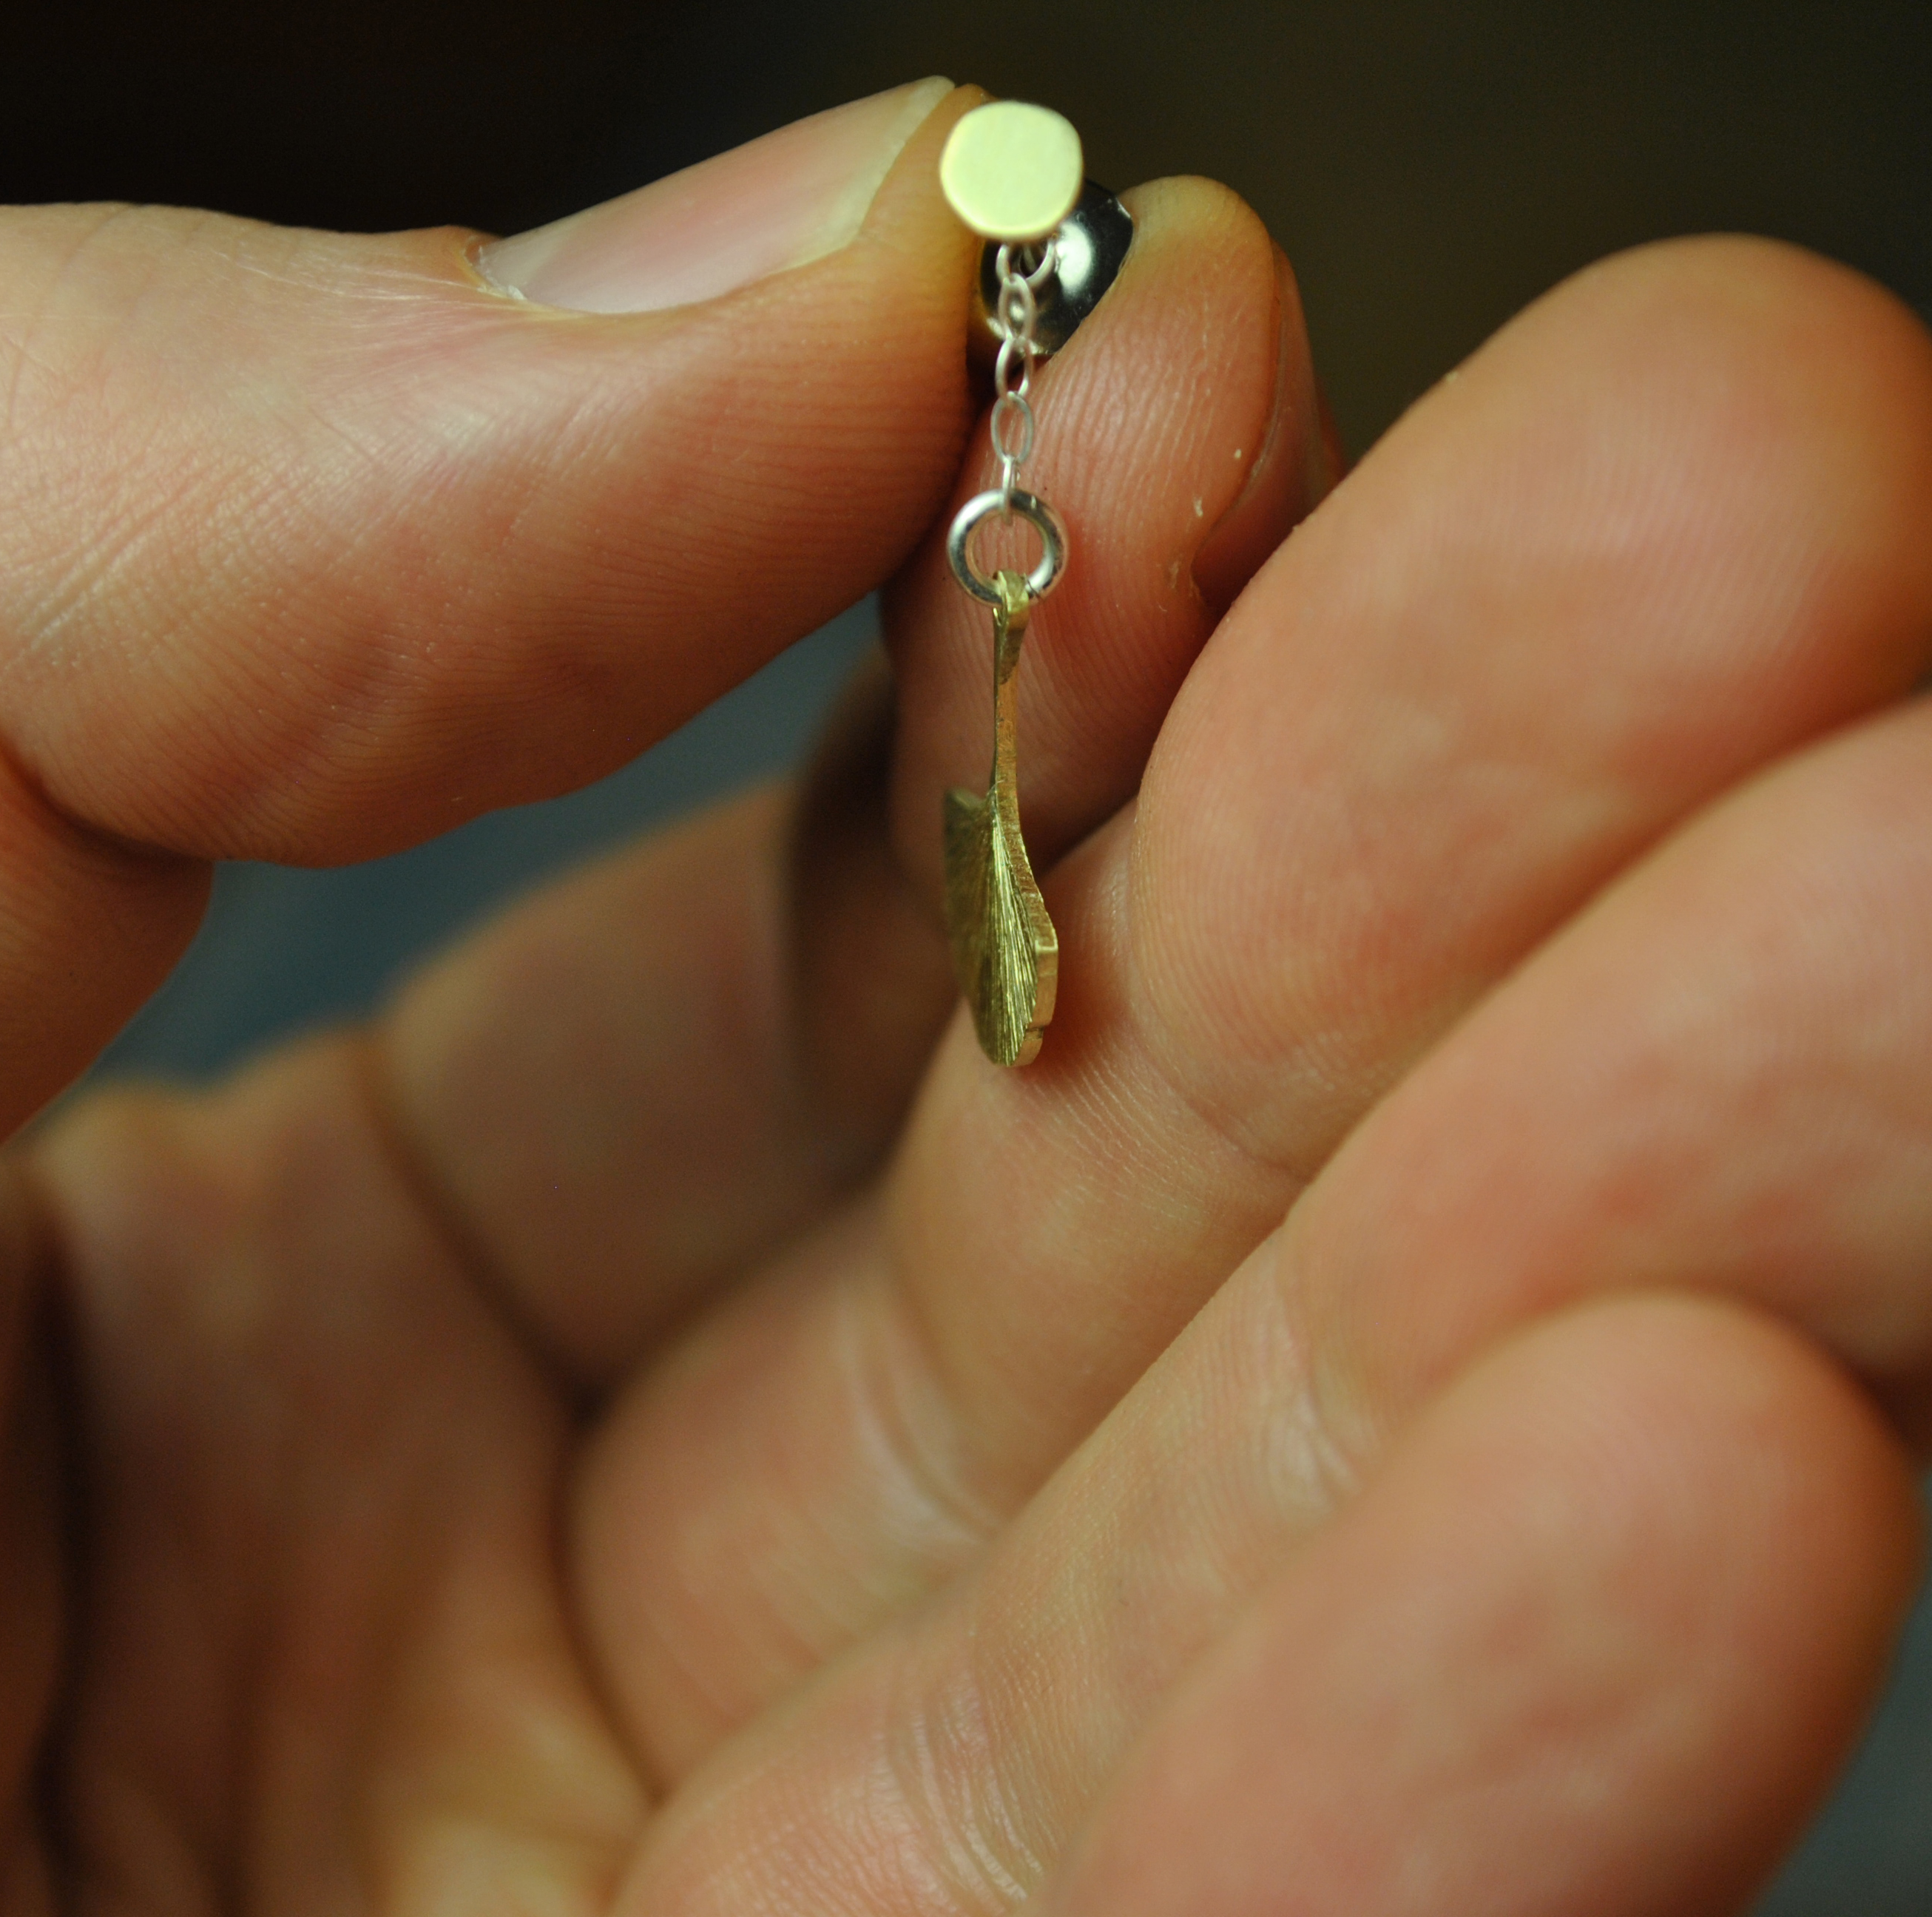
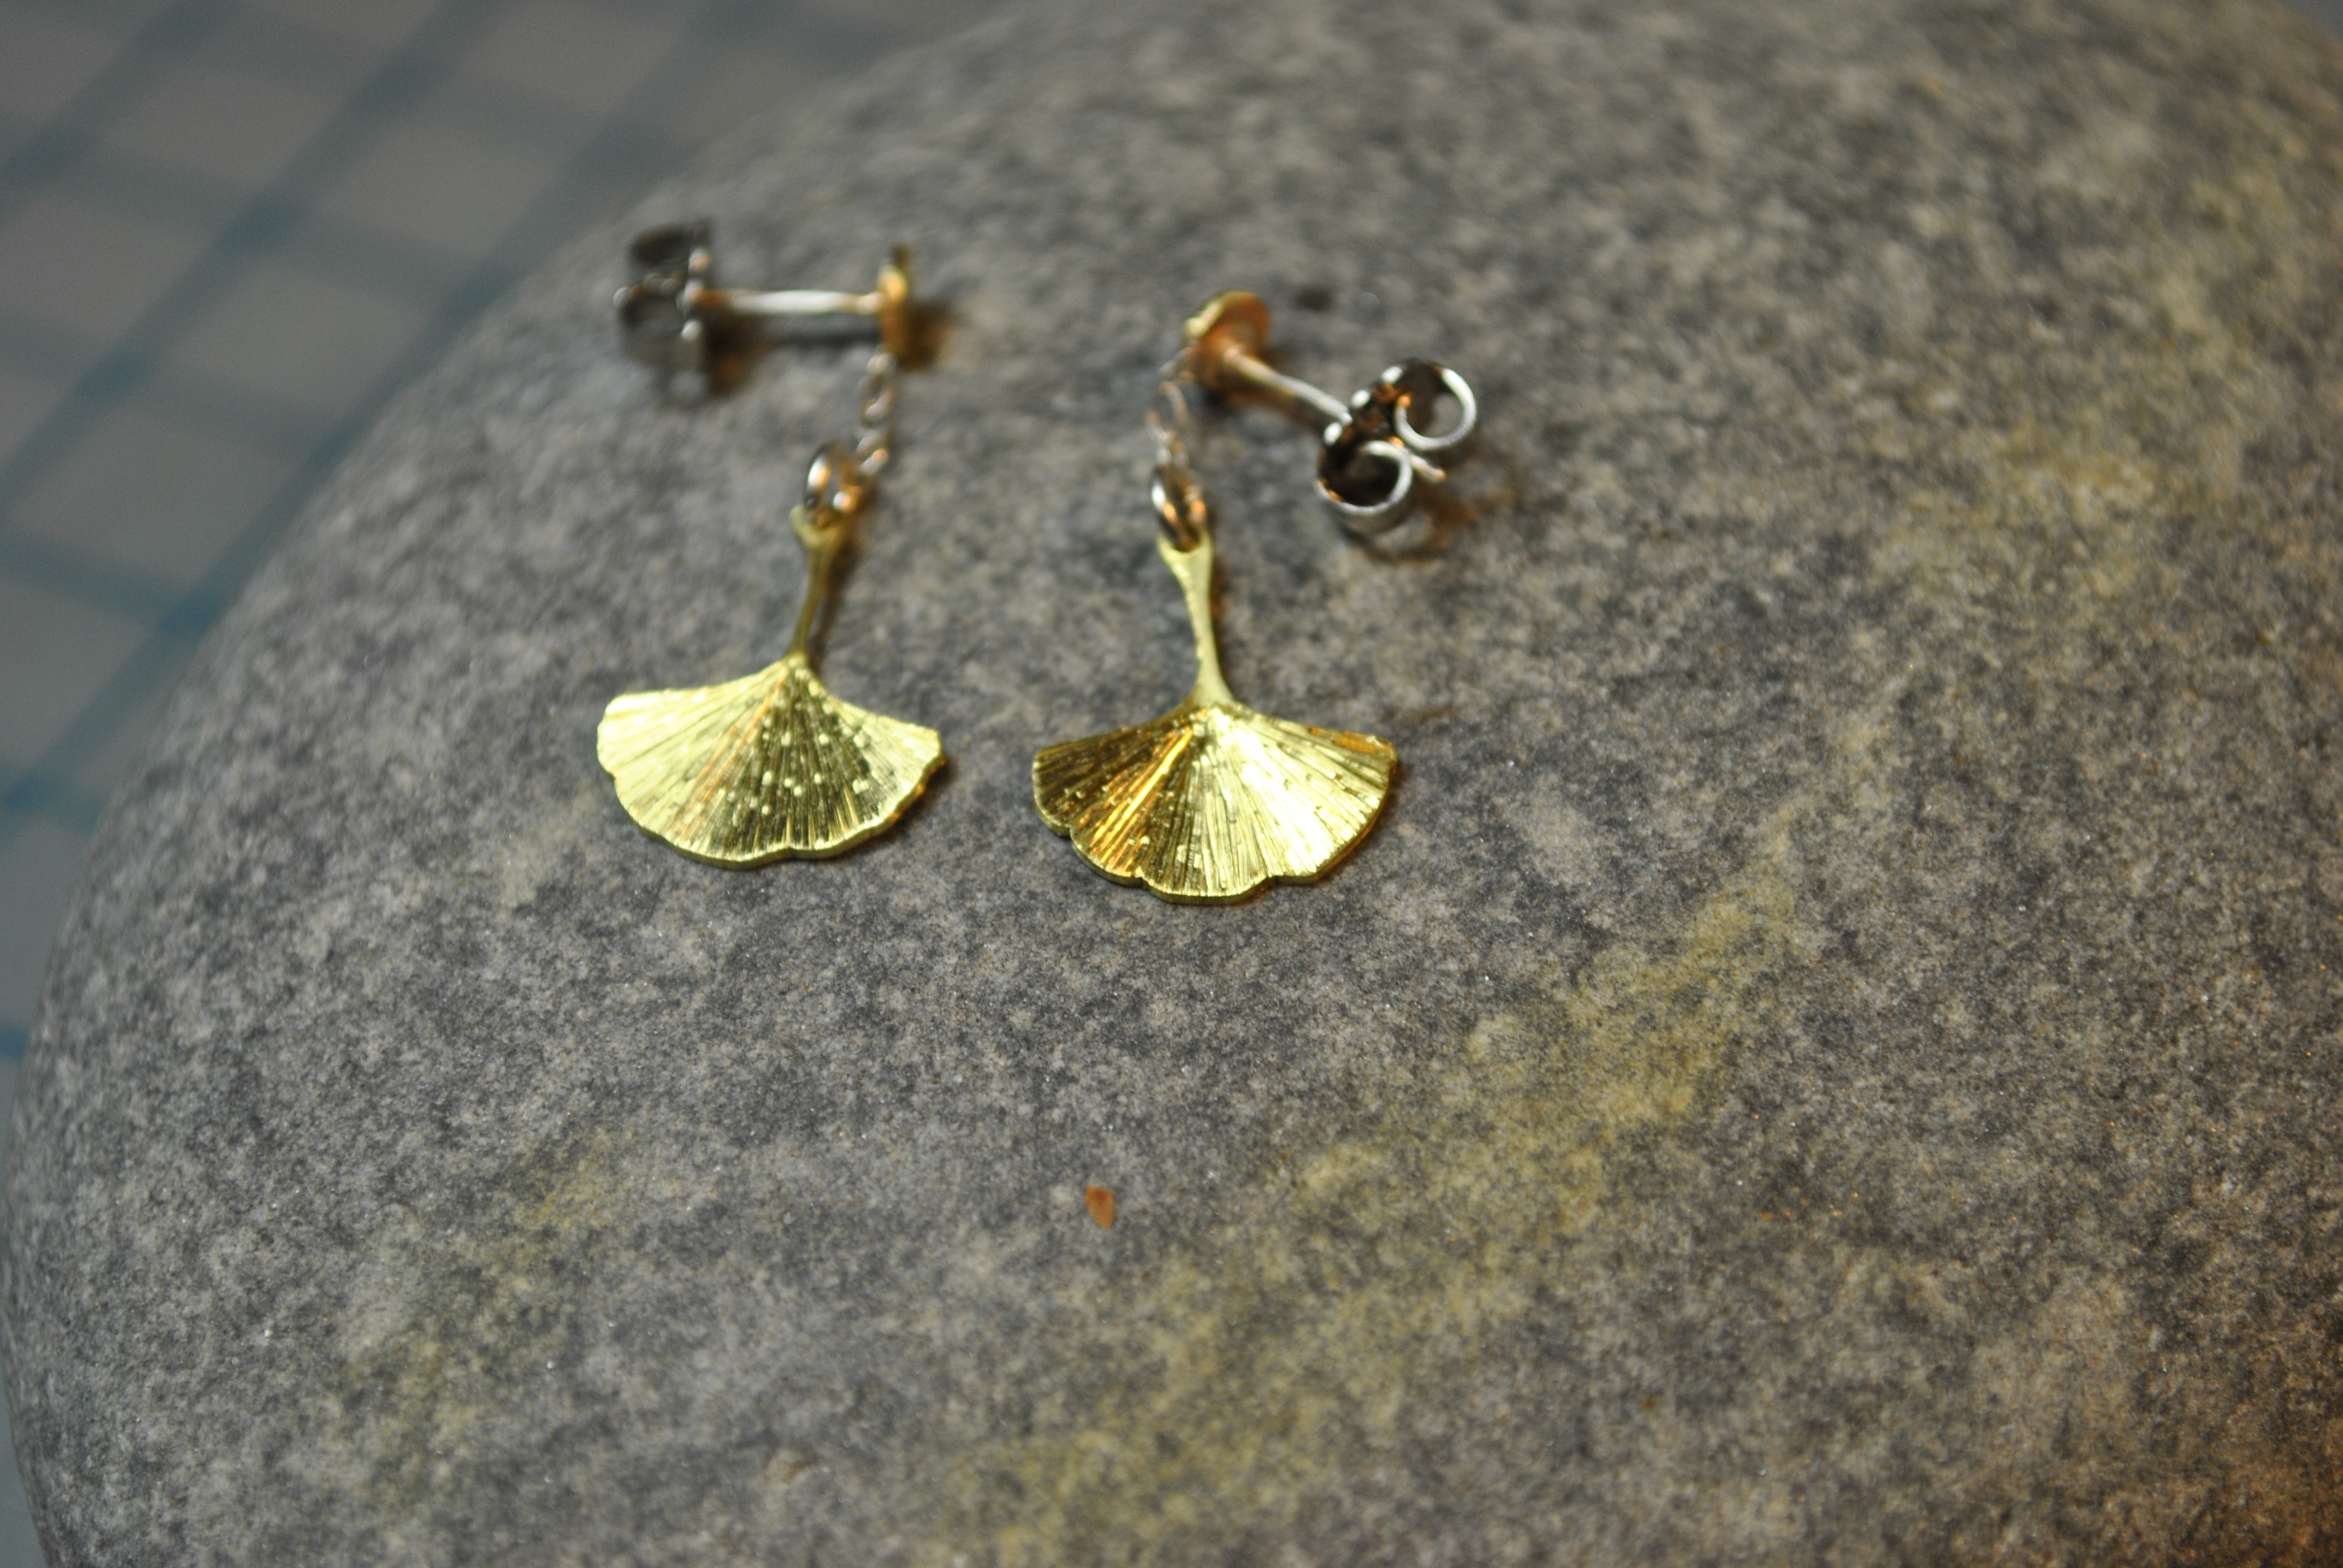
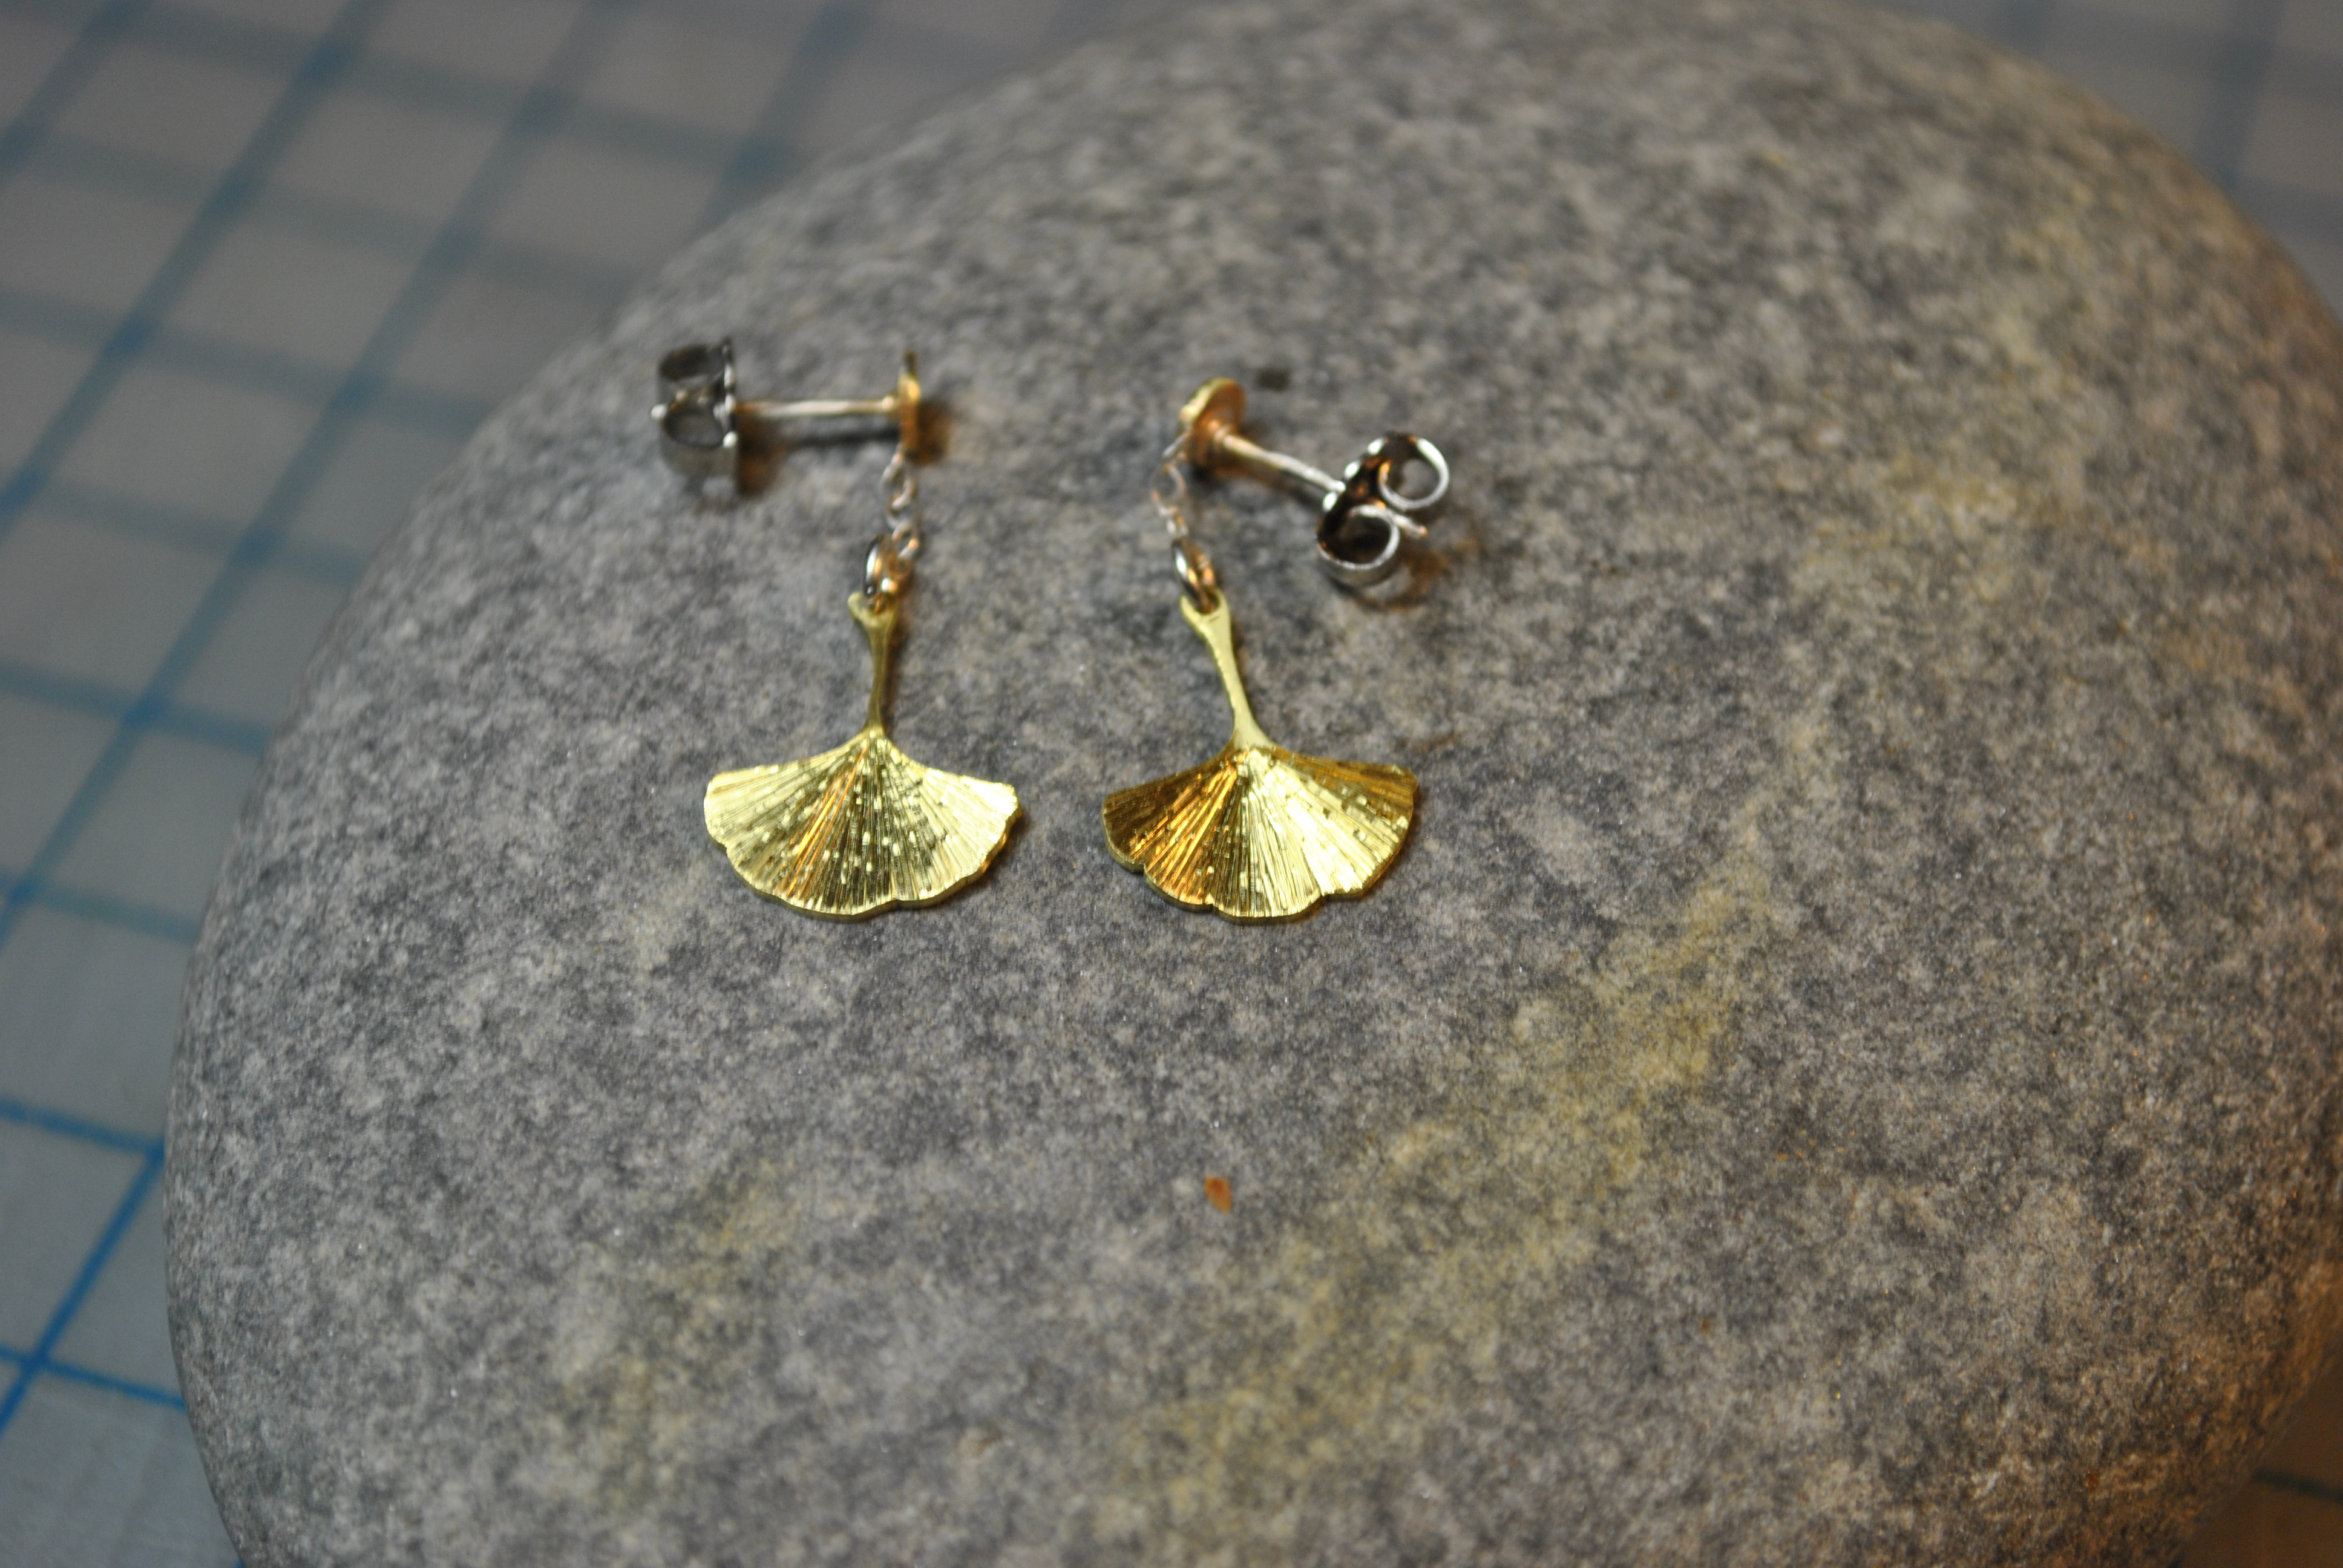
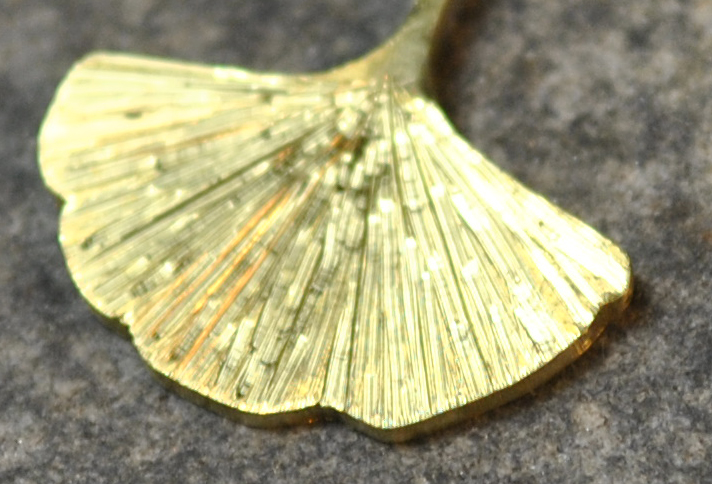
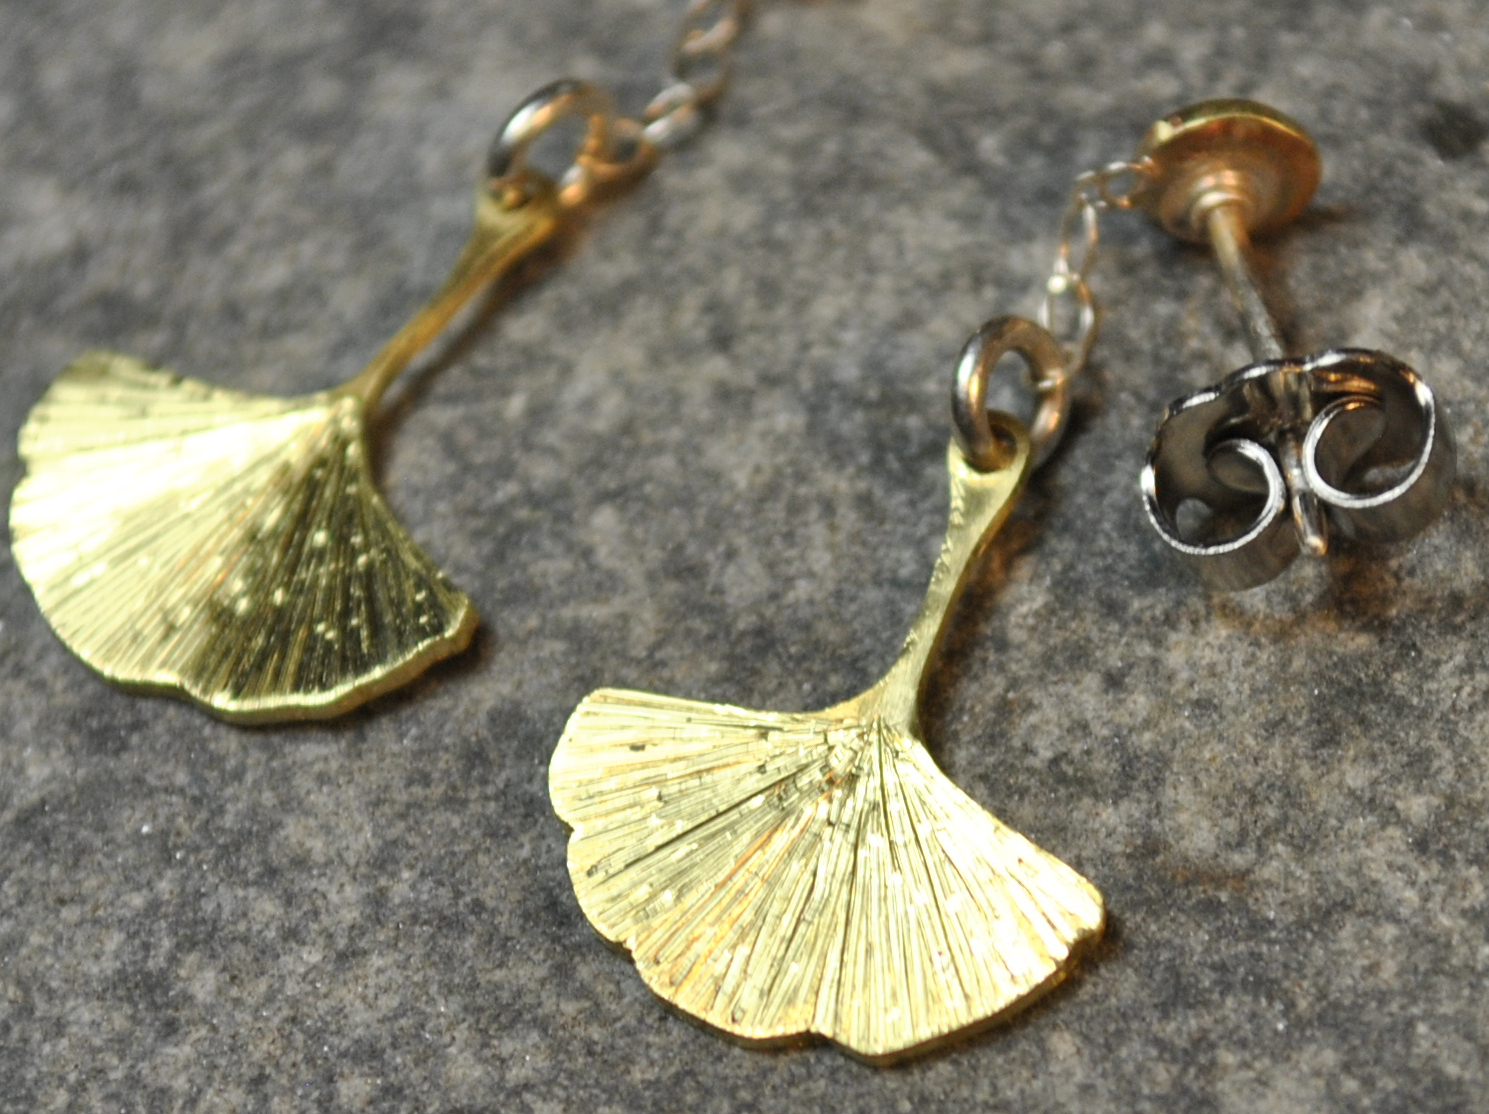
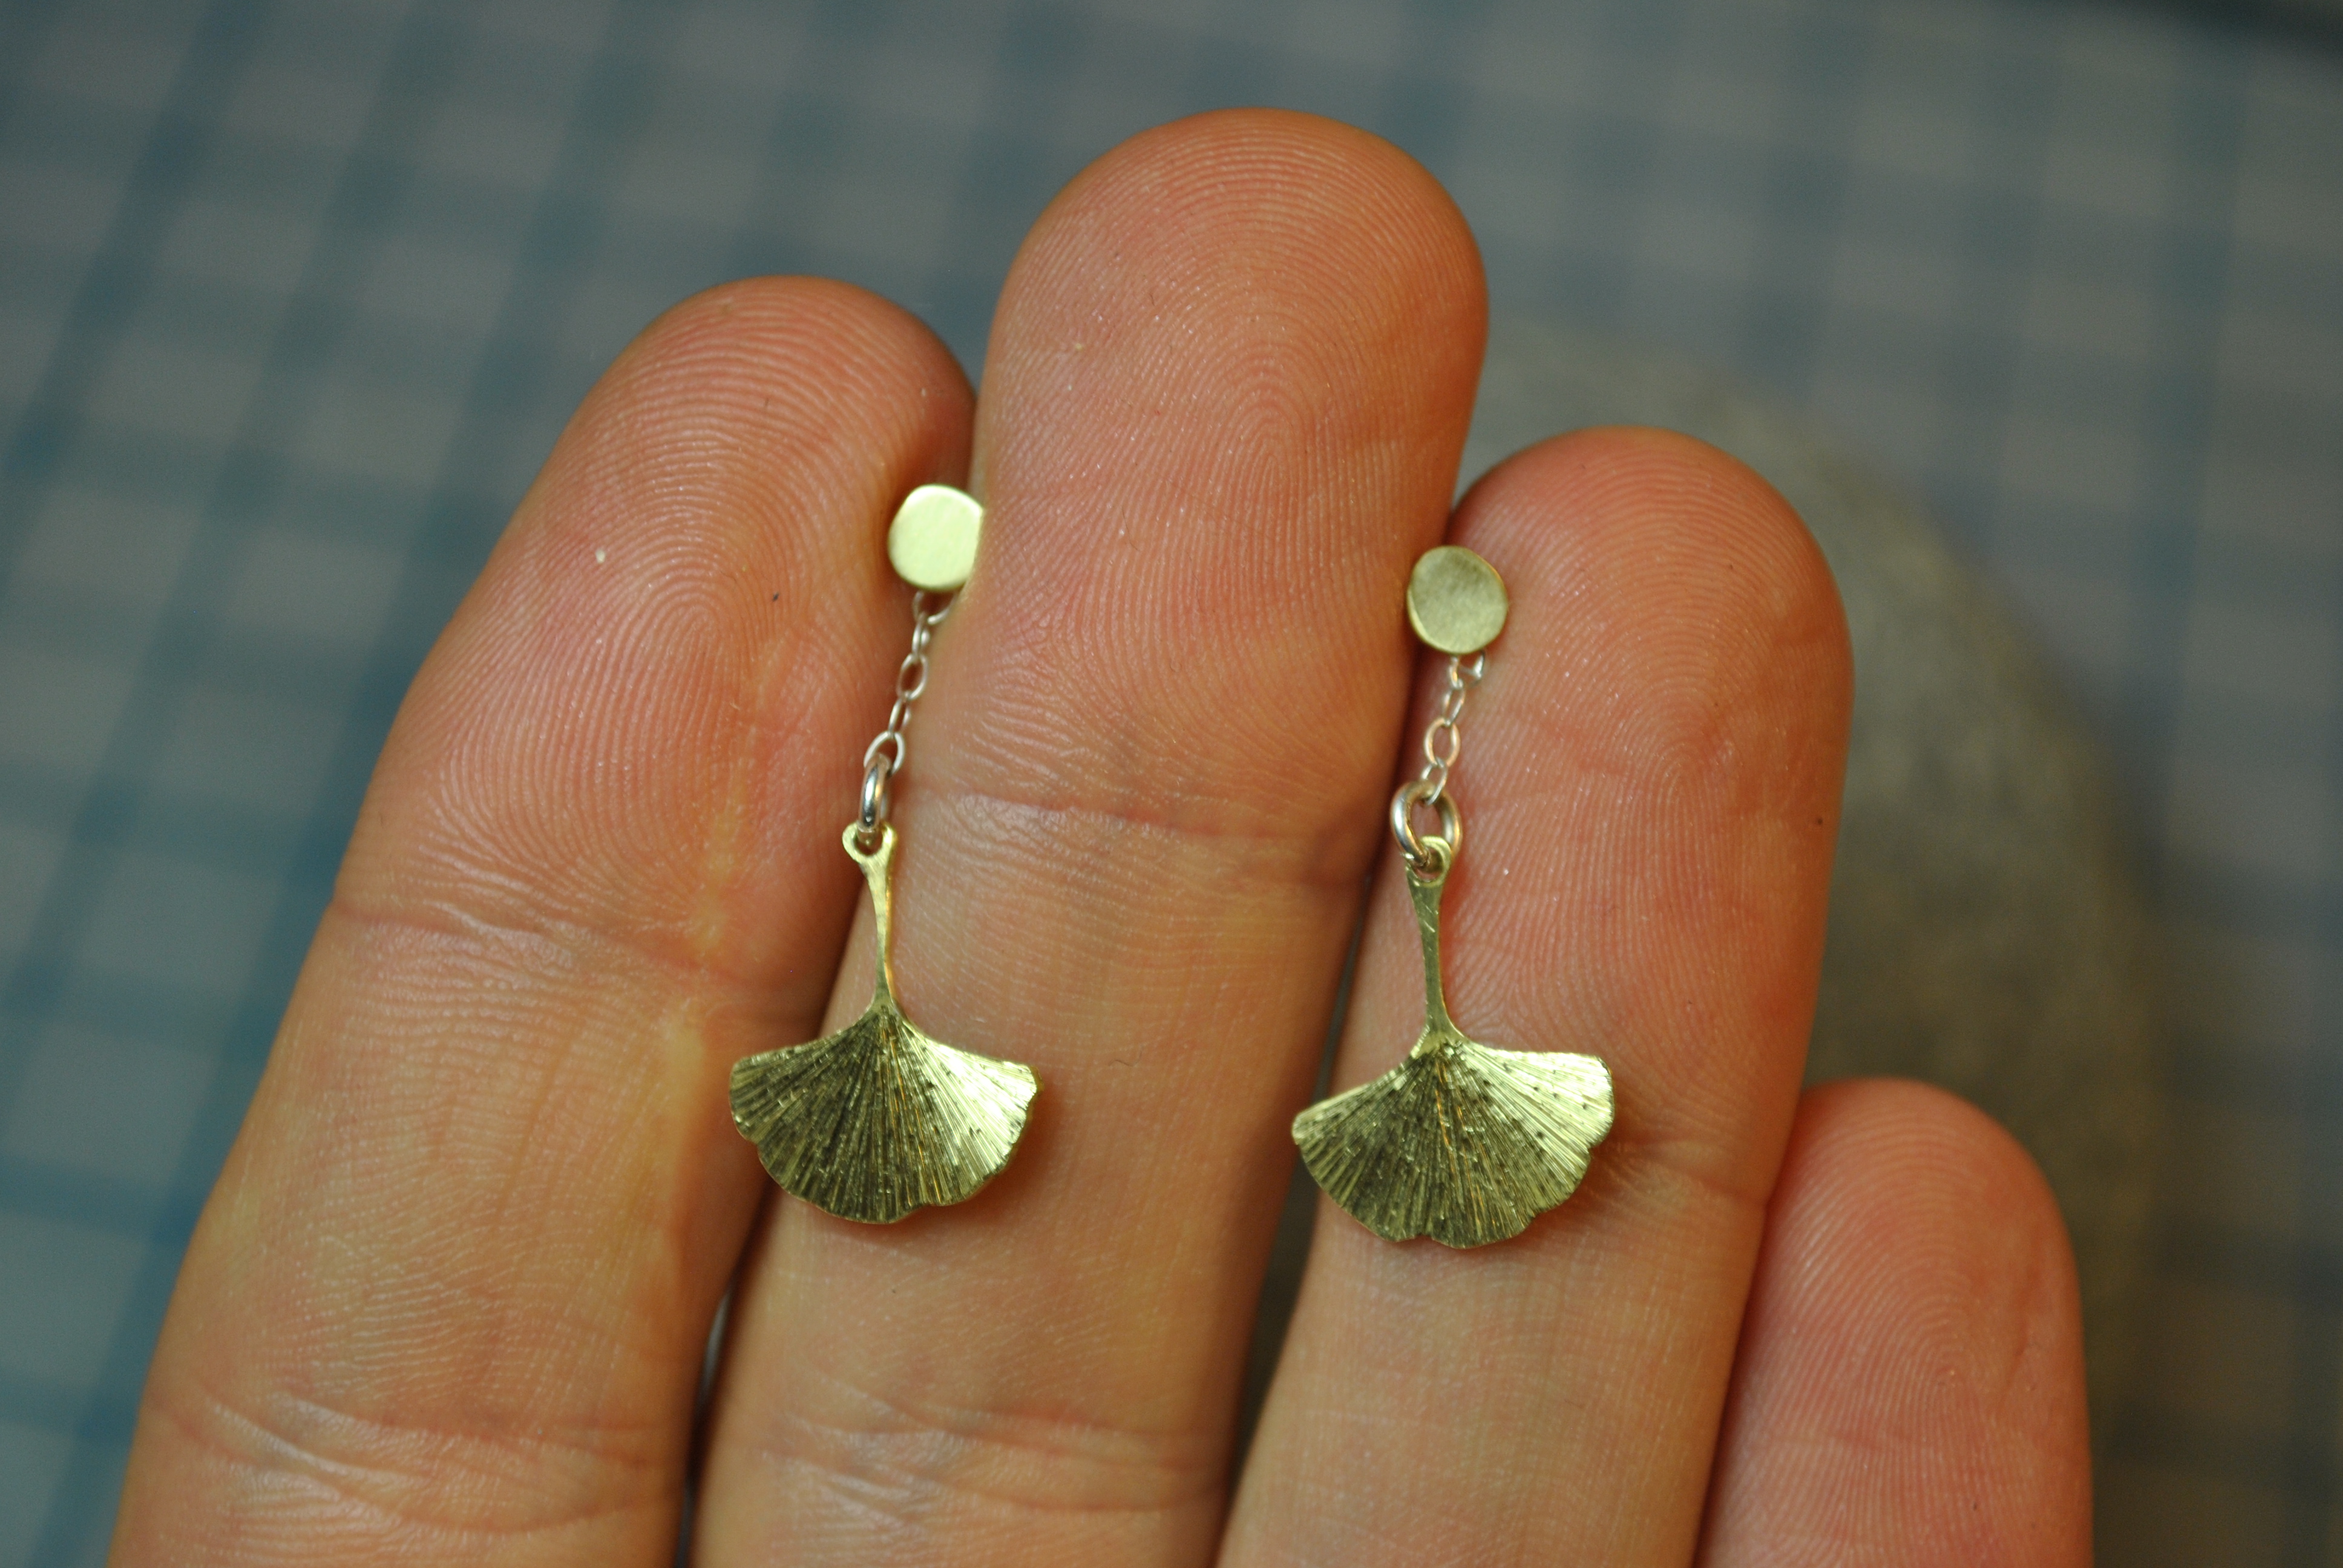
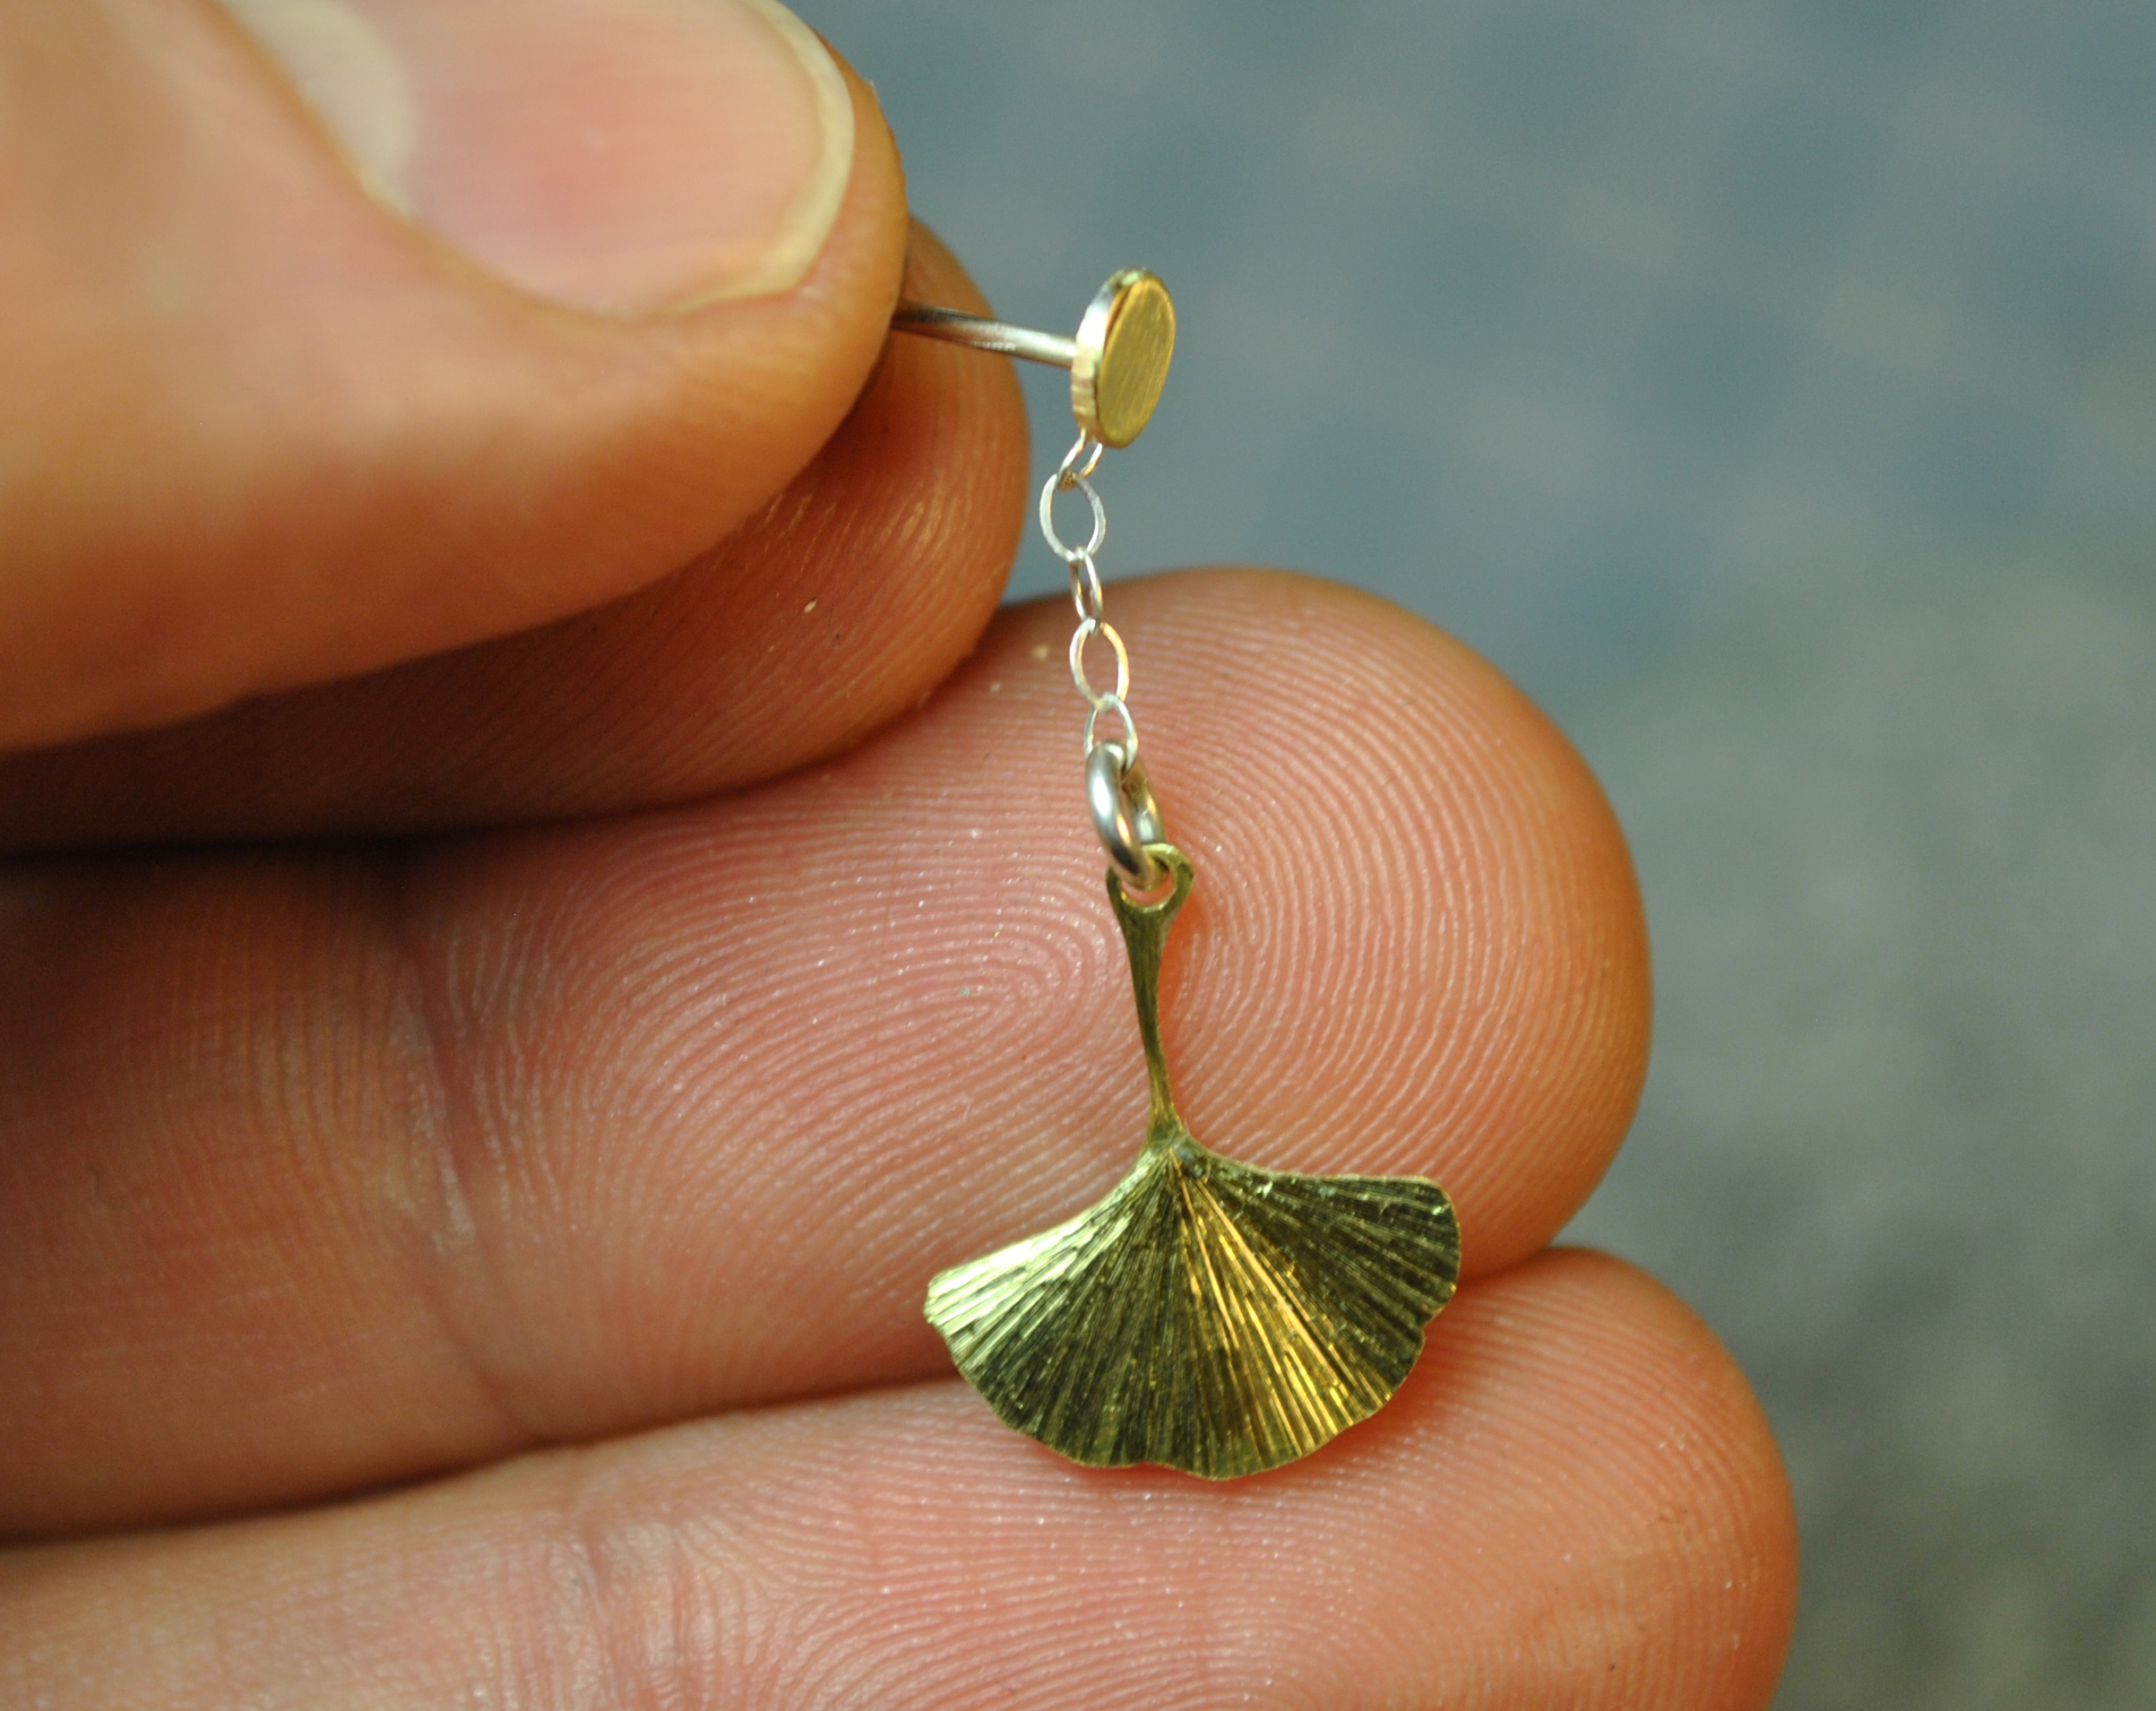
I have always been fascinated with Ginkgo’s. The last of a family of trees, the Ginkgo is unique both historically, genetically, and has its own unique beauty.
This Christmas I made a bunch of them for friends and family. The leaves are etched to give a lovely sparkle when they hit the light, and they dangle on a silver chain from a simple silver post, that is capped with a brass circle.
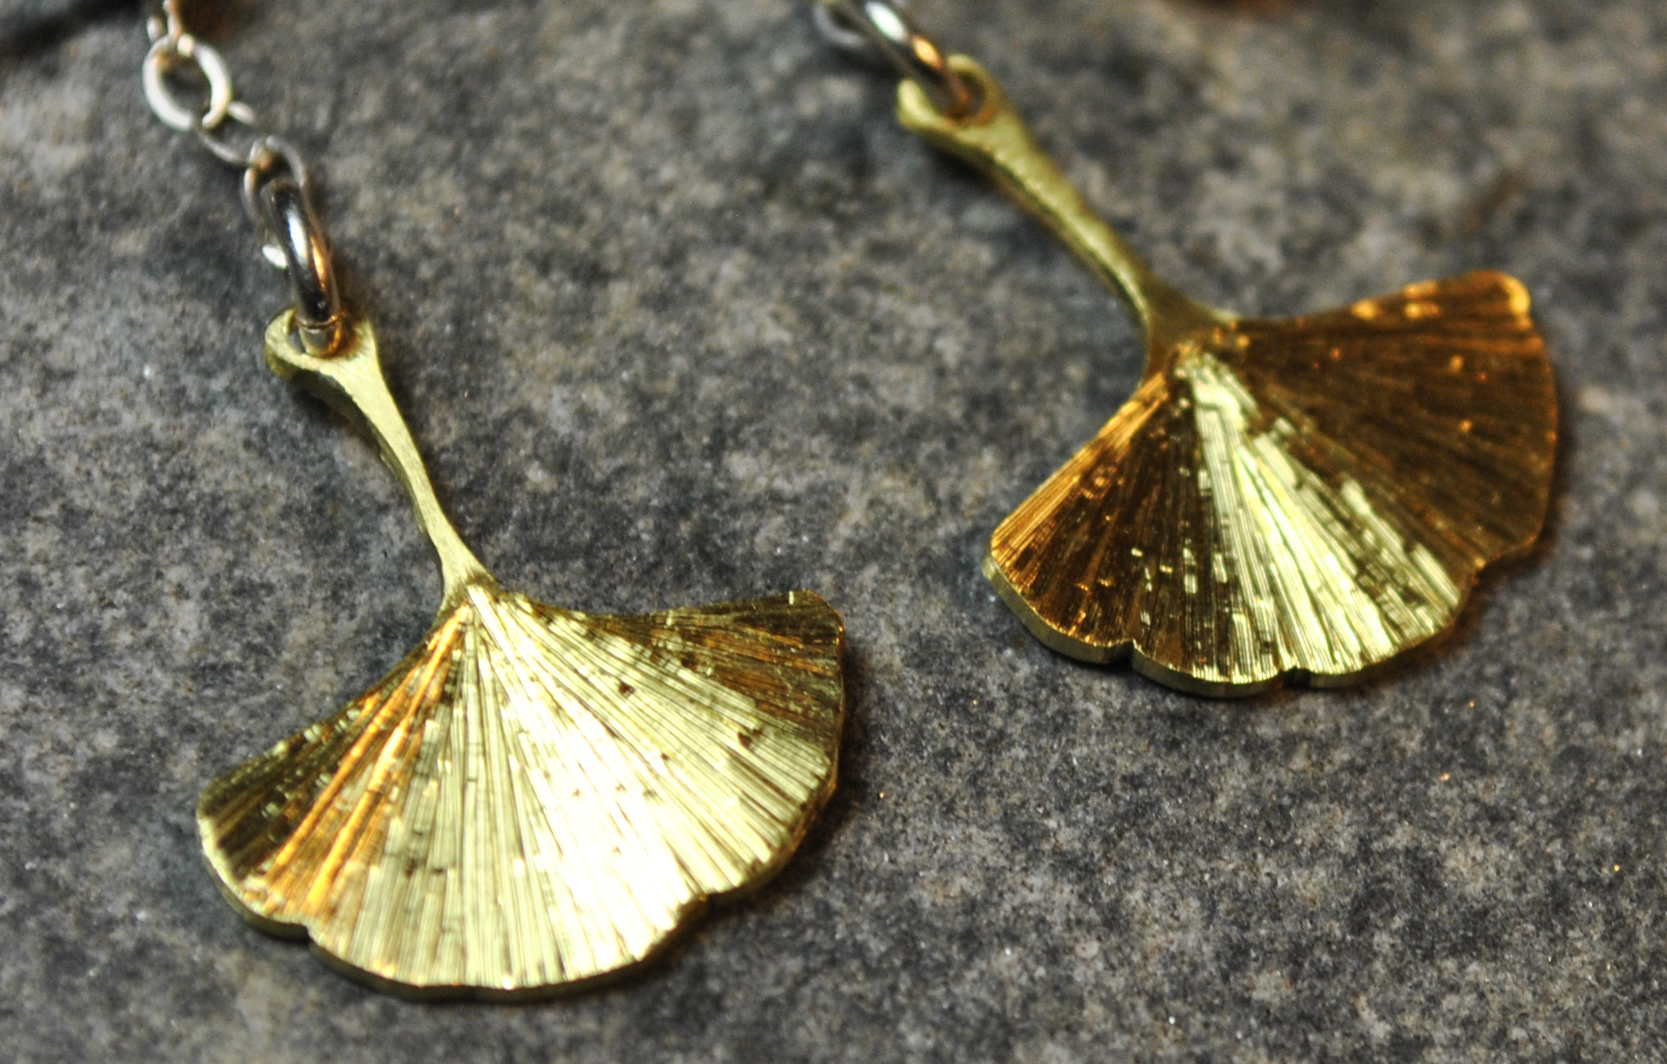
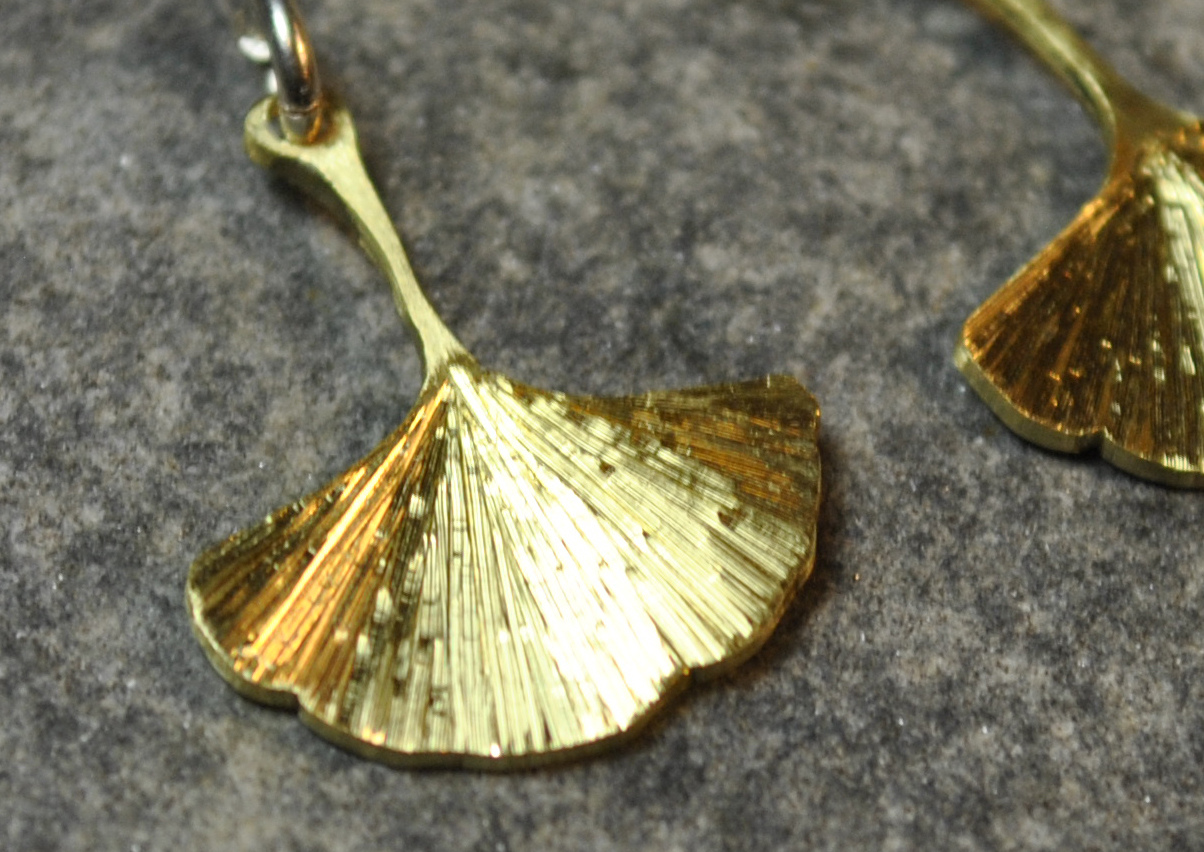
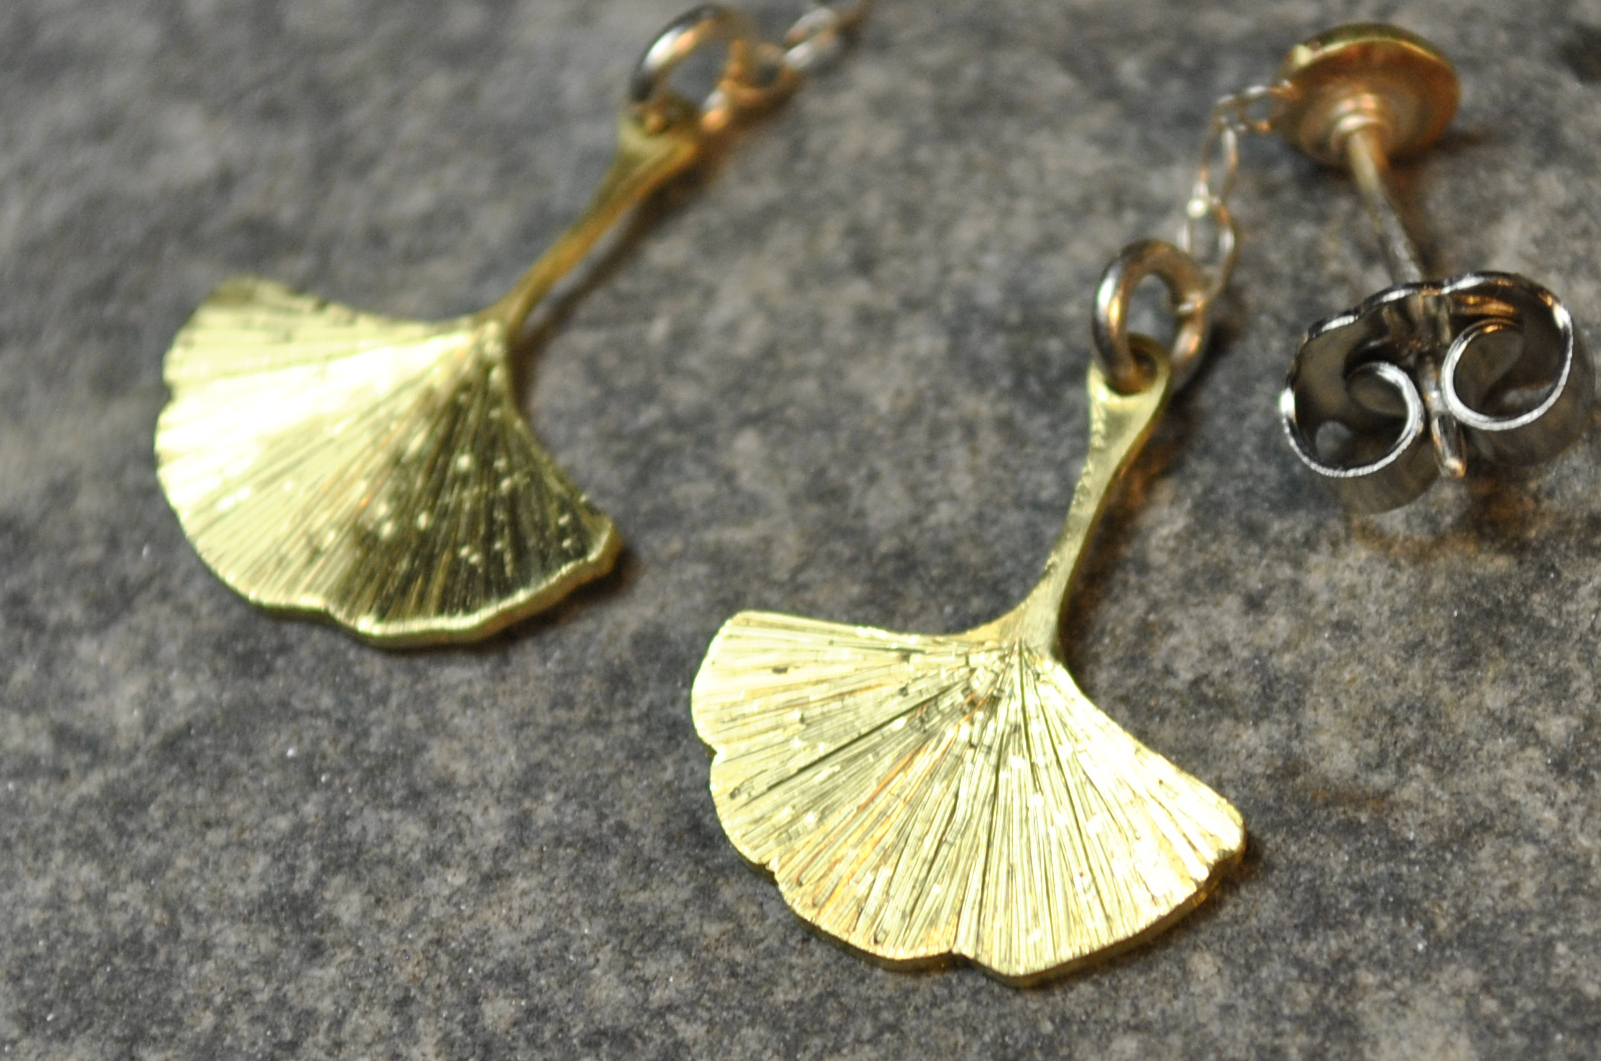

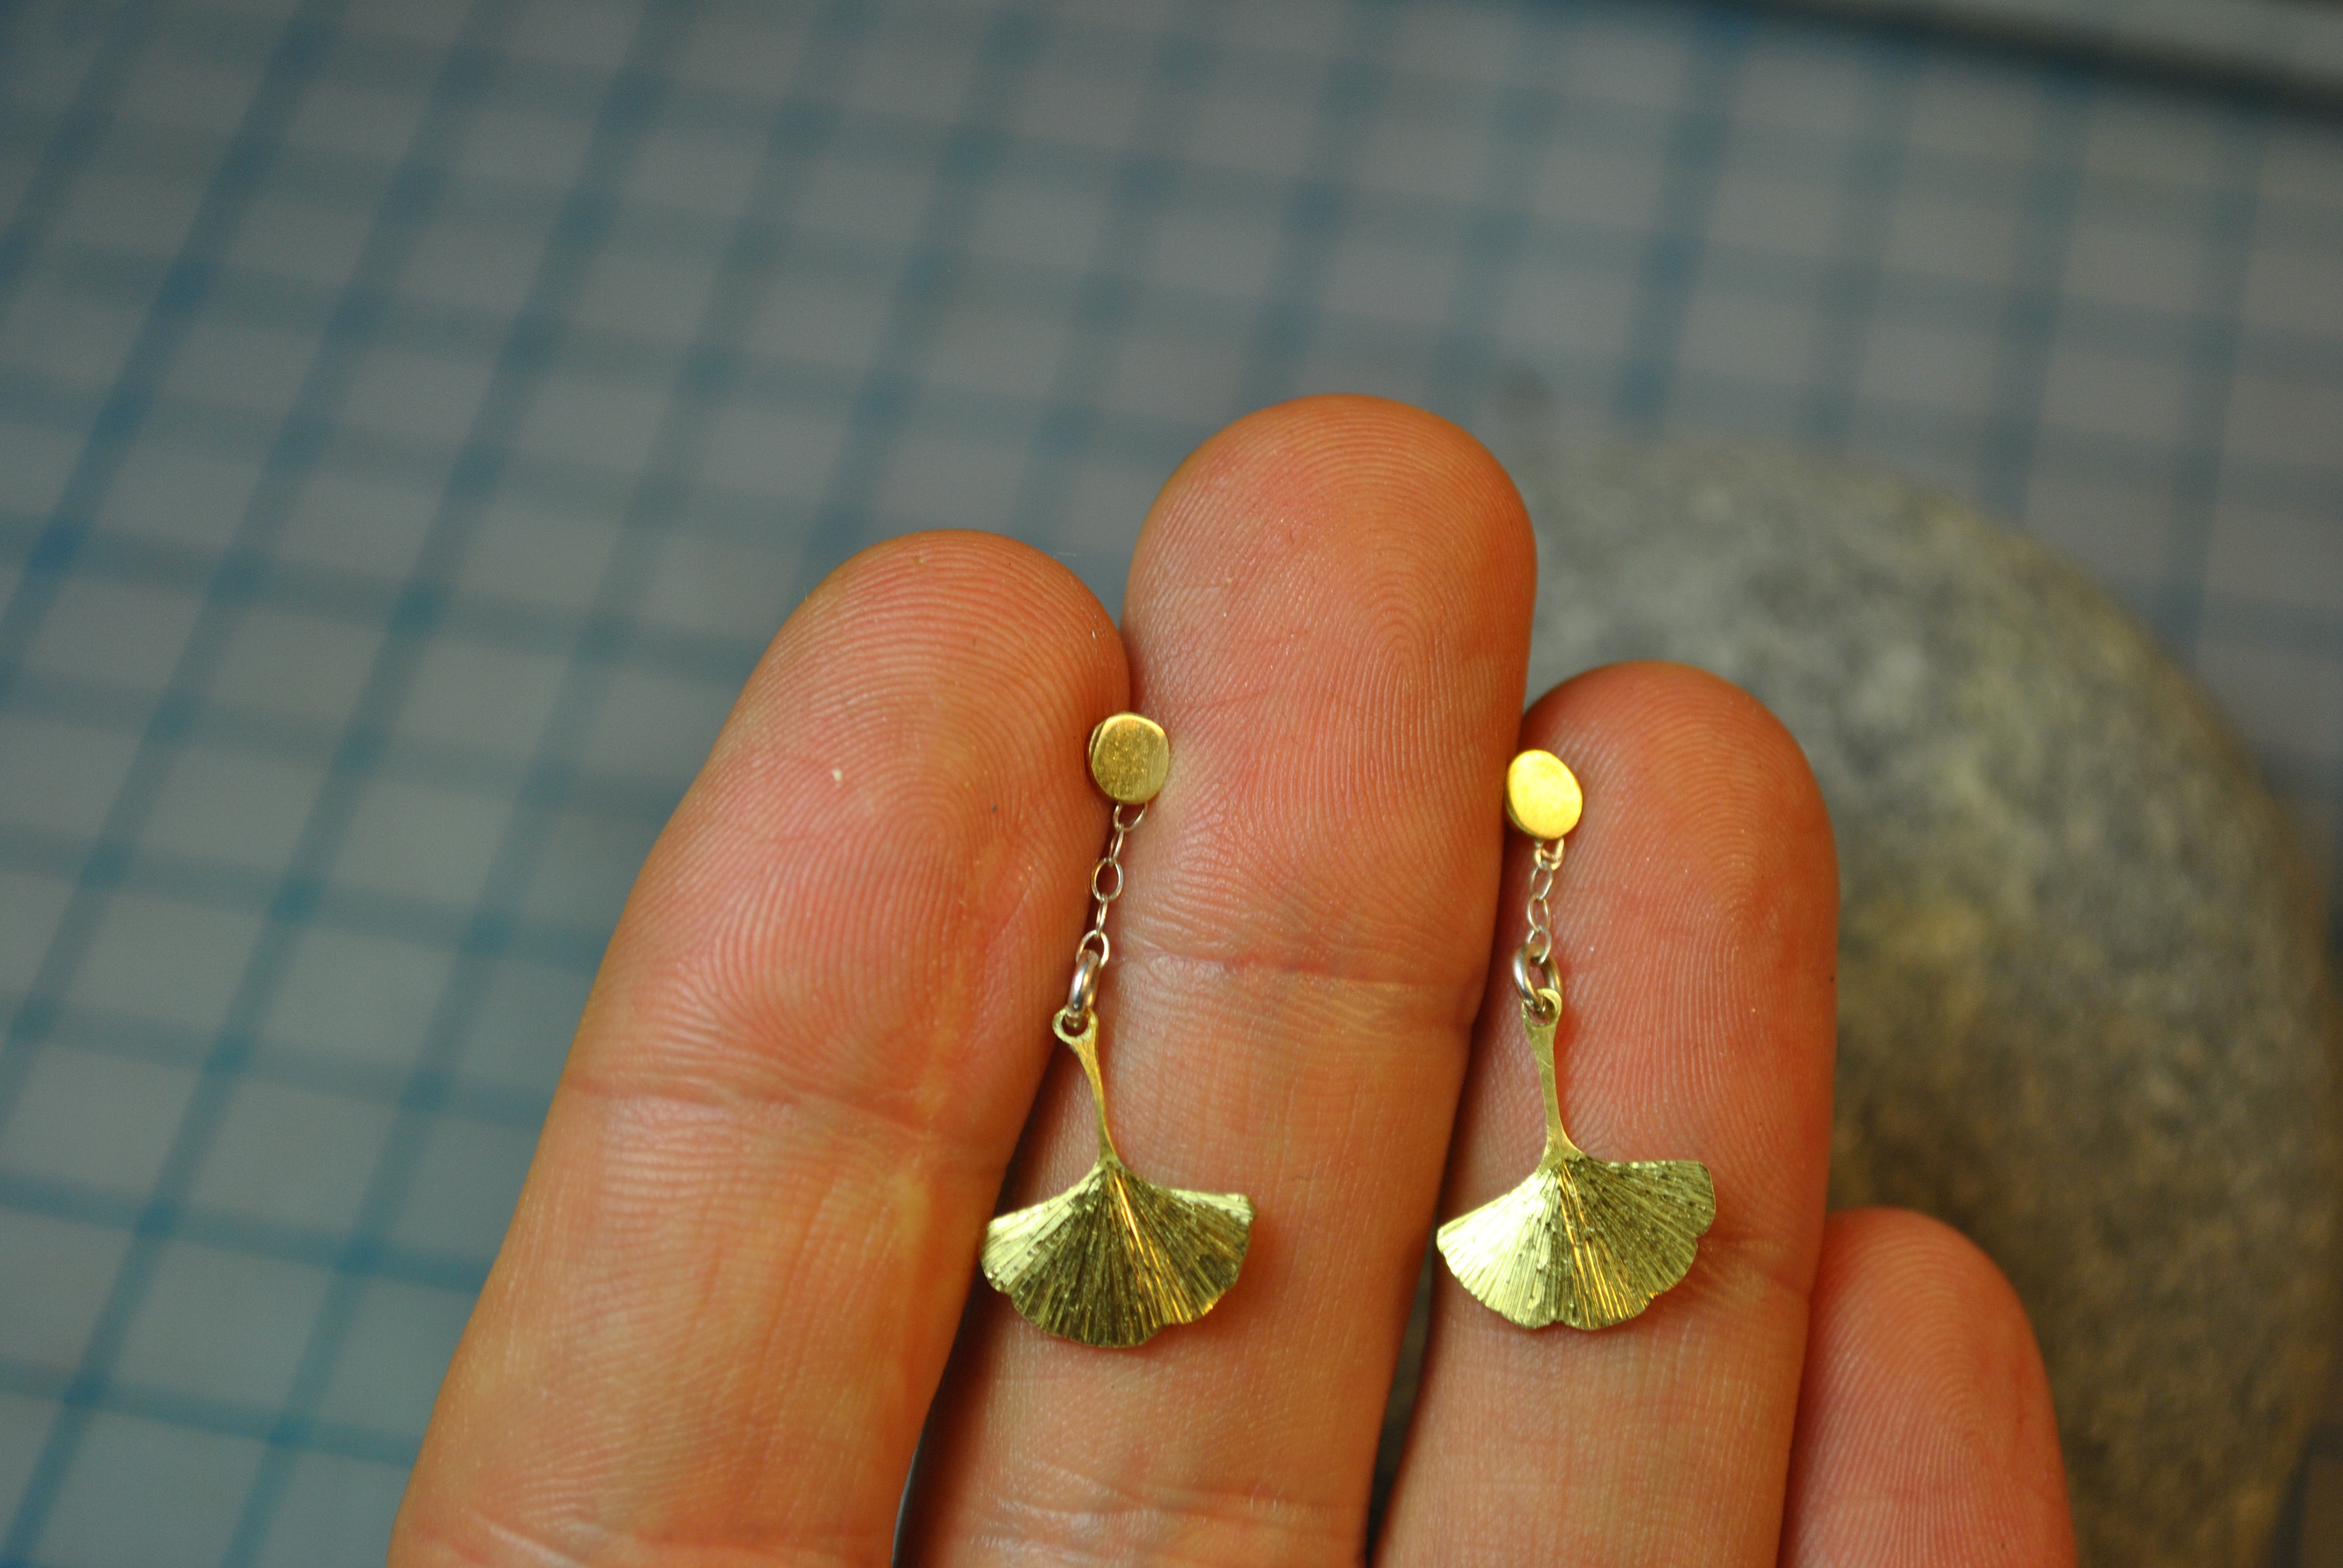
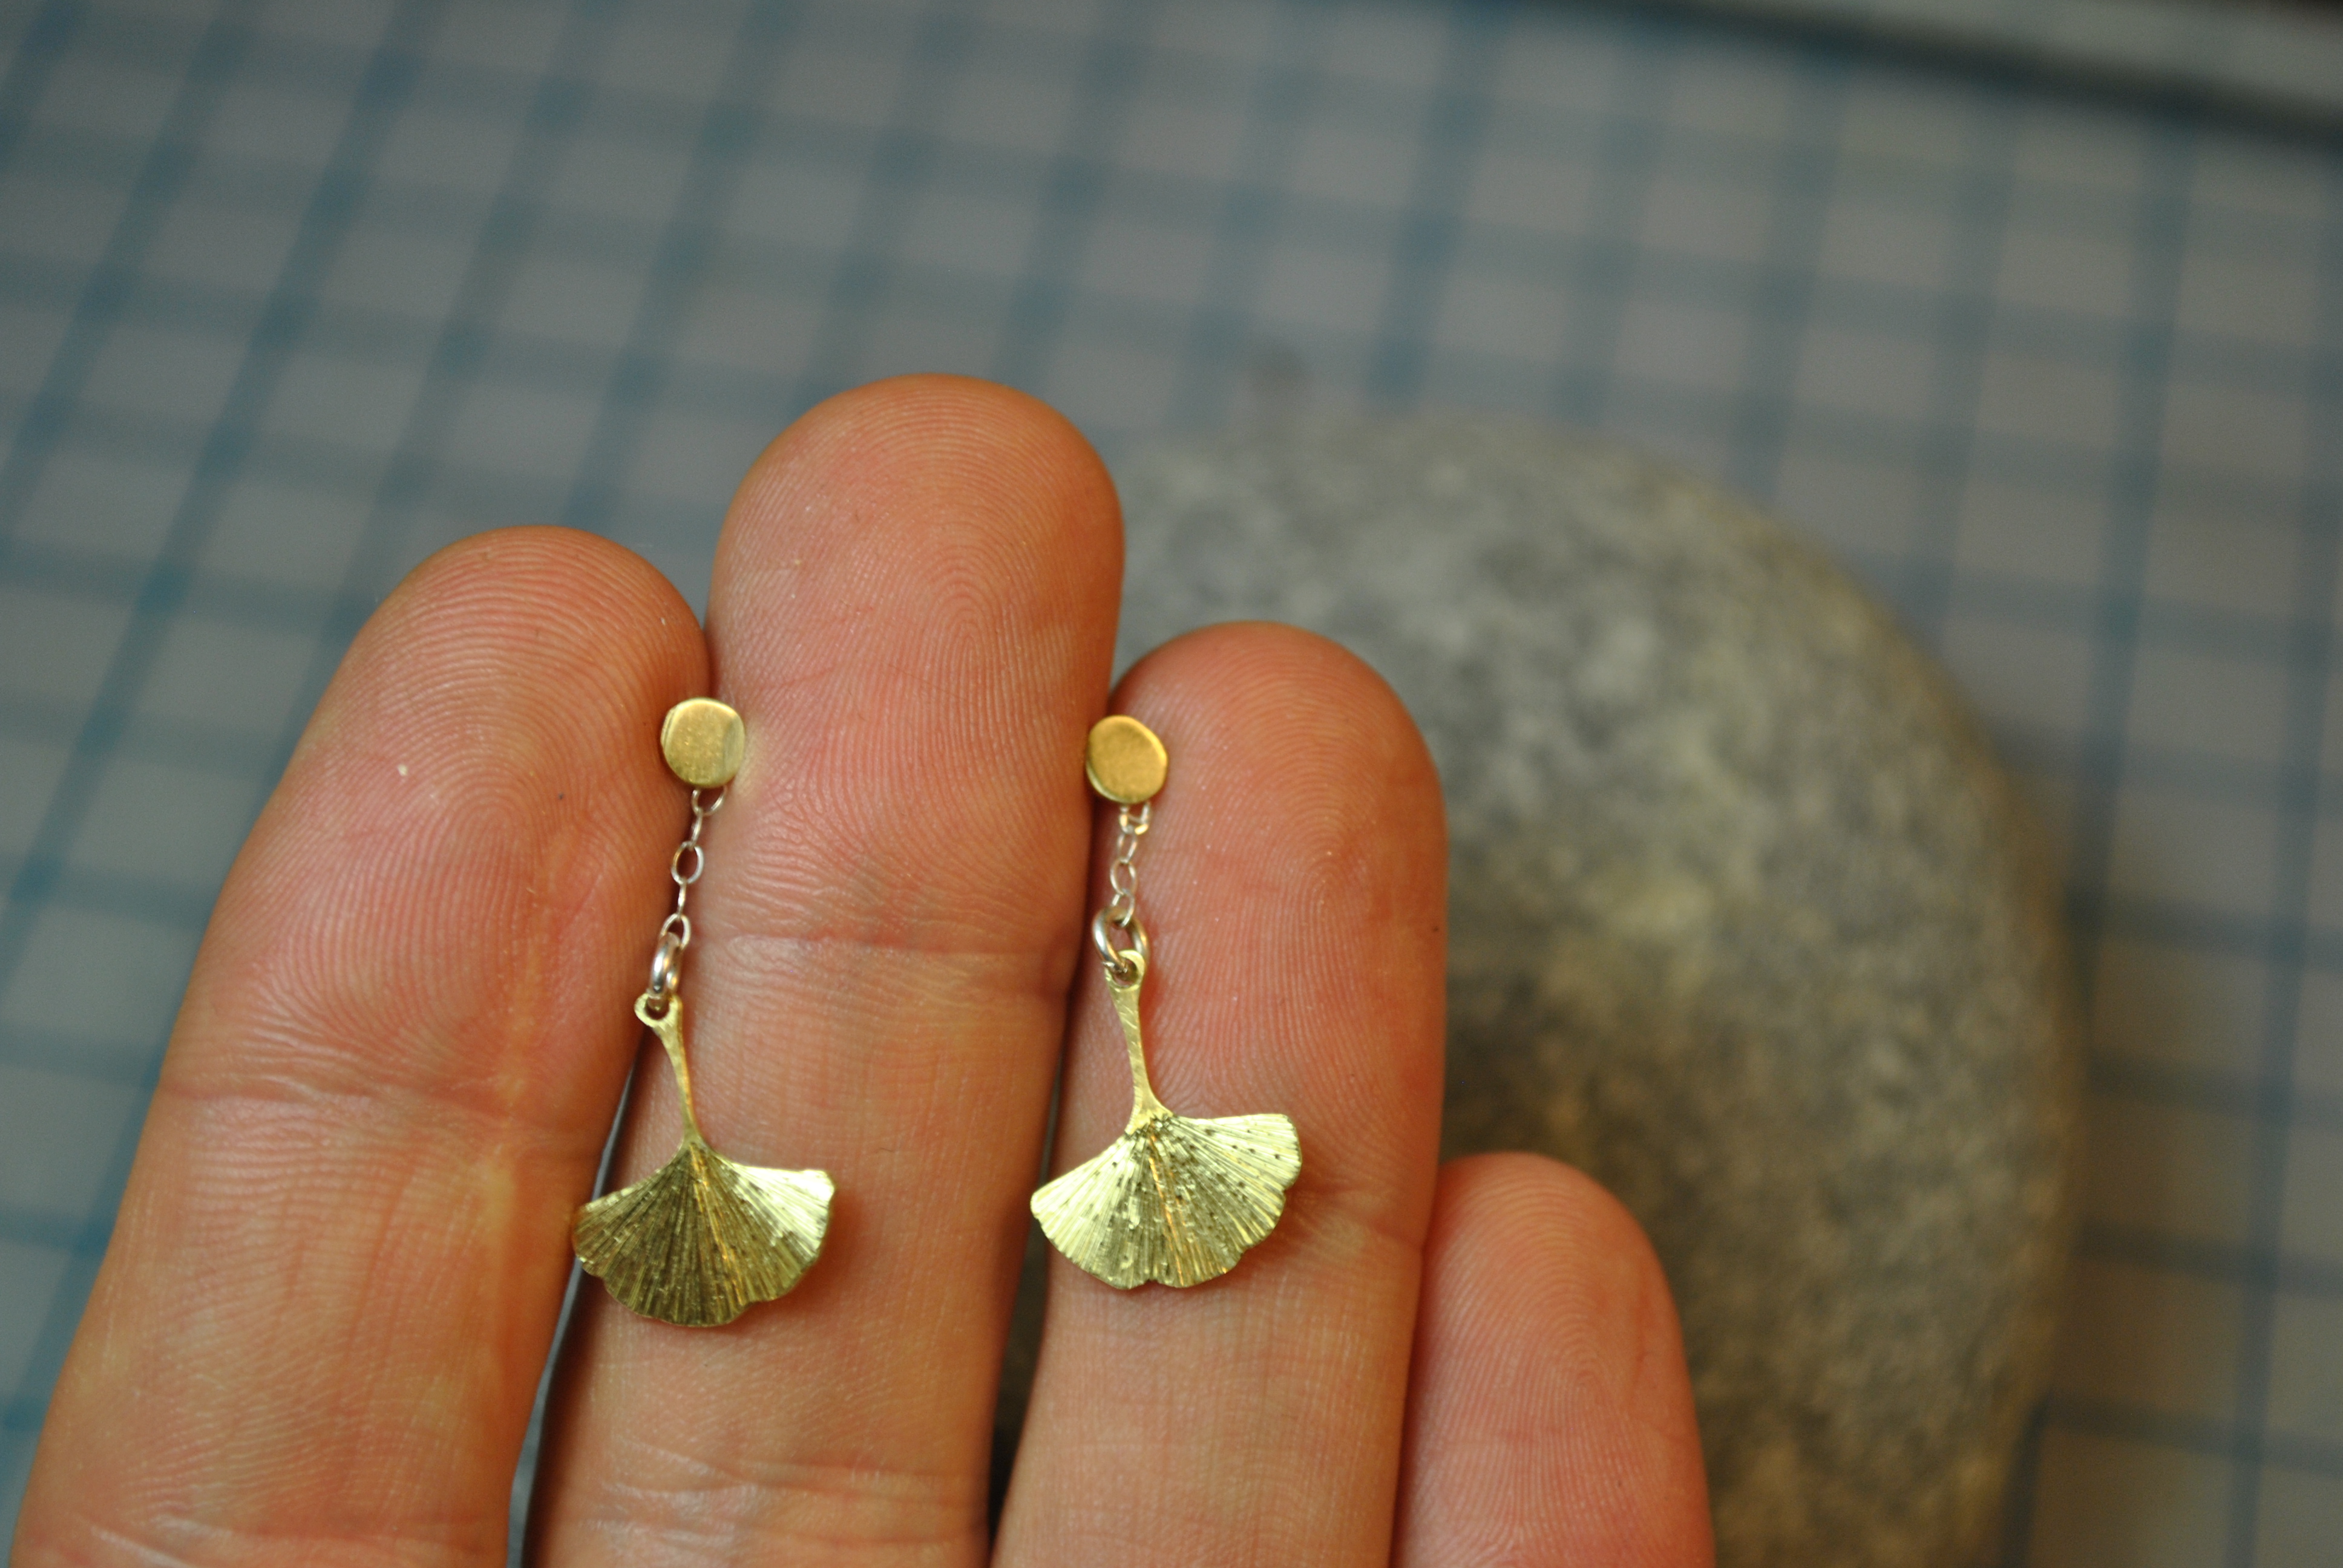
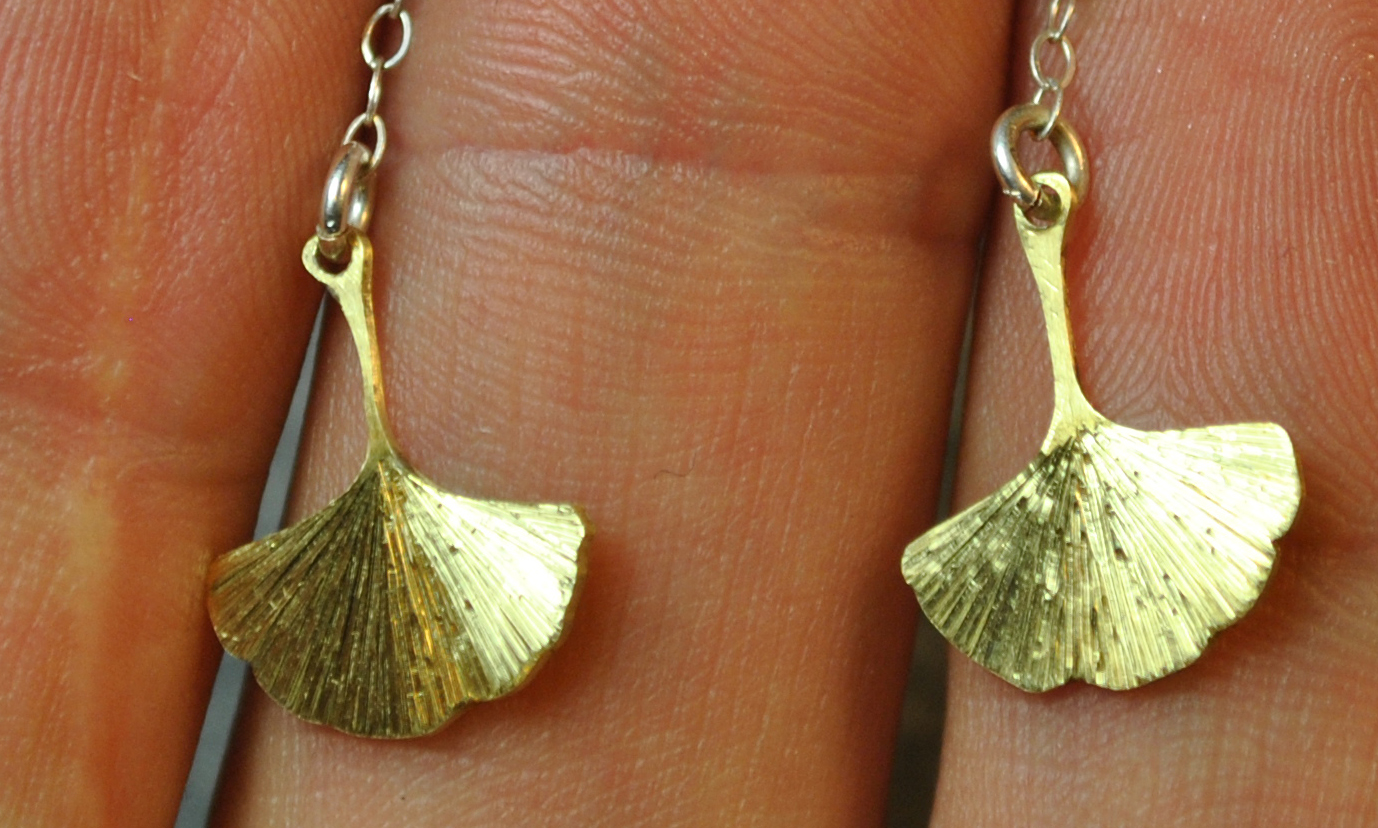

 If you like them you can buy them here.
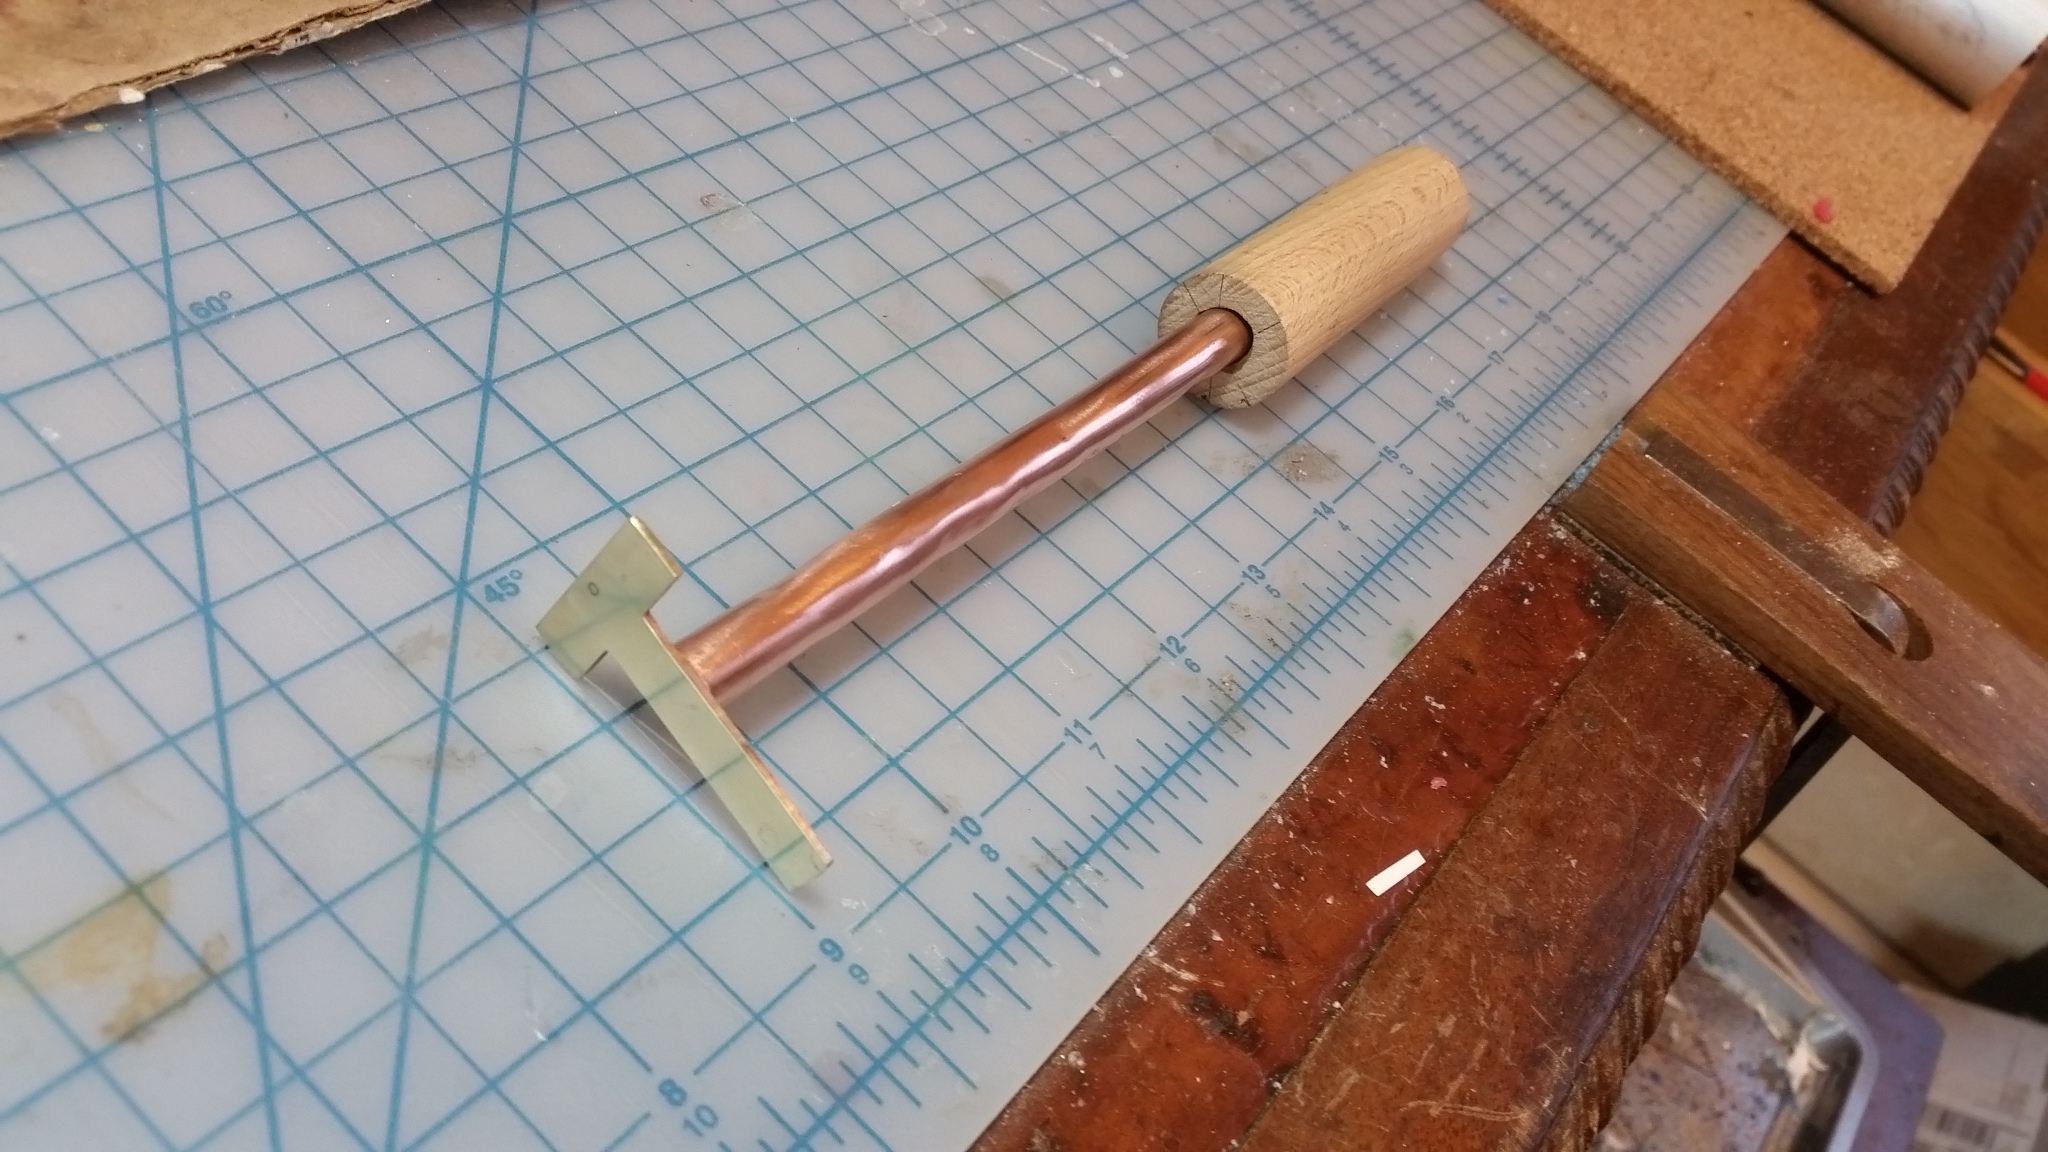
This job had to be a bit of a rush job, but I think its going to work great. Its a short bread cookie press, you roll out the cookie dough, press this into it then bake.

Get the “W” into a vector file.
Print it out.
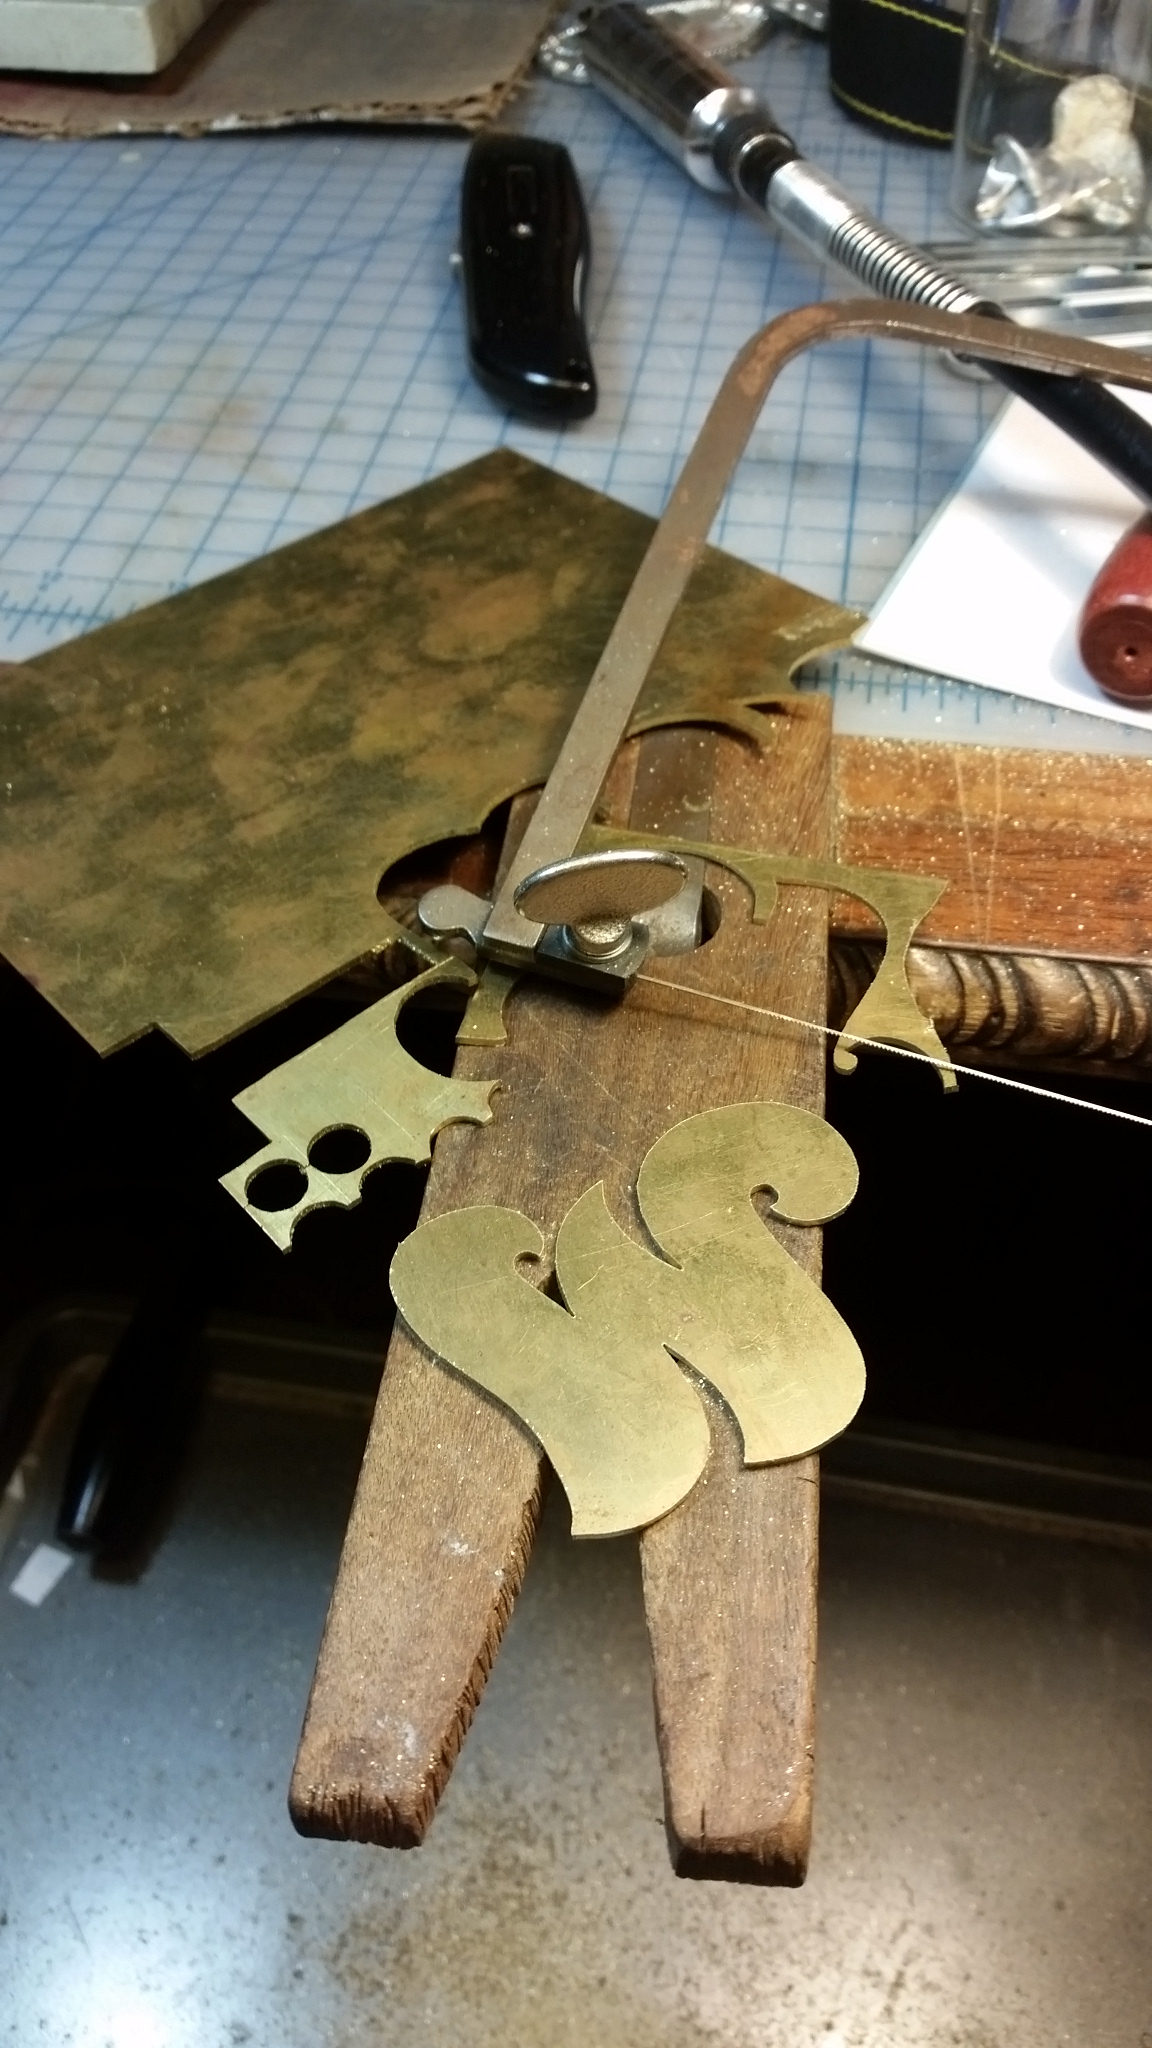
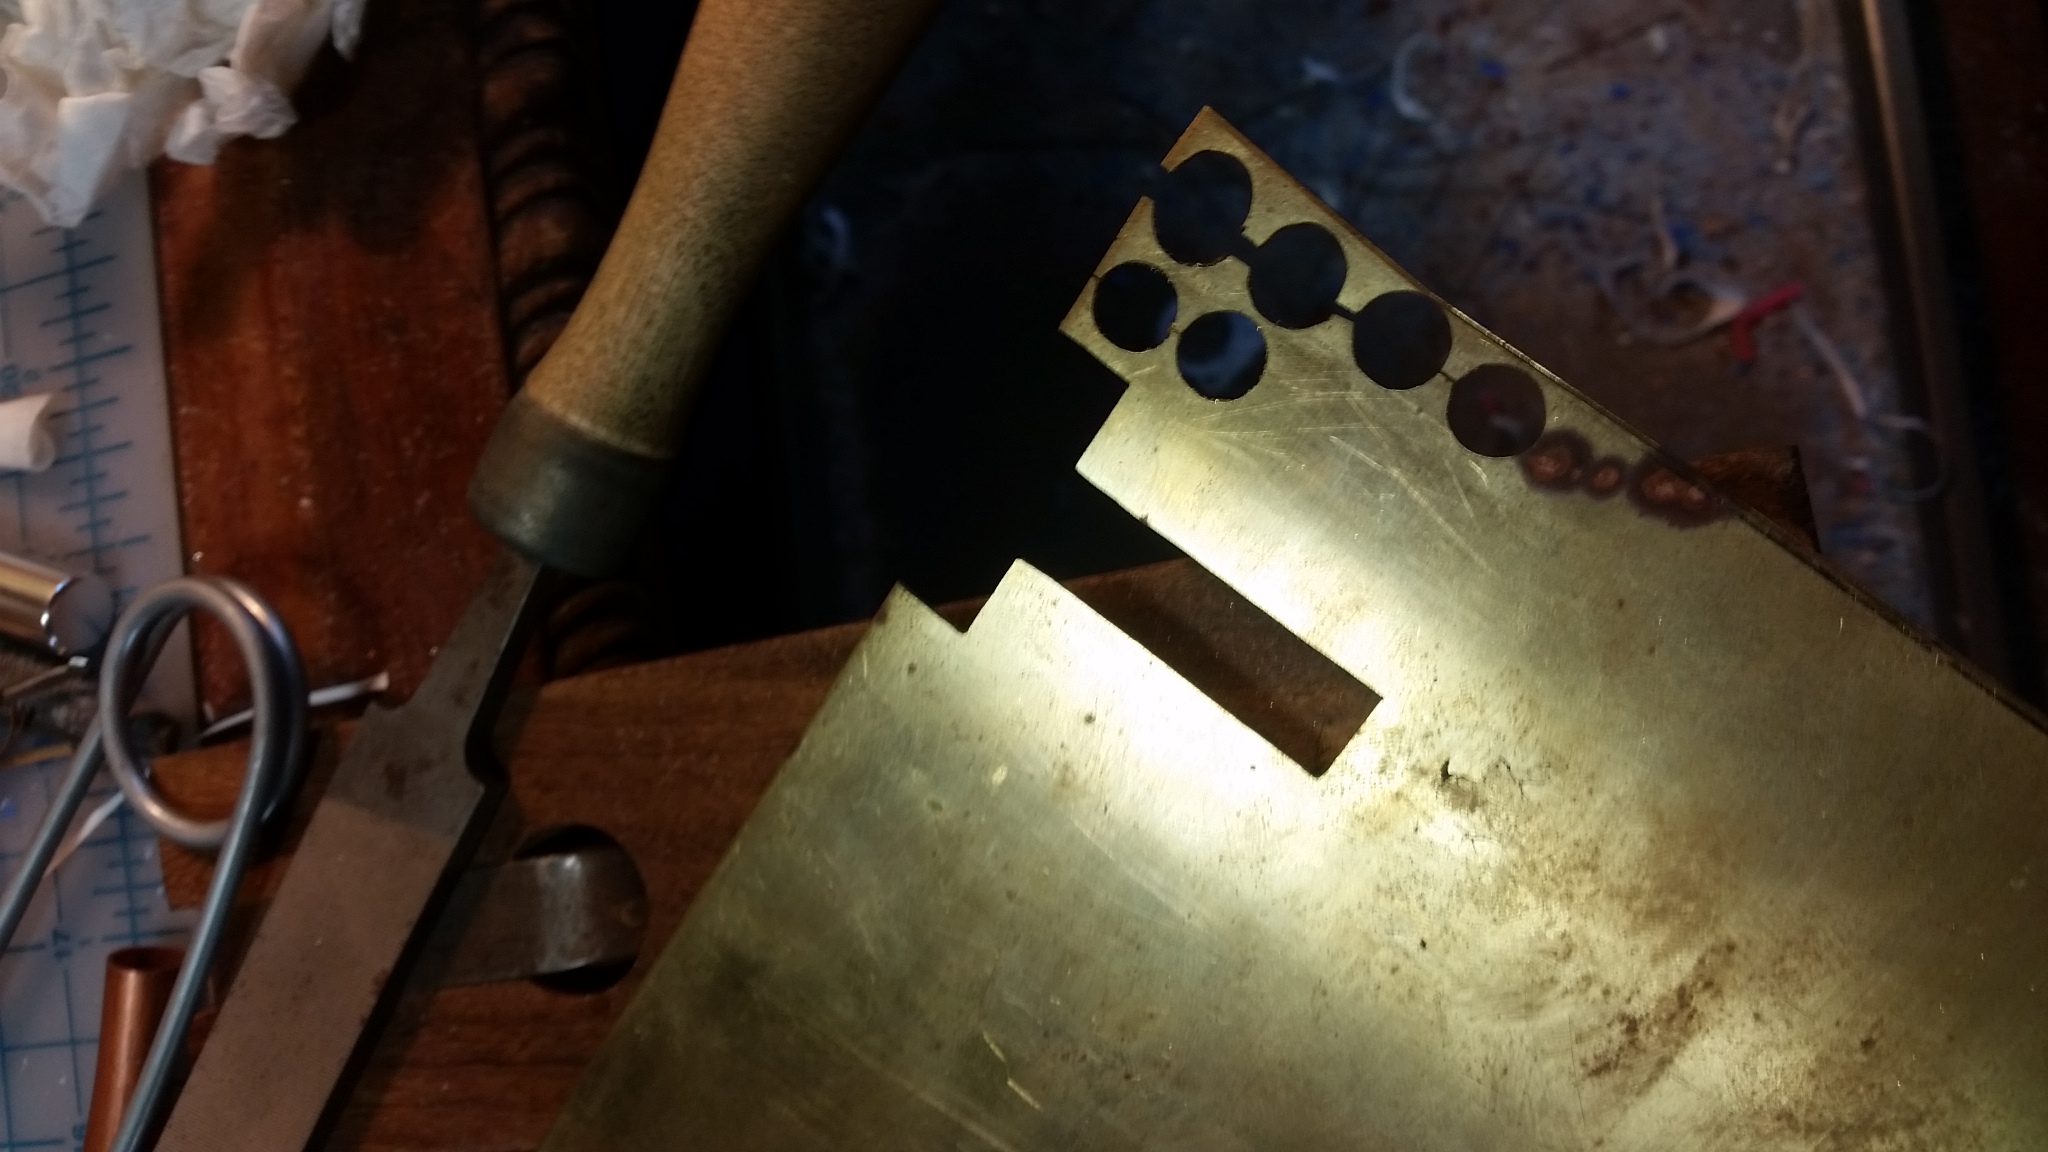
Cut it out of a nice thick 16g piece of brass.
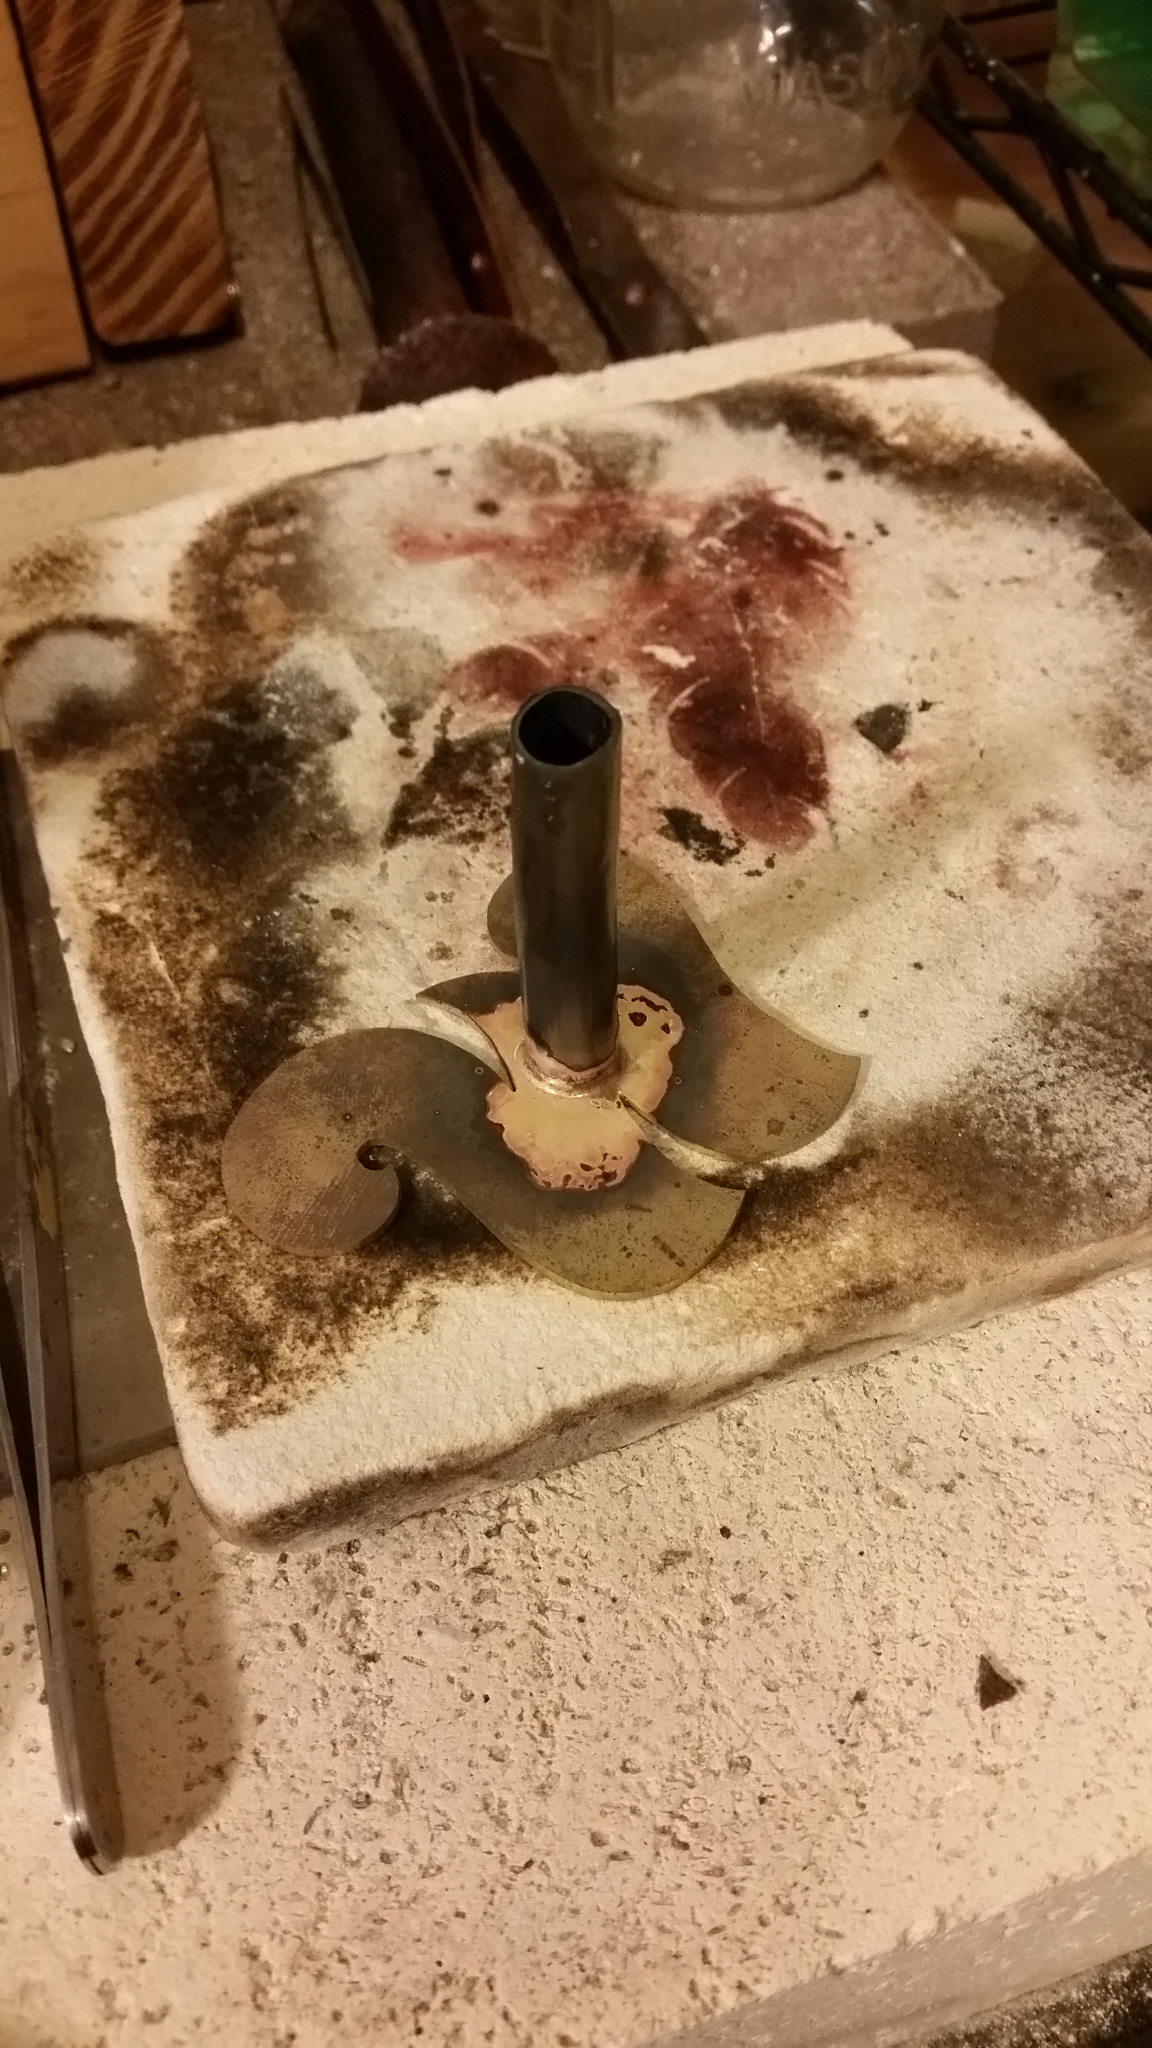
Soldier on a small copper tube
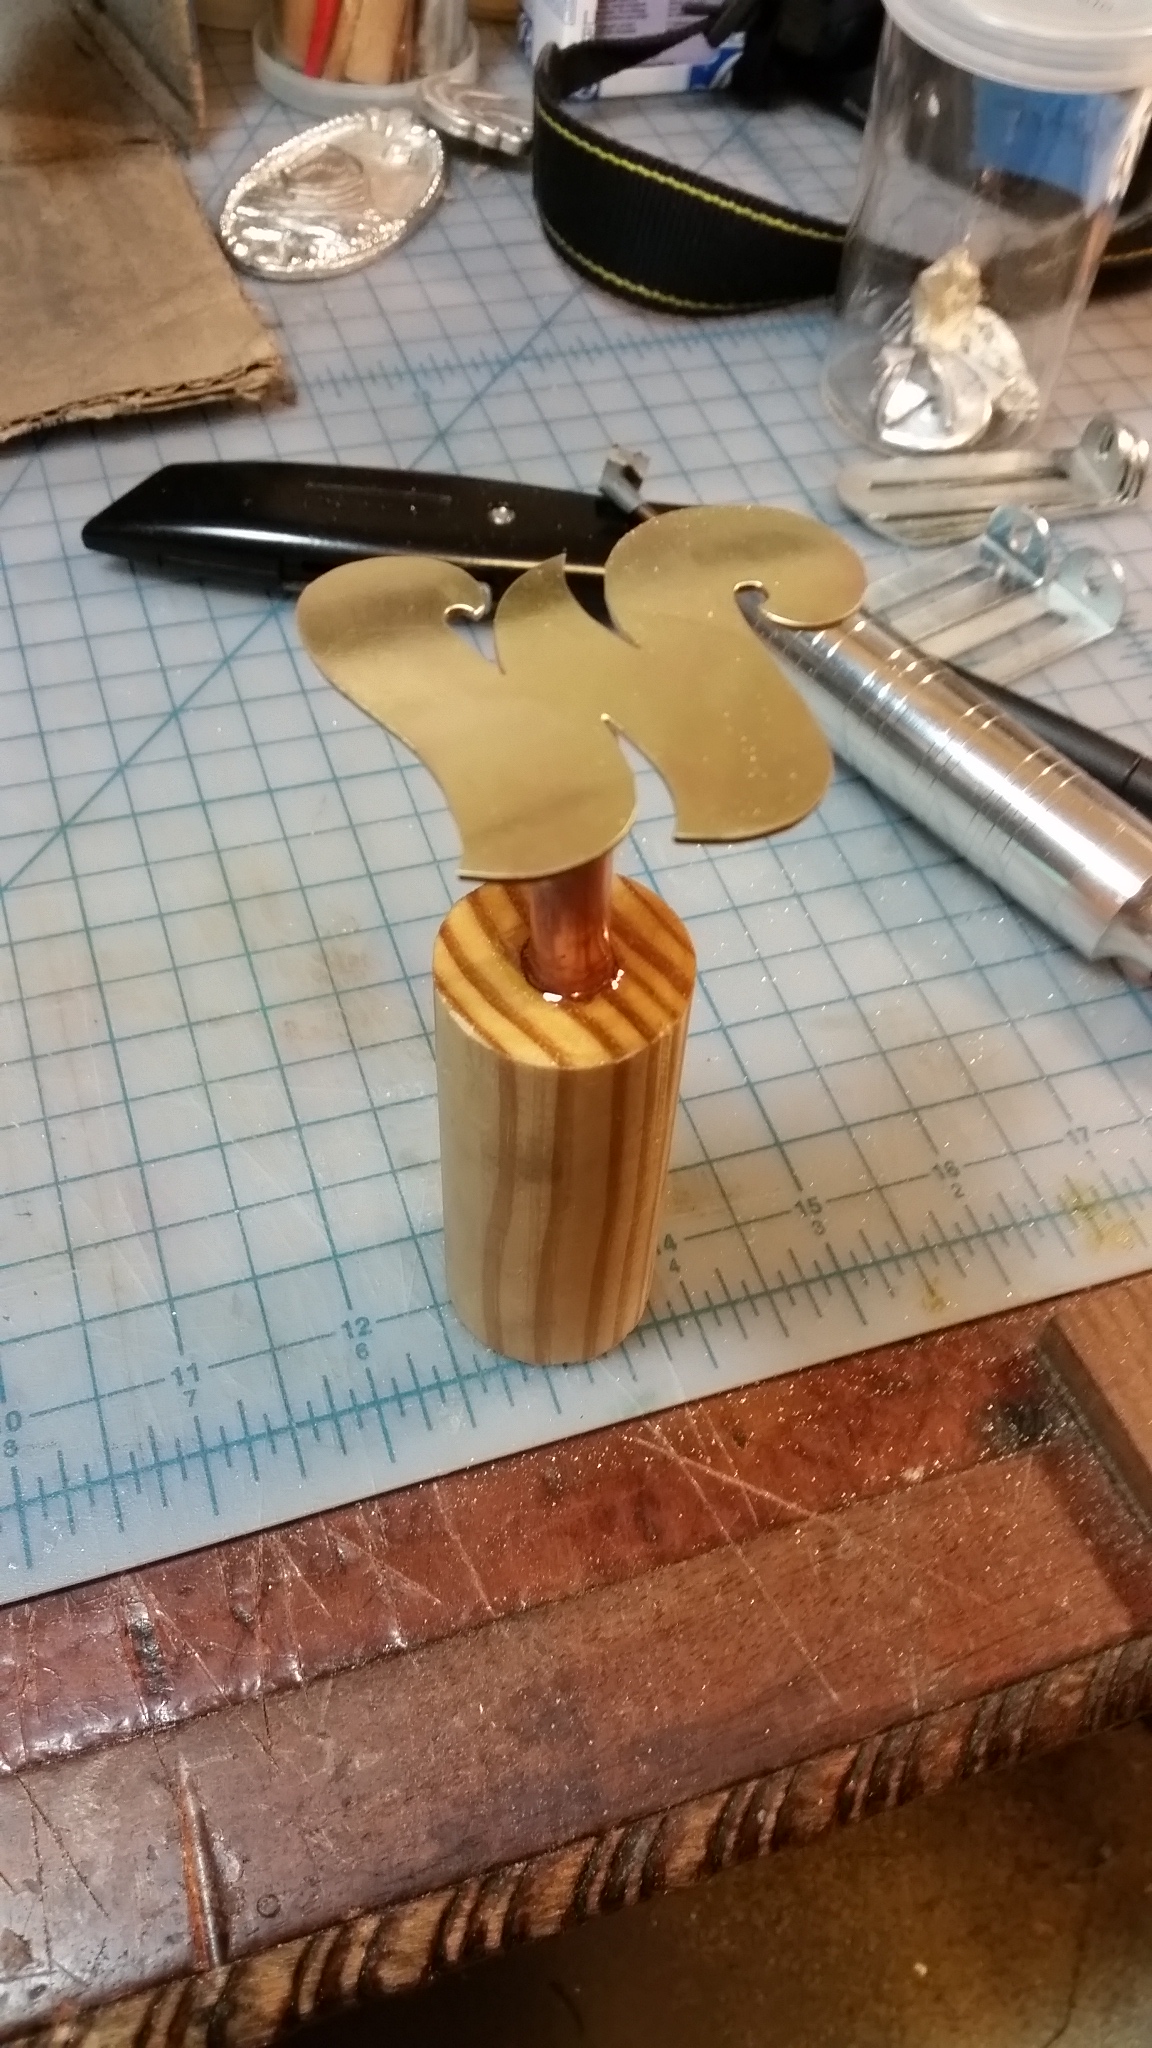
epoxy the whole thing into a stout dowel.
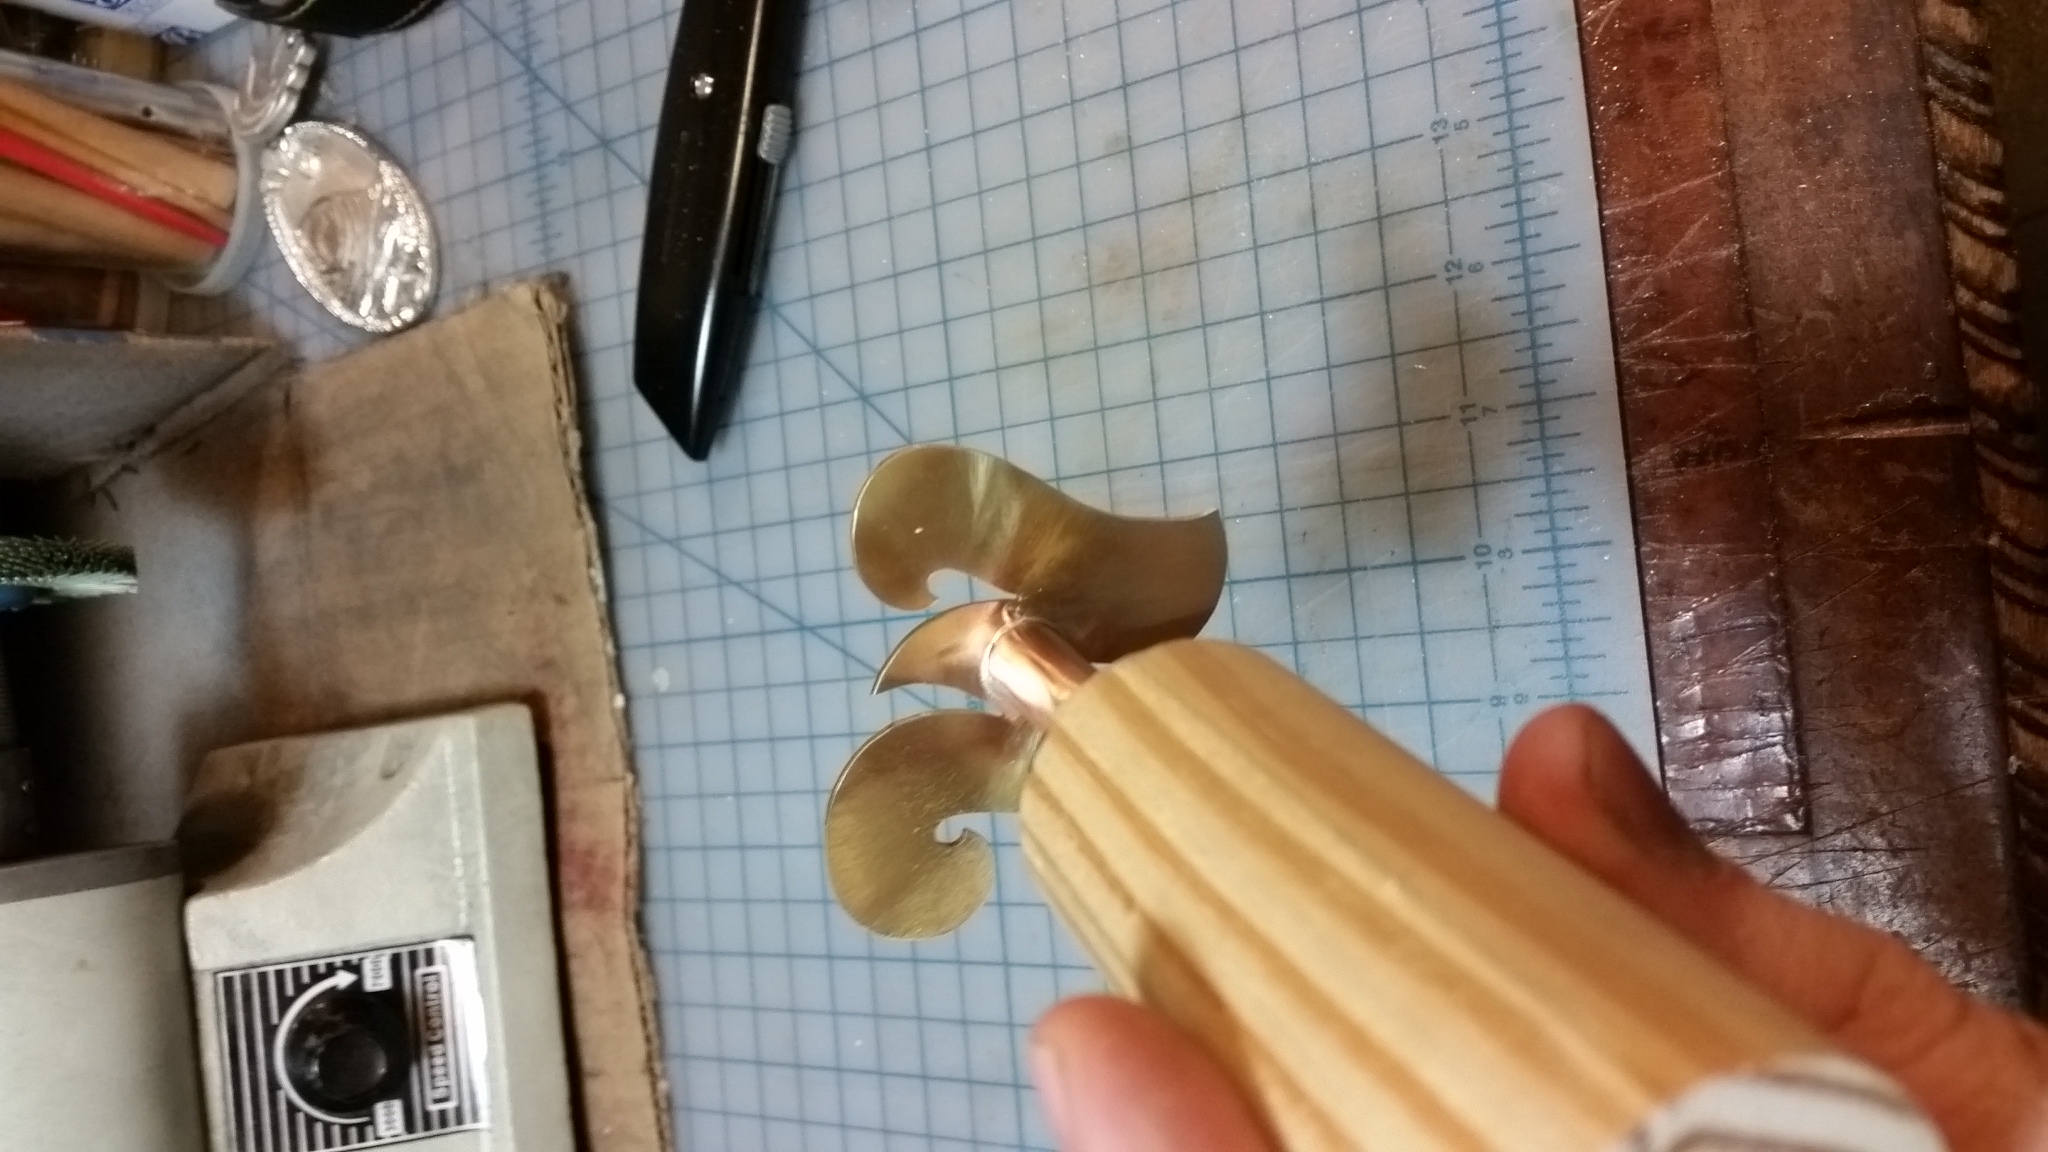
Shorty handle for good force manipulation, as well as easy storage.
When I get some cookie pictures I will post an update.
Do you want to help me continue to bring you great projects, while also getting great rewards? Then support me on Patreon!
Thank you!
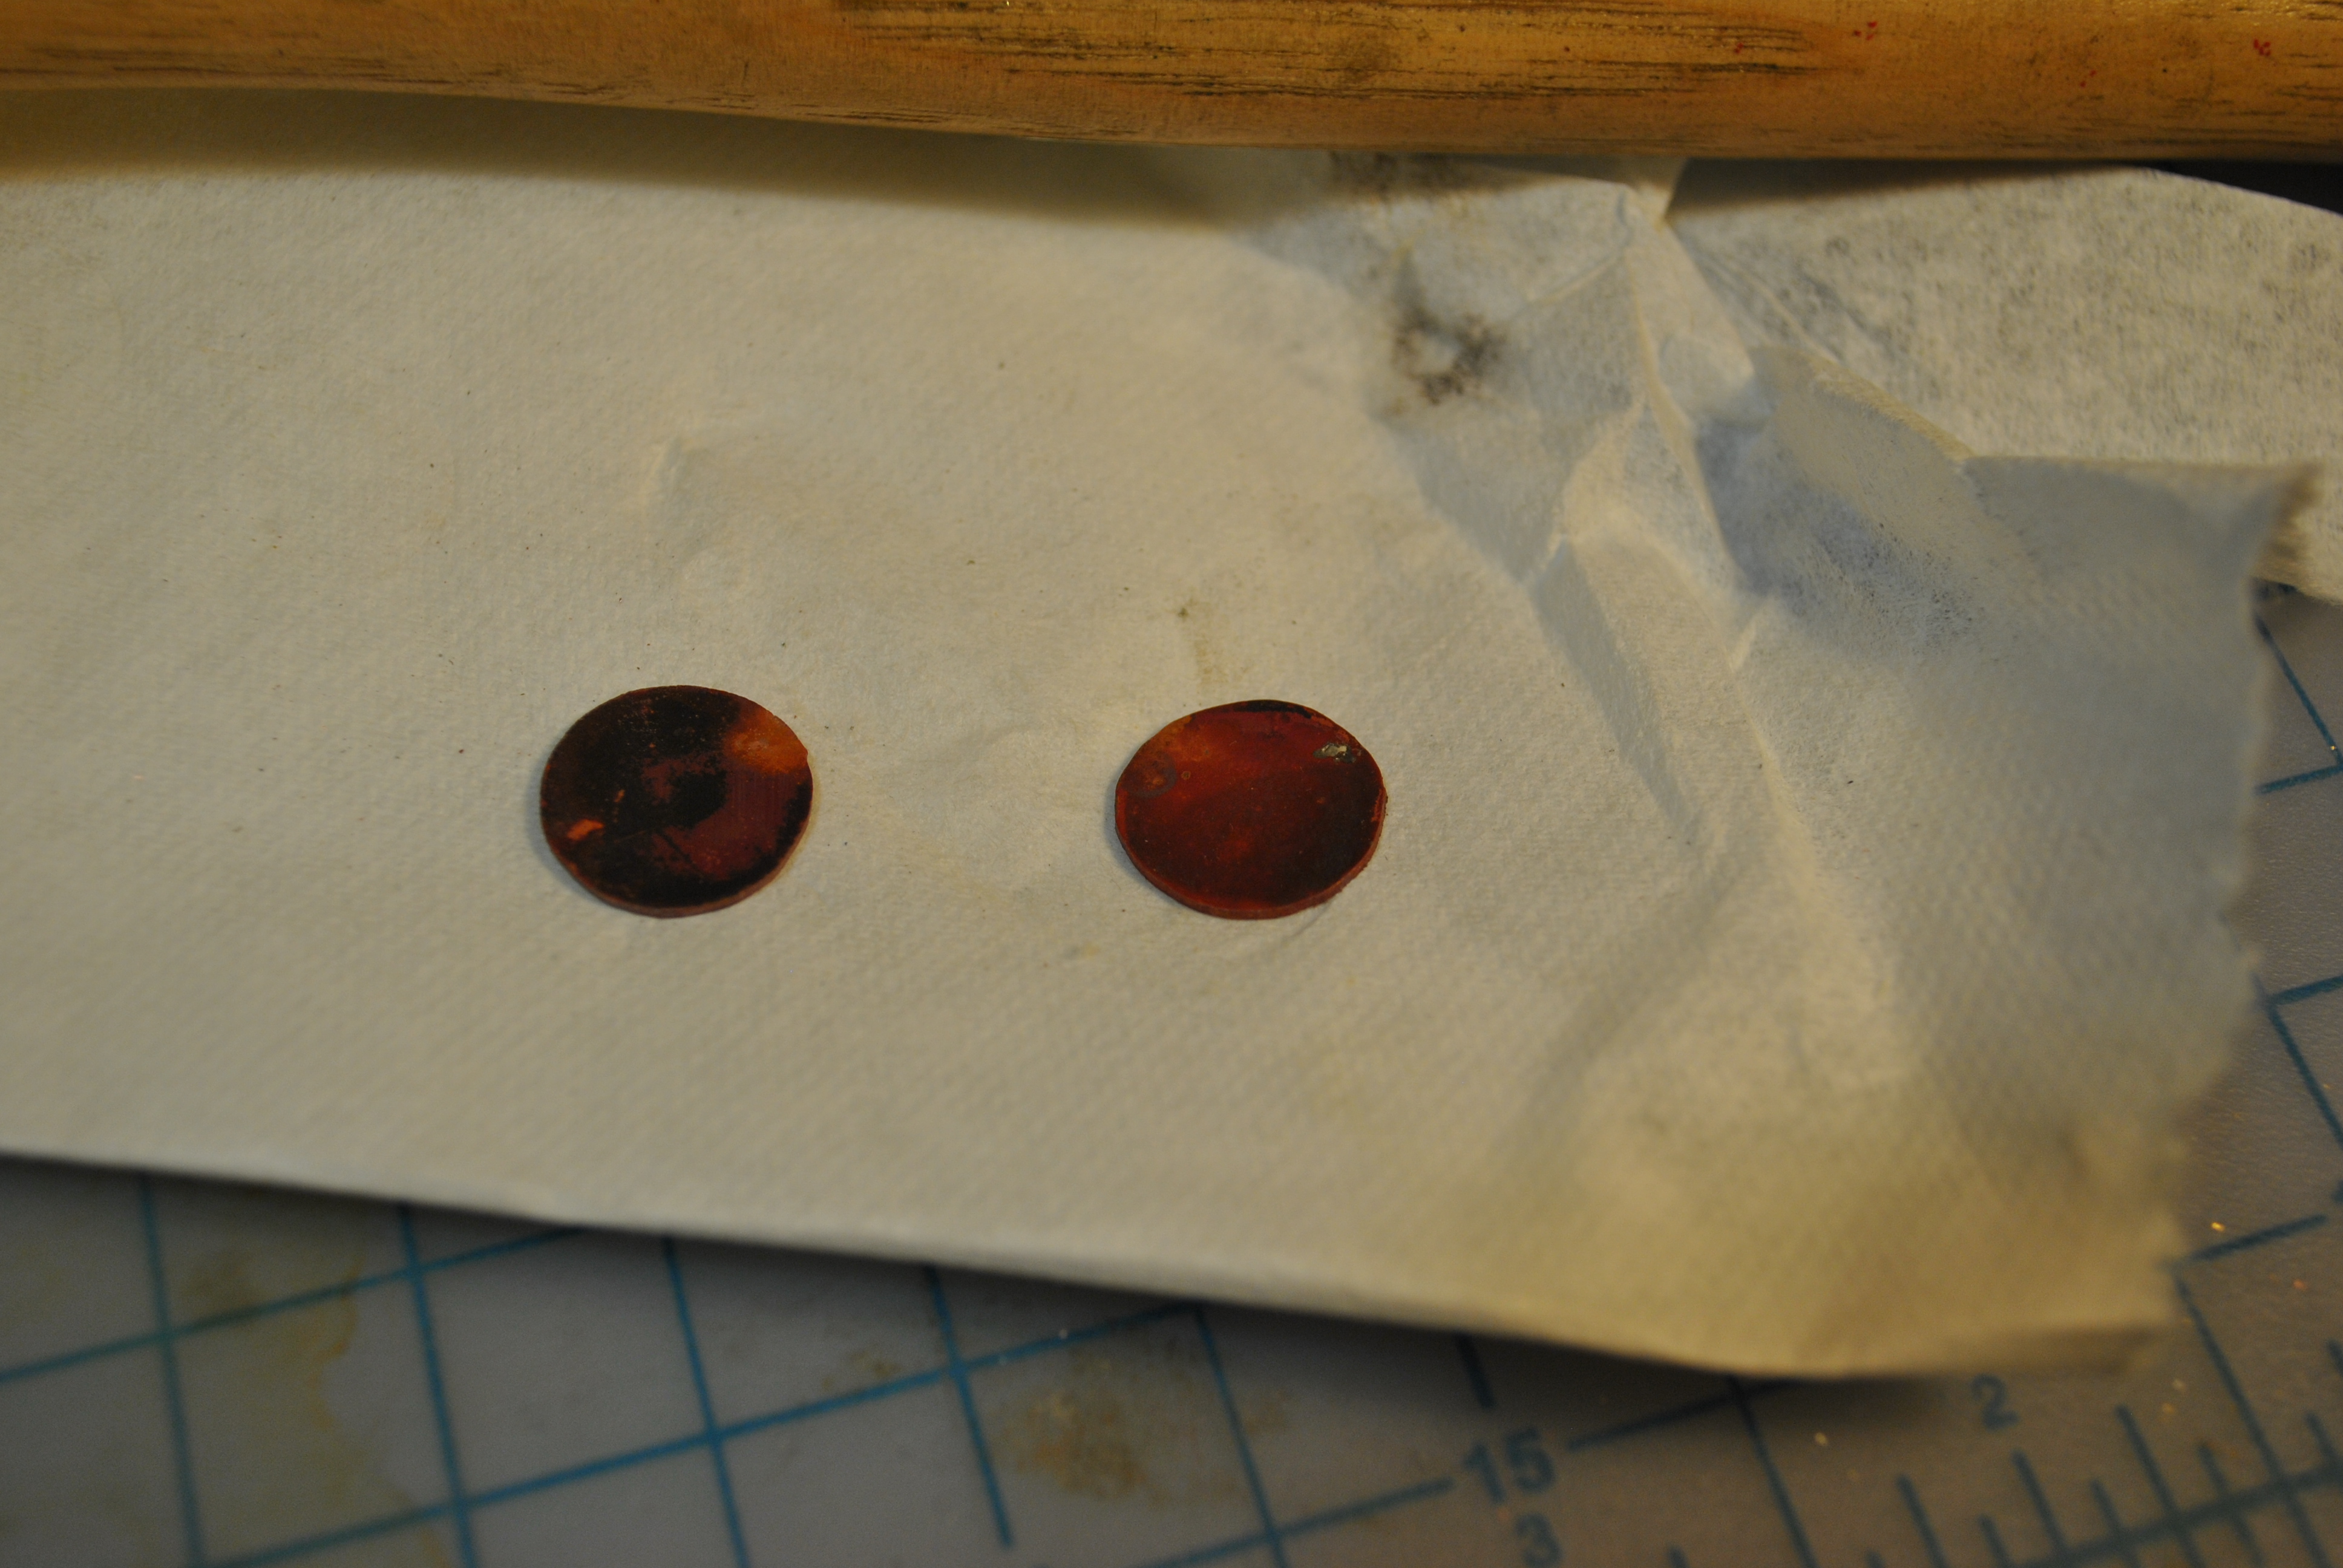
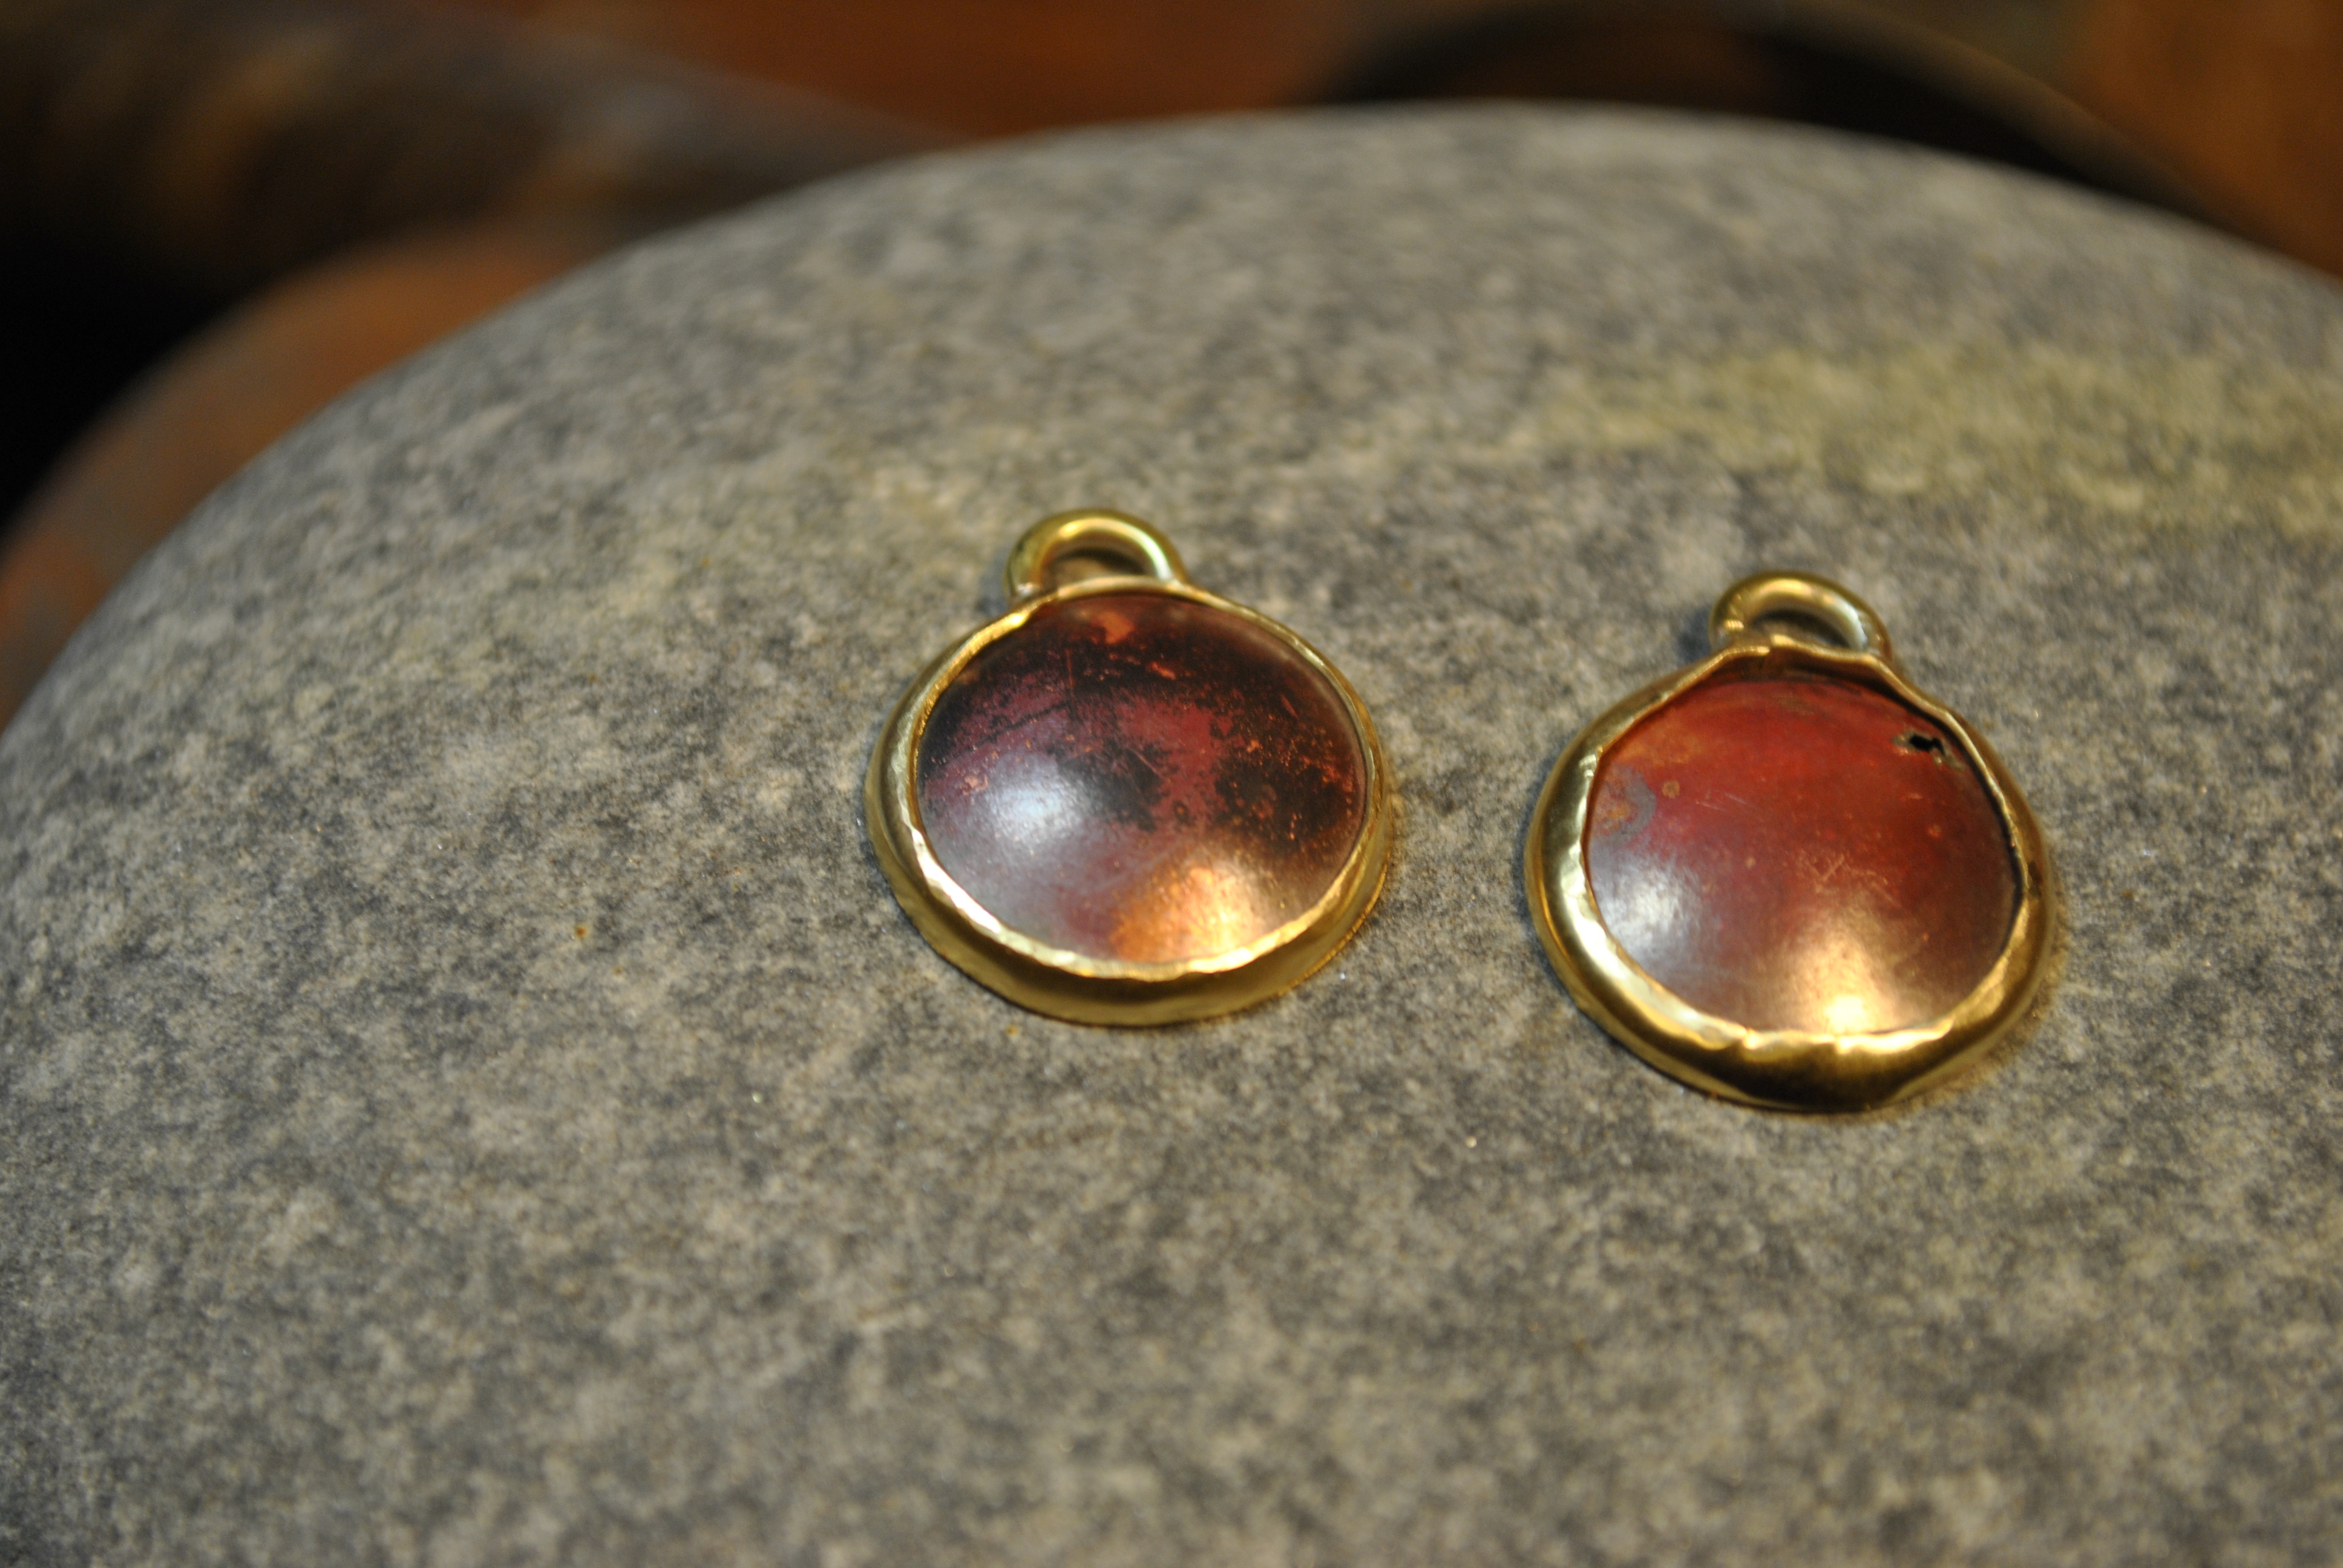
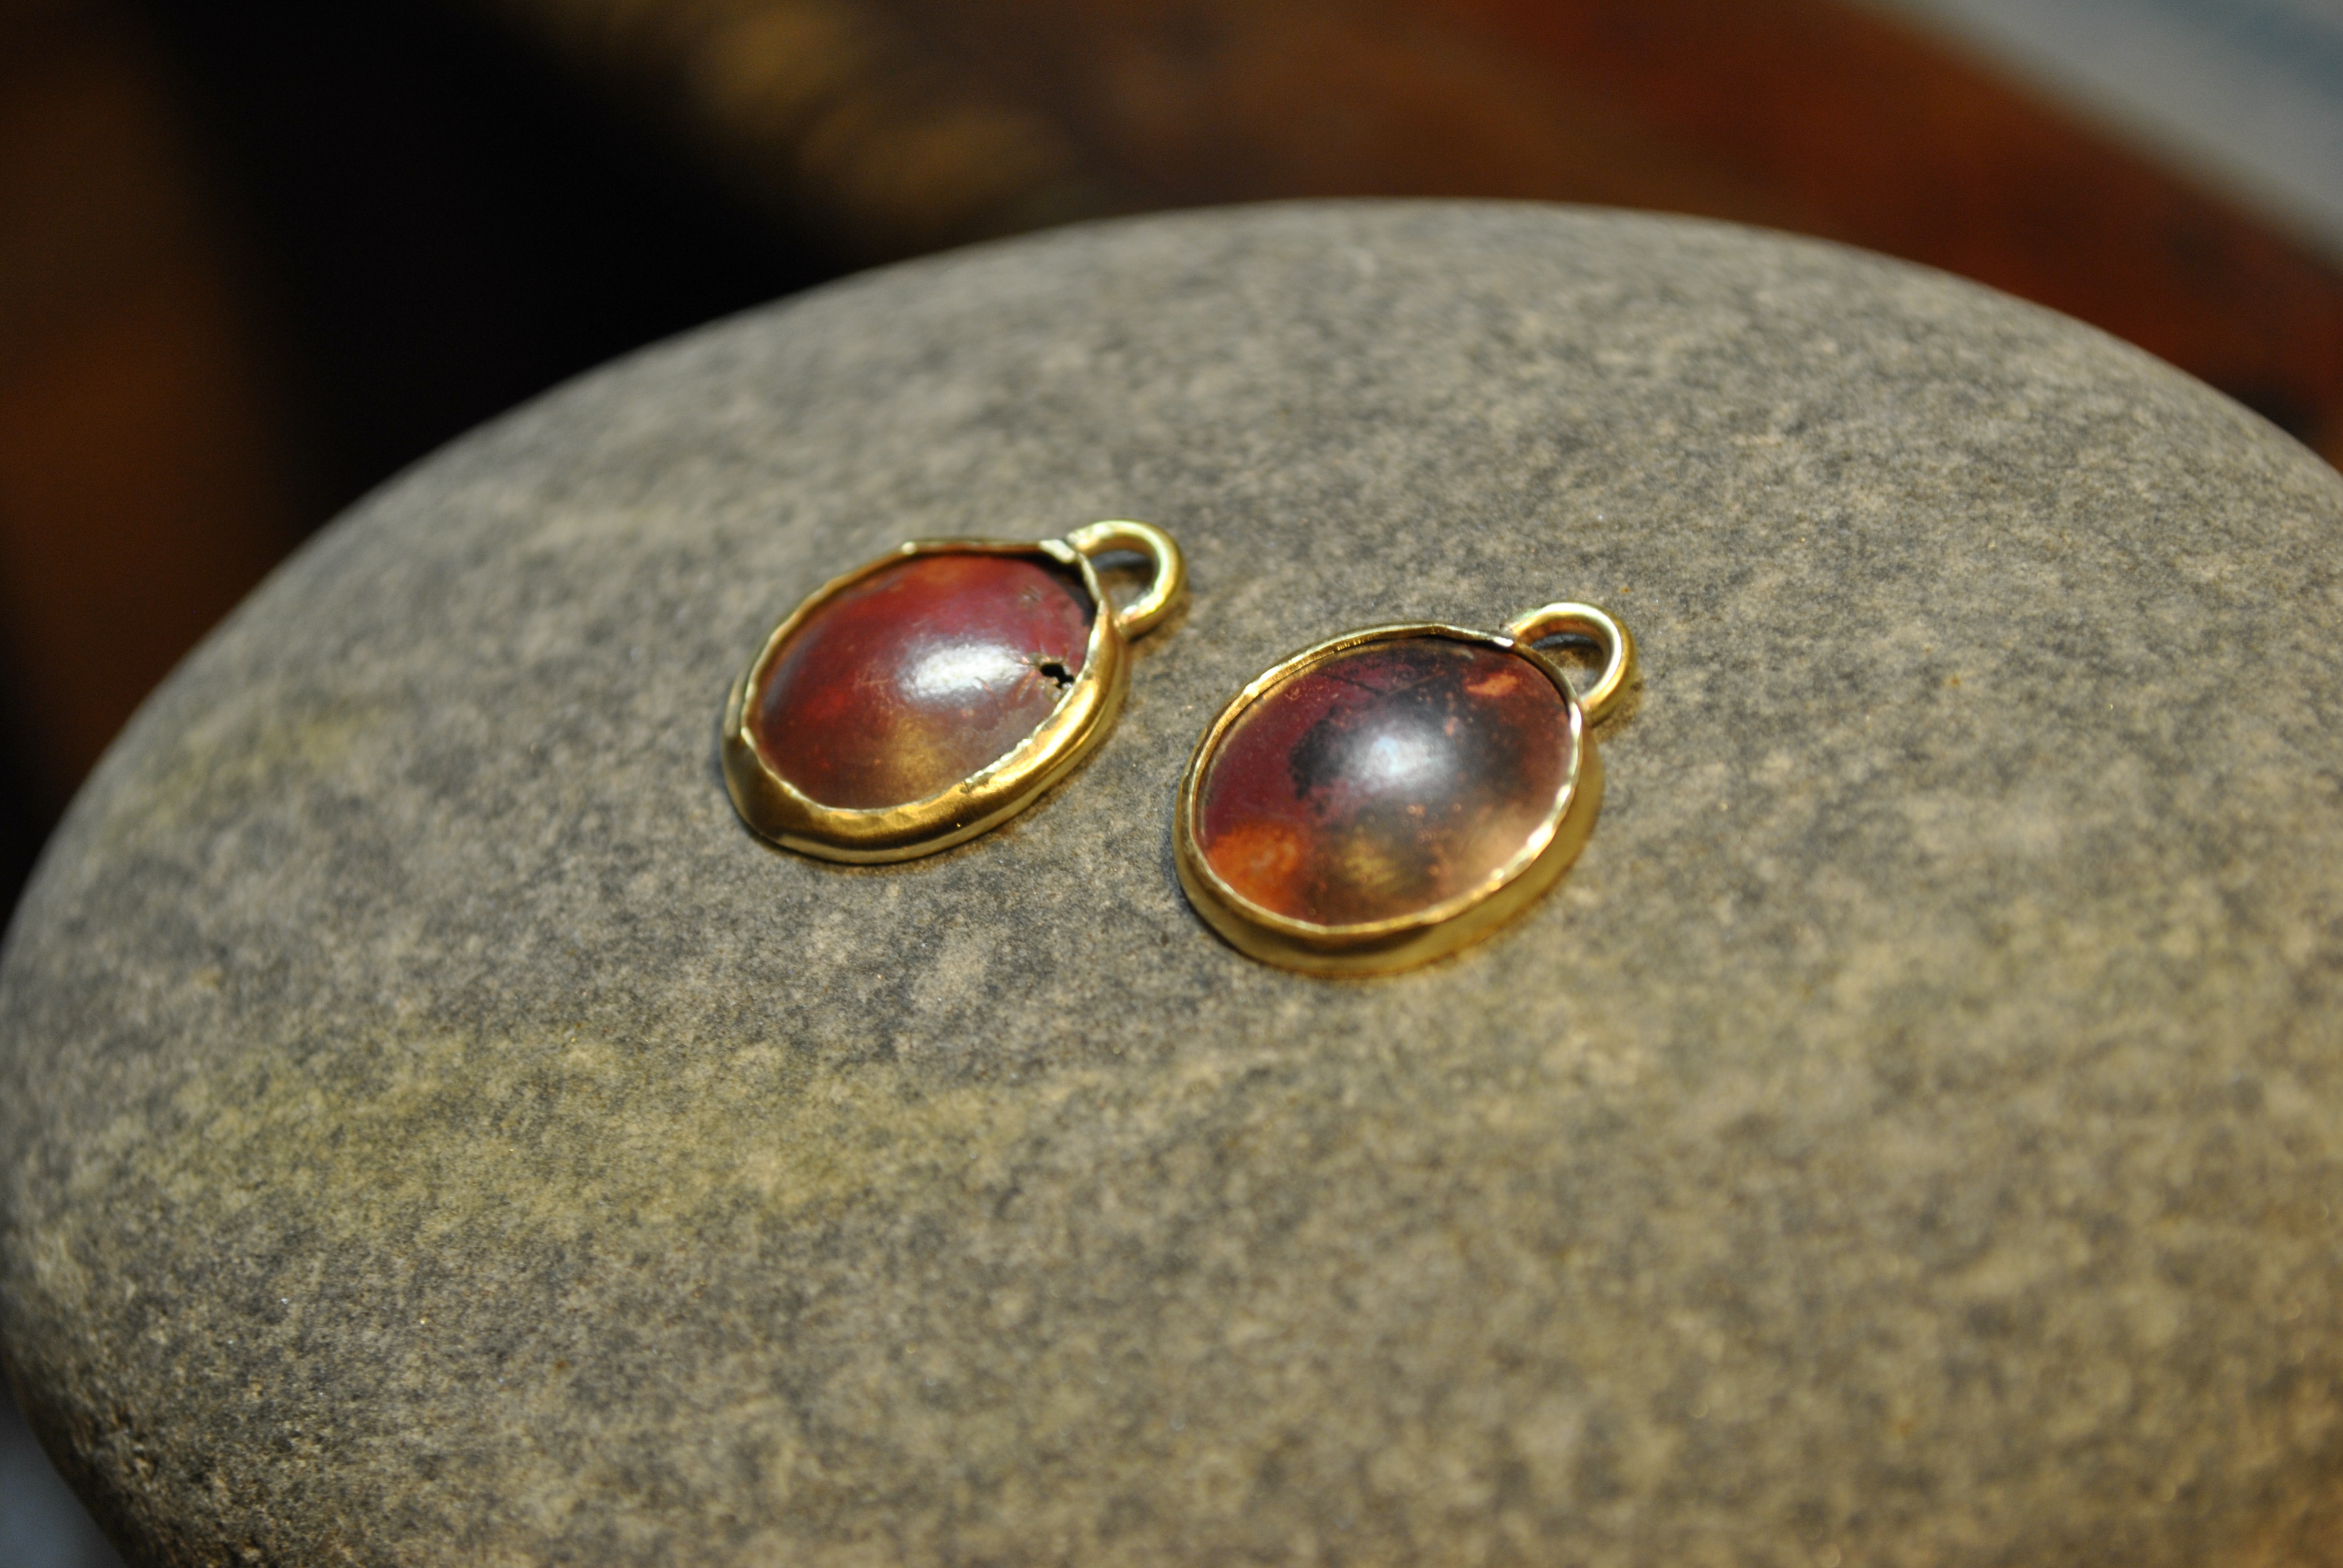
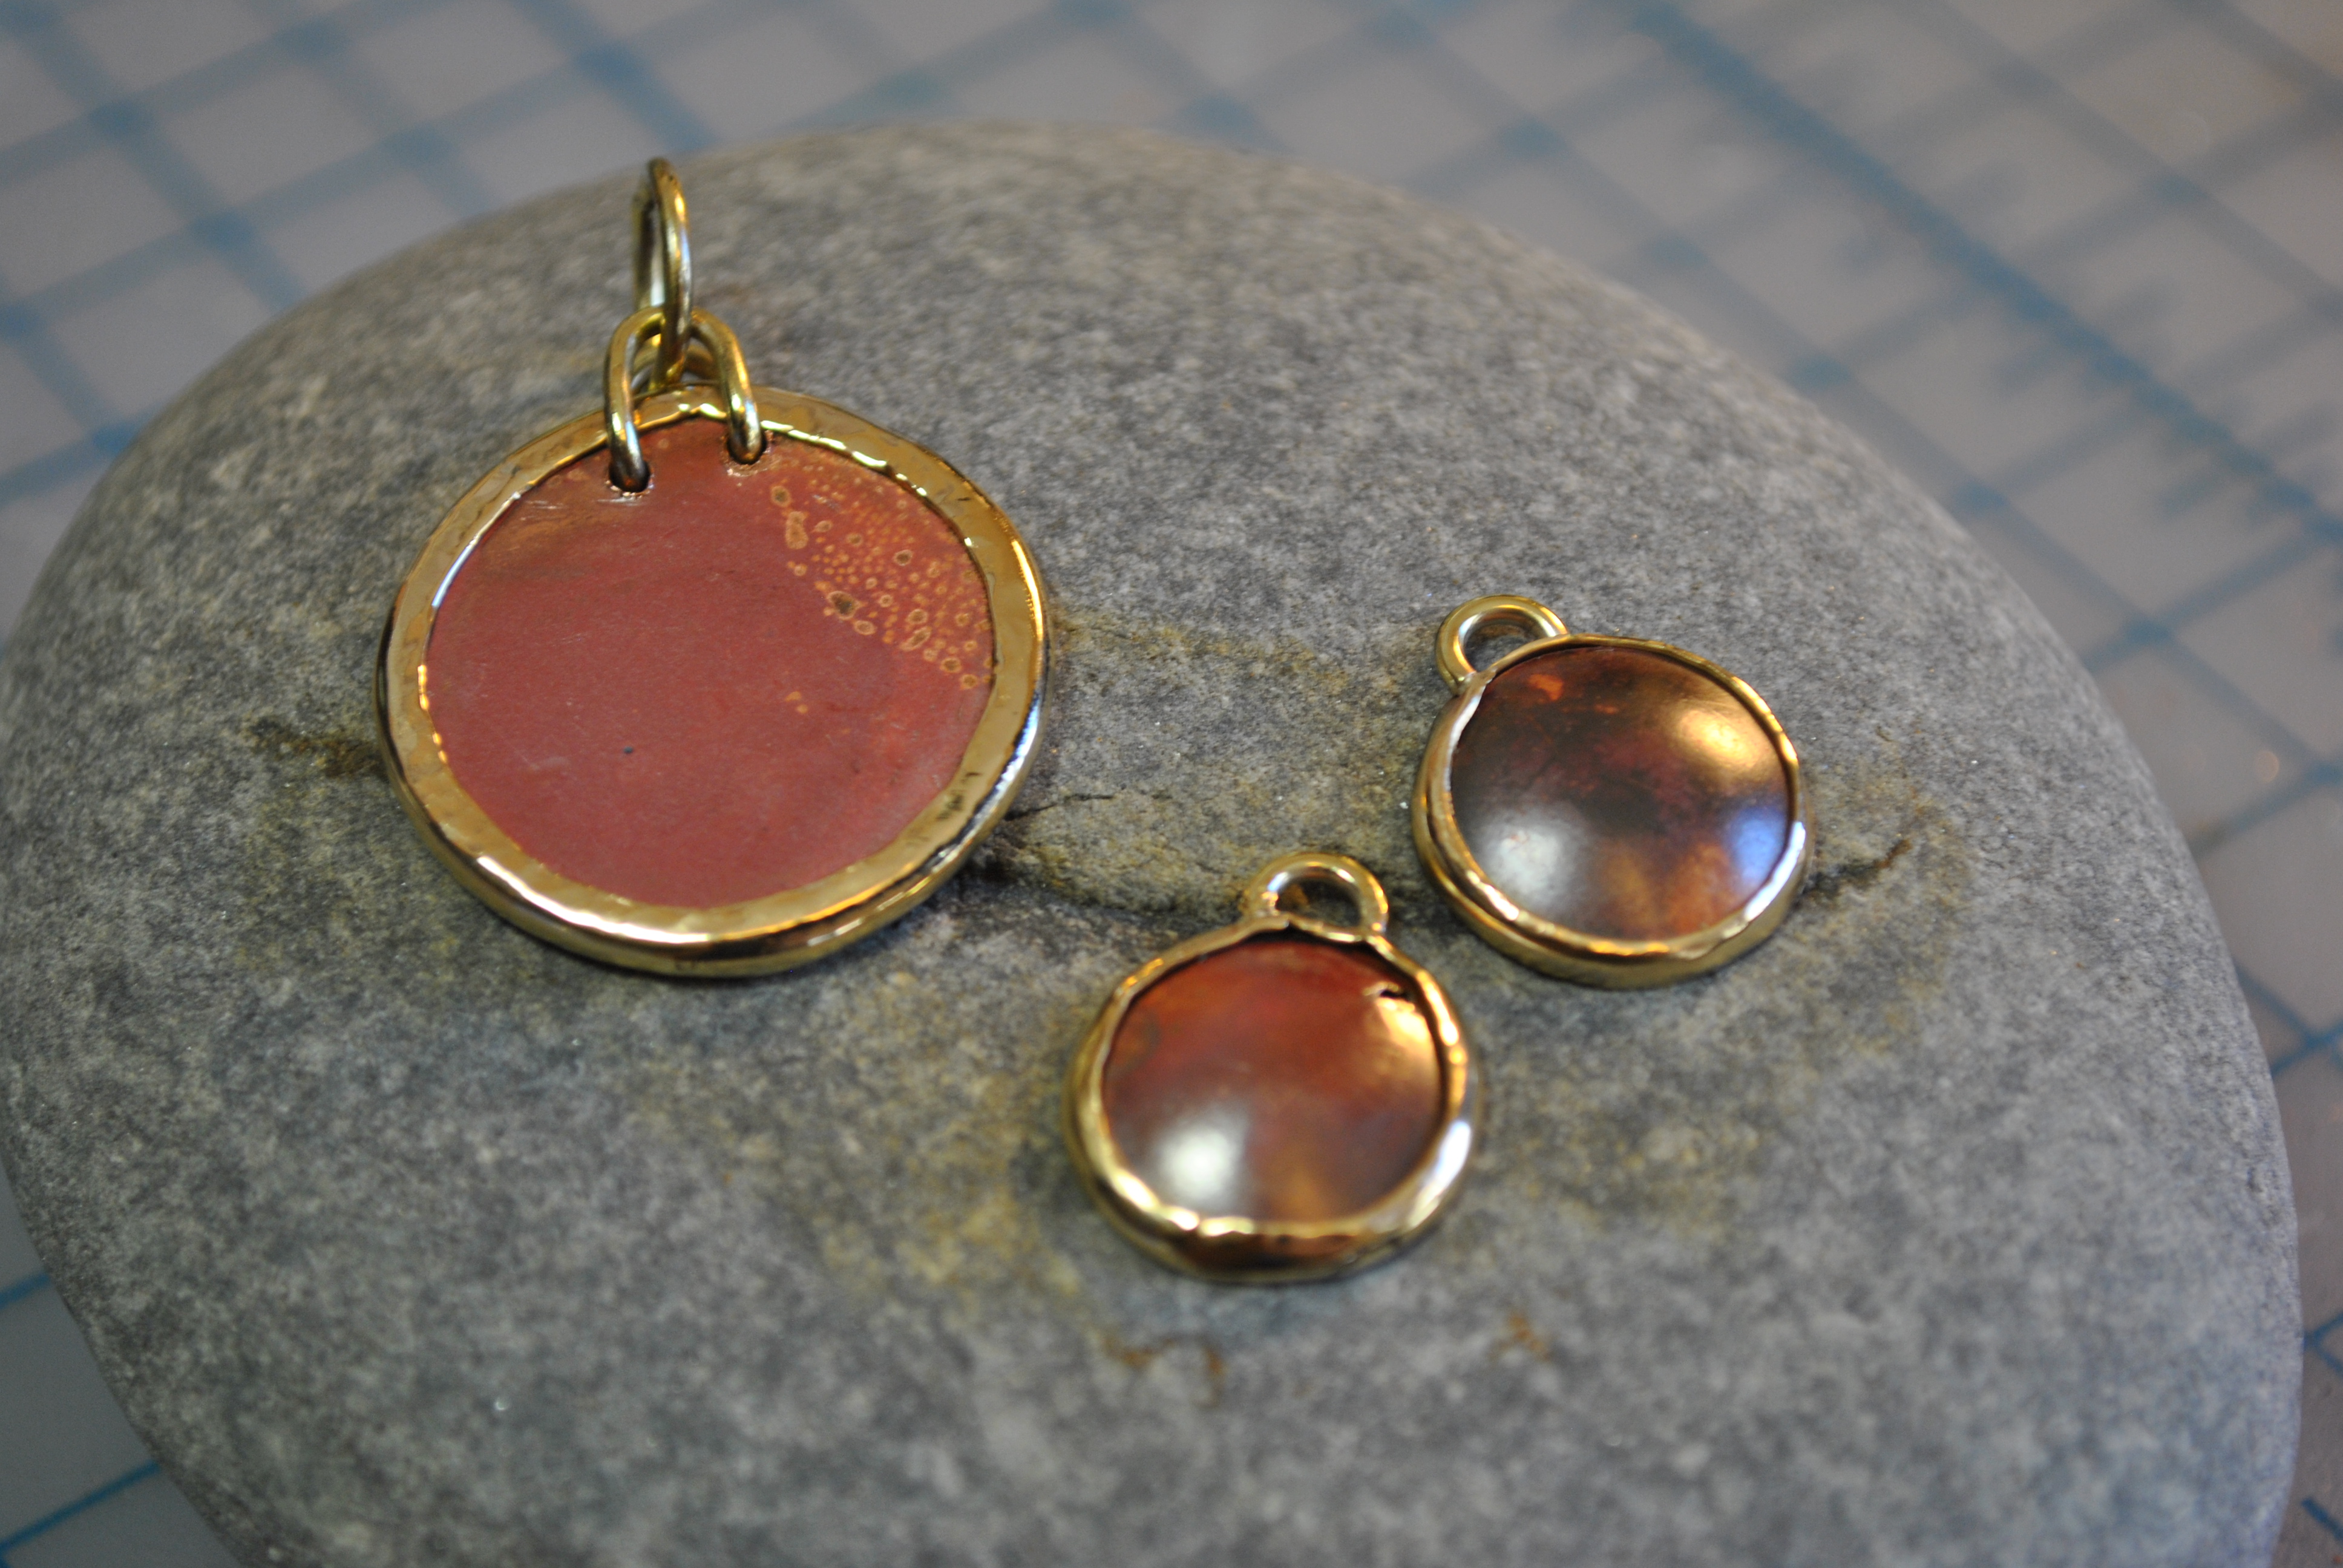
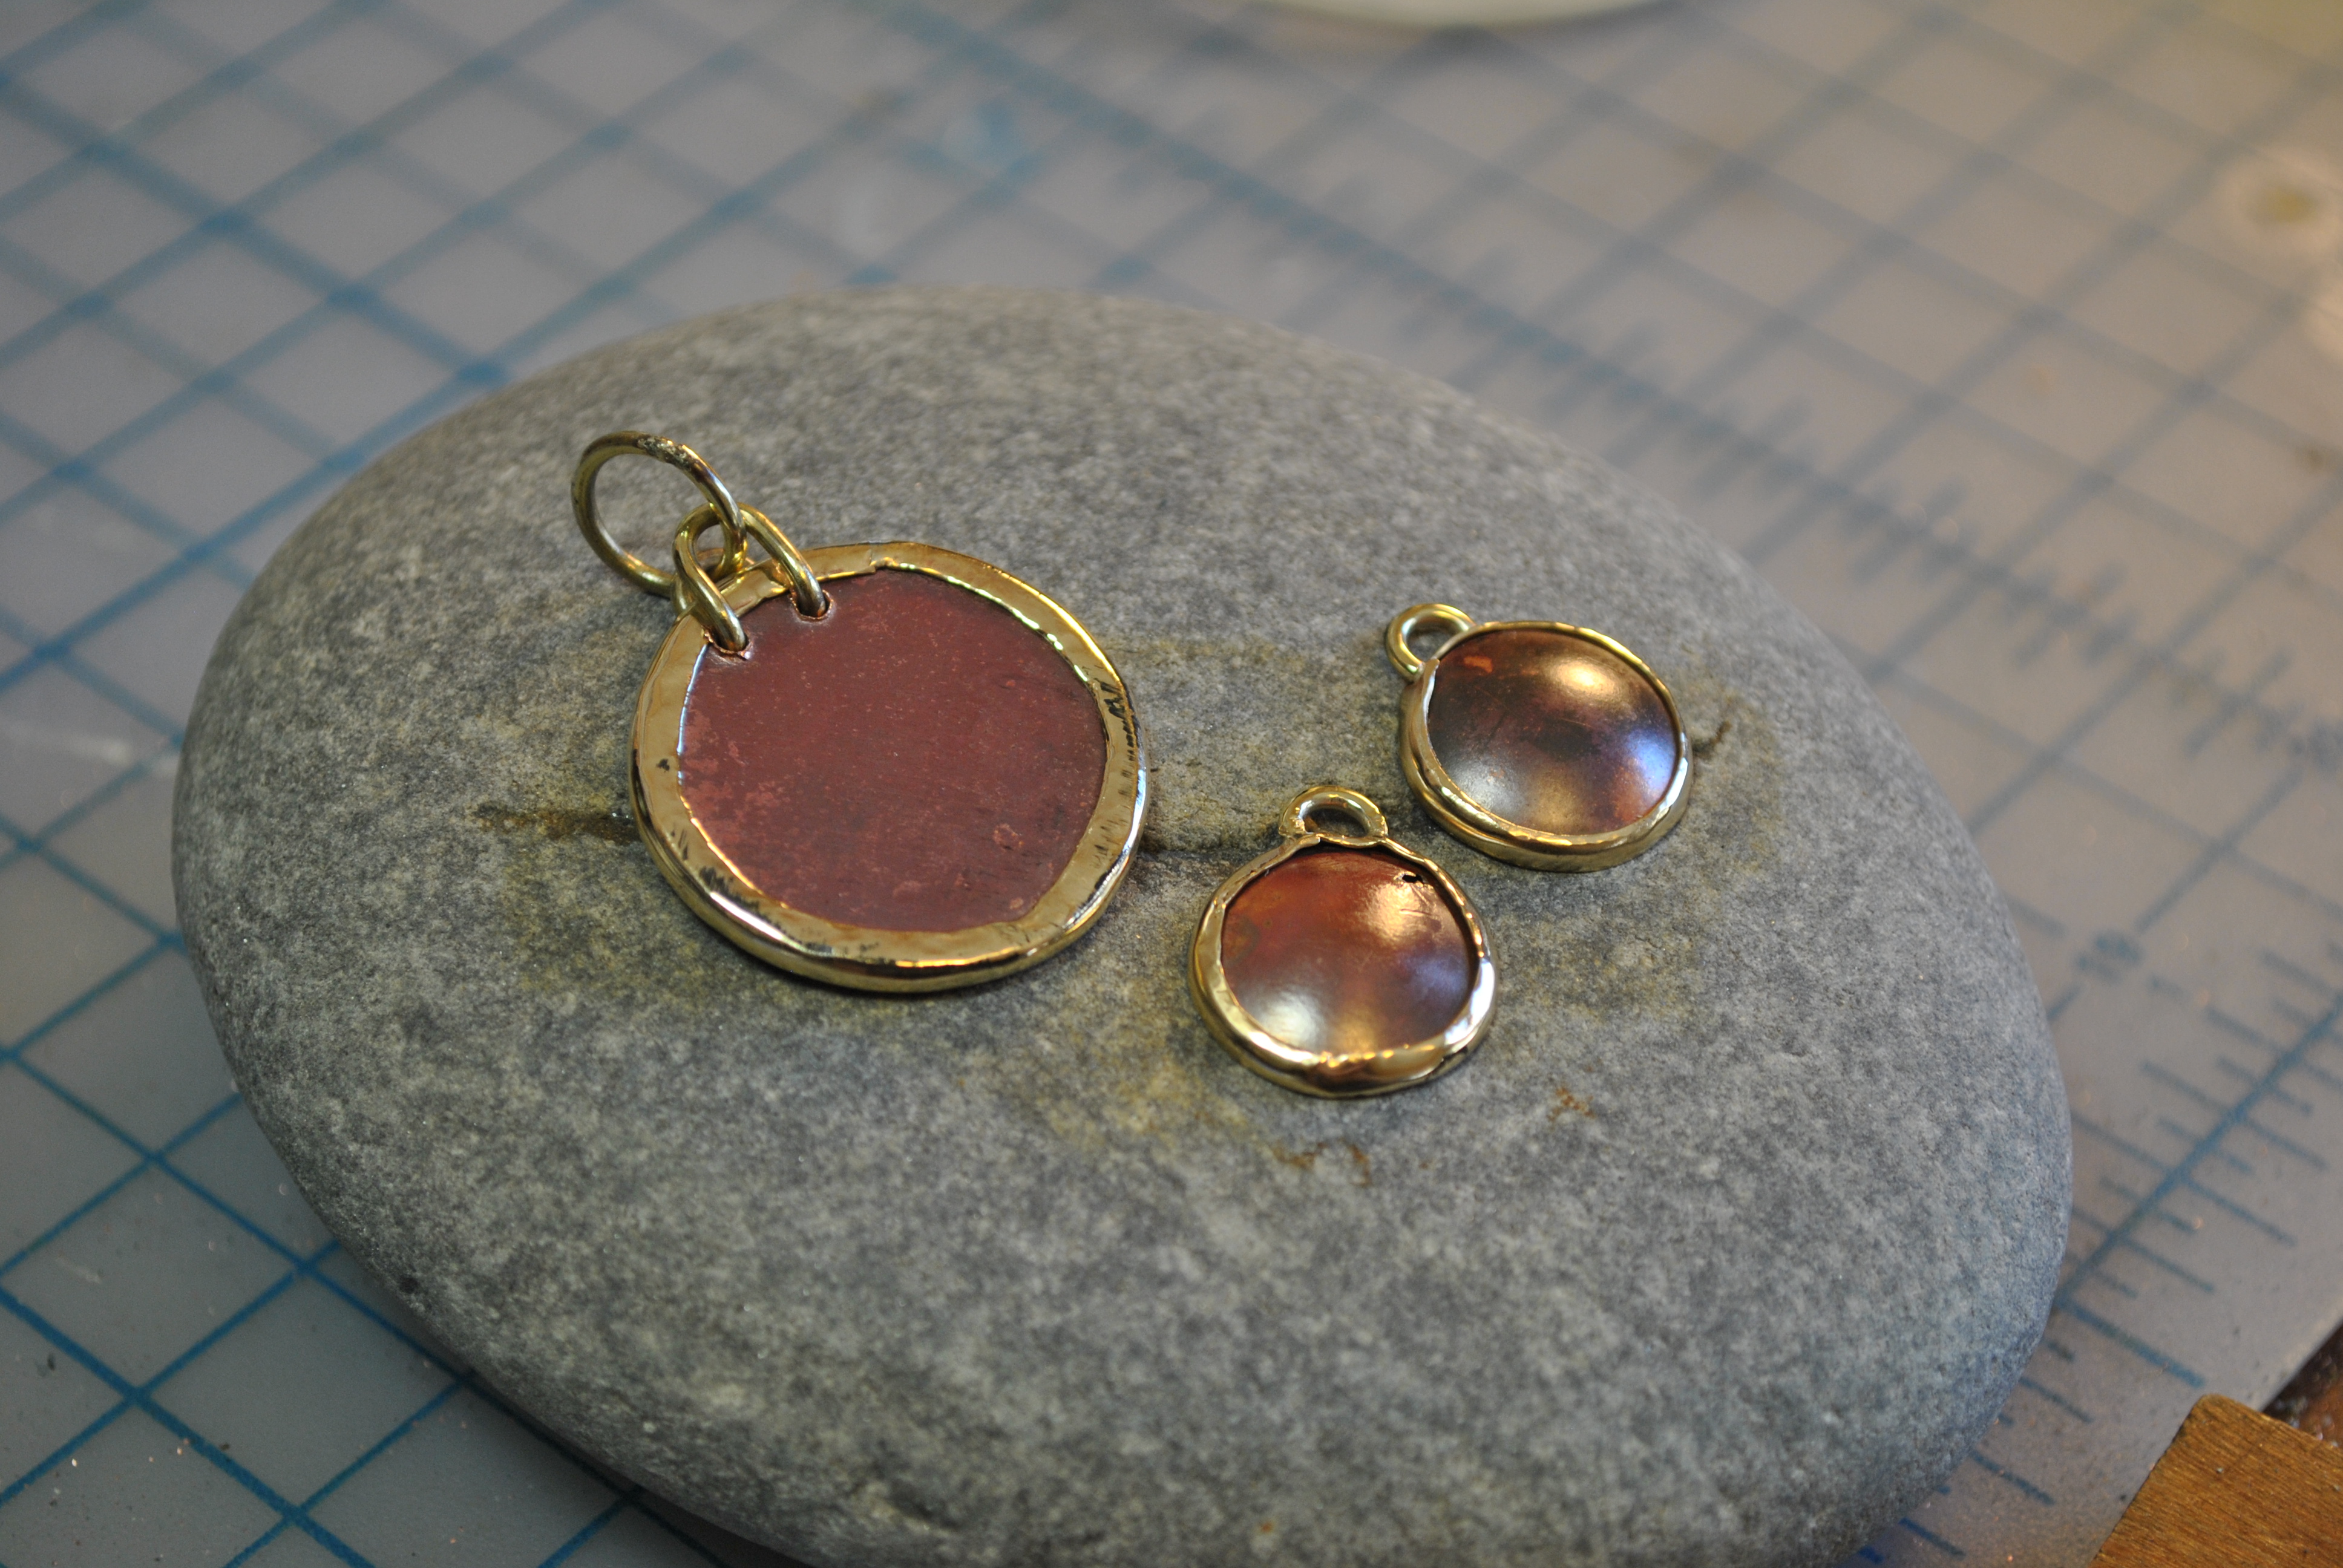
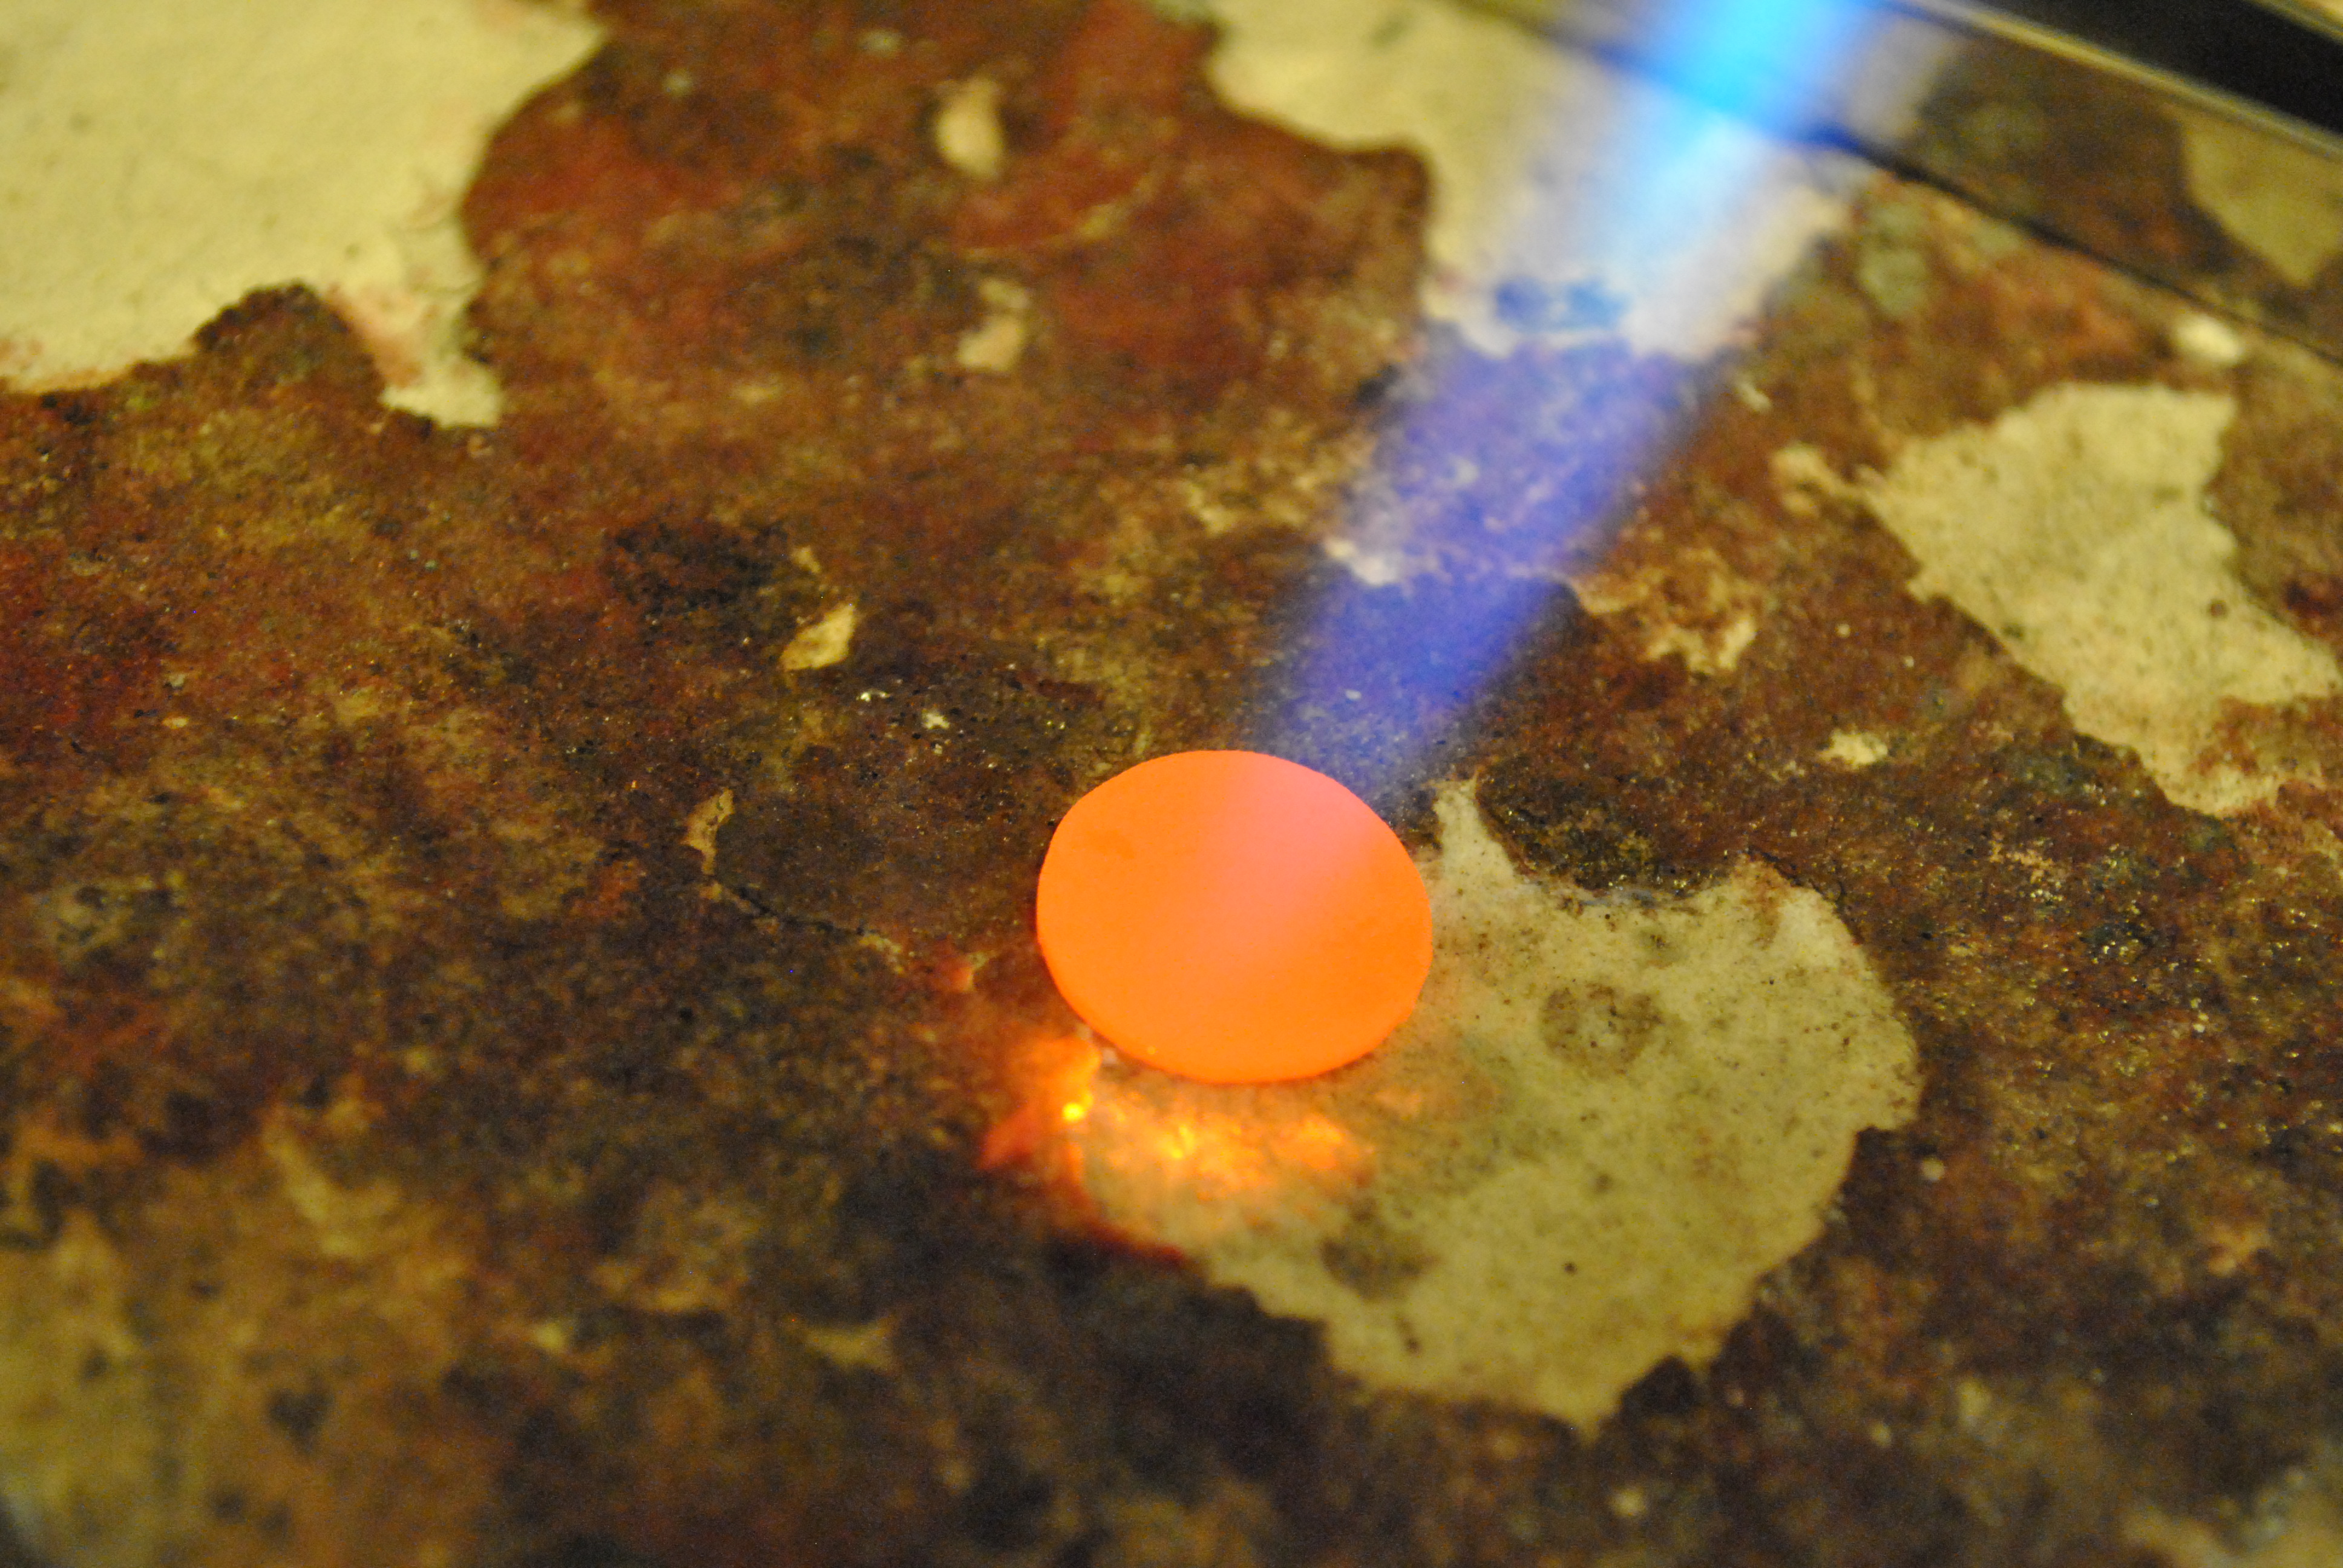
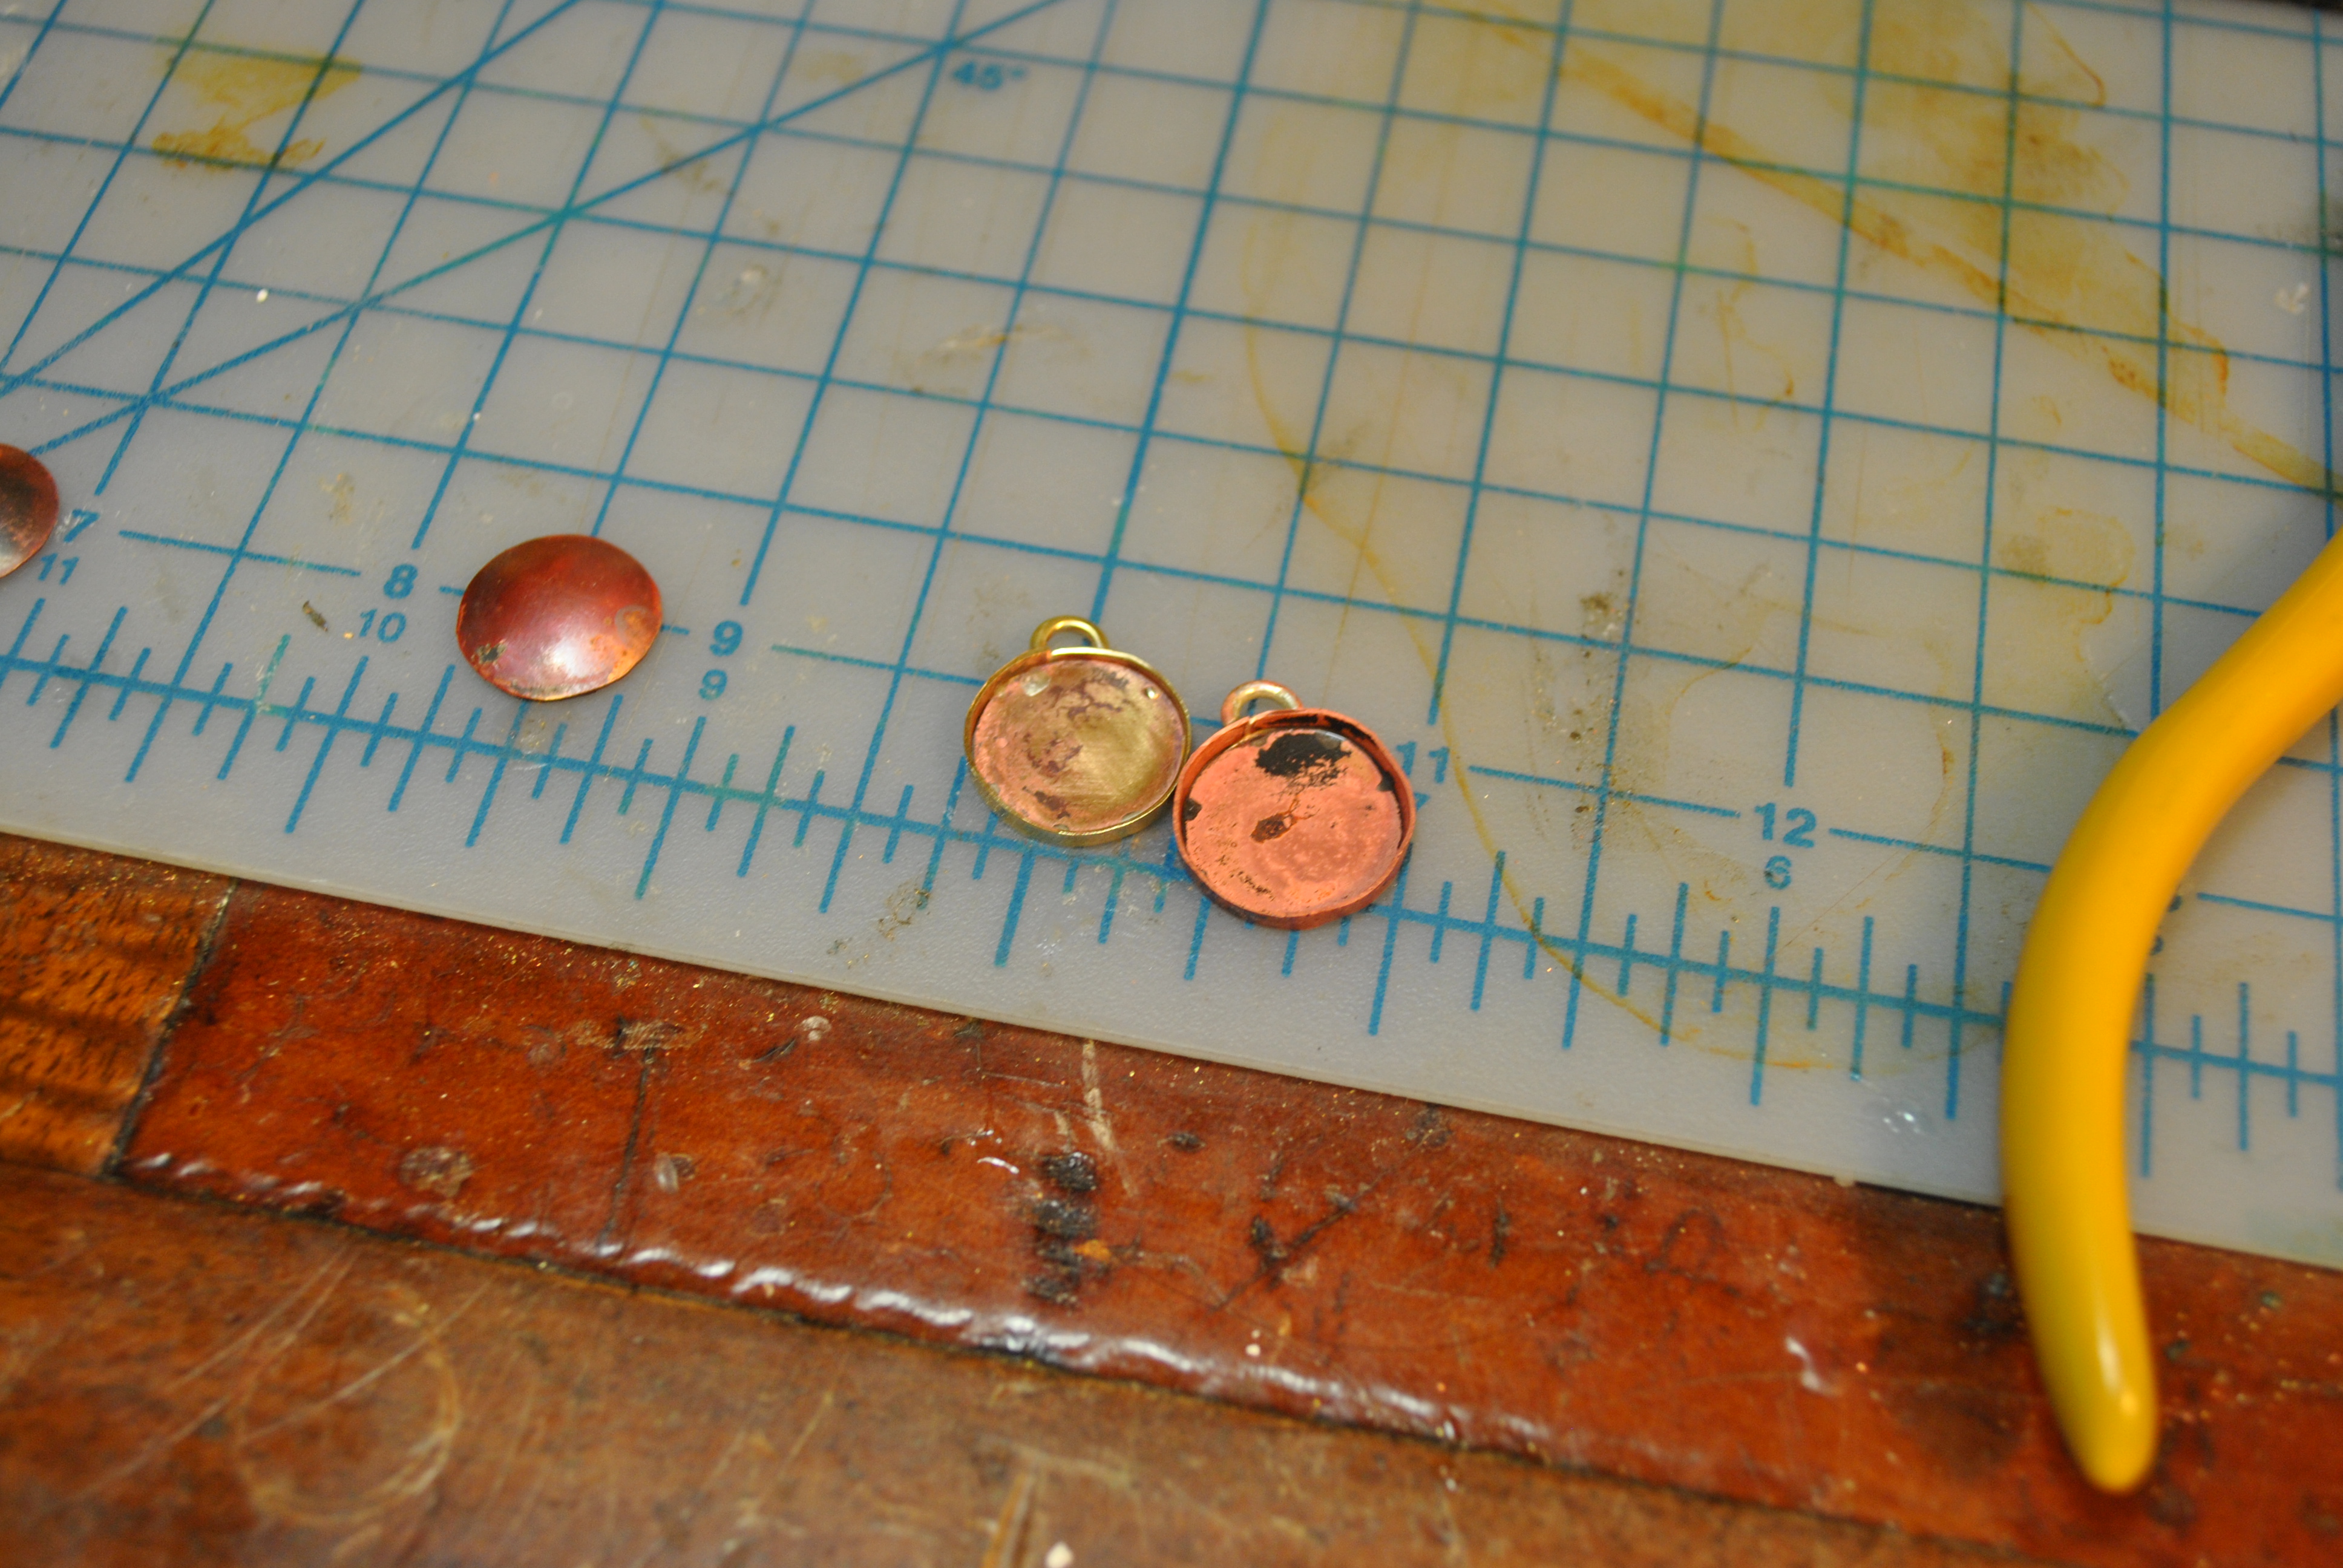
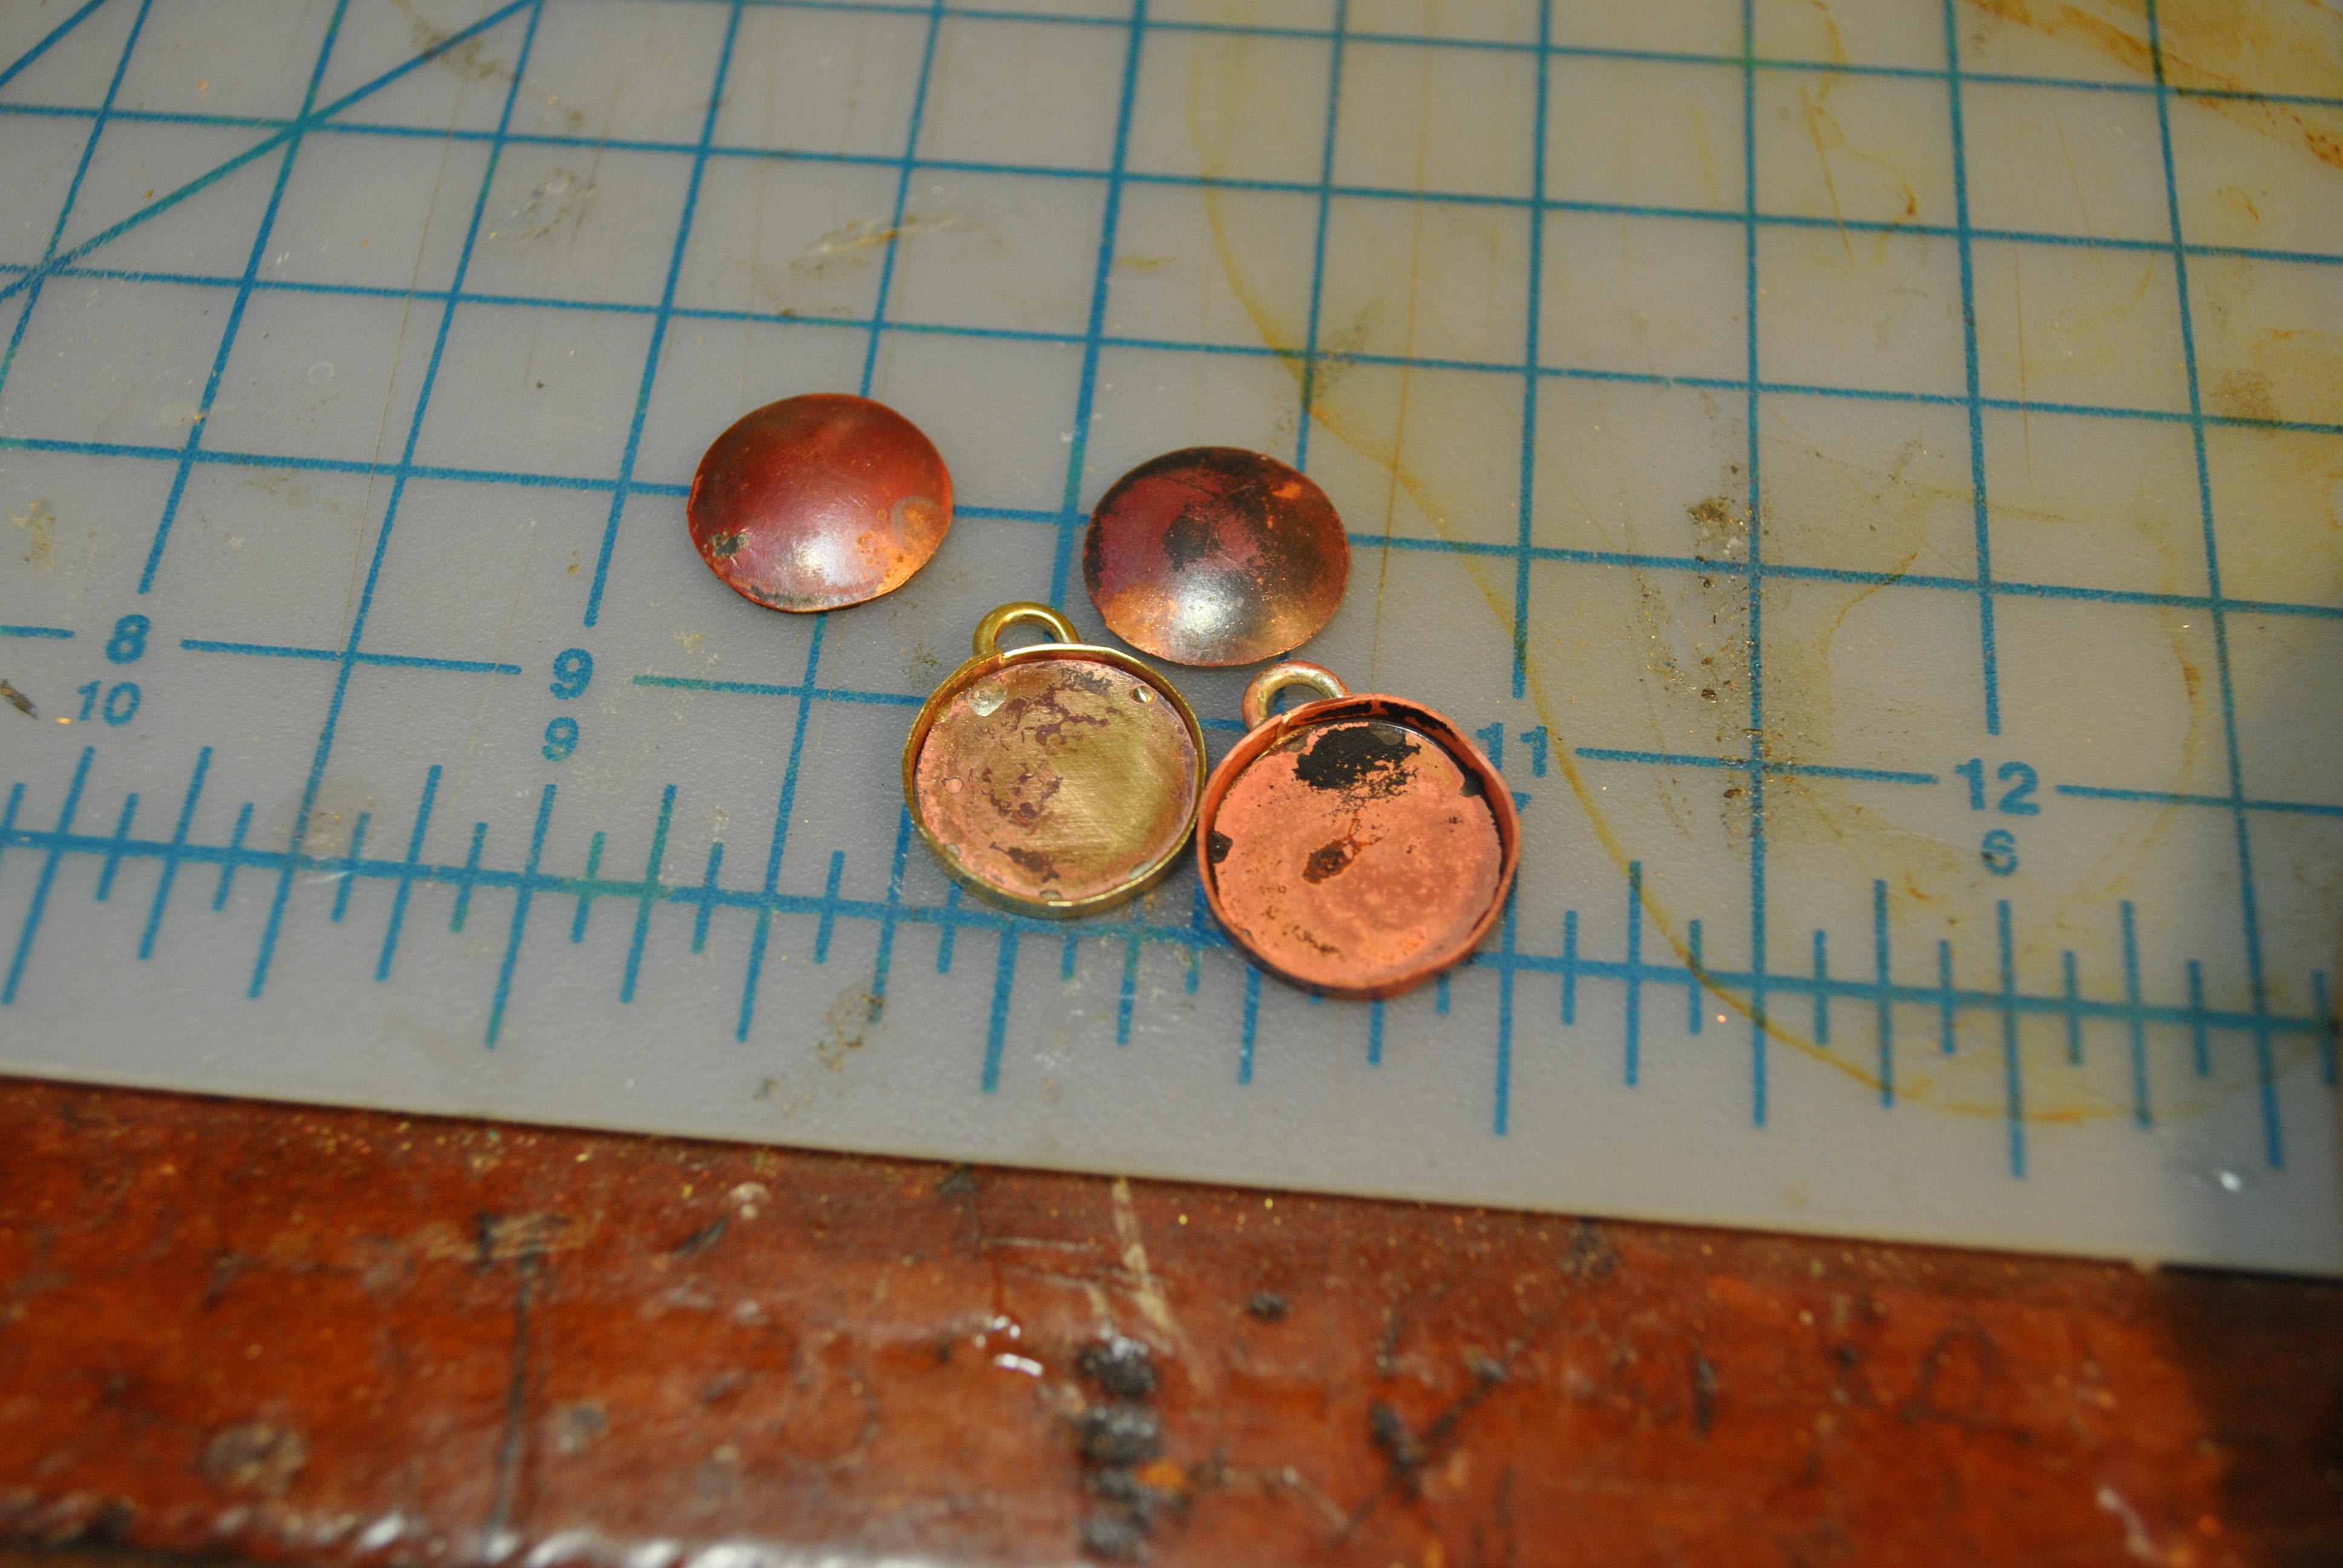
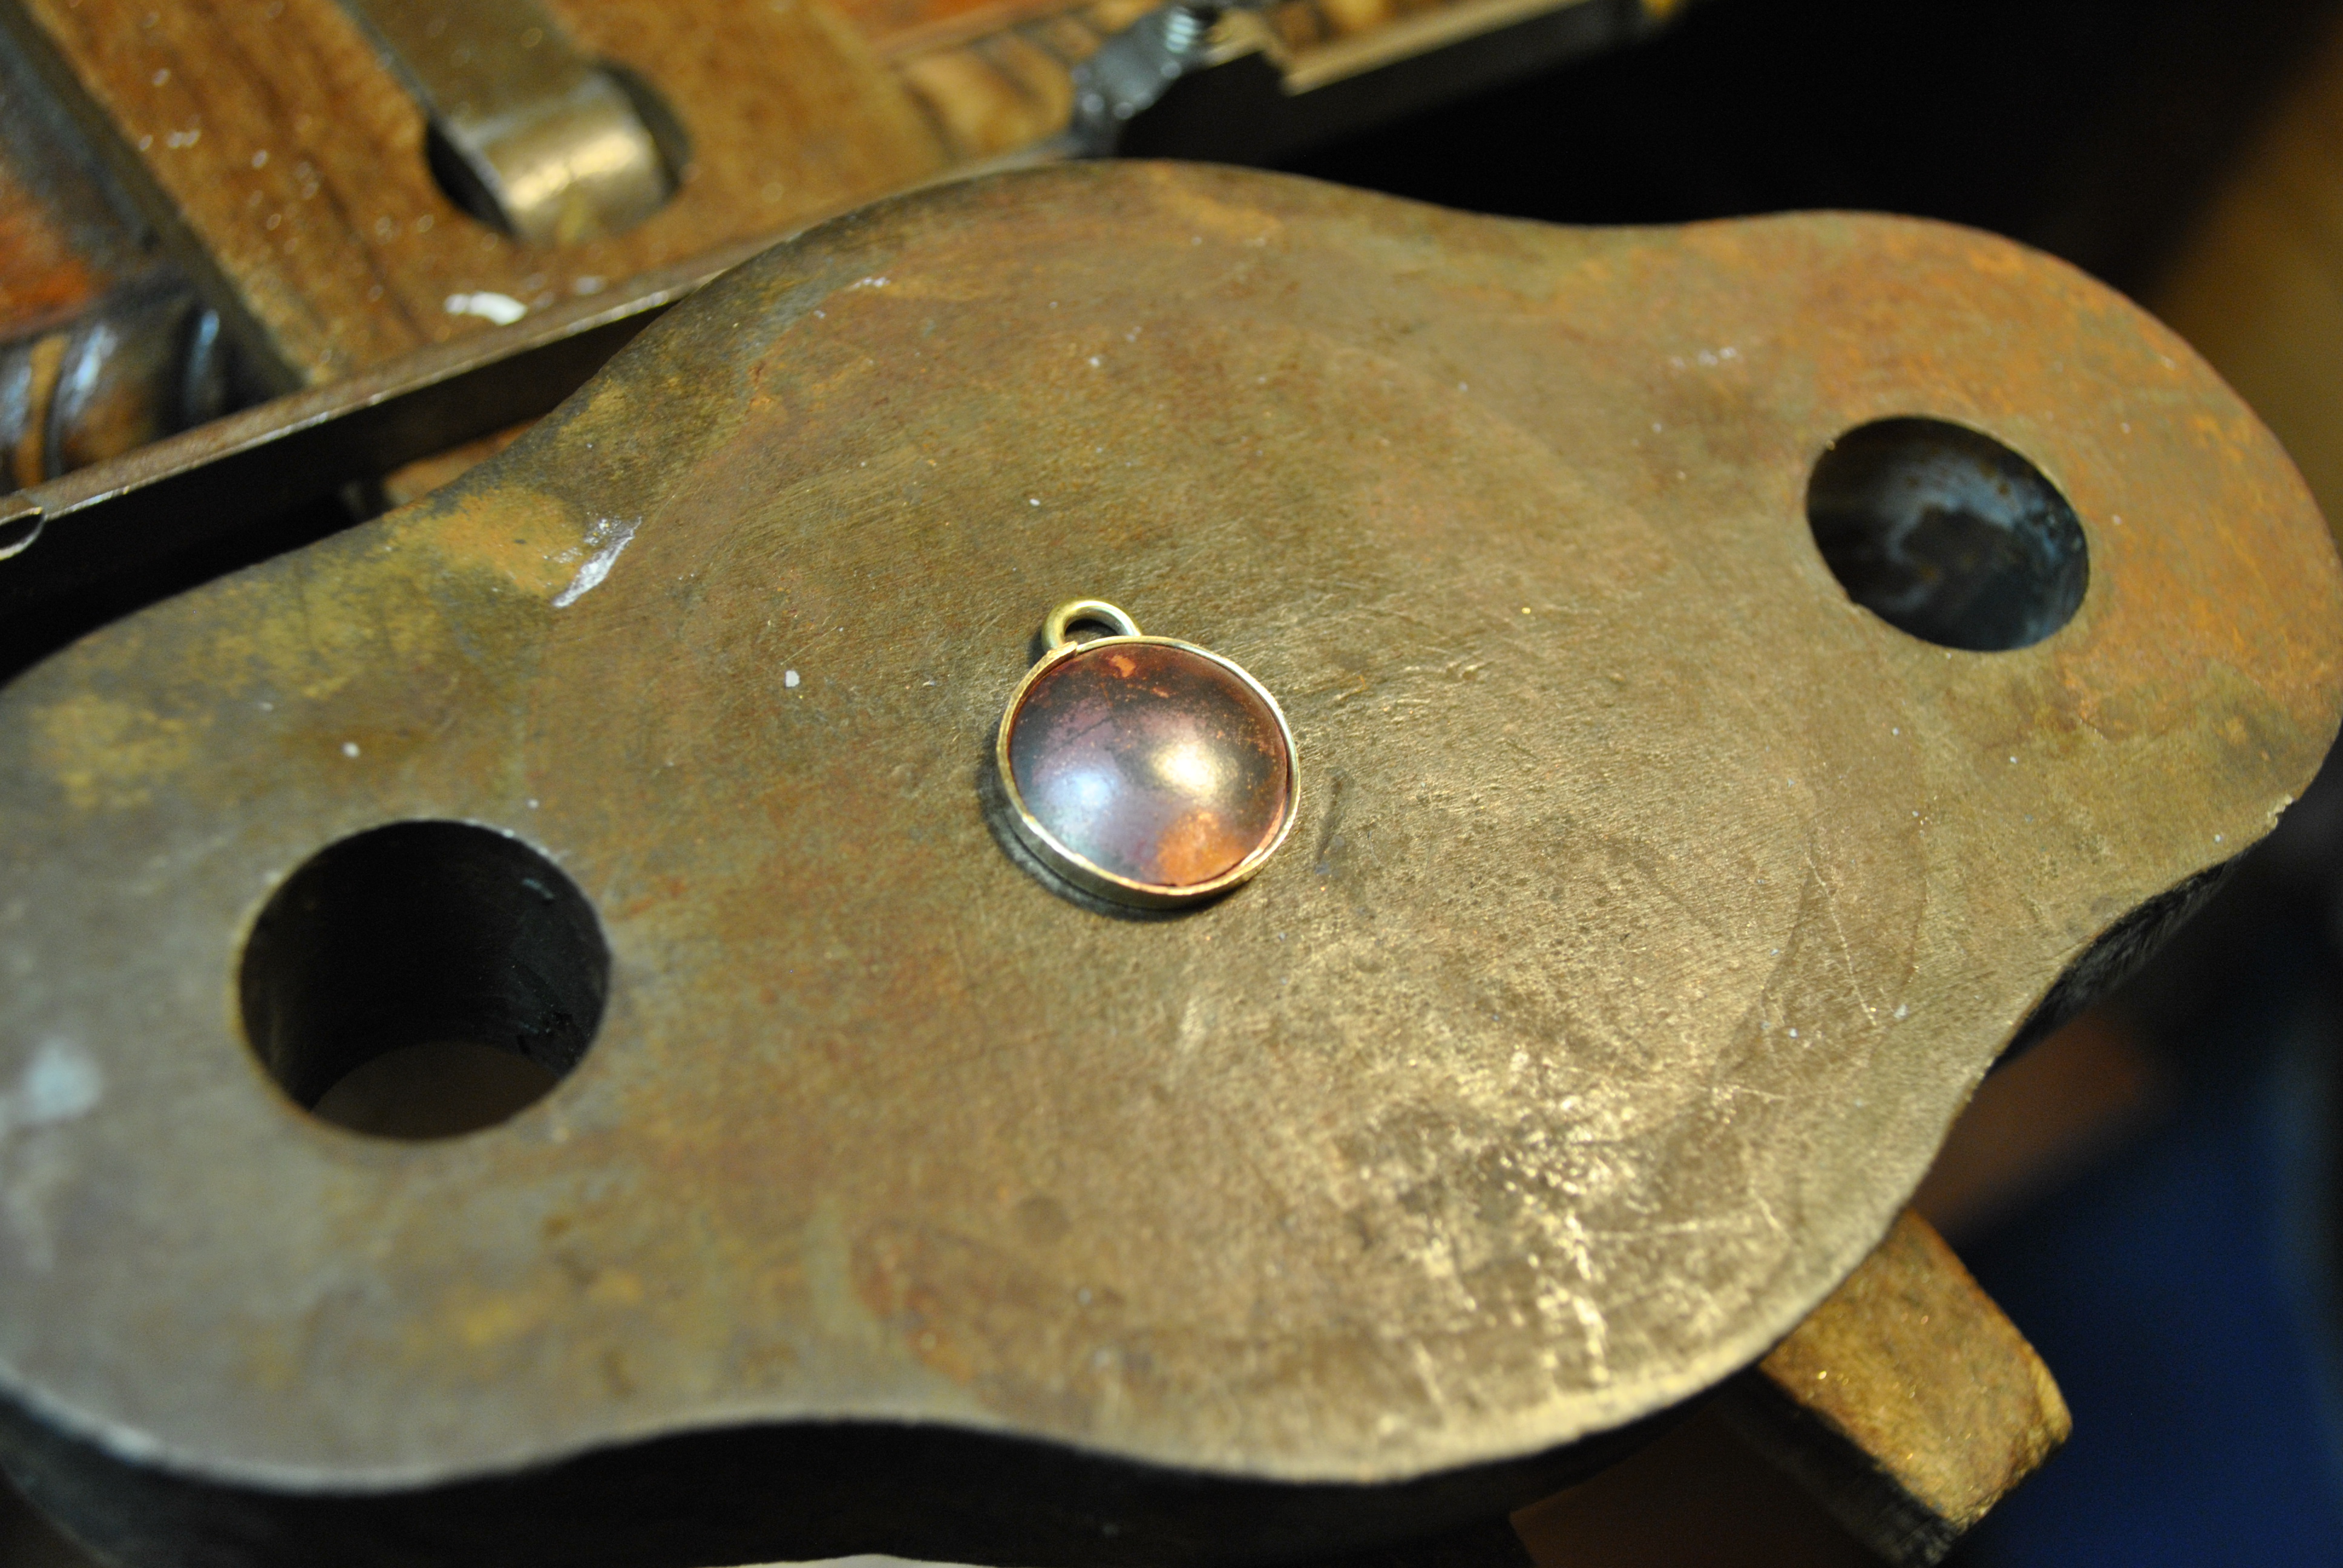
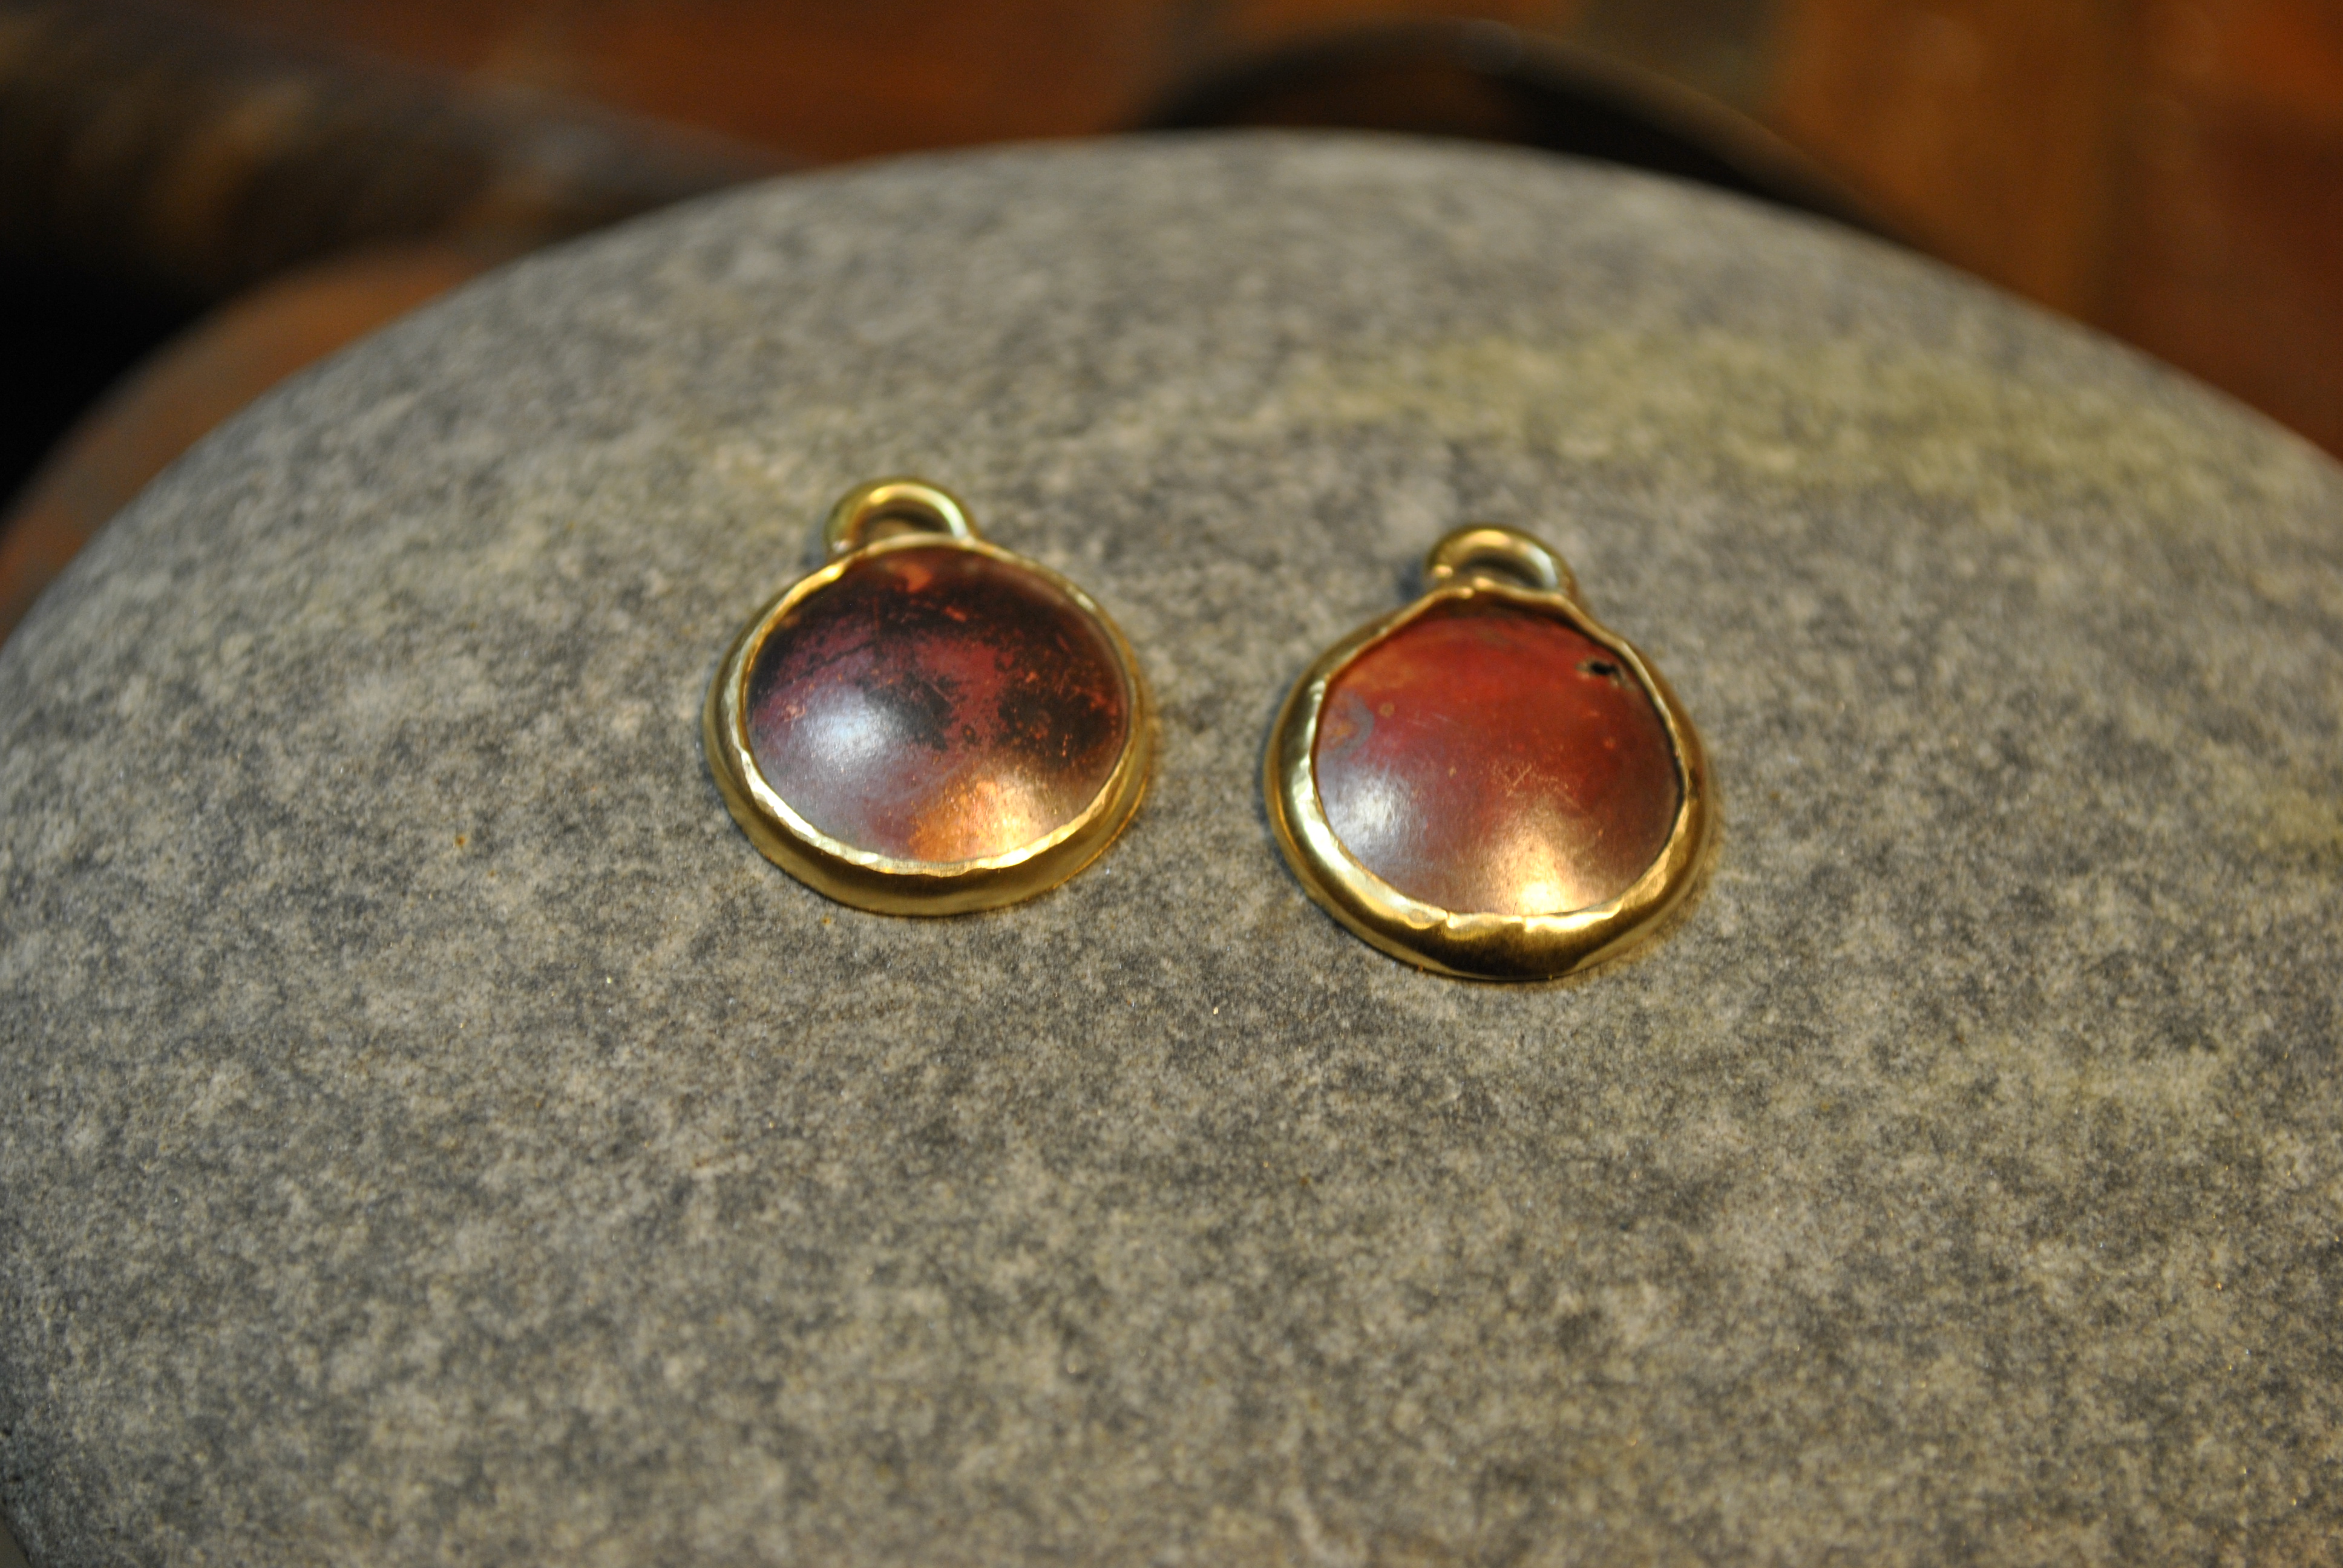
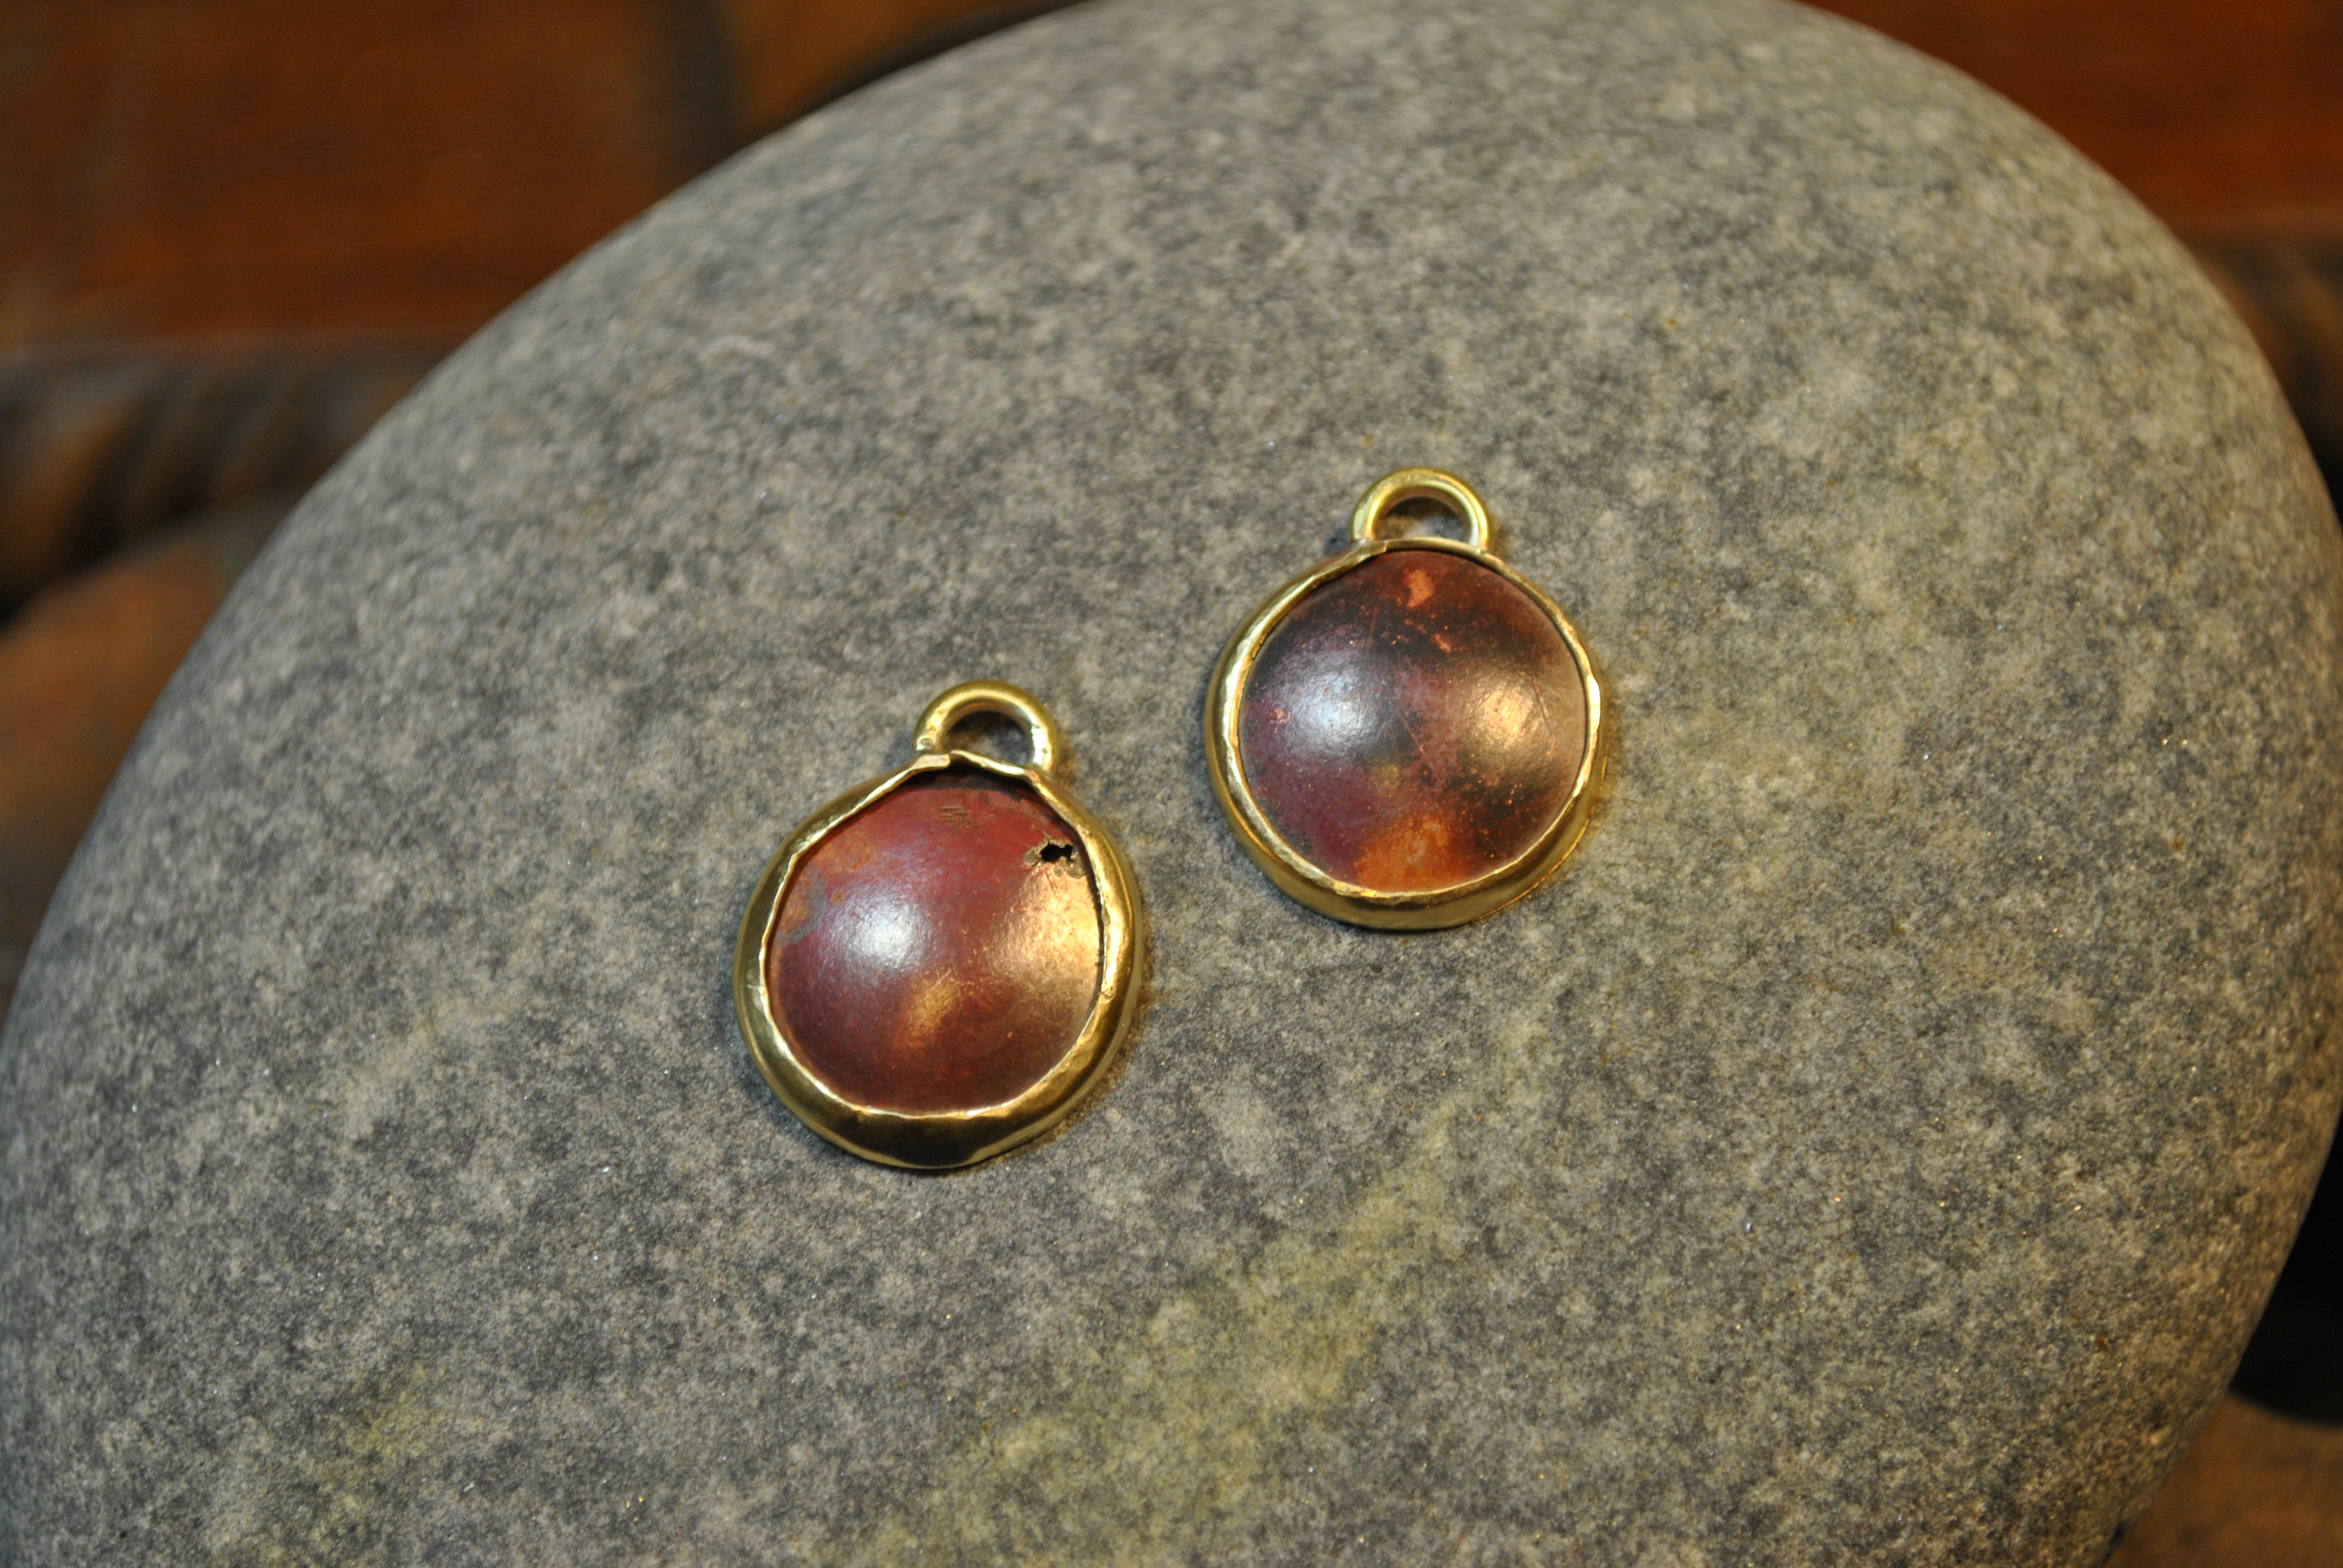
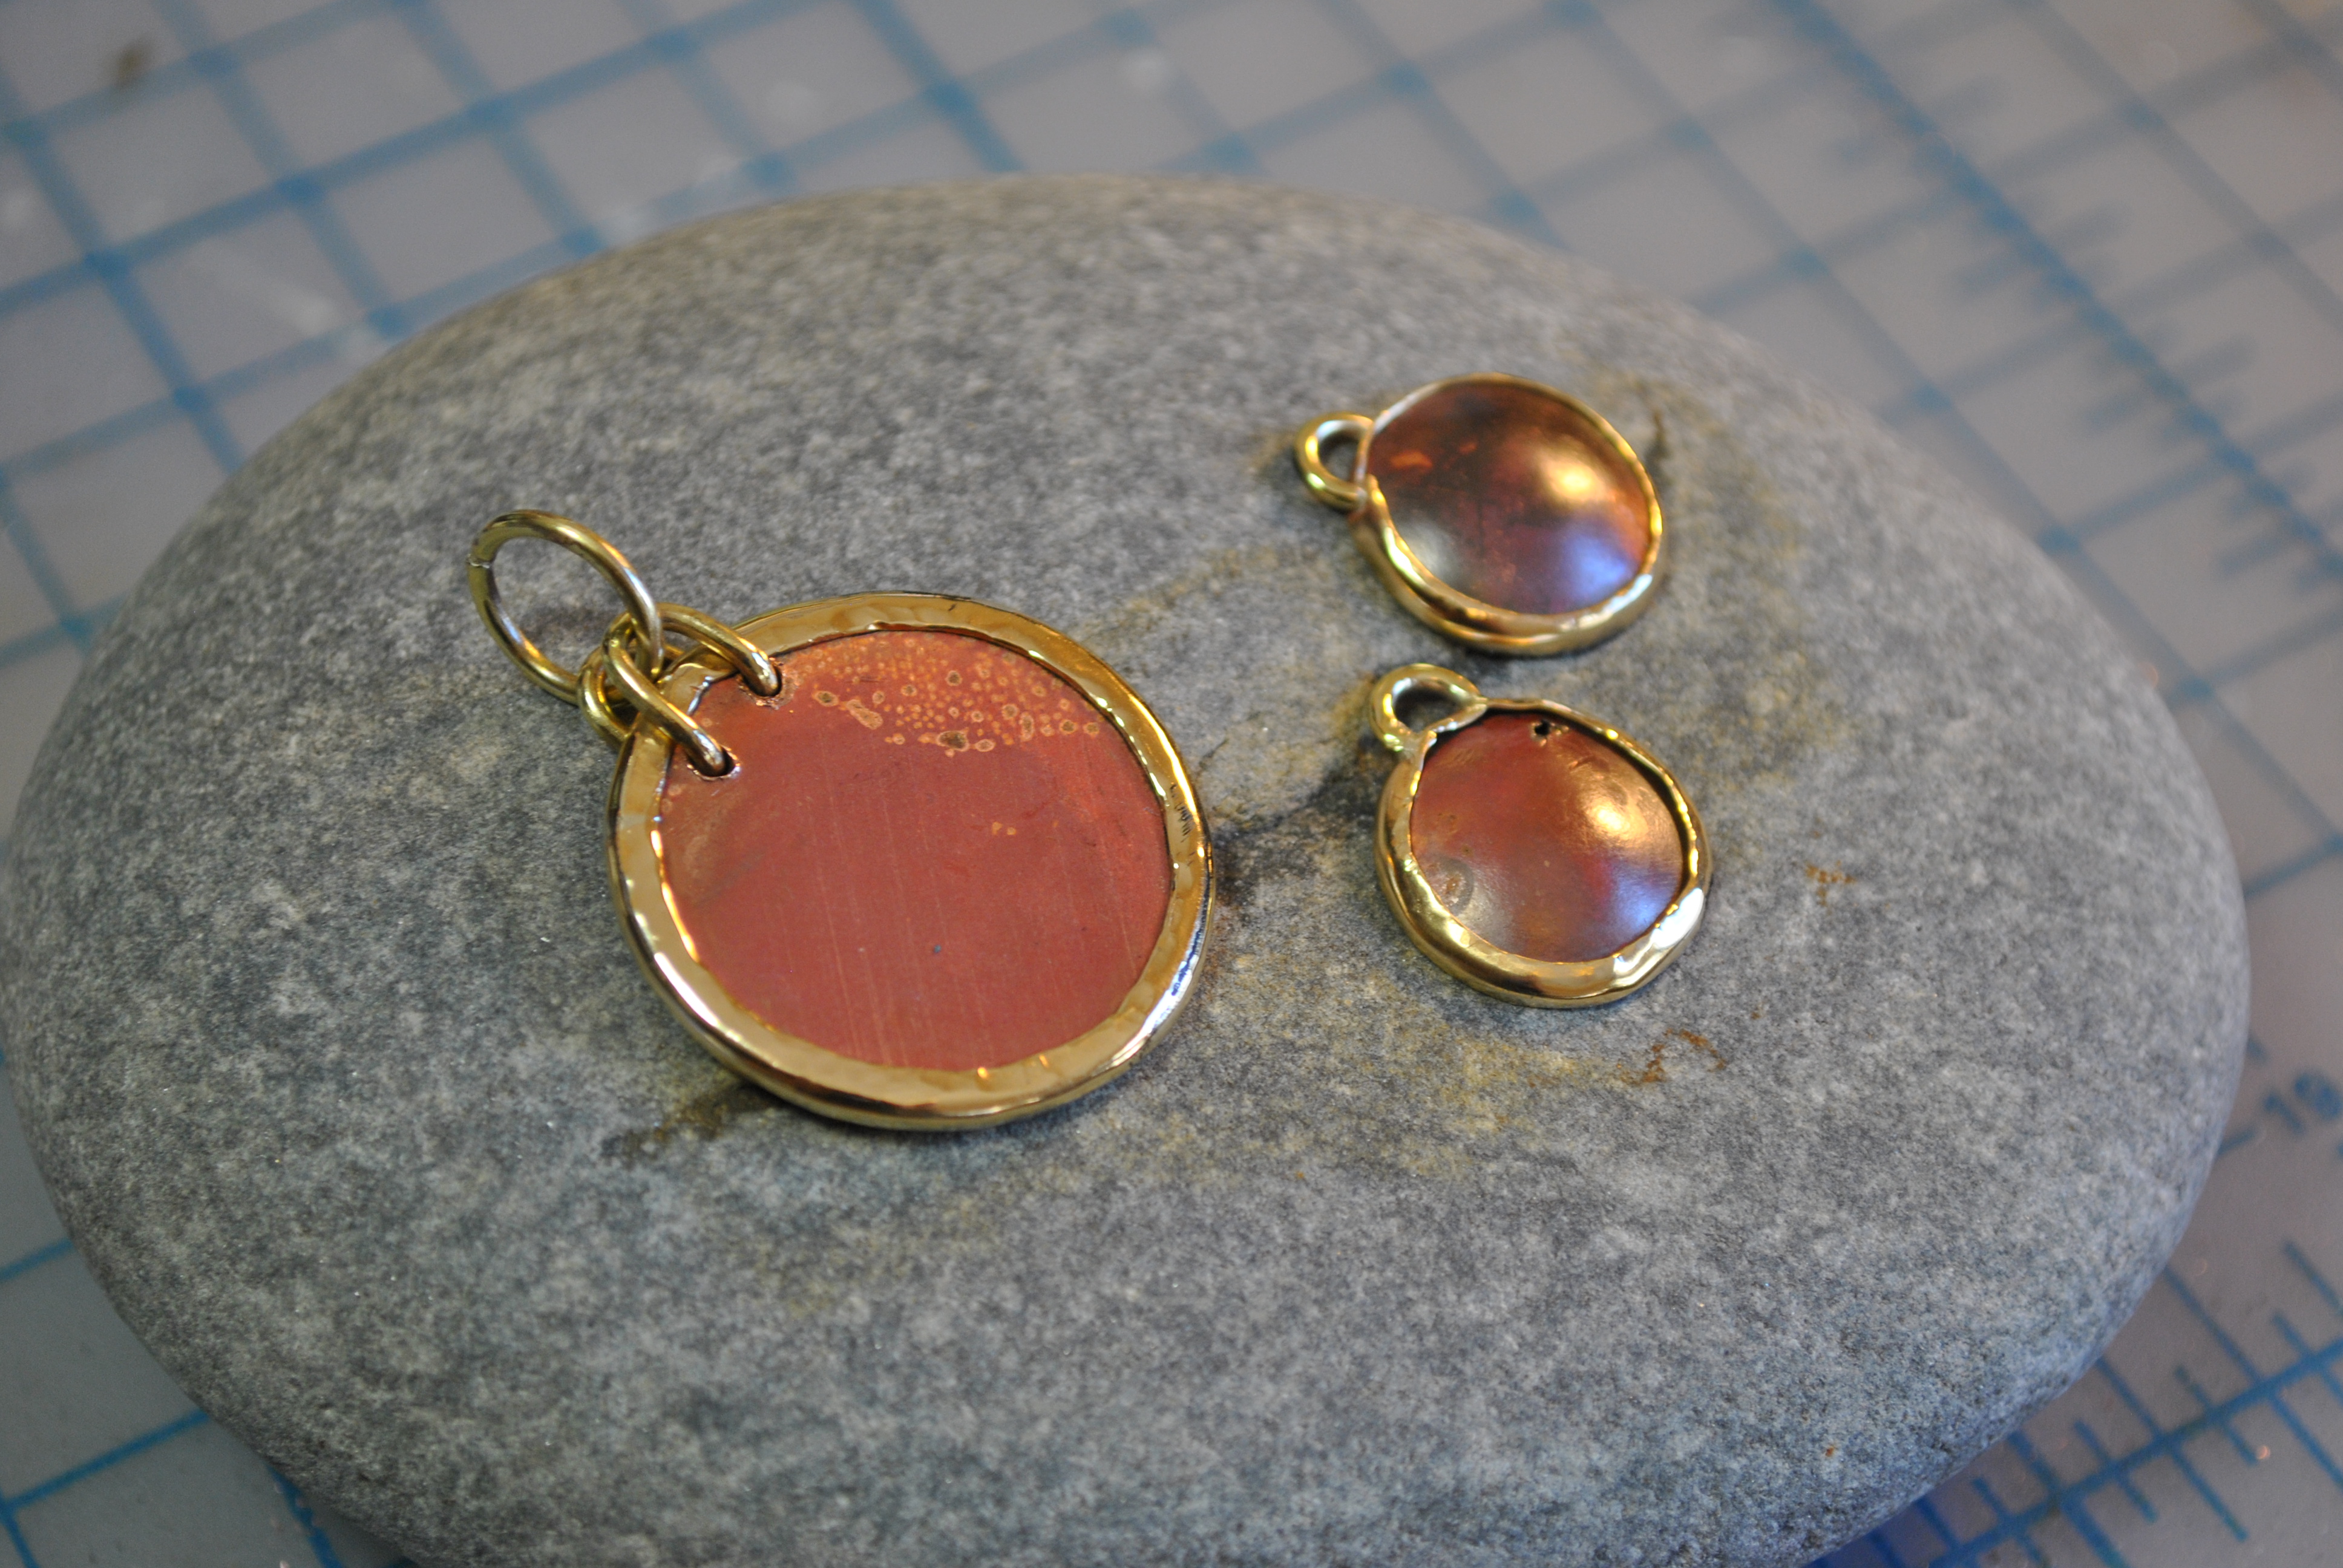
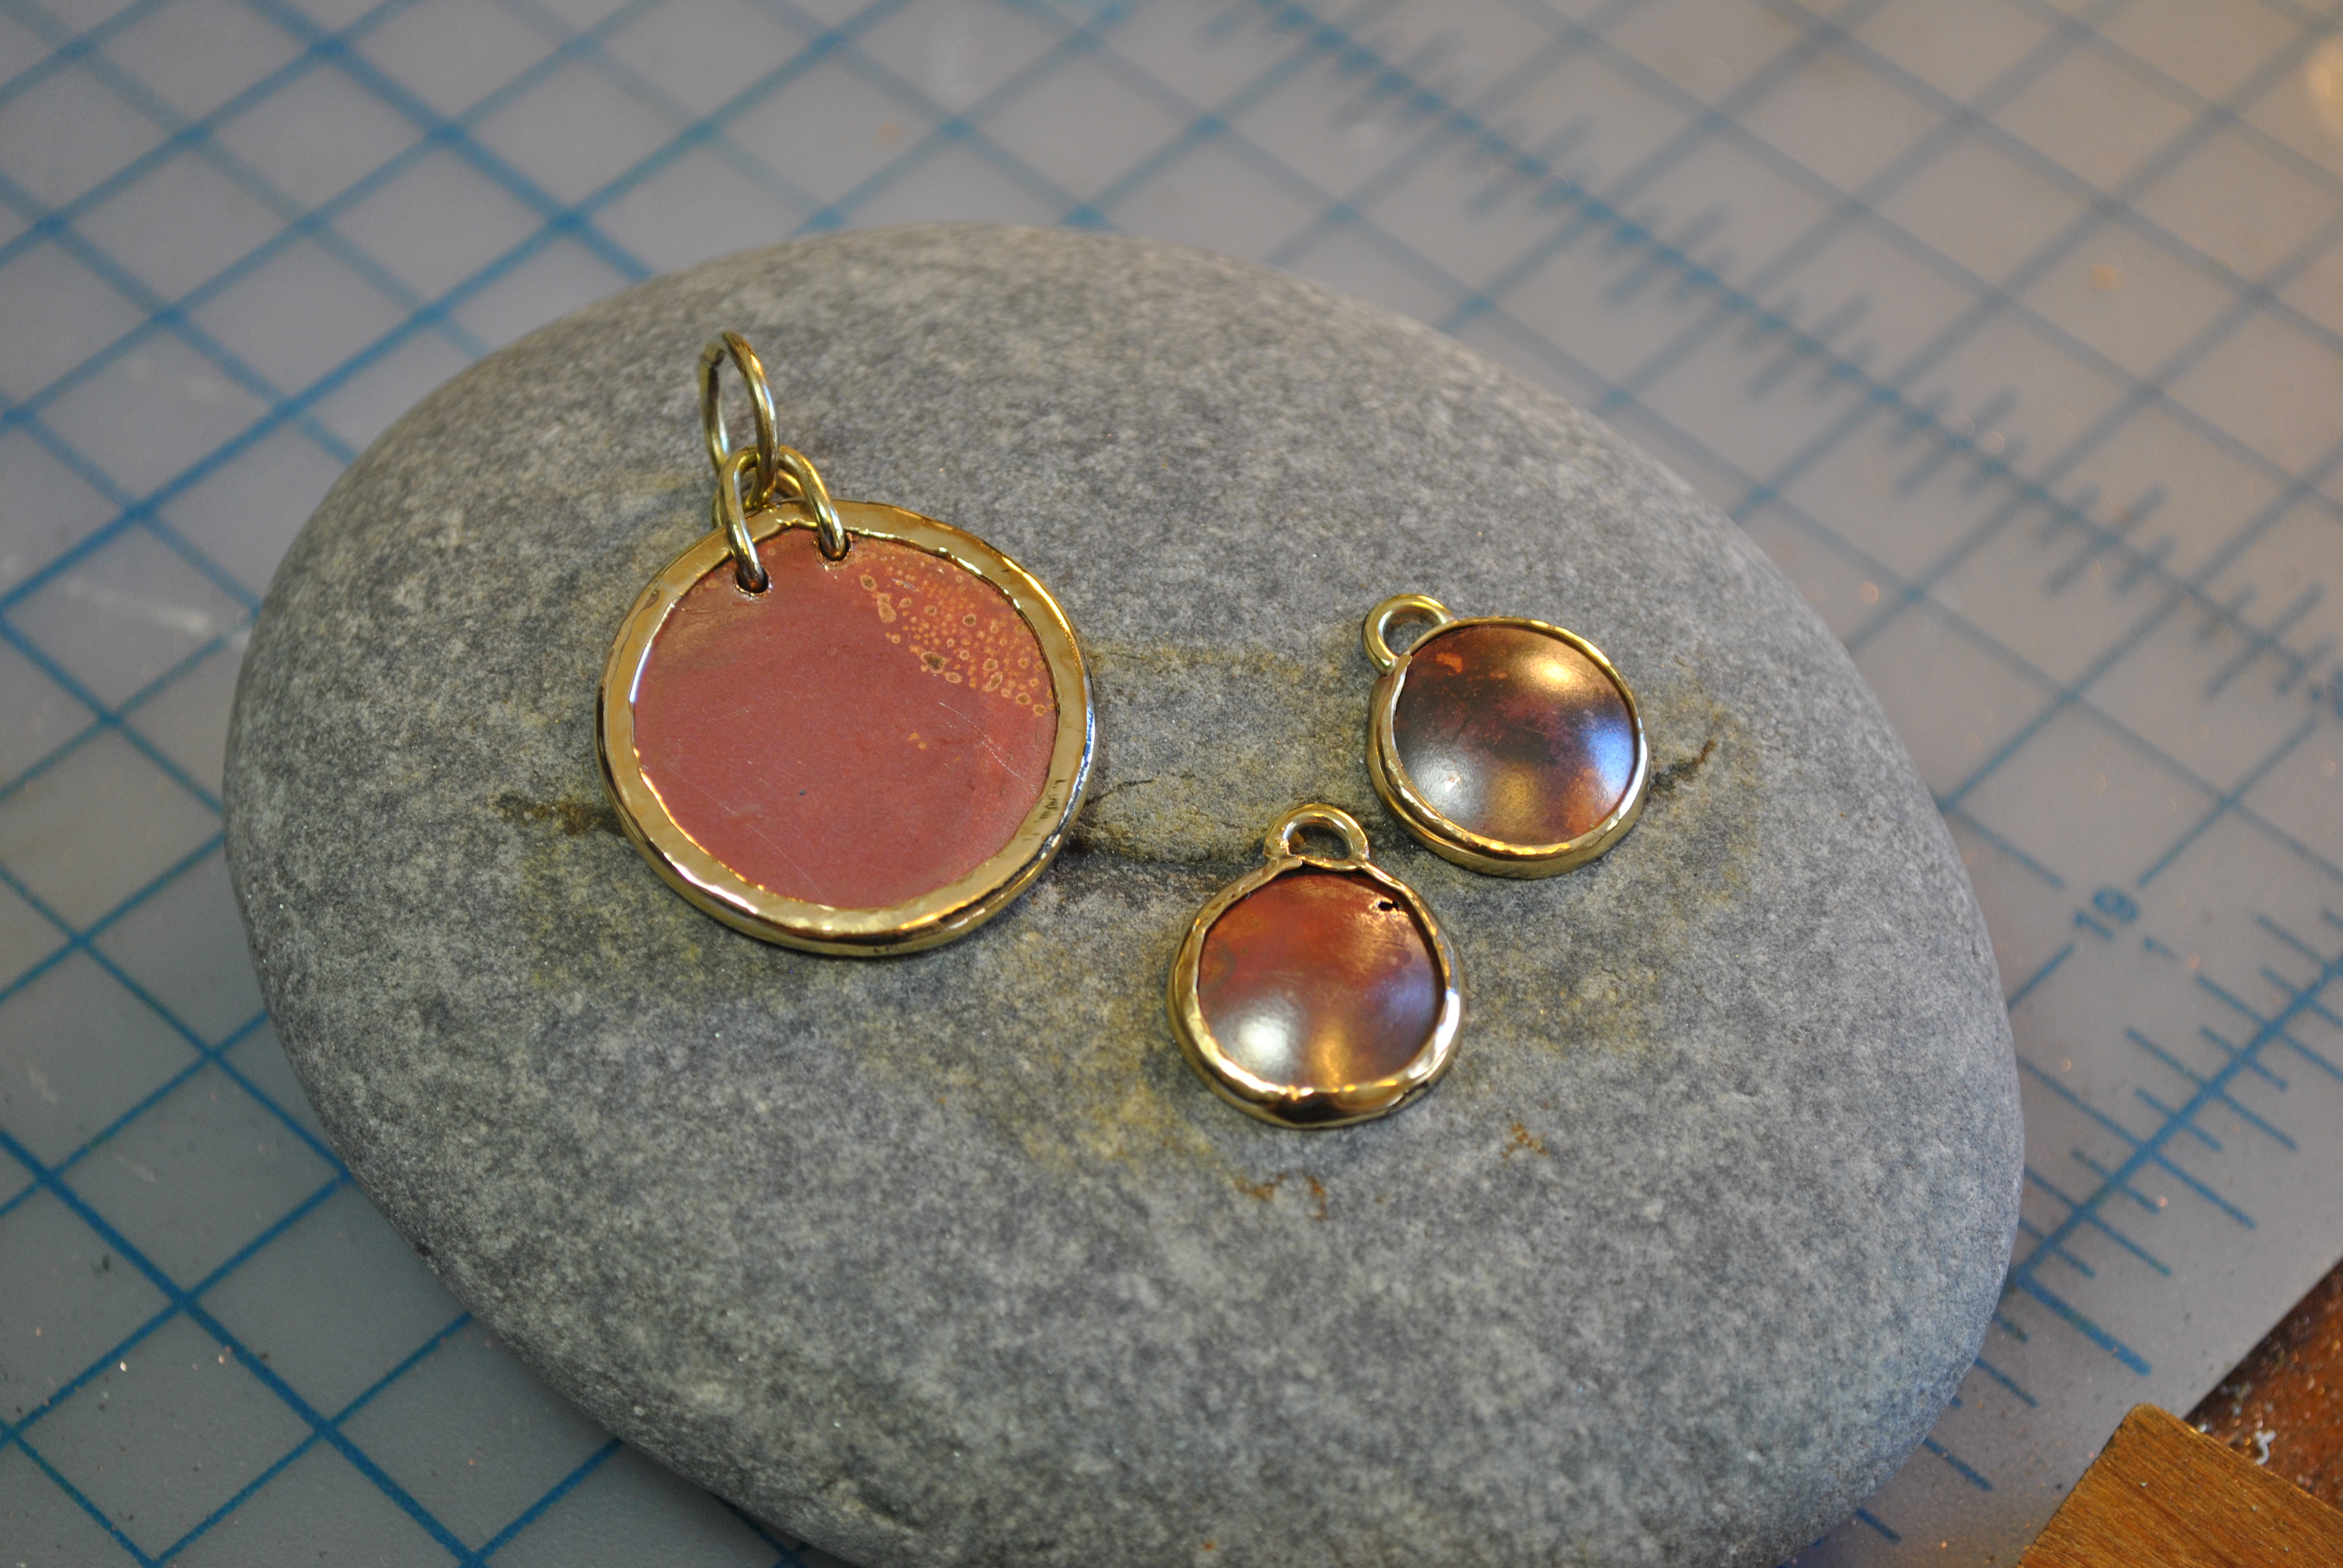
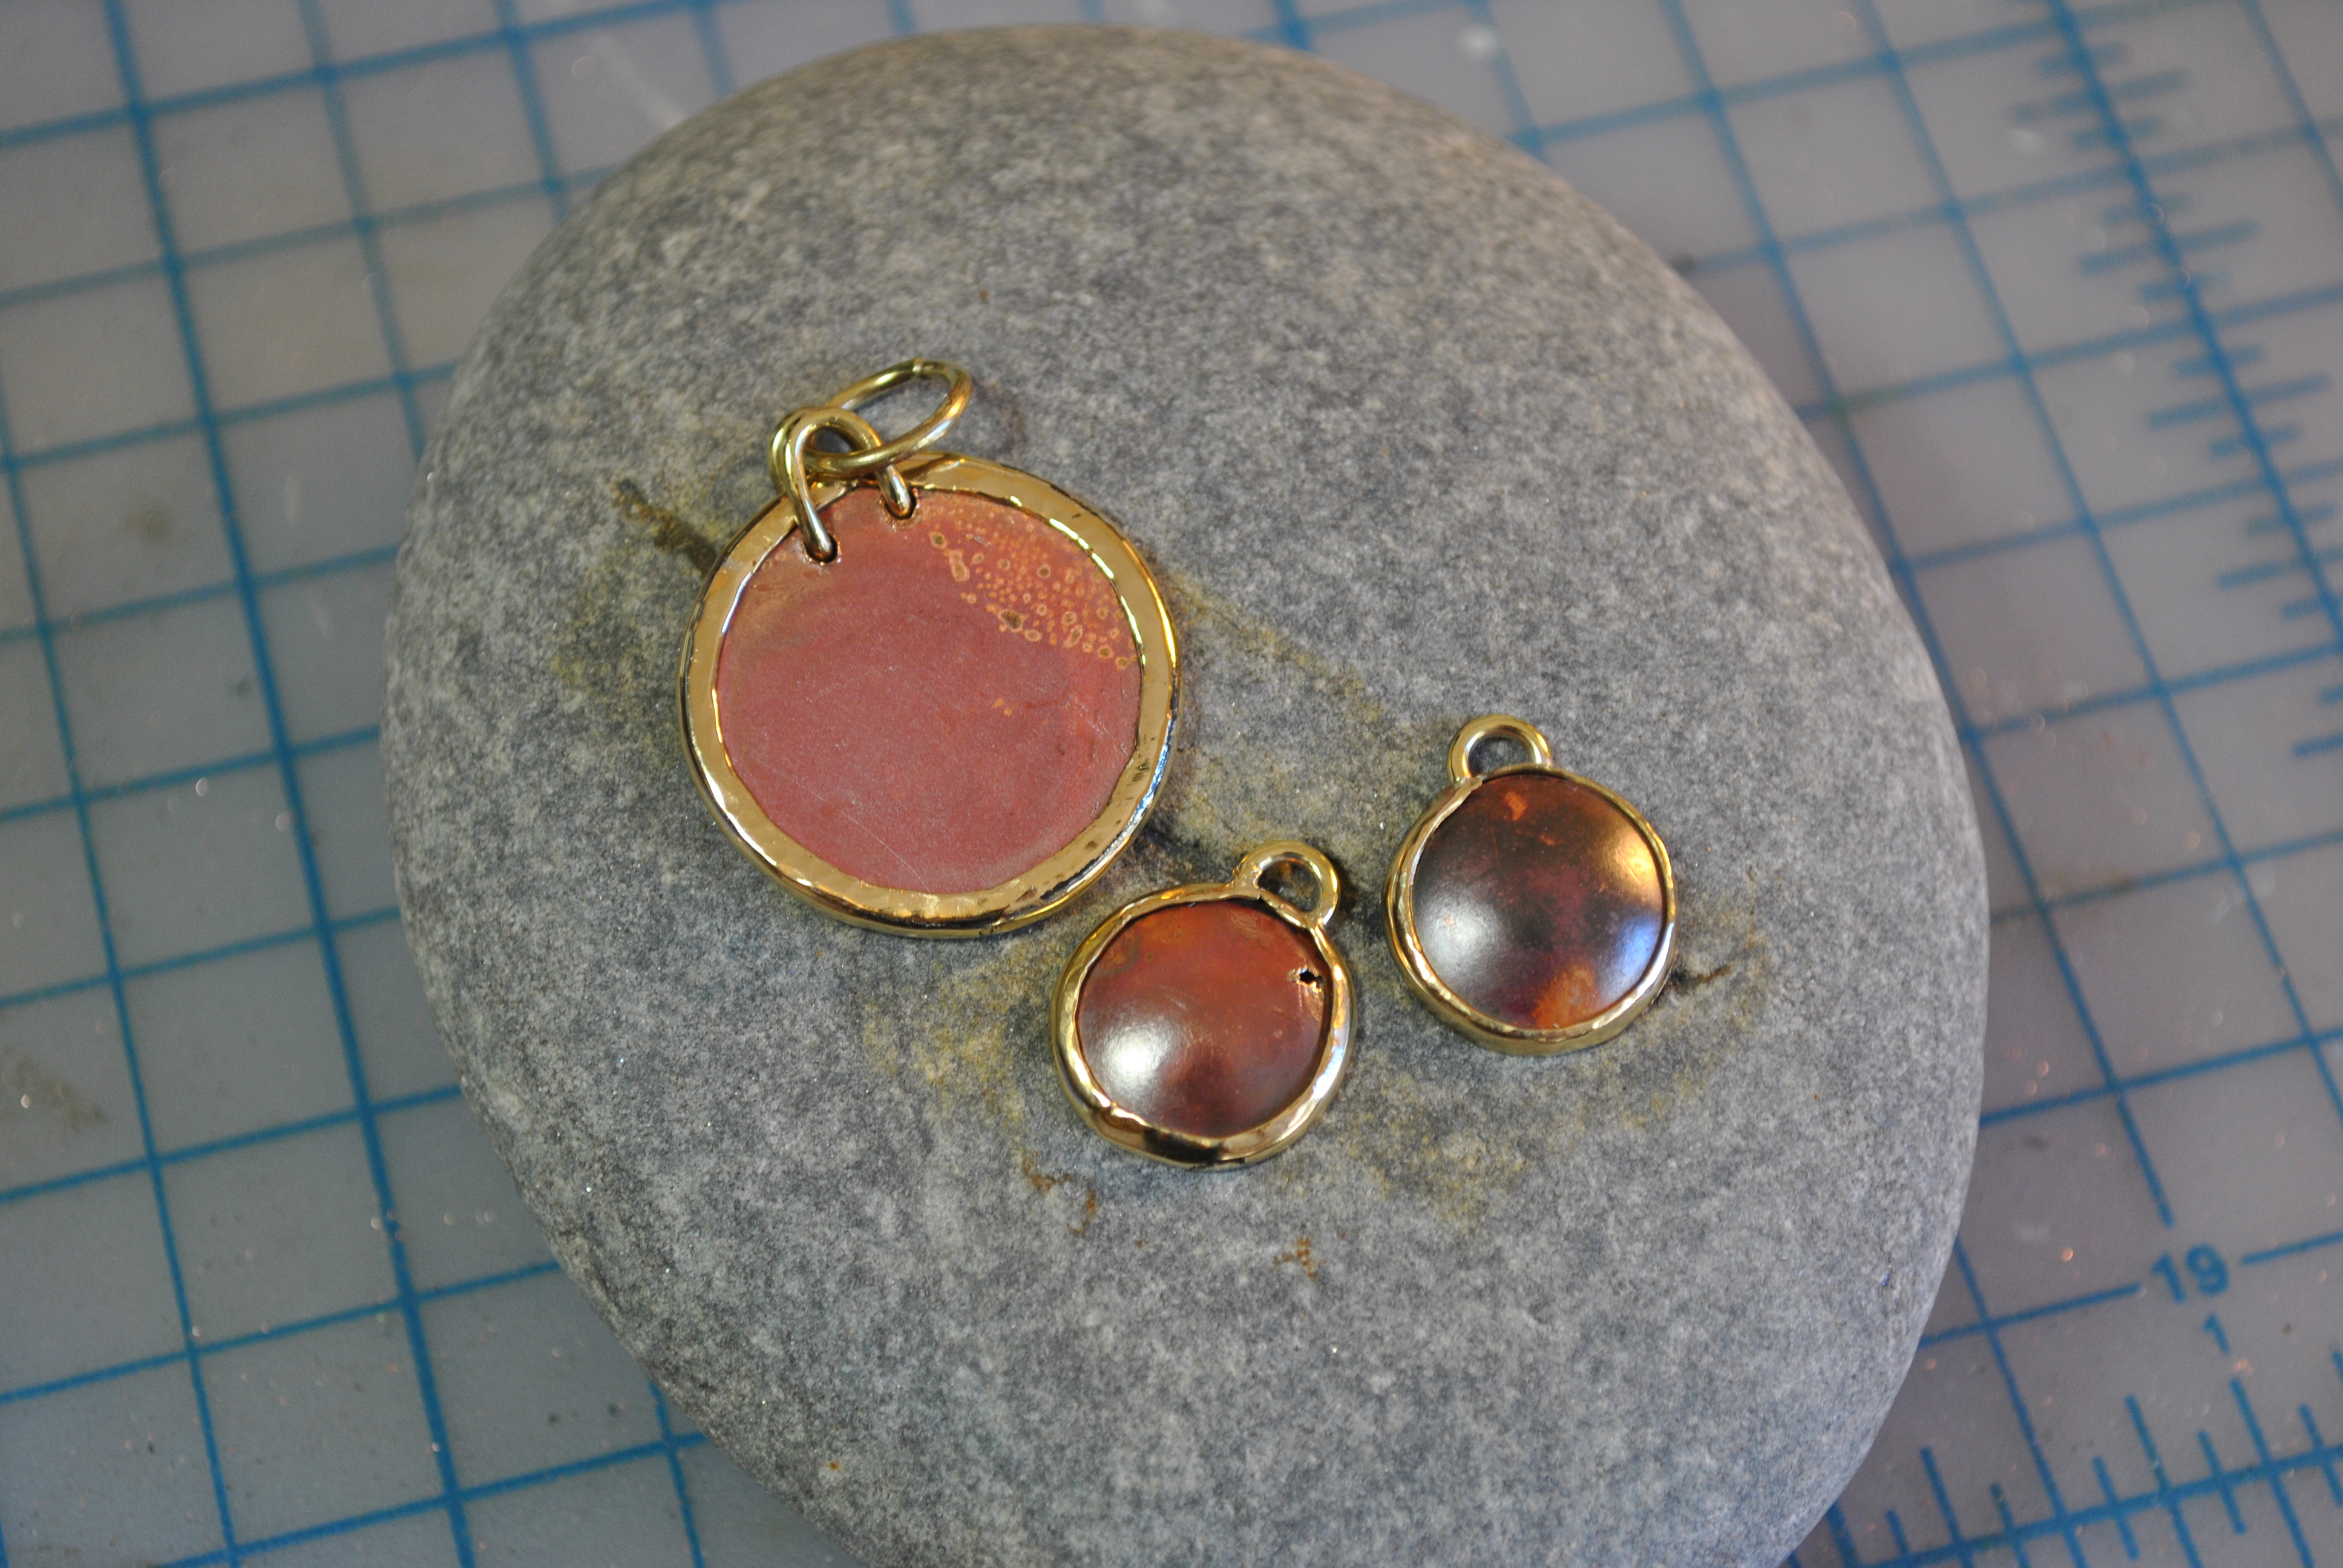
I have occasionally in my goofing around with torch and flux turned a piece of copper bright red. I had no idea how I had accomplished it, and chocked it up to a fluke of chemistry. The color however was gorgeous, and I was sad I couldn’t recreate it….that was until I stumbled upon the hidden knowledge of the Borax Red Patina.
It’s super simple, you just take some water, dissolve as much Borax (20 mule team Borax from the store works just fine), heat your copper up till its bright red, and dunk it in the water. The finish is very rugged and wont wear off, but it is heat sensitive, so make sure you only do cold forming after the treatment, if you need to solder anything on its going to be a little tricky.
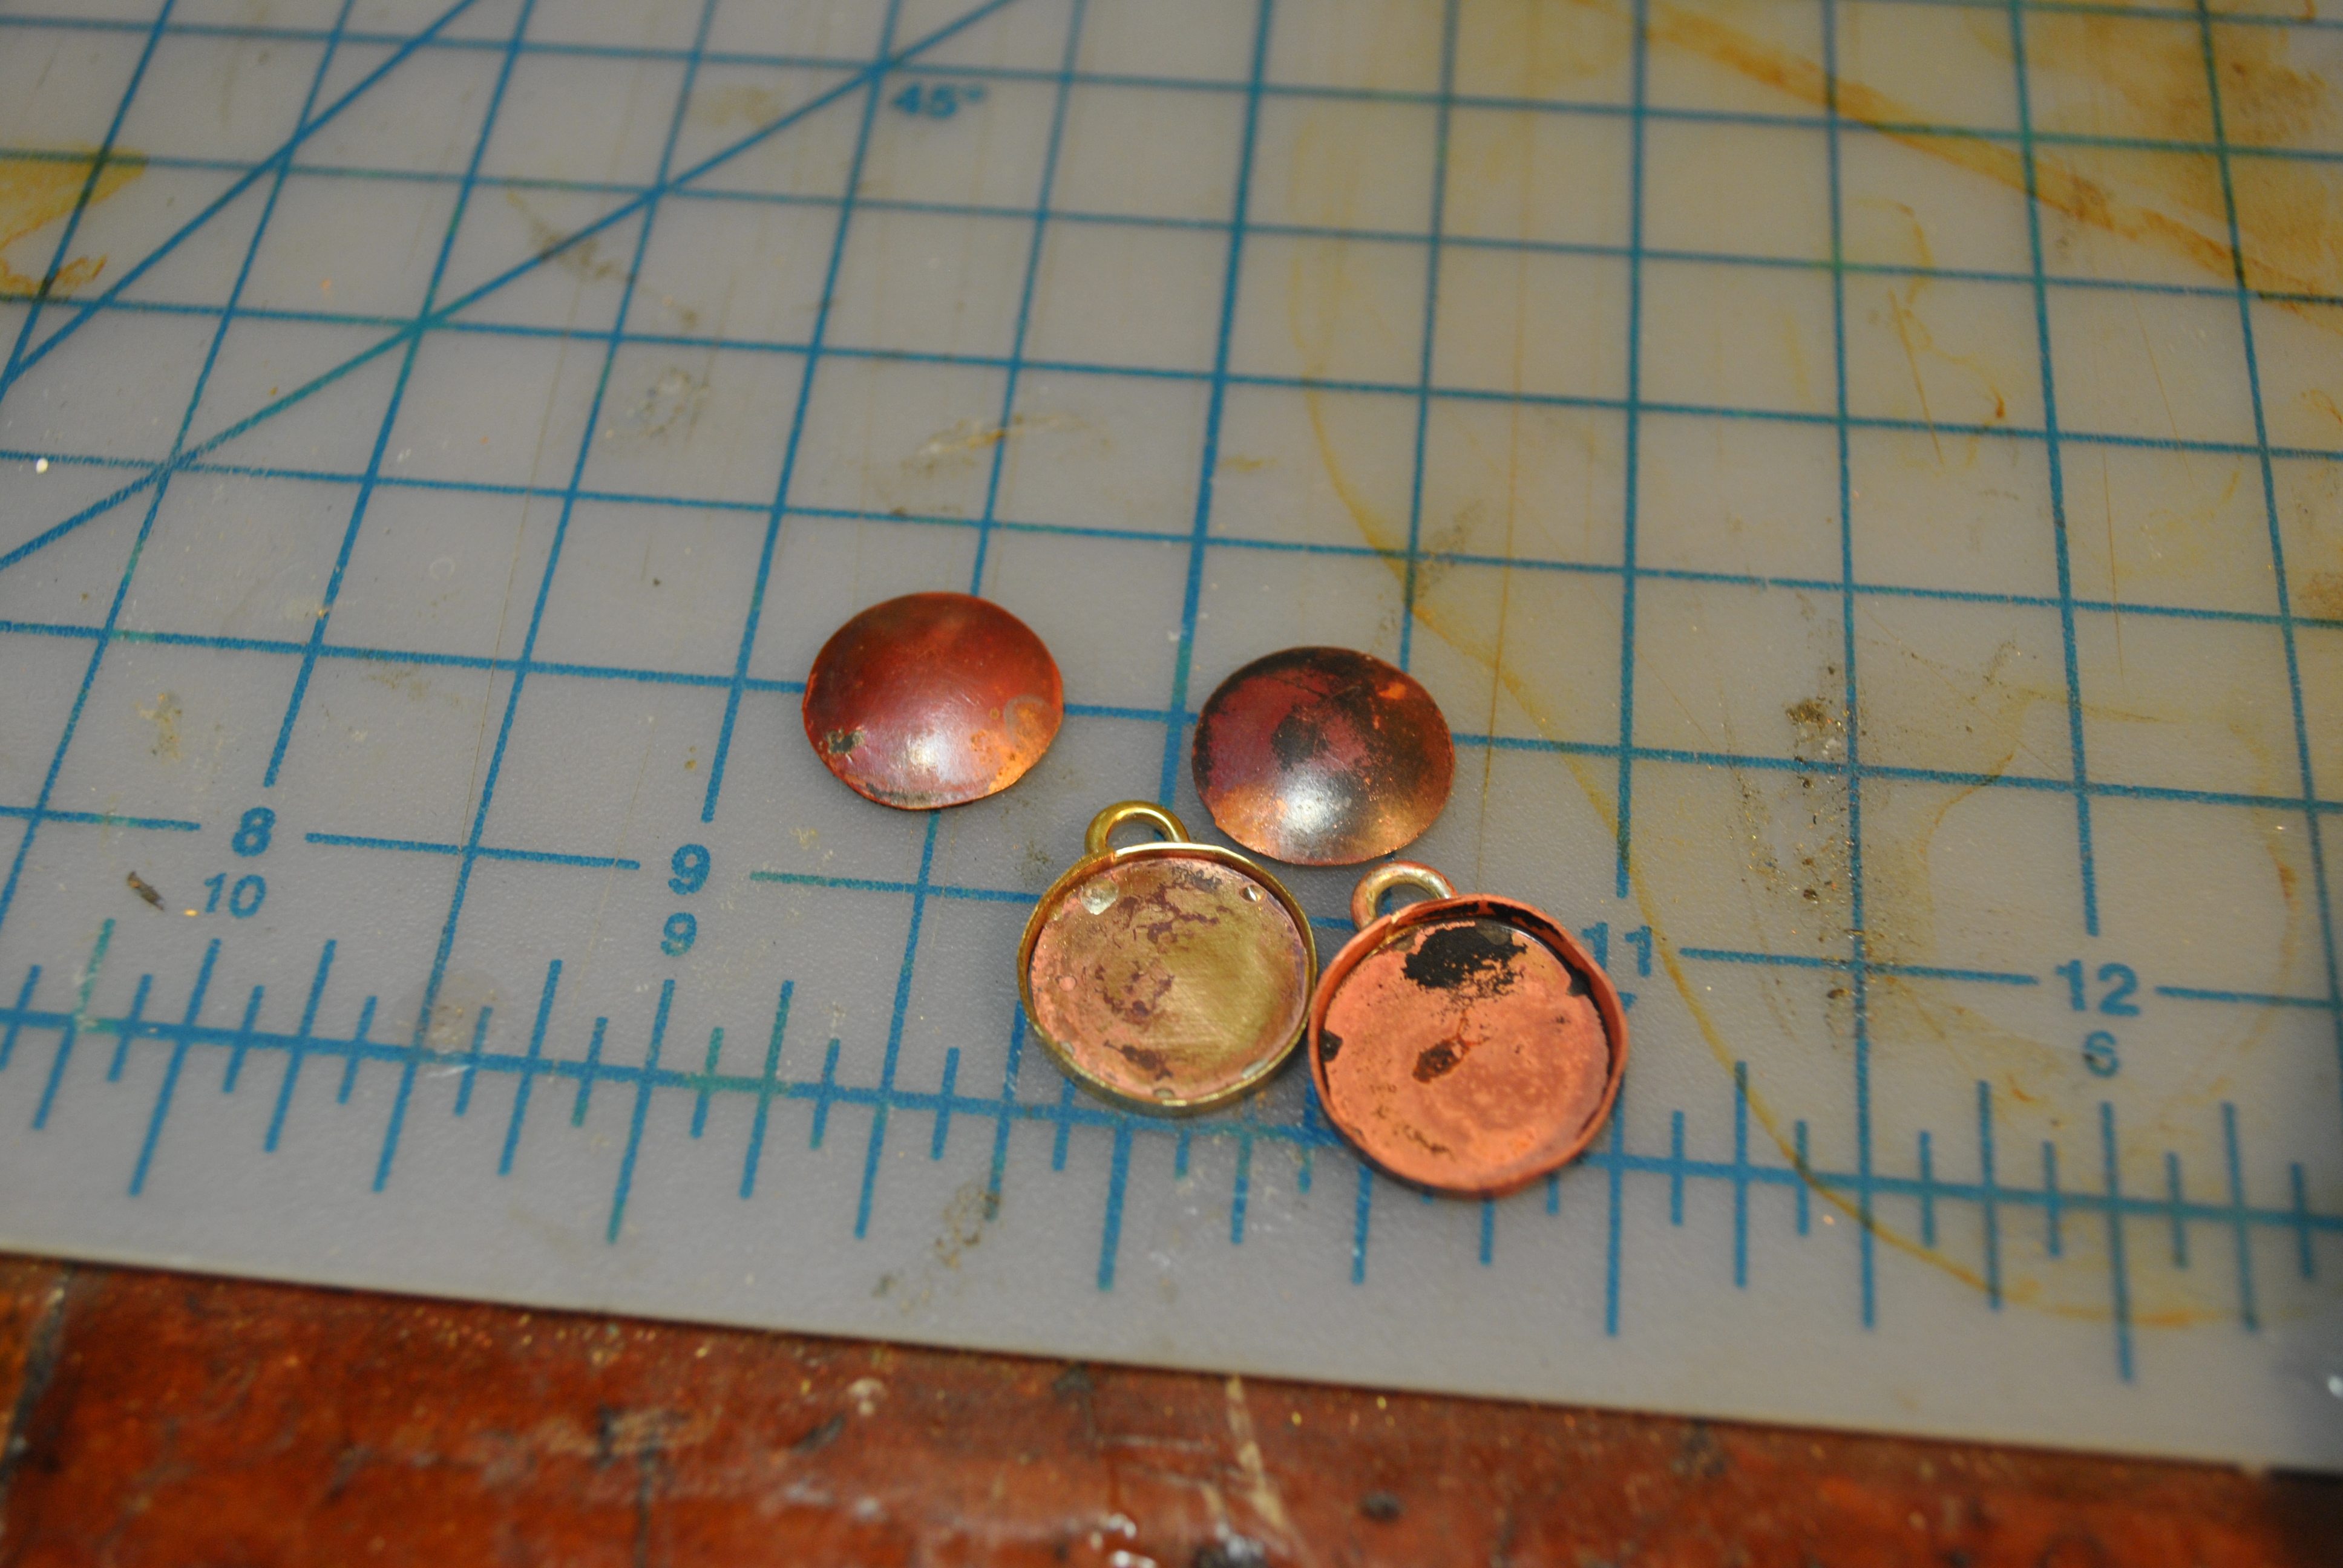
I played around with the technique for a while and found it rather fun to just make the copper red, you can lightly polish it after to bring out the redness and make it more interesting.
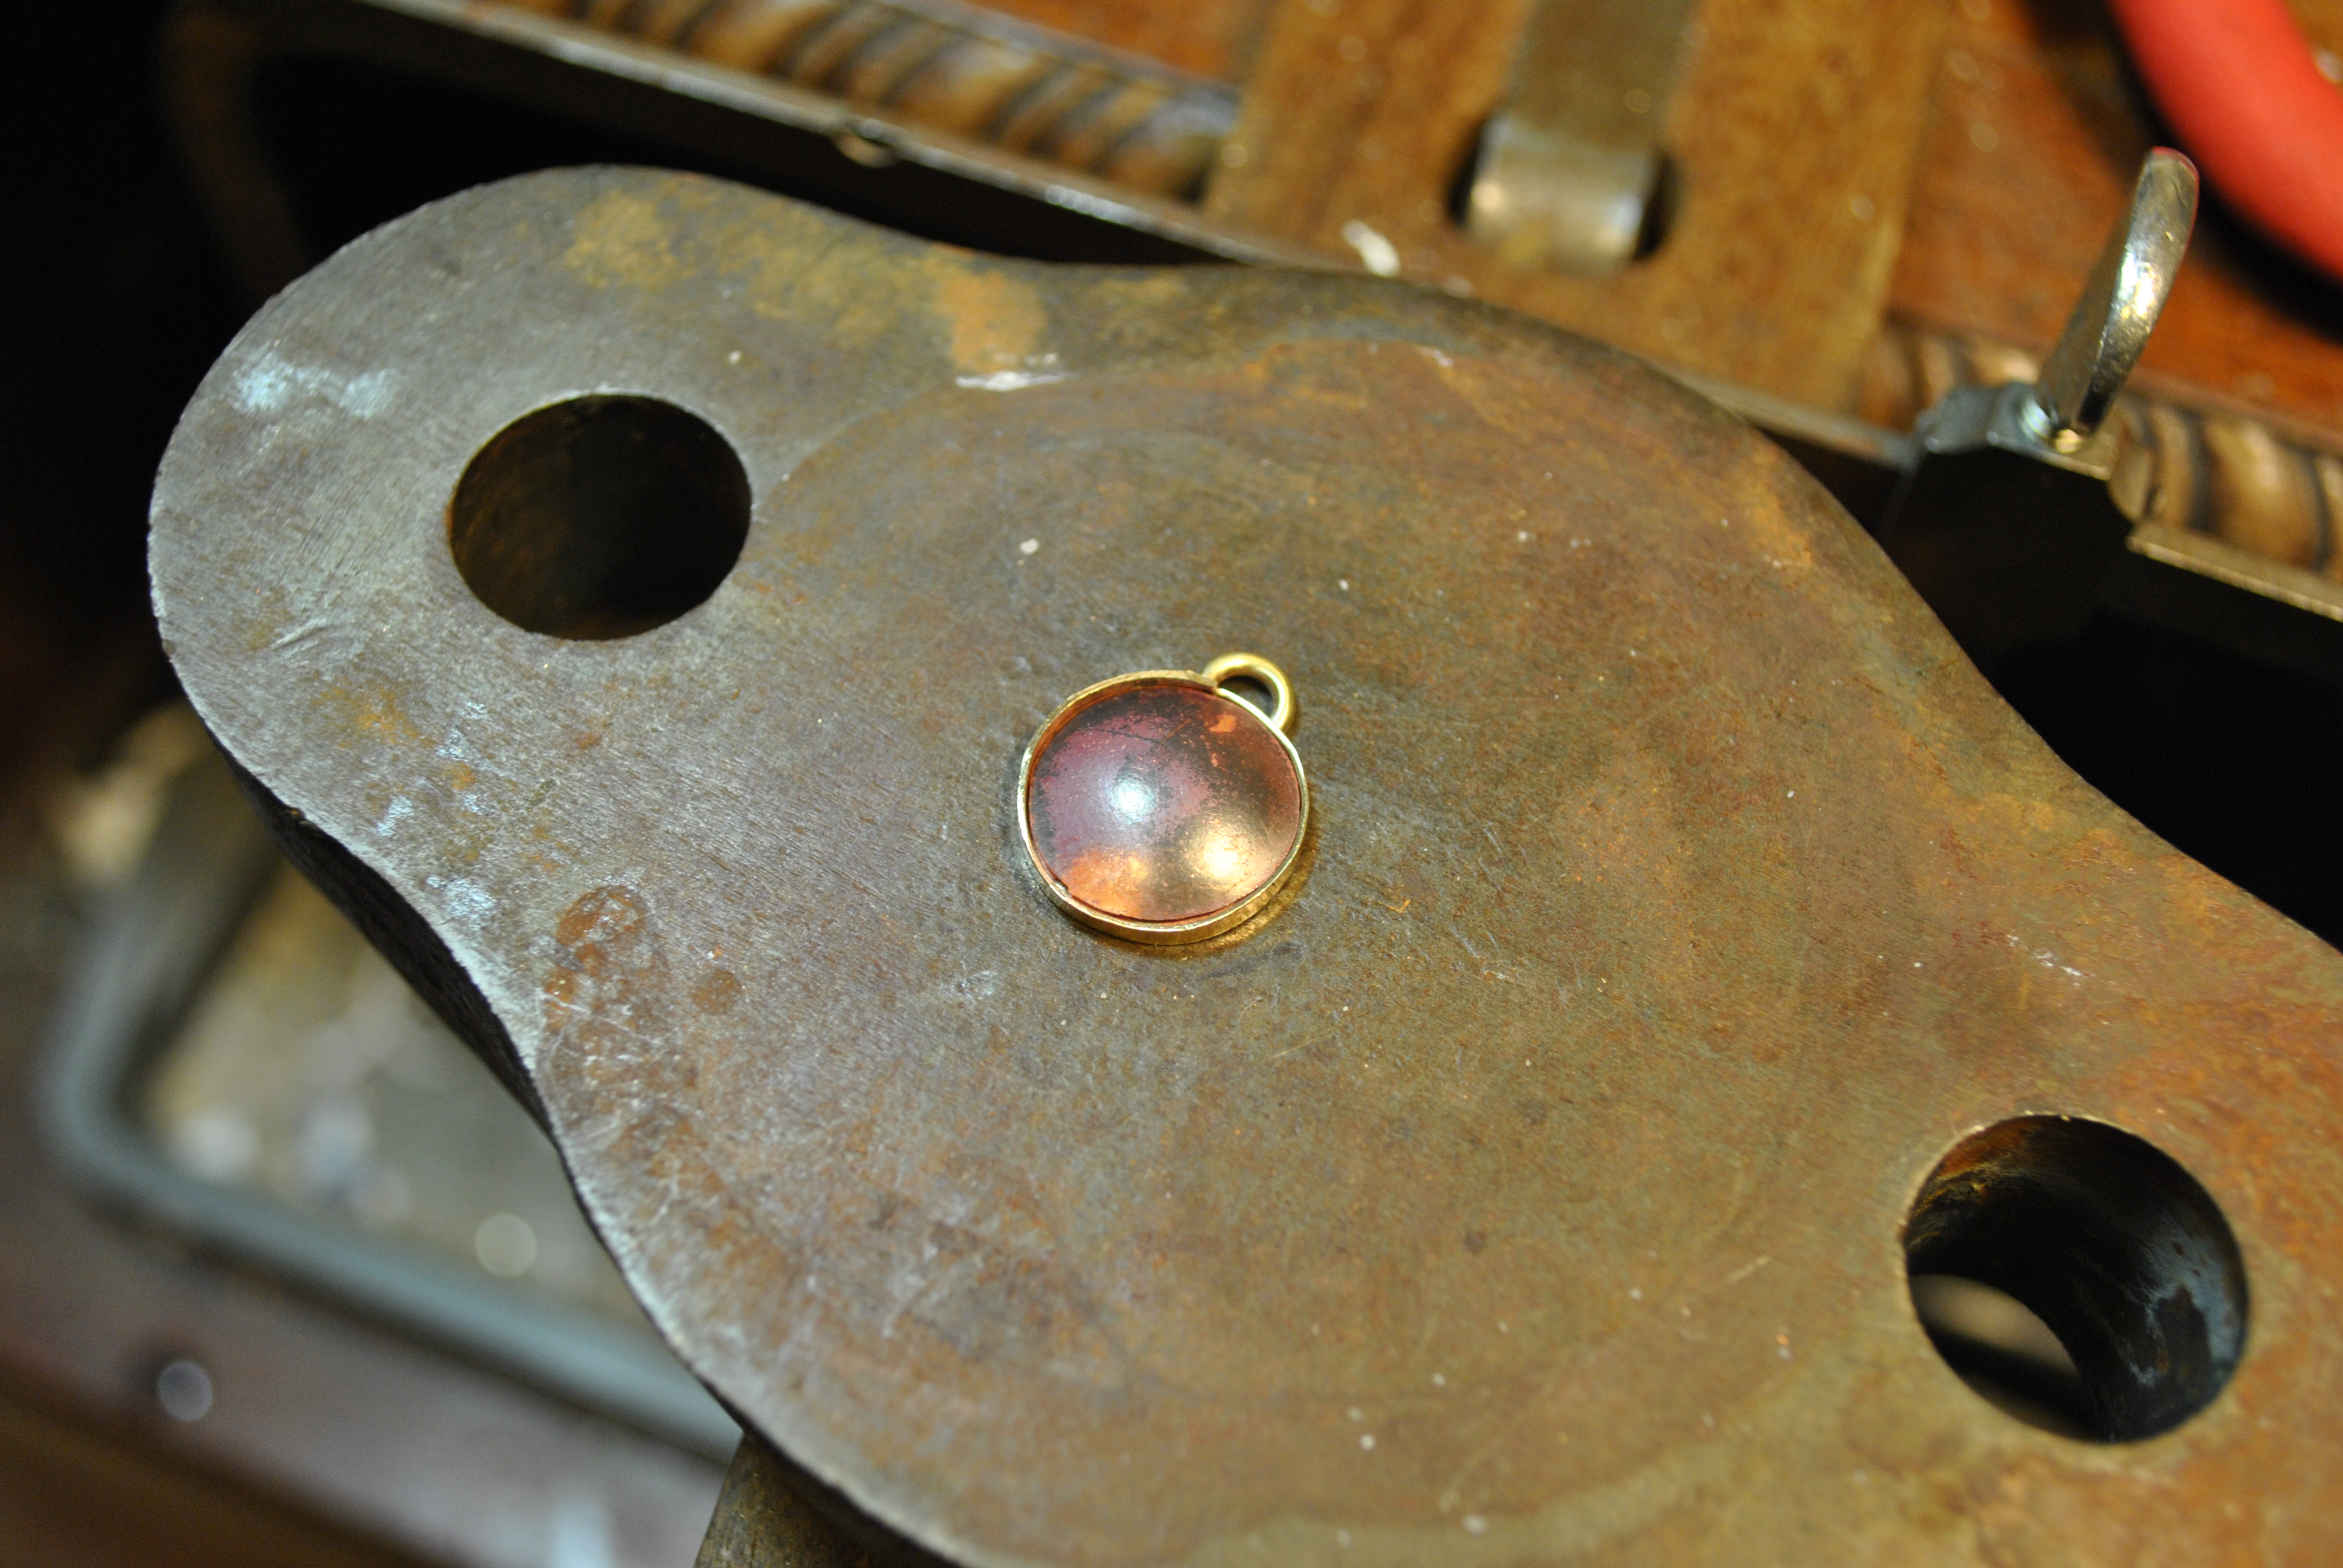
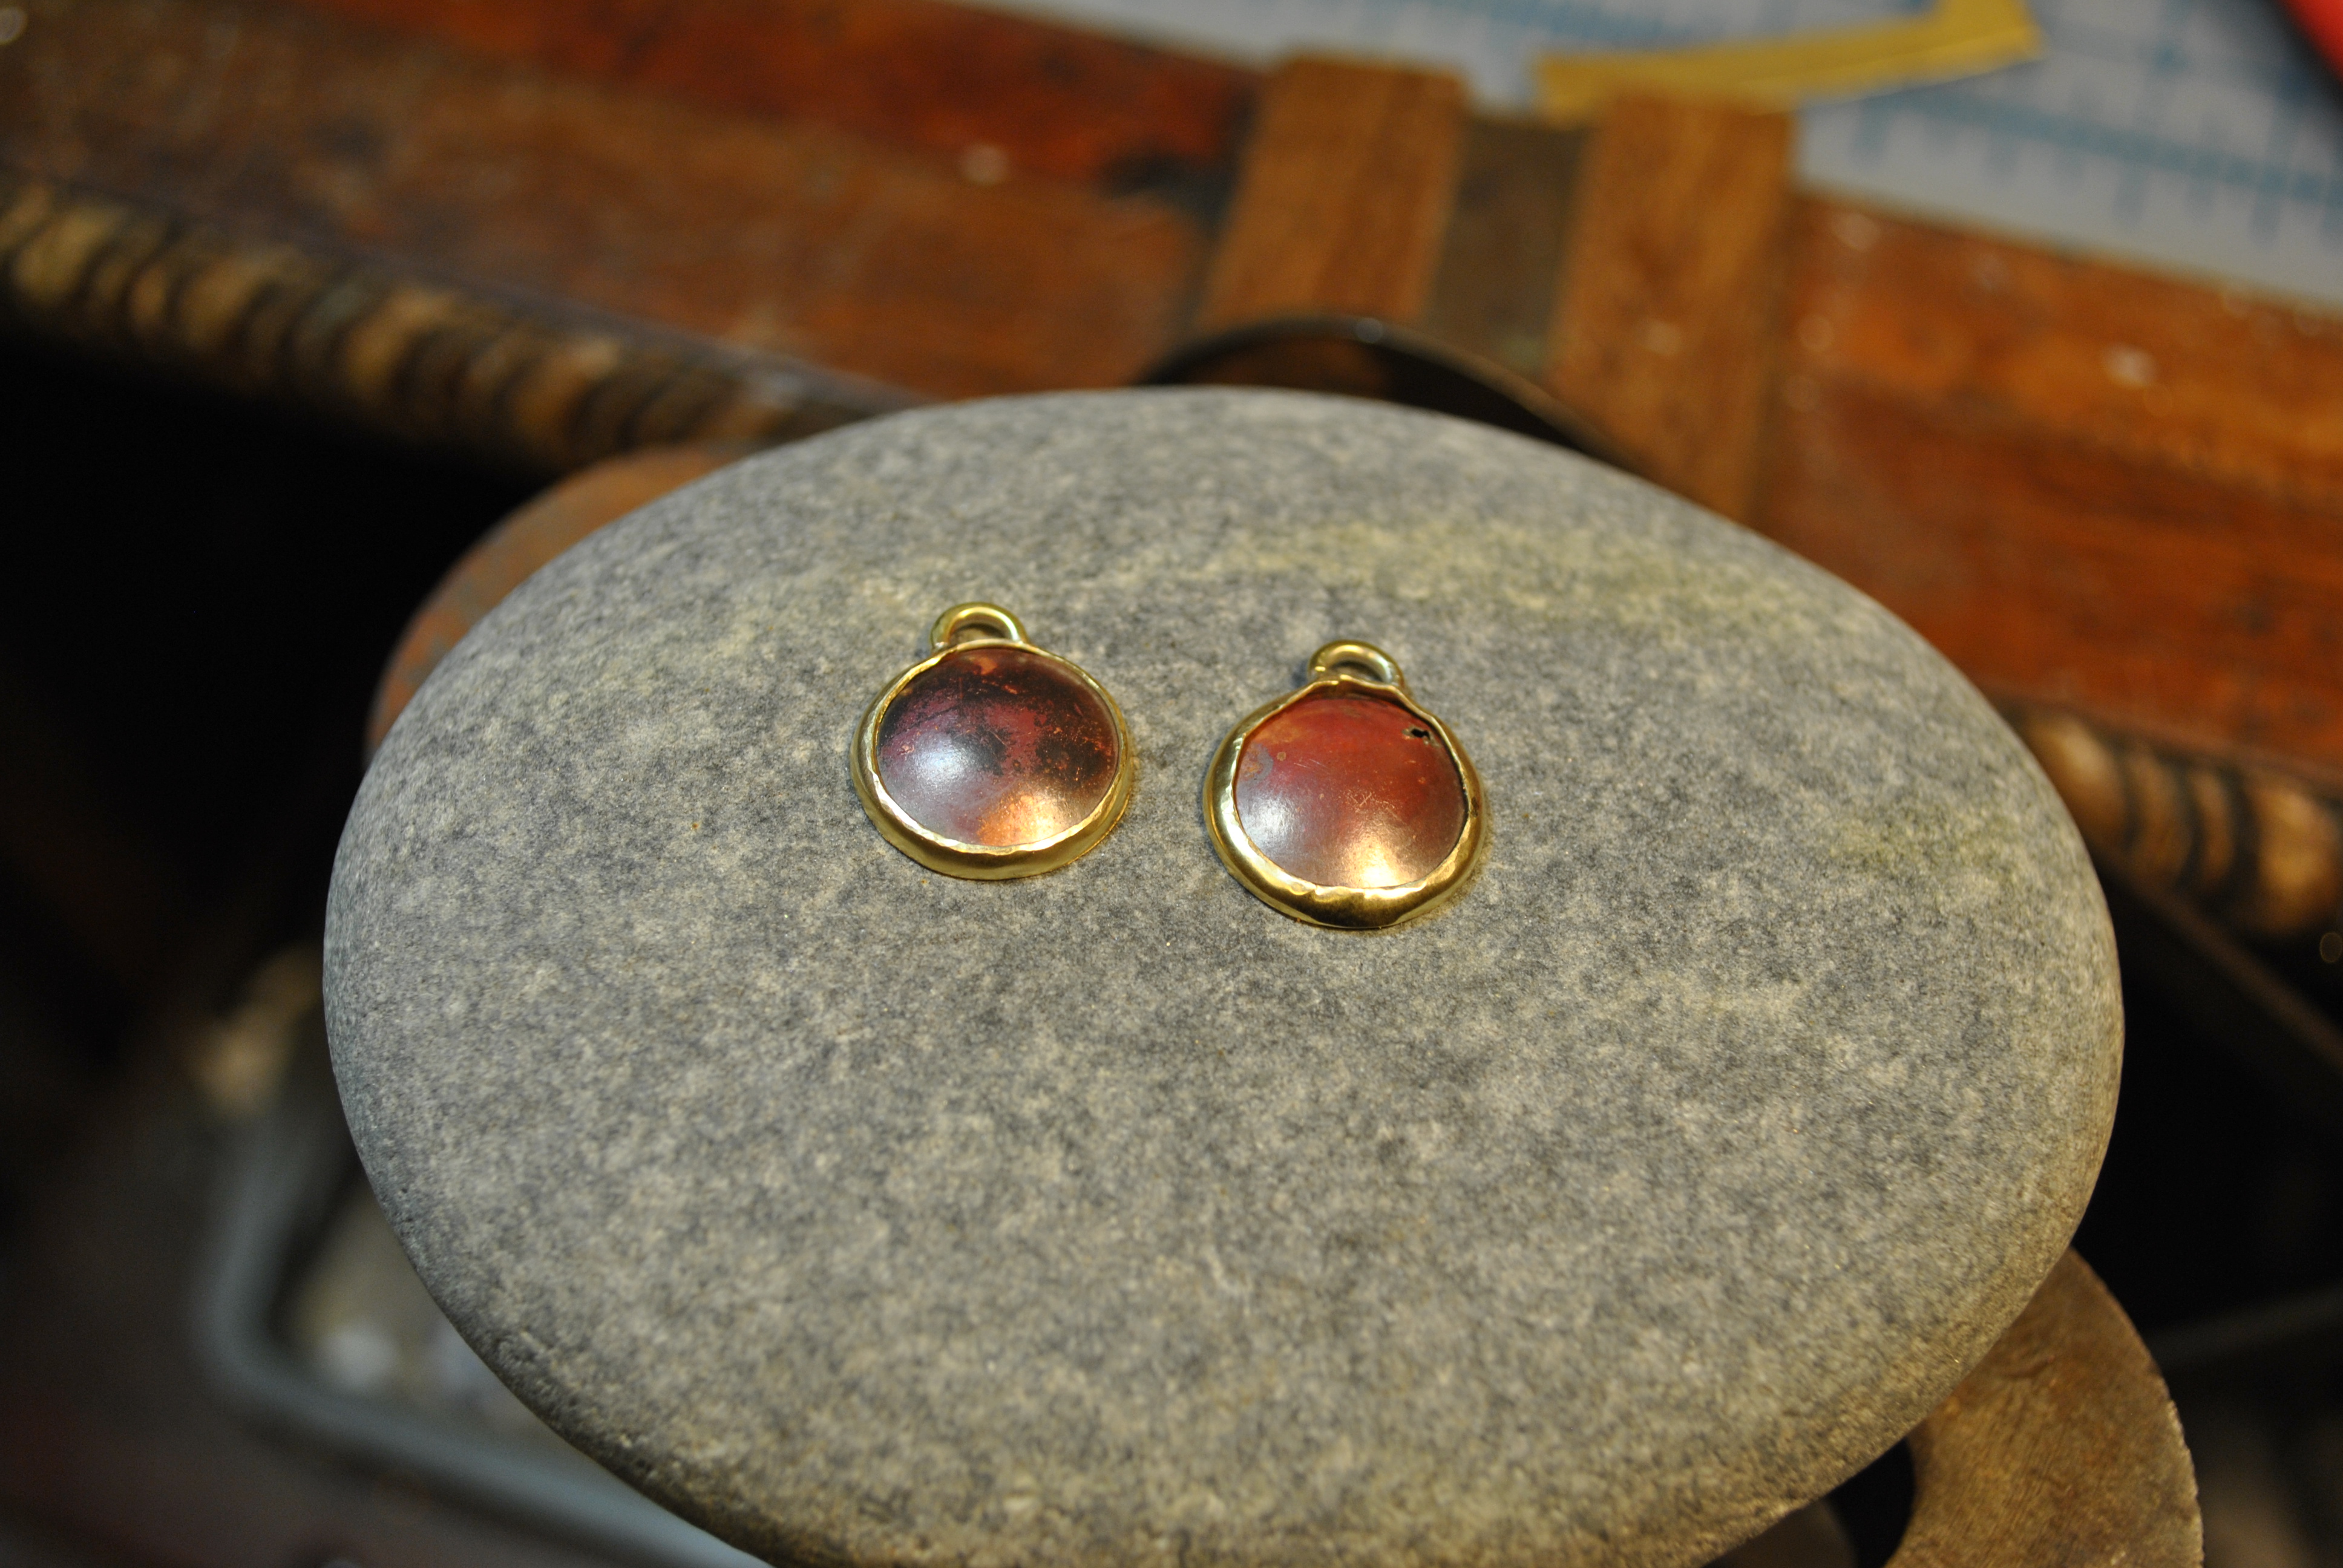
I ended up making an earring and pendant set. Its all pretty rough, as I was just sort of playing around, but I am glad I figured out the technique and will use it again in the future.
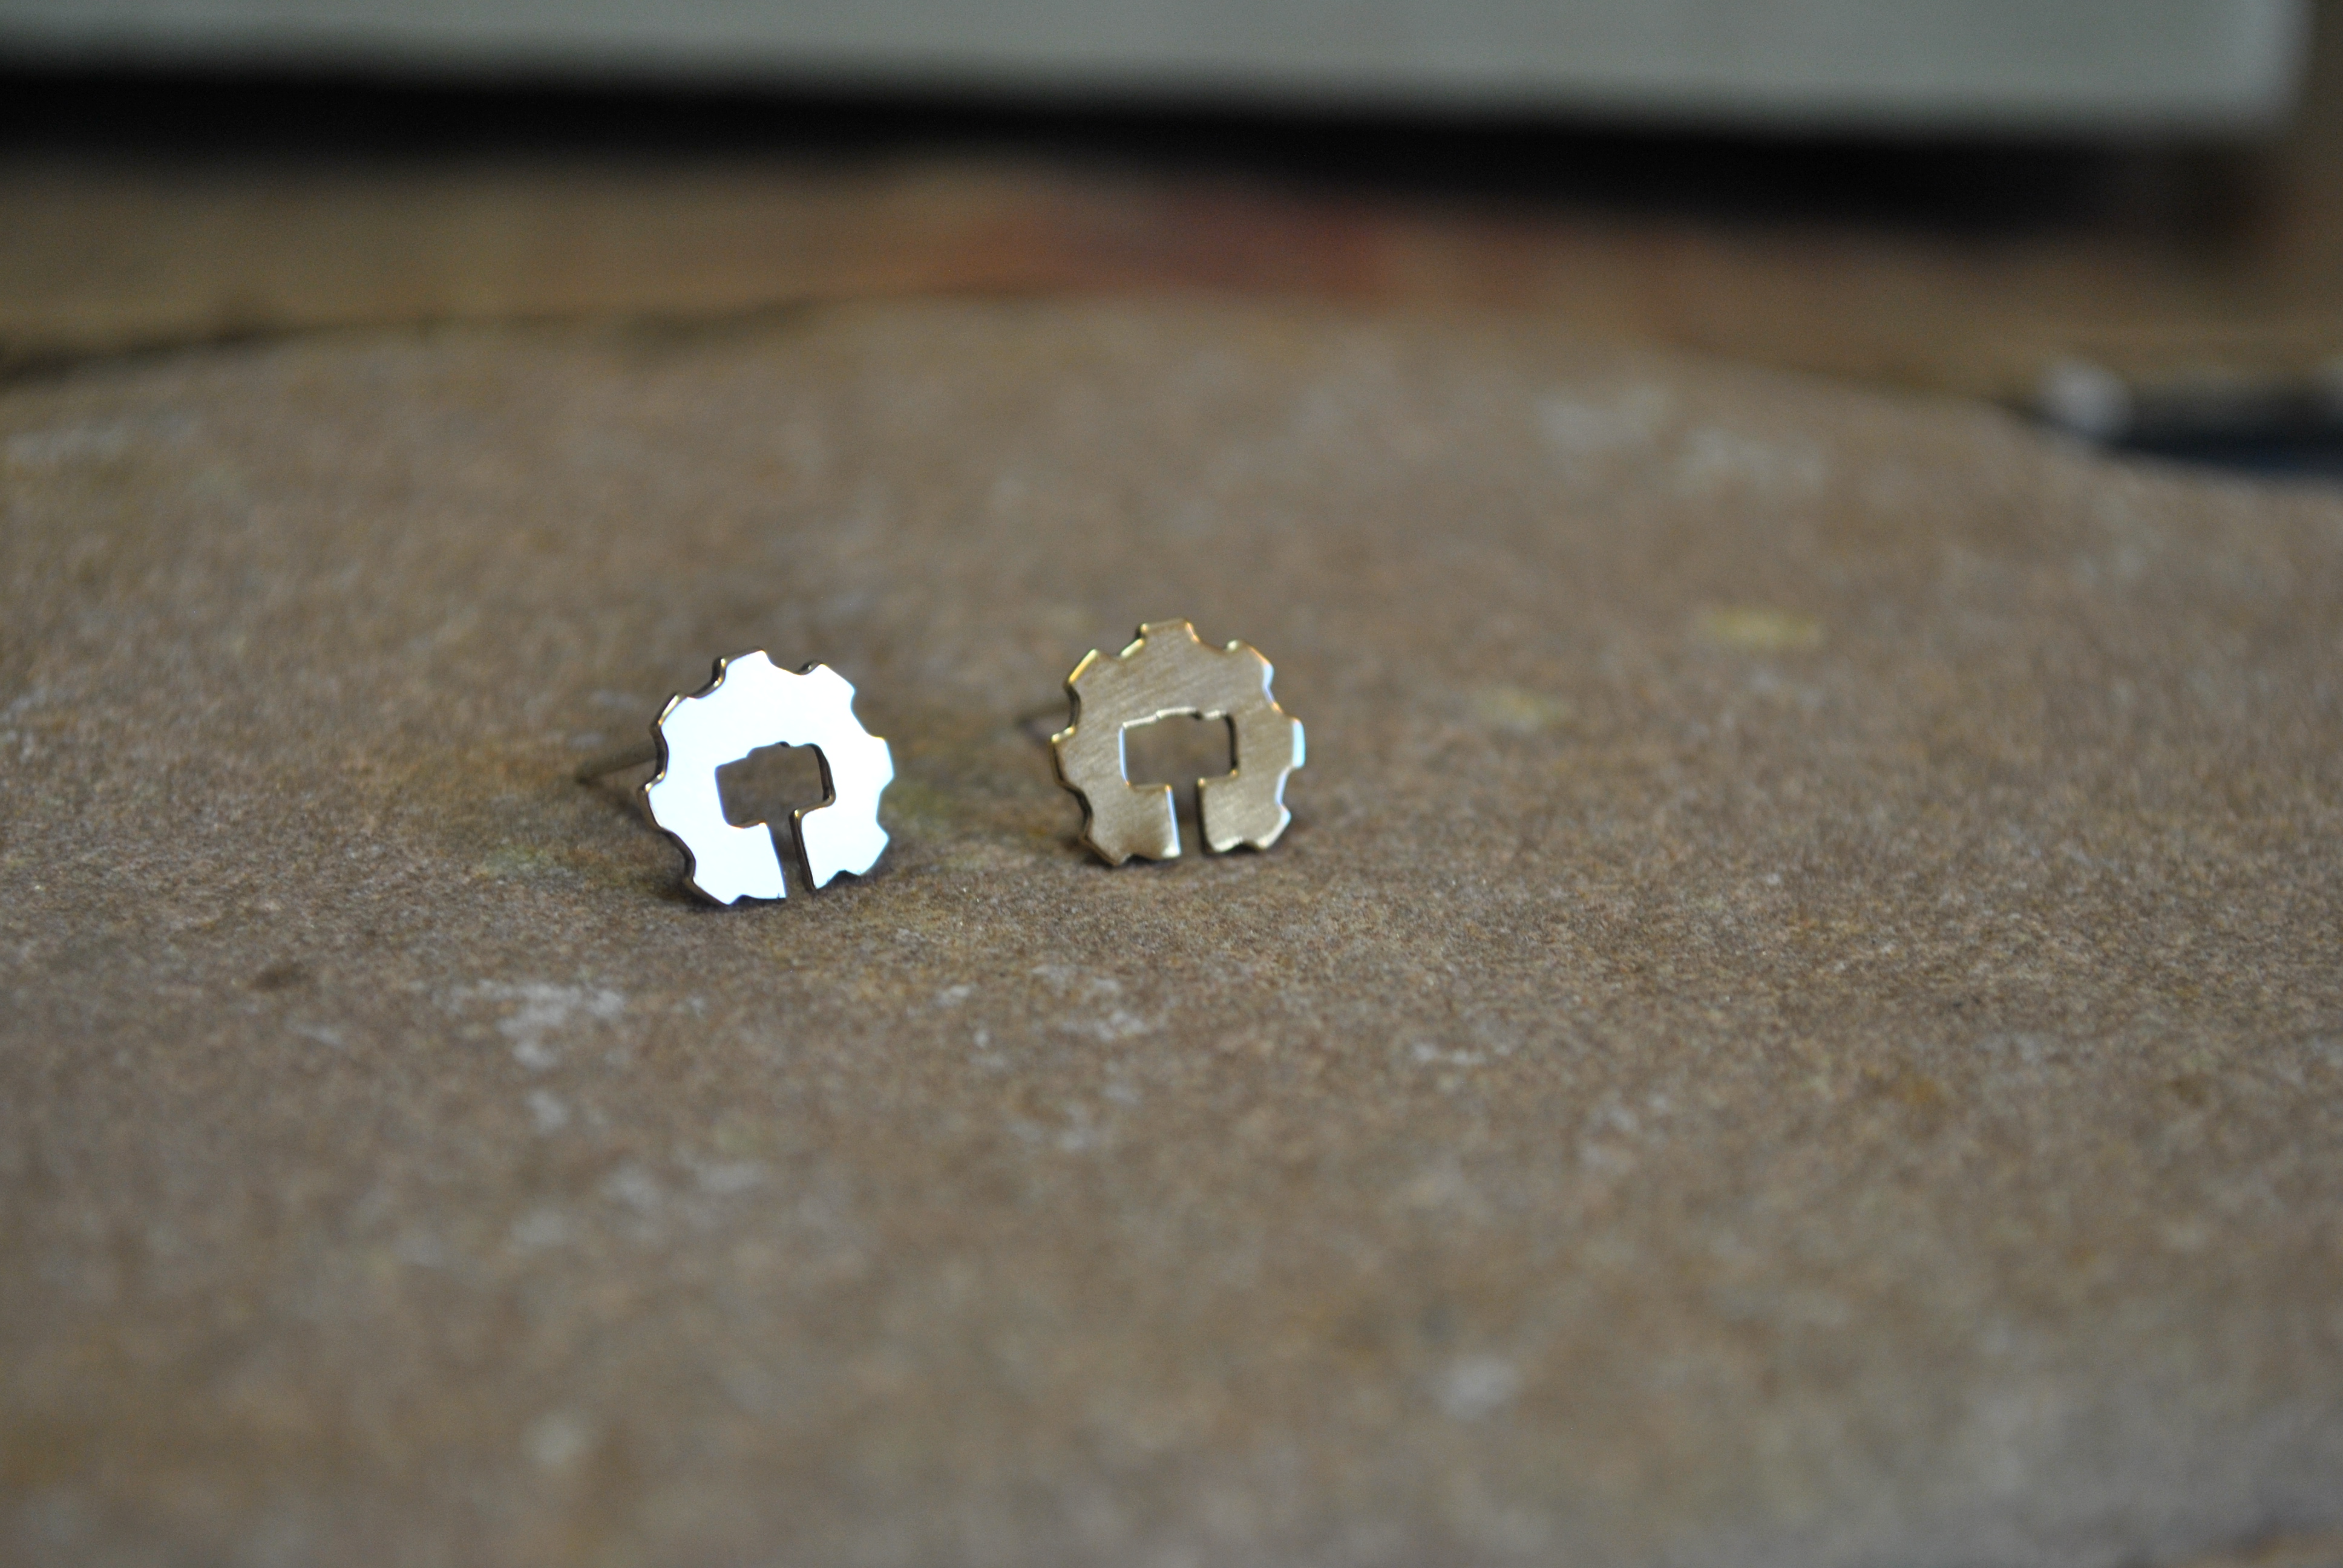
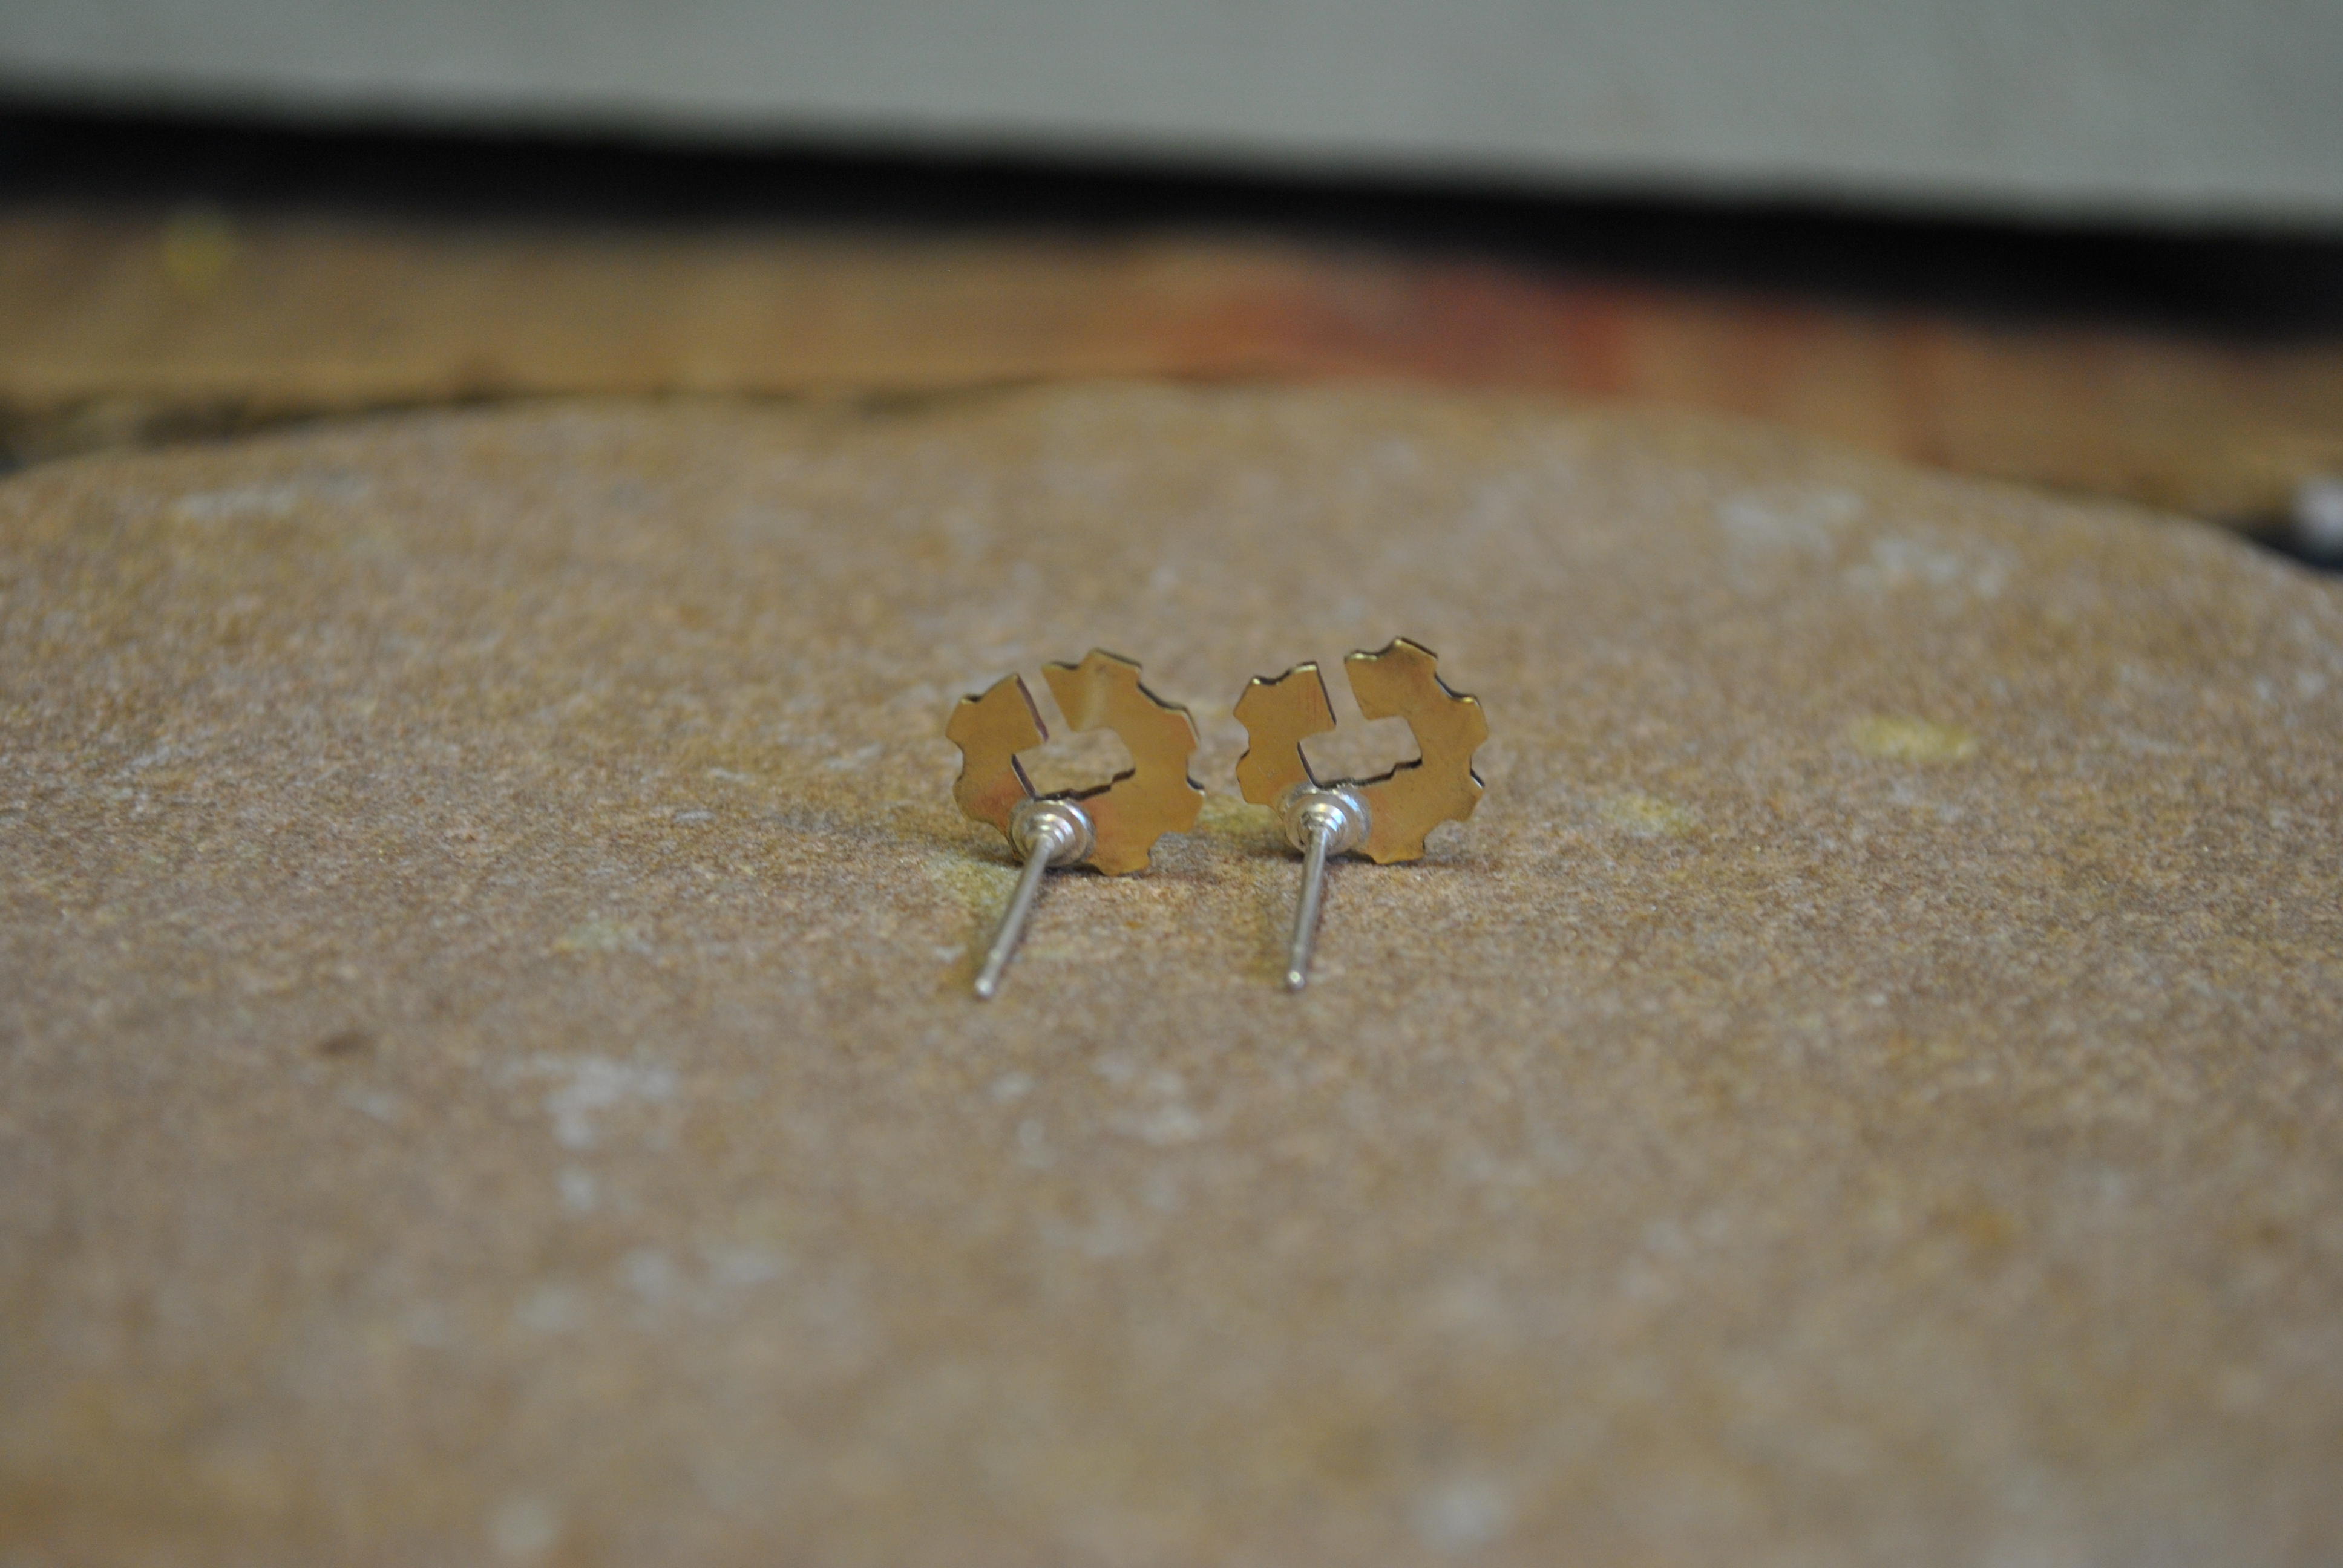
Made these for a client, think they look nice. The posts are set so that the earrings hangs to match the logo they were designed after.
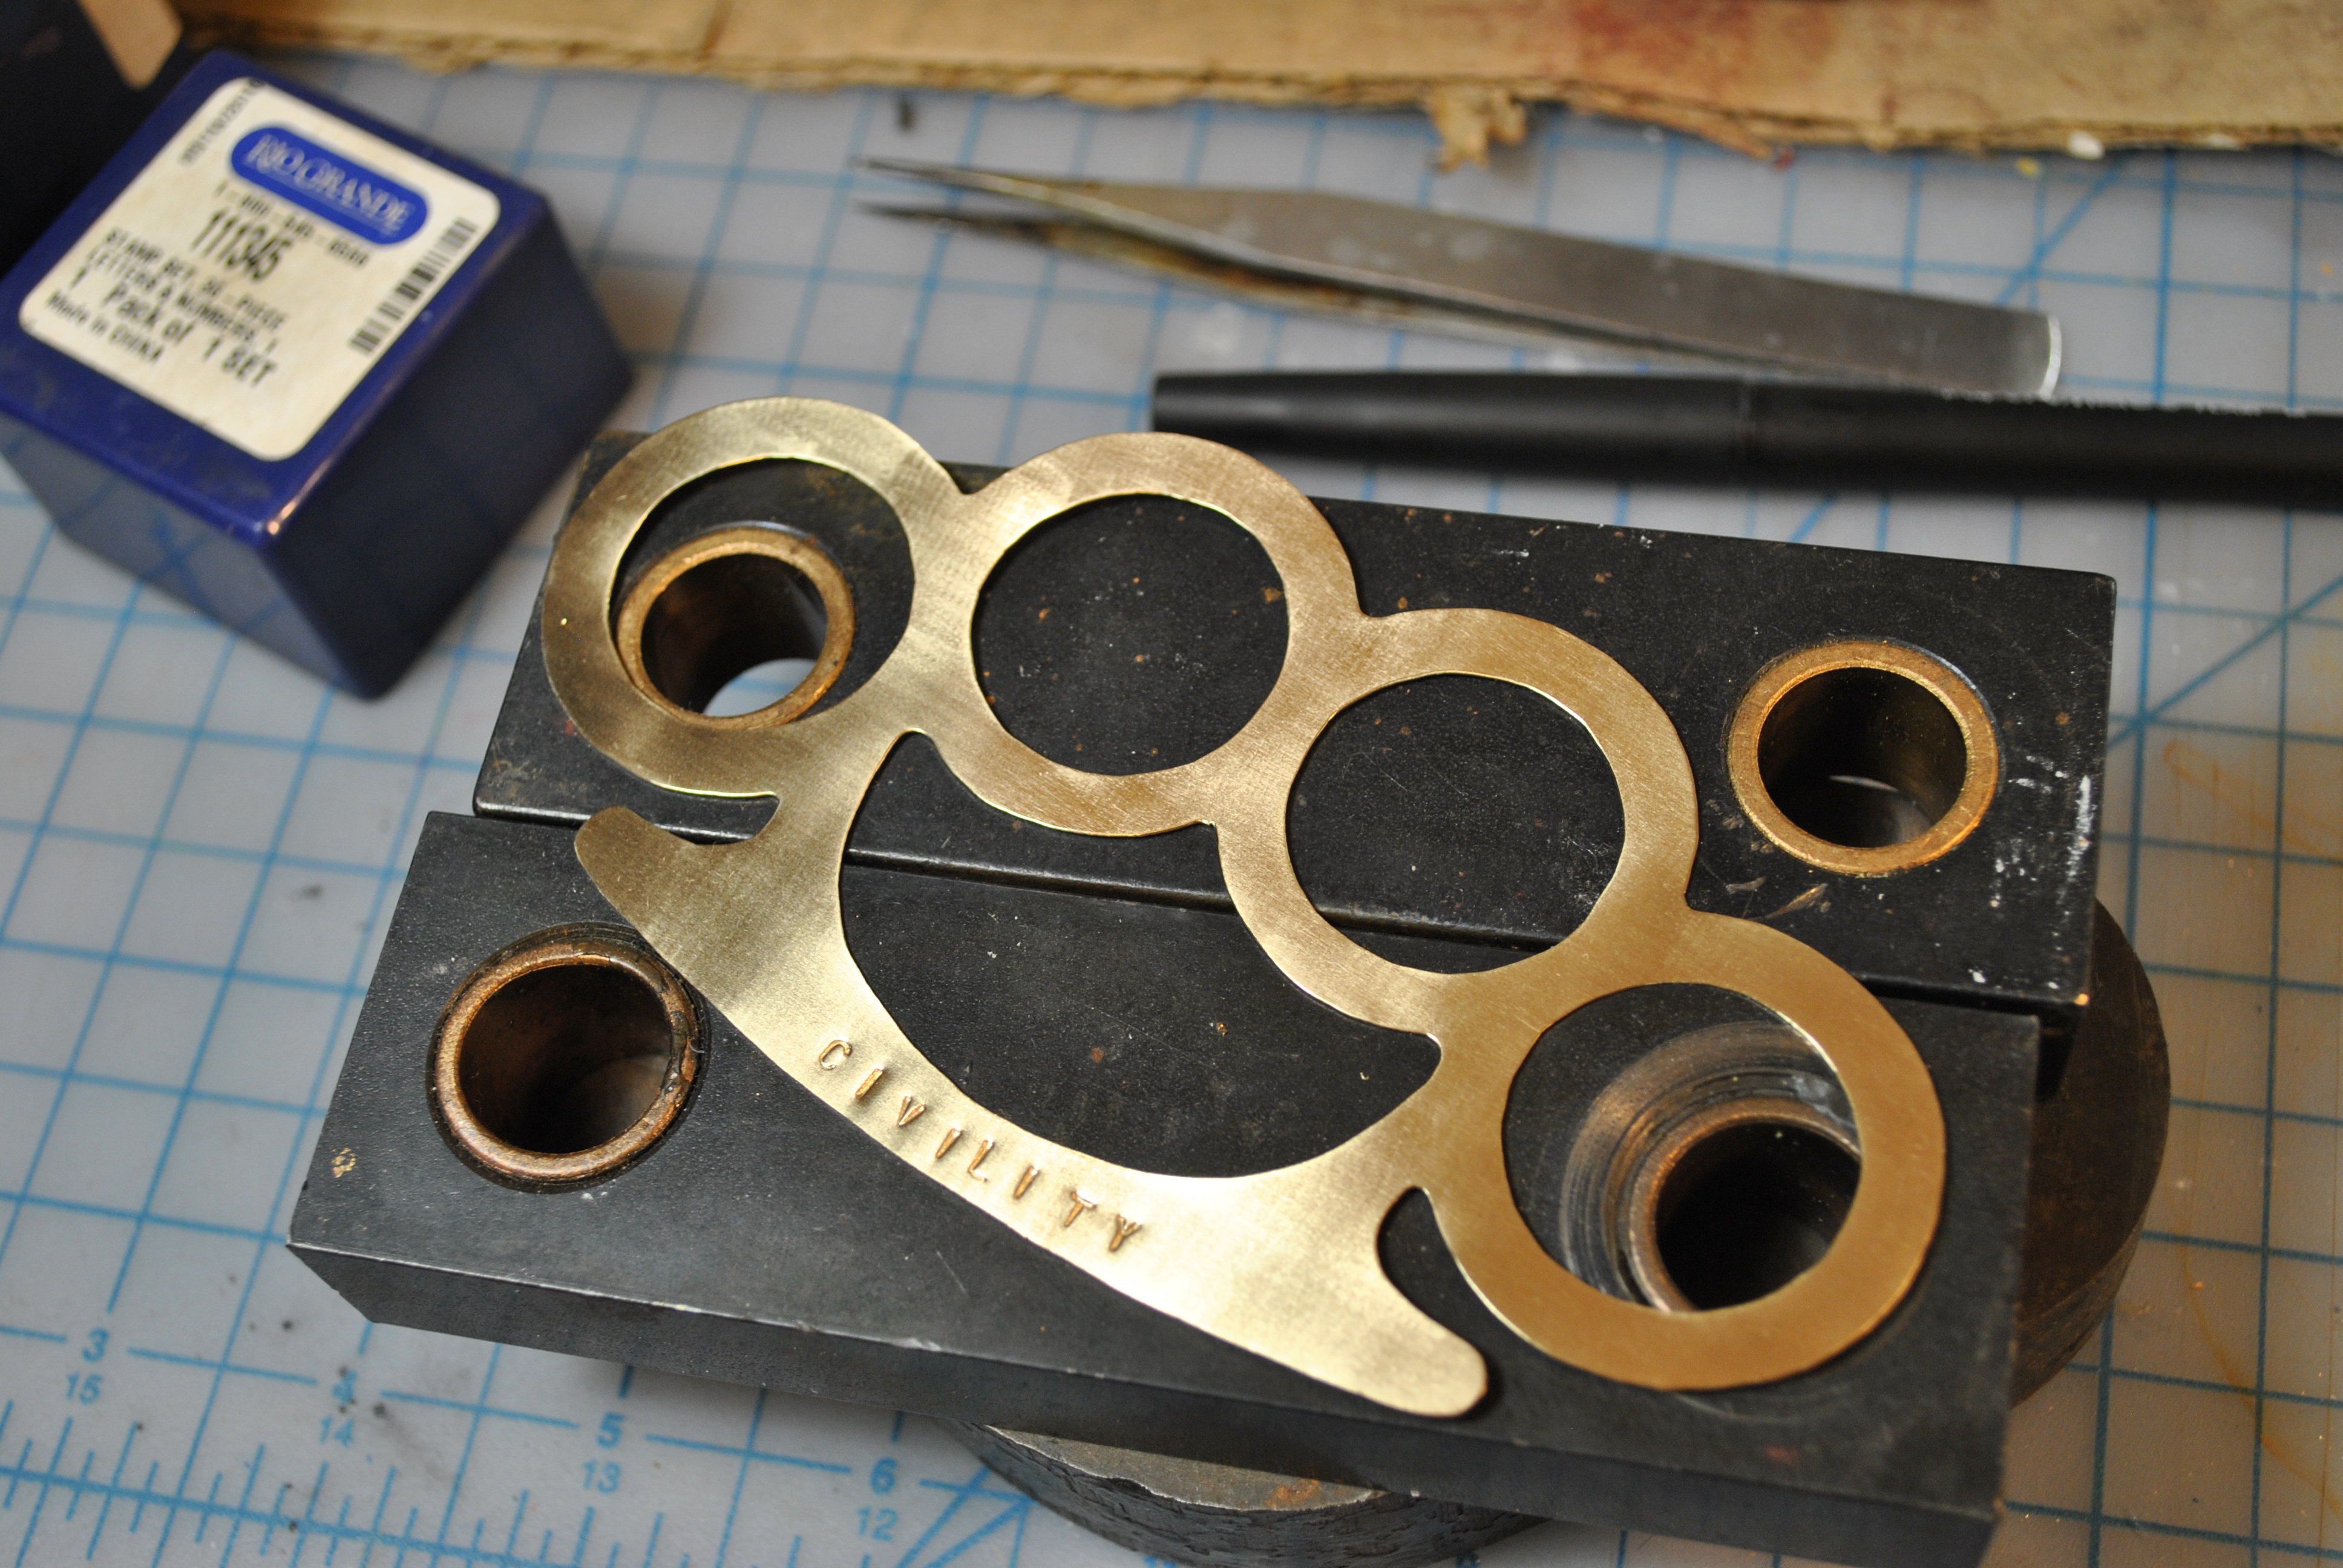
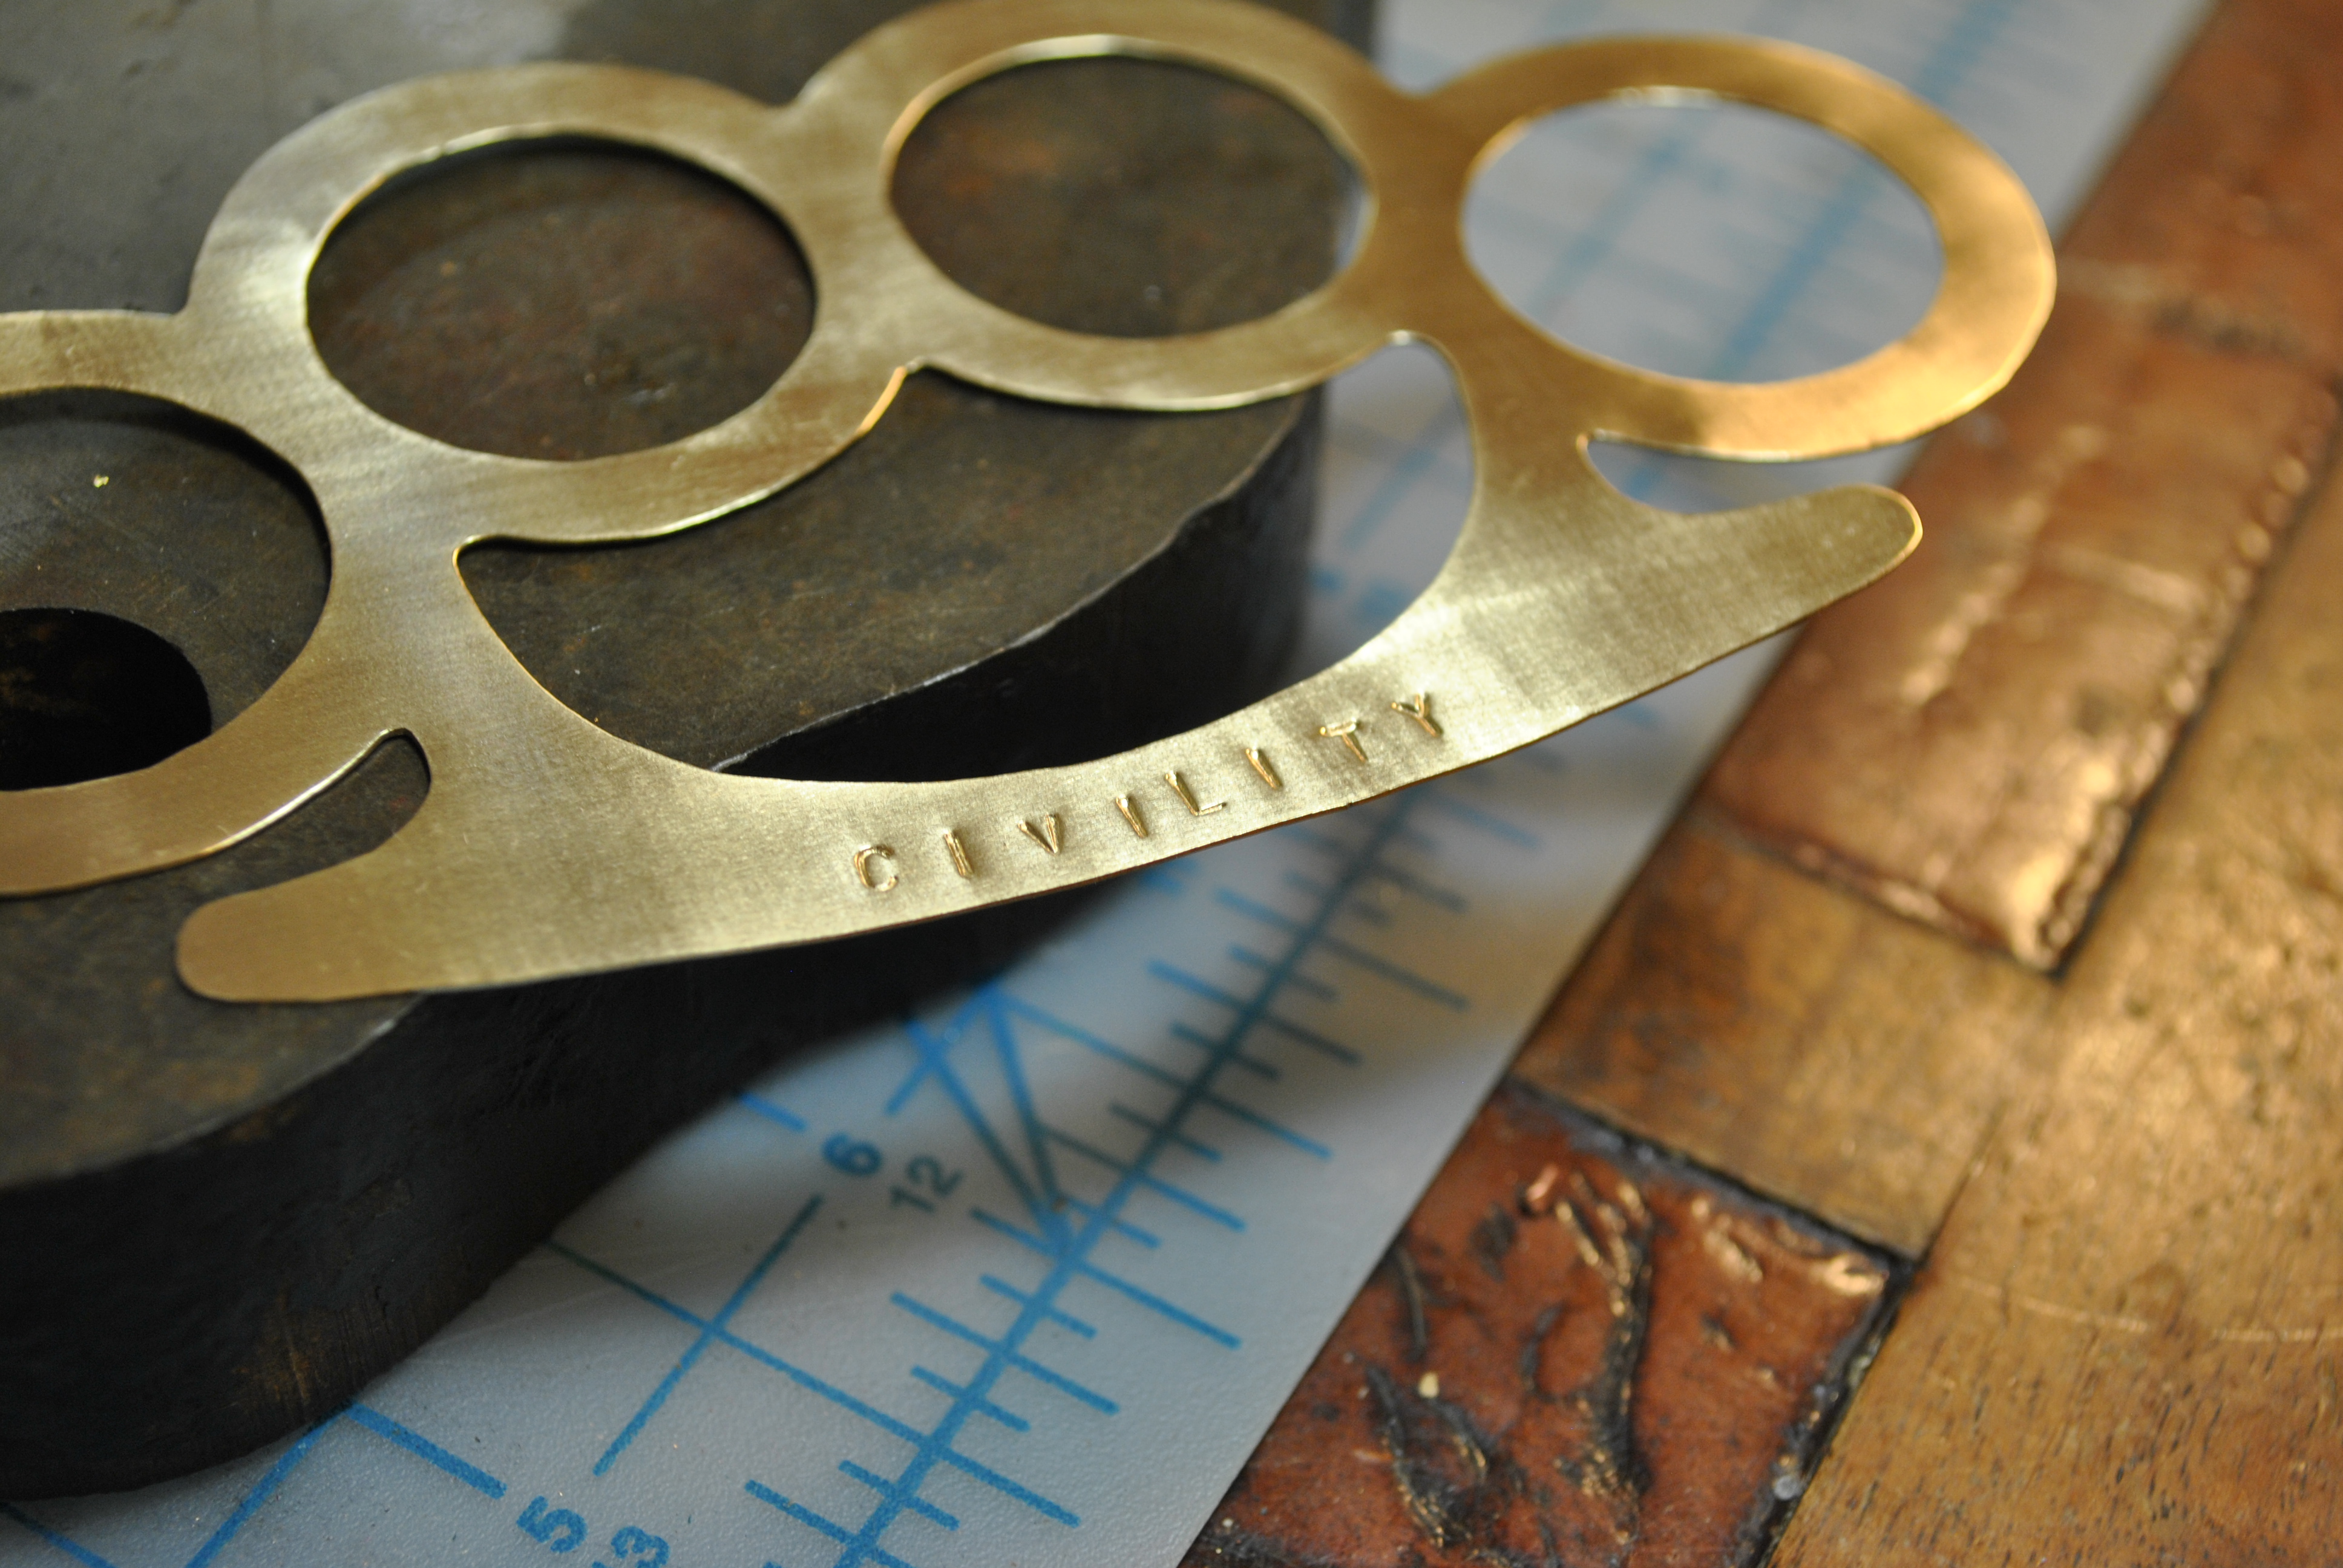
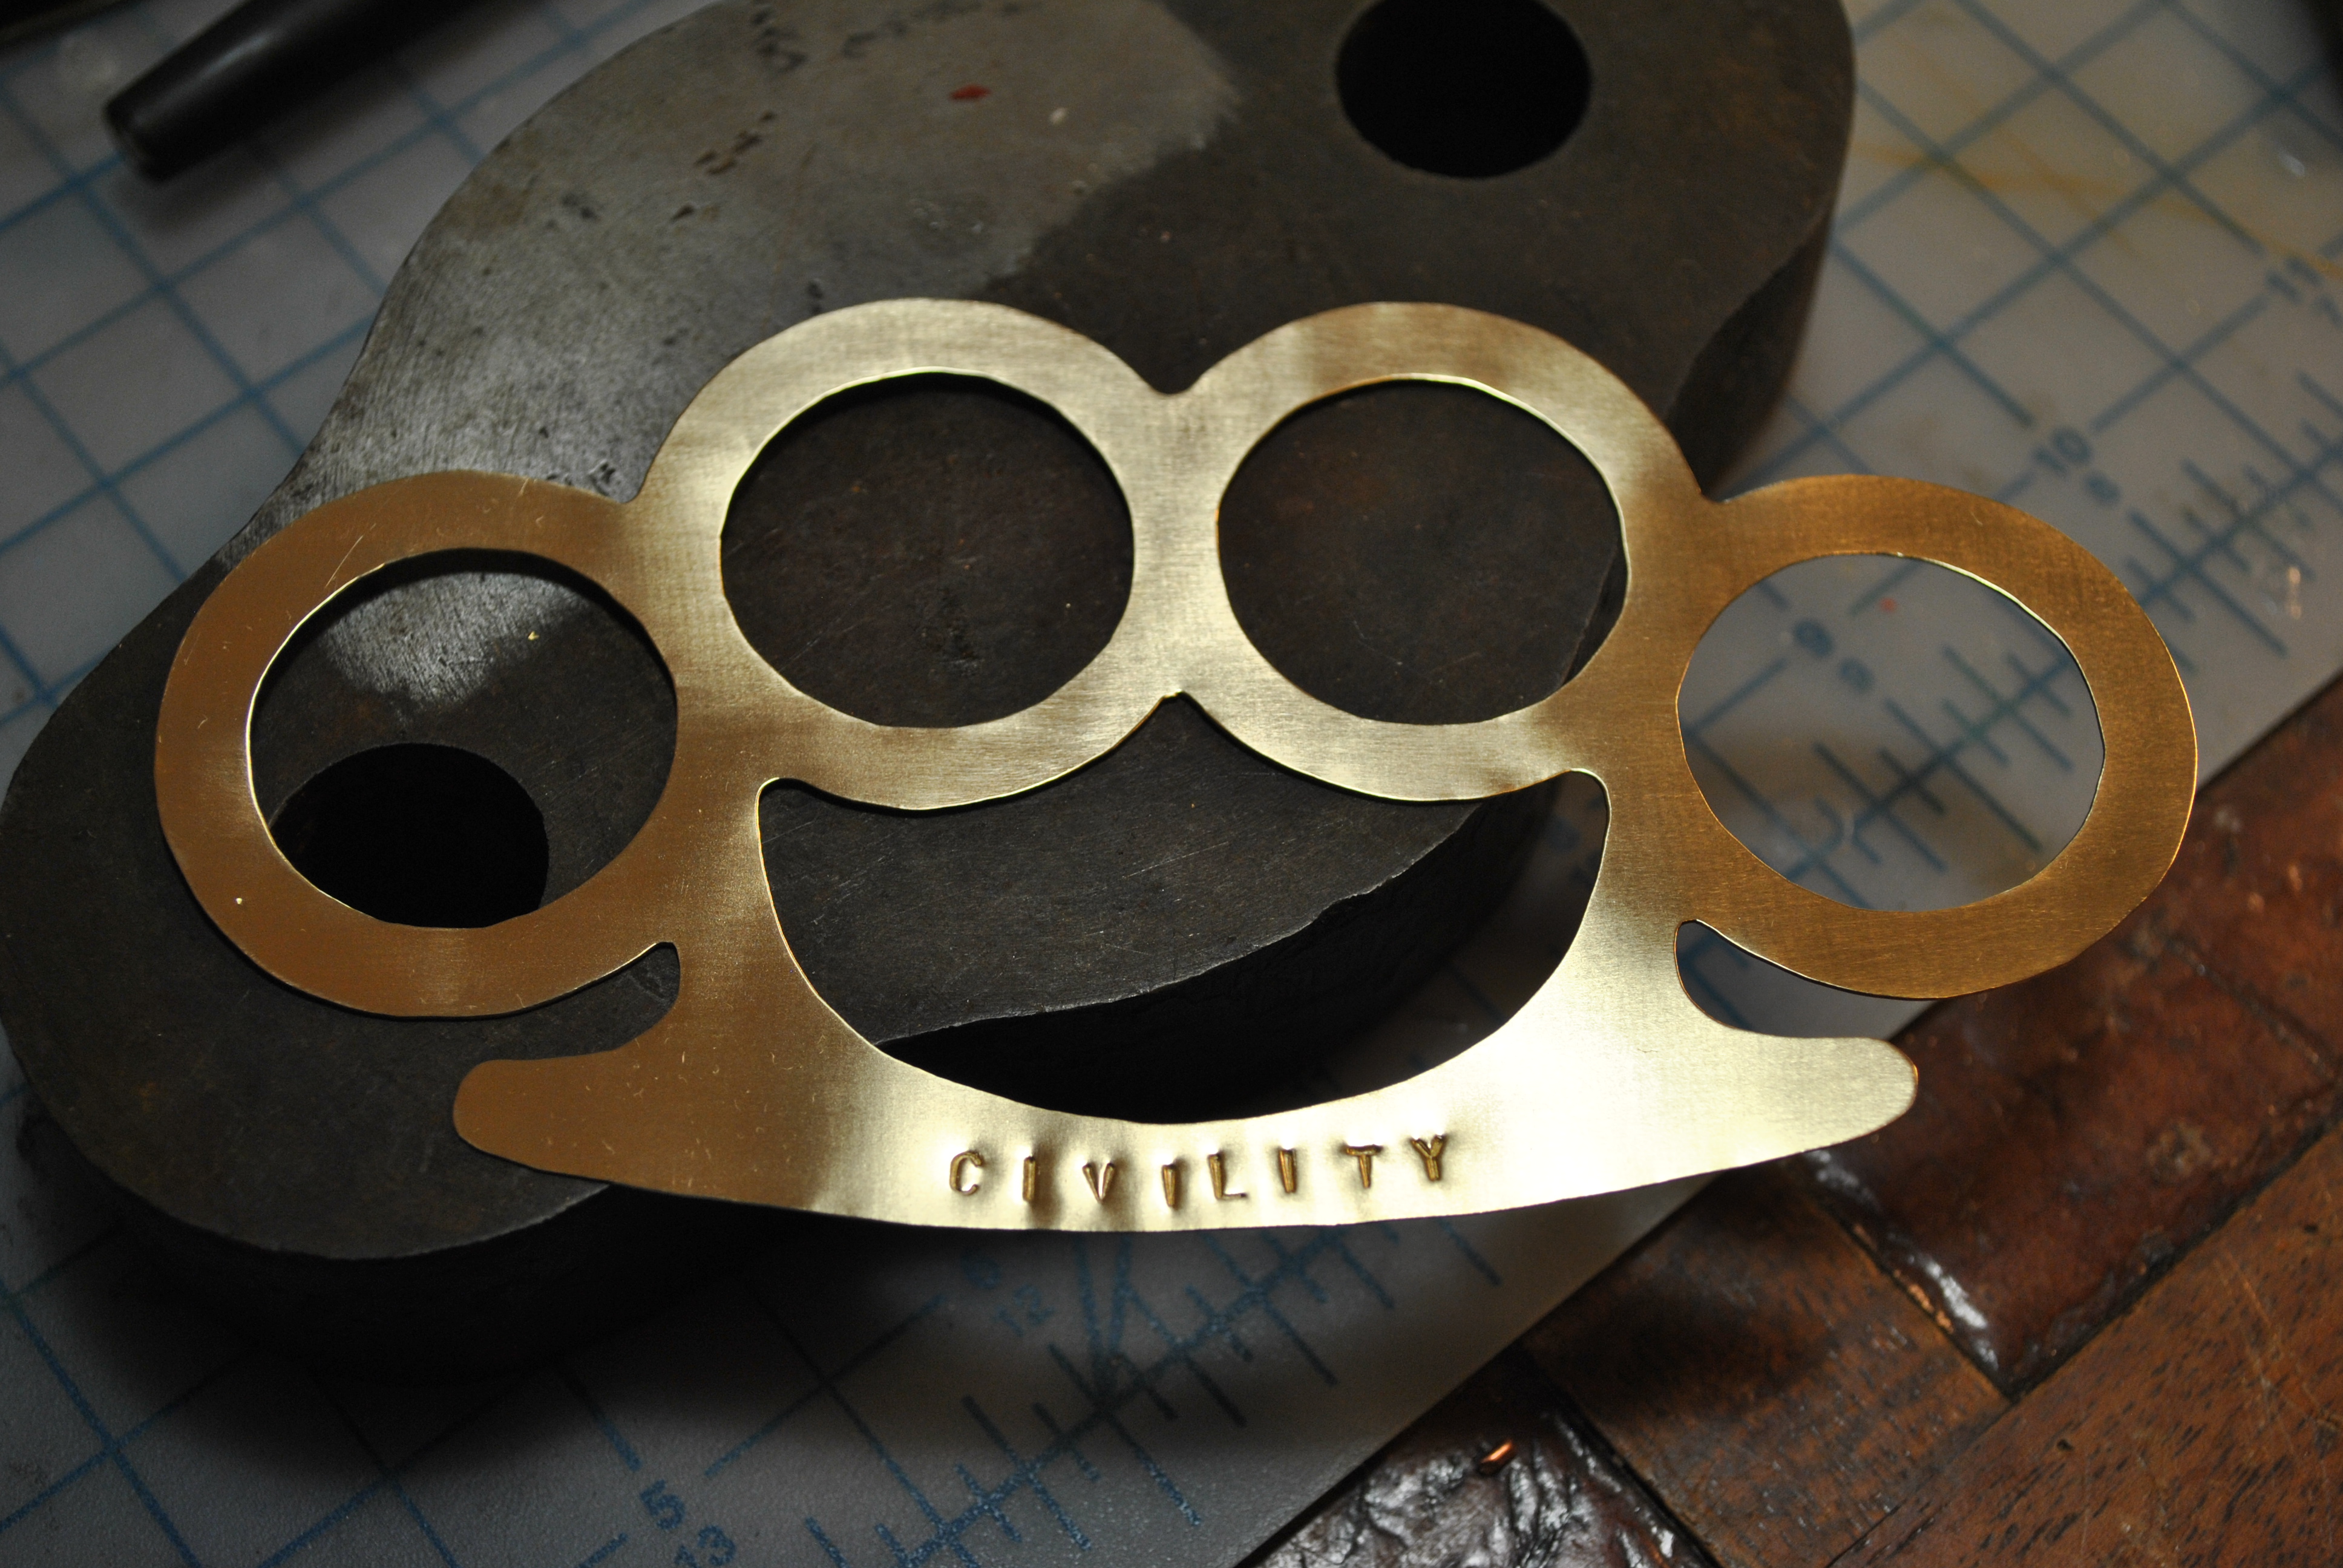
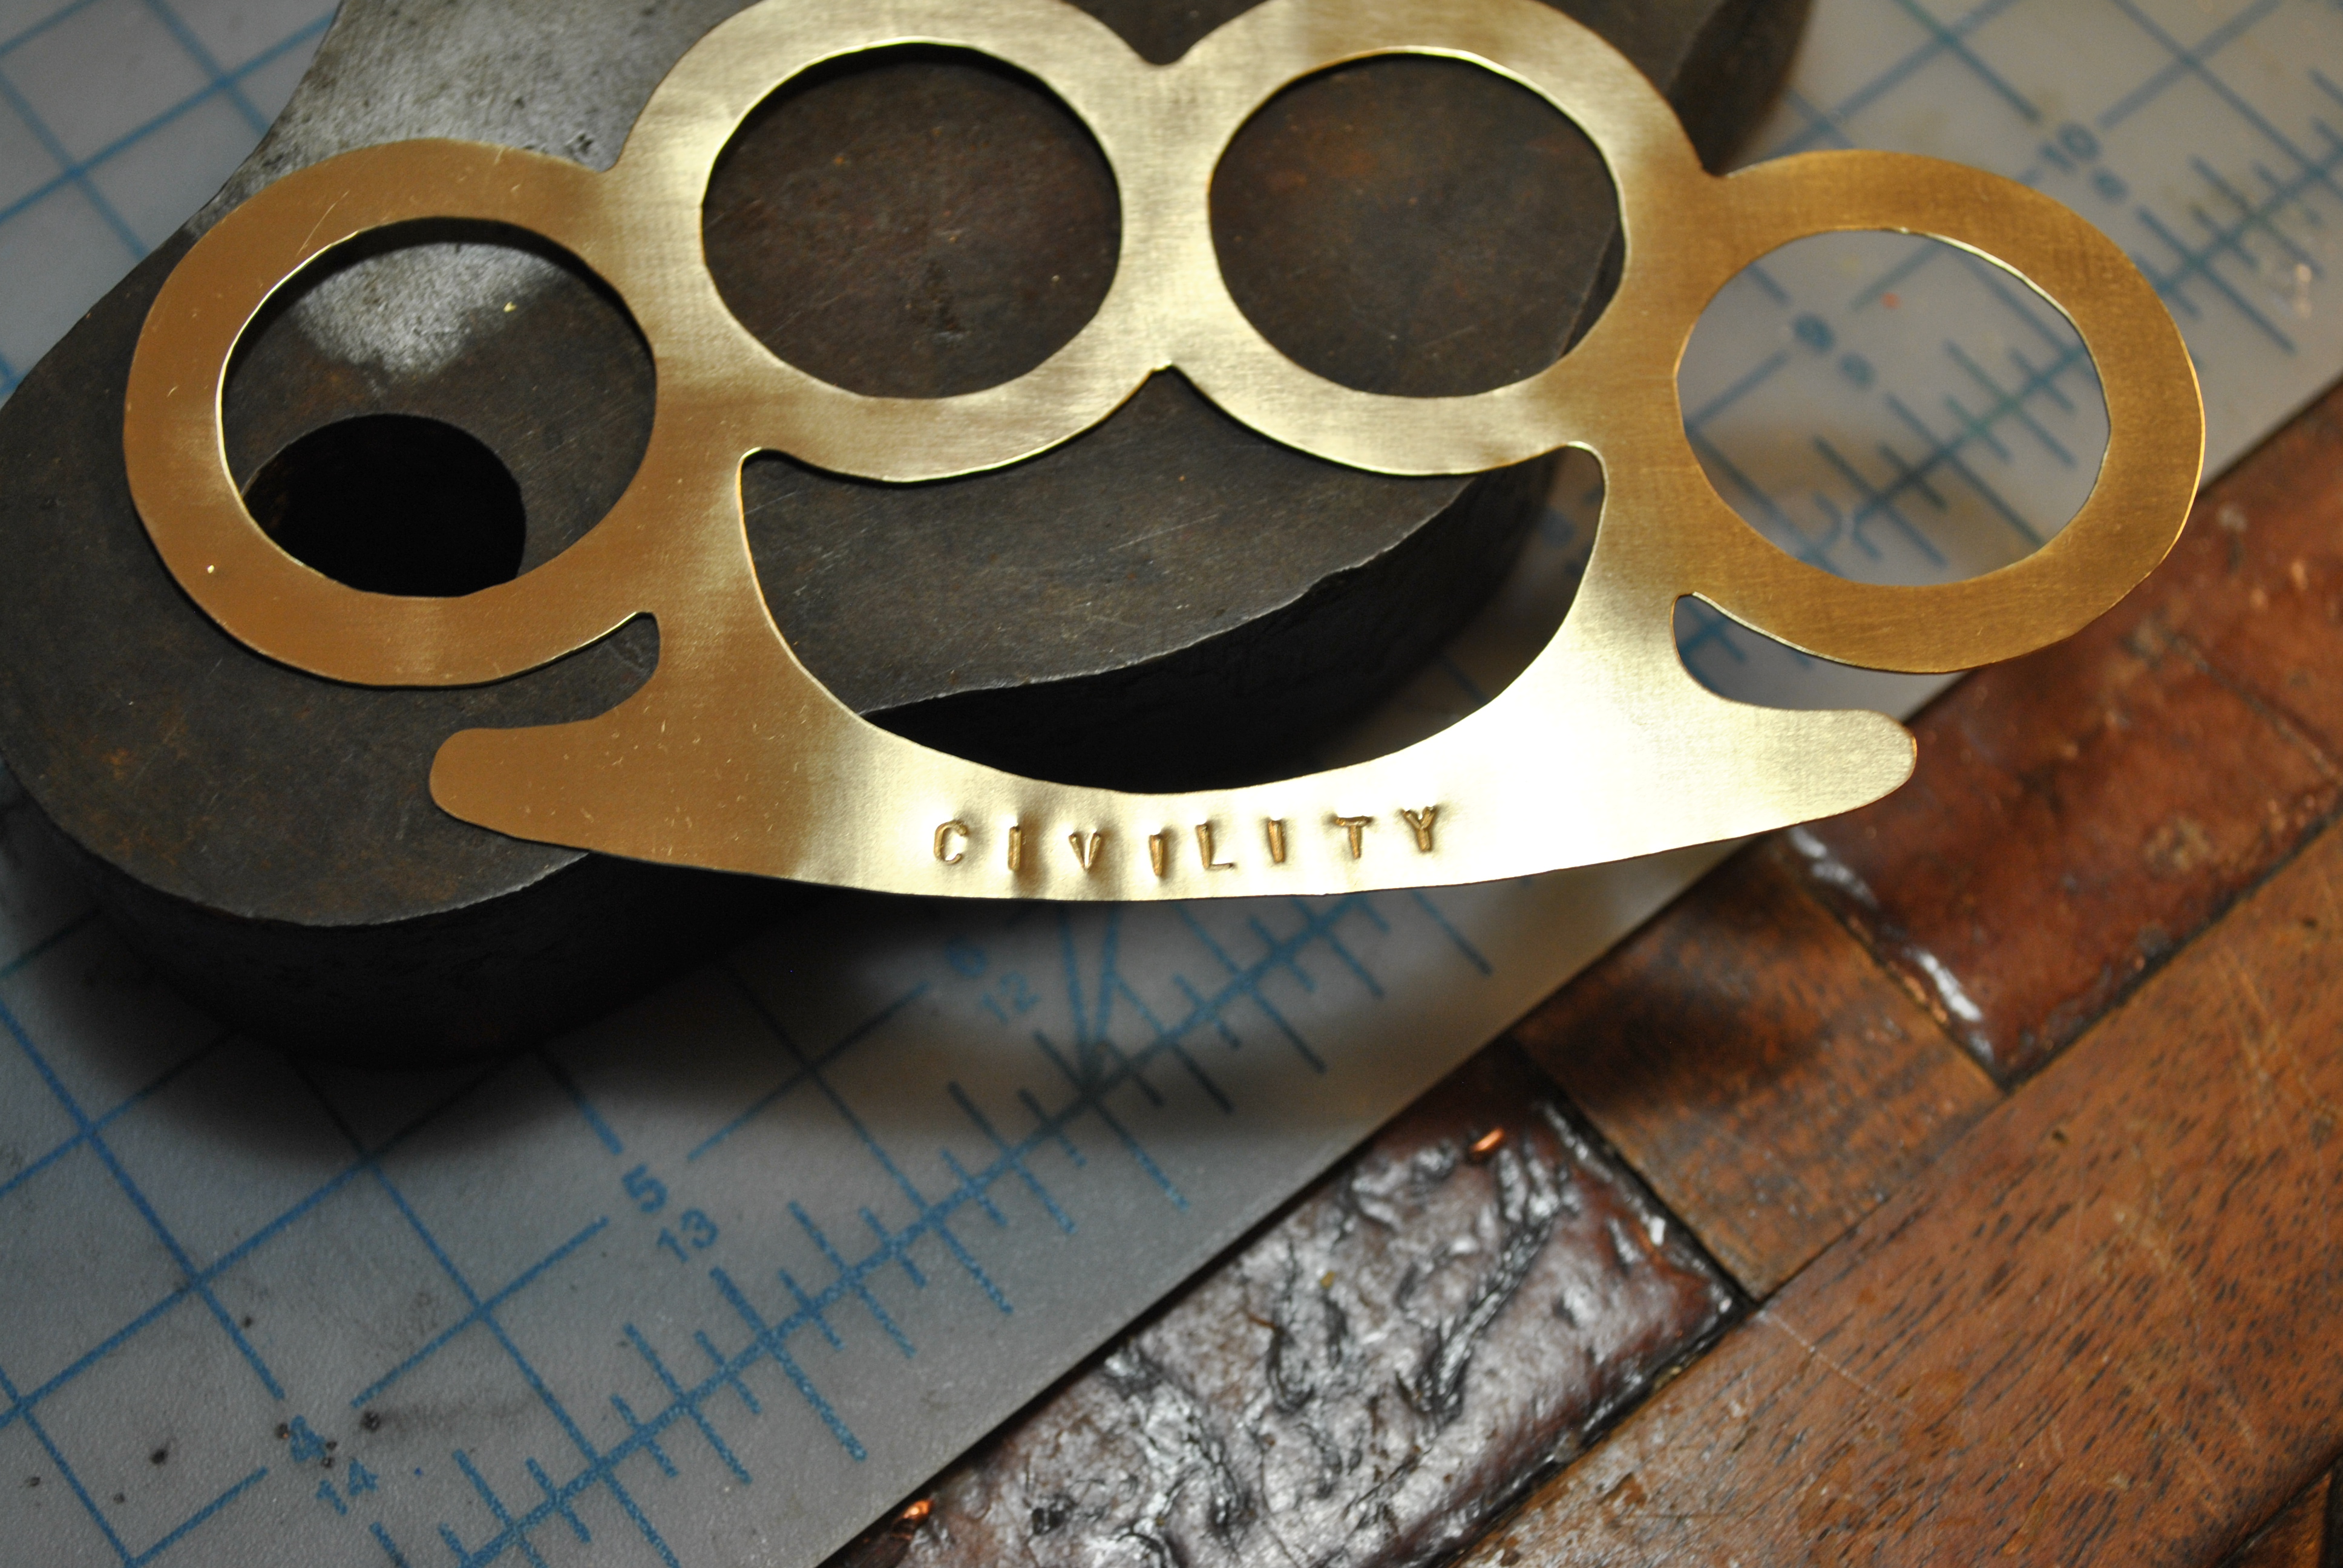
Made this brass knuckle bookmark for a client and they wanted “Civility” stamped on it. Thought it fit perfectly into the world of 2016. No reason we can’t be civil while we fight the power!
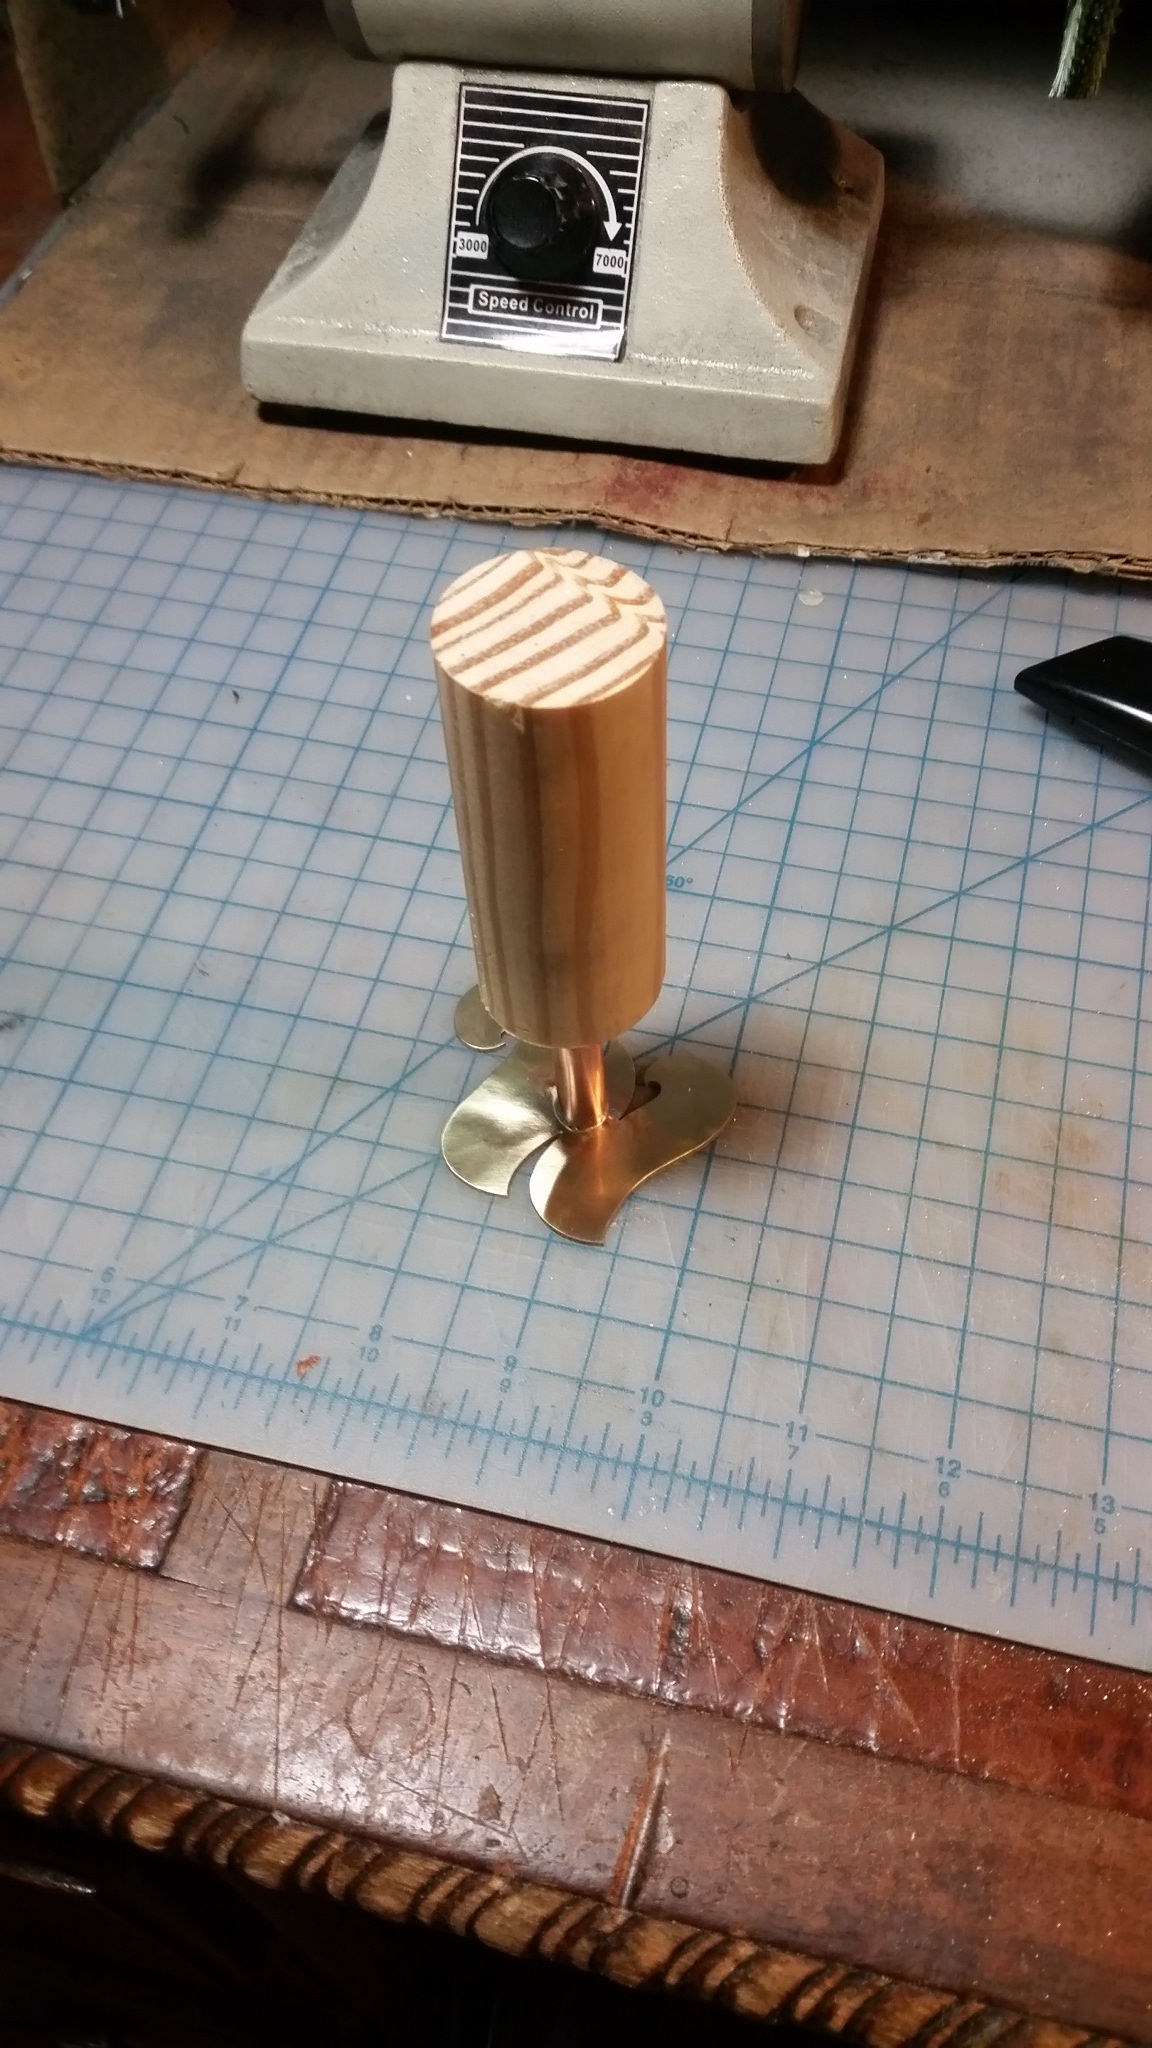
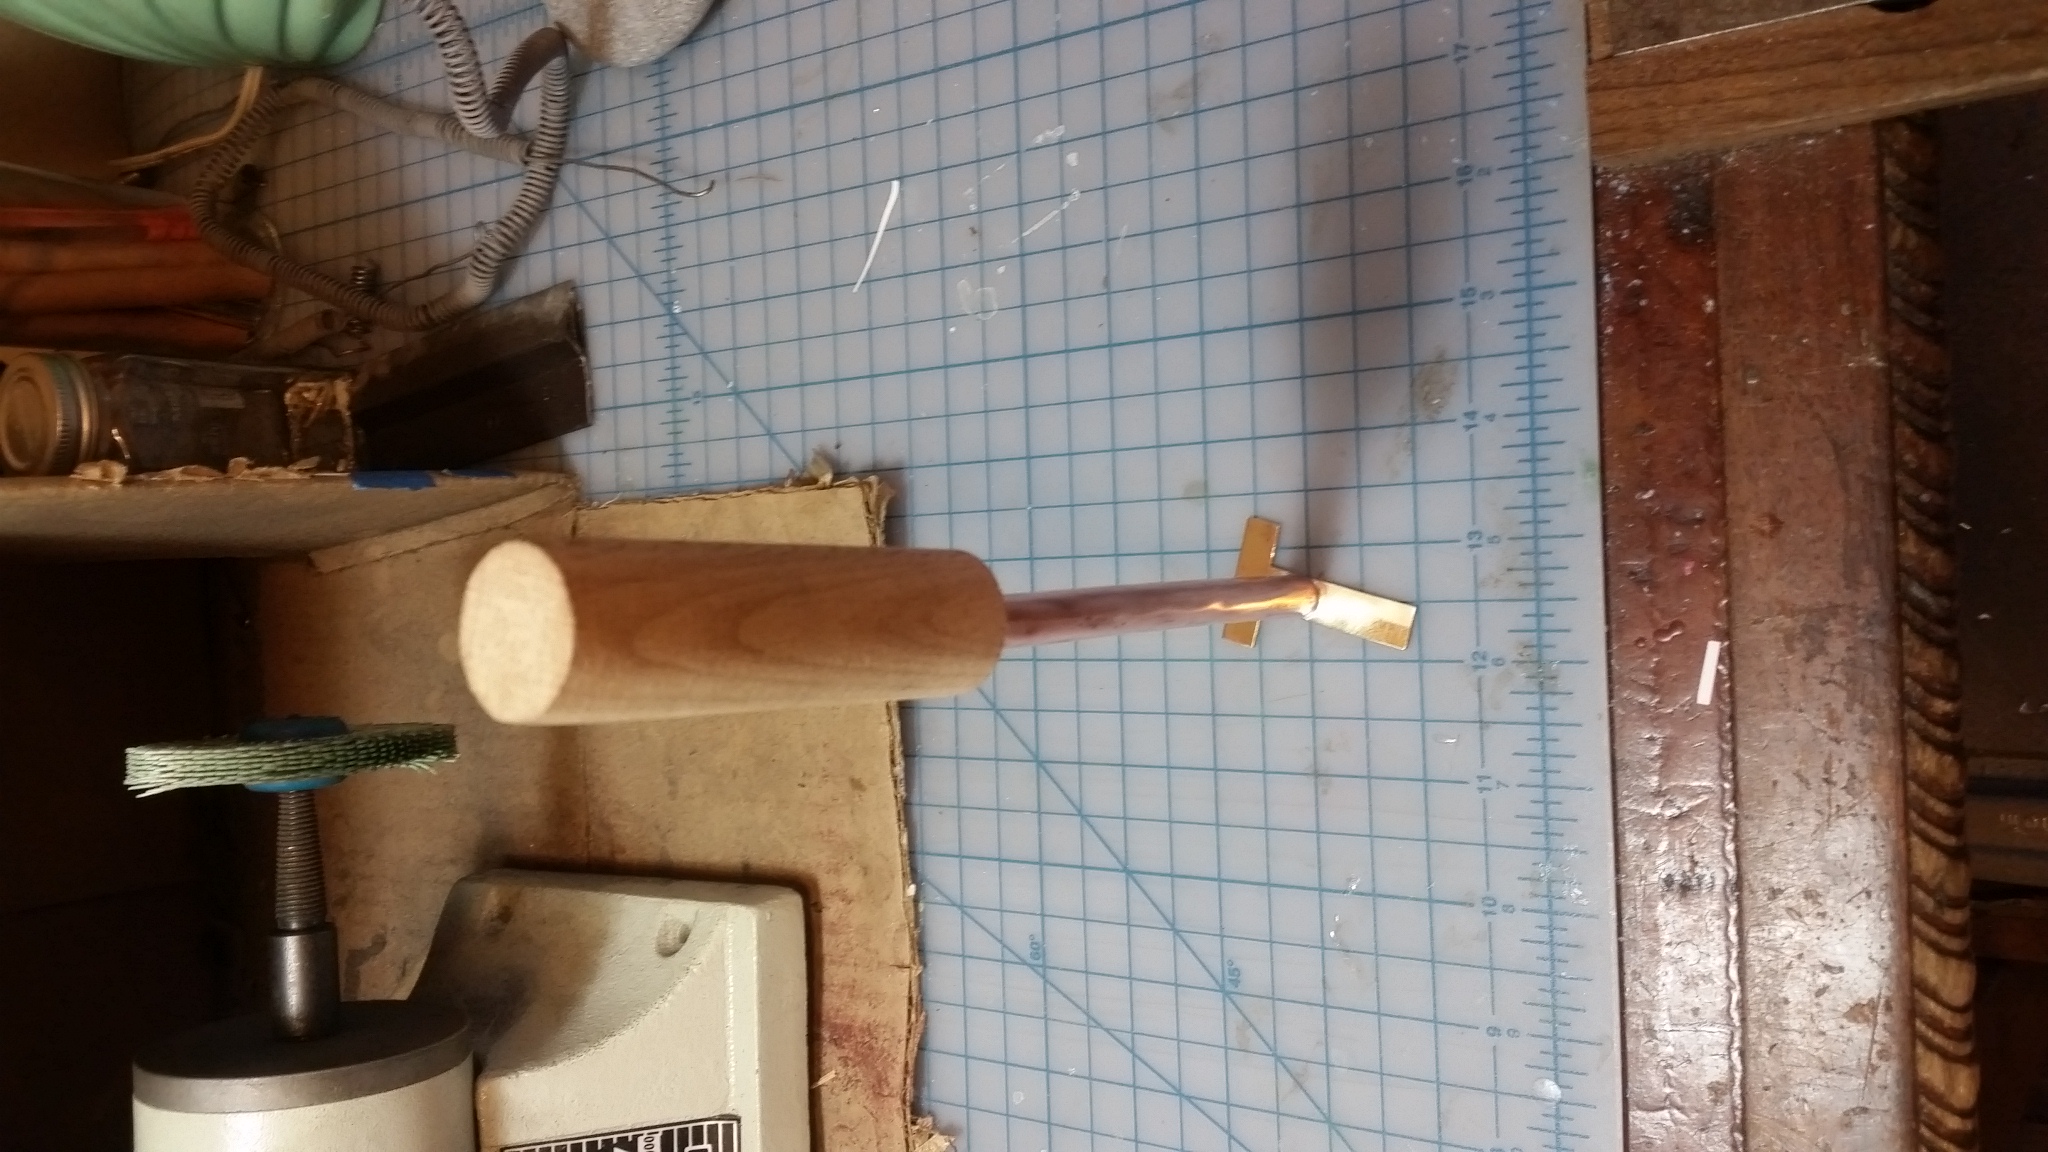
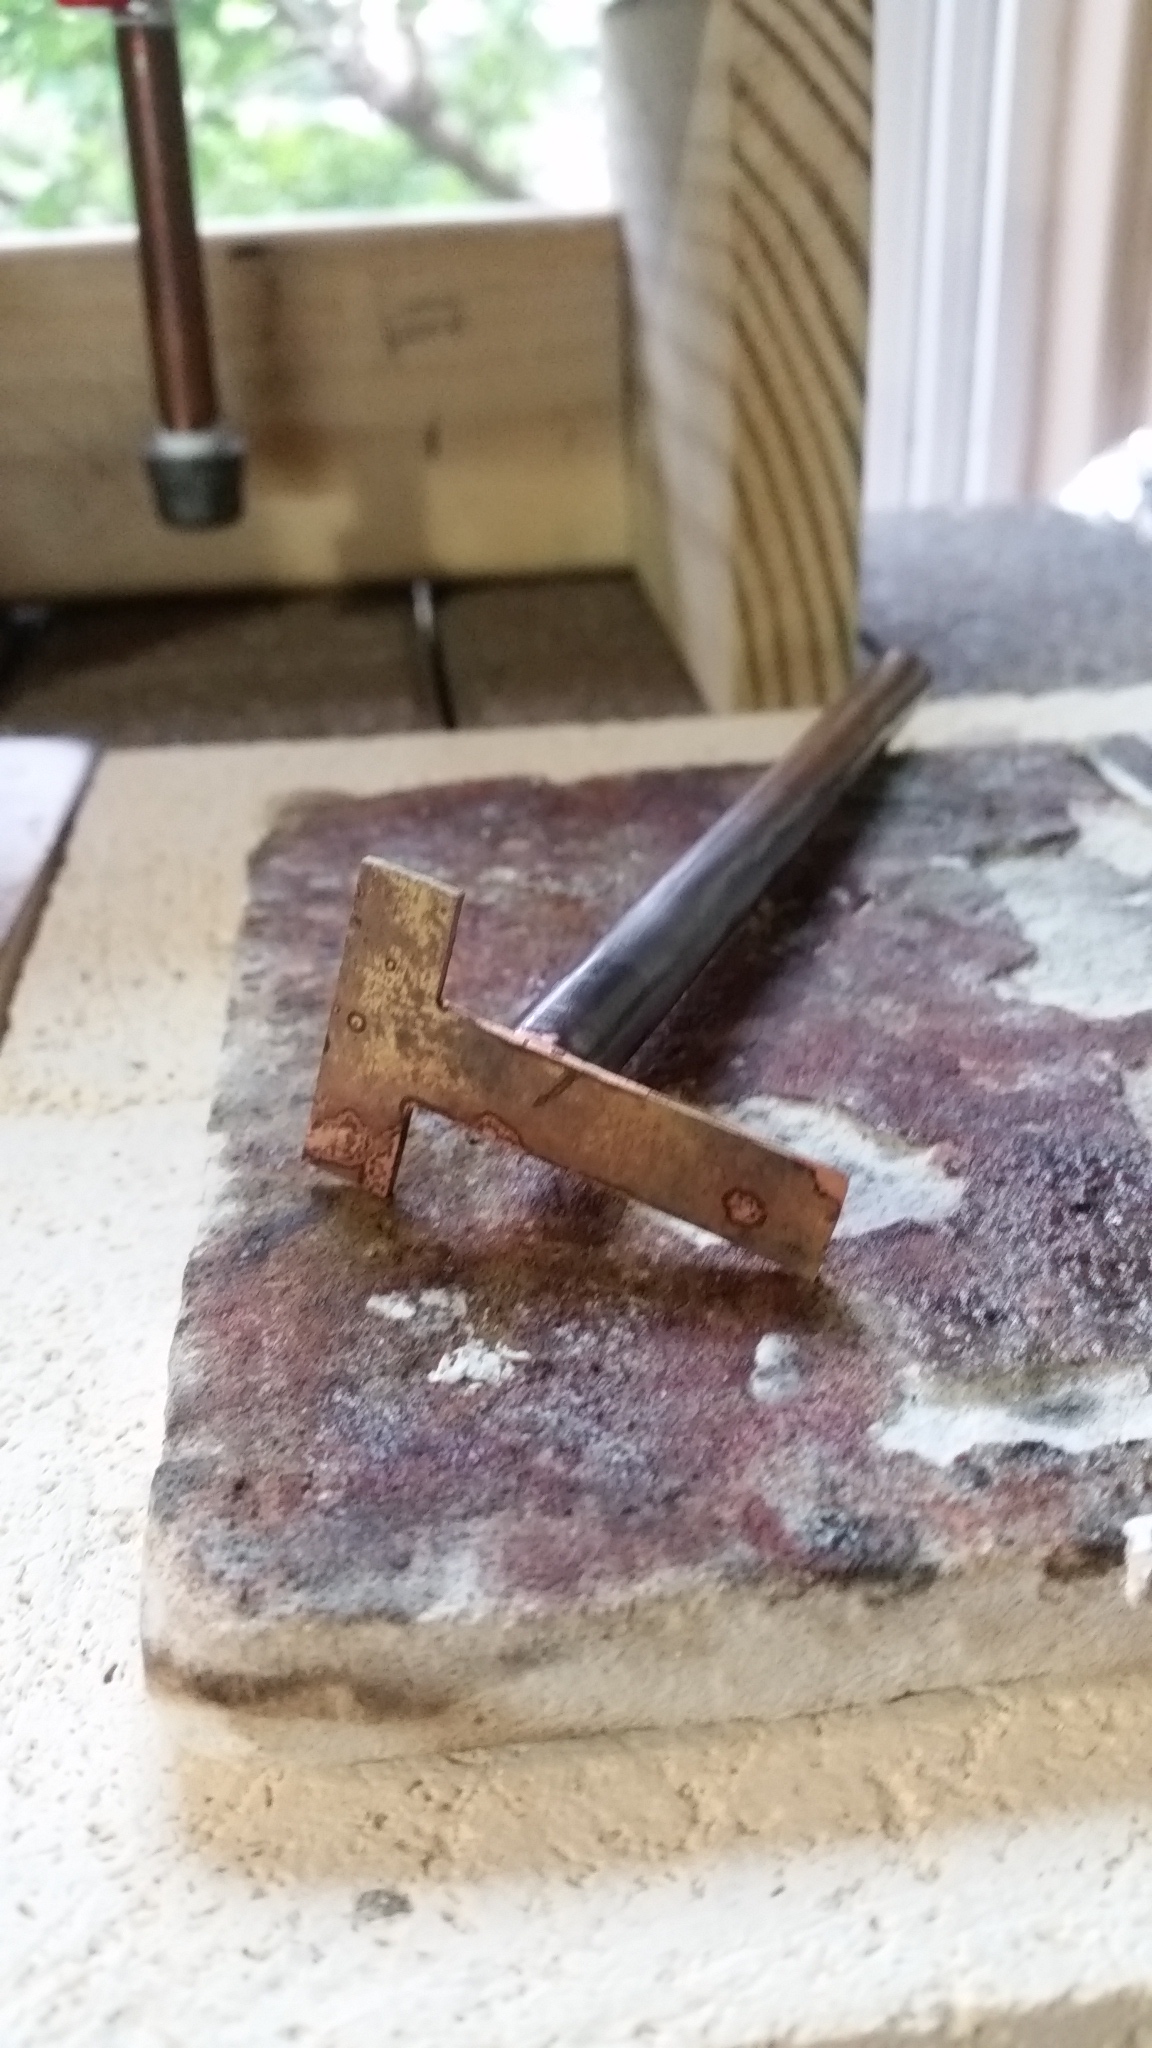
A friend in the bakery business wanted to be able to brand her bread to give it a little more flair. So I whipped up this quick and dirty bread brand.

Cut out the T from 16 gauge brass, it was the thickest I had, if I could have found thicker I would, but turned out ok.

Solder on some hollow copper pipe, again what I had on hand, with a nice strong joint using high temp solder.

Looking good so far, now for a handle.
Drilled a hole in a hard wood dowel and used a mix of friction fit and CA glue to hold it in place.
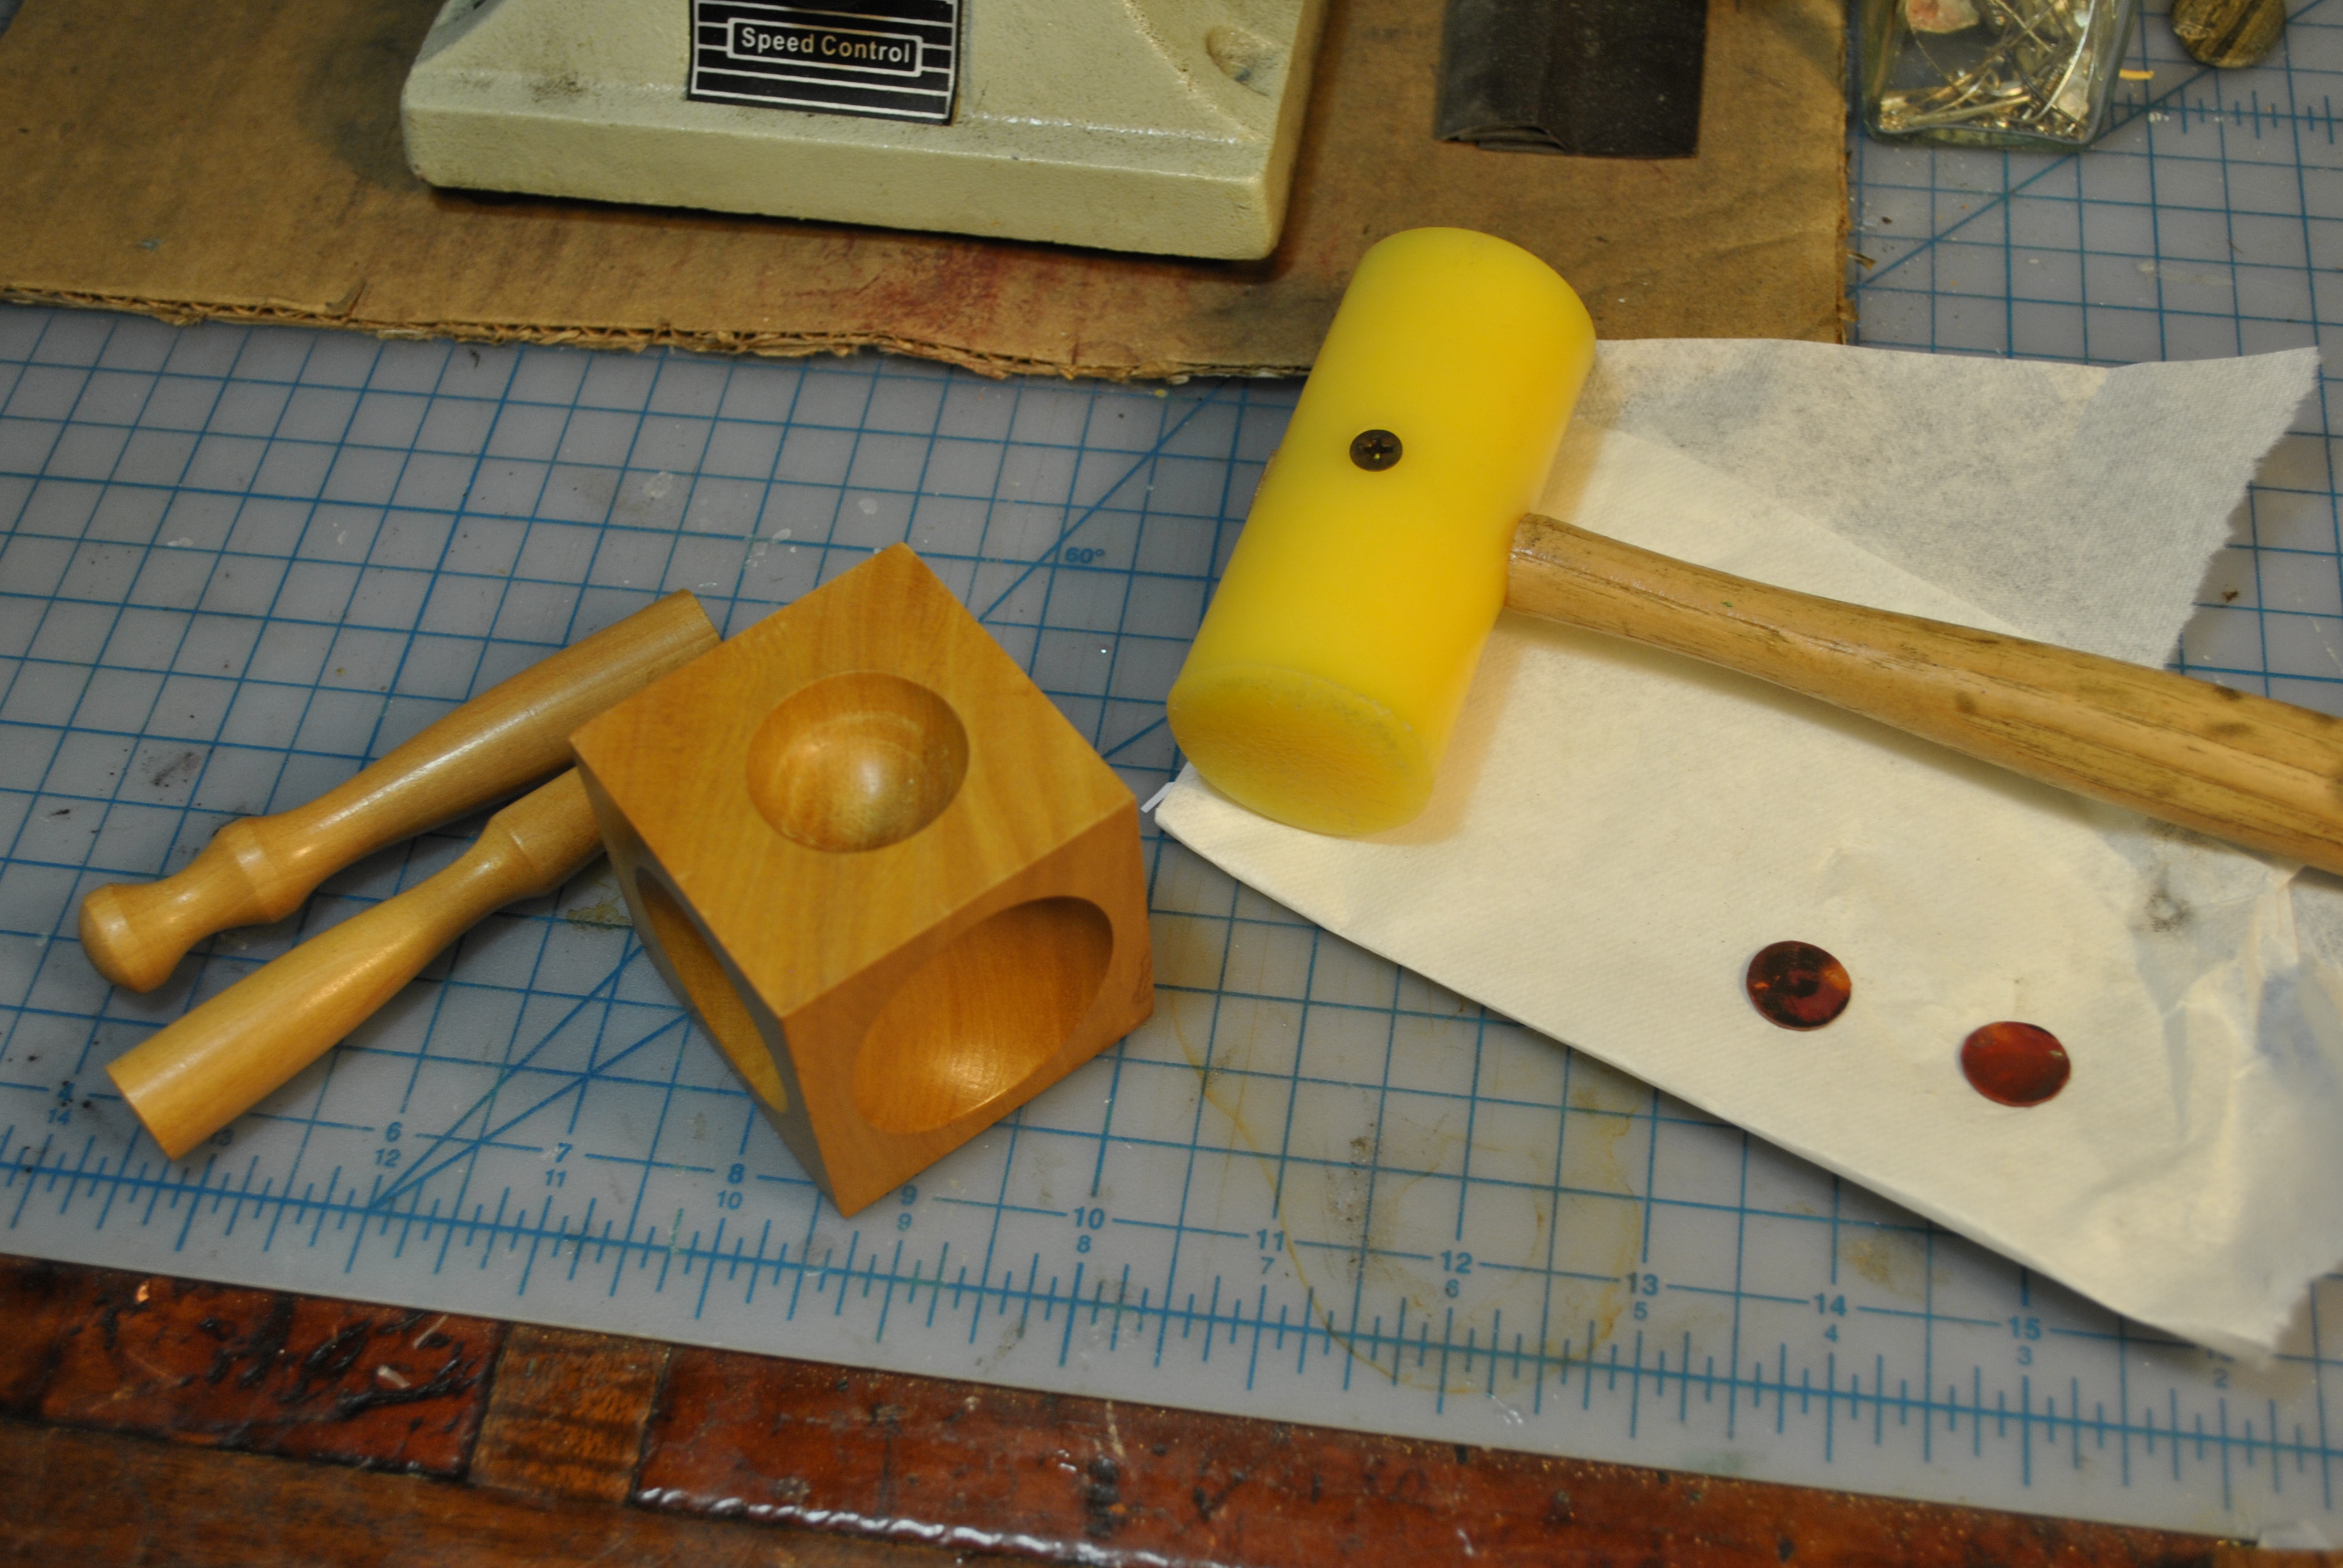
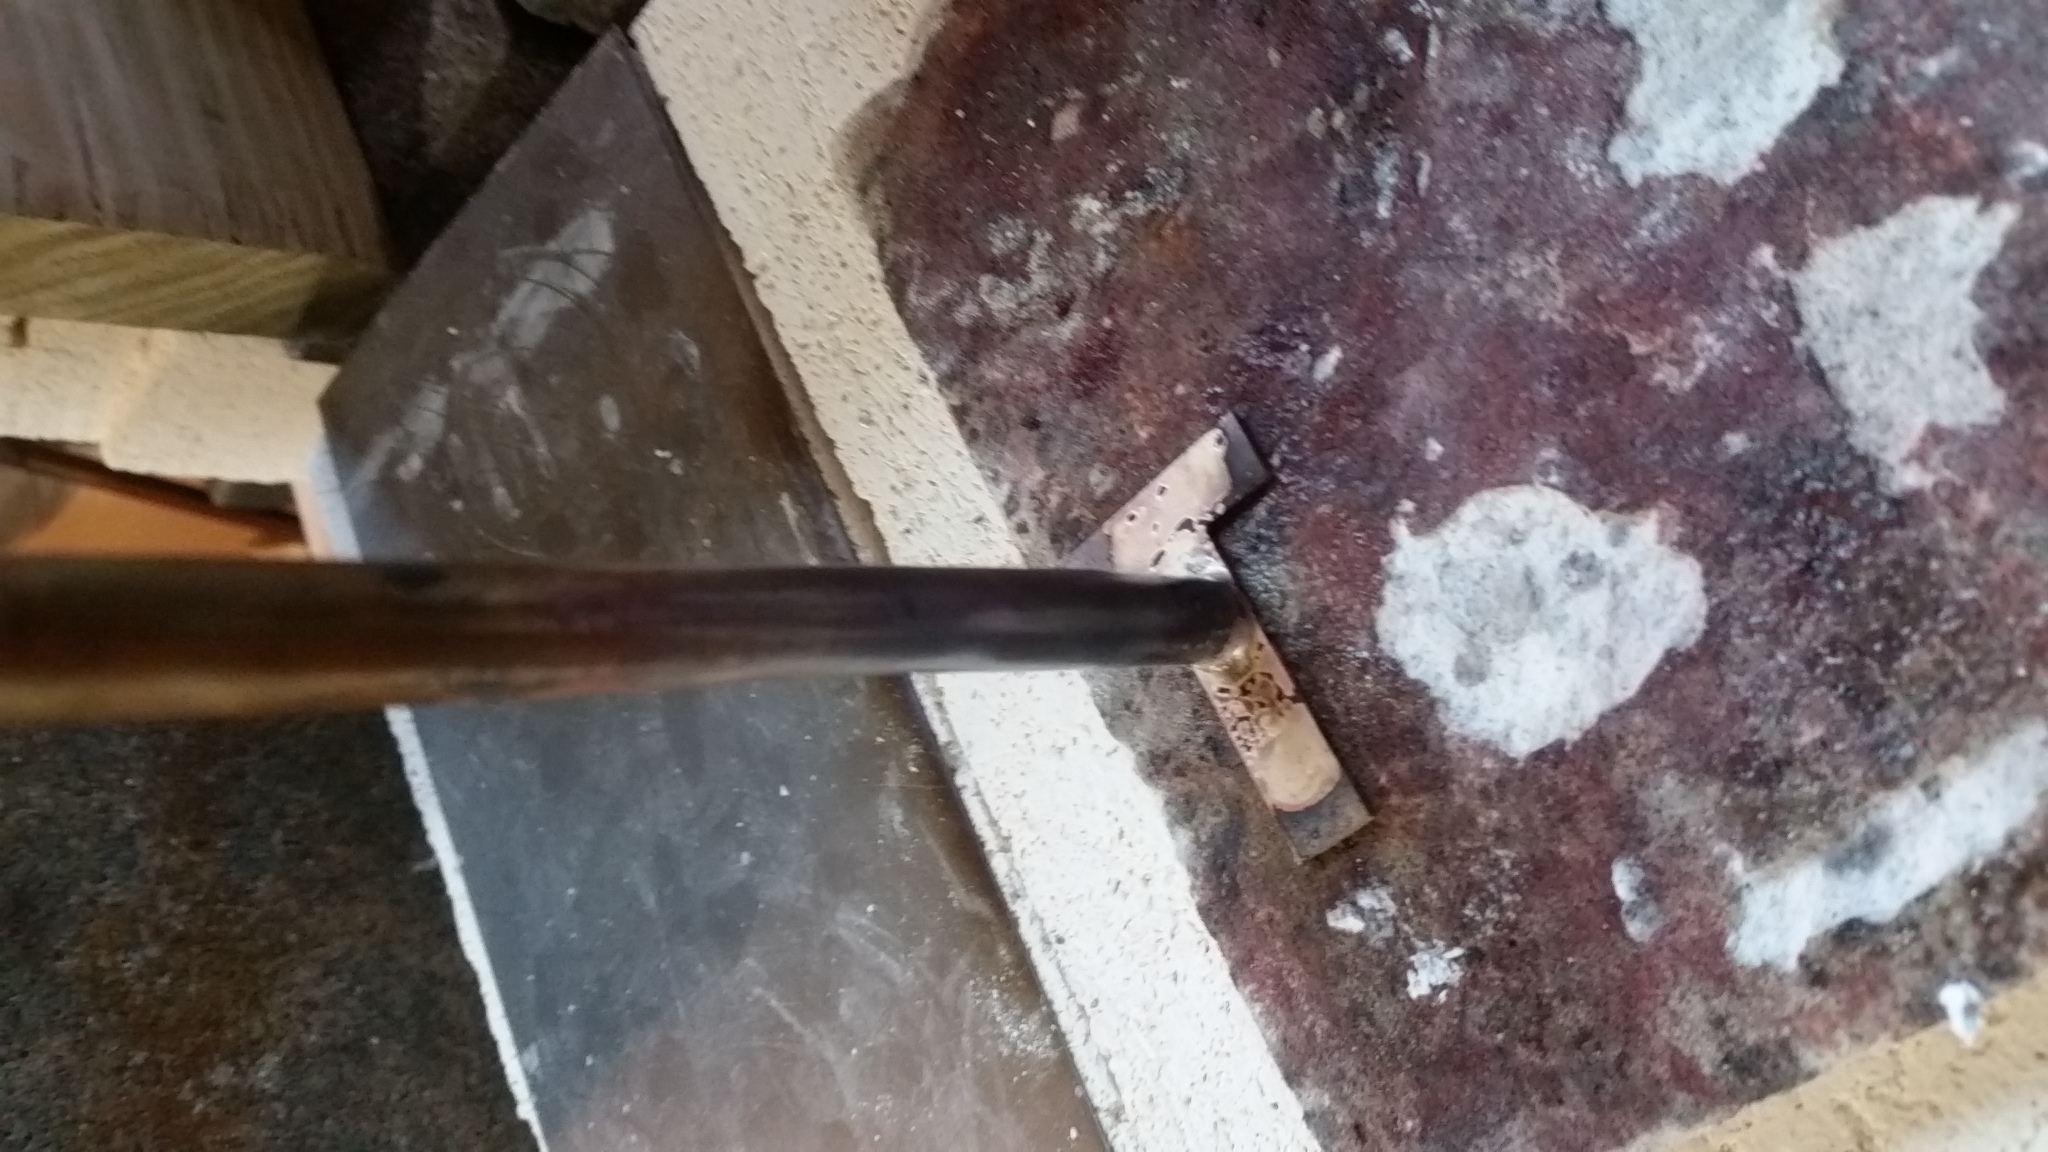
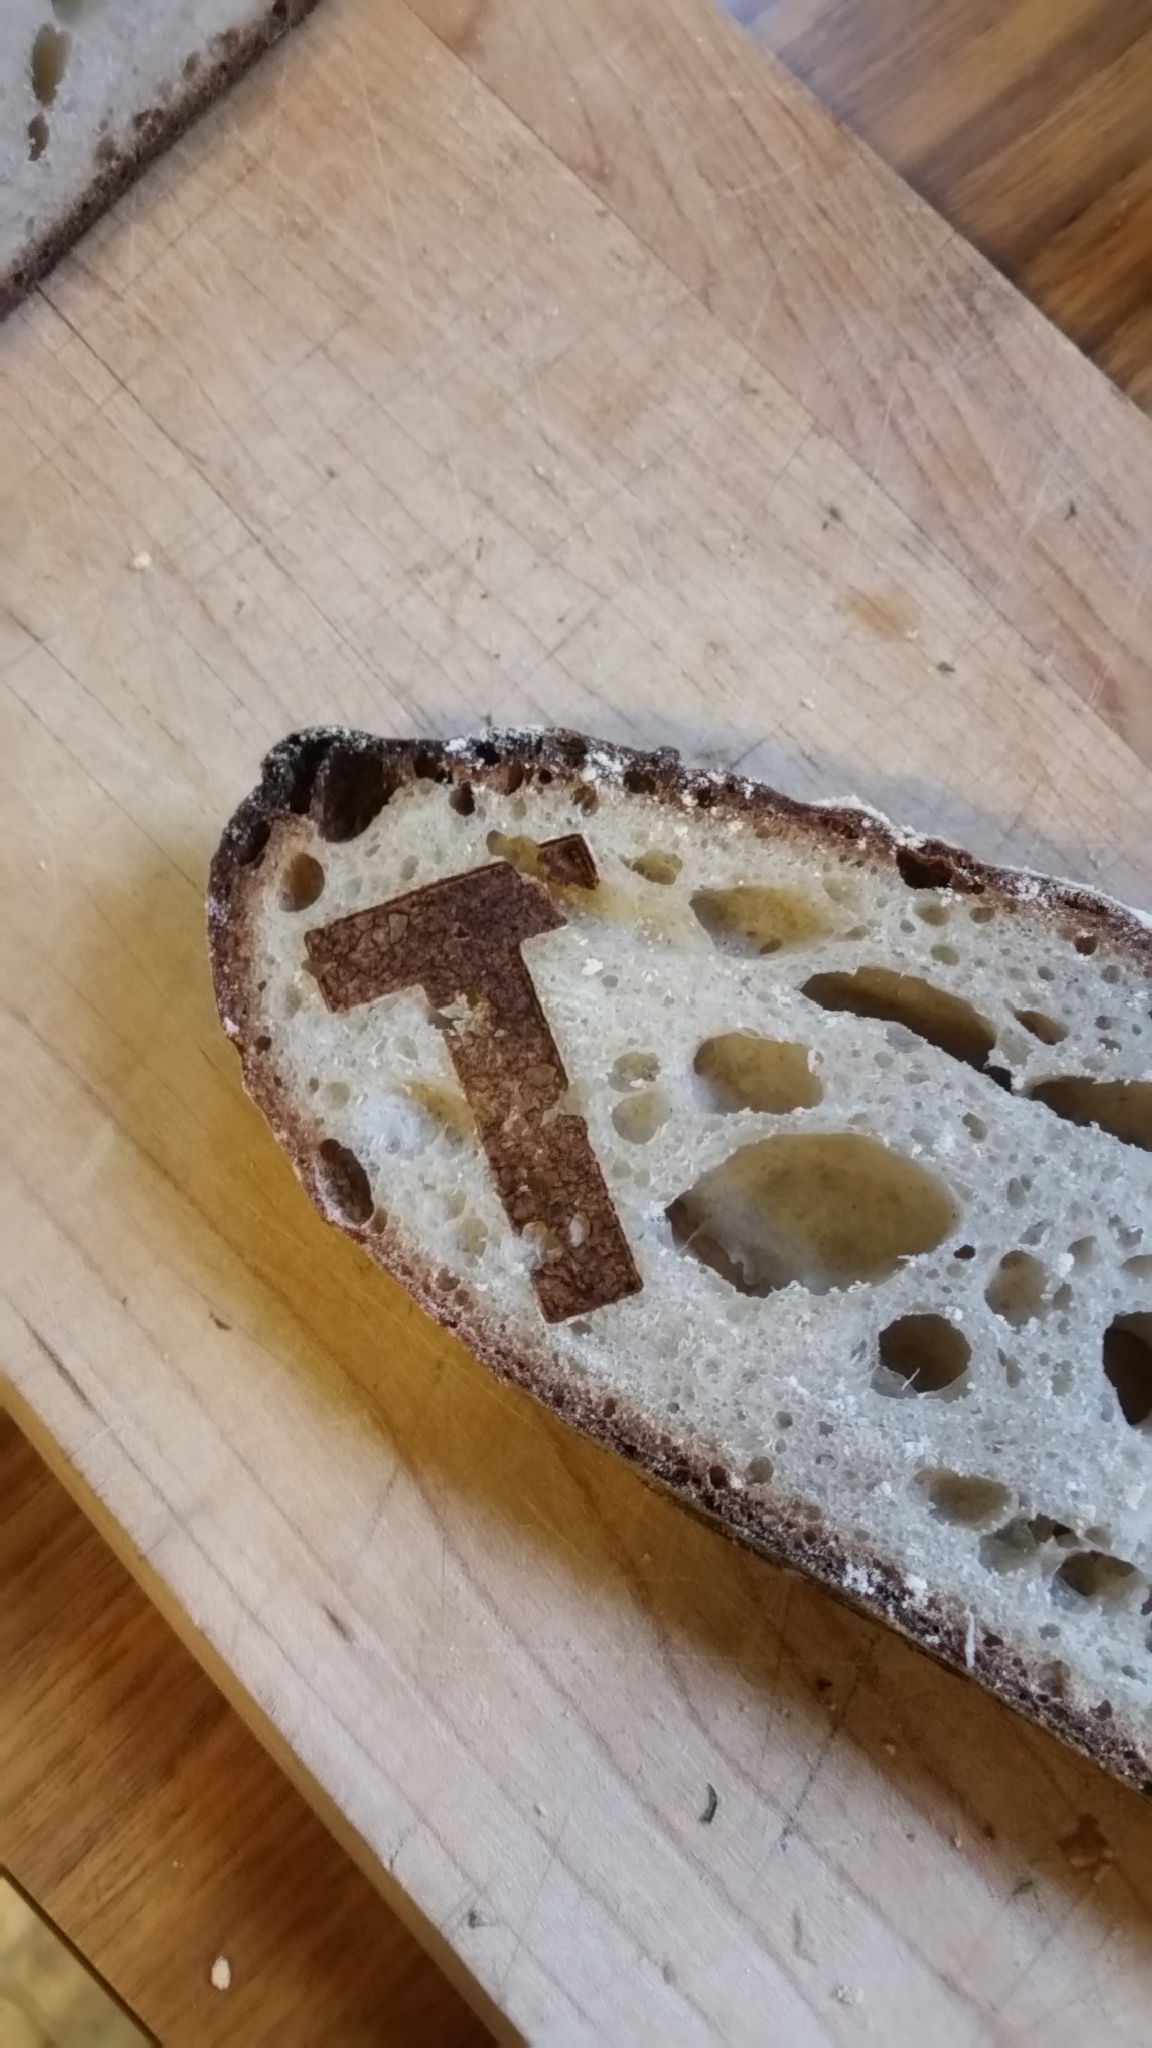
Getting ready to try it.
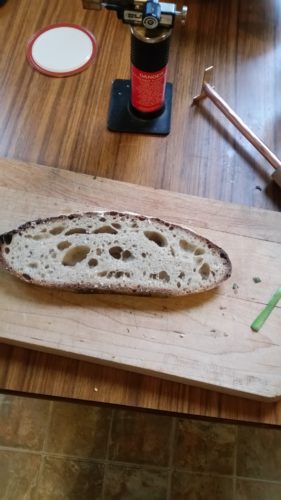
Get yourself a nice slice of home made sour dough bread.
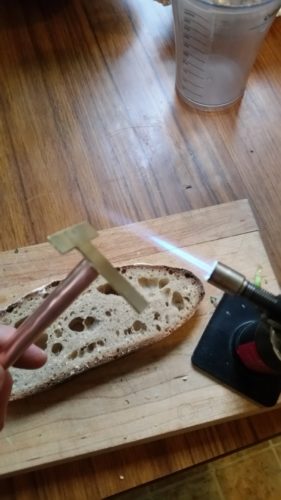
Heat that bad boy up for 30-50 seconds till the end of the pipe near the handle is too hot to touch. Make sure you keep the flame moving around the whole time.

You will know its hot enough if the bread smokes when you touch it to the bread.
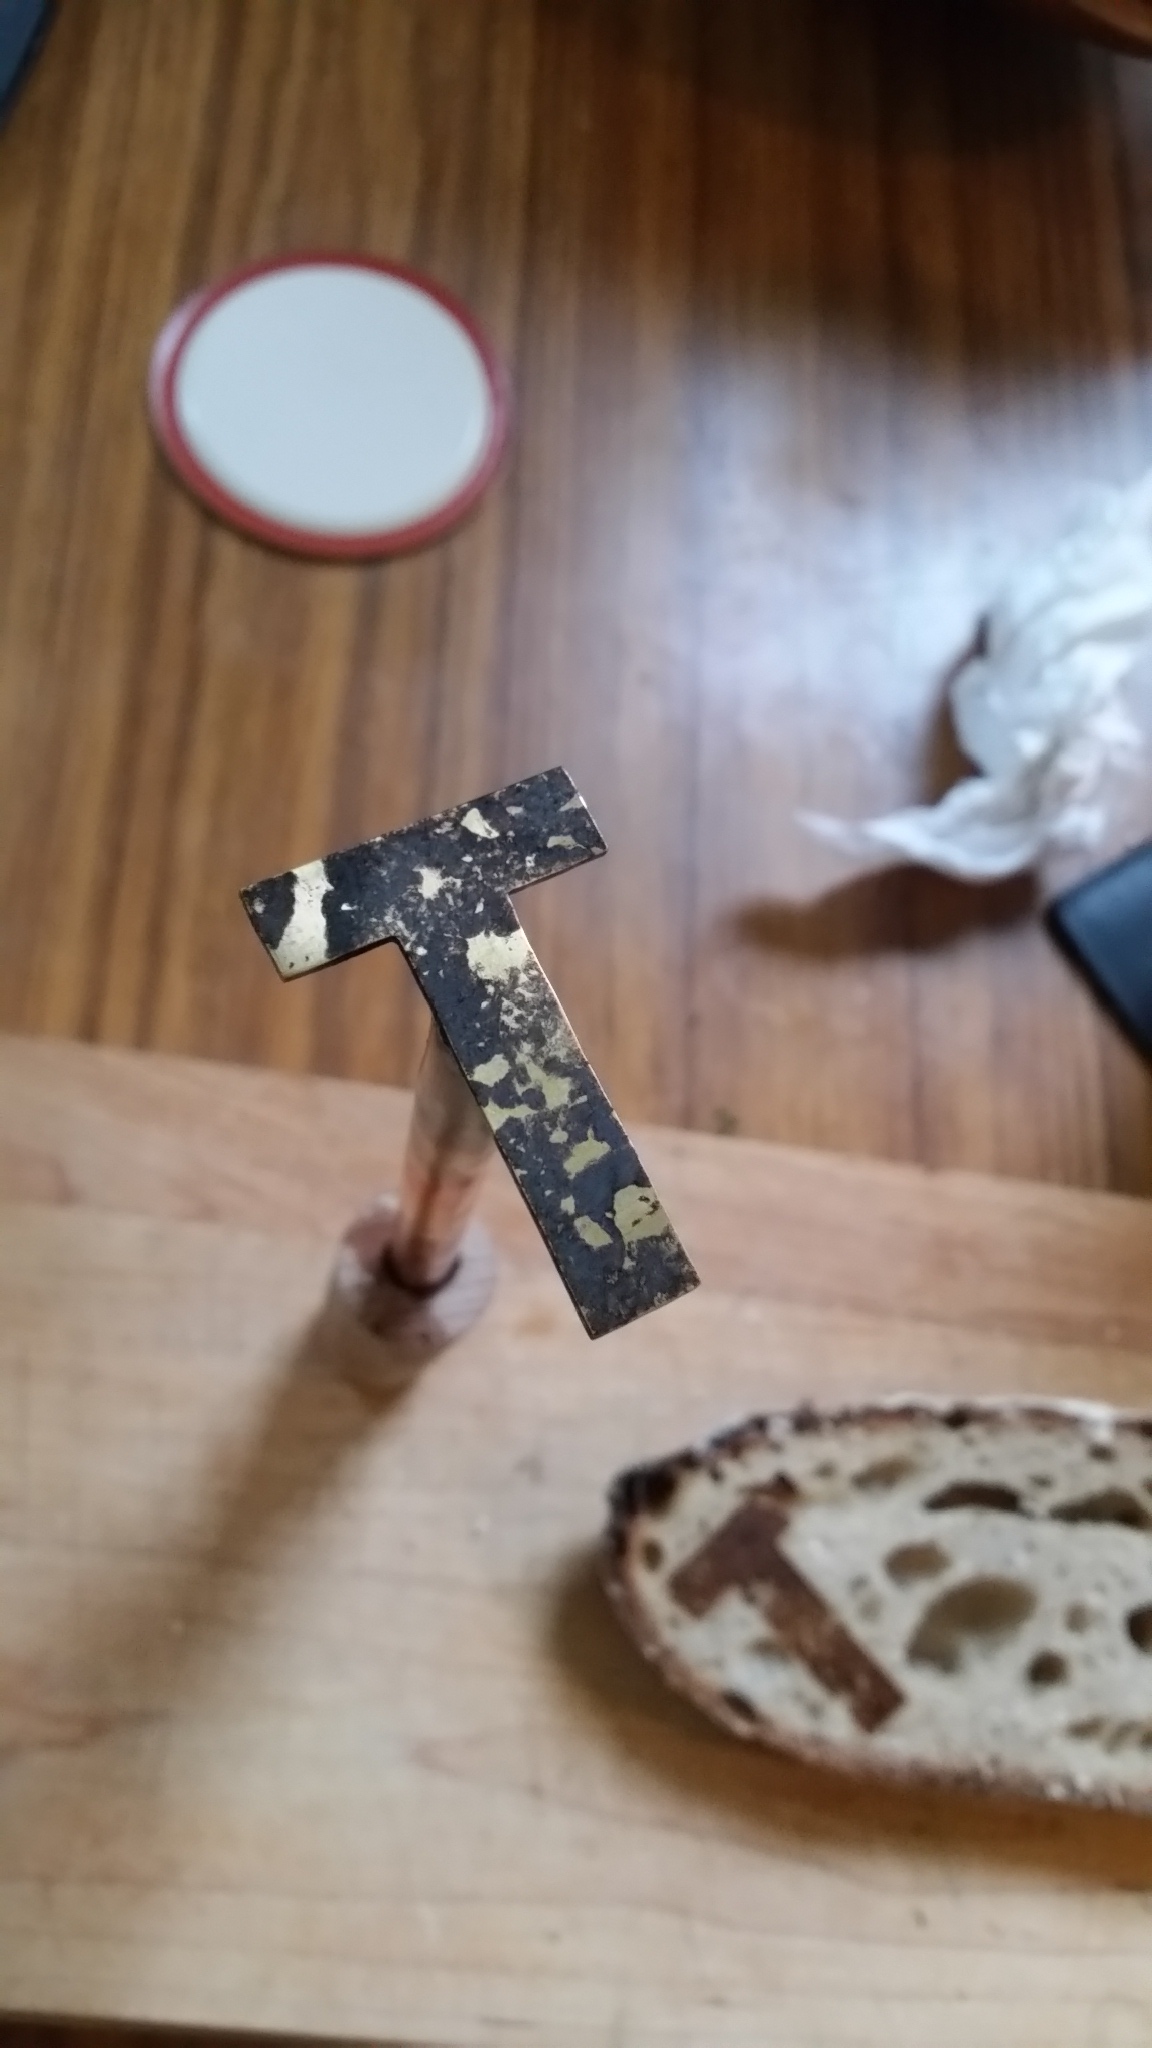
Gets pretty gross, but doesn’t affect how it works, just burn off all the gross and go again!
No bread is safe!
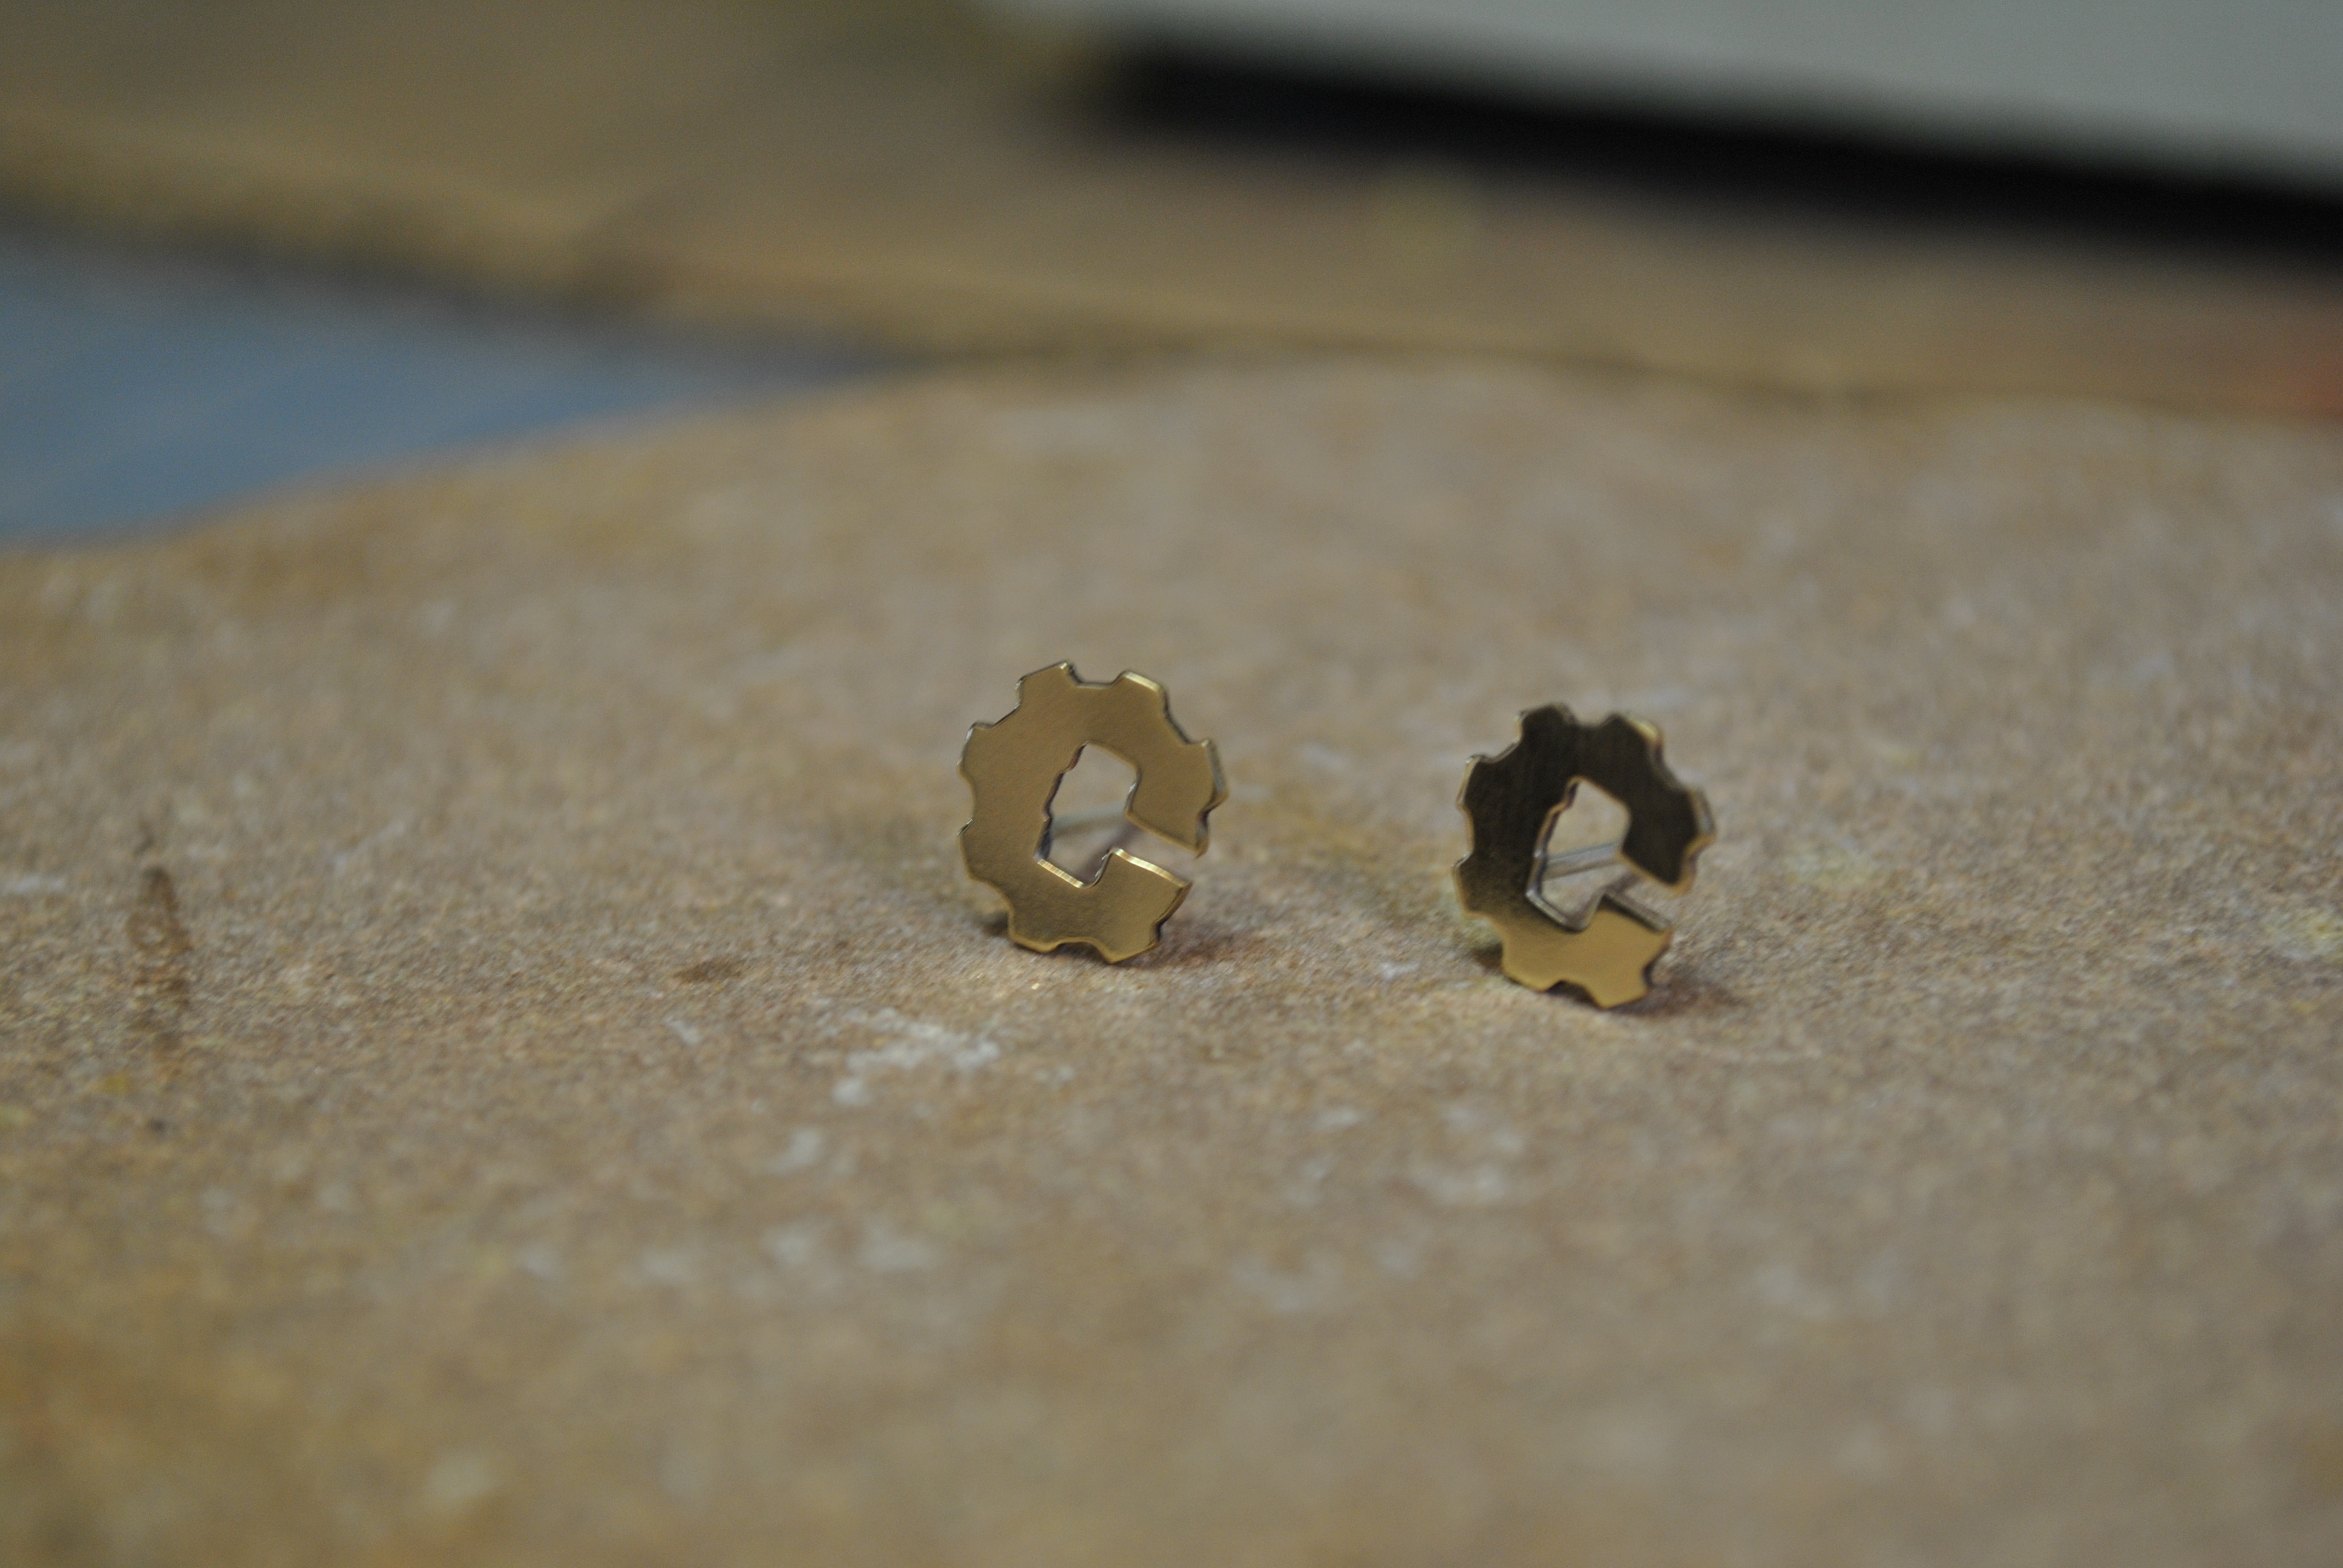
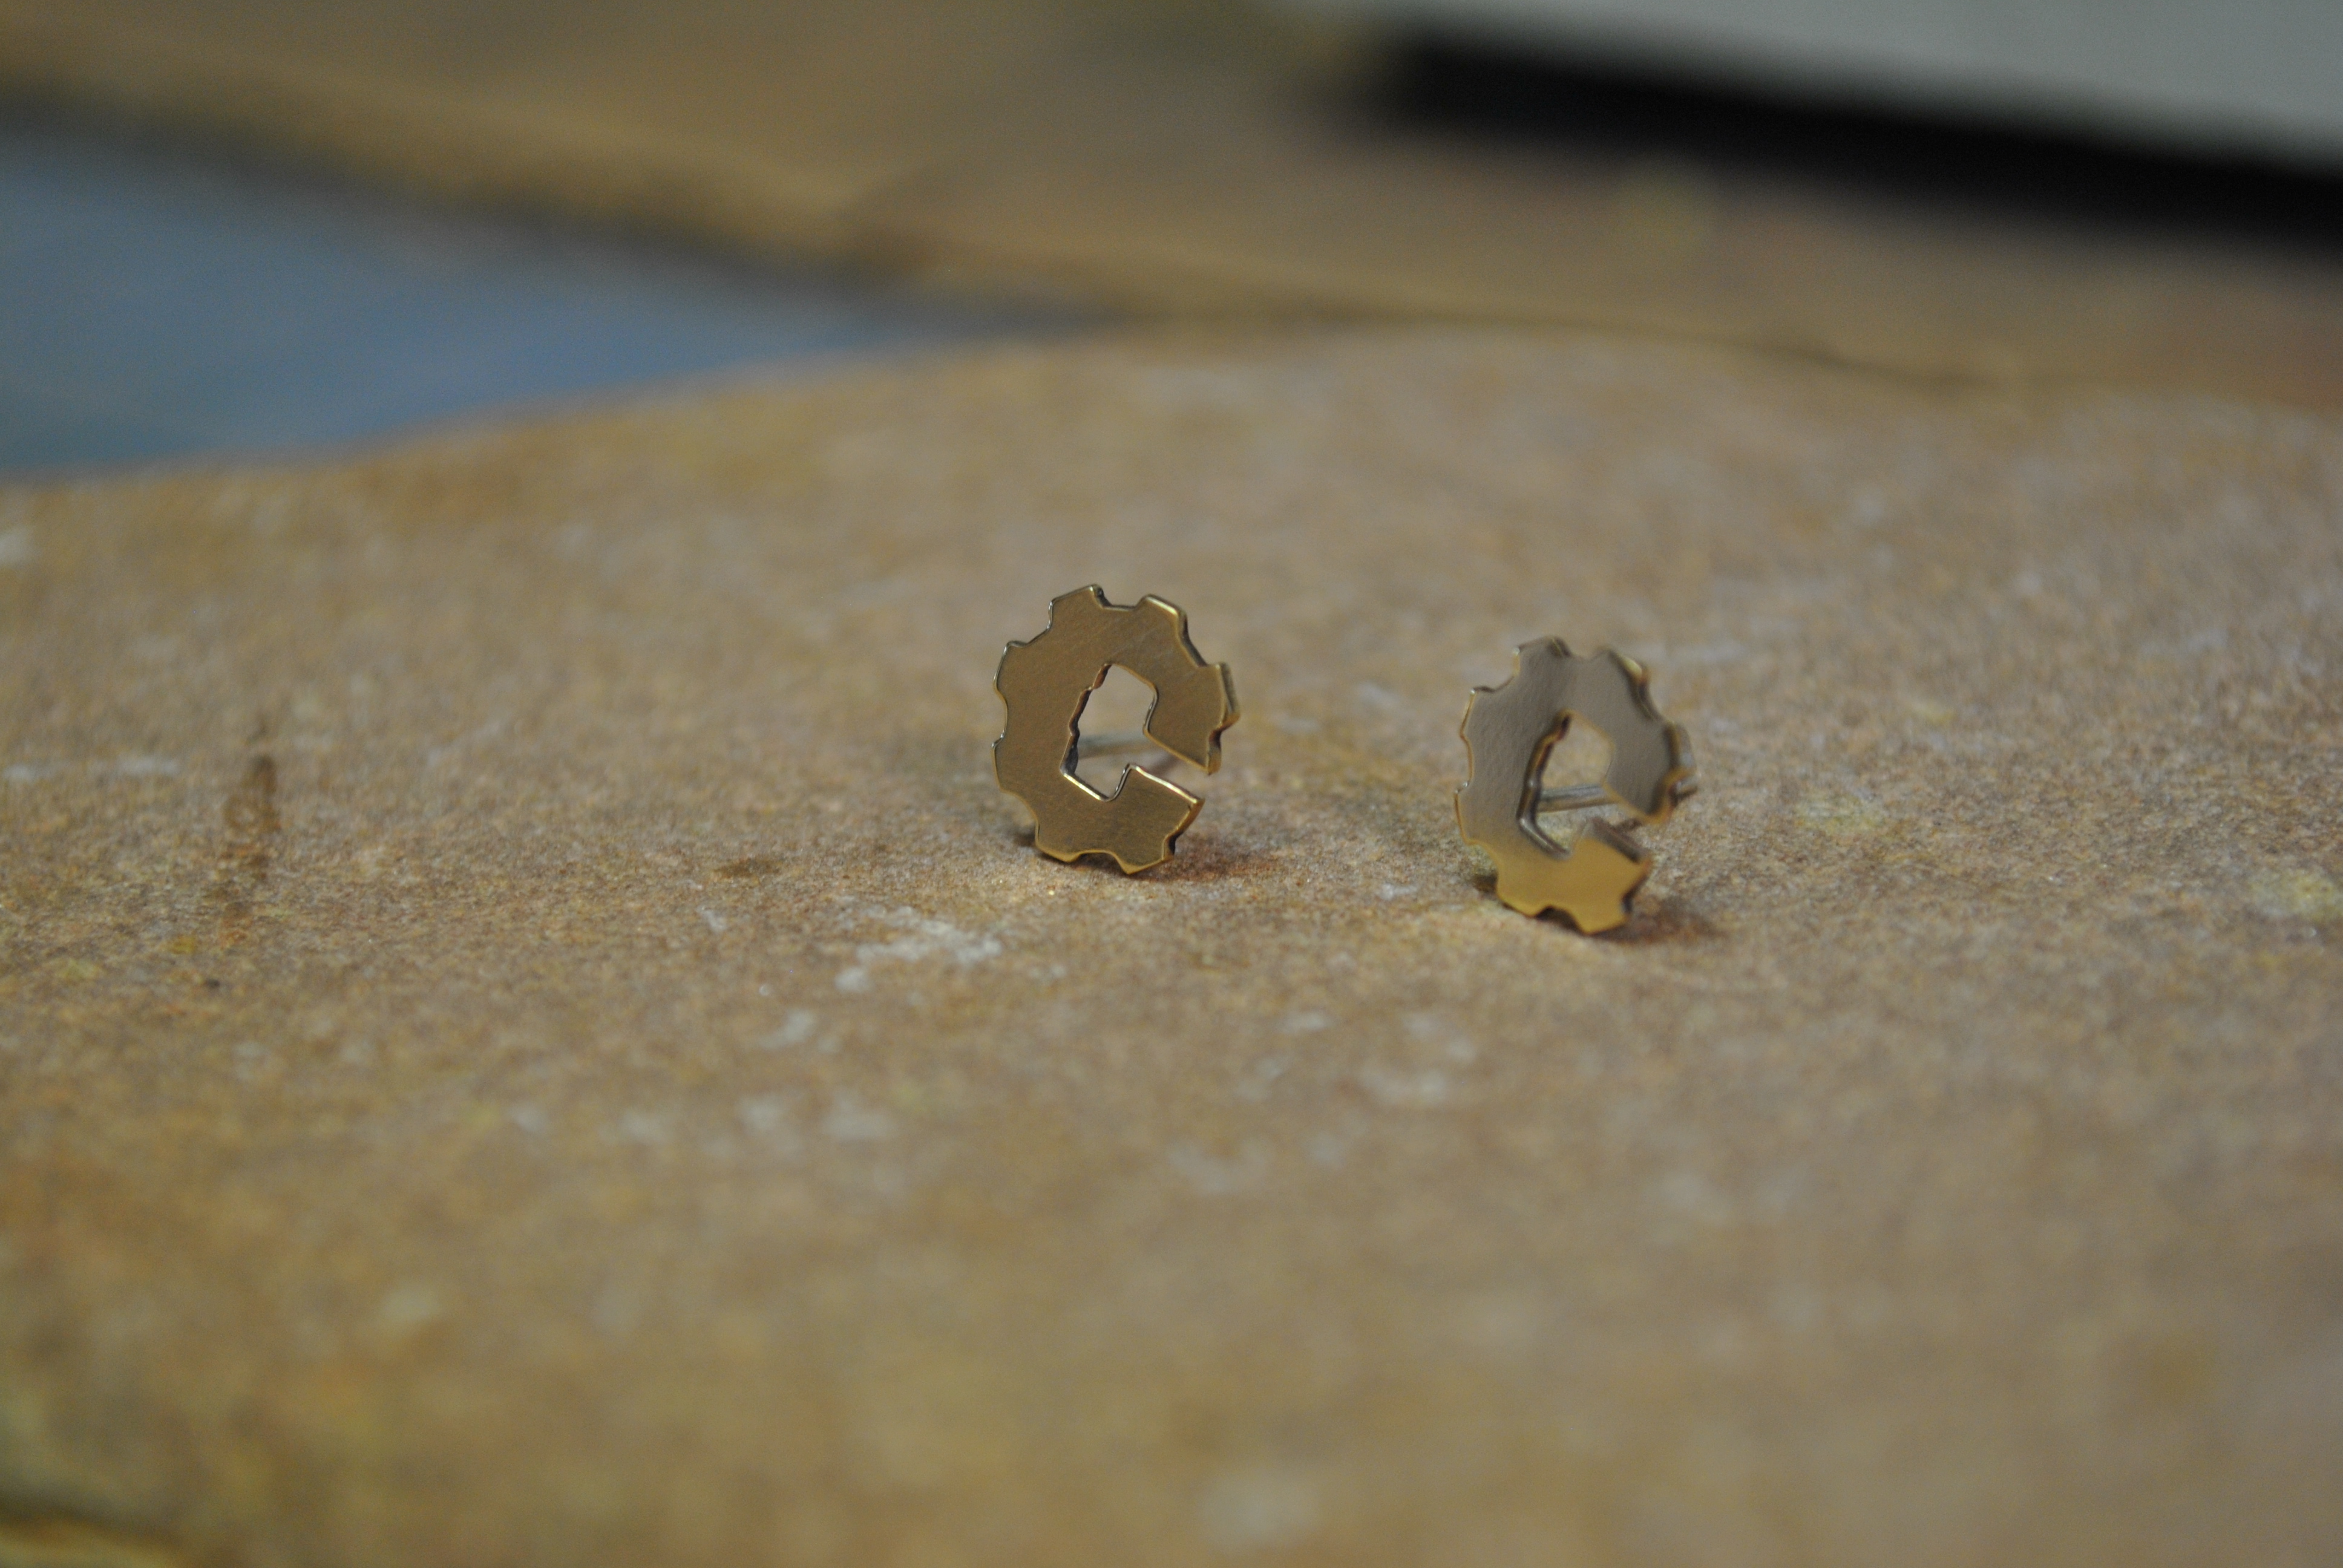
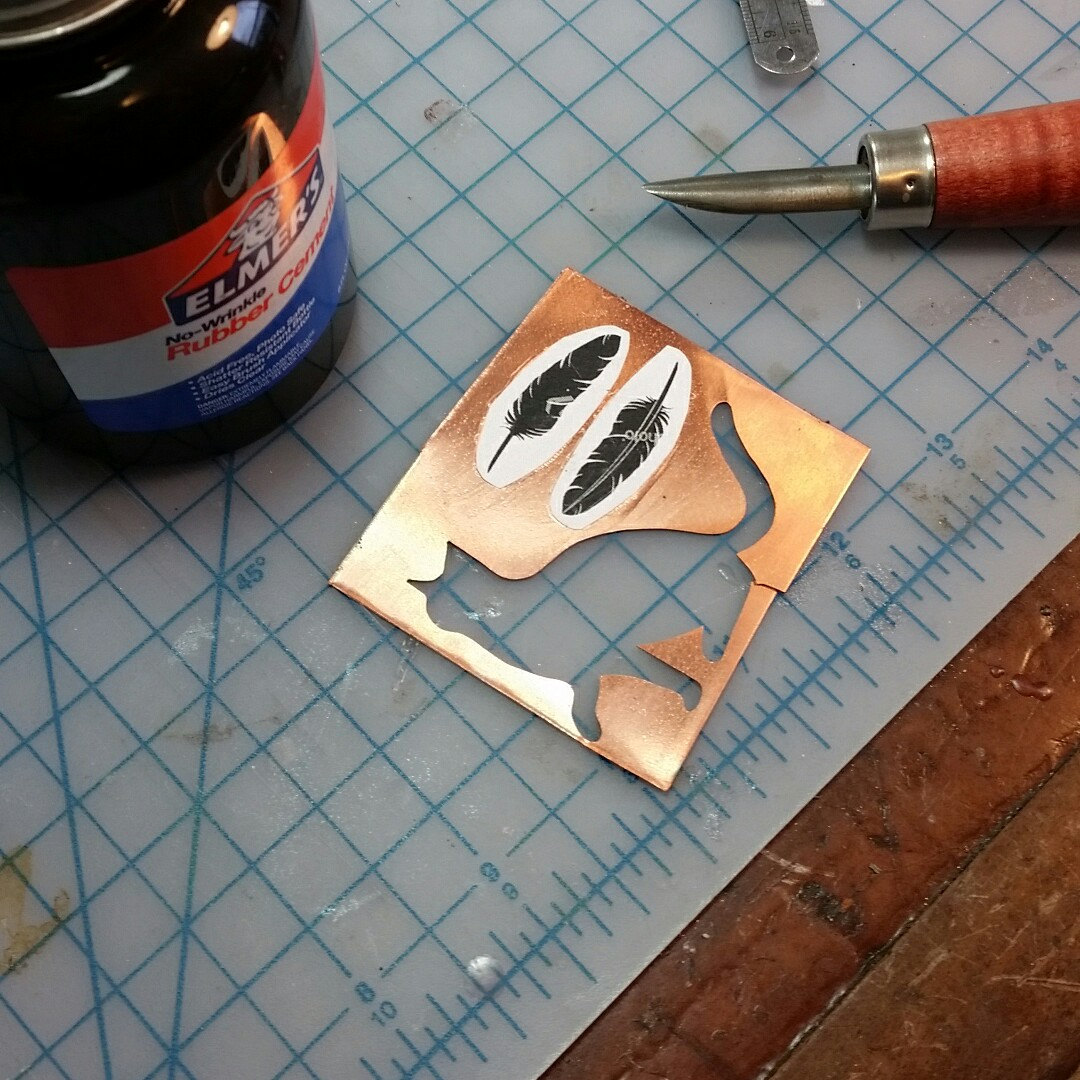
Here are some process shots from the latest group of earrings I made.
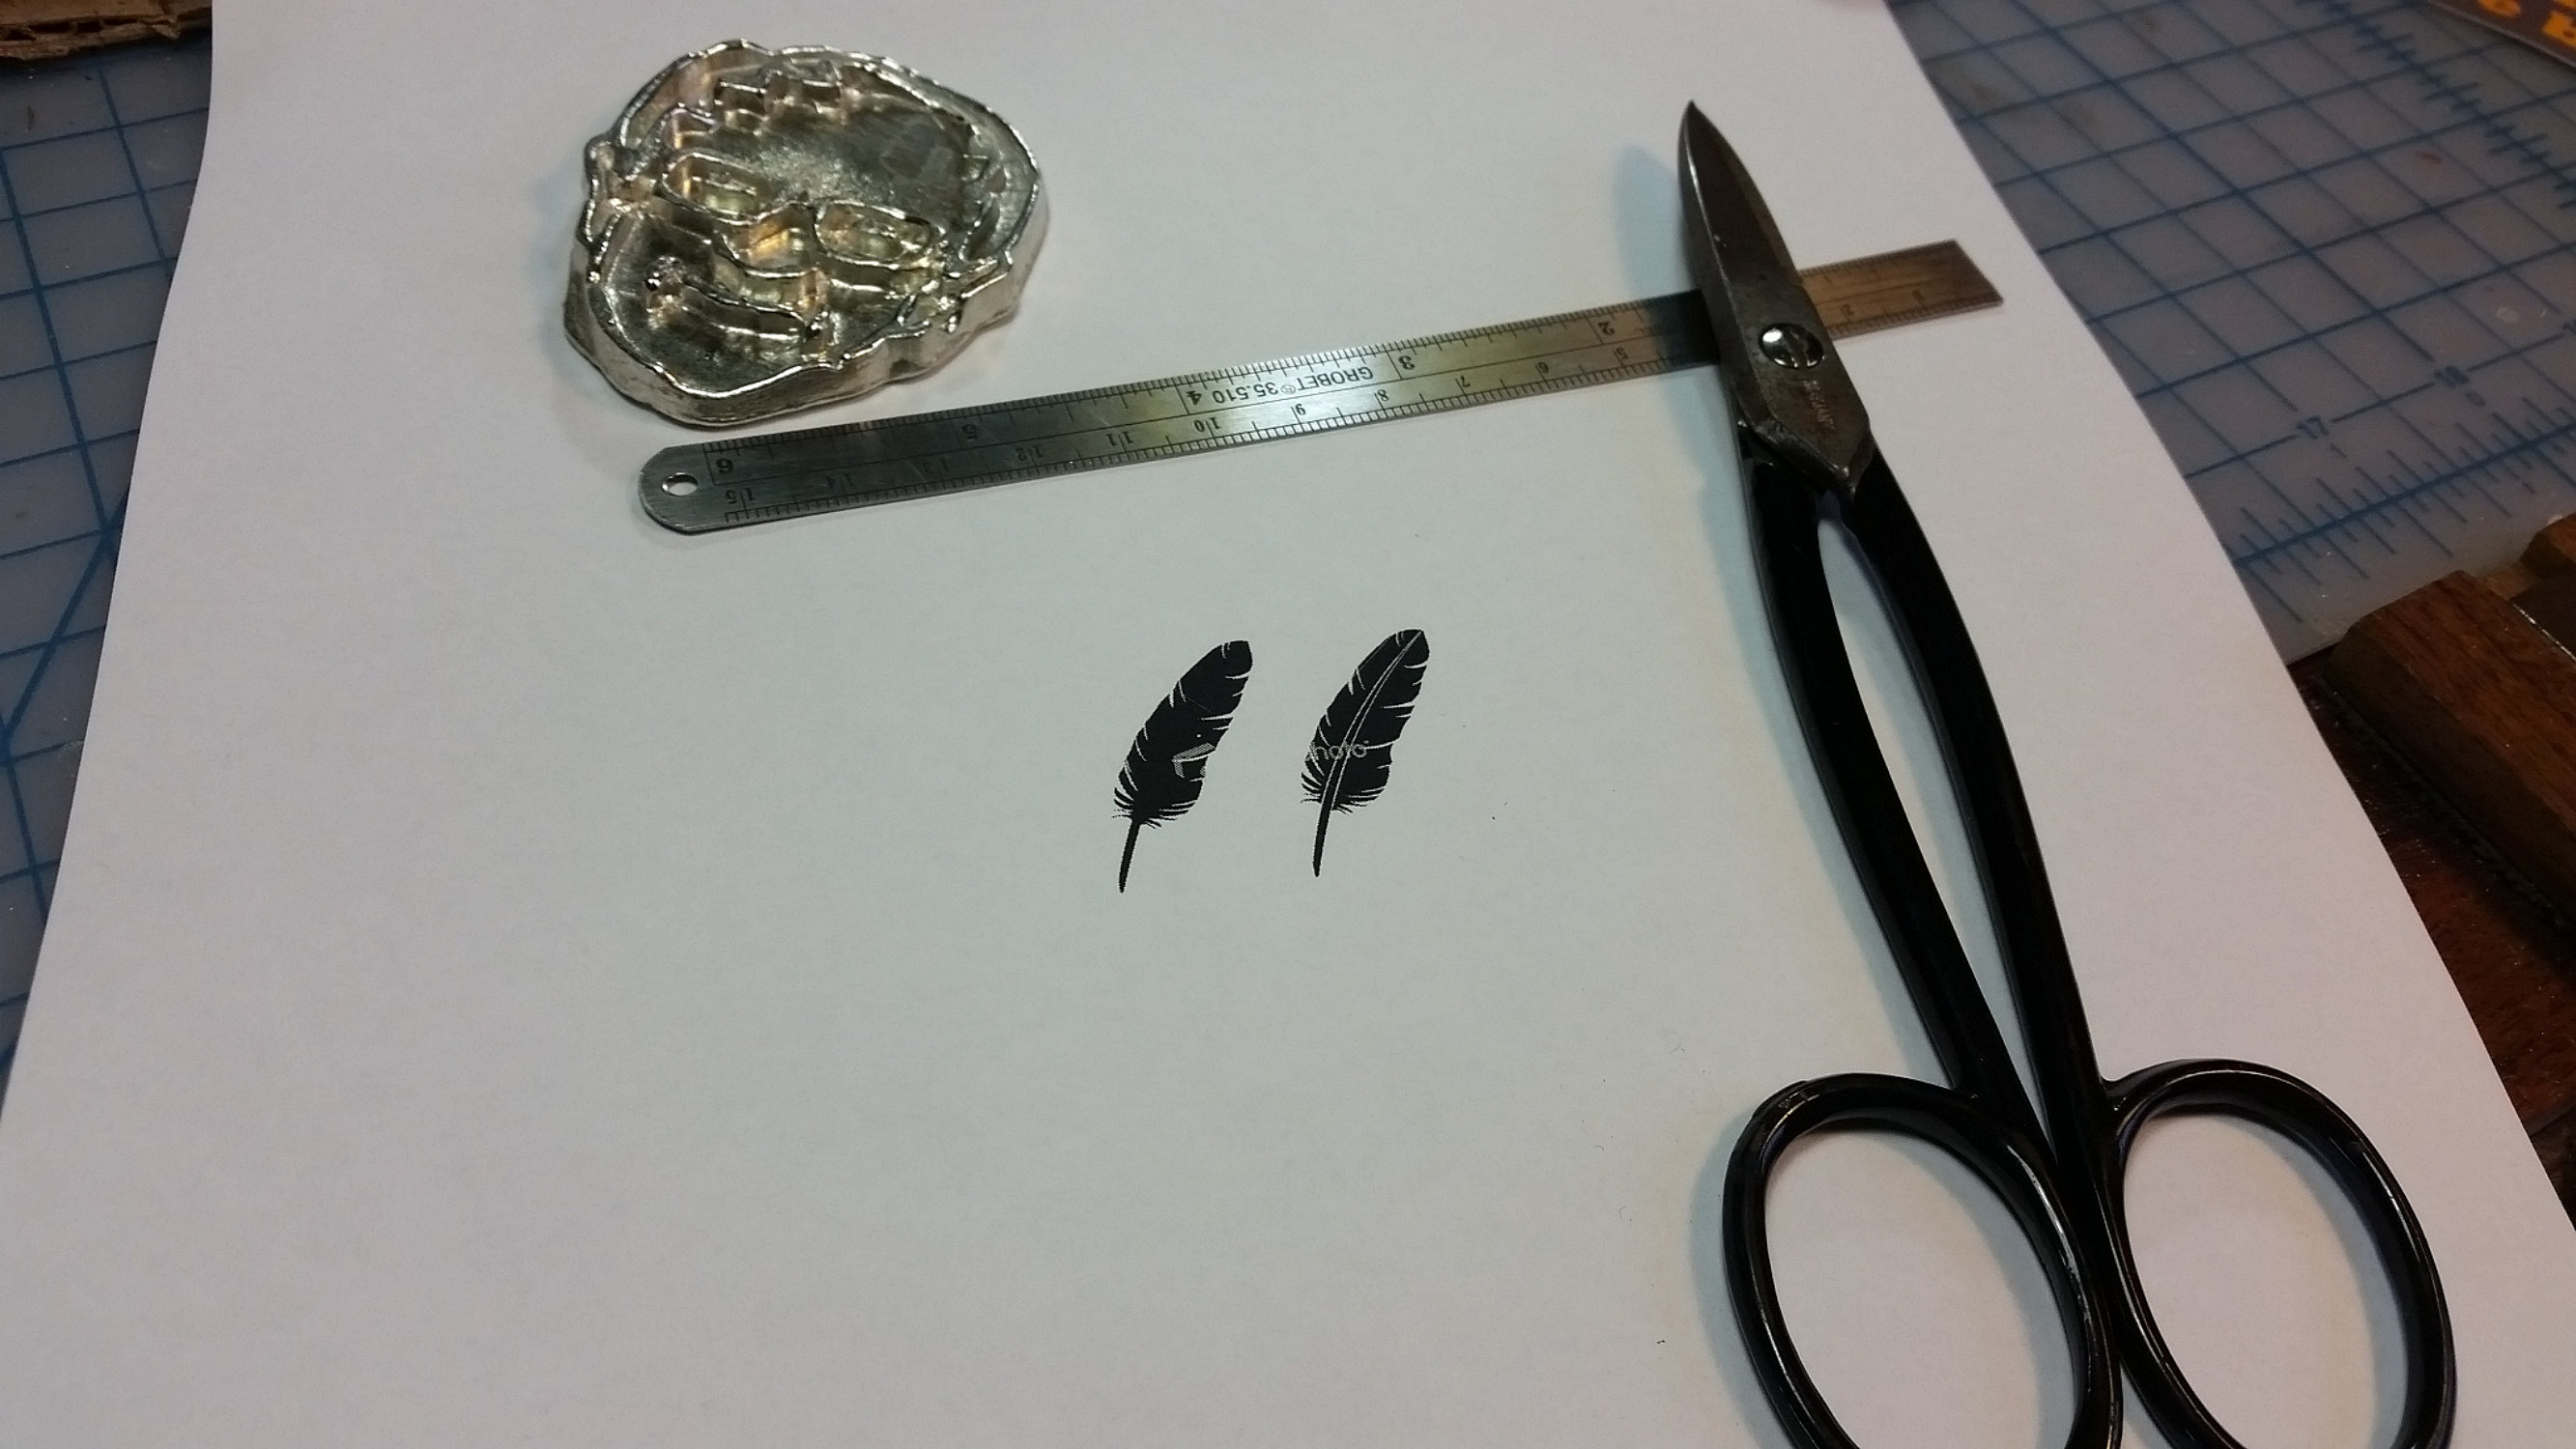
First I print out the design, and then cut and rubber cement it to the copper plate.
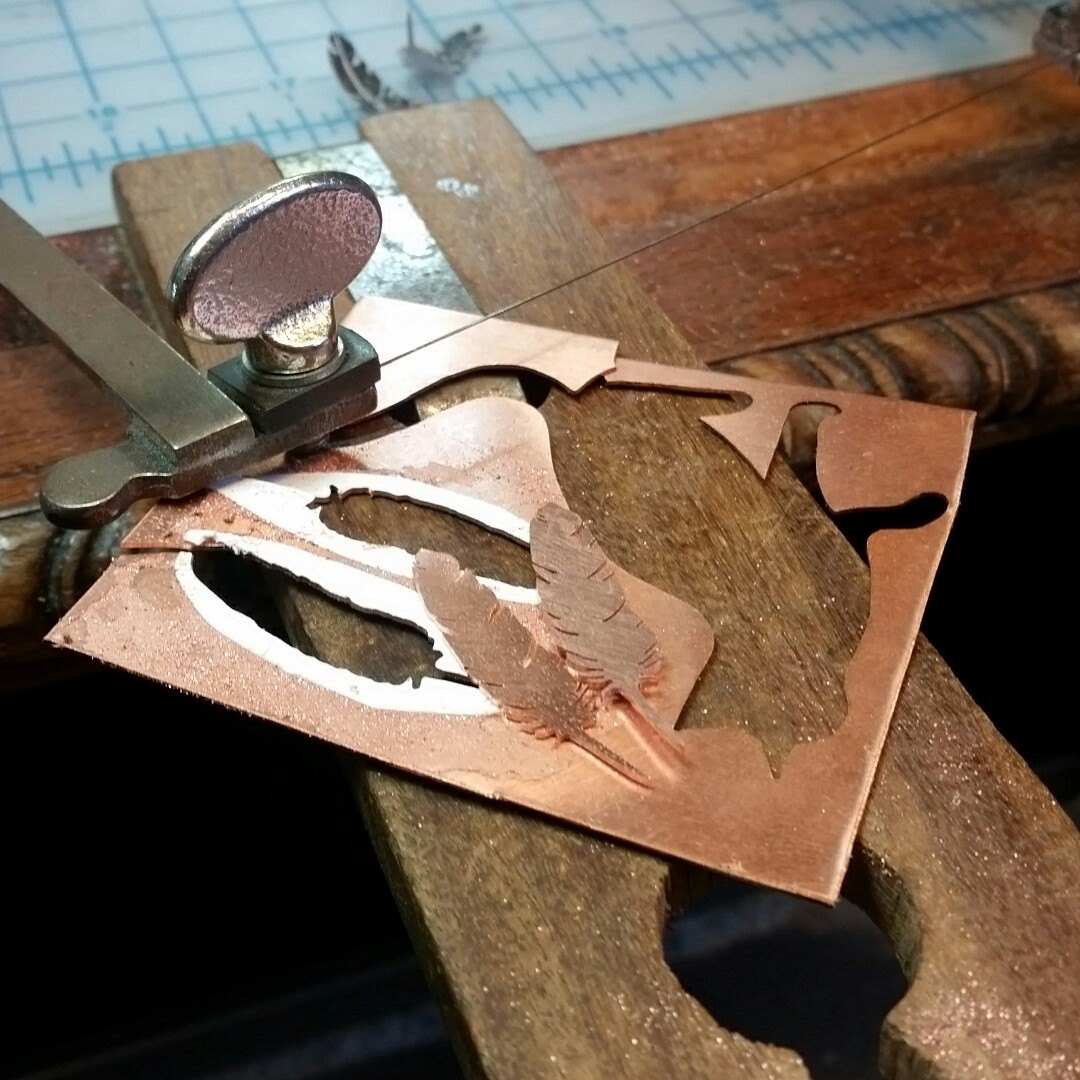
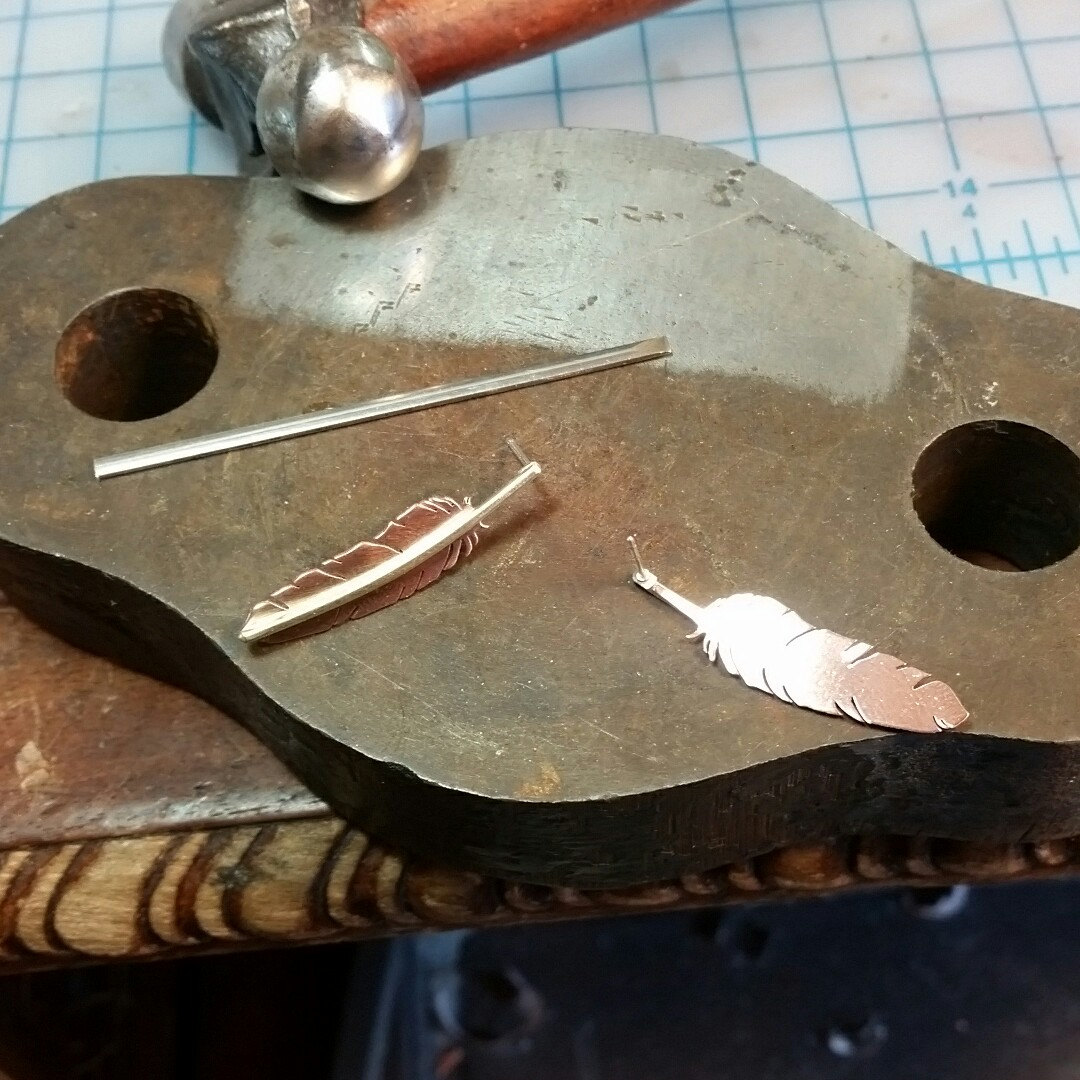
the design is cut out using a jewelers saw, then you file and polish the burs off.
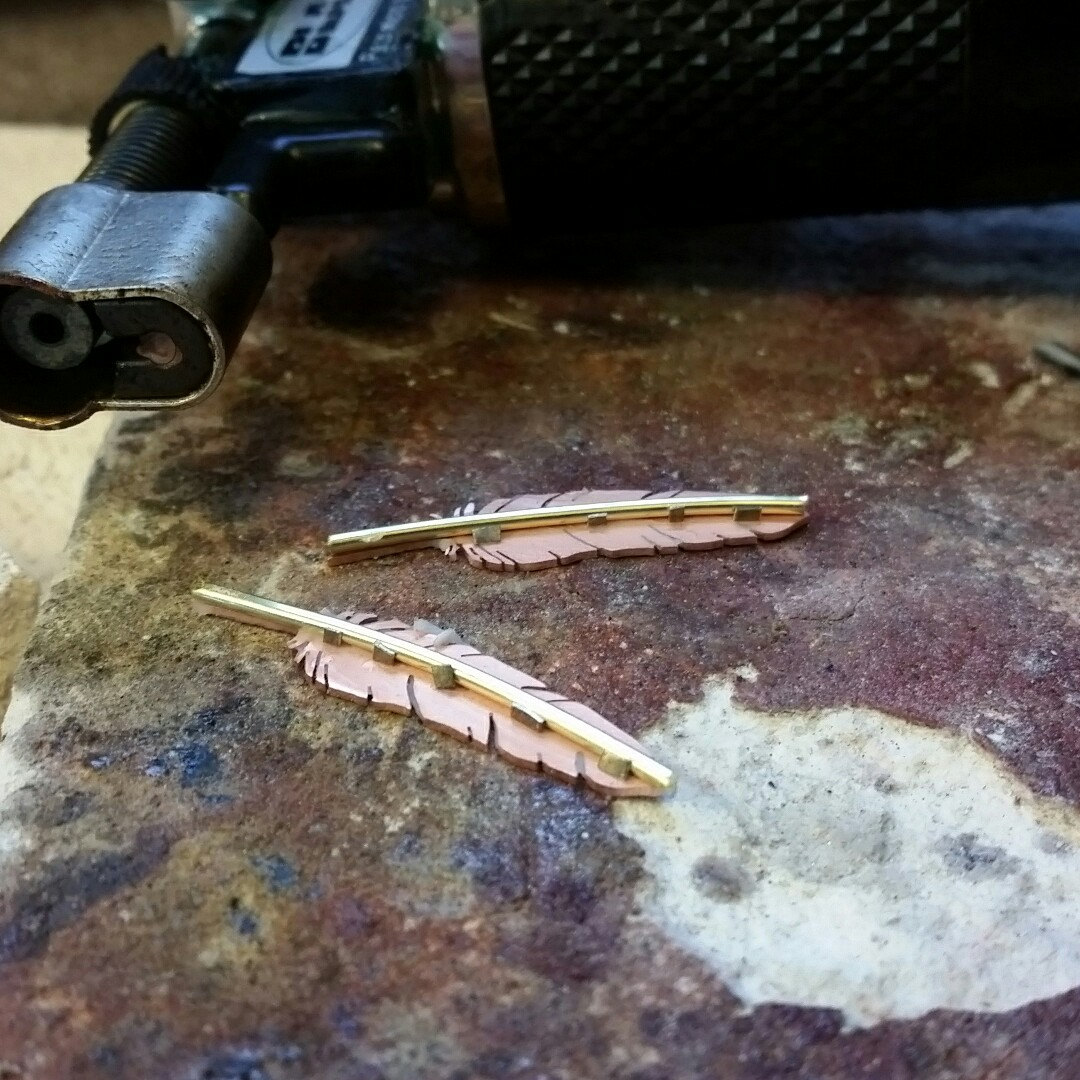
The feathers ready and prepped for soldering. Silver ear posts are also soldered on during this stage.
After the brass wire is soldered down the middle, tiny feather marks are made using a small hand made chisel.
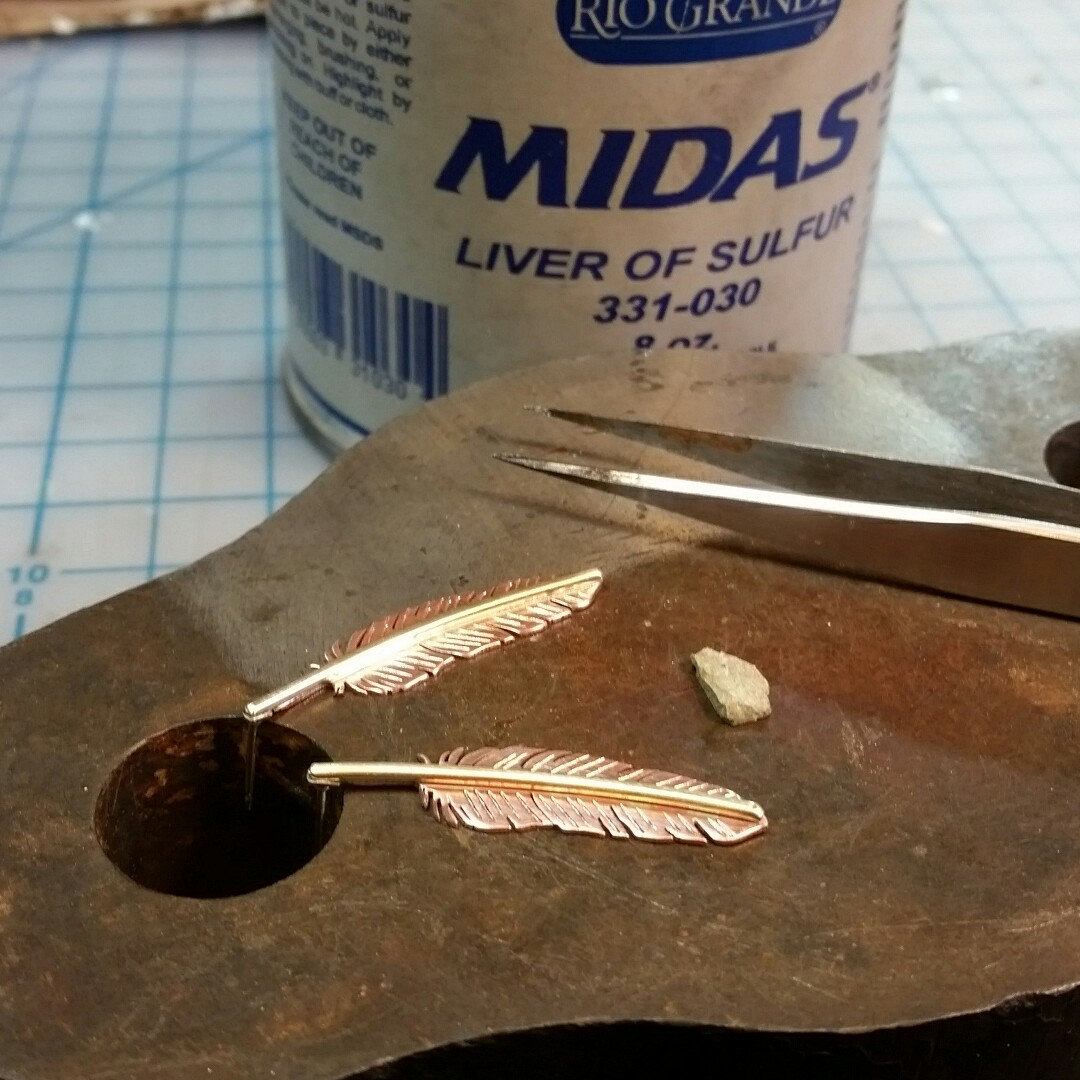
Liver of sulfur is used to patina the feathers and give them a nice dark color.
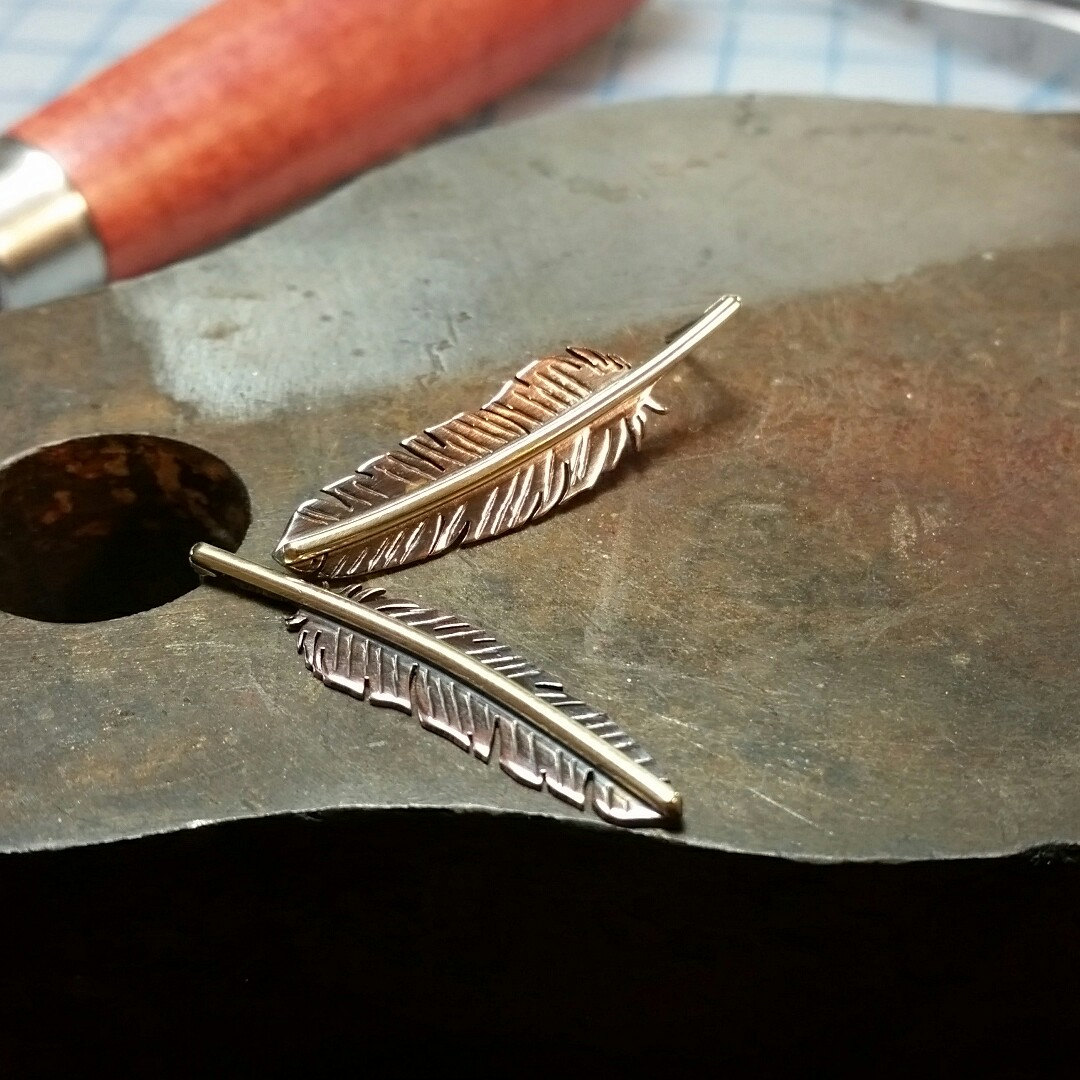
All done! You can buy a pair here.
Got this awesome design from a client, I was inspired to try something a little different, a multi-layered riveted design. It turned out better than I would have thought! I also did something different than I normally do and documented the process.

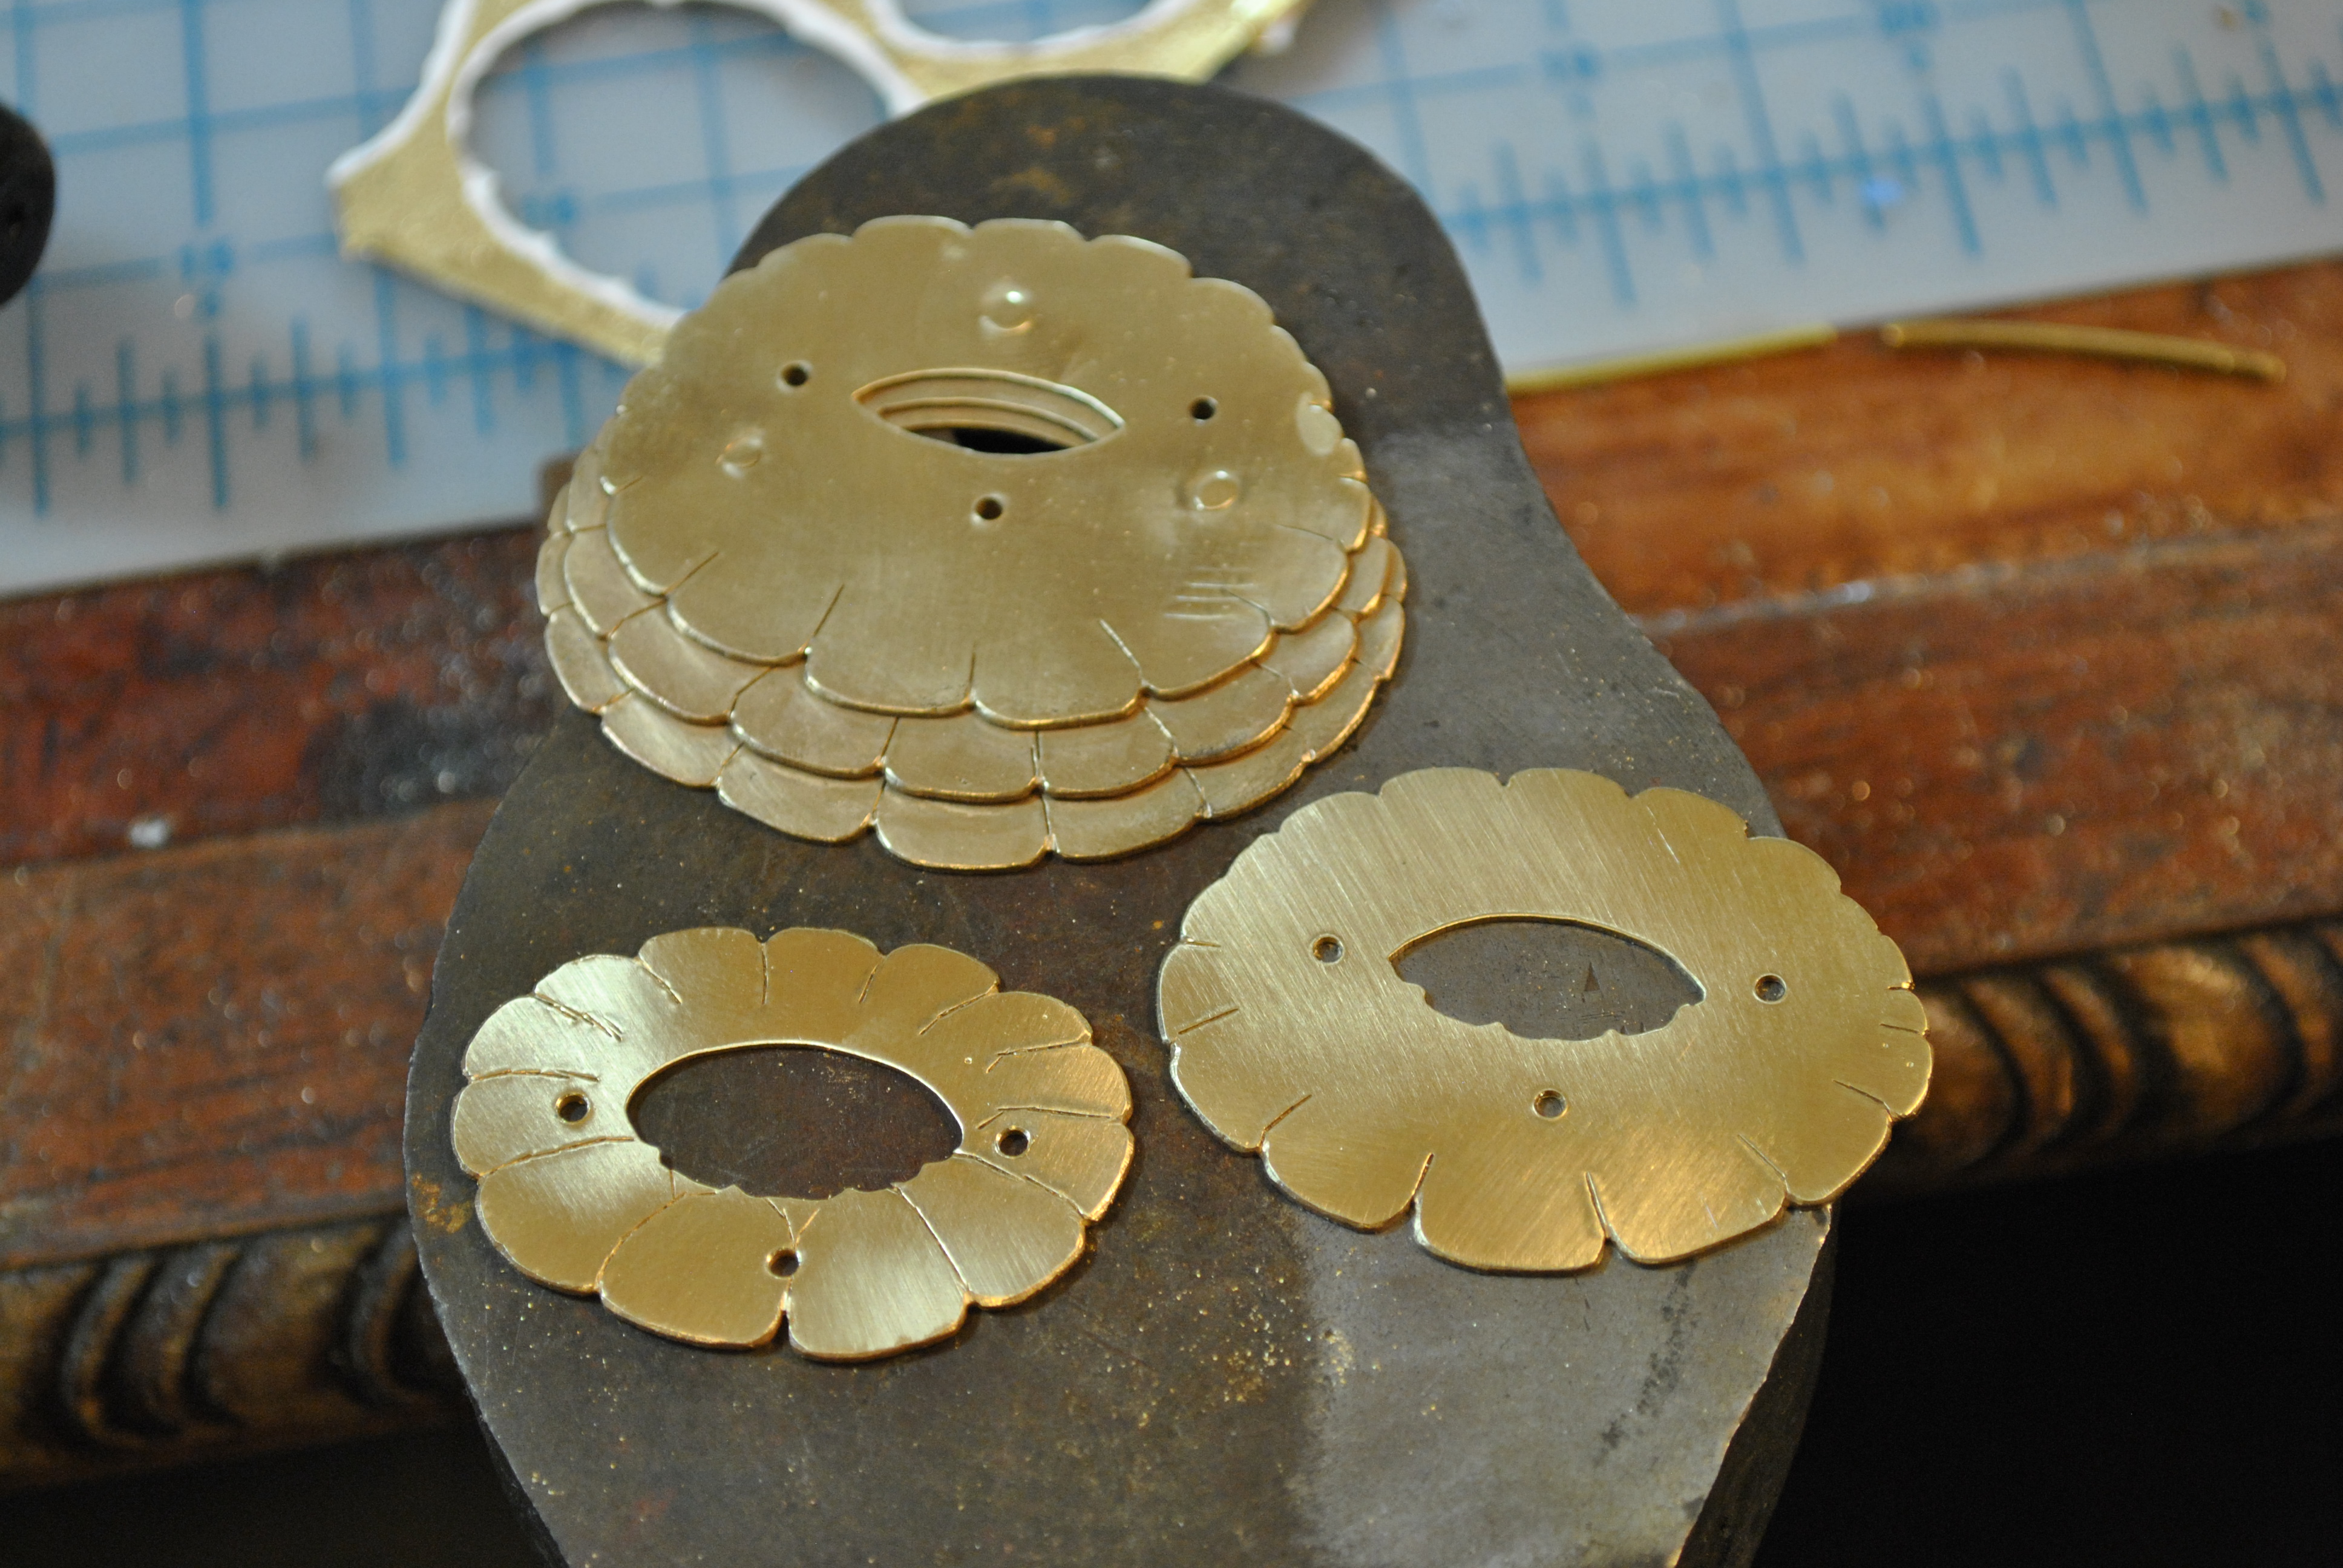
Start with a sheet of 22g brass and the design broken out into the layers.
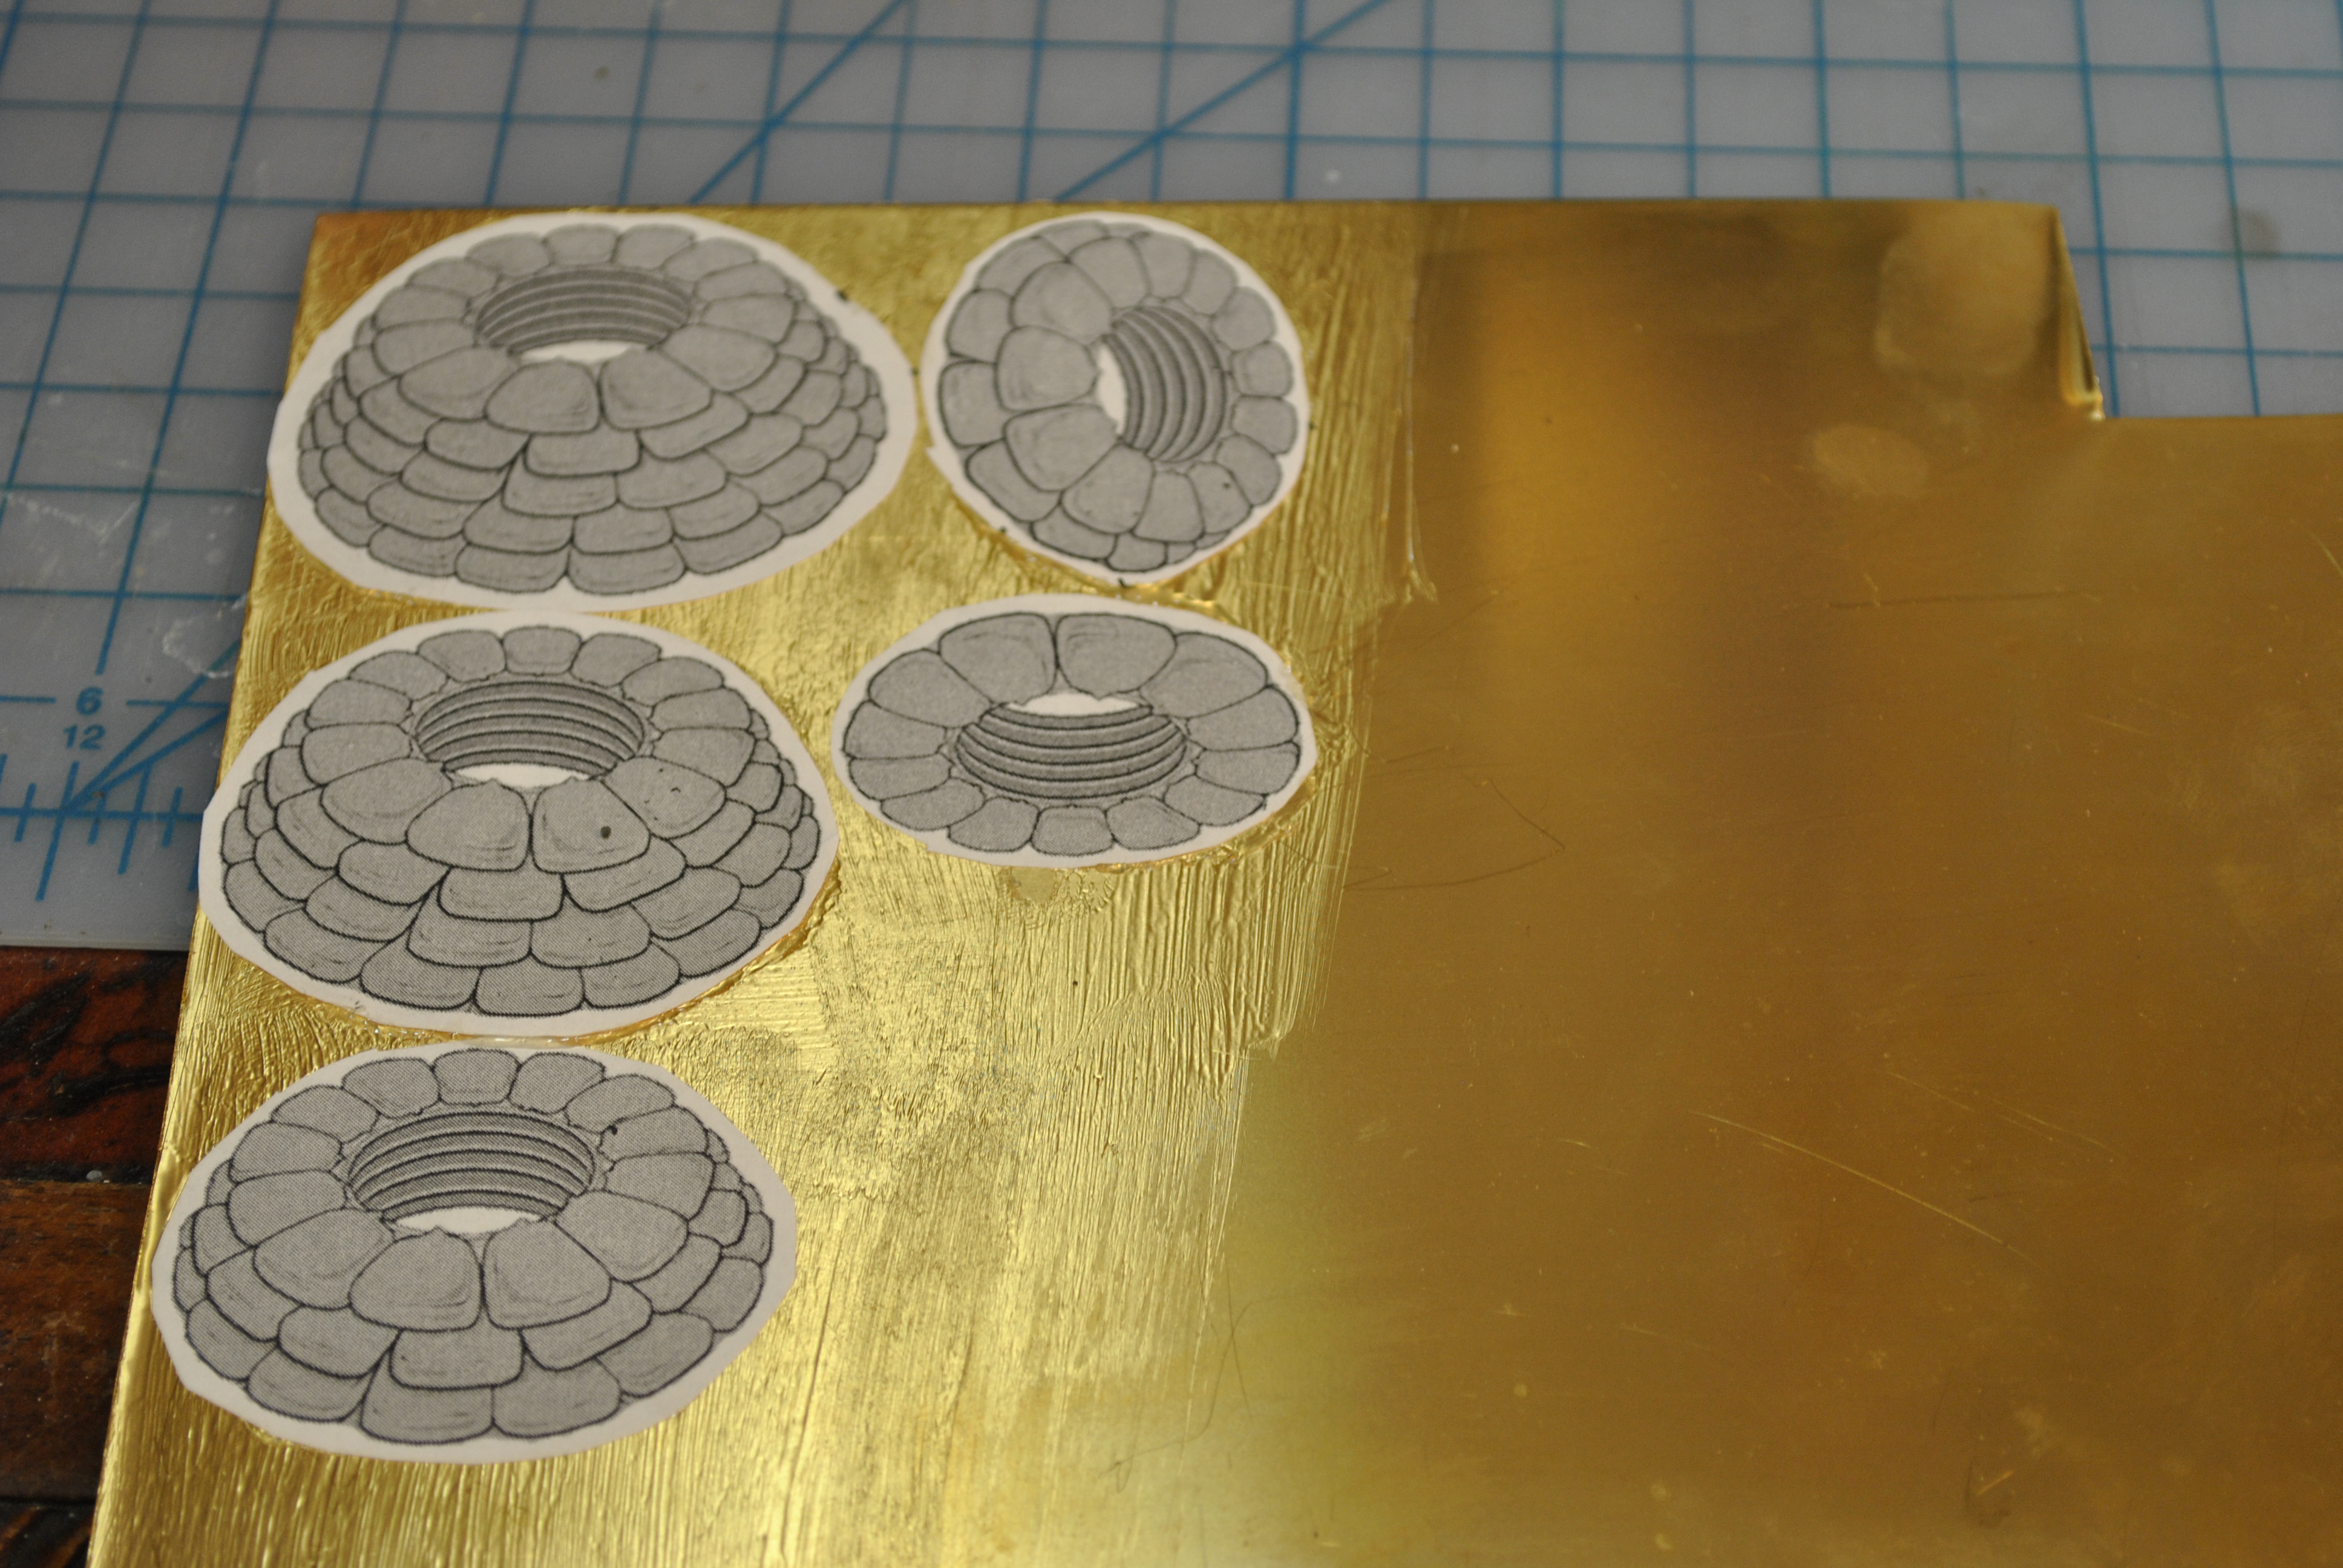
Using rubber cement I attached the cut out designs on the brass sheet.
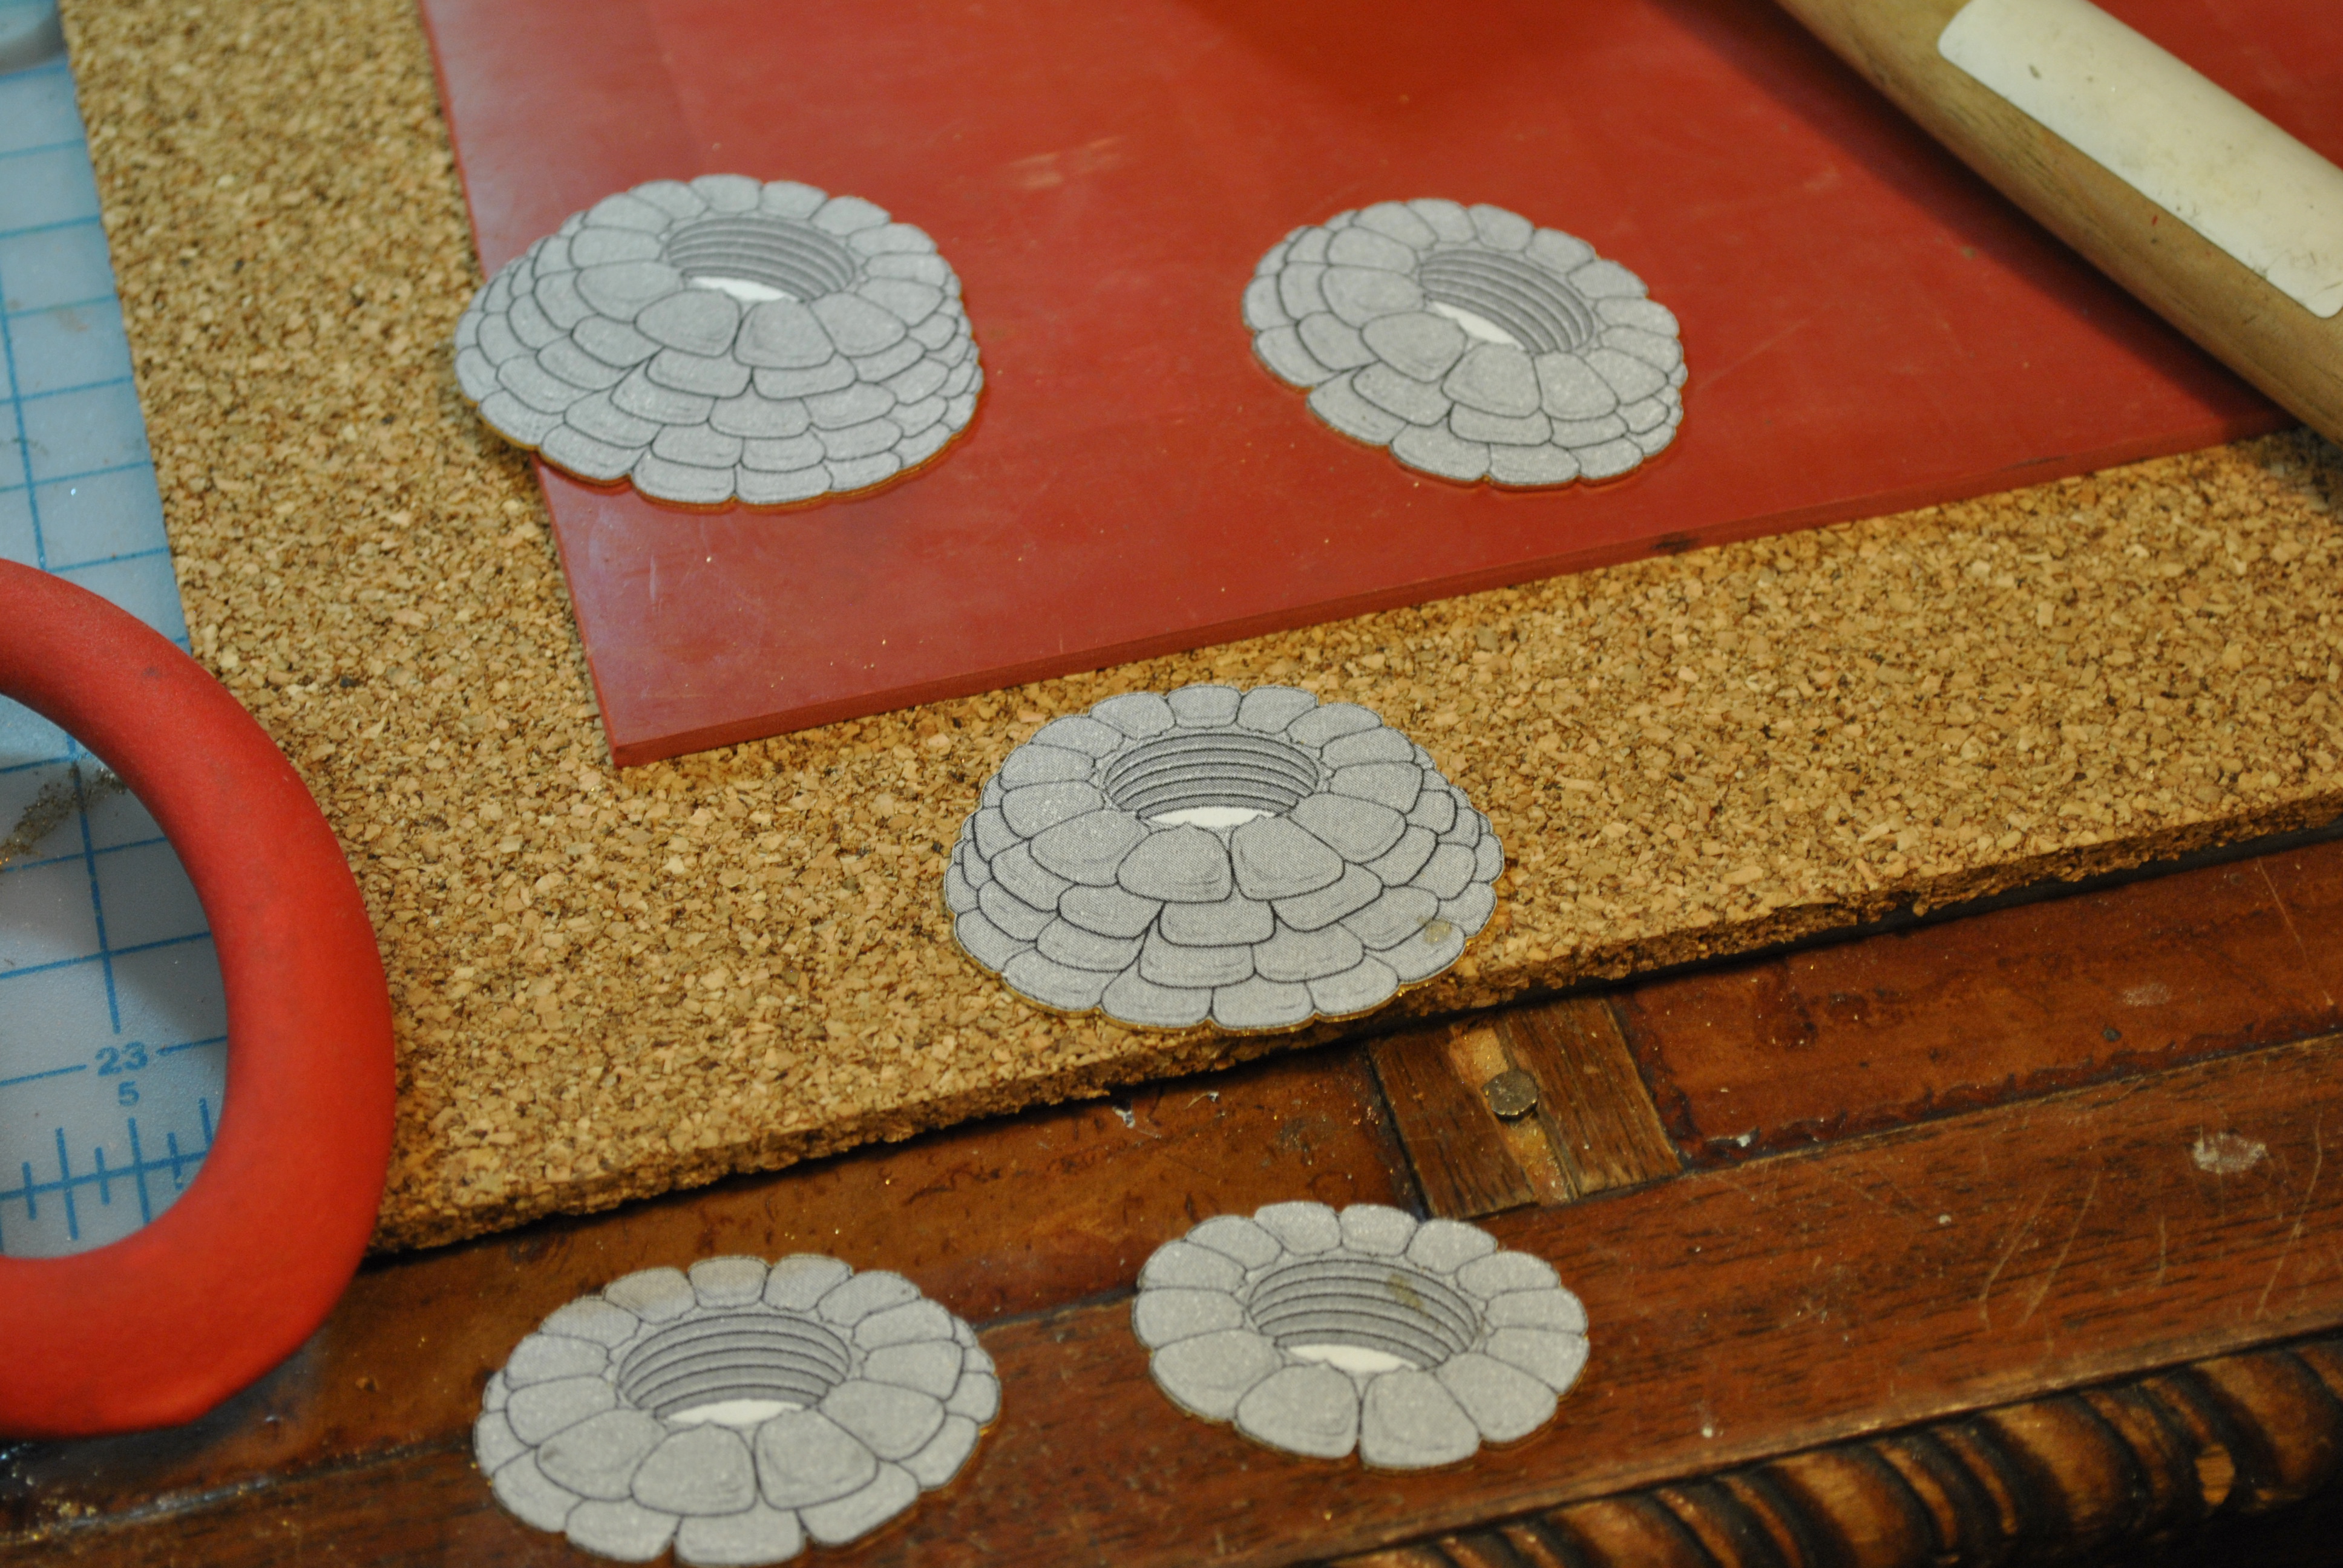
After they were cut out I filed and cut out the interior of the design, what you can’t see in this picture (but you can in the following) is where I etched the lines of the design in and filed the kernels of the corn.
the final cut outs with etching and filing.
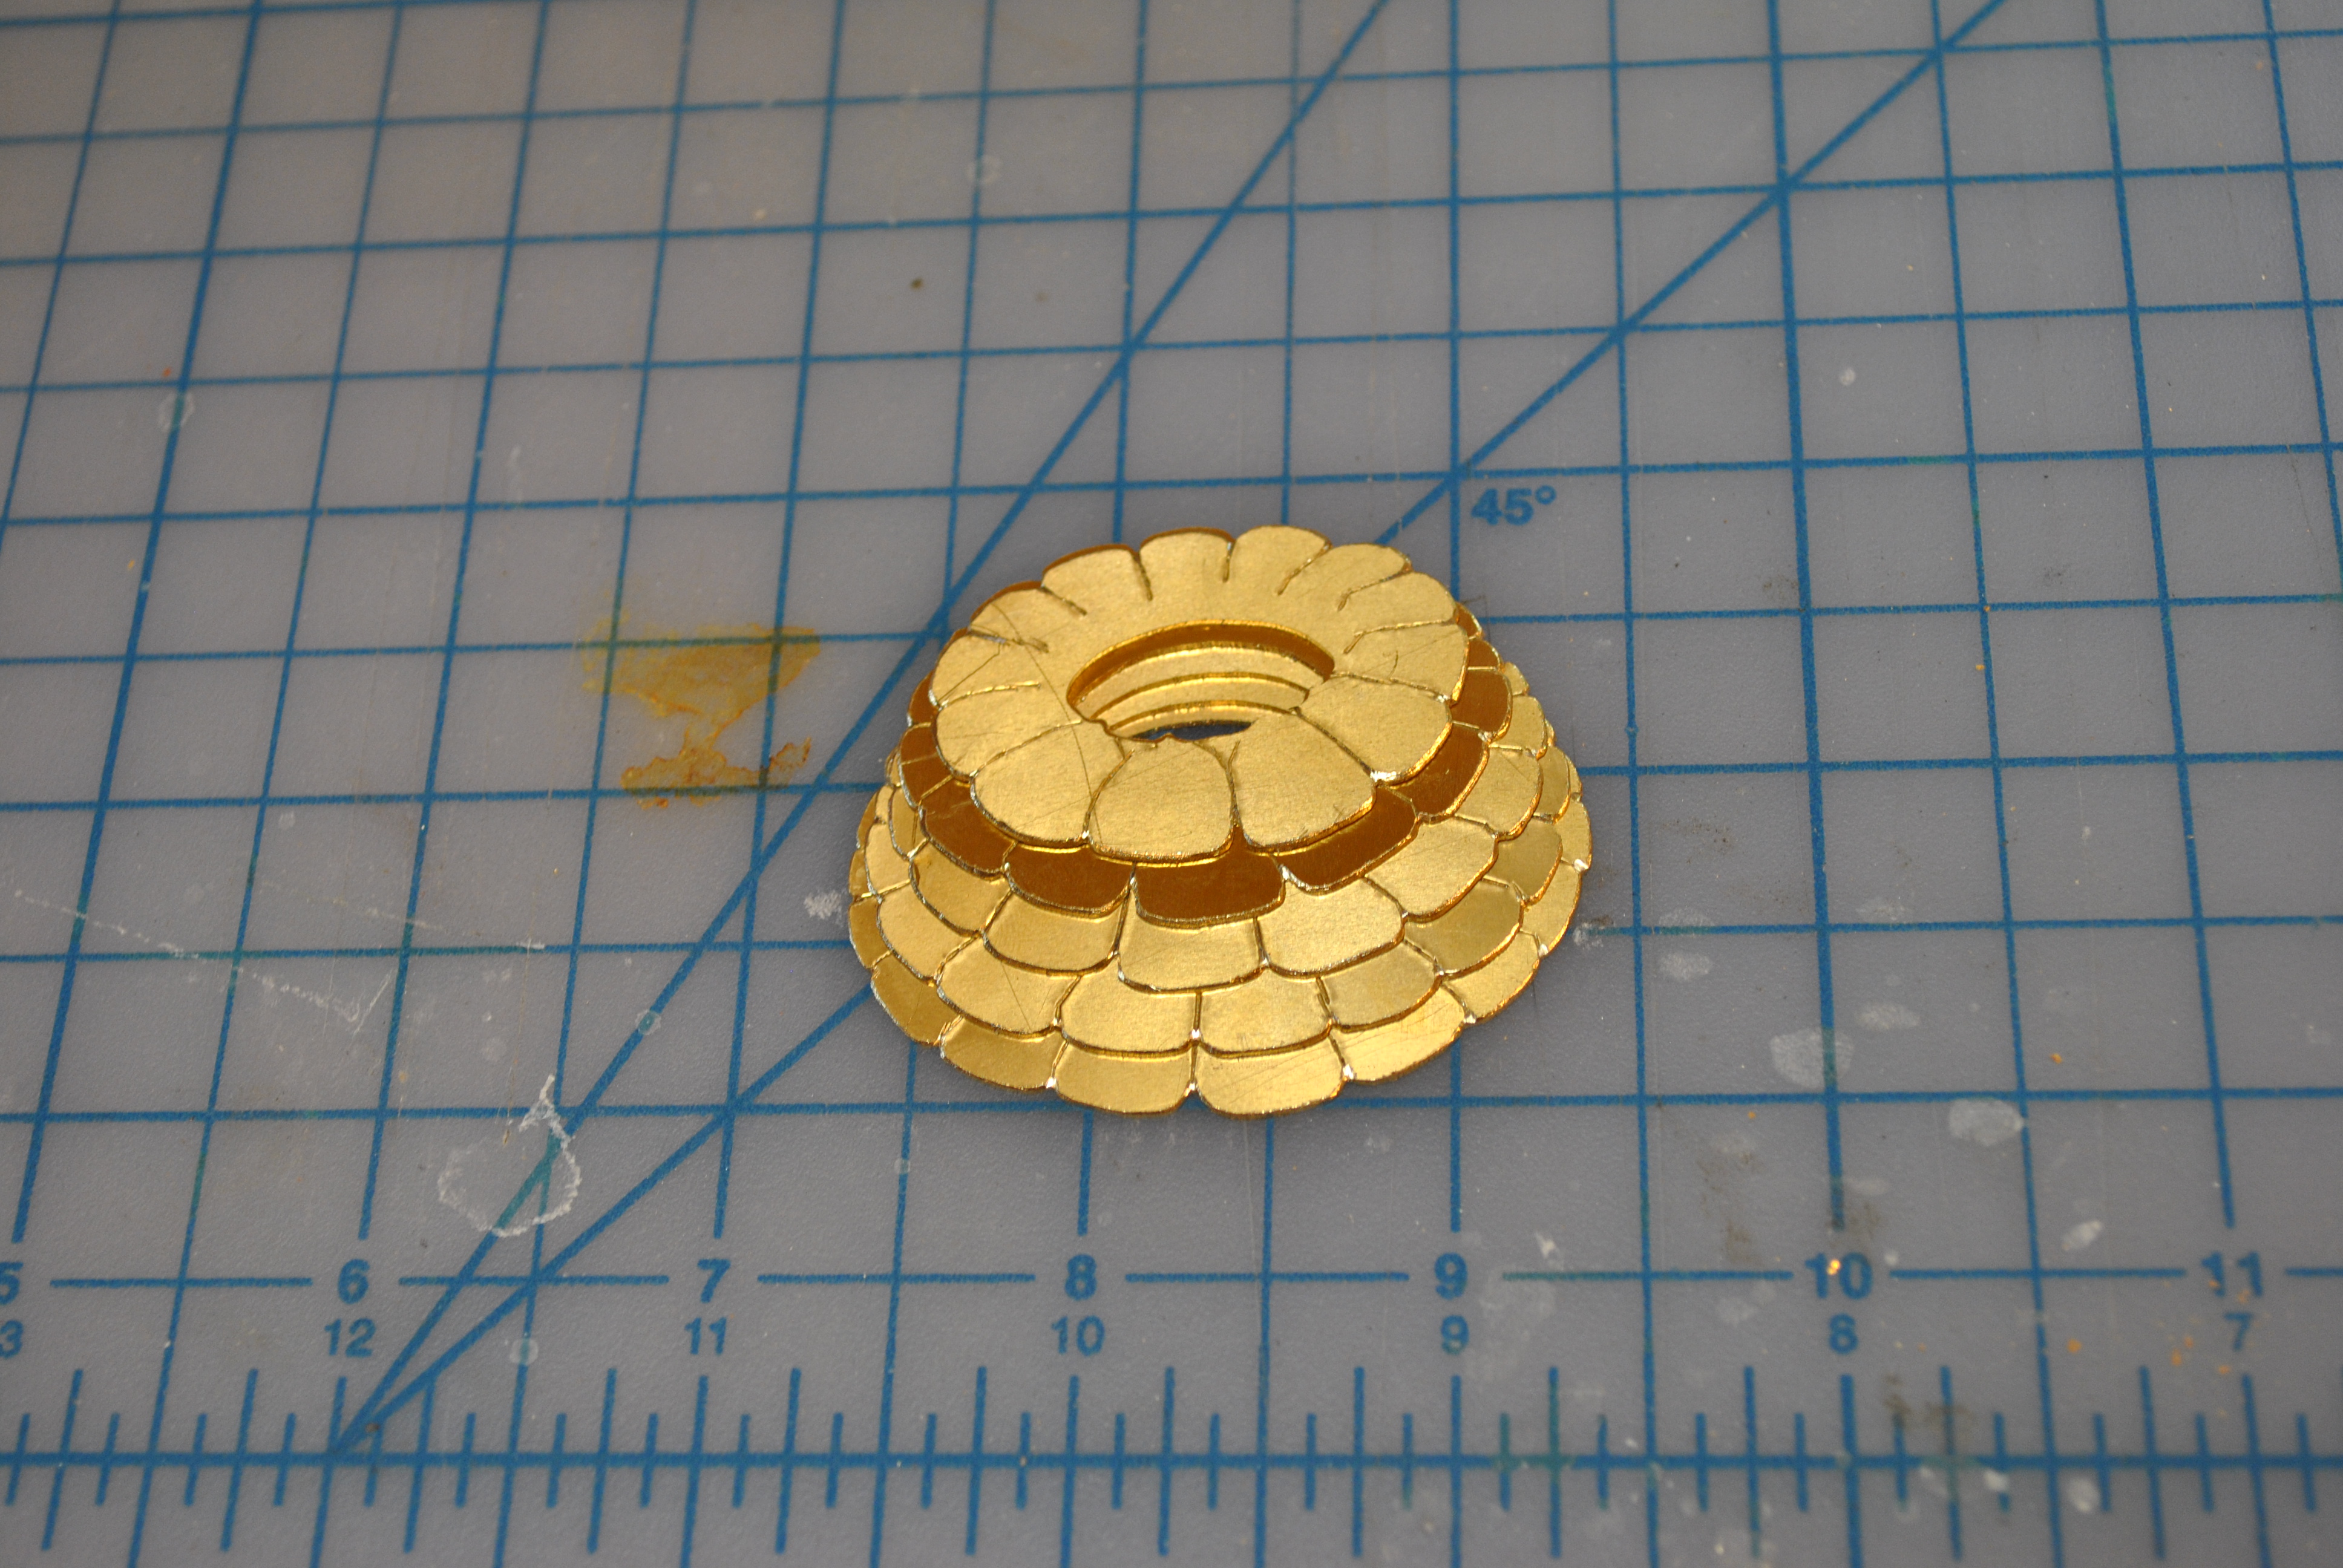
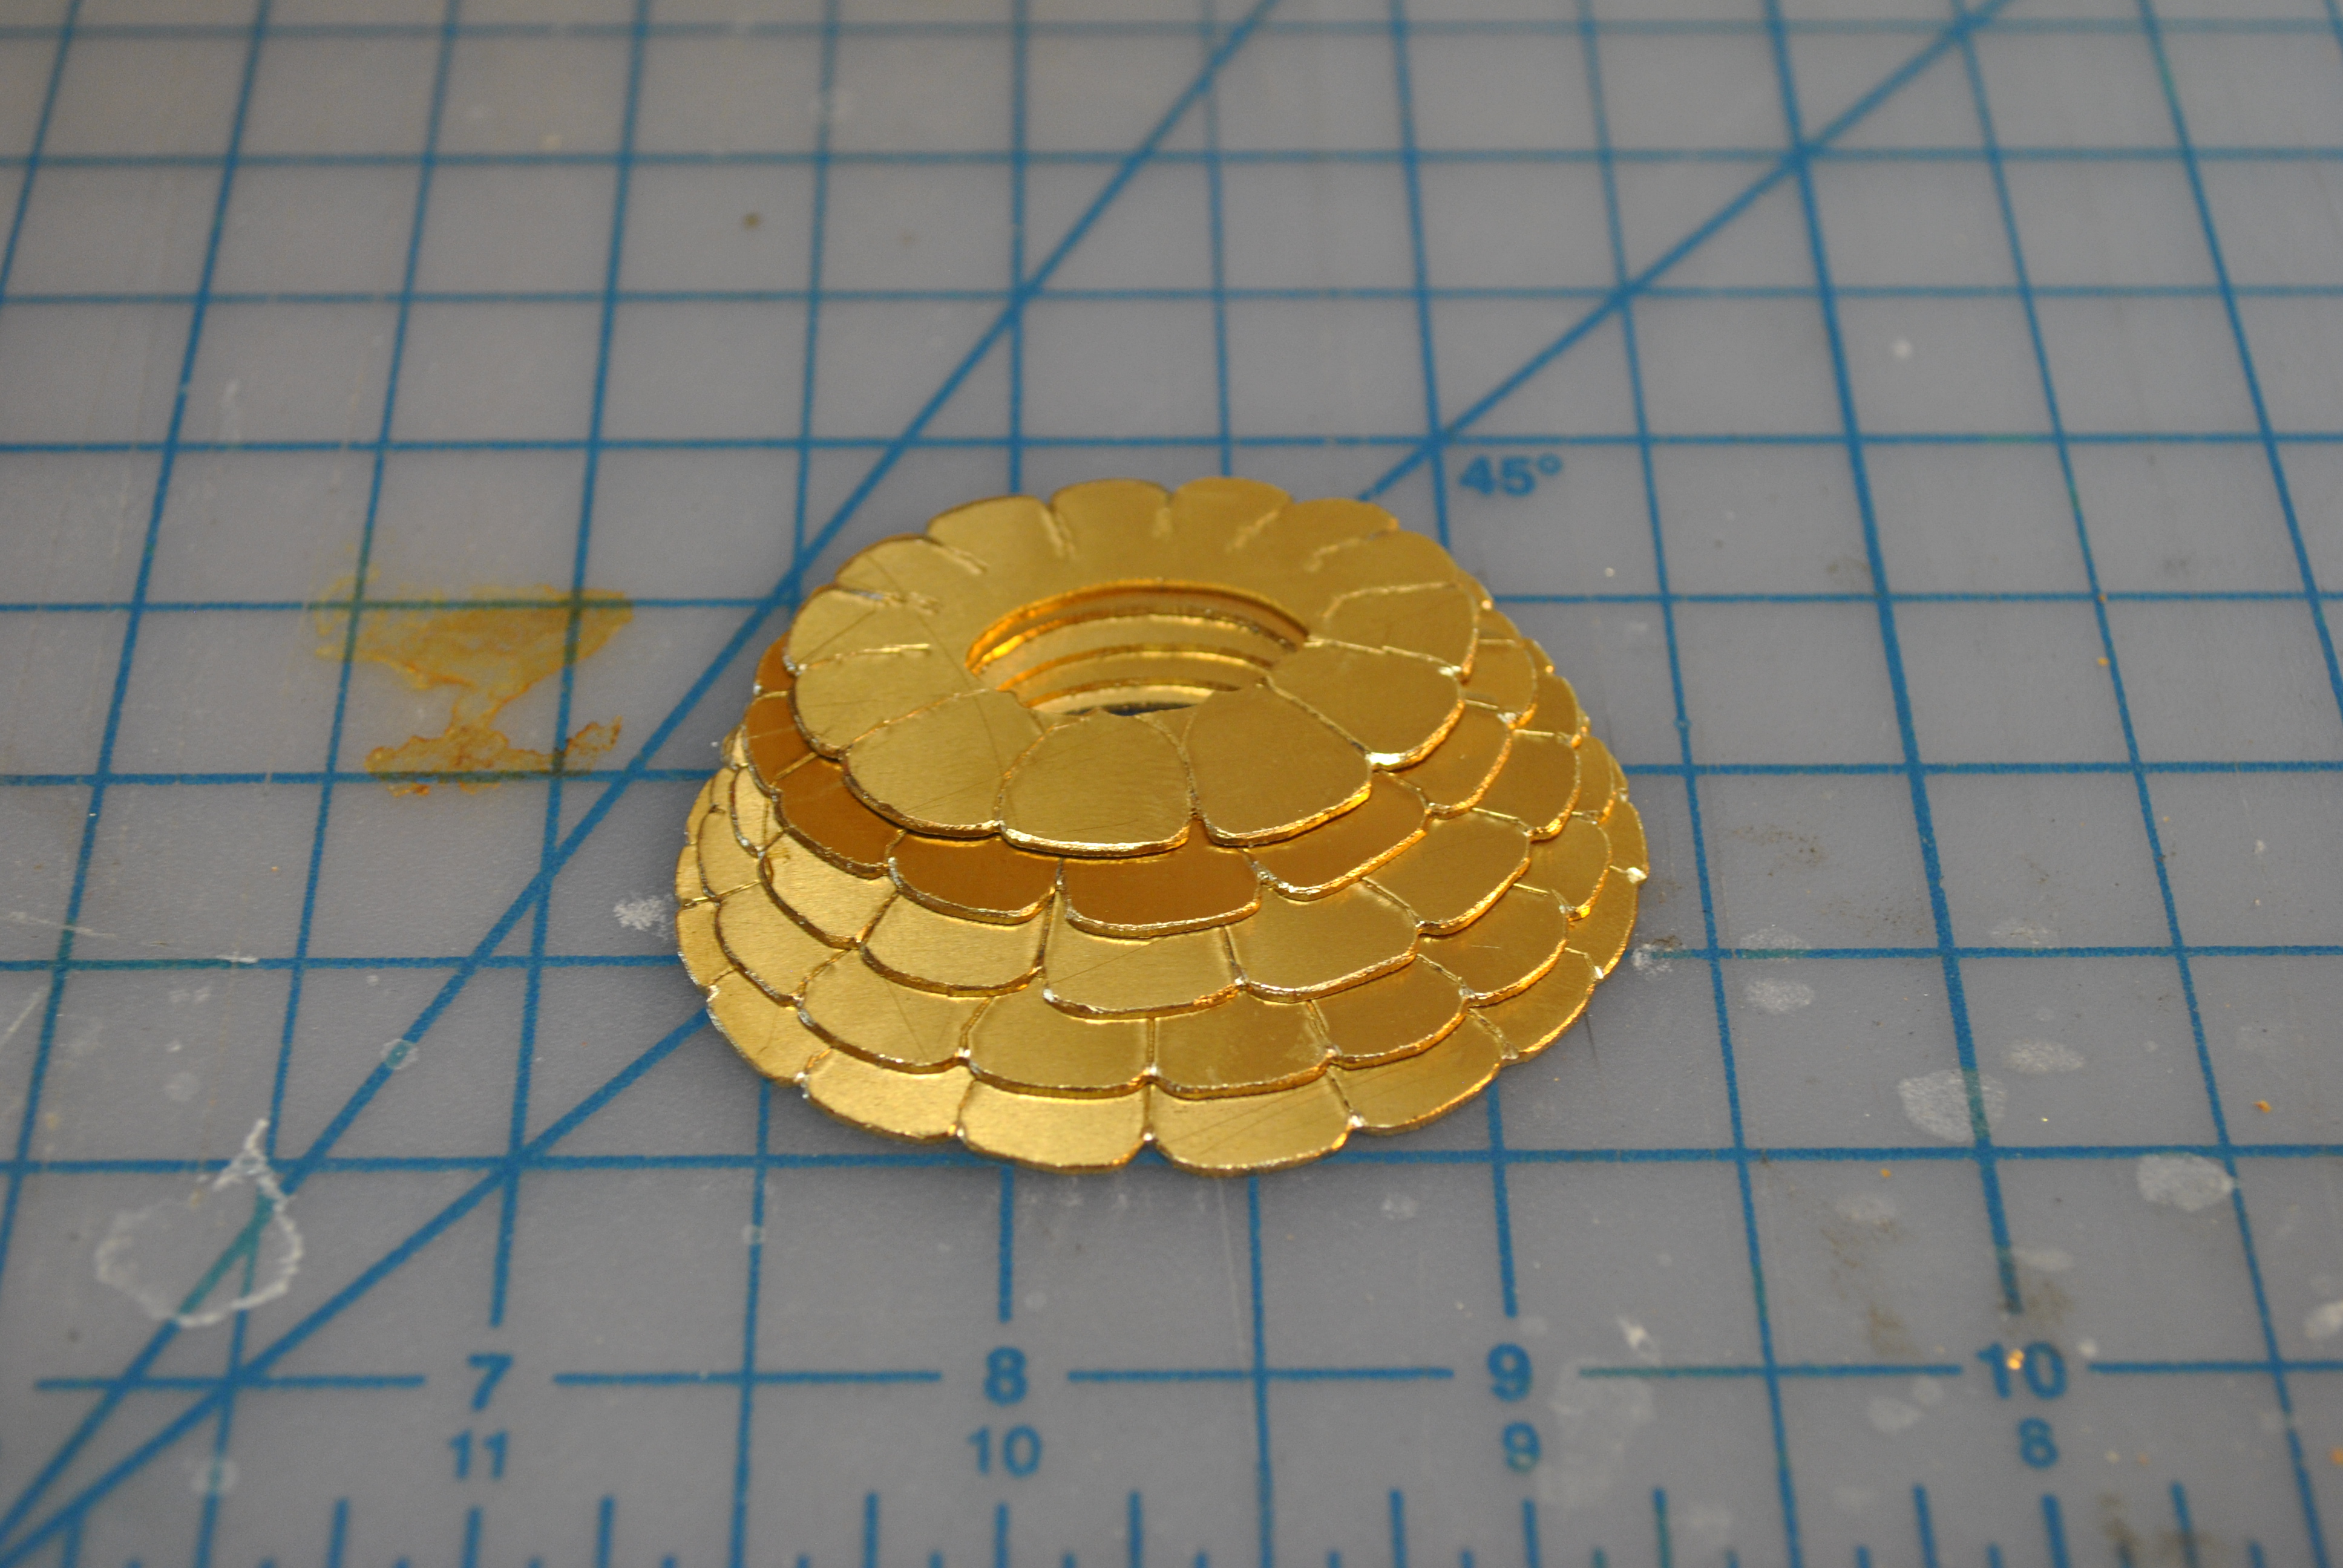
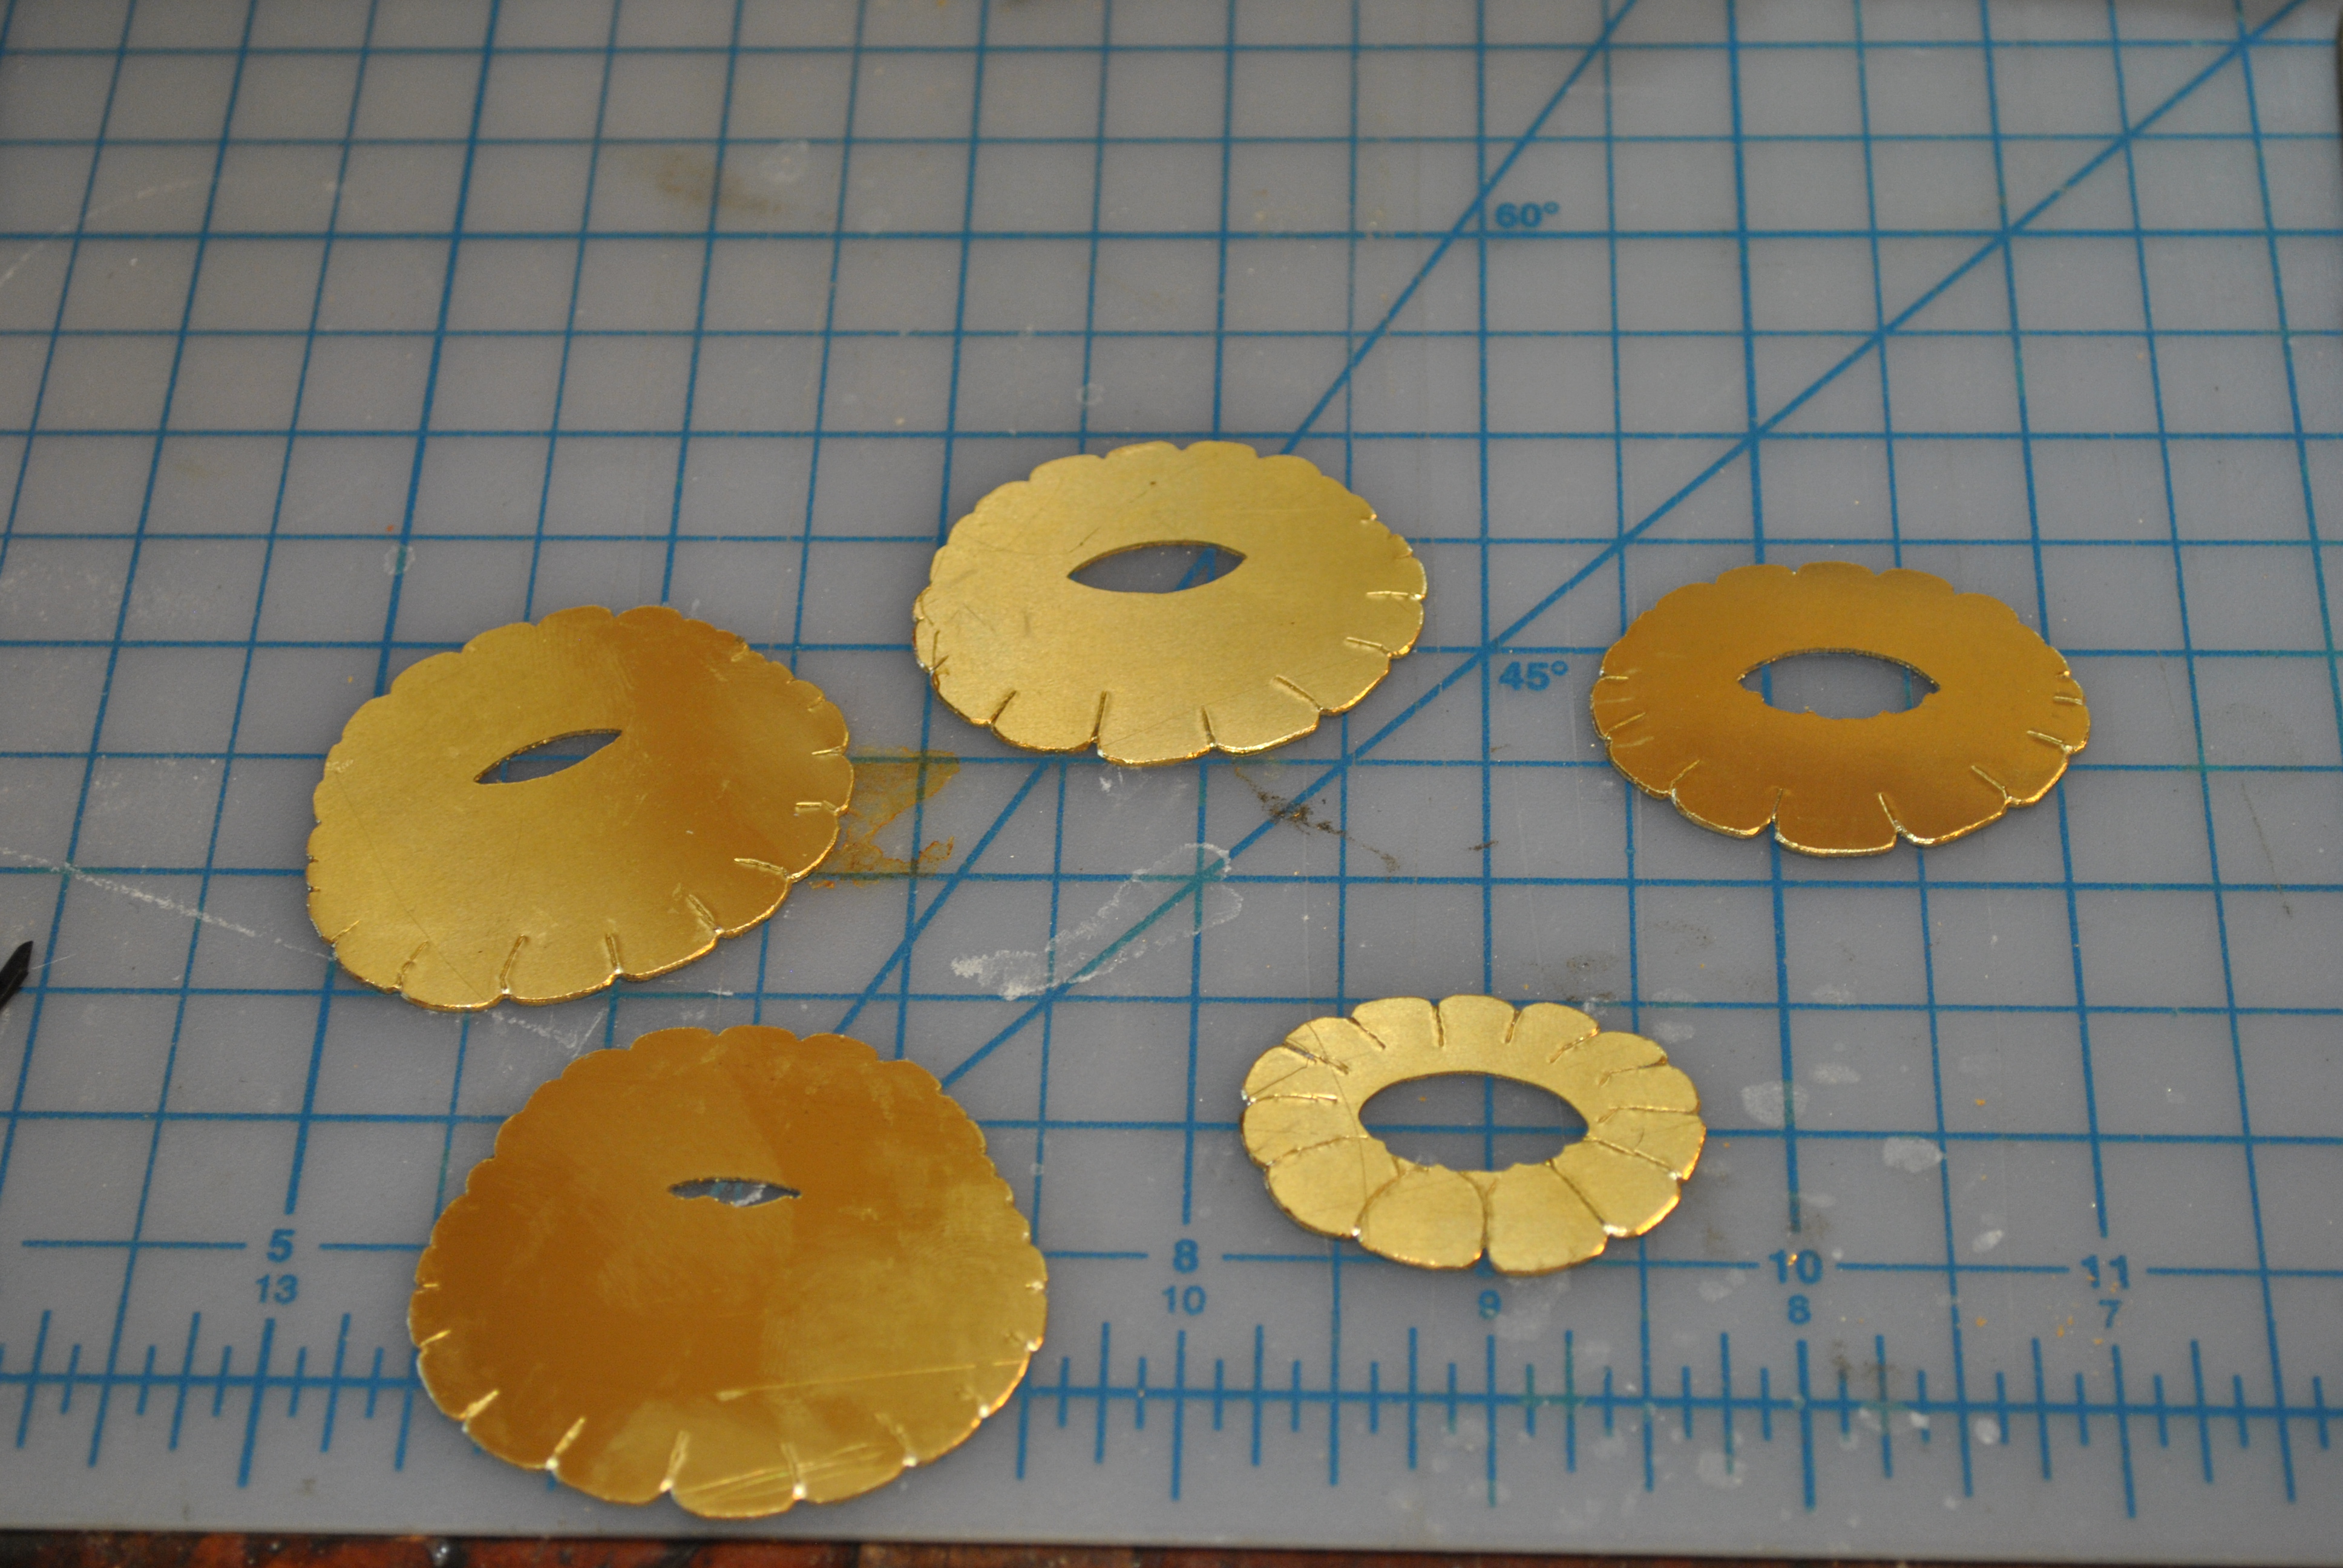
Dry fitting getting ready for the riveting.
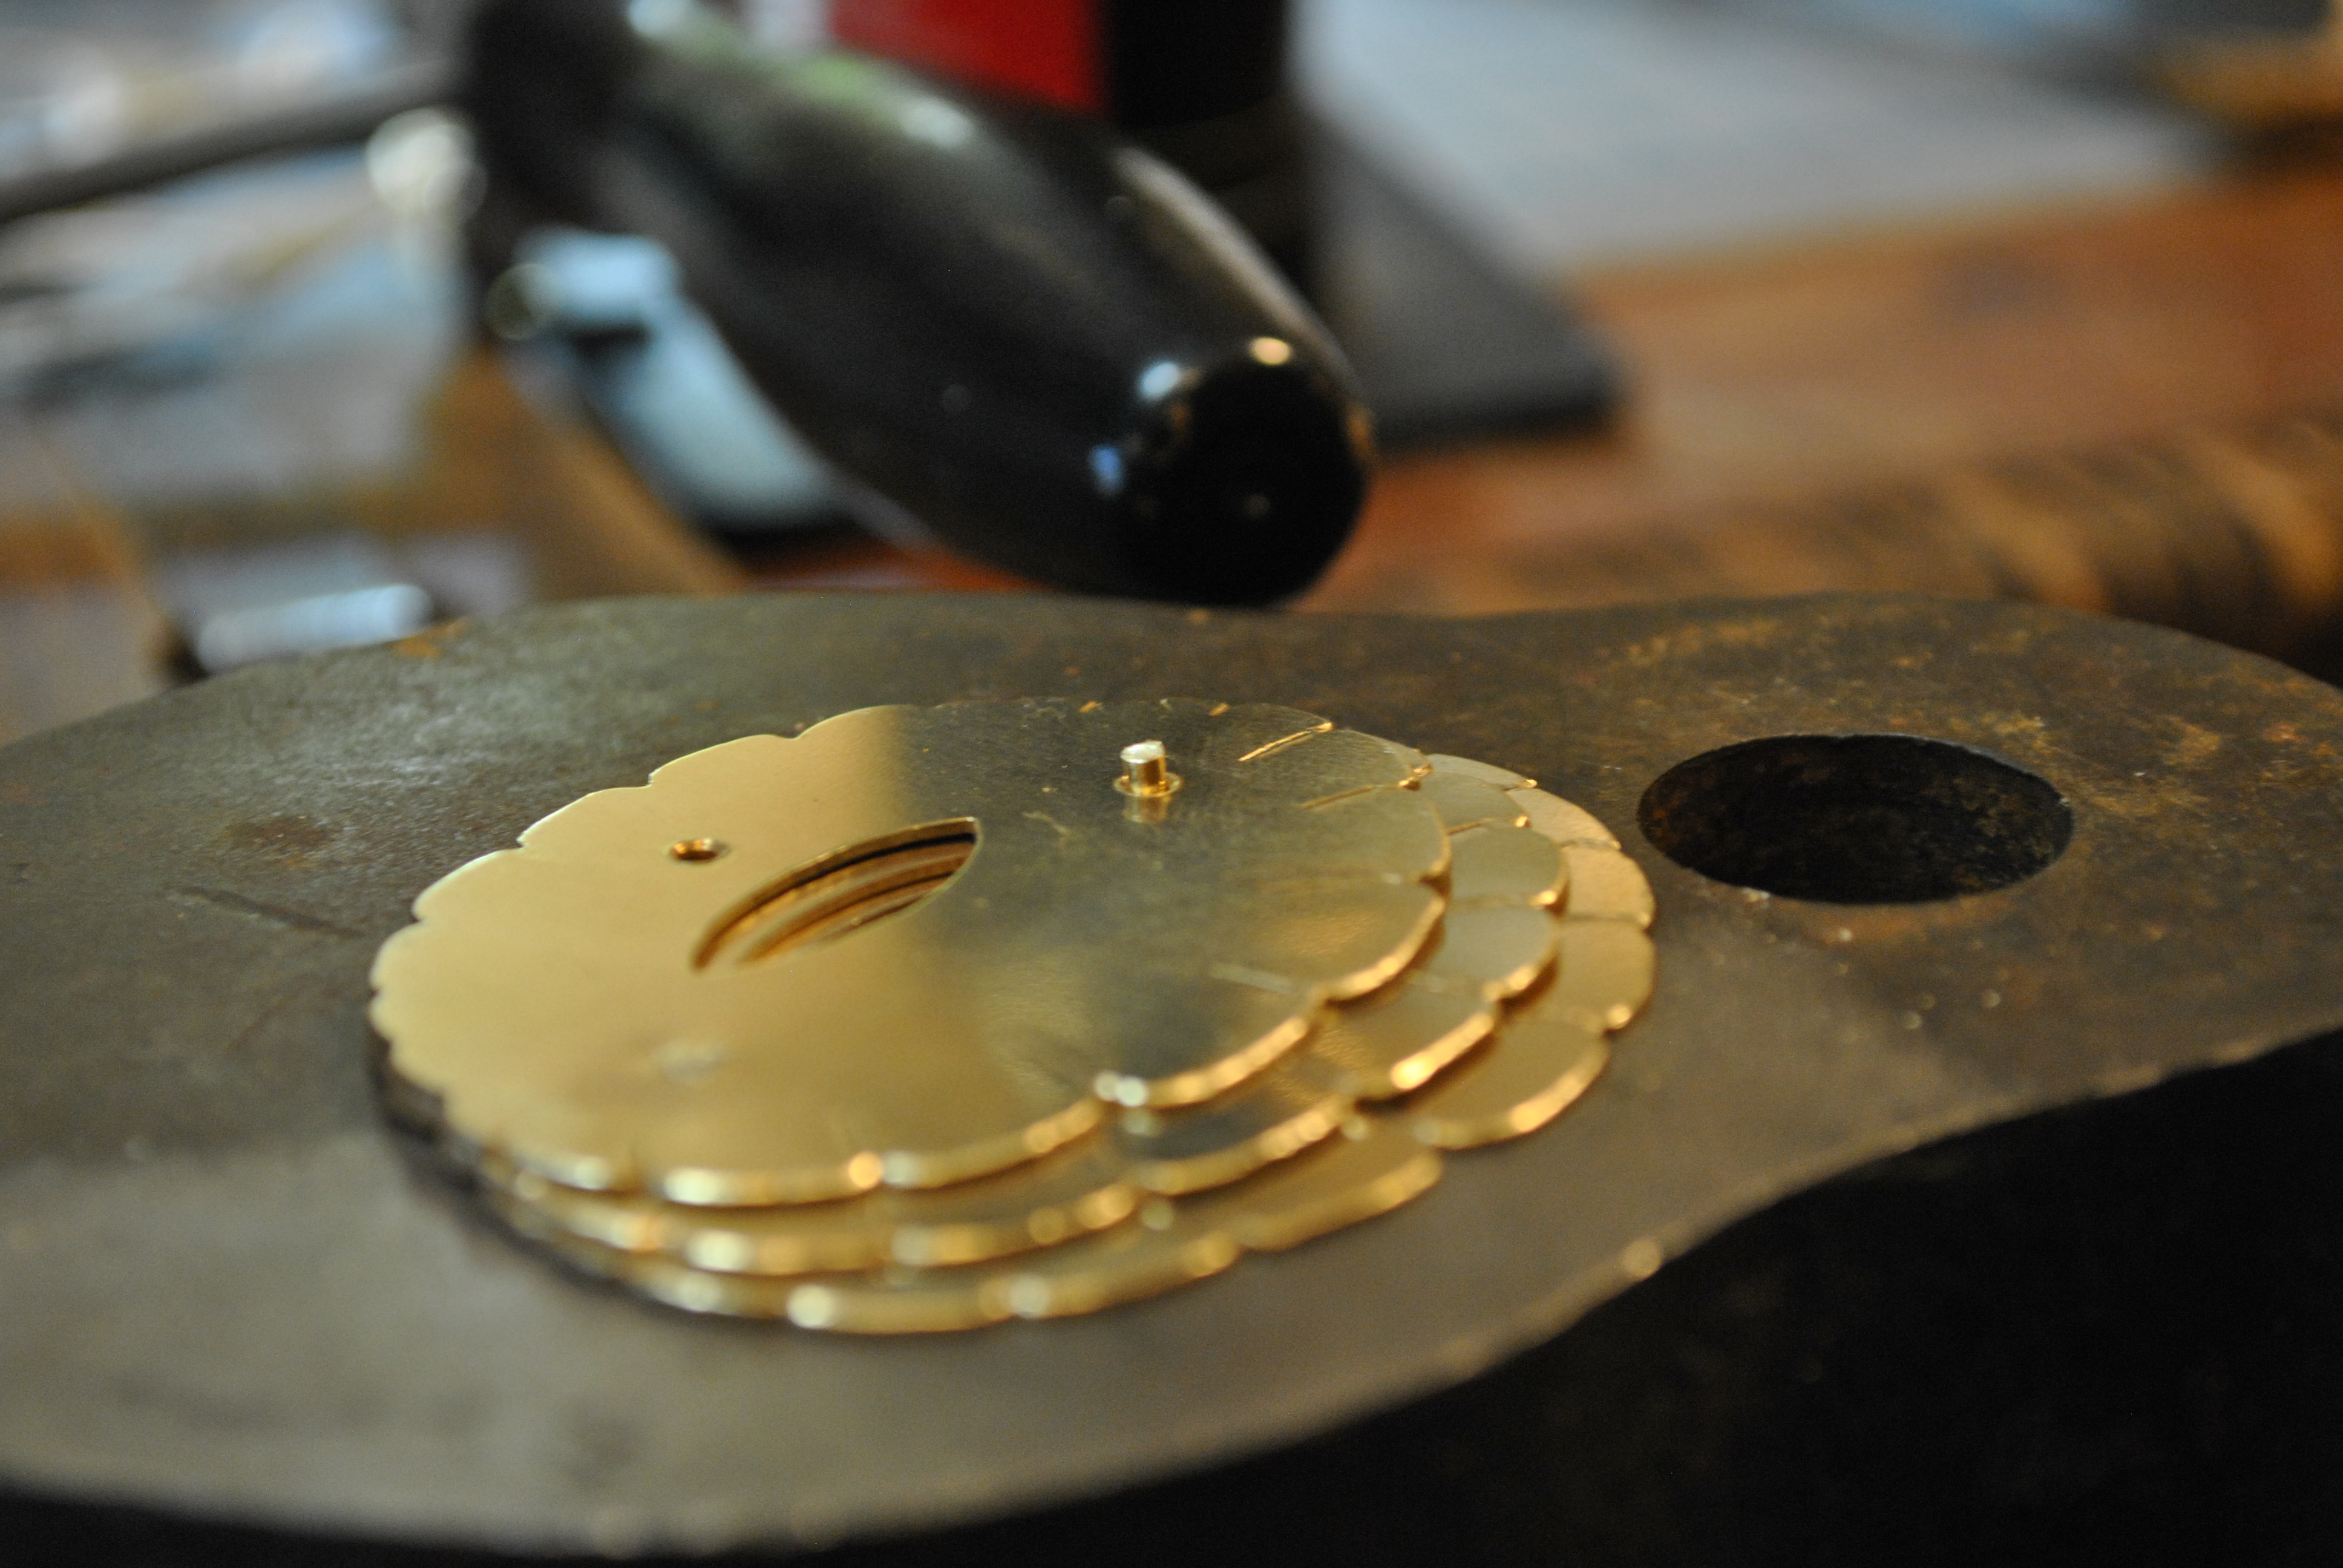

I did the rivets in two layers for strength and also so that they would fit better into the final design. I didn’t want rivets showing on every layer, but also wanted it to be strong, so there are three “hidden” rivets.
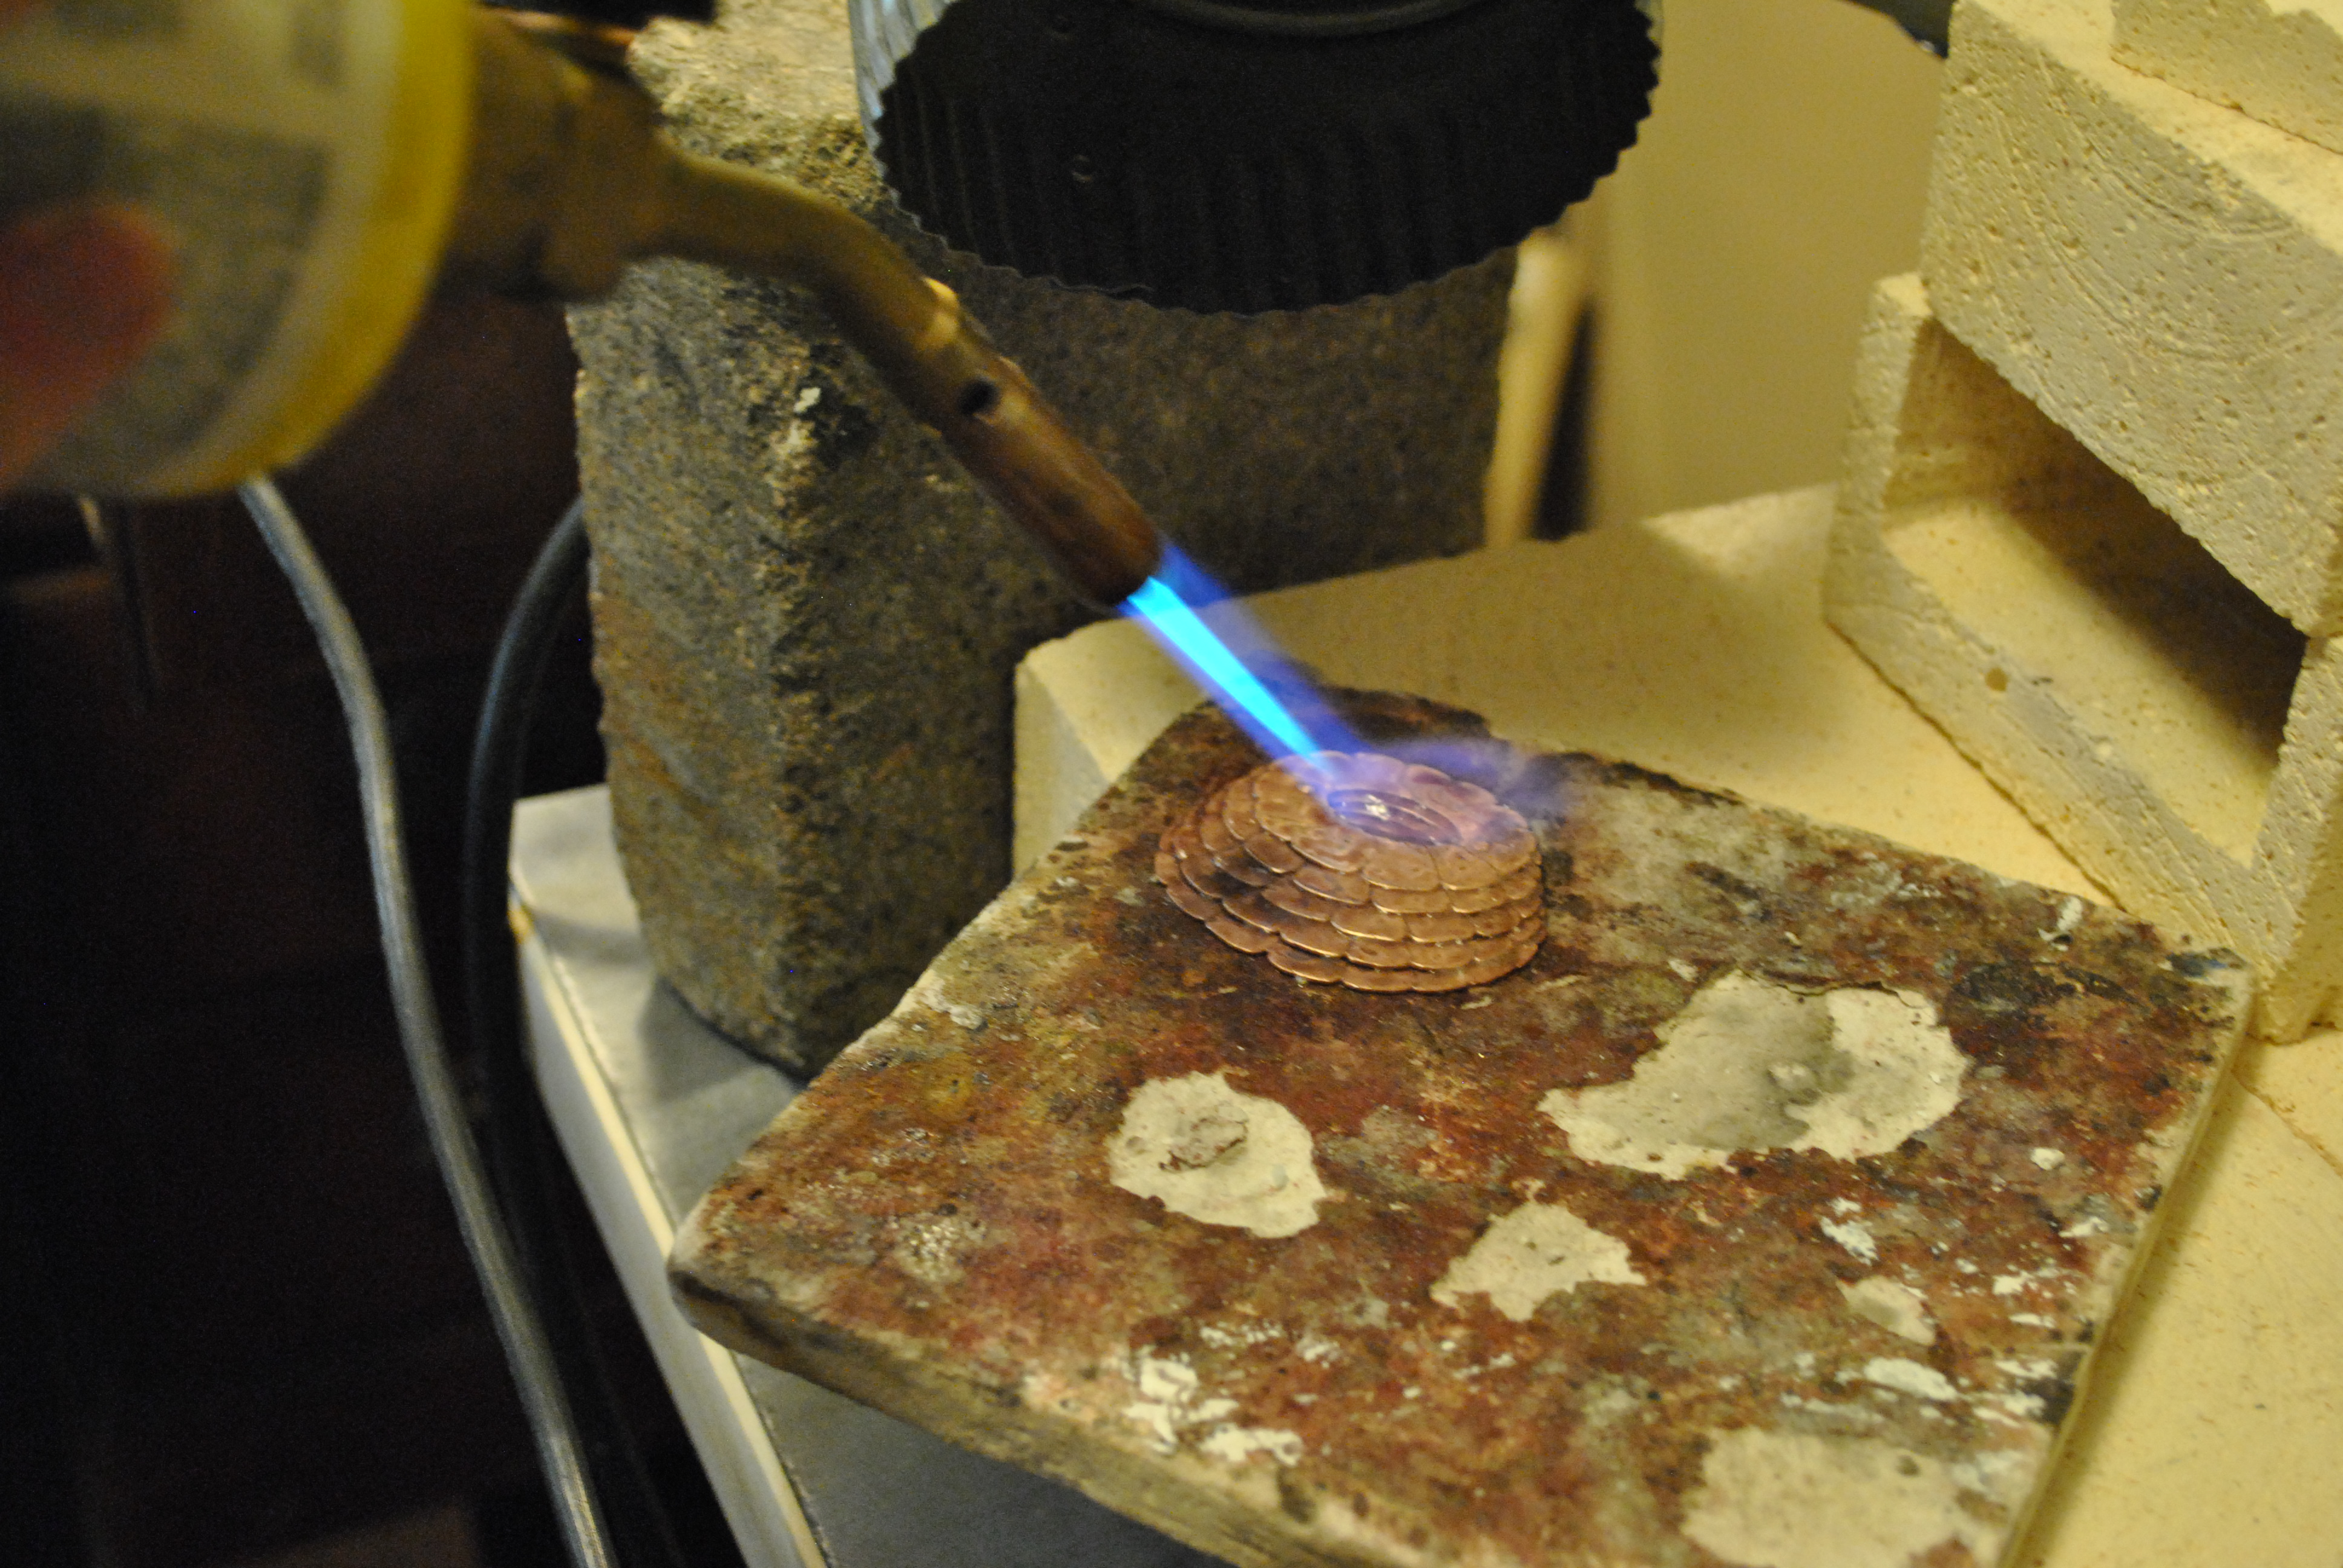
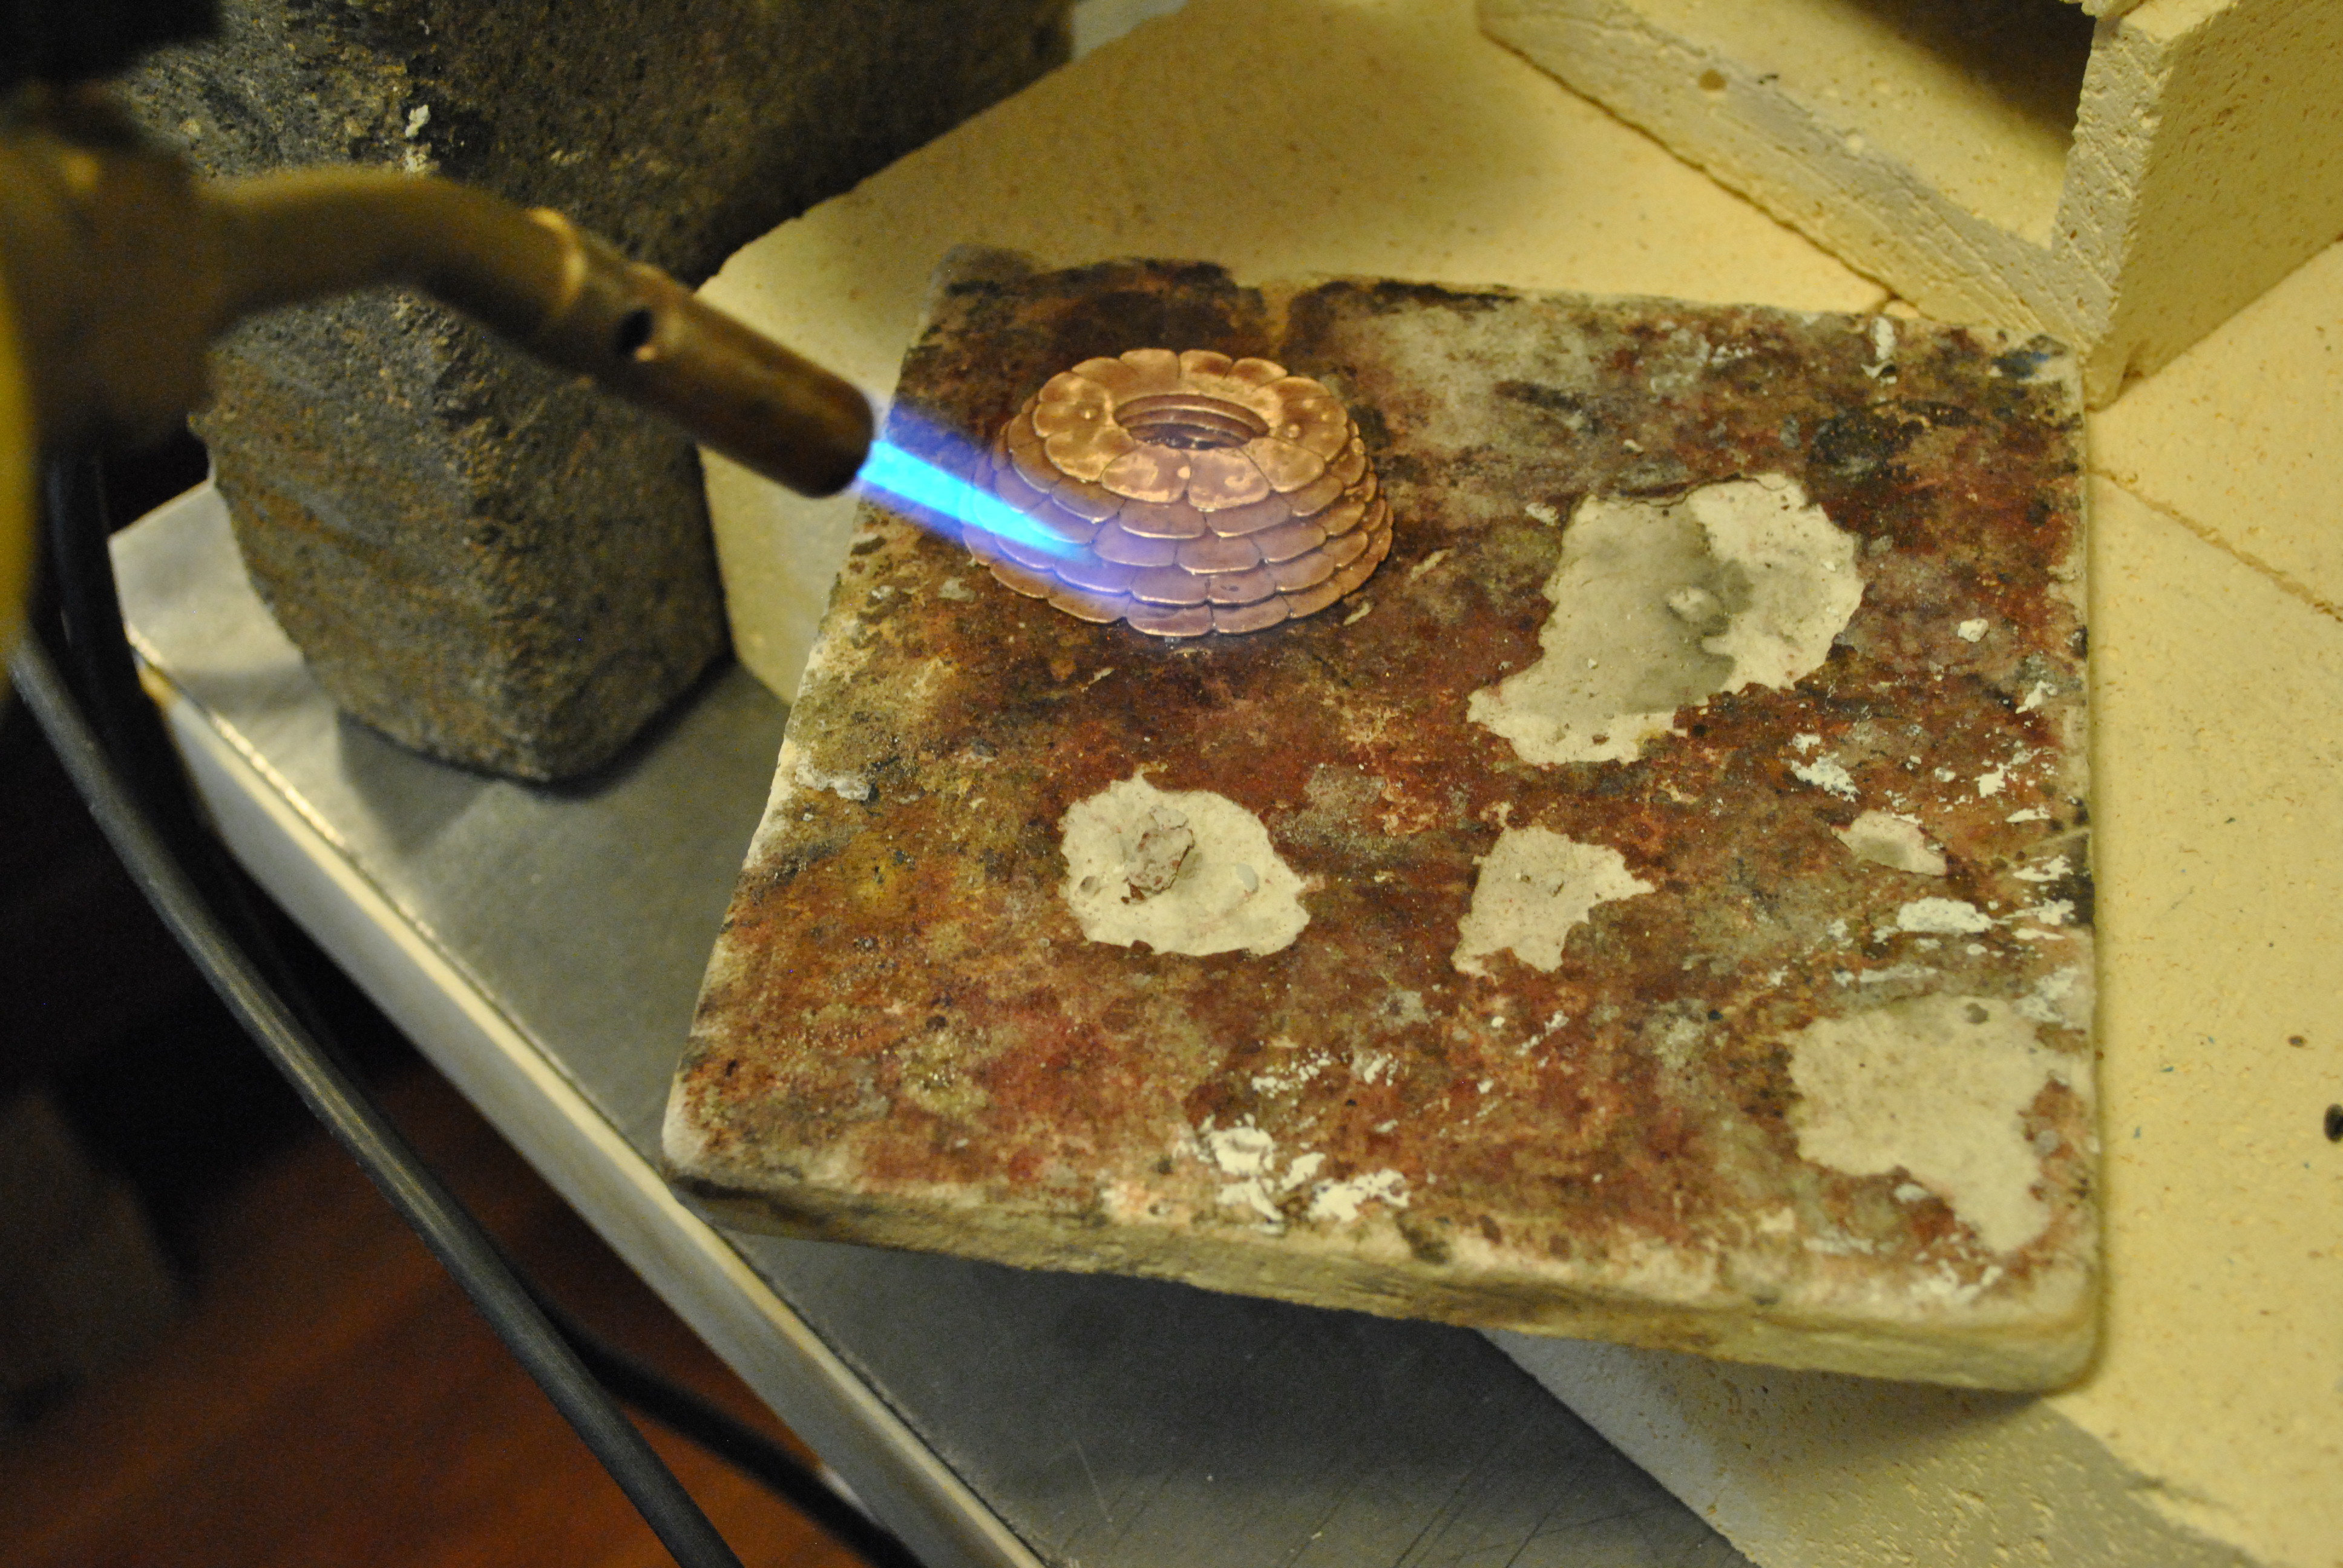
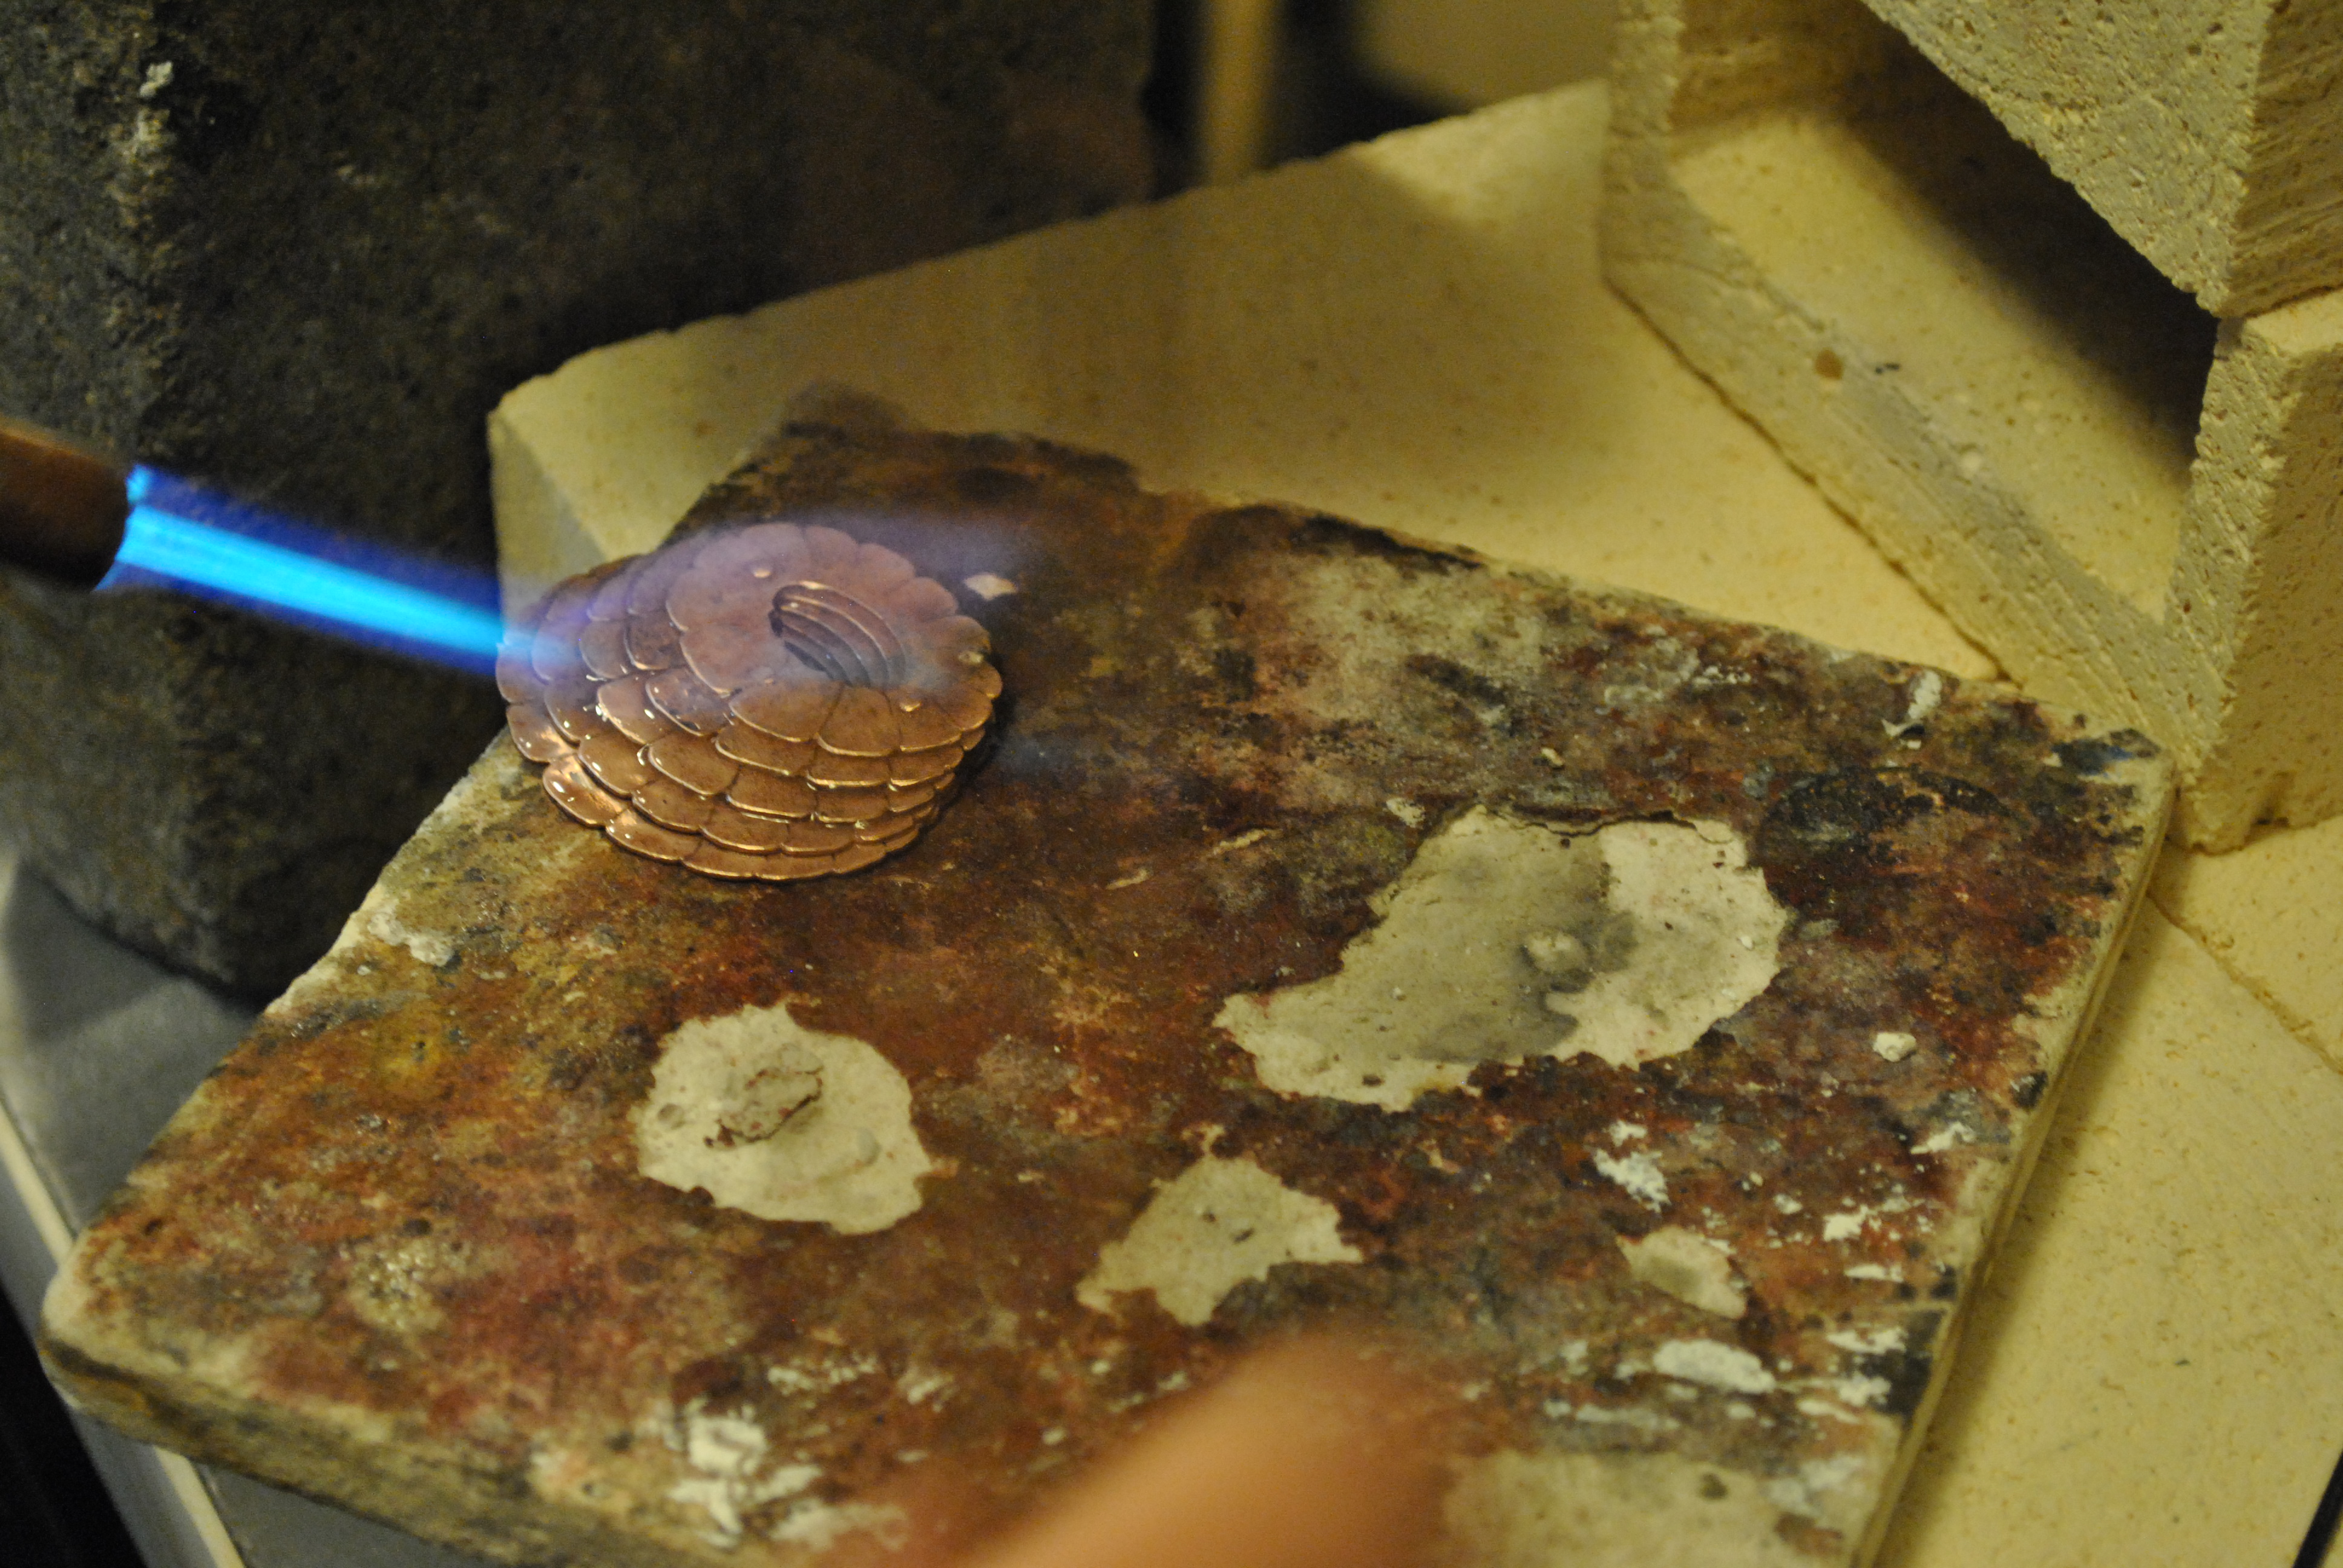
Five layers of brass is almost impossible to bend, so I annealed the metal to make it softer.
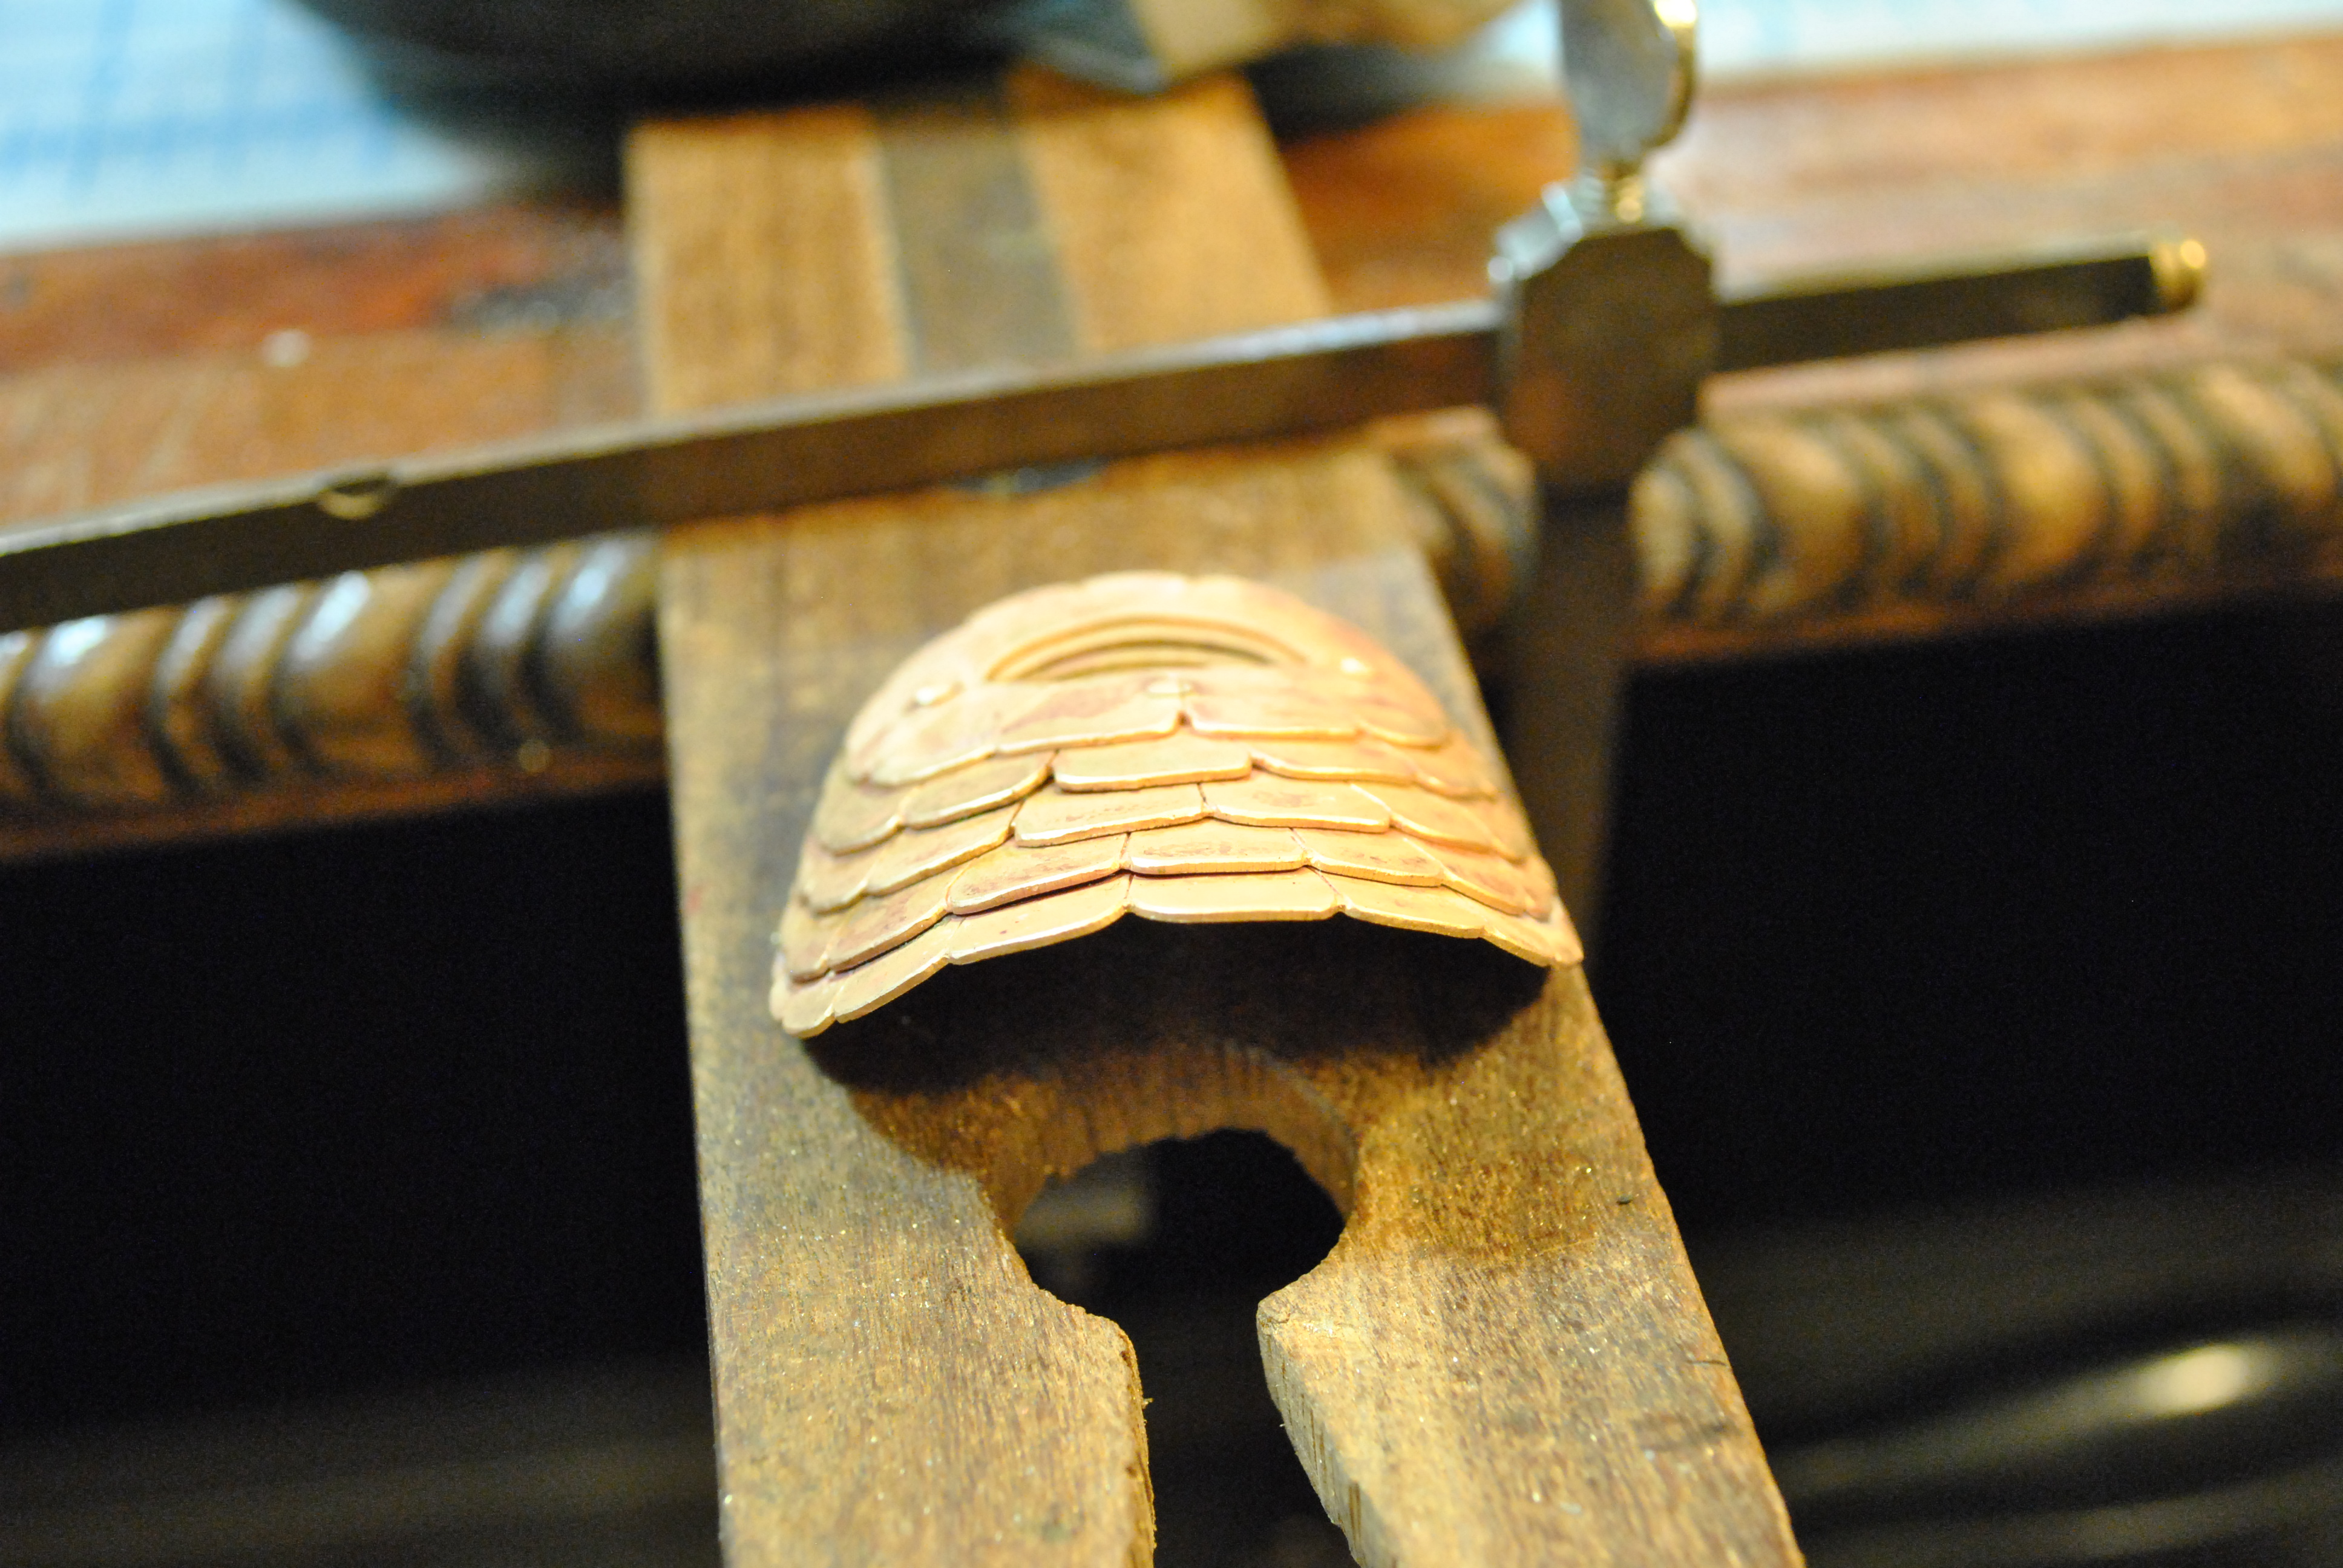
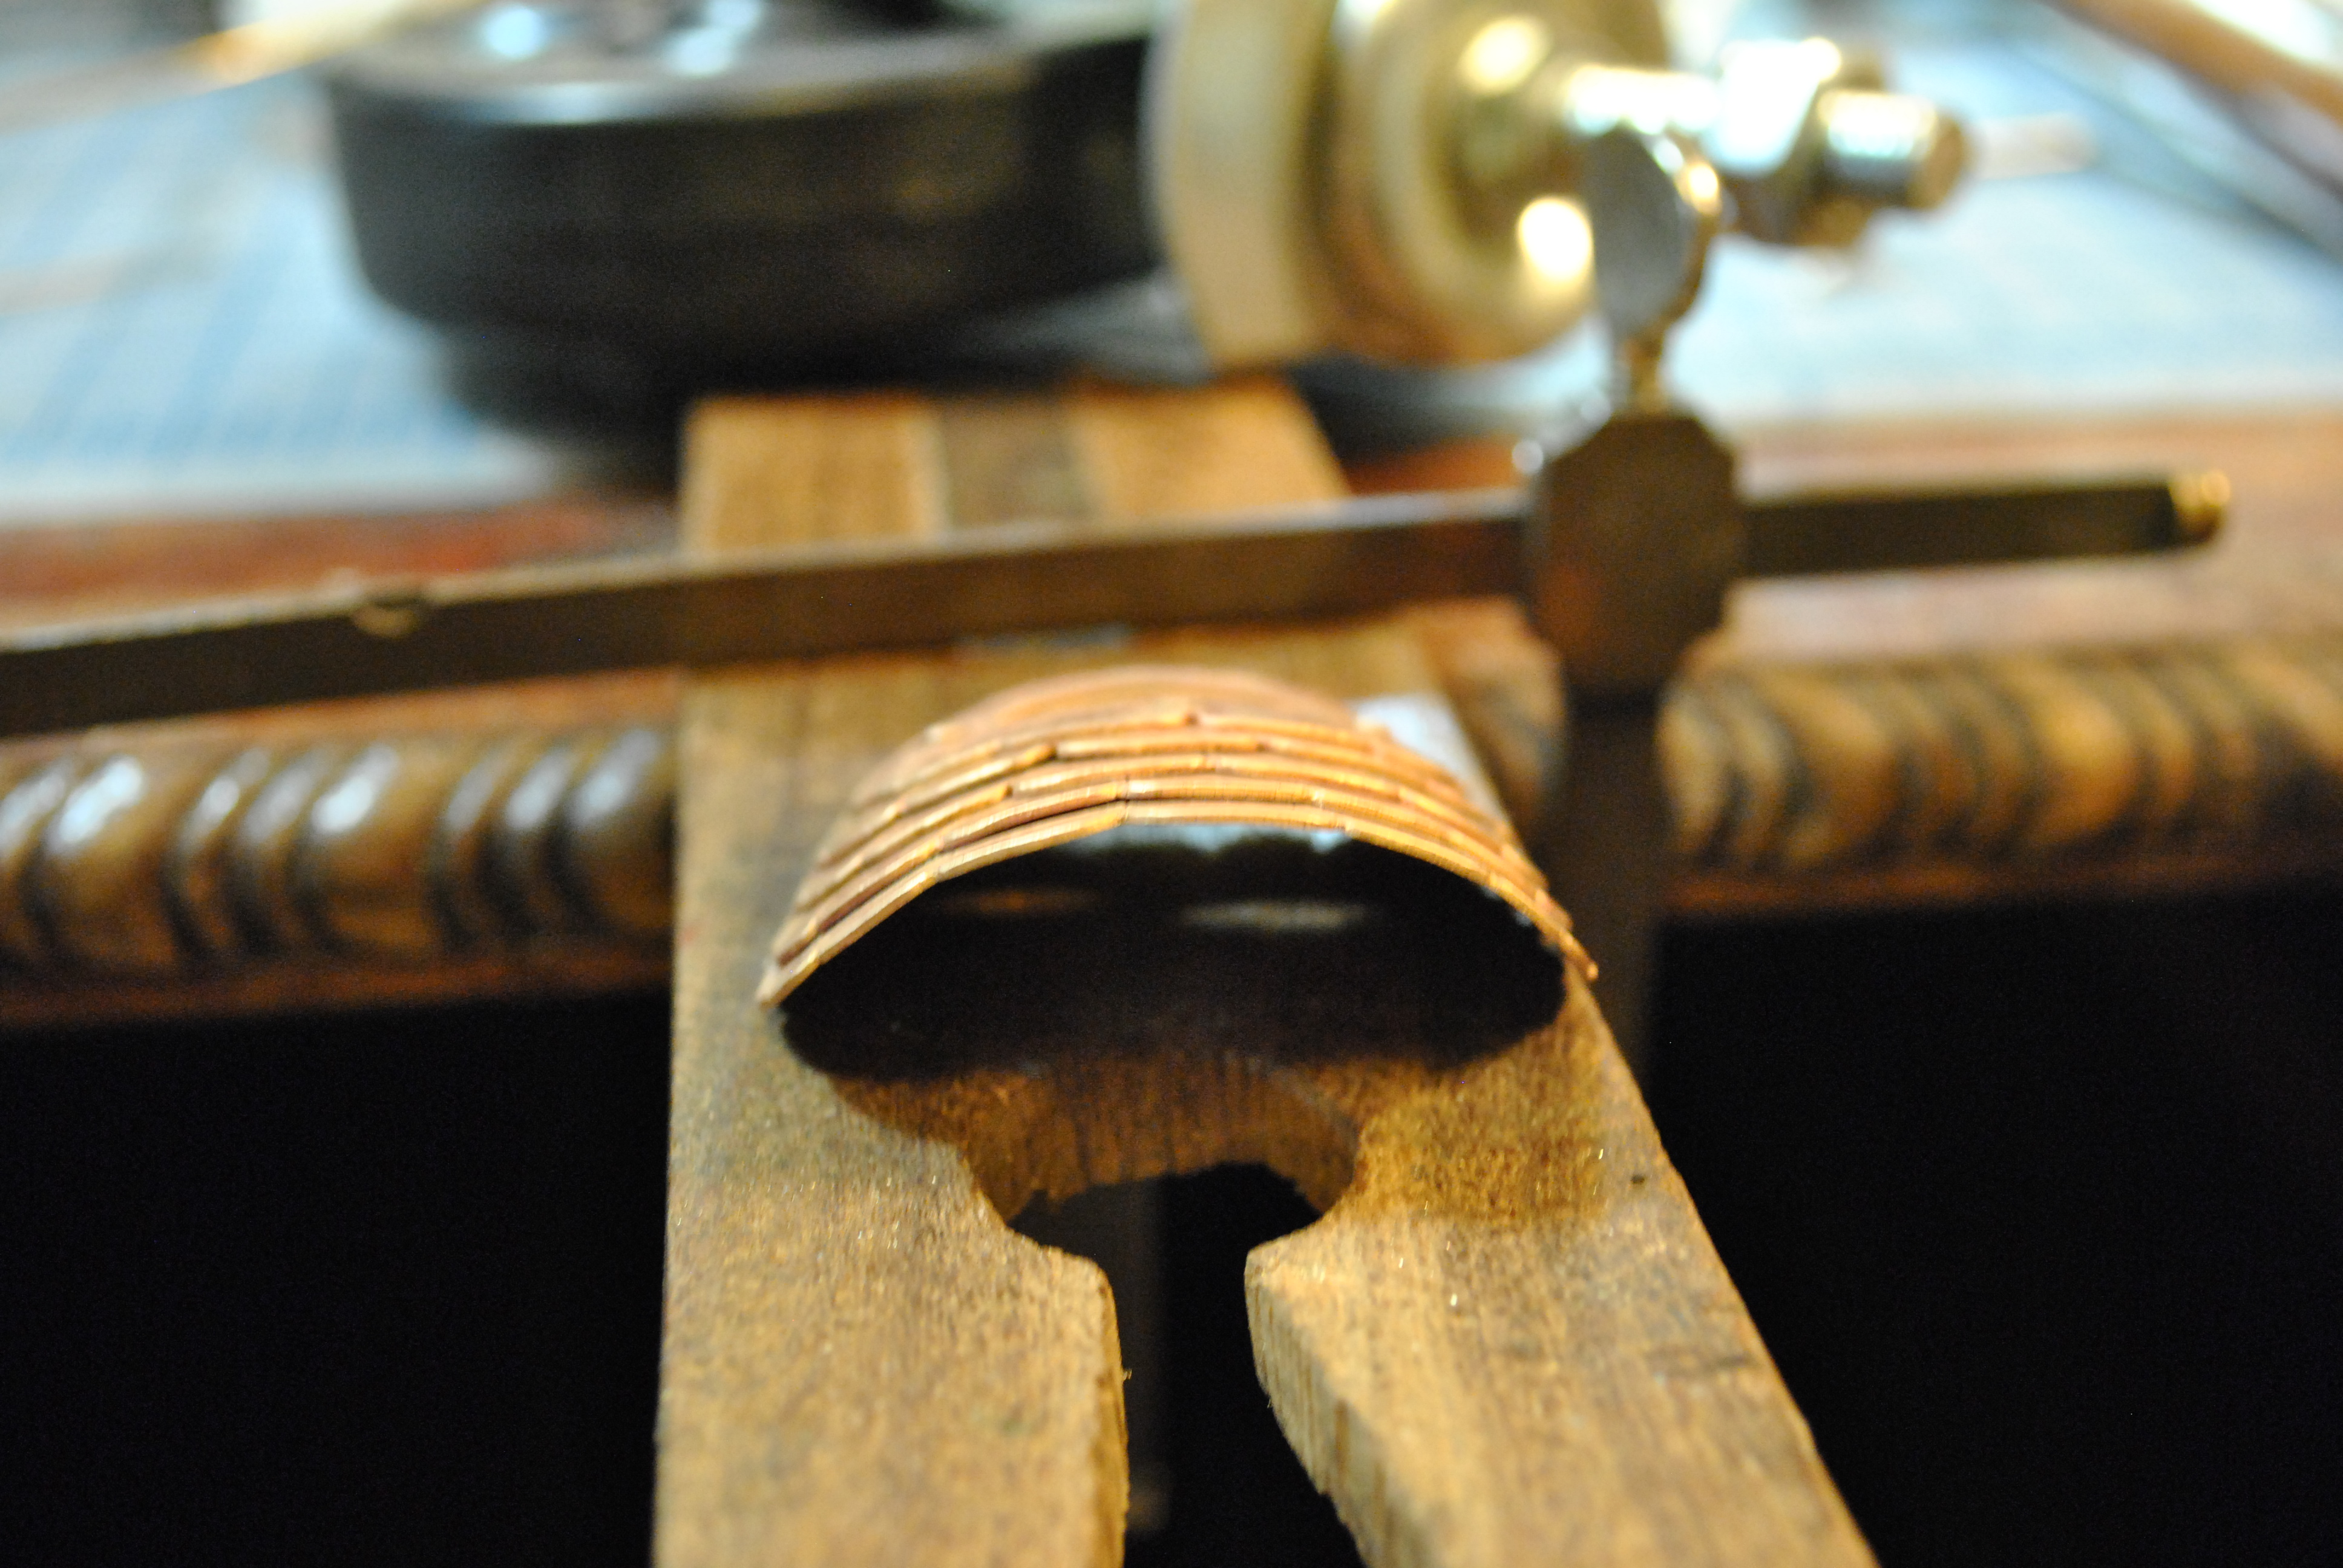
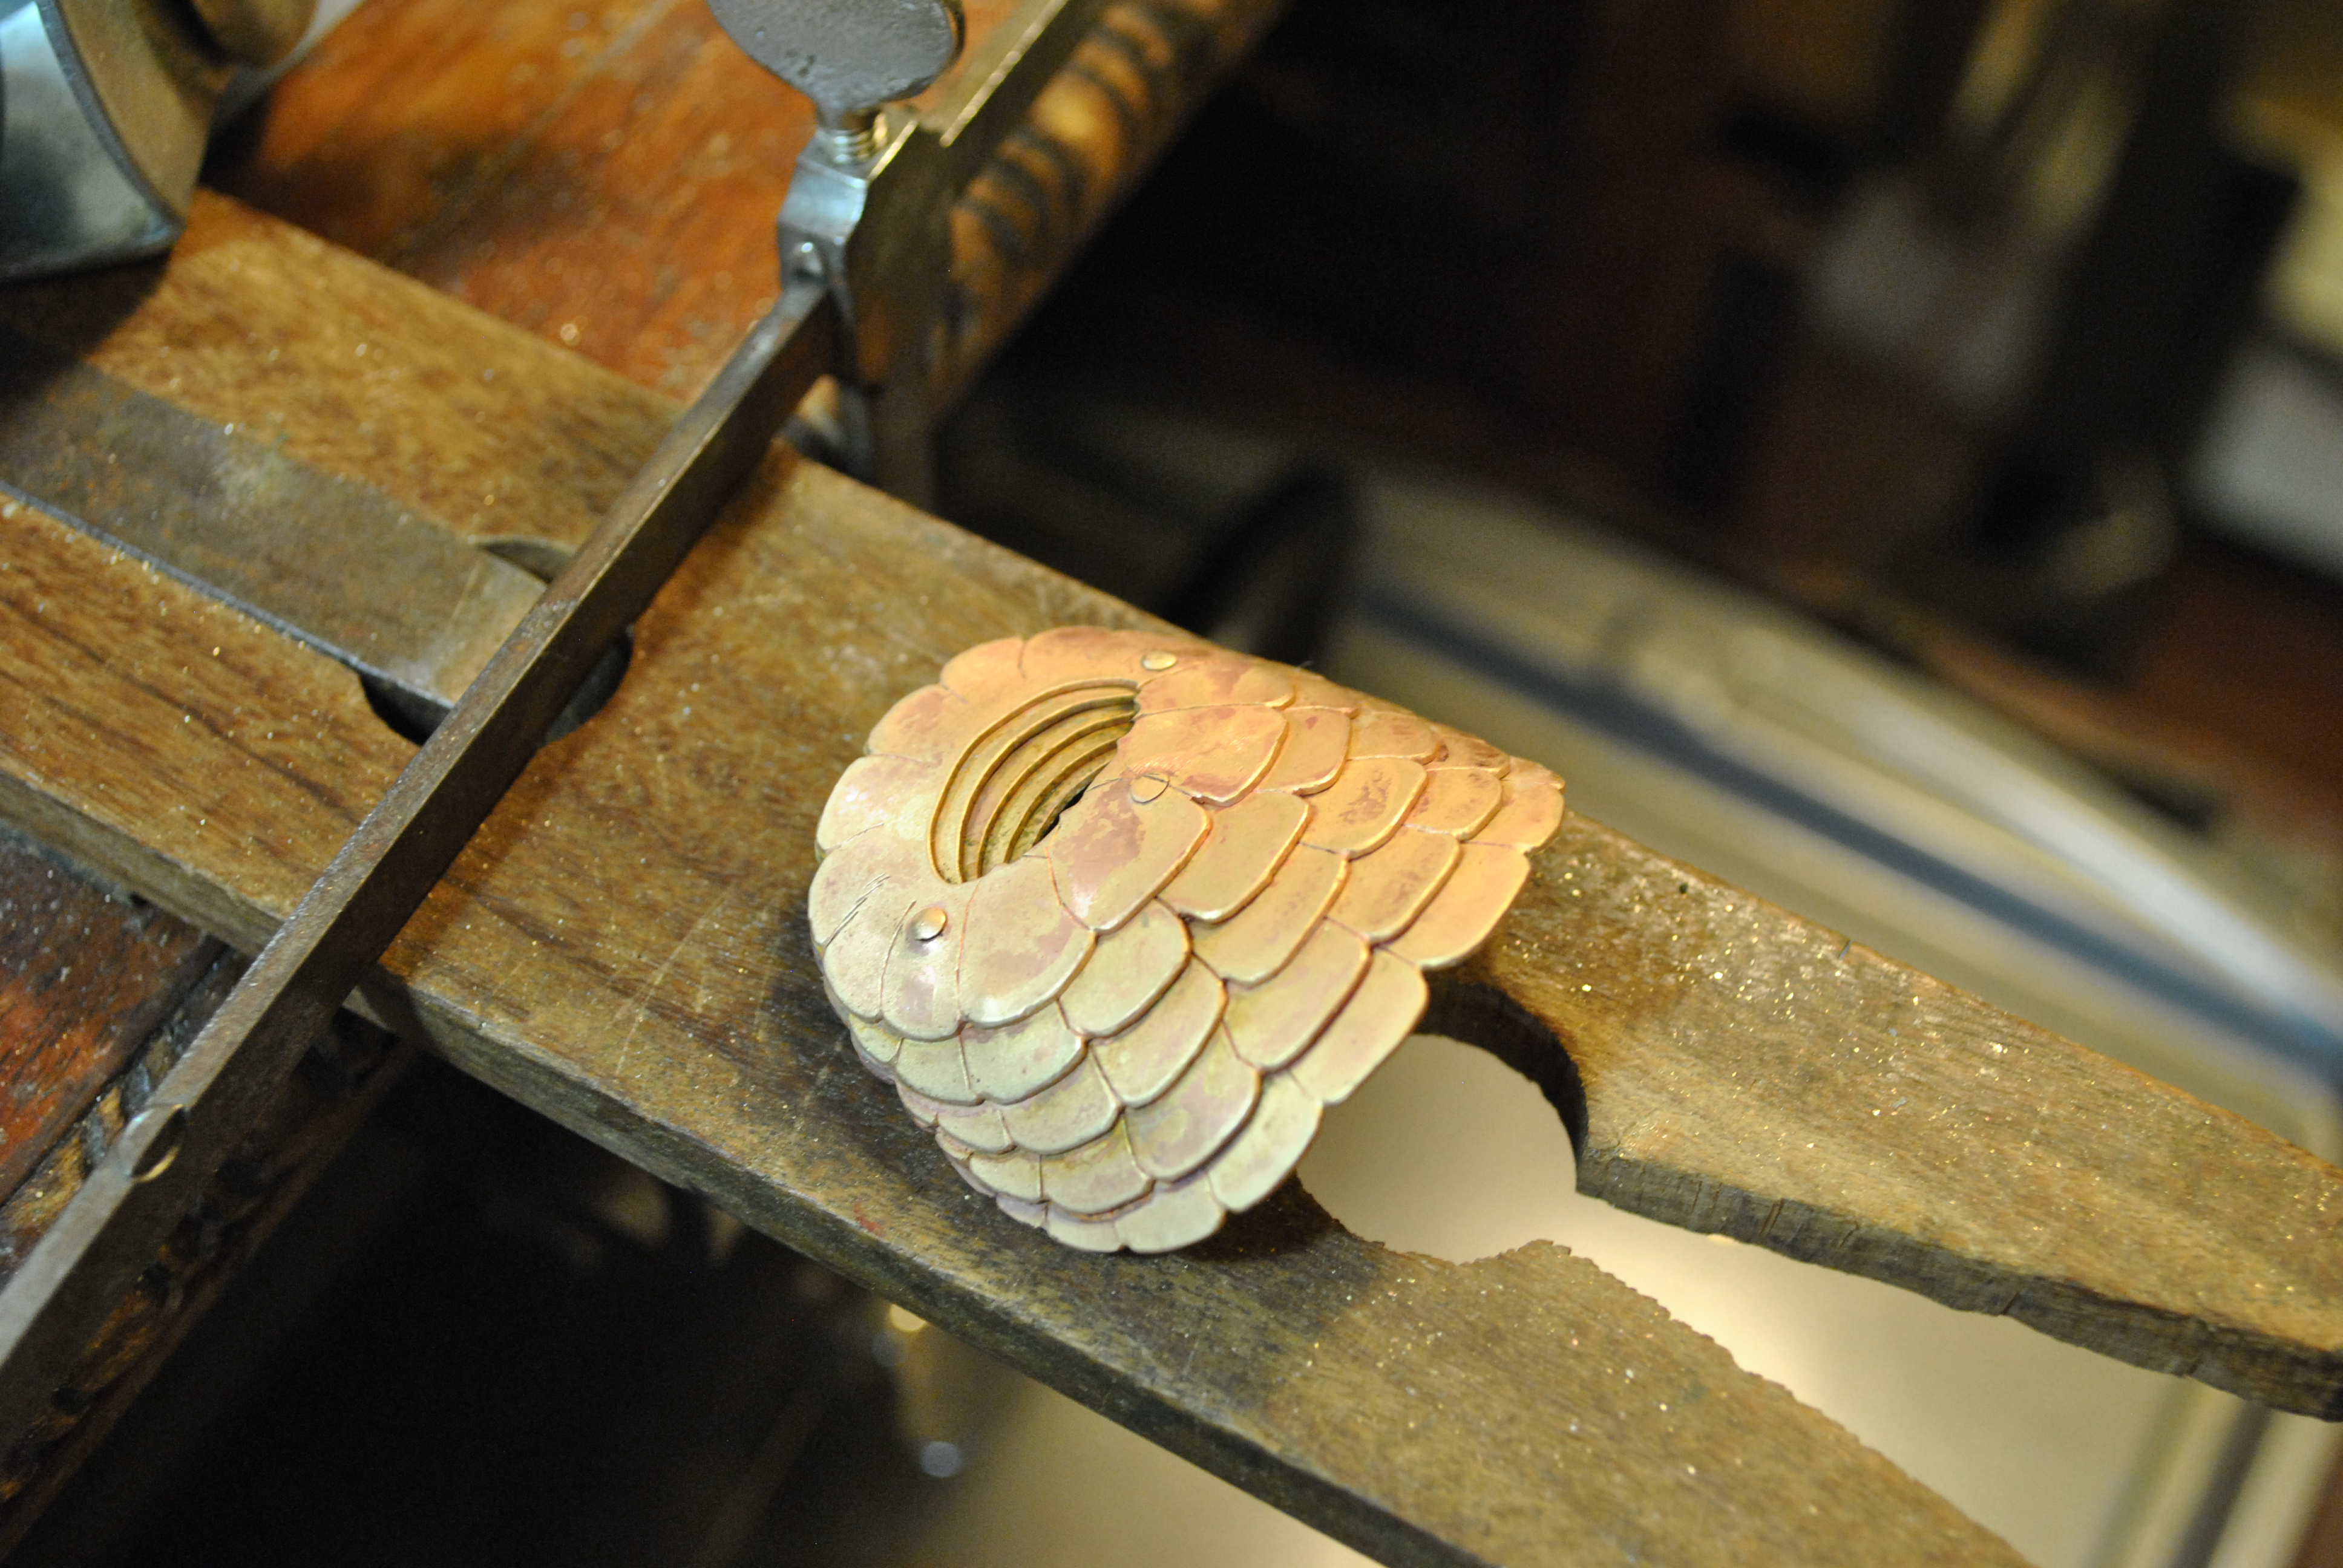
after a quick bath in the pickle it came out much softer and I was able to hammer it into shape with a plastic mallet. It also however is ugly from the fire scale.
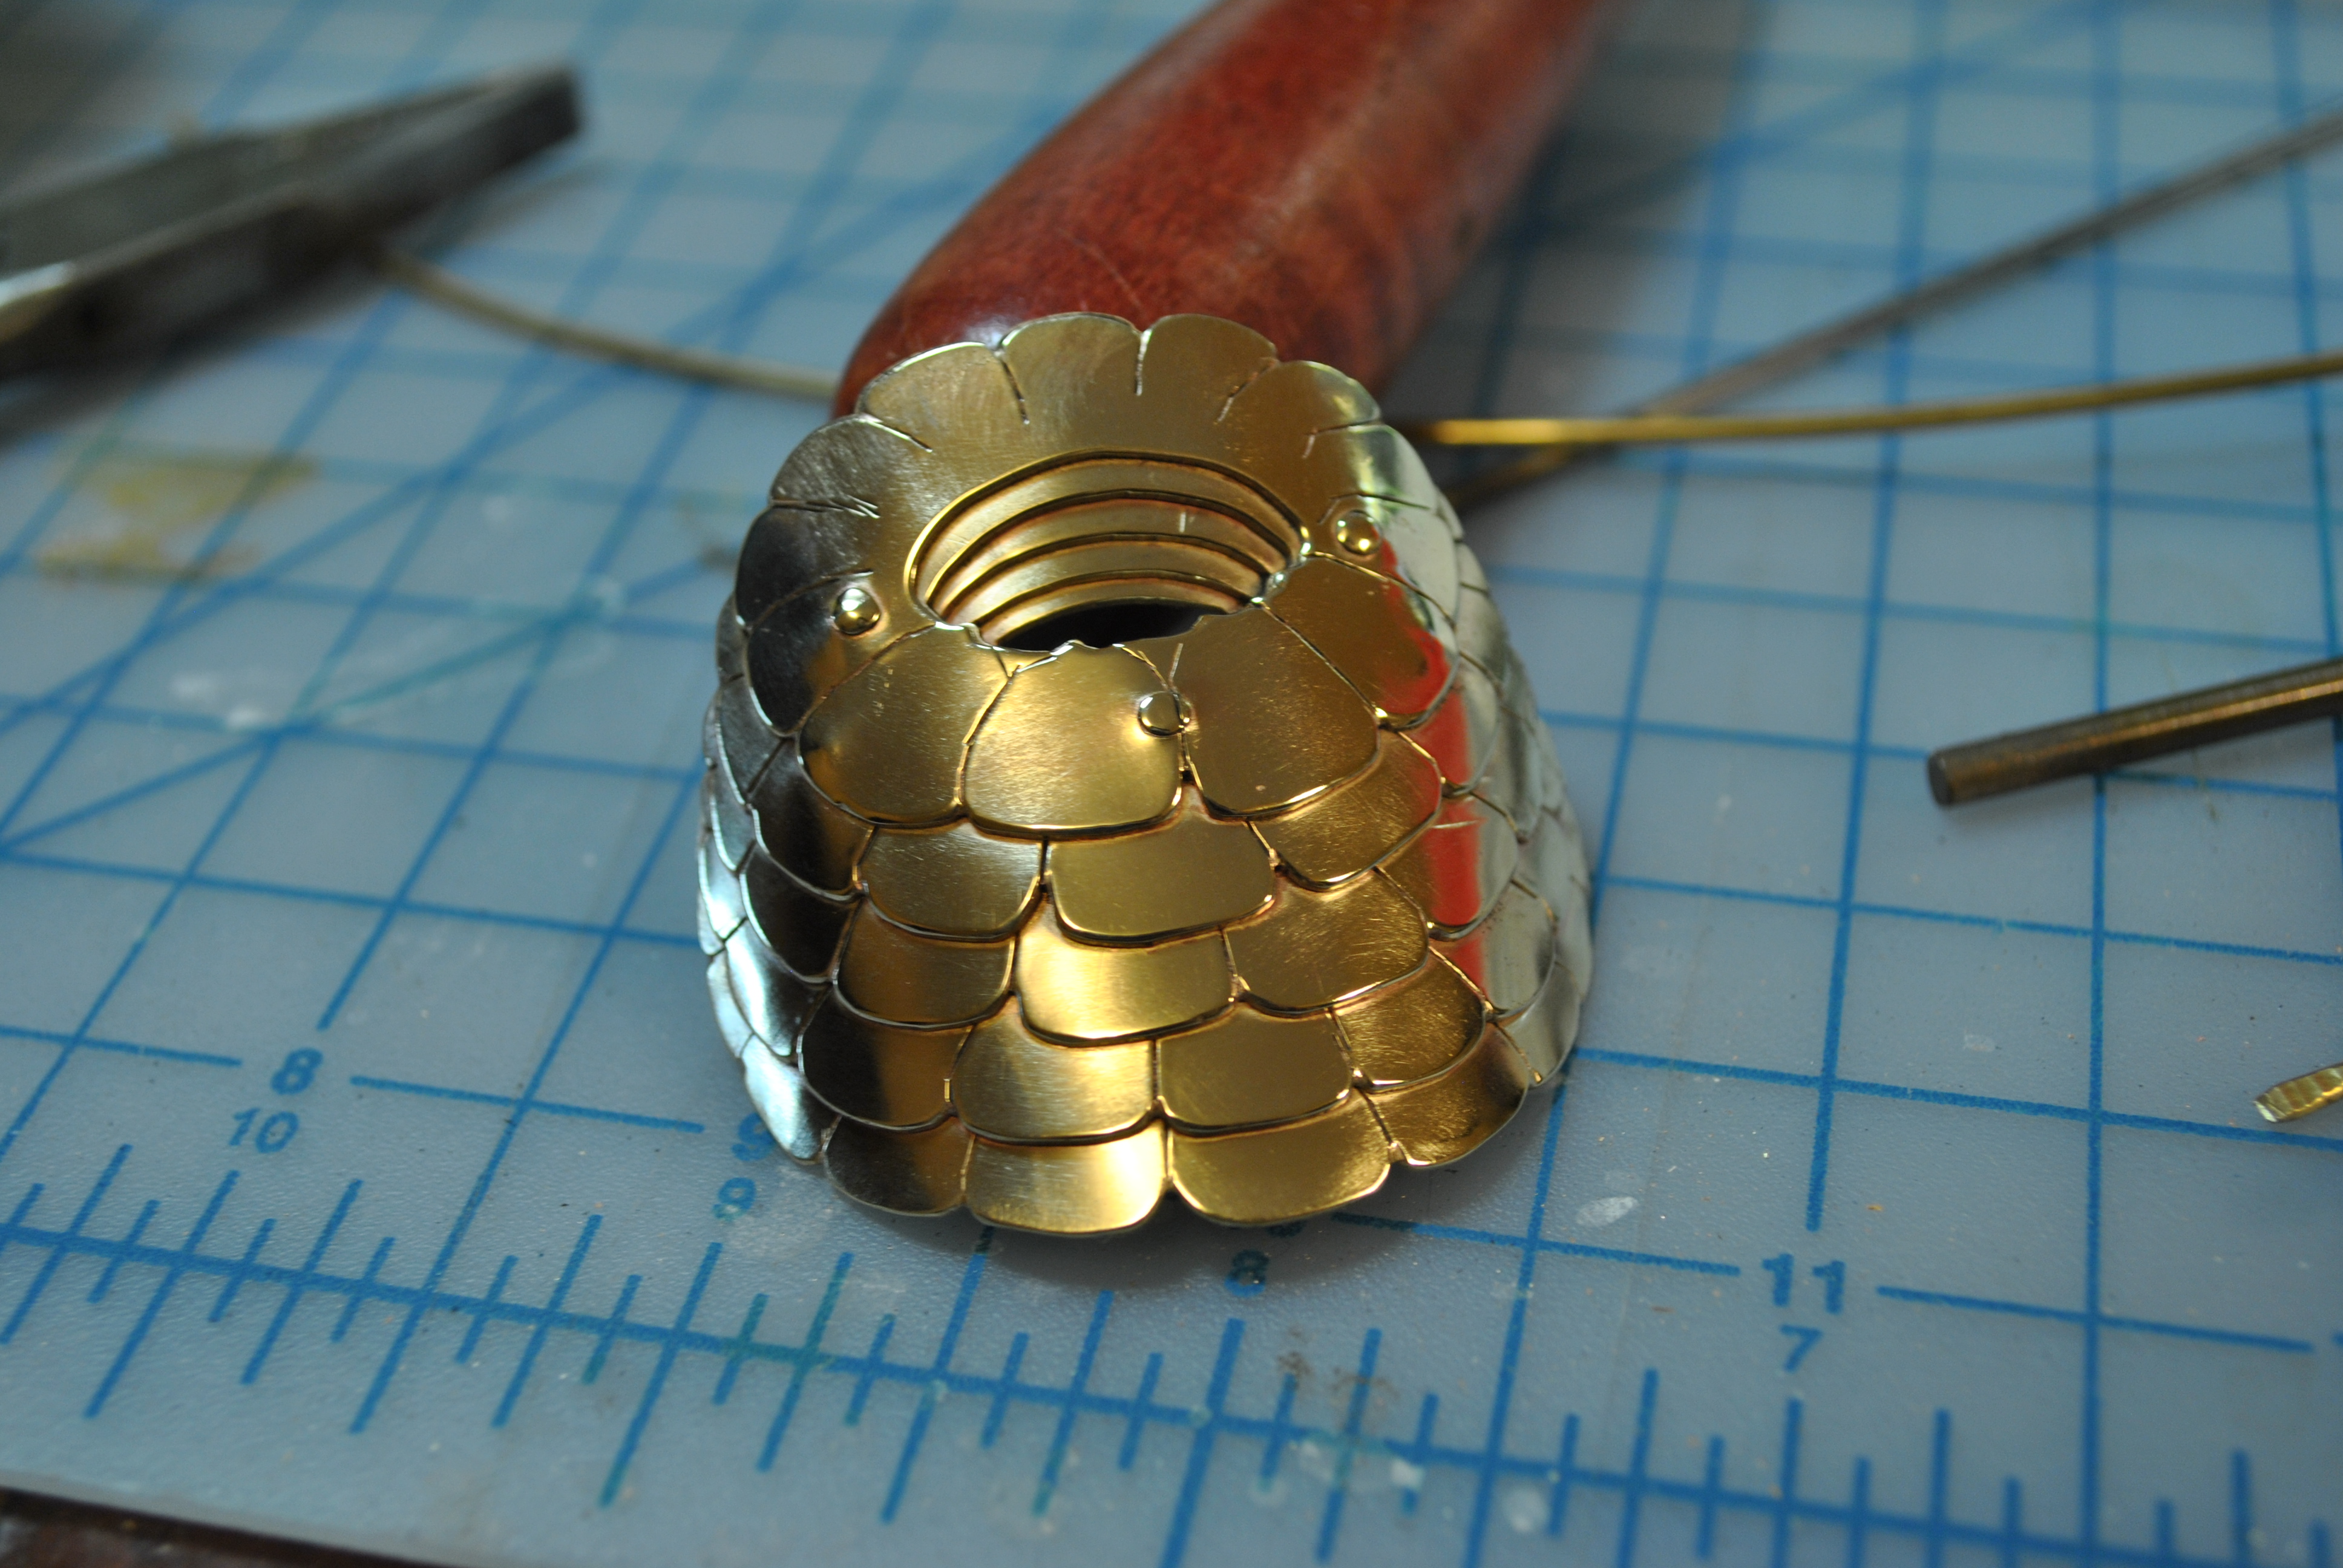
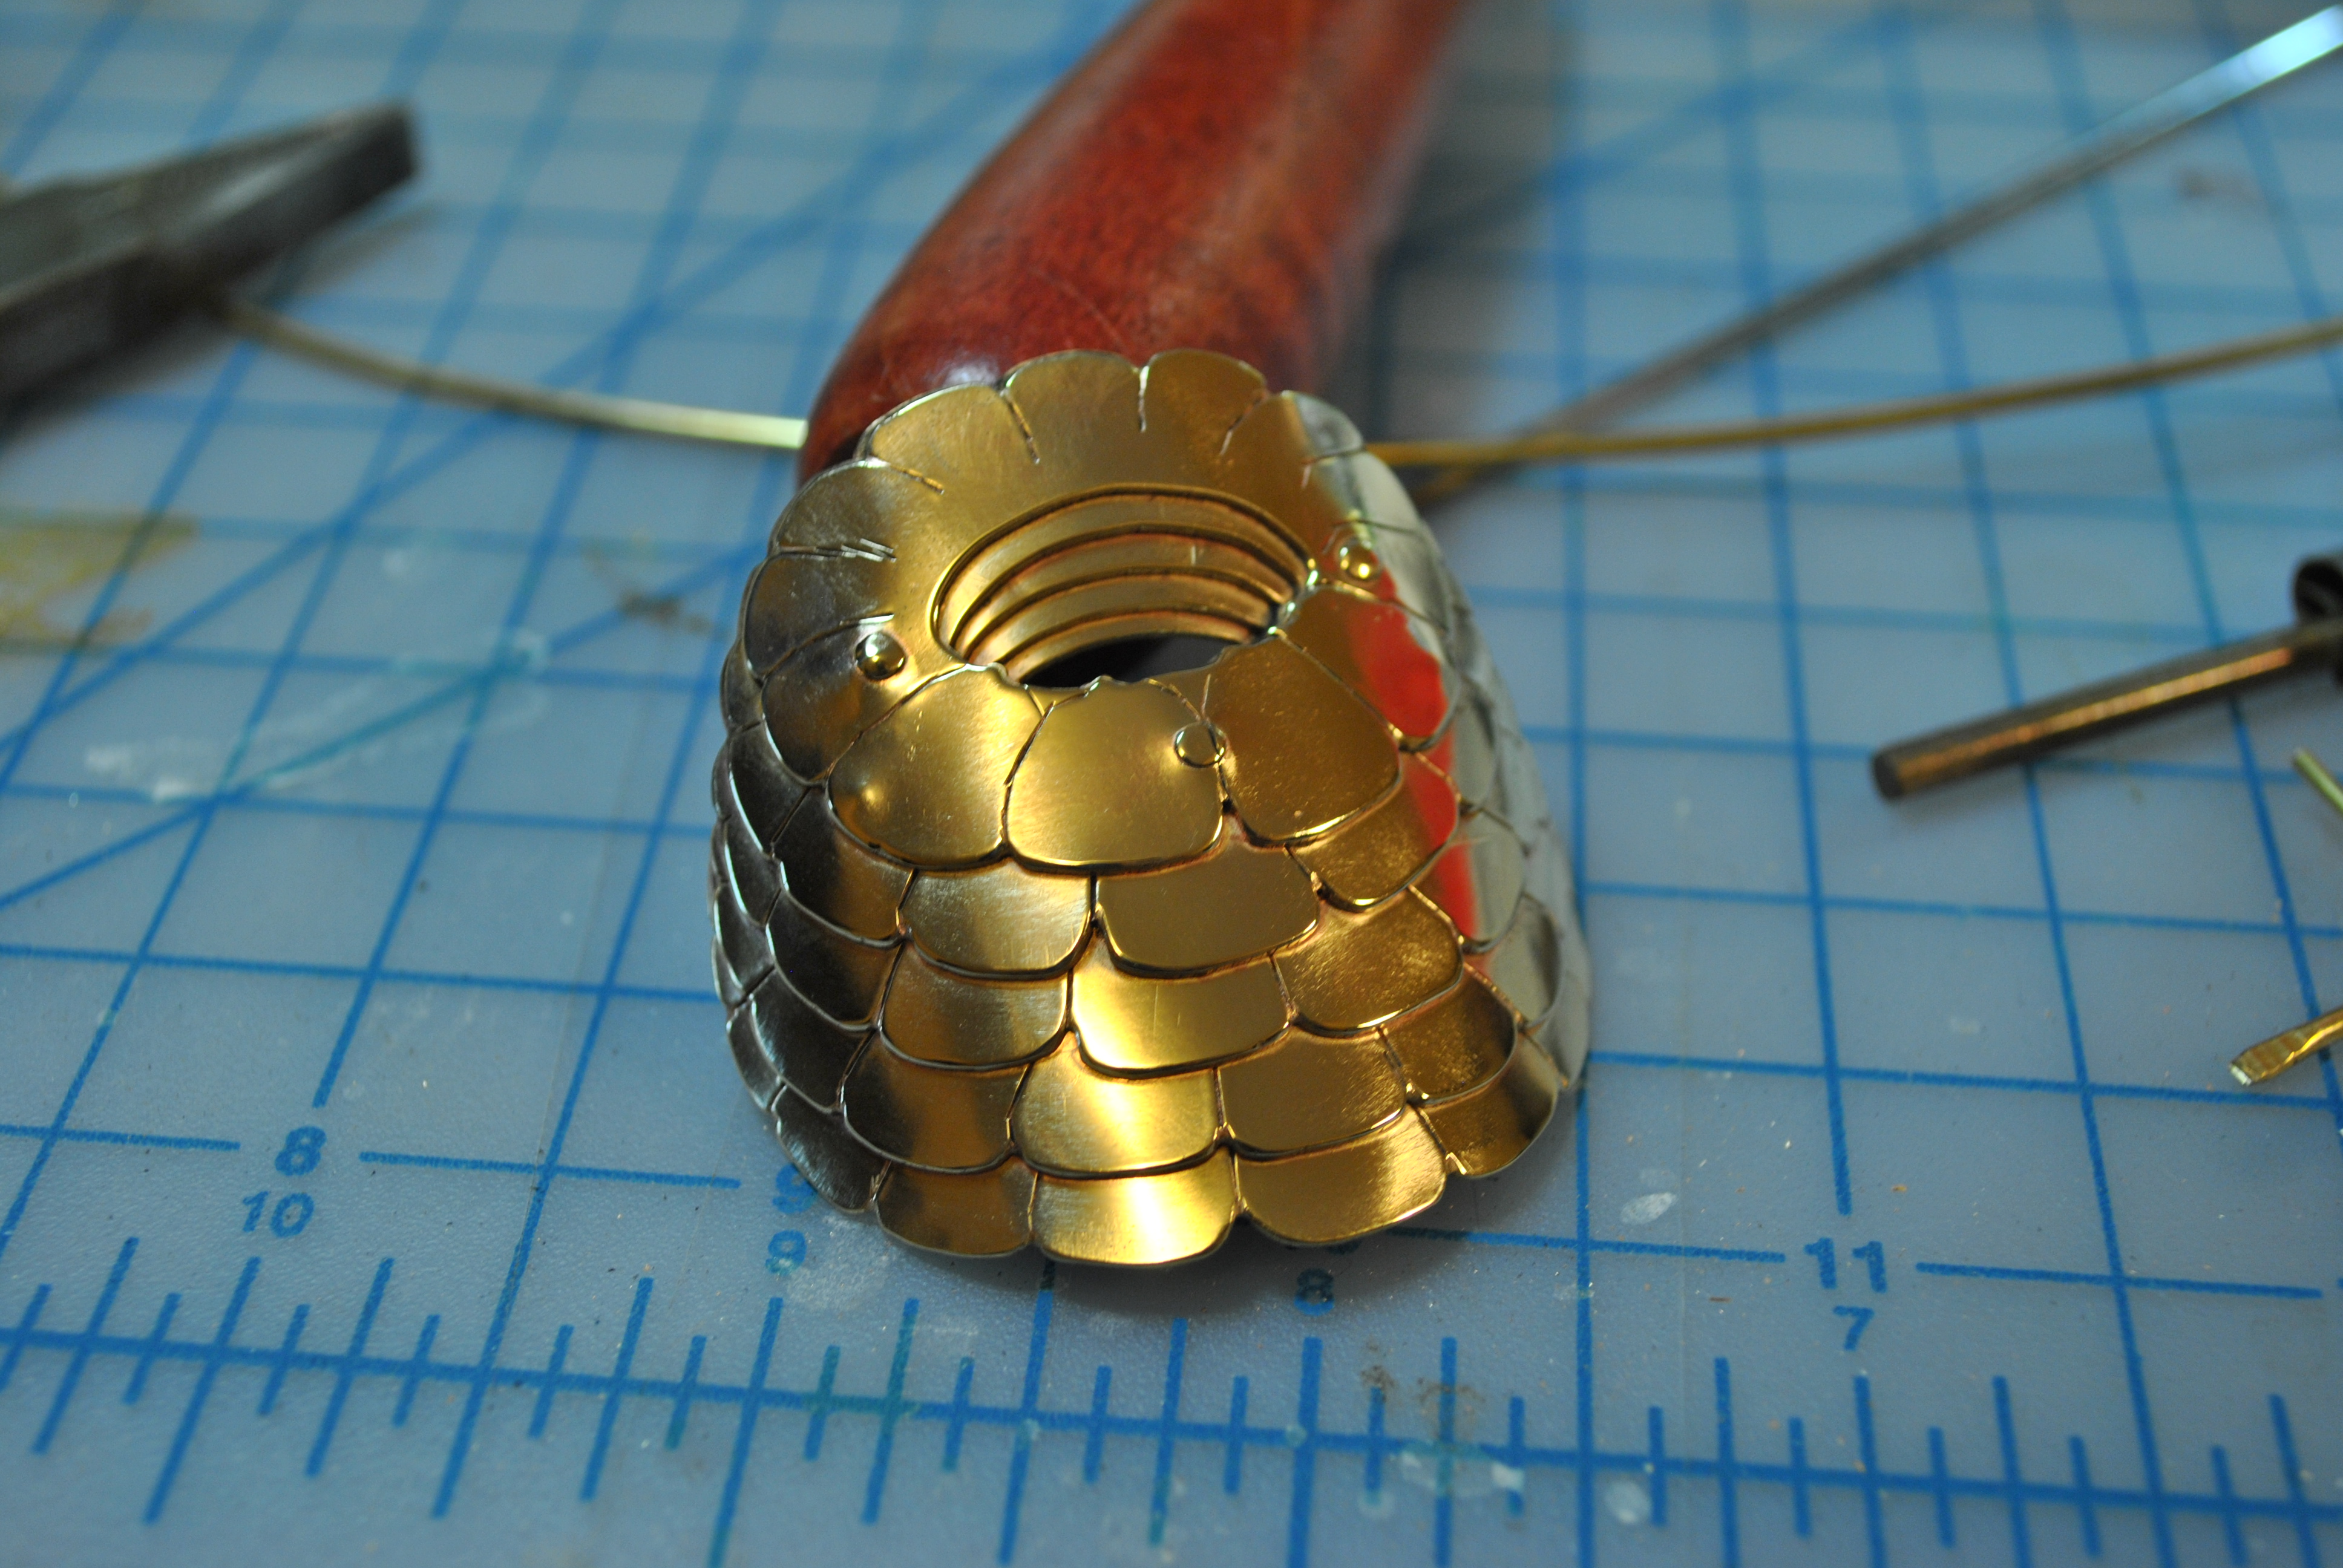
After the initial hand polishing to get all the fire scale off and start the buffing process.
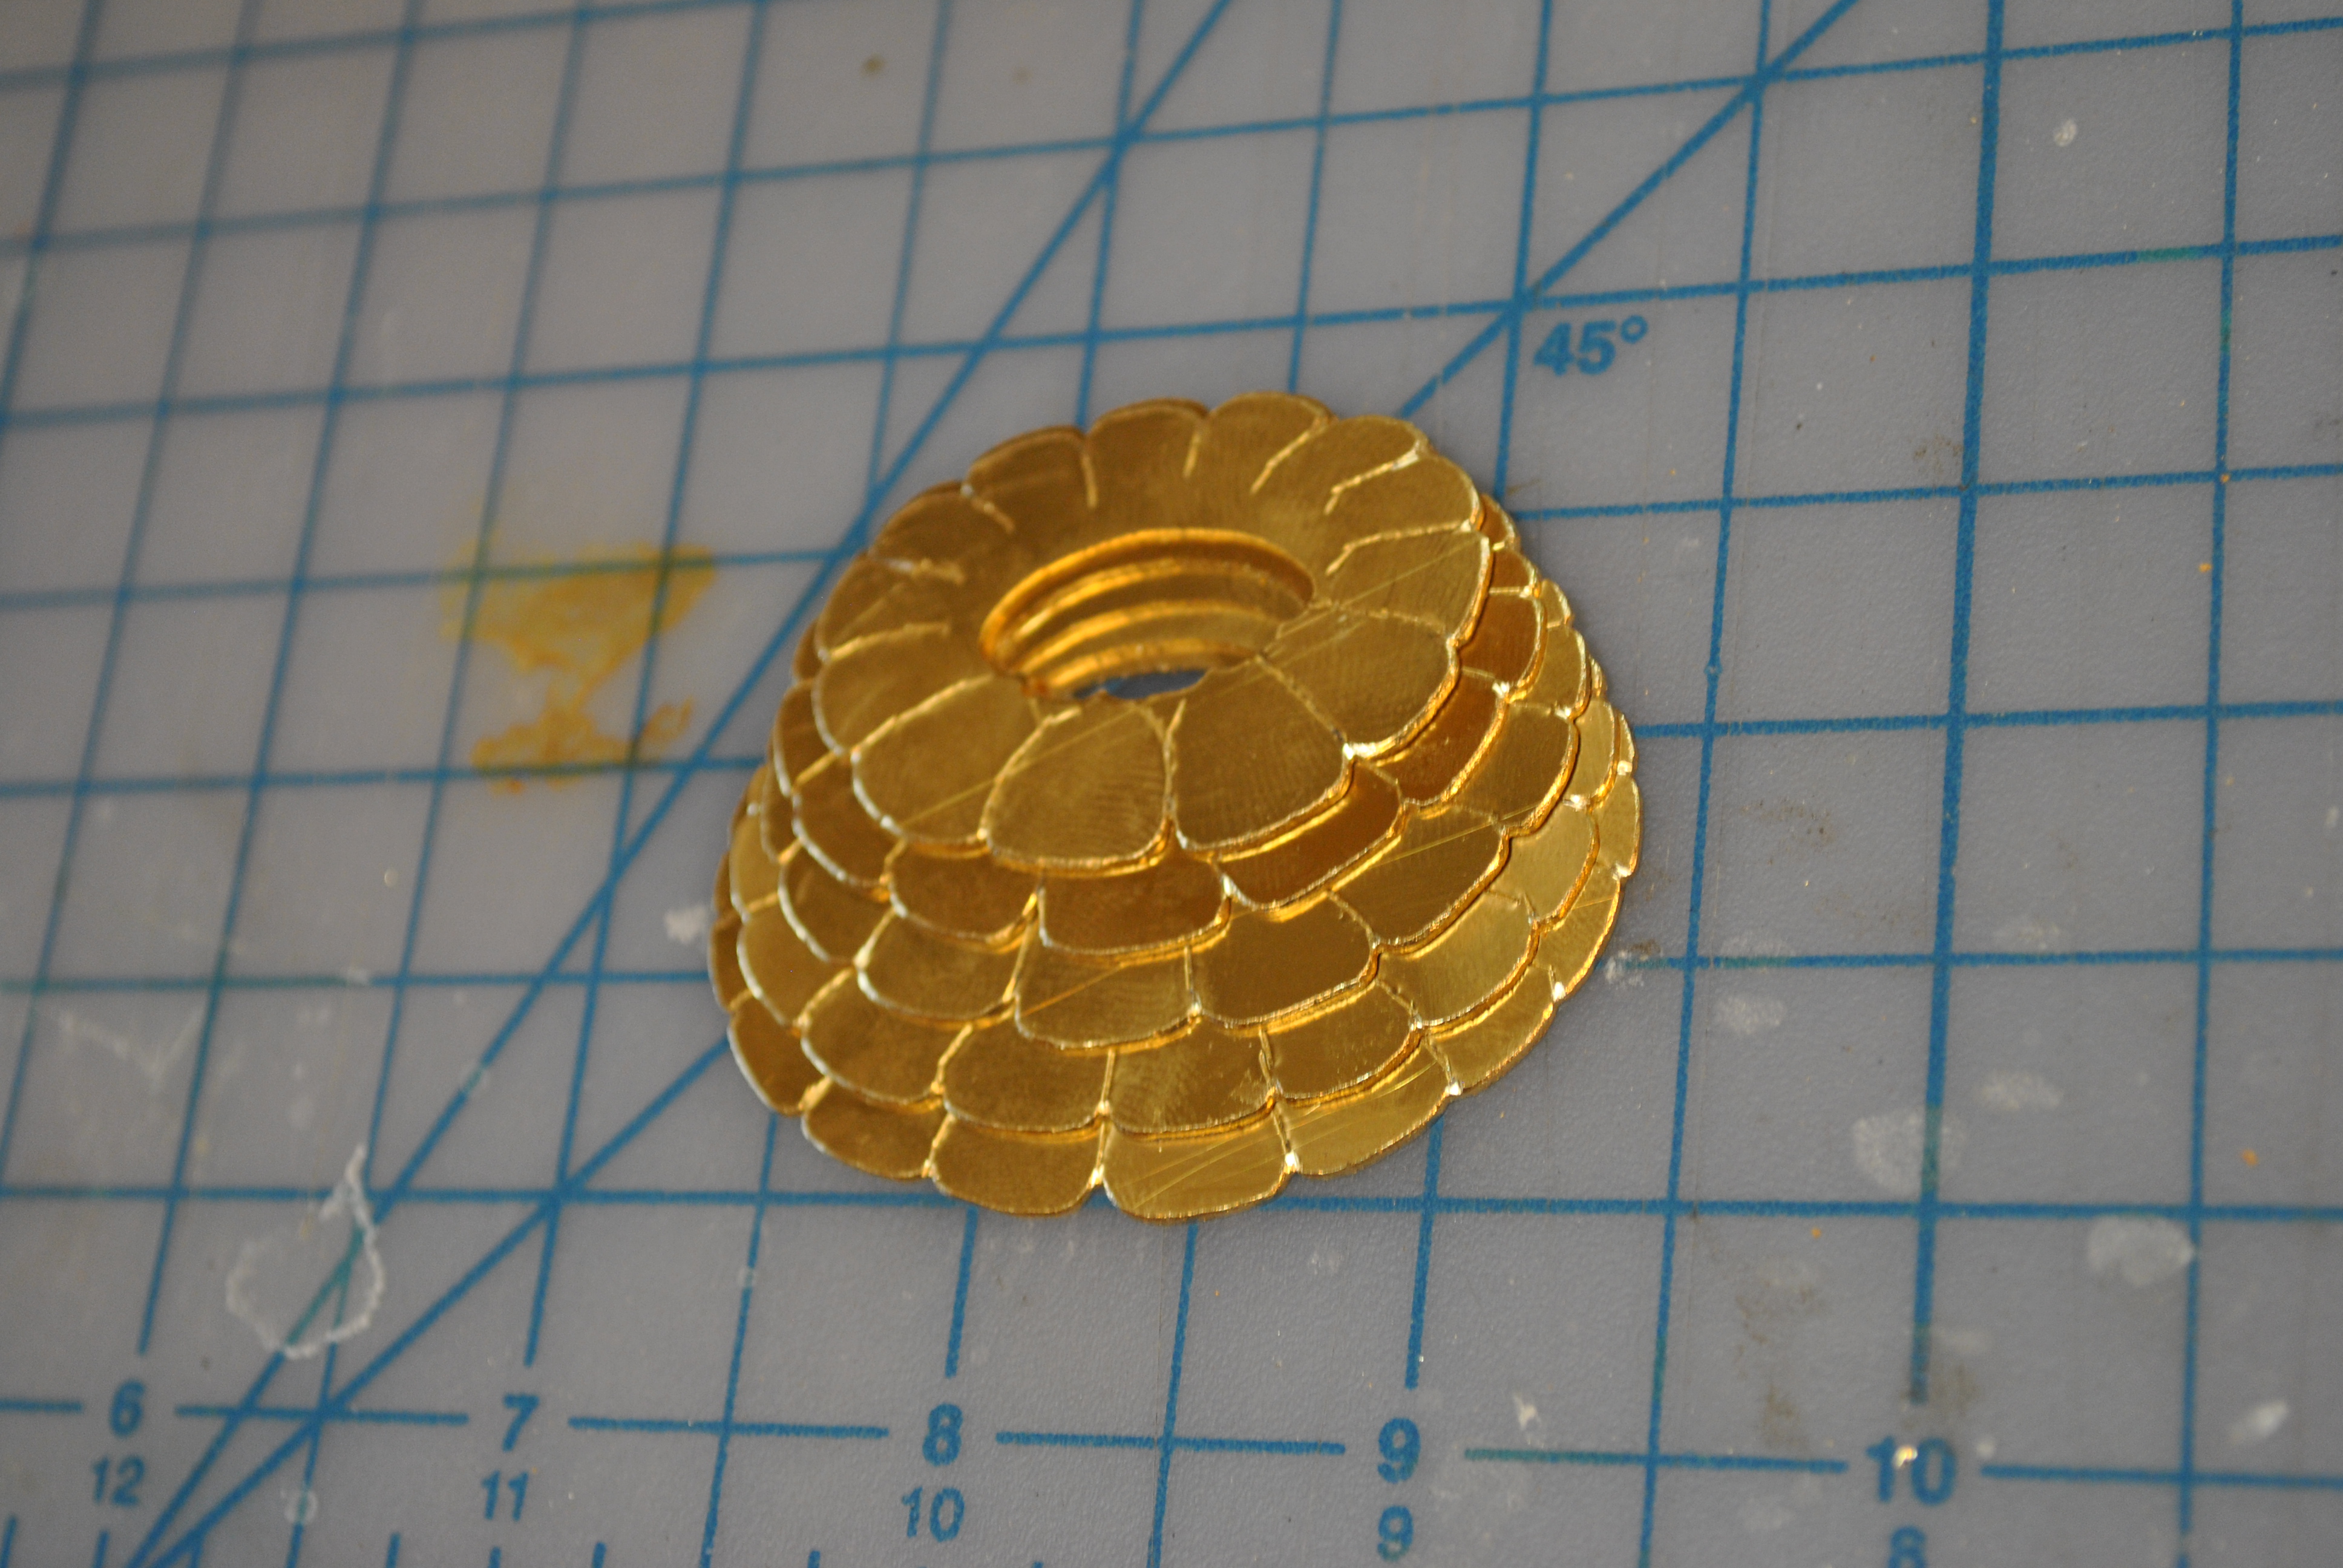
After an hour in the tumbler and some more buffing on a wheel it now has a high shine and glows gloriously in the sun. I really like the way this design came out, and it was fun using rivets instead of solder for a change.
 My Other Ride Is Shai-Hulud Vinyl Two Color Sticker/decal
$9.00 – $13.00
My Other Ride Is Shai-Hulud Vinyl Two Color Sticker/decal
$9.00 – $13.00
 Mad Max Imorten Joe Head Badge
$65.00
Mad Max Imorten Joe Head Badge
$65.00
 Hand Carved and Cast Dune Themed Journal
$80.00
Hand Carved and Cast Dune Themed Journal
$80.00
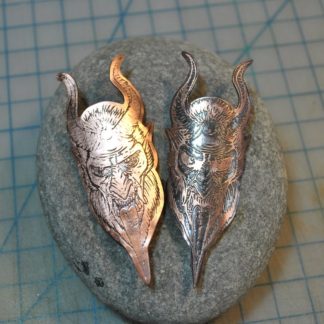 Krampus Head Badge
$65.00
Krampus Head Badge
$65.00
 Run The Jewels Gold and Black Fist and Gun Logo Vinyl Sticker/Decal
$22.00 – $27.00
Run The Jewels Gold and Black Fist and Gun Logo Vinyl Sticker/Decal
$22.00 – $27.00